PDF (0.5 MB)
PDF (0.5 MB)
PDF (0.5 MB)

You also want an ePaper? Increase the reach of your titles
YUMPU automatically turns print PDFs into web optimized ePapers that Google loves.
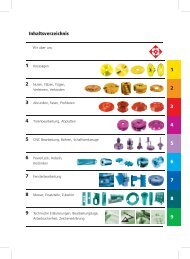
9 TECHNICAL<br />
EXPLANATIONS, POSITION OF<br />
WORKPIECE, SAFETY, ABBREVIATION<br />
Technical explanations 298<br />
Position of workpiece 305<br />
Safety 306<br />
Abbreviation 307<br />
9
TECHNICAL EXPLANATIONS, POSITION OF WORKPIECE, SAFETY, ABBREVIATION<br />
TECHNICAL EXPLANATIONS>POSITION OF WORKPIECE>SAFETY>ABBREVIATION<br />
Technical explanations<br />
1. Tool safety<br />
Tools for machining of wood and plastics often operate at high<br />
cutting speeds and – depending on their diameters – in high speed<br />
ranges. Therefore requirements for the design are ambitious.<br />
All OERTLI tools comply with the safety regulations in force in Switzerland<br />
and with those of the European Standards EN 847.1–3.<br />
As an active member of EUMABOIS (European Federation of Woodworking<br />
Machinery Manufacturers), OERTLI is permanently striving<br />
to improve safety in the field of woodworking machinery and<br />
woodworking tools, thereby observing relevant recommendations.<br />
The safe operation of woodworking machinery depends not only<br />
on the tool. Just as important is the application of the correct<br />
safety device as well as the correct working technique. SUVAsafety<br />
devices (Swiss Accident Insurance Company, Lucerne) are<br />
compulsory for many woodworking machines. The corresponding<br />
correct working technique is taught in all trade schools.<br />
(http://www.suva.ch/en/home-en/suvapro.htm)<br />
Particular attention is required when working with CNC machining<br />
centres. These machines do have partially a relative open<br />
design. Very often only curtains exist between installed tool and<br />
surrounding work area. These curtains are partially not in a position<br />
to retain tool fractures, which could occur after collision or malfunction<br />
of a tool in operation. Thrown-away tool fractures may<br />
lead to severe injuries.<br />
For personal safety of the machine operator, OERTLI has compiled<br />
detailed operating instruction manuals for all type of tools, which<br />
should be read before taking tools and clamping adaptors into<br />
operation. These manuals should be kept personnel accessible for<br />
all responsible for using the tools. The operating instruction<br />
manuals inform in detail about safety regulations, operating,<br />
handling, maintenance as well as storage of OERTLI tools. An<br />
additional instruction sheet, which could be hung-up near the<br />
machine, refers to the most important dangers.<br />
(www.oertli.com/operating instructions)<br />
1.1 Manual Feed (MAN)<br />
Manual feed, as it is understood in the European Standards EN<br />
847.1–3, refers to holding and guiding of workpieces, tools and<br />
portable machines by hand, even if used with a feed device that<br />
can be swung- or slid-away, but not being interlocked with the tool<br />
drive or a manually actuated tenoning attachment.<br />
OERTLI tools for manual feed fulfil corresponding safety regulations,<br />
in particular the maximum cutting edge projection and the kickback<br />
values. Since the European Standards are in force, such tools<br />
are designated with «MAN». Further, they are marked with the<br />
corresponding speed range, e.g. «n = 5`000– 8`000 RPM».<br />
Manual feed tools (MAN) may also be used for mechanical feed.<br />
1.2 Mechanical Feed (MEC)<br />
Mechanical feed, as it is understood in the European Standards<br />
EN 847.1-3, refers to a feed mechanism for the workpiece or the<br />
tool, that is integrated into the machine and with which the workpiece<br />
and the tool are mechanically guided or held during operation.<br />
OERTLI tools for mechanical feed fulfil corresponding safety regulations.<br />
Since the European Standards are in force, such tools are<br />
designated with «MEC». Further, they are marked with the maximum<br />
permissible speed, e.g. «n max = 12`000 RPM». This speed<br />
does not provide any hint for the best operational speed, which is<br />
normally lower.<br />
Mechanical feed tools (MEC) are not allowed to be used for<br />
manual feed.<br />
298
TECHNICAL EXPLANATIONS, POSITION OF WORKPIECE, SAFETY, ABBREVIATION<br />
TECHNICAL EXPLANATIONS>POSITION OF WORKPIECE>SAFETY>ABBREVIATION<br />
2. General information and definitions<br />
On a machine tool, we distinguish between tool body and knife.<br />
The tool body is the holder for the knife. Depending on how the<br />
knife is attached to the tool body, the tools are classified into three<br />
types:<br />
• Single-part tools<br />
• Compound tools<br />
• Assembled tools<br />
2.1 Single-part tools<br />
(Solid tools)<br />
Single-part tools or solid tools are manufactured throughout of<br />
one material. An example for it is the solid tungsten carbide spiral<br />
shank cutter. Tools made of HS or low alloy steel do also belong to<br />
this category. The tools are reground after they are dull. As a result,<br />
the cutting circle diameter will become smaller and smaller, which<br />
may result in profile distortions on profile tools. For this reason,<br />
there is a limit for regrinding. If this limit is reached, the tool has to<br />
be replaced. The range of such tools comprises of cutters, drills and<br />
knives.<br />
2.2 Compound tools (tipped tools)<br />
Compound tools or tipped tools consist of a tool body which is<br />
«tipped» with cutting knives. The knives are attached permanently<br />
by welding, soldering or gluing. The tool body is normally made<br />
of steel, the knives of HS, HW, DP or DM. The tools are reground<br />
after they are dull. As a result, the cutting circle diameter will become<br />
smaller and smaller, which may result in profile distortions on profile<br />
tools. For this reason, there is a limit for regrinding. If this limit<br />
is reached, the tool has to be replaced. The range of such tools<br />
comprises of cutters, drills and circular saw blades.<br />
2.3 Assembled tools<br />
Assembled tools consist of a tool body, knives and clamping elements,<br />
which require connecting mechanically the knives to the<br />
tool body. The knives can be replaced, if dull or broken. As a result,<br />
the cutting circle diameter and the tool profile remain constant.<br />
The range of such tools comprises of reversible knife tools, cutterheads<br />
and knife spindles.<br />
Messerwellen.<br />
2.4 Tool set<br />
Several single-part tools are mounted together on a clamping shaft<br />
or sleeve. Such a combination is called «tool set». With it, a complex<br />
profile can be machined in a single pass operation. Tool sets<br />
consist of several tools with bore, sleeves, spacers, pins, screws or<br />
similar connecting elements.<br />
2.5 Tool body (carrier body)<br />
The function of the tool body is to ensure that the knives are held<br />
in place with absolute reliability and without dimensional variations<br />
under all operating conditions. The life of a tool with exchangeable<br />
knives depends decisive on the quality of the tool body. The design<br />
of most OERTLI tools with exchangeable knives is in such a way,<br />
that these can manufactured with either a tool body in steel or aluminum.<br />
Aluminum<br />
The advantage of aluminum is undisputed the low specific weight,<br />
which in comparison to steel is achieved by a reduced life time. As<br />
a rule, we recommend the use of aluminum tool bodies always in<br />
cases, where for reasons of weight limits, light tools are asked for.<br />
Steel<br />
The advantage of steel is its high strength and stability in long run<br />
operations. On tool bodies in steel the knives lie-on directly onto<br />
the solid steel body, thereby an extreme life time and a maximum<br />
performance is achieved.<br />
299
TECHNICAL EXPLANATIONS, POSITION OF WORKPIECE, SAFETY, ABBREVIATION<br />
TECHNICAL EXPLANATIONS>POSITION OF WORKPIECE>SAFETY>ABBREVIATION<br />
3. Surface finish<br />
The optical view of a nice surface depends on two factors. On the<br />
one hand it`s the cleanness of the surface, on the other hand it`s<br />
the wavelike surface.<br />
4.4 Cutting the end grain<br />
Results in a slight raw surface by tear-out of grains. The vertical<br />
cut-off of the fibres requires higher cutting- and feed forces.<br />
3.1 Surface cleanness<br />
The following points are essential for the cleanness of the surface:<br />
– Feed direction according to the wood structure<br />
– Cutting knife material<br />
– Cutting knife geometry<br />
– Pre-splitting with the direct the influence factors of cutting<br />
speed and RPM<br />
3.2 Wavelike surface<br />
The following points are essential for the surface:<br />
– Feed per tooth with the direct influence factors of feed rate,<br />
RPM and number of teeth<br />
– Cutting circle diameter<br />
– Concentric running accuracy<br />
4.5 Against the feed machining<br />
When machining against the feed, the cutting movement of the<br />
tool is against the relative feed motion of the workpiece. The tool<br />
knife always enters shaving and pushing into the workpiece. The<br />
cutting procedure creates long chips with increasing thicknesses.<br />
Due to unfavourable cutting forces, the workpiece is pushed-up<br />
from the machine table; the fibres may tear-out by pre-splitting<br />
actions thereby resulting in a poorer surface. Due to the use of presplitting,<br />
cutting forces and drive power are reduced resulting in<br />
longer tool life and lower knife pressure. For reasons of safety, tools<br />
for manual feed are only allowed to operate against the feed<br />
machining.<br />
4. Direction of feed<br />
4.1 Cutting with the grain<br />
Results in a clean, smooth surface by low cutting- and feed forces.<br />
4.2 Cutting against the grain<br />
Results in an unclean, raw surface, as pre-splitting of the wood<br />
occurs in front of the knife. High risks of tear-outs.<br />
4.6 With the feed machining<br />
Only suitable for mechanical feed!<br />
When machining with the feed, the cutting movement of the tool<br />
is alike the relative feed movement of the workpiece. The tool knife<br />
enters always in a cutting action into the workpiece. The cutting<br />
procedure creates short chips with decreasing thicknesses. The<br />
cutting forces push-down the workpiece towards the table, thereby<br />
nearly eliminating pre-splitting. Even with unfavourable grain conditions,<br />
relatively good surface conditions can be achieved. Due to<br />
little pre-splitting, the knives are used-up stronger resulting in<br />
faster wear-out. Machining with the feed is only permitted with<br />
mechanical feed.<br />
4.3 Cutting across the grain<br />
Results in a slight raw but clean surface. Relatively good machining<br />
possibilities.<br />
300
TECHNICAL EXPLANATIONS, POSITION OF WORKPIECE, SAFETY, ABBREVIATION<br />
TECHNICAL EXPLANATIONS>POSITION OF WORKPIECE>SAFETY>ABBREVIATION<br />
5. Cutting edge materials<br />
SP: Alloy tool steel<br />
Application: Drills, knives, simple CV circular saw blades, wobble<br />
saws, etc.<br />
HL: High-alloy tool steel<br />
For woodworking, alloy steel with 2% carbon and 12% chromium<br />
is preferred. HL is used for machining of solid wood.<br />
HS: High speed steel<br />
Alloy steel with at least 12% wolfram, molybdenum, vanadium,<br />
cobalt and chromium. Mainly used for machining of soft wood. HS<br />
has a longer tool life time and a higher machining quality comparing<br />
to HL.<br />
ST: Special high-cobalt-alloy steel (Stellite)<br />
Material produced by fusion of cobalt, chromium and carbide.<br />
Stellite contains only a small part of iron. Stellite is used for machining<br />
of solid wood, especially oak requiring an excellent surface<br />
quality.<br />
HW: Tungsten carbide<br />
Carbide particles are melted together with soft metals (e.g. cobalt,<br />
nickel) in a sinter process. Requirements for woodworking are defined<br />
by a multiplicity of various applications. The OERTLI HW-programme<br />
comprises of Ultrafine high performance grades over<br />
Submicron grades up to Fine-grain grades. Tungsten carbide qualities<br />
H6 and H8 are the grades mostly used.<br />
Tungsten carbide H6 is best suited for machining of abrasive<br />
materials, such as chip boards, MDF boards as well as for sand-containing,<br />
hard and abrasive exotic wood.<br />
Tungsten carbide H8 is a universal tungsten carbide material best<br />
suitable by its toughness and cutting qualities for machining of<br />
solid softwood and hardwood.<br />
HC: Coated tungsten carbide<br />
Tungsten carbide knives and HS-knives can be coated with a hard,<br />
thin layer in order to change the surface of the knife in such a way,<br />
that the application and the performance will be improved. The<br />
substances, applied in a thin coating process, stick so well to the<br />
surface that the knives -even after coating- can always be reground<br />
on the cutting- and clearance face. Considerably improved lifetimes<br />
are achieved by coating especially HS-planing knives, Minifinger<br />
jointing cutters and VHM-shank cutters.<br />
DP: Polycrystalline diamond<br />
Synthetic produced diamond, which is sintered on a tungsten carbide<br />
base. DP is the hardest known cutting material. Polycrystalline<br />
diamond is mainly used for machining of abrasive materials such as<br />
chip boards, MDF-boards and coated panels.<br />
DM: Mono-crystalline diamond<br />
Synthetic produced diamond grains with sizes of only a few millimetres<br />
produce a through cutting edge with which extreme<br />
smooth and sharp cuts are possible. Mono-crystalline diamond is<br />
suitable for applications with small chip removal, where a high<br />
surface quality and/or long tool life times are required, e.g. floor<br />
laminates.<br />
301
TECHNICAL EXPLANATIONS, POSITION OF WORKPIECE, SAFETY, ABBREVIATION<br />
TECHNICAL EXPLANATIONS>POSITION OF WORKPIECE>SAFETY>ABBREVIATION<br />
6. Cutting geometry<br />
The knife geometry depends on the particular application of the<br />
tool, the material to be machined and the cutting tip quality.<br />
6.1 Clearance angle ( )<br />
The size of the clearance angle for woodworking is between 12°<br />
and 20°. Normally 15° is selected. If the clearance angle is 0°, no<br />
cutting in the wood is possible. The tooth-back (e.g. knife back) is<br />
rubbing over the cutting surface.<br />
6.5 Force diagram of different wedge angles, shown on a<br />
split wedge:<br />
The smaller the wedge angle, the bigger are the dividing forces FT<br />
at a constant split force (feed rate force). With a small wedge<br />
angle, cutting is easy, but the danger of breaking is high and the<br />
edge is getting blunt fast.<br />
6.2 Wedge angle ( )<br />
The greater the wedge angle, the better is the resistance of the<br />
knife against wear. Therefore harder materials can be machined<br />
with greater wedge angles; thereby has to be considered that<br />
required forces for chip removal always increase. As a rule of<br />
thumb counts: The harder the material, the greater the wedge<br />
angle.<br />
6.3 Hook angle ( )<br />
The hook angle indicates the position of the cutting face to the<br />
tool axis or tooth line. The size of the hook angle for woodworking<br />
is between 5° and 30°.<br />
6.4 Shear cut angle ( )<br />
Shear cut angle 0° (straight cut).<br />
Shear cut angle one-sided (single shear cut).<br />
Shear cut angle reciprocal (alternate shear cut).<br />
The size of the shear cut angle depends mainly on tool dimensions<br />
and the tool application.<br />
Angles on the cutting edge<br />
Clearance angle on tooth back<br />
1 Lateral clearance angle<br />
2 Radial clearance angle<br />
Wedge angle (angle between cutting surface and tooth back)<br />
Hook angle<br />
Shear cut angle<br />
Inclined tooth angle<br />
302
TECHNICAL EXPLANATIONS, POSITION OF WORKPIECE, SAFETY, ABBREVIATION<br />
TECHNICAL EXPLANATIONS>POSITION OF WORKPIECE>SAFETY>ABBREVIATION<br />
7. Pre-splitting<br />
7.1 Cutting speed<br />
In general, pre-splitting of wood should be avoided during machining.<br />
This can only be achieved, if the cutting speed of the tool is<br />
higher than the pre-splitting speed of the wood. The pre-splitting<br />
speed of wood is around 40 m ⁄ s. On pyramidal assembled tool sets,<br />
it is possible that the cutting speed on the smallest tool diameter<br />
drops below 40 m ⁄ s. For such cases pre-splitting can be reduced by<br />
use of a chip breaker.<br />
The cutting speed (v s ) is the distance the cutting edge travels per<br />
seconds ( m ⁄ s). It is determined by the following formula:<br />
D x Pi x n<br />
v s = ________ [ m ⁄ s]<br />
1000 x 60<br />
with: D = Tool diameter [mm]<br />
Pi = 3.14<br />
n = Rotary speed (RPM)<br />
Approximate values for cutting speeds:<br />
Material Cutters Cutters Saw blades<br />
HS/ST HW/DP Hogging units HW<br />
v s [ m / s ] v s [ m / s ] v s [ m / s ]<br />
Softwoods 50 – 80 60 – 90 70 – 100<br />
Hardwoods 40 – 70 50 – 90 70 – 90<br />
Chip boards 60 – 90 60 – 90<br />
Core boards 60 – 90 60 – 90<br />
Hard boards 40 – 70 60 – 90<br />
Laminated boards 40 – 70 60 – 100<br />
Aluminum 30 – 50 40 – 70<br />
Note: The cutting speed for tools for manual feed should not be<br />
below 40 m ⁄ s. If the speed drops below this value, risk of kickback<br />
increases.<br />
7.2 Speed range<br />
OERTLI tools are – depending on the type of feed – marked with<br />
the maximum RPM, respectively with the admissible speed range.<br />
The speeds are determined in such a way, that the cutting speed is<br />
not above 90 m ⁄ s for mechanical feed MEC and always between<br />
40 m ⁄ s and 70 m ⁄ s for manual feed MAN. This does not apply for saw<br />
blades and HW hogging units.<br />
400<br />
380<br />
360<br />
340<br />
320<br />
300<br />
280<br />
260<br />
240<br />
220<br />
200<br />
180<br />
160<br />
140<br />
120<br />
100<br />
80<br />
60<br />
40<br />
20<br />
2000<br />
10<br />
120<br />
110<br />
100<br />
90<br />
80<br />
70<br />
60<br />
50<br />
40<br />
30<br />
20<br />
4000<br />
6000<br />
Speed range (RPM)<br />
Tool diameter D (mm)<br />
Optimized working range for<br />
manual feed (white area)<br />
8000<br />
8. Feed per tooth<br />
From the feed per tooth results the wave effect on the machined<br />
surface, which in general is created by the peripheral cutting process.<br />
The smaller the length between the waves and the depth is,<br />
the finer and smoother the surface will be. In this case, it will be<br />
considered optically nice. The feed per tooth f z can be determined<br />
by the following formula:<br />
10000<br />
Cutting speed in m ⁄ s<br />
12000<br />
14000<br />
16000<br />
18000<br />
v f x 1000<br />
f z = ———— [mm]<br />
n x z<br />
with: v f = Feed rate [ m / min ]<br />
z = Number of teeth<br />
n = Rotary speed (RPM)<br />
To calculate the wave-length W b , the number of teeth has to be<br />
reduced to z = 1. For hydro-locking and jointed tools, the wavelength<br />
W b has to be set the same as the feed per tooth f z .<br />
Feed per tooth for cutting work:<br />
f z 0,3 – 0,8 mm = fine-machining<br />
0,8 – 2,5 mm = finish-machining<br />
2,5 – 5,0 mm = rough-machining<br />
For hydro-locking high performance tools, eventually with jointing,<br />
much higher values are to be used.<br />
303
TECHNICAL EXPLANATIONS, POSITION OF WORKPIECE, SAFETY, ABBREVIATION<br />
TECHNICAL EXPLANATIONS>POSITION OF WORKPIECE>SAFETY>ABBREVIATION<br />
9. Cutting circle diameter<br />
The cutting circle diameter has an indirect proportional influence<br />
on the wave-depth W t , which affects considerably the optical<br />
impression of the machined surface. The wave-depth is determined<br />
by the following formula:<br />
f z<br />
2<br />
W t = ——— [mm]<br />
4 x D<br />
with: f z = Feed per tooth [mm]<br />
D = Cutting circle [mm]<br />
10. Concentric running accuracy of the tool<br />
The concentric running accuracy is determined by the concentric<br />
running of the teeth, by the accuracy of the machine spindle and<br />
by the play between the bore of the tool and the machine spindle.<br />
Through the play the two centres move against each other. This<br />
move causes, that one tooth projects in diameter against all others<br />
and that independent of the number of teeth. Therefore the<br />
system will be reduced to the number of teeth z = 1. Through the<br />
tolerance ranges of cutting edge, knife seat and clamping elements<br />
a similar situation occurs. One knife will project in diameter,<br />
thereby the number of teeth is reduced here as well to z = 1.<br />
Therefore, in order to determine the effective wave-length W b and<br />
wave-depth W t , the number of teeth on all cutting tools must be<br />
taken as z = 1. This means an increase for wave-length and wavedepth,<br />
which again results in a deterioration of the surface. The<br />
only exemption is hydro-locking and jointed tools, where play and<br />
tolerances are eliminated.<br />
9.1 Feed rate<br />
The feed rate v f depends on the rotary speed, the number of teeth<br />
and the feed per tooth. In general the required feed rate is calculated<br />
by experience. I.e., to reduce the machining time, an approximate<br />
value is set and then the feed rate is accelerated as long as<br />
the machined surface is considered satisfactory. The approximate<br />
values can be determined by the following formula:<br />
f z x z x n<br />
v f = ———— [ m / min ]<br />
1000<br />
with: f z = Feed per tooth (mm)<br />
z = Number of teeth<br />
n = Rotary speed (RPM)<br />
9.2 Correct chip thickness<br />
The correct chip thickness is achieved, if -during machining- neither<br />
chop-chips nor wood-dust occur.<br />
304
TECHNICAL EXPLANATIONS, POSITION OF WORKPIECE, SAFETY, ABBREVIATION<br />
TECHNICAL EXPLANATIONS>POSITION OF WORKPIECE>SAFETY>ABBREVIATION<br />
Position of workpiece<br />
Direction of rotation for cutting tools:<br />
Counter-clockwise rotation<br />
Looking from top onto the tool, rotating counter clockwise.<br />
Direction of rotation for shank tools:<br />
Right-hand rotation<br />
Viewed from the shank, rotating clockwise<br />
Right-hand thread<br />
Clockwise rotation<br />
Looking from top onto the tool, rotating clockwise<br />
Left-hand rotation<br />
Viewed from the shank, rotating counter-clockwise<br />
Left-hand thread<br />
Tool position:<br />
Position of the machine spindle relative to the workpiece<br />
The position of the machine spindle or tool is always defined from<br />
the feed side of the workpiece.<br />
li<br />
re<br />
305
TECHNICAL EXPLANATIONS, POSITION OF WORKPIECE, SAFETY, ABBREVIATION<br />
TECHNICAL EXPLANATIONS>POSITION OF WORKPIECE>SAFETY>ABBREVIATION<br />
Safety<br />
Tool maintenance and safe working<br />
Woodworking tools are very sensitive to shock and impact. After a<br />
collision or after very high operating vibrations, the strength of the<br />
cutting material or the clamping element is not guaranteed anymore<br />
and therefore they must be checked by the manufacturer.<br />
Damaged tools and clamping components may lead to breakage;<br />
fly-away parts are perilous.<br />
OERTLI tools are developed, designed and manufactured according<br />
to currently valid safety regulations. Careful handling and<br />
maintenance are essential and provide an important contribution<br />
to safety. Therefore the following rules should be adhered to:<br />
The operation manuals for the tools and clamping components<br />
must be read and observed. Keep operation manuals always in an<br />
accessible place. They are also available under www.oertli.ch/ operating<br />
instructions.<br />
Danger of cutting injuries by the sharp cutting edges exists by touching<br />
the tools. Further the brittle cutting materials are sensitive to<br />
impacts and therefore require highest care when handling and transporting.<br />
Always check screws and nuts before tools are taken into operation.<br />
Do not use key extensions. Use kickback-free torque wrenches.<br />
Do not mount tools and clamping components in a heated-up or<br />
under-cooled condition.<br />
Select RPM and direction of rotation according to the application.<br />
It is prohibited to operate the tool over the maximum admissible<br />
RPM marked on the tool.<br />
Further, observe the following additional rules for manual feed tools<br />
(MAN):<br />
• To be used only for against the feed operation<br />
• Do not operate below the admissible speed range<br />
• Never operate without safety device<br />
Remove resins from the tools and clean them regularly. Use resin<br />
removal solvent according to recommendations from the supplier.<br />
The tools should not lie in the cleaning solvent for a too long time.<br />
All clamping surfaces must be clean from oil, grease and water.<br />
Rinse and dry tools after cleaning with a solvent. For tools with aluminum<br />
body use only a suitable, water soluble special cleansing<br />
agent.<br />
Check regularly tools, clamping components and clamping adaptors<br />
regarding corrosion and damages. Do not put into operation<br />
tools and clamping components with corroded screw connections.<br />
Corroded screws must be replaced.<br />
Do eliminate run-out inaccuracies on support-faces, as for example<br />
spindles, spacers and spindle shoulders. Use only precise and planparallel<br />
spacers.<br />
Check the tool after especially tough operation or a collision for<br />
cracks, damaged knives or abnormal wear. Do not re-use damaged<br />
or profile modified tools and clamping components. Repair and<br />
maintenance work on tools and clamping components should<br />
only be carried-out by the tool manufacturer.<br />
Sharpening of tools, respectively replacement of knives in time is<br />
always worth-while. Sharpening work should be done only by the<br />
specialist. An OERTLI service station with optimum facilities is available<br />
in many countries. After sharpening, the tool must comply to<br />
all valid standards and regulations; especially for:<br />
• Knife projection<br />
• Rest thickness of cutting tips<br />
• Chip gullet width<br />
• Rest imbalance<br />
• Tool inscription<br />
Use only original OERTLI replacement parts. For use of foreign<br />
replacement parts as well as for modifications or repair work done<br />
by third parties, all responsibilities will be rejected. Further, the<br />
European Standards EN 847.1-3, Attachment B, «Safe working» is<br />
applicable.<br />
306
TECHNICAL EXPLANATIONS, POSITION OF WORKPIECE, SAFETY, ABBREVIATION<br />
TECHNICAL EXPLANATIONS>POSITION OF WORKPIECE>SAFETY>ABBREVIATION<br />
Abbreviation<br />
D<br />
D1<br />
B<br />
B1<br />
d<br />
d1<br />
d2<br />
d6<br />
b<br />
SL<br />
L<br />
L1<br />
h<br />
a<br />
T max.<br />
A<br />
M<br />
SW<br />
R<br />
Diameter<br />
Tool body diameter<br />
Cutting width<br />
Tool body width<br />
Bore<br />
Shank diameter<br />
Diameter<br />
Internal thread diameter<br />
Saw plate thickness on circular saw blades<br />
Cutting length<br />
Length<br />
Clamping length<br />
Knife height<br />
Knife thickness<br />
Max. grooving depth<br />
Dimension A on clamping shafts<br />
Thread<br />
Key opening<br />
Radius<br />
Angle<br />
Z<br />
NL<br />
DKN<br />
re.<br />
li.<br />
pos.<br />
neg.<br />
HD<br />
Number of teeth<br />
Pin holes<br />
Double keyway<br />
Clockwise rotation<br />
Counter clockwise rotation<br />
Positive spiral angle<br />
Negative spiral angle<br />
Wood thickness<br />
307