Vineyard Establishment II: Planting & Early Care of Vineyards
Vineyard Establishment II: Planting & Early Care of Vineyards
Vineyard Establishment II: Planting & Early Care of Vineyards

You also want an ePaper? Increase the reach of your titles
YUMPU automatically turns print PDFs into web optimized ePapers that Google loves.
Extension Bulletin E-2645 • Reprinted • May 2004<br />
<strong>Vineyard</strong> <strong>Establishment</strong> <strong>II</strong><br />
<strong>Planting</strong> and <strong>Early</strong> <strong>Care</strong> <strong>of</strong> <strong>Vineyard</strong>s<br />
Thomas J. Zabadal<br />
Department <strong>of</strong> Horticulture<br />
MICHIGAN STATE<br />
UNIVERSITY<br />
EXTENSION
Table <strong>of</strong> Contents<br />
Acknowledgments 3<br />
Introduction 3<br />
I. Preplanting Activities 4<br />
Preparing the Soil for <strong>Planting</strong> 4<br />
Marking the Field 4<br />
<strong>II</strong>. <strong>Planting</strong> Vines 7<br />
Preparing and Handling Vines 7<br />
<strong>Planting</strong> Techniques 8<br />
<strong>II</strong>I. Steps Immediately After <strong>Planting</strong> 10<br />
Hilling Soil Around Vines 10<br />
Controlling Weeds 10<br />
Supplemental Weed Control 15<br />
Fertilizing 16<br />
Irrigating 16<br />
Trellis/Staking 16<br />
Using Grow Tubes 17<br />
IV Year 1 Vine Management 18<br />
Adjusting the Number <strong>of</strong> Shoots Per Vine ... 18<br />
Defruiting 18<br />
Controlling Pests 18<br />
Managing Shoot Growth 18<br />
Managing Row Middles 19<br />
Controlling Weeds Around Vines 20<br />
V Engineering A Modern Trellis 20<br />
Types <strong>of</strong> Posts 21<br />
Quantities <strong>of</strong> Posts Required per Acre<br />
<strong>of</strong> <strong>Vineyard</strong> 23<br />
Installing Line Posts 24<br />
Installing End Posts 25<br />
Wire Characteristics <strong>of</strong> Importance for<br />
Use in <strong>Vineyard</strong> Trellises 27<br />
Amount <strong>of</strong> Wire Required 29<br />
Installing Wires 30<br />
Tools and Gadgets for Installing<br />
Trellis Wires 32<br />
VI. Year 2 Vine Management 32<br />
<strong>Early</strong>-season Weed Control 32<br />
Replanting 33<br />
Year 2 Vine Management 33<br />
Tying Grapevines 33<br />
Preemergence Weed Control 34<br />
Fertilizing with Nitrogen 34<br />
Adjusting Shoot Number per Vine,<br />
Suckering and Defruiting 35<br />
Controlling Pests 35<br />
Managing the Canopy 35<br />
Managing Row Middles 35<br />
V<strong>II</strong>. Year 3 Vine Management 36<br />
Training 36<br />
Pruning 36<br />
Controlling Weeds 37<br />
Fertilizing with Nitrogen 37<br />
Controlling Pests 37<br />
Controlling Crop 37<br />
Harvesting 38<br />
V<strong>II</strong>I. Summary 38<br />
References 39<br />
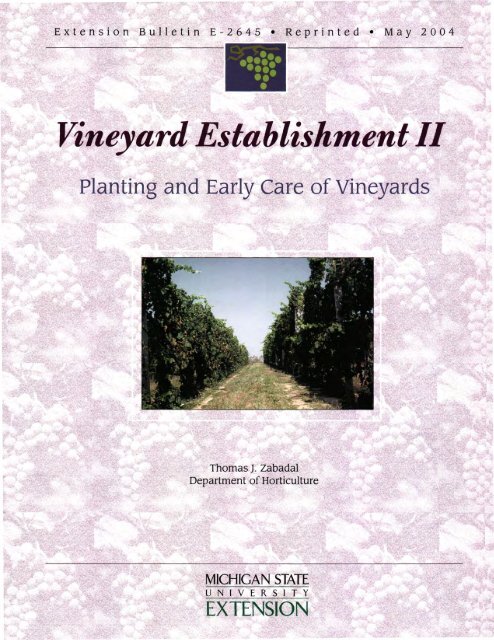
Cover Photo: A Cabernet franc vineyard in its third growing<br />
season near Benton Harbor, Michigan. Vines produced<br />
a yield <strong>of</strong> approximately 2 tons per acre after being<br />
thinned to allow the development <strong>of</strong> vine size.
Acknowledgments<br />
Thanks to Michigan State University Extension, the<br />
Michigan State University Agricultural Experiment<br />
Station, the National Grape Cooperative, and the<br />
Michigan Grape and Wine Industry Council for supporting<br />
projects reported in this manuscript. Thanks<br />
also to the Michigan Grape and Wine Industry Council<br />
for direct financial support to publish this manuscript.<br />
The Southwest Michigan Research and Extension<br />
Center field staff— including Jim Ertman, Jerry<br />
Grajauskis, Tom Dittmer, Gaylord Brunke and Fred<br />
Froehlich — provided direct logistical support for<br />
many activities reported here. Dr. Will Carlson and<br />
Dr. Jim Flore provided guidance on the development <strong>of</strong><br />
this manuscript. Many helpful comments on the final<br />
draft <strong>of</strong> this manuscript were provided by Dr. Bruce<br />
Bordelon, Dr. G. Stanley Howell, Robert Blum, Michael<br />
Nitz and Dr. Allen Zencka. Special thanks to the<br />
numerous growers in Michigan, New York and other<br />
areas who have so freely shared their viticultural ingenuity<br />
over the past quarter-century. Much <strong>of</strong> the information<br />
presented on these pages is a recording <strong>of</strong><br />
their collective creativity in vineyard management.<br />
Diane Dings has been a major contributor to this<br />
manuscript through graphics preparation, numerous<br />
draft revisions and many helpful suggestions throughout<br />
the process.<br />
Introduction<br />
The establishment <strong>of</strong> a productive vineyard is hard<br />
work. Too <strong>of</strong>ten those who undertake this enterprise<br />
do not understand the amount <strong>of</strong> effort and the<br />
need for timely performance <strong>of</strong> the many tasks<br />
required to bring a vineyard into full productive capacity.<br />
Frequently, vines are hurriedly planted without<br />
adequate preplanting and postplanting care with the<br />
expectation that, if one can just get the process started,<br />
eventually a beautiful, highly productive vineyard<br />
will result. Unfortunately, a poor start can doom a<br />
vineyard to mediocrity for a long period — perhaps<br />
forever. Therefore, careful planning and timely application<br />
<strong>of</strong> each step in the process <strong>of</strong> vineyard establishment<br />
are important not only to hasten the onset <strong>of</strong><br />
vineyard productivity but also to ensure its long-term<br />
productivity. The information presented here will<br />
assist those undertaking what can be a highly economically<br />
and personally rewarding experience —<br />
the establishment <strong>of</strong> a vineyard.
. Preplanting Activities<br />
Preparing the Soil for <strong>Planting</strong><br />
Most vineyards are planted after the soil has been<br />
tilled completely to provide a loose, workable planting<br />
bed for the vines. Plowing, disking, dragging, floating,<br />
etc., to prepare a field for planting requires more skill<br />
than one might imagine. Laying out the plow patterns<br />
to avoid dead furrows in the middle <strong>of</strong> the field,<br />
adjusting the plow so it rolls over the soil properly,<br />
cross-disking and dragging to ensure level soils, etc.,<br />
require planning and skill. Seek counsel from local<br />
field crop experts on tillage operations when necessary.<br />
Heavy sods, excessively wet soils, excessive<br />
growth <strong>of</strong> cover crops before plowing, etc., can complicate<br />
the process. The soil should be not only level<br />
but also loose and workable to a depth <strong>of</strong> 8 to 9 inches<br />
so a planter can be readily pulled through the soil<br />
to open a furrow for setting the vines. This furrow is<br />
typically 12 to 15 inches deep, but some planters can<br />
open a trench as much as 24 inches deep. Most soils<br />
require only typical surface tillage operations to prepare<br />
them for vine planting. Some soils, however,<br />
have compacted layers <strong>of</strong> subsoil, which form either<br />
naturally, in the case <strong>of</strong> a pan soil such as a hardpan<br />
or fragipan soil, or through physical compaction by<br />
equipment. Because these layers can restrict vine root<br />
development, breaking up these layers, either by subsoiling<br />
or (less <strong>of</strong>ten) through deep plowing, can significantly<br />
improve vine size development.<br />
Moldboard plowing works well on fields that have<br />
been managed uniformly without woody vegetation,<br />
such as those with a field crops history. Many growers<br />
prefer chisel plowing on old orchard or vineyard sites.<br />
Heavy sods may be killed with a herbicide treatment<br />
the previous fall and then rough-plowed so<br />
freeze/thaw cycles help break up large clods.<br />
If the field to be planted has considerable slope and<br />
the soils are light enough to be erodible, then complete<br />
tillage <strong>of</strong> the vineyard site may be hazardous. In<br />
recent years, a number <strong>of</strong> vineyards with these characteristics<br />
have been planted by first rotovating strips<br />
<strong>of</strong> soil into which vines are then planted. Rotovation<br />
should be performed as deeply as possible. Placing<br />
small marker stakes at the ends <strong>of</strong> vine rows and at<br />
intermediate places in the field will provide a guide for<br />
the tractor.<br />
Marking the Field<br />
Marking a field for planting a vineyard is perhaps like<br />
brushing teeth — no two people do it exactly the<br />
same. Though numerous variations on this step in<br />
vineyard establishment are possible, the following<br />
guidelines will help focus one's creativity for this task.<br />
The most common situation is a field that has been<br />
completely tilled and sufficiently leveled so that 3- to<br />
4-inch deep grooves in the soil will be readily visible.<br />
A grid pattern <strong>of</strong> grooves is made in the soil (Fig. 1)<br />
Fig. 1. Vertical grooves in the soil mark the spacing <strong>of</strong> rows.<br />
Less distinct horizontal grooves mark the vine spacing. This<br />
planting was on the Jim and Dan Nitz farm on an April morning<br />
near Baroda, Mich.
. Preplanting Activities<br />
marker stakes<br />
for first pass<br />
(A)<br />
-K-<br />
W<br />
Fig. 2. This trailer fieldmarker for planting grapevines on the<br />
Kerlikowske farm in Michigan uses two cultivating teeth to<br />
make grooves in the soil. Meanwhile a hydraulically extended<br />
disk marks the location for the next pass <strong>of</strong> the tractor.<br />
(Kerlikowske Farm, Berrien Springs, Mich.)<br />
t<br />
(B)<br />
Q<br />
and then vines are planted at the intersections on this<br />
grid. The marking tools used to make this grid are<br />
<strong>of</strong>ten fabricated on the farm (Fig. 2) and vary considerably<br />
from farm to farm. A common method will be<br />
described first and then comment will be made on<br />
variations.<br />
The marker is typically a tool bar behind the tractor,<br />
either on a 3-point hitch or trailered, on which cultivating<br />
teeth are spaced to make grooves in the soil.<br />
Three teeth <strong>of</strong>ten are used — one in the middle <strong>of</strong> the<br />
tractor and one movable tooth on each side. Begin by<br />
placing several stakes along what will be the second<br />
row <strong>of</strong> the vineyard (Fig. 3a). Then set intermediate<br />
stakes as needed, either by stretching a wire between<br />
end stakes or sighting between end stakes with binoculars<br />
to align a 6-foot pole held by one <strong>of</strong> the crew.<br />
Stakes in this row should be about 3 feet tall so the<br />
tractor driver can readily sight along them. Lath strips<br />
work well. They should be lightly staked in the soil so<br />
the tractor can easily push them over during marking.<br />
With the marking tool set so the distance between the<br />
cultivating teeth is at the desired row spacing, drive<br />
down the field along this set <strong>of</strong> stakes to make the<br />
first three rows (Fig. 3a). The third row marked with<br />
this first pass then becomes the guide for an outside<br />
1 4<br />
11<br />
It<br />
ft<br />
• i<br />
marker stakes<br />
for first pass<br />
—<br />
| J ^<br />
m<br />
K<br />
K<br />
Fig. 3. Steps in planting vines include (A) marking<br />
rows, (B) marking vine spaces and (C) planting vines.<br />
(C)
. Preplanting Activities<br />
edge <strong>of</strong> field<br />
row 1 <strong>of</strong> vineyard<br />
-40!-<br />
®T<br />
Headland<br />
(leave space<br />
at both ends<br />
<strong>of</strong> vineyard<br />
for equipment<br />
turnaround)<br />
stakes<br />
marking ^ y<br />
the end ^ ^ \<br />
<strong>of</strong> vine<br />
rows I<br />
lines perpendicular to row 1 for setting end •<br />
stakes <strong>of</strong> other rows<br />
X*© 1<br />
X<br />
Headland<br />
Fig. 4. A method using right-triangle measurements to establish end stakes for vineyard rows in a line perpendicular<br />
to the first row <strong>of</strong> a vineyard (figure adapted from Cahoon et al, 1991).<br />
tooth on the marker for the next pass. This is repeated<br />
across the entire field (Fig. 3a). If the marker is stabilized<br />
so there is no side-to-side movement, then<br />
marking can be performed in both directions.<br />
However, even a 2-inch shift on a side slope will make<br />
every other row 4 inches too wide or too narrow.<br />
Therefore, on small plantings it may be best to take<br />
the extra time to mark all rows in the same direction.<br />
On large plantings, mark rows on one side <strong>of</strong> the field<br />
in one direction and those on the other side in the<br />
opposite direction. This will limit row width variation<br />
to possibly one row middle in the center <strong>of</strong> the field.<br />
The next step is to mark vine spaces. Begin by setting<br />
stakes in the second vine space from one end <strong>of</strong> the<br />
vineyard (Fig. 3b). A technique for establishing a right<br />
angle to the row markings (Fig. 4) will ensure these<br />
stakes are perpendicular to the row markings. Then<br />
repeat the process <strong>of</strong> marking with the cultivating<br />
teeth spaced for the desired vine spacing (Fig. 3b).<br />
One ingenious grower variation simply marks the vine<br />
spaces. The first row is staked. The other rows are<br />
then marked while planting by using a marking pole<br />
mounted on the front <strong>of</strong> the tractor (Fig. 5).<br />
If strip tillage is performed on an erodible slope, begin<br />
by placing end stakes for the vineyard rows (Fig. 4).<br />
This will <strong>of</strong>ten be adequate marking for rotovation <strong>of</strong><br />
the strips. If the field is very long and undulating,<br />
intermediate stakes will be helpful. After the rotovation,<br />
place intermediate stakes in the rotovated strips<br />
between the end stakes as described above. If it is not<br />
Fig. 5. The person planting vines is looking for the vine<br />
spacing grooves in the soil for precise placement <strong>of</strong> the vine,<br />
while a disk on a boom in the front <strong>of</strong> the tractor marks a<br />
groove in the soil for the next row. Others in the crew supply<br />
vines and make sure vines are upright and mounded with<br />
soil. (Oxley Farm, Lawton, Mich.)
. <strong>Planting</strong> Vines<br />
feasible to mark vine spaces perpendicular to these<br />
strips as described above, mark vine spaces with spray<br />
lime as described below.<br />
On an outer row <strong>of</strong> the vineyard, lightly tension a wire<br />
between the end stakes. Use a 100-foot measuring<br />
tape to mark the wire for the desired vine spacing.<br />
Begin at an end stake to mark a half-vine space for<br />
the first vine and then full vine spaces. Using a bucket<br />
<strong>of</strong> spray lime, put a narrow strip <strong>of</strong> lime about 2 feet<br />
long perpendicular to the wire where each vine space<br />
is marked on the wire. When complete, relocate this<br />
wire to the other outside row <strong>of</strong> the vineyard, or at 15-<br />
row intervals on large vineyards. Repeat the marking<br />
with lime. Then a rope or wire can be stretched temporarily<br />
across the 13 or fewer unmarked rows<br />
between these marked rows. Beginning at the first<br />
vine space at one end <strong>of</strong> the vineyard, place a 2-foot<br />
strip <strong>of</strong> lime to mark the vine space where the rope<br />
crosses the unmarked rows. Repeat the process down<br />
the row until all the vine spaces have been marked.<br />
In reality, growers will be highly influenced in their<br />
approach to the task <strong>of</strong> marking a field for planting by<br />
the resources available among their grape-growing<br />
neighbors. Nevertheless, the very important goal <strong>of</strong><br />
straight, uniformly spaced rows and vines is universal.<br />
//. <strong>Planting</strong> Vines<br />
Preparing and Handling Vines<br />
Keep grapevines moist at all times. If the nursery from<br />
which you are purchasing vines is storing them well in<br />
a moist, cold storage, do not accept delivery <strong>of</strong> vines<br />
until you are ready to use them. Vines that arrive with<br />
chlorotic emerging shoots indicate poor storage techniques.<br />
Vines should not experience extended periods<br />
<strong>of</strong> shipping. When you receive vines, immediately<br />
inspect and water them and place them in a cool,<br />
moist environment. If a cold-storage facility is not<br />
available, plant as soon as possible. Vines may be<br />
kept in a cool cellar for a few days as long as they are<br />
watered <strong>of</strong>ten and kept covered to prevent their drying<br />
out. Check tags on all bundles to make sure they are<br />
true to variety and rootstock as per your order. Do not<br />
prune the roots <strong>of</strong> vines. Plant as much <strong>of</strong> the root<br />
system as can be well distributed in the soil (see discussion<br />
below). Vines shipped from commercial nurseries<br />
<strong>of</strong>ten will have had their top portions pruned so<br />
that no further pruning is required. Vines that you<br />
propagated should have the tops pruned back to 5 to 6<br />
inches. If vine tissues seem dry at planting, soak bundles<br />
<strong>of</strong> vines in water for 4 to 6 hours prior to planting.<br />
Vines should be transported to the field under<br />
tarps or in covered containers (Fig. 6).
. <strong>Planting</strong> Vines<br />
<strong>Planting</strong> Techniques<br />
Most vineyards are planted with a modified tree<br />
planter (Fig. 5). This piece <strong>of</strong> equipment seats one or<br />
two people. When there are two, individuals may<br />
alternate planting vines or one may prepare vines for<br />
insertion into the furrow while the other plants. While<br />
the tractor driver keeps the planter in line with the<br />
row markings, the person(s) planting vines places a<br />
vine in the furrow each time it reaches a cross marking<br />
(Fig. 5). When vines are planted, place roots as<br />
deep in the trench as possible (Fig. 7), make a quick<br />
Fig. 8. This planter has been modified to open a trench as<br />
much as 24 inches deep and 9 inches wide so that the large<br />
vine root systems can be planted with good distribution in<br />
the soil. Blades behind the planter fillin the trench with soil.<br />
(Oxley Farm, Lawton, Mich.)<br />
Fig. 7. A vine being planted in a trench. It is placed as deep<br />
as possible, shaken slightly to distribute roots and then lifted<br />
to the proper height. Blades attached to the planter are<br />
pulling soil into the trench. (Oxley Farm, Lawton, Mich.)<br />
swirling motion <strong>of</strong> the vine, and then pull it up slightly<br />
to get good root distribution. Some growers have usefully<br />
modified the flanges on a tree planter to open a<br />
furrow as much as 9 inches wide and 24 inches deep<br />
(Fig. 8). Grafted vines should have the graft union situated<br />
approximately 2 inches above the level <strong>of</strong> the<br />
vineyard floor (Fig. 9). This facilitates both hilling and<br />
removing soil from around the graft union. If the root<br />
systems <strong>of</strong> vines are so large that they cannot be well<br />
distributed in the trench at planting, then modest root<br />
pruning may be warranted. Nevertheless, for the<br />
health <strong>of</strong> the vine and to promote its maximum rate <strong>of</strong><br />
establishment, make the extra effort to plant as much<br />
Fig. 9. A young grapevine showing a root system that was<br />
well distributed at planting and the proper height placement<br />
<strong>of</strong> the graft union.
. <strong>Planting</strong> Vines<br />
well distributed root system as possible. Though tree<br />
planters <strong>of</strong>ten have wheels or blades to fill in the<br />
trench, hand labor should follow the planter (Fig. 10)<br />
to straighten vines, make a final adjustment on the<br />
height <strong>of</strong> the graft union on grafted vines and firm the<br />
soil around each vine.<br />
When planting by hand, it is helpful to till the soil<br />
before planting. One approach is first to rotovate<br />
strips for the vine rows. If a V-shaped shovel plow is<br />
available, it can then be used to open a trench for<br />
planting (Fig. 11). It may be possible to mark vine<br />
spaces perpendicular to the rows with a marker, then<br />
plant at the intersections <strong>of</strong> that grid. It is also possible<br />
to plant by hand along a wire that has been lightly<br />
tensioned between end-row stakes. Placing this wire<br />
directly on the row complicates digging holes and distributing<br />
root systems. Therefore, it is helpful to <strong>of</strong>fset<br />
this wire about 15 inches from where the vines will be<br />
planted. Then a 15-inch stick can be used to measure<br />
from the wire to the precise location for vine placement.<br />
Mark vine positions on the wire, beginning with<br />
a half-vine spacing. Do not use a stick to measure the<br />
length <strong>of</strong> individual vine spaces — small errors in vine<br />
placement become cumulative as one plants down the<br />
Fig. 11. A V-shaped shovel plow has opened a trench for<br />
hand planting <strong>of</strong> vines. The 12-inch ruler next to the vine<br />
shows that root systems can easily be distributed 12 to 15<br />
inches deep at the bottom <strong>of</strong> this trench without any additional<br />
digging. A mound <strong>of</strong> soil is then gathered by hand<br />
around each vine and the rest <strong>of</strong> the trench is filledin<br />
mechanically.<br />
row. Holes dug with a shovel should be at least 12<br />
inches in diameter and 12 inches deep. Make sure that<br />
the roots are well distributed and that the ends <strong>of</strong> the<br />
roots are at the bottom <strong>of</strong> the hole, not creeping up<br />
the sides to the surface. Mound soil around each vine<br />
to hold it upright.<br />
Augers may be used to dig the holes for planting vines<br />
by hand. In soils with clay, however, augering may<br />
compress soil on the sides <strong>of</strong> the hole, making it<br />
impenetrable to roots. If such soil compression is suspected,<br />
chip <strong>of</strong>f soil on the side walls <strong>of</strong> the hole during<br />
planting.<br />
Fig. 10. Members <strong>of</strong> the planting crew follow the planter to<br />
make sure each vine is upright and has a firmmound <strong>of</strong> soil<br />
around it. The marking grid is evident on the soil. (Jim and<br />
Dan Nitz Farm, Baroda, Mich.)
. Steps Immediately After <strong>Planting</strong><br />
Hilling Soil Around Vines<br />
The soil around vines immediately after planting is<br />
generally level or slightly depressed. Before the introduction<br />
<strong>of</strong> preemergence herbicides in the early 1950s,<br />
weed control around vines was accomplished by alternately<br />
hilling and removing soil around vines. Though<br />
weed control around vines is now accomplished<br />
chemically in most vineyards, hilling soil around vines<br />
is still desirable for several reasons: vineyards are<br />
<strong>of</strong>ten planted with rows across sloping ground so that<br />
ridges <strong>of</strong> soil under the trellis interrupt the highly erosive<br />
downhill flow <strong>of</strong> water during heavy rains;<br />
depressions in the soil around grapevines may concentrate<br />
herbicides at the bases <strong>of</strong> young vines and<br />
lead to vine injury; and hilling soil around graft unions<br />
during the winter is the best known method <strong>of</strong> affording<br />
winter protection to those tissues.<br />
Offset plows, disks, cultivators, etc., are commonly<br />
used to hill soil around newly planted vines immediately<br />
after planting (Fig. 12). Perform this task before<br />
applying any herbicides. A ridge <strong>of</strong> soil 4 to 6 inches<br />
above the level vineyard floor is a reasonable goal. If a<br />
deep furrow was created during the planting process,<br />
a somewhat higher hilling will be necessary to compensate<br />
for settling <strong>of</strong> the soil. Although covering graft<br />
unions may initiate scion rooting, it keeps young graft<br />
unions moist during the early growth <strong>of</strong> vines. Scion<br />
roots that form should be removed when soil is<br />
cleared away from around vines the following spring.<br />
Hilling soil around grafted grapevines is <strong>of</strong>ten considered<br />
as protection for the graft unions against winter<br />
injury from low temperatures. However, what is really<br />
desired is to protect not only the graft union but also<br />
the scion tissues 2 to 4 inches above the graft. This<br />
affords the opportunity to renew a severely winterinjured<br />
grapevine (Figs. 13-A to 13-D). Otherwise,<br />
winter injury could occur immediately above the graft<br />
union (Fig. 13-E) and prevent any possibility <strong>of</strong> renewing<br />
the vine (Fig. 13-F). Therefore, be sure that hilling<br />
<strong>of</strong> grafted vines is sufficient to provide 2 to 4 inches <strong>of</strong><br />
settled soil over the graft.<br />
A second strategy uses hilling around new grapevines<br />
as a means <strong>of</strong> weed control. A light cultivation about<br />
3 weeks after the planting begins to fill in furrows and<br />
cover any newly emerged weed seedlings. A second<br />
and possibly a third cultivation at 2- to 3-week intervals<br />
gradually fills in planting furrows and creates a<br />
ridge <strong>of</strong> soil around vines while suppressing emerging<br />
weed seedlings.<br />
Controlling Weeds<br />
Fig. 12. A new planting <strong>of</strong> 'Cabernet franc' vines showing<br />
hilling <strong>of</strong> soil in a ridge around vines. (Doug Nitz Farm,<br />
Baroda, Mich.)<br />
Weed control is the single most important cultural<br />
practice in vineyard establishment. It should dominate<br />
site preparation as well as vine management<br />
immediately after planting. Without weed control,<br />
other cultural practices such as nitrogen fertilization,<br />
S5*r
<strong>II</strong>I. Steps Immediately After <strong>Planting</strong><br />
trunk renewal<br />
cane<br />
double trunked vine<br />
\V fiS<br />
Crown gall<br />
develops<br />
on tissues<br />
winter-injured<br />
above the mound<br />
<strong>of</strong> soil.<br />
crown gall<br />
removed<br />
by pruning<br />
(D)<br />
(A)<br />
Crown gall<br />
develops<br />
on tissues<br />
immediately above<br />
graft union, leaving<br />
no opportunity for<br />
renewing vine<br />
above the graft.<br />
Vine dies<br />
when galling<br />
completely<br />
girdles<br />
the vine.<br />
(E)<br />
(F)<br />
(G)<br />
Fig. 13. A schematic <strong>of</strong> the base <strong>of</strong> a grafted grapevine (A) showing the progression <strong>of</strong> crown galling after a winter<br />
injury episode, depending on whether hilling <strong>of</strong> soil covers the graft union and vine tissues several inches above<br />
the graft union (B-D) or covers only the graft union (E-G).<br />
irrigation and vine pruning severity will be incapable<br />
<strong>of</strong> promoting vine size development (Fig. 14). When<br />
these cultural practices are used in combination with<br />
weed control, however, they can have a positive, additive<br />
influence on vine growth (Fig. 14).<br />
If vineyard site preparation properly eliminates perennial<br />
weed growth, weed control after planting is a<br />
matter <strong>of</strong> preventing weeds that develop from seed.<br />
Two fundamental questions relate to that task: how<br />
much weed control is desirable around newly planted<br />
vines and how can it be accomplished?<br />
Weed control around grapevines typically is established<br />
in bands along the vine rows. <strong>Vineyard</strong> row<br />
middles are a separate aspect <strong>of</strong> vineyard management.<br />
A quarter-century ago, most eastern U.S. vineyards<br />
were managed with a 30- to 36-inch-wide weed-free<br />
band under the trellis. That width has evolved to<br />
approximately 40 to 48 inches. However, even wider<br />
weed-free bands — up to 96 inches around newly<br />
planted vines — can promote significantly greater vine<br />
growth (Fig. 15).
<strong>II</strong>I. Steps Immediately After <strong>Planting</strong><br />
CD<br />
Z<br />
if<br />
z<br />
<<br />
o<br />
Weed<br />
control<br />
Nitrogen<br />
fertilizer<br />
2 -<br />
• • ••<br />
NO<br />
NO<br />
J i<br />
NO<br />
YES<br />
YES<br />
NO<br />
YES<br />
YES<br />
Irrigation 1 NO I YES I I NO | YES I I NO | YES I I NO I YES j<br />
MvSrity ISILISILI ISlLlSlLl |S|L|S|Ll |S|L|S|L<br />
Fig. 14. Weight <strong>of</strong> cane prunings per vine for 'Niagara'<br />
grapevines after two growing seasons. Vines were subjected<br />
to combinations <strong>of</strong> weed control under the trellis, nitrogen<br />
fertilization, irrigation and severe (S) or light (L) pruning.<br />
(<strong>Vineyard</strong> near Benton Harbor, Mich.)<br />
Therefore, a grower needs to consider two opposing<br />
factors when deciding how large a weed-free area to<br />
manage around newly planted grapevines. The first is<br />
the erodibility <strong>of</strong> the site. When preemergence herbicides<br />
first became available for vineyard use, some<br />
growers thought that complete control <strong>of</strong> vegetation<br />
on the vineyard floor would be desirable. This strategy<br />
<strong>of</strong>ten led to highly erosive conditions (Fig. 16), so it<br />
was abandoned. However, the wider the weed control<br />
band is around new vines, the greater the opportunity<br />
for vine growth. Therefore, a grower needs to decide<br />
how wide a weed-free band can be established safely<br />
around vines. That width can <strong>of</strong>ten be enlarged if it is<br />
used in combination with erosion control practices<br />
such as ridging soil along the vines and maintaining a<br />
sod strip in the row middles. A minimum 48-inch-wide<br />
weed-free band should be possible in most situations.<br />
At times, even wider weed-free bands will be useful.<br />
60<br />
leaves<br />
vine (g)<br />
50<br />
40<br />
/<br />
^^^roots<br />
CD<br />
O.<br />
Tissue dry weight<br />
30<br />
20<br />
10<br />
^ 0 ^ shoots<br />
sfZ/<br />
—-^y ^^^<br />
0<br />
^<br />
^<br />
C I 3 4 5 6 7 8<br />
Width <strong>of</strong> weed-free band around vines (ft)<br />
Fig. 15. The dry weight per vine for leaves, roots and shoots<br />
<strong>of</strong> 'Niagara' grapevines at the end <strong>of</strong> their firstgrowing season.<br />
Vines had varying widths <strong>of</strong> weed-free bands around<br />
them. (<strong>Vineyard</strong> near Benton Harbor, Mich.)<br />
Fig. 16. A highly eroded vineyard that has lost a large<br />
amount <strong>of</strong> topsoil because sod strips were not maintained in<br />
the row middles. Vines are small and unproductive.
<strong>II</strong>I. Steps Immediately After <strong>Planting</strong><br />
The options for weed control around newly planted<br />
grapevines are manual, mechanical, chemical,<br />
mulching and combinations there<strong>of</strong>. Manual weed<br />
control with hoeing and hand weeding is an acceptable<br />
vineyard practice and can result in good vine size<br />
development. However, those who intend to practice<br />
manual weed control around more than a hundred<br />
vines <strong>of</strong>ten grossly underestimate the difficulty <strong>of</strong> the<br />
task. Faithful biweekly weeding throughout the growing<br />
season is the key for making this weed control<br />
strategy successful. This means marking the calendar<br />
so that 2-week periods do not stretch into 3 or 4<br />
weeks!<br />
Mechanical weed control around newly planted vines<br />
is practiced with several types <strong>of</strong> equipment, including<br />
hilling-up/taking-out plows, <strong>of</strong>fset rotovating devices,<br />
<strong>of</strong>fset cultivators, etc. Although such efforts may control<br />
weeds between vines well, they do not control the<br />
critically important weed growth immediately around<br />
vines. Therefore, supplemental manual weed control<br />
around vines is essential. Even if cross-cultivation<br />
with disks or rotovators is possible, manual weeding<br />
immediately around vines is still critical to promote<br />
vine size development (Fig. 17).<br />
Mulching materials used to control weeds around<br />
newly planted vines include strips <strong>of</strong> black plastic<br />
Fig. 17. This new vineyard was cross-cultivated in the<br />
first six weeks after planting. Manual weeding/hoeing<br />
was not performed immediately around vines.<br />
mulch, straw, grass clippings, shredded bark, stones<br />
and newspaper held down with stones. Commercial<br />
use <strong>of</strong> black plastic mulch typically results in vine<br />
growth that is no better than that obtained with herbicides.<br />
There are the added complications <strong>of</strong> managing<br />
vineyard row middles at the edge <strong>of</strong> the plastic mulch<br />
and disposing <strong>of</strong> the plastic at the end <strong>of</strong> 1 or 2 years.<br />
Though weed control around most newly planted<br />
vines in vineyards is attempted with preemergence<br />
herbicides, this is not an easy task. The number <strong>of</strong><br />
herbicides for this purpose is limited, and many do not<br />
control a broad spectrum <strong>of</strong> weed species. In addition,<br />
the grower must obtain and calibrate equipment to<br />
ensure proper rate and patterns <strong>of</strong> herbicide application.<br />
Furthermore, adequate rainfall after application<br />
is required to activate the herbicides. Too <strong>of</strong>ten, some<br />
aspect <strong>of</strong> this combination <strong>of</strong> factors fails despite the<br />
paramount importance <strong>of</strong> weed control in new vineyards.<br />
For this reason, we'll review the steps involved<br />
with this task in detail.<br />
Herbicide control <strong>of</strong> weed growth in a newly planted<br />
vineyard begins with the application <strong>of</strong> a preemergence<br />
herbicide. This type <strong>of</strong> herbicide interferes with<br />
seed germination. It will not control existing weeds —<br />
this is why control <strong>of</strong> perennial weeds before planting<br />
is so important. Preemergence herbicides are typically<br />
highly water-insoluble materials, yet they must penetrate<br />
the top 1/4 to 1/2 inch <strong>of</strong> the soil to be effective.<br />
Hence, rainfall after application is important. Because<br />
these materials are effective only on a thin top layer <strong>of</strong><br />
soil, they should be applied after all vineyard tasks<br />
that will disturb the soil surface have been completed.<br />
This includes hand fertilization <strong>of</strong> vines and installation<br />
<strong>of</strong> trellis. If a grower waits too long to apply a<br />
preemergence herbicide after planting, germination <strong>of</strong><br />
weeds already may have begun or a late spring<br />
drought may occur. Either <strong>of</strong> these may result in poor<br />
performance <strong>of</strong> the material. Therefore, it is desirable<br />
to plant vines as early in the spring as possible and<br />
then perform hilling, fertilizing, trellis installation (if<br />
one elects to do so) and weed spraying in rapid succession.<br />
If trellis installation is deferred, a well managed<br />
operation can perform these other tasks in a 2-<br />
day period.
<strong>II</strong>I. Steps Immediately After <strong>Planting</strong><br />
Several preemergence herbicides for use on newly<br />
planted grapevines have been evaluated at the<br />
Southwest Michigan Research and Extension Center<br />
and are discussed below. Reference to products mentioned<br />
does not imply an endorsement by Michigan<br />
State University or bias against those not mentioned.<br />
The legal registration <strong>of</strong> products mentioned in this<br />
publication is subject to change. Growers should<br />
always check with the local Extension <strong>of</strong>fice on the<br />
current registration status <strong>of</strong> herbicides before using<br />
them. A complete listing <strong>of</strong> preemergence herbicides<br />
available for use on vineyards can be found in the<br />
publication "Fruit Spraying Calendar," Michigan State<br />
University Extension bulletin E-154.<br />
Snapshot (oryzalin/isoxaben combination): This<br />
material is a combination <strong>of</strong> the herbicides Surflan<br />
and Gallery. It is highly effective against a broad spectrum<br />
<strong>of</strong> weed species. In our trials, the lowest registered<br />
rate <strong>of</strong> 3.75 pounds per acre sprayed was inferior<br />
to the full rate <strong>of</strong> 5.0 pounds per acre sprayed.<br />
Therefore, use this product at its full rate. Snapshot<br />
provided the best herbicide control <strong>of</strong> weeds around<br />
newly planted vines in our trials.<br />
Surflan (oryzalin): This product is highly effective<br />
against many grass and broadleaf weed species but<br />
only partially effective against certain other broadleaf<br />
weed species, including ragweed and wild carrot.<br />
Therefore, it should be used at its full rate <strong>of</strong> 6 quarts<br />
per acre sprayed and weed development should be<br />
carefully monitored. A supplemental weed spray, as<br />
discussed below, is likely to be required.<br />
Prowl (pendimethalin): This material is effective for<br />
many grass and broadleaf weed species at a rate <strong>of</strong><br />
4.0 quarts per acre sprayed but is totally ineffective<br />
against common ragweed. Therefore, it must be used<br />
in combination with the supplemental spray program<br />
discussed below.<br />
The cost <strong>of</strong> weed control strategies in new vineyard<br />
plantings varies considerably, with manual weeding<br />
generally being the most costly (Table 2).<br />
Table 2. Estimated cost <strong>of</strong> material, labor and equipment for four weed control treatments in new vineyard<br />
plantings.<br />
Treatment<br />
description<br />
Unit<br />
price ($)<br />
Rate/acre<br />
sprayed<br />
Materials<br />
Rate/acre<br />
<strong>of</strong> vineyard 1<br />
Cost/acre<br />
<strong>of</strong> vineyard [ ($)<br />
Labor 2<br />
Hours/<br />
acre<br />
Cost/<br />
acre($)<br />
Equipment 3<br />
($)<br />
Total<br />
cost/acre<br />
<strong>of</strong> vineyard<br />
($)<br />
Manual<br />
weeding<br />
30.0<br />
180<br />
180<br />
Snapshot<br />
41/lb<br />
5 1b<br />
2.2 1b<br />
91.11<br />
0.5<br />
5<br />
10<br />
106<br />
Surflan<br />
90/gal<br />
6qt<br />
2.67 qt<br />
60.08<br />
0.5<br />
5<br />
10<br />
75<br />
Prowl &<br />
Gramoxone<br />
Extra<br />
32/gal<br />
49/gal<br />
lgal<br />
3pt<br />
0.44 gal<br />
1.3 pt<br />
14.08<br />
7.96<br />
0.5<br />
2.0<br />
5<br />
20<br />
10<br />
2<br />
59<br />
Assuming 4-foot spray band and 9-foot vineyard row widths.<br />
2 Manual labor valued at $6/hour and labor to operate equipment valued at $ 10/hour, including benefits.<br />
3 Tractor and sprayer valued at $20/hour; backpack sprayer valued at $l/hour.
. Steps Immediately After <strong>Planting</strong><br />
Weed control planning should begin weeks or even<br />
months before planting so appropriate materials and<br />
equipment can be readied for a timely application <strong>of</strong><br />
the chosen strategy. Adequate resources should be<br />
committed to this aspect <strong>of</strong> vineyard establishment in<br />
preference to fertilization, irrigation or early establishment<br />
<strong>of</strong> the trellis.<br />
Supplemental Weed Control<br />
Even with good planning and application <strong>of</strong> any preemergence<br />
herbicide, a few weed seedlings <strong>of</strong>ten<br />
escape control in the treated area around vines. When<br />
weed seedlings in the herbicide-treated area around<br />
grapevines are freed from competition with other<br />
plant growth, they grow rapidly. For example, a common<br />
ragweed plant, which might develop normally to<br />
a height <strong>of</strong> 18 inches, can attain a height <strong>of</strong> 4 to 5 feet<br />
by midsummer when it escapes control in a herbicide<br />
band. Therefore, a relatively few escaped weed<br />
seedlings can compete significantly with the<br />
grapevines.<br />
To control those escaped weed seedlings, mark the<br />
calendar for inspection <strong>of</strong> weed control around vines<br />
30 days after planting. Gramoxone Extra herbicide<br />
may be applied at this time to newly planted vineyards.<br />
Grapevine shoots at 30 days after planting typically<br />
have just begun their growth and <strong>of</strong>ten will be<br />
6 to 10 inches long. Therefore, it is quite feasible to<br />
spot-spray Gramoxone Extra around vines to control<br />
escaped weed seedlings without injuring vines<br />
(Fig. 18). A person with a backpack sprayer can treat<br />
several acres in a day. Gramoxone Extra is a highly<br />
toxic restricted-use pesticide. Follow all precautions<br />
listed on its label, including use <strong>of</strong> protective clothing,<br />
when using this product.<br />
When a vineyard site has been well managed by eradicating<br />
perennial weed problems, applying an appropriate<br />
preemergence herbicide after planting and<br />
using a supplemental Gramoxone Extra spray as needed,<br />
a grower can expect good weed control in a new<br />
Fig. 18. Grapevines 30 days after planting showing an occasional<br />
weed seedling that has escaped control in a 48-inch<br />
wide preemergence herbicide spray band. Spot herbicide<br />
spraying to eliminate those weeds is very helpful at this<br />
stage.<br />
vineyard until sometime in August (Fig. 19). This situation<br />
<strong>of</strong>ten is acceptable because the majority <strong>of</strong> vine<br />
growth for the season will have occurred and the<br />
onset <strong>of</strong> weed competition will help slow the vines'<br />
growth so that shoots develop into mature canes.<br />
Fig. 19. This new vineyard has had good weed control<br />
around vines, which is just beginning to deteriorate in late<br />
August. This weed growth will help to slow vine growth and<br />
develop maximum winter hardiness.
<strong>II</strong>I. Steps Immediately After <strong>Planting</strong><br />
Fertilizing<br />
A soil test taken during site preparation may indicate<br />
a need for potassium fertilization. If so, applying<br />
potassium fertilizer in a band along the vine rows<br />
immediately after planting will be more efficient than<br />
broadcasting the fertilizer before planting.<br />
Newly planted grapevines almost always respond to<br />
nitrogen fertilization. An application <strong>of</strong> 30 pounds <strong>of</strong><br />
actual nitrogen per acre is generally recommended for<br />
most plantings. This is equivalent to approximately<br />
2 ounces <strong>of</strong> ammonium nitrate or 6 ounces <strong>of</strong> a blended<br />
fertilizer such as 10-10-10 per vine on typical vine<br />
and row spacings. Apply this fertilizer by ringing it<br />
around each grapevine in a radius <strong>of</strong> approximately 1<br />
foot after any hilling operation and before the application<br />
<strong>of</strong> any herbicides. Some growers have obtained<br />
impressive early growth <strong>of</strong> vines by applying as much<br />
as twice this amount with 50 pounds actual nitrogen<br />
being broadcast at planting and a supplemental banded<br />
application <strong>of</strong> 10 to 15 pounds <strong>of</strong> actual nitrogen<br />
being applied in early July.<br />
Irrigating<br />
Few Michigan vineyards are irrigated. Watering new<br />
vines in any manner is not essential for the establishment<br />
<strong>of</strong> a vineyard in Michigan. Research at the<br />
Southwest Michigan Research and Extension Center,<br />
however, suggests that when newly planted vineyards<br />
have been well managed for weed control and nitrogen<br />
fertilization, irrigation may further enhance vine<br />
development (Fig. 14). If a grower intends to install an<br />
irrigation system in a Michigan vineyard, it should be<br />
in place at planting because the first 2 years <strong>of</strong> the<br />
vineyard's life are likely to be the most cost-effective<br />
time to use it.<br />
Growers occasionally make efforts to water newly<br />
planted grapevines. Water has been carried to the field<br />
in spray tanks, by a series <strong>of</strong> hoses or by other creative<br />
means. The impact <strong>of</strong> these efforts is questionable.<br />
To be effective, irrigation <strong>of</strong> young vines should<br />
penetrate a minimum <strong>of</strong> 6 to 10 inches into the<br />
ground. A quick application <strong>of</strong> a few gallons <strong>of</strong> water<br />
per grapevine will result in most <strong>of</strong> the water either<br />
running <strong>of</strong>f or evaporating and not being utilized by<br />
the vine. If a temporary irrigation system is considered<br />
for a new vineyard planting, then disposable trickle<br />
irrigation tape, which can cost as little as 2 cents per<br />
foot, should be considered. A relatively low-cost manifold<br />
that includes a pressure regulator and a filter can<br />
be used with this low-cost trickle tape. Such a system<br />
can apply enough water over a period <strong>of</strong> several hours<br />
to percolate into the vines' root zones and be effective.<br />
The publication "Components <strong>of</strong> a Temporary<br />
Trickle Irrigation System for New <strong>Vineyard</strong>s" (Zabadal,<br />
1997a) is available to guide growers.<br />
Trellis/Staking<br />
The benefits <strong>of</strong> supporting grapevines in their first<br />
growing season include better pesticide spray coverage,<br />
reduced risk <strong>of</strong> disease and vines that are kept<br />
out <strong>of</strong> vineyard traffic. Therefore, when growers find it<br />
economically and logistically feasible, trellis posts and<br />
one or two wires should be installed immediately after<br />
planting (Fig. 20) (see section V, "Engineering a<br />
Modern Trellis").<br />
Fig. 20. A new vineyard managed with the installation <strong>of</strong> a<br />
trellis immediately after planting. String was tied from a<br />
shootless spur on each vine to a wire installed on the top <strong>of</strong><br />
the posts. Vines were then wound around this string as they<br />
grew. (Dongvillo Farm, St. Joseph, Mich.)<br />
&<br />
&
<strong>II</strong>I. Steps Immediately After <strong>Planting</strong><br />
Using Grow Tubes<br />
Fig. 21. This new vineyard was managed without installing<br />
trellis after planting. Posts and one or two wires will be<br />
installed during the winter between years 1 and 2.<br />
(Kerlikowske Farm, Berrien Springs, Mich.)<br />
Nevertheless, many large commercial vineyard<br />
acreages are established successfully without the use<br />
<strong>of</strong> any vine-supporting structures in the first growing<br />
season (Fig. 21). When vines are managed this way, it<br />
<strong>of</strong>ten is desirable to reposition shoots out <strong>of</strong> the vineyard<br />
row middles and into the vine rows with a pitchfork<br />
or garden rake a few times during the growing<br />
season to prevent injury from vineyard traffic.<br />
Growers occasionally place individual stakes next to<br />
grapevines for training in their first growing season.<br />
Though this procedure can be helpful the first year <strong>of</strong><br />
vine management, these stakes <strong>of</strong>ten have little value<br />
in succeeding years. Therefore, the material and labor<br />
cost associated with such staking <strong>of</strong>ten would be better<br />
invested in constructing the permanent trellis.<br />
Appropriate vine tying techniques (Zabadal, 1997b)<br />
should be used to attach vines to the trellis.<br />
The use <strong>of</strong> grow tubes at planting is a relatively new<br />
cultural practice. It is well documented that using<br />
grow tubes hastens shoot elongation. However, the<br />
long-term effects <strong>of</strong> such rapid shoot growth on winter<br />
hardiness and the stability <strong>of</strong> these tissues in coolclimate<br />
vineyards is uncertain. Root development to<br />
exploit the soil volume, increase vine size and<br />
increase the vine's capacity for fruiting should be the<br />
primary goal in the first 2 years <strong>of</strong> managing a vineyard.<br />
Research data indicate that when weeds around<br />
vines are controlled and vines are fertilized, unpruned<br />
newly planted vines develop more leaf area and roots<br />
than severely pruned vines. That strategy is incompatible<br />
with the use <strong>of</strong> grow tubes because a large number<br />
<strong>of</strong> shoots per vine can not be placed in these<br />
tubes. Nevertheless, grow tubes provide a sheltered,<br />
warm climate for increasing the rate <strong>of</strong> shoot growth<br />
as well as a physical barrier to protect vines from herbicide<br />
spray operations. The positive and negative<br />
attributes <strong>of</strong> grow tubes in cool-climate vineyards will<br />
be verified over the next 5 to 10 years. For the present,<br />
growers should consider them on a trial basis.
IV, Year 1 Vine Management<br />
The primary goal <strong>of</strong> vine management in the first 2<br />
years <strong>of</strong> a vineyard is to develop large, healthy<br />
vines with large root systems. It is possible, under<br />
ideal conditions, for vines to fill the trellis totally with<br />
a healthy, functional canopy by the end <strong>of</strong> their second<br />
growing season and to produce significant crops<br />
<strong>of</strong> quality fruit in the third year. To accomplish this<br />
goal, all the vineyard tasks in the first 2 years are<br />
aimed at reducing or eliminating stresses on the vines.<br />
These stresses include pests (weeds, diseases and<br />
insects), drought, nutritional deficiencies and cropping<br />
stress.<br />
Adjusting the Number <strong>of</strong> Shoots<br />
Per Vine<br />
A basic strategy for developing vine size is to promote<br />
the development <strong>of</strong> as much functional leaf area as<br />
possible. Traditional vine management <strong>of</strong> newly planted<br />
vines involves reducing shoot numbers to two to<br />
four per vine when shoot growth is 6 to 10 inches<br />
long, which is compatible with the contemporary use<br />
<strong>of</strong> grow tubes.<br />
Research on newly planted vines <strong>of</strong> the 'Niagara' variety<br />
at the Southwest Michigan Research and<br />
Extension Center indicates that when vines were well<br />
managed with regard to weed control and nitrogen<br />
fertilization, those left unpruned after planting produced<br />
more leaf area and larger root systems than<br />
those that were adjusted to two shoots per vine.<br />
Defruiting<br />
It is <strong>of</strong>ten surprising to new grape growers that vines<br />
can produce fruit the year they are planted. However,<br />
producing a crop is detrimental to the development <strong>of</strong><br />
young vines. Therefore, vines should be defruited at<br />
least their first 2 years <strong>of</strong> growth or until they have<br />
adequately filled the trellis. Growers can perform this<br />
task with shoot adjustment when shoots are approximately<br />
10 inches long. Retain one cluster per vine<br />
when there is a need to check the trueness to variety<br />
<strong>of</strong> vines.<br />
Controlling Pests<br />
Keep the leaves <strong>of</strong> new vines healthy. Powdery<br />
mildew and downy mildew can attack the leaf area <strong>of</strong><br />
young vines. Fungicide spray programs to prevent<br />
these diseases should be part <strong>of</strong> the first-year management<br />
<strong>of</strong> vines but need not be as rigorous as programs<br />
for mature vines with crops. Locally systemic<br />
fungicides to control these diseases, applied at spray<br />
intervals <strong>of</strong> 14 to 21 days, generally are adequate.<br />
Insect control in new vineyards is a matter <strong>of</strong> scouting<br />
weekly because both traditional grape and non-grape<br />
insect pests may attack new vines. Particularly check<br />
portions <strong>of</strong> vineyards that border hedgerows or woodlands.<br />
Consult with Extension personnel and refer to<br />
current grape pest spray guides to determine pesticide<br />
materials, rates and times <strong>of</strong> application appropriate<br />
to your situation.<br />
Managing Shoot Growth<br />
Trellises with one or two wires — one at the top <strong>of</strong> the<br />
vineyard posts and possibly another at 30 inches<br />
above ground level — provide a structure for supporting<br />
vines during the first 2 years <strong>of</strong> their growth<br />
(Fig. 20). One strategy for supporting shoot growth in<br />
a first-year vineyard involves tying twine to a shootless<br />
vine spur (Fig. 22), then looping the twine around<br />
the lower wire (if there is one) and then tying it to the
IV. Year 1 Vine Management<br />
Fig. 22. A close-up<br />
view <strong>of</strong> the trunk <strong>of</strong><br />
a vine at the end <strong>of</strong><br />
its second growing<br />
season. Twine was<br />
tied to a shootless<br />
spur at the base <strong>of</strong><br />
the vine and then to<br />
the top wire <strong>of</strong> the<br />
trellis. The new<br />
trunk was gently<br />
wound around this<br />
twine to keep it<br />
straight.<br />
upper wire (Fig. 23). This provides a structure for<br />
attachment <strong>of</strong> upward-growing shoots. Large bales <strong>of</strong><br />
twine and boxes <strong>of</strong> several thousand wire twist ties<br />
are common, low-cost commercial tying materials for<br />
grapevines. Walk the new vineyard periodically<br />
through the growing season to loosely tie shoot<br />
growth. Distribute growth over the trellis as much as<br />
possible.<br />
If a trellis was not installed (Fig. 21), use a pitchfork or<br />
rake to move shoots out <strong>of</strong> the vineyard row middles<br />
before mowing, spraying, etc.<br />
Managing Row Middles<br />
Any growth <strong>of</strong> weeds or sod in the row middles <strong>of</strong> the<br />
newly planted vineyard is likely to reduce the growth<br />
<strong>of</strong> new vines. Therefore, this growth should be kept to<br />
a minimum, especially in the first half <strong>of</strong> the growing<br />
season. If the vineyard site will permit it, a light,<br />
trashy cultivation <strong>of</strong> the row middles works well.<br />
Other options include close mowing or arresting<br />
growth in the middle with herbicide sprays. The width<br />
twine tied to top wire<br />
Fig. 23. A piece <strong>of</strong> twine tied vertically from a shootless spur to the trellis wire. Shoots are then tied loosely<br />
around this vertical twine support and the trellis wires with twist ties and other pieces <strong>of</strong> twine to distribute growth<br />
on the trellis.
V. Engineering A Modern Tr ell i s<br />
<strong>of</strong> the row middle will depend on the width <strong>of</strong> the<br />
weed-free band established in the vine rows. The<br />
majority <strong>of</strong> vine growth should have occurred by early<br />
August. Then it is time to establish a cover in row<br />
middles to stabilize the vineyard floor against fallwinter<br />
erosion and to help slow vine growth so<br />
tissues will develop hardiness before winter. Allow<br />
weed growth to regrow (Fig. 22) or, if the row middles<br />
Fig. 24. A well managed vineyard after its firstgrowing season.<br />
Rye has been sown in the row middles and trellis posts<br />
have been installed in the outer and middle rows. Posts will<br />
then be installed in the rest <strong>of</strong> the rows. (Humphrey Farm,<br />
Lakemont, N.Y.)<br />
are cultivated, sow a cover crop in early August. Rye<br />
is a good choice if it can be sown precisely in the row<br />
middles (Fig. 24). If seed must be broadcast in a less<br />
precise manner, then oats are a good choice because<br />
they will not overwinter to become a weed problem<br />
under the trellis the following spring.<br />
Controlling Weeds Around Vines<br />
Good weed control should be maintained around<br />
newly planted vines until at least the end <strong>of</strong> July. If all<br />
the weed control steps discussed previously were<br />
properly applied, no additional effort will be required.<br />
Unfortunately, imperfect weed control around newly<br />
planted vines is all too common. Options for controlling<br />
weeds after vine growth has begun are few, and<br />
the task becomes considerably more difficult as the<br />
season progresses. Therefore, attend to such problems<br />
early in the growing season when they begin.<br />
Mechanical approaches such as gas-powered weed<br />
whips or cross-disking are not capable <strong>of</strong> weeding<br />
close to the vine. Therefore, hand hoeing and weeding<br />
around vines are the last resort. Spot spraying with<br />
Gramoxone Extra herbicide must be applied very carefully<br />
to avoid injuring young vines.<br />
V. Enzineerinz A Modern Trellis<br />
Building a good vineyard trellis is very important,<br />
not only because it can be the single largest cash<br />
expense in the establishment <strong>of</strong> a vineyard but also<br />
because it can influence significantly the long-term<br />
productivity and pr<strong>of</strong>itability <strong>of</strong> a vineyard. Durability<br />
is important because the real cost <strong>of</strong> a vineyard trellis<br />
is determined by its years <strong>of</strong> service rather than initial<br />
cost. Considerable annual maintenance <strong>of</strong> trellises<br />
and frequent replacement <strong>of</strong> trellis components are<br />
inefficient and unnecessary with today's technology.<br />
A good trellis promotes good canopy management<br />
with well exposed leaves and, when desired, well<br />
exposed fruit. It facilitates efficient performance <strong>of</strong><br />
vineyard tasks. The trend toward increased mechanization<br />
<strong>of</strong> vineyard tasks requires precise vine structures,<br />
which begin with a proper vineyard trellis.<br />
Crooked vineyard rows, sagging trellis wires and<br />
bowed vine trunks jeopardize the precise management<br />
<strong>of</strong> vines.<br />
When a trellis is installed in stages for reasons <strong>of</strong><br />
labor management and/or cash flow, install posts and<br />
two wires either at planting or in the fall/spring<br />
sair
V. Engineering A Modern Tr ell i s<br />
between years 1 and 2, then install end post anchors<br />
and the full complement <strong>of</strong> trellis wires in the<br />
fall/spring between years 2 and 3.<br />
Types <strong>of</strong> Posts<br />
Selection <strong>of</strong> trellis post materials will be influenced by<br />
the types <strong>of</strong> posts available, post installation equipment<br />
available, choice <strong>of</strong> a vine training system, cost<br />
and personal preference.<br />
Metal Posts<br />
Metal vineyard trellis posts are an attractive option<br />
because they are relatively easy to handle and install.<br />
Their cost can also be competitive with that <strong>of</strong> wooden<br />
posts. Metal posts specifically fabricated for trellises<br />
are in use in some viticultural regions. Those in use<br />
in Midwestern vineyards, however, are typically<br />
generic fence-type posts. Many types <strong>of</strong> metal posts<br />
have questionable lateral strength. Metal posts have<br />
been known to bend when supporting large crops in<br />
windy locations, and they may be difficult to use with<br />
complex trellis designs. Relatively new specialized<br />
metal posts for vineyards may overcome these limitations.<br />
However, their durability under Midwestern<br />
conditions is unknown. Growers occasionally have<br />
installed metal posts in predominantly wooden post<br />
vineyards to serve as grounding rods against lightning<br />
strikes on vineyard rows. The worth <strong>of</strong> that strategy is<br />
undocumented.<br />
Wooden Posts from Native Tree Species<br />
<strong>Vineyard</strong> trellis construction a half-century ago was<br />
dominated by the use <strong>of</strong> posts cut from native tree<br />
species. These posts occasionally were subjected to<br />
on-farm preservative treatments but <strong>of</strong>ten were<br />
untreated. Because most native tree species are not<br />
rot-resistant, random selection <strong>of</strong> trellis posts from<br />
woodlots is likely to result in a high percentage <strong>of</strong><br />
post failure in 10 years or fewer, with some posts failing<br />
in as few as 4 years. The annual cost <strong>of</strong> a post is<br />
its cash cost plus the labor required to install it divided<br />
by its years <strong>of</strong> service. Inexpensive posts with a short<br />
life are costly per year <strong>of</strong> service.<br />
Black locust is the woodlot tree species most frequently<br />
used for vineyard trellis posts. Split posts from<br />
large black locust trees or slow-growing small trees<br />
that contain a very high percentage <strong>of</strong> heartwood typically<br />
provide more than 20 years <strong>of</strong> service. They have<br />
even been documented to be in service more than 50<br />
years! In contrast, locust posts from a suckering second<br />
growth that has a very small proportion <strong>of</strong> heartwood<br />
may fail in fewer than 10 years. The sapwood <strong>of</strong><br />
black locust is very yellow. Some veteran grape growers<br />
refer to black locust posts with considerable sapwood<br />
as "yellow locust posts." Black locust posts<br />
become very hard when they are fully seasoned, so<br />
some growers install staples to hold wires on them<br />
before that happens.<br />
White cedar is another native tree species that is still<br />
used for vineyard trellis posts (Fig. 20). When these<br />
posts have 80 percent or more <strong>of</strong> their cross-sectional<br />
area composed <strong>of</strong> heartwood, they have a life<br />
expectancy <strong>of</strong> 20 years or more. However, white cedar<br />
posts with relatively little heartwood, such as those<br />
typical from a so-called second-growth woodlot, may<br />
fail in as few as 5 years, which is why the reputation<br />
<strong>of</strong> white cedar posts is so variable. On-farm preservative<br />
treatments <strong>of</strong> white cedar were fairly common<br />
many years ago. Reference materials from the U.S.<br />
Department <strong>of</strong> Agriculture and other sources provide<br />
recipes for this activity, which rarely is practiced today.<br />
Pressure-treated Wooden Posts<br />
Wooden posts that have been commercially pressuretreated<br />
with a preservative are the predominant type<br />
<strong>of</strong> trellis post used in Midwestern vineyards today<br />
(Fig. 24). Red pine or southern yellow pine is commonly<br />
used. Although these posts would fail in 4 to 5<br />
years if they were not preservative treated, with proper<br />
treatment they have a 20- to 30-year life expectancy.<br />
Characteristics that will influence post life
V. Engineering A Modern Tr ell i s<br />
expectancy include the diameter <strong>of</strong> the post, the type<br />
<strong>of</strong> preservative used, the amount <strong>of</strong> preservative used<br />
per unit volume <strong>of</strong> wood and the vineyard site.<br />
Pressure-treated wooden posts are sold in sizes<br />
according to the minimum diameter at the smaller end<br />
<strong>of</strong> the post. The cost <strong>of</strong> a pressure-treated post<br />
increases rapidly as its minimum diameter increases<br />
(Table 3). Therefore, important information is presented<br />
below to address the question "What minimum<br />
diameter is adequate for a trellis post?"<br />
Post Strength and Durability<br />
The strength <strong>of</strong> a post is proportional to its crosssectional<br />
area. For example, posts 2 and 3 inches in<br />
diameter have cross-sectional areas that are only 39<br />
and 56 percent and lateral strengths that are only 25<br />
and 42 percent <strong>of</strong> those <strong>of</strong> a 4-inch post, respectively<br />
(Table 3).<br />
Post life expectancy is also influenced greatly by diameter.<br />
The rate <strong>of</strong> leaching and weathering <strong>of</strong> preservative<br />
from a post is related to its surface area. As post<br />
diameter decreases, the ratio <strong>of</strong> surface area to volume<br />
decreases, a higher percentage <strong>of</strong> preservative<br />
leaks from the wood each year and the rate <strong>of</strong> post<br />
decay increases.<br />
The cost <strong>of</strong> posts <strong>of</strong>ten is related directly to their<br />
cross-sectional area (Table 3). Because a post with a<br />
3.5-inch minimum diameter <strong>of</strong>ten will be guaranteed<br />
for 30 years <strong>of</strong> service, many growers elect to use this<br />
size for line posts.<br />
Four-inch-diameter posts with lateral breaking forces<br />
<strong>of</strong> 970 pounds (Table 3) will be adequate for end posts<br />
when they are new and if they are anchored so that<br />
tension on load-bearing wires is transferred to the<br />
anchor. However, as 4-inch posts decay or if anchoring<br />
is inadequate, or both, lateral forces in excess <strong>of</strong><br />
970 pounds are likely to cause post failure. Therefore,<br />
growers <strong>of</strong>ten choose posts with diameters larger than<br />
4 inches for end posts. For example, posts with a 5- or<br />
6-inch diameter will have lateral breaking strengths<br />
that are twice or more than three times that <strong>of</strong> a 4-<br />
inch-diameter post, respectively (Table 3).<br />
Table 3. The cross-sectional area, lateral breaking force and percentages <strong>of</strong> those values compared with a<br />
4-inch-diameter post for pressure-treated pine posts in six diameter classes.<br />
Post<br />
Cost<br />
Cross-sectional area<br />
Lateral breaking force 1<br />
diameter<br />
(inches)<br />
Per<br />
post 2<br />
($)<br />
Percentage<br />
<strong>of</strong> 4-inch<br />
post<br />
Square<br />
inches<br />
Percentage<br />
<strong>of</strong> 4-inch<br />
post<br />
Pounds<br />
Percentage<br />
<strong>of</strong> 4-inch<br />
post<br />
2.5<br />
—<br />
—<br />
4.91<br />
39<br />
238<br />
25<br />
3.0<br />
2.22<br />
59<br />
7.07<br />
56<br />
408<br />
42<br />
3.5<br />
2.87<br />
76<br />
9.62<br />
77<br />
—<br />
—<br />
4.0<br />
3.75<br />
100<br />
12.57<br />
100<br />
970<br />
100<br />
5.0<br />
5.22<br />
139<br />
19.64<br />
156<br />
1,893<br />
195<br />
6.0<br />
—<br />
—<br />
28.27<br />
225<br />
3,268<br />
337<br />
1 Average pressure applied 4 feet above ground to cause the post to fail. Adapted from "How to Build Trellises with<br />
USS Max-Ten 200 High-Tensile Fence Wire", United States Steel Catalog T-l 11575.<br />
2 Wholesale price <strong>of</strong> chromated copper arsenate-treated red pine posts as <strong>of</strong> April 1996.
V. Engineering A Modern Tr elli s<br />
The two most common chemical preservatives currently<br />
used for pressure treating pine posts are pentachlorophenol<br />
(PCP) and chromated copper arsenate<br />
(CCA). PCP posts are impregnated with a petroleum<br />
base; CCA-treated posts are impregnated with an<br />
aqueous solution. The American Wood Preservers<br />
Association establishes standards for the minimum<br />
amounts <strong>of</strong> these materials that should be impregnated<br />
into wood to ensure long-term resistance to decay.<br />
For both PCP and CCA, the standard for vineyard posts<br />
is 0.4 pounds <strong>of</strong> material per cubic foot <strong>of</strong> wood.<br />
Certificates <strong>of</strong> treatment, service life guarantees or<br />
both may be associated with pressure-treated post<br />
products. Growers should work with their suppliers to<br />
obtain these assurances for this costly part <strong>of</strong> vineyard<br />
establishment. If there is a doubt about the extent <strong>of</strong><br />
preservation treatment when purchasing large quantities<br />
<strong>of</strong> pressure-treated posts, it is possible to have a<br />
post sample analyzed by a private laboratory.<br />
Large knots are a major defect in pressure-treated<br />
pine posts. They can cause posts to break during<br />
installation or before the end <strong>of</strong> their projected life<br />
expectancy.<br />
Quantities <strong>of</strong> Posts Required<br />
per Acre <strong>of</strong> <strong>Vineyard</strong><br />
How many posts are required per acre <strong>of</strong> vineyard<br />
depends on the row spacing, the distance between<br />
posts and the number <strong>of</strong> rows required to plant an<br />
acre <strong>of</strong> vineyard. The force <strong>of</strong> gravity causes wires and<br />
vines to sag in the middle <strong>of</strong> a post space. The distance<br />
between posts depends on a grower's tolerance<br />
for sagging, which can be reduced but not eliminated<br />
by increasing tension on trellis wires. Increasing tension<br />
on the trellis wires beyond a certain point (see<br />
section V, "Installing Wires") will not further reduce<br />
sagging and will lead to excessive tension on wires.<br />
Therefore, control <strong>of</strong> sagging is influenced greatly by<br />
the distance between line posts in a vineyard, which<br />
should ideally not exceed 21 feet and never exceed 24<br />
feet. Table 4 presents values for the number <strong>of</strong> vines<br />
per acre, vines per post space, post spacing and posts<br />
per acre for several row and vine spacing combinations.<br />
Depending on the choice <strong>of</strong> row spacing, vine<br />
spacing and vines per post space, the number <strong>of</strong> posts<br />
required per acre <strong>of</strong> vineyard ranges from 196 to 356.<br />
Table 4. Ground area per vine, vines per acre, vines<br />
per post space, post spacing and posts per acre for<br />
several row and vine spacing combinations.<br />
Row x vine<br />
spacing<br />
(ft)<br />
10x8<br />
10x8<br />
10x7<br />
10x6<br />
10x6<br />
9x8<br />
9x7<br />
9x6<br />
9x6<br />
9x5<br />
8.5x8<br />
8.5x8<br />
8.5x7<br />
8.5x6<br />
8.5x6<br />
8x8<br />
8x8<br />
8x7<br />
8x6<br />
8x6<br />
8x5<br />
Ground<br />
area<br />
per vine<br />
(square<br />
feet)<br />
80<br />
80<br />
70<br />
60<br />
60<br />
72<br />
63<br />
54<br />
54<br />
45<br />
68<br />
68<br />
59.5<br />
51<br />
51<br />
64<br />
64<br />
56<br />
48<br />
48<br />
40<br />
Vines<br />
per<br />
acre<br />
544<br />
544<br />
622<br />
726<br />
126<br />
605<br />
691<br />
807<br />
807<br />
968<br />
641<br />
641<br />
732<br />
854<br />
854<br />
681<br />
681<br />
778<br />
908<br />
908<br />
1089<br />
Vines<br />
per<br />
post<br />
space<br />
3<br />
2<br />
3<br />
4<br />
3<br />
3<br />
3<br />
4<br />
3<br />
4<br />
3<br />
2<br />
3<br />
4<br />
3<br />
3<br />
2<br />
3<br />
4<br />
3<br />
4<br />
Post<br />
spacing<br />
(ft)<br />
1 Values assume 15 continuous rows per acre <strong>of</strong><br />
vineyard.<br />
24<br />
16<br />
21<br />
24<br />
18<br />
24<br />
21<br />
24<br />
18<br />
20<br />
24<br />
16<br />
21<br />
24<br />
18<br />
24<br />
16<br />
21<br />
24<br />
18<br />
20<br />
Posts 1<br />
per<br />
acre<br />
196<br />
287<br />
222<br />
197<br />
257<br />
217<br />
245<br />
217<br />
284<br />
257<br />
229<br />
335<br />
259<br />
229<br />
300<br />
242<br />
356<br />
274<br />
242<br />
318<br />
287
V. Engineering A Modern Tr elli s<br />
Installing Line Posts<br />
Posts installed within the vineyard rows are called line<br />
posts. A typical 8-foot line post is set 24 to 30 inches<br />
into the ground so that the top <strong>of</strong> the post is 66 to 72<br />
inches above the vineyard floor. A measuring stick<br />
can be used to guide uniform height installation <strong>of</strong><br />
posts. Installation <strong>of</strong> these posts is best accomplished<br />
when there is good but not excessive soil moisture.<br />
Posts should be installed with their larger diameter<br />
end down in the soil because this portion <strong>of</strong> the post<br />
will decay more rapidly than the aboveground portion<br />
and ultimately cause the post to fail at ground level.<br />
<strong>Vineyard</strong> posts are sharpened at their bottom end in<br />
some viticultural areas, either prior to purchase or on<br />
the farm. This is especially useful when pounding<br />
posts into heavy soils, either with a hydraulic post<br />
pounder or with a post maul. In contrast, vineyard<br />
posts are rarely sharpened when they are installed in<br />
Michigan's light sandy soils. Hydraulic pounding <strong>of</strong><br />
posts (Fig. 25) is advantageous because it is relatively<br />
rapid (several times faster than augering). The posts<br />
can be set to a precise desired depth and they are<br />
immediately firm in the ground. Augering <strong>of</strong> postholes<br />
is also common and requires less expensive equipment<br />
than post pounding. Light soil tends to backfill<br />
Fig. 25. <strong>Vineyard</strong> trellis posts are <strong>of</strong>ten installed with a<br />
hydraulic post pounder like the one shown here. (Stamp<br />
Farm, Rock Stream, N.Y.)<br />
Fig. 26. This post maul has a head with a 3.5-inch diameter.<br />
It is used for installing or replacing a small number <strong>of</strong> posts.<br />
around and firm up posts installed in augered holes<br />
relatively quickly, but posts on heavier soils can<br />
remain loose for long periods. Bucket loaders and<br />
other hydraulic equipment have also been used to<br />
push posts into the ground.<br />
A hand-held posthole digger is the common method<br />
<strong>of</strong> installing posts in small backyard plantings.<br />
Another easy method for installing a small number <strong>of</strong><br />
posts or replacing posts uses a pinch bar and post<br />
maul (Fig. 26). Begin with the pinch bar to punch a<br />
hole and then use it to "auger" the hole deeper and<br />
wider with a circular motion. Put the post in this hole<br />
and finish the job with a post maul. A post maul is a<br />
specialized sledgehammer with a head face about 3.5<br />
inches in diameter (Fig. 26). When using this venerable<br />
tool, stand on a platform such as the trailer that<br />
carried the posts into the vineyard.
V. Engineering A Modern Tr ell i s<br />
Installing End Posts<br />
All material preparation and trellis engineering skills<br />
will be for naught if the end posts are not installed<br />
well. End posts function differently than line posts<br />
because they are subjected to a lateral breaking force.<br />
Tension that develops in the load-bearing trellis wires<br />
is transferred to the end post. An end post that is not<br />
anchored or braced will react to this tension by creating<br />
a fulcrum at the soil line. Failure to resist this tension<br />
may result in curvature <strong>of</strong> the post or its being<br />
pulled through the soil (Fig. 27). End posts that are<br />
strong enough and set deep enough into the soil can<br />
resist this tension and perform well without additional<br />
engineering. For example, large-diameter poles or railroad<br />
ties set 4 feet or more into the ground function in<br />
this manner. More commonly, however, an end post is<br />
chosen for adequate breaking strength when used in<br />
combination with an end post anchoring or bracing<br />
system. An increase in diameter <strong>of</strong> 1 inch approximately<br />
doubles a post's lateral breaking strength<br />
(Table 3). Four-inch-diameter posts should be considered<br />
a minimum requirement for an end post, and 5-<br />
to 6-inch-diameter end posts are an excellent choice<br />
when used in conjunction with a well engineered<br />
anchoring system.<br />
Fig. 27. The end posts in this vineyard were not adequately<br />
anchored. They have moved after installation to become this<br />
random arrangement.<br />
<strong>of</strong> plate<br />
Fig. 28. Characteristics <strong>of</strong> an end post anchoring system that<br />
uses an external anchor.<br />
End posts that will be anchored should be installed at<br />
an angle to a depth <strong>of</strong> 3 feet (Fig. 28), either by augering<br />
or post pounding. To ensure that end posts will<br />
line up properly, first install the end posts on the outside<br />
rows. Then lightly tension two wires between<br />
these posts, one at their tops and one at the soil line.<br />
These wires guide the installation and angling <strong>of</strong> end<br />
posts for the interior rows. When installing end posts<br />
in a large number <strong>of</strong> rows, first install end posts at 15-<br />
row intervals to provide guides for installation on the<br />
other rows. Angling end posts 60 degrees from horizontal<br />
(Figs. 28 & 29) will transfer tension from loadbearing<br />
wires to the anchor at a wider angle than setting<br />
posts upright. The more vertical an end post and<br />
the closer anchors are placed to the end post, the<br />
greater the tendency for the tension on trellis wires to<br />
pull the end post inward.
V. Engineering A Modern Tr ell i s<br />
There are several good methods for anchoring end<br />
posts. Bracing end posts within the row (Fig. 30) is<br />
advantageous because it avoids conflict with equipment<br />
in the headlands. However, this approach is generally<br />
more complex and costly than external anchoring.<br />
Therefore, anchoring externally to the end post is<br />
the most common method <strong>of</strong> constructing an end post<br />
assembly.<br />
Fig. 30. Bracing an end post. This avoids conflict between<br />
equipment and external anchors in headlands but is more<br />
difficult and costly to install.<br />
Fig. 29. This end post was set with a 30-degree angle from<br />
vertical. Reinforcement rod connects the post to the anchor<br />
and an L-shaped crank is being used to tighten the one wire<br />
attached to this post.<br />
There are several characteristics <strong>of</strong> good anchor<br />
installation:<br />
• Attach the anchoring wire as close as possible on<br />
the post to the main crop-bearing wire. This facilitates<br />
transfer <strong>of</strong> tension from the crop-bearing wire<br />
to the anchor and reduces the tendency for the point<br />
<strong>of</strong> attachment <strong>of</strong> the anchor to act as a fulcrum.<br />
• Angle the anchoring wire to avoid a narrow angle<br />
between the post and this wire. If the anchor is<br />
installed too close to the post, it may keep the post<br />
from rising up but not from being pulled into the<br />
row.<br />
• Install the anchor so that its shaft rests in line with<br />
the anchoring wire (Fig. 28). Otherwise there will be<br />
a tendency to pull or bend the anchor shaft through<br />
the soil when tension is applied until it achieves this<br />
in-line orientation.<br />
• Install the anchor deep enough and with an anchor<br />
plate <strong>of</strong> adequate surface area. The anchor plate<br />
should be at a minimum 30-inch vertical depth and<br />
have a minimum diameter <strong>of</strong> 6 inches. Screw-in<br />
anchors may or may not provide a satisfactory shortcut<br />
to this procedure.<br />
• Make sure that the anchoring plate is in contact with<br />
firm, undisturbed soil. Auger holes for anchors verti-
V. Engineering A Modern Tr ell i s<br />
cally. Then use a crowbar to make a narrow slit in<br />
the soil, angling the slit from the bottom <strong>of</strong> the hole<br />
up to the point <strong>of</strong> anchor attachment to the post.<br />
The shaft <strong>of</strong> the anchor is placed in this slit and the<br />
plate <strong>of</strong> the anchor sits firmly against undisturbed<br />
soil on the side wall <strong>of</strong> the augered hole (Fig. 28).<br />
• Use a double-stranded #9 wire or the equivalent for<br />
the anchoring wire to ensure that it will not be the<br />
weakest point in the assembly. Reinforcement rod<br />
(1/2-inch diameter) also has been used very effectively<br />
to attach anchors to end posts. A loop is bent<br />
and welded in the shop at one end <strong>of</strong> a 7-foot piece<br />
<strong>of</strong> rod, slid over the post and then held with a staple.<br />
The other end is bent with a torch through and<br />
around the loop in the anchor (Fig. 29).<br />
End post anchoring systems should be in place no<br />
later than the start <strong>of</strong> the third growing season. Final<br />
tensioning <strong>of</strong> trellis wires is done after anchoring is<br />
completed.<br />
Wire Characteristics <strong>of</strong><br />
Importance for Use in<br />
<strong>Vineyard</strong> Trellises<br />
The purchase <strong>of</strong> wire for vineyard trellises has <strong>of</strong>ten<br />
focused on two characteristics <strong>of</strong> wire: gauge and corrosion<br />
resistance. Growers intuitively know that the<br />
gauge <strong>of</strong> a wire determines its ability to support a<br />
load. Because most wire used for vineyard trellises is<br />
made <strong>of</strong> steel, it is also readily apparent that galvanized<br />
wire is desirable to resist rusting.<br />
Improved materials and technology make it possible<br />
to install vineyard trellis wires that are no more<br />
expensive than traditional materials but that improve<br />
vine management, reduce trellis maintenance costs<br />
and lengthen the life expectancy <strong>of</strong> the vineyard trellis.<br />
The following information will assist growers in<br />
properly choosing and installing trellis wires.<br />
The tensile strength <strong>of</strong> a wire, a measure <strong>of</strong> how much<br />
pulling (tension) is required to break it, is determined<br />
by the alloy mixture used to make the wire.<br />
Traditional vineyard wire for many decades has been<br />
relatively s<strong>of</strong>t, so-called low-carbon wire. Today vineyard<br />
trellises are increasingly being constructed with<br />
stiffer, harder, high-tensile (high-carbon) wire. Tensile<br />
strength is reported as the pounds <strong>of</strong> tension that<br />
would be required to break a wire if it had a crosssectional<br />
area <strong>of</strong> 1 square inch. Traditional s<strong>of</strong>t vineyard<br />
wire typically has a tensile strength rating <strong>of</strong><br />
about 77,000 pounds per square inch (psi), whereas<br />
high-tensile wire has a tensile strength <strong>of</strong> about<br />
200,000 psi. The ability <strong>of</strong> a wire to resist breaking is<br />
directly proportional to its cross-sectional area.<br />
Therefore, the breaking point <strong>of</strong> a particular gauge <strong>of</strong><br />
wire is determined by its tensile strength multiplied by<br />
the cross- sectional area <strong>of</strong> the wire. For example, a<br />
low-carbon, 9-gauge wire with a tensile strength <strong>of</strong><br />
77,000 psi and a cross-sectional area <strong>of</strong> 0.0172 square<br />
inches has a breaking point <strong>of</strong> 77,000 x 0.0172 = 1,324<br />
pounds. Growers <strong>of</strong>ten buy large-diameter (lower<br />
gauge number) wires to obtain high breaking-point<br />
values for the major load-bearing wires <strong>of</strong> the trellis.<br />
Wire, however, does not simply resist all tension until<br />
it reaches its breaking point. Rather, as tension is put<br />
on a wire, it begins to stretch. If a small amount <strong>of</strong><br />
tension is put on a wire, it will return to its original<br />
length when the tension is released. As tension on a<br />
wire is increased, stretching continues and eventually<br />
a portion <strong>of</strong> that stretching becomes irreversible.<br />
When that happens, the wire has reached its yield<br />
point, which occurs at 65 to 85 percent <strong>of</strong> the tension<br />
required to break the wire. The importance <strong>of</strong> the yield<br />
point for trellis wire has been recognized only in<br />
recent years. Relatively modest lengthening <strong>of</strong> trellis<br />
wires causes them to sag considerably between trellis<br />
posts so that vines sag. When vine trunks bow, it is<br />
more difficult to move equipment through the vineyard,<br />
prune mechanically, hill and remove soil around<br />
vines, and perform other tasks. Trellis maintenance is<br />
increased because wires that have stretched need<br />
retensioning. Vines with cordon training systems may<br />
be so embedded into wires that retensioning may not<br />
be possible. Stretching <strong>of</strong> the wire reduces the crosssectional<br />
area <strong>of</strong> a portion <strong>of</strong> the wire slightly, and this<br />
lowers its yield and breaking points. Therefore, more
V. Engineering A Modern Tr ell i s<br />
irreversible wire stretching will occur at a lower tension,<br />
which leads to repeated cycles <strong>of</strong> wire stretching<br />
and eventual wire breakage.<br />
If a wire never reaches its yield point, none <strong>of</strong> the<br />
above problems will occur. Therefore, trellis wires<br />
should be installed with consideration <strong>of</strong> their yield<br />
points, not their breaking points. A grower can avoid<br />
reaching the yield point with low-carbon, s<strong>of</strong>t wires by<br />
increasing the diameter <strong>of</strong> the wire, but purchasing a<br />
large-diameter, s<strong>of</strong>t wire to obtain a higher yielding<br />
point wire is not cost effective. High-tensile wires<br />
have yield points that are approximately double that <strong>of</strong><br />
s<strong>of</strong>t wires for the same diameter (gauge) <strong>of</strong> wire, and<br />
their cost per foot is about half that <strong>of</strong> a s<strong>of</strong>t wire with<br />
a comparable yield point (Table 5). Therefore, a grower<br />
can use a higher gauge (thinner) high-tensile wire<br />
and have the same yield point to resist stretching as a<br />
smaller gauge (thicker), s<strong>of</strong>t, low-carbon wire that<br />
costs more per foot. For example, a high-tensile 12.5-<br />
gauge wire and a s<strong>of</strong>t 9-gauge wire have approximately<br />
the same yield points — 1,063 and 1,118 psi,<br />
respectively — but their costs per foot are 1.6 cents<br />
and 3.5 cents (Table 5).<br />
Table 5. Characteristics and costs <strong>of</strong> several kinds <strong>of</strong> wire typically used to construct vineyard trellises.<br />
Wire<br />
type<br />
Low- carbon<br />
Low- carbon<br />
Low- carbon<br />
Low- carbon 3<br />
High- tensile crimped<br />
High- tensile<br />
High- tensile<br />
High- tensile<br />
High- tensile<br />
High- tensile<br />
High- tensile<br />
Wire<br />
gauge<br />
12<br />
11<br />
10<br />
9<br />
11<br />
10<br />
11<br />
12<br />
12.5<br />
14.0<br />
16.0<br />
Dia.<br />
(in.)<br />
.106<br />
.121<br />
.135<br />
.148<br />
.121<br />
.135<br />
.121<br />
.106<br />
.099<br />
.080<br />
.062<br />
Crosssectional<br />
area<br />
(sq.in.)<br />
.0088<br />
.0115<br />
.0143<br />
.0172<br />
.0115<br />
.0143<br />
.0115<br />
.0088<br />
.0077<br />
.0050<br />
.0030<br />
Tensile<br />
strength 1<br />
(PSI)<br />
77,000<br />
77,000<br />
77,000<br />
77,000<br />
210,000 2<br />
200,000*<br />
200,000 x<br />
200,000*<br />
200,000 2<br />
200,000 2<br />
180,000<br />
Breaking<br />
point 2<br />
(lb)<br />
678<br />
886<br />
1,101<br />
1,324<br />
2,415<br />
2,860<br />
2,300<br />
1,760<br />
1,540<br />
1,000<br />
540<br />
Yield<br />
strength 3<br />
(PSI)<br />
65,000<br />
65,000<br />
65,000<br />
65,000<br />
138,000<br />
138,000<br />
138,000<br />
138,000<br />
138,000<br />
138,000<br />
124,200<br />
Yield<br />
point 4<br />
(lb)<br />
572<br />
747<br />
929<br />
1,118<br />
1,587<br />
1,973<br />
1,587<br />
1,214<br />
1,063<br />
690<br />
373<br />
Feet/<br />
lb<br />
33.7<br />
26.3<br />
20.6<br />
17.1<br />
25.8<br />
20.6<br />
26.3<br />
33.7<br />
38.2<br />
58.6<br />
119.6<br />
Cost/ Cost/<br />
lb 5 foot 5<br />
.60 1.8<br />
.60 2.3<br />
.60 2.9<br />
.60 3.5<br />
.65 2.5<br />
.55 2.7<br />
.55 2.1<br />
.55 1.6<br />
.60 6 1.6<br />
.93 6 1.6<br />
1.70 6 1.4<br />
1 Minimum tensile strength rating supplied by manufacturer.<br />
2 Breaking point = tensile strength -f cross-sectional area in inches.<br />
3 Values based on yield and tensile strength data from Mechanical Engineering Design by J.E. Shigley, 1963.<br />
4 Yield point = yield strength-=- cross-sectional area in inches.<br />
5 Local supplier prices in southwest Michigan as <strong>of</strong> April 1996.<br />
6 Supplier price as <strong>of</strong> January 1997.
V. Engineering A Modern Tr ell i s<br />
Most vineyard wires are made <strong>of</strong> steel. As they rust,<br />
their tensile strength is reduced. Small-diameter wires<br />
without corrosion protection can lose more than half<br />
<strong>of</strong> their tensile strength in fewer than five years.<br />
Therefore, corrosion resistance <strong>of</strong> trellis wire is very<br />
important to the grape grower. The highest quality<br />
zinc galvanization for wire corrosion resistance is a<br />
type 3 galvanization, which, according to the American<br />
Society <strong>of</strong> Testing Materials (ASTM Designation<br />
Al 16-57), specifies the ounces <strong>of</strong> zinc required per<br />
square foot <strong>of</strong> wire surface so that wires may resist<br />
the onset <strong>of</strong> rusting for up to 30 years. When using<br />
other types <strong>of</strong> wire, such as aluminum or plastic,<br />
growers should obtain assurances <strong>of</strong> their durability to<br />
resist corrosion and ultraviolet light degradation.<br />
In summary, wire for vineyard trellises should be<br />
purchased on the basis <strong>of</strong> yield point, cost per foot<br />
and corrosion resistance rather than breaking<br />
point and cost per pound.<br />
functions. They are either load-bearing wires, which<br />
support most <strong>of</strong> the weight <strong>of</strong> the vines and crop, or<br />
so-called catch wires, which help orient the structure<br />
<strong>of</strong> the vine but do not support much weight. Loadbearing<br />
wires should be chosen with emphasis on<br />
their yield points. Catch wires have less demanding<br />
specifications and can be chosen on the basis <strong>of</strong> cost<br />
per foot <strong>of</strong> wire and durability.<br />
When purchasing wire, it is <strong>of</strong>ten useful to know the<br />
number <strong>of</strong> feet <strong>of</strong> wire per pound (Table 6) and the<br />
quantity <strong>of</strong> wire required per acre <strong>of</strong> vineyard<br />
(Table 7).<br />
Table 6. Feet <strong>of</strong> wire per 100 pounds for several<br />
gauges <strong>of</strong> wire used in trellis construction.<br />
Wire gauge<br />
Feet/100 lbs<br />
Amount <strong>of</strong> Wire Required<br />
The number <strong>of</strong> wires required to construct a trellis will<br />
range from one to 10, depending on the choice <strong>of</strong> a<br />
vine training system. Trellis wires generally serve two<br />
9<br />
10<br />
11<br />
12<br />
12.5<br />
1,724<br />
2,070<br />
2,617<br />
3,300<br />
3,846<br />
Table 7. The length <strong>of</strong> trellis per acre and the pounds <strong>of</strong> wire for one wire per acre for combinations <strong>of</strong> five gauges<br />
<strong>of</strong> wire and seven vineyard row spacings.<br />
<strong>Vineyard</strong> row<br />
spacing<br />
(ft)<br />
Trellis<br />
length/<br />
acre (ft)<br />
9<br />
Pounds <strong>of</strong> wire for one wire/acre<br />
10<br />
11<br />
12<br />
12.5<br />
6<br />
7<br />
8<br />
8.5<br />
9<br />
9.5<br />
10<br />
7,260<br />
6,223<br />
5,445<br />
5,125<br />
4,840<br />
4,585<br />
4,356<br />
425<br />
364<br />
318<br />
300<br />
283<br />
268<br />
255<br />
352<br />
302<br />
264<br />
249<br />
235<br />
223<br />
211<br />
276<br />
237<br />
207<br />
195<br />
184<br />
174<br />
166<br />
215<br />
185<br />
162<br />
152<br />
144<br />
136<br />
129<br />
190<br />
163<br />
143<br />
134<br />
127<br />
120<br />
114
V. Engineering A Modern Tr ell i s<br />
total length <strong>of</strong> bucket and<br />
chain should be 6" less than —<br />
the height <strong>of</strong> the wire<br />
at the post<br />
distance between posts<br />
Fig. 31. A technique for tensioning wires to be used in conjunction with information in Table 8. (Figure reproduced<br />
courtesy <strong>of</strong> Washington State University Extension.)<br />
Installing Wires<br />
Trellis wires are properly tensioned to 270 to 300<br />
pounds. It is quite common to overtension wires to<br />
put excessive strain on end posts and stretch wires<br />
irreversibly beyond their yield point. A simple, effective<br />
technique for proper tensioning <strong>of</strong> wires involves<br />
suspending a bucket containing the appropriate<br />
weight from the top wire (Fig. 31). A bucket and chain<br />
assembly that is 6 inches shorter than the height <strong>of</strong><br />
the wire is hung on the wire in the middle <strong>of</strong> a post<br />
space. This chain, bucket and its contents need to be<br />
a specific weight in relation to the distance between<br />
posts and the desired wire tension (Table 8). As the<br />
wire is pulled, the desired tension will be achieved<br />
when the bucket is lifted <strong>of</strong>f the ground.<br />
This technique for tensioning wires allows a grower to<br />
learn the appropriate amount <strong>of</strong> tension to place on<br />
wires so that he can then feel the 270 to 300 pounds<br />
<strong>of</strong> tension on a trellis wire.<br />
It is difficult to properly tension wires on relatively<br />
short trellis rows because very little movement <strong>of</strong> end<br />
posts can result in considerable sagging <strong>of</strong> wires, even<br />
when good end post anchoring is installed. Consider<br />
two options for vineyard rows 150 feet long or less.<br />
The first is to use specially designed springs, which<br />
are placed in line with trellis wires to keep them tight<br />
year round (Fig. 32). The second possibility is to<br />
Table 8. The total test weight, in pounds, <strong>of</strong> a chain,<br />
bucket and its contents that will indicate 270 or 300<br />
psi tension on wire for three post spacings when used<br />
as indicated in Fig. 31.<br />
Desired wire<br />
tension (lb)<br />
Test wei ght (lb) for 6-inch sag<br />
for three post spacings (feet)<br />
24 21 18<br />
300<br />
270<br />
25.0<br />
22.5<br />
28.6 33.3<br />
25.7 30.0<br />
Fig. 32. This spring absorbs changes in the trellis wire tension<br />
due to temperature fluctuations or crop load so that the<br />
wire never reaches its yield point.
V. Engineering Modern Tr ell i s<br />
Fig. 33. The groove in the top <strong>of</strong> this vineyard post provides<br />
excellent support <strong>of</strong> the trellis wire and still allows post<br />
pounding without damage to the wire.<br />
release tension on wires each fall so they will not<br />
exceed their yield point when they contract during the<br />
winter, and then retension them in the spring.<br />
Several tips can guide the proper installation <strong>of</strong> wires<br />
on trellis posts. U-shaped, galvanized or otherwise<br />
coated staples approximately 1 x h inches long are used<br />
commonly for this vineyard task. They should be<br />
applied on the windward side <strong>of</strong> the posts for standard<br />
trellis wires. When paired catch wires are installed,<br />
staples also will be applied on the leeward side <strong>of</strong> the<br />
trellis. Staples should have a slightly downward orientation<br />
when nailed into the posts on level ground.<br />
Apply staples to posts in knoll and valley areas at a<br />
somewhat exaggerated downward or upward angle,<br />
respectively. Nail staples so they are not directly oriented<br />
with the grain <strong>of</strong> the wood in the posts, which<br />
<strong>of</strong>ten means slightly <strong>of</strong>f vertical.<br />
A variation for attaching a load-bearing wire at the<br />
top <strong>of</strong> a line post is to place it on top <strong>of</strong> the post rather<br />
than on the side. If periodic post pounding is anticipated<br />
to reset line posts moved by frost heaving, a<br />
groove % inch deep can be made with a chain saw in<br />
the top <strong>of</strong> the line posts in line with the vineyard row<br />
(Fig. 33). Then place the wire in the groove and place<br />
a staple on top <strong>of</strong> the groove. This permits the post to<br />
be pounded without damage to the wire.<br />
Regardless <strong>of</strong> which <strong>of</strong> the many ways you use to<br />
attach wires to end post assemblies, they should be<br />
installed with gentle bends. Abruptly bending or<br />
stretching a wire reduces its yield and breaking points<br />
and that point becomes the weakest link in the trellis<br />
assembly. The simplest method <strong>of</strong> attaching a wire to<br />
an end post is to wrap it around the end post once<br />
and then gently bend it around itself several times<br />
(Fig. 34). Some prefer to place the staples on each<br />
post on the end or back side, while others prefer to<br />
place a pair <strong>of</strong> staples on each side to help maintain<br />
the horizontal orientation <strong>of</strong> closely spaced wires.<br />
High-tensile wires may be difficult to attach to end<br />
post assemblies. S<strong>of</strong>t-metal crimps frequently are used<br />
in these situations (Fig. 35). S<strong>of</strong>t wires or small-diameter,<br />
high-tensile wires may be attached to end post assemblies<br />
with L-shaped cranks, which utilize a wire fed<br />
through a hole drilled through the end post (Fig. 29).<br />
The crank is made out <strong>of</strong> a 5/8-inch-diameter and<br />
15-inch-long metal rod. Several excellent in-line tensioning<br />
devices are available and will work well as<br />
long as they do not cause abrupt bending <strong>of</strong> the wire.<br />
Movable catch wires are used with some training systems.<br />
They are typically installed on upward-slanting<br />
nails (or downward-slanting nails in dip areas) on line<br />
posts. These wires may be lightly tensioned and permanently<br />
attached at the end posts. Some growers<br />
have used short (24-inch) lengths <strong>of</strong> chain on the ends<br />
Fig. 34. Low-carbon trellis wire that has been attached to an<br />
end post by wrapping the wire around the post and then<br />
making a series <strong>of</strong> gentle bends back on the wire itself.
VI. Year 2 Vine Management<br />
and a ratcheting wire tightener (Fig. 36), which is<br />
preferable to a chain grab wire puller. A wire gripper<br />
(Klein Tools, Chicago, 111., model #1613-30F) can be<br />
added to the ratchet tightener at one or both ends to<br />
hold even high-tensile wire quite well (Fig. 36). A wire<br />
reel, which can be purchased or fabricated in several<br />
designs, is essential for unwinding rolls <strong>of</strong> wire.<br />
Crimps (Fig. 35) and a crimping tool, a post maul<br />
(Fig. 26), a pinch bar and a carpenter's apron to hold<br />
staples are also useful.<br />
Fig. 35. A high-carbon trellis wire that has been attached to<br />
an end post by wrapping the wire around the post and then<br />
attaching the wire to itself with a s<strong>of</strong>t-metal crimp.<br />
<strong>of</strong> these wires, which are pulled tight and hooked over<br />
nails on the end posts to retension wires after they<br />
have been moved.<br />
Tools and Gadgets<br />
for Installing Trellis Wires<br />
Basic hand tools for installing vineyard trellis wires<br />
include fencing pliers for pulling misguided staples<br />
and cutting lengths <strong>of</strong> wire, a standard claw hammer<br />
Fig. 36. A ratcheting wire tightener. A wire gripper has been<br />
welded on one end to reliably hold high-tensile wire.<br />
VI. Tear 2 Vine<br />
Management<br />
<strong>Early</strong>-season Weed Control<br />
A second-year vineyard should be inspected in early<br />
spring for weed control in the vine rows. Before vine<br />
growth begins, there is a window <strong>of</strong> opportunity to<br />
control any weed growth around vines that has overwintered<br />
with green leaf area. Quackgrass is a common<br />
overwintering weed problem (Fig. 37). An application<br />
<strong>of</strong> the systemic herbicide glyphosate can be<br />
made over vines before they start to grow to control<br />
such weed problems. Because the target for this herbicide<br />
is mature leaf area, an application will be most<br />
effective if the weed leaf area is allowed to green up<br />
in the spring. However, the application must be made<br />
before vines start to grow. Therefore, optimum timing<br />
for this application can be determined by watching for<br />
the first sign <strong>of</strong> bud swell on vines. A moderate rate <strong>of</strong><br />
glyphosate in a low volume <strong>of</strong> water (approximately<br />
10 gallons per acre sprayed) <strong>of</strong>ten will be effective.<br />
Check the product label for application details.
VI. Year 2 Vine Management<br />
Fig. 37. This vineyard was overrun with quackgrass at the<br />
start <strong>of</strong> its second growing season. Glyphosate herbicide<br />
applied before bud break killed this weed infestation except<br />
in the area to the left <strong>of</strong> the post, which was left unsprayed.<br />
Growers who miss this opportunity will be left to rely<br />
on more difficult, more costly, less effective efforts to<br />
control these weed problems during the growing<br />
season.<br />
Replanting<br />
It <strong>of</strong>ten will be necessary to replant a small percentage<br />
<strong>of</strong> vines that either never grew or did not survive<br />
the winter, as well as those with extremely weak<br />
growth. Plans should be made to obtain the necessary<br />
vines. Replant as early as the ground can be worked<br />
in the spring and before applying preemergence<br />
herbicides.<br />
Year 2 Vine Management<br />
Year 2 vine management continues to focus on the<br />
development <strong>of</strong> vine size. If vine growth in year 1 was<br />
exceptionally good, then year 2 pruning may involve<br />
the first steps in establishing the permanent vine<br />
training system. Information on vine training systems<br />
is presented in other publications (Zabadal, 1996a,<br />
and Zabadal, 1996b). However, most vines in their<br />
second year can be pruned and trained in a standard<br />
manner that will permit the grower to select any vine<br />
training system in year 3. Retain one or two canes per<br />
vine with a maximum length extending to about 4<br />
inches below the top wire <strong>of</strong> the trellis (Fig. 38). The<br />
goal in year 2 will be to approximately triple the number<br />
<strong>of</strong> shoots that grew well in year 1. A shoot will<br />
have grown well if it attained a minimum length <strong>of</strong><br />
approximately 30 inches. A quick evaluation <strong>of</strong> the<br />
vineyard at the start <strong>of</strong> year 2 will indicate the average<br />
condition <strong>of</strong> vines. For example, if vines average four<br />
canes at least 30 inches long, then aim for about 12<br />
shoots to be grown in year 2. Double or even multiple<br />
trunking <strong>of</strong> vines is <strong>of</strong>ten desirable in cool-climate<br />
vineyards. If growth was good in year 1, it may be<br />
possible to establish two trunks in year 2. If the vines<br />
are self-rooted, the goal is to have trunks arise independent<br />
<strong>of</strong> each other from the ground (Fig. 38a). If<br />
the vines are grafted, both trunks must originate just<br />
above the graft union area (Fig. 38b). It <strong>of</strong>ten will be<br />
possible to obtain enough shoot growth from just one<br />
long cane in year 2 so that other canes on grafted<br />
vines can be pruned to one- or two-node spurs to<br />
create a reservoir <strong>of</strong> growth near the graft union<br />
(Fig. 38c).<br />
If the winter was severe, the variety being grown is<br />
relatively cold tender or both, check the nodes on<br />
vines before pruning to determine the extent <strong>of</strong> bud<br />
mortality. Compensate for bud mortality by pruning<br />
less severely. When winter injury is extensive, delay<br />
pruning until after shoot growth has begun.<br />
Tying Grapevines<br />
The second and third years <strong>of</strong> the vineyard are important<br />
formative years for the structure <strong>of</strong> vines. If the<br />
trellis is properly constructed and vines are properly<br />
pruned and tied to the trellis, vines with straight<br />
trunks will develop. The vineyard task <strong>of</strong> tying can<br />
proceed after pruning and trellis maintenance on days<br />
when it is warm enough to work with bare hands.
VI. Year 2 Vine Management<br />
shoots arising low<br />
on the trellis are<br />
<strong>of</strong>ten removed<br />
when shoot<br />
growth is 2 to 6<br />
inches long to<br />
structure vines<br />
for several<br />
training systems<br />
» :<<br />
*E!><br />
o<br />
J<br />
L<br />
shoots arising r* %<br />
low on the trellis<br />
are <strong>of</strong>ten<br />
removed when<br />
shoot growth is<br />
2 to 6 inches<br />
long to structure<br />
vines for several "-<br />
training systems<br />
V".<br />
•H CI<br />
*V<br />
top node<br />
about 4"<br />
below<br />
top wire<br />
loose<br />
twine tie<br />
Because early shoot growth is weakly attached to<br />
canes, tying should be completed before the start <strong>of</strong><br />
vine growth. Otherwise, it may be preferable to delay<br />
this task until shoots have grown several inches and<br />
become less susceptible to detachment. Vines that<br />
become detached from the trellis during the growing<br />
season are very difficult and costly to reattach.<br />
Therefore, vines need to be tied well to the trellis to<br />
support heavy loads during the growing season.<br />
However, if ties are made too tight or in the wrong<br />
locations on the vine, girdling can destroy portions <strong>of</strong><br />
the vine.<br />
Hemp twine and twist ties are the most economical<br />
and widely used tying materials. Several types <strong>of</strong> plastic<br />
ties and tools for applying plastic tape are a matter<br />
<strong>of</strong> personal preference and may or may not be cost<br />
effective. Whatever the approach, proper tying <strong>of</strong><br />
vines is very important in year 2 <strong>of</strong> the vineyard. The<br />
fundamental techniques for tying grapevines are presented<br />
in the Southwest Michigan Research and<br />
Extension Center Report "Tying Grapevines" (Zabadal,<br />
1997b).<br />
Preemergence Weed Control<br />
The same options available for controlling annual<br />
weed growth in the newly planted vineyard are available<br />
for the second-year vineyard. When vines are<br />
three years old or older, other preemergence herbicides<br />
are registered for vineyard use. If preemergence<br />
herbicides are used, make applications as early as<br />
possible in the spring.<br />
Fertilizing with Nitrogen<br />
Fig. 38 (a) Two canes originating from the ground for<br />
self-rooted vines at the start <strong>of</strong> year 2; (b) the development<br />
<strong>of</strong> two canes from a single trunk when either<br />
two independent trunks from self-rooted vines directly<br />
from the ground are not available or when managing<br />
grafted grapevines; (c) use <strong>of</strong> a single cane plus spurs<br />
on a grafted vine.<br />
Most vineyards will exhibit a growth response to<br />
nitrogen fertilization. Application <strong>of</strong> 30 to 60 pounds<br />
<strong>of</strong> actual N is recommended in a second-year vineyard<br />
when shoots are 4 to 12 inches long. Band fertilizer<br />
along the vine rows or apply by hand in a ring around<br />
each vine 2 feet in diameter. Choose the specific type
VI. Year 2 Vine Management<br />
<strong>of</strong> nitrogen fertilizer on the basis <strong>of</strong> cost per pound <strong>of</strong><br />
actual nitrogen. Ammonium nitrate is the most commonly<br />
used vineyard nitrogen fertilizer.<br />
Adjusting Shoot Number per<br />
Vine, Suckering and Defruiting<br />
If it is necessary to reduce the number <strong>of</strong> shoots per<br />
vine, perform this task when shoots are 6 to 10 inches<br />
long. The location <strong>of</strong> shoots to be retained will depend<br />
on the training system to be used. For example, if the<br />
chosen training system were the Hudson River<br />
Umbrella (top-wire cordon), retain shoots high on the<br />
trellis to develop a source <strong>of</strong> canes with which to<br />
establish the cordons (Fig. 39). Many training systems<br />
similarly utilize canes high on the trellis, so shoots in<br />
that part <strong>of</strong> the trellis <strong>of</strong>ten are retained in preference<br />
to those lower (Fig. 38b).<br />
Suckers are shoots that arise from the base <strong>of</strong> the<br />
vines (sometimes also called water sprouts) or from<br />
the ground. Some sucker shoots should be retained<br />
because they mature into canes that may be used to<br />
renew trunks on the vine. However, grapevines can<br />
develop as many as 60 suckers per vine. Therefore,<br />
reduce suckers at the bases <strong>of</strong> new vines to two to<br />
four per vine. This can be done when the number <strong>of</strong><br />
shoots is adjusted. Suckers can be loosely summer<br />
tied to facilitate their upward growth on the trellis so<br />
they are protected from equipment (Fig. 23).<br />
Vines should be defruited in the second year, which is<br />
most easily accomplished when shoots are about 10<br />
to 15 inches long and the small, visible clusters can<br />
easily be pinched <strong>of</strong>f the vine.<br />
Controlling Pests<br />
The health <strong>of</strong> the vine must be maintained to promote<br />
its growth in year 2. Preventive fungicide sprays and<br />
insecticide sprays should be applied as needed to protect<br />
leaf area as in year 1.<br />
Fig. 39. This 'Niagara' vine is at the end <strong>of</strong> its second growing<br />
season. Shoots were saved on the upper portion <strong>of</strong> the<br />
vine and allowed to cling along wires. Those shoots matured<br />
into canes that were used to establish a cordon along the top<br />
wire <strong>of</strong> the trellis.<br />
Managing the Canopy<br />
Rapidly elongating shoot growth on young grapevines<br />
may be highly susceptible to detachment, especially<br />
during high winds. It is <strong>of</strong>ten useful to attach these<br />
shoots to the trellis by a combination <strong>of</strong> light tying and<br />
tucking <strong>of</strong> shoots. Begin this activity when the shoots<br />
are 20 to 24 inches long or about the time <strong>of</strong> grape<br />
bloom — i.e., when shoots are long enough to be<br />
reoriented but tendrils have not yet attached themselves<br />
to the trellis. Make ties loose so they won't<br />
girdle expanding shoots and canes (Fig. 23).<br />
Managing Row Middles<br />
Competition for water and nutrients from weed/sod<br />
growth in the vineyard floor middles should be minimized,<br />
especially in the first half <strong>of</strong> the growing season.<br />
Row middle management options as previously<br />
discussed include cultivation, mowing, mulching and<br />
herbicide spraying. Begin in early to mid-August to<br />
slow vine growth by ceasing mowing (Fig. 21) or<br />
planting a cover crop in row middles that have been<br />
cultivated (Fig. 24).
V<strong>II</strong>, Year 3 Vine Management<br />
Some aspects <strong>of</strong> vine management in year 3 <strong>of</strong> a<br />
vineyard will be similar to that in year 2. Inspect<br />
the vineyard in early spring to determine if overwintering<br />
weed growth under the trellis warrants an<br />
early-season spray <strong>of</strong> glyphosate or if there is still a<br />
need to replace a few vines. Trellis construction,<br />
including end post anchoring, should have been completed<br />
by the start <strong>of</strong> year 3.<br />
Vines at this stage <strong>of</strong> the vineyard can vary from being<br />
as small as those originally planted to being large<br />
enough to fill the entire trellis. Pruning, fertilization<br />
and crop adjustment <strong>of</strong> vines at this time should be<br />
based on the size <strong>of</strong> the vine, which is conveniently<br />
determined by its weight <strong>of</strong> cane prunings, not its age.<br />
Training<br />
Year 3 is <strong>of</strong>ten the time to initiate the permanent vine<br />
training system. The choice <strong>of</strong> a vine training system<br />
is a major decision in the life <strong>of</strong> the vineyard. Factors<br />
to consider when choosing a vine training system<br />
(Zabadal, 1996a) and training system options for coolclimate<br />
vineyards (Zabadal, 1996b) are presented in<br />
other publications.<br />
Pruning<br />
Vines should be managed in year 3 according to their<br />
size. The actual size <strong>of</strong> individual vines is not apparent<br />
after they have been pruned, so as a part <strong>of</strong> the<br />
pruning process in the third year <strong>of</strong> the vineyard,<br />
growers need to determine the average size <strong>of</strong> vines<br />
and employ a strategy to identify vines that are considerably<br />
smaller than the average.<br />
To determine the average size <strong>of</strong> vines, identify sections<br />
<strong>of</strong> the vineyard according to their apparent uniformity<br />
<strong>of</strong> vine size. Prune and weigh the cane prunings<br />
<strong>of</strong> 10 vines in each section.<br />
Vines are considered small, medium, large or extra<br />
large when they develop approximately 0.2 or less,<br />
0.3, 0.4 or greater than 0.4 pounds <strong>of</strong> cane prunings<br />
per foot <strong>of</strong> trellis (per foot <strong>of</strong> canopy on three-dimensional<br />
trellises). For example, vines on a 6-foot vine<br />
spacing would be considered small, medium, large or<br />
extra large if they developed approximately 1.2 or less,<br />
1.8, 2.4 or more than 2.4 pounds <strong>of</strong> cane prunings per<br />
vine, respectively.<br />
The smaller the vine, the less it should be cropped.<br />
However, it is not possible to apply such management<br />
if differences in the sizes <strong>of</strong> vines are not identified in<br />
some way during pruning. One strategy is merely to<br />
prune small vines as severely as required to reduce<br />
the fruiting potential <strong>of</strong> the vine. If the vine is not<br />
much larger than it was when it was planted, prune it<br />
to three to four nodes. If the vine matured only four<br />
canes that were 30 inches or more in length, prune it<br />
back like a second-year vine — i.e., to a 12-node<br />
cane. That is the easiest approach.<br />
With such severe pruning, however, winter injury<br />
could result in fewer shoots growing out than desired.<br />
Regardless <strong>of</strong> winter injury, severe pruning will limit<br />
leaf area development on vines that are already<br />
smaller than average. Therefore, a second strategy for<br />
small vines is to prune them with the same pruning<br />
severity as the other vines in the vineyard but mark<br />
them with flagging tape at the time <strong>of</strong> pruning. In its<br />
simplest application, all marked vines are completely<br />
defruited to promote their vegetative development.<br />
Two colors <strong>of</strong> tape may also be used to indicate partial<br />
or complete defruiting. In this way, small vines can be<br />
pruned to develop substantial leaf area without adding<br />
crop stress.
V<strong>II</strong>. Year 3 Vine Management<br />
Controlling Weeds<br />
Preemergence herbicides that were not legally available<br />
for the first 2 years <strong>of</strong> the vineyard may be registered<br />
for use in year 3. Growers should seek counsel<br />
from Extension and private consultants on options for<br />
preemergence weed control in vineyards 3 years old<br />
and older. Nevertheless, the strategy is the same as in<br />
previous years — i.e., apply preemergence weed control<br />
early in the spring so that the relatively waterinsoluble<br />
herbicides may be fully activated in the surface<br />
<strong>of</strong> the soil early in the growing season.<br />
Fertilizing with Nitrogen<br />
Nitrogen fertilization in the third-year vineyard will be<br />
guided by soil type and the average vine size that has<br />
developed in the first 2 years <strong>of</strong> growth <strong>of</strong> the vines.<br />
Increase fertilizer rates on light soils that have low<br />
organic matter and, therefore, release less nitrogen to<br />
vines. If vines are already larger than 0.4 pounds <strong>of</strong><br />
cane pruning per foot <strong>of</strong> trellis, do not apply nitrogen<br />
fertilizer. Large vines (approximately 0.4 pounds <strong>of</strong><br />
cane prunings per foot <strong>of</strong> trellis) with good weed control<br />
under the trellis should be fertilized with approximately<br />
30 to 60 pounds <strong>of</strong> actual N per acre. If vine<br />
size is less than 0.4 pounds <strong>of</strong> cane prunings per foot<br />
<strong>of</strong> row, apply 60 to 100 pounds <strong>of</strong> actual N per acre.<br />
A maximum application <strong>of</strong> 100 pounds <strong>of</strong> actual N per<br />
acre is recommended for all vineyards with a singlecurtain<br />
trellis.<br />
Controlling Pests<br />
The pest control strategy in most third-year vineyards<br />
changes from that in years 1 and 2 because vines will<br />
be managed to produce some crop. Diseases such as<br />
black rot, Phomopsis cane and leaf spot, and Botrytis<br />
bunch rot, as well as insects such as grape berry<br />
moth, may now threaten the health <strong>of</strong> the fruit itself.<br />
Therefore, growers should apply a spray program that<br />
also includes control <strong>of</strong> these potential problems.<br />
Pesticide information for these sprays is presented in<br />
Michigan State University Extension bulletin E-154,<br />
"Fruit Spraying Calendar."<br />
Controlling Crop<br />
Overcropping is the greatest hazard to a vineyard in<br />
year 3. Several factors predispose vines to this stress.<br />
First, the establishment <strong>of</strong> a vine training system in<br />
year 3 <strong>of</strong>ten causes a grower to retain more live nodes<br />
with more total fruitfulness on the vine than is warranted.<br />
Second, vines in year 3 <strong>of</strong>ten have highly fruitful<br />
nodes that developed on non-fruiting, open-canopy<br />
vines in the previous year. Third, a vineyard in its third<br />
year presents the first opportunity for a grower to easily<br />
place more fruiting nodes on the trellis than are<br />
warranted. Fourth, a grower is <strong>of</strong>ten understandably<br />
eager to obtain income from a new vineyard. Therefore,<br />
even veteran growers too <strong>of</strong>ten retain too much<br />
crop on third-year vines. Such a large crop may not<br />
acceptably mature and, more importantly, vine size<br />
may decline rather than increase in year 3. Income<br />
derived from heavy cropping in year 3 can be <strong>of</strong>fset in<br />
later years by costs required to regain vine size. For all<br />
these reasons, crop control is a major focus <strong>of</strong> good<br />
vine management in year 3 <strong>of</strong> the vineyard.<br />
If large vine size has developed during the first 2 years<br />
<strong>of</strong> the vineyard, then cropping at 4 tons per acre or<br />
even more may be fully warranted. For example, it has<br />
been possible to crop the 'Niagara' variety at 7 tons<br />
per acre in year 3 without any harm to the vines.<br />
However, if the development <strong>of</strong> vine size is lagging<br />
going into year 3, then cropping at 1 or 2 tons per<br />
acre, or even no cropping, may be the appropriate<br />
management for year 3 <strong>of</strong> the vineyard.<br />
Information on vine size that was obtained at the time<br />
<strong>of</strong> pruning can be used to determine the desired level<br />
<strong>of</strong> cropping for the vineyard in year 3. For juice grape<br />
varieties, vines that average 0.1, 0.2, 0.3, 0.4 or more<br />
than 0.4 pounds <strong>of</strong> cane prunings per foot <strong>of</strong> trellis<br />
should be managed to produce no crop, 1 to 2 tons,<br />
3 to 4 tons, 5 to 6 tons or 6 or more tons per acre in<br />
year 3, respectively. For vines on a 7-foot spacing,
V<strong>II</strong>I.<br />
Summary<br />
those levels <strong>of</strong> cropping would correspond to vines<br />
with cane prunings that average 0.7, 1.4, 2.1, 2.8 or<br />
more than 2.8 pounds, respectively. For wine grape<br />
varieties, the upper limit on cropping will be highly<br />
influenced by the desired quality <strong>of</strong> the grapes as well<br />
as the average maturity date for the variety. For well<br />
developed wine grape vineyards, cropping in the third<br />
year is commonly in the range <strong>of</strong> 2 to 3 tons per acre.<br />
Cluster weight information for a variety can be used to<br />
calculate the average number <strong>of</strong> clusters per vine to<br />
retain for a desired level <strong>of</strong> crop. For example, the 5-<br />
year average weight <strong>of</strong> clusters <strong>of</strong> the 'Niagara' variety<br />
at the Southwest Michigan Research and Extension<br />
Center (SWMREC) is 0.3 pounds. The 'Niagara' vineyard<br />
is planted on a 9-foot by 7-foot (row x vine)<br />
spacing and has 691 vines per acre. The number <strong>of</strong><br />
clusters per vine required to produce a 1 -ton-per-acre<br />
crop on this vineyard can be calculated as follows:<br />
Clusters per vine = pounds per ton<br />
(vines/acre) x (pounds/cluster)<br />
(2000)<br />
(691) x (0.3)<br />
= 9.6 = 10 clusters per vine<br />
Therefore, in this example, to adjust the crop to 1, 2 or<br />
4 tons per acre, one would retain approximately 10, 20<br />
or 40 clusters per vine, respectively. Be mindful that<br />
cluster size is likely to be larger in the third-year vineyard<br />
than the long-term average for a variety.<br />
Therefore, the number <strong>of</strong> clusters per vine should not<br />
exceed calculations and possibly be somewhat lower.<br />
Average cluster weight will decline as more clusters<br />
are retained per vine. Therefore, in this example,<br />
retaining 60 clusters per vine may not result in a 6-<br />
ton-per-acre crop. This general approach to crop<br />
adjustment in year 3 will provide only a rough estimate<br />
for crop adjustment, but it is a workable method<br />
to avoid massive overcropping <strong>of</strong> vines.<br />
Harvesting<br />
Vines in year 3 are still undergoing vine size development.<br />
The crop on these vines should be harvested<br />
early enough to allow for a postharvest period with<br />
functional leaf area for maturing the vine itself.<br />
Leaving crop on the vine as late as possible may<br />
enhance fruit maturation but also reduces vine<br />
hardiness.<br />
V<strong>II</strong>I. Summary<br />
The extent to which information in this publication<br />
is successfully applied will highly influence<br />
whether a vineyard experiences exceptional full establishment<br />
in 2 years, is well managed with full establishment<br />
in 3 years or is poorly managed with full<br />
establishment in 4 years or longer, or perhaps never<br />
at all.<br />
The preceding information is useful not only for establishing<br />
new vineyards but also for managing aspects<br />
<strong>of</strong> a mature vineyard, which <strong>of</strong>ten contains all stages<br />
<strong>of</strong> vine development. There may be blank vine spaces<br />
that need replanting or small vines that need to be<br />
managed like second- or third-year vines with total or<br />
partial crop removal, respectively.<br />
The long-term productivity <strong>of</strong> a vineyard is best served<br />
if the vineyard is fully established before significant<br />
cropping begins. The information in this publication<br />
was assembled to help reduce the lag time between<br />
planting and full cropping <strong>of</strong> the vineyard, which so<br />
<strong>of</strong>ten creates severe cash flow problems for the<br />
grower.
4fe —^^ M A<br />
References<br />
Cahoon, G., M. Ellis, R. Williams, L. Lockshin. 1991.<br />
Grapes: Production, Management and Marketing.<br />
OSU bull. 815. Columbus, Ohio: Ohio State<br />
University.<br />
Casteel,T. (ed.). 1992. Oregon Winegrape Grower's<br />
Guide (4th edition). Portland, Ore.: Oregon<br />
Winegrowers' Association.<br />
DeGroot, R.C., and B.R. Johnson. 1979. Preservative<br />
Treatment <strong>of</strong> Wood for Farm Use. Madison, Wis.:<br />
University <strong>of</strong> Wisconsin Extension.<br />
How to build fences with USS Max-Ten 200 High-<br />
Tensile Fence Wire. U.S.S. Catalog No. T-l 11575.<br />
Pittsburgh, Pa.: U.S. Steel.<br />
Johnson, J.W., J. Hull and A.J. Jones. Fruit Spraying<br />
Calendar for Commercial Fruit Growers. Bulletin E-<br />
154. East Lansing, Mich.: Michigan State University<br />
Extension.<br />
Levi, M.P., and W.T. Hoxster, Jr. 1974. The Selection <strong>of</strong><br />
Wood Posts for Grape Trellising. Forest Resource<br />
Notes. Raleigh, N.C.: North Carolina State Extension.<br />
MacLean, J.D. 1952. Preservative Treatment <strong>of</strong> Wood<br />
by Pressure Methods. USD A Agriculture Handbook<br />
#40. Washington, D.C.: U.S. Government Printing<br />
Office.<br />
Mendall, S.C. 1960. The <strong>Planting</strong> and <strong>Care</strong> <strong>of</strong> Young<br />
<strong>Vineyard</strong>s. Hammondsport, N.Y.: The Taylor Wine<br />
Company.<br />
Shigley, J.E. 1963. Mechanical Engineering Design.<br />
New York, N.Y.: McGraw-Hill.<br />
Zabadal, T.J. 1996a. Vine Training Systems. Special<br />
Report #9. Benton Harbor, Mich.: Michigan State<br />
University Southwest Michigan Research and<br />
Extension Center.<br />
Zabadal, T.J. 1996b. Vine Training Systems for Wine<br />
Grape Production in Cool Climates. Special report<br />
#10. Benton Harbor, Mich.: Michigan State University<br />
Southwest Michigan Research and Extension Center.<br />
Zabadal, T.J. 1997a. Components <strong>of</strong> a Temporary<br />
Irrigation System for New <strong>Vineyard</strong>s. Special report<br />
#11. Benton Harbor, Mich.: Michigan State University<br />
Southwest Michigan Research and Extension Center.<br />
Zabadal, T.J. 1997b. Tying Grapevines. Special report<br />
#12. Benton Harbor, Mich.: Michigan State University<br />
Southwest Michigan Research and Extension Center.
n<br />
Other Extension Bulletins in this series:<br />
E-2642, Table Grape Varieties for Michigan<br />
E-2643, Wine Grape Varieties for Michigan<br />
E-2644, <strong>Vineyard</strong> <strong>Establishment</strong> I: Preplant Decisions<br />
For copies <strong>of</strong> these titles or a catalog <strong>of</strong> available publications, contact your county Extension <strong>of</strong>fice<br />
(listed under GOVERNMENT in the white pages <strong>of</strong> your phone book)<br />
or the MSU Bulletin Office, 117 Central Services BIdg., Michigan State University,<br />
East Lansing, MI 48824-1001. Phone: 517-353-6740, Fax: 517-353-7168<br />
or visit our website at web2.msue.msu.edu/buIletins/intro.cftn.<br />
MICHIGAN STATE<br />
UNIVERSITY<br />
EXTENSION<br />
MSU is an affirmative-action, equal-opportunity institution. Michigan State University Extension<br />
programs and materials are open to all without regard to race, color, national origin, gender, religion,<br />
age, disability, political beliefs, sexual orientation, marital status, or family status.<br />
Issued in furtherance <strong>of</strong> Extension work in agriculture and home economics, acts <strong>of</strong> May 8 and<br />
June 30, 1914, in cooperation with the U.S. Department <strong>of</strong> Agriculture. Margaret A. Bethel,<br />
Extension director, Michigan State University, E. Lansing, MI 48824.<br />
This information is for educational purposes only. References to commercial products or trade<br />
names do not imply endorsement by MSU Extension or bias against those not mentioned. This<br />
bulletin becomes public property upon publication and may be printed verbatim with credit to<br />
MSU. Reprinting cannot be used to endorse or advertise a commercial product or company.<br />
Produced by Communication and Technology Services <strong>of</strong> the College <strong>of</strong> Agriculture and Natural<br />
Resources at Michigan State University. Printed on recycled paper using vegetable-based inks.<br />
Rep. 5/04 - 1M - KMF/LP. Price $8.00, for sale only (Fruit-Commercial)