RCN 47 for pdf - Steve Briggs
RCN 47 for pdf - Steve Briggs
RCN 47 for pdf - Steve Briggs

You also want an ePaper? Increase the reach of your titles
YUMPU automatically turns print PDFs into web optimized ePapers that Google loves.
<strong>RCN</strong><br />
Tales From the Recycle Bin<br />
3 Homebuilt Recumbents<br />
20<br />
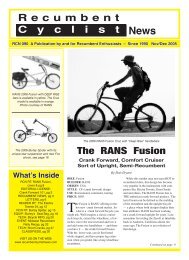
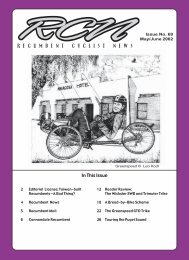
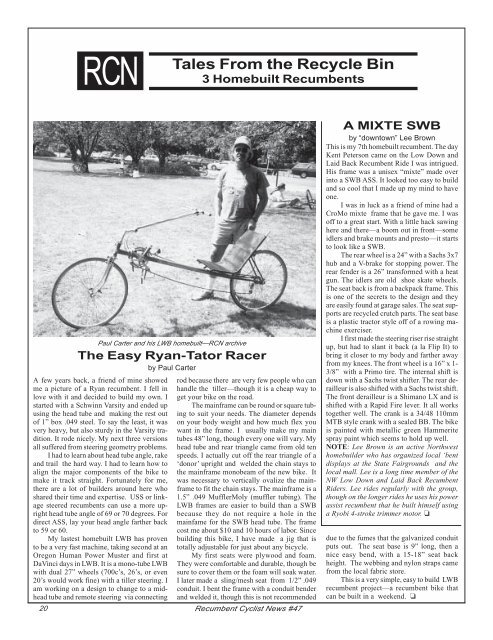
Paul Carter and his LWB homebuilt—<strong>RCN</strong> archive<br />
The Easy Ryan-Tator Racer<br />
by Paul Carter<br />
A few years back, a friend of mine showed<br />
me a picture of a Ryan recumbent. I fell in<br />
love with it and decided to build my own. I<br />
started with a Schwinn Varsity and ended up<br />
using the head tube and making the rest out<br />
of 1” box .049 steel. To say the least, it was<br />
very heavy, but also sturdy in the Varsity tradition.<br />
It rode nicely. My next three versions<br />
all suffered from steering geometry problems.<br />
I had to learn about head tube angle, rake<br />
and trail the hard way. I had to learn how to<br />
align the major components of the bike to<br />
make it track straight. Fortunately <strong>for</strong> me,<br />
there are a lot of builders around here who<br />
shared their time and expertise. USS or linkage<br />
steered recumbents can use a more upright<br />
head tube angle of 69 or 70 degrees. For<br />
direct ASS, lay your head angle farther back<br />
to 59 or 60.<br />
My lastest homebuilt LWB has proven<br />
to be a very fast machine, taking second at an<br />
Oregon Human Power Muster and first at<br />
DaVinci days in LWB. It is a mono-tube LWB<br />
with dual 27” wheels (700c’s, 26’s, or even<br />
20’s would work fine) with a tiller steering. I<br />
am working on a design to change to a midhead<br />
tube and remote steering via connecting<br />
rod because there are very few people who can<br />
handle the tiller—though it is a cheap way to<br />
get your bike on the road.<br />
The mainframe can be round or square tubing<br />
to suit your needs. The diameter depends<br />
on your body weight and how much flex you<br />
want in the frame. I usually make my main<br />
tubes 48” long, though every one will vary. My<br />
head tube and rear triangle came from old ten<br />
speeds. I actually cut off the rear triangle of a<br />
‘donor’ upright and welded the chain stays to<br />
the mainframe monobeam of the new bike. It<br />
was necessary to vertically ovalize the mainframe<br />
to fit the chain stays. The mainframe is a<br />
1.5” .049 MufflerMoly (muffler tubing). The<br />
LWB frames are easier to build than a SWB<br />
because they do not require a hole in the<br />
mainfame <strong>for</strong> the SWB head tube. The frame<br />
cost me about $10 and 10 hours of labor. Since<br />
building this bike, I have made a jig that is<br />
totally adjustable <strong>for</strong> just about any bicycle.<br />
My first seats were plywood and foam.<br />
They were com<strong>for</strong>table and durable, though be<br />
sure to cover them or the foam will soak water.<br />
I later made a sling/mesh seat from 1/2” .049<br />
conduit. I bent the frame with a conduit bender<br />
and welded it, though this is not recommended<br />
Recumbent Cyclist News #<strong>47</strong><br />
A MIXTE SWB<br />
by “downtown” Lee Brown<br />
This is my 7th homebuilt recumbent. The day<br />
Kent Peterson came on the Low Down and<br />
Laid Back Recumbent Ride I was intrigued.<br />
His frame was a unisex “mixte” made over<br />
into a SWB ASS. It looked too easy to build<br />
and so cool that I made up my mind to have<br />
one.<br />
I was in luck as a friend of mine had a<br />
CroMo mixte frame that he gave me. I was<br />
off to a great start. With a little hack sawing<br />
here and there—a boom out in front—some<br />
idlers and brake mounts and presto—it starts<br />
to look like a SWB.<br />
The rear wheel is a 24” with a Sachs 3x7<br />
hub and a V-brake <strong>for</strong> stopping power. The<br />
rear fender is a 26” trans<strong>for</strong>med with a heat<br />
gun. The idlers are old shoe skate wheels.<br />
The seat back is from a backpack frame. This<br />
is one of the secrets to the design and they<br />
are easily found at garage sales. The seat supports<br />
are recycled crutch parts. The seat base<br />
is a plastic tractor style off of a rowing machine<br />
exerciser.<br />
I first made the steering riser rise straight<br />
up, but had to slant it back (a la Flip It) to<br />
bring it closer to my body and farther away<br />
from my knees. The front wheel is a 16” x 1-<br />
3/8” with a Primo tire. The internal shift is<br />
down with a Sachs twist shifter. The rear derailleur<br />
is also shifted with a Sachs twist shift.<br />
The front derailleur is a Shimano LX and is<br />
shifted with a Rapid Fire lever. It all works<br />
together well. The crank is a 34/48 110mm<br />
MTB style crank with a sealed BB. The bike<br />
is painted with metallic green Hammerite<br />
spray paint which seems to hold up well.<br />
NOTE: Lee Brown is an active Northwest<br />
homebuilder who has organized local ‘bent<br />
displays at the State Fairgrounds and the<br />
local mall. Lee is a long time member of the<br />
NW Low Down and Laid Back Recumbent<br />
Riders. Lee rides regularly with the group,<br />
though on the longer rides he uses his power<br />
assist recumbent that he built himself using<br />
a Ryobi 4-stroke trimmer motor. ❏<br />
due to the fumes that the galvanized conduit<br />
puts out. The seat base is 9” long, then a<br />
nice easy bend, with a 15-18” seat back<br />
height. The webbing and nylon straps came<br />
from the local fabric store.<br />
This is a very simple, easy to build LWB<br />
recumbent project—a recumbent bike that<br />
can be built in a weekend. ❏