RCN 47 for pdf - Steve Briggs
RCN 47 for pdf - Steve Briggs
RCN 47 for pdf - Steve Briggs

You also want an ePaper? Increase the reach of your titles
YUMPU automatically turns print PDFs into web optimized ePapers that Google loves.
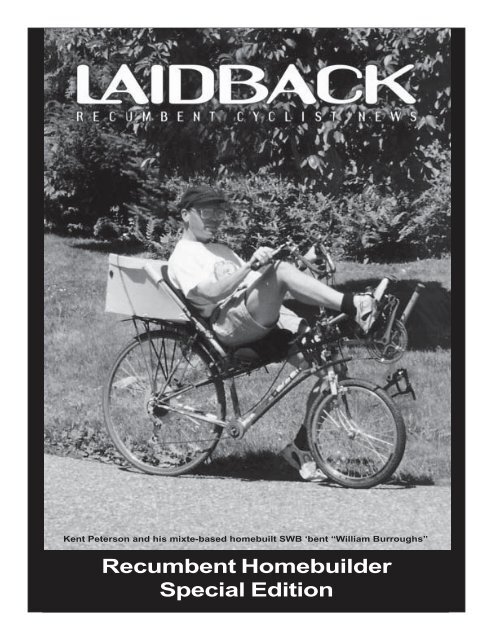
Kent Peterson and his mixte-based homebuilt SWB ‘bent “William Burroughs”<br />
Recumbent Homebuilder<br />
Special Edition
Recumbent<br />
Cyclist News #<strong>47</strong><br />
Sept/Oct 1998<br />
Editor/Publisher—Robert J. Bryant<br />
Circulation—Marilyn Jayne Bryant<br />
Subscription In<strong>for</strong>mation<br />
Standard 1-Year 6-issue sub—$32<br />
Deluxe first class sub—$45<br />
<strong>RCN</strong> Offices—Tel. 360-379-5607<br />
<strong>RCN</strong> Internet<br />
www.recumbentcyclistnews.com<br />
Recumbent Cyclist News<br />
is published six times a year by<br />
Recumbent Cyclist International,<br />
PO Box 2048, Port Townsend, WA 98368<br />
Ad Rates<br />
Give us a call and we’ll happily mail<br />
our commercial ad rates<br />
About the Mail Service<br />
We do everything possible to ensure<br />
that you get your <strong>RCN</strong>. Standard<br />
Subscriptions are sent via “bulk” mail.<br />
The USPS does not <strong>for</strong>ward bulk mail,<br />
and they tend to misplace 2% of each<br />
mailing. For this reason, we offer<br />
a “deluxe” upgrade that utilizes first<br />
class mail and issues are mailed in a<br />
flat envelope.<br />
If you are missed, please give<br />
us a call the 3rd week of the 2nd issue<br />
calendar month and we’ll send a<br />
replacement. (Example: May/June<br />
issue, call the 3rd week of June)<br />
Please notify <strong>RCN</strong> of address<br />
changes in writing in advance of<br />
your address change.<br />
Copyright © 1998; 2003<br />
by Recumbent Cyclist International.<br />
Contents may not be reproduced in<br />
whole or part unless expressly<br />
authorized in writing by<br />
the editorial office.<br />
Although we at Recumbent Cyclist News<br />
make every ef<strong>for</strong>t to provide useful<br />
and accurate in<strong>for</strong>mation, we do not<br />
claim to have definitive<br />
answers—particularly with regard to<br />
safety, technique and equipment.<br />
Editorial<br />
License<br />
Email us at DrRecumbnt@aol.com<br />
What I Did On My Summer Vacation<br />
ince we’re over the hump <strong>for</strong> the 1998 season, I guess I can say that it has been a tough year <strong>for</strong> the<br />
<strong>RCN</strong> crew. Our circulation growth is up nearly 35% over a year ago, but advertisers are cancel-<br />
Sing ads, and manufacturers have not been very attentive with our buyers’ guide, press release,<br />
photo and test bike needs. I guess we can blame the overwhelming demand <strong>for</strong> recumbents this year.<br />
What this means <strong>for</strong> the <strong>RCN</strong> skeleton crew is a lot more work and longer hours.<br />
In our rush to make up <strong>for</strong> being slightly behind schedule, <strong>RCN</strong>#46 turned into a bit of a disaster<br />
with a few mistakes (cover & title page photo info). A trike manufacturer had me on the firing line <strong>for</strong><br />
my trike commentary and we were trashed by a UK reader on the internet. Somehow, they can’t<br />
understand why I feel safer and more stable on a two wheeler here in suburban King County.<br />
It was plain to see that I needed a vacation. Everyone around me knew it, too. Since my life’s<br />
passion (bikes), career, hobby and sport of choice all converge on cycling, sometimes I just need to<br />
disappear <strong>for</strong> awhile. With the ‘98 schedule (terminal buyers’ guides), this had not been possible. So,<br />
every July, we shut down the office <strong>for</strong> ten days, pack up the kids, dog, and bikes and head <strong>for</strong> the hills.<br />
We go to a quiet north Cascades mountain town and camp by a lake. My brother-in-law brings his dog<br />
and his fishing boat. My other brother-in-law and sister-in-law bring their kids, kids’ friends, kids dog,<br />
and 4 x 4 with travel trailer, and our family communes with nature in a most American sort of way.<br />
I make it a point of not telling anyone where I’m going. I don’t check my email or voice mail. Our<br />
secret spot is on a Washington state tour loop—popular with cyclists, and a great mountain biking area.<br />
There are lots of scenic country roads and mountains to climb—a real cyclist’s heaven. Last year I<br />
took my Rans Rocket; this year I took my wedgie Gary Fisher Alfresco Nexus 7 ($300 on closeout)<br />
with sprung Lepper leather saddle (beater bike) as I’m doing some research on internal hub gearing.<br />
The city bike gave me one other vital benefit—the kind of anonymity that I was desperately in need of.<br />
Besides daily bike rides and family camping fun, my other big thrill is to read. I love bike touring<br />
narratives. This year, I chose Stan Purdum’s new book, Roll Around Heaven All Day. I also had Rob<br />
van der Plas’ The Bicycle Touring Manual and Bicycling the Pacific Coast, by Tom Kirkendall and<br />
Vicky Spring. With family, dog, mobile cycling library, Fisher Nexus wedgie and the clean mountain<br />
air—I’m set. I can be a cycling enthusiast with the biz, phones, and email hundreds of miles away.<br />
I finally talked the family into the yearly bicycling trek into town. It’s a six mile round trip, though<br />
mostly up hill on the return. It was also 95º by 10 a.m. (heading towards 100º). Our plan was to stop at<br />
the espresso stand in town <strong>for</strong> an iced latte. The kids had their eyes on a candy store on main street. So<br />
we’re standing on the main corner in this town in the quiet north Cascades when my nephew, Brian,<br />
says, “Hey Bob—a recumbent” and points across the street. Just then, everyone else sees the bike and<br />
points in unison. Marilyn yells, “Nice bike!” and gives a thumbs up. The rider rolls his steed across<br />
Main street. It’s a Black Gold set up <strong>for</strong> touring (ooh, ahh). We exchange pleasantries. The rider says<br />
“Bob?” and comments about the unattended whiskers on my face (my attempt to be incognito). “I<br />
didn’t know it was you until I heard your voice.” He says.<br />
So, it turns out that I know this guy. It’s Jim Giles from Quilcene, WA on the last leg of his Maine<br />
to Washington tour—over 4,000 miles in 8 weeks. Jim had the look of a seasoned cycle tourist and was<br />
clearly having a good time. He had just come down a mountain pass, and would be climbing the last big<br />
pass on his tour. He’d be home in three days. He was excited that his cyclist friends would be coming<br />
out to meet him <strong>for</strong> the last day of riding. Interestingly enough, I had just received a post card from Jim<br />
the week be<strong>for</strong>e. This was really cool.<br />
Jim’s bike is very trick—a ‘97 Easy Racer Gold Rush Replica Black Gold with a 559mm 26” rear<br />
wheel, 406mm 20” front wheel, Magura hydraulic brakes, Zzipper fairing, rack and panniers. The<br />
extreme gearing, Magura conversion and trick extended cage front derailleur were immediately recognizable<br />
as the work of Zach Kaplan Cycles (and Conrad Oho). Jim said he’s ridden 4,000 miles without<br />
a flat tire. Just as a precaution, he had just replaced the 406mm Comet the day be<strong>for</strong>e due to a slit in the<br />
tread. He said the bike per<strong>for</strong>med flawlessly. In true Easy Racer style, the bike looked brand new—<br />
even in the final leg of Jim’s transcontinental ride. Seems like a GRR set up in this <strong>for</strong>mat would make<br />
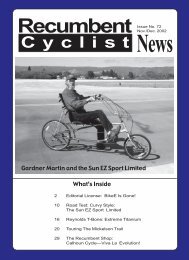
the ultimate touring recumbent. Let’s hope Gardner Martin pays attention.<br />
We talked <strong>for</strong> about twenty minutes. My family had all but disappeared to a museum up the hill. I<br />
needed to roll out, but needless to say, this experience made my day and made what I do seem real,<br />
offering a pleasant, yet unexpected, boost in my revitalization process. Jim and I said goodbye and he<br />
set off to climb a mountain pass, and I rode the three miles back to camp with my family.<br />
Some other interesting experiences on my summer vacation included camping next to a group<br />
traveling in a 5th wheel trailer towed by a full size Peterbilt semi-tractor (downright bizarre, though<br />
highly entertaining) and a really neat conversation with a guy who lives in a bus with full solar power<br />
(the solar thing really set my mind a-buzz). Comparing Jim touring on his GRR “RV” to the crew in<br />
the semi and the 5th wheel trailer gave me a good chuckle.<br />
Viva Recumbency, Bob Bryant
<strong>RCN</strong><br />
How to Beat the High Cost<br />
of Recumbency (and other rants)<br />
The cost of bringing a product to market<br />
far surpasses what one person<br />
could kluge one together themselves<br />
<strong>for</strong>. Our quest <strong>for</strong> product perfection and<br />
“newer is better” is not always the right<br />
path <strong>for</strong> everyone, though corporate<br />
America may have you believe otherwise.<br />
It is okay to place different standards<br />
<strong>for</strong> commercially built bikes over what is<br />
acceptable <strong>for</strong> homebuilders. New uses <strong>for</strong><br />
a recycled frame, U-bolts, hose-clamps<br />
and JB weld is exciting in the world of recycled<br />
‘bent building, though put any of<br />
these items on a $2,000 bike and you will<br />
have customers turn their noses up in disgust.<br />
What is the difference? About $1800!<br />
It costs a lot of money to build a bike<br />
<strong>for</strong> commercial consumption. There are<br />
middle-men all along the way with their<br />
hands out, and bicycles have comparatively<br />
smaller profit margins.<br />
We’re all <strong>for</strong> a healthy ‘bent and bike<br />
industry. Manufacturers need to make a<br />
profit and so do the dealers. Dealers<br />
deserve a healthy margin, as a bike shop<br />
is not generally the key to <strong>for</strong>tunes. Some<br />
manufacturers barely make a living.<br />
I know one who admits to living on $7K<br />
a year and another who lives in an RV.<br />
The manufacturers deal with<br />
powdercoat painters, multiple component<br />
sources and trying to bring all of the cast<br />
members of the three ring circus into the<br />
big top all at once. As we have seen especially<br />
this year, that doesn’t always happen<br />
and results in long delays. Other manufacturers<br />
will hire more people to build,<br />
take extended trips to Taiwan to build overseas—which<br />
again slows the whole process<br />
down.<br />
The cost of building anything comes<br />
with a train load of overhead. The actual<br />
cost of building a product may be as low<br />
as 1/3 of the final retail price—or less. If<br />
you want access to a ‘perfect’ commercially<br />
built product, you should be prepared<br />
to pay a retail price.<br />
If you are not willing to pay the<br />
price—the easist way to cut the cost of anything<br />
is to get off your duff, look <strong>for</strong> an<br />
angle, a deal, or do some work yourself.<br />
■ THE BIKE YOU BUILD!<br />
I have ridden every nice recumbent made,<br />
from suspended compacts to imported<br />
trikes. There is a constant flow of bikes<br />
through <strong>RCN</strong>. It’s fun, but it also has made<br />
me realize that the perfect ‘bent has not<br />
Remember Tony’ Licuanan’s CAT (<strong>RCN</strong>#35)? Tony took the amidship suspension seat out and<br />
made it into a low racer—<strong>RCN</strong>.<br />
been built yet. Besides making my living solely<br />
from publishing <strong>RCN</strong>, I am a ‘bent hobbyist.<br />
When I do find the ‘perfect’ ‘bent, I hope that<br />
it will be done with my own two hands.<br />
■ YOU CAN BE A ‘BENT CHEAPSKATE<br />
There are several ways to cut the cost of a ‘bent.<br />
We will split the list into homebuilders and<br />
retail sources. Here are just a few:<br />
■ HOMEBUILDERS<br />
Be careful here. Plans and kits are a neat idea,<br />
but do a careful cost comparison, as once you<br />
add a factory seat, <strong>for</strong>k, handlebars, components<br />
and a paint job, you may be already out<br />
of sight—cost wise.<br />
Here are some creative ideas <strong>for</strong> building<br />
a ‘bent that can help you get on the road cheaply.<br />
✔ Recycle Frames: Build your own by recycling<br />
old road, BMX and mountain bikes. This<br />
is by far the least expensive way to get into<br />
recumbent bicycles.<br />
✔ Building Plans: The great ones like Easy<br />
Racers and EconBent are no longer produced.<br />
They required old bike frames and parts. Want<br />
ads <strong>for</strong> plans are free to subscribers.<br />
✔ Building Plans II: The new breed of building<br />
plans, like those offered by BenTech even<br />
offer optional frame tubing kits.<br />
✔ Half-Building: Be your own ‘bent contractor.<br />
Source the parts, frame tubes, miter and jig<br />
stuff yourself and when it’s ready to weld up, find<br />
a local guy to do it. Local welders will charge<br />
less than bike builders. Finding a buddy who<br />
welds is the best and may set you back a few lattes<br />
or a take-out Chinese food dinner.<br />
✔ Local Guru: In every group there is a local<br />
guy who helps folks build bikes. Heck, Joe<br />
Kochanowski gave the Joetator away and he’s<br />
given away other bikes and frames as well.<br />
■ RETAIL DEALS<br />
✔ Manufacturers: Ask the manufacturer about<br />
factory 2nds, repaired frames, or used bikes.<br />
✔ Manufacturers II: Buy a frameset and strip<br />
down your old road bike or MTB <strong>for</strong> parts.<br />
(though keep in mind that some mfr.’s penalize<br />
frameset buyers with inflated prices to discourage<br />
frameset build-ups).<br />
✔ Last year’s demos: Last year’s ‘bents are often<br />
considered passe and can be a bit soft on the<br />
market, thus good deals.<br />
✔ Yesterday’s Latest Greatest: Supreme bargains<br />
can be had in 700c and 26/20 and 24/20 V-<br />
Rexi, square tube Rockets, first generation<br />
BikeE’s, Metro’s (I found a ‘97 21-spd. demo<br />
<strong>for</strong> $650!) and anything with Suntour components<br />
(which most retrogrouches prefer).<br />
✔ Bikes that had mediocre <strong>RCN</strong> reviews: These<br />
bikes can be soft on the market or sold in low<br />
quantities, and be good bargains. Small builders<br />
like to sell framesets and often discount them<br />
September/October 1998 3
(while others penalize frameset buyers).<br />
✔ Stale/Soft Product: If you’ve seen a particular<br />
demo around the shop <strong>for</strong> awhile, talk to the<br />
owner about a deal.<br />
Bikes that are built in large quantities or<br />
that are not perceived as the best can often be<br />
found at half their new cost—slightly used.<br />
✔Used ‘Bents in unlikely places: Hypercycles,<br />
ReBikes, Turner, S & B, often low end or<br />
regionally built ‘bents can be had <strong>for</strong> a few<br />
hundred bucks if you are in the right place at<br />
the right time. Our S & B Beach Cruiser was<br />
recently in the paper <strong>for</strong> $375. Thousands of<br />
Hypercycles were built and show up at swap<br />
meets and garage sales. We even heard of a mint<br />
Avatar 2000 purchased <strong>for</strong> $200 out of<br />
somebody’s basement.<br />
✔ <strong>RCN</strong> classifieds are a great place to find parts<br />
and used bikes. However, it is not always the<br />
cheapest place. <strong>RCN</strong> readers are educated to the<br />
values of a used bike. If that bike is in demand,<br />
the price will be higher, though I’ve still heard<br />
of a few local Tour Easys selling <strong>for</strong> $500!<br />
✔ Local Media: Traders, Recycler’s, Freebie<br />
newspapers, local bike club newsletters (two of<br />
the Tour Easys came from club newsletters) are<br />
all great sources.<br />
✔ Clubs: Some great bikes and deals are found<br />
within local bike clubs and recumbent rider<br />
groups. You’ll never know about these unless<br />
you make yourself known.<br />
✔ 2nd Hand: You may get lucky and find a<br />
‘bent at a 2nd hand store, swap meet, or 2nd<br />
hand bike store, but this is rare.<br />
✔ ‘Bent-A-Holic: Everybody knows one.<br />
Somebody who goes through bikes like other<br />
people do underwear. The deals can be great—<br />
and the bikes exceptional as these guys are usually<br />
the pickiest of customers.<br />
✔ Internet: Check out the HPV For Sale list<br />
www.ihpva.org or www.bikeroute.com <strong>for</strong><br />
online recumbent classifieds. Even America<br />
Online has a used ‘bent section.<br />
■ LOW-TECH IS CHEAP<br />
Once you have a good frameset, you must<br />
choose between expensive high-tech stuff or<br />
cast-offs or parts taken from recycled bikes or<br />
wedgie donors. Here are some simple rules:<br />
1. New technology is expensive and is not as<br />
diverse in how it interacts with other components.<br />
Mixing and matching is becoming more<br />
and more difficult these days, especially if you<br />
require 24 or 27 indexed gears.<br />
2. New technology is disposable. For the most<br />
part, it has taken the high quality (last <strong>for</strong>ever?)<br />
out of bike components and built them with<br />
planned obsolescence as the goal. This is why<br />
the old Campy, Suntour and even Huret parts<br />
are highly sought after by retrogrouches.<br />
3. Indexed Shifting is the single biggest money<br />
sucking technology on your bike. It requires the<br />
following:<br />
A. A perfectly aligned frame.<br />
B. Expensive drivetrain parts that<br />
are supposed to work perfectly in unison.<br />
C. Expensive ramped chainrings on<br />
your new current model crankset.<br />
D. Expensive shifters that match your<br />
4<br />
derailleur, cassette, etc.<br />
E. Expensive “indexable” chain.<br />
F. Proper indexed cables and housing.<br />
G. Constant and frequent adjustments.<br />
H. Better ‘bent hygiene (clean your<br />
bike more often).<br />
If you take indexed shifting out of the picture,<br />
you can use any brand of parts. Mix and<br />
match components to your heart’s content: freewheel,<br />
crankset, derailleur, shifters, wheel spacing<br />
and your frame doesn’t have to be perfectly<br />
true. You will have some extra time on your<br />
<strong>Steve</strong> Robson’s<br />
MiniMax<br />
hands not worrying about perfect ‘click’ shifting,<br />
as well as a less stressful hobby and sport.<br />
Friction works with most every brand of part—<br />
though requires retro shifters.<br />
Indexed: “Click-click....Ka chunk!”<br />
Friction: “....................................”<br />
(silence)<br />
With indexed, riders all around you will hear<br />
you shift and know that you are shifting. <strong>RCN</strong>’s<br />
master recycler guru Kent Peterson uses friction<br />
exclusively. He was telling me last week<br />
that he needed a new rear wheel. Kent said he<br />
had a budget of $160 (only the best <strong>for</strong> Rose<br />
Red). He went into a bike shop. The clerk asked<br />
him how many gears, spacing and then indexed<br />
or friction? Kent said, 130-135mm, 6 or 7 speed<br />
and friction. The guy came back with a perfect,<br />
and gorgeous new 26” wheel...<strong>for</strong> $40. Why?<br />
The wheel is outdated with narrow spacing and<br />
<strong>for</strong> a FREEWHEEL, thus the great buy.<br />
In the past two years we have had difficulty<br />
with modern indexed shifting on recumbent<br />
bicycles being ridden in extreme weather.<br />
The tough rainy season miles really take their<br />
toll on bikes. The road grit, grime and total soaking<br />
can equal more than a year’s worth of use<br />
in a dry climate.<br />
For rainy city commuters, the biggest problem<br />
with the indexed shifting is retaining an<br />
acceptable adjustment. Some local mechanics<br />
joke about how long a drivetrain will retain its<br />
perfect “new” shifting. The biggest culprit<br />
seems to be with the mating of the Grip Shift<br />
shifters and a Shimano derailleur. This, and the<br />
new 11-tooth cogs on modern cassettes, along<br />
with the weak spring on modern Shimano derailleurs<br />
makes <strong>for</strong> a system that doesn’t like<br />
grime. On several test bikes with this drivetrain<br />
Recumbent Cyclist News #<strong>47</strong><br />
combo, we lost our high gear (11-T.), reducing<br />
our drive-train to an 18 speed, and one that<br />
doesn’t indexed very well. So far, we have yet<br />
to find a solution to this dilemma, short of going<br />
back to friction shifting, and that is just what<br />
we have done with the ‘97 test Rocket. Many<br />
of our hard-core local riders now ride with friction<br />
shifting on their bad weather bikes.<br />
I really do feel like I’ve been sold a bill of<br />
goods with modern bicycle drivetrains. They are<br />
seemingly designed <strong>for</strong> weekend warriors who<br />
use their bikes as toys. I am shocked and<br />
appalled that I have never read about this in any<br />
other bike mags. We are currently experimenting<br />
with internal hub gears and hope to have an<br />
article about them in the near future.<br />
Friction systems do not revolve around<br />
high tech disposable plastic shifters with a dial<br />
to tell you what gear you’re in, but a learned<br />
skill to judge the spacing between gears, shift<br />
and then trim to make it perfect. The fewer cogs<br />
on your freewheel, the easier this is. You can<br />
spend time perfecting your skill rather than driving<br />
to the bike shop where the mechanic gives<br />
you an annoyed look about your most recent<br />
high-tech whine.<br />
Today’s indexed parts are heavier than<br />
ever, and little progress has been made over the<br />
light downtube, MTB thumbshifters and barend<br />
(bar-con) shifters of cycling’s past.<br />
4. The quest <strong>for</strong> more gears is a big waste of<br />
time. We want range, not number of gears. 5-<br />
speeds was enough, six was cool, seven was<br />
fine, 8 gives me a headache, 9 will inspire a<br />
new cult of retrogrouch ’bent riders and 10<br />
gears on the rear hub will lead to the demise of<br />
derailleur gears. The next thing we may see is<br />
bike shops charging $67 per hour <strong>for</strong> ‘scheduled<br />
maintenance’ like your local car dealership.<br />
5. The Latest, Greatest, Newest most High<br />
Tech does not mean that it is the best: KISS—<br />
Keep it Simple Stupid. The beauty of bicycles<br />
is in their simplicity. It’s about how a basic<br />
human powered two wheeled vehicle can take<br />
us great distances with granola and apple juice<br />
(or lattes & round powerbars—donuts...) as fuel.<br />
Learn to work on your bike yourself and rid it<br />
of any component you can’t fix yourself. Don’t<br />
let the technoweenies dissuade you on this one.<br />
There are thousands, upon thousands of road<br />
bike, mountain bike, and city bike ‘donors’ just<br />
sitting in garages awaiting the lustful eye of the<br />
‘bent homebuilder/recycler. Five and six speed<br />
FREEWHEELS are still used on low end bikes<br />
today, made by Shimano, Sachs, Pyramid and<br />
others, and they are cheap, too.<br />
6. You Can’t Buy Bicycle Per<strong>for</strong>mance! Sure,<br />
the record breaking design, with race heritage,<br />
speed records, swoopy looks and a multi-thousand<br />
dollar price tag is very cool, but deep down<br />
inside we all know that training has a much<br />
greater effect on bicycling per<strong>for</strong>mance.<br />
We don’t need lighter, skinnier, faster,<br />
more expensive, we need more free time to ride<br />
(or rearrange your priorities), petition the powers<br />
that be to take cycling as a serious mode of<br />
transport, giving us safe places to ride without<br />
the plow-you-off-the-road, harried, toxic infernal<br />
combustion powered commuters living in
oad-rage hell in their pollution spewing metal crypts. Many of these<br />
un<strong>for</strong>tunate souls see the cyclist as the enemy, and that you are making<br />
them slower, late and stressing them out even more.<br />
■ TECHNOWEENIE DISCLAIMER<br />
If you must have the latest stuff, the best deal is the Shimano Nexave<br />
Megarange 11-34 ultra-wide range cassette. It’s relatively medium level,<br />
fairly inexpensive and will work with other Shimano stuff, or you can<br />
use the Nexave derailleur and shifters. With this choice, you will need to<br />
go indexed—and deal with 8-speeds, so I don’t know if the trade-off is<br />
worth it.<br />
Just keep in mind that even the fancy stuff wears out and needs<br />
service and adjustment. One local recumbent commuter I know takes his<br />
maintenance-free cartridge bearings out of his Phil Wood hubs to squirt<br />
some grease in every so often. Aren’t these supposed to be maintenance<br />
free? A good retro-rant on this subject can be found in John Forester’s<br />
book, Effective Cycling. Mr. Forester mixes his own lube and converts<br />
his headset, BB and hubs to lube inject (Zach Kaplan offers this service).<br />
If you like wiz-bang, there are lots of companies out there willing<br />
to cater just to the high-tech bicycle consumer. Bicycle components are<br />
on the planned obsolesence fast track to be outdated yearly like computer<br />
stuff. If high-tech is your thing, more power to you! I will offer<br />
<strong>RCN</strong> readers carte blanche to make your bike as fancy as you can with<br />
all of the most high-tech parts in the world.<br />
■ RETRO TENDENCIES & STUFF<br />
My bikes have indexed shifting because that is the way they came from<br />
the factory. While writing this issue, I had the chance to put some miles<br />
on my old Rans Rocket which now sports friction thumbshifters (Kent<br />
replaced the Grip Shifts). It brought back many wonderful memories of<br />
simpler days of cycling. I would not hesitate to switch to friction and<br />
plan to build a retro’bent soon.<br />
Those who know me are aware of my retro tendencies, though with<br />
Jerry Jacobsen build this “Jari-Rig” using a road bike rear triangle, steel<br />
main tube and 16” front wheel—<strong>RCN</strong> archives 1991<br />
this issue I’ve kind of come out of the closet. Don’t feel guilty if you like<br />
nice stuff, or even indexed shifting—just become educated about bicycle<br />
components, learn how they work, and even better, how to fix them yourself.<br />
Develop your own personal criteria and standards <strong>for</strong> what you will<br />
allow on your bike.<br />
Just remember, bicycles were meant to be simple and used as efficient<br />
transportation <strong>for</strong> work or play. Carefully consider what you plan<br />
to do with your bike and where you are going to ride it. Don’t let the<br />
lack of bucks keep you off a ‘bent. Improvise, recycle, don’t be afraid to<br />
go retro. And if you have a super high tech expensive bike, build up a<br />
grungy bad weather beater/shopper to park next to it. Hey, if you don’t<br />
want to ride it, a friend might. ❏<br />
GET PRIMAL<br />
by Dan Kavanagh, kavanagh@freenet.tlh.fl.us<br />
Get primal, do not obsess about the<br />
details. If this is your first bike project, the<br />
largest obstacle is actually completing it.<br />
Try to remember that you are building a<br />
bike, not a Faberge egg. Use old Huffys<br />
and the like as they are easy to cut, bend<br />
and weld because the steel is soft and<br />
thick. Ignore naysayers and kindly givers<br />
of advice, <strong>for</strong> they are jealous of your<br />
initiative or likely never to have lifted a<br />
wrench themselves.<br />
Let fly with all your wild ideas at once.<br />
If 28" wheels, 7 of them all in a line with<br />
knobby tires and 328 gears with a butterfly<br />
steering wheel that you had been saving<br />
<strong>for</strong> a VW sand rail is your idea <strong>for</strong> the perfect<br />
‘bent, do not let anyone talk you into a<br />
conservative SWB design. Kill the lawn furniture<br />
in your quest <strong>for</strong> a seat, use that piece<br />
of water pipe <strong>for</strong> a top tube and attach it<br />
with 19 hose-clamps. Stick the frame together<br />
with a stick, MIG, TIG, brazing rod,<br />
silver solder, epoxy, sheet metal screws,<br />
pop rivets, JB Weld (Kent Peterson’s<br />
miracle epoxy of choice) and if all else fails<br />
use chewing gum. Believe me it WILL be<br />
rideable.....it just may take some practice<br />
runs.<br />
If others call it ugly, ask politely to see<br />
theirs and return to your rust and can of<br />
Rust-Oleum. After all, the next one will be<br />
even better. ❏<br />
Dan Kavanagh is the chief mechanic and<br />
designer of the Daisy Mayhem tandem at<br />
Fools Crow Cycles in Tallahassee,<br />
Florida.<br />
September/October 1998 5
<strong>RCN</strong><br />
Homebuilders Source Guide<br />
(or Go Build a ‘Bent)<br />
omebuilding covers a wide and diverse<br />
spectrum of people who build<br />
recumbents. The most famous<br />
Hhomebuilders are Gardner Martin (Easy Racers),<br />
Randy Schlitter (Rans) and Grant Bower<br />
(Vision). These folks built so many bikes that<br />
they turned it into their business. With the<br />
exception of the new Trek recumbent, almost<br />
every other one started out being built by one<br />
guy in one garage.<br />
Don’t let any lofty recumbent manufacturers<br />
talk to you in a condescending manner.<br />
Nearly every manufacturer currently building<br />
a recumbent in the USA today was, at one<br />
time, a homebuilder—possibly right where you<br />
are today. They need to be reminded of this<br />
from time to time, as they ask you to part with<br />
thousands of hard earned dollars.<br />
■ HOMEBUILDER QUEST<br />
After riding many, many commercially built<br />
recumbents, I can say that the one I most want<br />
to ride is one that I build with my own two<br />
hands—the crowning achievement <strong>for</strong> the<br />
recumbent hobbyist.<br />
These days, the homebuild crowd is<br />
actually split in two sections: “homebuilders”<br />
and “recyclers.”<br />
BENTECH leads the way with the<br />
homebuild-plans/tube-kit sales. They advertise<br />
a simple philosophy and the plans provide<br />
exactly what is stated in the in<strong>for</strong>mation provided.<br />
“The keystone of BENTECH’s<br />
design philosophy is that the design be simple,<br />
functional and easy <strong>for</strong> anyone to build. To<br />
accomplish this, BENTECH has come up with<br />
plans <strong>for</strong> comprehensive welding jigs <strong>for</strong> seat<br />
and frame. ”<br />
My concern with the “simple philosophies”<br />
is that they look too hard to build <strong>for</strong><br />
many people, especially those of us who do<br />
not have access to fabrication tools. As somebody<br />
who has dreamed of building <strong>for</strong> ten years<br />
and never done so, here are the questions I ask<br />
myself:<br />
▲ WHY not use a rear triangle from an<br />
existing bike? Wouldn’t this solve a lot of<br />
problems and simplify things?<br />
▲ WHY not use a BMX frame? This<br />
gets a triangulation and since BMX is so hot,<br />
parts are readily available everywhere. I would<br />
think that this would be the absolute simplest<br />
way to build a recumbent— possibly a weekend<br />
project? I don’t want to build a huge frame<br />
jig and I don’t want to buy a welder.<br />
Kent Peterson has become the local<br />
homebuilder guru and is the vision of a recum-<br />
6<br />
bent homebuilder master recycler working in<br />
his carport, or under the big tree in his yard.<br />
■ POPULAR HOMEBUILDER TYPES<br />
✔ LWB ASS—This is Easy Racer homebuilder<br />
territory. These have made the Easy Racer into<br />
the world’s most recognizable design. The plans<br />
are currently not available, though thousands<br />
have been sold. We run free want ads <strong>for</strong> subscribers<br />
looking <strong>for</strong> them. People Movers has<br />
plans <strong>for</strong> a similar bike. <strong>Steve</strong> Robson offers<br />
LWB plans in his plan book.<br />
✔ LWB USS—Bentech offers plans and tube<br />
kits <strong>for</strong> a Vision/Linear-like design.<br />
✔ SWB—Bentech offers the most complete<br />
SWB building plans ever done. They are concise,<br />
well-written, and will allow builders to<br />
create a SWB from scratch, start to finish. This<br />
is not a recycle project.<br />
✔ SWB-Wedgie Conversion—This design requires<br />
the use of a road bike rear triangle mated<br />
to a monotube front end, and usually a 16” front<br />
wheel. This is an easy to build design, however,<br />
it often places too much weight on the front end.<br />
So, if you try this, plan on stretching the wheelbase<br />
out to at least 38”. No plans are available.<br />
✔ SWB-BMX Conversion—This is a natural<br />
as BMX bikes have a similar layout to 20/20<br />
SWB recumbents. Many homebuilt SWB bikes<br />
are built each year in many, many different configurations.<br />
We have seen booms welded on, clamped<br />
on—even with wood fasteners in the front of<br />
the triangle. This is a fun and quick homebuilder<br />
project, and most ride very nicely. In riding<br />
“Cheap & Ugly” (tested in this issue), I realized<br />
that a BMX ‘bent is very similar to a Counterpoint<br />
Presto with the 38-39” wheelbase, and<br />
the lower bottom bracket possible with this<br />
design makes it even more user-friendly than<br />
some similar commercially built bikes. Cheap<br />
& Ugly’s drivetrain was quieter than our Vivo<br />
test bike. The BMX conversion can be done<br />
more easily than any other homebuilt project,<br />
and can easily be done in a weekend utilizing<br />
tips and tricks found in this issue.<br />
✔ SWB-Mixte Conversion—This is the<br />
homebuilder design <strong>for</strong> the ‘90’s. Kent Peterson,<br />
Lee Brown and Alan Amenta have had great<br />
luck with the mixte. They make great SWB<br />
and FWD recumbents. The weight distribution<br />
of the mixte is superior to the standard rear-triangle<br />
SWB, or BMX conversions which<br />
always are too quick handling...unless you flip<br />
them upside down. The mixte SWB is a<br />
homebrew V-Rex that anyone can build.<br />
A mixte is a ladies step through frame,<br />
Recumbent Cyclist News #<strong>47</strong><br />
usually with twin top tubes that run from the<br />
head tube straight back to the rear dropouts.<br />
These were sold by Peugeot, Motobecane and<br />
others throughout the ‘70’s and ‘80’s. This<br />
makes <strong>for</strong> a perfect mounting plat<strong>for</strong>m <strong>for</strong> a<br />
recumbent seat. Kent U-bolts, hose clamps<br />
and JB welds the SWB boom onto the mixte<br />
frame (see Kent’s article in this issue).<br />
✔ FWD—The Tom Traylor plans have been<br />
the best resource <strong>for</strong> front wheel drive plans<br />
<strong>for</strong> years.<br />
✔ FWD-Mixte Conversion—This is the<br />
slickest way to build a front wheel drive. Kent<br />
Peterson’s first mixte project was a FWD.<br />
✔ TRIKE—Greenspeed and Crystal (Trice)<br />
sell blueprints/plans. Greenspeed sells mitered<br />
tube sets and all the parts you’ll need. <strong>Steve</strong><br />
Robson sells simpler trike plans and there are<br />
a few on the internet.<br />
■ HOMEBUILDER PLANS<br />
There are just a few plan sets still available<br />
today. BenTech sells monobeam SWB and<br />
LWB plans and now parts and frame tube kits.<br />
Tom Traylor sells his FWD plans. Both are<br />
excellent and will fuel the novice ‘bent builder<br />
fires. There is plenty of homebuilder action<br />
on the internet. Here’s some to get you started:<br />
◆ IHVPA: www.ihpva.org (great links and<br />
learn how to get on the hpv mailing list).<br />
◆ Mark Matarella’s recumbent site: www.<br />
recumbent.com<br />
◆ <strong>Steve</strong> Schmeck’s Wood Recumbent:<br />
www. up.net/~manytrac/recumbent/htm<br />
◆ <strong>Steve</strong> Robson site: www.xclelco.on.ca/<br />
~stevbike/<br />
◆ Beng’s Bike Page www.web.sing<br />
net.com.sg/~/ahbeng/bent.htm<br />
◆ Bentech site: http://members.aol.com/<br />
domerie/bentech/htm<br />
More Easy Racer plan-sets have been<br />
sold than any other—making it quite possibly<br />
the most popular recumbent design in the<br />
world today. The Easy Racer was born of an<br />
old wedgie tandem. The tandem had a lady’s<br />
style rear frame section with a low (mixtestyle)<br />
top tube. Designer Gardner Martin<br />
realized that if he hack-sawed off the front<br />
riders seat post and installed a “Stingray” style<br />
laid back handlebar, he could sit on the rear<br />
section of the frame and pedal at the front riders<br />
pedals. The rear seat post was then<br />
removed and some old partially inflated<br />
innertubes were wrapped on the seat area.<br />
This was the first Easy Racer. We all know<br />
where this little experiment led.
■ FABRICATION<br />
Okay, I’ll admit it. I don’t weld or braze. And I<br />
am not about to give you advice on it, though I<br />
will cover some of the ways in which<br />
homebuilders get their bikes built.<br />
✔ Learn to Weld—Take a night course at a<br />
community college or have a welding friend<br />
give you some tips. Some welders come with<br />
videos and step-by-step info on how to do it.<br />
✔ Hire a welder—Your best bet may be to find<br />
a local welder. You know, one of those guys who<br />
has a sign out in front of their house that says<br />
“Welding & Fabrication.” They fix boat trailers,<br />
minibikes and anything that needs hot molten<br />
metal. They won’t expect as much pay as a<br />
bike builder.<br />
✔ Bike Builder—Some bike builders will be<br />
willing to weld or braze <strong>for</strong> you. Be sure you’re<br />
jigged up as we’ve been quoted, “$50 per hour”<br />
to build a recumbent—and that’s no bargain.<br />
✔ Braze/Mapp Gas—These portable welders<br />
have been used to flow brass onto recycled bike<br />
frames. They are af<strong>for</strong>dable and, I am told, fairly<br />
easy to use.<br />
✔ Kent Peterson’s Weldless (U-bolt, Hose-<br />
Clamp and JB Weld)—Kent and I flunked out<br />
of brazing class. Ming Dinh’s BMX wood/<br />
clamp-on boom is a neat idea <strong>for</strong> the non-welding/brazing<br />
builder (see photos on page 27).<br />
✔ Square Tubing—It worked great <strong>for</strong> the first<br />
Rans Rockets and Tailwinds. They are far stiffer<br />
than their round tube counterparts. Square tubing<br />
makes mitering easier, though is heavier.<br />
✔ Muffler Moly—You can hire your local muffler<br />
shop to bend you a piece of muffler pipe as<br />
the mainframe of your homebuilt. This was the<br />
basis of the EconBent from CycloPedia (no<br />
longer in business).<br />
■ WHEEL CONFIGURATION<br />
This is primarily dependent on what you are<br />
starting out with and your own preference as to<br />
wheel sizes. Most recumbent riders do have a<br />
preference. I prefer dual 20’s, however, a 26/<br />
20 combo makes a lot of sense though 700/20<br />
seems to be the fastest. Consider where you<br />
ride, your body weight and how many flat tires<br />
you have with your current bike in your decision<br />
making process. BMX technology is tough<br />
and inexpensive. Most bike shops have a supply<br />
of 20” parts (fat 406mm wheels).<br />
Recyclers may be swayed by what’s in the<br />
parts heap or what fits their BMX or mixte<br />
frame. Head tube angles can be adjusted by<br />
larger or smaller wheels and shorter or longer<br />
<strong>for</strong>ks. Some may scoff at the mere thought of<br />
this, but hey, it’s been done in the mainstream<br />
‘bent world <strong>for</strong> years. Lightning, Rans and Vision<br />
have all offered the same bikes with varying<br />
front and, in some cases, rear wheel sizes.<br />
■ COMPONENTS<br />
Retro-Recycle is the name of the game. Do the<br />
world a favor and dismantle a wedgie (I’m smiling...),<br />
look <strong>for</strong> upwrongs and BMX bikes at<br />
garage sales. If you want first class stuff, prepare<br />
to pay dearly. Our best advice <strong>for</strong> new stuff<br />
is to buy outdated parts. To make your life<br />
simple, <strong>for</strong>get about 8/9-speeds, cassettes and<br />
especially indexed shifting.<br />
Stick with tried and true MTB or road components<br />
from Shimano, Sachs or the ultimate<br />
retro Suntour. For those with style, the ultimate<br />
is retro Campy.<br />
A word of warning—DO NOT mix new<br />
and used drivetrain parts (chain, cluster/cassette,<br />
chainrings) or you will have problems. This is<br />
the recycler’s cardinal rule.<br />
✔ Shifters—Twist grip style shifters were designed<br />
to get you back into the bike shop <strong>for</strong><br />
indexed adjustments. None of these work with<br />
old fashioned friction shifting, so don’t even<br />
consider them. The best shifters are as follows:<br />
✔ MTB Thumbshifters—These are fantastic,<br />
have a friction option and are tough.<br />
✔ Bar-Cons (bar ends)—The finest recumbent<br />
shifter ever made, available from Campy,<br />
Suntour and Shimano. All are great. The newer<br />
models have an indexed option.<br />
✔Downtube (clamp on)—Suntour and Campy<br />
downtube shifters with clamp-on mounts can<br />
be placed on frames, or ASS bar/stems and are<br />
the lightest shifters made. They last <strong>for</strong>ever, too.<br />
✔ Derailleurs—These miracles of modern man<br />
are the next closest thing to prying your chain<br />
from gear to gear with a stick—and we love<br />
them. Most recumbents require a long cage<br />
MTB or touring derailleur —the longer the cage<br />
the better (if you don’t have a chain idler).<br />
Alivio, STX, LX, and XT all work great.<br />
Suntour’s XCT, XCD, XC LTD and XC Pro<br />
are all fine and work especially well without<br />
indexing. Kent even uses some low end<br />
Shimano TY derailleurs from Target and they<br />
work fine.<br />
Some derailleurs like the Huret Jubilee,<br />
DuoPar and Campy Rallye (long cage) are<br />
highly sought after. The Suntour MounTech is<br />
one of the best front derailleurs ever made <strong>for</strong><br />
wide range ‘bent gearing.<br />
Suntour had these great drivetrains in the<br />
‘70’s. We didn’t appreciate them then, but in<br />
these days of planned obsolescence—they bring<br />
happy thoughts. The VGT long cage shifted<br />
wonderfully. The Powershifter had small click<br />
detents and was a mock indexing. These were<br />
found even on pre-indexed MTB thumbshifters.<br />
The Powershifters are some of the coolest bike<br />
parts ever made. They generally shift and feel<br />
better than Campy or Shimano thumbshifters.<br />
The fact of the matter is that in ‘friction<br />
mode,’ many of these older parts shift better than<br />
the new stuff. Try to find a wedgie ‘donor’ or a<br />
good source <strong>for</strong> used parts. Paying upwards of<br />
$100 <strong>for</strong> a new set of derailleurs is unreasonable<br />
<strong>for</strong> a low-brow project like this.<br />
Modern Shimano rear derailleurs have<br />
wimpy springs. You can upgrade them, though<br />
it’s a hassle. If you do buy new, STX, Nexave<br />
and LX are your best bet <strong>for</strong> the rear and a 105<br />
<strong>for</strong> the front (full size road triple). Don’t get<br />
stuck with Microdrive stuff unless you’ve figured<br />
the smaller size chainrings into your drivetrain<br />
and gear range calculations.<br />
The top of the line is <strong>for</strong> racers. Many of<br />
them get it free, and/or get new stuff every year.<br />
The Nexave has the same reverse pull rear<br />
derailleurs as the Gold Rush’s XTR—which you<br />
don’t really need.<br />
✔ Internal hubs—The Nexus are very slick<br />
and cool—and a mystery mechanism. They<br />
shift great, though have lots of very noticeable<br />
drag and they are a real hassle to remove when<br />
you have a flat—possibly the worst system <strong>for</strong><br />
removal. Sturmey Archer 3, 5 and 7 speed hubs<br />
are probably your best bet. Sachs are also very<br />
nice as well and some have drum brakes. All<br />
are expensive, though there are millions of<br />
3-speeds out there <strong>for</strong> recyclers. If you add one<br />
to a recumbent, Gardner Martin’s trick is to<br />
leave the rear derailleur on as a chain idler,<br />
which allows you to spring the chain and use a<br />
front derailleur too.<br />
The Sachs 3x7 has an internal 3-speed with<br />
a 7-speed cassette. It makes <strong>for</strong> a 21-speed<br />
drivetrain without the use of a front derailleur<br />
(or 63-speeds with). The 3x7’s #2 gear is a 1:1<br />
lockup, supposedly friction free. Gear #1 is a<br />
27% reduction, and gear #3 is an 36% overdrive.<br />
This system works fantastic and is near bulletproof.<br />
However, it is heavier, more complex and<br />
there is some friction loss (a few percent) in the<br />
over and underdrives. Whether you’ll notice this<br />
is another story.<br />
✔ Freewheels (not cassettes)—Steer clear of<br />
the cassette thing unless you have to. First, you<br />
don’t need 8 or 9 gears. There are plenty of 5/6/<br />
7 speed freewheels available and they still come<br />
on cheap new bikes. The fewer the cogs, the<br />
easier they are to friction shift, trim and finesse.<br />
✔ Chains—We’re still fans of Sachs chain—<br />
recall and all. The new chains with quick link<br />
is phenomenal. We’ve heard KMC is improved<br />
and haven’t had any KMC woes as of late.<br />
Friction systems do not require the world’s<br />
best chain. I suggest keeping it clean and fresh,<br />
and use your personal preference.<br />
✔ Chain Idlers: You can buy these from your<br />
local ‘bent builder, use machined skateboard<br />
wheels, cannibalize a lower derailleur cage,<br />
adapt an MTB downhill idler or whatever you<br />
like. Kent Peterson uses the same hardware store<br />
“T” brackets that he uses <strong>for</strong> brake bridges to<br />
make idler mounts. Keep in mind that driveside<br />
idlers create friction, noise and vibration<br />
and need to be carefully thought out.<br />
✔ Brakes—Cantilevers are strong, available<br />
and have been nearly outdated by the newfangled<br />
V-brakes. A good side-pull or centerpull<br />
can be made stronger by adding Mathauser,<br />
Aztec or Kool Stop pads. Centerpulls are retro<br />
and cool. BMX calipers like the Big Dog, Bull<br />
Dog and FSE (we like them in that order) are<br />
one-bolt and very strong. The Odyssey PitBull<br />
is a one-bolt mount roller cam BMX brake that<br />
sells <strong>for</strong> around 20 bucks new and less used.<br />
Kent Peterson uses steel “T” brackets and offthe-shelf<br />
clamps to make lower brake bridges.<br />
Drum brakes are underrated. Bike Friday<br />
used them on my Family Tandem 20” front<br />
wheel and they work awesome (not a bad source<br />
<strong>for</strong> these...). Local riders Joe Kochanowski and<br />
Nick Hein use Arai tandem drag brakes with<br />
good success, though these require a tandem<br />
rear hub/wheel as they thread on.<br />
The bike industry consumerism machine<br />
would have you believe that you need hydrau-<br />
September/October 1998 7
lics, disks or super power V-brakes, when sidepulls<br />
were adequate <strong>for</strong> 30 years previous. So,<br />
the question remains, how fast do you really<br />
need to stop?<br />
Be wary of the expensive and high tech<br />
lined brake and shift cables. We’ve had reports<br />
of great per<strong>for</strong>mance when they are new, but<br />
that they wear out quickly.<br />
✔ Wheels—New wheels can be had <strong>for</strong> around<br />
$50 each complete, or up to $150+. A new 3x7<br />
rear wheel may even be more than that. New<br />
wheels are a good idea. An old wheel with rusty<br />
spokes may be unsafe. Recyclers must be willing<br />
to take that risk. A good indication that a<br />
recycled wheel is no good is the first time a<br />
spoke breaks. A broken spoke can quickly turn<br />
into a wheel failure that has the ability to toast<br />
your derailleur and bend your rear derailleur<br />
hanger. A decent set of new wheels will be<br />
money well spent.<br />
✔ The Best Stuff—You can still be a recycler<br />
or retrogrouch and like nice componentry.<br />
Being a retrogrouch or using friction shifting<br />
will give you access to a treasure-trove of 30-<br />
years of high quality bike components that are<br />
better than most of what is being made today<br />
and will work on your bike.<br />
You may still want to have an XT<br />
derailleur and Phil Wood hubs; that is cool, too.<br />
■ SEATS<br />
This is another one of those crucial areas where<br />
you can spend $3, $30 or $300. From the<br />
homebuilders that I have met, none of them are<br />
as picky as I am about their seats.<br />
✔ Wood Built—Wood can be very light.<br />
Charles Brown has done some neat work with<br />
wood seats (and bikes). Charles cuts wood sides<br />
with a contoured lumbar, and then uses a 3rd<br />
piece of wood <strong>for</strong> the back/base. Bill Volk has<br />
a wood Euro seat on his homebuilt. The simplest<br />
wood seat method is two pieces of plywood<br />
(back and base) cut to fit your bike, connected<br />
by a piano or door hinge, layered with<br />
foam, contoured and covered with lycra or<br />
naugahyde.<br />
✔ Recycle Back/Base—Joe Kochanowski<br />
uses sheet metal and sheet aluminum covered<br />
with foam and old shag carpet (olive green).<br />
Kent Peterson likes backpack frames, and a<br />
home-made base covered with foam and a<br />
recycled Rans seat cover, held on by an old<br />
innertube with an auto seat pad from Target on<br />
top. Lee Brown also likes backpack frames<br />
from garage sales and flea markets and looks<br />
<strong>for</strong> seat bases from rowing machines.<br />
J. Gaerlan sells a ReBike-like seat base<br />
shaped like an old John Deere tractor seat. These<br />
have been used on BikeE’s as comfy upgrades<br />
as well. This type of seat base (or a rowing<br />
machine base) could be used in conjunction with<br />
a mesh back, foam covered plywood back or an<br />
old backpack frame.<br />
✔ Tubular—CroMo steel, aluminum or even<br />
conduit can be used to <strong>for</strong>m a sling seat frame.<br />
Just be careful with galvanized conduit (nasty<br />
fumes). The best deal we know of is Dan<br />
Kavanagh at Fools Crow who would build you<br />
8<br />
a sling/mesh seat like that on the Daisy Mayhem<br />
tandem <strong>for</strong> around $150.<br />
✔ Commercial—If you buy a seat outside of<br />
the ‘bent industry, you’ll save a lot of money.<br />
Consider looking at seats designed <strong>for</strong> the following:<br />
marine use (boats), go-karts (see Pop.<br />
Mech. <strong>for</strong> catalog sellers) and even cheap seats<br />
designed <strong>for</strong> school cafeterias. We’ve even<br />
heard of a rider using a K-Mart bass boat seat<br />
on his BikeE. Be creative on this one.<br />
Keep in mind that any upholstery shop can<br />
cut or ad foam, sew a seat cover, or customize a<br />
seat. Most can build seat mesh sections to suit,<br />
though this kind of work can be pricey.<br />
✔ ‘Bent Factory Built—Most homebuilders<br />
will scoff at the thought of $300 <strong>for</strong> a factory<br />
seat. However, if you do need dialed, proven<br />
com<strong>for</strong>t, the Rans seat seems to be the easiest<br />
to mount on different bikes. The aluminum<br />
channel comes in different widths to fit on top<br />
■ WHERE TO GO FOR PARTS:<br />
▲ Bike Shop<br />
▲ Recycled Bike shop<br />
▲ Garage sales<br />
▲ Thrift stores (Kent’s tip is to frequent<br />
these in upscale neighborhoods).<br />
▲ Swap Meets<br />
▲ ‘Bent pals<br />
▲ Friends and relatives about old bikes in<br />
the garage.<br />
▲ Recumbent Parts sellers<br />
▲ Bike Nashbar/Per<strong>for</strong>mance offer the<br />
best prices.<br />
▲ Internet sites and lists<br />
▲ Dumpster-Dive: Bike shops and bike<br />
builders throw out a lot of stuff. Make<br />
friends with your local ‘bent builder and<br />
offer to help clean up or haul away unwanted<br />
stuff.<br />
▲ TIP: Don’t just watch the classifieds, get<br />
out and look around. People who want to<br />
get rid of cheap stuff don’t always advertise<br />
it, as ads can be costly.<br />
of the main tubes. There are versatile mounts<br />
<strong>for</strong> Ryan and Easy Racer bikes as well. Easy<br />
Racers has used/trade-in Cobras as well as the<br />
new Cool Back seat. S & B’s fiberglass bucket<br />
is as cheap as they come. The BikeE, Vision<br />
and Haluzak seats are more difficult to mount<br />
on homebuilts, though not impossible. Used and<br />
trade-in seats are often available from manufacturers<br />
when they come out with a new seat<br />
design.<br />
■ PERFORMANCE<br />
The other day, I was reminded by Joe “Road<br />
Warrior” Kochanowski of yet another reason to<br />
build a bike—per<strong>for</strong>mance. Virtually no manufacturers<br />
build out and out per<strong>for</strong>mance bikes<br />
to HPV racer standards—low, fully faired<br />
streamliner chassis. Once I asked a midwest<br />
HPV racer what he thought of the production<br />
hot rods. He chuckled and said, “What hot<br />
rods?”<br />
Sure, there are the F-40 and Gold Rush,<br />
though there are plenty of reasons homebuilders<br />
Recumbent Cyclist News #<strong>47</strong><br />
may want to pass on these off-the-shelf speed<br />
bikes. The primary reason is price; a faired version<br />
of each can set you back $3,500-$6,000<br />
or more bucks. Others don’t like the high centers<br />
of gravity of either model, and of the speed<br />
guys in the NW, nobody rides with the upright<br />
seat and high bottom bracket of the Lightning<br />
design, though I know they can be very fast.<br />
■ FAIRINGS<br />
Zzipper fairings are available to fit nearly any<br />
recumbent—though they can be pricey (SWB<br />
are much more than LWB). Earth Cycles has<br />
been working on their own bubbles as well.<br />
Coroplast is the king of the homebuilder fairing<br />
material. Anybody can craft a tailbox of<br />
coroplast (plastic cardboard). Kent Peterson<br />
wrote a great article on how to build a tailbox<br />
in <strong>RCN</strong>#44. Kent’s newest theory is to build<br />
tailboxes on top of rear racks <strong>for</strong> MORE support,<br />
haul more stuff and quick-release removal.<br />
Zzip Designs’ plastic bolts and wing nuts would<br />
be ideal <strong>for</strong> this.<br />
Homebuilt front fairings are more difficult.<br />
Kent built a coroplast fairing <strong>for</strong> his BikeE (see<br />
<strong>RCN</strong>#40: the Fast Pig). He bent underground<br />
sprinkler tube to shape the coroplast, along with<br />
a lexan safety shield <strong>for</strong> a windshield and his<br />
usual host of hardware store mounts. Many<br />
have used flat, or sections of glued lexan. <strong>RCN</strong>’s<br />
Tony Licuanan actually used a doghouse igloo<br />
as a nose cone. The midwest hpv guys blow<br />
their own fairing bubbles.<br />
People Movers sells the Ed Gin coroplast<br />
full body fairing building Seminar on videotape.<br />
This, along with Kent’s article in <strong>RCN</strong>, a few<br />
sheets of coroplast and some zip-ties, can make<br />
you an expert. This is a pleasing experience,<br />
and a simple project that nearly anyone can be<br />
proud of.<br />
In the advanced fairing course, Kent<br />
Peterson has built a body stocking using fabric<br />
store lycra, hand stitched with custom PVC and<br />
velcro mounts. Look <strong>for</strong> a story on this in an<br />
upcoming <strong>RCN</strong>.<br />
■ COSTS<br />
It’s pretty easy <strong>for</strong> things to get out of control.<br />
Do a careful cost analysis to find out if you can<br />
even af<strong>for</strong>d to build. Similar homebuilts can be<br />
priced hundreds of dollars apart. An example<br />
can be found in comparing Alan Amenta’s<br />
‘ExWrecks Uranus 10’ to Kent Peterson’s<br />
‘William Burroughs’ and ‘Jack Kerouac.’ Alan<br />
used many new parts and spent nearly $700. In<br />
contrast, Kent spent $50 on ‘William Burroughs’<br />
and $100 on ‘Jack Kerouac.’<br />
If you plan to use a factory seat, handlebars,<br />
and a bunch of new parts from Nashbar,<br />
you can easily spend over $1,000. At this point,<br />
ask yourself if it wouldn’t be a better choice to<br />
buy a new entry level factory built bike.<br />
■ SOURCES<br />
For up to date recumbent sources, be sure to<br />
check out our 2003 Season Preview issue (<strong>RCN</strong><br />
74).
<strong>RCN</strong><br />
A ‘Bent Bike of Wood<br />
by Charles Brown<br />
ince 1980 I have built 30 different<br />
recumbent bicycles, over half of them<br />
made of wood. Robert J. has invited me<br />
Sto describe wooden construction <strong>for</strong> the<br />
homebuilder.<br />
Wood is stronger <strong>for</strong> its weight than even<br />
the finest steels, but frames made from it tend<br />
to be more flexible. The low Young’s modulus<br />
must be kept in mind to design a successful<br />
frame.<br />
■ BEST WOOD<br />
The ideal wood will require a straight grain,<br />
no knots, and a low density. The lighter wood<br />
is less stiff, but you can make the frame members<br />
large with the same weight of material,<br />
and it is this larger size that gives low density<br />
woods a better stiffness to weight ratio.<br />
You can’t just slap wood together any<br />
which way. The strength and stiffness along<br />
the grain is around 10x what is across it, so<br />
the grain has to be pointed right. Wood swells<br />
and shrinks across the grain, too, so if you<br />
want your glued joints to hold together, think<br />
about which way the grain goes be<strong>for</strong>e making<br />
the joint.<br />
■ BEST GLUE<br />
The best glue to use is epoxy. The slow setting<br />
varieties give you more time to put it<br />
together and line it up right. They are stronger<br />
and waterproof—many are used in boat<br />
building. Joints must be clean, dry, and slightly<br />
roughened be<strong>for</strong>e gluing, and mix that epoxy<br />
well. Even so, I often run a couple of long thin<br />
screws into critical joints just to make sure.<br />
■ ATTACHING STEEL PARTS<br />
When attaching steel parts to a wooden frame,<br />
always remember to spread the load! Sometimes<br />
this just means backing up the head of a bolt<br />
with a fender washer. Dropouts are trickier.<br />
WOOD ‘BENT BUILDING TIPS<br />
✓ Dreaming of HPV’s every time you<br />
pass a lumberyard!<br />
✓ Live in mortal fear of termites!<br />
✓ Carry a hammer and nails in your<br />
repair kit!<br />
✓Watch the Flinstones movie <strong>for</strong><br />
construction tips!<br />
✓ Ask your frame painter if he/she can<br />
do spar varnish!<br />
I now taper the back ends of my wood<br />
chainstays to a point, then cover them with fiberglass<br />
and extend this out in a flange, 3/8” or<br />
1/2” thick, so I have fiberglass dropouts. Another<br />
way would be to slot the back ends of the<br />
chainstays, then insert and firmly attach 1/8”<br />
steel, letting it protrude out the back to <strong>for</strong>m<br />
the dropouts.<br />
■ BEST WOODY DESIGN<br />
In my own experience, wood works better <strong>for</strong><br />
a LWB or Compact (CLWB) bike. There is a<br />
major compressive <strong>for</strong>ce between the bottom<br />
(boom) bracket and the rear axle, and I usually<br />
design the frame as a single member going<br />
straight between the two or bending down<br />
slightly to best resist this <strong>for</strong>ce.<br />
My best frame of solid wood weighs 8<br />
pounds, very similar to an Easy Racer or Rans<br />
frame in my XL frame size. This frame is a<br />
little wiggly, though, slightly affecting the<br />
bike’s steering and hill climbing. It is better<br />
to enlarge the frame member somewhat and<br />
hollow out the inside. The wall thickness can<br />
be trimmed to about 1/8” of the outer diameter—making<br />
<strong>for</strong> a lighter, stiffer, stronger<br />
frame. In this way, I’ve gotten a frame <strong>for</strong> my<br />
big self down to 6 pounds. I recently built a<br />
test model of a truss structure which suggests<br />
this may be the way to achieve an even more<br />
efficient frame.<br />
In concluding this overview, I’d like to<br />
mention that wood is perhaps the nicest material<br />
to build with and to use—imagine a steel<br />
or aluminum Stradivarius violin! For more<br />
in<strong>for</strong>mation, pester the author, along with an<br />
SASE and description of just what it is you<br />
are trying to do. ❏<br />
Charles Brown<br />
1875 Sunset Point #206<br />
Clearwater, FL 33765<br />
September/October 1998 9
<strong>RCN</strong><br />
The Accidental Frame Builder<br />
by William Volk<br />
I<br />
n January, if you had told me that in a few<br />
months I’d be riding a homebuilt recumbent<br />
of my own design, I would have<br />
laughed. Homebuilding was <strong>for</strong> the sort of<br />
person who had a machine shop in this garage<br />
and years of welding experience, not <strong>for</strong> a<br />
weekend mechanic and sometimes fairing<br />
builder like me. Besides, I was set on buying<br />
something new and exotic, like a Greenspeed,<br />
Trice or even a European Low Racer. At least<br />
that’s what I had in mind <strong>for</strong> 1998.<br />
It wasn’t that I needed a new recumbent.<br />
I was already riding my second custom built<br />
USS SWB frame, wonderfully crafted <strong>for</strong> me<br />
by S&B. I had been using a tall Rans seat <strong>for</strong><br />
years, and had the bike “dialed in” with a huge<br />
tailbox, Zipper front fairing, and nice lighting<br />
system. I had ridden the previous frame over<br />
11,000 miles and was finishing a great 8500<br />
mile year.<br />
The bike was com<strong>for</strong>table, the bike was<br />
fast, and I could haul a week’s worth of produce<br />
in the trunk. However, I had the racing<br />
bug... and I had it bad. During the previous<br />
summer I had had the use of a Ross Festina<br />
Low Racer. This was a fast machine, and<br />
riding the S&B was like driving a Miata Sports<br />
Car after having had the loan of a Porsche<br />
Turbo <strong>for</strong> a few months.<br />
10<br />
bvolk@INETWORLD.NET<br />
THE CANDLESTICK HOLDER<br />
We received an iron candlestick holder <strong>for</strong><br />
Christmas last year. Sure enough on the flight<br />
back home, the airline managed to break it. I<br />
figured why not visit Home Depot and see<br />
what they had in the way of brazing torches.<br />
Now the sum total experience I had in brazing<br />
metal was the construction of a stainless<br />
steel water bottle holder in 1977. I was tired of<br />
the aluminum ones breaking and wanted something<br />
light that would last. In college I had a<br />
part time job in an electronics lab, and had<br />
access to lathes, milling machines, and oxy-<br />
Acetylene torches. With some help from the<br />
resident expert I managed to do a pretty fair job<br />
of silver brazing some stainless sheet and tubing<br />
into a neat water bottle cage that outlasted<br />
the now rusted out road bike it was attached to.<br />
ISN’T BRAZING FUN?<br />
I still had NO INTENTION of building a frame.<br />
But I purchased a nice Air-MAPP torch at Home<br />
Depot along with the required safety gear and<br />
brazing supplies. Spending $75 on tools to fix<br />
the $25 candlestick holder is something my wife<br />
has become familiar with.<br />
They say you never <strong>for</strong>get how to ride a<br />
bike, and I suppose you don’t <strong>for</strong>get how to<br />
braze. I had to braze a nut onto a tube. In a few<br />
Recumbent Cyclist News #<strong>47</strong><br />
seconds the deed was done. The Air-MAPP<br />
stuff works great, if you are patient enough to<br />
let the work get heated sufficiently.<br />
So now what was I going to do with all<br />
of the equipment I had? Near where I work<br />
is a metal supply house that sells scrap at<br />
amazing prices. I figured, what’s the harm in<br />
buying some 1/2” stainless tubing, the sort of<br />
thing I could use to build a rear rack or a fairing<br />
frame?<br />
Now the fun begins. Every weekend I<br />
would spend a few hours cutting, mitering,<br />
and brazing whatever I had scrounged from<br />
Industrial. I picked up some cheap steel tubing<br />
and practiced making miters. I’d even<br />
braze a joint and then see if I could break it.<br />
This was getting serious. I ordered the<br />
CroMo assortment from the Aircraft Spruce<br />
Catalog. This is a box of various tubes (round<br />
and square) and plate that sells <strong>for</strong> $25. I<br />
would braze some sort of joint and then take<br />
a chisel and hacksaw to it to see if the brass<br />
had migrated throughout the joint (An excellent<br />
reference is The Brazing Book. See<br />
www.handyharmancanada.com/TheBrazing<br />
Book/ bbook.htm).<br />
MR. BILL DESIGNS HIS DREAM BIKE<br />
So by now I had decided to go <strong>for</strong> it—to enter<br />
that exalted level of bike fanatic, the realm of<br />
those who build what they ride. Since I had a<br />
Mountain Bike that had maybe 50 miles on<br />
it, I figured I’d build a dual 26” wheel SWB<br />
bike. I snagged a new alloy 26" road <strong>for</strong>k <strong>for</strong><br />
$25 and started the drawing work via “Delta<br />
CAD” (a Windows shareware drawing program,<br />
see www.dcad.com <strong>for</strong> details).<br />
Quickly it became apparent that the absence<br />
of dual 26” wheel recumbents on our<br />
nation’s roads was not some sort of conspiracy.<br />
It’s nearly impossible to design one<br />
without lots-o-idlers, something I was trying<br />
to avoid. The first thing I did was to exchange<br />
the <strong>for</strong>k <strong>for</strong> a new sealed bottom bracket. One<br />
thing I have learned from designing software<br />
is never let some cool demo fool you. In the<br />
case of the bike, the neat-o alloy <strong>for</strong>k was an<br />
incentive to make a bad design decision, at<br />
least in my opinion.<br />
So now it’s time <strong>for</strong> “Bill’s Design Philosophy,”<br />
some of which applies to more than<br />
bikes. Most of this is based on 20 years in the<br />
video game business, some of this is based<br />
on my experience working on bikes, the rest<br />
is pure B.S.—but hey, it’s MY B.S. so enjoy.<br />
1. Simple is good. Really simple is really<br />
good.
2. A solution that’s hard to implement may<br />
sound impressive, but the bike doesn’t care<br />
how hard you worked on it.<br />
3. Paranoia in design is good. Overbuild it.<br />
If weight is an issue... it’s easier to lose some<br />
(unless you’re Zach Kaplan).<br />
4. Design <strong>for</strong> manufacture. Know the limits<br />
of your ability and your equipment and don’t<br />
try to exceed them too much.<br />
5. Amateurs copy, professionals steal with<br />
both hands.<br />
6. If no one does that, there may be a reason<br />
why.<br />
7. Constraints are good. Constraints are your<br />
friend.<br />
8. There’s no UNDO key with metal.<br />
9. Spend more time in design than in production.<br />
10. The full-scale drawing is not an option.<br />
11. Don’t count on miracles, rely on them!<br />
The bike I most wanted to build was the<br />
Challenge Hurricane. This is a dual 20”<br />
wheeled low racer. I’ve wanted a dual 20”<br />
recumbent since I first saw a ATP Vision R20<br />
(the bike that predates the R40). That’s where I<br />
started. Of course my bike, Heavy Metal (HM),<br />
looks nothing like it. The Challenge Hurricane’s<br />
seat is about 12” off the ground. HM’s is over<br />
20” off the ground. It’s not my fault, folks! The<br />
design constraints did it.<br />
In a way, the design constraints did the<br />
design <strong>for</strong> me. I knew what the seat-to-crank<br />
distance on my S&B was. I knew I wanted a<br />
“low racer” type profile, high cranks, and ASS.<br />
However, I didn’t want any idlers on the power<br />
side of the chain and I wanted a stiff frame.<br />
I’m not a bad mechanic, but the test brazes<br />
with the round steel tubing convinced me that<br />
I’d have a tough time aligning a round tubing<br />
frame. Besides, square tubing is stiffer (given<br />
the same dimensions) than round tubes of the<br />
same wall thickness (but it’s heavier).<br />
I spent months revising the drawings. I<br />
love design. It’s fun to visualize what the bike<br />
is going to look like and imagine riding it. I<br />
posted my drawings on the IHPVA web site<br />
(www.ihpva.org) and received so much valuable<br />
feedback. I also feel that the HPV CD-<br />
ROM (People Movers) is a great resource; there<br />
are some very interesting ‘bents “over there.”<br />
THE BUILDING BEGINS<br />
This is where I started getting serious. I<br />
ordered 6 feet of 2” x 2” square 4130 0.065<br />
wall tubing from Dillsburg Aircraft Supply (no<br />
one else had it in stock). Overkill? At over 2<br />
pounds per foot—you bet. I really wanted a<br />
stiff frame, and nothing succeeds like excess. I<br />
also purchased the bottom bracket shell and<br />
head tube from Gaerlan (www.gaerlan.com);<br />
they sell thick wall versions that don’t heat-distort.<br />
Gaerlen also supplied the various brazeons.<br />
Finally I managed to obtain chainstays<br />
from a “wish to remain unnamed” bike<br />
company.<br />
And you know what, after 6 weekends of<br />
cutting and brazing I had a bike, just in time <strong>for</strong><br />
the San Diego Streamliner Event on April 18th.<br />
The bike worked great. I managed a better time<br />
on this bike sans fairing than I had on the S&B<br />
with front and rear fairings. I still had tons of<br />
braze-ons to add, stuff like a front derailleur post<br />
and rear canti-brake studs, and a bike to be<br />
painted but I was racing on my own bike.<br />
THE BIG SURPRISE<br />
The San Diego Bike Club runs an open time<br />
trial series in the winter and spring. If you can<br />
pedal it, you can race it. It’s a good place to<br />
get yer butt kicked by some fast roadies. It’s a<br />
20km TT on a 3 lap course. Lots of wind, small<br />
climbs. In Feburary I braved rain and hail and<br />
managed to place 37th out of a field of 44 with<br />
a time of 40:05 (on the S&B). In March the<br />
conditions were better and I managed a 39:42<br />
on the same bike.<br />
On the day of the race I had yet to install<br />
any bike computer. I figured I would just put it<br />
in the highest gear I could turn over and try to<br />
finish the 20km “just on the dry side of puking.”<br />
So I had it in a 96” gear and just stayed<br />
there. The bike felt great. BUT having no cyclocomputer<br />
I had NO IDEA if I was a slug, or if I<br />
had gone faster than February. To make matters<br />
worse I couldn’t stay <strong>for</strong> the results, I had<br />
to get home to deal with some family stuff.<br />
Later that week I found out that I had managed<br />
to do 34:10 unfaired. I was quite surprised.<br />
Heck I was in a state of shock! That<br />
34:10 was a 14% improvement and I didn’t have<br />
fairings. This was good. This made all the work<br />
worth it. Later I would find that my theory that<br />
“stiffer is better” was right <strong>for</strong> me. HM gets<br />
me up the hills about 20% faster than the S&B.<br />
I love this bike and I loved building it. There’s<br />
nothing in bicycling that can match the experience<br />
of building your own ‘bent. ❏<br />
HEAVY METAL SPECS<br />
Wheelbase.............................................41”<br />
Bottom Bracket Height..................28.75”<br />
Seat Height........................................24.5”<br />
Headtube Angle....................................80º<br />
(that is why it can be ridden hands off)<br />
Seatback........................................................40º<br />
Weight..............................about 30 pounds<br />
September/October 1998 11
<strong>RCN</strong><br />
A ‘BENT FOLDER HOMEBREW<br />
Have you ever looked at a bike and wondered,<br />
“Hmmm... I think I can turn that<br />
into a recumbent...”? This is what my<br />
little folder is all about. “With a little<br />
cutting here, brazing there,” I’m there!<br />
It all started while walking around the<br />
Flea Market. I spotted a little folder bike that’s<br />
out of commission, but the frame, handlebars,<br />
and the front wheel looked good. I’ve always<br />
wanted to convert a regular bike into a recumbent<br />
anyway. The project looked too easy not<br />
to tackle. Plus the bike being a folder adds a<br />
twist and some excitement to it all. So I handed<br />
the gentleman the $20 bucks that he wanted<br />
<strong>for</strong> the bike and the trans<strong>for</strong>mation began.<br />
▲ GUIDELINES<br />
1. The project must be simple.<br />
2. The cost should be reasonable.<br />
3. The bike must per<strong>for</strong>m well as a commuter.<br />
4. The bike must remain a folder.<br />
▲ FRAME SURGERY<br />
Like Ed Gin says, “This is not rocket science!”<br />
This project is truly easy to do. The procedure<br />
is a simple one that mostly anyone should be<br />
able to follow. This is what I did to trans<strong>for</strong>m<br />
the frame:<br />
1. I cut the seat tube down to make room <strong>for</strong><br />
the recumbent seat.<br />
2. Then, brazed on:<br />
A) Boom/BB to the head tube, (adjustable).<br />
B) Add two seat mounts, (<strong>for</strong>e and aft).<br />
C) Add a brake bridge to the <strong>for</strong>k, (original<br />
bike had coaster brakes).<br />
▲ ASSEMBLY<br />
I put the bike together as normal. I used flex<br />
riser (chain tubes) as idlers, installed a Nexus<br />
7-speed internal hub with built-in brakes and<br />
attached a quick release Vision seat. For tires,<br />
I went with dual 406 Primo Comet 20” x<br />
1 3/8” tires.<br />
▲ BUCK$<br />
Thanks to Vision’s help, the cost was kept to a<br />
minimum. I told them about <strong>RCN</strong>’s Homebrew<br />
issue and they gave me the parts <strong>for</strong> the project<br />
at cost. (For a detailed breakdown see the cost<br />
analysis box.)<br />
▲ THE RESULT<br />
I ended up with a bike that’s truly fun to ride,<br />
commuter worthy, and a fun educational<br />
project that left me with knowledge. For<br />
around $320 bucks and less than 20 hours of<br />
work, I have a bike that rides like a new fac-<br />
12<br />
by Tony Licuanan<br />
TONYSCAT@webtv.net<br />
Tony’s dual 20” folder with Nexus 7 hub and Vision seat—<strong>RCN</strong><br />
It takes about a minute to break it down this far, and I had never done it be<strong>for</strong>e<br />
tory built. It has a quiet drivetrain, it’s good on<br />
trail and/or city streets and heck, it even did Kent<br />
Peterson’s hilly Issaquah ride just fine. I can<br />
say I’m satisfied. Now, all I need is a can of<br />
spray paint. ❏<br />
Recumbent Cyclist News #<strong>47</strong><br />
Tony Licuanan is an esteemed member of both<br />
the <strong>RCN</strong> Crew and the NW Low Down and<br />
Laid Back Recumbent Riders. He has way too<br />
many bikes, and has way too much fun. He<br />
runs a dental lab by night.<br />
FOLDER HOMEBREW COST ANALYSIS<br />
1. Complete Nexus 7 wheel w/ brake, shifter, and hardware.....................................$X<br />
2. Brake levers, grips, chains and a front tire............................................................$X<br />
3. Vision seat, (slightly irregular)..................................................................................$X<br />
TOTAL: .............................................................................................................$285.00<br />
*Don’t know itemized breakdown. This is what they charged me.<br />
4. Flex riser (chain) tubes (2x)...................................................................................$6.00<br />
5. Zip ties...............................................................................................................$6.00<br />
6. Folder bike........................................................................................................$20.00<br />
GRAND TOTAL: ...............................................................................................$317.00
<strong>RCN</strong><br />
SS20—The Folding, Dual Suspension,<br />
Compact LWB Recumbent<br />
by <strong>Steve</strong> Smith<br />
smith@ecentral.com<br />
Kathryn Smith on the SS20 with 26” rear wheel on Vail Pass trail in Colorado—Smith<br />
Iprefer long wheelbase bikes, but they are a<br />
bit of a bother to haul around, especially in<br />
cars and airplanes. So I set about building<br />
a folder <strong>for</strong> my most recent homebuilding<br />
project. The bike was built in my one-car<br />
(actually six-bike) garage with a Jet mill/drill,<br />
old Atlas bench lathe, and a portable Oxy-<br />
Acetylene outfit.<br />
The SS20 is a truly suitcase-able folding<br />
recumbent that does not sacrifice per<strong>for</strong>mance<br />
or com<strong>for</strong>t. It is the fastest of my current fleet<br />
of six recumbents. And while not the very best<br />
off road, it handles well on dirt and gravel<br />
surfaces with a silky smooth ride. Recently<br />
during bike-to-work week, I was the only one<br />
who actually pedaled up a steep rutted dirt<br />
shortcut to the plant. Every mountain bike<br />
rider I saw carried or walked his bike up.<br />
There are a couple of nice features on the<br />
SS20 that homebuilders can get away with,<br />
since we do not have the liability risk that<br />
goes along with selling products to the public.<br />
One feature is the hinged <strong>for</strong>k crown that<br />
allows micro dialing of the trail (castor) as well<br />
as full folding back of the front <strong>for</strong>k <strong>for</strong><br />
suitcasing.<br />
Another feature is the sliding rear brake<br />
boss mounts that accommodate use of any<br />
wheel size from 26” down to 20”. This makes<br />
a win-win situation: I have a 26” rear wheel<br />
with a 100 psi tire <strong>for</strong> everyday riding, and a<br />
20” rear wheel with 100 psi ACS tire <strong>for</strong> suitcase<br />
traveling. It takes about 10 minutes to<br />
adjust the brakes <strong>for</strong> the rear wheel size.<br />
The bike folds down using quick releases<br />
and a 5mm hex wrench in about 15 minutes.<br />
On a recent vacation trip to Florida 1 , the bike<br />
and all my personal effects went into two boxes,<br />
each 27” by 20” by 9” in size, and a daypack.<br />
The frame fits in one box and the seat and<br />
wheels in the other. Since I spent all my spare<br />
change on bike parts, I have not yet purchased<br />
actual suitcases. I use cardboard boxes lined<br />
with corrugated polyethylene and use my clothing<br />
compressed in zipper bags as stuffing/protection<br />
<strong>for</strong> the bike.<br />
▲ GOOD FEATURES OF THE SS20:<br />
Wheelbase: 59.5 inches<br />
Seat adjustment: 5 inches<br />
(29 Inch inseam +/- 2.5 inches)<br />
Rear Shock: Noleen coil/oil<br />
Front shock: Action Tech coil/oil<br />
Seat material: Polypropylene and GoreTex<br />
Paint: Mystic Purple powdercoat<br />
▲ NOT AS GOOD FEATURES OF THE SS20:<br />
Weight: Too heavy <strong>for</strong> a market competitive<br />
folder (light weight, though, is overrated).<br />
Seat height: 26” with 26” rear wheel.<br />
Number of braze joints: 63.<br />
▲ HOMEBUILDER TIPS<br />
1. Read: Rob Talbot’s book Designing and<br />
Building Your Own Frameset, Manet Guild,<br />
ISBN 0-9602418-1-7.<br />
2. Read: Bicycle Metallurgy <strong>for</strong> the Cyclist,<br />
by Douglas Hayduk, Johnson Publishing,<br />
ISBN0-9618977-0-8.<br />
3. Read: Bicycles and Tricycles by Archibald<br />
Sharp, first published in 1896, republished by<br />
David Gordon Wilson, MIT Press, ISBN 0-<br />
262-69066-7.<br />
4. Read: Bicycling Science by Witt and Wilson,<br />
MIT Press, ISBN 0-262-23068-2.<br />
5. Read: The Oxy-Acetylene Handbook,<br />
Union Carbide, Linde Division, ISBN 0-<br />
914096-109.<br />
6. Pay attention to the trail measurement<br />
of your design (trail is the distance from the<br />
theoretical point where the head tube<br />
centerline contacts the ground to the point<br />
where the tire contacts the ground directly<br />
below the axle). 1 to 1 1/2 inches of trail are<br />
in the ballpark. The use of stock <strong>for</strong>ks with<br />
non-stock head angles will result in poor handling<br />
(most likely over-steer). Try to make<br />
trail adjustable if possible —I once made front<br />
dropouts with several axle slots. One quarter<br />
inch of trail change can make the difference<br />
between a good handling bike and a sweet<br />
handling bike. LWB, SWB, steep or low head<br />
angle, the best handling bike will be the one<br />
with dialed in trail.<br />
7. I use 1/16th-inch diameter Silver braze<br />
filler (50% Silver) <strong>for</strong> all joints, which are all<br />
lugless. It is expensive at about US$30 <strong>for</strong><br />
one bike’s worth, but wonderful to work with<br />
and melts at about 1400ºF. This means that<br />
the bike tubing does not have to be heated to<br />
cherry red - better <strong>for</strong> avoiding hydrogen<br />
embrittlement that is prone in chrome moly<br />
tubing. When using Silver braze filler, make<br />
sure your joints fit tightly with no more than<br />
.015 inch air gap.<br />
8. Polypropylene trampoline cloth is great<br />
seat material. It is super strong, durable,<br />
wicks, and breathes, but a bit hard to work<br />
with. I lace my Polypropylene seats tight as a<br />
drum <strong>for</strong> maximum pedaling efficiency. Buy<br />
it from your local trampoline dealer.<br />
9. Use roller skate wheels <strong>for</strong> idler pulleys.<br />
They are totally quiet and energy efficient. I<br />
chuck them in my drill press and use a rat tail<br />
file to auger in a chain groove.<br />
10. High quality hole saws, such as Lenox<br />
and Starrett, work just fine <strong>for</strong> mitering tubes.<br />
September/October 1998 13
SS20 with 20” rear wheel —Smith<br />
Clamp the tubes in a vise in a drill press.<br />
11. Don’t worry about not making the perfect bike the first time.<br />
The SS20 completely changed steering, seat, and rear swing arm be<strong>for</strong>e<br />
it was rideable.<br />
12. The more you pay <strong>for</strong> components, the more<br />
delicate they often are.<br />
▲ GOOD SOURCES OF SUPPLY<br />
1. Gaerlan Custom Cycles.<br />
2. Aircraft Spruce and Specialty (wide range of<br />
4130 tubing in small quantities, lots of fastener<br />
gadgets).<br />
3. Recumbent dealers advertising in <strong>RCN</strong>.<br />
▲ PERSONAL RANTS<br />
While I can only speak <strong>for</strong> my own designs, I<br />
have some safety concerns about USS. I have two<br />
USS bikes and four ASS bikes. USS is super<br />
com<strong>for</strong>table while touring, but in an emergency<br />
situation there is little to brace yourself with.<br />
Picture this scenario: a cat runs in front of you<br />
and you brake hard. Your feet naturally go to the<br />
ground to protect a fall. Once a shoe makes contact<br />
with the road, it digs in, and momentum<br />
causes your body to pivot <strong>for</strong>ward. Since your<br />
hands are at the center of your <strong>for</strong>ward rotation,<br />
they are useless to control your body movement<br />
and you do a face plant on the frame of the bike.<br />
I’ve done this twice. It hurts.<br />
▲ ‘BENT OFF-ROAD RANT<br />
There has been some good discussion in recent<br />
<strong>RCN</strong> issues regarding off-road riding. One side<br />
says big air and single track are a great new re-<br />
SS20 in boxes at airline counter—Smith<br />
SS20 shown folded in open box, note yard stick—Smith<br />
cumbent sport, and another side says stick to asphalt <strong>for</strong> safety reasons.<br />
I see the middle ground. Single track jumping on a recumbent, if even<br />
possible, seems like asking <strong>for</strong> a broken back, but so does riding with<br />
road raged 4,000 pound automobiles bearing<br />
down on you. Dirt and gravel roads and paths<br />
are absolutely within the realm of suspended<br />
recumbents and these byways are missing cars<br />
and the odor of asphalt and exhaust fumes. See<br />
where you and your bike can reasonably go<br />
and have some fun.<br />
Take the handling/climbing/racing advantage<br />
claims towards any generic recumbent type<br />
with a grain of salt. I was amazed a while ago<br />
when a co-worker invited me to test ride his<br />
expensive drop-handlebar wedgie touring bike<br />
and I almost dumped it within 20 feet. After<br />
15 years of recumbent-only riding, I had literally<br />
lost my ability to ride a bike that once was<br />
second nature. It felt horribly wobbly, and truly<br />
over-weighted on the front wheel. If this bike<br />
design were new, rather than 100 years old,<br />
we would call it unrideable. The human body<br />
is incredibly adaptable. Pick the recumbent design<br />
that appeals to you, learn to ride it well<br />
and go <strong>for</strong> it. ❏<br />
1 Our friends at United Airlines attempted to charge<br />
the extra fee <strong>for</strong> bicycles, even though the boxes are<br />
well within luggage size and weight limits - they relented<br />
as the ticket line behind me grew longer and<br />
the contents were re-declared as metal tubing rather<br />
than a bicycle.<br />
14<br />
Recumbent Cyclist News #<strong>47</strong>
<strong>RCN</strong><br />
Revenge of the FlatBlacks<br />
by Mark Colliton<br />
Mark Colliton’s 20/16 FB1 with Rans seat and Sturmey 5-spd. hub—MC<br />
ALong, Long Time Ago, In a Galaxy Far,<br />
Far Away.... (oops, wrong story)... Long<br />
be<strong>for</strong>e the V-Rex, Mark Colliton was on<br />
a warp-speed evolution of recumbent<br />
knowledge. Mark started tinkering with BMX<br />
frames back in 1990 as he built several rideable<br />
SWB BMX conversions be<strong>for</strong>e graduating<br />
to a Rans Stratus, then onto a Lightning<br />
P-38, then used his knowledge gained as the<br />
co-designer of the original Rans V-Rex. This<br />
article was originally printed back 1991.<br />
After pricing a few SWB recumbents, I<br />
knew that if I was ever going to own one, I<br />
would have to build it myself (famous last<br />
words). Although I had no background in<br />
frame building, I decided to go ahead and give<br />
it a try anyway. Fortunately, I’ve had some<br />
good luck and what I think are some good successes.<br />
I’ve named the bikes “FlatBlacks” <strong>for</strong><br />
their easy primer black finish. One nice thing<br />
about designing and building your own bikes<br />
is that you can call them whatever you like.<br />
There are four bikes in the FlatBlack series.<br />
FB-1 was built and later made the trip to<br />
the HPV Speed Championships where it<br />
turned more than a few heads. When I was<br />
checking into the hotel be<strong>for</strong>e the races I had<br />
the good <strong>for</strong>tune to meet Easy Racers’<br />
Gardner Martin. He gave the bike a nod of<br />
approval after a quick inspection. Needless to<br />
say, I came home with recumbent-building<br />
fever. As with most homebuilders, the FB-1<br />
was disassembled <strong>for</strong> parts when the new FB-<br />
2 frame was complete.<br />
Both the FB-1 and FB-2 were built using<br />
a standard BMX 20” frame with a boom tube<br />
and bottom bracket added to the front of the<br />
head tube. I took a rough guess at what the<br />
boom length should be—knowing that I needed<br />
6” of seat adjustment. Using your X-seam measurement<br />
is a good place to start when laying<br />
out your BMX boom length. For my 6’1” body,<br />
an 18” boom seemed just about perfect. The<br />
FB-1 had no heel interference with the 16” front<br />
wheel, though the inverted FB-2 does.<br />
The difference between FB-1 and FB- 2 is<br />
the frame geometry. With FB-2, I inverted the<br />
BMX frame and turned the <strong>for</strong>k upside down<br />
in the frame angle. This gave the bike a more<br />
relaxed head angle. I did not have any problems<br />
with the taller FB-1, but a shorter rider<br />
found the seat height a bit awkward when starting<br />
and stopping.<br />
One other change that was made to the FB-<br />
2 was to make it easier to build. Instead of cutting<br />
the seat tube and bottom bracket out of an<br />
old wedgie frame, I used a 1.5” muffler tube<br />
and a sleeved bottom bracket. This required just<br />
one weld and gives you the ability to adjust both<br />
seat and bottom bracket <strong>for</strong> a perfect fit. On the<br />
FB-1, I found that the seat tube from the old<br />
frame set wasn’t strong enough on its own and<br />
needed additional bracing. Even so, three welds<br />
is not a lot of welding.<br />
Both bikes use a custom built 20” rear with<br />
a Sturmey Archer 5-speed internal hub with a<br />
16” front wheel. This was necessary because<br />
the dropout spacing was not wide enough <strong>for</strong><br />
a freewheel. My friends at the bike shop said<br />
it could be spread to accomodate conventional<br />
gearing, but I didn’t want to take the<br />
chance of screwing up the frame.<br />
For steering I used the original stem and<br />
handlebars that came with the BMX<br />
frameset. I simply turned the stem backwards,<br />
cut out the cross-brace tube and<br />
pushed the bars down under the seat. I later<br />
added bar-end extensions which greatly improved<br />
steering control and you can move<br />
the bars a bit further back and truly under<br />
the seat. You may need an odd size (rare)<br />
stem, though I did find one at my local shop.<br />
The one thing that I would recommend<br />
spending your money on is a commercially<br />
built recumbent seat. I used an old Rans<br />
“bucket” fiberglass shell that was the stock<br />
seat on the Nimbus and Stratus of the time.<br />
The aluminum channel mounts to the top<br />
tube making seat mounting a breeze. Modern<br />
Rans seats are a bit pricey, though there<br />
are still Rans buckets and other inexpensive<br />
seats to be found.<br />
I used a Rans chain idler as well. It was<br />
easy to modify. I’ve used it in many different<br />
configurations and it is versatile. The<br />
exact positioning is a bit tricky. It must<br />
carry the return chain over the front <strong>for</strong>k<br />
and still not interfere with the drive-chain.<br />
I positioned it by hand after the chain was<br />
installed, marked the stop and bolted it to<br />
the frame later. You become very proficient<br />
at chain removal throughout this little exercise.<br />
Chain tubes or a BB-mounted mid-drive<br />
are also possibilities.<br />
All in all, I spent about $350 on the FB-<br />
1. Most of that went <strong>for</strong> the seat, wheels, tires<br />
and front <strong>for</strong>k. The frame boom was TIG<br />
welded in a welding class that I had taken.<br />
The FB-2 frame cost $30, plus $20 <strong>for</strong> the<br />
MIG welding at a local muffler shop.<br />
FB-3 started life as a 24” wheeled Mongoose<br />
mountain bike frame that I retrieved<br />
from the trash (‘bent dumpster dived). As a<br />
recumbent, the wheel set up was a 24” rear<br />
and 20” front. The boom was, again, welded<br />
on the frame at the local muffler shop. I finished<br />
it out as an 18 speed with MTB style<br />
gearing. FB-4 started out as a Hutch dual 20”<br />
wheeled SuperBike and has the perfect geometry<br />
<strong>for</strong> this type of conversion. If you<br />
have a chance to get your hands on one of<br />
these, grab it. BMX conversions are easy,<br />
fun and offer a great SWB education. ❏<br />
September/October 1998 15
<strong>RCN</strong><br />
A Budget Basic Bolt-on BMX Build<br />
Ever since I started researching<br />
recumbents on the internet, I have been<br />
fascinated by how many people have<br />
built their own, the innovative materials<br />
used, and the ingenuity of the builders. The<br />
bikes created match the building requirements<br />
and skills of the builders. I have seen bikes<br />
made of wood, bikes made without welding,<br />
and bikes where just about every part of the<br />
frame was machined by the builder.<br />
My first recumbent was a mail order<br />
BikeE, the only recumbent I could find at the<br />
time which looked like it could fit my 5’ tall,<br />
105 pound, 26” inseam, 36” x-seam self. I<br />
was right. None of the other bikes I have tried<br />
since have fit (Vision, Rans, Quetzal...) Riding<br />
the BikeE around <strong>for</strong> a year taught me that I<br />
preferred a more closed pedaling position than<br />
BikeE offered, and that I wanted a smaller,<br />
more compact bike as well. The Vision and<br />
Rans SWB that I tried didn’t fit, but allowed<br />
me to see that I would probably like a SWB<br />
bike, but I wasn't sure. What if I made a mistake<br />
and didn't like it? Budget considerations<br />
also wouldn't allow me to do the serial/multiple<br />
recumbent ownership thing—I just can't<br />
af<strong>for</strong>d it. I also couldn't envisage making my<br />
own until I came across Kent Peterson's noweld<br />
homebuilt SWB at www.halcyon.com/<br />
peterson/bentkent.html. After seeing that a<br />
bike could be knocked together using the<br />
skills that I had (saw, file, drill), I decided to<br />
give the project a go.<br />
I started gathering supplies: a friend of<br />
my brother's donated a Kuwahara BMX<br />
frame, I found a junked bike in the trash to<br />
cut up, I had an old backpack frame, some<br />
wood, and assorted bike parts from past bikes.<br />
I did have to buy some parts, like wheels and<br />
<strong>for</strong>ks and tires and chains. I think that I managed<br />
to keep my costs to below $300 Can<br />
(about $200 US).<br />
After doing research on the internet and<br />
picking the brains of several people on the<br />
HPV list (thanks, guys), I had a design drawn<br />
up <strong>for</strong> a high BB, ASS bike. What made this<br />
BMX conversion so simple was the frame<br />
itself, which has a gusset between the top and<br />
down tubes, with holes cut out of it <strong>for</strong> lightness<br />
(which is a joke, as the frame weighs<br />
around 7 pounds. All I had to do was to bolt a<br />
boom to this gusset and I had myself a SWB<br />
frame.<br />
I took a tip from Mark Colliton’s <strong>RCN</strong><br />
BMX conversions Flat Black article (reprinted<br />
this issue) and flipped the frame upside down.<br />
This laid back the head angle to a relaxed 70<br />
16<br />
by Ming Dinh<br />
emari@intouch.bc.ca<br />
degrees and lowered the seat height somewhat.<br />
I used a 16” wheel in front, fitted with a 16” x<br />
1-3/8” Primo. The <strong>for</strong>k offset was around<br />
25mm, giving me a trail of 65mm. The handling<br />
of this combination is very stable and predictable<br />
and I'm very happy with how it rides.<br />
The boom of the bike is made from a road<br />
<strong>for</strong>k that has had the tips cut off (they make great<br />
bottle openers) and the blades drilled to accept<br />
two 4” x 3/16” bolts. I cut a couple of wooden<br />
boards to fit exactly in the space between the<br />
head and down tubes on either side of the gusset<br />
and screwed them together through some<br />
holes in the gusset. That held them in place.<br />
Next, I drilled a hole <strong>for</strong> the <strong>for</strong>ward-most bolt.<br />
I squeezed the <strong>for</strong>k blades until they were parallel<br />
and bolted them to the frame. I could then<br />
swing the boom up and eyeball where I wanted<br />
to position the BB <strong>for</strong> heel clearance. I decided<br />
on a 24” BB height. I then marked off where to<br />
position the second hole on my wood block/<br />
gusset and finished drilling and bolting the<br />
boom on. The nice thing about this setup is<br />
that it allows me to play around with BB height.<br />
For instance, I think I may want to experiment<br />
with a higher BB height. Flipping the cut-off<br />
<strong>for</strong>k around will give me a 25” BB height, due<br />
to the orientation of the <strong>for</strong>k offset. If I want an<br />
even higher BB height, I will just cut off some<br />
more wood blocks and drill new holes <strong>for</strong> the<br />
new boom position. The BB was made from<br />
cutting up the junked bike frame. I believe that<br />
this is where being short came in handy <strong>for</strong> me.<br />
I have read other people’s accounts of how they<br />
made their boom from a BB attached to a length<br />
Recumbent Cyclist News #<strong>47</strong><br />
Ming Dinh and the BMX “Shopper”—Ming Dinh<br />
of seat tube and had it bend. Because I'm<br />
short, I was able to keep the boom length<br />
short (around 12”) and boom flex (or bending)<br />
hasn't been a problem <strong>for</strong> me. That may<br />
also be due to knee problems <strong>for</strong>cing me to<br />
remain very low powered in my pedaling.<br />
The seat tube portion slips nicely over the<br />
<strong>for</strong>k steerer tube (boom) to allow seat to<br />
pedal adjustment. I used a seat clamp to hold<br />
it on. It twisted when I put pressure on the<br />
pedal, so I cut a shim from a plastic soda<br />
bottle that solved the problem.<br />
The seat was made from an old backpack<br />
frame and plywood. The seat bottom<br />
was made from a triangular piece of plywood<br />
that I have trimmed repeatedly until there is<br />
as little wood left as possible to still give me<br />
a com<strong>for</strong>table seat. This allowed me to get<br />
a good shape to be able to easily put a foot<br />
down flat at a stop. The mesh fabric that I<br />
used <strong>for</strong> the seat back was window screening.<br />
This is temporary as it really isn't strong<br />
enough <strong>for</strong> the purpose, even when doubled.<br />
I added a wooden seat horn to the plywood<br />
to prevent sliding <strong>for</strong>ward during pedaling.<br />
Cushioning and ersatz suspension is provided<br />
by a Thermarest Sportseat and a couple<br />
of layers of 5mm closed-cell foam. I have<br />
this cushion positioned in such a way that it<br />
supports my lower back too, so when I am<br />
riding over rough spots, I just lean <strong>for</strong>ward<br />
and let the bike rock and roll under me while<br />
I sit totally suspended on a cushion of air. I<br />
suspect this also works well due to my small<br />
size.
Ming Dinh’s BMX “shopper.” Note the bolt-on boom utilizing a road <strong>for</strong>k,<br />
frame tube and a clamp bolted to a wood wedge in the frame—Ming Dinh<br />
Note the idler-less drivetrain using chain tubes—Ming Dinh<br />
The stem riser was made from the remainder of the seat tube and a<br />
seatpost to provide the shim <strong>for</strong> an ordinary stem and MTB straight bars.<br />
The chain line is very straight<strong>for</strong>ward with 2 poly garden irrigation tubes<br />
serving as chain guard and guide (the bottom tube).<br />
The project took a couple of weeks to complete and was a nice<br />
winter project that I was able to put together entirely in my living room.<br />
This bike serves its purpose very well as my commuting and everything<br />
else bike. It handles well and is stable at all the speeds I ride at,<br />
both loaded and unloaded. I use it every day and have also taken it<br />
touring. It packs well <strong>for</strong> travel in the bottom of a bus, and is easy to<br />
maneuver inside houses and elevators. The bike currently weighs in at<br />
35.5 pounds, I will eventually trim a few pounds off that with a lighter<br />
frame. The BB is at 24” and the seat at 22”, weight distribution is 45%<br />
front, 55% rear. It has rack and fenders and part-time doggie assist.<br />
I use Power Grips pedal straps on the bike. They work great, and<br />
are a less theft appealing alternative to clipless pedals and allow me to<br />
walk better when off the bike than my bike shoes do—important <strong>for</strong> my<br />
knee com<strong>for</strong>t. I have recently bought a Bicycle-R-Evolution two wheeled<br />
trailer to use with it and it is the perfect transportation combination <strong>for</strong><br />
me: a bike that's more com<strong>for</strong>table than a car (cars are stuffy) and has a<br />
trunk!! What more can I ask <strong>for</strong>? Well, a fairing that's in the works,<br />
better knees, which is an ongoing project... and oh yeah, a folding<br />
recumbent, which is a story <strong>for</strong> another time. ❏<br />
September/October 1998 17
<strong>RCN</strong><br />
DEVELOPMENTAL RECUMBENT ENGINEERING<br />
(or, go out in the garage and start cutting up old bikes)<br />
The Evolution of the Bangletech Ex-Wrecks Uranus 10<br />
fter 30 years of riding a wedgie, the<br />
pain in my neck was <strong>for</strong>cing me off<br />
my bike. When I was on the verge of<br />
cancelling a long-anticipated century Aride, a friend suggested, “Why not try a<br />
recumbent?” I rented a Rans Rocket <strong>for</strong> two<br />
weeks, did the century, and became an instant<br />
‘bent-head. NO PAIN!<br />
I could af<strong>for</strong>d to buy a bike, but which<br />
one? I decided to play around with some old<br />
bikes just to see what riding configuration I<br />
would like and then, I thought, I’ll buy a bike<br />
of similar design.<br />
My wife had a Peugeot mixte frame from<br />
the early ’70s (which seem to be highly sought<br />
after by bent homebuilders). If you squint real<br />
hard and turn it upside down, it looked like a<br />
V-Rex. Well, at least a starting point. First, I<br />
cut down the seat tube and cut the seat stays<br />
at the brake bridge. I then attached the bottom<br />
bracket and chain stays from a junk frame<br />
to the head tube with a muffler clamp plus<br />
two bolts through the rear drop out, one above<br />
the mixte seat tubes and one below. Voila!—<br />
an adjustable bottom bracket! A standard bike<br />
seat is mounted with a broken skateboard deck<br />
as a backrest which is padded with a half of a<br />
boating life preserver. The adjustable riser is<br />
the handle from a pull golf cart. An added<br />
bonus of this project is that I’ve cleaned out<br />
my garage. I tried installing the front <strong>for</strong>k<br />
backwards and <strong>for</strong>wards—like the Street<br />
Glider. Hands-off stability was better backwards,<br />
so it stayed that way.<br />
During the next couple of months, I upgraded<br />
everything. By now I was so happy<br />
with this bike, I was stripping parts off of my<br />
beloved road bike: the rear wheel, derailleurs,<br />
and crank. I bought a skinny front wheel. The<br />
seat base is a Kmart mattress bike saddle (a<br />
seat from a recumbent stationary exerciser<br />
would probably work better). The seat back<br />
and struts are hardware store aluminum tubing<br />
joined with electrical conduit connectors.<br />
The mesh came from a company that rebuilds<br />
pool furniture. The new riser is 1” aluminum,<br />
which accepts a standard stem with BMX<br />
hi-rise handlebars. I put a few hundred miles<br />
on this bike and decided it was time to “weld<br />
it up.”<br />
■ IF IT LOOKS STRAIGHT—IT IS<br />
STRAIGHT ENOUGH<br />
A local frame builder ok’ed the strength of<br />
my design and sold me some tubing and a bot-<br />
18<br />
by Alan Amenta<br />
AlanAmenta@aol.com<br />
The almost final Bangletech Ex-Wrecks Uranus 10—Alan Amenta<br />
tom bracket shell. I had never brazed anything,<br />
but on one of my trips to the hardware store, I<br />
spotted a Bernz-O-Matic oxy-propane brazing<br />
Ex-Wrecks Uranus10 Specs<br />
WHEELBASE....................................36.5"<br />
REAR WHEEL.............................26" X 1.5"<br />
FRONT WHEEL.......................20" X 1-3/8"<br />
FORK: ...............................BMX elastomer<br />
2" travel, <strong>for</strong>k reversed to provide 3.5" trail<br />
SEAT HEIGHT......................................24"<br />
Rans sliding mount with adjustable recline<br />
BB HEIGHT...........................................28"<br />
WEIGHT.....................................32 pounds<br />
WEIGHT DIST..............52.5% (R)/43.5% (F)<br />
GEAR INCHES................................22-118<br />
COST.................................................$676<br />
Parts were new unless otherwise listed:<br />
Used rear wheel $50; cassette $30; front<br />
wheel $90; chain $24; derailleurs $135;<br />
used brake levers $2; Twist shifters $22;<br />
crank $30; <strong>for</strong>k $20; seat $200; frame parts<br />
$34; Misc. $39. I recently picked up another<br />
mixte frame <strong>for</strong> $7.50 at a junk shop.<br />
Recumbent Cyclist News #<strong>47</strong><br />
torch. I bought it, followed the directions on<br />
the box and made a right angle joint with some<br />
scrap tubing—a piece of cake! Brazing is<br />
easier than soldering because the flux doesn’t<br />
run. Just carefully paint the flux exactly where<br />
you want the brass. It won’t run out of the<br />
joint and all over the piece. I used no jigs,<br />
figuring “if it looks straight, it is straight.” If<br />
you’d rather skip the brazing, the frame<br />
builder would have charged me $40 to braze<br />
the mitered parts.<br />
■ FINAL FORM—Yeah Right!<br />
The photo shows the current, though probably<br />
not the final Bangletech Ex-Wrecks Uranus<br />
10. A few years ago suspended <strong>for</strong>ks were offered<br />
on BMX bikes but they didn’t work very<br />
well. I located one of these <strong>for</strong> twenty bucks.<br />
I bought a Rans seat and opted to eliminate<br />
the adjustable stays and support the seat with<br />
the rack. I extended the <strong>for</strong>k steer tube 2”<br />
above the head tube by cutting it in half,<br />
inserting a piece of tubing and brazing. A<br />
1-1/8” OD piece of CroMo slips over the steer<br />
tube, receives the 1” aluminum riser, and is<br />
clamped with a BMX seat post clamp. An alu-
minum MTB stem slips into the riser and supports<br />
the aluminum handlebars.<br />
I’m pretty pleased with the per<strong>for</strong>mance<br />
of the bike. The high bottom bracket and reversed<br />
<strong>for</strong>k results in no heel interference. The<br />
bike can be pedaled at a crawl of about 2 mph,<br />
ridden “no hands” above 8 mph coasting, and a<br />
figure-8 can be ridden inside a 21’ square.<br />
■ BUILD TIME<br />
How many hours did I spend? Countless—this<br />
was the most fun I’ve had in years. So, get out<br />
in the garage and start cutting up old bike<br />
frames! You’ve nothing to loose but your trash.<br />
■ COMPONENTS: Shimano BioPace (stateof-the-art)<br />
26/36/50, Shimano 11-30 cassette,<br />
Sachs chain, skateboard wheel idlers (premium<br />
bearings), Campy derailleurs (road triple), Grip<br />
Shift shifters, Side pull road brakes with Kool<br />
Stop Pads.<br />
■ SOURCES OF SUPPLY<br />
✓ People Movers was very friendly and supplied<br />
a used V-Rex front wheel and <strong>for</strong>k.<br />
✓ Local bike shops supplied used: suspension<br />
<strong>for</strong>k, crankset, rear wheel.<br />
✓ Bike flea markets supplied: stem, bars,<br />
shifters, brake levers, rack, pedals.<br />
✓ The Campy derailleurs were new from<br />
Nashbar, and the saddle bags are a $10 dandy<br />
from Kmart.<br />
✓ The seat mesh came from my local lawn chair/<br />
patio store. Bob Bryant says Prairie HPV sells<br />
seat mesh. ❏<br />
Alan Amenta has lived in southeast PA all of<br />
his 55 years. His primary career has been as a<br />
programmer and IT consultant and he currently<br />
is licensing his patented Y2k solution to end user<br />
corporations and software developers<br />
(www.TOCS.com). Secondarily he designedbuilt-sold<br />
three passive solar homes and owned<br />
a kite store. The favorite family gathering place<br />
is their log cabin on a mountain top in WV. He<br />
first rode a two wheeler at age three, took his<br />
first 50 mile ride at age 12, and did his first<br />
century at age 54. Member of Bicycle Club of<br />
Philadelphia.<br />
NW Rider Lee Brown’s mixte-based SWB—Lee Brown<br />
September/October 1998 19
<strong>RCN</strong><br />
Tales From the Recycle Bin<br />
3 Homebuilt Recumbents<br />
20<br />
Paul Carter and his LWB homebuilt—<strong>RCN</strong> archive<br />
The Easy Ryan-Tator Racer<br />
by Paul Carter<br />
A few years back, a friend of mine showed<br />
me a picture of a Ryan recumbent. I fell in<br />
love with it and decided to build my own. I<br />
started with a Schwinn Varsity and ended up<br />
using the head tube and making the rest out<br />
of 1” box .049 steel. To say the least, it was<br />
very heavy, but also sturdy in the Varsity tradition.<br />
It rode nicely. My next three versions<br />
all suffered from steering geometry problems.<br />
I had to learn about head tube angle, rake<br />
and trail the hard way. I had to learn how to<br />
align the major components of the bike to<br />
make it track straight. Fortunately <strong>for</strong> me,<br />
there are a lot of builders around here who<br />
shared their time and expertise. USS or linkage<br />
steered recumbents can use a more upright<br />
head tube angle of 69 or 70 degrees. For<br />
direct ASS, lay your head angle farther back<br />
to 59 or 60.<br />
My lastest homebuilt LWB has proven<br />
to be a very fast machine, taking second at an<br />
Oregon Human Power Muster and first at<br />
DaVinci days in LWB. It is a mono-tube LWB<br />
with dual 27” wheels (700c’s, 26’s, or even<br />
20’s would work fine) with a tiller steering. I<br />
am working on a design to change to a midhead<br />
tube and remote steering via connecting<br />
rod because there are very few people who can<br />
handle the tiller—though it is a cheap way to<br />
get your bike on the road.<br />
The mainframe can be round or square tubing<br />
to suit your needs. The diameter depends<br />
on your body weight and how much flex you<br />
want in the frame. I usually make my main<br />
tubes 48” long, though every one will vary. My<br />
head tube and rear triangle came from old ten<br />
speeds. I actually cut off the rear triangle of a<br />
‘donor’ upright and welded the chain stays to<br />
the mainframe monobeam of the new bike. It<br />
was necessary to vertically ovalize the mainframe<br />
to fit the chain stays. The mainframe is a<br />
1.5” .049 MufflerMoly (muffler tubing). The<br />
LWB frames are easier to build than a SWB<br />
because they do not require a hole in the<br />
mainfame <strong>for</strong> the SWB head tube. The frame<br />
cost me about $10 and 10 hours of labor. Since<br />
building this bike, I have made a jig that is<br />
totally adjustable <strong>for</strong> just about any bicycle.<br />
My first seats were plywood and foam.<br />
They were com<strong>for</strong>table and durable, though be<br />
sure to cover them or the foam will soak water.<br />
I later made a sling/mesh seat from 1/2” .049<br />
conduit. I bent the frame with a conduit bender<br />
and welded it, though this is not recommended<br />
Recumbent Cyclist News #<strong>47</strong><br />
A MIXTE SWB<br />
by “downtown” Lee Brown<br />
This is my 7th homebuilt recumbent. The day<br />
Kent Peterson came on the Low Down and<br />
Laid Back Recumbent Ride I was intrigued.<br />
His frame was a unisex “mixte” made over<br />
into a SWB ASS. It looked too easy to build<br />
and so cool that I made up my mind to have<br />
one.<br />
I was in luck as a friend of mine had a<br />
CroMo mixte frame that he gave me. I was<br />
off to a great start. With a little hack sawing<br />
here and there—a boom out in front—some<br />
idlers and brake mounts and presto—it starts<br />
to look like a SWB.<br />
The rear wheel is a 24” with a Sachs 3x7<br />
hub and a V-brake <strong>for</strong> stopping power. The<br />
rear fender is a 26” trans<strong>for</strong>med with a heat<br />
gun. The idlers are old shoe skate wheels.<br />
The seat back is from a backpack frame. This<br />
is one of the secrets to the design and they<br />
are easily found at garage sales. The seat supports<br />
are recycled crutch parts. The seat base<br />
is a plastic tractor style off of a rowing machine<br />
exerciser.<br />
I first made the steering riser rise straight<br />
up, but had to slant it back (a la Flip It) to<br />
bring it closer to my body and farther away<br />
from my knees. The front wheel is a 16” x 1-<br />
3/8” with a Primo tire. The internal shift is<br />
down with a Sachs twist shifter. The rear derailleur<br />
is also shifted with a Sachs twist shift.<br />
The front derailleur is a Shimano LX and is<br />
shifted with a Rapid Fire lever. It all works<br />
together well. The crank is a 34/48 110mm<br />
MTB style crank with a sealed BB. The bike<br />
is painted with metallic green Hammerite<br />
spray paint which seems to hold up well.<br />
NOTE: Lee Brown is an active Northwest<br />
homebuilder who has organized local ‘bent<br />
displays at the State Fairgrounds and the<br />
local mall. Lee is a long time member of the<br />
NW Low Down and Laid Back Recumbent<br />
Riders. Lee rides regularly with the group,<br />
though on the longer rides he uses his power<br />
assist recumbent that he built himself using<br />
a Ryobi 4-stroke trimmer motor. ❏<br />
due to the fumes that the galvanized conduit<br />
puts out. The seat base is 9” long, then a<br />
nice easy bend, with a 15-18” seat back<br />
height. The webbing and nylon straps came<br />
from the local fabric store.<br />
This is a very simple, easy to build LWB<br />
recumbent project—a recumbent bike that<br />
can be built in a weekend. ❏
<strong>RCN</strong><br />
I<br />
n the fall of 1996 I got my nose pressed to<br />
the window of Wheel & Sprocket checking<br />
out their ‘bent display when I spotted a ‘96<br />
Stratus with red to black fade paint job. I wiped<br />
the drool off the glass and went in <strong>for</strong> a closer<br />
look. I met Harry Wozniak and he explained<br />
to me that this is one of two Stratus’ built with<br />
a 24” rear wheel. I took it out <strong>for</strong> a spin and<br />
found it much to my liking. The next day, I<br />
returned to the shop with my wife Pam “Car<br />
Back” Ariens. One ride with Pam and you’ll<br />
understand the nickname. She hollers “CAR<br />
BACK” so loud that even the drivers of the<br />
cars check their rearview mirrors. If she likes<br />
the Stratus as much as I do, it will be ours.<br />
Pam really likes the low, feet on the ground,<br />
position and we now own the Stratus.<br />
During one of our many trips to Wheel &<br />
Sprocket, Harry, knowing that we are avid<br />
tandemists, waves a Rans Screamer under our<br />
noses, recites his secret mantra and abra<br />
cadabra the Screamer is in my garage. A neat<br />
trick that I’ll bet other dealers would like to<br />
learn. This is the most enjoyable tandem we’ve<br />
ever owned.<br />
Early Spring riding finds Car Back<br />
enjoying her outings on the Stratus, <strong>for</strong> the<br />
most part. However, she does struggle a bit<br />
with climbs. We’ve come to believe that the<br />
wide style bars and longish wheelbase are a<br />
bit oversize <strong>for</strong> her, but suit me just fine (she<br />
really needed a 33”, but this is a 37”, which is<br />
really too large).<br />
So, I’m back at Wheel to see Harry and<br />
check out a small frame V-Rex24 (‘97 24/20).<br />
I’m impressed with the V-Rex and do a deal<br />
with Harry. Back at the house, I have Car Back<br />
try the ‘Rex thinking this might be the solution<br />
to her low speed stability problem. She<br />
takes to the V-Rex quickly and hills are a snap,<br />
but there is one big problem! Her landing gear<br />
is about 4” too short and I have to launch and<br />
catch her while she tests the bike. The bottom<br />
line is that at 5’1”, Pam is too short (vertically<br />
challenged or inseam impaired). “What dear?”<br />
she says. “Oh, petite!” That’s it, she’s too petite<br />
<strong>for</strong> the V-Rex. Funny how I think that a<br />
bike that fits me perfect will work <strong>for</strong> her.<br />
It’s now late summer ‘97. Pam and I are<br />
at Wheel once again searching <strong>for</strong> the correct<br />
size ‘bent <strong>for</strong> her. I suggest a Rocket, but Harry<br />
points out that it’s not much lower than a V-<br />
Rex. Harry then has a brainstorm. “What if<br />
we take the V-Rex24 and put a 20” wheel in<br />
the rear and a 16” wheel in the front? That<br />
should effectively drop the rear a few inches<br />
and the front even more, which should lower<br />
Honey, I Shrunk the Bike<br />
Or...As Michael Moore would say, “Downsize This....”<br />
by Mark Ariens<br />
ariens@execpc.com<br />
Pam “Car Back” Ariens and (left) V-Rex 24/20 and (right) V-Rex 20/16<br />
the bottom bracket in relation to the seat. That<br />
would give Pam a riding position more to her<br />
liking,” says Harry.<br />
Harry thinks <strong>for</strong> a moment and runs into<br />
the back room. He returns a moment later with<br />
a 20” rear wheel and a 16” front wheel and<br />
CroMo <strong>for</strong>k. “Go <strong>for</strong> it, let’s see what happens,”<br />
he adds. I say, “Harry, look where the rear brake<br />
posts are in relation to that 20” rim. What if we<br />
try a U-brake or one of those old roller-cam<br />
MTB brakes. They use similar cantilever-type<br />
posts, but the studs are mounted closer to the<br />
wheel.” Harry says, “I think it may work.”<br />
The changeover goes fast and Pam tries out<br />
the V-Rex 20/16 set up with just a front brake<br />
(don’t try this at home). Starts and stops are no<br />
problem and both feet down while stationary is<br />
good. Car Back is zipping up and down the<br />
block making U-turns with ease. She says she<br />
likes the set up and is very com<strong>for</strong>table on the<br />
bike.<br />
Back at the shop, Harry proudly produces<br />
a shiney new (old) SunTour Power Cam (roller<br />
cam) brake. He found them in a crusty Dunkin<br />
Donuts box that still contained three rather nasty<br />
donuts (round power bars as ‘Bent Bob calls<br />
them). Slipping the brake on shows us that they<br />
will work, but a bushing will be needed to compensate<br />
<strong>for</strong> the difference between the cam<br />
brake hole diameter and the brake stud. The<br />
search takes us to a local hobby shop where we<br />
found some 5/16 I.D. thin-wall brass tube—and<br />
it works like a charm.<br />
In this part of the universe, Harry<br />
Wozniak is the local recumbent wizard who<br />
has ridden more makes and models of commercial<br />
and homebuilt ‘bents than I know to<br />
exist. To me, his assessment of this modified<br />
V-Rex will be the truest test of its practicality.<br />
After putting it through its paces, Harry<br />
proclaims that it handles much like a Rocket<br />
and should serve its purpose as a recumbent<br />
<strong>for</strong> smaller riders. “Hey Harry, if it rides like<br />
a Rocket, does that means we just per<strong>for</strong>med<br />
Rocket Science?” A moment of brilliance in<br />
Hales Corner, Wisconsin. And no, NASA<br />
won’t be interested in our accomplishment,<br />
though Rans may.<br />
So that’s it! A very simple and unique<br />
way to cut down a V-Rex24 without sawing,<br />
welding, bending or messing with the excellent<br />
frame in any way. Pam and I would like<br />
to thank the following people <strong>for</strong> raising our<br />
interest in recumbent riding and reducing our<br />
savings account. Bob Bryant, <strong>for</strong> this great<br />
publication, with its excellent reviews and<br />
enthusiasts’ idea exchange and much, much<br />
more. Chris Kegel, owner of (5) Wheel &<br />
Sprocket stores in the Milwaukee area. Chris<br />
is a ‘bent rider himself and promoter of the<br />
recumbent movement. Harry Wozniak, <strong>for</strong> his<br />
expert advice and encouragement.<br />
PS: Hey Bob, Harry ate those three donuts!<br />
❏<br />
September/October 1998 21
The Notebook of an<br />
Unreasonable<br />
Man<br />
By Kent<br />
Peterson<br />
peterson@halcyon.com<br />
www.halcyon.com/peterson/<br />
bentkent.html<br />
Dumpster Diving and the Beat Bikes<br />
Kent’s Mission: A ‘bent beat from the back alleys, garages and dumpsters<br />
where new bikes don’t come powdercoated and old bikes live on with the<br />
help of duct tape, hose clamps and determination.<br />
homas Edison once said, “To invent you<br />
need a good imagination and a pile of<br />
junk.” As anyone who’s ever been to my<br />
Thouse will attest, I’ve got that pile of junk part<br />
covered. In fact, that pile of junk keeps threatening<br />
to cover every square inch of living and<br />
storage space, but pressures from my long suffering<br />
wife, my neighbors, and various zoning<br />
laws work valiantly to keep things under<br />
control. And I do my part as well by periodically<br />
swooping into the pile, tinkering and<br />
combining pieces, and eventually emerging<br />
with something that looks suspiciously like a<br />
recumbent bicycle.<br />
■ JUNK DISCLAIMER<br />
In this article, I’ll describe what I believe is<br />
the fastest and easiest way to build a recumbent<br />
bicycle from various pieces of junk. A<br />
bike like this may not be especially pretty, but<br />
it will ride well and be quite com<strong>for</strong>table. I<br />
should make it clear that while I’ve ridden<br />
homebrew bikes <strong>for</strong> over a thousand trouble<br />
free miles, neither I nor Recumbent Cyclist<br />
News can make any guarantees as to your<br />
safety if you choose to build your own bike<br />
based on the in<strong>for</strong>mation in this article. Riding<br />
any bicycle involves some risk and riding a<br />
bike you built yourself may involve added<br />
risk. Use your head and be careful out there.<br />
Still with me? Good. Let’s talk about<br />
junk. Junk is not useless, worn out stuff. Junk<br />
is stuff that may no longer work <strong>for</strong> its original<br />
purpose; maybe it has a broken piece or is<br />
out of fashion or is the wrong size. Junk is<br />
thrown out by people too busy, too cramped<br />
<strong>for</strong> space, or too unskilled to deal with it. If<br />
junk is lucky, it gets rescued by someone like<br />
me and it gets a second chance at usefulness.<br />
■ DUMPSTER DIVING<br />
One of my favorite sources of bike junk is the<br />
dumpster behind a bike shop not far from my<br />
house. This is a good shop, although it’s small<br />
and always tight on space. Most of the shop’s<br />
customers are either BMX riding kids with<br />
rich parents or mountain bike riding weekend<br />
warrior yuppies. This shop has no ready market<br />
<strong>for</strong> used parts and no space to store them<br />
even if they did. It does have a handy dumpster<br />
right out back, and at least once a week I get<br />
22<br />
up early and do my bit to lessen the burden on<br />
the King County landfill.<br />
I never know what I’ll find in the dumpster,<br />
but it’s usually a safe bet that at the very least<br />
I’ll score some inner tubes. Most tubes can be<br />
patched pretty easily, but even the ones too far<br />
gone to ever hold air can be made into various<br />
cargo straps and bungee cords. Other common<br />
finds are tires with many miles still left on them.<br />
But some days the dumpster holds major<br />
treasure. At various times I’ve found an entire<br />
bike frame whose front end had lost an argument<br />
with a tree but whose back half was completely<br />
functional, a nice mountain bike stem<br />
with one tiny spot of rust, a single pannier in<br />
mint condition, various dinged wheels, an<br />
assortment of cables, widowed brake levers and<br />
orphaned friction shifters. I haul all these pieces<br />
home to the bike lab where they get to know<br />
the other discards and I begin drawing plans in<br />
my head.<br />
■ HOMEBREW SWB<br />
My favorite design is a short wheelbase recumbent<br />
that at a quick glance looks a lot like a<br />
Lightning P-38 or a Rans V-Rex. I built the first<br />
of these bikes as an experiment to see if I could<br />
build a cheap, roadworthy recumbent using junk<br />
parts and simple tools. When this bike was a<br />
success, I decided to build another one using<br />
slightly better components. Mainly I wanted to<br />
prove to myself that the first bike wasn’t a fluke.<br />
Since my first bike was very old and junky,<br />
I named it after the old junky godfather of the<br />
beat generation, William Burroughs. Old Bill<br />
wrote through his junk addiction and pioneered<br />
a writing style he called “cut-ups,” which involves<br />
combining found pieces of text in new<br />
and novel ways. I like to think part of his spirit<br />
lives on in the bike that bears his name. My second<br />
bike, which also captures a similar spirit, I<br />
put together with a bit more care and polish. I<br />
made this one a bit more reliable and a bit more<br />
suited to go “on the road.” I named it Jack<br />
Kerouac.<br />
To build a basic beat bike, you should<br />
really start with three bikes. First you need to<br />
get a mixte frame touring bike. A mixte bike is<br />
a kind of “ladies” bike. Instead of having a<br />
single horizontal top tube running from the head<br />
tube to the seat tube, a mixte frame has twin<br />
Recumbent Cyclist News #<strong>47</strong><br />
tubes running from the top of the head tube<br />
diagonally back to the rear dropouts. This<br />
makes a mixte frame strong and light while<br />
giving it a very low stand-over height. I’ve<br />
never found a mixte bike in the dumpster, but<br />
they do show up in thrift stores and yard sales.<br />
Since the mixte frame <strong>for</strong>ms the heart of the<br />
bicycle, try to find one made from high quality<br />
chrome-moly or Reynolds 531 tubes. I’ve<br />
gotten some wonderful old bikes <strong>for</strong> as little<br />
as three dollars and on more than one occasion<br />
I’ve had people give me old bikes! Once<br />
you get a reputation as a recycler, the bike<br />
parts will find you.<br />
In addition to the mixte bike, you’ll need<br />
one old BMX bike and a mountain bike. These<br />
donor bikes don’t have to be in very good<br />
shape or even be complete bicycles. As you<br />
look over the rest of this article, you’ll see<br />
what’s needed. You will also need a few other<br />
items that may require trips to your local thrift<br />
and hardware stores. A few final bits may need<br />
to come from your local bike shop, but I always<br />
view buying a new part as an absolute<br />
last resort. Part of the appeal of building the<br />
recycled cycle is seeing how low I can keep<br />
the overall cost. William Burroughs wound<br />
up costing me about fifty bucks, while Jack<br />
Kerouac’s cost was closer to one hundred.<br />
Compared to even the lowest priced factory<br />
built recumbents, these bikes are bargains.<br />
“My pal Joe Kochanowski took<br />
one look at William Burroughs<br />
and declared it to be “even less<br />
than homemade!” Coming from<br />
Joe, I took this as high praise.”<br />
■ JACK & WILLIAM<br />
I built my pair of beat bikes using simple<br />
hand tools—nothing more complex than a<br />
hacksaw, some wrenches and a drill. My pal<br />
Joe Kochanowski took one look at William<br />
Burroughs and declared it to be “even less than<br />
homemade!” Coming from Joe, I took this as<br />
high praise.<br />
Here’s the basic breakdown of what<br />
pieces go into a beat bike:<br />
✓ The mixte bike provides the basic frame,
Kent Peterson’s original mixte SWB, “William Burroughs.”<br />
<strong>for</strong>k, rear derailleur, rear wheel and brakes.<br />
✓ The BMX bike is the source of the front wheel<br />
and handle bars.<br />
✓ The rear triangle of the mountain bike<br />
becomes the front boom. The mountain bike<br />
also provides the crankset, front derailleur,<br />
brake levers and shifters.<br />
✓ The seat is a thrift store special made from<br />
an old backpack frame and the wide saddle from<br />
an exercise bike. A small pillow and an inexpensive<br />
car seat cover make things comfy.<br />
✓ Various nuts, bolts, hose clamps, steel mending<br />
plates, plastic pipes and epoxy come from<br />
the local hardware store.<br />
✓ A tall stem or a stem extension is the part of<br />
the puzzle that will probably have to come from<br />
your local bike shop. While you are there you<br />
may want to pick up some extra shift and brake<br />
cables as well as some chain.<br />
■ BENT BUILD<br />
Assembling the bike is basically a matter of taking<br />
the above mentioned pieces and assembling<br />
them in such a manner that the final product<br />
looks like a recumbent bike and is strong enough<br />
not to fall apart. I tried writing down step by<br />
step instructions, but they wound up being too<br />
long and besides each beat bike is its own unique<br />
beast. Your particular components and dreams<br />
will shape your bike, so instead of instructions,<br />
I’ll give some hints and guidelines.<br />
First, make very sure the seat is secure. You<br />
may need to cut or bend part of the mixte frame<br />
behind the backrest to position the seat at a com<strong>for</strong>table<br />
angle, but make sure the backrest is well<br />
braced. I used the upper stays, a rear carrying<br />
rack and in one case a set of old aluminum aerobars<br />
to brace the seat back. A strong seat back<br />
will let you punch a lot of power to your bike’s<br />
pedals.<br />
The other part of the bike that has to be<br />
rock solid is the front boom. You make the boom<br />
by hack-sawing the rear triangle off the mountain<br />
bike and cold bending the seat stays down<br />
until they join the seat tube an inch or two above<br />
the front derailleur. A pair of U-bolts hold the<br />
stays in place. The boom itself is quite strong<br />
because it is triangulated but the boom is only<br />
as strong as the point where it joins the rest of<br />
the frame.<br />
■ I SUCK AT BRAZING<br />
When I made William Burroughs, I didn’t have<br />
a brazing torch so I secured the boom with a<br />
massive array of clamps, U-bolts, steel mending<br />
plates and JB Weld epoxy. By the time I<br />
made Jack Kerouac, I’d gotten a torch, but a<br />
few hot, frustrating hours of brazing attempts<br />
convinced me that I truly suck at brazing and I<br />
went back to my bolts, mending plates and JB<br />
Weld.<br />
Mending plates are incredibly useful<br />
devices. These are steel pieces in either rectangular<br />
or “T” shapes with quarter inch holes<br />
drilled in them every couple of inches. You can<br />
use mending plates and bolts to make some<br />
strong clamps and the “T” shaped ones make a<br />
great brake bridge <strong>for</strong> the front wheel.<br />
■ JB WELD<br />
JB Weld is one of mankind’s best weapons in<br />
our never ending war against entropy. JB Weld<br />
comes in a couple of tubes that you mix together<br />
and it contains some chemicals that can’t be<br />
good <strong>for</strong> you together with powdered metal, a<br />
bit of acid and some darn strong polymers. Once<br />
you mix the contents of the two tubes together,<br />
it gets warm and sticky and you’ve only got a<br />
few minutes to slap it where you want it be<strong>for</strong>e<br />
it permanently bonds to whatever you’re working<br />
with. The JB Weld package contains wonderful<br />
quotes from guys in Texas who use it to<br />
repair cracked engine blocks and busted radiators.<br />
I figure JB Weld together with all the steel<br />
plates and bolts can handle my little bicycle<br />
projects. So far, it’s held up fine.<br />
The best way to route the chain is with<br />
chain tubes and a single idler. You can use black<br />
plastic sprinkler pipe <strong>for</strong> the chain tubes, but<br />
I’ve found that riser pipe is better. Riser pipe is<br />
available at larger hardware stores and garden<br />
centers. It’s a bit stiffer than sprinkler tubing.<br />
Two foot lengths cost about 89 cents. I used<br />
about three feet on the drive side of the chain<br />
and two feet on the return side. The chain tubes<br />
keep the chain clear of the front <strong>for</strong>k, and I’ve<br />
found the best way to secure them is to use big<br />
rubber straps cut from old inner tubes. The idler<br />
wheel is attached to the bottom bracket of the<br />
mixte frame. I made a pretty decent idler out of<br />
a couple of bearing assemblies and some big<br />
washers, but a lot of homebuilders make idlers<br />
from old skateboard wheels.<br />
The most important thing to remember is<br />
that you are building a junk bike. Do not get<br />
carried away trying to make it fancy or perfect.<br />
It’s easy to get the drive train working if you<br />
stick with a five or six speed freewheel and friction<br />
shifting. If you value your time and mental<br />
health, you won’t even think about trying to set<br />
up an eight or nine speed indexed freehub. Save<br />
that stuff <strong>for</strong> the multi-thousand dollar bikes.<br />
■ WHY?<br />
This brings me to the whole purpose of this<br />
article. Why build a junk recumbent? You may<br />
want to build one because it’s a cheap way to<br />
experiment with these fascinating bikes, but why<br />
in the world did I build not one but two of these<br />
bikes? I write <strong>for</strong> this magazine, but I have a<br />
real job as well and I can actually get my hands<br />
on almost any recumbent on the planet if I put<br />
my mind to it.<br />
The answer is simple: these bikes are fun.<br />
It’s fun to mess around with junk and solve problems<br />
and wind up with something you can ride<br />
down the street. I’ve ridden William Burroughs<br />
in a snowstorm when I didn’t feel safe on any<br />
other bike and found that this creaky, rusty,<br />
junky-looking bike is the most stable two<br />
wheeler I’ve ever ridden. I’ve blown past three<br />
thousand dollar titanium Litespeeds on a hundred<br />
dollar bike I made from garbage, and let<br />
me tell you that feels good. On the rare occasions<br />
when I get passed by someone who is<br />
younger, fitter and more determined, I console<br />
myself with the thought that my entire bike cost<br />
less than his left pedal.<br />
A junk bike you build yourself is yours in<br />
a way no factory bike can ever be. You are the<br />
designer, builder and chief mechanic, and when<br />
you are done you’ll have a bike that you can<br />
ride to the store or around the world. Sure, you<br />
might break down, but with a crescent wrench,<br />
some duct tape, and just the right piece of garbage,<br />
it won’t be long be<strong>for</strong>e you’re back on<br />
the road. ❏<br />
September/October 1998 23
Recumbent Design:<br />
Rat’s Long, Cheap & Easy<br />
by James Bauer<br />
Do you drool over the high priced, high-zoot recumbent bikes that are<br />
advertised in this rag? These bikes cost a lot of money and seem to offer<br />
little in the way of actual benefit over what a home-builder may be able to<br />
hack together his/herself. My thoughts left me wondering if this big buck,<br />
high zoot craze where recumbent manufacturers have lots of new $2000-<br />
$5000 recumbents is healthy <strong>for</strong> the industry (or our sanity). The low-end<br />
bikes are often a slap in the face of the serious recumbent enthusiasts.<br />
They are either too high off the ground, have poor ‘entry level’ (low<br />
speed) handling or they have components that you’ve never heard of or<br />
that don’t work. $700 entry-level recumbents offer nothing <strong>for</strong> me—the<br />
recumbent ‘per<strong>for</strong>mance’ cheapskate, so I started Rat’s Long, Cheap &<br />
Easy Recumbent Bicycles.<br />
THE ‘RAT’ LONG, CHEAP & EASY RECUMBENT BICYCLES<br />
An Interview With Industry Blacksheep Martin “Rat” Ratner<br />
Interviewed by James Bauer (JB)<br />
JB: When did you first get involved in recumbent bicycles?<br />
RAT: I did an endo on my mountain bike and was laid up <strong>for</strong> a few days.<br />
That was 1996. I had seen a copy of that overpriced recumbent rag and<br />
‘borrowed’ a few copies from ‘somebody.’ I kept riding my mountain bike<br />
<strong>for</strong> awhile, but started getting ‘numbness’ in my nether regions. My<br />
girlfriend started to complain...so I decided to try a recumbent.<br />
JB: What kind of recumbent bicycle did you buy?<br />
RAT: I rode everything out there. I would take bikes on extended test rides<br />
and put them through their paces (beat the crap out of them). The guy at<br />
the local recumbent shop thought I was a jerk and banned me from the<br />
shop. I liked the low Harley-like recumbents the best, but they were too<br />
expensive. The compact and SWB bikes made me look like a real geek,<br />
and as a recumbent newbie, I was concerned about my image.<br />
Then I got this wild idea that I could actually do it myself. I borrowed<br />
more magazines, wrote <strong>for</strong> brochures and asked stupid questions on the<br />
Internet (library’s computer). I stayed up <strong>for</strong> two days straight eating<br />
nothing but cold pizza and warm beer and going through two pads of draft<br />
paper coming up with my unique design. It is a long chopper bar<br />
recumbent based on parts from new or recycled BMX bikes and mountain<br />
bikes/frames mated to a square section mild steel main tube. This stuff is<br />
big, heavy and easy to work with. I can make nearly perfect miter cuts<br />
with my junk or borrowed tools. I got some handlebars from a bike shop<br />
that sells lowrider bikes. They are like from a Stingray or something. The<br />
shiny chrome is cool, but they’re heavy.<br />
I don’t have a welder, but this guy down the street does. For $20 and a<br />
six pack, he does the welding <strong>for</strong> me. It takes him a few hours. Square<br />
steel is easy to bolt things to. Giant U-bolts work miracles. My bike looks<br />
like a Schwinn Varsity collided with a lowrider BMX bike morphed into a<br />
Gold Rush. With my ‘hot rod’ wheels, it blows the doors off of a Gold<br />
Rush.... downhill. It weighs about 50 pounds. I’ll be adding a fairing soon.<br />
My el cheapo fairing design utilizes hardware store aluminum strips,<br />
glued, screwed and duct-taped into position. I’ve used some coroplast<br />
sections to do a cheap stealth looking fairing and tail box. Did I tell you<br />
how fast this thing was down hills?<br />
JB: Did your mountain bike pals give you a hard time?<br />
RAT: All of my riding pals told me that I was turning into a total geek.<br />
That is when I traded my green hair <strong>for</strong> a pocket protector, protractor and<br />
let my beard grow (kidding). I’ve been working on a new offroad<br />
recumbent design that should ‘blow chunks’ in their faces. My girlfriend is<br />
very excited about my new interest in recumbents (Big Grin!). My ‘nether<br />
numbness’ is gone and my heavy Long, Cheap & Easy is getting me into<br />
great shape and gives me great endurance. If you know what I mean.<br />
JB: When did you decide to start your own company?<br />
RAT: Back at the recumbent store, I realized within minutes that the<br />
recumbent was <strong>for</strong> me. What I also realized is that I could never af<strong>for</strong>d<br />
what is considered a ‘good’ recumbent. And the bikes aren’t getting much<br />
cheaper. My mountain bike cost $259 at a warehouse store (it has full<br />
suspension). I can’t even buy a factory-built recumbent seat <strong>for</strong> that price.<br />
While at the local bike recycler (junk yard) all of the sudden it came to<br />
me: Recumbents are no longer about guys designing high-tech bikes in<br />
their garages late at night. They have become about the quest <strong>for</strong> big bucks<br />
in our materialistic capitalist pig society. Everyone is looking to get rich<br />
with stock options. I don’t even think some of these guys are even<br />
designing products that we really want. The push <strong>for</strong> the latest, greatest is<br />
driven by the builders who sell to bike shops at the tradeshows. Successful<br />
builders whip the shop owners into a buying frenzy with their ‘newer is<br />
better’ sales patter.<br />
I look at some of these new designs and shake my head. It was at that<br />
time that I decided to quit complaining.... and start my own company. I<br />
knew I’d be an underdog. The recumbent status quo isn’t interested in a<br />
guy like me. They’re too busy acting like snobs and working on the next,<br />
latest, greatest, lighter, better per<strong>for</strong>ming recumbent to brainwash you into<br />
thinking you’ll be faster and that last year’s bike isn’t good enough. I was<br />
mad as hell. And this is America! I’ve decided to stand up <strong>for</strong> the ‘average<br />
guy’ who thinks 700 bucks is too much <strong>for</strong> a recumbent!<br />
JB: Tell us more.<br />
RAT: Besides the dealers and manufacturers (many with dollar signs in<br />
their eyes)....I’d show up at recumbent rides and the yuppie snobs would<br />
give me a lot of crap. Some bragging about their $5000 Titanium headrush<br />
or some damn thing. I mean, these guys are spending thousands on<br />
their bikes, and then they don’t ride them much. Most of them drive some<br />
big road hog SUV getting 8 miles to the gallon, and they are working 80<br />
hours a week to pay <strong>for</strong> them.<br />
Somebody told me that the ti bike (cost 40% more than aluminum) is<br />
5% faster than the aluminum (costs 35% more than steel), which is 5%<br />
faster than the steel (A Long, Cheap & Easy costs 15% of the cost of this<br />
bike). This may be true <strong>for</strong> the yuppies that buy these bikes, but not <strong>for</strong><br />
me. I work part time at this Mexican restaurant in town and at Rat<br />
Bicycles during the day (a few hours). I ride everywhere (lost my driver’s<br />
license...a long story...it wasn’t my fault). My legs are strong. It takes me<br />
about 5 minutes to leave the ti-guy in the dust. Rat Long, Cheap & Easy<br />
(bike model) can be built <strong>for</strong> around 300 bucks. More if you don’t want a<br />
plywood, piano hinge and naugahyde covered seat; less if you scrounge<br />
more. We may offer mounting directions <strong>for</strong> a few commercial seats, but<br />
we’ll have to choose a cheap one or it will double the cost of the bike.<br />
(Thanks to my pal Joe <strong>for</strong> the advanced math lesson above.)<br />
JB: Did you have a plan <strong>for</strong> your company?<br />
RAT: Nope. Not really. In the beginning I was just looking <strong>for</strong> a way to<br />
finance my hobby and recumbent building projects. Hey, I guess that<br />
sounds like every other recumbent manufacturer. The difference is that I’d<br />
like to think that I have a social conscience. It isn’t about bucks to me. My<br />
mission is simple and is good advice <strong>for</strong> the average recumbent customer<br />
looking to part with a grand or two. You can build one yourself real cheap,<br />
most of the industry hype is smoke and mirrors and the rest can be<br />
overcome with riding more and drinking fewer lattes. If you want light<br />
weight, go on a diet. I like bikes that are big and strong. I’ve never broken<br />
a Long, Cheap & Easy frame. This is amazing given that I beat the Schlitz<br />
out of it and ride it offroad.<br />
JB: How did you come up with your company name?<br />
RAT: My nickname has been ‘Rat’ since the ‘60’s. My hero is ‘Rat Fink.’<br />
Long, Cheap & Easy was a natural. I take life easy. I like a lot of stuff<br />
24<br />
Recumbent Cyclist News #<strong>47</strong>
‘Easy’ if you know what I mean. I like the long recumbents with the<br />
chopper bars. I don’t like the direction of the bike bizness and the high<br />
cost of bikes, esp-ecially recumbents. So Rat’s Long, Cheap & Easy is my<br />
anti-establishment, non-commercial, roots showing through.<br />
JB: What about a company slogan?<br />
RAT: We’re a pretty exclusive group you know. Not everyone can join.<br />
You have to pass a test that I have spent years working on (build a Long,<br />
Cheap & Easy). Our unofficial corporate slogan is “Cheap Bikes Kick<br />
ASS.”<br />
JB: What do you actually sell?<br />
RAT: Well, we actually just provide proven insight and knowledge into<br />
cheapskate recumbent technology and per<strong>for</strong>mance in our building<br />
manual. Our manual is chock full of ideas on how to get almost as good<br />
per<strong>for</strong>mance <strong>for</strong> a fraction of the bucks.<br />
JB: What models are covered in the manual?<br />
RAT: Our flagship model is the one with the wedgie bike rear end mated<br />
with the 2” steel tubing and plywood seat. Like I said, it can be built <strong>for</strong><br />
under 300 bucks in 5, 6, 7, 14, and 21 speed models. Our manual<br />
recommends not using an 8/24 or 9/27 speed drivetrain as you’ll always be<br />
fussing with them. If you do, <strong>for</strong>get about the indexed shifting. Actually,<br />
we recommend that you don’t use indexed shifting at all. Our bikes have<br />
no cable stops. We run continuous housing zip-tied to the frame <strong>for</strong> the<br />
brakes and shifters. Some of our builders mount the shifters under the seat<br />
to keep the cable runs shorter. You know those chrome Stingray bars are<br />
rather high and you might need some extra-long tandem cables. No need<br />
to worry, our manual tells you where to find those, too.<br />
We have a per<strong>for</strong>mance model. It has a higher bottom bracket. It is our<br />
lightest bike at just a tad under 40 pounds and is painted with gold spray<br />
paint. We like to give prospective owners a little quiz (outlined in the<br />
manual) to make sure they fit the criteria and personality profile to ride<br />
one. We think skinny tires suck and don’t recommend them unless you are<br />
a racer type who rides on perfect pavement that have no thorns, nails or<br />
other road hazards on them, EVER. We’ve found a limited market <strong>for</strong> this<br />
model, though offering it proves a point to some riders (who live in a<br />
dream world).<br />
JB: What about upgrades?<br />
RAT: We’re working on a full suspension design....and it won’t set you<br />
back two grand neither. Did you know that those 20-inch shock <strong>for</strong>ks were<br />
made <strong>for</strong> kids’ BMX bikes? You’d be surprised at what you can get <strong>for</strong> a<br />
couple of hundred bucks. I buy a fully suspended mountain bike from a<br />
toy store or wholesale club, and a BMX bike with a front shock <strong>for</strong>k. I<br />
figure that full suspension might add a few hundred bucks, but you’ll get<br />
a bunch of good components, a drivetrain, and enough parts to get going<br />
on your second Long, Cheap & Easy.<br />
You can actually hack the back end of a Long, Cheap & Easy off and<br />
weld on your Bikes R Us suspended rear end. That way you don’t have to<br />
buy a new multi-thousand dollar bike. We don’t outdate Long, Cheap &<br />
Easy models. We are all <strong>for</strong> recycling and reusing. Our product updates<br />
are all do-it-yourself retrofitable. There are a lot of unridden bikes sitting<br />
around in garages out there. We suggest that you put the word out that you<br />
are looking <strong>for</strong> them.<br />
JB: Are your construction methods environmentally friendly?<br />
RAT: Well, we kind of leave that up to the builder. We kinda figure that<br />
our recycling is about as good as we can get. We don’t use cheap <strong>for</strong>eign<br />
labor, toxic chemicals or anything like that, and everyone speaks English.<br />
We don’t use fancy paint or powdercoat neither. Since you might be<br />
modifying your bike at some point in the future, our manual gives careful<br />
instructions on the best methods of using spray paint—the colors to use<br />
and avoid....that sort of thing.<br />
JB: Aren’t the Long, Cheap & Easy recumbents kinda heavy?<br />
RAT: You know, recumbents in general are heavy. Any mid-20 pound<br />
recumbent is either too flexible or not tough enough to meet our rigorous<br />
standards. The long bikes are all in the mid-30 pound range once you carry<br />
some spares and tools...and a fairing. Aerodynamics is far more important<br />
than saving a few grams—or even pounds!<br />
We have a unique way of looking at the weight. If you have a 25 pound<br />
recumbent, chances are that it is worth 2 or 3 grand. You will need to carry<br />
a pretty damn big lock to keep it safe...that is if you really USE your bike.<br />
We’ve found that a long recumbent with a fairing, even one of our hackjob<br />
strip aluminum and coroplast jobs is still faster in most situations than<br />
a 25-pound factory built. We blow their doors off downhill. Uphill is<br />
where the 25-pounder might have the edge, though you need to ask<br />
yourself if .5, 1 or even 2 MPH uphill is worth a grand or two. If you ride<br />
a factory long bike, they already weigh in the low-mid 30-pound range.<br />
Add a heavy lock <strong>for</strong> parking security and they are up to the weight of our<br />
bikes. Our manual also suggests other theft deterrents, though theft of<br />
these bikes has not been too big of a problem.<br />
JB: What are your thoughts on bottom bracket height?<br />
RAT: Well, with the easy and cheap ‘Long, Cheap & Easy,’ the bottom<br />
bracket can be placed at or below the seat height. For those who prefer a<br />
really low bottom bracket, the manual shows how to weld on a wedgie’s<br />
lower frame section/bottom bracket or some more square steel with a BB<br />
attached to accomplish this. A lower bottom bracket seems to work best<br />
with this design. We find it a personal preference sort of thing.<br />
There really is little benefit to these euro-sheik dudes with their feet<br />
way up in the air.<br />
We have had the benefit of many decades of motorcycle ergonomic R &<br />
D. We stare at a big Harley, and rotate the riding position backward a bit.<br />
It’s not brain surgery. If you identify more with the Euro dudes, that’s<br />
cool, too. We’ve got a design on the drawing board that starts with a<br />
BMX bike, and we weld a high triangulated boom onto the frame. It will<br />
be lighter, but the best benefit is that the plans <strong>for</strong> all of our models are in<br />
the same manual so that owners dissatisfied with the feet in the skyward<br />
position (looking at the moon) can bring them back down to planet earth<br />
and ride like the guys in Easy Rider. I mean, it’s really about com<strong>for</strong>t,<br />
man. Odd and extreme riding positions can be a pain.<br />
JB: What about cycling outfits?<br />
RAT: We recommend that you throw away all of your Lycra leotard sissylooking<br />
outfits that make you look like a jerk. Have you ever seen guys<br />
riding Harley’s wearing Lycra? It makes you look like a clown. I wear<br />
whatever I’ve got on. Usually some baggy hiking shorts and one of our<br />
Long, Cheap & Easy corporate T-shirts. I wear real shoes and ride with<br />
plat<strong>for</strong>m pedals. To get more of your hard earned cash, the dealers and<br />
rags recommend clipless pedals. My theories on this are simple. Borrow<br />
from somebody who has done extensive R & D. Shark tooth BMX pedals<br />
grab my high-top Converse Allstars just fine. Sometimes I wear hiking<br />
boots when I’m riding offroad to protect my ankles. One of the added<br />
benefits of the lower bottom bracket is that you don’t need to hook your<br />
feet onto the pedals. They also work well if you are being chased by a<br />
dog. Don’t get me wrong, I like dogs, but I take a ‘him or me’ attitude<br />
when I’m on the road.<br />
If you are still wearing Lycra, 100 dollar shoes, pedals and sunglasses,<br />
we suggest you get over that addiction first. Sometimes we recommend<br />
riders go back to riding a drop bar upright bike until they can break these<br />
bad habits.<br />
JB: What do you think about the direction of the bicycle industry?<br />
RAT: All of my theories are based on simple and af<strong>for</strong>dable strategies (all<br />
of which are outlined in the Long, Cheap & Easy Building Manual). As<br />
we examine the term ‘SIMPLE,’ I refer back to the often overlooked (by<br />
geek engineers who want to sell you expensive bikes and money motivated<br />
component makers who have a burning desire to outdate parts<br />
EVERY freakin’ year). Think K. I. S. S. When in doubt, KEEP IT<br />
SIMPLE, STUPID! Extreme theories and complexities add cost.<br />
When we analyze modern components (in the Long, Cheap & Easy<br />
Manual), we see that systems are not getting easier to use, they are getting<br />
more difficult. I read in some rag that weather changes can alter a 9/27-<br />
speed drivetrain. Since our weather changes by the hour, that might stress<br />
me out too much. I don’t use 9/27 speeds or even indexed shifting. My<br />
bike is 7 speed with two chainrings up front (with no front shifter or<br />
derailleur) <strong>for</strong> a manual shift. If you don’t like greasy hands, make a little<br />
chain-tube-guard and pull it or kick it to change gears. Like I said,<br />
September/October 1998 25
K. I. S. S.<br />
JB: How do the Long, Cheap & Easy ride?<br />
RAT: Well, they ride like any of the classic,<br />
expensive factory built long recumbents with<br />
AFC (above frame controls). Long, Cheap &<br />
Easy’s kick ASS in the downhills. They are like<br />
a roller coaster with a ton of bricks tied to the<br />
frame. They handle well, though depending on<br />
how creative you get with the front end, skinny<br />
or fat tires, 20” or 26” wheel, they will vary a bit<br />
in ride ‘feel.’ You can expect even the worst<br />
Long, Cheap & Easy to be more confidence<br />
inspiring than a tall skinny tire short bike, or a<br />
tail-heavy wheelie popping compact. Recumbent<br />
climbing is overrated. Most are fairly slow<br />
unless you are an athlete. I have low gears, and<br />
spin up the largest hills. All of the Long, Cheap<br />
& Easy’s are faster than the wedgies we cut up<br />
to make them. If you need better per<strong>for</strong>mance<br />
than we have to offer, RIDE MORE.<br />
JB: It’s really about the money, huh?<br />
RAT: Well, yeah. Kinda. ‘Cool’ has become<br />
trademarked. Have you noticed that oncerebellious<br />
rock and roll is now used in TV<br />
commercials? Harley’s were once <strong>for</strong> outlaws,<br />
now it costs 20 grand <strong>for</strong> the privilege while<br />
looking like a yuppie, consumeristic sucker.<br />
And you’ll be doing it with a bunch of posers.<br />
I’m <strong>for</strong> a REAL world cycling experience.<br />
Something that I make with my own two hands,<br />
<strong>for</strong> cheap. I’m proud of that. And without the<br />
industry smoke and mirrors. We’ve got a bunch<br />
of borderline hucksters trying to convince you<br />
that their costly technologically advanced bikes<br />
are superior. Yet, they’ll try to sell you the next<br />
latest greatest a year from now—mark my<br />
words. And don’t ask what your trade-in is<br />
worth. These bikes are so costly new, they<br />
depreciate 50% the first year (often more if<br />
traded in). Most of these basic recumbent<br />
designs have been around <strong>for</strong> 30 years. Some<br />
can be traced back nearly 100 years. So what is<br />
really new? Maybe the Long, Cheap & Easy<br />
approach to recumbent cycling.<br />
If everyone followed my lead, we could start<br />
a revolution. Rampant materialism sucks. The<br />
endless pursuit of multi-thousand dollar bikes<br />
never ends and leaves you feeling empty, taken<br />
advantage of and depressed as well as broke.<br />
Many riders are on a quest <strong>for</strong> the next bike<br />
even be<strong>for</strong>e their current one is broken in. I’m<br />
just saying take a look at your life and realign<br />
what’s important. If you like recumbent bikin’,<br />
GO RIDE!<br />
Bicycles are the cheapest and simplest (and<br />
greatest) <strong>for</strong>m of transportation known to<br />
mankind. Recumbent bikes will bring more<br />
riders into the cycling fold. The industry needed<br />
a non-commercial venue <strong>for</strong> those of us who<br />
don’t have one, two or even three grand <strong>for</strong> a<br />
new bike (and question the sanity of those<br />
spending 5 or 6 grand—actually, they are the<br />
same folks buying 35 grand SUV’s). Give the<br />
posers a bad time. Show them that they need to<br />
RIDE to keep up. You can’t really BUY<br />
per<strong>for</strong>mance with a bicycle. Ride with all of<br />
your heart and soul. Ride to the store. Ride <strong>for</strong> a<br />
burrito. Ride to the.....recumbent ride. We can<br />
26<br />
Recumbent Cyclist News #<strong>47</strong><br />
Rat’s<br />
Long, Cheap & Easy<br />
agree that ridin’ ’ bikes is clean, cool fun.<br />
Whether you build a Long, Cheap & Easy or<br />
ride a factory bike, we can agree to that. ❏<br />
Editor’s Note: The ‘Rat’ Long Cheap & Easy<br />
article is a spoof. “Rat” exists only in the mind<br />
of the author and maybe a little bit in every<br />
homebuilder and bicycle retro-grouch. If you are<br />
interested in similar technology, we suggest that<br />
you check out the LaBent from Denny LaDue.<br />
Mr. LaDue’s bikes may have been the motivation<br />
<strong>for</strong> this article, but the views of the author<br />
are his/hers alone and may not represent the<br />
views of <strong>RCN</strong>, Bob & Marilyn Bryant, our<br />
advertisers, sponsors, writers, LaBent or Denny<br />
LaDue.
The Recumbent Bicycle<br />
The desire <strong>for</strong> more and more speed has perhaps fathered more vehicular<br />
designs than any other single consideration. And so it has been with this<br />
recumbent bicycle. I was seeking greater speed and I found it. But even<br />
more exciting, I found undreamed of ease and com<strong>for</strong>t.<br />
The recumbent bicycle, as such, is not a new idea. Over several<br />
generations a number of them have been shown and tried on bike tracks<br />
around the world and outstanding per<strong>for</strong>mances have been recorded.<br />
Previous versions were either ridden on one’s belly in a swimming<br />
position, with the pedals at the rear, or on one’s back in a reclining<br />
position quite like that assumed on a deck chair. On this second type, feet<br />
were extended horizontally <strong>for</strong>ward with pedals convenient to this<br />
position. Less successful designs utilized some combination of crank and<br />
rod instead of a conventional chain drive. In all cases, the prime object<br />
was to reduce aerodynamic drag by reducing the square unit of body area<br />
passing through the air. Aerodynamic drag is by far the most <strong>for</strong>midable<br />
barrier to attaining greater speeds.<br />
All recumbent designs insofar as I can determine, failed to prevail and<br />
never achieved mass production or distribution. Usually just a single unit<br />
was hand built.<br />
Much of the failure appears to have derived from the inability of the<br />
cyclist to sustain himself <strong>for</strong> extended periods on the bike because of<br />
physical distress. One or a number of physiological factors placed them in<br />
disfavor. Additionally, it is my belief that they also failed <strong>for</strong> a variety of<br />
mechanical and economic factors.<br />
The recumbent shown here was conceived after a careful study of<br />
photographs and drawings of a goodly number of previous designs. My<br />
goal was to build a speedy bicycle that would be com<strong>for</strong>table and a<br />
pleasure to ride.<br />
This bicycle is fast and has the drive and float of a tandem. A real<br />
speedster and fun machine. Fun <strong>for</strong> the person on the bike and a fascinating<br />
and amusing occasion <strong>for</strong> most spectators. Unlike any other bike that I<br />
have ridden, I find an aura, an invisible envelope of contagious excitement<br />
seems to follow it down every road upon which I ride. Faces light<br />
up with childish delight as I pass and this adds immeasurably to the<br />
pleasure of the day’s outing. The phenomena is quite unlike simple<br />
ridicule to which cyclists have become accustomed.<br />
by Dan Henry<br />
Technical Details<br />
Except <strong>for</strong> the frame, which is silver brazed of ultra light CroMo aircraft<br />
tubing, it is built from conventional bicycle parts, or other equipment likely<br />
to be found around the house or in a neighborhood hardware store. Many<br />
parts have, however, been modified by heating, bending, cutting, etc. Not a<br />
single part was machined especially <strong>for</strong> this bicycle.<br />
The most novel feature of all is the remote steering arrangement. A false<br />
steering head supports the handlebar and steering is accomplished by a<br />
chain drive from this false head to the true steering head at the front.<br />
Seat of Furniture Webbing<br />
The seat is constructed of old handlebars and furniture webbing very much<br />
like the webbing of a folding chair. Sitting com<strong>for</strong>t is comparable to that of<br />
a webbed chair. The seat in its present version, shown here, is the fourth<br />
type that was tried. The three that were discarded were equal to or better<br />
than the ordinary standards of bicycle com<strong>for</strong>t but fell short of the degree<br />
of com<strong>for</strong>t that I had hoped to attain.<br />
Spring Suspension<br />
Both wheels are spring suspended <strong>for</strong> the elimination of road shock. This<br />
suspension is similar to the one employed on a more conventional bicycle<br />
previously described in American Bicycling 1967.<br />
The wheelbase is longer than a tandem and about twice that of a<br />
conventional bicycle. This extreme of wheelbase gives exceptional<br />
com<strong>for</strong>t. The rider being suspended well within this long wheelbase, results<br />
in his receiving but a faction of the amplitude of shock received by the<br />
wheel.<br />
Hub brakes are employed because of the spring wheels. The conventional<br />
rim brakes are not feasible with this arrangement.<br />
Normal riding position is relaxed and natural imposing no discom<strong>for</strong>t. In<br />
several of the photographs it is apparent that the riding position assumed<br />
greatly reduced the aerodynamic drag factor. On the recumbent, substantially<br />
the biggest reduction in drag is derived by both the arms and the legs<br />
entering the air stream endwise rather than full or partially broadside, as is<br />
the case on a conventional bicycle. The torso is about equally situated in<br />
September/October 1998 27
either case.<br />
Increase In Pedal Thrust<br />
One’s thrust upon the pedal is considerably<br />
greater than can be achieved on a regular<br />
bicycle. It is quite like sitting upon the floor with<br />
your back against the wall—in this braced<br />
position a <strong>for</strong>ce much greater than one’s weight<br />
can be imposed upon the pedals. On the<br />
conventional bike, your weight approximates<br />
the maximum thrust.<br />
Very High Gears<br />
Because the recumbent rolls at a higher speed<br />
with comparable ef<strong>for</strong>t, exceptionally high gear<br />
ratios are employed. It has a five speed set of<br />
conventional derailleur gears utilizing a chain<br />
wheel with 60 teeth. Several gear ratio choices<br />
with over 100 are available. The gear shifting<br />
lever is at the center of the handlebar. Eight<br />
ounce rims, silk tires aluminum parts wherever<br />
possible, and egg shell thin tubing are many of<br />
the refinements that make the bike a very lively<br />
and responsive machine. The gross weight is<br />
within a few pounds of the conventional racing<br />
bike.<br />
“So long <strong>for</strong> now I’ll wait <strong>for</strong> you at the coffee<br />
shop.”<br />
Dan Henry and wedgie rider chat. Note dual suspension and remote above-seat steering—photo<br />
circa 1968<br />
This article was originally published in<br />
American Cycling Magazine 1968 Article by<br />
Dan Henry. Photos by Victor Hirschfield.<br />
Scanned by Mark Colliton from photocopies of<br />
the original magazine article<br />
Dan’s recumbent seat<br />
consisted of an<br />
inverted drop bar,<br />
homebuilt seat back<br />
with mesh from a lawn<br />
chair<br />
28<br />
Recumbent Cyclist News #<strong>47</strong>