A block-of-the-month course designed for ... - Plum Creek Quilts
A block-of-the-month course designed for ... - Plum Creek Quilts
A block-of-the-month course designed for ... - Plum Creek Quilts

You also want an ePaper? Increase the reach of your titles
YUMPU automatically turns print PDFs into web optimized ePapers that Google loves.
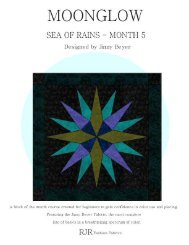
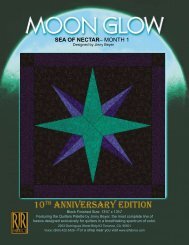
A <strong>block</strong>-<strong>of</strong>-<strong>the</strong>-<strong>month</strong> <strong>course</strong> <strong>designed</strong><br />
<strong>for</strong> quilters to gain confidence in piecing and color.<br />
86¼" x 86¼"<br />
Featuring <strong>the</strong> Jinny Beyer Palette, <strong>the</strong> most complete line <strong>of</strong> basics<br />
<strong>designed</strong> exclusively <strong>for</strong> quilters in a breathtaking spectrum <strong>of</strong> color.<br />
2203 Dominguez Street Bldg K3 Torrance, CA 90501<br />
Moon Glow by Jinny Beyer (800) 422-5426 • For a shop near you visit www.rjrfabrics.comGeneral In<strong>for</strong>mation - Page 1 <strong>of</strong> 7
MOON GLOW by Jinny Beyer<br />
Block-<strong>of</strong>-<strong>the</strong>-Month Quilt<br />
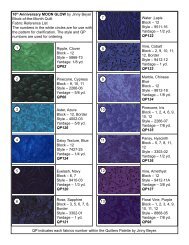
Jinny Beyer Palette #11 Fabric Reference List<br />
The numbers in <strong>the</strong> white circles are <strong>for</strong> use with<br />
<strong>the</strong> pattern <strong>for</strong> clarification. The style numbers<br />
and Palette numbers(P#xx) are used <strong>for</strong> ordering.<br />
7<br />
Water ,Lapis<br />
Block – 12<br />
Style – 9511-16<br />
Yardage – 1/2 yd.<br />
P#122<br />
1<br />
Thunder, Apple Green<br />
Block – 12<br />
Style – 4795-21<br />
Yardage: 1/4 yd.<br />
P#61<br />
8<br />
Posies, Cobalt<br />
Block – 2, 9, 10, 11,<br />
12, Border<br />
Style – 0498-09<br />
Yardage – 1 yd.<br />
P#123<br />
2<br />
Pinecone, Cypress<br />
Block – 9, 10, 11<br />
Style – 2266-06<br />
Yardage – 1/2 yd.<br />
P#66<br />
9<br />
Marble, Chinese<br />
Blue<br />
Block – 12<br />
Style – 9812-18<br />
Yardage – 1/4 yd.<br />
P#134<br />
3<br />
Floral Outline, Azure<br />
Block – 12, Border<br />
Style – 7132-29<br />
Yardage – 3/4 yd.<br />
P#126<br />
10<br />
Pinecone, Iris<br />
Block – 1, 2, 4, 6, 9,<br />
10, 12<br />
Style – 2266-07<br />
Yardage – 1/2 yd.<br />
P#135<br />
4<br />
Daisy Texture, Blue<br />
Block – 12<br />
Style – 7427-25<br />
Yardage – 1/4 yd.<br />
P#124<br />
11<br />
Floral Outline, Hyacinth<br />
Block – 5, 7, 8, 11,<br />
12<br />
Style – 7132-30<br />
Yardage –1/2 yd.<br />
P#136<br />
5<br />
Eyelash, Navy<br />
Block – 6, 7<br />
Style – 9410-03<br />
Yardage – 1/4 yd.<br />
P#120<br />
12<br />
Hens&Chicks,Amethyst<br />
Block – 12<br />
Style – 8737-09<br />
Yardage – 1/3 yd.<br />
P#137<br />
6<br />
Hens&Chicks,Sapphire<br />
Block – 3, 5, 6, 7, 8,<br />
Border<br />
Style – 8737-08<br />
Yardage – 3/4 yd.<br />
P#121<br />
13<br />
Floral Vine, Purple<br />
Block – 1, 2, 3, 4, 9,<br />
10, 11, 12<br />
Style – 8868-05<br />
Yardage – 3/4 yd.<br />
P#96<br />
P# indicates each fabric's number within <strong>the</strong> Jinny Beyer Palette.<br />
Moon Glow by Jinny Beyer General In<strong>for</strong>mation - Page 2 <strong>of</strong> 7
14<br />
Msq.Fea<strong>the</strong>rs,Blackberry<br />
Block – 1, 2, 3, 4<br />
Style – 5868-18<br />
Yardage – 1/2 yd.<br />
P#97<br />
21<br />
Lagoon, Crackle<br />
Block – 12<br />
Style – 4730-08<br />
Yardage – 1/3 yd.<br />
P#84<br />
15<br />
Etched Leaf., Hea<strong>the</strong>r<br />
Green P#12<br />
Block – 5, 6, 7, 8, 9,<br />
10, 11, 12<br />
Style – 7424-07<br />
Yardage – 3/4 yd.<br />
22<br />
Filigree, Pilgrim<br />
Block – 12, Backing<br />
(8 additional yards)<br />
Style – 8868-02<br />
Yardage – 1/2 yd.<br />
P#51<br />
16<br />
Ripple, Clover<br />
Block – 3, 4, 12<br />
Style – 5866-73<br />
Yardage – 1/4 yd.<br />
P#62<br />
23<br />
Tapestry, Teal<br />
Block – 5, 8<br />
Style – 4005-03<br />
Yardage – 1/4 yd.<br />
P#86<br />
17<br />
MasqueFea<strong>the</strong>rs, Jade<br />
Block – 1, 2, 6, 7, 9,<br />
10, 12<br />
Style – 5868-17<br />
Yardage – 3/4 yd.<br />
P#83<br />
24<br />
Eyelash, Black P#48<br />
Block – 1, 2, 3, 4, 5,<br />
6, 7, 8, 9, 10, 11, 12,<br />
Border, Binding<br />
Style –9410-14<br />
Yardage –5-1/4 yds.<br />
18<br />
Flower Texture, Turq.<br />
Block – 2, 3, 4, 5, 8,<br />
9, 10, 11, 12, Border<br />
Style – 6931-27<br />
Yardage –1-1/4 yds.<br />
P#127<br />
25<br />
MasqueFea<strong>the</strong>rs,Juniper<br />
Block – 12<br />
Style – 5868-13<br />
Yardage – 1/2 yard<br />
P#10<br />
19<br />
Marble, Aquamarine<br />
Block – 7, 12<br />
Style – 9812-09<br />
Yardage – 1/4 yd.<br />
P#128<br />
26<br />
Filigree, Slate Green<br />
Block – 12<br />
Style – 6739-02<br />
Yardage – 1/3 yd.<br />
P#11<br />
20<br />
Crackle, Glacier<br />
Block – 12<br />
Style – 4730-10<br />
Yardage – 1/4 yd.<br />
P#129<br />
27<br />
Marble, Midnight<br />
Border<br />
Style – 9812-08<br />
Yardage – 5/8 yd.<br />
P#87<br />
Moon Glow by Jinny Beyer General In<strong>for</strong>mation - Page 3 <strong>of</strong> 7
MOON GLOW<br />
Yardage Requirements<br />
Pattern<br />
Fabric #<br />
P#<br />
Pattern Name<br />
Style<br />
Block Number by Month<br />
1 Quilt<br />
1<br />
61 Thunder, Apple Green 4795-21<br />
12<br />
1/4 yd.<br />
2<br />
66<br />
Pinecone, Cypress<br />
2266-06<br />
9, 10, 11<br />
1/2 yd.<br />
3<br />
126<br />
Floral Outline, Azure 7132-29<br />
12, Border<br />
3/4 yd.<br />
4<br />
124<br />
Daisy Texture, Blue<br />
7427-25<br />
12<br />
1/4 yd.<br />
5<br />
120<br />
Eyelash, Navy<br />
9410-03<br />
6, 7<br />
1/4 yd.<br />
6<br />
121<br />
Hens & Chicks, Sapphire 8737-08<br />
3, 5, 6, 7, 8, Border<br />
3/4 yd.<br />
7<br />
122<br />
Water, Lapis<br />
9511-16<br />
12<br />
1/2 yd.<br />
8<br />
123<br />
Posies, Cobalt 0498-09<br />
2, 9, 10,11,12, Border<br />
1 yd.<br />
9<br />
134<br />
Marble, Chinese Blue<br />
9812-18<br />
12<br />
1/4 yd.<br />
10<br />
135<br />
Pinecone, Iris<br />
2266-07<br />
1, 2, 4, 6, 9,10,12<br />
1/2 yd.<br />
11<br />
136<br />
Floral Outline, Hyacinth 7132-30<br />
5, 7, 8, 11, 12<br />
1/2 yd.<br />
12<br />
137<br />
Hens & Chicks,Amethyst 8737-09<br />
12<br />
1/3 yd.<br />
13<br />
96<br />
Floral Vine, Purple<br />
8868-05<br />
1, 2, 3, 4, 9, 10,11,12<br />
3/4 yd.<br />
14<br />
97<br />
Msq. Fea<strong>the</strong>rs, Blackberry 5868-18<br />
1, 2, 3, 4<br />
1/2 yd.<br />
15<br />
12<br />
Etched Leaf, Hthr Green<br />
7424-07<br />
5, 6, 7, 8, 9,10,11,12<br />
3/4 yd.<br />
16<br />
62<br />
Ripple, Clover 5866-73<br />
3, 4, 12<br />
1/4 yd.<br />
17<br />
83<br />
Masque Fea<strong>the</strong>rs, Jade 5868-17<br />
1, 2, 6, 7, 9,10,12<br />
3/4 yd.<br />
18<br />
127<br />
Flower Texture, Turq.<br />
6931-27<br />
2, 3, 4, 5, 8, 9,10,11,12, Border<br />
1-1/4 yds.<br />
19<br />
128<br />
Marble, Aquamarine<br />
9812-09<br />
7,12<br />
1/4 yd.<br />
20<br />
129<br />
Crackle, Glacier<br />
4730-10<br />
12<br />
1/4 yd.<br />
21<br />
84<br />
Lagoon, Crackle<br />
4730-08<br />
12<br />
1/3 yd.<br />
22<br />
51<br />
Filigree, Pilgrim<br />
8868-02<br />
12<br />
1/2 yd.<br />
23<br />
86<br />
Tapestry, Teal<br />
4005-03<br />
5, 8<br />
1/4 yd.<br />
24<br />
48<br />
Eyelash, Black<br />
9410-14<br />
1, 2, 3, 4, 5, 6, 7, 8, 9, 10,11,12, Border<br />
5-1/4 yds.<br />
25<br />
10<br />
Masque Fea<strong>the</strong>rs, Juniper 5868-13<br />
12<br />
1/2 yd.<br />
26<br />
11<br />
Filigree, Slate Green<br />
6739-02<br />
12<br />
1/3 yd.<br />
27<br />
87<br />
Marble, Midnight<br />
9812-08<br />
Border<br />
5/8 yd.<br />
22<br />
51<br />
Filigree, Pilgrim<br />
6739-03<br />
Quilt Backing Suggestion<br />
8 yds.<br />
*The yardage chart requirements provided are approximate yardages to help shops in kitting <strong>the</strong> fabrics. These<br />
measurements include sufficient yardage <strong>for</strong> any <strong>of</strong> <strong>the</strong> template techniques, including using templates to cut pieces<br />
<strong>for</strong> foundation piecing. If you elect to cut your fabrics using <strong>the</strong> larger sizes in <strong>the</strong> PRECUTTING GUIDES FOR<br />
FOUNDATIONS, you may need to purchase additional yardage to accommodate this style <strong>of</strong> piecing.<br />
2203 Dominguez Street Bldg K3 Torrance, CA 90501<br />
(800) 422-5426 • For a shop near you visit www.rjrfabrics.com<br />
© 2000, 2009, 2012 RJR Fabrics<br />
Moon Glow by Jinny Beyer General In<strong>for</strong>mation - Page 4 <strong>of</strong> 7
A & AR<br />
Block 1<br />
GENERAL INSTRUCTIONS<br />
INTRODUCTION<br />
This Jinny Beyer <strong>block</strong>-<strong>of</strong>-<strong>the</strong>-<strong>month</strong> quilt has been <strong>designed</strong> as a patchwork <strong>course</strong> <strong>for</strong> intermediate to advanced level<br />
quilters. The <strong>block</strong>s each <strong>month</strong> have been geared to teach a variety <strong>of</strong> basic skills and become more advanced as <strong>the</strong><br />
<strong>month</strong>s progress. Quilters will build on <strong>the</strong> knowledge and skills <strong>the</strong>y learn from each <strong>block</strong> until even <strong>the</strong> seemingly more<br />
complex patterns become easy to assemble. Included in <strong>the</strong> techniques that participants learn are rotary cutting, strip<br />
piecing, joining four corners, joining eight corners, paper piecing, setting in, working with curves and much more. The<br />
<strong>block</strong>s <strong>for</strong> this quilt can be constructed using a variety <strong>of</strong> <strong>the</strong> following methods <strong>of</strong> construction: hand piecing, machine<br />
piecing, piecing with freezer paper templates, or piecing onto a foundation. The fabrics used in Moon Glow are all from <strong>the</strong><br />
Quilters Palette by Jinny Beyer <strong>for</strong> RJR Fabrics. The shading <strong>of</strong> <strong>the</strong> colors produces a “moon glow” that gives <strong>the</strong><br />
quilt a rich quality. Each <strong>of</strong> <strong>the</strong> compasses is named after <strong>the</strong> seas <strong>of</strong> <strong>the</strong> moon.<br />
GETTING STARTED<br />
• Wash and press all fabrics.<br />
•<br />
• For machine piecing, test your 1/4" seam accuracy. To achieve accurate 1/4" seams, adjust machine marking or<br />
needle position if necessary.<br />
• Press seams in <strong>the</strong> direction that creates <strong>the</strong> least bulk and/or towards <strong>the</strong> darker fabric.<br />
TEMPLATES<br />
• As printed, all templates include a 1/4" seam allowance.<br />
Dashed lines are sewing lines; solid lines are cutting lines.<br />
• Not all printers/copiers reproduce perfectly.<br />
Test print this page, and check that <strong>the</strong> Template Size<br />
Check below measures <strong>the</strong> correct size. This is critical<br />
to ensuring that your pieces will fit toge<strong>the</strong>r correctly<br />
and your <strong>block</strong>s will finish <strong>the</strong> correct size.<br />
A & AR<br />
Block 1<br />
•<br />
•<br />
•<br />
•<br />
•<br />
•<br />
For machine piecing, trace or photocopy template shapes<br />
<strong>for</strong> each <strong>block</strong>. Templates may be transferred or glued to<br />
template plastic.<br />
For hand piecing, trace on <strong>the</strong> solid line to create templates<br />
that include <strong>the</strong> 1/4" seam allowance. Use <strong>the</strong> template to<br />
draw <strong>the</strong> sewing line, or include <strong>the</strong> seam allowances and trace on <strong>the</strong> solid lines.<br />
For freezer paper method, trace templates onto freezer paper using a freezer paper<br />
template technique. Trace and cut on <strong>the</strong> dashed lines.<br />
Several templates need to be reversed <strong>for</strong> tracing and/or cutting to complete <strong>the</strong><br />
<strong>block</strong>s, i.e. - A (normal) and AR (reversed). They are indicated on <strong>the</strong> templates and<br />
in <strong>the</strong> individual instructions.<br />
All templates should be placed on <strong>the</strong> wrong side <strong>of</strong> <strong>the</strong> fabric <strong>for</strong> tracing and/or<br />
cutting.<br />
Several <strong>of</strong> <strong>the</strong> template shapes are used in more than one <strong>block</strong>. If a template shape<br />
has been used be<strong>for</strong>e, it will be noted in <strong>the</strong> individual <strong>block</strong> instructions.<br />
A & AR<br />
Block 1<br />
Template Size Check<br />
This box should measure<br />
2 inches square.<br />
If <strong>the</strong> box does not measure 2",<br />
your templates/foundations will<br />
not be <strong>the</strong> correct size.<br />
If you are printing at home, be<br />
sure your printer is set to print at<br />
100% with “no scaling”.<br />
Moon Glow by Jinny Beyer General In<strong>for</strong>mation - Page 5 <strong>of</strong> 7
MOON GLOW<br />
Block Guide<br />
Block 1 Block 2<br />
Block 3 Block 4<br />
Block 5 Block 6<br />
Moon Glow by Jinny Beyer General In<strong>for</strong>mation - Page 6 <strong>of</strong> 7
Block 7 Block 8<br />
Block 9<br />
Block 10<br />
Block 11<br />
Block 12B<br />
Moon Glow by Jinny Beyer General In<strong>for</strong>mation - Page 7 <strong>of</strong> 7
MOON GLOW by Jinny Beyer<br />
MONTH 1 – SEA OF NECTAR<br />
Swatch Fabric Description and Cut Needed Block Area Template Cut Quantity<br />
24 9410-14 - Eyelash, Black<br />
P#48<br />
6-1/2" x 41"<br />
17 5868-17 Masque Fea<strong>the</strong>rs, Jade<br />
P#83<br />
8-1/4" x 10-3/4"<br />
13 8868-05 - Floral Vine, Purple<br />
P#96<br />
6-3/4" x 7-1/8"<br />
10 2266-07 - Pinecone, Iris<br />
P#135<br />
6-3/4" x 7-1/8"<br />
1 A 4<br />
1 AR 4<br />
5 Square 4<br />
2 B 4<br />
3 C 4<br />
4 CR 4<br />
14 5868-18 - Masque Fea<strong>the</strong>rs, 6 Rectangle 4<br />
Blackberry P#97<br />
9" x 14"<br />
Square = 1-3/4" x 1-3/4"<br />
FRAME { Rectangle = 1-3/4" x 11-3/4"<br />
IMPORTANT NOTE: Enough fabric <strong>for</strong> borders 1 and 7<br />
should be cut from <strong>the</strong> black eyelash fabric be<strong>for</strong>e making<br />
any o<strong>the</strong>r cuts. This will allow <strong>for</strong> lengthwise grain, 1 piece<br />
borders. O<strong>the</strong>rwise WOF cuts can be made later. See<br />
Month 12 pattern <strong>for</strong> specifics!<br />
Pick your passion! This pattern includes templates <strong>for</strong><br />
machine or hand piecing. There are also freezer paper foundation<br />
pages and standard foundation piecing pages. Use which ever<br />
technique suits you best to accomplish this beautiful <strong>block</strong>!<br />
Spray fabrics with a light sizing or similar product<br />
be<strong>for</strong>e pressing foundations papers to <strong>the</strong>m, especially be<strong>for</strong>e<br />
making any cuts. This will help stabilize <strong>the</strong> bias edges <strong>of</strong> <strong>the</strong><br />
pieces even more!<br />
TEMPLATE GUIDE<br />
FABRIC PLACEMENT<br />
5 6<br />
5<br />
AR<br />
A<br />
1 1<br />
A<br />
AR<br />
CR<br />
C<br />
C<br />
B<br />
CR<br />
B<br />
B<br />
B<br />
CR<br />
C<br />
C<br />
CR<br />
AR<br />
A<br />
1 3<br />
1<br />
4<br />
4<br />
2 3<br />
6 2 2 6<br />
3 2<br />
4 3<br />
4<br />
1 1<br />
A<br />
AR<br />
1 1<br />
The Template Guide diagram illustrates<br />
which templates are needed <strong>for</strong> each<br />
area <strong>of</strong> <strong>the</strong> quilt <strong>block</strong>.<br />
5 6<br />
5<br />
The Fabric Placement diagram illustrates which<br />
fabrics will be used in each <strong>of</strong> those areas.<br />
Moon Glow by Jinny Beyer Month 1 - Page 1 <strong>of</strong> 9
Directions- Freezer Paper Foundation Method.<br />
Match Point = where seams intersect 1/4" from <strong>the</strong> edge (seam<br />
allowance).<br />
CR<br />
B<br />
C<br />
1.<br />
Print copies <strong>of</strong> <strong>the</strong> freezer paper foundation pages onto <strong>the</strong> dull<br />
side <strong>of</strong> 8-1/2" x 11" freezer paper. Using paper cutting scissors,<br />
cut out each shape directly on <strong>the</strong> dashed lines. Be careful not<br />
to add any distance past those lines or your shapes will be too<br />
large.<br />
A<br />
AR<br />
Shown right side up (RSU).<br />
2.<br />
AT THE IRONING BOARD: Place <strong>the</strong><br />
shiny side <strong>of</strong> <strong>the</strong> corresponding freezer<br />
paper shapes onto <strong>the</strong> wrong side <strong>of</strong> <strong>the</strong><br />
fabrics. Space <strong>the</strong> shapes so <strong>the</strong>re is<br />
plenty <strong>of</strong> room on all sides <strong>of</strong> each <strong>for</strong> a<br />
1/4" seam allowance. Using a hot, dry<br />
iron press <strong>the</strong> shiny side <strong>of</strong> <strong>the</strong> freezer<br />
paper shapes onto <strong>the</strong> wrong side <strong>of</strong><br />
each corresponding fabric. This will<br />
temporarily bond <strong>the</strong> paper to <strong>the</strong> fabric.<br />
B<br />
B<br />
B B<br />
B BBB<br />
AT THE CUTTING MAT: Do not mark <strong>the</strong> seam allowances<br />
around <strong>the</strong> paper shapes. Cut each shape out leaving an<br />
exact 1/4" seam allowance on all sides. This is accurately<br />
done with a square see-thru ruler with a clear 1/4" outer<br />
edge marking and rotary cutter. Use <strong>the</strong> template shapes<br />
from page 5 to trim <strong>the</strong> elongated points <strong>of</strong> <strong>the</strong> shapes. This<br />
will make piecing much easier!<br />
A<br />
CR<br />
CR<br />
C<br />
C<br />
AR<br />
3.<br />
4.<br />
Sew <strong>the</strong> A, AR, C and CR shapes toge<strong>the</strong>r. To help line up<br />
<strong>the</strong> match points push a straight pin through <strong>the</strong> match point<br />
on <strong>the</strong> CR foundation to <strong>the</strong> corresponding match point on<br />
<strong>the</strong> A foundation. Carefully pin to secure. Repeat <strong>for</strong> both <strong>the</strong><br />
starting and <strong>the</strong> ending match points. Sew toge<strong>the</strong>r using a<br />
1/4" seam allowance. Backstitch at <strong>the</strong> beginning and<br />
ending <strong>of</strong> each addition.<br />
Leave <strong>the</strong> foundation papers attached to <strong>the</strong> shapes.<br />
Press <strong>the</strong> seam allowances in <strong>the</strong> direction indicated<br />
by <strong>the</strong> arrows. Again, use a hot, dry iron. Press down<br />
with out gliding <strong>the</strong> iron on <strong>the</strong> fabrics as much as<br />
possible.<br />
A<br />
AR<br />
Make 4 Make 4<br />
B<br />
A<br />
A<br />
CR<br />
B<br />
5.<br />
Sew <strong>the</strong> B shapes to <strong>the</strong> A units. Use straight pins to “pin point”<br />
<strong>the</strong> matches. Press.<br />
A<br />
CR<br />
B<br />
C<br />
AR<br />
Make 4<br />
Moon Glow by Jinny Beyer Month 1 - Page 2 <strong>of</strong> 9
6.<br />
7.<br />
Sew <strong>the</strong> AR units to<br />
<strong>the</strong> remaining long<br />
side <strong>of</strong> <strong>the</strong> B shapes.<br />
Press.<br />
Sew <strong>the</strong> units into two<br />
half <strong>block</strong>s. Press.<br />
Sew <strong>the</strong> half <strong>block</strong>s<br />
toge<strong>the</strong>r <strong>for</strong>ming one<br />
Sea <strong>of</strong> Nectar <strong>block</strong>.<br />
Measures 11-3/4" sq.<br />
When viewing from <strong>the</strong> back, <strong>the</strong> seam allowances should all be pressed in a clockwise direction.<br />
This has been an aid in making sharp points and accurate matches. If during <strong>the</strong> piecing process<br />
you wish to remove some <strong>of</strong> <strong>the</strong> foundations remember this rule: Always leave <strong>the</strong> foundations<br />
that are on <strong>the</strong> outside <strong>of</strong> <strong>the</strong> units/<strong>block</strong> attached to <strong>the</strong> fabric <strong>for</strong> exterior support until piecing<br />
is complete. Any interior foundations (foundations that are sewn on all sides) can be removed if<br />
needed to make <strong>the</strong> best match <strong>of</strong> points/seams.<br />
Remove all foundation papers. Press well without sliding <strong>the</strong> iron. Placing a cloth on top <strong>of</strong> <strong>the</strong><br />
<strong>block</strong> be<strong>for</strong>e pressing will help avoid striking a shine on bulky areas <strong>of</strong> <strong>the</strong> piecework.<br />
Trim <strong>the</strong> outer edges <strong>of</strong> <strong>the</strong> <strong>block</strong> if needed to bring it to an 11-3/4" x 11-3/4" measurement.<br />
8.<br />
Sew <strong>the</strong> frame squares and rectangles toge<strong>the</strong>r Press.<br />
Make 2<br />
9.<br />
Sew a rectangle to each side <strong>of</strong> <strong>the</strong> <strong>block</strong>. Press. Sew <strong>the</strong> square/rectangle strips to <strong>the</strong> top and<br />
bottom <strong>of</strong> <strong>the</strong> <strong>block</strong>. Press.<br />
Measures 14-1/4" sq.<br />
Moon Glow by Jinny Beyer Month 1 - Page 3 <strong>of</strong> 9
MONTH 1 – SEA OF NECTAR TEMPLATES<br />
Block 1 - C & CR<br />
MONTH 1 – SEA OF NECTAR<br />
MONTH 1 – SEA OF NECTAR<br />
Block 1 - B<br />
Block 1 - A & AR<br />
MONTH 1 – SEA OF NECTAR<br />
FABRIC CUTTING USING TEMPLATES TECHNIQUE<br />
See step 2 <strong>of</strong> <strong>the</strong> directions if using <strong>the</strong> freezer paper foundation method.<br />
A & AR<br />
• Cut fabric strip that measures 4-1/2" x 35".<br />
• Fold in half, right sides toge<strong>the</strong>r.<br />
• Cut all pieces using A template; bottom half will<br />
be cut into AR pieces.<br />
B<br />
• Cut fabric strip<br />
that measures<br />
6-1/4" x 8-3/4".<br />
B<br />
A<br />
© 2000, 2009, 2011<br />
RJR Fabrics<br />
C & CR<br />
•<br />
Cut fabric piece that measures 4-3/4" x<br />
5-1/8" from both #3 & #4.<br />
Place fabric pieces right<br />
sides toge<strong>the</strong>r, with #4 on<br />
<strong>the</strong> bottom.<br />
Cut all pieces using C<br />
template; bottom fabric will<br />
be cut into CR pieces.<br />
Moon Glow by Jinny Beyer Month 1 - Page 4 <strong>of</strong> 9<br />
•<br />
•<br />
C
MONTH 1 – SEA OF NECTAR Freezer Paper Foundations A<br />
Block 1 - A & AR<br />
MONTH 1 – SEA OF NECTAR<br />
Block 1 - A & AR<br />
MONTH 1 – SEA OF NECTAR<br />
Block 1 - A & AR<br />
MONTH 1 – SEA OF NECTAR<br />
Block 1 - A & AR<br />
MONTH 1 – SEA OF NECTAR<br />
Print 1 copy each <strong>of</strong> pages 6-8 or trace one <strong>of</strong> each <strong>of</strong> <strong>the</strong> foundations (pgs. 6-8) onto freezer paper.<br />
Print at 100% scale on <strong>the</strong> dull side <strong>of</strong> 8-1/2" x 11" freezer paper sheet.<br />
Moon Glow by Jinny Beyer Month 1 - Page 5 <strong>of</strong> 9
MONTH 1 – SEA OF NECTAR Freezer Paper Foundations AR<br />
MONTH 1 – SEA OF NECTAR<br />
Block 1 - A & AR<br />
Block 1 - A & AR<br />
MONTH 1 – SEA OF NECTAR<br />
Block 1 - A & AR<br />
MONTH 1 – SEA OF NECTAR<br />
Block 1 - A & AR<br />
MONTH 1 – SEA OF NECTAR<br />
Print at 100% scale on <strong>the</strong> dull side <strong>of</strong> 8-1/2" x 11" freezer paper sheet.<br />
Moon Glow by Jinny Beyer Month 1 - Page 6 <strong>of</strong> 9
MONTH 1 – SEA OF NECTAR<br />
MONTH 1 – SEA OF NECTAR<br />
Block 1 - C & CR<br />
Block 1 - C & CR<br />
MONTH 1 – SEA OF NECTAR<br />
MONTH 1 – SEA OF NECTAR<br />
Block 1 - C & CR<br />
Block 1 - C & CR<br />
MONTH 1 – SEA OF NECTAR Freezer Paper Foundations B, C & CR<br />
MONTH 1 – SEA OF NECTAR<br />
MONTH 1 – SEA OF NECTAR<br />
Block 1 - B<br />
Block 1 - B<br />
MONTH 1 – SEA OF NECTAR<br />
MONTH 1 – SEA OF NECTAR<br />
Block 1 - B<br />
Block 1 - B<br />
MONTH 1 – SEA OF NECTAR<br />
MONTH 1 – SEA OF NECTAR<br />
Block 1 - C & CR<br />
Block 1 - C & CR<br />
MONTH 1 – SEA OF NECTAR<br />
MONTH 1 – SEA OF NECTAR<br />
Block 1 - C & CR<br />
Block 1 - C & CR<br />
Use <strong>the</strong> template shapes from page<br />
5 to trim <strong>the</strong> elongated points <strong>of</strong> <strong>the</strong><br />
shapes. This will make piecing much<br />
easier!<br />
Print at 100% scale on <strong>the</strong> dull side <strong>of</strong> 8-1/2" x 11" freezer paper sheet.<br />
Moon Glow by Jinny Beyer Month 1 - Page 7 <strong>of</strong> 9
SEA OF NECTAR - PART 2<br />
MONTH 1 – SEA OF NECTAR FOUNDATIONS<br />
Print 4 copies <strong>of</strong> this page or trace 4 <strong>of</strong> each part 1 & 2. Vellum is <strong>the</strong> best paper to use.<br />
B<br />
Foundation piece<br />
<strong>the</strong> sections and sew<br />
to star sewn using<br />
template B.<br />
DESIGNED BY JINNY BEYER<br />
1<br />
2<br />
MOON GLOW - MONTH 1<br />
2<br />
MOON GLOW - MONTH 1<br />
SEA OF NECTAR - PART 1<br />
1<br />
DESIGNED BY JINNY BEYER<br />
If you prefer to work with shapes similar to <strong>the</strong> areas on <strong>the</strong> foundation, make templates as you would<br />
<strong>for</strong> hand and machine piecing. Add an additional 1/4" seam allowance around all sides to make<br />
foundation piecing easier.<br />
Moon Glow by Jinny Beyer Month 1 - Page 8 <strong>of</strong> 9
HAND PIECING<br />
• Mark <strong>the</strong> sewing line onto <strong>the</strong> wrong side <strong>of</strong> each fabric piece.<br />
• In preparation <strong>for</strong> sewing, pin two fabric pieces toge<strong>the</strong>r. To make sure <strong>the</strong> drawn lines are<br />
perfectly aligned, use pins at <strong>the</strong> beginning and end <strong>of</strong> <strong>the</strong> seam line. Also place pins at<br />
intervals along <strong>the</strong> seam line to help hold pieces toge<strong>the</strong>r securely <strong>for</strong> stitching.<br />
• Sew fabric pieces toge<strong>the</strong>r in <strong>the</strong> order indicated in <strong>the</strong> individual instructions.<br />
• Stitch on <strong>the</strong> seam line using a running stitch. To keep <strong>the</strong> thread from pulling, stitch<br />
additional backstitches every couple <strong>of</strong> inches. Secure each end with a fastening stitch,<br />
i.e. knot or backstitch.<br />
MACHINE PIECING<br />
• On <strong>the</strong> wrong side <strong>of</strong> each fabric piece, mark 1/4" intersections at all corners.<br />
• In preparation <strong>for</strong> sewing, pin two fabric pieces toge<strong>the</strong>r. Use pins at <strong>the</strong> beginning and end <strong>of</strong> <strong>the</strong> seam line, pinning<br />
through <strong>the</strong> 1/4" intersections marked on both fabrics. To help hold pieces toge<strong>the</strong>r securely <strong>for</strong> stitching, place<br />
pins along <strong>the</strong> seam line .<br />
• Using <strong>the</strong> appropriate marking on your sewing machine to accomplish a 1/4" seam, stitch<br />
along <strong>the</strong> seam line.<br />
• Sew fabric pieces toge<strong>the</strong>r in <strong>the</strong> order indicated in <strong>the</strong> individual instructions.<br />
• For most seams you will sew from cut edge to cut edge. However, because many <strong>of</strong> <strong>the</strong>se<br />
<strong>block</strong>s require set-in seams, care must be taken to determine when <strong>the</strong> seam should be<br />
ended at <strong>the</strong> 1/4" intersection markings. If a pivot or set-in is needed at ei<strong>the</strong>r end <strong>of</strong> <strong>the</strong><br />
seam, it is best to begin and/or end <strong>the</strong> seam at <strong>the</strong> marked intersection, backstitching <strong>for</strong><br />
a few stitches to secure <strong>the</strong> seam.<br />
FREEZER PAPER PIECING<br />
• Trace and cut out freezer paper template pieces and press onto <strong>the</strong> wrong side <strong>of</strong> fabric.<br />
• Cut out shapes, leaving 1/4" <strong>of</strong> fabric <strong>for</strong> seam allowance around each template shape.<br />
• In preparation <strong>for</strong> sewing, pin two fabric pieces toge<strong>the</strong>r. Use pins at <strong>the</strong> beginning and<br />
end <strong>of</strong> <strong>the</strong> seam line, pinning at <strong>the</strong> corners <strong>of</strong> <strong>the</strong> freezer paper templates on both pieces<br />
<strong>of</strong> fabric. To help hold pieces toge<strong>the</strong>r securely <strong>for</strong> stitching, place pins along <strong>the</strong> seam<br />
line.<br />
• Stitch along <strong>the</strong> edges <strong>of</strong> <strong>the</strong> freezer paper. Leave <strong>the</strong> freezer paper templates in place<br />
until <strong>the</strong> <strong>block</strong> has been completed.<br />
• Sew fabric pieces toge<strong>the</strong>r in <strong>the</strong> order indicated in <strong>the</strong> individual instructions.<br />
FOUNDATION PIECING<br />
• Trace or photocopy foundation pieces <strong>for</strong> each <strong>block</strong>.<br />
• Cut a piece <strong>of</strong> fabric <strong>for</strong> each area on <strong>the</strong> foundation with a generous 1/4" seam allowance<br />
along all sides.<br />
• Place wrong side <strong>of</strong> #1 fabric on <strong>the</strong> wrong (unprinted) side <strong>of</strong> <strong>the</strong> foundation with 1/4"<br />
extending beyond <strong>the</strong> seam line between areas #1 and #2.<br />
•<br />
•<br />
•<br />
•<br />
•<br />
•<br />
•<br />
•<br />
•<br />
Using a slightly shorter stitch length than usual, sew on <strong>the</strong> printed line. Stitch several<br />
stitches beyond <strong>the</strong> seam line at each end.<br />
Using a warm, dry iron, press fabric #2 completely to <strong>the</strong> side, being careful to avoid any<br />
pleats that will affect accuracy.<br />
Fold <strong>the</strong> foundation on <strong>the</strong> line <strong>for</strong> <strong>the</strong> next seam to be sewn. Using this fold as a guide,<br />
trim <strong>the</strong> fabric along <strong>the</strong> fold, leaving a 1/4" seam allowance.<br />
Continue adding fabric pieces to <strong>the</strong> foundation by repeating <strong>the</strong>se same steps until all<br />
numbered areas have been covered with fabric.<br />
Cut <strong>of</strong>f excess fabric by trimming 1/4" away from <strong>the</strong> outermost solid line along each edge.<br />
Place two pieced sections right sides toge<strong>the</strong>r. Place pins at <strong>the</strong> beginning and end <strong>of</strong> <strong>the</strong><br />
seam lines on both pieces.<br />
Sew on <strong>the</strong> line, stitching from cut edge to cut edge.<br />
Sew pieces toge<strong>the</strong>r in <strong>the</strong> order indicated in <strong>the</strong> individual instructions.<br />
MOON GLOW - BLOCK OF THE MONTH - #3<br />
3<br />
2<br />
1<br />
SEA OF INGENUITY - PART 1<br />
DESIGNED BY JINNY BEYER<br />
3<br />
SEA OF INGENUITY - PART 1<br />
DESIGNED BY JINNY BEYER<br />
2<br />
MOON GLOW - BLOCK OF THE MONTH - #3<br />
1<br />
© Copyright RJR Fabrics<br />
Moon Glow by Jinny Beyer Month 1 - Page 9 <strong>of</strong> 9
MOON GLOW by Jinny Beyer<br />
MONTH 2 – SEA OF MOISTURE<br />
Swatch Fabric Description and Cut Needed Block Area Template Cut Quantity<br />
24 9410-14 - Eyelash, Black<br />
1 A 4<br />
P#48<br />
1 AR 4<br />
6-1/2" x 41"<br />
7 Square 4<br />
FRAME {<br />
17 5868-17 - Masque Fea<strong>the</strong>rs, Jade<br />
P#83<br />
7-1/8" x 7-1/4"<br />
10 2266-07 - Pinecone, Iris<br />
P#135<br />
7-1/8" x 7-1/4"<br />
18 6931-27 - Flower Texture, Turq.<br />
P#127<br />
6-3/4" x 7-1/8"<br />
8 0498-09 - Posies, Cobalt<br />
P#123<br />
6-3/4" x 7-1/8"<br />
13 8868-5 - Floral Vine, Purple<br />
P#96<br />
5" x 5"<br />
14 5868-18 - Masque Fea<strong>the</strong>rs,<br />
Blackberry P#97<br />
9" x 14"<br />
Square = 1-3/4" x 1-3/4"<br />
Rectangle = 1-3/4" x 11-3/4"<br />
Pick your passion!<br />
This pattern includes<br />
templates <strong>for</strong> machine<br />
or hand piecing. There<br />
are also freezer paper<br />
foundation pages and<br />
standard foundation<br />
piecing pages. Use which<br />
ever technique suits you<br />
best or a combination to<br />
accomplish this beautiful<br />
<strong>block</strong>!<br />
© 2000, 2009, 2011<br />
RJR Fabrics<br />
A<br />
AR<br />
TEMPLATE GUIDE<br />
AR<br />
CR<br />
A<br />
C<br />
B<br />
BR<br />
C<br />
CR<br />
BR<br />
B<br />
D<br />
AR<br />
The Template Guide diagram illustrates<br />
which templates are needed <strong>for</strong> each<br />
area <strong>of</strong> <strong>the</strong> quilt <strong>block</strong>.<br />
B<br />
BR<br />
A<br />
C<br />
BR<br />
B<br />
C<br />
CR<br />
CR<br />
2 B 4<br />
3 BR 4<br />
4 C 4<br />
5 CR 4<br />
6 D 1<br />
8 Rectangle 4<br />
Moon Glow by Jinny Beyer Month 2 - Page 1 <strong>of</strong> 7<br />
AR<br />
A<br />
FABRIC PLACEMENT<br />
7 8<br />
7<br />
1<br />
1 1<br />
4<br />
5<br />
8<br />
2 3<br />
6<br />
3 2<br />
8<br />
4 2 3 4 5<br />
1 5<br />
1<br />
1 1<br />
7 7<br />
8<br />
The Fabric Placement diagram illustrates which<br />
fabrics will be used in each <strong>of</strong> those areas.<br />
Spray fabrics with a light sizing or similar product be<strong>for</strong>e pressing<br />
foundations papers to <strong>the</strong>m, especially be<strong>for</strong>e making any cuts. This<br />
will help stabilize <strong>the</strong> bias edges <strong>of</strong> <strong>the</strong> pieces even more!<br />
3<br />
2<br />
5<br />
4<br />
1
Directions- Set-In Seam Method. Alternate approach: Applique D to <strong>the</strong> <strong>block</strong> once all o<strong>the</strong>r<br />
pieces are sewn toge<strong>the</strong>r. Match Point = where seams intersect 1/4" from <strong>the</strong> edge (seam allowance).<br />
1.<br />
2.<br />
3.<br />
4.<br />
5.<br />
6.<br />
Make templates and cut out fabric.<br />
Using <strong>the</strong> B and BR pieces, sew<br />
four identical units as shown<br />
here. Press <strong>the</strong> seam allowances<br />
in <strong>the</strong> direction indicated by <strong>the</strong><br />
arrows.<br />
Make 4<br />
Sew <strong>the</strong> units to <strong>the</strong> D square<br />
creating a core star unit. Start and stop <strong>the</strong> seams<br />
at <strong>the</strong> edge <strong>of</strong> <strong>the</strong> foundation papers (1/4" from<br />
fabric edge). Area left unsewn is indicated by <strong>the</strong> red circles. Press.<br />
Sew <strong>the</strong> A, AR, C and CR pieces into star point units. Press after each addition.<br />
C<br />
CR<br />
Pin <strong>the</strong> match points<br />
(indicated by red dots).<br />
A AR<br />
The seam is sewn all<br />
Make 4<br />
<strong>the</strong> way to <strong>the</strong> end at<br />
<strong>the</strong> outer points <strong>of</strong> <strong>the</strong><br />
star. Stop <strong>the</strong> seam at <strong>the</strong><br />
match point at <strong>the</strong> inside<br />
<strong>of</strong> <strong>the</strong> core star. TIP: Sew<br />
through only two layers<br />
<strong>of</strong> fabric where ever<br />
possible. Push all existing<br />
seam allowances away from<br />
your seam line path. Backstitch<br />
at start and stop <strong>of</strong> seam line. Pull<br />
Measures 11-3/4" sq.<br />
<strong>the</strong> pieces away from <strong>the</strong> machine. Line<br />
up <strong>the</strong> second side. Place piecework under <strong>the</strong> presser foot and lower <strong>the</strong> presser foot. Sew down<br />
<strong>the</strong> second side. Press well and repeat <strong>the</strong> process <strong>for</strong> <strong>the</strong> remaining units. Press.<br />
Sew <strong>the</strong> frame squares and rectangles toge<strong>the</strong>r Press.<br />
B<br />
BR<br />
Stop and<br />
start 1/4"<br />
from fabric<br />
edge.<br />
D<br />
7.<br />
Sew a rectangle<br />
to each side<br />
<strong>of</strong> <strong>the</strong> <strong>block</strong>.<br />
Press. Sew<br />
<strong>the</strong> square/<br />
rectangle strips<br />
to <strong>the</strong> top and<br />
bottom <strong>of</strong> <strong>the</strong><br />
<strong>block</strong>. Press.<br />
Make 2<br />
Measures 14-1/4" sq.<br />
Moon Glow by Jinny Beyer Month 2 - Page 2 <strong>of</strong> 7
MONTH 2 – SEA OF MOISTURE TEMPLATES<br />
MONTH 2 – SEA OF MOISTURE<br />
Block 2 - B & BR<br />
Block 2 - C & CR<br />
MONTH 2 – SEA OF MOISTURE<br />
MONTH 2 – SEA OF MOISTURE<br />
Block 2 - D<br />
Block 2 - A & AR<br />
MONTH 2 – SEA OF MOISTURE<br />
FABRIC CUTTING USING TEMPLATES<br />
A & AR<br />
• Cut fabric strip that measures<br />
• 4-1/2" x 35".<br />
• Fold in half, right sides toge<strong>the</strong>r.<br />
• Cut all pieces using A template;<br />
bottom half will be cut into AR pieces.<br />
B & BR<br />
•<br />
•<br />
•<br />
Cut fabric piece that<br />
measures 5-1/8" x 5-1/4"<br />
from both #2 & #3.<br />
Place fabric pieces right<br />
sides toge<strong>the</strong>r, with<br />
#3 on <strong>the</strong> bottom.<br />
Cut all pieces using<br />
B template; bottom<br />
fabric will be cut into<br />
BR pieces.<br />
B<br />
C & CR<br />
•<br />
•<br />
•<br />
A<br />
Cut fabric piece that measures<br />
4-3/4" x 5-1/8" from both #4 &<br />
#5.<br />
Place fabric pieces right sides<br />
toge<strong>the</strong>r, with #5 on<br />
<strong>the</strong> bottom.<br />
Cut all pieces using<br />
C template; bottom<br />
fabric will be cut<br />
into CR pieces.<br />
C<br />
D<br />
• Cut fabric piece<br />
that measures<br />
3" x 3".<br />
C<br />
Moon Glow by Jinny Beyer Month 2 - Page 3 <strong>of</strong> 7
MONTH 2 – SEA OF MOISTURE Freezer Paper Foundations A & D<br />
Block 2 - A & AR<br />
MONTH 2 – SEA OF MOISTURE<br />
Block 2 - A & AR<br />
MONTH 12– SEA OF MOISTURE<br />
Block 2 - A & AR<br />
MONTH 12– SEA OF MOISTURE<br />
Block 2 - A & AR<br />
MONTH 2 – SEA OF MOISTURE<br />
Print 1 copy each <strong>of</strong> pages 5-7 or trace one <strong>of</strong> each <strong>of</strong> <strong>the</strong><br />
size. No seam allowances are included in <strong>the</strong>se foundations.<br />
Block 2 - D<br />
Print at 100% scale on <strong>the</strong> dull side <strong>of</strong> 8-1/2" x 11" freezer paper sheet.<br />
MONTH 2 – SEA OF MOISTURE<br />
Moon Glow by Jinny Beyer Month 2 - Page 4 <strong>of</strong> 7
MONTH 2 – SEA OF MOISTURE Freezer Paper Foundations AR<br />
MONTH 2 – SEA OF MOISTURE<br />
Block 2 - A & AR<br />
MONTH 2 – SEA OF MOISTURE<br />
Block 2 - A & AR<br />
MONTH 2 – SEA OF MOISTURE<br />
Block 2 - A & AR<br />
MONTH 2 – SEA OF MOISTURE<br />
Block 2 - A & AR<br />
Print at 100% scale on <strong>the</strong> dull side <strong>of</strong> 8-1/2" x 11" freezer paper sheet.<br />
Moon Glow by Jinny Beyer Month 2 - Page 5 <strong>of</strong> 7
Block 2 - B & BR<br />
MONTH 2 – SEA OF MOISTURE<br />
Block 2 - B & BR<br />
MONTH 2 – SEA OF MOISTURE<br />
Block 2 - B & BR<br />
MONTH 2 – SEA OF MOISTURE<br />
Block 2 - B & BR<br />
MONTH 2 – SEA OF MOISTURE<br />
Block 2 - C & CR<br />
MONTH 2 – SEA OF MOISTURE<br />
Block 2 - C & CR<br />
MONTH 2 – SEA OF MOISTURE<br />
Block 2 - C & CR<br />
MONTH 2 – SEA OF MOISTURE<br />
Block 2 - C & CR<br />
MONTH 2 – SEA OF MOISTURE<br />
MONTH 2 – SEA OF MOISTURE Freezer Paper Foundations B, BR, C, CR<br />
Block 2 - C & CR<br />
MONTH 2 – SEA OF MOISTURE<br />
Block 2 - C & CR<br />
MONTH 2 – SEA OF MOISTURE<br />
Block 2 - C & CR<br />
MONTH 2 – SEA OF MOISTURE<br />
Block 2 - C & CR<br />
MONTH 2 – SEA OF MOISTURE<br />
Block 2 - B & BR<br />
MONTH 2 – SEA OF MOISTURE<br />
Block 2 - B & BR<br />
MONTH 2 – SEA OF MOISTURE<br />
Block 2 - B & BR<br />
MONTH 2 – SEA OF MOISTURE<br />
Block 2 - B & BR<br />
MONTH 2 – SEA OF MOISTURE<br />
Print at 100% scale on <strong>the</strong> dull side <strong>of</strong> 8-1/2" x 11" freezer paper sheet.<br />
Moon Glow by Jinny Beyer Month 2 - Page 6 <strong>of</strong> 7
MONTH 2 – SEA OF MOISTURE FOUNDATIONS<br />
Print 4 copies <strong>of</strong> this page or trace 4 <strong>of</strong> each part 1 & 2. Vellum is <strong>the</strong> best paper to use.<br />
D<br />
MOON GLOW - MONTH 2<br />
Foundation piece<br />
<strong>the</strong> sections and<br />
<strong>the</strong>n applique <strong>the</strong> D<br />
square in <strong>the</strong> center.<br />
3<br />
DESIGNED BY JINNY BEYER<br />
1<br />
SEA OF MOISTURE - PART 1<br />
SEA OF MOISTURE - PART 2<br />
2<br />
3<br />
2<br />
MOON GLOW - MONTH 2<br />
1<br />
DESIGNED BY JINNY BEYER<br />
If you prefer to work with shapes similar to <strong>the</strong> areas on <strong>the</strong> foundation, make templates as you would<br />
<strong>for</strong> hand and machine piecing. Add an additional 1/4" seam allowance around all sides to make<br />
foundation piecing easier.<br />
Moon Glow by Jinny Beyer Month 2 - Page 7 <strong>of</strong> 7
MOON GLOW by Jinny Beyer<br />
MONTH 3 – SEA OF INGENUITY<br />
Swatch Fabric Description and Cut Needed Block Area Template Cut Quantity<br />
24 9410-14 - Eyelash, Black<br />
1 A 4<br />
P#48<br />
1 AR 4<br />
11" x 31"<br />
6 Square 4<br />
FRAME {<br />
18 6931-27 - Flower Texture, Turq.<br />
P#127<br />
8-5/8" x 10"<br />
16<br />
5866-73 - Ripple, Clover<br />
P#62<br />
8-5/8" x 10"<br />
6 8737-08 - Hens & Chicks,<br />
Sapphire P#121<br />
7-3/4" x 8-1/2"<br />
13 8868-05 - Floral Vine, Purple<br />
P#96<br />
7-3/4" x 8-1/2"<br />
14 5868-18 - Masque Fea<strong>the</strong>rs,<br />
Blackberry P#97<br />
9" x 14"<br />
Square = 1-3/4" x 1-3/4"<br />
Rectangle = 1-3/4" x 11-3/4"<br />
2 B 4<br />
3 B 4<br />
4 C 4<br />
5 C 4<br />
7 Rectangle 4<br />
TEMPLATE GUIDE<br />
6<br />
FABRIC PLACEMENT<br />
7<br />
6<br />
AR<br />
A<br />
1 1<br />
A<br />
AR<br />
C<br />
C<br />
AR<br />
1 4<br />
5<br />
B B C<br />
2 3 5<br />
C B B 4 3 2<br />
B B C<br />
7<br />
2 3 4<br />
C B B 5<br />
3 2<br />
C<br />
C A<br />
5<br />
1 4<br />
A<br />
AR<br />
The Template Guide diagram illustrates<br />
which templates are needed <strong>for</strong> each<br />
area <strong>of</strong> <strong>the</strong> quilt <strong>block</strong>.<br />
6<br />
1 1<br />
The Fabric Placement diagram illustrates which<br />
fabrics will be used in each <strong>of</strong> those areas.<br />
Pick your passion! This pattern includes templates <strong>for</strong> machine or<br />
hand piecing. There are also standard foundation piecing pages. Use<br />
which ever technique suits you best or a combination to accomplish this<br />
beautiful <strong>block</strong>!<br />
Moon Glow by Jinny Beyer Month 3 - Page 1 <strong>of</strong> 4<br />
7<br />
1<br />
1<br />
7<br />
6<br />
Spray fabrics with a<br />
light sizing or similar<br />
product be<strong>for</strong>e pressing<br />
foundations papers to<br />
<strong>the</strong>m. Especially be<strong>for</strong>e<br />
making any cuts. This<br />
will help stabilize <strong>the</strong> bias<br />
edges <strong>of</strong> <strong>the</strong> pieces even<br />
more!<br />
© 2000, 2009, 2011<br />
RJR Fabrics
The lesson this <strong>month</strong> is how to join eight points. The remaining piecing is similar to Block 1. Two<br />
templates can be reused from Block 1, A/AR and C. This <strong>month</strong> simple paper piecing instructions are<br />
also introduced.<br />
Directions- Template method.<br />
1.<br />
2.<br />
3.<br />
Make templates and/or foundations.<br />
Cut out fabric. If using foundation method use <strong>the</strong> Pre-Cutting Guide For Foundations.<br />
Sew four identical units as<br />
shown. Press in <strong>the</strong> direction<br />
indicated by <strong>the</strong> arrows. If you<br />
are foundation piecing <strong>the</strong>se<br />
units <strong>the</strong> pressing direction will<br />
be set by how <strong>the</strong> foundation is<br />
numbered.<br />
Make 4<br />
4.<br />
Sew <strong>the</strong> units into two half <strong>block</strong>s. Press. Sew <strong>the</strong> half <strong>block</strong>s toge<strong>the</strong>r <strong>for</strong>ming one Sea <strong>of</strong><br />
Ingenuity <strong>block</strong>.<br />
Measures 11-3/4" sq.<br />
5.<br />
Sew <strong>the</strong> frame squares and rectangles toge<strong>the</strong>r Press.<br />
6.<br />
Sew a rectangle to each side <strong>of</strong> <strong>the</strong> <strong>block</strong>. Press. Sew <strong>the</strong> square/<br />
rectangle strips to <strong>the</strong> top and bottom <strong>of</strong> <strong>the</strong> <strong>block</strong>. Press.<br />
Make 2<br />
Measures 14-1/4" sq.<br />
Moon Glow by Jinny Beyer Month 3 - Page 2 <strong>of</strong> 4
MONTH 3 – SEA OF INGENUITY TEMPLATES<br />
MONTH 3 – SEA OF INGENUITY<br />
Block 3 - C<br />
Block 3 - B<br />
MONTH 3 – SEA OF INGENUITY<br />
Block 3- A & AR<br />
MONTH 3 – SEA OF INGENUITY<br />
FABRIC CUTTING USING TEMPLATES<br />
A & AR<br />
• Cut fabric strip that measures 4-1/2" x 35".<br />
• Fold in half, right sides toge<strong>the</strong>r.<br />
• Cut all pieces using A template; bottom half will be cut into AR pieces.<br />
A<br />
B<br />
• Cut fabric piece that measures<br />
5-3/4" x 6-1/2" from both #2 &<br />
#3.<br />
• Place both fabric pieces wrong<br />
sides facing up.<br />
B<br />
C<br />
• Cut fabric piece that<br />
measures 4-3/4" x 5-1/8"<br />
from both #4 & #5.<br />
• Place both fabric pieces<br />
wrong sides facing up.<br />
C<br />
Moon Glow by Jinny Beyer Month 3 - Page 3 <strong>of</strong> 4
MONTH 3 – SEA OF INGENUITY FOUNDATIONS<br />
Print 4 copies <strong>of</strong> this page or trace 4 <strong>of</strong> each part 1 & 2. Vellum is <strong>the</strong> best paper to use.<br />
3<br />
MOON GLOW - MONTH 3 SEA OF INGENUITY - PART 1<br />
MOON GLOW - MONTH 3 SEA OF INGENUITY - PART 2<br />
3<br />
2<br />
1<br />
DESIGNED BY JINNY BEYER<br />
2<br />
1<br />
DESIGNED BY JINNY BEYER<br />
PRE-CUTTING GUIDE FOR FOUNDATIONS<br />
Area Fabric Qty Size Template<br />
Part 1 - 1 Fabric 24 - Eyelash, Black 4 4-1/2" x 6-3/4" A<br />
Part 1 - 2 Fabric 6 - Hens & Chicks, Sapphire 4 1-5/8" x 5-3/4" C<br />
Part 1 - 3 Fabric 16 - Ripple, Clover 4 2" x 6-5/8" B<br />
Part 2 - 1 Fabric 24 - Eyelash, Black 4 4-1/2" x 6-3/4" AR<br />
Part 2 - 2 Fabric 13 - Floral Vine, Purple 4 1-5/8" x 5-3/4" C<br />
Part 2 - 3 Fabric 18 - Flower Texture, Turquoise 4 2" x 6-5/8" B<br />
If you prefer to work with shapes similar to <strong>the</strong> areas on <strong>the</strong> foundation, make templates as you would<br />
<strong>for</strong> hand and machine piecing. Add an additional 1/4" seam allowance around all sides to make<br />
Moon Glow by Jinny Beyer Month 3 - Page 4 <strong>of</strong> 4
MOON GLOW by Jinny Beyer<br />
MONTH 4 – SEA OF TRANQUILITY<br />
Swatch Fabric Description and Cut Needed Block Area Template Cut Quantity<br />
24 9410-14 - Eyelash, Black<br />
1 A 4<br />
P#48<br />
1 AR 4<br />
6 1/2" x 41"<br />
6 Square 4<br />
FRAME {<br />
18 6931-27 - Flower Texture, Turq.<br />
P#127<br />
6 7/8" x 9 3/8"<br />
16 4795-21 - Ripple, Clover<br />
P#62<br />
6 7/8" x 9 3/8"<br />
13 8868-05 - Floral Vine, Purple<br />
P#96<br />
3 1/2" x 12 1/4"<br />
10 2266-07 - Pinecone, Iris<br />
P#135<br />
5 3/4" x 5 3/4"<br />
14 5868-18 - Masque Fea<strong>the</strong>rs,<br />
Blackberry P#97<br />
9" x 14"<br />
Square = 1-3/4" x 1-3/4"<br />
Rectangle = 1-3/4" x 11-3/4"<br />
Pick your passion! This pattern includes templates<br />
<strong>for</strong> machine or hand piecing. There are also freezer paper<br />
foundation pages and standard foundation piecing pages.<br />
Use which ever technique suits you best or a combination to<br />
accomplish this beautiful <strong>block</strong>!<br />
2 B 4<br />
3 B 4<br />
4 C 8<br />
5 D 1<br />
7 Rectangle 4<br />
TEMPLATE GUIDE<br />
6<br />
FABRIC PLACEMENT<br />
7<br />
6<br />
AR<br />
A<br />
1 1<br />
A<br />
AR<br />
B<br />
B<br />
C<br />
C<br />
B<br />
B<br />
C C<br />
D<br />
C C<br />
B<br />
B<br />
C<br />
C<br />
B<br />
B<br />
AR<br />
A<br />
1 2 1<br />
3 3<br />
4<br />
4 4<br />
7 2 5 2 7<br />
3 4 4 3<br />
1 2 1<br />
4<br />
4 4<br />
A<br />
AR<br />
1 1<br />
© 2000, 2009, 2011<br />
RJR Fabrics<br />
The Template Guide diagram illustrates<br />
which templates are needed <strong>for</strong> each<br />
area <strong>of</strong> <strong>the</strong> quilt <strong>block</strong>.<br />
The Fabric Placement diagram illustrates which<br />
fabrics will be used in each <strong>of</strong> those areas.<br />
Moon Glow by Jinny Beyer Month 4 - Page 1 <strong>of</strong> 7<br />
6<br />
7<br />
6
The lesson this <strong>month</strong> is how to add small pieces around <strong>the</strong> octagon. Setting in a simple angle is<br />
also continued from Month 2. One template can be reused from Month 1, A/AR.<br />
Directions- Template method.<br />
1.<br />
2.<br />
3.<br />
4.<br />
5.<br />
Make templates. Cut out fabric.<br />
Because <strong>the</strong> center<br />
<strong>of</strong> this <strong>block</strong> has set<br />
in seams, start and<br />
stop stitching at all<br />
seam intersections<br />
when sewing <strong>the</strong><br />
small triangles onto<br />
<strong>the</strong> octagon. Not stitching<br />
into <strong>the</strong> seam allowance will allow<br />
<strong>for</strong> easier piecing at <strong>the</strong> pivot points along<br />
<strong>the</strong>se seams.<br />
When attaching small triangles to <strong>the</strong> octagon, <strong>the</strong> side with <strong>the</strong> grainline arrow is <strong>the</strong> side onto<br />
which <strong>the</strong> octagon is sewn.<br />
Sew four identical units as shown below. Press in <strong>the</strong> direction indicated by <strong>the</strong> arrows.<br />
Sew <strong>the</strong> units into two half <strong>block</strong>s. Press. Sew <strong>the</strong> half <strong>block</strong>s toge<strong>the</strong>r <strong>for</strong>ming one Sea <strong>of</strong><br />
Tranquility<br />
<strong>block</strong>.<br />
Make 4<br />
See set in seam tutorial (<strong>block</strong> 2 page 3).<br />
Measures 11-3/4" sq.<br />
6.<br />
7.<br />
Sew <strong>the</strong> frame squares and rectangles toge<strong>the</strong>r Press.<br />
Sew a rectangle to each side <strong>of</strong> <strong>the</strong> <strong>block</strong>. Press. Sew <strong>the</strong> square/<br />
rectangle strips to <strong>the</strong> top and bottom <strong>of</strong> <strong>the</strong> <strong>block</strong>. Press.<br />
Make 2<br />
Measures 14-1/4" sq.<br />
Moon Glow by Jinny Beyer Month 4 - Page 2 <strong>of</strong> 7
MONTH 4 – SEA OF TRANQUILITY TEMPLATES<br />
MONTH 4 – SEA OF TRANQUILITY<br />
4/C<br />
MONTH 4 – SEA OF TRANQUILITY<br />
Block 4 - B<br />
MONTH 4 – SEA OF TRANQUILITY<br />
Block 4 - D<br />
Block 4 - A & AR<br />
MONTH 4 – SEA OF TRANQUILITY<br />
FABRIC CUTTING USING TEMPLATES<br />
A & AR<br />
• Cut fabric strip that measures 4-1/2" x 35".<br />
• Fold in half, right sides toge<strong>the</strong>r.<br />
• Cut all pieces using A template; bottom half will be cut<br />
into AR pieces.<br />
C<br />
• Cut fabric piece that measures<br />
1-1/2" x 10-1/4".<br />
C<br />
A<br />
D<br />
• Cut fabric piece that measures<br />
3-3/4" x 3-3/4".<br />
B<br />
• Cut fabric piece that measures<br />
4-7/8" x 7-3/8" from both #2 &<br />
#3.<br />
• Place both fabric pieces wrong<br />
sides up.<br />
B<br />
D<br />
Moon Glow by Jinny Beyer Month 4 - Page 3 <strong>of</strong> 7
MONTH 4 – SEA OF TRANQUILITY Freezer Paper Foundations A<br />
Block 4 - A & AR<br />
MONTH 4 – SEA OF TRANQUILITY<br />
Block 4 - A & AR<br />
MONTH 4 – SEA OF TRANQUILITY<br />
Block 4 - A & AR<br />
MONTH 4 – SEA OF TRANQUILITY<br />
Block 4 - A & AR<br />
MONTH 4 – SEA OF TRANQUILITY<br />
Print 1 copy each <strong>of</strong> pages 5-7 or trace one <strong>of</strong> each <strong>of</strong> <strong>the</strong> foundations (pgs. 5-7) onto freezer paper.<br />
Print at 100% scale on <strong>the</strong> dull side <strong>of</strong> 8-1/2" x 11" freezer paper sheet.<br />
Moon Glow by Jinny Beyer Month 4 - Page 4 <strong>of</strong> 7
MONTH 4 – SEA OF TRANQUILITY Freezer Paper Foundations AR<br />
MONTH 4 – SEA OF TRANQUILITY<br />
Block 4 - A & AR<br />
MONTH 4 – SEA OF TRANQUILITY<br />
Block 4 - A & AR<br />
MONTH 4 – SEA OF TRANQUILITY<br />
Block 4 - A & AR<br />
MONTH 4 – SEA OF TRANQUILITY<br />
Block 4 - A & AR<br />
Print at 100% scale on <strong>the</strong> dull side <strong>of</strong> 8-1/2" x 11" freezer paper sheet.<br />
Moon Glow by Jinny Beyer Month 4 - Page 5 <strong>of</strong> 7
MONTH 4 – SEA OF TRANQUILITY Freezer Paper Foundations B, C & D<br />
MONTH 4 – SEA OF TRANQUILITY<br />
4/C<br />
Block 4 - B<br />
MONTH 4 – SEA OF TRANQUILITY<br />
Block 4 - B<br />
MONTH 4 – SEA OF TRANQUILITY<br />
MONTH 4 – SEA OF TRANQUILITY<br />
4/C<br />
MONTH 4 – SEA OF TRANQUILITY<br />
4/C<br />
Block 4 - B<br />
MONTH 4 – SEA OF TRANQUILITY<br />
Block 4 - B<br />
MONTH 4 – SEA OF TRANQUILITY<br />
MONTH 4 – SEA OF TRANQUILITY<br />
4/C<br />
MONTH 4 – SEA OF TRANQUILITY<br />
4/C<br />
Block 4 - B<br />
MONTH 4 – SEA OF TRANQUILITY<br />
MONTH 4 – SEA OF TRANQUILITY<br />
4/C<br />
Block 4 - B<br />
MONTH 4 – SEA OF TRANQUILITY<br />
MONTH 4 – SEA OF TRANQUILITY<br />
4/C<br />
MONTH 4 – SEA OF TRANQUILITY<br />
Block 4 - B<br />
MONTH 4 – SEA OF TRANQUILITY<br />
4/C<br />
Block 4 - B<br />
MONTH 4 – SEA OF TRANQUILITY<br />
Block 4 - D<br />
MONTH 4 – SEA OF TRANQUILITY<br />
Print at 100% scale on <strong>the</strong> dull side <strong>of</strong> 8-1/2" x 11" freezer paper sheet.<br />
Moon Glow by Jinny Beyer Month 4 - Page 6 <strong>of</strong> 7
MONTH 4 – SEA OF TRANQUILITY FOUNDATIONS<br />
Print 4 copies <strong>of</strong> this page or trace 4 <strong>of</strong> each part 1 & 2. Vellum is <strong>the</strong> best paper to use.<br />
If you prefer<br />
to work with<br />
fabric shapes<br />
similar to<br />
<strong>the</strong> areas<br />
on <strong>the</strong> foundation,<br />
make templates as you<br />
would <strong>for</strong> hand and<br />
machine piecing. Add<br />
an additional 1/4" seam<br />
allowance around all<br />
sides to make foundation<br />
piecing easier.<br />
MOON GLOW - MONTH 4<br />
3<br />
Foundation piece<br />
<strong>the</strong> sections and<br />
<strong>the</strong>n applique <strong>the</strong> D<br />
square in <strong>the</strong> center.<br />
MOON GLOW - MONTH 4<br />
SEA OF TRANQUILITY - PART 1<br />
3<br />
2<br />
1<br />
1<br />
DESIGNED BY JINNY BEYER<br />
SEA OF TRANQUILITY - PART 2DESIGNED BY JINNY BEYER<br />
2<br />
Moon Glow by Jinny Beyer Month 4 - Page 7 <strong>of</strong> 7
MOON GLOW by Jinny Beyer<br />
MONTH 5 – SEA OF RAINS<br />
Swatch Fabric Description and Cut Needed Block Area Template Cut Quantity<br />
24 9410-14 - Eyelash, Black<br />
1 A 4<br />
P#48<br />
1 AR 4<br />
10-1/4" x 40"<br />
7 Square 4<br />
2 B 4<br />
2 BR 4<br />
18 6931-27 - Flower Texture, Turq.<br />
P#127<br />
9 1/2" x 11 1/2"<br />
3 C 8<br />
FRAME {<br />
6 8737-08 - Hens & Chicks,<br />
Sapphire P#121<br />
4-5/8" x 8"<br />
11 7132-30 - Floral Outline, Hyacinth<br />
P#136<br />
6-1/2" x 8-1/2"<br />
15 7424-07 - Etched Leaf,<br />
Hea<strong>the</strong>r Green P#12<br />
8-5/8" x 9 3/4"<br />
23 4005-03 - Tapestry, Teal<br />
P#86<br />
9" x 14"<br />
Square = 1-3/4" x 1-3/4"<br />
Rectangle = 1-3/4" x 11-3/4"<br />
4 D 4<br />
5 E 4<br />
6 F 4<br />
8 Rectangle 4<br />
Pick your passion! This pattern includes templates <strong>for</strong> machine or hand piecing. There are also<br />
foundation piecing pages. Use which ever technique suits you best or a combination to accomplish<br />
this beautiful <strong>block</strong>!<br />
© 2000, 2009, 2011<br />
RJR Fabrics<br />
B<br />
A<br />
BR<br />
AR<br />
TEMPLATE GUIDE<br />
AR<br />
A<br />
BR<br />
B<br />
AR<br />
AR<br />
The Template Guide diagram illustrates<br />
which templates are needed <strong>for</strong> each<br />
area <strong>of</strong> <strong>the</strong> quilt <strong>block</strong>.<br />
B<br />
C C<br />
E F E<br />
C<br />
D D<br />
C<br />
F F<br />
C D D C<br />
E F E<br />
C C<br />
BR<br />
A<br />
BR<br />
B<br />
A<br />
7<br />
8<br />
7<br />
1<br />
2<br />
2<br />
1<br />
FABRIC PLACEMENT<br />
8<br />
1<br />
1<br />
2 2<br />
3 3<br />
5<br />
6<br />
5<br />
3 4 4 3<br />
6 6<br />
3 4 4 3<br />
5 6 5<br />
3 3<br />
2 2<br />
8<br />
The Fabric Placement diagram illustrates which<br />
fabrics will be used in each <strong>of</strong> those areas.<br />
1<br />
1<br />
1<br />
2<br />
2<br />
1<br />
7<br />
8<br />
7<br />
Moon Glow by Jinny Beyer Month 5 - Page 1 <strong>of</strong> 5
More points are added to <strong>the</strong> compass this <strong>month</strong>. Techniques from <strong>the</strong> previous <strong>month</strong> are<br />
continued: more advanced paper piecing, joining eight points and setting in a simple angle<br />
Directions- Template method.<br />
1.<br />
2.<br />
3.<br />
4.<br />
Make templates or foundations and cut out fabric.<br />
Because <strong>the</strong> center <strong>of</strong> this <strong>block</strong> has set-in seams, start and stop stitching at all seam<br />
intersections at <strong>the</strong> wide end <strong>of</strong> <strong>the</strong> Template D triangles. Not stitching into <strong>the</strong> seam allowance<br />
will allow <strong>for</strong> easier piecing at <strong>the</strong> pivot points along <strong>the</strong>se seams.<br />
When attaching small triangles to <strong>the</strong> octagon, <strong>the</strong> side with <strong>the</strong> grainline arrow is <strong>the</strong> side onto<br />
which <strong>the</strong><br />
octagon is<br />
sewn.<br />
Sew four<br />
identical units<br />
as shown<br />
here.<br />
5.<br />
Sew <strong>the</strong> units<br />
into two half<br />
<strong>block</strong>s. Sew<br />
<strong>the</strong> half <strong>block</strong>s<br />
toge<strong>the</strong>r<br />
<strong>for</strong>ming one<br />
Sea <strong>of</strong> Rains<br />
<strong>block</strong>.<br />
Make 4<br />
Make 4<br />
Measures 11-3/4" sq.<br />
6.<br />
Sew <strong>the</strong> frame<br />
squares and rectangles toge<strong>the</strong>r.<br />
Make 4<br />
7.<br />
Sew a rectangle to each side <strong>of</strong> <strong>the</strong> <strong>block</strong>. Sew <strong>the</strong> square/rectangle<br />
strips to <strong>the</strong> top and bottom <strong>of</strong> <strong>the</strong> <strong>block</strong>.<br />
Make 2<br />
Measures 14-1/4" sq.<br />
Moon Glow by Jinny Beyer Month 5 - Page 2 <strong>of</strong> 5
MONTH 5 – SEA OF RAINS<br />
MONTH 5 – SEA OF RAINS<br />
MONTH 5 – SEA OF RAINS TEMPLATES<br />
Block 5 - F<br />
Block 5 - E<br />
MONTH 5 – SEA OF RAINS<br />
Block 5 - C<br />
MONTH 5 – SEA OF RAINS<br />
5/D<br />
Block 5 - B & BR<br />
Block 5 - A & AR<br />
MONTH 5 – SEA OF RAINS<br />
MONTH 5 – SEA OF RAINS<br />
Moon Glow by Jinny Beyer Month 5 - Page 3 <strong>of</strong> 5
FABRIC CUTTING USING TEMPLATES<br />
A & AR<br />
• Cut fabric strip that measures 4-3/8" x 24".<br />
• Fold in half, right sides toge<strong>the</strong>r.<br />
• Cut all pieces using A template; bottom half will be cut<br />
into AR pieces.<br />
A<br />
B & BR<br />
• Cut fabric strip that measures 4" x 16-1/2".<br />
• Fold in half, right sides toge<strong>the</strong>r.<br />
• Cut all pieces using A template; bottom half will be cut<br />
into AR pieces;<br />
B<br />
C<br />
• Cut fabric piece that measures 4-5/8" x 11-3/4".<br />
E<br />
• Cut fabric piece that measures<br />
4-1/2" x 6-1/2".<br />
C<br />
E<br />
D<br />
• Cut fabric piece that measures 2-5/8" x 6".<br />
F<br />
• Cut fabric piece that measures<br />
6-5/8" x 7-3/4".<br />
D<br />
F<br />
Moon Glow by Jinny Beyer Month 5 - Page 4 <strong>of</strong> 5
MONTH 5 – SEA OF RAINS FOUNDATIONS<br />
Print 4 copies <strong>of</strong> this page or trace 4 <strong>of</strong> each part 1 & 2. Vellum is <strong>the</strong> best paper to use.<br />
SEA OF RAINS - PART 1<br />
This <strong>block</strong> can be partially<br />
foundation pieced using <strong>the</strong>se two<br />
foundation masters.<br />
3<br />
MOON GLOW - MONTH 5<br />
2<br />
MOON GLOW - MONTH 5<br />
2<br />
SEA OF RAINS - PART 2<br />
DESIGNED BY JINNY BEYER<br />
1<br />
DESIGNED BY JINNY BEYER<br />
1<br />
3<br />
PRE-CUTTING GUIDE FOR FOUNDATIONS<br />
Area Fabric Qty Size Template<br />
Part 1 - 1 Fabric 24 - Eyelash, Black<br />
4 4 3/8” x 5 1/4” A<br />
Part 1 - 2 Fabric 18 - Flower Texture, Turquoise 4 1-7/8" x 4-3/4" C<br />
Part 1 - 3 Fabric 24 - Eyelash, Black<br />
4 2-7/8" x 4-1/2" B<br />
Part 2 - 1 Fabric 24 - Eyelash, Black<br />
4 4-3/8" x 5-1/4" AR<br />
Part 2 - 2 Fabric 18 - Flower Texture, Turquoise 4 1-7/8" x 4-3/4" C<br />
Part 2 - 3 Fabric 24 - Eyelash, Black<br />
4 2-7/8" x 4-1/2" BR<br />
If you prefer to work with fabric shapes similar to <strong>the</strong> areas on <strong>the</strong> foundation, make templates as you<br />
would <strong>for</strong> hand and machine piecing. Add an additional 1/4" seam allowance around all sides to make<br />
foundation piecing easier.<br />
Moon Glow by Jinny Beyer Month 5 - Page 5 <strong>of</strong> 5
MOON GLOW by Jinny Beyer<br />
MONTH 6 – SEA OF FERTILITY<br />
Swatch Fabric Description and Cut Needed Block Area Template Cut Quantity<br />
24 9410-14 - Eyelash, Black<br />
1 A 4<br />
P#48<br />
1 AR 4<br />
10 1/4" x 40"<br />
2 B 4<br />
FRAME {<br />
17 5868-17 - Masque Flowers, Jade<br />
P#83<br />
9 1/2" x 11 1/2"<br />
15 7424-07 - Etched Leaf,<br />
Hea<strong>the</strong>r Green P#12<br />
7 3/8" x 8 3/4"<br />
10 2266-07 - Pinecone, Iris<br />
P#135<br />
7 3/8" x 8 3/4"<br />
6 8737-08 - Hens & Chicks,<br />
Sapphire P#121<br />
3 1/4" x 18 1/4"<br />
5 9410-03 - Eyelash, Navy<br />
P#120<br />
9" x 14"<br />
Square = 1-3/4" x 1-3/4"<br />
Rectangle = 1-3/4" x 11-3/4"<br />
2 BR 4<br />
7 Square 4<br />
3 C 8<br />
4 D 4<br />
5 D 4<br />
6 E 8<br />
8 Rectangle 4<br />
Pick your passion! This pattern includes templates <strong>for</strong> machine or hand piecing. There are also<br />
foundation piecing pages. Use which ever technique suits you best or a combination to accomplish<br />
this beautiful <strong>block</strong>!<br />
TEMPLATE GUIDE<br />
FABRIC PLACEMENT<br />
7<br />
8<br />
7<br />
© 2000, 2009, 2011<br />
RJR Fabrics<br />
B<br />
A<br />
BR<br />
AR<br />
AR<br />
A<br />
BR<br />
C<br />
C D<br />
D<br />
C<br />
D<br />
C<br />
B<br />
D<br />
The Template Guide diagram illustrates<br />
which templates are needed <strong>for</strong> each<br />
area <strong>of</strong> <strong>the</strong> quilt <strong>block</strong>.<br />
B<br />
C<br />
E E<br />
E E<br />
E E<br />
E E<br />
D<br />
D C<br />
D<br />
D<br />
C<br />
BR<br />
Moon Glow by Jinny Beyer Month 6 - Page 1 <strong>of</strong> 5<br />
C<br />
A<br />
AR<br />
AR<br />
BR<br />
A<br />
B<br />
8<br />
7<br />
2<br />
2<br />
1<br />
1<br />
1 2<br />
1<br />
3<br />
3<br />
4 5<br />
6 6<br />
6 6<br />
6 6<br />
6 6<br />
The Fabric Placement diagram illustrates which<br />
fabrics will be used in each <strong>of</strong> those areas.<br />
8<br />
2<br />
3<br />
2 2<br />
4<br />
3<br />
5 5<br />
3 4<br />
5<br />
4 3<br />
3 3<br />
1<br />
1<br />
1<br />
2<br />
2<br />
1<br />
8<br />
7
An eight-pointed star is added to <strong>the</strong> center <strong>of</strong> <strong>the</strong> <strong>block</strong> this <strong>month</strong>. Techniques from <strong>the</strong> previous<br />
<strong>month</strong>s are continued: paper piecing, joining eight points and setting in a simple angle. Templates<br />
A/AR, B/BR, C and Foundation Parts 1 & 2 are reused from Month 5.<br />
Directions- Template method.<br />
1.<br />
2.<br />
3.<br />
4.<br />
Make templates.<br />
Cut out fabric.<br />
Because <strong>the</strong><br />
center <strong>of</strong> this<br />
<strong>block</strong> has<br />
set-in seams,<br />
start and stop<br />
stitching at<br />
<strong>the</strong> seam<br />
intersections along <strong>the</strong> outer edges <strong>of</strong> <strong>the</strong> eight pointed star. Not stitching into <strong>the</strong> seam<br />
allowance will allow <strong>for</strong> easier piecing at <strong>the</strong> pivot points along <strong>the</strong>se seams.<br />
Sew four identical units as shown.<br />
Make 4<br />
Make 4<br />
Make 4<br />
5.<br />
6.<br />
7.<br />
Sew <strong>the</strong> units into two half <strong>block</strong>s. Sew <strong>the</strong> half <strong>block</strong>s toge<strong>the</strong>r <strong>for</strong>ming one<br />
Sea <strong>of</strong> Fertility <strong>block</strong>.<br />
Sew <strong>the</strong> frame squares and rectangles toge<strong>the</strong>r.<br />
Sew a rectangle to each side <strong>of</strong> <strong>the</strong> <strong>block</strong>. Sew <strong>the</strong> square/rectangle<br />
strips to <strong>the</strong> top and bottom <strong>of</strong> <strong>the</strong> <strong>block</strong>.<br />
Measures 11-3/4" sq.<br />
Make 2<br />
Measures 14-1/4" sq.<br />
Moon Glow by Jinny Beyer Month 6 - Page 2 <strong>of</strong> 5
MONTH 6 – SEA OF FERTILITY TEMPLATES<br />
Block 6 - C<br />
Block 6 - D<br />
MONTH 6 – SEA OF FERTILITY<br />
MONTH 6 – SEA OF FERTILITY<br />
6/E<br />
MONTH 6 – SEA OF FERTILITY<br />
Block 6 - A & AR<br />
Block 6 - B & BR<br />
MONTH 6 – SEA OF FERTILITY<br />
MONTH 6 – SEA OF FERTILITY<br />
Moon Glow by Jinny Beyer Month 6 - Page 3 <strong>of</strong> 5
FABRIC CUTTING USING TEMPLATES<br />
A & AR<br />
• Cut fabric strip that measures 4-3/8" x 24".<br />
• Fold in half, right sides toge<strong>the</strong>r.<br />
• Cut all pieces using A template; bottom<br />
half will be cut into AR pieces.<br />
A<br />
B & BR<br />
• Cut fabric strip that measures 4" x 16-1/2".<br />
• Fold in half, right sides toge<strong>the</strong>r.<br />
• Cut all pieces using A template; bottom half will be<br />
cut into BR pieces.<br />
B<br />
C<br />
• Cut fabric piece that measures 4-5/8" x 11-3/4".<br />
C<br />
D<br />
• Cut fabric piece that measures 5-3/8" x 6-3/4" from<br />
both #4 and #5.<br />
• Place both fabric pieces wrong sides up.<br />
D<br />
E<br />
• Cut fabric piece that measures<br />
1-1/4" x 16-1/4".<br />
E<br />
Moon Glow by Jinny Beyer Month 6 - Page 4 <strong>of</strong> 5
FOUNDATION MASTERS<br />
SEA OF FERTILITY - PART 1<br />
This <strong>block</strong> can be partially<br />
foundation pieced using <strong>the</strong>se<br />
two foundation masters. Trace<br />
or copy 4 <strong>of</strong> each.<br />
DESIGNED BY JINNY BEYER<br />
3<br />
1<br />
MOON GLOW - MONTH 6<br />
2<br />
MOON GLOW - MONTH 6<br />
1<br />
2<br />
3<br />
SEA OF FERTILITY - PART 2<br />
DESIGNED BY JINNY BEYER<br />
PRE-CUTTING GUIDE FOR FOUNDATIONS<br />
Area Fabric Qty Size Template<br />
Part 1 - 1 Fabric 24 - Eyelash, Black<br />
4 4-3/8" x 5-1/4" A<br />
Part 1 - 2 Fabric 17 - Masque Fea<strong>the</strong>rs, Jade 4 1-7/8" x 4-3/4" C<br />
Part 1 - 3 Fabric 24 - Eyelash, Black<br />
4 2-7/8" x 4-1/2" B<br />
Part 2 - 1 Fabric 24 - Eyelash, Black<br />
4 4-3/8" x 5-1/4" AR<br />
Part 2 - 2 Fabric 17 - Masque Fea<strong>the</strong>rs, Jade 4 1-7/8" x 4-3/4" C<br />
Part 2 - 3 Fabric 24 - Eyelash, Black<br />
4 2-7/8" x 4-1/2" BR<br />
If you prefer to work with shapes similar to <strong>the</strong> areas on <strong>the</strong> foundation, make templates as you<br />
would <strong>for</strong> hand and machine piecing. Add an additional 1/4" seam allowance around all sides to<br />
make foundation piecing easier. Template letter identifications are included in chart above.<br />
Moon Glow by Jinny Beyer Month 6 - Page 5 <strong>of</strong> 5
MOON GLOW by Jinny Beyer<br />
MONTH 7 – SEA OF VAPOR<br />
Swatch Fabric Description and Cut Needed Block Area Template Cut Quantity<br />
24 9410-14 - Eyelash, Black<br />
1 A 4<br />
P#48<br />
1 AR 4<br />
10-1/4" x 40"<br />
2 B 4<br />
2 BR 4<br />
8 Square 4<br />
11 7132-30 - Floral Outline, Hyacinth<br />
P#136<br />
7-1/8" x 8-3/4"<br />
3 C 4<br />
FRAME {<br />
15 7424-07 - Etched Leaf,<br />
Hea<strong>the</strong>r Green P#12<br />
7 1/8" x 8 3/4"<br />
17 5868-17 - Masque Fea<strong>the</strong>rs, Jade<br />
P#83<br />
5 1/2" x 13 1/2"<br />
6 8737-08 - Hens & Chicks,<br />
Sapphire P#121<br />
5 1/2" x 5 1/2"<br />
19 9812-09 - Marble, Aquamarine<br />
P#128<br />
3 1/2" x 11 1/4"<br />
5 9410-03 - Eyelash, Navy<br />
P#120<br />
9" x 14"<br />
Square = 1-3/4" x 1-3/4"<br />
Rectangle = 1-3/4" x 11-3/4"<br />
4 C 4<br />
5 D 8<br />
6 E 1<br />
7 F 8<br />
9 Rectangle 4<br />
Pick your passion! This pattern includes templates <strong>for</strong> machine or hand piecing. There are also<br />
foundation piecing pages. Use which ever technique suits you best or a combination to accomplish<br />
this beautiful <strong>block</strong>!<br />
TEMPLATE GUIDE<br />
FABRIC PLACEMENT<br />
© 2000, 2009, 2011<br />
RJR Fabrics<br />
8 9<br />
8<br />
AR BR B<br />
A<br />
1 2 2 1<br />
A<br />
AR<br />
D D<br />
C<br />
1<br />
1<br />
C<br />
B<br />
F F C<br />
BR<br />
5 5<br />
D<br />
D<br />
3<br />
F F<br />
4 7 7 4<br />
C E C<br />
2 5 5 2<br />
F F<br />
7 7<br />
BR D<br />
B<br />
C F F C D<br />
3 6 3 9<br />
7 7<br />
C<br />
D D<br />
2 5 7 7 5<br />
AR<br />
4 4 2<br />
A<br />
5 3 5<br />
A B<br />
AR<br />
1 1<br />
BR<br />
1 2 2 1<br />
The Template Guide diagram illustrates<br />
which templates are needed <strong>for</strong> each 8 9<br />
8<br />
area <strong>of</strong> <strong>the</strong> quilt <strong>block</strong>.<br />
The Fabric Placement diagram illustrates which<br />
fabrics will be used in each <strong>of</strong> those areas.<br />
Moon Glow by Jinny Beyer Month 7 - Page 1 <strong>of</strong> 5
Because <strong>of</strong> <strong>the</strong> angles involved in <strong>the</strong> shorter points, this <strong>month</strong>’s <strong>block</strong> is a good lesson in hand<br />
piecing. Setting in <strong>of</strong> simple angles and a repeat <strong>of</strong> <strong>the</strong> lesson on sewing small points around an<br />
octagon are <strong>the</strong> main lessons.<br />
Directions- Template method.<br />
1.<br />
2.<br />
Make templates and/or foundations. Cut out fabric.<br />
Sew four identical units as shown.<br />
Make 4<br />
3.<br />
4.<br />
Because <strong>the</strong> center <strong>of</strong> this <strong>block</strong> has set in seams, when sewing<br />
<strong>the</strong> small triangles onto <strong>the</strong> octagon, start and stop stitching at<br />
all seam intersections. Not stitching into <strong>the</strong> seam allowance will<br />
allow <strong>for</strong> easier piecing at <strong>the</strong> pivot points along <strong>the</strong>se seams.<br />
When attaching small triangles to <strong>the</strong> octagon, <strong>the</strong> side with <strong>the</strong><br />
grain line arrow is <strong>the</strong> side onto which <strong>the</strong> octagon is sewn.<br />
Make 4<br />
5.<br />
Sew <strong>the</strong> units into two half <strong>block</strong>s. Press. Sew <strong>the</strong> half <strong>block</strong>s<br />
toge<strong>the</strong>r <strong>for</strong>ming one Sea <strong>of</strong> Vapor <strong>block</strong>.<br />
6.<br />
Make 4<br />
Sew <strong>the</strong> frame squares and rectangles toge<strong>the</strong>r Press.<br />
Measures 11-3/4" sq.<br />
7. Sew a rectangle to each side <strong>of</strong> <strong>the</strong> <strong>block</strong>. Press. Sew <strong>the</strong> square/<br />
Make 2<br />
rectangle strips to <strong>the</strong> top and bottom <strong>of</strong> <strong>the</strong> <strong>block</strong>. Press.<br />
Measures 14-1/4" sq.<br />
Moon Glow by Jinny Beyer Month 7 - Page 2 <strong>of</strong> 5
MONTH 7 – SEA OF VAPOR TEMPLATES<br />
Block 7- C<br />
MONTH 7 – SEA OF VAPOR<br />
7/D<br />
Block 7- E<br />
MONTH 7 – SEA OF VAPOR<br />
MONTH 7 – SEA OF VAPOR<br />
7/F<br />
MONTH 7 – SEA OF VAPOR<br />
Block 7- B & BR<br />
Block 7- A & AR<br />
MONTH 7 – SEA OF VAPOR<br />
MONTH 7 – SEA OF VAPOR<br />
Moon Glow by Jinny Beyer Month 7 - Page 3 <strong>of</strong> 5
FABRIC CUTTING USING TEMPLATES<br />
A & AR<br />
• Cut fabric strip that measures 4-1/4" x 26-1/2".<br />
• Fold in half, right sides toge<strong>the</strong>r.<br />
• Cut all pieces using A template; bottom half will<br />
be cut into AR pieces.<br />
A<br />
B & BR<br />
• Cut fabric piece that measures 4" x 18".<br />
• Fold in half, right sides toge<strong>the</strong>r.<br />
• Cut all pieces using B template; bottom half will be cut<br />
into BR pieces.<br />
B<br />
C<br />
• Cut fabric piece that measures 5-1/8" x 6-3/4" from both<br />
#3 and #4.<br />
• Place both fabric pieces wrong sides up.<br />
C<br />
D<br />
• Cut fabric piece that measures 3-1/2" x 11-1/2".<br />
D<br />
E<br />
• Cut fabric piece that measures 3-1/2" x 3-1/2".<br />
E<br />
F<br />
• Cut fabric piece that measures 1-1/2" x 9-1/4".<br />
F<br />
Moon Glow by Jinny Beyer Month 7 - Page 4 <strong>of</strong> 5
MONTH 7 – SEA OF VAPOR FOUNDATIONS<br />
Print 4 copies <strong>of</strong> this page or trace 4 <strong>of</strong> each part 1 & 2. Vellum is <strong>the</strong> best paper to use.<br />
E<br />
SEA OF VAPOR - PART 1<br />
4<br />
5<br />
Applique E into position<br />
after <strong>block</strong> has been<br />
constructed.<br />
1<br />
MOON GLOW - MONTH 7<br />
2<br />
4<br />
5<br />
MOON GLOW - MONTH 7<br />
2<br />
3<br />
DESIGNED BY JINNY BEYER<br />
SEA OF VAPOR - PART 2<br />
3<br />
1<br />
DESIGNED BY JINNY BEYER<br />
If you prefer to work with shapes similar to <strong>the</strong> areas on <strong>the</strong> foundation, make templates as you would<br />
<strong>for</strong> hand and machine piecing. Add an additional 1/4" seam allowance around all sides to make<br />
foundation piecing easier.<br />
Moon Glow by Jinny Beyer Month 7 - Page 5 <strong>of</strong> 5
MOON GLOW by Jinny Beyer<br />
MONTH 8 – SEA OF CLOUDS<br />
Swatch Fabric Description and Cut Needed Block Area Template Cut Quantity<br />
24 9410-14 - Eyelash, Black<br />
1 A 4<br />
P#48<br />
1 AR 4<br />
10 1/4" x 40"<br />
2 B 4<br />
2 BR 4<br />
4 D 8<br />
FRAME {<br />
18 6931-27 - Flower Texture, Turq.<br />
P#127<br />
6" x 16"<br />
11 7132-30 - Floral Outline, Hyacinth<br />
P#136<br />
7-1/8" x 6-3/4"<br />
15 7424-07 - Etched Leaf,<br />
Hea<strong>the</strong>r Green P#12<br />
7-3/8" x 9"<br />
6 8737-08 - Hens & Chicks,<br />
Sapphire P#121<br />
4-5/8" x 4-5/8"<br />
23 4005-03 - Tapestry, Teal<br />
P#86<br />
9" x 14"<br />
Square = 1-3/4" x 1-3/4"<br />
Rectangle = 1-3/4" x 11-3/4"<br />
8 Square 4<br />
3 C 8<br />
5 E 4<br />
6 F 4<br />
7 G 1<br />
9 Rectangle 4<br />
Pick your passion! This pattern includes templates <strong>for</strong> machine or hand piecing. There are also<br />
foundation piecing pages. Use which ever technique suits you best or a combination to accomplish<br />
this beautiful <strong>block</strong>!<br />
TEMPLATE GUIDE<br />
FABRIC PLACEMENT<br />
© 2000, 2009, 2011<br />
RJR Fabrics<br />
B<br />
BR<br />
A<br />
AR<br />
AR<br />
BR<br />
C<br />
D<br />
E<br />
C D<br />
D<br />
C<br />
E<br />
D<br />
C<br />
A<br />
F<br />
B<br />
F<br />
G<br />
F<br />
The Template Guide diagram<br />
illustrates which templates are<br />
needed <strong>for</strong> each area <strong>of</strong> <strong>the</strong> quilt<br />
<strong>block</strong>.<br />
B<br />
C<br />
D<br />
E<br />
D<br />
BR<br />
F<br />
D<br />
E<br />
D<br />
C<br />
Moon Glow by Jinny Beyer Month 8 - Page 1 <strong>of</strong> 5<br />
A<br />
C<br />
C<br />
AR<br />
AR<br />
BR<br />
B<br />
A<br />
8 9<br />
8<br />
2<br />
1<br />
1<br />
3<br />
4<br />
2<br />
3<br />
4<br />
5<br />
3<br />
4<br />
1<br />
5<br />
4<br />
3<br />
2<br />
6<br />
9 6 7 6<br />
9<br />
8<br />
2<br />
1<br />
6<br />
9<br />
The Fabric Placement diagram illustrates which<br />
fabrics will be used in each <strong>of</strong> those areas.<br />
2<br />
3<br />
4<br />
5<br />
4<br />
2<br />
3<br />
1<br />
4<br />
5<br />
3<br />
2<br />
4<br />
3 1<br />
1<br />
1<br />
2<br />
8
A slightly more complex compass <strong>block</strong> is made this <strong>month</strong>. Paper piecing<br />
makes this easy to construct and ensures accurate size. Templates A, AR and B,<br />
BR are reused from Month 6.<br />
Directions- Template method.<br />
1.<br />
2.<br />
3.<br />
4.<br />
5.<br />
6.<br />
Make templates.<br />
Cut out fabric.<br />
Sew <strong>the</strong> <strong>block</strong> center as shown. Press<br />
<strong>the</strong> seam allowances in <strong>the</strong> direction<br />
indicated by <strong>the</strong> arrows.<br />
Sew four identical units as shown.<br />
Sew <strong>the</strong> units into two half <strong>block</strong>s. Press. Sew <strong>the</strong> half <strong>block</strong>s toge<strong>the</strong>r <strong>for</strong>ming one Sea <strong>of</strong> Vapor<br />
<strong>block</strong>.<br />
Because <strong>the</strong> center <strong>of</strong> this <strong>block</strong> has set-in seams, when joining <strong>the</strong>m to <strong>the</strong> compass points, start<br />
and stop stitching at <strong>the</strong> seam intersections on <strong>the</strong> center square. Not stitching into <strong>the</strong> seam<br />
allowance will allow <strong>for</strong> easier piecing at <strong>the</strong> pivot points along <strong>the</strong>se seams.<br />
Make 4<br />
Make 4<br />
Measures 11-3/4" sq.<br />
7.<br />
8.<br />
Make 4<br />
Sew <strong>the</strong> frame squares and rectangles toge<strong>the</strong>r.<br />
Sew a rectangle to each side <strong>of</strong> <strong>the</strong> <strong>block</strong>. Sew <strong>the</strong> square/rectangle<br />
strips to <strong>the</strong> top and bottom <strong>of</strong> <strong>the</strong> <strong>block</strong>.<br />
Make 2<br />
Measures 14-1/4" sq.<br />
Moon Glow by Jinny Beyer Month 8 - Page 2 <strong>of</strong> 5
MONTH 8 – SEA OF CLOUDS TEMPLATES<br />
Block 8 - E<br />
Block 8 - G<br />
Block 8 - F<br />
MONTH 8 – SEA OF OF CLOUDS<br />
MONTH 8 – SEA OF OF CLOUDS<br />
MONTH 8 – SEA OF OF CLOUDS<br />
8/D<br />
MONTH 8 – SEA OF OF CLOUDS<br />
MONTH 8 – SEA OF OF CLOUDS<br />
Block 8 - C<br />
Block 8 - B & BR<br />
Block 8 - A & AR<br />
MONTH 8 – SEA OF OF CLOUDS<br />
MONTH 8 – SEA OF OF CLOUDS<br />
Moon Glow by Jinny Beyer Month 8 - Page 3 <strong>of</strong> 5
FABRIC CUTTING USING TEMPLATES<br />
A & AR<br />
• Cut fabric strip that measures 4-3/8" x 24".<br />
• Fold in half, right sides toge<strong>the</strong>r.<br />
• Cut all pieces using A template; bottom half will be<br />
cut into AR pieces.<br />
A<br />
B & BR<br />
• Cut fabric piece that measures 4-1/8" x 15-1/2".<br />
• Fold in half, right sides toge<strong>the</strong>r.<br />
• Cut all pieces using B template; bottom half will be cut<br />
into BR pieces.<br />
B<br />
C<br />
• Cut fabric piece that measures 3-5/8" x 10".<br />
C<br />
D<br />
• Cut fabric piece that measures 1-5/8" x 9-3/4".<br />
D<br />
E<br />
• Cut fabric piece that measures 5-1/8" x 6-3/4".<br />
E<br />
F<br />
• Cut fabric piece that measures 5-3/8" x 7".<br />
F<br />
G<br />
• Cut fabric piece that measures 2-5/8" x 2-5/8".<br />
G<br />
Moon Glow by Jinny Beyer Month 8 - Page 4 <strong>of</strong> 5
MONTH 8 – SEA OF CLOUDS FOUNDATIONS<br />
Print 4 copies <strong>of</strong> this page or trace 4 <strong>of</strong> each part 1 & 2. Vellum is <strong>the</strong> best paper to use.<br />
SEA OF CLOUDS - PART 1<br />
This <strong>block</strong> can be partially<br />
foundation pieced using <strong>the</strong>se two<br />
foundation masters.<br />
4<br />
3<br />
1<br />
MOON GLOW - MONTH 8<br />
2<br />
MOON GLOW - MONTH 8<br />
2<br />
4<br />
SEA OF CLOUDS - PART 2<br />
DESIGNED BY JINNY BEYER<br />
DESIGNED BY JINNY BEYER<br />
1<br />
3<br />
PRE-CUTTING GUIDE FOR FOUNDATIONS<br />
Area Fabric Qty Size Template<br />
Part 1 - 1 Fabric 24 - Eyelash, Black<br />
4 4-3/8" x 5-1/4" A<br />
Part 1 - 2 Fabric 18 - Flower Texture, Turquoise 4 1-3/4" x 4" C<br />
Part 1 - 3 Fabric 24 - Eyelash, Black<br />
4 2-7/8" x 4-1/2" B<br />
Part 1 - 4 Fabric 24 - Eyelash, Black<br />
4 1-3/4" x 1-3/4" D<br />
Part 2 - 1 Fabric 24 - Eyelash, Black<br />
4 4-3/8" x 5-1/4" AR<br />
Part 2 - 2 Fabric 18 - Flower Texture, Turquoise 4 1-3/4" x 4" C<br />
Part 2 - 3 Fabric 24 - Eyelash, Black<br />
4 2-7/8" x 4-1/2" BR<br />
Part 2 - 4 Fabric 24 - Eyelash, Black<br />
4 1-3/4" x 1-3/4" D<br />
If you prefer to work with shapes similar to <strong>the</strong> areas on <strong>the</strong> foundation, make templates as you would<br />
<strong>for</strong> hand and machine piecing. Add an additional 1/8" seam allowance around all sides to make<br />
foundation piecing easier. Template letter identifications are included in above.<br />
Moon Glow by Jinny Beyer Month 8 - Page 5 <strong>of</strong> 5
MOON GLOW by Jinny Beyer<br />
MONTH 9 – SEA OF CRISIS<br />
Swatch Fabric Description and Cut Needed Block Area Template Cut Quantity<br />
FRAME {<br />
24 9410-14 - Eyelash, Black<br />
P#48<br />
10-1/4" x 40"<br />
15 7424-07 - Etched Leaf,<br />
Hea<strong>the</strong>r Green P#12<br />
8-5/8" x 9"<br />
13 8868-05 - Floral Vine, Purple<br />
P#96<br />
8-5/8" x 9"<br />
17 5868-17 - Masque Fea<strong>the</strong>rs, Jade<br />
P#83<br />
8" x 8-1/4"<br />
8 0498-09 - Posies, Cobalt<br />
P#123<br />
8" x 8-1/4"<br />
18 6931-27 - Flower Texture, Turq.<br />
P#127<br />
10" x 12"<br />
10 2266-07 - Pinecone, Iris<br />
P#135<br />
10" x 12"<br />
2 2266-06 - Pinecone, Cypress<br />
P#66<br />
9" x 14"<br />
Square = 1-3/4" x 1-3/4"<br />
Rectangle = 1-3/4" x 11-3/4"<br />
Pick your passion!<br />
This pattern includes<br />
templates <strong>for</strong> machine<br />
or hand piecing. There<br />
are also foundation<br />
piecing pages. Use<br />
which ever technique<br />
suits you best or<br />
a combination to<br />
accomplish this<br />
beautiful <strong>block</strong>!<br />
© 2000, 2009, 2011<br />
RJR Fabrics<br />
B<br />
A<br />
BR<br />
AR<br />
TEMPLATE GUIDE<br />
AR<br />
A<br />
ER<br />
E<br />
ER<br />
E DR<br />
D<br />
ER<br />
BR<br />
D<br />
C<br />
CR<br />
E<br />
DR<br />
ER<br />
B<br />
E<br />
CR<br />
C<br />
B<br />
ER<br />
CR<br />
C<br />
E<br />
D<br />
DR<br />
CR<br />
C<br />
D<br />
ER<br />
E<br />
DR<br />
BR<br />
ER<br />
E<br />
ER<br />
E<br />
A<br />
AR<br />
1 A 4<br />
1 AR 4<br />
2 B 4<br />
2 BR 4<br />
9 Square 4<br />
3 C 4<br />
4 CR 4<br />
5 D 4<br />
6 DR 4<br />
7 E 8<br />
8 ER 8<br />
10 Rectangle 4<br />
The Template Guide diagram illustrates 9 10<br />
9<br />
which templates are needed <strong>for</strong> each<br />
area <strong>of</strong> <strong>the</strong> quilt <strong>block</strong>.<br />
The Fabric Placement diagram illustrates which<br />
fabrics will be used in each <strong>of</strong> those areas.<br />
Moon Glow by Jinny Beyer Month 9 - Page 1 <strong>of</strong> 5<br />
AR<br />
BR<br />
A<br />
B<br />
FABRIC PLACEMENT<br />
9 10<br />
9<br />
1<br />
1 2 2 1<br />
8 7<br />
5<br />
8<br />
7<br />
7<br />
2 4 3 5 8<br />
8 6<br />
7 2<br />
3 4<br />
10 10<br />
4 3<br />
2<br />
7<br />
8<br />
3 4 2<br />
8 5<br />
6<br />
6<br />
5<br />
1<br />
1 1<br />
1 2 2 1<br />
6<br />
7 8 7 8<br />
7
The same number <strong>of</strong> points are used in this <strong>month</strong>’s <strong>block</strong> as in Month 6, 7, & 8, but now <strong>the</strong> points<br />
are split. This is a very easy <strong>block</strong> to do by <strong>the</strong> paper piecing method. It is also a follow-up lesson on<br />
joining eight points successfully. Two <strong>of</strong> <strong>the</strong>se <strong>block</strong>s are required <strong>for</strong> <strong>the</strong> quilt. Templates A/AR<br />
and B/BR can be reused from Month 8.<br />
Directions- Template method.<br />
1.<br />
2.<br />
Make templates.<br />
Cut out<br />
fabric.<br />
If using<br />
foundation<br />
method<br />
use <strong>the</strong><br />
Pre-Cutting<br />
Guide For<br />
Foundations.<br />
Make 4<br />
Make 4<br />
3.<br />
Sew four identical units as shown.<br />
Make 4<br />
4.<br />
Sew <strong>the</strong> units into two half <strong>block</strong>s.<br />
Press. Sew <strong>the</strong> half <strong>block</strong>s toge<strong>the</strong>r<br />
<strong>for</strong>ming one Sea <strong>of</strong> Crisis <strong>block</strong>.<br />
5.<br />
6.<br />
Sew <strong>the</strong> frame squares and rectangles toge<strong>the</strong>r.<br />
Sew a rectangle to each side <strong>of</strong> <strong>the</strong> <strong>block</strong>. Sew <strong>the</strong> square/rectangle<br />
strips to <strong>the</strong> top and bottom <strong>of</strong> <strong>the</strong> <strong>block</strong>.<br />
Measures 11-3/4" sq.<br />
Make 2<br />
Measures 14-1/4" sq.<br />
Make 2 <strong>block</strong>s<br />
Moon Glow by Jinny Beyer Month 9 - Page 2 <strong>of</strong> 5
MONTH 9 – SEA OF CRISIS TEMPLATES<br />
MONTH 9 – SEA OF CRISIS<br />
Block 9 - C & CR<br />
Block 9 - D & DR<br />
MONTH 9 – SEA OF CRISIS<br />
MONTH 9 – SEA OF CRISIS<br />
Block 9 - E & ER<br />
Block 9 - B & BR<br />
Block 9 - A & AR<br />
MONTH 9 – SEA OF CRISIS<br />
MONTH 9 – SEA OF CRISIS<br />
Moon Glow by Jinny Beyer Month 9 - Page 3 <strong>of</strong> 5
FABRIC CUTTING USING TEMPLATES<br />
A & AR<br />
• Cut fabric strip that measures 4 3/8” x 24”.<br />
• Fold in half, right sides toge<strong>the</strong>r.<br />
• Cut all pieces using A template; bottom half will<br />
be cut into AR pieces.<br />
A<br />
B & BR<br />
• Cut fabric piece that measures 4 1/8” x 15 1/2”.<br />
• Fold in half, right sides toge<strong>the</strong>r.<br />
• Cut all pieces using B template; bottom half will be cut<br />
into BR pieces.<br />
B<br />
C & CR<br />
• Cut fabric piece that measures 4 3/4” x 6 1/2” from both<br />
#3 & #4.<br />
• Place fabric pieces right sides toge<strong>the</strong>r, with #4 on <strong>the</strong><br />
bottom.<br />
• Cut all pieces using C template; bottom fabric will be cut<br />
into CR pieces.<br />
C<br />
D & DR<br />
• Cut fabric piece that measures 4 1/2” x 5 1/4” from both #5 &<br />
#6.<br />
• Place fabric pieces right sides toge<strong>the</strong>r, with #6 on <strong>the</strong><br />
bottom.<br />
• Cut all pieces using D template; bottom fabric will be cut into<br />
DR pieces.<br />
D<br />
E & ER<br />
• Cut fabric piece that measures 5” x 8 1/4” from both #7 &<br />
#8.<br />
• Place fabric pieces right sides toge<strong>the</strong>r, with #8 on <strong>the</strong><br />
bottom.<br />
• Cut all pieces using E template; bottom fabric will be cut<br />
into ER pieces.<br />
E<br />
Moon Glow by Jinny Beyer Month 9 - Page 4 <strong>of</strong> 5
MONTH 9 – SEA OF CRISIS FOUNDATIONS<br />
Print 4 copies <strong>of</strong> this page or trace 4 <strong>of</strong> each part 1 & 2. Vellum is <strong>the</strong> best paper to use.<br />
SEA OF CRISIS - PART 1<br />
4<br />
1<br />
2<br />
MOON GLOW - MONTH 9<br />
6<br />
5<br />
MOON GLOW - MONTH 9<br />
2<br />
5<br />
1<br />
6<br />
SEA OF CRISIS - PART 2<br />
3<br />
DESIGNED BY JINNY BEYER<br />
3<br />
4<br />
DESIGNED BY JINNY BEYER<br />
PRE-CUTTING GUIDE FOR FOUNDATIONS<br />
Area Fabric Qty Size Template<br />
Part 1 - 1 Fabric 10 - Pinecone, Iris 4 1 1/4" x 4 5/8" ER<br />
Part 1 - 2 Fabric 18 - Flower Texture, Turquoise 4 1-1/4" x 4-5/8" E<br />
Part 1 - 3 Fabric 24 - Eyelash, Black 4 4-3/8" x 5-1/4" A<br />
Part 1 - 4 Fabric 24 - Eyelash, Black<br />
4 2-7/8" x 4-3/8" B<br />
Part 1 - 5 Fabric 8 - Posies, Cobalt 4 1-1/2" x 6-1/4" DR<br />
Part 1 - 6 Fabric 15 - Etched Leaf, Hea<strong>the</strong>r Green 4 1-3/4" x 6-5/8" C<br />
Part 2 - 1 Fabric 18 - Flower Texture, Turquoise 4 1-1/4" x 4-5/8" E<br />
Part 2 - 2 Fabric 10 - Pinecone, Iris<br />
4 1-1/4" x 4-5/8" ER<br />
Part 2 - 3 Fabric 24 - Eyelash, Black<br />
4 4-3/8" x 5-1/4" AR<br />
Part 2 - 4 Fabric 24 - Eyelash, Black<br />
4 2-7/8" x 4-3/8" BR<br />
Part 2 - 5 Fabric 17 - Masque Fea<strong>the</strong>rs, Jade 4 1-1/2" x 6-1/4" D<br />
Part 2 - 6 Fabric 13 - Floral Vine, Purple 4 1-3/4" x 6-5/8" CR<br />
If you prefer to work with fabric shapes similar to <strong>the</strong> areas on <strong>the</strong> foundation, make templates as you would <strong>for</strong> hand and<br />
machine piecing. Add an additional 1/4" seam allowance around all sides to make foundation piecing easier.<br />
Moon Glow by Jinny Beyer Month 9 - Page 5 <strong>of</strong> 5
MOON GLOW by Jinny Beyer<br />
MONTH 10 – SEA OF SERENITY<br />
Swatch Fabric Description and Cut Needed Block Area Template Cut Quantity<br />
24 9410-14 - Eyelash, Black<br />
1 A 4<br />
P#48<br />
1 AR 4<br />
12" x 40"<br />
2 B 4<br />
2 BR 4<br />
9 F 8<br />
11 Square 4<br />
15 7424-07 - Etched Leaf,<br />
Hea<strong>the</strong>r Green P#12<br />
7-3/4" x 8"<br />
3 C 4<br />
13 8868-05 - Floral Vine, Purple<br />
P#96<br />
7-3/4" x 8"<br />
17 5868-17 - Masque Flowers, Jade<br />
P#83<br />
8" x 8 1/4"<br />
8 0498-09 - Posies, Cobalt<br />
P#123<br />
8" x 8 1/4"<br />
18 6931-27 - Flower Texture, Turq.<br />
P#127<br />
5-7/8" x 10"<br />
10 2266-07 - Pinecone, Iris<br />
P#135<br />
5-7/8" x 10"<br />
2 2266-06 - Pinecone, Cypress<br />
P#66<br />
9" x 14"<br />
Square = 1-3/4" x 1-3/4"<br />
FRAME { Rectangle = 1-3/4" x 11-3/4"<br />
TEMPLATE GUIDE<br />
Pick your passion! This<br />
AR<br />
BR B<br />
pattern includes templates <strong>for</strong><br />
A<br />
machine or hand piecing. A<br />
AR<br />
There are also foundation<br />
F F<br />
C<br />
piecing pages. Use which B<br />
F<br />
F BR<br />
C<br />
CR<br />
ever technique suits you best<br />
G<br />
CR<br />
C<br />
or a combination to accomplish<br />
this beautiful<br />
BR F<br />
F<br />
B<br />
C<br />
<strong>block</strong>!<br />
© 2000, 2009, 2011<br />
RJR Fabrics<br />
E<br />
ER<br />
E<br />
ER<br />
ER<br />
DR<br />
D<br />
D<br />
E<br />
DR<br />
F<br />
CR<br />
CR<br />
D<br />
F<br />
DR<br />
D<br />
DR<br />
4 CR 4<br />
5 D 4<br />
6 DR 4<br />
7 E 8<br />
10 G 1<br />
8 ER 8<br />
12 Rectangle 4<br />
AR<br />
A<br />
1 1<br />
A B BR AR<br />
1 2 2 1<br />
The Template Guide diagram illustrates<br />
11<br />
12<br />
11<br />
which templates are needed <strong>for</strong> each<br />
area <strong>of</strong> <strong>the</strong> quilt <strong>block</strong>.<br />
The Fabric Placement diagram illustrates which<br />
fabrics will be used in each <strong>of</strong> those areas.<br />
E<br />
ER<br />
ER<br />
E<br />
E<br />
ER<br />
Moon Glow by Jinny Beyer Month 10 - Page 1 <strong>of</strong> 5<br />
ER<br />
E<br />
ER<br />
E<br />
11<br />
1<br />
FABRIC PLACEMENT<br />
12<br />
1 2 2 1<br />
8<br />
7 8<br />
7<br />
9 9<br />
5 4 3 6<br />
7 6<br />
5<br />
8 9<br />
3 4<br />
11<br />
8<br />
2<br />
9 7 2<br />
12 10<br />
3<br />
12<br />
4<br />
7 9 5<br />
6 9 8<br />
2<br />
7 2<br />
8<br />
6 3 4 5<br />
9 9<br />
7 8 7<br />
8<br />
1
The <strong>block</strong> this <strong>month</strong> is very similar to Month 9, except that an additional piece has been added to<br />
<strong>the</strong> smallest points. The octagon in <strong>the</strong> center utilizes <strong>the</strong> earlier skills <strong>of</strong> setting in a simple angle.<br />
Two <strong>of</strong> <strong>the</strong>se <strong>block</strong>s are required <strong>for</strong> <strong>the</strong> quilt. Templates A/AR and B/BR are reused from Month 8.<br />
Directions- Template method.<br />
1.<br />
2.<br />
3.<br />
Make templates.<br />
Cut out fabric. If using foundation method<br />
use <strong>the</strong> Pre-Cutting Guide For Foundations.<br />
Because <strong>the</strong> center <strong>of</strong> this <strong>block</strong> has set in<br />
seams, when sewing center units toge<strong>the</strong>r,<br />
start and stop stitching at seam intersections<br />
at wide end <strong>of</strong> triangles. Not stitching into <strong>the</strong><br />
seam allowance will allow <strong>for</strong> easier piecing<br />
at <strong>the</strong> pivot points along <strong>the</strong>se seams.<br />
Make 4<br />
Make 4<br />
Make 4<br />
4.<br />
5.<br />
Sew four identical units as shown.<br />
Sew <strong>the</strong> units into two half <strong>block</strong>s. Sew <strong>the</strong> half<br />
<strong>block</strong>s toge<strong>the</strong>r <strong>for</strong>ming one Sea <strong>of</strong> Ingenuity <strong>block</strong>.<br />
Make 4<br />
6.<br />
7.<br />
Sew <strong>the</strong> frame squares and rectangles toge<strong>the</strong>r<br />
Sew a rectangle to each side <strong>of</strong> <strong>the</strong> <strong>block</strong>. Sew <strong>the</strong> square/rectangle<br />
strips to <strong>the</strong> top and bottom <strong>of</strong> <strong>the</strong> <strong>block</strong>.<br />
Measures 11-3/4" sq.<br />
Make 2<br />
Measures 14-1/4" sq.<br />
Moon Glow by Jinny Beyer Month 10 - Page 2 <strong>of</strong> 5
MONTH 10 – SEA OF SERENITY TEMPLATES<br />
MONTH 10 – SEA OF SERENITY<br />
Block 10 - E & ER<br />
Block 10 - C & CR<br />
MONTH 10 – SEA OF SERENITY<br />
MONTH 10 – SEA OF SERENITY<br />
Block 10 - D & DR<br />
MONTH 10 – SEA OF SERENITY<br />
Block 10 - G<br />
10 /F<br />
MONTH 10 – SEA OF SERENITY<br />
Block 10 - B & BR<br />
MONTH 10 – SEA OF SERENITY<br />
Block 10 - A & AR<br />
MONTH 10 – SEA OF SERENITY<br />
Moon Glow by Jinny Beyer Month 10 - Page 3 <strong>of</strong> 5
A & AR<br />
• Cut fabric strip that measures 4-3/8" x 24".<br />
• Fold in half, right sides toge<strong>the</strong>r.<br />
• Cut all pieces using A template; bottom half<br />
will be cut into AR pieces.<br />
B & BR<br />
•<br />
•<br />
•<br />
A<br />
Cut fabric piece that measures<br />
4-1/8" x 15-1/2".<br />
Fold in half, right sides toge<strong>the</strong>r.<br />
Cut all pieces<br />
using B template;<br />
bottom half will be<br />
cut into BR pieces.<br />
C & CR<br />
• Cut fabric piece<br />
that measures 4-1/2" x 5-1/2"<br />
from both #3 & #4.<br />
• Place fabric pieces right<br />
sides toge<strong>the</strong>r, with #4 on <strong>the</strong><br />
bottom.<br />
• Cut all pieces using C<br />
template; bottom fabric will<br />
be cut into CR pieces.<br />
FOUNDATION ASSEMBLY<br />
B<br />
C<br />
D & DR<br />
•<br />
•<br />
•<br />
Cut fabric piece that measures 4-1/2" x 5-1/4"<br />
from both #5 & #6.<br />
Place fabric pieces right<br />
sides toge<strong>the</strong>r, with #6 on<br />
<strong>the</strong> bottom.<br />
Cut all pieces using D<br />
template; bottom fabric will<br />
be cut into DR pieces.<br />
E & ER<br />
•<br />
•<br />
•<br />
Cut fabric piece that measures 3-5/8" x 7-1/4"<br />
from both #7 & #8.<br />
Place fabric pieces right sides toge<strong>the</strong>r, with<br />
#8 on <strong>the</strong> bottom.<br />
Cut all pieces using<br />
D template; bottom<br />
fabric will be cut into<br />
DR pieces.<br />
F<br />
• Cut fabric<br />
piece that F<br />
measures<br />
1-5/8" x 9-3/4".<br />
G<br />
• Cut fabric piece that measures<br />
3-1/2" x 3-1/2".<br />
E<br />
D<br />
G<br />
1.<br />
2.<br />
3.<br />
4.<br />
5.<br />
6.<br />
7.<br />
Sew fabric onto foundations in <strong>the</strong> order that <strong>the</strong><br />
numbers are printed in <strong>the</strong> Foundation Masters<br />
diagram.<br />
Trim and assemble foundations following<br />
sequence shown in diagrams.<br />
Trace and cut a freezer paper template using <strong>the</strong><br />
dashed line on Template G.<br />
Press onto wrong side <strong>of</strong> 3 1/4” x 3 1/4” piece <strong>of</strong><br />
6391-27 - Flower Texture, Turquoise fabric.<br />
Press seam allowance over edge <strong>of</strong> freezer paper.<br />
Pin in place on center and applique in place to<br />
complete <strong>block</strong>.<br />
Refer to <strong>the</strong> main <strong>block</strong> assembly diagrams and<br />
cutting chart <strong>for</strong> guidance in cutting and sewing <strong>the</strong><br />
<strong>block</strong> frame.<br />
Moon Glow by Jinny Beyer Month 10 - Page 4 <strong>of</strong> 5
SEA OF SERENITY - PART 1<br />
7<br />
4<br />
3<br />
5<br />
2<br />
1<br />
MOON GLOW - MONTH 10<br />
6<br />
MOON GLOW - MONTH 10<br />
1<br />
6<br />
5<br />
2<br />
7<br />
SEA OF SERENITY - PART 2<br />
DESIGNED BY JINNY BEYER<br />
If you prefer to work with<br />
shapes similar to <strong>the</strong><br />
areas on <strong>the</strong> foundation,<br />
make templates as you<br />
would <strong>for</strong> hand and<br />
machine piecing. Add<br />
an additional 1/4" seam<br />
allowance around all<br />
sides to make foundation<br />
piecing easier. Template<br />
letter identifications are<br />
included in charts.<br />
DESIGNED BY JINNY BEYER<br />
PART 1 PRE-CUTTING GUIDE FOR FOUNDATIONS<br />
Area Fabric Qty Size Template<br />
1 Fabric 10 - Pinecone, Iris 4 1-1/4" x 3-7/8" ER<br />
2 Fabric 18 - Flower Tex., Tur. 4 1-1/4" x 3-7/8" E<br />
3 Fabric 24 - Eyelash, Black 4 4-3/8" x 5-1/2" A<br />
4 Fabric 24 - Eyelash, Black 4 2-7/8" x 4-3/8" B<br />
5 Fabric 24 - Eyelash, Black 4 1-5/8" x 1-7/8" F<br />
6 Fabric 8 - Vine, Cobalt 4 1-1/2" x 6-1/4" DR<br />
7 Fabric15-EtchedLeaf,H.Green 4 1-1/2" x 5-3/4" C<br />
PART 2<br />
Area Fabric Qty Size Template<br />
1 Fabric 10 - Pinecone, Iris 4 1-1/4" x 3-7/8" ER<br />
2 Fabric 18 - Flower Tex., Tur. 4 1-1/4" x 3-7/8" E<br />
3 Fabric 24 - Eyelash, Black 4 4-3/8" x 5-1/2" AR<br />
4 Fabric 24 - Eyelash, Black 4 2-7/8" x 4-3/8" BR<br />
5 Fabric 24 - Eyelash, Black 4 1-5/8" x 1-7/8" F<br />
6 Fabric17-Msq.Fea<strong>the</strong>rs,Jade 4 1-1/2" x 6-1/4" D<br />
7 Fabric 13 - Fl. Vine, Purple 4 1-1/2" x 5-3/4" CR<br />
Moon Glow by Jinny Beyer Month 10 - Page 5 <strong>of</strong> 5<br />
3<br />
4
MOON GLOW by Jinny Beyer<br />
MONTH 11 – SEA OF KNOWLEDGE<br />
Swatch Fabric Description and Cut Needed Block Area Template Cut Quantity<br />
24 9410-14 - Eyelash, Black<br />
1 A 4<br />
P#48<br />
2 B 32<br />
17-1/2" x 20"<br />
8 Square 4<br />
FRAME {<br />
18 6931-27 - Flower Texture, Turq.<br />
P#127<br />
7-1/4" x 19"<br />
15 7424-07 - Etched Leaf,<br />
Hea<strong>the</strong>r Green P#12<br />
6-5/8" x 16"<br />
8 0498-09 - Posies, Cobalt<br />
P#123<br />
10-1/4" x 14"<br />
13 8868-05 - Floral Vine, Purple<br />
P#96<br />
5-1/2" x 8-1/2"<br />
11 7132-30 - Floral Outline, Hyacinth<br />
P#136<br />
5-1/4" x 5-1/4"<br />
2 2266-06 - Pinecone, Cypress<br />
P#66<br />
9" x 14"<br />
Square = 1-3/4" x 1-3/4"<br />
Rectangle = 1-3/4" x 11-3/4"<br />
3 C 8<br />
4 D 8<br />
5 E 16<br />
6 F 8<br />
7 G 1<br />
9 Rectangle 4<br />
Pick your passion! This pattern includes templates <strong>for</strong> machine or hand piecing. There are also<br />
foundation piecing pages. Use which ever technique suits you best or a combination to accomplish<br />
this beautiful <strong>block</strong>!<br />
TEMPLATE GUIDE<br />
FABRIC PLACEMENT<br />
A<br />
A 8 9<br />
8<br />
© 2000, 2009, 2011<br />
RJR Fabrics<br />
B B B B B B<br />
B<br />
B<br />
B E E B<br />
E<br />
E<br />
B<br />
D B<br />
E C E<br />
B<br />
B<br />
F F<br />
B E<br />
E B<br />
B<br />
B<br />
B<br />
B<br />
E<br />
B<br />
E<br />
D<br />
C<br />
D<br />
F<br />
C<br />
D F<br />
C<br />
D<br />
E<br />
F<br />
E<br />
G<br />
C<br />
F<br />
E<br />
C D<br />
F<br />
C<br />
F<br />
C<br />
D<br />
D<br />
E<br />
A B<br />
B A<br />
2 5 5<br />
B B B<br />
5 5<br />
2<br />
B<br />
2<br />
1<br />
The Template Guide diagram illustrates<br />
2 2 2 2<br />
2 1<br />
which templates are needed <strong>for</strong> each 8 9<br />
8<br />
area <strong>of</strong> <strong>the</strong> quilt <strong>block</strong>.<br />
The Fabric Placement diagram illustrates which<br />
fabrics will be used in each <strong>of</strong> those areas.<br />
Moon Glow by Jinny Beyer Month 11 - Page 1 <strong>of</strong> 5<br />
E<br />
B<br />
E<br />
B<br />
B<br />
B<br />
B<br />
9<br />
2 2 2 2<br />
1 2<br />
2 1<br />
2 2<br />
2 5 5<br />
5 5<br />
2<br />
2 4 4 2<br />
5 3 5<br />
2 3 6 6<br />
4<br />
3 2<br />
5<br />
4<br />
2<br />
6 6 5 2<br />
3 7 3<br />
2<br />
6 6<br />
5<br />
5 2<br />
4 6 6<br />
2 3 3 4 2<br />
5 3 5<br />
2 4 4 2<br />
2 2<br />
9
The last compass <strong>block</strong> in this series is <strong>the</strong> traditional Mariner’s Compass pattern. It has twice as<br />
many points as <strong>the</strong> last four <strong>block</strong>s. By paper piecing <strong>the</strong> <strong>block</strong> can be constructed with accuracy.<br />
Since <strong>the</strong> compass <strong>block</strong> sets into <strong>the</strong> background, this <strong>month</strong>’s <strong>block</strong> will also include a lesson on<br />
piecing curves. By now you should have <strong>the</strong> knowledge and confidence to proceed with any <strong>block</strong> <strong>of</strong><br />
your choice.<br />
Directions- Template method.<br />
1.<br />
2.<br />
3.<br />
Make templates. Cut fabric out.<br />
Sew eight identical units as shown. Press in <strong>the</strong> direction<br />
indicated by <strong>the</strong> arrows.<br />
Diagram 1<br />
Make 8<br />
Because <strong>the</strong> center <strong>of</strong> this <strong>block</strong> has set-in seams, when sewing<br />
<strong>the</strong> small triangles onto <strong>the</strong> octagon, start and stop stitching at all seam intersections. Not stitching<br />
into <strong>the</strong> seam allowance will allow <strong>for</strong> easier piecing at <strong>the</strong> pivot points along <strong>the</strong>se seams.<br />
4.<br />
Sew <strong>the</strong> units into two half <strong>block</strong>s. Press.<br />
Fold each A fabric piece in half and match<br />
<strong>the</strong> center <strong>of</strong> <strong>the</strong> curved edge with <strong>the</strong> tip <strong>of</strong><br />
C on <strong>the</strong> completed quarter compass. Pin A<br />
securely in place along <strong>the</strong> curve<br />
be<strong>for</strong>e stitching.<br />
Diagram 2<br />
Make 4<br />
5.<br />
Sew <strong>the</strong> half <strong>block</strong>s toge<strong>the</strong>r <strong>for</strong>ming<br />
one Sea <strong>of</strong> Knowledge <strong>block</strong>.<br />
6.<br />
Trace and cut a freezer paper<br />
template using <strong>the</strong> dashed line <strong>of</strong><br />
Template G.<br />
Diagram 3<br />
7.<br />
8.<br />
9.<br />
Press onto wrong side <strong>of</strong> 3 1/4” x 3 1/4” piece <strong>of</strong> 3303-02 - Pansy,<br />
Hyacinth fabric.<br />
Press seam allowance over edge <strong>of</strong> freezer paper.To complete<br />
<strong>block</strong>, pin in place on center and applique in place<br />
Measures 11-3/4" sq.<br />
Sew <strong>the</strong> frame squares and rectangles toge<strong>the</strong>r Press. Sew a<br />
rectangle to each side <strong>of</strong> <strong>the</strong> <strong>block</strong>. Press. Sew <strong>the</strong> square/rectangle strips to <strong>the</strong> top and bottom<br />
<strong>of</strong> <strong>the</strong> <strong>block</strong>. Press.<br />
Make 2<br />
Measures 14-1/4" sq.<br />
Moon Glow by Jinny Beyer Month 11 - Page 2 <strong>of</strong> 5
MONTH 11 – SEA OF KNOWLEDGE TEMPLATES<br />
Block 11 - B<br />
Block 11 - D<br />
MONTH 11 – SEA OF KNOWLEDGE<br />
MONTH 11 – SEA OF KNOWLEDGE<br />
Block 11 - C<br />
MONTH 11 – SEA OF KNOWLEDGE<br />
Block 11 - E<br />
MONTH 11 – SEA OF KNOWLEDGE<br />
MONTH 11 – SEA OF KNOWLEDGE<br />
MONTH 11 – SEA OF KNOWLEDGE<br />
11/F<br />
Block 11 - G<br />
Block 11 - A<br />
MONTH 11 – SEA OF KNOWLEDGE<br />
Moon Glow by Jinny Beyer Month 11 - Page 3 <strong>of</strong> 5
A<br />
• Cut fabric strip that measures 6-1/8" x 13-3/4".<br />
D<br />
• Cut fabric strip that measures 4-5/8" x 11".<br />
D<br />
A<br />
B<br />
•<br />
•<br />
Cut fabric strip that measures 2-5/8" x 40".<br />
Fold in quarters, cutting through four layers.<br />
B<br />
E<br />
•<br />
•<br />
Cut fabric strip that measures 4" x 9-3/4".<br />
Fold in half, right sides toge<strong>the</strong>r, cutting<br />
through<br />
two layers.<br />
E<br />
C<br />
• Cut fabric strip that measures 5-1/8" x 12".<br />
C<br />
F<br />
• Cut fabric strip that measures 1-7/16" x 8-1/2".<br />
F<br />
G<br />
• Cut fabric square that measures<br />
3-1/4" x 3-1/4".<br />
G<br />
.<br />
FOUNDATION ASSEMBLY<br />
1. Sew fabric onto foundations in <strong>the</strong> order that <strong>the</strong> numbers are<br />
printed in <strong>the</strong> Foundation Masters diagram.<br />
2. Trim and assemble foundations as shown in Diagrams 1-3.<br />
3. Trace and cut a freezer paper template using <strong>the</strong> dashed line <strong>of</strong><br />
Template G.<br />
4.<br />
5.<br />
6.<br />
7.<br />
Press onto wrong side <strong>of</strong> 3-1/4" x 3-1/4" piece <strong>of</strong> 3303-02 - Pansy, Hyacinth fabric.<br />
Press seam allowance over edge <strong>of</strong> freezer<br />
paper.<br />
To complete <strong>block</strong>, pin in place on center and<br />
applique in place<br />
Refer to <strong>the</strong> basic <strong>block</strong> assembly diagrams<br />
and chart <strong>for</strong> guidance on cutting and sewing<br />
<strong>the</strong> <strong>block</strong> frame.<br />
Diagram 3<br />
Diagram 2<br />
Diagram 1<br />
Make 8<br />
Make 4<br />
Moon Glow by Jinny Beyer Month 11 - Page 4 <strong>of</strong> 5
MONTH 11 – SEA OF KNOWLEDGE FOUNDATIONS<br />
6<br />
5<br />
MOON GLOW - MONTH 11<br />
1<br />
4<br />
SEA OF KNOWLEDGE - PART 2<br />
1<br />
2 3<br />
MOON GLOW - MONTH 11<br />
SEA OF KNOWLEDGE - PART 1<br />
2 3<br />
DESIGNED BY JINNY BEYER<br />
DESIGNED BY JINNY BEYER<br />
PRE-CUTTING GUIDE FOR FOUNDATIONS<br />
Area Fabric Qty Size Template<br />
1 Fabric 8 - Posies, Cobalt 16 1-1/2" x 4-1/8" E<br />
2 Fabric 24 - Eyelash, Black 16 1-7/8" x 3" B<br />
3 Fabric 24 - Eyelash, Black<br />
16 1-7/8" x 3" B<br />
4 Fabric 15 - Etched Leaf, Hea<strong>the</strong>r Green 8 1-3/4" x 4-5/8" D<br />
5 Fabric 18 - Flower Texture, Turquoise 8 2-1/8" x 5-1/4" C<br />
6 Fabric 13 - Floral Vine, Purple 8 1-5/8" x 1-3/4" F<br />
If you prefer to work with shapes similar to <strong>the</strong> areas on <strong>the</strong> foundation, make templates as you would<br />
<strong>for</strong> hand and machine piecing. Add an additional 1/4" seam allowance around all sides to make<br />
foundation piecing easier. Template letter identifications are included in above.<br />
Moon Glow by Jinny Beyer Month 11 - Page 5 <strong>of</strong> 5
MONTH 12 – THE BORDER SEA Subsequent cuts are listed throughout this pattern!<br />
Swatch Fabric # Description and Cut Needed Block Area Cut Size<br />
24 9410-14 - Eyelash, Black<br />
P#48<br />
1 25" x 42"<br />
1 4795-21 - Thunder, Apple Green<br />
P#61<br />
9 9812-18 - Marble, Chinese Blue<br />
P#134<br />
20 4730-10 - Crackle, Glacier<br />
P#129<br />
18 6931-27 - Flower Texture,<br />
Turquoise P#127<br />
16 5866-73 - Ripple, Clover<br />
P#62<br />
10 2266-07 - Pinecone, Iris<br />
P#135<br />
19 9812-09 - Marble, Aquamarine<br />
P#128<br />
3 7132-29 - Floral Outline, Azure<br />
P#126<br />
15 7424-07 - Floral Etch<br />
Hea<strong>the</strong>r Green P#12<br />
11 7132-30 - Floral Outline, Hyacinth<br />
P#136<br />
17 5868-17 - Masque Fea<strong>the</strong>rs, Jade<br />
P#83<br />
4 7427-25 - Daisy Texture, Blue<br />
P#124<br />
26 6739-02 - Filigree, Slate Green<br />
P#11<br />
12 8737-09 - Hens&Chicks,Amethyst<br />
P#137<br />
21 4730-08 - Lagoon, Crackle<br />
P#84<br />
8 0498-09 - Posies, Cobalt<br />
P#123<br />
25 5868-13 - MasqueFea<strong>the</strong>rs,Juniper<br />
P#10<br />
13 8868-05 - Floral Vine, Purple<br />
P#96<br />
22 8868-02 - Filigree, Pilgrim<br />
P#51<br />
7 9511-16 - Water, Lapis<br />
P#122<br />
2 3-3/4" x 25"<br />
3 3-3/4" x 25"<br />
4 3-3/4" x 25"<br />
5 3-3/4" x 25"<br />
6 6-1/4" x 25"<br />
7 6-1/4" x 25"<br />
8 6-1/4" x 25"<br />
9 6-1/4" x 25"<br />
10 8-3/4" x 25"<br />
11 8-3/4" x 25"<br />
12 8-3/4' x 25"<br />
13 8-3/4" x 25"<br />
14 11-1/4" x 25"<br />
15 11-1/4" x 25"<br />
16 11-1/4" x 25"<br />
17 11-1/4" x 25"<br />
18 13-3/4' x 25"<br />
19 13-3/4" x 25"<br />
20 13-3/4" x 25"<br />
21 13-3/4" x 25"<br />
Moon Glow by Jinny Beyer Month 12 - Page 1 <strong>of</strong> 6
The alternate setting <strong>block</strong> <strong>for</strong> <strong>the</strong> compasses can be rotary cut and strip pieced. Twelve <strong>block</strong>s are<br />
needed <strong>for</strong> <strong>the</strong> quilt. Six <strong>block</strong>s are colored one way, and six are mirror images <strong>of</strong> <strong>the</strong> first. Take care<br />
to look at <strong>the</strong> diagrams in terms <strong>of</strong> <strong>the</strong> coloring <strong>of</strong> <strong>the</strong> <strong>block</strong> and <strong>the</strong> placement within <strong>the</strong> quilt. The<br />
lesson this <strong>month</strong> is to learn basic rotary cutting and strip piecing techniques.<br />
Directions-<br />
1.<br />
2.<br />
3.<br />
4.<br />
Using <strong>the</strong> measurements in Chart I, cut one strip <strong>of</strong> each color. These strips will <strong>the</strong>n be sewn<br />
toge<strong>the</strong>r and cut to create <strong>the</strong> nine patch and log units needed to complete <strong>the</strong>se <strong>block</strong>s.<br />
Cut <strong>the</strong> Black Eyelash - 9410-14 fabric into 21 strips that measure 1 3/4" x 23".<br />
Sew one Black Eyelash - 9410-14 strip onto each side <strong>of</strong> <strong>the</strong> following fabric strips (number refers<br />
to Block Area):<br />
8 - Marble, Aquamarine<br />
9 - Floral Outline, Azure<br />
12 - Masque Fea<strong>the</strong>rs, Jade<br />
13 - Daisy Texture, Blue<br />
16 - Lagoon, Crackle<br />
17 - Posies, Cobalt<br />
20 - Filigree, Pilgrim<br />
21 - Water, Lapis<br />
Cut each <strong>of</strong> <strong>the</strong>se units into 12 strips that are 1-3/4" wide.<br />
5.<br />
Cut 12 strips from each <strong>of</strong> <strong>the</strong> following fabrics. The strips will need to be 1-3/4" by <strong>the</strong> width <strong>of</strong><br />
<strong>the</strong> original strip. i.e. #6 would be 1-3/4" x 4-1/4". (Number refers to Block Area):<br />
6 - Ripple, Clover<br />
7 - Pinecone, Iris<br />
10 - Floral Etch, Hea<strong>the</strong>r Green<br />
11 - Floral Outline, Hyacinth<br />
14 - Filigree, Slate Green<br />
15 - Hens & Chicks, Amethyst<br />
18 - Masque Fea<strong>the</strong>rs, Juniper<br />
19 - Floral Vine, Purple<br />
4<br />
6. To aid when stitching <strong>the</strong>se <strong>block</strong>s toge<strong>the</strong>r, you may find it<br />
helpful to label by fabric name and/or number each group <strong>of</strong><br />
strips created in above Steps 4 and 5.<br />
7. Sew one Black Eyelash - 9410-14 strip onto each side <strong>of</strong> <strong>the</strong><br />
following fabric strips (number refers to Block Area):<br />
4 - Crackle, Glacier<br />
5 - Flower Texture, Turquoise<br />
8. Sew one Black Eyelash - 9410-14 strip between <strong>the</strong> following<br />
two fabric strips (number refers to Block Area):<br />
2 - Thunder, Apple Green<br />
3 - Marble, Chinese Blue<br />
9. Cut each <strong>of</strong> <strong>the</strong>se units into 12 strips that are 1-3/4” wide.<br />
10. Sew strips toge<strong>the</strong>r as shown to create nine patch units <strong>for</strong><br />
<strong>the</strong>se <strong>block</strong>s as shown. Make 6 <strong>block</strong>s each <strong>of</strong> 12A and 12B.<br />
2<br />
3<br />
5<br />
12A<br />
4<br />
2 3<br />
5<br />
12B<br />
3<br />
4<br />
5<br />
2<br />
Moon Glow by Jinny Beyer Month 12 - Page 2 <strong>of</strong> 6
11. Beginning with a nine patch unit as <strong>the</strong> center, add strip units from Step 3 and single fabric strips<br />
from Step 5 to complete <strong>the</strong> 12 setting <strong>block</strong>s needed <strong>for</strong> this quilt. Make 6 <strong>block</strong>s <strong>of</strong> each fabric<br />
arrangement, 12A and 12B. Please note 6 <strong>block</strong>s are colored one way (12A) and 6 <strong>block</strong>s are<br />
mirror images <strong>of</strong> <strong>the</strong> first (12B). Take care to review <strong>the</strong> Fabric Placement diagram below.<br />
FABRIC PLACEMENT<br />
12A<br />
Make 6 <strong>of</strong> <strong>the</strong>se<br />
<strong>block</strong>s. Please<br />
note color<br />
placement.<br />
GREEN<br />
TEAL<br />
BLUE<br />
PURPLE<br />
1<br />
18<br />
1<br />
1<br />
14<br />
1<br />
1<br />
10<br />
1<br />
20<br />
16<br />
12<br />
1 8 1<br />
1 4 1<br />
6 2 1 3 7<br />
1 5 1<br />
1 9 1<br />
13<br />
17<br />
21<br />
1<br />
1<br />
1<br />
11 15 19<br />
1<br />
1<br />
1<br />
12B<br />
Make 6 <strong>of</strong> <strong>the</strong>se<br />
<strong>block</strong>s. Please<br />
note color<br />
placement.<br />
PURPLE<br />
TEAL<br />
BLUE<br />
GREEN<br />
1<br />
19<br />
1<br />
1<br />
15<br />
1<br />
1<br />
11<br />
1<br />
20<br />
16<br />
12<br />
1 8<br />
1 4<br />
1<br />
1<br />
7 3 1 2 6<br />
1 5<br />
1 9<br />
13<br />
17<br />
21<br />
1<br />
1<br />
1<br />
1<br />
1<br />
10 14 18<br />
1<br />
1<br />
1<br />
BLOCK ASSEMBLY<br />
Moon Glow by Jinny Beyer Month 12 - Page 3 <strong>of</strong> 6
If you prefer to cut individual<br />
pieces <strong>for</strong> assembling <strong>the</strong>se<br />
<strong>block</strong>s, use <strong>the</strong> measurements<br />
and color guidelines listed <strong>the</strong>n<br />
assemble <strong>the</strong> <strong>block</strong>s using <strong>the</strong><br />
Block Assembly diagram.<br />
Area Description Cut Size Qty.<br />
1 Fabric 24 - Eyelash, Black 1 3/4" x 1 3/4" 252<br />
2 Fabric 1 - Thunder, Apple Green 1 3/4" x 1 3/4" 12<br />
3 Fabric 9 - Marble, Chinese Blue 1 3/4" x 1 3/4" 12<br />
4 Fabric 20 - Crackle, Glacier 1 3/4" x 1 3/4" 12<br />
5 Fabric 18 - Flower Texture, Turquoise 1 3/4" x 1 3/4" 12<br />
6 Fabric 16 - Ripple, Clover 1 3/4" x 4 1/4" 12<br />
7 Fabric 10 - Pinecone, Iris 1 3/4" x 4 1/4" 12<br />
8 Fabric 19 - Marble, Aquamarine 1 3/4" x 4 1/4" 12<br />
9 Fabric 3 - Floral Outline, Azure 1 3/4" x 4 1/4" 12<br />
10 Fabric 15 - Etched Leaf, Hea<strong>the</strong>r Green 1 3/4" x 6 3/4" 12<br />
11 Fabric 11 - Floral Outline, Hyacinth 1 3/4" x 6 3/4" 12<br />
12 Fabric 17 - Masque Fea<strong>the</strong>rs, Jade 1 3/4" x 6 3/4" 12<br />
13 Fabric 4 - Daisy Texture, Blue 1 3/4" x 6 3/4" 12<br />
14 Fabric 26 - Filigree, Slate Green 1 3/4" x 9 1/4" 12<br />
15 Fabric 12 - Hens & Chicks, Amethyst 1 3/4" x 9 1/4" 12<br />
16 Fabric 21 - Crackle, Lagoon 1 3/4" x 9 1/4" 12<br />
17 Fabric 8 - Posies, Cobalt 1 3/4" x 9 1/4" 12<br />
18 Fabric 25 - Masque Fea<strong>the</strong>rs, Juniper 1 3/4" x 11 3/4" 12<br />
19 Fabric 13 - Floral Vine, Purple 1 3/4" x 11 3/4" 12<br />
20 Fabric 22 - Filigree, Pilgrim 1 3/4" x 11 3/4" 12<br />
21 Fabric 7 - Water, Lapis 1 3/4" x 11 3/4" 12<br />
QUILT ASSEMBLY<br />
BLOCKS<br />
1. To avoid confusion, separate <strong>the</strong>12A and 12B <strong>block</strong>s, orienting each one so that <strong>the</strong> Teal portion<br />
is at <strong>the</strong> top.<br />
2. Arrange and sew <strong>the</strong> <strong>block</strong>s toge<strong>the</strong>r<br />
according to <strong>the</strong> Positioning Guide and<br />
color image below. Note <strong>the</strong> letter T in <strong>the</strong><br />
Positioning Guide on <strong>the</strong> 12A and 12B<br />
<strong>block</strong>s as it represents where <strong>the</strong> Teal<br />
portion <strong>of</strong> <strong>the</strong> <strong>block</strong> will be placed.<br />
3. Press seams away from <strong>the</strong> 12A and 12B<br />
<strong>block</strong>s. Sew row to row and press to one<br />
side. POSITIONING GUIDE<br />
10<br />
12A<br />
T<br />
4 12A 9<br />
T<br />
12B<br />
T<br />
8<br />
T<br />
12B<br />
6<br />
12B<br />
T<br />
T<br />
1 12A 11<br />
12A<br />
2<br />
T<br />
T<br />
12B<br />
7 12B 5<br />
T<br />
T<br />
12B<br />
9<br />
12A 3<br />
T<br />
= Top <strong>of</strong> Block/Teal Fabrics<br />
T<br />
12A<br />
10<br />
Moon Glow by Jinny Beyer Month 12 - Page 4 <strong>of</strong> 6
BORDERS & BINDING<br />
Swatch # Description Yardage<br />
24 Fabric - Eyelash, 2 yards<br />
Black P#48<br />
Strip #<br />
Fabric/Color<br />
1<br />
Black Eyelash<br />
2<br />
Flower Texture,<br />
Turquoise<br />
3<br />
Fl. Outline, Azure<br />
4<br />
Posies, Cobalt<br />
5<br />
Hens & Chicks,<br />
Sapphire<br />
6<br />
Marble, Midnight<br />
7<br />
Eyelash, Black<br />
Style # 9410-14 6931-27 7132-29 0498-09 8737-08 9812-08 9410-14<br />
Cut Size 71-1/4" 74-3/4" 78-1/4" 81-3/4" 85-1/4" 88-3/4" 92-1/4"<br />
WOF strips 8 8 8 9 9 9 10<br />
Borders 1 and 7 can be cut parallel to <strong>the</strong> selvage if you cut <strong>the</strong>m be<strong>for</strong>e any o<strong>the</strong>r <strong>block</strong> cuts. If not, a<br />
combined 17 WOF cuts will be enough <strong>for</strong> both. *WOF = 40"-44" selvage to selvage cut<br />
BORDERS<br />
1. The border is made up <strong>of</strong> seven strips <strong>of</strong> fabric sewn toge<strong>the</strong>r. Sew <strong>the</strong> ASSEMBLY DIAGRAM<br />
WOF strips short end to short end. Trim to listed length above. Always<br />
1<br />
measure your quilt’s pieced center and make adjustments in <strong>the</strong> border<br />
2<br />
3<br />
lengths as needed.<br />
4<br />
2. Sew <strong>the</strong> seven borders strips toge<strong>the</strong>r, <strong>of</strong>fsetting each strip by 1 3/4" to<br />
5<br />
6<br />
create a stepped strip unit as shown in <strong>the</strong> Assembly Diagram. Sew 4<br />
7<br />
sets <strong>of</strong> border strips (one <strong>for</strong> each side <strong>of</strong> <strong>the</strong> quilt).<br />
3.<br />
4.<br />
5.<br />
6.<br />
18 6931-27 - Flower<br />
Texture, Turquoise<br />
P#127<br />
3 7132-29 - Fl. Outline,<br />
Azure P#126<br />
8 0498-09 - Posies,<br />
Cobalt P#123<br />
6 8737-08 - Hens & Chicks,<br />
Sapphire P#121<br />
1/2 yard<br />
5/8 yard<br />
5/8 yard<br />
5/8 yard<br />
27 9812-08 - Marble, 5/8 yard<br />
Midnight P#87<br />
Always measure your pieced quilt center be<strong>for</strong>e<br />
cutting border lengths. Make adjustment if<br />
needed. Border cuts are 1-3/4" wide x WOF*.<br />
QUILT ASSEMBLY & BORDER DIAGRAM<br />
69-1/4" x 69-1/4" pieced quilt center<br />
(<strong>block</strong>s be<strong>for</strong>e borders added)<br />
To ensure <strong>for</strong> a perfectly symmetrical quilt, measure across <strong>the</strong> center <strong>of</strong> <strong>the</strong> quilt; <strong>the</strong>n measure<br />
and mark <strong>the</strong> same measurement on each border unit.<br />
Indicate <strong>the</strong> ends <strong>of</strong> <strong>the</strong> line by making a mark or placing a pin at each end.<br />
Find <strong>the</strong> center <strong>of</strong> <strong>the</strong> pinned or marked line on each border unit, and <strong>the</strong> center <strong>of</strong> each side <strong>of</strong><br />
<strong>the</strong> quilt.<br />
Pin <strong>the</strong> center <strong>of</strong> <strong>the</strong> border to <strong>the</strong> center <strong>of</strong> <strong>the</strong> quilt. To find <strong>the</strong> necessary length <strong>of</strong> <strong>the</strong> borders,<br />
place one <strong>of</strong> <strong>the</strong> border units across <strong>the</strong> middle <strong>of</strong> <strong>the</strong> quilt (measuring across <strong>the</strong> middle as<br />
opposed to <strong>the</strong> ends is more accurate).<br />
Place a pin on each edge <strong>of</strong> <strong>the</strong> border unit where it meets <strong>the</strong> edge <strong>of</strong> <strong>the</strong> quilt.<br />
Using <strong>the</strong> first border unit as a guide, mark <strong>the</strong> same length on each <strong>of</strong> <strong>the</strong> o<strong>the</strong>r border units.<br />
Pin <strong>the</strong> midpoint <strong>of</strong> one <strong>of</strong> <strong>the</strong> border units to <strong>the</strong> middle point <strong>of</strong> one <strong>of</strong> <strong>the</strong> edges <strong>of</strong> <strong>the</strong> quilt.<br />
7.<br />
8.<br />
9.<br />
10. Pin <strong>the</strong> corner next, making sure to place <strong>the</strong> pin at <strong>the</strong> point where <strong>the</strong> seam allowances would<br />
meet. Continue pinning across <strong>the</strong> edge <strong>of</strong> <strong>the</strong> quilt easing in any fullness (due to <strong>the</strong> stretch along<br />
Moon Glow by Jinny Beyer Month 12 - Page 5 <strong>of</strong> 6
<strong>the</strong> seams, <strong>the</strong> edge <strong>of</strong> <strong>the</strong> quilt is slightly wider than <strong>the</strong> center; any extra fullness must be eased<br />
in to ensure a perfectly square quilt).<br />
11.Sew <strong>the</strong> remaining three borders in <strong>the</strong> same manner.<br />
MITERING<br />
1.<br />
2.<br />
3.<br />
4.<br />
5.<br />
To miter <strong>the</strong> edges, use a rotary ruler or folded piece <strong>of</strong> paper to mark a<br />
45 degree angled line at both ends <strong>of</strong> each border unit, as shown in <strong>the</strong><br />
Mitering Diagram.<br />
Position <strong>the</strong> edge <strong>of</strong> <strong>the</strong> ruler or paper so that it creates a line that goes<br />
from <strong>the</strong> corner <strong>of</strong> <strong>the</strong> compass <strong>block</strong> to <strong>the</strong> outer edge <strong>of</strong> <strong>the</strong> quilt. Be<br />
careful to check that ruler lines and/or edge <strong>of</strong> paper are parallel to <strong>the</strong><br />
edge <strong>of</strong> <strong>the</strong> border.<br />
Fold and press, or draw a line to mark <strong>the</strong> 45 degree angle.<br />
Pin and stitch along this miter line, being careful to match seams <strong>of</strong> each<br />
border strip along <strong>the</strong> seam line.<br />
Trim <strong>of</strong>f excess fabric along<br />
seam line, leaving a 1/4" seam<br />
allowance. Press.<br />
BASTING AND QUILTING<br />
1. Layer <strong>the</strong> quilt top, batting and<br />
backing, and baste all three layers<br />
toge<strong>the</strong>r.<br />
2. Quilt <strong>the</strong> layers toge<strong>the</strong>r using a<br />
design <strong>of</strong> your choice.<br />
BINDING<br />
1.<br />
2.<br />
3.<br />
4.<br />
5.<br />
6.<br />
7.<br />
8.<br />
9.<br />
10.<br />
MITERING DIAGRAM<br />
Trim <strong>of</strong>f excess fabric and batting.<br />
Make double fold binding using<br />
9410-14 - Black Eyelash. For<br />
straight grain binding, cut 10 strips<br />
that measure 2-1/2" x 40", <strong>for</strong> bias<br />
binding, cut a 32-1/2" square;<br />
<strong>the</strong>n use <strong>the</strong> circular bias, binding<br />
technique to cut <strong>the</strong> tube into<br />
2-1/2" strips.<br />
Stitch strips toge<strong>the</strong>r end to end<br />
using diagonal seams.<br />
Trim <strong>of</strong>f excess seam allowance<br />
and press all seams open.<br />
Press strip in half lengthwise, right side facing out.<br />
Measure across <strong>the</strong> quilt to determine <strong>the</strong> binding length needed <strong>for</strong> each side. In order to keep<br />
<strong>the</strong> quilt square and flat, use <strong>the</strong> same measurement <strong>for</strong> all four sides.<br />
Mark <strong>the</strong> measurement, <strong>the</strong>n pin <strong>the</strong> binding in<br />
BINDING DIAGRAM<br />
place.<br />
Stitch folded binding to edge <strong>of</strong> quilt using a 3/8"<br />
seam allowance.<br />
Miter corners and finish <strong>the</strong> ends as shown in <strong>the</strong><br />
Binding Diagram.<br />
Turn folded edge <strong>of</strong> binding to <strong>the</strong> back <strong>of</strong> <strong>the</strong> quilt<br />
and stitch in place.<br />
Moon Glow by Jinny Beyer Month 12 - Page 6 <strong>of</strong> 6