Pro Iron - Shark
Pro Iron - Shark
Pro Iron - Shark

Create successful ePaper yourself
Turn your PDF publications into a flip-book with our unique Google optimized e-Paper software.
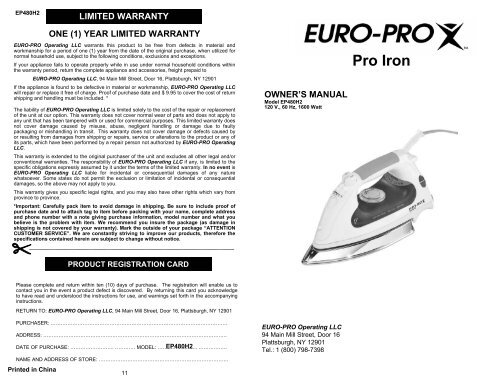
EP480H2<br />
LIMITED WARRANTY<br />
ONE (1) YEAR LIMITED WARRANTY<br />
EURO-PRO Operating LLC warrants this product to be free from defects in material and<br />
workmanship for a period of one (1) year from the date of the original purchase, when utilized for<br />
normal household use, subject to the following conditions, exclusions and exceptions.<br />
If your appliance fails to operate properly while in use under normal household conditions within<br />
the warranty period, return the complete appliance and accessories, freight prepaid to<br />
EURO-PRO Operating LLC, 94 Main Mill Street, Door 16, Plattsburgh, NY 12901<br />
If the appliance is found to be defective in material or workmanship, EURO-PRO Operating LLC<br />
will repair or replace it free of charge. <strong>Pro</strong>of of purchase date and $ 9.95 to cover the cost of return<br />
shipping and handling must be included. *<br />
The liability of EURO-PRO Operating LLC is limited solely to the cost of the repair or replacement<br />
of the unit at our option. This warranty does not cover normal wear of parts and does not apply to<br />
any unit that has been tampered with or used for commercial purposes. This limited warranty does<br />
not cover damage caused by misuse, abuse, negligent handling or damage due to faulty<br />
packaging or mishandling in transit. This warranty does not cover damage or defects caused by<br />
or resulting from damages from shipping or repairs, service or alterations to the product or any of<br />
its parts, which have been performed by a repair person not authorized by EURO-PRO Operating<br />
LLC.<br />
This warranty is extended to the original purchaser of the unit and excludes all other legal and/or<br />
conventional warranties. The responsibility of EURO-PRO Operating LLC if any, is limited to the<br />
specific obligations expressly assumed by it under the terms of the limited warranty. In no event is<br />
EURO-PRO Operating LLC liable for incidental or consequential damages of any nature<br />
whatsoever. Some states do not permit the exclusion or limitation of incidental or consequential<br />
damages, so the above may not apply to you.<br />
This warranty gives you specific legal rights, and you may also have other rights which vary from<br />
province to province.<br />
*Important: Carefully pack item to avoid damage in shipping. Be sure to include proof of<br />
purchase date and to attach tag to item before packing with your name, complete address<br />
and phone number with a note giving purchase information, model number and what you<br />
believe is the problem with item. We recommend you insure the package (as damage in<br />
shipping is not covered by your warranty). Mark the outside of your package “ATTENTION<br />
CUSTOMER SERVICE”. We are constantly striving to improve our products, therefore the<br />
specifications contained herein are subject to change without notice.<br />
OWNER’S MANUAL<br />
Model EP480H2<br />
120 V., 60 Hz, 1600 Watt<br />
<strong>Pro</strong> <strong>Iron</strong><br />
PRODUCT REGISTRATION CARD<br />
Please complete and return within ten (10) days of purchase. The registration will enable us to<br />
contact you in the event a product defect is discovered. By returning this card you acknowledge<br />
to have read and understood the instructions for use, and warnings set forth in the accompanying<br />
instructions.<br />
RETURN TO: EURO-PRO Operating LLC, 94 Main Mill Street, Door 16, Plattsburgh, NY 12901<br />
PURCHASER: ……………………………………………………………………………………………<br />
ADDRESS: ……………………………………………………………………………………………….<br />
EP480H2<br />
DATE OF PURCHASE: …………………….. ………… MODEL: ……. ……………. .…………….<br />
NAME AND ADDRESS OF STORE: …………………………………………………………………..<br />
Printed in China<br />
11<br />
EURO-PRO Operating LLC<br />
94 Main Mill Street, Door 16<br />
Plattsburgh, NY 12901<br />
Tel.: 1 (800) 798-7398
IMPORTANT SAFETY INSTRUCTIONS<br />
When using your iron, basic safety<br />
precautions should always be followed,<br />
including the following:<br />
1. Read all instructions carefully.<br />
2. Use iron only for its intended use.<br />
3. To protect against risk of electrical<br />
shock, do not immerse the iron in<br />
water or other liquids.<br />
4. The iron thermostat should always<br />
be turned to its lowest position<br />
before plugging in or unplugging<br />
from the electrical outlet.<br />
5. Never yank cord to disconnect from<br />
outlet. Grasp plug and pull to<br />
disconnect.<br />
6. Do not allow cord to touch hot<br />
surfaces. Let iron cool completely<br />
before putting away.<br />
7. Always disconnect iron from<br />
electrical outlet when filling with<br />
water, emptying, or when not in use.<br />
8. Do not operate iron with a damaged<br />
cord, or after the iron has been<br />
dropped or damaged in any manner.<br />
To avoid the risk of electric shock,<br />
do not disassemble the iron. Return<br />
the iron to the nearest service facility<br />
for examination and repair. Incorrect<br />
POLARIZED PLUG:<br />
reassembly can cause the risk of<br />
electric shock when the iron is<br />
used.<br />
9. Close supervision is necessary for<br />
any appliance being used by or<br />
near children. Do not leave iron<br />
unattended while connected or on<br />
an ironing board.<br />
10. Burns can occur from touching hot<br />
metal parts, hot water or steam.<br />
Use caution when you turn a steam<br />
iron upside down; there may be hot<br />
water in the reservoir.<br />
11. Never direct steam at any person,<br />
especially when using the iron in<br />
the vertical position. The steam is<br />
very hot and can cause burns.<br />
12. This appliance is for household<br />
use only.<br />
SPECIAL INSTRUCTIONS<br />
1. To avoid a circuit overload, do not<br />
operate another high-wattage<br />
appliance on the same circuit.<br />
2. If an extension cord is absolutely<br />
necessary, use a 13-ampere cord.<br />
Cords rated for less amperage may<br />
overheat. Use care to arrange the<br />
cord so that it cannot be pulled or<br />
tripped over.<br />
This appliance has a polarized plug (one blade is<br />
wider than the other). As a safety feature, this plug<br />
will fit into a polarized outlet only one way. If the<br />
plug does not fit fully into the outlet, reverse the<br />
plug. If it still does not fit, contact a qualified<br />
electrician. Do no attempt to defeat this safety<br />
feature.<br />
SAVE THESE INSTRUCTIONS<br />
For Household Use Only<br />
1<br />
Rev. 01/04B<br />
PROBLEM<br />
<strong>Iron</strong> does not heat<br />
Thermostat ready light<br />
goes On and Off<br />
Some odor or small<br />
particles come out of<br />
steam vents of new<br />
iron<br />
<strong>Iron</strong> does not steam<br />
Water droplets coming<br />
from steam vents<br />
TROUBLESHOOTING<br />
Printed in China 10<br />
POSSIBLE REASONS & SOLUTIONS<br />
• <strong>Iron</strong> should be plugged into a 120V AC electrical<br />
outlet only.<br />
Make sure that the plug is securely in the socket.<br />
• Temperature setting too low.<br />
Turn to higher setting.<br />
• This is normal.<br />
The light goes On and Off as the thermostat is<br />
switching the heating element On and Off to<br />
maintain the selected temperature.<br />
• This is normal.<br />
Follow instructions for first use and allow iron to steam<br />
through 2-3 fillings & press the steam burst button<br />
occasionally to eliminate small white particles.<br />
• Water tank may be empty or water level is very low.<br />
Add water.<br />
• Make sure that the temperature control dial and<br />
the variable steam control are correctly set. For<br />
maximum steam, (setting "Max" on steam control),<br />
temperature control dial should be set on "•••".<br />
• Adjustable steam control is set on "0".<br />
Always allow the iron to reach the selected<br />
temperature with the adjustable steam control setting<br />
at "0". Make sure the temperature control dial is set in<br />
the correct steam area, e.g. "•", and the steam control<br />
is not on "0". For more steam, turn temperature dial to<br />
higher setting, e.g. "•••", and the steam control to<br />
"Max".<br />
• If temperature setting and steam control setting are<br />
correct and there is no steam, gently tap the<br />
soleplate on the ironing board a few times. Move<br />
the variable steam control from "0" to "Max" a few<br />
times.<br />
• <strong>Iron</strong> may not be hot enough. Set thermostat to the<br />
"Max" position. Always allow iron sufficient time to<br />
heat up (thermostat light goes off) before activating<br />
the variable steam control.<br />
• Overuse of steam burst. Allow more time between<br />
each burst.<br />
• <strong>Iron</strong> may have been overfilled. Turn iron off,empty<br />
water and follow instructions for filling.<br />
• Steam performance may be low if iron requires<br />
seasoning. To season, use regular tap water for 1or 2<br />
tanks until steam performance improves.
NOTE: Before starting to iron delicate<br />
fabrics, it is best to first test the<br />
temperature of the iron on a hem or an<br />
inside seam.<br />
DIRECTIONS<br />
ON LABEL<br />
FABRIC<br />
TEMP.<br />
CONTROL<br />
STEAM<br />
CONTROL<br />
BURST OF<br />
STEAM<br />
SPRAY<br />
IRONING CHART<br />
SYNTHETIC<br />
FIBERS, e.g.<br />
acrylic, nylon<br />
polyester<br />
To select iron temperature, align<br />
temperature selected on dial with<br />
the indicator on the water tank.<br />
SILK<br />
WOOL<br />
COTTON<br />
LINEN<br />
MIN<br />
MAX<br />
• •• •••<br />
0<br />
MINIMUM<br />
STEAM<br />
MAXIMUM<br />
STEAM<br />
Please note that on the label means ‘THIS ARTICLE CANNOT BE IRONED!”<br />
ADDITIONAL IMPORTANT SAFEGUARDS<br />
1. Do not rest iron on soleplate.<br />
2. Never use or rest iron on an<br />
unstable surface.<br />
3. While the iron is hot, never set iron<br />
on an unprotected surface - even if it<br />
is on its heel rest.<br />
4. WARNING! TO PREVENT<br />
ELECTRIC SHOCK OR OTHER<br />
INJURY, before filling the iron<br />
with water, make sure that the<br />
plug is removed from the outlet.<br />
5. CAUTION: Never fill the iron with<br />
fabric conditioner, starches or any<br />
other solution, as these will<br />
damage the steam mechanism. Do<br />
not use contaminated water.<br />
6. WARNING! TO AVOID FIRE, never<br />
leave iron unattended while it is<br />
plugged in.<br />
7. WARNING! TO PREVENT<br />
ELECTRIC SHOCK, never<br />
immerse the iron in water or other<br />
liquid.<br />
8. WARNING! TO PREVENT<br />
ELECTRIC SHOCK, never use the<br />
iron in a location where it can fall<br />
or be pulled into water or any<br />
other liquid. If the iron falls into<br />
water or any other liquid, unplug it<br />
immediately. DO NOT reach into<br />
the water or liquid.<br />
9. CAUTION: Never use scouring<br />
pads, abrasive or chemical<br />
cleaners, or solvents to clean the<br />
exterior or soleplate of your iron.<br />
Doing so will scratch and/or<br />
damage the surface.<br />
10. WARNING! DO NOT aim iron at<br />
face, towards yourself, or anyone<br />
else while using or adjusting<br />
steam. Burns or serious injury<br />
may occur.<br />
11. Always store your iron in the upright<br />
position, not on the soleplate. If<br />
stored face down, even the<br />
smallest amount of moisture will<br />
cause the soleplate to corrode and<br />
stain.<br />
12. DANGER! Never use the iron if it<br />
is damaged or dropped. Using<br />
the iron when it is damaged<br />
could create the risks of fire,<br />
electric shock, injury or death.<br />
9<br />
2
GETTING TO KNOW YOUR IRON<br />
USER MAINTENANCE INSTRUCTIONS<br />
Before using your 1600 Watt <strong>Pro</strong> <strong>Iron</strong>,<br />
remove any labels, stickers or tags that<br />
may be attached to the body or<br />
soleplate of the iron.<br />
When turned on for the first time, your<br />
new iron may emit an odor for up to 10<br />
minutes. This is due to the initial<br />
heating of the materials used in making<br />
the iron.<br />
1. Power Supply Cord<br />
2. Auto Shut-Off Light<br />
3. Temperature Ready Light<br />
4. Variable Steam Control<br />
5. Burst of Steam<br />
6. Spray Button<br />
7. Water Filling Inlet Cover<br />
Technical Specifications<br />
Voltage:<br />
Power:<br />
120V., 60Hz.<br />
1600 Watts<br />
The odor is safe and should not reoccur<br />
after initial heating.<br />
Also, before ironing with steam for the<br />
first time, allow iron to heat, hold in a<br />
horizontal position and hit the burst of<br />
steam button several times. The iron<br />
may emit some small particles from the<br />
steam holes. This is normal and will<br />
clear after pressing the burst of steam<br />
button several times.<br />
8. Spray Nozzle<br />
9. Temperature Control Dial<br />
10. Water Level Window<br />
11. Stainless Steel Soleplate<br />
12. Water Flask<br />
13. <strong>Iron</strong> Heel Rest<br />
EMPTYING THE IRON<br />
1. Always empty iron after each use.<br />
2. When finished using the iron, turn<br />
the variable steam control to“0” and<br />
the temperature control dial to "MIN".<br />
3. Unplug the iron from the electrical<br />
outlet.<br />
4. Set variable steam control to "MAX".<br />
5. Turn the iron upside down over the<br />
sink with the tip pointing downward<br />
and allow the water to flow from the<br />
opening.<br />
6. Set variable steam control to "0".<br />
7. Allow iron to cool in an upright<br />
position before storing.<br />
WARNING! Use caution when<br />
emptying the iron. Burns may<br />
occur from touching hot metal<br />
surfaces, hot water or steam.<br />
SELF-CLEANING<br />
12 In order to remove calcium and built-up<br />
particles, the self-cleaning system should be<br />
run at least once a month.<br />
• Fill the water beaker provided halfway<br />
and then pour into the water reservoir.<br />
• Set the variable steam control to the no<br />
steam position.<br />
• Insert the main plug into the wall socket.<br />
• Set the temperature control dial to the<br />
maximum temperature.<br />
• Wait until the thermostat light goes off and<br />
steam iron has reached preset<br />
temperature.<br />
• Remove the plug from the wall socket.<br />
• Hold the steam iron horizontally over a<br />
sink.<br />
• Turn the variable steam control to<br />
“Self-Clean ” position. Hot water and<br />
steam will be emitted from the soleplate.<br />
Swing the steam iron lightly back and forth<br />
gently to allow lime and dust particles to<br />
come out.<br />
• When the water reservoir is empty, shift<br />
the variable steam control from “Self-<br />
Clean” position to “0”.<br />
• Stand the iron upright and insert the plug<br />
into the wall socket to let the iron heat up<br />
again.<br />
• Move the iron over a clean cotton cloth to<br />
clean the soleplate and let the remaining<br />
water on the soleplate evaporate.<br />
ANTI-DRIP FEATURE<br />
Built-in Anti-Drip feature helps reduce<br />
water spots by cutting of water flow<br />
when the iron temperature is too low to<br />
build sufficient steam. The anti drip<br />
function reduces water dripping and<br />
water stains. It does not prevent water<br />
dripping and water stains if you press<br />
the steam burst button too often or if the<br />
temperature is too low. The amount of<br />
water droplets will eventually decrease<br />
after the iron is used for 2 to 3 tankfuls<br />
of steaming and ironing.<br />
STORAGE<br />
1. Always turn the variable steam<br />
control to “0” after you have<br />
emptied the water tank.<br />
2. Allow the iron to cool down.<br />
3. Always store the iron in the upright<br />
position to protect the soleplate.<br />
4. From time to time, clean the exterior<br />
of the iron with a damp cloth and<br />
wipe dry.<br />
5. If you use spray starch, wipe the<br />
soleplate occasionally with a soft<br />
damp cloth to prevent the build-up of<br />
deposits.<br />
6. If the iron has not been used for a<br />
few weeks, hold the iron horizontally<br />
and allow to steam for 2 minutes<br />
before ironing.<br />
WARNING: The anti-drip<br />
function reduces water<br />
dripping and water stains. It<br />
does not prevent water<br />
dripping or water stains if you<br />
press the steam burst button<br />
too often or if temperature is<br />
too low. The amount of water<br />
droplets will eventually<br />
decrease after iron is used for<br />
2 to 3 tankfuls of steaming<br />
and ironing.<br />
3<br />
8
OPERATING INSTRUCTIONS (CONT.)<br />
FEATURES OF YOUR PRO IRON<br />
NOTE: If the tank runs dry, remove the<br />
plug from wall outlet. Then, fill the iron<br />
with water and re-prime the pump. The<br />
iron may be filled with water while it is<br />
hot.<br />
4. For vertical steam,<br />
press the blast of<br />
steam button while<br />
holding the iron<br />
in a vertical<br />
position. See<br />
figure 5. The<br />
vertical steam<br />
function is useful<br />
for steaming<br />
curtains and Fig. 5<br />
drapes while still hanging.<br />
WATER SPRAY<br />
The water spray is<br />
useful on fabrics<br />
with stubborn<br />
wrinkles. Press the<br />
spray button and a<br />
jet of water will<br />
spray onto the<br />
Fig. 6<br />
fabric being ironed.<br />
See Figure 6. The water spray can be<br />
used with dry or steam ironing as<br />
desired.<br />
SELECTING IRON TEMPERATURES<br />
Always read garment labels and follow<br />
the manufacturer's ironing instructions.<br />
Refer to the "<strong>Iron</strong>ing Chart" on page 9<br />
for temperature recommendations: See<br />
figures 7 & 8.<br />
• Use low settings for synthetics.<br />
•• Use moderate settings for wool,<br />
silks, and blends.<br />
••• Use high settings for cottons and<br />
linens.<br />
Variable Steam Control<br />
Fig. 7<br />
Fig. 8<br />
7<br />
NOTE: Before starting to iron delicate<br />
fabrics, it is best to first test the<br />
temperature of the iron on a hem or<br />
an inside seam.<br />
AUTOMATIC SHUT-OFF<br />
The auto shut-off safety function of your<br />
<strong>Pro</strong> <strong>Iron</strong> is designed to engage after<br />
approx. 7 minutes of non-use. The auto<br />
shut-off indicator light will flash when the<br />
auto shut-off has activated. To reset your<br />
iron and continue ironing follow these<br />
steps. See figure 9.<br />
1) Lift the iron.<br />
2) Holding the iron horizontally in front of<br />
you, gently rock the iron back and<br />
forth several times. This motion will<br />
reset the safety switch inside the iron.<br />
Do Not Shake the <strong>Iron</strong>.<br />
The red temperature ready light will<br />
illuminate when the auto shut-off system<br />
has been reset. Allow time for the iron to<br />
re-heat. The red temperature indicator<br />
light will go out when the iron is ready for<br />
use.<br />
IRONING HINTS<br />
Fig. 9<br />
WARNING! To prevent fire, do<br />
not leave iron unattended while<br />
connected.<br />
• Sort articles to be ironed according<br />
to the type of fabric. This will reduce<br />
the need to adjust the temperature<br />
for different types of garments.<br />
• If you are not sure of the fiber<br />
content of a garment, test a small<br />
area such as a seam or inside hem<br />
section before ironing a visible area.<br />
Start with a low temperature setting<br />
and gradually increase to find the<br />
best setting.<br />
• When reducing the temperature to<br />
iron sensitive fabrics, allow<br />
approximately 2 minutes for the iron<br />
to cool to the new temperature<br />
setting.<br />
• Fabrics such as velour, wool, linen<br />
and silk are best ironed with an<br />
ironing cloth to prevent shine marks.<br />
1. BLAST OF STEAM<br />
The Blast of Steam provides<br />
extra, sudden blasts of steam<br />
which aid in removing stubborn<br />
wrinkles from fabrics such as<br />
denim, cotton or linen.<br />
2. ATOMIZER SPRAY<br />
BUTTON<br />
Pressing this Button provides a<br />
defined jet of spray which gently<br />
moistens fabric.<br />
3. VARIABLE STEAM<br />
CONTROL<br />
Minimum to maximum steaming for<br />
different materials. Self cleaning<br />
feature flushes internal sole plate<br />
with water.<br />
4. TEMPERATURE CONTROL<br />
Turn dial to select temperature.<br />
Main temperature settings are<br />
indicated by the 1, 2 and 3<br />
dots. (See “<strong>Iron</strong>ing Chart.”)<br />
5. ANTI-DRIP FUNCTION<br />
Built-in Anti-Drip feature<br />
helps reduce water spots by<br />
cutting of water flow when<br />
the iron temperature is too<br />
low to build sufficient steam.<br />
4<br />
6. WATER FILLING INLET<br />
The cover prevents dust and<br />
foreign matter from entering<br />
the water tank. It also stops<br />
any water from spilling during<br />
ironing.<br />
7. BUILT-IN ANTI-CALCIUM<br />
FILTER<br />
Prevents calcium build-up<br />
and prolongs the life of the<br />
iron.<br />
8. STAINLESS STEEL<br />
SOLEPLATE<br />
<strong>Pro</strong>vides maximum glideability<br />
and heat retention.<br />
9. PIVOT CORD<br />
For left or right handed use.<br />
Pivots up and down;<br />
prevents dragging along the<br />
fabric. The flexible cord<br />
protector protects the cord<br />
from fraying.<br />
10. SELF-CLEANING<br />
Flushes internal soleplate<br />
with water.
OPERATING INSTRUCTIONS<br />
OPERATING INSTRUCTIONS<br />
This appliance is for HOUSEHOLD USE<br />
ONLY and may be plugged into any<br />
120V AC polarized electrical outlet. Do<br />
not use any other type of outlet.<br />
BEFORE FIRST USE<br />
Remove any labels, stickers or tags<br />
which may be attached to the body or<br />
the soleplate of the iron before using<br />
the iron.<br />
Before you start using your iron, read all<br />
the instructions in the manual and do<br />
the following in order to eliminate any<br />
odor and small white residue particles<br />
and to ensure optimum steam<br />
performance.<br />
1. Fill the iron with regular tap water.<br />
(See page 6 for filling instructions.)<br />
2. Set the temperature control dial to its<br />
highest setting and the variable<br />
steam control to “0”.<br />
3. When the temperature ready light<br />
goes off, the iron has reached the<br />
selected temperature. Set the<br />
variable steam control to the highest<br />
setting.<br />
4. Keep the iron in a horizontal position<br />
and allow it to steam until the water<br />
runs out. Press the blast of steam<br />
button to eliminate white residue<br />
particles.<br />
5. Repeat this procedure for two or<br />
three fillings of water.<br />
DRY IRONING<br />
All marked settings on the temperature<br />
dial can be used for dry ironing. Slide<br />
the variable steam control lever all the<br />
way down as shown in Figure 1. This<br />
will cut off the steam flow if water is in<br />
the tank.<br />
For Dry <strong>Iron</strong>ing:<br />
0<br />
1. Turn temperature dial to "MIN" and<br />
slide the variable steam control lever<br />
all the way down to "0".<br />
2. Plug the cord into a polarized, 120V<br />
AC electrical outlet. The power "ON"<br />
light will come on, indicating that the<br />
iron is receiving power.<br />
3. Turn the temperature dial to the<br />
desired setting. (See "<strong>Iron</strong>ing Guide"<br />
for a guide to temperature selection.)<br />
4. Place iron on its heel (on a stable,<br />
protected surface) while iron is<br />
warming to desired temperature.<br />
STEAM IRONING<br />
CAUTION! DO NOT aim iron<br />
at face, towards yourself, or<br />
anyone else while using or<br />
adjusting steam. Burns or<br />
serious injury may occur.<br />
WARNING! Before filling the<br />
iron with water, be sure the<br />
iron is not plugged into the<br />
electrical outlet. The iron may<br />
be filled with water while it is<br />
hot.<br />
CAUTION! TO PREVENT THE<br />
RISK OF BURNS, use caution<br />
when filling iron with water.<br />
Burns can occur from touching<br />
hot metal parts, hot water, or<br />
steam.<br />
NOTE: Because of the soleplate design,<br />
ordinary tap water may be used with this<br />
iron. However, in very hard water areas,<br />
we recommend using distilled or<br />
demineralized water.<br />
WARNING: Never fill the iron<br />
with fabric conditioner,<br />
starches or any other liquid, as<br />
these will damage the steam<br />
mechanism. Do not use<br />
contaminated water.<br />
1. Turn temperature dial to "••" or "•••"<br />
and slide lever all the way to the left.<br />
2. Holding the iron at a slight angle,<br />
pour water slowly into the water<br />
filling inlet. See figure 2. Fill tank to<br />
desired level or to the “MAX”<br />
water level marking using the water<br />
filling flask. (When the iron is upright,<br />
see-through water tank allows you to<br />
gauge the amount of water.) DO<br />
NOT overfill the tank.<br />
Fig. 2<br />
3. Plug the cord into a polarized, 120V<br />
AC electrical outlet.<br />
4. Turn the temperature dial to any of<br />
the temperatures within the red<br />
steam band and allow the iron to<br />
heat for approximately 2 minutes<br />
before ironing. Place iron on its<br />
heel (on a stable, protected<br />
surface) while the iron is warming to<br />
desired temperature.<br />
5. Slide the steam lever up to increase<br />
the amount of steam. (See figure 3)<br />
When using extra steam, the iron<br />
uses more water and it may be<br />
necessary to fill the tank more often.<br />
See page 6 for refilling the iron with<br />
water.<br />
For Steam <strong>Iron</strong>ing:<br />
0<br />
6. Steam is produced as soon as the<br />
iron is held in the horizontal position.<br />
Steam will stop coming out when the<br />
iron is put on its heel in a vertical<br />
position or by turning the steam<br />
control dial to "0".<br />
BLAST OF STEAM<br />
WARNING! DO NOT aim iron<br />
at face, towards yourself, or<br />
anyone else while using or<br />
adjusting steam. Burns or<br />
serious injury may occur.<br />
The blast-of-steam button is useful<br />
when ironing denim, cotton, and linens.<br />
It provides extra, sudden blasts of<br />
steam which aid in removing stubborn<br />
wrinkles.<br />
The blast-of-steam feature can be used<br />
with Dry or Steam ironing as desired.<br />
1. Make sure the water tank is at least<br />
1/2 filled with water.<br />
2. Set the temperature dial. Place the<br />
iron on its heel (on a stable,<br />
protected surface) and allow it to<br />
heat for approximately 2 minutes.<br />
3. With the iron in a horizontal position,<br />
press the blast of steam button<br />
several times to prime the pump.<br />
See Figure 4.<br />
Fig. 4<br />
Fig. 1<br />
Fig. 3<br />
5 6