(bcls) programme - Singapore General Hospital
(bcls) programme - Singapore General Hospital
(bcls) programme - Singapore General Hospital

Create successful ePaper yourself
Turn your PDF publications into a flip-book with our unique Google optimized e-Paper software.
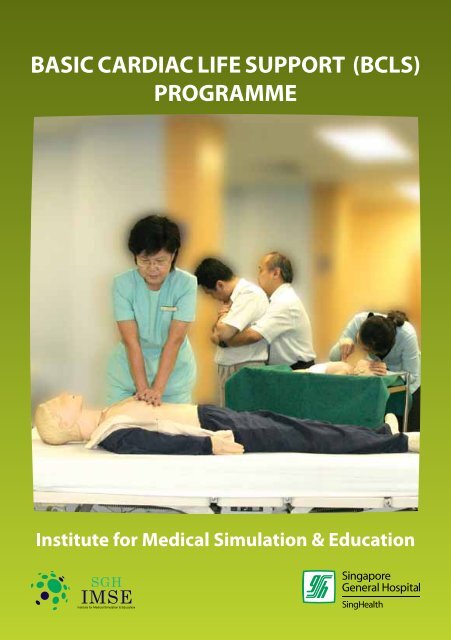
BASIC CARDIAC LIFE SUPPORT (BCLS)<br />
PROGRAMME<br />
Institute for Medical Simulation & Education
SAFETY IN<br />
CPR TRAINING<br />
DO’s<br />
• Wash your hands or use handrub before<br />
and after manikin contact.<br />
• Disinfect manikin’s mouth and nose<br />
with 70% methylated spirit after each<br />
participant’s contact.<br />
• Use a disposable face shield when<br />
performing mouth-to-mouth ventilation.<br />
• Inform the staff of the training centre if<br />
you have :<br />
– Wet skin rashes on your hands, in your<br />
mouth or around your lips.<br />
– Hepatitis B.<br />
– An upper respiratory infection.<br />
– Medical problems e.g. heart, asthma or<br />
orthopaedic problems.<br />
• Disinfect manikins after each practical<br />
session following guidelines provided by<br />
the training centre.<br />
BCLS Programme<br />
DONT’s<br />
• Do not eat or drink during practical<br />
training to avoid contamination of<br />
manikins with food particles.<br />
• Do not use pen to mark any area of the<br />
manikin.<br />
• Do not attempt to force the manikin’s<br />
mouth open beyond 2.5cm.<br />
• Do not use lipstick if practising on the<br />
manikin.<br />
• Do not perform or practise chest<br />
compression on a victim with a pulse,<br />
practise only on a manikin.
C o n t e n t s<br />
Module 1 INTRODUCTION 2<br />
Module 2 The Chain of Survival 3<br />
Module 3 The Heart 4<br />
3.1 Anatomy & Function<br />
3.2 Heart Attack<br />
3.3 Risk Factors of Heart Attack<br />
3.4 Prudent Heart Living<br />
Module 4 ADULT CARDIO-PULMONARY RESUSCITATION (CPR) 9<br />
4.1 Definition<br />
4.2 Steps of Adult One-Man CPR<br />
Module 5 ADULT RECOVERY POSITION 19<br />
Module 6<br />
ADULT FOREIGN BODY AIRWAY<br />
OBSTRUCTION (FBAO) 21<br />
6.1 Introduction<br />
6.2 Recognition of FBAO<br />
6.3 Relief of FBAO in the Conscious Adult<br />
6.4 Relief of FBAO in the Unconscious Adult<br />
Module 7 INFANT CARDIO-PULMONARY RESUSCITATION (CPR) 27<br />
7.1 Introduction<br />
Module 8 INFANT RECOVERY POSITION 35<br />
Module 9<br />
INFANT FOREIGN BODY AIRWAY<br />
OBSTRUCTION (FBAO) 37<br />
9.1 Introduction<br />
9.2 Relief of FBAO in the Conscious Infant<br />
9.3 Relief of FBAO in the Unconscious Infant<br />
Module 10 APPLICATION OF POCKET MASK 43<br />
Module 11 SUMMARY CHECKLIST 47<br />
Copyright © 2011<br />
Produced by Institue for Medical Simulation & Education, SGH<br />
All rights reserved.<br />
No part of this publication may be reproduced, stored in a retrieval system or transmitted, in any form or by any means,<br />
electronic, mechanical, photocopying, recording or otherwise, without the prior permission of the copyright owner.<br />
BCLS Programme<br />
1
Module 1<br />
INTRODUCTION<br />
In <strong>Singapore</strong>, heart disease is the second commonest cause of death, being responsible<br />
for about 24% of total mortality. About 2,400 persons develop an acute heart attack in<br />
<strong>Singapore</strong>. In addition, nearly 1000 people suffer from sudden cardiac arrest in the outof-hospital<br />
environment and another few hundred sustain sudden cardiac arrest after<br />
reaching hospital. The total survival rate for the group of pre-hospital collapses is about<br />
2.6%.<br />
Public education and training in Cardio-Pulmonary Resuscitation (CPR) are crucial in<br />
reducing “sudden death” because the majority of these deaths occur out of hospital.<br />
One of the most startling ideas of modern medicine is that “sudden death” can be<br />
reversed. The actions taken during the first few minutes of an “Emergency” are critical<br />
to victim survival. It can be performed by any of us, anywhere. All that is needed is our<br />
two hands.<br />
REMEMBER:<br />
CPR can save lives.<br />
Do it well. Do it right.<br />
And the victim gets a chance at life.<br />
BCLS Programme<br />
2
Module 2<br />
The Chain of Survival<br />
The concept of “Chain of Survival” is the best approach to the treatment of victims<br />
in cardiac arrest. The four links in this chain are: Early Recognition and Access to<br />
Emergency Care, Early CPR, Early Defibrillation and Early Advanced Cardiac Care.<br />
Early<br />
Recognition<br />
and Access<br />
Early<br />
CPR<br />
Early<br />
Defibrillation<br />
Early<br />
Advanced Care<br />
First Link : Early Recognition and Access<br />
Early recognition and access refers to shortening the time interval from onset of<br />
heart attack or cardiac arrest to arrival of a trained emergency care team. It includes:<br />
• recognition of early warning signs of heart attack e.g. chest pain, sweatiness,<br />
shortness of breath, nausea or vomiting<br />
• recognition of cardiac arrest e.g. unconscious, no breathing and no pulse or<br />
‘signs of circulation’<br />
• rapid call for the first response team<br />
• allowing ambulances priority on the roads so that they can reach the patient quickly<br />
• allowing paramedics rapid access and priority in use of elevators in high-rise<br />
buildings.<br />
Second Link : Early CPR<br />
The brain starts dying within minutes when the heart stops pumping. CPR needs<br />
to be initiated as soon as possible to provide oxygen and blood flow to the brain and<br />
heart and remove excess carbon dioxide from the lungs. CPR cannot always re-start the<br />
heart. It can however buy the valuable time needed to keep the vital organs alive until<br />
definitive help arrives.<br />
BCLS Programme<br />
3
Third Link : Early Defibrillation<br />
This procedure can frequently re-start the heart if carried out early. Studies have<br />
shown that early defibrillation is most likely to improve survival rates for out-ofhospital<br />
cardiac arrest patients. Every emergency vehicle transporting cardiac arrest<br />
patients should be equipped with a defibrillator. Defibrillation works best in the first<br />
few minutes after onset of cardiac arrest. If initiated too late, the heart will not respond<br />
to electrical therapy. For every minute of delay in delivering defibrillation following<br />
collapse, the survival rate decreases by 7 –10%.<br />
Fourth Link : Early Advanced Care<br />
Advanced Cardiac Life Support stabilises the resuscitated victim’s condition in the<br />
most critical phase. It consists of advanced airway management and administration of<br />
medication and is frequently carried out in the in-hospital environment.<br />
Module 3<br />
The Heart<br />
3.1 ANATOMY & FUNCTION<br />
The heart is a hollow, conical, muscular organ situated in the centre of the chest<br />
between the lungs and behind the sternum (breastbone). It is about the size of a<br />
clenched fist.<br />
The Heart in Relation<br />
to the Chest<br />
The Heart as a Pump<br />
Right<br />
pulmonary artery<br />
Left<br />
pulmonary artery<br />
Rib<br />
Heart<br />
Superior<br />
vena cava<br />
Left<br />
pulmonary<br />
veins<br />
Sternum<br />
Xiphoid<br />
process<br />
Inferior<br />
vena cava<br />
BCLS Programme<br />
It receives blood depleted of oxygen from all parts of the body and pumps it to the<br />
lungs. There oxygen is taken up and the oxygen-enriched blood returns to the heart to<br />
be distributed to all parts of the body. The coronary arteries are blood vessels that send<br />
oxygen-rich blood to the muscles of the heart.<br />
4
3.2 Heart ATTACK<br />
Heart attack usually occurs when a blood clot suddenly and completely blocks an<br />
already diseased coronary artery. Coronary artery disease is the end-result of a gradual<br />
build-up of fatty deposits (cholesterol plaques) and blood cells in the inner lining of the<br />
coronary arterial wall, a process also known as “atherosclerosis”. Over a period of years,<br />
this leads to gradual narrowing of the lumen of the vessel, thereby reducing blood flow<br />
to heart muscle. Occasionally, the surface of a plaque may split or crack, and attract<br />
blood clots, which then cause complete obstruction of the lumen, resulting in “heart<br />
attacks”.<br />
Coronary Arteries<br />
Right Coronary<br />
Artery<br />
Left Circumflex<br />
Artery<br />
Left Coronary<br />
Artery<br />
Left Anterior<br />
Descending<br />
Artery<br />
Symptoms of Heart Attack<br />
How to recognize a Heart Attack<br />
• Chest discomfort or pain is the most common symptom. It usually has the following<br />
characteristics:<br />
– uncomfortable pressure, squeezing, fullness, tightness, or pain.<br />
– usually located at the centre of the chest behind the breastbone.<br />
– may spread to either the shoulder, neck,<br />
lower jaw, or either arm and occasionally to<br />
the upper abdomen.<br />
– usually lasts longer than 20 minutes.<br />
• Other symptoms may include any or all of the<br />
following:<br />
– sweating<br />
– nausea (a feeling of wanting to vomit)<br />
– shortness of breath<br />
– weakness<br />
BCLS Programme<br />
5
• Symptoms may occur suddenly and not be typical, so that some victims may not<br />
realise that they are having a heart attack. They may also think that the problem is<br />
due to indigestion.<br />
If you meet anyone<br />
with these symptoms,<br />
arrange for immediate<br />
transportation to the<br />
nearest emergency<br />
medical facility by dialling<br />
995 for an emergency<br />
ambulance.<br />
Photo Courtesy of SCDF<br />
Common Causes Of Sudden Death<br />
• Heart Attack<br />
• Foreign Body Airway Obstruction<br />
• Drowning<br />
• Stroke<br />
• Drug Overdose<br />
• Suffocation<br />
• Smoke Inhalation<br />
• Electrocution<br />
• Severe Allergic Reactions<br />
• Severe Trauma, e.g. Automobile Accident<br />
Many of these deaths can be prevented if the victims get prompt help – if someone<br />
trained in CPR provides proper life-saving first-aid until other medical expertise take<br />
over.<br />
BCLS Programme<br />
3.3 RISK FACTORS OF HEART ATTACK<br />
There are a number of well-recognised risk factors for a heart<br />
attack. All risk factors can be modified to decrease the chance<br />
of heart attack. The more risk factors are present, the greater<br />
the risk of having a heart attack.<br />
• Major risk factors that cannot be changed:<br />
– heredity<br />
– male gender<br />
– increasing age<br />
6
• Major risk factors that can be changed:<br />
– cigarette smoking<br />
– high blood pressure<br />
– high blood cholesterol levels<br />
– diabetes mellitus<br />
• Other risk factors that can be modified:<br />
– obesity<br />
– physical inactivity<br />
– stress<br />
3.4 PRUDENT HEART LIVING<br />
Prudent Heart Living includes adopting a lifestyle to help<br />
minimise the risk of a future heart attack. Reducing risk factors<br />
lowers the chance of having a heart attack or stroke.<br />
• Control high blood pressure – treatment generally includes<br />
dietary change and medication. Take<br />
medication regularly as prescribed by your<br />
doctor.<br />
• Quit smoking completely.<br />
• Eat wisely – reduce saturated fat and<br />
cholesterol in the diet. Eat a Balanced diet.<br />
• Reduce weight if you are overweight –<br />
count calories in your food intake.<br />
• Exercise regularly – exercise tones the muscles, stimulates<br />
blood circulation, helps avoid excess weight gain and<br />
promotes a general feeling of well being.<br />
BCLS Programme<br />
7
CARDIO-PULMONARY<br />
RESUSCITATION (CPR)<br />
Adult<br />
BCLS Programme<br />
8
Module 4<br />
ADULT CARDIO-PULMONARY RESUSCITATION (CPR)<br />
4.1 DEFINITION<br />
Cardio-Pulmonary Resuscitation (CPR) includes a series of assessments and<br />
interventions that support cardiac and pulmonary functions. When cardiac arrest<br />
occurs, the heart stops beating and circulation ceases. Unless the circulation is<br />
re-started quickly, organ death will begin to occur. The most sensitive organ is the<br />
brain and if its circulation to the brain is not re-started within 4 to 6 minutes,<br />
permanent and irreversible damage can occur. It is therefore important to start CPR as<br />
quickly as possible.<br />
Air contains approximately 21% oxygen at sea level. During its passage through<br />
the body, only about 5% of the oxygen is utilised and hence exhaled air contains<br />
approximately 16% oxygen. When mouth to mouth ventilation is done during<br />
CPR, there is just sufficient oxygen in the exhaled air to keep the victim alive. Chest<br />
compression squeezes the heart between the breastbone and the spine and thereby<br />
helps to circulate the blood and deliver this oxygen to the vital organs, especially the<br />
brain, heart and kidneys.<br />
If CPR is performed promptly and correctly,<br />
1) heart function may be restored, and<br />
2) circulation may be maintained until institution of other life support measures.<br />
The next section takes you step-by-step through the procedures needed to<br />
perform CPR or cardio-pulmonary resuscitation – the basic skill needed to save life in<br />
the event of cardiac arrest.<br />
4.2 STEPS FOR ADULT ONE-MAN CPR<br />
STEP 1<br />
Check For Danger<br />
• Look out for unsafe environment eg, electrical current, fire, possible explosion,<br />
construction works or poisonous gas.<br />
• Ensure that the scene is safe for you to help.<br />
BCLS Programme<br />
9
STEP 2<br />
ASSESS UNRESPONSIVENESS<br />
Quickly assess and determine whether the victim is responsive. The rescuer should tap<br />
or gently shake the victim on his / her shoulders and ask loudly: “Hello! Hello! Are you<br />
OK?”<br />
BCLS Programme<br />
Avoid violent shaking of the victim as this might result in injury. Also, avoid<br />
unnecessary movements of the neck in the event of injury to the head and neck.<br />
If the victim does not respond, he / she is likely to be unconscious.<br />
Unconsciousness may be due to:<br />
• An airway that is obstructed (blocked) by food, secretions or a tongue that has fallen<br />
backwards.<br />
• Breathing that has stopped.<br />
• A heart that has stopped beating, usually because of a heart attack.<br />
10
STEP 3<br />
SHOUT FOR HELP & ACTIVATE EMERGENCY MEDICAL SERVICES (EMS)<br />
If the victim does not respond, call loudly for help and immediately dial 995 for an<br />
emergency ambulance.<br />
The rescuer should activate the Emergency Medical Services (EMS) as soon as he<br />
has determined that an adult victim is unconscious and requires emergency care.<br />
If there is another person around, ask him / her to do the calling. When calling the<br />
EMS, state:<br />
• Location of victim.<br />
• The telephone number you are calling from.<br />
• What happened (e.g. that someone is having a heart attack / is unconscious).<br />
• Number of victims.<br />
• Hang up only after instructed to do so by the dispatcher.<br />
In addition, there is an increasing number of AEDs (automated external<br />
defibrillators) that are currently being deployed in public areas. These can also be life<br />
saving. Thus call for an AED. Say loudly “Help! Call Ambulance 995, Get AED”.<br />
BCLS Programme<br />
11
STEP 4<br />
POSITION THE vICTIM<br />
For CPR to be effective,<br />
the victim must lie on a<br />
firm, flat surface. If the<br />
victim is lying face down,<br />
or on his / her side, you<br />
will need to roll the<br />
victim over onto his /her<br />
back.<br />
Do take care that the<br />
head, neck and body are<br />
supported and turned<br />
simultaneously during<br />
re-positioning.<br />
STEP 5<br />
OPEN THE AIRWAY<br />
Perform a Head tilt-chin lift Manoeuvre to open the airway. In the unresponsive victim,<br />
muscle tone is impaired resulting in the tongue falling back and obstructing the airway.<br />
As the tongue is attached to the lower jaw, moving the lower jaw forward will lift the<br />
tongue away from the back of the throat and open the airway.<br />
Airway<br />
blocked<br />
Tongue<br />
falls back<br />
With head tilt-chin lift,<br />
the airway is clear<br />
BCLS Programme<br />
12
• Place one hand on the victim’s forehead and apply firm backward pressure with your<br />
palm to tilt the head back.<br />
• Place the fingers of your other hand under the bony part of the lower jaw to lift the<br />
jaw forward.<br />
Caution<br />
• Do not press deeply<br />
into the soft tissues<br />
under the chin<br />
because this might<br />
obstruct the airway.<br />
• Perform a gentle chin<br />
lift if head or neck<br />
injury is suspected.<br />
STEP 6<br />
CHECK FOR NORMAL BREATHING<br />
Place your ear and cheek over the victim’s mouth and nose and assess for breathing (up<br />
to 10 seconds) :<br />
– Look for the rise and<br />
fall of the chest.<br />
– Listen for air escaping<br />
during exhalation.<br />
– Feel for the flow of air<br />
from the victim’s mouth<br />
and nose moving past<br />
your cheeks.<br />
* Gasping is NOT considered<br />
as normal breathing.<br />
BCLS Programme<br />
13
STEP 7<br />
ASSESS FOR PULSE (FOR HEALTHCARE PROVIDERS ONLY)<br />
• Maintain head tilt, locate the Adam’s apple or centre of the throat of the victim with<br />
the index and middle fingers.<br />
• Slide your fingers down into the groove at the side of the neck near you (This is the<br />
location of the carotid pulse).<br />
• Apply gentle pressure and feel for the carotid pulse up to 10 seconds.<br />
• If the victim has no pulse or if unsure of the presence of normal breathing or pulse<br />
within 10 seconds, start chest compressions.<br />
BCLS Programme<br />
* For laypersons, it is not necessary to check for pulse. If victim has no breathing, start<br />
chest compressions.<br />
14
STEP 8<br />
LOCATE HAND POSITION FOR CHEST COMPRESSION<br />
Chest compression technique consists of serial, rhythmic applications of pressure over<br />
the lower half of the sternum (breastbone). To locate the correct hand position for chest<br />
compression :<br />
• Maintain head tilt, run your middle<br />
finger from the lower margin of the<br />
victim’s rib cage till you reach the<br />
Xiphi Sternum.<br />
Xiphi Sternum<br />
• Place your index finger next to the<br />
middle finger.<br />
• Place the heel of one hand next to<br />
the index finger.<br />
BCLS Programme<br />
15
STEP 9A<br />
PERFORM CHEST COMPRESSION<br />
• Remove the index and middle fingers.<br />
• Place the heel of the other hand on top<br />
of the hand on the sternum.<br />
• Interlace the fingers of both hands and<br />
lift the fingers off the chest wall.<br />
• Straighten both elbows and lock them<br />
in position.<br />
• Position your shoulder directly over the<br />
victim’s chest.<br />
• Use your body weight to compress the victim’s chest by at least 5cm.<br />
• Count your compressions:<br />
1 and 2 and 3 and 4 and 5 and<br />
1 and 2 and 3 and 4 and 10 and<br />
1 and 2 and 3 and 4 and 15<br />
1 and 2 and 3 and 4 and 20<br />
1 and 2 and 3 and 4 and 25<br />
1 and 2 and 3 and 4 and 30.<br />
BCLS Programme<br />
• Perform chest compressions at a rate of<br />
at least 100 per minute. Allow complete recoil<br />
of the chest wall after each compression.<br />
• The ratio of compression and ventilation is<br />
30 compressions: 2 breaths.<br />
• Healthcare Providers – Check pulse after 5 cycles of<br />
30 compressions : 2 ventilations. If no pulse or unsure presence of pulse, resume CPR.<br />
• Laypersons – Continue performing CPR until help arrives or victim starts moving.<br />
16
GUIDELINES FOR PROPER COMPRESSION<br />
DO’s<br />
• Maintain your hands on the sternum (breastbone) during each<br />
upstroke.<br />
• Release the pressure on the chest after each compression to allow<br />
blood to flow into the chest and heart.<br />
• Use your body weight to perform the chest compression.<br />
• Keep the fingers off the chest wall.<br />
• Compress at rate of at least 100 per minute.<br />
DONT’s<br />
• Do not lift the hands from the sternum (breastbone), otherwise<br />
correct hand position may be lost.<br />
• Do not bounce or jerk during compressions as these movements may<br />
cause injuries.<br />
STEP 9B<br />
MOUTH-TO-MOUTH BREATHING<br />
To perform mouth-to-mouth-breathing :<br />
• Maintain head tilt-chin lift.<br />
• Pinch the nose with your<br />
thumb and index finger to<br />
prevent air from escaping<br />
through the victim’s nose.<br />
• Seal your mouth over the<br />
victim’s mouth and give<br />
2 short breaths in quick<br />
succession one after the<br />
other.<br />
• Release the nostrils to allow<br />
exhalation after each breath.<br />
• Each rescue breath should<br />
make the chest rise.<br />
• The duration for each breath is 1 second.<br />
• Ventilation volume is between 400 to 600 ml.<br />
Note :<br />
Too great a volume of air is likely to cause air to enter the stomach and result in gastric<br />
distension.<br />
BCLS Programme<br />
17
STEP 10<br />
RE-ASSESSMENT (FOR HEALTHCARE PROVIDES ONLY)<br />
• Assess the victim for pulse and breathing after every 5 cycles of CPR 30:2.<br />
• If pulse is absent (if unsure of pulse and victim has no breathing, assume cardiac<br />
arrest), continue CPR 30:2.<br />
• If both the pulse and breathing are present, position the victim in the recovery<br />
position.<br />
• Continue to monitor the victim’s pulse and breathing every few minutes as these can<br />
stop suddenly.<br />
D<br />
R<br />
S<br />
CHECK DANGER<br />
UNRESPONSIVE?<br />
Tap shoulder firmly<br />
Ask loudly<br />
SHOUT “HELP! CALL<br />
AMBULANCE 995,<br />
GET AED” Activate EMS<br />
Adult 1-man CPR<br />
Flowchart courtesy of NRC<br />
A<br />
B<br />
C<br />
OPEN AIRWAY<br />
Head tilt, chin lift<br />
NOT BREATHING NORMALLY?<br />
Look, Listen, Feel<br />
Up to10 sec<br />
No<br />
No<br />
30 CHEST COMPRESSIONS<br />
Centre of chest / lower half of sternum<br />
Depth at least 5 cm<br />
Rate at least 100 per min<br />
Allow complete chest recoil<br />
CHECK CAROTID PULSE<br />
For healthcare providers only<br />
Define pulse and normal<br />
breathing within 10 sec<br />
No<br />
OPEN AIRWAY<br />
Head tilt, chin lift<br />
BCLS Programme<br />
2 BREATHS<br />
1 sec per breath, tidal volume<br />
400-600 ml till chest just rises<br />
CONTINUE UNTIL PATIENT WAKES UP<br />
AED ARRIVES AND ANALYSING<br />
HEART RHYTHM EMERGENCY TEAM<br />
TAKES OVER CPR<br />
HEALTHCARE<br />
PROVIDERS –<br />
Check pulse after<br />
5 cycles of<br />
30 compressions :<br />
2 ventilations. If No<br />
pulse or unsure of<br />
presence of pulse,<br />
resume CPR<br />
IF UNABLE / UNWILLING TO DO MOUTH-TO-MOUTH FOR ANY REASON<br />
DO CONTINUOUS CHEST COMPRESSIONS AT LEAST 100 / MINUTE<br />
18
Module 5<br />
ADULT RECOVERY POSITION<br />
The recovery position is used in the management of victims who are unresponsive but<br />
have breathing and pulse. When an unresponsive victim is lying supine, the airway<br />
may become obstructed by the tongue or mucus and vomit. These problems may be<br />
prevented when the victim is placed in the recovery position, because fluid can drain<br />
easily from the mouth.<br />
If there is no evidence of trauma, place the victim in the recovery position. This<br />
position keeps the airway open. The following steps are recommended :<br />
STEP 1<br />
POSITION THE vICTIM<br />
A) Tuck the hand nearer to you, arm straight and palm upward under the victim’s thigh.<br />
B) Bring the arm further from you across the victim’s chest and place the back of his<br />
hand against his cheek.<br />
C) Using your other hand, bend the victim’s far knee to a 90 degrees angle.<br />
C<br />
B<br />
A<br />
BCLS Programme<br />
19
STEP 2<br />
ROLL THE Victim TOWARDS THE RESCUER<br />
• Put your palm against the victim’s<br />
palm that is on the cheek and<br />
maintain position. Using your<br />
other hand, hold the victim’s far<br />
hip and roll him towards you until<br />
he is lying on his side.<br />
• Use your knees to support the<br />
victim’s body as you turn him so as<br />
to prevent him from rolling too far<br />
forward.<br />
STEP 3<br />
FINAL RECOVERY POSITION<br />
• Ensure that the victim’s head (cheek) is lying on the back of his palm.<br />
• Check that the victim’s other hand is lying free along side his body with palm facing<br />
upwards.<br />
• The former far leg<br />
should preferably be<br />
bent at the knee at<br />
about 90 degrees.<br />
• Continue to monitor<br />
the victim’s pulse and<br />
breathing every few<br />
minutes as these can<br />
stop suddenly.<br />
BCLS Programme<br />
20
Module 6<br />
ADULT FOREIGN BODY AIRWAY OBSTRUCTION (FBAO)<br />
6.1 INTRODUCTION<br />
Complete airway obstruction is an emergency that will result in death within minutes,<br />
if not treated immediately. Complete airway obstruction indicates that the breathing<br />
passages are totally blocked. The victim is unable to speak, breathe or cough.<br />
As most choking incidents are associated with eating, and are commonly<br />
witnessed, the chance of survival increases if the rescuer is able to intervene<br />
immediately when the victim is still conscious. Techniques used to relief FBAO include<br />
the Heimlich Manoeuvre (abdominal thrusts) and chest thrusts (for pregnant and obese<br />
victims).<br />
The Heimlich Manoeuvre, also known as subdiaphragmatic abdominal thrusts<br />
or abdominal thrusts is recommended for relieve of FBAO in responsive adults and<br />
children of 1 to 8 years of age.<br />
The Heimlich Manoeuvre (abdominal thrusts) elevates the diaphragm and increase<br />
airway pressure, which force air out from the lungs. This creates an artificial cough and<br />
expels the foreign body from the airway.<br />
In obese or pregnant victims, the chest thrust is recommended.<br />
COMMON CAUSES OF FBAO<br />
Airway obstruction can result from either intrinsic, or extrinsic causes.<br />
INTRINSIC CAUSES<br />
• The tongue falling backward into the pharynx in the supine unconscious victim.<br />
• Blood from head and facial injuries trickle into the airway.<br />
• Regurgitated stomach contents going into the airway.<br />
EXTRINSIC CAUSES<br />
• Foreign bodies e.g. food, dentures etc.<br />
BCLS Programme<br />
21
6.2 RECOGNITION OF FOREIGN BODY AIRWAY OBSTRUCTION (FBAO)<br />
FBAO can cause partial or complete airway obstruction.<br />
Coughing is the body’s natural defence against airway<br />
obstruction.<br />
A victim with partial airway obstruction will cough in an<br />
attempt to expel the foreign body. If the victim is wheezing<br />
(breathing noisily with a wheezing sound) or coughing, this<br />
means that the airway is partially obstructed. Do not interfere.<br />
Allow the victim to cough to expel the object himself.<br />
In complete airway obstruction, the victim is unable to speak,<br />
breathe or cough and may become cyanotic. The victim will<br />
clutch his neck with the thumb and fingers, which is the universal<br />
distress signal for choking. This requires immediate action.<br />
Universal Choking Sign<br />
6.3 RELIEF OF FBAO IN THE CONSCIOUS ADULT<br />
Techniques used to relieve FBAO in a conscious adult include the Heimlich<br />
Manoeuvre (abdominal thrusts) and chest thrusts.<br />
A) The Heimlich Manoeuvre ( Abdominal Thrust ) Technique<br />
STEP 1<br />
• To determine whether the victim is choking, ask, “Are you choking?”<br />
• If the victim is able to cough, ask him to cough as hard as he can to get the foreign<br />
body out of his upper airway.<br />
• If the victim’s airway is obstructed, he will not be able to speak, breathe or cough. The<br />
victim’s face may turn blue. The rescuer should immediately proceed to the next step.<br />
STEP 2<br />
BCLS Programme<br />
• If the victim is upright, the rescuer stands behind the victim. If the victim is sitting,<br />
the rescuer kneels down and positions himself behind the victim.<br />
• Position one foot between the victim’s legs.<br />
22
STEP 3<br />
• Place your arms around the victim’s abdomen and<br />
locate the navel.<br />
• With one hand, place 2 fingers just above the navel.<br />
• Make a fist with the other hand.<br />
• Place the thumb-side of the fist against the abdomen<br />
above the 2 fingers.<br />
• Release the 2 fingers but maintain your fist against the<br />
abdomen.<br />
• Lean the victim forward and grasp your fist with the<br />
Heimlich Manoeuvre<br />
other hand.<br />
(Abdominal Thrust)<br />
• Give successive inward and upward thrusts<br />
(set of 5 abdominal thrusts).<br />
• Check if foreign body is expelled after every set of 5 abdominal thrusts.<br />
• Repeat abdominal thrusts until the foreign body is expelled or the victim becomes<br />
unconscious.<br />
B) Chest Thrust Technique<br />
Chest thrust technique is used as an alternative to Heimlich Manoeuvre. It is performed<br />
on a conscious obese or pregnant victim.<br />
STEP 1<br />
• To determine whether the victim is choking, ask “Are you choking?”<br />
If the victim is choked, the victim will not be able to speak, breathe or cough.<br />
STEP 2<br />
• If the victim is upright, the rescuer stands behind the victim. If the victim is sitting,<br />
the rescuer kneels down and positions behind the victim.<br />
• Position one foot between the victim’s legs.<br />
BCLS Programme<br />
23
STEP 3<br />
• Place arms under the victim’s armpits<br />
to encircle the chest.<br />
• Make a fist with one hand.<br />
• Place the thumb-side of the fist<br />
on the middle of the victim’s<br />
breastbone.<br />
• Grasps fist with the other hand and<br />
give successive quick backward<br />
thrusts (set of 5 chest thrusts).<br />
• Check if foreign body is expelled<br />
after every set of 5 chest thrusts.<br />
• If the obstruction is still not relieved,<br />
continue to deliver the set of 5 chest<br />
thrusts firmly and distinctly until the<br />
foreign body is expelled or the victim<br />
becomes unconscious.<br />
6.4 RELIEF OF FBAO IN THE UNCONSCIOUS ADULT<br />
For an unconscious adult, proceed with the following steps:<br />
STEP 1<br />
• Position victim on a firm, flat surface and immediately activate Emergency Medical<br />
Services by dialling 995 for an emergency ambulance.<br />
STEP 2<br />
• Start 30 chest compressions (The hand position for chest compression is the same as<br />
for Adult CPR).<br />
BCLS Programme<br />
24
STEP 3<br />
• Open victim’s airway by peforming head tilt-chin lift.<br />
• Check victim’s mouth for any visible foreign bodies.<br />
• Use a hooked index finger and remove any obvious obstructing foreign bodies.<br />
STEP 4<br />
• Check for normal breathing : Look, Listen & Feel (up to 10 seconds).<br />
• If breathing is absent, attempt to ventilate (1st attempt).<br />
• If airway is blocked, re-position with the Head Tilt-Chin Lift procedure.<br />
• Attempt 2nd ventilation.<br />
STEP 5<br />
• If airway is still blocked, perform 30 chest compressions, then proceed back to head<br />
tilt-chin lift and check for foreign body.<br />
• Repeat Step 3 & 4 till help arrives or able to give 2 successful ventilation.<br />
STEP 6<br />
• Assess the victim for pulse & breathing once the airway is cleared.<br />
• If pulse (for healthcare providers only) & breathing are absent, assume cardiac arrest,<br />
continue 30:2.<br />
• If both pulse & breathing are present, position the victim in the recovery position<br />
• Continue to monitor the victim’s pulse and breathing every few minutes as these can<br />
stop suddenly.<br />
BCLS Programme<br />
25
CARDIO-PULMONARY<br />
RESUSCITATION (CPR)<br />
Infant<br />
BCLS Programme<br />
26
Module 7<br />
INFANT CARDIO-PULMONARY RESUSCITATION (CPR)<br />
7.1 INTRODUCTION<br />
An infant is a child who is up to 1 year old. Infants rarely collapse because of a primary<br />
heart problem. Cardiac arrest is usually secondary to other events, such as major<br />
trauma or respiratory problems. Therefore, rescuers must detect and promptly treat<br />
early signs of respiratory failure to prevent cardiac arrest.<br />
STEP 1<br />
Check For Danger<br />
• Look out for unsafe environment eg, electrical current, fire, possible explosion,<br />
construction works or poisonous gas.<br />
• Ensure that the scene is safe for you to help.<br />
• One should always ensure the safety of rescuer(s) and infant at the onset.<br />
STEP 2<br />
ASSESS UNRESPONSIVENESS<br />
• Quickly assess and determine whether the infant is responsive by tapping gently on<br />
the infant’s shoulders.<br />
• Avoid violent shaking and unnecessary movements of the infant’s head and neck as<br />
this might result in injury.<br />
• If the infant does not respond, he/ she is<br />
likely to be unconscious.<br />
• Possible causes of unconsciousness may be:<br />
– an airway that is obstructed (blocked)<br />
by food, secretions or a tongue that has<br />
fallen backwards.<br />
– breathing that has stopped.<br />
– a heart that has stopped beating.<br />
BCLS Programme<br />
27
STEP 3<br />
ACTIVATE EMERGENCY MEDICAL SERVICE (EMS)<br />
When the infant does not respond :<br />
• If you are alone, immediately commence CPR 30 : 2 for approximately 2 minutes<br />
before calling 995 for an ambulance.<br />
• If a second rescuer is present, ask him / her to activate the EMS system by dialling the<br />
ambulance number 995.<br />
When calling EMS 995, state:<br />
• Location of infant.<br />
• The telephone number you are<br />
calling from.<br />
• What happened<br />
• Number of victims.<br />
• Hang up only after instructed to do<br />
so by the dispatcher.<br />
STEP 4<br />
POSITION THE INFANT<br />
• For CPR to be effective, the infant<br />
must lie on a firm flat surface, the leg<br />
straightened and the arms placed<br />
alongside the body.<br />
BCLS Programme<br />
28
STEP 5<br />
OPEN THE AIRWAY<br />
Perform a head tilt-chin lift manoeuvre to open the airway. In an unconscious infant,<br />
muscle tone is impaired resulting in the tongue falling back and obstructing the airway.<br />
As the tongue is attached to the lower jaw, moving the lower jaw forward will lift the<br />
tongue away from back of the throat and open the airway.<br />
Perform a head tilt-chin lift manoeuvre :<br />
• Place one hand on the infant’s forehead and<br />
apply firm backward pressure<br />
with your palm to tilt the<br />
head back.<br />
• Place the fingers of<br />
your other hand under<br />
the bony part of the<br />
lower jaw to lift the jaw<br />
forward.<br />
Caution<br />
• Do not press deeply into the soft<br />
tissues under the chin or over<br />
extend the infant’s neck because<br />
this may block the airway.<br />
• Perform a gentle chin lift if head<br />
or neck injury is suspected.<br />
BCLS Programme<br />
29
STEP 6<br />
CHECK FOR NORMAL BREATHING<br />
• Place your ear and cheek<br />
over the infant’s mouth and<br />
nose and assess for<br />
breathing (up to 10 seconds) :<br />
– Look for the rise and fall of<br />
the chest.<br />
– Listen for air escaping<br />
during exhalation.<br />
– Feel for the flow of air from<br />
the infant’s mouth and<br />
nose moving past your<br />
cheeks.<br />
* Gasping is NOT considered as normal breathing.<br />
STEP 7<br />
ASSESS FOR PULSE (FOR HEALTHCARE PROVIDERS ONLY)<br />
• Maintain head tilt and locate<br />
the brachial pulse (which is<br />
on the inner aspect of the<br />
upper arm) with the index<br />
and middle fingers.<br />
• Apply gentle pressure and<br />
feel for the brachial pulse<br />
within 10 seconds.<br />
• If the infant has no pulse<br />
(if unsure of pulse) and is<br />
not breathing, start chest<br />
compressions.<br />
BCLS Programme<br />
30
STEP 8<br />
LOCATE LANDMARK FOR CHEST COMPRESSION<br />
Chest compressions in an infant consist of serial, rhythmic applications of pressure over<br />
the lower half of the sternum (breastbone). To locate the correct landmark for chest<br />
compression:<br />
• Maintain head tilt with one hand.<br />
• Draw an imaginary line between the<br />
infant’s nipples using your index finger<br />
of the other hand.<br />
• Place the index finger on the<br />
imaginary line.<br />
• Place your middle and ring<br />
fingers next to the index<br />
finger.<br />
BCLS Programme<br />
31
• Move the 3 fingers to the<br />
centre of the sternum<br />
(breastbone).<br />
• Position the fingers upright.<br />
• Lift off the index finger but<br />
maintain the middle and ring<br />
fingers contact on the sternum<br />
(breastbone).<br />
BCLS Programme<br />
32
STEP 9A<br />
PERFORM CHEST COMPRESSION<br />
• Lean forward and place your<br />
cheek near the infant’s mouth<br />
and nose.<br />
• Use your middle and ring<br />
fingers to compress the sternum<br />
(breastbone) 4cm.<br />
• Count your compressions:<br />
1 and 2 and 3 and 4 and 5 and<br />
1 and 2 and 3 and 4 and 10 and<br />
1 and 2 and 3 and 4 and 15<br />
1 and 2 and 3 and 4 and 20<br />
1 and 2 and 3 and 4 and 25<br />
1 and 2 and 3 and 4 and 30.<br />
• Perform chest compressions at a rate of at least 100 per minute.<br />
• Healthcare Providers – Check pulse after 5 cycles of 30 compressions :<br />
2 ventilations. If no pulse or unsure presence of pulse, resume CPR.<br />
• Laypersons – Continue performing CPR until help arrives or infant starts moving.<br />
Note :<br />
To facilitate ventilation without delays to re-position the head, use one hand to maintain<br />
the head tilt position while performing chest compressions.<br />
BCLS Programme<br />
33
GUIDELINES FOR PROPER COMPRESSION<br />
DO’s<br />
• Maintain your 2 fingers on the sternum (breastbone) during each<br />
upstroke.<br />
• Release the pressure on the chest after each compression to allow<br />
blood to flow into the chest and heart.<br />
• Compress at rate of at least 100 per minute.<br />
DONT’s<br />
• Do not lift the fingers from the sternum (breastbone), otherwise<br />
correct finger position may be lost.<br />
• Do not bounce or jerk during compressions as these movements may<br />
cause injuries.<br />
STEP 9B<br />
MOUTH TO MOUTH & NOSE BREATHING<br />
Perform mouth to mouth & nose breathing as follows :<br />
• Maintain a head tilt-chin lift.<br />
• Seal your mouth over the infant’s mouth and<br />
give 2 short breaths in quick succession one<br />
after the other.<br />
• Each rescue breath should make the chest rise.<br />
• The duration for each breath is 1 second.<br />
• Ventilation volume is approximately 30 ml per<br />
breath.<br />
• Allow exhalation between breaths.<br />
STEP 10<br />
RE-ASSESSMENT (FOR HEALTHCARE PROVIDERS ONLY)<br />
BCLS Programme<br />
• Assess the infant for pulse and breathing<br />
after every 5 cycles of CPR 30:2.<br />
• If pulse is absent (if unsure of pulse and<br />
infant has no breathing, assume cardiac<br />
arrest), continue CPR 30:2.<br />
• If both the pulse and breathing are<br />
present, position the infant in the<br />
recovery position.<br />
• Continue to monitor the infant’s pulse<br />
and breathing every few minutes as<br />
these can stop suddenly.<br />
34
Module 8<br />
INFANT RECOVERY POSITION<br />
8.1 INTRODUCTION<br />
The recovery position is used in the management of infants who are unresponsive but<br />
are breathing. When an unresponsive infant is lying supine, the airway may become<br />
obstructed by the tongue or mucus and vomit. These problems may be prevented<br />
when the infant is placed in the recovery position, because fluid can drain easily from<br />
the mouth.<br />
The recovery position for an infant differs from the adult position. The infant is put<br />
on the lateral (side) position when pulse and breathing have resumed.<br />
This position keeps the airway open. The following steps are recommended :<br />
STEP 1<br />
POSITION THE INFANT<br />
• Place the infant’s arms alongside the body.<br />
• Straighten the infant’s legs.<br />
BCLS Programme<br />
35
STEP 2<br />
ROLL THE CHILD TOWARDS THE RESCUER<br />
• Support the infant’s head<br />
and neck with one hand.<br />
• Place the other hand on the<br />
infant’s hip.<br />
• Gently roll or turn the infant<br />
on the side toward the<br />
rescuer.<br />
STEP 3<br />
FINAL RECOVERY POSITION<br />
• Support the infant’s back<br />
with a soft pillow / cushion.<br />
• Ensure that the infant’s head<br />
is not over extended or<br />
flexed.<br />
• Stay with the infant and<br />
continue to monitor the<br />
pulse and breathing every<br />
few minutes as these can<br />
stop suddenly.<br />
BCLS Programme<br />
36
Module 9<br />
INFANT FOREIGN BODY AIRWAY OBSTRUCTION (FBAO)<br />
9.1 INTRODUCTION<br />
Airway obstruction (choking) is a common cause of infant death and disability.<br />
Complete airway obstruction indicates that the breathing passages are totally blocked.<br />
The infant is unable to speak (make noises), breathe or cough. Choking in infants is<br />
commonest during eating or playing with small objects.<br />
In a witnessed choking event, the chance of survival increases if the rescuer is able<br />
to intervene when the infant is still conscious. The obstructed airway can be cleared<br />
using a combination of back blows and chest thrusts.<br />
COMMON CAUSES OF FBAO<br />
Airway obstruction can result from either intrinsic, or extrinsic causes.<br />
INTRINSIC CAUSES<br />
• The tongue falling backward into the pharynx in an unconscious infant.<br />
• Blood from head and facial injuries trickling into the airway.<br />
• Regurgitated stomach contents going into the airway.<br />
EXTRINSIC CAUSES<br />
• Foreign bodies e.g. food, small objects or toys etc.<br />
RECOGNITION OF FBAO<br />
In complete airway obstruction, the infant may exhibit the following signs:<br />
• Sudden onset of respiratory /breathing distress.<br />
• Cyanosis (blue lips, nail or skin).<br />
• Unable to speak (make noises).<br />
• Unable to breathe.<br />
• Unable to cough.<br />
BCLS Programme<br />
37
9.2 RELIEF OF FBAO IN THE CONSCIOUS INFANT<br />
STEP 1<br />
ASSESSMENT<br />
• Assess for signs of complete airway obstruction e.g. unable to make noises, breathe<br />
or cough.<br />
• If infant is choking, attempt to relieve the airway obstruction immediately.<br />
STEP 2<br />
SUPPORT THE INFANT<br />
• Supporting the infant’s head and<br />
body between your hands and<br />
forearms using the ‘Sandwich<br />
Manoeuvre’.<br />
• Hold the infant’s face down and rest your forearm<br />
on your thigh.<br />
• Keep the head lower than the trunk.<br />
BCLS Programme<br />
38
STEP 3<br />
BACK BLOWS AND CHEST THRUSTS<br />
• Deliver 5 back blows forcefully between the<br />
shoulder blades with the heel of your other hand.<br />
• Support the infant’s head and body between<br />
your hands and forearms using the ‘Sandwich<br />
Manoeuvre’ after delivering the 5 back blows.<br />
• Turn the infant over on his/her back, resting on<br />
your thigh.<br />
• Keep the infant’s head lower than the trunk.<br />
BCLS Programme<br />
39
• Deliver 5 chest thrusts over<br />
the lower half of the sternum<br />
(breastbone) by counting<br />
aloud ‘1,2,3,4,5’ (landmark for<br />
chest thrust is the same as for<br />
infant CPR).<br />
Note :<br />
Each back blow and chest thrust should be delivered with sufficient force and with the<br />
intention of expelling the foreign body.<br />
STEP 4<br />
RE-ASSESSMENT<br />
• Check if foreign body is expelled after every set of 5 back blows and 5 chest thrusts<br />
and remove it with your little finger if the foreign body is visible in the mouth.<br />
• If the foreign body is expelled successfully, assess the infant for pulse and breathing.<br />
• If the airway remains obstructed and the infant is still conscious, repeat the sequence<br />
of 5 back blows and 5 chest thrusts until the foreign body is expelled or the infant<br />
becomes unconscious.<br />
BCLS Programme<br />
40
9.3 RELIEF OF FBAO IN THE UNCONSCIOUS INFANT<br />
For an unconscious infant, proceed with the following steps :<br />
STEP 1<br />
• Position infant on a firm flat surface and immediately activate Emergency Medical<br />
Services by dialling 995 for an emergency ambulance, if a second rescuer is available.<br />
STEP 2<br />
• Start 30 chest compressions. (The landmark and technique is the same as for infant<br />
CPR ).<br />
STEP 3<br />
• Open infant’s airway by performing head tilt-chin lift.<br />
• Check the infant’s mouth for visible foreign bodies.<br />
• Use a hooked little finger and remove any obvious obstructing foreign bodies.<br />
STEP 4<br />
• Check for normal breathing.<br />
• If breathing is absent, attempt to ventilate.<br />
• If airway is blocked, re-position the infant’s head and re-attempt to ventilate.<br />
• Attempt 2nd ventilation.<br />
STEP 5<br />
• If airway is blocked, perform 30 chest compressions.<br />
• Proceed to head tilt-chin tilt and check for foreign body.<br />
• Repeat step 3 and 4 till help arrives or able to give 2 sucessful ventilations.<br />
STEP 6<br />
• Assess for pulse and breathing once the airway is cleared.<br />
• If pulse and breathing are absent assume cardiac arrest & continue CPR 30:2.<br />
• If both the pulse and breathing are present, position the infant in the recovery<br />
position.<br />
• Continue to monitor the infant’s pulse, and breathing every few minutes as these can<br />
stop suddenly.<br />
• Activate EMS if it is not done earlier.<br />
BCLS Programme<br />
41
APPLICATION OF<br />
POCKET MASK<br />
BCLS Programme<br />
42
Module 10<br />
APPLICATION OF POCKET MASK<br />
The pocket mask is a barrier device used to provide rescue breathing. It has a one-way<br />
valve that prevents exchange of secretions between the victim and rescuer. It is made<br />
of firm plastic with a cushioned rim and is roughly triangular in shape. The rim creates a<br />
flexible seal around the victim’s nose and mouth. The mask fits over the victim’s mouth<br />
and nose. The narrowest portion of the mask is placed over the bridge of the victim’s<br />
nose.<br />
Mask connection port with<br />
one-way valve<br />
Exhalation port<br />
Mask port<br />
Filter<br />
Rim<br />
BCLS Programme<br />
43
APPLICATION<br />
STEP 1<br />
• Check that filter (if<br />
included) is snapped<br />
firmly in place.<br />
STEP 2<br />
• Push out the dome.<br />
STEP 3<br />
• Attach one-way<br />
valve to mask port.<br />
• Direct exhalation<br />
port away from<br />
‘nose’ end of mask.<br />
BCLS Programme<br />
44
STEP 4<br />
• Apply the rim of the<br />
mask first between<br />
the victim’s lower lip<br />
and chin. This will<br />
retract the lower lip<br />
and keep the mouth<br />
open under the<br />
mask.<br />
• Position end marked ‘nose’ over the victim’s nose.<br />
STEP 5<br />
• Seal as illustrated.<br />
• Open the airway by<br />
performing a gentle<br />
head tilt-chin lift.<br />
• Blow slowly until<br />
chest rises.<br />
STEP 6<br />
• Remove your mouth and allow victim to exhale.<br />
Note:<br />
If victim vomits, remove mask and clear victim’s airway. Clear mask assembly by shaking<br />
or sweeping out foreign material. Blow through valve to verify operation. Re-apply mask to<br />
victim and continue ventilation.<br />
BCLS Programme<br />
45
SUMMARY CHECKLIST<br />
BCLS Programme<br />
46
Module 11<br />
SUMMARY CHECKLIST<br />
ADULT ONE-MAN CPR<br />
STEPS<br />
D : Danger<br />
R : Response<br />
S : Shout for Help<br />
A : Airway<br />
B : Breathing<br />
C : Circulation<br />
CPR Cycle<br />
ACTION<br />
Look out for unsafe environment, e.g. Electrical current, Fire, Possible<br />
Explosion, Construction works, or Poisonous gas<br />
• Ensure that the scene is safe for you to help<br />
Establish unresponsiveness<br />
• Call, tap or gently shake the victim<br />
• Call out loudly: “Hello! Hello! Are you OK?”<br />
• If no response, Call for ambulance 995 & AED<br />
Open airway : Head Tilt-Chin Lift<br />
Check for normal breathing : Look, Listen, & Feel (up to 10 seconds)<br />
Look for the rise and fall of the chest<br />
Listen for air escaping during exhalation<br />
Feel for the flow of air from the victim’s mouth and nose moving past your<br />
cheeks<br />
Check for pulse up to 10 seconds (only for Healthcare providers)<br />
If no pulse and breathing, start CPR<br />
For laypersons, there is no need to check for pulse. If victim has no<br />
breathing, start CPR<br />
• Locate the landmark for chest compression<br />
• Proper body and hand position<br />
• Compress vertically at least 5 cm downwards with complete relaxation<br />
of pressure after each compression at rate of at least 100 per minute<br />
• Say mnemonic<br />
“1&2&3&4&5& 1&2&3&4&10& 1&2&3&4&15 1&2&3&4&20<br />
1&2&3&4&25 1&2&3&4&30”<br />
• Perform 30 chest compressions followed by 2 breaths<br />
• The duration for each breath is 1 second.<br />
• Ventilation volume is between 400 - 600 ml/breath<br />
• Allow lung deflation between each breath<br />
Reassessment • Assess the victim for pulse and breathing after every 5 cycles of 30:2<br />
(for healthcare providers only)<br />
• If pulse is absent (if unsure of pulse and victim has No breathing,<br />
assume cardiac arrest), continue 30:2<br />
• For laypersons, continue performing CPR until help arrives or victim<br />
starts moving<br />
Recovery<br />
Position<br />
Place the victim in the recovery position if :<br />
• Pulse and breathing are present<br />
• Victim is unconscious and has no evidence of trauma<br />
• Continue to monitor victim’s pulse and breathing every few minutes as<br />
this can stop suddenly<br />
BCLS Programme<br />
47
ADULT FOREIGN-BODY AIRWAY OBSTRUCTION (CONSCIOUS – UNCONSCIOUS)<br />
STEPS<br />
Conscious victim<br />
Assessment<br />
Heimlich<br />
Manoeuvre<br />
Technique<br />
(Normal Size)<br />
Chest Thrust<br />
Technique<br />
(Pregnant &<br />
Obese)<br />
Unconscious<br />
victim<br />
ACTION<br />
Ask: “Are you choking?”<br />
Victim acknowledges by nodding. Rescuer replies: “I can help.”<br />
Stand behind the victim. Position one foot between the victim’s legs<br />
Locate the landmark :<br />
• Place your arms around the victim’s abdomen and locate the navel<br />
• With one hand place 2 fingers just above the navel<br />
• Make a fist with the other hand<br />
• Place thumb-side of the fist against the abdomen above the 2 fingers<br />
• Release the 2 fingers but maintain the fist on the abdomen<br />
• Lean the victim forward and grasp the fist with the other hand<br />
• Give successive inward-upward thrusts<br />
• Check if foreign body is expelled after every set of 5 abdominal thrusts<br />
• Repeat thrusts until the foreign body is dislodged or the victim becomes<br />
unconscious<br />
Stand behind the victim. Position one foot between the victim’s legs<br />
Locate the landmark :<br />
• Place arms under the victim’s armpits to encircle the chest<br />
• Make a fist with one hand<br />
• Place thumb-side of fist on the middle of the victim’s breastbone<br />
• Grasp the fist with the other hand and give successive quick backward thrusts<br />
• Check if foreign body is expelled after every set of 5 chest thrusts<br />
• Repeat thrusts until the foreign body is dislodged or the victim becomes<br />
unconscious<br />
When victim becomes unconscious. Proceed with the following steps :<br />
• Position the victim on a firm, flat surface<br />
• Call for ambulance 995<br />
• Start 30 chest compressions (The landmark & technique is the same as for adult<br />
CPR)<br />
• Open airway : Head Tilt-Chin Lift<br />
• Check airway and remove any obvious foreign bodies<br />
• Check for normal breathing : Look, Listen, & Feel (up to 10 seconds)<br />
• If breathing is absent, attempt to ventilate (1st attempt)<br />
• If airway is still blocked, re-position the victim’s head and reattempt to ventilate<br />
• Attempt 2nd ventilation<br />
• If airway is still blocked, perform 30 chest compressions<br />
• Proceed to head tilt-chin tilt and check for foreign body<br />
• Repeat Step till help arrives or able to give 2 successful ventilations<br />
BCLS Programme<br />
• Check pulse (for healthcare providers only) and breathing once airway is cleared.<br />
• If pulse is absent (if unsure of pulse and victim has no breathing, assume cardiac<br />
arrest),<br />
continue CPR 30:2<br />
Recovery Position Place victim in the recovery position if :<br />
• Pulse and breathing are present<br />
• Continue to monitor victim’s pulse and breathing every few minutes as this can<br />
stop suddenly<br />
48
INFANT CPR<br />
STEPS<br />
D : Danger<br />
ACTION<br />
Look out for unsafe environment, e.g. Electrical current, Fire, Possible<br />
Explosion, Construction works, or Poisonous gas<br />
• Ensure that the scene is safe for you to help<br />
R : Response Establish unresponsiveness :<br />
• Call, tap or gently shake the infant’s shoulder to elicit response<br />
• If you are alone, immediately start CPR 30:2 for approx. 2 minutes<br />
S : Shout for Help • If a second rescuer is present, ask him or her to call for ambulance 995<br />
A : Airway<br />
B : Breathing<br />
C : Circulation<br />
Open airway : Head Tilt-Chin Lift<br />
Check for normal breathing : Look, Listen, & Feel (up to 10 seconds)<br />
Look for the rise and fall of the chest<br />
Listen for air escaping during exhalation<br />
Feel for the flow of air from the infant’s mouth and nose moving past your cheeks<br />
Check for brachial pulse up to 10 seconds (only for Healthcare providers)<br />
If pulse is absent (if unsure of pulse and infant has no breathing, assume cardiac arrest),<br />
start 30:2<br />
For laypersons, there is no need to check for pulse. If infant has no breathing, start CPR<br />
Locate landmark for chest compression:<br />
• Draw an imaginary line between nipples<br />
• Place index finger on the imaginary line<br />
• Place your middle and ring fingers next to the index finger<br />
• Move the 3 fingers to the centre of the sternum (breastbone)<br />
• Position the fingers upright<br />
• Lift off the index finger but maintain the middle and ring fingers contact on the<br />
sternum (breastbone)<br />
• Lean forward and place your cheek near the infant’s mouth and nose<br />
• Use your middle and ring fingers to compress the sternum (breastbone) by 4 cm<br />
Demonstrate correct technique of compression<br />
Keep fingers contact on the sternum during each upstroke<br />
Say mnemonic<br />
“1&2&3&4&5&1&2&3&4&10&1&2&3&4&15 1&2&3&4&20<br />
1&2&3&4&25 1&2&3&4&30”<br />
Compression rate is at least 100 per minute<br />
CPR Cycle • Perform 5 cycles of 30 chest compressions followed by 2 breaths for approximately 2<br />
minutes (For Healthcare providers only)<br />
• The duration for each breath is 1 second.<br />
• Ventilation volume is between 30 ml/breath<br />
• Allow lung deflation between each breath<br />
Reassessment<br />
• Assess for pulse and breathing after every 5 cycles of CPR 30:2 (for healthcare providers<br />
only)<br />
• If pulse is absent (if unsure of pulse and infant is not breathing, assume cardiac arrest),<br />
continue CPR 30:2<br />
• For laypersons, continue performing CPR until help arrives or infant starts moving<br />
Recovery Position • Recovery Position Place the infant in the recovery position if :<br />
• Pulse and breathing are present<br />
• Infant is unconscious and has no evidence of trauma<br />
• Continue to monitor infant’s pulse & breathing every few minutes as this can stop<br />
suddenly<br />
BCLS Programme<br />
49
INFANT FOREIGN-BODY AIRWAY OBSTRUCTION (CONSCIOUS – UNCONSCIOUS)<br />
STEPS<br />
Conscious infant<br />
Assessment<br />
Back blows &<br />
Chest thrusts<br />
Reassessment<br />
Unconscious<br />
infant<br />
ACTION<br />
Assess for signs of complete airway obstruction (choking)<br />
If infant is choking, attempt to Assessment relieve the airway obstruction immediately<br />
Support the infant’s head and body between your hands and forearms using the<br />
“Sandwich Manoeuvre”<br />
• Hold the infant’s face down and rest your forearm on your thigh<br />
• Keep the head lower than the trunk<br />
• Deliver 5 back blows forcefully between the shoulder blades with the heel of your<br />
other hand<br />
• Support the infant’s head and body between your hands and forearms after<br />
delivering the 5 back blows<br />
• Turn the infant over on his/her back, resting on your thigh<br />
• Keep the head lower than the trunk<br />
• Deliver 5 chest thrusts over the lower half of the sternum (breastbone) by counting<br />
aloud ‘1,2,3,4,5’.(landmark for chest thrust is the same as for infant CPR)<br />
Check if foreign body is expelled after every set of 5 back blows and 5 chest thrusts<br />
and<br />
remove if it is visible<br />
• If the foreign body is expelled successfully, assess the infant for pulse & breathing<br />
• If the airway remains obstructed and the infant is conscious, repeat the sequence<br />
of 5 back blows and 5 chest thrusts until the foreign body is expelled or the infant<br />
becomes unconscious<br />
When infant becomes unconscious. Proceed with the following steps :<br />
• Position the infant on a firm, flat surface<br />
• Call for ambulance 995 if a second rescuer is available<br />
• Start 30 chest compressions (The landmark & technique is the same as for Infant<br />
CPR)<br />
• Open airway : Head Tilt-Chin Lift<br />
• Check airway and remove any obvious foreign bodies<br />
• Check for normal breathing : Look, Listen, & Feel (up to 10 seconds)<br />
• If breathing is absent, attempt to ventilate (1st attempt)<br />
• If airway is still blocked, re-position the infant’s head and reattempt to ventilate<br />
• Attempt 2nd ventilation<br />
• If airway is still blocked, perform 30 chest compressions<br />
• Proceed to head tilt-chin tilt and check for foreign body<br />
• Repeat Step till help arrives or able to give 2 successful ventilations<br />
• Check pulse (for healthcare providers only) and breathing once airway is cleared.<br />
• If pulse is absent (if unsure of pulse and infant has no breathing, assume cardiac<br />
arrest),<br />
continue CPR 30:2<br />
BCLS Programme<br />
Recovery Position Place the infant in the recovery position if :<br />
• Pulse and breathing are present<br />
• Continue to monitor infant’s pulse and breathing every few minutes as this can<br />
stop suddenly<br />
• Activate EMS if it is not done earlier<br />
50
Notes<br />
BCLS Programme<br />
51
Notes<br />
BCLS Programme<br />
52
Notes<br />
BCLS Programme<br />
53
<strong>Singapore</strong> <strong>General</strong> <strong>Hospital</strong><br />
Institute for Medical Simulation & Education<br />
167 Jalan Bukit Merah, Connection One<br />
Tower 5, #03-10, <strong>Singapore</strong> 150167<br />
Tel : 6326 6885 / 6326 6884 / 6321 3651<br />
Fax : 6878 0495<br />
Email : imse@sgh.com.sg<br />
Information correct as at April 2011
![help document [pdf]](https://img.yumpu.com/26291587/1/190x245/help-document-pdf.jpg?quality=85)