(bcls) programme - Singapore General Hospital
(bcls) programme - Singapore General Hospital
(bcls) programme - Singapore General Hospital

You also want an ePaper? Increase the reach of your titles
YUMPU automatically turns print PDFs into web optimized ePapers that Google loves.
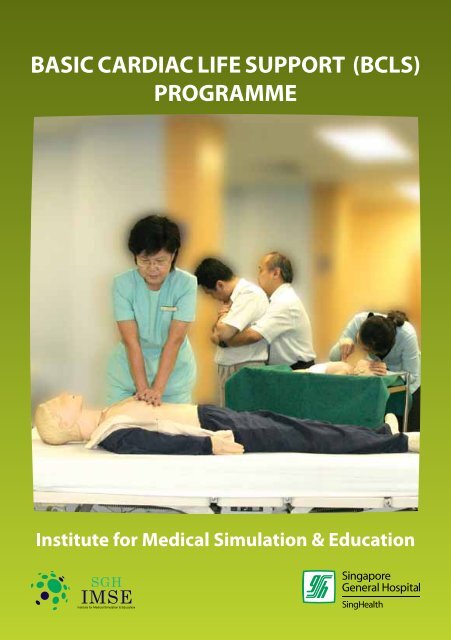
BASIC CARDIAC LIFE SUPPORT (BCLS)<br />
PROGRAMME<br />
Institute for Medical Simulation & Education
SAFETY IN<br />
CPR TRAINING<br />
DO’s<br />
• Wash your hands or use handrub before<br />
and after manikin contact.<br />
• Disinfect manikin’s mouth and nose<br />
with 70% methylated spirit after each<br />
participant’s contact.<br />
• Use a disposable face shield when<br />
performing mouth-to-mouth ventilation.<br />
• Inform the staff of the training centre if<br />
you have :<br />
– Wet skin rashes on your hands, in your<br />
mouth or around your lips.<br />
– Hepatitis B.<br />
– An upper respiratory infection.<br />
– Medical problems e.g. heart, asthma or<br />
orthopaedic problems.<br />
• Disinfect manikins after each practical<br />
session following guidelines provided by<br />
the training centre.<br />
BCLS Programme<br />
DONT’s<br />
• Do not eat or drink during practical<br />
training to avoid contamination of<br />
manikins with food particles.<br />
• Do not use pen to mark any area of the<br />
manikin.<br />
• Do not attempt to force the manikin’s<br />
mouth open beyond 2.5cm.<br />
• Do not use lipstick if practising on the<br />
manikin.<br />
• Do not perform or practise chest<br />
compression on a victim with a pulse,<br />
practise only on a manikin.
C o n t e n t s<br />
Module 1 INTRODUCTION 2<br />
Module 2 The Chain of Survival 3<br />
Module 3 The Heart 4<br />
3.1 Anatomy & Function<br />
3.2 Heart Attack<br />
3.3 Risk Factors of Heart Attack<br />
3.4 Prudent Heart Living<br />
Module 4 ADULT CARDIO-PULMONARY RESUSCITATION (CPR) 9<br />
4.1 Definition<br />
4.2 Steps of Adult One-Man CPR<br />
Module 5 ADULT RECOVERY POSITION 19<br />
Module 6<br />
ADULT FOREIGN BODY AIRWAY<br />
OBSTRUCTION (FBAO) 21<br />
6.1 Introduction<br />
6.2 Recognition of FBAO<br />
6.3 Relief of FBAO in the Conscious Adult<br />
6.4 Relief of FBAO in the Unconscious Adult<br />
Module 7 INFANT CARDIO-PULMONARY RESUSCITATION (CPR) 27<br />
7.1 Introduction<br />
Module 8 INFANT RECOVERY POSITION 35<br />
Module 9<br />
INFANT FOREIGN BODY AIRWAY<br />
OBSTRUCTION (FBAO) 37<br />
9.1 Introduction<br />
9.2 Relief of FBAO in the Conscious Infant<br />
9.3 Relief of FBAO in the Unconscious Infant<br />
Module 10 APPLICATION OF POCKET MASK 43<br />
Module 11 SUMMARY CHECKLIST 47<br />
Copyright © 2011<br />
Produced by Institue for Medical Simulation & Education, SGH<br />
All rights reserved.<br />
No part of this publication may be reproduced, stored in a retrieval system or transmitted, in any form or by any means,<br />
electronic, mechanical, photocopying, recording or otherwise, without the prior permission of the copyright owner.<br />
BCLS Programme<br />
1
Module 1<br />
INTRODUCTION<br />
In <strong>Singapore</strong>, heart disease is the second commonest cause of death, being responsible<br />
for about 24% of total mortality. About 2,400 persons develop an acute heart attack in<br />
<strong>Singapore</strong>. In addition, nearly 1000 people suffer from sudden cardiac arrest in the outof-hospital<br />
environment and another few hundred sustain sudden cardiac arrest after<br />
reaching hospital. The total survival rate for the group of pre-hospital collapses is about<br />
2.6%.<br />
Public education and training in Cardio-Pulmonary Resuscitation (CPR) are crucial in<br />
reducing “sudden death” because the majority of these deaths occur out of hospital.<br />
One of the most startling ideas of modern medicine is that “sudden death” can be<br />
reversed. The actions taken during the first few minutes of an “Emergency” are critical<br />
to victim survival. It can be performed by any of us, anywhere. All that is needed is our<br />
two hands.<br />
REMEMBER:<br />
CPR can save lives.<br />
Do it well. Do it right.<br />
And the victim gets a chance at life.<br />
BCLS Programme<br />
2
Module 2<br />
The Chain of Survival<br />
The concept of “Chain of Survival” is the best approach to the treatment of victims<br />
in cardiac arrest. The four links in this chain are: Early Recognition and Access to<br />
Emergency Care, Early CPR, Early Defibrillation and Early Advanced Cardiac Care.<br />
Early<br />
Recognition<br />
and Access<br />
Early<br />
CPR<br />
Early<br />
Defibrillation<br />
Early<br />
Advanced Care<br />
First Link : Early Recognition and Access<br />
Early recognition and access refers to shortening the time interval from onset of<br />
heart attack or cardiac arrest to arrival of a trained emergency care team. It includes:<br />
• recognition of early warning signs of heart attack e.g. chest pain, sweatiness,<br />
shortness of breath, nausea or vomiting<br />
• recognition of cardiac arrest e.g. unconscious, no breathing and no pulse or<br />
‘signs of circulation’<br />
• rapid call for the first response team<br />
• allowing ambulances priority on the roads so that they can reach the patient quickly<br />
• allowing paramedics rapid access and priority in use of elevators in high-rise<br />
buildings.<br />
Second Link : Early CPR<br />
The brain starts dying within minutes when the heart stops pumping. CPR needs<br />
to be initiated as soon as possible to provide oxygen and blood flow to the brain and<br />
heart and remove excess carbon dioxide from the lungs. CPR cannot always re-start the<br />
heart. It can however buy the valuable time needed to keep the vital organs alive until<br />
definitive help arrives.<br />
BCLS Programme<br />
3
Third Link : Early Defibrillation<br />
This procedure can frequently re-start the heart if carried out early. Studies have<br />
shown that early defibrillation is most likely to improve survival rates for out-ofhospital<br />
cardiac arrest patients. Every emergency vehicle transporting cardiac arrest<br />
patients should be equipped with a defibrillator. Defibrillation works best in the first<br />
few minutes after onset of cardiac arrest. If initiated too late, the heart will not respond<br />
to electrical therapy. For every minute of delay in delivering defibrillation following<br />
collapse, the survival rate decreases by 7 –10%.<br />
Fourth Link : Early Advanced Care<br />
Advanced Cardiac Life Support stabilises the resuscitated victim’s condition in the<br />
most critical phase. It consists of advanced airway management and administration of<br />
medication and is frequently carried out in the in-hospital environment.<br />
Module 3<br />
The Heart<br />
3.1 ANATOMY & FUNCTION<br />
The heart is a hollow, conical, muscular organ situated in the centre of the chest<br />
between the lungs and behind the sternum (breastbone). It is about the size of a<br />
clenched fist.<br />
The Heart in Relation<br />
to the Chest<br />
The Heart as a Pump<br />
Right<br />
pulmonary artery<br />
Left<br />
pulmonary artery<br />
Rib<br />
Heart<br />
Superior<br />
vena cava<br />
Left<br />
pulmonary<br />
veins<br />
Sternum<br />
Xiphoid<br />
process<br />
Inferior<br />
vena cava<br />
BCLS Programme<br />
It receives blood depleted of oxygen from all parts of the body and pumps it to the<br />
lungs. There oxygen is taken up and the oxygen-enriched blood returns to the heart to<br />
be distributed to all parts of the body. The coronary arteries are blood vessels that send<br />
oxygen-rich blood to the muscles of the heart.<br />
4
3.2 Heart ATTACK<br />
Heart attack usually occurs when a blood clot suddenly and completely blocks an<br />
already diseased coronary artery. Coronary artery disease is the end-result of a gradual<br />
build-up of fatty deposits (cholesterol plaques) and blood cells in the inner lining of the<br />
coronary arterial wall, a process also known as “atherosclerosis”. Over a period of years,<br />
this leads to gradual narrowing of the lumen of the vessel, thereby reducing blood flow<br />
to heart muscle. Occasionally, the surface of a plaque may split or crack, and attract<br />
blood clots, which then cause complete obstruction of the lumen, resulting in “heart<br />
attacks”.<br />
Coronary Arteries<br />
Right Coronary<br />
Artery<br />
Left Circumflex<br />
Artery<br />
Left Coronary<br />
Artery<br />
Left Anterior<br />
Descending<br />
Artery<br />
Symptoms of Heart Attack<br />
How to recognize a Heart Attack<br />
• Chest discomfort or pain is the most common symptom. It usually has the following<br />
characteristics:<br />
– uncomfortable pressure, squeezing, fullness, tightness, or pain.<br />
– usually located at the centre of the chest behind the breastbone.<br />
– may spread to either the shoulder, neck,<br />
lower jaw, or either arm and occasionally to<br />
the upper abdomen.<br />
– usually lasts longer than 20 minutes.<br />
• Other symptoms may include any or all of the<br />
following:<br />
– sweating<br />
– nausea (a feeling of wanting to vomit)<br />
– shortness of breath<br />
– weakness<br />
BCLS Programme<br />
5
• Symptoms may occur suddenly and not be typical, so that some victims may not<br />
realise that they are having a heart attack. They may also think that the problem is<br />
due to indigestion.<br />
If you meet anyone<br />
with these symptoms,<br />
arrange for immediate<br />
transportation to the<br />
nearest emergency<br />
medical facility by dialling<br />
995 for an emergency<br />
ambulance.<br />
Photo Courtesy of SCDF<br />
Common Causes Of Sudden Death<br />
• Heart Attack<br />
• Foreign Body Airway Obstruction<br />
• Drowning<br />
• Stroke<br />
• Drug Overdose<br />
• Suffocation<br />
• Smoke Inhalation<br />
• Electrocution<br />
• Severe Allergic Reactions<br />
• Severe Trauma, e.g. Automobile Accident<br />
Many of these deaths can be prevented if the victims get prompt help – if someone<br />
trained in CPR provides proper life-saving first-aid until other medical expertise take<br />
over.<br />
BCLS Programme<br />
3.3 RISK FACTORS OF HEART ATTACK<br />
There are a number of well-recognised risk factors for a heart<br />
attack. All risk factors can be modified to decrease the chance<br />
of heart attack. The more risk factors are present, the greater<br />
the risk of having a heart attack.<br />
• Major risk factors that cannot be changed:<br />
– heredity<br />
– male gender<br />
– increasing age<br />
6
• Major risk factors that can be changed:<br />
– cigarette smoking<br />
– high blood pressure<br />
– high blood cholesterol levels<br />
– diabetes mellitus<br />
• Other risk factors that can be modified:<br />
– obesity<br />
– physical inactivity<br />
– stress<br />
3.4 PRUDENT HEART LIVING<br />
Prudent Heart Living includes adopting a lifestyle to help<br />
minimise the risk of a future heart attack. Reducing risk factors<br />
lowers the chance of having a heart attack or stroke.<br />
• Control high blood pressure – treatment generally includes<br />
dietary change and medication. Take<br />
medication regularly as prescribed by your<br />
doctor.<br />
• Quit smoking completely.<br />
• Eat wisely – reduce saturated fat and<br />
cholesterol in the diet. Eat a Balanced diet.<br />
• Reduce weight if you are overweight –<br />
count calories in your food intake.<br />
• Exercise regularly – exercise tones the muscles, stimulates<br />
blood circulation, helps avoid excess weight gain and<br />
promotes a general feeling of well being.<br />
BCLS Programme<br />
7
CARDIO-PULMONARY<br />
RESUSCITATION (CPR)<br />
Adult<br />
BCLS Programme<br />
8
Module 4<br />
ADULT CARDIO-PULMONARY RESUSCITATION (CPR)<br />
4.1 DEFINITION<br />
Cardio-Pulmonary Resuscitation (CPR) includes a series of assessments and<br />
interventions that support cardiac and pulmonary functions. When cardiac arrest<br />
occurs, the heart stops beating and circulation ceases. Unless the circulation is<br />
re-started quickly, organ death will begin to occur. The most sensitive organ is the<br />
brain and if its circulation to the brain is not re-started within 4 to 6 minutes,<br />
permanent and irreversible damage can occur. It is therefore important to start CPR as<br />
quickly as possible.<br />
Air contains approximately 21% oxygen at sea level. During its passage through<br />
the body, only about 5% of the oxygen is utilised and hence exhaled air contains<br />
approximately 16% oxygen. When mouth to mouth ventilation is done during<br />
CPR, there is just sufficient oxygen in the exhaled air to keep the victim alive. Chest<br />
compression squeezes the heart between the breastbone and the spine and thereby<br />
helps to circulate the blood and deliver this oxygen to the vital organs, especially the<br />
brain, heart and kidneys.<br />
If CPR is performed promptly and correctly,<br />
1) heart function may be restored, and<br />
2) circulation may be maintained until institution of other life support measures.<br />
The next section takes you step-by-step through the procedures needed to<br />
perform CPR or cardio-pulmonary resuscitation – the basic skill needed to save life in<br />
the event of cardiac arrest.<br />
4.2 STEPS FOR ADULT ONE-MAN CPR<br />
STEP 1<br />
Check For Danger<br />
• Look out for unsafe environment eg, electrical current, fire, possible explosion,<br />
construction works or poisonous gas.<br />
• Ensure that the scene is safe for you to help.<br />
BCLS Programme<br />
9
STEP 2<br />
ASSESS UNRESPONSIVENESS<br />
Quickly assess and determine whether the victim is responsive. The rescuer should tap<br />
or gently shake the victim on his / her shoulders and ask loudly: “Hello! Hello! Are you<br />
OK?”<br />
BCLS Programme<br />
Avoid violent shaking of the victim as this might result in injury. Also, avoid<br />
unnecessary movements of the neck in the event of injury to the head and neck.<br />
If the victim does not respond, he / she is likely to be unconscious.<br />
Unconsciousness may be due to:<br />
• An airway that is obstructed (blocked) by food, secretions or a tongue that has fallen<br />
backwards.<br />
• Breathing that has stopped.<br />
• A heart that has stopped beating, usually because of a heart attack.<br />
10
STEP 3<br />
SHOUT FOR HELP & ACTIVATE EMERGENCY MEDICAL SERVICES (EMS)<br />
If the victim does not respond, call loudly for help and immediately dial 995 for an<br />
emergency ambulance.<br />
The rescuer should activate the Emergency Medical Services (EMS) as soon as he<br />
has determined that an adult victim is unconscious and requires emergency care.<br />
If there is another person around, ask him / her to do the calling. When calling the<br />
EMS, state:<br />
• Location of victim.<br />
• The telephone number you are calling from.<br />
• What happened (e.g. that someone is having a heart attack / is unconscious).<br />
• Number of victims.<br />
• Hang up only after instructed to do so by the dispatcher.<br />
In addition, there is an increasing number of AEDs (automated external<br />
defibrillators) that are currently being deployed in public areas. These can also be life<br />
saving. Thus call for an AED. Say loudly “Help! Call Ambulance 995, Get AED”.<br />
BCLS Programme<br />
11
STEP 4<br />
POSITION THE vICTIM<br />
For CPR to be effective,<br />
the victim must lie on a<br />
firm, flat surface. If the<br />
victim is lying face down,<br />
or on his / her side, you<br />
will need to roll the<br />
victim over onto his /her<br />
back.<br />
Do take care that the<br />
head, neck and body are<br />
supported and turned<br />
simultaneously during<br />
re-positioning.<br />
STEP 5<br />
OPEN THE AIRWAY<br />
Perform a Head tilt-chin lift Manoeuvre to open the airway. In the unresponsive victim,<br />
muscle tone is impaired resulting in the tongue falling back and obstructing the airway.<br />
As the tongue is attached to the lower jaw, moving the lower jaw forward will lift the<br />
tongue away from the back of the throat and open the airway.<br />
Airway<br />
blocked<br />
Tongue<br />
falls back<br />
With head tilt-chin lift,<br />
the airway is clear<br />
BCLS Programme<br />
12
• Place one hand on the victim’s forehead and apply firm backward pressure with your<br />
palm to tilt the head back.<br />
• Place the fingers of your other hand under the bony part of the lower jaw to lift the<br />
jaw forward.<br />
Caution<br />
• Do not press deeply<br />
into the soft tissues<br />
under the chin<br />
because this might<br />
obstruct the airway.<br />
• Perform a gentle chin<br />
lift if head or neck<br />
injury is suspected.<br />
STEP 6<br />
CHECK FOR NORMAL BREATHING<br />
Place your ear and cheek over the victim’s mouth and nose and assess for breathing (up<br />
to 10 seconds) :<br />
– Look for the rise and<br />
fall of the chest.<br />
– Listen for air escaping<br />
during exhalation.<br />
– Feel for the flow of air<br />
from the victim’s mouth<br />
and nose moving past<br />
your cheeks.<br />
* Gasping is NOT considered<br />
as normal breathing.<br />
BCLS Programme<br />
13
STEP 7<br />
ASSESS FOR PULSE (FOR HEALTHCARE PROVIDERS ONLY)<br />
• Maintain head tilt, locate the Adam’s apple or centre of the throat of the victim with<br />
the index and middle fingers.<br />
• Slide your fingers down into the groove at the side of the neck near you (This is the<br />
location of the carotid pulse).<br />
• Apply gentle pressure and feel for the carotid pulse up to 10 seconds.<br />
• If the victim has no pulse or if unsure of the presence of normal breathing or pulse<br />
within 10 seconds, start chest compressions.<br />
BCLS Programme<br />
* For laypersons, it is not necessary to check for pulse. If victim has no breathing, start<br />
chest compressions.<br />
14
STEP 8<br />
LOCATE HAND POSITION FOR CHEST COMPRESSION<br />
Chest compression technique consists of serial, rhythmic applications of pressure over<br />
the lower half of the sternum (breastbone). To locate the correct hand position for chest<br />
compression :<br />
• Maintain head tilt, run your middle<br />
finger from the lower margin of the<br />
victim’s rib cage till you reach the<br />
Xiphi Sternum.<br />
Xiphi Sternum<br />
• Place your index finger next to the<br />
middle finger.<br />
• Place the heel of one hand next to<br />
the index finger.<br />
BCLS Programme<br />
15
STEP 9A<br />
PERFORM CHEST COMPRESSION<br />
• Remove the index and middle fingers.<br />
• Place the heel of the other hand on top<br />
of the hand on the sternum.<br />
• Interlace the fingers of both hands and<br />
lift the fingers off the chest wall.<br />
• Straighten both elbows and lock them<br />
in position.<br />
• Position your shoulder directly over the<br />
victim’s chest.<br />
• Use your body weight to compress the victim’s chest by at least 5cm.<br />
• Count your compressions:<br />
1 and 2 and 3 and 4 and 5 and<br />
1 and 2 and 3 and 4 and 10 and<br />
1 and 2 and 3 and 4 and 15<br />
1 and 2 and 3 and 4 and 20<br />
1 and 2 and 3 and 4 and 25<br />
1 and 2 and 3 and 4 and 30.<br />
BCLS Programme<br />
• Perform chest compressions at a rate of<br />
at least 100 per minute. Allow complete recoil<br />
of the chest wall after each compression.<br />
• The ratio of compression and ventilation is<br />
30 compressions: 2 breaths.<br />
• Healthcare Providers – Check pulse after 5 cycles of<br />
30 compressions : 2 ventilations. If no pulse or unsure presence of pulse, resume CPR.<br />
• Laypersons – Continue performing CPR until help arrives or victim starts moving.<br />
16
GUIDELINES FOR PROPER COMPRESSION<br />
DO’s<br />
• Maintain your hands on the sternum (breastbone) during each<br />
upstroke.<br />
• Release the pressure on the chest after each compression to allow<br />
blood to flow into the chest and heart.<br />
• Use your body weight to perform the chest compression.<br />
• Keep the fingers off the chest wall.<br />
• Compress at rate of at least 100 per minute.<br />
DONT’s<br />
• Do not lift the hands from the sternum (breastbone), otherwise<br />
correct hand position may be lost.<br />
• Do not bounce or jerk during compressions as these movements may<br />
cause injuries.<br />
STEP 9B<br />
MOUTH-TO-MOUTH BREATHING<br />
To perform mouth-to-mouth-breathing :<br />
• Maintain head tilt-chin lift.<br />
• Pinch the nose with your<br />
thumb and index finger to<br />
prevent air from escaping<br />
through the victim’s nose.<br />
• Seal your mouth over the<br />
victim’s mouth and give<br />
2 short breaths in quick<br />
succession one after the<br />
other.<br />
• Release the nostrils to allow<br />
exhalation after each breath.<br />
• Each rescue breath should<br />
make the chest rise.<br />
• The duration for each breath is 1 second.<br />
• Ventilation volume is between 400 to 600 ml.<br />
Note :<br />
Too great a volume of air is likely to cause air to enter the stomach and result in gastric<br />
distension.<br />
BCLS Programme<br />
17
STEP 10<br />
RE-ASSESSMENT (FOR HEALTHCARE PROVIDES ONLY)<br />
• Assess the victim for pulse and breathing after every 5 cycles of CPR 30:2.<br />
• If pulse is absent (if unsure of pulse and victim has no breathing, assume cardiac<br />
arrest), continue CPR 30:2.<br />
• If both the pulse and breathing are present, position the victim in the recovery<br />
position.<br />
• Continue to monitor the victim’s pulse and breathing every few minutes as these can<br />
stop suddenly.<br />
D<br />
R<br />
S<br />
CHECK DANGER<br />
UNRESPONSIVE?<br />
Tap shoulder firmly<br />
Ask loudly<br />
SHOUT “HELP! CALL<br />
AMBULANCE 995,<br />
GET AED” Activate EMS<br />
Adult 1-man CPR<br />
Flowchart courtesy of NRC<br />
A<br />
B<br />
C<br />
OPEN AIRWAY<br />
Head tilt, chin lift<br />
NOT BREATHING NORMALLY?<br />
Look, Listen, Feel<br />
Up to10 sec<br />
No<br />
No<br />
30 CHEST COMPRESSIONS<br />
Centre of chest / lower half of sternum<br />
Depth at least 5 cm<br />
Rate at least 100 per min<br />
Allow complete chest recoil<br />
CHECK CAROTID PULSE<br />
For healthcare providers only<br />
Define pulse and normal<br />
breathing within 10 sec<br />
No<br />
OPEN AIRWAY<br />
Head tilt, chin lift<br />
BCLS Programme<br />
2 BREATHS<br />
1 sec per breath, tidal volume<br />
400-600 ml till chest just rises<br />
CONTINUE UNTIL PATIENT WAKES UP<br />
AED ARRIVES AND ANALYSING<br />
HEART RHYTHM EMERGENCY TEAM<br />
TAKES OVER CPR<br />
HEALTHCARE<br />
PROVIDERS –<br />
Check pulse after<br />
5 cycles of<br />
30 compressions :<br />
2 ventilations. If No<br />
pulse or unsure of<br />
presence of pulse,<br />
resume CPR<br />
IF UNABLE / UNWILLING TO DO MOUTH-TO-MOUTH FOR ANY REASON<br />
DO CONTINUOUS CHEST COMPRESSIONS AT LEAST 100 / MINUTE<br />
18
Module 5<br />
ADULT RECOVERY POSITION<br />
The recovery position is used in the management of victims who are unresponsive but<br />
have breathing and pulse. When an unresponsive victim is lying supine, the airway<br />
may become obstructed by the tongue or mucus and vomit. These problems may be<br />
prevented when the victim is placed in the recovery position, because fluid can drain<br />
easily from the mouth.<br />
If there is no evidence of trauma, place the victim in the recovery position. This<br />
position keeps the airway open. The following steps are recommended :<br />
STEP 1<br />
POSITION THE vICTIM<br />
A) Tuck the hand nearer to you, arm straight and palm upward under the victim’s thigh.<br />
B) Bring the arm further from you across the victim’s chest and place the back of his<br />
hand against his cheek.<br />
C) Using your other hand, bend the victim’s far knee to a 90 degrees angle.<br />
C<br />
B<br />
A<br />
BCLS Programme<br />
19
STEP 2<br />
ROLL THE Victim TOWARDS THE RESCUER<br />
• Put your palm against the victim’s<br />
palm that is on the cheek and<br />
maintain position. Using your<br />
other hand, hold the victim’s far<br />
hip and roll him towards you until<br />
he is lying on his side.<br />
• Use your knees to support the<br />
victim’s body as you turn him so as<br />
to prevent him from rolling too far<br />
forward.<br />
STEP 3<br />
FINAL RECOVERY POSITION<br />
• Ensure that the victim’s head (cheek) is lying on the back of his palm.<br />
• Check that the victim’s other hand is lying free along side his body with palm facing<br />
upwards.<br />
• The former far leg<br />
should preferably be<br />
bent at the knee at<br />
about 90 degrees.<br />
• Continue to monitor<br />
the victim’s pulse and<br />
breathing every few<br />
minutes as these can<br />
stop suddenly.<br />
BCLS Programme<br />
20
Module 6<br />
ADULT FOREIGN BODY AIRWAY OBSTRUCTION (FBAO)<br />
6.1 INTRODUCTION<br />
Complete airway obstruction is an emergency that will result in death within minutes,<br />
if not treated immediately. Complete airway obstruction indicates that the breathing<br />
passages are totally blocked. The victim is unable to speak, breathe or cough.<br />
As most choking incidents are associated with eating, and are commonly<br />
witnessed, the chance of survival increases if the rescuer is able to intervene<br />
immediately when the victim is still conscious. Techniques used to relief FBAO include<br />
the Heimlich Manoeuvre (abdominal thrusts) and chest thrusts (for pregnant and obese<br />
victims).<br />
The Heimlich Manoeuvre, also known as subdiaphragmatic abdominal thrusts<br />
or abdominal thrusts is recommended for relieve of FBAO in responsive adults and<br />
children of 1 to 8 years of age.<br />
The Heimlich Manoeuvre (abdominal thrusts) elevates the diaphragm and increase<br />
airway pressure, which force air out from the lungs. This creates an artificial cough and<br />
expels the foreign body from the airway.<br />
In obese or pregnant victims, the chest thrust is recommended.<br />
COMMON CAUSES OF FBAO<br />
Airway obstruction can result from either intrinsic, or extrinsic causes.<br />
INTRINSIC CAUSES<br />
• The tongue falling backward into the pharynx in the supine unconscious victim.<br />
• Blood from head and facial injuries trickle into the airway.<br />
• Regurgitated stomach contents going into the airway.<br />
EXTRINSIC CAUSES<br />
• Foreign bodies e.g. food, dentures etc.<br />
BCLS Programme<br />
21
6.2 RECOGNITION OF FOREIGN BODY AIRWAY OBSTRUCTION (FBAO)<br />
FBAO can cause partial or complete airway obstruction.<br />
Coughing is the body’s natural defence against airway<br />
obstruction.<br />
A victim with partial airway obstruction will cough in an<br />
attempt to expel the foreign body. If the victim is wheezing<br />
(breathing noisily with a wheezing sound) or coughing, this<br />
means that the airway is partially obstructed. Do not interfere.<br />
Allow the victim to cough to expel the object himself.<br />
In complete airway obstruction, the victim is unable to speak,<br />
breathe or cough and may become cyanotic. The victim will<br />
clutch his neck with the thumb and fingers, which is the universal<br />
distress signal for choking. This requires immediate action.<br />
Universal Choking Sign<br />
6.3 RELIEF OF FBAO IN THE CONSCIOUS ADULT<br />
Techniques used to relieve FBAO in a conscious adult include the Heimlich<br />
Manoeuvre (abdominal thrusts) and chest thrusts.<br />
A) The Heimlich Manoeuvre ( Abdominal Thrust ) Technique<br />
STEP 1<br />
• To determine whether the victim is choking, ask, “Are you choking?”<br />
• If the victim is able to cough, ask him to cough as hard as he can to get the foreign<br />
body out of his upper airway.<br />
• If the victim’s airway is obstructed, he will not be able to speak, breathe or cough. The<br />
victim’s face may turn blue. The rescuer should immediately proceed to the next step.<br />
STEP 2<br />
BCLS Programme<br />
• If the victim is upright, the rescuer stands behind the victim. If the victim is sitting,<br />
the rescuer kneels down and positions himself behind the victim.<br />
• Position one foot between the victim’s legs.<br />
22
STEP 3<br />
• Place your arms around the victim’s abdomen and<br />
locate the navel.<br />
• With one hand, place 2 fingers just above the navel.<br />
• Make a fist with the other hand.<br />
• Place the thumb-side of the fist against the abdomen<br />
above the 2 fingers.<br />
• Release the 2 fingers but maintain your fist against the<br />
abdomen.<br />
• Lean the victim forward and grasp your fist with the<br />
Heimlich Manoeuvre<br />
other hand.<br />
(Abdominal Thrust)<br />
• Give successive inward and upward thrusts<br />
(set of 5 abdominal thrusts).<br />
• Check if foreign body is expelled after every set of 5 abdominal thrusts.<br />
• Repeat abdominal thrusts until the foreign body is expelled or the victim becomes<br />
unconscious.<br />
B) Chest Thrust Technique<br />
Chest thrust technique is used as an alternative to Heimlich Manoeuvre. It is performed<br />
on a conscious obese or pregnant victim.<br />
STEP 1<br />
• To determine whether the victim is choking, ask “Are you choking?”<br />
If the victim is choked, the victim will not be able to speak, breathe or cough.<br />
STEP 2<br />
• If the victim is upright, the rescuer stands behind the victim. If the victim is sitting,<br />
the rescuer kneels down and positions behind the victim.<br />
• Position one foot between the victim’s legs.<br />
BCLS Programme<br />
23
STEP 3<br />
• Place arms under the victim’s armpits<br />
to encircle the chest.<br />
• Make a fist with one hand.<br />
• Place the thumb-side of the fist<br />
on the middle of the victim’s<br />
breastbone.<br />
• Grasps fist with the other hand and<br />
give successive quick backward<br />
thrusts (set of 5 chest thrusts).<br />
• Check if foreign body is expelled<br />
after every set of 5 chest thrusts.<br />
• If the obstruction is still not relieved,<br />
continue to deliver the set of 5 chest<br />
thrusts firmly and distinctly until the<br />
foreign body is expelled or the victim<br />
becomes unconscious.<br />
6.4 RELIEF OF FBAO IN THE UNCONSCIOUS ADULT<br />
For an unconscious adult, proceed with the following steps:<br />
STEP 1<br />
• Position victim on a firm, flat surface and immediately activate Emergency Medical<br />
Services by dialling 995 for an emergency ambulance.<br />
STEP 2<br />
• Start 30 chest compressions (The hand position for chest compression is the same as<br />
for Adult CPR).<br />
BCLS Programme<br />
24
STEP 3<br />
• Open victim’s airway by peforming head tilt-chin lift.<br />
• Check victim’s mouth for any visible foreign bodies.<br />
• Use a hooked index finger and remove any obvious obstructing foreign bodies.<br />
STEP 4<br />
• Check for normal breathing : Look, Listen & Feel (up to 10 seconds).<br />
• If breathing is absent, attempt to ventilate (1st attempt).<br />
• If airway is blocked, re-position with the Head Tilt-Chin Lift procedure.<br />
• Attempt 2nd ventilation.<br />
STEP 5<br />
• If airway is still blocked, perform 30 chest compressions, then proceed back to head<br />
tilt-chin lift and check for foreign body.<br />
• Repeat Step 3 & 4 till help arrives or able to give 2 successful ventilation.<br />
STEP 6<br />
• Assess the victim for pulse & breathing once the airway is cleared.<br />
• If pulse (for healthcare providers only) & breathing are absent, assume cardiac arrest,<br />
continue 30:2.<br />
• If both pulse & breathing are present, position the victim in the recovery position<br />
• Continue to monitor the victim’s pulse and breathing every few minutes as these can<br />
stop suddenly.<br />
BCLS Programme<br />
25
CARDIO-PULMONARY<br />
RESUSCITATION (CPR)<br />
Infant<br />
BCLS Programme<br />
26
Module 7<br />
INFANT CARDIO-PULMONARY RESUSCITATION (CPR)<br />
7.1 INTRODUCTION<br />
An infant is a child who is up to 1 year old. Infants rarely collapse because of a primary<br />
heart problem. Cardiac arrest is usually secondary to other events, such as major<br />
trauma or respiratory problems. Therefore, rescuers must detect and promptly treat<br />
early signs of respiratory failure to prevent cardiac arrest.<br />
STEP 1<br />
Check For Danger<br />
• Look out for unsafe environment eg, electrical current, fire, possible explosion,<br />
construction works or poisonous gas.<br />
• Ensure that the scene is safe for you to help.<br />
• One should always ensure the safety of rescuer(s) and infant at the onset.<br />
STEP 2<br />
ASSESS UNRESPONSIVENESS<br />
• Quickly assess and determine whether the infant is responsive by tapping gently on<br />
the infant’s shoulders.<br />
• Avoid violent shaking and unnecessary movements of the infant’s head and neck as<br />
this might result in injury.<br />
• If the infant does not respond, he/ she is<br />
likely to be unconscious.<br />
• Possible causes of unconsciousness may be:<br />
– an airway that is obstructed (blocked)<br />
by food, secretions or a tongue that has<br />
fallen backwards.<br />
– breathing that has stopped.<br />
– a heart that has stopped beating.<br />
BCLS Programme<br />
27
STEP 3<br />
ACTIVATE EMERGENCY MEDICAL SERVICE (EMS)<br />
When the infant does not respond :<br />
• If you are alone, immediately commence CPR 30 : 2 for approximately 2 minutes<br />
before calling 995 for an ambulance.<br />
• If a second rescuer is present, ask him / her to activate the EMS system by dialling the<br />
ambulance number 995.<br />
When calling EMS 995, state:<br />
• Location of infant.<br />
• The telephone number you are<br />
calling from.<br />
• What happened<br />
• Number of victims.<br />
• Hang up only after instructed to do<br />
so by the dispatcher.<br />
STEP 4<br />
POSITION THE INFANT<br />
• For CPR to be effective, the infant<br />
must lie on a firm flat surface, the leg<br />
straightened and the arms placed<br />
alongside the body.<br />
BCLS Programme<br />
28
STEP 5<br />
OPEN THE AIRWAY<br />
Perform a head tilt-chin lift manoeuvre to open the airway. In an unconscious infant,<br />
muscle tone is impaired resulting in the tongue falling back and obstructing the airway.<br />
As the tongue is attached to the lower jaw, moving the lower jaw forward will lift the<br />
tongue away from back of the throat and open the airway.<br />
Perform a head tilt-chin lift manoeuvre :<br />
• Place one hand on the infant’s forehead and<br />
apply firm backward pressure<br />
with your palm to tilt the<br />
head back.<br />
• Place the fingers of<br />
your other hand under<br />
the bony part of the<br />
lower jaw to lift the jaw<br />
forward.<br />
Caution<br />
• Do not press deeply into the soft<br />
tissues under the chin or over<br />
extend the infant’s neck because<br />
this may block the airway.<br />
• Perform a gentle chin lift if head<br />
or neck injury is suspected.<br />
BCLS Programme<br />
29
STEP 6<br />
CHECK FOR NORMAL BREATHING<br />
• Place your ear and cheek<br />
over the infant’s mouth and<br />
nose and assess for<br />
breathing (up to 10 seconds) :<br />
– Look for the rise and fall of<br />
the chest.<br />
– Listen for air escaping<br />
during exhalation.<br />
– Feel for the flow of air from<br />
the infant’s mouth and<br />
nose moving past your<br />
cheeks.<br />
* Gasping is NOT considered as normal breathing.<br />
STEP 7<br />
ASSESS FOR PULSE (FOR HEALTHCARE PROVIDERS ONLY)<br />
• Maintain head tilt and locate<br />
the brachial pulse (which is<br />
on the inner aspect of the<br />
upper arm) with the index<br />
and middle fingers.<br />
• Apply gentle pressure and<br />
feel for the brachial pulse<br />
within 10 seconds.<br />
• If the infant has no pulse<br />
(if unsure of pulse) and is<br />
not breathing, start chest<br />
compressions.<br />
BCLS Programme<br />
30
STEP 8<br />
LOCATE LANDMARK FOR CHEST COMPRESSION<br />
Chest compressions in an infant consist of serial, rhythmic applications of pressure over<br />
the lower half of the sternum (breastbone). To locate the correct landmark for chest<br />
compression:<br />
• Maintain head tilt with one hand.<br />
• Draw an imaginary line between the<br />
infant’s nipples using your index finger<br />
of the other hand.<br />
• Place the index finger on the<br />
imaginary line.<br />
• Place your middle and ring<br />
fingers next to the index<br />
finger.<br />
BCLS Programme<br />
31
• Move the 3 fingers to the<br />
centre of the sternum<br />
(breastbone).<br />
• Position the fingers upright.<br />
• Lift off the index finger but<br />
maintain the middle and ring<br />
fingers contact on the sternum<br />
(breastbone).<br />
BCLS Programme<br />
32
STEP 9A<br />
PERFORM CHEST COMPRESSION<br />
• Lean forward and place your<br />
cheek near the infant’s mouth<br />
and nose.<br />
• Use your middle and ring<br />
fingers to compress the sternum<br />
(breastbone) 4cm.<br />
• Count your compressions:<br />
1 and 2 and 3 and 4 and 5 and<br />
1 and 2 and 3 and 4 and 10 and<br />
1 and 2 and 3 and 4 and 15<br />
1 and 2 and 3 and 4 and 20<br />
1 and 2 and 3 and 4 and 25<br />
1 and 2 and 3 and 4 and 30.<br />
• Perform chest compressions at a rate of at least 100 per minute.<br />
• Healthcare Providers – Check pulse after 5 cycles of 30 compressions :<br />
2 ventilations. If no pulse or unsure presence of pulse, resume CPR.<br />
• Laypersons – Continue performing CPR until help arrives or infant starts moving.<br />
Note :<br />
To facilitate ventilation without delays to re-position the head, use one hand to maintain<br />
the head tilt position while performing chest compressions.<br />
BCLS Programme<br />
33
GUIDELINES FOR PROPER COMPRESSION<br />
DO’s<br />
• Maintain your 2 fingers on the sternum (breastbone) during each<br />
upstroke.<br />
• Release the pressure on the chest after each compression to allow<br />
blood to flow into the chest and heart.<br />
• Compress at rate of at least 100 per minute.<br />
DONT’s<br />
• Do not lift the fingers from the sternum (breastbone), otherwise<br />
correct finger position may be lost.<br />
• Do not bounce or jerk during compressions as these movements may<br />
cause injuries.<br />
STEP 9B<br />
MOUTH TO MOUTH & NOSE BREATHING<br />
Perform mouth to mouth & nose breathing as follows :<br />
• Maintain a head tilt-chin lift.<br />
• Seal your mouth over the infant’s mouth and<br />
give 2 short breaths in quick succession one<br />
after the other.<br />
• Each rescue breath should make the chest rise.<br />
• The duration for each breath is 1 second.<br />
• Ventilation volume is approximately 30 ml per<br />
breath.<br />
• Allow exhalation between breaths.<br />
STEP 10<br />
RE-ASSESSMENT (FOR HEALTHCARE PROVIDERS ONLY)<br />
BCLS Programme<br />
• Assess the infant for pulse and breathing<br />
after every 5 cycles of CPR 30:2.<br />
• If pulse is absent (if unsure of pulse and<br />
infant has no breathing, assume cardiac<br />
arrest), continue CPR 30:2.<br />
• If both the pulse and breathing are<br />
present, position the infant in the<br />
recovery position.<br />
• Continue to monitor the infant’s pulse<br />
and breathing every few minutes as<br />
these can stop suddenly.<br />
34
Module 8<br />
INFANT RECOVERY POSITION<br />
8.1 INTRODUCTION<br />
The recovery position is used in the management of infants who are unresponsive but<br />
are breathing. When an unresponsive infant is lying supine, the airway may become<br />
obstructed by the tongue or mucus and vomit. These problems may be prevented<br />
when the infant is placed in the recovery position, because fluid can drain easily from<br />
the mouth.<br />
The recovery position for an infant differs from the adult position. The infant is put<br />
on the lateral (side) position when pulse and breathing have resumed.<br />
This position keeps the airway open. The following steps are recommended :<br />
STEP 1<br />
POSITION THE INFANT<br />
• Place the infant’s arms alongside the body.<br />
• Straighten the infant’s legs.<br />
BCLS Programme<br />
35
STEP 2<br />
ROLL THE CHILD TOWARDS THE RESCUER<br />
• Support the infant’s head<br />
and neck with one hand.<br />
• Place the other hand on the<br />
infant’s hip.<br />
• Gently roll or turn the infant<br />
on the side toward the<br />
rescuer.<br />
STEP 3<br />
FINAL RECOVERY POSITION<br />
• Support the infant’s back<br />
with a soft pillow / cushion.<br />
• Ensure that the infant’s head<br />
is not over extended or<br />
flexed.<br />
• Stay with the infant and<br />
continue to monitor the<br />
pulse and breathing every<br />
few minutes as these can<br />
stop suddenly.<br />
BCLS Programme<br />
36
Module 9<br />
INFANT FOREIGN BODY AIRWAY OBSTRUCTION (FBAO)<br />
9.1 INTRODUCTION<br />
Airway obstruction (choking) is a common cause of infant death and disability.<br />
Complete airway obstruction indicates that the breathing passages are totally blocked.<br />
The infant is unable to speak (make noises), breathe or cough. Choking in infants is<br />
commonest during eating or playing with small objects.<br />
In a witnessed choking event, the chance of survival increases if the rescuer is able<br />
to intervene when the infant is still conscious. The obstructed airway can be cleared<br />
using a combination of back blows and chest thrusts.<br />
COMMON CAUSES OF FBAO<br />
Airway obstruction can result from either intrinsic, or extrinsic causes.<br />
INTRINSIC CAUSES<br />
• The tongue falling backward into the pharynx in an unconscious infant.<br />
• Blood from head and facial injuries trickling into the airway.<br />
• Regurgitated stomach contents going into the airway.<br />
EXTRINSIC CAUSES<br />
• Foreign bodies e.g. food, small objects or toys etc.<br />
RECOGNITION OF FBAO<br />
In complete airway obstruction, the infant may exhibit the following signs:<br />
• Sudden onset of respiratory /breathing distress.<br />
• Cyanosis (blue lips, nail or skin).<br />
• Unable to speak (make noises).<br />
• Unable to breathe.<br />
• Unable to cough.<br />
BCLS Programme<br />
37
9.2 RELIEF OF FBAO IN THE CONSCIOUS INFANT<br />
STEP 1<br />
ASSESSMENT<br />
• Assess for signs of complete airway obstruction e.g. unable to make noises, breathe<br />
or cough.<br />
• If infant is choking, attempt to relieve the airway obstruction immediately.<br />
STEP 2<br />
SUPPORT THE INFANT<br />
• Supporting the infant’s head and<br />
body between your hands and<br />
forearms using the ‘Sandwich<br />
Manoeuvre’.<br />
• Hold the infant’s face down and rest your forearm<br />
on your thigh.<br />
• Keep the head lower than the trunk.<br />
BCLS Programme<br />
38
STEP 3<br />
BACK BLOWS AND CHEST THRUSTS<br />
• Deliver 5 back blows forcefully between the<br />
shoulder blades with the heel of your other hand.<br />
• Support the infant’s head and body between<br />
your hands and forearms using the ‘Sandwich<br />
Manoeuvre’ after delivering the 5 back blows.<br />
• Turn the infant over on his/her back, resting on<br />
your thigh.<br />
• Keep the infant’s head lower than the trunk.<br />
BCLS Programme<br />
39
• Deliver 5 chest thrusts over<br />
the lower half of the sternum<br />
(breastbone) by counting<br />
aloud ‘1,2,3,4,5’ (landmark for<br />
chest thrust is the same as for<br />
infant CPR).<br />
Note :<br />
Each back blow and chest thrust should be delivered with sufficient force and with the<br />
intention of expelling the foreign body.<br />
STEP 4<br />
RE-ASSESSMENT<br />
• Check if foreign body is expelled after every set of 5 back blows and 5 chest thrusts<br />
and remove it with your little finger if the foreign body is visible in the mouth.<br />
• If the foreign body is expelled successfully, assess the infant for pulse and breathing.<br />
• If the airway remains obstructed and the infant is still conscious, repeat the sequence<br />
of 5 back blows and 5 chest thrusts until the foreign body is expelled or the infant<br />
becomes unconscious.<br />
BCLS Programme<br />
40
9.3 RELIEF OF FBAO IN THE UNCONSCIOUS INFANT<br />
For an unconscious infant, proceed with the following steps :<br />
STEP 1<br />
• Position infant on a firm flat surface and immediately activate Emergency Medical<br />
Services by dialling 995 for an emergency ambulance, if a second rescuer is available.<br />
STEP 2<br />
• Start 30 chest compressions. (The landmark and technique is the same as for infant<br />
CPR ).<br />
STEP 3<br />
• Open infant’s airway by performing head tilt-chin lift.<br />
• Check the infant’s mouth for visible foreign bodies.<br />
• Use a hooked little finger and remove any obvious obstructing foreign bodies.<br />
STEP 4<br />
• Check for normal breathing.<br />
• If breathing is absent, attempt to ventilate.<br />
• If airway is blocked, re-position the infant’s head and re-attempt to ventilate.<br />
• Attempt 2nd ventilation.<br />
STEP 5<br />
• If airway is blocked, perform 30 chest compressions.<br />
• Proceed to head tilt-chin tilt and check for foreign body.<br />
• Repeat step 3 and 4 till help arrives or able to give 2 sucessful ventilations.<br />
STEP 6<br />
• Assess for pulse and breathing once the airway is cleared.<br />
• If pulse and breathing are absent assume cardiac arrest & continue CPR 30:2.<br />
• If both the pulse and breathing are present, position the infant in the recovery<br />
position.<br />
• Continue to monitor the infant’s pulse, and breathing every few minutes as these can<br />
stop suddenly.<br />
• Activate EMS if it is not done earlier.<br />
BCLS Programme<br />
41
APPLICATION OF<br />
POCKET MASK<br />
BCLS Programme<br />
42
Module 10<br />
APPLICATION OF POCKET MASK<br />
The pocket mask is a barrier device used to provide rescue breathing. It has a one-way<br />
valve that prevents exchange of secretions between the victim and rescuer. It is made<br />
of firm plastic with a cushioned rim and is roughly triangular in shape. The rim creates a<br />
flexible seal around the victim’s nose and mouth. The mask fits over the victim’s mouth<br />
and nose. The narrowest portion of the mask is placed over the bridge of the victim’s<br />
nose.<br />
Mask connection port with<br />
one-way valve<br />
Exhalation port<br />
Mask port<br />
Filter<br />
Rim<br />
BCLS Programme<br />
43
APPLICATION<br />
STEP 1<br />
• Check that filter (if<br />
included) is snapped<br />
firmly in place.<br />
STEP 2<br />
• Push out the dome.<br />
STEP 3<br />
• Attach one-way<br />
valve to mask port.<br />
• Direct exhalation<br />
port away from<br />
‘nose’ end of mask.<br />
BCLS Programme<br />
44
STEP 4<br />
• Apply the rim of the<br />
mask first between<br />
the victim’s lower lip<br />
and chin. This will<br />
retract the lower lip<br />
and keep the mouth<br />
open under the<br />
mask.<br />
• Position end marked ‘nose’ over the victim’s nose.<br />
STEP 5<br />
• Seal as illustrated.<br />
• Open the airway by<br />
performing a gentle<br />
head tilt-chin lift.<br />
• Blow slowly until<br />
chest rises.<br />
STEP 6<br />
• Remove your mouth and allow victim to exhale.<br />
Note:<br />
If victim vomits, remove mask and clear victim’s airway. Clear mask assembly by shaking<br />
or sweeping out foreign material. Blow through valve to verify operation. Re-apply mask to<br />
victim and continue ventilation.<br />
BCLS Programme<br />
45
SUMMARY CHECKLIST<br />
BCLS Programme<br />
46
Module 11<br />
SUMMARY CHECKLIST<br />
ADULT ONE-MAN CPR<br />
STEPS<br />
D : Danger<br />
R : Response<br />
S : Shout for Help<br />
A : Airway<br />
B : Breathing<br />
C : Circulation<br />
CPR Cycle<br />
ACTION<br />
Look out for unsafe environment, e.g. Electrical current, Fire, Possible<br />
Explosion, Construction works, or Poisonous gas<br />
• Ensure that the scene is safe for you to help<br />
Establish unresponsiveness<br />
• Call, tap or gently shake the victim<br />
• Call out loudly: “Hello! Hello! Are you OK?”<br />
• If no response, Call for ambulance 995 & AED<br />
Open airway : Head Tilt-Chin Lift<br />
Check for normal breathing : Look, Listen, & Feel (up to 10 seconds)<br />
Look for the rise and fall of the chest<br />
Listen for air escaping during exhalation<br />
Feel for the flow of air from the victim’s mouth and nose moving past your<br />
cheeks<br />
Check for pulse up to 10 seconds (only for Healthcare providers)<br />
If no pulse and breathing, start CPR<br />
For laypersons, there is no need to check for pulse. If victim has no<br />
breathing, start CPR<br />
• Locate the landmark for chest compression<br />
• Proper body and hand position<br />
• Compress vertically at least 5 cm downwards with complete relaxation<br />
of pressure after each compression at rate of at least 100 per minute<br />
• Say mnemonic<br />
“1&2&3&4&5& 1&2&3&4&10& 1&2&3&4&15 1&2&3&4&20<br />
1&2&3&4&25 1&2&3&4&30”<br />
• Perform 30 chest compressions followed by 2 breaths<br />
• The duration for each breath is 1 second.<br />
• Ventilation volume is between 400 - 600 ml/breath<br />
• Allow lung deflation between each breath<br />
Reassessment • Assess the victim for pulse and breathing after every 5 cycles of 30:2<br />
(for healthcare providers only)<br />
• If pulse is absent (if unsure of pulse and victim has No breathing,<br />
assume cardiac arrest), continue 30:2<br />
• For laypersons, continue performing CPR until help arrives or victim<br />
starts moving<br />
Recovery<br />
Position<br />
Place the victim in the recovery position if :<br />
• Pulse and breathing are present<br />
• Victim is unconscious and has no evidence of trauma<br />
• Continue to monitor victim’s pulse and breathing every few minutes as<br />
this can stop suddenly<br />
BCLS Programme<br />
47
ADULT FOREIGN-BODY AIRWAY OBSTRUCTION (CONSCIOUS – UNCONSCIOUS)<br />
STEPS<br />
Conscious victim<br />
Assessment<br />
Heimlich<br />
Manoeuvre<br />
Technique<br />
(Normal Size)<br />
Chest Thrust<br />
Technique<br />
(Pregnant &<br />
Obese)<br />
Unconscious<br />
victim<br />
ACTION<br />
Ask: “Are you choking?”<br />
Victim acknowledges by nodding. Rescuer replies: “I can help.”<br />
Stand behind the victim. Position one foot between the victim’s legs<br />
Locate the landmark :<br />
• Place your arms around the victim’s abdomen and locate the navel<br />
• With one hand place 2 fingers just above the navel<br />
• Make a fist with the other hand<br />
• Place thumb-side of the fist against the abdomen above the 2 fingers<br />
• Release the 2 fingers but maintain the fist on the abdomen<br />
• Lean the victim forward and grasp the fist with the other hand<br />
• Give successive inward-upward thrusts<br />
• Check if foreign body is expelled after every set of 5 abdominal thrusts<br />
• Repeat thrusts until the foreign body is dislodged or the victim becomes<br />
unconscious<br />
Stand behind the victim. Position one foot between the victim’s legs<br />
Locate the landmark :<br />
• Place arms under the victim’s armpits to encircle the chest<br />
• Make a fist with one hand<br />
• Place thumb-side of fist on the middle of the victim’s breastbone<br />
• Grasp the fist with the other hand and give successive quick backward thrusts<br />
• Check if foreign body is expelled after every set of 5 chest thrusts<br />
• Repeat thrusts until the foreign body is dislodged or the victim becomes<br />
unconscious<br />
When victim becomes unconscious. Proceed with the following steps :<br />
• Position the victim on a firm, flat surface<br />
• Call for ambulance 995<br />
• Start 30 chest compressions (The landmark & technique is the same as for adult<br />
CPR)<br />
• Open airway : Head Tilt-Chin Lift<br />
• Check airway and remove any obvious foreign bodies<br />
• Check for normal breathing : Look, Listen, & Feel (up to 10 seconds)<br />
• If breathing is absent, attempt to ventilate (1st attempt)<br />
• If airway is still blocked, re-position the victim’s head and reattempt to ventilate<br />
• Attempt 2nd ventilation<br />
• If airway is still blocked, perform 30 chest compressions<br />
• Proceed to head tilt-chin tilt and check for foreign body<br />
• Repeat Step till help arrives or able to give 2 successful ventilations<br />
BCLS Programme<br />
• Check pulse (for healthcare providers only) and breathing once airway is cleared.<br />
• If pulse is absent (if unsure of pulse and victim has no breathing, assume cardiac<br />
arrest),<br />
continue CPR 30:2<br />
Recovery Position Place victim in the recovery position if :<br />
• Pulse and breathing are present<br />
• Continue to monitor victim’s pulse and breathing every few minutes as this can<br />
stop suddenly<br />
48
INFANT CPR<br />
STEPS<br />
D : Danger<br />
ACTION<br />
Look out for unsafe environment, e.g. Electrical current, Fire, Possible<br />
Explosion, Construction works, or Poisonous gas<br />
• Ensure that the scene is safe for you to help<br />
R : Response Establish unresponsiveness :<br />
• Call, tap or gently shake the infant’s shoulder to elicit response<br />
• If you are alone, immediately start CPR 30:2 for approx. 2 minutes<br />
S : Shout for Help • If a second rescuer is present, ask him or her to call for ambulance 995<br />
A : Airway<br />
B : Breathing<br />
C : Circulation<br />
Open airway : Head Tilt-Chin Lift<br />
Check for normal breathing : Look, Listen, & Feel (up to 10 seconds)<br />
Look for the rise and fall of the chest<br />
Listen for air escaping during exhalation<br />
Feel for the flow of air from the infant’s mouth and nose moving past your cheeks<br />
Check for brachial pulse up to 10 seconds (only for Healthcare providers)<br />
If pulse is absent (if unsure of pulse and infant has no breathing, assume cardiac arrest),<br />
start 30:2<br />
For laypersons, there is no need to check for pulse. If infant has no breathing, start CPR<br />
Locate landmark for chest compression:<br />
• Draw an imaginary line between nipples<br />
• Place index finger on the imaginary line<br />
• Place your middle and ring fingers next to the index finger<br />
• Move the 3 fingers to the centre of the sternum (breastbone)<br />
• Position the fingers upright<br />
• Lift off the index finger but maintain the middle and ring fingers contact on the<br />
sternum (breastbone)<br />
• Lean forward and place your cheek near the infant’s mouth and nose<br />
• Use your middle and ring fingers to compress the sternum (breastbone) by 4 cm<br />
Demonstrate correct technique of compression<br />
Keep fingers contact on the sternum during each upstroke<br />
Say mnemonic<br />
“1&2&3&4&5&1&2&3&4&10&1&2&3&4&15 1&2&3&4&20<br />
1&2&3&4&25 1&2&3&4&30”<br />
Compression rate is at least 100 per minute<br />
CPR Cycle • Perform 5 cycles of 30 chest compressions followed by 2 breaths for approximately 2<br />
minutes (For Healthcare providers only)<br />
• The duration for each breath is 1 second.<br />
• Ventilation volume is between 30 ml/breath<br />
• Allow lung deflation between each breath<br />
Reassessment<br />
• Assess for pulse and breathing after every 5 cycles of CPR 30:2 (for healthcare providers<br />
only)<br />
• If pulse is absent (if unsure of pulse and infant is not breathing, assume cardiac arrest),<br />
continue CPR 30:2<br />
• For laypersons, continue performing CPR until help arrives or infant starts moving<br />
Recovery Position • Recovery Position Place the infant in the recovery position if :<br />
• Pulse and breathing are present<br />
• Infant is unconscious and has no evidence of trauma<br />
• Continue to monitor infant’s pulse & breathing every few minutes as this can stop<br />
suddenly<br />
BCLS Programme<br />
49
INFANT FOREIGN-BODY AIRWAY OBSTRUCTION (CONSCIOUS – UNCONSCIOUS)<br />
STEPS<br />
Conscious infant<br />
Assessment<br />
Back blows &<br />
Chest thrusts<br />
Reassessment<br />
Unconscious<br />
infant<br />
ACTION<br />
Assess for signs of complete airway obstruction (choking)<br />
If infant is choking, attempt to Assessment relieve the airway obstruction immediately<br />
Support the infant’s head and body between your hands and forearms using the<br />
“Sandwich Manoeuvre”<br />
• Hold the infant’s face down and rest your forearm on your thigh<br />
• Keep the head lower than the trunk<br />
• Deliver 5 back blows forcefully between the shoulder blades with the heel of your<br />
other hand<br />
• Support the infant’s head and body between your hands and forearms after<br />
delivering the 5 back blows<br />
• Turn the infant over on his/her back, resting on your thigh<br />
• Keep the head lower than the trunk<br />
• Deliver 5 chest thrusts over the lower half of the sternum (breastbone) by counting<br />
aloud ‘1,2,3,4,5’.(landmark for chest thrust is the same as for infant CPR)<br />
Check if foreign body is expelled after every set of 5 back blows and 5 chest thrusts<br />
and<br />
remove if it is visible<br />
• If the foreign body is expelled successfully, assess the infant for pulse & breathing<br />
• If the airway remains obstructed and the infant is conscious, repeat the sequence<br />
of 5 back blows and 5 chest thrusts until the foreign body is expelled or the infant<br />
becomes unconscious<br />
When infant becomes unconscious. Proceed with the following steps :<br />
• Position the infant on a firm, flat surface<br />
• Call for ambulance 995 if a second rescuer is available<br />
• Start 30 chest compressions (The landmark & technique is the same as for Infant<br />
CPR)<br />
• Open airway : Head Tilt-Chin Lift<br />
• Check airway and remove any obvious foreign bodies<br />
• Check for normal breathing : Look, Listen, & Feel (up to 10 seconds)<br />
• If breathing is absent, attempt to ventilate (1st attempt)<br />
• If airway is still blocked, re-position the infant’s head and reattempt to ventilate<br />
• Attempt 2nd ventilation<br />
• If airway is still blocked, perform 30 chest compressions<br />
• Proceed to head tilt-chin tilt and check for foreign body<br />
• Repeat Step till help arrives or able to give 2 successful ventilations<br />
• Check pulse (for healthcare providers only) and breathing once airway is cleared.<br />
• If pulse is absent (if unsure of pulse and infant has no breathing, assume cardiac<br />
arrest),<br />
continue CPR 30:2<br />
BCLS Programme<br />
Recovery Position Place the infant in the recovery position if :<br />
• Pulse and breathing are present<br />
• Continue to monitor infant’s pulse and breathing every few minutes as this can<br />
stop suddenly<br />
• Activate EMS if it is not done earlier<br />
50
Notes<br />
BCLS Programme<br />
51
Notes<br />
BCLS Programme<br />
52
Notes<br />
BCLS Programme<br />
53
<strong>Singapore</strong> <strong>General</strong> <strong>Hospital</strong><br />
Institute for Medical Simulation & Education<br />
167 Jalan Bukit Merah, Connection One<br />
Tower 5, #03-10, <strong>Singapore</strong> 150167<br />
Tel : 6326 6885 / 6326 6884 / 6321 3651<br />
Fax : 6878 0495<br />
Email : imse@sgh.com.sg<br />
Information correct as at April 2011
![help document [pdf]](https://img.yumpu.com/26291587/1/190x245/help-document-pdf.jpg?quality=85)