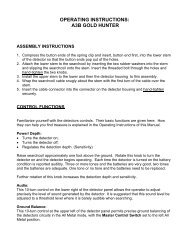
ACE 350 Manual - Garrett
ACE 350 Manual - Garrett
ACE 350 Manual - Garrett

You also want an ePaper? Increase the reach of your titles
YUMPU automatically turns print PDFs into web optimized ePapers that Google loves.
Owner’s <strong>Manual</strong>
THANK YOU FOR CHOOSING<br />
GARRETT METAL DETECTORS!<br />
Congratulations on the purchase of your new <strong>Garrett</strong><br />
<strong>ACE</strong> <strong>350</strong> metal detector. This enhanced metal detector<br />
has been specifically designed for use in more challenging<br />
environments such as mineralized grounds and iron-cluttered<br />
relic and coin hunting areas.<br />
The <strong>ACE</strong> <strong>350</strong> includes <strong>Garrett</strong>'s exclusive Target ID<br />
technology and patented discrimination features. This<br />
technology features two indicator scales that allow you to see<br />
the detector’s discrimination setting (Lower Scale) as well as<br />
the analysis of each detected target (Upper Scale). The <strong>ACE</strong><br />
<strong>350</strong> also features Enhanced Iron Resolution (additional<br />
resolution for separating desirable targets from iron junk in<br />
cluttered areas) and a standard 8.5" x 11" elliptical Double-D<br />
searchcoil engineered for optimum performance in more<br />
challenging mineralized soils.<br />
Backed by more than 45 years of extensive research<br />
and development, your <strong>Garrett</strong> <strong>ACE</strong> <strong>350</strong> metal detector is<br />
the most advanced of its kind in the industry. Whether you<br />
are experienced or a beginner, this machine is well suited<br />
for a wide variety of your detecting environments. With One-<br />
Touch operation, the <strong>ACE</strong> <strong>350</strong> powers on with the touch<br />
of a single button, adjusts easily for ground minerals and is<br />
immediately ready to begin searching.<br />
In order to take full advantage of the special features and<br />
functions of the <strong>ACE</strong> <strong>350</strong>, you are urged to carefully read this<br />
instruction manual in its entirety.<br />
<strong>ACE</strong> <strong>350</strong> 1
TABLE OF CONTENTS<br />
<strong>ACE</strong> <strong>350</strong> Control Panel............................................................ 4<br />
Quick Start Guide..................................................................... 5<br />
<strong>ACE</strong> <strong>350</strong> Components............................................................. 6<br />
List of Parts.............................................................................. 7<br />
Detector Assembly................................................................... 8<br />
<strong>ACE</strong> <strong>350</strong> Display Elements....................................................10<br />
Audio Features.......................................................................13<br />
Pushbutton Controls..............................................................14<br />
Setting Custom Modes (Discrim. Patterns) ............................19<br />
Enhanced Iron Resolution.....................................................22<br />
Bench Tests............................................................................24<br />
Hunting Tips With Your <strong>ACE</strong> <strong>350</strong> Detector...........................27<br />
Target Pinpointing Methods..................................................31<br />
Troubleshooting Guide...........................................................35<br />
Metal Detecting Code of Ethics ............................................36<br />
Cautions..................................................................................37<br />
Caring For Your <strong>ACE</strong> <strong>350</strong> Detector .......................................38<br />
<strong>ACE</strong> <strong>350</strong> Warranty / Service ................................................39<br />
<strong>ACE</strong> <strong>350</strong> Accessories............................................................. 41<br />
Suggested Reading................................................................43<br />
2 <strong>Garrett</strong> Metal Detectors <strong>ACE</strong> <strong>350</strong> 3
<strong>ACE</strong> <strong>350</strong> CONTROL PANEL<br />
QUICK START GUIDE<br />
Target ID Legend<br />
indicates metal types.<br />
Mode<br />
Indicator<br />
Sensitivity<br />
Setting<br />
Target ID Cursor<br />
indicates probable<br />
target identity.<br />
Lower Scale<br />
indicates notch<br />
discrimination pattern.<br />
Coin Depth<br />
Indicator<br />
indicates depth of<br />
coin-sized target.<br />
1. Install batteries.<br />
The <strong>ACE</strong> <strong>350</strong> operates with four (4) AA batteries which are<br />
already installed by <strong>Garrett</strong>.<br />
2. Power ON.<br />
Press and release the ON / OFF Power button. The <strong>ACE</strong> <strong>350</strong><br />
powers on in the last mode used, automatically adjusts for<br />
ground minerals and is ready to search. (Factory default<br />
mode is Coins.)<br />
3. Select Mode.<br />
Use the Mode Pushbutton to select a different detection<br />
mode, when desired.<br />
4. Adjust settings.<br />
Adjust Sensitivity or Discrimination settings, if desired.<br />
MODE<br />
Pushbutton<br />
selects detection<br />
mode (i.e.<br />
discrimination<br />
pattern).<br />
ON / OFF<br />
Power<br />
Sensitivity<br />
Pushbutton<br />
increases or<br />
decreases<br />
sensitivity.<br />
Pinpoint<br />
Pushbutton<br />
allows static detection<br />
to precisely locate the<br />
object.<br />
Battery Level<br />
Indicator<br />
DISCRIM and Accept/<br />
Reject Pushbuttons<br />
Use DISCRIM (+) or (-) to select a<br />
cursor. Then use (/X) button to set<br />
its discrimination on or off.<br />
5. Begin scanning.<br />
Lower the searchcoil to 1 to 2 inches above the ground and<br />
scan the coil left and right at approximately 3 ft/second.<br />
4 <strong>Garrett</strong> Metal Detectors <strong>ACE</strong> <strong>350</strong> 5
<strong>ACE</strong> <strong>350</strong> COMPONENTS<br />
LIST OF PARTS<br />
No tools are required to assemble the <strong>ACE</strong> <strong>350</strong>. Four (4) AA<br />
batteries are included with the detector. The box for your<br />
detector contains the following parts:<br />
Search<br />
coil<br />
Lower<br />
Stem<br />
Upper<br />
Stem<br />
Control<br />
Housing<br />
LCD<br />
Screen<br />
One (1) control housing with<br />
S-shaped stem<br />
One (1) upper stem and one<br />
(1) lower stem connected<br />
One (1) wing nut, two (2)<br />
mounting washers and<br />
one (1) threaded bolt<br />
One (1) 8.5″x11″ DD<br />
searchcoil<br />
Owner's manual<br />
Warranty Card<br />
If any part is missing, please contact your local dealer.<br />
Pushbutton<br />
Controls<br />
Spring<br />
Clip<br />
Arm<br />
strap<br />
S-shaped<br />
Stem<br />
<br />
<br />
Handle<br />
Grip<br />
<br />
<br />
Detector<br />
Stand<br />
Padded<br />
Arm Cuff<br />
<br />
<br />
6 <strong>Garrett</strong> Metal Detectors <strong>ACE</strong> <strong>350</strong> 7
DETECTOR ASSEMBLY<br />
1. Align the holes in the mounting washers with the<br />
small posts on the lower stem and press firmly into<br />
place.<br />
1. 2.<br />
5. Depress the spring clip in the lower stem and adjust to<br />
the most comfortable operating length.<br />
5. 6.<br />
6. Wrap the cable snugly about the stem with the<br />
first turn of the cable over the stem.<br />
2. Slide the searchcoil onto the stem.<br />
3. Insert the threaded bolt through the holes of the<br />
lower stem and searchcoil. Hand-tighten the<br />
searchcoil assembly with the wing nut.<br />
7. Insert the cable connector into the connector of the<br />
control housing and hand-tighten.<br />
7. 8.<br />
3. 4.<br />
8. Adjust the arm cuff by removing the screw on the<br />
bottom and moving it to the other hole.<br />
4. Depress the spring clip in the S-stem and insert the<br />
control housing into the upper stem.<br />
8 <strong>Garrett</strong> Metal Detectors <strong>ACE</strong> <strong>350</strong> 9
<strong>ACE</strong> <strong>350</strong> DISPLAY ELEMENTS<br />
The <strong>ACE</strong> <strong>350</strong> is designed with <strong>Garrett</strong>’s exclusive Graphic<br />
Target ID technology, which indicates the probable<br />
identification of a target along a horizontal scale that reads<br />
from ferrous metals (e.g. iron) on the left to low conductivity<br />
metals in the middle to high conductive metals (e.g. pure<br />
silver) on the right.<br />
<br />
Mode<br />
Indicator<br />
<br />
Target ID<br />
Legend<br />
<br />
Target<br />
ID Cursor<br />
(Upper Scale)<br />
<br />
Discrimination<br />
Pattern (Lower<br />
Scale)<br />
<br />
Coin Depth<br />
Indicator<br />
Mode—Indicates which of the five detection modes (Zero,<br />
Jewelry, Custom, Relics or Coins) has been selected by<br />
highlighting the corresponding word on the LCD screen.<br />
Target ID Legend—Works in conjunction with the Target ID<br />
Cursor to indicate a target's probable identity. Ferrous (iron)<br />
targets will indicate on the left half, non-ferrous targets that<br />
are thin or have low conductivity will indicate in the middle,<br />
and thick or high conductivity targets will indicate at the right.<br />
Target ID Cursor (Upper Scale)—The Target ID cursor, in<br />
conjunction with the Target ID Legend, indicates the probable<br />
identity of a detected target. The upper scale consists of<br />
twelve (12) graphic segments for Target ID.<br />
Lower Scale—The lower scale, or Notch Discrimination<br />
Scale, indicates the discrimination pattern. The <strong>ACE</strong> <strong>350</strong> will<br />
produce an audible target response for the pixels that are<br />
switched on, and no audible response for those that have<br />
been switched off. The Target ID Cursor will always indicate<br />
all targets.<br />
The discrimination pattern can be adjusted by changing<br />
modes and/or using the DISCRIM and Accept/Reject (/X)<br />
pushbuttons (see page 16).<br />
<br />
Sensitivity<br />
Indicator<br />
<br />
Battery<br />
Level<br />
Indicator<br />
Coin Depth Indicator—The depth of a coin, or similar sized<br />
target, is indicated in 2-inch increments. Sweep over the<br />
target with the searchcoil 1 inch from the soil to get the most<br />
accurate reading. Note: targets larger than a coin may display<br />
shallower than actual depth while targets smaller than a coin<br />
may display deeper than actual depth.<br />
10 <strong>Garrett</strong> Metal Detectors <strong>ACE</strong> <strong>350</strong> 11
AUDIO FEATURES<br />
Headphone Jack—Any headphones with a 1/4” plug can be<br />
inserted into the jack at the rear of the Control Housing.<br />
Battery Level Indicator—Indicates the current battery<br />
condition. The detector will maintain full performance until<br />
the batteries need to be replaced. Replace batteries when<br />
there is only 1 segment remaining. NiMH rechargeable<br />
batteries may be used, but may have a shorter life per charge.<br />
You can expect 20 to 40 hours of operation depending on<br />
battery type and quality.<br />
Access and replace the batteries by sliding the cover off<br />
the control housing. Remove batteries when the <strong>ACE</strong> <strong>350</strong> will<br />
be stored for longer than 30 days.<br />
Sensitivity Indicator—The <strong>ACE</strong> <strong>350</strong> has eight (8) settings<br />
for sensitivity. (See page 18 for information on when to adjust<br />
your sensitivity settings.)<br />
Tone ID—The Tone ID feature produces three distinct audible<br />
tones based on a target’s metal type and conductivity:<br />
• High conductivity targets (such as silver) produce a<br />
unique belltone signal.<br />
• Medium to low conductivity targets (such as jewelry or<br />
small gold), produce a medium-pitched audio signal.<br />
• Ferrous targets (such as iron and nails) produce<br />
a low-pitch audio signal.<br />
12 <strong>Garrett</strong> Metal Detectors <strong>ACE</strong> <strong>350</strong> 13
ON/OFF<br />
Power<br />
pushbutton controls<br />
<br />
MODE<br />
Pushbutton<br />
Pinpoint<br />
Pushbutton<br />
<br />
DISCRIM<br />
Pushbutton<br />
<br />
SENSITIVITY<br />
Pushbutton<br />
<br />
Accept/<br />
Reject<br />
Pushbutton<br />
ON/OFF Power Pushbutton<br />
Press and release to switch the unit ON and resume hunting<br />
with the same settings used prior to turning the unit OFF. To<br />
restore the factory settings, press and hold the power button<br />
for 5 to 10 seconds (until the detector produces a fast double<br />
beep).<br />
MODE Pushbutton<br />
Push the MODE button to select<br />
one of five discrimination modes (Zero, Jewely, Custom,<br />
Relics or Coins). See the next section ("Selecting Modes") for<br />
details on each <strong>ACE</strong> <strong>350</strong> Mode.<br />
PINPOINT Pushbutton<br />
Press and hold the Pinpoint<br />
pushbutton to determine the exact location of a target.<br />
To use the pinpoint function, position the searchcoil to the<br />
side of the target's suspected location at a fixed height above<br />
the ground (e.g. 1"). Press and hold the Pinpoint button and<br />
sweep the searchcoil over the target area while maintaining<br />
the same fixed height above the ground (e.g. 1"). Sweep<br />
the searchcoil side-to-side and front-to-back in a crosshair<br />
pattern to locate the peak signal. Note: it is important to<br />
maintain a constant height during the entire Pinpointing<br />
process to prevent ground mineralization from producing<br />
false signals or masking the target's signal.<br />
The bar graph on the LCD can also aid in locating a peak<br />
signal. When pinpointing, the Upper Scale on the LCD Screen<br />
indicates signal strength. When the greatest number of LCD<br />
segments (increasing left to right on the scale) is shown, the<br />
center of the searchcoil is directly over the target with the<br />
depth of a coin-sized target shown on the depth scale.<br />
With practice, you will be able to pinpoint objects quickly<br />
and accurately.<br />
DISCRIM Pushbutton<br />
(Use in conjunction with the Accept/Reject pushbutton to<br />
modify the discrimination pattern.)<br />
Use the (+) or (-) DISCRIM pushbuttons to move the Target<br />
ID cursor to the left or right. Next, use the Accept/Reject<br />
pushbutton to modify the Lower Scale discrimination pattern.<br />
14 <strong>Garrett</strong> Metal Detectors <strong>ACE</strong> <strong>350</strong> 15
Accept/Reject Pushbutton<br />
(Use in conjunction with the DISCRIM<br />
pushbuttons to modify the discrimination pattern.)<br />
Press the Accept/Reject pushbutton to eliminate or activate<br />
pixels located on the Lower Scale, directly below the Target<br />
ID cursor.<br />
As seen in the illustration below, the <strong>ACE</strong> <strong>350</strong> has 12 pixels<br />
or "notches" of discrimination. Any combination of these<br />
pixels can be switched on or off based upon your preference.<br />
There are two primary methods for modifying the Notch<br />
Discrmination Pattern to reject a specific type of trash or<br />
unwanted item while detecting all other metal.<br />
The example below illustrates how to manually use both<br />
the DISCRIM and Accept/Reject pushbuttons to modify the<br />
Notch Discrimination pattern.<br />
Use the DISCRIM buttons to position the Target ID Cursor above the pixel you<br />
wish to eliminate (see above illustration). Use the Accept/Reject pushbutton<br />
(/X) to delete this pixel from the Lower Scale (see below). This item is now<br />
rejected.<br />
The second method of modifying the Notch Discrimination<br />
pattern involves the use of only the Accept/Reject<br />
pushbuttons. When an unwanted metal target is audibly<br />
detected while hunting, simply push the Accept/Reject button<br />
to create a notch where the Target ID Cursor has signaled the<br />
presence of the trash. The next time the <strong>ACE</strong> <strong>350</strong> encounters<br />
the same trash item, it will not produce an audible signal.<br />
The <strong>ACE</strong> <strong>350</strong>'s Accept/Reject pushbutton (/X) can also<br />
be used to find specific metal items. For example, if an<br />
earring has been lost, scan the matching earring with the <strong>ACE</strong><br />
<strong>350</strong> while in the ZERO mode. Note where the Target ID cursor<br />
appears when the earring is scanned. Next, use the DISCRIM<br />
and Accept/Reject pushbuttons to switch off all the pixels<br />
except the one for the earring.<br />
Note: Depending upon how the lost earring is laying in the<br />
ground, its Target ID may shift a little; therefore, your ability<br />
to find it will be enhanced by turning on an additional pixel<br />
on either side. The <strong>ACE</strong> <strong>350</strong> is now programmed to find only<br />
the missing earring based on the conductivity of its matching<br />
pair.<br />
Note: The accept/reject function can be used to modify<br />
each Mode’s discrimination pattern. Notch Discrimination<br />
modifications made while in CUSTOM mode will be retained<br />
when the detector is turned OFF. However, all changes made<br />
to the Notch Discrimination pattern while in ZERO, JEWELRY,<br />
RELICS or COINS modes will return to the factory settings<br />
when the detector is turned OFF and back ON again.<br />
16 <strong>Garrett</strong> Metal Detectors <strong>ACE</strong> <strong>350</strong> 17
SENSITIVITY Pushbutton<br />
Use the (+) or (-) SENSITIVITY buttons to step through the<br />
eight (8) sensitivity levels, which are continuously shown on<br />
the LCD screen.<br />
Use higher sensitivity levels when searching for very<br />
small or very deep targets. Use lower sensitivity levels in<br />
locations where the detector is behaving erratically due to<br />
excessive metallic trash, highly mineralized soils, saltwater<br />
beaches, electrical interference or the presence of other<br />
metal detectors.<br />
SELECTING MODES (Discrimination Patterns)<br />
The <strong>ACE</strong> <strong>350</strong> includes five Modes. Select the mode that<br />
best suits the targets you hope to find or use the CUSTOM<br />
Mode to create your own personal settings. In each mode,<br />
minor changes in the preset discrimination patterns have<br />
been programmed to optimize hunting for such typical<br />
target(s).<br />
This does not mean that the detector will search only for<br />
jewelry while in Jewelry Mode. It simply indicates that the<br />
discrimination pattern is optimized for locating most jewelry<br />
items. The JEWELRY Mode will still locate coins, relics and<br />
other non-jewelry items.<br />
• Jewelry Mode<br />
The discrimination pattern for this mode is designed<br />
to find jewelry such as rings, bracelets, watches and<br />
necklaces. Three pixels of ferrous targets have been<br />
excluded to ignore most nails and small iron pieces.<br />
Some iron pixels remain in order to minimize target<br />
masking effects (see page 23 for more on target<br />
masking).<br />
The LCD screen in JEWELRY Mode will appear as:<br />
In JEWELRY Mode, the lower 3 pixels are notched out.<br />
18 <strong>Garrett</strong> Metal Detectors <strong>ACE</strong> <strong>350</strong> 19
• CUSTOM Mode<br />
The discrimination pattern for this mode can be<br />
programmed by the operator. The factory preset for<br />
the CUSTOM Mode is the same as the COINS Mode.<br />
Once you have changed the discrimination pattern of<br />
the CUSTOM Mode to your preferences, the <strong>ACE</strong> <strong>350</strong><br />
will retain your CUSTOM discrimination pattern. (For<br />
information on the use of the DISCRIM and Accept/Reject<br />
pushbutton controls, see pages 15–17.)<br />
• Coins Mode<br />
The discrimination pattern for this mode is designed<br />
to find all types of coins and eliminate trash items<br />
such as iron and foil. Five pixels of ferrous targets and<br />
two notches of non-ferrous have been excluded in the<br />
COINS Mode.<br />
This discrimination pattern is intended to elminate<br />
iron trash, many pulltabs and pieces of tabs from<br />
detection. Be aware that medium-sized gold rings may<br />
be missed with the Coins Mode discrimination pattern.<br />
Some digging of junk targets is to be expected, such<br />
as aluminum cans.<br />
For COINS Mode, the discrimination pattern will<br />
appear as illustrated below.<br />
• RELICS Mode<br />
The discrimination pattern for this mode is designed<br />
to eliminate small iron pieces, while detecting good<br />
targets in the lower conductivity range, such as lead,<br />
brass and bronze. Two pixels of ferrous have been<br />
removed and the pattern will appear as:<br />
In RELICS Mode, the lowest 2 ferrous pixels are notched out.<br />
• ZERO Mode<br />
The discrimination pattern for this mode is designed<br />
to detect every type of metal and should be used<br />
when you want to find all metal items or when the<br />
material of the desired object is unknown. As seen in<br />
the illustration below, all 12 discrimination pixels are<br />
switched on—indicating that no metal targets have<br />
been notched out (eliminated).<br />
Switch to the Zero Mode to aid in locating a target<br />
when its signal is inconsistent. Such signals could<br />
mean a trash target is close to a good target.<br />
In COINS Mode, 5 pixels under ferrous and 2 pixels of non-ferrous targets are<br />
notched out.<br />
In ZERO Mode, the discrimination pattern shows all 12 pixels are on.<br />
20 <strong>Garrett</strong> Metal Detectors <strong>ACE</strong> <strong>350</strong> 21
enhanced iron RESOLUTION<br />
The <strong>ACE</strong> <strong>350</strong> features increased resolution (i.e. more<br />
pixels) of iron discrimination. This additional resolution allows<br />
more precise control of how much iron discrimination can be<br />
applied. In the example shown below, an iron object can often<br />
"mask" out the signal of an adjacent good target.<br />
To prevent this from happening, use the DISCRIM and<br />
Accept/Reject pushbuttons to select just enough discrimination<br />
to reject the iron trash (e.g. small nail, as seen in<br />
Illustration 1). By using only a minimal amount of iron<br />
discrimination, your detector will continue to detect the coin<br />
and nail together (see Illustration 2) and "masking" will not<br />
cause you to miss a good target. See example settings shown<br />
on the following page.<br />
Example: Preventing Target Masking with Enhanced Iron Resolution<br />
In the illustration above, the <strong>ACE</strong> <strong>350</strong> is operating in RELICS Mode, with<br />
two pixels of iron discriminated. The nail seen in Illustration 1 (on page 22)<br />
registers above the third pixel. These ferrous targets can be eliminated from<br />
detection by using the Accept/Reject pushbutton (/X) to turn off the third<br />
pixel from the left.<br />
Illustration 1 Illustration 2<br />
In Illustration 2, one of the same iron nails is laying above a good coin target.<br />
Since three pixels of ferrous have been notched out, the nail by itself would<br />
not be detected; however, the two objects have a combined conductivity of<br />
four pixels.<br />
Therefore, the good target is detected due to the combined conductivity<br />
being higher than that of the discriminated target (nail) alone.<br />
Iron targets, such as the nail shown above, can sometimes mask a good target. If<br />
too much iron discrimination is applied, the good target can be missed. Read page<br />
23 to learn how to apply the proper amount of iron discrimination to eliminate the<br />
nail shown in Illustration 1 and still detect the good target shown in Illustration 2.<br />
22 <strong>Garrett</strong> Metal Detectors <strong>ACE</strong> <strong>350</strong> 23
BENCH TESTS<br />
You should conduct bench tests to become more familiar<br />
with your detector’s operation. To conduct a bench test:<br />
1. Place the searchcoil on a flat, non-metallic surface that is<br />
several feet from other metallic objects.<br />
2. Select the ZERO mode.<br />
3. Pass various metal objects (coins, bottle caps, nails, etc.)<br />
across the searchcoil at a distance of 3 to 4 inches. Your<br />
metal detector will audibly and visually identify the target.<br />
4. Perform this test in all the modes available on your<br />
detector. Observe the sounds as well as the graphics on<br />
the LCD that are made in each mode.<br />
5. Record the results of your bench tests and refer to them<br />
when hunting in the field.<br />
Once you have determined how your test targets register<br />
on the Target ID during bench tests, test them in the soil. Bury<br />
your targets at recorded depths to create a "test plot." Note<br />
how various targets read based upon whether they are lying<br />
in the ground flat or at various angles.<br />
Keep accurate records or surface markers to indicate your<br />
test plot targets and their depths. Try testing these targets<br />
again in several months after the ground has settled, during<br />
periods of extreme drought or after a soaking rain. Take note<br />
of any changes in how these targets are detected.<br />
The following illustrations depict a <strong>ACE</strong> <strong>350</strong> in ZERO Mode<br />
scanning selected targets during a bench test. (Note: these are "air<br />
tests" conducted in a pristine environment. The target ID scale can<br />
be influenced by the soil as well as the conductivity, permeability,<br />
thickness, size, shape and orientation of the target.)<br />
TARGET<br />
TARGET ID DISPLAY<br />
Small,<br />
rusty iron<br />
nail<br />
Aluminum<br />
foil<br />
24 <strong>Garrett</strong> Metal Detectors <strong>ACE</strong> <strong>350</strong> 25
TARGET<br />
TARGET ID DISPLAY<br />
HUNTING TIPS WITH YOUR <strong>ACE</strong> <strong>350</strong><br />
Small, 14k<br />
gold ring<br />
• If you are new to metal detecting, start searching in areas<br />
with sandy and loose soil to make it easier to learn how to<br />
use your metal detector, pinpoint and dig targets.<br />
Large, 14k<br />
gold ring<br />
Minié<br />
ball<br />
• Keep your searchcoil height approximately 1 to 2 inches<br />
above and parallel to the ground at all times for best<br />
detection results.<br />
• Walk slowly as you scan your searchcoil in a straight line<br />
from side to side at a speed of about 2 to 5 feet per second.<br />
Advance the searchcoil about half the length of the<br />
searchcoil at the end of each sweep.<br />
Musket<br />
ball<br />
CORRECT<br />
SWING<br />
Twist-off<br />
bottle cap<br />
INCORRECT<br />
SWING<br />
Civil War<br />
U.S. Belt Plate<br />
26 <strong>Garrett</strong> Metal Detectors <strong>ACE</strong> <strong>350</strong> 27
In order to fully search an area, overlap the swings of your searchcoil by<br />
half the length of the coil (about 5.5 inches). Sweep the searchcoil in a<br />
straight line or with a slight arc at a sweep speed of about 3 ft/sec.<br />
Scan side<br />
to side<br />
approx.<br />
3 ft per<br />
second.<br />
• Isolating adjacent targets. The narrow detection field<br />
of the <strong>ACE</strong> <strong>350</strong>'s DD searchcoil allows better separation of<br />
adjacent targets versus a similar size concentric searchcoil.<br />
Use narrow swings of the searchcoil in trashy areas to isolate<br />
good targets amongst the trash.<br />
Walk slowly to allow<br />
overlapping of your<br />
searchcoil<br />
28 <strong>Garrett</strong> Metal Detectors <strong>ACE</strong> <strong>350</strong> 29
• Swing your searchcoil parallel to plow lines and the<br />
water's edge. This will minimize the negative effects caused<br />
by uneven ground in plowed fields and varying amounts<br />
of moisture near the water. Do not swing the searchcoil<br />
perpendicular to plow lines and the water's edge, as this may<br />
produce abrupt changes in ground response that can reduce<br />
the detector's performance.<br />
TARGET PINPOINTING METHODS<br />
Standard pinpointing method using the Pinpoint button<br />
(see page 15). In this method, position the searchcoil to the<br />
side of the target's suspected location. Press and hold the<br />
Pinpoint button, then sweep the searchcoil side-to-side and<br />
front-to-back in a crosshair pattern to locate the peak signal.<br />
You will notice the greatest number of pixels on the upper<br />
scale and the strongest audio (loudest sound) as you pinpoint<br />
the peak target signal. (See LCD meter illustration below.)<br />
5-10cm<br />
Note: The <strong>ACE</strong> <strong>350</strong> DD searchcoil's "hot spot" is under the<br />
center of the coil, just ahead of its stem mount. The opening<br />
just ahead of the stem mount can serve as your reference<br />
point for pinpointing.<br />
5-10cm<br />
Indicates detected target<br />
Indicates target pinpointing<br />
center of the 8.5" x 11"<br />
PROformance searchcoil.<br />
30 <strong>Garrett</strong> Metal Detectors <strong>ACE</strong> <strong>350</strong> 31
5-10cm<br />
• Alternative pinpointing technique: DD-tip or tail. In the<br />
standard pinpointing method described on pages 15 and 31,<br />
the target is pinpointed beneath the center of the searchcoil.<br />
Some detectorists using DD coils prefer to pinpoint off the tip<br />
or tail of the searchcoil.<br />
Image A<br />
DD "tip" pinpointing technique<br />
(Left) Press and hold the<br />
Pinpoint pushbutton during this<br />
technique. Sweep the searchcoil<br />
side-to-side to center the target<br />
(the point where the strongest<br />
audio response is heard and the<br />
maximum LCD pixels on the top<br />
row are displayed).<br />
Traditional pinpointing technique using Pinpoint pushbutton.<br />
Note: It is important to maintain a constant searchcoil height<br />
above the ground (e.g. 1 inch) during the entire Pinpointing<br />
process to prevent ground mineralization from producing<br />
false signals or masking the target's signal.<br />
• Alternative pinpointing technique: DD-wiggle. Quickly<br />
locate targets without using the Pinpoint button as follows.<br />
Continuously swing the searchcoil side-to-side using<br />
fast, narrow swings of 2 to 4 inches (i.e. wiggle). While<br />
continuing this side-to-side wiggle, slowly move the searchcoil<br />
sideways toward the target's suspected position until the<br />
audio response produces a consistent, symmetric beat. This<br />
indicates the lateral left-to-right position of the target. Then<br />
locate the target's front-to-back position by rotating around<br />
90° and repeating the same process.<br />
5-10cm<br />
PUll coil toward you<br />
Indicates detected target target position<br />
Image B<br />
Then, pull the searchcoil slowly<br />
toward you, while noting the<br />
target signal (see Image A).<br />
Once the target signal drops off<br />
(both audibly and on the LCD<br />
meter), shallow targets should<br />
be located immediately in front<br />
of the searchcoil's tip (see Image<br />
B). Deep targets will be under or<br />
just inside your searchcoil's tip.<br />
This is because the conical shape<br />
of the searchcoil's detection field<br />
begins bending in slightly as the<br />
depth increases (see Image C).<br />
32 <strong>Garrett</strong> Metal Detectors <strong>ACE</strong> <strong>350</strong> 33
Image C<br />
TROUBLESHOOTING GUIDE<br />
You can reverse this pinpointing technique to pinpoint off<br />
the DD coil's tail; in this case, push the coil away from you.<br />
The audio and LCD meter will place the target just off the<br />
searchcoil's tail.<br />
Tip: Practice any or all of these various pinpointing options in<br />
your test plot. Choose the technique that works best for you.<br />
As you improve your pinpointing accuracy, you will dig smaller<br />
holes and increase your productive hunting time.<br />
SYMPTOM<br />
No power<br />
Erratic sounds or<br />
target ID cursor<br />
movement<br />
Intermittent Signals<br />
I’m not finding<br />
specific targets<br />
Target ID Cursor<br />
bounces<br />
SOLUTION<br />
1. Ensure batteries are installed in the correct position.<br />
2. Replace all old batteries with all new batteries.<br />
1. Ensure your searchcoil is securely connected and the coil<br />
cable is snugly wound around the stem.<br />
2. If using the detector indoors, be aware that excessive<br />
amounts of electrical interference exists, plus excessive<br />
amounts of metal can be found in floors and walls.<br />
3. Reduce your sensitivity setting.<br />
4. Determine if you are close to other metal detectors or other<br />
metal structures such as electrical power lines, wire fences,<br />
benches, etc.<br />
Intermittent signals typically mean you’ve found a deeply<br />
buried target or one that is positioned at a difficult angle for<br />
your detector to read. Scan from different directions to help<br />
define the signal. In the case of multiple targets switch to the<br />
ZERO Mode or press the pinpoint button to precisely locate<br />
all targets. In trashy areas, use the Super Sniper searchcoil.<br />
(NOTE: Iron targets may cause Intermittent Signals. You can<br />
identify iron targets in ZERO Mode).<br />
Ensure you are using the correct mode for the type hunting<br />
you are doing. If specifically hunting for coins, COINS mode<br />
should be your best choice to eliminate other undesirable<br />
targets. You may also use the ZERO mode, which detects all<br />
metal targets to ensure desired targets are present.<br />
If your Target ID Cursor bounces erratically, chances are<br />
you’ve found a trash target. However, a Target ID Cursor may<br />
bounce if a good target (such as a coin) is not parallel to the<br />
searchcoil (e.g. on edge). It may also bounce if there is one<br />
or multiple “junk” targets laying next to the good target. Scan<br />
from different directions until your Target ID Cursor becomes<br />
more stable.<br />
NOTE: Large, flat pieces of iron—depending on their<br />
orientation in the ground—can read as a good target or can<br />
cause erratic Target ID Cursor movement.<br />
34 <strong>Garrett</strong> Metal Detectors <strong>ACE</strong> <strong>350</strong> 35
METAL DETECTING CODE OF ETHICS<br />
The following is a Code of Ethics that many treasure hunt<br />
clubs endorse and hobbyists follow to preserve our exciting<br />
hobby of metal detecting. We encourage you to do the same:<br />
• I will respect private and public property, all historical and<br />
archaeological sites and will do no metal detecting on<br />
these lands without proper permission.<br />
• I will keep informed on and obey all local and national<br />
legislation relating to the discovery and reporting of found<br />
treasures.<br />
• I will aid law enforcement officials whenever possible.<br />
• I will cause no willful damage to property of any kind,<br />
including fences, signs and buildings.<br />
• I will always fill the holes I dig.<br />
• I will not destroy property, buildings or the remains of<br />
deserted structures.<br />
• I will not leave litter or other discarded junk items lying<br />
around.<br />
• I will carry all rubbish and dug targets with me when I leave<br />
each search area.<br />
• I will observe the Golden Rule, using good outdoor manners<br />
and conducting myself at all times in a manner which will<br />
add to the stature and public image of all people engaged<br />
in the field of metal detection.<br />
CAUTIONS<br />
When searching for treasure with your <strong>Garrett</strong> detector,<br />
observe these precautions:<br />
• Never trespass or hunt on private property without<br />
permission.<br />
• Avoid areas where pipelines or electric lines may be<br />
buried.<br />
• National and state parks / monuments, etc are absolutely<br />
off-limits.<br />
• Deepseeking detectors can detect concealed pipes, wiring<br />
and other potentially dangerous material. When those are<br />
located, the proper authorities should be notified.<br />
• Do not hunt in a military zone where bombs or other<br />
explosives may be buried.<br />
• Do not disturb any pipeline, particularly if it could be<br />
carrying flammable gas or liquid.<br />
• Use reasonable caution in digging toward any target,<br />
particularly in areas where you are uncertain of the ground<br />
conditions.<br />
• If you are unsure about using your metal detector in any<br />
area, always seek permission from the proper authorities.<br />
36 <strong>Garrett</strong> Metal Detectors <strong>ACE</strong> <strong>350</strong> 37
CARING FOR YOUR <strong>ACE</strong> <strong>350</strong> DETECTOR<br />
Your <strong>Garrett</strong> detector is a rugged machine, designed for<br />
outdoor use. However, as with all electronic equipment,<br />
there are some simple ways you can care for your detector to<br />
maintain its high performance.<br />
• Avoid extreme temperatures as much as possible, such<br />
as storing the detector in an automobile trunk during the<br />
summer or outdoors in sub-freezing weather.<br />
• Keep your detector clean. Wipe the control housing with a<br />
damp cloth when necessary.<br />
• Remember that your searchcoil is submersible, but your<br />
control housing is not. Never submerge any control housing<br />
or the connector in water (unless specifically designed for<br />
underwater use).<br />
• Protect your control housing from heavy mist, rain and<br />
blowing surf.<br />
• Disassemble the stem, and wipe it and the searchcoil clean<br />
with a damp cloth.<br />
• When storing for longer than one month, remove the<br />
batteries from the detector.<br />
<strong>ACE</strong> <strong>350</strong> WARRANTY & SERVICE<br />
Your <strong>ACE</strong> <strong>350</strong> detector is warranted for 24 months, limited<br />
parts and labor, but does not cover damage caused by<br />
alteration, modification, neglect, accident or misuse.<br />
In the event you encounter problems with your <strong>ACE</strong> <strong>350</strong><br />
detector please read through this Owner’s <strong>Manual</strong> carefully<br />
to ensure the detector is not inoperable due to manual<br />
adjustments. Press and hold the power pushbutton for 10<br />
seconds to return to the recommended factory settings.<br />
You should also make certain you have:<br />
1. Checked your batteries, switches and connectors. Weak<br />
batteries are the most common cause of detector “failure.”<br />
2. Contacted your dealer for help, particularly if you are not<br />
familiar with the <strong>ACE</strong> <strong>350</strong> detector.<br />
In the event that repairs or warranty service are necessary<br />
for your <strong>ACE</strong> <strong>350</strong>, contact the local retail outlet where your<br />
detector was purchased. To avoid excessive shipping and<br />
import charges, do not attempt to return a <strong>Garrett</strong> product to<br />
the factory in the United States.<br />
Information on international warranty/repair needs can be<br />
found on the <strong>Garrett</strong> website: www.garrett.com. Click on the<br />
Hobby Division and then the Technical Support page for more<br />
details.<br />
• It is best to use quality alkaline batteries. When changing<br />
batteries, be sure to replace with all new batteries for<br />
optimum performance.<br />
38 <strong>Garrett</strong> Metal Detectors <strong>ACE</strong> <strong>350</strong> 39
<strong>ACE</strong> <strong>350</strong> ACCESSORIES<br />
<strong>Garrett</strong> offers a complete line of accessories that will increase<br />
your success and enjoyment of treasure hunting with your<br />
new detector. These accessory products are available from<br />
your local or dealer or by calling the <strong>Garrett</strong> factory at 1-800-<br />
527-4011.<br />
4.5” <strong>ACE</strong> Super Sniper Searchcoil—<br />
Part No. 221800<br />
Use when searching for small, shallow<br />
targets in trashy or tight places.<br />
<strong>ACE</strong> Environmental Cover-Up—<br />
Part No. 1619900<br />
Protect your detector from light rain and<br />
dust without inhibiting view of control<br />
panel.<br />
40 <strong>Garrett</strong> Metal Detectors <strong>ACE</strong> <strong>350</strong> 41
<strong>Garrett</strong> Detectorist's Backpack—<br />
Part No. 1651800<br />
This rugged pack has external tie-down<br />
straps to hold a shovel and a metal detector.<br />
Inside, additional straps can secure<br />
another disassembled detector. Divided<br />
compartments allow plenty of room for gold<br />
pans, extra searchcoils, headphones, your<br />
lunch, camera, etc. Backpack also features<br />
zippered treasure pouch, utility clip, water<br />
bottle holder, and tool holders for recovery<br />
tools and pinpointer.<br />
SUGGESTED READING<br />
Also available: pocket-size treasurehunting<br />
field guides written by<br />
Charles <strong>Garrett</strong>. Collect them all!<br />
Each book is a compact, 3.5" x 5" size with between 72 and 84 pages. These<br />
handy guides offer the basic knowledge needed to begin treasure hunting.<br />
<strong>Garrett</strong> PRO-POINTER ® Pinpointing Detector—<br />
Part No. 1166000<br />
Author/master treasure hunter<br />
The PRO-POINTER combines performance with sleek design to<br />
assist in pinpointing hard-to-find targets. Includes proportional<br />
audio/vibration pulse rate target indicators and 360° side scan<br />
detection area. Water resistant with LED light for low light uses.<br />
Includes woven belt holster and 9-volt battery.<br />
To see <strong>Garrett</strong>'s complete collection of metal detector accessories,<br />
please visit www.garrett.com and view products within our Hobby<br />
Division.<br />
Additional searchcoils, recovery tools, headphones, carrying bags,<br />
searchcoil covers, <strong>Garrett</strong> caps and <strong>Garrett</strong> shirts are available for<br />
all detecting accessory needs.<br />
(Available in English<br />
language only)<br />
Visit RAM Books on<br />
www.garrett.com for<br />
future releases.<br />
42 <strong>Garrett</strong> Metal Detectors <strong>ACE</strong> <strong>350</strong> 43
RAM BOOKS TITLES<br />
Please note that RAM Books, the publishing division<br />
of <strong>Garrett</strong> Metal Detectors, continues to release<br />
new titles each year related to treasure hunting, gold<br />
prospecting, coin hunting and relic recovery.<br />
To see a current list of titles available from<br />
RAM Books, please consult a <strong>Garrett</strong> Metal<br />
Detectors hobby catalog or visit:<br />
www.garrett.com<br />
After reaching <strong>Garrett</strong>’s website, visit the Hobby<br />
Divison section and select “RAM Books” to see all<br />
current titles. An order form is available on the site<br />
which can be printed and mailed with requested<br />
titles and payment.<br />
44 <strong>Garrett</strong> Metal Detectors <strong>ACE</strong> <strong>350</strong> 45
1881 W. State Street<br />
Garland, Texas 75042<br />
Toll Free: 800.527.4011<br />
Tel: 972.494.6151<br />
Fax: 972.494.1881<br />
Email: sales@garrett.com<br />
© 2010 <strong>Garrett</strong> Electronics, Inc.<br />
PN 1533000.A.0710<br />
46 <strong>Garrett</strong> Metal Detectors <strong>ACE</strong> <strong>350</strong> 47