Advanced MFC Programming
Advanced MFC Programming Advanced MFC Programming
Chapter 2. Menu void CMenuDoc::OnFileClose() { CMenu menu; } menu.LoadMenu(IDR_MAINFRAME); AfxGetMainWnd()->SetMenu(&menu); AfxGetMainWnd()->DrawMenuBar(); menu.Detach(); In the above three member functions, we use a local variable menu to load the menu resource. It will be destroyed after the function exits. So before the variable goes out of scope, we must call function CMenu::Detach() to release the loaded menu resource so that it can continue to be used by the application. Otherwise, the menu resource will be destroyed automatically. Summary 1) In order to execute commands, we need to handle message WM_COMMAND. In order to update user interfaces of menu, we need to handle message UPDATE_COMMAND_UI. 1) To implement right-click menu, we need to first prepare a menu resource, then trap WM_RBUTTONDOWN message. Within the message handler, we can use CMenu type variable to load the menu resource, and call CMenu::TrackPopupMenu(…) to activate the menu and track mouse activities. Before the menu is shown, we can call functions CMenu::EnableMenuItem(…) and CMenu::CheckMenuItem(…) to set the states of the menu items. 1) To add or remove a menu item dynamically, we need to call functions CMenu::InsertMenu(…) and CMenu::RemoveMenu(…). 1) With function CMenu::SetMenuItemBitmaps(…), we can use bitmap images to implement checked and unchecked states for a menu item. 1) A window’s standard menu can be obtained by calling function CWnd::GetMenu(), and the application’s system menu can be obtained by calling function CWnd::GetSysMenu(…). 1) We can change a normal menu item to a bitmap menu item, a separator, or a sub-menu by calling function CMenu::ModifyMenu(…). 1) Owner-draw menu can be implemented by setting MF_OWNERDRAW style then overriding functions CMenu::MeasureItem(…) and CMenu::DrawItem(…). 1) We can change the whole menu attached to a window by calling function CWnd::SetMenu(…). 56
Chapter 3. Splitter Window Chapter 3 Splitter Window Asplitter window resides within the frame window. It is divided into several panes, each pane can have a different size. Splitter window provides the user with several different views for monitoring data contained in the document at the same time. Normally, the size of each pane can be adjusted freely, this gives the user a better view of data. There are two types of splitter windows: Dynamic Splitter Window and Static Splitter Window. For a dynamic splitter window, all views within the splitter window are of the same type. The user can create new panes or remove old panes on the fly. For a static splitter window, the views could be of different types and the number of panes has to be fixed at the beginning. In this case, the user can not add or delete views after the program has started. Both SDI and MDI applications can have splitter windows. In an SDI application, the splitter window is embedded in the mainframe window. In an MDI application, it is embedded in the child frame window. 3.1 Implementing Static Splitter Windows In MFC, class CSplitterWnd is used to implement window splitting. To split a window into several panes, we must first declare a CSplitterWnd type variable in the frame window class. One CSplitterWnd can divide window into M×N sub-panes. The splitter window can be nested, which means we can further split a single pane into several sub panes by using another CSplitterWnd type variable. So if we want to create an unevenly divided splitter window, we need to declare more than one CSplitterWnd type variables. For example, if we want to create a splitter window that has two rows, the first row has two columns and the second row has two columns, we need to first split the client area into a 1×2 splitter window, then split the first row into a 2×1 splitter window (Figure 3-1). Divide the window into row 0 and row 1 Divide row 0 into column 0 and column 1 Figure 3-1. Create irregularly divided splitter window To create static splitter window, first we need to declare CSplitterWnd type variable(s) in the frame window class, then in frame window’s OnCreateClient(…) member function, call functions CSplitterWnd::CreateStatic(…) and CSplitterWnd::CreateView(…). Here, function CSplitterWnd:: CreateStatic(…) is used to split the window into several panes and CSplitterWnd::CreateView(…) is used to attach a view to each pane. 57
- Page 21 and 22: Chapter 1. Tool Bar and Dialog Bar
- Page 23 and 24: Chapter 1. Tool Bar and Dialog Bar
- Page 25 and 26: Chapter 1. Tool Bar and Dialog Bar
- Page 27 and 28: Chapter 1. Tool Bar and Dialog Bar
- Page 29 and 30: Chapter 1. Tool Bar and Dialog Bar
- Page 31 and 32: Chapter 1. Tool Bar and Dialog Bar
- Page 33 and 34: Chapter 1. Tool Bar and Dialog Bar
- Page 35 and 36: Chapter 1. Tool Bar and Dialog Bar
- Page 37 and 38: Chapter 1. Tool Bar and Dialog Bar
- Page 39 and 40: Chapter 1. Tool Bar and Dialog Bar
- Page 41 and 42: Chapter 1. Tool Bar and Dialog Bar
- Page 43 and 44: Chapter 1. Tool Bar and Dialog Bar
- Page 45 and 46: Chapter 1. Tool Bar and Dialog Bar
- Page 47 and 48: Chapter 1. Tool Bar and Dialog Bar
- Page 49 and 50: Chapter 2. Menu Chapter 2 Menu Menu
- Page 51 and 52: Chapter 2. Menu ON_COMMAND(ID_EDIT_
- Page 53 and 54: Chapter 2. Menu “clipboard”. We
- Page 55 and 56: Chapter 2. Menu Using Class CMenu W
- Page 57 and 58: Chapter 2. Menu } After implementin
- Page 59 and 60: Chapter 2. Menu ); UINT nPosition,
- Page 61 and 62: Chapter 2. Menu void CMenuDoc::OnEd
- Page 63 and 64: Chapter 2. Menu } In the sample, bi
- Page 65 and 66: Chapter 2. Menu Message Mapping for
- Page 67 and 68: Chapter 2. Menu We can implement bi
- Page 69 and 70: Chapter 2. Menu CDC *ptrDC; CDC dcM
- Page 71: Chapter 2. Menu Because the popup m
- Page 75 and 76: Chapter 3. Splitter Window function
- Page 77 and 78: Chapter 3. Splitter Window BOOL CSp
- Page 79 and 80: Chapter 3. Splitter Window In the a
- Page 81 and 82: Chapter 3. Splitter Window Sample S
- Page 83 and 84: Chapter 3. Splitter Window WM_LBUTT
- Page 85 and 86: Chapter 4. Button Chapter 4 Buttons
- Page 87 and 88: Chapter 4. Button Use string text a
- Page 89 and 90: Chapter 4. Button function, first t
- Page 91 and 92: Chapter 4. Button Now we can remove
- Page 93 and 94: Chapter 4. Button } ( m_bBmpCheck ?
- Page 95 and 96: Chapter 4. Button using bit-wise AN
- Page 97 and 98: Chapter 4. Button Overriding Functi
- Page 99 and 100: Chapter 4. Button …… First pBit
- Page 101 and 102: Chapter 4. Button Using Class MCBit
- Page 103 and 104: Chapter 4. Button The button’s ID
- Page 105 and 106: Chapter 4. Button However, since me
- Page 107 and 108: Chapter 4. Button Here, we use subc
- Page 109 and 110: Chapter 5. Common Controls command
- Page 111 and 112: Chapter 5. Common Controls ((CSpinB
- Page 113 and 114: Chapter 5. Common Controls } The in
- Page 115 and 116: Chapter 5. Common Controls …… B
- Page 117 and 118: Chapter 5. Common Controls The “S
- Page 119 and 120: Chapter 5. Common Controls button
- Page 121 and 122: Chapter 5. Common Controls In this
Chapter 3. Splitter Window<br />
Chapter 3<br />
Splitter Window<br />
Asplitter window resides within the frame window. It is divided into several panes, each pane can<br />
have a different size. Splitter window provides the user with several different views for monitoring<br />
data contained in the document at the same time. Normally, the size of each pane can be adjusted<br />
freely, this gives the user a better view of data. There are two types of splitter windows: Dynamic<br />
Splitter Window and Static Splitter Window. For a dynamic splitter window, all views within the splitter<br />
window are of the same type. The user can create new panes or remove old panes on the fly. For a static<br />
splitter window, the views could be of different types and the number of panes has to be fixed at the<br />
beginning. In this case, the user can not add or delete views after the program has started.<br />
Both SDI and MDI applications can have splitter windows. In an SDI application, the splitter window<br />
is embedded in the mainframe window. In an MDI application, it is embedded in the child frame window.<br />
3.1 Implementing Static Splitter Windows<br />
In <strong>MFC</strong>, class CSplitterWnd is used to implement window splitting. To split a window into several<br />
panes, we must first declare a CSplitterWnd type variable in the frame window class. One CSplitterWnd<br />
can divide window into M×N sub-panes. The splitter window can be nested, which means we can further<br />
split a single pane into several sub panes by using another CSplitterWnd type variable. So if we want to<br />
create an unevenly divided splitter window, we need to declare more than one CSplitterWnd type<br />
variables.<br />
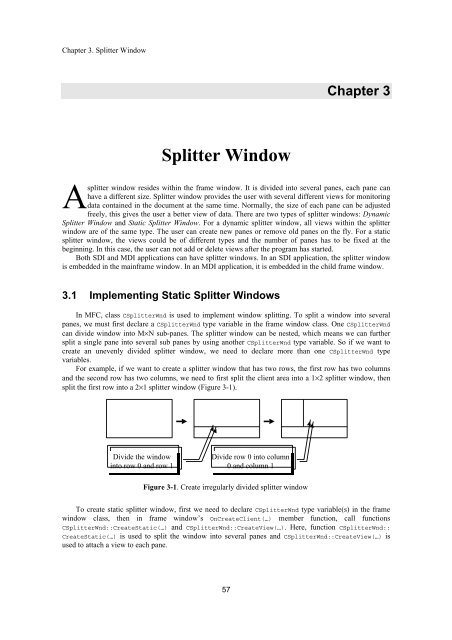
For example, if we want to create a splitter window that has two rows, the first row has two columns<br />
and the second row has two columns, we need to first split the client area into a 1×2 splitter window, then<br />
split the first row into a 2×1 splitter window (Figure 3-1).<br />
Divide the window<br />
into row 0 and row 1<br />
Divide row 0 into column<br />
0 and column 1<br />
Figure 3-1. Create irregularly divided splitter window<br />
To create static splitter window, first we need to declare CSplitterWnd type variable(s) in the frame<br />
window class, then in frame window’s OnCreateClient(…) member function, call functions<br />
CSplitterWnd::CreateStatic(…) and CSplitterWnd::CreateView(…). Here, function CSplitterWnd::<br />
CreateStatic(…) is used to split the window into several panes and CSplitterWnd::CreateView(…) is<br />
used to attach a view to each pane.<br />
57


