How To Install a NoFAB Subframe - Chris Alston's Chassisworks
How To Install a NoFAB Subframe - Chris Alston's Chassisworks
How To Install a NoFAB Subframe - Chris Alston's Chassisworks

You also want an ePaper? Increase the reach of your titles
YUMPU automatically turns print PDFs into web optimized ePapers that Google loves.
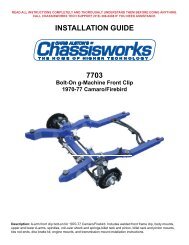
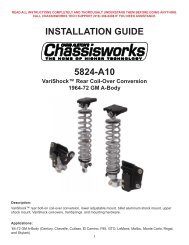
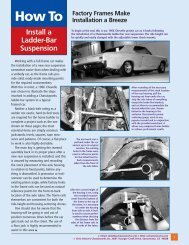
<strong>How</strong> <strong>To</strong><br />
<strong>Install</strong> a NOFAB<br />
<strong>Subframe</strong><br />
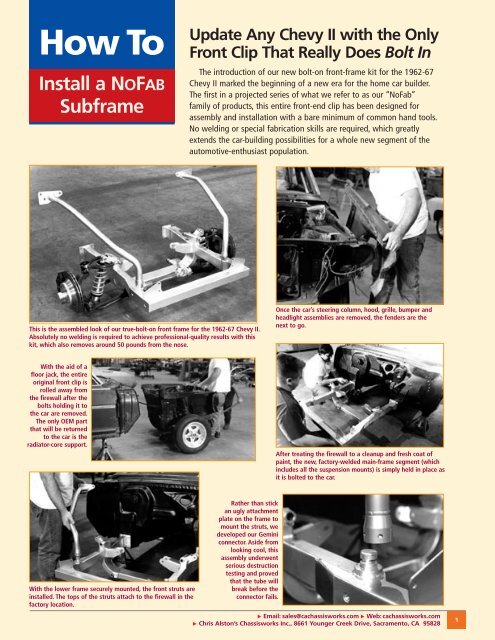
Update Any Chevy II with the Only<br />
Front Clip That Really Does Bolt In<br />
The introduction of our new bolt-on front-frame kit for the 1962-67<br />
Chevy II marked the beginning of a new era for the home car builder.<br />
The first in a projected series of what we refer to as our “NoFab”<br />
family of products, this entire front-end clip has been designed for<br />
assembly and installation with a bare minimum of common hand tools.<br />
No welding or special fabrication skills are required, which greatly<br />
extends the car-building possibilities for a whole new segment of the<br />
automotive-enthusiast population.<br />
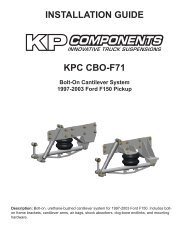
This is the assembled look of our true-bolt-on front frame for the 1962-67 Chevy II.<br />
Absolutely no welding is required to achieve professional-quality results with this<br />
kit, which also removes around 50 pounds from the nose.<br />
Once the car’s steering column, hood, grille, bumper and<br />
headlight assemblies are removed, the fenders are the<br />
next to go.<br />
With the aid of a<br />
floor jack, the entire<br />
original front clip is<br />
rolled away from<br />
the firewall after the<br />
bolts holding it to<br />
the car are removed.<br />
The only OEM part<br />
that will be returned<br />
to the car is the<br />
radiator-core support.<br />
After treating the firewall to a cleanup and fresh coat of<br />
paint, the new, factory-welded main-frame segment (which<br />
includes all the suspension mounts) is simply held in place as<br />
it is bolted to the car.<br />
With the lower frame securely mounted, the front struts are<br />
installed. The tops of the struts attach to the firewall in the<br />
factory location.<br />
Rather than stick<br />
an ugly attachment<br />
plate on the frame to<br />
mount the struts, we<br />
developed our Gemini<br />
connector. Aside from<br />
looking cool, this<br />
assembly underwent<br />
serious destruction<br />
testing and proved<br />
that the tube will<br />
break before the<br />
connector fails.<br />
Email: sales@cachassisworks.com Web: cachassisworks.com<br />
<strong>Chris</strong> Alston’s <strong>Chassisworks</strong> Inc., 8661 Younger Creek Drive, Sacramento, CA 95828<br />
1
Special high-strength-steel, socket-head Allen bolts are used to<br />
secure the struts solidly to the frame.<br />
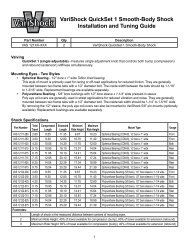
<strong>How</strong> <strong>To</strong><br />
<strong>Install</strong> a NOFAB <strong>Subframe</strong><br />
Rather than dealing with<br />
the compromises involved<br />
in trying to make existing<br />
stock or aftermarket parts<br />
fit, we chose to start over.<br />
By utilizing the industry’s<br />
most-sophisticated workstation<br />
computers, we created an entire product line. Prior to the<br />
revolution in computerized design and manufacturing, a project<br />
like this would have been impossible for anyone not linked with<br />
the Detroit automakers.<br />
<strong>How</strong>ever, <strong>Chassisworks</strong> now has computing power that far<br />
The radiator-core support simply slides in place behind the<br />
mounting tabs on each side of the front crossmember.<br />
Our preformed and predrilled aluminum inner splash panels slide down<br />
into place...<br />
...and the fender/hood-hinge mount goes in next, under the splash<br />
panel and over the radiator-core support and upper strut mount.<br />
No welding, but some drilling required. The holes drilled into the<br />
frame, through the slots in the inner splash panels, are then tapped<br />
for the 10-32 stainless screws that are provided.<br />
2<br />
Our precut, rubber splash-panel boots are custom formed to fit<br />
around the suspension components; they are installed on the<br />
outer side of the panel.<br />
Order: 800-722-2269 Technical Assistance/Customer Service: 916-388-0288<br />
<strong>Chris</strong> Alston’s <strong>Chassisworks</strong> Inc., 8661 Younger Creek Drive, Sacramento, CA 95828<br />
It’s amazing what can be achieved these days without a welder.<br />
The abundant space in the engine bay is also readily apparent.
surpasses anything Detroit possessed when<br />
these cars were built! We also have extremely<br />
sophisticated CNC milling centers in our facility<br />
— and we aren’t afraid to use them! Just<br />
about every part in this kit simply did not<br />
exist before we got started with this project,<br />
and everything has been designed specifically<br />
for this<br />
purpose. In fact, more than 400 new parts<br />
were created in the process.<br />
Instead of providing a set of blueprints<br />
that might intimidate the first-time builder,<br />
our NoFab kits come with photo-illustrated<br />
installation books that show literally every<br />
step in the conversion. The photos presented<br />
With its various<br />
angles and the<br />
curved top, it took<br />
a lot of time and<br />
effort to design and<br />
manufacture the<br />
fender/hood-hinge<br />
mount. <strong>How</strong>ever, the<br />
result is a perfect fit,<br />
especially with the<br />
fender.<br />
The A-arms<br />
used in this kit<br />
are constructed<br />
out of stainless<br />
steel. The<br />
upper arms<br />
are adjustable<br />
for alignment<br />
purposes.<br />
The Nova’s original sheet metal lined right up when everything went back<br />
together. It did take all of about five minutes to align the hood, though.<br />
The raw spindle castings are delivered to our shop, where all<br />
machining operations take place on one pass through a Mazak<br />
machining center.<br />
Stainless-steel pivot studs are used to secure the A-arms<br />
to the frame, and the precisely located set screws fit into<br />
the channel in the studs.<br />
With a shock<br />
simulator in<br />
place, the<br />
spindle is<br />
mounted to<br />
the A-arms.<br />
Our steering-rack mounts are both foolproof and strong. A raised section<br />
on the back of the billet clamp fits into the machined area of the factorywelded,<br />
crossmember-mounted boss.<br />
Email: sales@cachassisworks.com Web: cachassisworks.com<br />
<strong>Chris</strong> Alston’s <strong>Chassisworks</strong> Inc., 8661 Younger Creek Drive, Sacramento, CA 95828<br />
3
The rack assembly can be rotated in its mounts to provide the best<br />
angle for the steering-rack input shaft.<br />
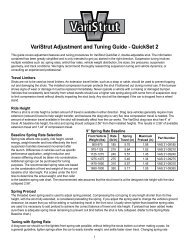
<strong>How</strong> <strong>To</strong><br />
<strong>Install</strong> a NOFAB <strong>Subframe</strong><br />
here have been pulled<br />
from the instructions<br />
just to give an<br />
overview of the steps<br />
involved; approximately<br />
300 additional photos<br />
appear in the books!<br />
The development<br />
of this kit has taken<br />
us down routes that will serve hot rodders well in the<br />
coming years. By simply changing the width of the front<br />
crossmember itself, the stainless-steel, crossmembermounted<br />
A-arm-suspension components will fit into a wide<br />
The antiroll bar is an important part of the handling package of this kit.<br />
After the urethane bushings are smeared with grease and<br />
installed on the antiroll bar, it is brought up in place from<br />
under the car...<br />
...and secured in place with the billet clamps.<br />
We manufacture the antiroll-bar-link eyebolts in-house. Urethane bushings<br />
are again used, and the eyebolt mounts to the pad visible on the lower<br />
A-arm. Also visible is the tie-rod end.<br />
After greasing the balljoints, the zerk fittings are removed. These<br />
stainless-steel caps are secured with countersunk stainless screws.<br />
After checking the suspension, adjustable coil-over shocks are<br />
installed.<br />
4<br />
Order: 800-722-2269 Technical Assistance/Customer Service: 916-388-0288<br />
<strong>Chris</strong> Alston’s <strong>Chassisworks</strong> Inc., 8661 Younger Creek Drive, Sacramento, CA 95828
variety of cars, as will our new billet-aluminum<br />
hubs and cast-iron spindles and rotors.<br />
We also designed and now manufacture our<br />
own billet steering rack — one that provides<br />
extra ground clearance while also allowing<br />
proper bump-steer control. The first rack in the<br />
industry built specifically for street machines, it<br />
is available in one-inch increments from 15.5<br />
to 29.5 inches wide,<br />
to fit any car with a front-hub width that<br />
measures between 51 and 65 inches.<br />
This endeavor also led us into manufacturing<br />
our own headers specifically for NoFab<br />
installations. After expending enormous time<br />
and resources to achieve and refine the ease<br />
of installation for this NoFab kit, leaving our<br />
customers on their own at this point made<br />
no sense. Consequently, we have developed<br />
equal-length-style headers for big- and<br />
small-blocks that clear all <strong>Chassisworks</strong><br />
frame, suspension and steering components.<br />
(An aftermarket “mini-starter” must be used.)<br />
The vehicle undergoing the transformation<br />
in these photos, a 1963 Chevy II Nova, was<br />
a long-running project car (“Saturday Night<br />
Special”) commissioned by Super Chevy<br />
magazine. During its extended stay in our<br />
Our new, billet-aluminum hubs have threaded stud-mounting holes for both<br />
4-1/2- and 4-3/4-inch bolt circles. We recommend that all threads should always<br />
be chased before use.<br />
Our 11-3/4-inch, vented rotors are directional, and drilled for both<br />
bolt circles.<br />
After greasing and installing the wheel bearings and mounting the hub/<br />
rotor assembly on the spindle, a dust cap is screwed hand-tight onto the<br />
hub; an internal O-ring will keep it from coming loose.<br />
These are the contents of the 1962-66 Chevy II steering-column kit. (The 1967<br />
steering column requires a column adapter, which is provided.)<br />
After holes are drilled into the end of the steering column,<br />
our bushing is installed flush with the end of the column and<br />
secured with blind rivets.<br />
Email: sales@cachassisworks.com Web: cachassisworks.com<br />
<strong>Chris</strong> Alston’s <strong>Chassisworks</strong> Inc., 8661 Younger Creek Drive, Sacramento, CA 95828<br />
5
The new bracket bolts to the firewall from inside the passenger<br />
compartment. A clamp secures the tab of the bracket to the steering<br />
column itself.<br />
After a bit of time with a tape measure and hacksaw, the steering<br />
linkage is complete.<br />
A steel sleeve<br />
rides inside the<br />
urethane bushings<br />
of our new, billetaluminum<br />
motor<br />
mounts.<br />
Shown here is a Bolt<br />
in midplate for the<br />
Lakewood bellhousing,<br />
also available is a<br />
midplate for automatic<br />
transmissions.<br />
The brackets are<br />
attached to the<br />
back side of the<br />
frame mounts,<br />
using the two<br />
inner frame bolts<br />
on each side.<br />
These mounting brackets are used to connect the<br />
midplate to the lower frame mounts.<br />
...and the<br />
midplate mounts<br />
loosely secured.<br />
The motor is carefully guided into place...<br />
6<br />
Order: 800-722-2269 Technical Assistance/Customer Service: 916-388-0288<br />
<strong>Chris</strong> Alston’s <strong>Chassisworks</strong> Inc., 8661 Younger Creek Drive, Sacramento, CA 95828
<strong>How</strong> <strong>To</strong><br />
<strong>Install</strong> a NOFAB <strong>Subframe</strong><br />
chassis shop, this Nova also received our<br />
4-link rear suspension and subframe kit;<br />
FAB9 rearend housing; 10-point roll cage<br />
with swing-out sidebars; and new, wheeltubbed<br />
“tin” interior (with a steel driveshaft<br />
tunnel).<br />
A blown, 421-inch small-block will be<br />
riding up front when the Saturday Night<br />
Special returns to the streets and hits the<br />
dragstrips. This mighty mouse is backed<br />
by a Jerico 4-speed manual transmission.<br />
For high-horsepower applications, we<br />
offer a motor-plate version of the NoFab<br />
front frame, in either big- or small-block<br />
configurations, along with pre-cut and<br />
pre-formed aluminum plates for both ends<br />
of the motor.<br />
As mentioned, this Chevy II kit was<br />
merely the first of an entire series of<br />
high-tech, NoFab installation packages.<br />
The same quality and ease of installation<br />
are now available to anyone inclined to<br />
replace the front clip of a first-generation<br />
Camaro-Firebird or a 1968-72 Nova.<br />
Stainless-steel, socket-head<br />
Allen bolts and locknuts are<br />
the fasteners provided in the<br />
motor-mount kit, but we also<br />
offer these optional, stainless<br />
button-head “spuds” for those<br />
who wish to dress things up.<br />
The precision length<br />
of the spuds causes<br />
them to bottom<br />
out against each<br />
other before the<br />
motor-mount saddle<br />
can distort and<br />
squeeze the bushings<br />
excessively.<br />
This small-block, front motor-plate kit comes compete<br />
with the same stainless-steel, button-head Allen bolts<br />
that are used throughout the new bolt-on front end.<br />
The billet plate is milled out of 6061-T6 aluminum.<br />
This shot from under the car shows another view of just about everything we’ve installed,<br />
plus the Wilwood brake calipers used with our rotors.<br />
The bracket for attaching the motor plate to the frame<br />
can be seen just ahead of the crossmember. This bracket<br />
replaces the side-mount hardware, which is attached to<br />
the crossmember itself.<br />
<strong>Chris</strong> Alston demonstrated his hands-on approach to this new product line many<br />
times during these photo sessions. When an extra pair of hands was needed to get<br />
the block in place, the <strong>Chassisworks</strong> president was there.<br />
Email: sales@cachassisworks.com Web: cachassisworks.com<br />
<strong>Chris</strong> Alston’s <strong>Chassisworks</strong> Inc., 8661 Younger Creek Drive, Sacramento, CA 95828<br />
7
This is the header kit that was developed specifically for this application.<br />
Note the sexy, machine-formed (not welded) primary pipes.<br />
The view down the driver’s side of the motor shows how the headers<br />
have been contoured to clear the steering linkage and frame...<br />
...while the passenger side clears the aftermarket mini-starter.<br />
With this Nova back on the ground and rolled outside, the ground<br />
clearance under the headers is evident.<br />
We’re throwing this shot<br />
in just in case anyone<br />
wondered what a blown<br />
motor would look like in<br />
this new front end.<br />
8<br />
Why is this man standing on a box? <strong>Chris</strong> Alston Jr. demonstrates the<br />
strength of the pallet-attached shipping carton that contains all of our<br />
front-frame and suspension components.<br />
Order: 800-722-2269 Technical Assistance/Customer Service: 916-388-0288<br />
<strong>Chris</strong> Alston’s <strong>Chassisworks</strong> Inc., 8661 Younger Creek Drive, Sacramento, CA 95828<br />
An entire production run of our bolt-on front frames is lined up,<br />
awaiting shipment, to Chevy II owners.<br />
<strong>How</strong><strong>To</strong>-006_0204