Download PDF - Bernina
Download PDF - Bernina
Download PDF - Bernina

Create successful ePaper yourself
Turn your PDF publications into a flip-book with our unique Google optimized e-Paper software.
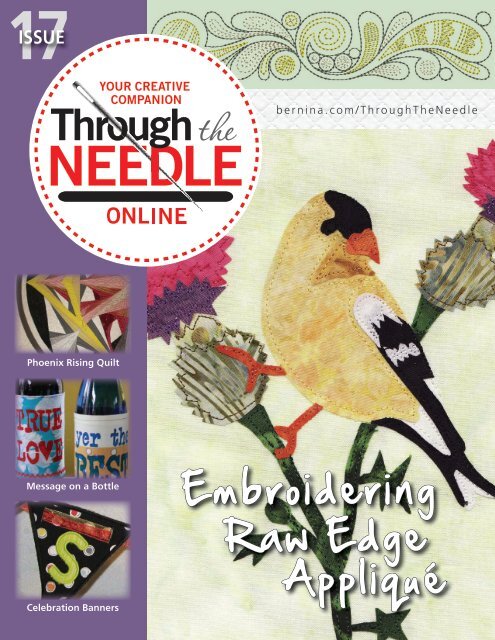
17<br />
ISSUE<br />
bernina.com/ThroughTheNeedle<br />
Phoenix Rising Quilt<br />
Message on a Bottle<br />
Embroidering<br />
Raw Edge<br />
Appliqué<br />
Celebration Banners
2 • THROUGH THE NEEDLE ONLINE<br />
Table of Contents<br />
Phoenix Rising<br />
4 Every “curve” of RaNae Merrill’s circular mandala design is created with<br />
straight lines of stitching. Two similar but different wedges – filled with<br />
twisted log cabin, or “spiral,” blocks – combine in mirror symmetry to<br />
produce the completed mandala.<br />
Embroidering Raw Edge Appliqué<br />
9 Stitching the outlines of raw edge appliqués with intricate details can be<br />
challenging and tedious. Why not let your embroidery machine stitch them<br />
for you instead? Patrice Denault’s clever appliqué technique features the<br />
manual digitizing tools in BERNINA Embroidery Software 6.<br />
Message on a Bottle<br />
12 Taking a bottle of wine or other beverage to a party? Add a fun message<br />
for the host with a sleeve that slides right over the label. Fonts from Jen<br />
Swearington’s 1960s Olivetti Underwood typewriter embellish labels<br />
constructed from vintage fabrics and trims.<br />
Lilified Beach Caftan<br />
14 Elva Mungai’s pretty caftan, embellished with “Lilified” appliqué designs<br />
from BERNINA Exclusive Collection #82003, is the perfect cover-up for your<br />
next pool party or trip to the beach. The bonus tote features an appliquéd<br />
monogram from the same collection.<br />
Accessory Spotlight: BERNINA Stitch Regulator #42<br />
18 The BERNINA Stitch Regulator (BSR) is a revolutionary aid to the creative<br />
sewer, making it easy to master the art of free-motion stitching, a technique<br />
that offers more creative options than almost any other type of sewing.<br />
Celebration Pennants<br />
20 Celebrate any special occasion – or person – with these cheerful pennants<br />
made completely in the hoop! Not only are they easy to make following<br />
Mary Beck’s directions; they’re re-usable, too.<br />
Quilted Circles<br />
24 Kathy Seymour shares instructions for joining perfect double-layer circles<br />
to make beautifully-shaped table runners. Using Circular Embroidery<br />
Attachment #83 in tandem with Walking Foot #50 makes it easy.<br />
The Last Word<br />
26 Valuable coupons, a list of quick links, and a sneak peek inside the next<br />
issue of Through the Needle ONLINE.<br />
Fab Feathers<br />
Collection 21008<br />
© OESD 2013<br />
did you know?<br />
If you see this symbol,<br />
simply click on it to<br />
view a video<br />
on related<br />
material!<br />
Managing Editor / Creative Director<br />
Jo Leichte<br />
Contributing Editor<br />
Barbara Weiland Talbert<br />
Graphic Artist<br />
Lisa Klingbeil<br />
Contributing Authors<br />
Susan Beck<br />
Elva Mungai<br />
Through the Needle Online is published six<br />
times a year by BERNINA of America, Inc. for<br />
machine stitchers and embroiderers of all types<br />
and all skill levels.<br />
This publication may be shared and reproduced in<br />
its original format, with the stipulation that credit<br />
be given to Through the Needle Online.<br />
3702 Prairie Lake Court, Aurora, IL 60504<br />
www.bernina.com/ThroughTheNeedle<br />
©BERNINA of America, 2013
ISSUE 17 • 3<br />
Needle Notes<br />
For many of us, May brings warm breezes, budding leaves, and blooming flowers. The end of winter is cause for<br />
making merry, and this issue of Through the Needle ONLINE is all about celebrating.<br />
The phoenix, an ancient symbol of rebirth and renewal, is the inspiration for ReNae Merrill’s foundation-pieced<br />
mandala. The intricate swirling design appears to require complicated sewing, but look more closely; all those<br />
complex curves are composed of straight lines. Based on a twisted log cabin block, the spiral designs aren’t so<br />
challenging to stitch after all.<br />
Patrice Denault captures the beauty of nature in her exquisite bird appliqués. Such perfectly placed free-motion<br />
outlines must require years of practice and experience to achieve, don’t you think? But, no – they’re not free-motion<br />
after all! Patrice shares her technique for digitizing raw edge appliqué in BERNINA Embroidery Software 6. Perfect<br />
results every time!<br />
Make any day a special occasion. Visiting friends? Take along a bottled beverage with a hand-crafted label; Jen<br />
Swearington shows how with her stenciled vintage-fabric label covers. Create a party atmosphere with Mary Beck’s<br />
festive Celebration Pennants. Don’t stop at birthdays and anniversaries; celebrate everyday events such as sports<br />
meets and music recitals, too.<br />
If you’re lucky enough to live in – or visit – a sun-drenched climate, treat yourself to an embellished beach caftan.<br />
Elva Mungai’s one-size-fits-most cover-up features summery appliqué and embroidery from the new BERNINA<br />
Exclusive Lilified Collection #82003; the matching monogrammed tote is a special bonus download from<br />
bernina.com/ThroughTheNeedle.<br />
For an easy-to-stitch décor update, set up your sewing machine with Circular Embroidery<br />
Attachment #83 and stitch Kathleen Seymour’s Quilted Circles Runner. So simple, you’ll<br />
want one for every season of the year. They’re also a great stash-buster!<br />
How do you celebrate spring? I’d love to see what you’re making! Jo<br />
Jo Leichte<br />
Editor<br />
Bohemian Shoulder Bag<br />
Project from Inspiration Magazine and WeAllSew<br />
Looking for a fun and practical project for sewers of all levels? This coollooking<br />
bag goes from super simple to super trendy with plenty of options for<br />
embellishment. Enjoy playing with decorative stitches on your machine and<br />
splash some color in the process. Walk away (and around!) with a casual bag<br />
that shows some serious groove.
4 • THROUGH THE NEEDLE ONLINE<br />
quilting<br />
PROJECT<br />
Phoenix Rising<br />
by RANAE MERRILL<br />
Based on her book<br />
Magnificent Spiral Mandala Quilts<br />
Finished Quilt size: 30” square<br />
Finished Mandala size: 20” diameter<br />
It’s hard to believe, but there are no curved seams in this quilt.<br />
Every curve within the circular mandala design is created with<br />
a twisted log cabin – or “spiral” – block, sewn in straight lines.<br />
Rather than building from a square block, the basic structure of<br />
the design is a wedge – like a slice of pie – filled with spiral blocks.<br />
Two similar but different wedges combine in mirror symmetry to<br />
produce the design. If you can sew a straight line, if you can make<br />
a Log Cabin block…you can make this quilt.
ISSUE 17 • 5<br />
Fabric, Value Comparison, and Cutting List<br />
To achieve a look similar to the quilt shown, select<br />
fabrics with the values indicated in the chart (right).<br />
Supplies<br />
• <strong>Download</strong> bonus files at<br />
BERNINA.com/ThroughTheNeedle<br />
• White, gray, pink, and yellow fabrics as listed in<br />
the chart (right); cut into strips as indicated*<br />
• One 36” square of batting<br />
• Eight 8½” x 11” EQ Printable Foundation<br />
Sheets<br />
• Four 8½” x 11” sheets of white paper<br />
• Small index card or piece of cardstock<br />
• Double-sided tape<br />
• Blue painters tape<br />
• Fabric glue stick (optional)<br />
• Highlighters in assorted colors<br />
• Iron or seam roller<br />
• Add-a-Quarter or Add-an-Eighth tool<br />
• Rotary cutter and mat<br />
*The list of strip cuts given here is a guide,<br />
based on grouping templates of the same height<br />
together on the same strip, with ¼”-wide seam<br />
allowances on all sides. Yardage is the minimum<br />
amount of 44”-wide fabric needed based on this<br />
cutting technique, rounded up to the nearest ⅛<br />
yard. Please purchase additional fabric if you cut<br />
generously and/or want “insurance.”<br />
WOF= Width of Fabric<br />
Color Amount Cutting Instructions<br />
(44" Width of Fabric/WOF)<br />
White 7/8 yard 1 strip, 1¾” x WOF (Spirals)<br />
1 strip, 2” x WOF (Spirals)<br />
1 square, 27” x 27” (Background)<br />
5 strips, 1” x 27”, join and cut into 4<br />
equal strips (Border 2)<br />
White Sparkle ⅛ yard 1 strip, 1¾” x WOF<br />
Solid Black 1⅜ yards 5 strips, 1½” x WOF (Spirals)<br />
4 strips, 1¾” x WOF (Border 3)<br />
4 strips, 2¼” x WOF; join with bias<br />
seams into one continuous strip<br />
(Binding)<br />
1 square, 22” x 22” (facing<br />
for finished mandala)<br />
Bright Yellow ⅛ yard 2 strips, 1¼” x WOF (Spirals)<br />
1 strip, 1½” x WOF (Spirals)<br />
Dark Yellow ⅛ yard 2 strips, 1¼” x WOF (Spirals)<br />
Solid Dark Gray (Gray #5) ¾ yard 3 strips, 1¼” x WOF (Spirals)<br />
4 strips, 1” x WOF (Border 1)<br />
Bias strips, 1⅝” wide; cut enough<br />
to join with bias seams into one<br />
continuous strip measuring 70” long<br />
(Circle around Mandala)<br />
Dark Medium Gray (Gray #4) ⅛ yard 1 strip, 1¼” x WOF (Spirals)<br />
Medium Gray (Gray #3) ⅛ yard 1 strip, 1¼” x WOF (Spirals)<br />
Light Medium Gray (Gray #2) ⅛ yard 2 strips, 1½” x WOF (Spirals)<br />
Light Gray (Gray #1) ⅛ yard 1 strip, 1” x WOF (Spirals)<br />
1 strip, 1½” x WOF (Spirals)<br />
Very Dark Red ⅛ yard 1 strip, 1½” x WOF (Spirals)<br />
Dark Pink (Pink #1) ⅛ yard 1 strip, 1” x WOF (Spirals)<br />
1 strip, 1¼” x WOF (Spirals)<br />
1 strip, 1⅝” x WOF (Spirals)<br />
Medium Pink (Pink #2) ⅛ yard 1 strip, 1¼” x WOF (Spirals)<br />
1 strip, 1⅝” x WOF (Spirals)<br />
Light Pink (Pink #3) ⅛ yard 1 strip, 1¼” x WOF (Spirals)<br />
1 strip, 1⅝” x WOF (Spirals)<br />
Fabric for backing and<br />
hanging sleeve<br />
1 yard 1 square, 36” x 36”<br />
Use remainder for hanging sleeve<br />
Prepare Foundations and Cutting Templates<br />
There are two different wedges in this mandala – Wedge<br />
A and Wedge B. Wedge A contains Spirals V, W and X;<br />
Wedge B contains Spirals Y and Z.<br />
There are four wedges on the vertical axis (B & BR) and<br />
four wedges on the horizontal axis (A & AR). In each set<br />
of four wedges, two are in original orientation (A, B) and<br />
two are in reverse (mirror-image) orientation (AR, BR). The<br />
templates provided are in original orientation. For reverse<br />
orientation, print the templates on translucent foundation,<br />
turn them over, and mark “R” on the backs. These are the<br />
fronts of the reverse foundation pieces. There is no need to<br />
make two sets of cutting templates, because all fabric is cut<br />
into rectangular strips, not triangles, and will work in either<br />
original or reverse orientation.
6 • THROUGH THE NEEDLE ONLINE<br />
On white paper, print two copies of Wedge A (Spirals<br />
V/W/X) and two copies of Wedge B (Spirals Y/Z). Keep a<br />
copy of each wedge for a master template copy and use<br />
the other copy for cutting templates.<br />
On translucent foundation material, print four copies<br />
of Wedge A (Spirals V/W/X) and four copies of Wedge<br />
B (Spirals Y/Z). Turn over two of each spiral foundation<br />
and mark “REVERSE.” Cut apart the individual spirals,<br />
leaving at least ¼” excess foundation beyond all edges.<br />
Cover the back of one white paper copy of each spiral<br />
template with double-sided tape spaced ⅛” to ¼”<br />
apart. Don’t stretch the tape as you stick it down or<br />
it will cause the templates to pucker. (If you do get a<br />
pucker, slit the tape behind it with sharp scissors or a<br />
seam ripper and smooth it flat.)<br />
Place the rotary cutting ruler over the templates, with<br />
the edge ¼” above the peak of the highest triangle in<br />
the row. (Don’t cut pieces larger than this – the excess<br />
fabric gets in the way when sewing.)<br />
Cut a strip across the width of the fabric (WOF). If<br />
necessary, cut enough additional strips of the same<br />
width so that you have 4 layers of fabric for each<br />
cutting template.<br />
Cut the Pieces<br />
Gather all of the fabrics for the spirals. Square off one<br />
cut edge of each fabric and lay them all on the table.<br />
Cut each spiral into its separate triangles and center. As<br />
you cut the triangles apart, sort the cutting templates<br />
on their corresponding fabrics.<br />
Stack the strips, and then cut apart the triangle<br />
templates leaving at least ¼” of fabric beyond each end<br />
of each template. Pin or clip each group together. Sort<br />
the stacks by spiral, so all the X’s are grouped together,<br />
all the Y’s, etc. Within each spiral group, arrange the<br />
stacks in alphabetical order – A1, A2, A3, etc., then B1,<br />
B2, B3 and so forth.<br />
Now work with one fabric at a time. Lay the fabric<br />
on a cutting mat with the squared edge toward you.<br />
The fabric can be folded in layers. (Be careful that the<br />
templates don’t fall off as you handle the fabric.)<br />
Position the cutting templates on the fabric ¾” apart<br />
with the labeled edge ¼” from the cut edge of the<br />
fabric. (A generous thumb width between them is just<br />
right.) Group the templates so that triangles of the<br />
same height are on the same strip.<br />
Sew the Nesting Spirals<br />
Sew the spirals following the instructions on the<br />
following pages, working in groups of four (two<br />
original, two reverse).
ISSUE 17 • 7<br />
Note: The photos here are from RaNae’s book<br />
Magnificent Spiral Mandala Quilts, so they do not<br />
match this project. However, the techniques described<br />
and shown are correct for sewing this project.<br />
Nesting spirals are constructed by sewing rings of<br />
triangles from the center to the outer edges.<br />
1. Set the Center<br />
Place a rolled piece of painter’s tape or a dab of fabric<br />
glue on the front of the foundation in the center.<br />
(Don’t use double-sided tape here. It’s easy to forget<br />
and difficult to remove.) If the center is not pieced or<br />
fussy-cut, simply place the center fabric face up over the<br />
center area on the front of the foundation.<br />
Do a “next step<br />
trim” (see sidebar for<br />
instructions) around the<br />
center to trim the fabric<br />
to size and set up the<br />
seam allowances for<br />
Ring A.<br />
Next Step Trim<br />
A “next step trim” cuts the rectangular strips of<br />
fabric down to the shapes of the center and the<br />
triangles in the spiral. At the same time, it sets up<br />
the correct seam allowance for the next ring of<br />
triangles. Do a “next step trim” around the center to<br />
begin, setting up the<br />
seam allowances the<br />
first ring.<br />
On the back of the<br />
foundation, highlight<br />
the seam line for the<br />
first ring (“A” ring) of<br />
triangles.<br />
Place an index card along the highlighted line and<br />
fold the foundation back over it. The fabric should<br />
extend beyond the folded edge of the foundation.<br />
2. Ring A<br />
Position the fabric for Triangle A1 face down on the<br />
front of the foundation. Align the long side of the strip<br />
with the edge of the center. Tape the fabric strip into<br />
position with painter’s tape. The picture shows three<br />
pieces of fabric in place at the same time; multiple strips<br />
can be sewn at the same time as long as they are not<br />
adjacent to each other in the ring.<br />
Place the Add-a-Quarter or Add-an-Eighth tool along<br />
the edge of the fold and trim the excess fabric with<br />
the rotary cutter.<br />
Here is the center<br />
of a spiral after its<br />
“next step trim.”<br />
It is trimmed<br />
to shape and it<br />
has ¼” seam<br />
allowances on all<br />
sides.<br />
3. Stitch Along the Seamline<br />
Turn the foundation over<br />
and stitch from the back<br />
along the seam line for<br />
Triangle A1. Begin and<br />
end the seam two or three<br />
stitches beyond each end<br />
of the line.
8 • THROUGH THE NEEDLE ONLINE<br />
4. Turn and Press<br />
Flip the fabric strip right-side<br />
up into position and press<br />
with an iron or seam roller.<br />
Hold onto the extra fabric<br />
of the rectangular strip and<br />
gently tug the fabric back<br />
until you can see the stitches,<br />
and then press. This is critical<br />
for having smooth edges on<br />
the spiral spokes.<br />
Tip: When pressing spirals,<br />
move the iron from the center<br />
toward the edge so the fabric<br />
is pressed back along the<br />
seam. If you see “hooks” on<br />
the spoke edges, the most<br />
likely reason is that the fabric<br />
is folded over the seam line.<br />
If necessary, tape the<br />
loose edge of the pressed<br />
fabric to the foundation<br />
to prevent it from slipping<br />
back over the seam line or<br />
getting caught in another<br />
seam.<br />
5. Ring A, Remaining Triangles<br />
Repeat steps 2-4 to sew each triangle in Ring A in<br />
numerical order on the front of the foundation.<br />
6. Do a “Next Step Trim”<br />
Do a “next step trim” to remove excess fabric and set<br />
up the seam allowances for the next ring of triangles.<br />
To avoid confusion, highlight the next seam line with<br />
a different color than the<br />
previous one. (When you<br />
do the “next step trim” for<br />
the next ring of triangles<br />
after that, use the first<br />
color highlighter to avoid<br />
confusing seam lines.)<br />
Tip: Watch out! As you work through the rings of the<br />
spiral, be careful not to fold back the foundation along<br />
the line of stitching that you just sewed. If you do, you<br />
will cut off all the pieces you just sewed on, and you<br />
will have to re-cut and re-sew all the cut-off pieces.<br />
Make sure there is NO stitching on the line where you<br />
set your card. If this happens, give yourself a chocolate<br />
break to calm down before attempting to fix it!<br />
7. Ring B and Remaining Outer Rings<br />
Repeat steps 2-6 for each ring of triangles, moving out<br />
from the center. Carefully follow the color placements<br />
as marked on the foundations. As you add rings to the<br />
spiral, you will see the spokes grow and curve.<br />
When you complete the spiral, trim ¼” beyond the<br />
outside line of the spiral leaving a seam allowance to<br />
join the spirals. Do not remove the foundation.<br />
If you are using foundation material that will remain in<br />
the quilt, remove the tape in the center of the spiral by<br />
tearing away only the center of the foundation.<br />
Assemble the Mandala<br />
Before sewing the spirals together, arrange them with<br />
the background pieces in their final positions. Refer<br />
to the photo at the beginning of this article and the<br />
diagram included with the templates for positioning.<br />
1. Join the spirals to make eight wedges: Two A<br />
wedges, two AR wedges, two B wedges, and two<br />
BR wedges.<br />
Note: Even though you will leave the foundation in the<br />
mandala, reduce bulk at the corners by removing the<br />
paper where the seams intersect. Sew the first seam<br />
with the foundation in, and then remove the corner of<br />
the foundation before sewing the second seam.<br />
1. Join each Wedge A to a Wedge AR and each Wedge<br />
B to a Wedge BR to make four quarter circles.<br />
2. Join the quarter circles into half circles, and then join<br />
the halves to complete the circle.<br />
Your mandala is finished! To complete your<br />
Rising Phoenix quilt, download the instructions<br />
at bernina.com/ThroughTheNeedle.<br />
RaNae Merrill<br />
RaNae Merrill is an awardwinning<br />
quilter, author and<br />
teacher. Her unique "spiral"<br />
quilts have appeared in national<br />
shows and magazines, and her<br />
two books Simply Amazing<br />
Spiral Quilts and Magnificent<br />
Spiral Mandala Quilts have<br />
already become quilting<br />
classics. RaNae designs quilts<br />
and patterns, writes quilting<br />
books and teaches workshops<br />
in the USA and abroad – in both English and Spanish.<br />
http://www.ranaemerrillquilts.com/<br />
http://spiromandalas.wordpress.com/<br />
http://spiromaniacs.wordpress.com/
ISSUE 17 • 9<br />
software<br />
PROJECT<br />
Embroidering<br />
Raw Edge Appliqué<br />
by PATRICE DENAULT<br />
Stitching the outlines of raw edge appliqués with<br />
intricate details can be challenging and tedious. No<br />
matter how careful you are, there are bound to be<br />
some places where you’re just not happy with the<br />
stitching. Why not let your embroidery machine<br />
stitch them for you instead? Construct and scan your<br />
appliqué, and then digitize the stitched outlines and<br />
reference points using the manual digitizing tools in<br />
BERNINA Embroidery Software 6. You’ll be able to<br />
tweak the placement of every stitch for perfect, precise<br />
outlines and details!<br />
This is a great method for sewing down the raw edges<br />
of artistic appliqués.<br />
For this technique you’ll need to invest in a few things,<br />
some of which you may already have:<br />
• BERNINA DesignerPlus Embroidery Software 6<br />
• Flatbed scanner (a Canon All In One MP600 was used<br />
for this project)<br />
• Light box<br />
• Fusible embroidery stabilizer<br />
• BERNINA 830 sewing/embroidery machine and Jumbo<br />
hoop*<br />
*I used my BERNINA 830 and Jumbo Hoop when<br />
digitizing my bird appliqués, but his technique can<br />
be used with any embroidery machine and hoop,<br />
regardless of size; you will just have to identify smaller<br />
sections of your design that are the right size for the<br />
hoop you will be using.<br />
Before you start you’ll need to compose your appliqué<br />
design. I prepare my appliqué fabrics by affixing Lite<br />
Steam-a-Seam 2 to the wrong side of each one. Then<br />
I work from my drawings, cutting and layering fabric<br />
shapes on the background fabric to compose the<br />
design. Because Steam-a-Seam 2 is sticky on both sides,<br />
I can reposition elements as desired without worrying<br />
about the other pieces shifting. When all the pieces are<br />
in place, I fuse them to the background fabric.
10 • THROUGH THE NEEDLE ONLINE<br />
Once you have completed your appliqué design,<br />
carefully place it upside down on the flatbed scanner.<br />
Scan your design at actual size. Do not adjust the size of<br />
the scan; it is important that the size remains the same,<br />
as the scan will be used as a template for digitizing the<br />
embroidery design. Save the scanned image.<br />
Open DesignerPlus and select the Art Canvas tab. Click<br />
on the Load Picture icon and open the saved scan<br />
of your appliqué design. Press the Enter key on the<br />
keyboard to place the image in the center of the work<br />
area; do not resize it.<br />
With the object selected, select Bitmap > Convert to<br />
Bitmap > OK.<br />
Once the design is converted, select the Embroidery<br />
Canvas tab.<br />
Right click on the Show Hoop icon and select your<br />
embroidery hoop; in this case, Jumbo Hoop #26.<br />
Save your completed appliqué design and transfer it to<br />
your embroidery machine.<br />
Hoop just the fusible stabilizer, fusible side up. Put the<br />
hoop on the machine and embroider just the anchor<br />
points.<br />
Remove the hoop from<br />
the machine and place<br />
it on your light box.<br />
Carefully place your<br />
assembled appliqué<br />
design on the hooped<br />
stabilizer; you will be<br />
able to see the anchor<br />
points through the<br />
fabric and use them<br />
to precisely position<br />
the appliqué. Fuse<br />
the appliqué to the<br />
stabilizer.<br />
Click on the Open Object tool and select Outline ><br />
Single Stitch from the menu bar. Digitize around the<br />
edge of each piece of the appliqué design, selecting<br />
colors that match the fabrics.<br />
Add embroidered details as desired. For instance, the<br />
bird’s eye in this example was made using the Circle tool.<br />
Once the edges of each piece are digitized, add anchor<br />
points around the edges of the complete design. These<br />
will be used to line up your appliqué in the hoop with<br />
the embroidery machine. Using the Open Object tool,<br />
draw V-shaped arrows at points or color breaks to<br />
identify reference points for placing the fabric shapes.<br />
(See photo on page 11.)<br />
Arrange the digitized shapes by color. To do this, select<br />
Edit > Select All from the main menu bar (or simply<br />
press the Ctrl and A keys on your computer keyboard at<br />
the same time!) and then select Arrange > Sequence by<br />
Color. Make sure the color for the anchors is at the top,<br />
as they must be sewn first.<br />
Place the hoop back on the machine and embroider<br />
the edges of your appliqué, changing thread colors as<br />
needed.<br />
When finished, remove the anchor stitches from the<br />
stabilizer.
ISSUE 17 • 11<br />
This is a screen<br />
capture showing the<br />
anchor points and a<br />
representation of the<br />
stitching.<br />
This is a scan of the<br />
completed appliqué<br />
with actual stitching.<br />
By carefully lining up<br />
the appliqué with the<br />
anchors the stitches<br />
have been sewn right<br />
where they should be!<br />
Patrice Denault<br />
Patrice enjoys quilts old<br />
and new, particularly<br />
the history of quilts, and<br />
loves the idea of using<br />
a modern approach to<br />
reproduce traditional<br />
patterns. She recently<br />
began writing instructions<br />
for her own appliqué and<br />
quilt patterns, which you<br />
can find in her etsy shop. See more of Patrice’s work on<br />
her blog.<br />
http://www.pmegios.com<br />
http://www.etsy.com/shop/pmegio
12 • THROUGH THE NEEDLE ONLINE<br />
upcycled<br />
PROJECT<br />
Message<br />
on a Bottle<br />
by JEN SWEARINGTON<br />
Taking a bottle of wine or other beverage to a party?<br />
Add a fun message for the host with a sleeve that<br />
slides right over the label. I enlarged and manipulated<br />
the font from my vintage 1960s Olivetti Underwood<br />
typewriter to make a few favorite messages. Since<br />
freezer paper is so easy to cut, I stacked a few layers<br />
together to cut multiples so I could keep them on file<br />
for making fresh labels as events pop up!<br />
Supplies<br />
• Freezer paper<br />
• Ruler<br />
• Craft knife and cutting mat<br />
• Tape<br />
• Iron and ironing board<br />
• 1-square-foot scrap of mat board, chipboard, or other<br />
non-corrugated cardboard<br />
• Templates “True Love,” “Sweet Home,” or “Yer the Best”<br />
(free download from bernina.com/ThroughTheNeedle)<br />
• Various pieces of vintage fabrics and handkerchiefs,<br />
no larger than 12” square each<br />
• Thread to coordinate with fabrics<br />
• Universal needle, size #80/12<br />
• Fabric shears<br />
• 12” of rickrack per label<br />
• Textile ink<br />
• Spoon<br />
• Stiff plastic card (old credit card or hotel key, frequent<br />
buyer card, etc.)<br />
• Press cloth or scrap paper<br />
• Hair dryer (optional)<br />
• Wine or other beverage bottle<br />
✽<br />
<strong>Download</strong> these free<br />
templates at bernina.com/<br />
ThroughTheNeedle
ISSUE 17 • 13<br />
Make the Stencil<br />
Cut the freezer paper in pieces about 8” square; each<br />
sheet will become one stencil. (I usually cut 4 to 6<br />
multiples at once). Stack the sheets of freezer paper so<br />
each is facing shiny side down and tape them to the<br />
cutting mat.<br />
Print the template and center it on the stack of freezer<br />
paper; tape it down. Use the craft knife to cut the<br />
words out of all layers of freezer paper. Remove the<br />
tape and discard the cutting template.<br />
Print the Message<br />
Place one freezer paper stencil shiny side down on the<br />
center of the fabric, place the fabric on the cardboard,<br />
the cardboard on the ironing board, and then press the<br />
stencil to adhere it to the fabric.<br />
Spoon a little textile ink onto the old credit card and<br />
spread a thin layer over the stencil words. Allow the ink<br />
to air dry or speed up the process by drying it with a<br />
hair dryer.<br />
Tip: For the samples in the photo I printed “True Love”<br />
in red, “Sweet Home” in dark gray (a mix of black and<br />
white textile ink), and “Yer the Best” in blue.<br />
Once the paint is dry, carefully peel away the freezer<br />
paper stencil and discard it. To heat-set the ink on the<br />
fabric, iron it for a minute or two under a press cloth or<br />
scrap paper.<br />
Stitch the Label<br />
Trim the overall height of the fabric panel to 6”.<br />
Finish the top and bottom edges by folding and<br />
pressing ½” to the back. Topstitch ¼” from the edge.<br />
For rickrack-trimmed edges, place the rickrack along the<br />
edge before topstitching through all the layers.<br />
Wrap the fabric panel around the bottle and trim away<br />
any excess, leaving 1” for the seam allowances. Fold<br />
the panel right sides together, aligning the short ends;<br />
machine-baste ½” from the raw edges.<br />
Turn the panel right side out, trim the threads tails, and<br />
press the seam allowances open and flat.<br />
Slip the sleeve onto the bottle to test the fit.<br />
• If it’s not snug enough, stitch a slightly deeper seam.<br />
• If it’s too tight, stitch a slightly narrower seam and<br />
remove the basting stitches.<br />
• If it’s just right, re-stitch over the basting stitches.<br />
Place the finished sleeve over the bottle to present to<br />
the party host. Cheers!<br />
Jen Swearington<br />
Jen Swearington is<br />
celebrating her tenth year<br />
in business operating<br />
Jennythreads, a tiny but<br />
busy studio in Asheville,<br />
North Carolina, where<br />
she designs and creates<br />
handmade, handprinted<br />
silk and bamboo fashion<br />
apparel and accessories.<br />
When she is not working<br />
on new designs, she creates artworks in many forms,<br />
from painterly mixed media quilts to intricate paper-cut<br />
illustrations. Most mornings before work she scampers<br />
out to the woods to trail-run with her dogs Rosco and<br />
Sesame. Her first book, Printing on Fabric: Techniques<br />
with Screens, Stencils, Inks, and Dyes, was published in<br />
April by Lark Books and is available online and in fine<br />
bookstores everywhere. See what she's up these days<br />
at www.jennythreads.net.<br />
partner<br />
links<br />
• http://thebobbincase.net<br />
• http://www.onceuponaquilt.com<br />
• http://sayitwithstitches.net/blog<br />
• http://whatsnewatthequiltshop.blogspot.com<br />
• http://sewvacltd.com<br />
• http://www.sandissewingconnection.com<br />
• http://www.thepresserfoot.com<br />
• http://www.seworiginal.org<br />
• https://www.shiisaquilts.com<br />
• http://www.keizerbernina.com<br />
• http://www.lindastewartcouturedesigns.com<br />
• http://www.quiltsonthecorner.com<br />
• http://www.fiberella.com<br />
• http://www.animasquilts.com<br />
• http://lunchboxquilts.com<br />
• http://amandamurphydesign.blogspot.com<br />
• http://www.kathydelaney.com<br />
• http://www.kjbartz.com<br />
• http://www.kate-n-kaboodle.com<br />
• http://www.nancyprince.com<br />
• http://scrap-therapy-quilts.blogspot.com<br />
• http://hummingbird-highway.com<br />
• http://www.libbylehman.us<br />
• http://www.branums.com<br />
• http://rgadesignquilts.blogspot.com<br />
• http://www.fiberellastudio.com<br />
• http://www.wendybutlerberns.com
14 • THROUGH THE NEEDLE ONLINE<br />
embroidery<br />
PROJECT<br />
Lilified<br />
Beach<br />
Caftan<br />
by ELVA MUNGAI<br />
This pretty caftan is the perfect cover-up<br />
for your next pool party or trip to the<br />
beach. Thread the belt through the center<br />
back buttonholes to cinch the waist all<br />
the way around, or belt only the front and let the back<br />
hang loose. Two rectangles of fabric, embellished with<br />
“Lilified” appliqué designs from BERNINA Exclusive<br />
Collection #82003, make up the front and back of<br />
this one-size-fits-most garment. The coordinating tote<br />
(download bonus project instructions at bernina.com/<br />
ThroughTheNeedle) features an appliquéd monogram<br />
from the same collection.<br />
Supplies<br />
• BERNINA Exclusive Embroidery Collection #82003, Lilified<br />
• BERNINA Embroidery Machine<br />
• Jumbo, Mega, or Large Oval Hoop<br />
• CutWork Tool and Stitch Plate<br />
• 2½ yards of black crinkled silk, polyester, or cotton gauze<br />
• Benertex “Lilified” fabric for caftan trim and appliqués<br />
– 1 yard in Bella Flora Fuschia<br />
– 1 yard in Bella Flora Orange<br />
• OESD HeavyWeight Cut-Away Stabilizer, black<br />
• OESD HydroStick Tear-Away stabilizer<br />
• OESD Appliqué Fuse & Fix<br />
• 1 yard of fusible interfacing<br />
• 505 Temporary Spray adhesive<br />
• Mettler Silk-finish cotton thread<br />
• Isacord Embroidery threads in desired colors<br />
• Bobbin thread for embroidery<br />
• Piping Hot Binding Tool and cording<br />
• Buttonhole cutter and block<br />
• Microtex needles #80/12<br />
• Organ needles #75/11<br />
• Reverse Pattern Foot #1/1C/1D<br />
• Overlock Foot #2/2A<br />
• Edgestitch Foot #10/10C/10D<br />
• Teardrop Embroidery Foot #26<br />
• Five Groove Pintuck Foot #31<br />
• Patchwork Foot #37/37D or Patchwork Foot with<br />
Guide #57/57D<br />
• Echo Quilting and CutWork Foot #44C
ISSUE 17 • 15<br />
Additional Supplies for Bonus Tote<br />
• 4” x 10” rectangle of ByAnnie’s Soft and Stable<br />
• 1 yard of 2”-wide webbing for tote handle<br />
• 1 yard of cord for bag drawstring<br />
• 1 package of grommets with insertion tool<br />
Cutting<br />
WOF= width of fabric<br />
Crinkled silk, polyester, or cotton gauze<br />
• Two 36” squares*<br />
Lilified Bella Flora Fuschia<br />
• Two 1½”-wide x WOF strips for piping<br />
• Two 2”-wide x WOF strips for belt<br />
• V-neckline pattern pieces (download at<br />
bernina.com/ThroughTheNeedle)<br />
Lilified Bella Flora Orange (hem and sleeve trim)<br />
• Cut two 3” x WOF strips<br />
Fusible interfacing (center and fuse to corresponding<br />
trim pieces)<br />
• Cut two 2½” x 45” strips (piece if needed)<br />
Cording<br />
• Cut two 45”-long pieces<br />
*For a wider caftan, cut 36” x 45” rectangles. Do<br />
not trim the selvages; leave them in place instead of<br />
hemming the sides later.<br />
Mark the V-Neckline<br />
Fold the caftan front rectangle along the vertical center<br />
line; mark the center line. Measure out 6” along the<br />
shoulder line. Place a ruler or straight edge from this<br />
point and angle it to find a point 8” away on the center<br />
line; mark this line. Repeat for the opposite side of the<br />
caftan front. Stay-stitch just outside the drawn lines; do<br />
not cut the neckline at this time. See diagram below.<br />
CutWork and Embroidery<br />
Create an arrangement of Lilified designs for your caftan<br />
and tote bag, or recreate my designs. This step can be<br />
done using the templates found on the collection CD,<br />
the on-screen editing tools of the BERNINA 830 or 780,<br />
or BERNINA Embroidery Software 6.<br />
CutWork<br />
Select the files for the CutWork appliqué pieces and<br />
monogram you wish to use. Prepare appliqué fabric<br />
pieces by pressing the non-paper side of Appliqué Fuse<br />
& Fix pieces to them.<br />
Hoop HydroStick Cut-Away stabilizer in the suggested<br />
hoop size for each piece. Spray lightly with 505<br />
Temporary Adhesive and position appliqué fabric on top.<br />
Tip: Designs can be arranged in the hoop to cut several<br />
at one time, but they cannot be rotated or mirrorimaged.<br />
To create mirror-image appliqué pieces, place<br />
the appliqué fabric wrong side up in the hoop.<br />
6"<br />
Install the CutWork Tool and Stitch Plate on your<br />
machine. Cut the appliqué pieces following the<br />
instructions included with the embroidery collection.<br />
Cut all appliqués before moving on to embroidery.<br />
8"<br />
staystitching
16 • THROUGH THE NEEDLE ONLINE<br />
Embroidery<br />
Print design templates using the files included on the<br />
collection CD or from the embroidery software. Position<br />
them as described below. Affix Cut-Away to the wrong<br />
side of the caftan, hoop the stabilizer/fabric sandwich,<br />
and attach the hoop to the embroidery machine. Stitch.<br />
When appliqué and embroidery are complete, carefully<br />
trim excess stabilizer from around the stitching.<br />
Caftan Back<br />
Measure the intended wearer from the base of the neck<br />
to the back waist. Add 2” to this measurement and<br />
mark a line this distance from the back neckline edge.<br />
(The sample measures 18” from the neckline to this<br />
point.)<br />
Select design #82003-28. If using the BERNINA 830,<br />
duplicate and mirror-image the designs and arrange<br />
them in the Jumbo Hoop. If desired, add a buttonhole<br />
to each half of the design for threading the tie belt.<br />
Other machines: Embroider the first half of the design<br />
using the Large Oval Hoop (or your largest hoop), then<br />
mirror-image, re-hoop, and embroider the second half.<br />
Buttonholes can be added later if desired.<br />
Cut buttonholes<br />
open with a<br />
buttonhole<br />
cutter and block.<br />
Caftan Front<br />
Two Lilified designs – #82003-30 (top) and #82003-42<br />
(bottom) – are combined on the front of the caftan; this<br />
can be done in the software, or using the machine’s onscreen<br />
editing features. The entire combined design can<br />
be stitched in the Jumbo Hoop, or each design can be<br />
stitched separately in the Large Oval Hoop.<br />
Position the designs on the left side of the caftan,<br />
parallel to the center line. Place the top of design<br />
#82003-30 about 4” below the left shoulder line.<br />
Position design #82003-42 so the right edge extends<br />
slightly beyond the center line. Embroider.<br />
Construction<br />
Finish the Side Edges<br />
Hem the side edges of the front and back rectangles:<br />
turn under ¼” and press; turn again and press.<br />
Topstitch close to the inner folded edge. Note: If using<br />
the entire 45” width of fabric, including the selvages,<br />
omit this step.<br />
Prepare and Apply the Trim<br />
Prepare the piping for the caftan and bag at the same<br />
time. Attach Five-Groove Pintuck Foot #31 to the<br />
sewing machine. Select straight stitch and move the<br />
needle position one step to the left. Place cording<br />
inside the piping strip and position the wrapped cord<br />
under the foot in the first groove left of center. Stitch,<br />
encasing the cord in the fabric strip. Trim strips to ¼”<br />
using the Piping Hot Binding Tool.<br />
Apply piping to one long<br />
edge of each trim strip,<br />
again placing the cording<br />
under the presser foot<br />
in the first groove left of<br />
center, but this time with<br />
the needle moved one step<br />
closer to the cording. Press<br />
the seam allowances to<br />
the wrong side of the trim<br />
strips.<br />
Place the right side of a 3”-wide trim strip on the wrong<br />
side of the caftan front, with the ends of the trim<br />
extending ½” beyond the sides. If it does not, ease the<br />
edge of the crinkled fabric as needed. Stitch the trim<br />
to the caftan, using a ¼”-wide seam allowance. Press<br />
seam allowances toward trim.
ISSUE 17 • 17<br />
Turn under the ½”-wide extensions at both ends of the<br />
trim; press.<br />
Turn the trim to the right side of the garment. Using<br />
Edgestitch Foot #10, stitch-in-the-ditch of the piping/<br />
trim seam to secure the upper edge of the trim.<br />
Edgestitch the ends of the trim to the caftan at the<br />
sides.<br />
Repeat for the caftan back.<br />
Make the Belt<br />
Fold the belt in half lengthwise, right sides together.<br />
Stitch around all three edges, leaving a 3”-long opening<br />
near the center of the long edge for turning. Turn right<br />
side out; press. Edgestitch the opening closed.<br />
Finish the Neckline<br />
Trim excess fabric from the V-neck opening, leaving a<br />
¼” seam allowance inside the staystitching.<br />
Fold the caftan back in half along the vertical center.<br />
Place the back facing piece at the top of the fold as<br />
indicated on the pattern piece. Trim the caftan to match<br />
the upper edge of the facing.<br />
Cut out the downloaded front and back facing pieces;<br />
cut from interfaced Lilified fabric.<br />
Place the front facing right sides together with wrong<br />
side of caftan front, matching V and raw edges;<br />
stitch with a ¼”-wide seam allowance. Clip into the<br />
V, to but not through the stitching. Turn facing to<br />
right side; press. Turn the raw edges under ¼” and<br />
press. Edgestitch the facing to the caftan front using<br />
Edgestitch Foot #10 and a needle position adjusted 1-2<br />
steps from center.<br />
Repeat for the back facing.<br />
With right sides together, stitch the caftan front to the<br />
back at the shoulders, using a ⅝”-wide seam allowance.<br />
Trim to ⅜”; finish the edge using the overlock stitch<br />
and Vari-Overlock Foot #2/2A. Alternatively, stitch the<br />
shoulder seams with a serger four-thread overlock,<br />
trimming ¼” from raw edges.<br />
<strong>Download</strong> facing pattern pieces and instructions for the<br />
coordinating tote at bernina.com/ThroughTheNeedle.
18 • THROUGH THE NEEDLE ONLINE<br />
accessory<br />
SPOTLIGHT<br />
BERNINA<br />
Stitch<br />
Regulator<br />
#42<br />
by SUSAN BECK<br />
More than a presser foot, the BERNINA Stitch Regulator<br />
(BSR) is truly a revolutionary aid to the creative sewer. It<br />
makes it easy to master the art of free-motion stitching,<br />
a technique that offers more creative options than<br />
almost any other type of sewing, including quilting,<br />
free-form, stipple quilting, thread painting, bobbin play,<br />
and more.<br />
Free-Motion Stitching in a Nutshell<br />
Essentially, with the feed dog of the sewing machine<br />
disengaged, the sewer moves the fabric in any direction<br />
to stitch any design or create any original pattern.<br />
Mastering free-motion stitching typically takes hours of<br />
practice to learn how to coordinate the movement of<br />
the fabric, the speed of the motor, and the length of<br />
the stitch for even, consistent results. Moving the fabric<br />
smoothly at an even pace is key.<br />
Moving the fabric too slowly results in tiny, unattractive<br />
stitches that may build up on the surface of the fabric.<br />
Moving too quickly creates long, loose stitches that<br />
resemble basting – again not especially attractive or<br />
secure. The BERNINA Stitch Regulator #42 (BSR) makes<br />
it easy to achieve regular and consistent free-motion<br />
stitching in a short time without hours and hours of<br />
practice and the frustration that may accompany it.<br />
The sensor of the BSR transfers information to the<br />
sewing machine about the speed at which you are<br />
moving the fabric under the sole. With this information<br />
it calculates the sewing speed needed to sew consistent<br />
stitches. The BSR, in tandem with the sewing machine,<br />
automatically adjusts to your movements to adjust<br />
the needle and motor speed for even and consistent<br />
stitching.<br />
Choose the Right Sole<br />
The BSR has three unique soles, each designed for<br />
different sewing situations.<br />
Choose from these three options (left to right),<br />
depending on your desired results:<br />
• Select the closed, O-shaped, metal sole for detailed<br />
free-motion stitching techniques such as stippling,<br />
bobbin play, and thread painting.<br />
• Opt for an open, C-shaped, metal sole for added<br />
visibility in front of the needle when following printed<br />
or marked lines. The “prongs” of this sole are slightly<br />
curved, facilitating movement over several layers of<br />
fabric and/or thread.<br />
• Choose the large, clear plastic sole for echo-quilting<br />
and medium- to large-scale free-motion stitching<br />
techniques. The large sole moves easily over raised<br />
areas and is useful for stitching through thick batts,<br />
as it compresses a larger area around the needle than<br />
the other soles, increasing visibility of the stitching<br />
area. Cross-hairs and concentric circles marked on the<br />
sole aid in accurate stitch placement.
ISSUE 17 • 19<br />
Changing the soles of the BSR is an easy process: Simply<br />
press the white buttons on each side of the presser foot<br />
and pull the sole forward to disengage it from the foot.<br />
Reattach by sliding the<br />
U-shaped sides of the sole<br />
onto the buttons until the<br />
sole clicks into place.<br />
BSR Basics<br />
The BERNINA Stitch Regulator has two operating<br />
modes; try each one to see which you like best.<br />
BERNINA Stitch Regulator Mode 1<br />
When BSR Mode 1 is selected, the needle immediately<br />
starts to move up and down, ready for the fabric to<br />
be moved for stitching. The needle will continue to<br />
move up and down even if the foot does not sense<br />
fabric movement. When stitching in Mode 1, secure<br />
the thread tails by selecting a short stitch length and<br />
moving the fabric under the needle along the design<br />
pattern line.<br />
BERNINA Stitch Regulator Mode 2<br />
When working in BSR Mode 2, the motor is engaged<br />
only when the fabric is moved under the foot, giving<br />
the stitcher time to pause and think about the path the<br />
needle is taking. Note: If there is no movement for over<br />
approximately seven seconds, the BSR automatically<br />
deactivates. Selecting Mode 2 enables the use of the<br />
Security Function for locking stitches. Set the desired<br />
stitch length, and then press the Securing function<br />
button. The needle will move up and down, taking<br />
four stitches and securing the thread tails to the fabric.<br />
When the needle stops moving, move the fabric and<br />
begin stitching your design. Press the Securing function<br />
again at the completion of the stitched design to secure<br />
the stitching, and then clip the thread ends.<br />
In addition to two stitching modes, most models offer<br />
two stitch choices – straight and a zigzag.<br />
The BERNINA Stitch Regulator is not an accessory that<br />
fits every BERNINA model; the electronics of the sewing<br />
machine must be designed to work with the sensor on<br />
the BSR.<br />
The BERNINA models in the current line (as of this<br />
writing) that accommodate the BERNINA Stitch<br />
Regulator are listed in the chart below.<br />
✽<br />
BERNINA Model<br />
830, 820, 780,<br />
750QE, 550 QE<br />
Ten Popular Free-motion Projects<br />
Here are links to ten of the most popular free-motion<br />
projects. Check one them out and learn to use the<br />
BERNINA Stitch Regulator. You'll love this attachment!<br />
1. Free Motion Floral<br />
2. Modern Mix Quilt<br />
by Nina McVeigh<br />
3. Just SEW It: eBook 3<br />
by Susan Beck<br />
4. Owlivia Quilt by Nina<br />
McVeigh<br />
BERNINA Stitch Regulator<br />
Standard Accessory<br />
Straight Stitch<br />
Zigzag Stitch<br />
710, 580, 530 Optional Accessory<br />
Straight Stitch<br />
Zigzag Stitch<br />
5. Divine Flowers & Vines: Pink Power Quilt<br />
by Linda Wenturine<br />
6. Birds & Blooms Sampler<br />
Quilt by Nina McVeigh<br />
7. Foot Book Page: BERNINA<br />
Stitch Regulator #42<br />
by Susan Beck<br />
8. Ode to Ireland Table Runner<br />
by Nina McVeigh<br />
9. Quilting with Decorative<br />
Threads by Kerry Finn<br />
10. Scrappy Table Runner by Nina McVeigh<br />
Bonus Video on the<br />
BERNINA Stitch Regulator #42<br />
See the BERNINA Stitch Regulator in<br />
action in this video from BERNINA<br />
International.
20 • THROUGH THE NEEDLE ONLINE<br />
cutwork<br />
PROJECT<br />
Celebration<br />
Pennants<br />
by MARY BECK<br />
Celebrate any special occasion –<br />
or person – with these cheerful<br />
pennants made completely in the<br />
hoop! Not only are they easy to<br />
make; they’re re-usable, too.<br />
Supplies<br />
• <strong>Bernina</strong> CutWork Software and Tool<br />
• CutWork stitch plate for your machine<br />
• Embroidery system<br />
• Teardrop Darning Foot #26<br />
• Large Oval Hoop (or Deco Hoop B)<br />
• Medium Hoop (or Deco Hoop A) (optional)<br />
• Embroidery needle, size #80/12<br />
• Fabric in desired colors (with matching color in bobbin<br />
for final cover stitch)<br />
• OESD Appliqué Fuse & Fix<br />
• OESD HydroStick Cut-Away or Tear-Away stabilizer<br />
• OESD Fuse & Fleece (or fusible fleece)<br />
• OESD AquaMesh Plus (or OESD Ultra Clean & Tear<br />
and 505 Temporary Adhesive spray)<br />
• Isacord embroidery thread<br />
• Mary Ellen’s Best Press starch alternative
ISSUE 17 • 21<br />
Prepare the Cutwork Design Area<br />
Open the Cutwork software and select File > New.<br />
Select Create New > Next.<br />
In the Artwork Source dialog box, select New Graphic.<br />
For Hoop, select <strong>Bernina</strong> 255 x 145 Large Oval #26 or<br />
Deco Hoop B. Click Next.<br />
In the Fabric dialog box, choose Embroidery Normal ><br />
Cotton and a light color. Choose Next. You should now<br />
be on the workspace with the Large Oval Hoop #26<br />
showing.<br />
Right click on “0” on the horizontal ruler and choose<br />
Add New Guideline > Vertical. Right click on “0” on<br />
the vertical ruler and choose Add New Guideline ><br />
Horizontal. If necessary, zoom in and adjust guidelines<br />
so that they intersect at “0” on the workspace.<br />
Right click on the vertical ruler and add a horizontal<br />
guideline at 3.5 cm. Repeat to add horizontal guidelines<br />
at 4 cm and 7 cm.<br />
Click on the horizontal ruler and add vertical guidelines<br />
at 4 cm and -4 cm.<br />
Click on either ruler and choose Guideline Options.<br />
Change the color to black. Select all of the options<br />
(Guidelines visible, Snap enabled, and Lock guidelines).<br />
Tip: Always select hoop size before adding guidelines.<br />
Extra guidelines are added by the software to define<br />
hoop boundaries, and the guidelines may change if the<br />
hoop size is changed after they are set.<br />
Select File > Save As Workspace.<br />
Digitize the Buttonholes<br />
Open the Workspace file and select Create Rectangle<br />
form the Side Toolbar.<br />
Draw a tall, narrow rectangle and tap the spacebar to<br />
select it.<br />
In Object Properties select Satin Serial and change<br />
Density to 0.60 mm.<br />
In Tool Options, change Outline to 2.0mm and enter 5<br />
mm for Width = 5 mm and Height = 25 mm.<br />
Select File > Save As Buttonholes.<br />
Move the buttonhole so the bottom is resting on the<br />
horizontal guideline at 3.5 mm and it is centered on the<br />
vertical guideline at -4 mm.<br />
Select the Create Bezier Shapes too. Using the guideline<br />
visible in the buttonhole slit, left click at the top of the<br />
slit and then at the bottom; right click to set. Zoom in<br />
to ensure that the line is not placed on the stitches.<br />
Select the line and choose Cutwork in Object Properties.<br />
Select All > Group.<br />
In Tool Options, select Duplicate. Click and drag the<br />
new buttonhole until it is centered on the vertical<br />
guideline at 4mm and the bottom is resting on the 3.5<br />
mm horizontal guideline.<br />
Select All > Ungroup. Select both cutting lines ><br />
Combine. Select both sets of stitching > Combine.<br />
Select All > Group.<br />
Select File > Save As Buttonholes.<br />
Prepare the Cutting Files<br />
Open the Workspace file.<br />
Select the Create Polygon tool; if the fly-out menu is<br />
not visible, click on the arrow in the lower right corner<br />
of the icon.<br />
Select 3 for number of sides; set start angle at 270°.<br />
Click and drag a vertical triangle shape; the size will be<br />
fine-tuned later. Right click to set the shape.<br />
Deselect Proportional and enter 133 for width and 147<br />
for height.<br />
Align the top of the triangle with the 7 cm horizontal<br />
guideline, centered on the vertical guideline.<br />
Select Cutwork in Object Properties. Set Running Before<br />
at 1.0 and Number of Passes at 2. Choose Auto for<br />
Discard Part.<br />
Duplicate and change the outline color. Choose<br />
Running in Object Properties and change Stitch Length<br />
to 5. Move this object to #1 in Sequence Manager. This<br />
is the placement line for the pennant fabric and fits the<br />
Large Oval hoop and the Large Deco hoop.<br />
Select File > Save As Pennant_cut.<br />
Add the Lettering<br />
Select File > New. Select Create New > Next.<br />
In the Artwork Source dialog box, select New Graphic.<br />
For Hoop, select none.<br />
In the Fabric dialog choose Embroidery Normal > Cotton<br />
and a light color. Choose Next. You should now be on<br />
the workspace.<br />
Select the Lettering icon. Type a phrase or name to put<br />
on the pennant.<br />
Click on the Rectangle Selection Tool to select all of the<br />
letters.
22 • THROUGH THE NEEDLE ONLINE<br />
Click on the Lettering icon. From the drop down menu<br />
in the upper tool bar choose a pleasing font. Any<br />
chunky font will do nicely; the sample uses PTF Nordic<br />
Rnd with a font size of 70.<br />
All of the letters should be the same height (60 mm or<br />
so is recommended). The width may vary depending<br />
upon the letter. Right click and select Break Apart to<br />
check the width of the individual letters; 34-35 mm is<br />
recommended. (Some letters, such as capital I, will be<br />
narrower.)<br />
Select All and choose Cutwork. Set Running Before at<br />
1.0 and Number of Passes at 2.<br />
Select File > Save As Letters.<br />
Select and display your largest available hoop. Arrange<br />
the letters to fit as many letters in the hoop as possible<br />
(it’s ok to turn them). This may require multiple<br />
hoopings, depending on the hoop size; arrange as<br />
many as you can in the first hoop. Copy and paste the<br />
remaining letters into a new file.<br />
Select All the letters in each hooping > Combine.<br />
Select File > Save as Letters#_cut, adding numbers for<br />
multiple hoopings.<br />
Note: If cutting letters from a variety of fabrics, delete<br />
duplicates and set up basting and tack-down rectangles<br />
to arrange squares of fabric in your hoop.<br />
Prepare the Appliqué Files<br />
Open the Pennant_cut file. In Sequence Manager,<br />
delete Object #2 (cutting file).<br />
Select the remaining object in Sequence Manager. In<br />
Object Properties, select the Outline tab and deselect<br />
Stitch Length.<br />
In Tool Options, choose Duplicate and select a new<br />
outline color. Select Object #2 in Sequence Manager<br />
and change the Offset to -1.0. Select both objects ><br />
Group. This is the placement and tack-down line for the<br />
pennant front.<br />
Select File > Save as Pennant_app.<br />
Open the Letters file (the one with all of the letters).<br />
Select All.<br />
In Object Properties, select the Outline tab and choose<br />
None.<br />
In Thread Palette, select a dark outline and a light fill<br />
color; this helps make the stitching visible.<br />
Select the Fill tab and choose Appliqué. Select Cleaning<br />
> Laser cut.<br />
Select the Outline tab and choose Satin Serial.<br />
Select Offset and enter -0.5; this moves the stitching<br />
line in a bit. Change the Density to 0.60 mm. Select<br />
Underlay > Zig Zag. Change Outline to 3 mm.<br />
Check the stitching lines and edit as necessary.<br />
Select File > Save As letters_app.<br />
Select the first letter; copy and paste onto Pennant_<br />
app.<br />
Move the letter so it is centered on the pennant with<br />
the top of the letter even with the 4 cm guideline.<br />
Select All > Align Vertically. Save As Letter_H (or<br />
Letter_A, Letter_P, etc.). The larger file name makes it<br />
easier to select the tab on the workspace.<br />
Copy and paste the buttonholes so that they are<br />
positioned above the letter along the 3.5 cm horizontal<br />
guideline. Select All > Align Vertically.<br />
Select Objects 1 and 2 in Sequence Manager; Duplicate.<br />
You should now have seven objects in Sequence<br />
Manager. Object #7 is a copy of the tack-down line<br />
used for the pennant front. Move it to position #6<br />
where it will be the tack-down line for the pennant<br />
back before the final cover stitch is applied.<br />
Select Object #7 in Sequence Manager. Choose Satin<br />
Serial. Change Outline to 5 mm and Offset to -2 mm.<br />
Select Zig Zag for the Underlay.<br />
Select Objects #4 and #5 (buttonhole stitch and slit) in<br />
Sequence Manager and move to them to positions #6<br />
and #7.<br />
Save.<br />
Cut the Pennant Shapes<br />
(Instructions are for one letter/triangle)<br />
Cut two 7” squares of fabric.<br />
Cut a 6½” square of OESD Fuse & Fleece. Center and<br />
fuse it to the back of one 7” square.<br />
Cut a 6½” square of OESD Appliqué Fuse & Fix. Center<br />
and fuse it to the back of the other 7” square.<br />
Hoop a layer of OESD HydroStick in the Large Oval<br />
Hoop or Deco 140 X 200 hoop.<br />
Install the CutWork Stitch Plate on your embroidery<br />
machine.<br />
Stitch the placement line. Place the two fabric squares<br />
so they cover the placement line. Continue stitching.<br />
Install the CutWork tool on your machine. Follow the<br />
on-screen prompts to cut the pennant shapes.
ISSUE 17 • 23<br />
Tip: Cut multiple layers at the same time. A maximum<br />
of seven layers of fabric bonded with OESD Fuse &<br />
Fleece worked well for me.<br />
Cut the Letters<br />
Cut a piece of fabric slightly larger than the hoop you<br />
will be using to cut your letters.<br />
Apply OESD Appliqué Fuse & Fix to the wrong side of the<br />
fabric. Hoop a layer of OESD HydroStick with the fabric.<br />
Basting lines are not necessary. Stitch the running<br />
before lines and cut out letters using the CutWork tool.<br />
Tip: Remember that you can set up your design to cut<br />
letters of different colors. (See Note on page 16.) Set up<br />
basting and tack down boxes in the software and cut<br />
squares of fabric slightly larger than the basting boxes.<br />
Assemble the Pennant<br />
Hoop a layer of OESD AquaMesh Plus, paper side up,<br />
in the Large Oval hoop or large Deco hoop; remove the<br />
paper backing.<br />
The placement line stitches first. When complete, center<br />
the top pennant fabric piece (the one with OESD Fuse &<br />
Fleece) within the lines, fabric side up.<br />
Stitch the tack down.<br />
Appliqué the letter.<br />
STOP!<br />
Remove the hoop from the machine but do not<br />
unhoop the fabric.<br />
Remove the OESD Appliqué Fuse & Fix from the back of<br />
the bottom pennant and attach it to the bottom side of<br />
the hoop so that the right side of the fabric faces the<br />
bed of the machine.<br />
Pennant back.<br />
Reattach the hoop and stitch the tack-down line.<br />
Remove the hoop from the machine and check the<br />
placement on the back; adjust if needed. Continue<br />
stitching the cover stitch.<br />
Install the CutWork tool and cut the buttonhole slits.<br />
Remove the hoop from the machine when the<br />
embroidery is complete. Trim the stabilizer close to the<br />
stitched design.<br />
Remove the remaining stabilizer with a finger dipped in<br />
warm water. I do not recommend soaking the pennant.<br />
Tip: Use a tear-away rather than a wash-away stabilizer.<br />
If all of the tear-away cannot be removed, color the<br />
edges with a permanent marker. And don’t forget that<br />
you can use black tear-away with black or dark threads.<br />
Repeat until all pennant pieces are complete.<br />
Thread the pennant pieces together with ribbon to<br />
create your banner.<br />
Time to celebrate!<br />
Instead of letters,<br />
digitize shapes<br />
– such as hearts –<br />
and appliqué them<br />
to the pennants.<br />
Mary Beck<br />
I am a Registered Nurse by<br />
training, but a wife and mom of<br />
three by profession. I dabbled<br />
in sewing as a teenager, but<br />
didn’t really embrace it until<br />
I was married. Life with kids<br />
sometimes takes over, but now<br />
that they are moving on to<br />
college I can spend more time<br />
in my “Sewing Cave,” as my youngest calls it. Fellow<br />
residents of the “cave” are a BERNINA 830LE, bernette<br />
Deco 340, and BERNINA 1300MDC serger. I work parttime<br />
at the Sewing Room in Tucson, AZ – although it is<br />
hard to call it “work” when you get to do something<br />
you love!<br />
www.sewingroomtucson.com
24 • THROUGH THE NEEDLE ONLINE<br />
basic<br />
SEWING<br />
Quilted Circles<br />
by KATHY SEYMOUR<br />
Join perfect double-layer circles to make a<br />
beautifully-shaped table runner. Using Circular<br />
Embroidery Attachment #83 in tandem with the<br />
Walking Foot #50 makes it easy. Join the circles<br />
Cathedral Window-style to create an interlocking<br />
secondary design on the surface. If you wish,<br />
embellish the circles with quilting or embroidery<br />
(see Design Options) for added panache!<br />
To begin, decide on a layout for your quilt:<br />
• Number of circles<br />
• Desired size (sample circles are 9½” finished diameter)<br />
• Straight or diagonal set<br />
• Colors<br />
• Quilting or embroidery (optional)<br />
For each circle in your runner choose a backing fabric<br />
(this will show on the right side as the “window<br />
frames”) and assorted fabrics for the “windows.” Then<br />
cut the following squares, cutting them ½” to 1” larger<br />
than the desired finished circle size.<br />
• One fabric square from each of the “window” prints<br />
• The same number of squares from the backing fabric<br />
• One batting square the same size for each circle<br />
For this project you will also need:<br />
• Coordinating thread for assembling the runner<br />
• Walking Foot #50<br />
• Circular Embroidery Attachment #83<br />
Stitch the Fabric “Sandwiches”<br />
Fold each “window” square precisely in half and then in<br />
half again; crease to mark the center. Unfold.<br />
Layer each marked square in the following order:<br />
• Batting<br />
• Backing, right side up<br />
• Top, right side down<br />
Attach Walking Foot #50 and Circular Embroidery<br />
Attachment #83 to the sewing machine.<br />
Place the center of the layered “sandwich” over the<br />
pin and push down to secure it against the bed of the<br />
machine. Be careful not to poke yourself; the pin is<br />
sharp!<br />
Divide the desired finished size of the circle by two.<br />
Move the pin of the Circular Embroidery Attachment<br />
this distance from the sewing machine needle.<br />
Select a straight stitch and begin sewing. The fabric will<br />
pivot around the pin, automatically feeding the fabric in<br />
a circle. Stitch completely around the circle.<br />
TIP: Using Walking Foot #50 helps prevent the layers<br />
from shifting as you sew around the circle.<br />
Remove the fabric from the pin. Trim outside the<br />
stitching, leaving a ¼”-wide seam allowance. Clip to<br />
the stitching, or cut all around using pinking shears or<br />
a rotary cutter with a pinking blade to reduce bulk for a<br />
smoothly turned edge all around each circle.
ISSUE 17 • 25<br />
Make a 1”-long slit in the<br />
top layer about ½” from the<br />
outside edge, in the area<br />
between the marked square<br />
and the edge. (The slit will be<br />
hidden in the fold later.)<br />
Design Options<br />
• Cut petal shapes and insert under flaps to create<br />
flowers.<br />
Turn the circle right side out;<br />
press. Mark the largest square<br />
that will fit in the circle; this<br />
will be your seamline for<br />
joining the circles.<br />
Assemble the Runner<br />
Assemble the runner in small sections. Place two circles<br />
back to back, matching the corners of the marked top<br />
square. Pin at the corners and again in the middle of<br />
the side to be stitched.<br />
Using Walking Foot #50, stitch the<br />
two circles together along one side,<br />
backstitching at the beginning and<br />
end of the seam.<br />
Repeat, joining circles as needed for<br />
desired layout.<br />
• Embroider circles before<br />
assembling runner. Hoop<br />
a layer of AquaMesh<br />
Plus, paper side up. Score<br />
and remove paper, then<br />
smooth circle in place<br />
on the sticky adhesive.<br />
Embroider.<br />
• Add applique motifs<br />
to some of the circles.<br />
• Fold in the sides of<br />
selected circles around<br />
the outside of the<br />
runner, creating points<br />
in place of curves.<br />
If desired, quilt the circle as shown below, stitching parallel<br />
lines from corner to corner using Walking Foot #50.<br />
Fold the “flaps” to the right side of each circle,<br />
exposing the backing to create the “frames” around<br />
the “windows.” Pin in place.<br />
Stitch each frame “flap” in<br />
place along the outer, curved<br />
edge, using the inside edge<br />
of the walking-foot sole as a<br />
guide. Stitch diagonally across<br />
the intersections to prevent<br />
holes from forming.<br />
Kathy Seymour<br />
Kathy Seymour is a longtime<br />
employee of Heirlooms Forever<br />
in Tupelo, Mississippi, where<br />
she teaches BERNINA classes<br />
for sewing, embroidery and<br />
software. A quilter for over<br />
thirty years, her favorite classes<br />
to teach are those that use<br />
color and design to encourage students to follow<br />
their own vision of beauty.
ISSUE 17 • 26<br />
The Last Word<br />
A sneak peek at what’s coming in<br />
Through the Needle ONLINE, Issue #18:<br />
Please Enter Your Pin<br />
The “buttons” on Mary<br />
Beck’s clever PaintWorkembellished<br />
pincushion<br />
are labeled with different<br />
needle types and sizes,<br />
making this the perfect<br />
storage device for<br />
gently-used sewing<br />
machine needles.<br />
Mad for Plaids Quilt<br />
No time for traditional<br />
piecing and quilting? Use<br />
your serger! Jo Leichte<br />
recycles a tub of men’s<br />
plaid shirts into a cozy<br />
reversible quilt using a<br />
simple, speedy, serger<br />
technique.<br />
May 2013<br />
Accessory<br />
SPECIAL<br />
June 2013<br />
Accessory<br />
SPECIAL<br />
25% OFF<br />
BERNINA Patchwork Foot<br />
with Guide #57 / 57D<br />
Produce perfect ¼” seams which<br />
are ideal for quilting, doll clothes,<br />
French seams and other precision<br />
techniques. The inner edge of the<br />
front of the foot is ⅛” from the<br />
center needle position. The springloaded<br />
guide on the right of the<br />
foot ensures accurate ¼” seams<br />
sewn at any speed!<br />
For May 2013 only, get 25% OFF BERNINA<br />
Patchwork Foot with Guide #57 / 57D. Offer good at<br />
participating BERNINA dealers in the United States.<br />
Coupon may not be combined with any other offer.<br />
25% OFF<br />
BERNINA Spanish<br />
Hemstitch Attachment<br />
Use the Spanish Hemstitch<br />
Attachment to create the look<br />
of hand-sewn fagotting entirely<br />
by machine. This decorative<br />
technique joins two pieces of fabric<br />
or lace leaving a space between<br />
them for decorative stitches with or<br />
without cording.<br />
For June 2013 only, get 25% OFF the BERNINA<br />
Spanish Hemstitch Attachment. Offer good at<br />
participating BERNINA dealers in the United States.<br />
Coupon may not be combined with any other offer.<br />
Quick Links<br />
These are the main links featured in this issue;<br />
see the articles for links to specific products,<br />
projects, and technique information. Please visit<br />
our sponsors and contributors for more inspiration,<br />
information, and stitching fun!<br />
• bernina.com/ThroughTheNeedle<br />
• bernina.com<br />
• WeAllSew.com<br />
• benartex.com<br />
• embroideryonline.com<br />
• bernina8series.com/EN/<br />
• facebook.com/berninausa<br />
• rickytims.com/seminars<br />
• sews.com<br />
• facebook.com/pages/Heirlooms-<br />
Forever/155151034517398<br />
• jennythreads.net<br />
• facebook.com/pages/Jennythreads-by-Jen-<br />
Swearington/287080514857<br />
• sewingroomtucson.com<br />
• facebook.com/pages/Sewing-Room-Tucson-<br />
AZ/118188948247612<br />
• ranaemerrillquilts.com<br />
• spiromandalas.wordpress.com<br />
• pmegios.com<br />
• etsy.com/shop/pmegio<br />
Until July...<br />
What will you be sewing this spring and summer?<br />
We’d love to hear from you! Send your photos to<br />
jo@berninausa.com.