SPG10 PC-Software Manual - elmed
SPG10 PC-Software Manual - elmed
SPG10 PC-Software Manual - elmed

Create successful ePaper yourself
Turn your PDF publications into a flip-book with our unique Google optimized e-Paper software.
Mitterweg 25 – Via di Mezzo ai Piani 25<br />
I-39100 Bozen – Bolzano Tel.:0471 977236 – Fax:976525<br />
e-mail: info@<strong>elmed</strong>.it http://www.<strong>elmed</strong>.it<br />
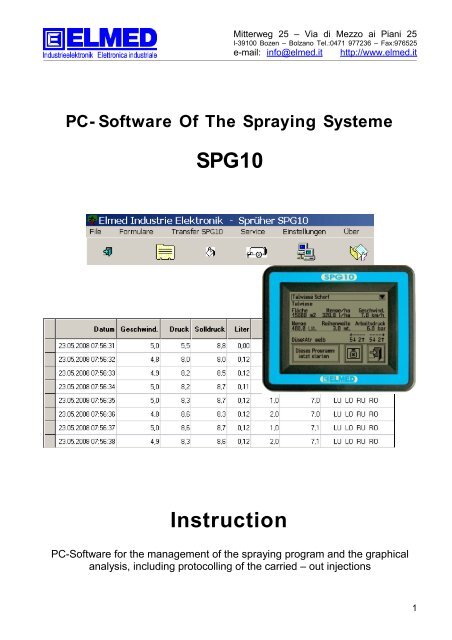
<strong>PC</strong>- <strong>Software</strong> Of The Spraying Systeme<br />
<strong>SPG10</strong><br />
Instruction<br />
<strong>PC</strong>-<strong>Software</strong> for the management of the spraying program and the graphical<br />
analysis, including protocolling of the carried – out injections<br />
1
Mitterweg 25 – Via di Mezzo ai Piani 25<br />
I-39100 Bozen – Bolzano Tel.:0471 977236 – Fax:976525<br />
e-mail: info@<strong>elmed</strong>.it http://www.<strong>elmed</strong>.it<br />
<strong>Manual</strong> <strong>PC</strong>-<strong>Software</strong> <strong>SPG10</strong> version 1.6.0 - (version 1.1 - 11.03.2010)<br />
2
Mitterweg 25 – Via di Mezzo ai Piani 25<br />
I-39100 Bozen – Bolzano Tel.:0471 977236 – Fax:976525<br />
e-mail: info@<strong>elmed</strong>.it http://www.<strong>elmed</strong>.it<br />
Content<br />
1. Installation.....................................................................................4<br />
1.1 Installation of the <strong>PC</strong>-<strong>Software</strong> <strong>SPG10</strong>...............................................4<br />
1.1.1 Installation start-window...................................................................................4<br />
1.1.2 Selection of the installation directory................................................................4<br />
1.1.3 Query during the installation ............................................................................5<br />
1.1.4 Registration.......................................................................................................5<br />
1.1.5 Basic Settings...................................................................................................6<br />
1.2 Hardware Driver Installation For The <strong>SPG10</strong> Device.........................7<br />
1.2.1 Step 1 – No connection with Windows Update................................................7<br />
1.2.2 Step 2 – automatic installation.........................................................................8<br />
1.2.3 Step 3 – choose driver......................................................................................9<br />
1.2.4 Step 4 – ignore warning, continue....................................................................9<br />
1.2.5 Step 5 – conclude installation ........................................................................10<br />
2. The Main Window .......................................................................11<br />
2.1 Close Program..................................................................................11<br />
2.2 Service..............................................................................................11<br />
2.3 Settings.............................................................................................11<br />
2.4 About................................................................................................12<br />
3. Operating Data.............................................................................12<br />
4. Active Substances.......................................................................13<br />
4.1 Edit active substances......................................................................14<br />
4.2 Delete active substance....................................................................14<br />
4.3 Create new active substance............................................................14<br />
4.4 Print active substances.....................................................................14<br />
5. Plots Of Land ..............................................................................15<br />
5.1 Edit Plots...........................................................................................15<br />
5.2 Delete Plot........................................................................................15<br />
5.3 Create A New Plot............................................................................16<br />
5.4 Print Plots.........................................................................................16<br />
6. Spray Programs...........................................................................17<br />
6.1 Create A New Program.....................................................................17<br />
6.2 Delete Program.................................................................................17<br />
6.3 Copy Program...................................................................................17<br />
6.4 Print Spray Program List...................................................................17<br />
6.5 Spray Program Settings - Standard..................................................18<br />
6.5.1 Designation Spray Program...........................................................................18<br />
6.5.2 Choice Plot.....................................................................................................18<br />
6.5.3 Comment........................................................................................................18<br />
6.5.4 Surface to be edit...........................................................................................18<br />
6.5.5 Speed.............................................................................................................19<br />
3
Mitterweg 25 – Via di Mezzo ai Piani 25<br />
I-39100 Bozen – Bolzano Tel.:0471 977236 – Fax:976525<br />
e-mail: info@<strong>elmed</strong>.it http://www.<strong>elmed</strong>.it<br />
6.5.6 Water Expense/ha..........................................................................................19<br />
6.6 Spray Program – Sbr South Tyrol Setting........................................20<br />
6.6.1 Designation Spray Program...........................................................................20<br />
6.6.2 Choice Plot.....................................................................................................20<br />
6.6.3 Comment........................................................................................................20<br />
6.6.4 Surface to be edit...........................................................................................20<br />
6.6.5 Concentration.................................................................................................21<br />
6.6.6 Speed.............................................................................................................21<br />
6.6.7 Water Expense Deviation...............................................................................21<br />
6.7 Nozzle settting..................................................................................21<br />
6.7.1 Number of sectors..........................................................................................21<br />
6.7.2 Multiline Sprayer.............................................................................................21<br />
6.7.3 Number Of Nozzles........................................................................................21<br />
6.7.4 Nozzle Type....................................................................................................21<br />
6.7.5 Nozzle Colour.................................................................................................21<br />
6.8 Active Substance Setting – Standard...............................................22<br />
6.8.1 Choice Active Substances..............................................................................22<br />
6.8.2 gr/ha – Display Of Dosage.............................................................................22<br />
6.8.3 Total Display Of The Necessary Amount Of Active Substances...................22<br />
6.9 Active Substance Setting – Sbr South Tyrol.....................................22<br />
6.9.1 Choice Active Substances..............................................................................22<br />
6.9.2 Active Substance Amount Input per Hectolitre (1-fold-concentration)...........22<br />
6.9.3 Display Of The Actual Amount Of Active Substances Needed Per Hectolitre<br />
.................................................................................................................................22<br />
6.9.4 Display Of The Total Required Amount Of Active Substances......................22<br />
7. Conducted Injection Forms........................................................23<br />
7.1 <strong>Manual</strong> Editing..................................................................................23<br />
7.2 Delete Entry......................................................................................24<br />
7.3 Print List............................................................................................25<br />
7.3.1 Open Print Preview.........................................................................................25<br />
7.4 Print Logbook ausdrucken (Operation issue)...................................26<br />
7.4.1 Open Print Preview.........................................................................................26<br />
7.5 Detail Information Of One Conducted Injection................................27<br />
7.5.1 Summary Of The Injection.............................................................................27<br />
7.5.2 Requirements Of One Conducted Injection...................................................28<br />
7.5.3 Show Details Of The Conducted Injection.....................................................28<br />
7.6 Graphic.............................................................................................28<br />
7.6.1 Construction Of The Graphic..........................................................................29<br />
7.6.2 The Graphic Buttons.......................................................................................29<br />
8. Data Transfer With <strong>SPG10</strong>..........................................................30<br />
4
Mitterweg 25 – Via di Mezzo ai Piani 25<br />
I-39100 Bozen – Bolzano Tel.:0471 977236 – Fax:976525<br />
e-mail: info@<strong>elmed</strong>.it http://www.<strong>elmed</strong>.it<br />
1. Installation<br />
Before you can work with the <strong>PC</strong>-<strong>Software</strong> <strong>SPG10</strong>, you need to install the program and the<br />
hardware drivers for the <strong>SPG10</strong> device on the calculator. The software runs on <strong>PC</strong>'s, that<br />
are equipped with a Microsoft Windows ® operating system.<br />
1.1 Installation of the <strong>PC</strong>-<strong>Software</strong> <strong>SPG10</strong><br />
To install the program, the file „setup.exe“ has to run with the enclosed CD-installation.<br />
1.1.1 Installation start-window<br />
The start window, which appears after „setup.exe“, can be confirmed with „OK“. The<br />
installation can continue.<br />
Img. 1: Installation start-window<br />
1.1.2 Selection of the installation directory<br />
In the second installation-window you can choose the directory, in which the <strong>SPG10</strong>-<br />
<strong>Software</strong> is installed. By default, the directory is set with „C:\Elmed\<strong>SPG10</strong>\“.<br />
Note: If you use Microsoft Windows Vista ® as an operating system, is strongly<br />
recommended not to change the installation directory. Please let the standard default<br />
„C:\Elmed\<strong>SPG10</strong>\“.<br />
With the button „Change Directory“ a different installation<br />
directory can be selected.<br />
By confirming the „installation“-button, the installation process starts.<br />
5
Mitterweg 25 – Via di Mezzo ai Piani 25<br />
I-39100 Bozen – Bolzano Tel.:0471 977236 – Fax:976525<br />
e-mail: info@<strong>elmed</strong>.it http://www.<strong>elmed</strong>.it<br />
Img. 2: Selection of the installation directory<br />
1.1.3 Query during the installation<br />
During the installation it is possible that some queries need to be acknowledged. This<br />
probably refers to a version conflict between existing and the files to install.<br />
Img. 3: Query during the installation<br />
Notes: It is strongly recommended to leave the already existing newer file on the<br />
system. Confirm this or similar queries with „Yes“.<br />
1.1.4 Registration<br />
After the software is successfully installed, the registration process must be performed<br />
before starting. After you have accepted the license conditions, a window (Img. 4)<br />
appears, that constitutes a license key. This one must be sent to the manufacturer,<br />
ideally by e-mail. Afterwards, you get from the manufacturer a personalized license key<br />
which you must type in the provided field. Thus, your software is activated and can be<br />
used.<br />
6
Mitterweg 25 – Via di Mezzo ai Piani 25<br />
I-39100 Bozen – Bolzano Tel.:0471 977236 – Fax:976525<br />
e-mail: info@<strong>elmed</strong>.it http://www.<strong>elmed</strong>.it<br />
Img. 4: <strong>Software</strong>-registration<br />
Notes: The registration can be interrupted and can be carried out at a later date.<br />
1.1.5 Basic Settings<br />
The <strong>PC</strong>-<strong>Software</strong> offers 2 different calculation methods, that have a special influence<br />
on the spray programs and entering the spray concentration.<br />
The two variants are:<br />
• Standard: In the case of the standard-variant is the concentration of active substance<br />
in grams per hectare (gr/ha). This method should be suitable for all users outside if<br />
South Tyrol.<br />
• „Sbr“ South Tyrol Consulting Group: In the case of the „Sbr“ South Tyrol<br />
Consulting Group variant, the concentration of active substance is indicated in grams<br />
per hectolitre (gr/hl). The concentrations from the South Tyrol Consulting Group is<br />
issued in this unit. Thus, this variant should be suitable for all users in South Tyrol.<br />
The setting of the calculation – variant is done in the menu „settings“, see chapter „2.3<br />
Settings“.<br />
Notes: The set calculating verion must match the setting in the <strong>SPG10</strong> device.<br />
Otherwise, correct operation of the spray system is not guaranteed.<br />
7
Mitterweg 25 – Via di Mezzo ai Piani 25<br />
I-39100 Bozen – Bolzano Tel.:0471 977236 – Fax:976525<br />
e-mail: info@<strong>elmed</strong>.it http://www.<strong>elmed</strong>.it<br />
1.2 Hardware Driver Installation For The <strong>SPG10</strong> Device<br />
After the correct installation of the <strong>PC</strong>-<strong>Software</strong> <strong>SPG10</strong>, the sprayer <strong>SPG10</strong> (displaymodule)<br />
can be connected to the <strong>PC</strong>. For this, use the included USB-cable. When you<br />
connect the device, the hardware drivers get installed.<br />
During the hardware driver installation on the screen can appear a query window. How a<br />
correct installation runs will be described step by step in the following subsections. The<br />
operating system used is Microsoft Windows XP ® . The basic procedures are for all<br />
current Windows operating systems quite similar.<br />
1.2.1 Step 1 – No connection with Windows Update<br />
Img. 5: Hardware-Installation 1<br />
No connection with Windows Update should be made (Img. 5).<br />
8
Mitterweg 25 – Via di Mezzo ai Piani 25<br />
I-39100 Bozen – Bolzano Tel.:0471 977236 – Fax:976525<br />
e-mail: info@<strong>elmed</strong>.it http://www.<strong>elmed</strong>.it<br />
1.2.2 Step 2 – automatic installation<br />
Img. 6: Hardware-Installation 2<br />
The driver - software will be installed automatically (Img. 6).<br />
9
Mitterweg 25 – Via di Mezzo ai Piani 25<br />
I-39100 Bozen – Bolzano Tel.:0471 977236 – Fax:976525<br />
e-mail: info@<strong>elmed</strong>.it http://www.<strong>elmed</strong>.it<br />
1.2.3 Step 3 – choose driver<br />
Img. 7: Hardware-Installation 3 – choose driver<br />
1.2.4 Step 4 – ignore warning, continue<br />
Img. 8: Hardware-Installation 4 - continue<br />
Continue installation and ignore warning (Img. 8).<br />
10
Mitterweg 25 – Via di Mezzo ai Piani 25<br />
I-39100 Bozen – Bolzano Tel.:0471 977236 – Fax:976525<br />
e-mail: info@<strong>elmed</strong>.it http://www.<strong>elmed</strong>.it<br />
1.2.5 Step 5 – conclude installation<br />
Img. 9: Hardware-Installation 5 - conclusion<br />
After the hardware driver installation was successfully completed, you need to remove<br />
the <strong>SPG10</strong> device from the <strong>PC</strong>. Remove the USB cable. Afterwards, the USB can<br />
again plugged in and the <strong>SPG10</strong> <strong>PC</strong>-<strong>Software</strong> should be able to establish a<br />
connection with the device.<br />
11
Mitterweg 25 – Via di Mezzo ai Piani 25<br />
I-39100 Bozen – Bolzano Tel.:0471 977236 – Fax:976525<br />
e-mail: info@<strong>elmed</strong>.it http://www.<strong>elmed</strong>.it<br />
2. The Main Window<br />
Img. 10: Main window<br />
After starting the program the main window of the software <strong>SPG10</strong> appears (Img. 10). Using<br />
the entries in the menu bar, all other windows and forms can be opened. The most important<br />
functions and menus (close, plot of land, active substances, spray programs, data window<br />
and the carried out injections) can be opened with the toolbar buttons.<br />
Menu structure:<br />
• File<br />
◦ close → 2.1<br />
• Forms:<br />
◦ operating data → 3<br />
◦ active substances → 4<br />
◦ plot of land → 5<br />
◦ spray programs → 6<br />
◦ carried out injections → 7<br />
• Transfer <strong>SPG10</strong> → 8<br />
• Service: → 2.2<br />
◦ remote control<br />
◦ remote control increased<br />
• Settings → 2.3<br />
• About → 2.4<br />
◦ license info<br />
◦ about...<br />
2.1 Close Program<br />
The program can be closed with the „close“-symbol or with the menu entry „file →<br />
close“. All changes and entries in the program are immediately stored in the database<br />
and are permanently available. The program can be closed at any time, without loosing<br />
data.<br />
2.2 Service<br />
With the „service“-menu the <strong>SPG10</strong> module can be remote controlled,if the <strong>SPG10</strong><br />
device is connected. The operation of the device can be made from the <strong>PC</strong> with the<br />
mouse, instead of the touch screen.<br />
2.3 Settings<br />
In the menu „settings“ the menu-language of the <strong>SPG10</strong> <strong>PC</strong> program can be chosen and<br />
the calculation variant of the concentration of sprayers can be set. You can also choose<br />
the option „multi line sprayer“. This is only useful, if you have a corresponding sprayer.<br />
12
Mitterweg 25 – Via di Mezzo ai Piani 25<br />
I-39100 Bozen – Bolzano Tel.:0471 977236 – Fax:976525<br />
e-mail: info@<strong>elmed</strong>.it http://www.<strong>elmed</strong>.it<br />
More information on the calculation variant can be found in the chapter„1.1.5 Basic<br />
Settings“.<br />
2.4 About<br />
The menu button „About“ shows information about the program <strong>SPG10</strong> and about the<br />
license agreement.<br />
• License info: You will see a window with the license conditions.<br />
• About...: The window contains information about the manufacturer and the program<br />
version of the software <strong>SPG10</strong>. (For any questions or problems, the program version<br />
used can be of importance).<br />
In the following chapters and sections the forms and functions are described, which can be<br />
opened with the menu buttons or with the main window-symbols.<br />
3. Operating Data<br />
Img. 11: Data of the enterprise or company<br />
With this form, data of the enterprise, company or agriculture farm can be entered. These<br />
information are used for the headers of prints and reports, which are created with the <strong>SPG10</strong><br />
software.<br />
13
Mitterweg 25 – Via di Mezzo ai Piani 25<br />
I-39100 Bozen – Bolzano Tel.:0471 977236 – Fax:976525<br />
e-mail: info@<strong>elmed</strong>.it http://www.<strong>elmed</strong>.it<br />
Leave the form with the „exit-symbol“.<br />
4. Active Substances<br />
Img. 12: Management of active substances<br />
In the menu „management of active substances“ all the entered substances are shown in<br />
table. The existing substances can be edited or added new. Every active substance is<br />
marked with the following data:<br />
• Trade name: this name identifies the product and is used in the printouts and in the<br />
selection fields for the spray programs.<br />
• Active substance: In this field you see the chemical substance that underlies the<br />
spray program.<br />
• gr/ha or gr/hl: The column contains informations about the dosage of the sprayer.<br />
The unit, where the value is specifyed, depends on the selection menu „2.3 Settings“.<br />
◦ Standard: The recommended amount per hectares in grams.<br />
◦ Sbr (South Tyrol): The recommended amount per hectolitres in grams. (max.<br />
gr/hl, at a 1-fold concentration).<br />
• Waiting period: The waiting period in prescribed in days, that should elapse between<br />
2 injections.<br />
• Type: The active substance-type (insecticide, fungicide...).<br />
• Remark: any text, e.g. number of allowed treatments in the year.<br />
14
Mitterweg 25 – Via di Mezzo ai Piani 25<br />
I-39100 Bozen – Bolzano Tel.:0471 977236 – Fax:976525<br />
e-mail: info@<strong>elmed</strong>.it http://www.<strong>elmed</strong>.it<br />
4.1 Edit active<br />
substances<br />
Every entry in the table can be<br />
edited. There are more options<br />
to open the window for the data<br />
input:<br />
Img. 13: Edit active substance<br />
• Double click on the desired entry<br />
• Click on „change data F2“ in the menu bar<br />
• Press the function key „F2“ on the keyboard<br />
• Click on the „change“-symbol on the symbol bar<br />
4.2 Delete active substance<br />
To delete an active substance in the table, the corresponding entry can be<br />
selected with the mouse or with the keyboard. To delete the selected substance<br />
click on the „delete“-symbol on the symbol bar. A security query avoids an<br />
accidental delete.<br />
4.3 Create new active<br />
substance<br />
With the „add“ button in the<br />
symbol bar, a new<br />
substance can be added. An<br />
input window opens, in which all<br />
parameter can be entered. The data<br />
are immediately saved. As soon as<br />
the input window gets closed, the<br />
new entry will be entered in the<br />
alphabetical sorted table.<br />
4.4 Print active substances<br />
Img. 14: Inputwindow active substance<br />
It is possible to print the<br />
active substance – list. By clicking on the „print“-symbol you see a print-preview,<br />
which is shown on the screen area. To print the list click in the preview on the<br />
„Printer“-symbol.<br />
15
Mitterweg 25 – Via di Mezzo ai Piani 25<br />
I-39100 Bozen – Bolzano Tel.:0471 977236 – Fax:976525<br />
e-mail: info@<strong>elmed</strong>.it http://www.<strong>elmed</strong>.it<br />
5. Plots Of Land<br />
Img. 15: Management of the plots<br />
In the plot management all plots can be shown in the table. Here you can edit, delete or<br />
create plots.<br />
Key data to be entered:<br />
• Name: the name or the designation of the plot<br />
• Surface: The plot size (surface) in square meters<br />
• Row width: row width in meters<br />
• Tree height: tree height in meters<br />
• Variety: fruit variety<br />
• Info: any text can be entered<br />
• Cadaster community: the community or locality in which the plot is or is registrated<br />
• N.plot: the number of plot (cadaster)<br />
• Sea heigth: the sea height of the plot in meters<br />
5.1 Edit Plots<br />
All entries in the table can be edited. There are more options to open the<br />
window for the data entry:<br />
• Double click on the required entry<br />
• Click on „change data F2“ in the menu bar<br />
• Press the function key „F2“ on the keyboard<br />
• Click on the „change“-symbol on the symbol bar.<br />
5.2 Delete Plot<br />
To delete a plot in the table, the corresponding entry can be selected with the<br />
mouse or with the keyboard. To delete the selected plot click on the „delete“-<br />
symbol on the symbol bar. A security query avoids an accidental delete.<br />
16
Mitterweg 25 – Via di Mezzo ai Piani 25<br />
I-39100 Bozen – Bolzano Tel.:0471 977236 – Fax:976525<br />
e-mail: info@<strong>elmed</strong>.it http://www.<strong>elmed</strong>.it<br />
5.3 Create A New Plot<br />
With the „add“ button on the<br />
symbol bar a new plot can be<br />
added in the table. A window<br />
opens in which all parameters of the<br />
plot can be entered. The data are<br />
immediately saved. As soon as the<br />
input window gets closed, the new entry<br />
will be entered in the alphabetical<br />
sorted table.<br />
img. 16: Inputwindow plot data<br />
5.4 Print Plots<br />
It is possible to print the list of the plots. By clicking on the „print“-symbol you see<br />
a print-preview, which is shown on the screen area. To print the list click in the<br />
preview on the „Printer“-symbol.<br />
17
Mitterweg 25 – Via di Mezzo ai Piani 25<br />
I-39100 Bozen – Bolzano Tel.:0471 977236 – Fax:976525<br />
e-mail: info@<strong>elmed</strong>.it http://www.<strong>elmed</strong>.it<br />
6. Spray Programs<br />
Img. 17: Management spray program<br />
In the menu „spray programs“ the spray programs can be created, edited or deleted. The<br />
window is divided in two parts. In the upper part you see the table with all the spray<br />
programs. In the lower part are shown the settings and the parameter of the chosen spray<br />
program.<br />
6.1 Create A New Program<br />
Click on this symbol to create a new program. The table shows a new entry with<br />
the name „New !!!!!“, which has also been selected for editing (in blue). The<br />
parameters of the program can be entered in the input window in the lower<br />
window area.<br />
6.2 Delete Program<br />
With the delete button the chosen program can be deleted. If you confirm the<br />
security query with OK, the program will be deleted.<br />
6.3 Copy Program<br />
To copy a program, choose a required program in the table. Click on the „copy“-<br />
symbol. As a consequence, a new entry is inserted in the table. The name of the<br />
source program remains, however, it receives the additional „copy“.<br />
E.g. copying: „house field“ → „Copy house field“<br />
6.4 Print Spray Program List<br />
It is possible to print a spray program list. By clicking on the „print“-symbol you<br />
see a print-preview, which is shown on the screen area. To print the list click in<br />
the preview on the „Printer“-symbol.<br />
18
Mitterweg 25 – Via di Mezzo ai Piani 25<br />
I-39100 Bozen – Bolzano Tel.:0471 977236 – Fax:976525<br />
e-mail: info@<strong>elmed</strong>.it http://www.<strong>elmed</strong>.it<br />
6.5 Spray Program Settings - Standard<br />
Important: This chapter is only relevant<br />
if you have selected under the menu<br />
item „settings“ the calculation variant<br />
„Standard“, otherwise continue with<br />
chapter „6.6 Spray Program – Sbr South<br />
Tyrol Setting“.<br />
In the lower area of the spray program<br />
management you see the fields for the<br />
display and input of the parameters of<br />
the spray program. The data are applied<br />
immediately, so you don't need to save<br />
them.<br />
6.5.1 Designation Spray Program<br />
In the field „designation spray<br />
program“ to every program can be given an individual name.<br />
So that in each spray program a particular plot and at least one active substance is<br />
assigned, it is recommended to choose the name so, that the plot and the type of<br />
injection are seen. So that the programs in the subsequent selection list (also on<br />
sprayer) are sorted alphabetically, it is recommended to name all spray programs with<br />
the same pattern:<br />
o e.g. first the land, then the spray type („meadow scab“). So, all spray programs<br />
are sorted by plot.<br />
o Other way around („scab meadow“). So, all spray programs are sorted by spray<br />
type.<br />
6.5.2 Choice Plot<br />
In the field „plot“ plot is assigned to a program (edit plot, create plot ect. see chapter „5<br />
Plots Of Land “). The key data of the chosen plot are shown in the lower window area.<br />
(e.g. row width, tree height, total water expense...)<br />
6.5.3 Comment<br />
In this field you can enter any text.<br />
Img. 18: Parameter of the spray program<br />
- Standard<br />
6.5.4 Surface to be edit<br />
The surface to be edit is taken from the data of the assigned plot. The surface can also<br />
be changed here, if only a part of the plot needs to be edited.<br />
19
Mitterweg 25 – Via di Mezzo ai Piani 25<br />
I-39100 Bozen – Bolzano Tel.:0471 977236 – Fax:976525<br />
e-mail: info@<strong>elmed</strong>.it http://www.<strong>elmed</strong>.it<br />
6.5.5 Speed<br />
The speed is shown here, which should be driven while spraying. Small speed<br />
changes during the ride are automatically balanced with an appropriate control.<br />
6.5.6 Water Expense/ha<br />
In this field you see the recommended water expense per hectares, which is used for<br />
the spraying. This value is included in the calculation and it determines the total<br />
amount of water.<br />
20
Mitterweg 25 – Via di Mezzo ai Piani 25<br />
I-39100 Bozen – Bolzano Tel.:0471 977236 – Fax:976525<br />
e-mail: info@<strong>elmed</strong>.it http://www.<strong>elmed</strong>.it<br />
6.6 Spray Program – Sbr South Tyrol Setting<br />
Important: This chapter is only relevant if you have selected under the menu item<br />
„settings“ the calculation variant „Sbr South Tyrol“, otherwise continue with chapter<br />
„6.5 Spray Program Settings - Standard“.<br />
in the lower area o the window you see the fields for the display and input of the<br />
parameters of the spray program. The data are applied immediately, so you don't need to<br />
save them.<br />
Img. 19: Parameter of the spray program<br />
6.6.1 Designation Spray Program<br />
In the field „designation spray program“ to every program can be given an individual<br />
name.<br />
So that in each spray program a particular plot and at least one active substance is<br />
assigned, it is recommended to choose the name so, that the plot and the type of<br />
injection are seen. So that the programs in the subsequent selection list (also on<br />
sprayer) are sorted alphabetically, it is recommended to name all spray programs with<br />
the same pattern:<br />
o e.g. first the land, then the spray type („meadow scab“). So, all spray programs<br />
are sorted by plot.<br />
o Oher way around („scab meadow“). So, all spray programs are sortey by spray<br />
type.<br />
6.6.2 Choice Plot<br />
In the field „plot“ plot is assigned to a program (edit plot, create plot ect. see chapter „5<br />
Plots Of Land “). The key data of the chosen plot are shown in the lower window area.<br />
(e.g. row width, tree height, total water expense...)<br />
6.6.3 Comment<br />
In this field you can enter any text.<br />
6.6.4 Surface to be edit<br />
The surface to be edit is taken from the data of the assigned plot. The surface can also<br />
be changed here, if only a part of the plot needs to be edited.<br />
21
6.6.5 Concentration<br />
Here you can enter the broth-concentration.<br />
Mitterweg 25 – Via di Mezzo ai Piani 25<br />
I-39100 Bozen – Bolzano Tel.:0471 977236 – Fax:976525<br />
e-mail: info@<strong>elmed</strong>.it http://www.<strong>elmed</strong>.it<br />
6.6.6 Speed<br />
The speed is shown here, which should be driven while spraying. Small speed<br />
changes during the ride are automatically balanced with an appropriate control.<br />
6.6.7 Water Expense Deviation<br />
Depending on the pant system it may be necessary to adjust the water expense<br />
accordingly. Enter the deviation in percent (-50 bis +50%).<br />
Plant system with the recommended deviation:<br />
0% = single row 30% = beddings-plants<br />
10% = double row -10% = palms<br />
20% = three series<br />
6.7 Nozzle settting<br />
The following parameters can be set:<br />
6.7.1 Number of sectors<br />
Depending on the type of sprayer there<br />
can be set 2, 4, 6, 8 sectors. Depending<br />
on the choice, different numbers of<br />
nozzle-selection buttons are displayed.<br />
6.7.2 Multiline Sprayer<br />
If a multi line sprayer is used, the<br />
corresponding option should be set. If<br />
this is the case, then the number of<br />
nozzles for all sectors should be the<br />
same.<br />
Img. 20: Nozzle setting<br />
6.7.3 Number Of Nozzles<br />
Th number of nozzles must be separately specified for every wreath (bottom-left, topleft,<br />
bottom-right, top-right). The selection fields are displayed in red if not all the<br />
sectors in a multi line sprayer have the same number of nozzles.<br />
6.7.4 Nozzle Type<br />
In the selection field the used nozzle type (ATR-or AVI-nozzles) can be chosen.<br />
6.7.5 Nozzle Colour<br />
Choose in the selection field „colour“ the desired nozzle. In the field below is<br />
recommended a nozzle colour, which was determined, based on the spray-programsetting.<br />
Next to it, you can see in brackets the calculated pression in bar.<br />
22
Mitterweg 25 – Via di Mezzo ai Piani 25<br />
I-39100 Bozen – Bolzano Tel.:0471 977236 – Fax:976525<br />
e-mail: info@<strong>elmed</strong>.it http://www.<strong>elmed</strong>.it<br />
6.8 Active Substance Setting – Standard<br />
Important: Only note, if under „settings“<br />
the calculation variant „standard“ is<br />
chosen.<br />
6.8.1 Choice Active Substances<br />
For every injection can be chosen, with<br />
the help of the selection field, up to 5<br />
active substances.<br />
6.8.2 gr/ha – Display Of Dosage<br />
In the column „gr/ha“ is shown the<br />
amount of substances per hectares.<br />
6.8.3 Total Display Of The Necessary<br />
Amount Of Active Substances<br />
In the last column „total (gr)“ is displayed<br />
the absolute amount of spray, which is<br />
used for the spraying.<br />
Img. 21: Choice of the active<br />
substances - Standard<br />
6.9 Active Substance Setting – Sbr South Tyrol<br />
Important: Only note, if under „settings“<br />
the calculation variant „Sbr South Tyrol“<br />
is chosen.<br />
6.9.1 Choice Active Substances<br />
For every injection can be chosen, with<br />
the help of the selection field, up to 5<br />
active substances.<br />
6.9.2 Active Substance Amount Input<br />
per Hectolitre (1-fold-concentration)<br />
In each of the selection fields next to the<br />
related fields „gr/hl (1x)“, after choosing a<br />
substance, the recommended amount per<br />
hectares in grams is shown automatically<br />
(1-fold concentration). (It can also be<br />
changed).<br />
Img. 22: Selection active substances -<br />
Sbr South Tyrol<br />
6.9.3 Display Of The Actual Amount Of Active Substances Needed Per<br />
Hectolitre<br />
In the coloumn „gr/hl“ the amount of active substance per hectolitre is shown, which is<br />
used with the current set concentration (dosage). For example, the amount doubled at<br />
2-fold concentration.<br />
6.9.4 Display Of The Total Required Amount Of Active Substances<br />
In the last column „total (gr)“ you see the total amount used for the injection.<br />
23
Mitterweg 25 – Via di Mezzo ai Piani 25<br />
I-39100 Bozen – Bolzano Tel.:0471 977236 – Fax:976525<br />
e-mail: info@<strong>elmed</strong>.it http://www.<strong>elmed</strong>.it<br />
7. Conducted Injection Forms<br />
Abb. 23: Conducted injections<br />
In the form „conducted injections“ you find in the upper area a table with the conducted<br />
injections, which were recorded with the spray device and were transferred on the <strong>PC</strong>.<br />
Below the table you see the detailed data of the chosen injection. (Details in chapter „7.5<br />
Detail Information Of One Conducted Injection“).<br />
7.1 <strong>Manual</strong> Editing<br />
All saved injections in the list can also be manually edited. First, choose a data<br />
record in the list. There are more possibilities to open the window for the<br />
recorded data:<br />
• Double click on the desired entry<br />
• Click on „manual editing F2“ in the menu bar<br />
• Press the function key „F2“ on the keyboard<br />
• Click on the „edit“-symbol in the symbol bar<br />
In the now opened form you can change the basic settings of the conducted injections.<br />
(the individual fields are described in chapter „6.5 Spray Program Settings - Standard“<br />
bzw. „6.6 Spray Program – Sbr South Tyrol Setting“.<br />
24
Mitterweg 25 – Via di Mezzo ai Piani 25<br />
I-39100 Bozen – Bolzano Tel.:0471 977236 – Fax:976525<br />
e-mail: info@<strong>elmed</strong>.it http://www.<strong>elmed</strong>.it<br />
Img. 24: <strong>Manual</strong> editing of the conducted injections<br />
7.2 Delete Entry<br />
With the „delete-button“ the chosen injection can be deleted. A security query<br />
avoids an accidental delete.<br />
25
Mitterweg 25 – Via di Mezzo ai Piani 25<br />
I-39100 Bozen – Bolzano Tel.:0471 977236 – Fax:976525<br />
e-mail: info@<strong>elmed</strong>.it http://www.<strong>elmed</strong>.it<br />
7.3 Print List<br />
The conducted injections can be printed. By clicking on the „print“-symbol it<br />
opens a selection field, where you can choose the printer and the injection to<br />
print.<br />
Img. 25: Choise of printing injections<br />
Click on the entries which you want to print. Also more injections can be chosen.<br />
With the symbol „select all lines“, all recorded data are highlighted.<br />
Press on the switch area „deselect all lines“to delete markings.<br />
7.3.1 Open Print Preview<br />
After having chosen the printer and the recorded data to be printed, with the<br />
„preview“-symbol can be opened the print preview. In the print preview the<br />
expected result can be examined in advance. You can print by clicking on<br />
the „printer“-symbol.<br />
26
Mitterweg 25 – Via di Mezzo ai Piani 25<br />
I-39100 Bozen – Bolzano Tel.:0471 977236 – Fax:976525<br />
e-mail: info@<strong>elmed</strong>.it http://www.<strong>elmed</strong>.it<br />
7.4 Print Logbook ausdrucken (Operation issue)<br />
With the help of the print function „logbook“, all conducted plot-injections can be printed.<br />
It is also possible to choose certain injections. The printed can be used for the operation<br />
issue for the documentation of fertilizer and pesticide.<br />
Img. 26: Selection of the printing injections<br />
Choose in the table with all conducted injections one injection, that is assigned ti<br />
one printed plot. By clicking on the „logbook“ button a selection field opens, that<br />
includes all injections of the plot. The injections are provided with a date and are<br />
chronological listed. In the selection field you can choose the desired injections.<br />
7.4.1 Open Print Preview<br />
After having chosen the printer and the recorded data to be printed, with the<br />
„preview“-symbol can be opened the print preview. In the print preview the<br />
expected result can be examined in advance. You can print by clicking on<br />
the „printer“-symbol.<br />
27
Mitterweg 25 – Via di Mezzo ai Piani 25<br />
I-39100 Bozen – Bolzano Tel.:0471 977236 – Fax:976525<br />
e-mail: info@<strong>elmed</strong>.it http://www.<strong>elmed</strong>.it<br />
7.5 Detail Information Of One Conducted Injection<br />
As already mentioned in the chapter „7 Conducted Injection Forms“, you see in the lower<br />
part of the form „conducted injections“ all details of the selected injection.<br />
Img. 27: Detail information about the injection<br />
7.5.1 Summary Of The Injection<br />
In the first two rows (Img. 27), all the data, that were recorded during the injection, are<br />
shown in summary:<br />
• Total amount (litre): The total amount of water used for the injection.<br />
• Application rate (l/ha): The amount in litres that were sprayed per hectares.<br />
• Editing surface (m²): The editing surface (line space × route), on which was active<br />
sprayed. It means that the driven routes, where it wasn't sprayed (e.g. starting and<br />
ending route), are not taken in consideration while counting the surface.<br />
• Sprayer: The sprayer name, which was saved in the sprayer.<br />
• Total injection duration (hh:mm:ss): The total recorded duration. Also the time<br />
difference between spray program-START and spray program-STOP (gross).<br />
• Injection duration (hh:mm:ss): The duration where is was effectively injected ( net).<br />
• Ø Average speed (km/h): It shows the speed that was driven on average during the<br />
injection.<br />
• Ø Average pressurek (bar): The average pressure that has prevailed during the<br />
injection.<br />
• Ø Average flow rate (l/min): The average flow rate during the injection.<br />
28
Mitterweg 25 – Via di Mezzo ai Piani 25<br />
I-39100 Bozen – Bolzano Tel.:0471 977236 – Fax:976525<br />
e-mail: info@<strong>elmed</strong>.it http://www.<strong>elmed</strong>.it<br />
7.5.2 Requirements Of One Conducted Injection<br />
In the requirements area are shown the program settings, which were used for this<br />
injection. Details to the individual parameters can be taken from chapter „6 Spray<br />
Programs“.<br />
7.5.3 Show Details Of The Conducted Injection<br />
The button „show detail“ activates and deactivates the detailed view of<br />
the chosen injection. The measured values are saved during the<br />
injection every second.<br />
Img. 28: Detail view of the measured values of the injection<br />
• Date: Recorded date and time<br />
• Speed: Speed in km/h<br />
• Pressure: measured pressure in bar<br />
• Nominal pressure: the calculated nominal pressure (varies with the speed)<br />
• Litre: the content of the sprayer<br />
• Way: The travelled distance in meters<br />
• Flow rate (l/min): the flow rate in litre per minute<br />
• Nozzles: The used wreaths: BL (bottom-left), TL (top-left), BR (bottom-right) and TR<br />
(top-right)<br />
With the help of this data table, all events or irregularities during the injection can be<br />
identified (wreath switch, pressure- or speed deviations...).<br />
7.6 Graphic<br />
In the graphic, data, which were recorded during the injection, are<br />
graphically shown (pressure, nominal pressure, flow rate speed). Above<br />
the graphic field are buttons with which the measurements can be<br />
activated or deactivated.<br />
29
Mitterweg 25 – Via di Mezzo ai Piani 25<br />
I-39100 Bozen – Bolzano Tel.:0471 977236 – Fax:976525<br />
e-mail: info@<strong>elmed</strong>.it http://www.<strong>elmed</strong>.it<br />
Img. 29: Selection of the measurements<br />
Img. 30: Graphical representation of measured values<br />
7.6.1 Construction Of The Graphic<br />
The X-axis (horizontally) is the axis with day, month and time. The y-axis (vertical)<br />
corresponds to the selected analogue values. The scale adapts automatically to the<br />
respective values shown.<br />
7.6.2 The Graphic Buttons<br />
Button „pointer“:<br />
When this button is pressed, with one click anywhere on the graph, the<br />
cross-hair can be positioned. All measured points, that intersect with the<br />
(vertical) cross-hair lines, are shown in plain text below the respective<br />
button. In addition, the timing of these points is given.<br />
30
Mitterweg 25 – Via di Mezzo ai Piani 25<br />
I-39100 Bozen – Bolzano Tel.:0471 977236 – Fax:976525<br />
e-mail: info@<strong>elmed</strong>.it http://www.<strong>elmed</strong>.it<br />
Button „zoom“:<br />
After clicking on this button, an area in the graph can be zoomed. Pull a<br />
rectangle by pressing the mouse button. After releasing it, this area is<br />
displayed in the graphic window.<br />
Button „move graphic“:<br />
With this function the graphic can be moved. Move the mouse pointer over<br />
the graphic by keeping the mouse button pressed on the desired position.<br />
Button „produce original settings“:<br />
The button restores the original setting of the graphic representation.<br />
Button „show/hide auxiliary lines“:<br />
The horizontal auxiliary lines can be shown or hidden with this button.<br />
Button „highlight measuring points“:<br />
Activate this button if every measuring point should be highlighted with one<br />
point.<br />
8. Data Transfer With <strong>SPG10</strong><br />
On the one hand, the data transfer,<br />
the exchange of data between the <strong>PC</strong><br />
program and the sprayer <strong>SPG10</strong>, is<br />
used to send the created programs (active<br />
substances and plot-list included) to the<br />
sprayer and on the other hand to import the<br />
recorded injections on the sprayer in the <strong>PC</strong><br />
program.<br />
Before the data transfer can start, the sprayer<br />
must be connected with the <strong>PC</strong>. Therefore,<br />
the included USB-cable has to be plugged<br />
into the sprayer <strong>SPG10</strong> and into an available<br />
USB slot of the <strong>PC</strong>.<br />
Img. 31: Data transfer between the<br />
<strong>SPG10</strong>-terminal and the <strong>PC</strong><br />
The data trasmission can be stated with the menu „transfer <strong>SPG10</strong>“ or with the „transfer“-<br />
sybmol. Afterwards, the transfer window opens (Img. 31). With the button „start transfer“<br />
starts the data transmission. This data sequence is used:<br />
• Verify connection to <strong>SPG10</strong><br />
First, the connection gets verified. In the case of connecting problems it appears the<br />
message „no connection to <strong>SPG10</strong>“. In this case, you need to verify if the<br />
connection was made properly.<br />
31
Mitterweg 25 – Via di Mezzo ai Piani 25<br />
I-39100 Bozen – Bolzano Tel.:0471 977236 – Fax:976525<br />
e-mail: info@<strong>elmed</strong>.it http://www.<strong>elmed</strong>.it<br />
• Read directory<br />
The recorded injections in the sprayer <strong>SPG10</strong> are read. With this operation, the<br />
records (that are only recorded in the <strong>PC</strong> program) are deleted to have again space<br />
for new recordings.<br />
• Send new plot -data to the <strong>SPG10</strong><br />
The recorded plot-data in the <strong>PC</strong> program are transmitted to the sprayer. All the<br />
existing plots will be overwritten in the sprayer.<br />
• Send new active substances to the <strong>SPG10</strong><br />
The existing active substances in the <strong>PC</strong> program are transmitted to the sprayer. All<br />
the existing active substances will be overwritten in the sprayer.<br />
• Send new spray programs to the <strong>SPG10</strong><br />
Also all spray programs are sent and the existing programs in the sprayer will be<br />
overwritten.<br />
After a successfully data transmission it appears a OK-message, which you will confirm with<br />
OK.<br />
Notes: Changes (in plots, active substances and spray programs), that are made on the<br />
sprayer, can not be transferred on the <strong>PC</strong>. So that during the data transmission these data in<br />
the sprayer will be overwritten, it is recommended not to make any major changes on the<br />
sprayer. Instead, all changes should always be done on the <strong>PC</strong>.<br />
32