Coffee Maker Senseo HD7823/10 - Expert-CM
Coffee Maker Senseo HD7823/10 - Expert-CM
Coffee Maker Senseo HD7823/10 - Expert-CM
You also want an ePaper? Increase the reach of your titles
YUMPU automatically turns print PDFs into web optimized ePapers that Google loves.
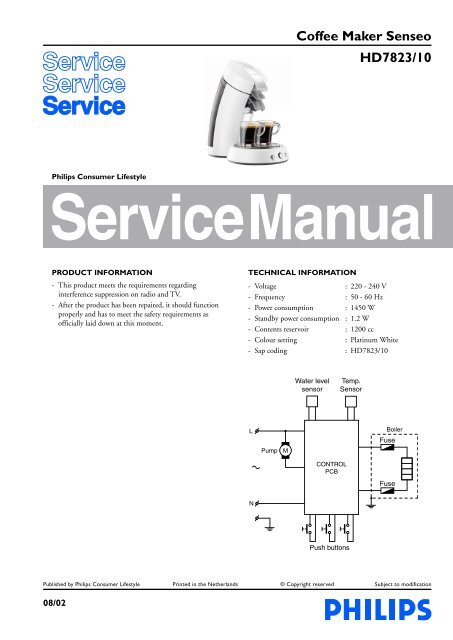
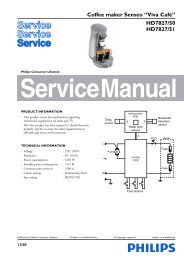
<strong>Coffee</strong> <strong>Maker</strong> <strong>Senseo</strong><br />
<strong>HD7823</strong>/<strong>10</strong><br />
Philips Consumer Lifestyle<br />
Service Manual<br />
PRODUCT INFORMATION<br />
- This product meets the requirements regarding<br />
interference suppression on radio and TV.<br />
- After the product has been repaired, it should function<br />
properly and has to meet the safety requirements as<br />
officially laid down at this moment.<br />
TECHNICAL INFORMATION<br />
- Voltage : 220 - 240 V<br />
- Frequency : 50 - 60 Hz<br />
- Power consumption : 1450 W<br />
- Standby power consumption : 1.2 W<br />
- Contents reservoir : 1200 cc<br />
- Colour setting : Platinum White<br />
- Sap coding : <strong>HD7823</strong>/<strong>10</strong><br />
Water level<br />
sensor<br />
Temp.<br />
Sensor<br />
L<br />
Pump<br />
M<br />
Boiler<br />
Fuse<br />
CONTROL<br />
PCB<br />
Fuse<br />
N<br />
Push buttons<br />
Published by Philips Consumer Lifestyle Printed in the Netherlands © Copyright reserved Subject to modification<br />
08/02
DISASSEMBLY- AND RE-ASSEMBLY ADVISE<br />
To remove the back cover, follow below steps:<br />
- Remove Screw A (see exploded view).<br />
- Remove valve outlet.<br />
- Start at the upper side of the back cover and stick a<br />
screwdriver into the 2 snap locks positions and gently pull<br />
the back cover from the appliance so that a little chink<br />
between back cover and brew chamber becomes visible.<br />
- Put the screwdriver into the 4 rectangular holes (snap locks)<br />
at the back and gently pull the screwdriver such away that<br />
the lips of the snap locks are bent outwards.<br />
- If all clicks positions are loose, it is possible to remove the<br />
back cover.<br />
- Reassemble follow steps backwards.<br />
To reach the components placed on the base (for example<br />
exchange the NTC temperature sensor) follow below steps:<br />
- First remove back cover, brew chamber, 3-way valve and<br />
boiler.<br />
- Remove both Torx T15 screws B (see exploded view).<br />
- Bend the 2 click snap locks with a screwdriver (see base),<br />
the housing can now be removed.<br />
- To remove the rest of the housing unlock the last 4 snap<br />
locks at the base and gently pull of the front cover.<br />
- To reassemble follow above steps backwards.<br />
OPTIONAL (accessories)<br />
- No specific issues.<br />
REPAIR INSTRUCTION<br />
Descaling<br />
Regular descaling will prolong the life of your appliance and<br />
will guarantee optimal brewing results for a long time.<br />
• Follow the steps in the section headed “Preparing the<br />
appliance for use” see DFU (Direction for Use manual)<br />
• Instead of only water use a mix of water and Lemon sour.<br />
• For the best result leave the mix of water and Lemon sour<br />
for about 30 Minutes in the appliance, before you start with<br />
flushing the appliance.<br />
• To get the best results repeat above-mentioned step once or<br />
twice.<br />
• When finished, flush the appliance twice by repeating the<br />
above-mentioned steps only use water instead.<br />
<strong>HD7823</strong>/<strong>10</strong><br />
Volume adjustment<br />
The new PCB circuit board makes it possible to adjust the<br />
volume output by means of pushing the one-cup and two-cup<br />
user controls.<br />
How to adjust the volume output:<br />
1. Be sure the boiler is filled properly, other wise perform fill<br />
procedure see DFU for instructions.<br />
2. Switch appliance on and wait until the unit is ready to<br />
brew.<br />
3. Be sure a pod holder is placed, but without a <strong>Coffee</strong><br />
POD. (Only adjusting with plain water)<br />
4. Place a cup on the drip tray cover and push the one-cup<br />
button.<br />
5. When the appliance has finished it is stabilized to perform<br />
the volume adjustment.<br />
6. Empty the cup, podholder and push again for one cup<br />
setting, measure the volume output with a graduated<br />
beaker. In the table you can find the requirements for<br />
the minimum / maximum volume output cc/mL values<br />
depending from the country version:<br />
Min. water cc/mL Max. water cc/mL<br />
France version <strong>10</strong>4 120<br />
General version 125 141<br />
7. Unplug the appliance from the mains.<br />
8. Press the 1- and 2 cup button simultaneously and plug the<br />
mains on.<br />
9. When above step succeeded the LED will turn on<br />
continuously.<br />
<strong>10</strong>. Depending if the volume has to de- or increase you have<br />
to push the 1- or 2 cup button.<br />
Every time you push the 1- or 2 cup button the LED will<br />
turn off for 0.5 second (feedback to user) and the pump<br />
time will be shortened or lengthened for 0.5 seconds<br />
depending which button was pushed.<br />
Pushing 1 cup button pump, time will be shorten with<br />
0.5 sec is approximately − 3.5 cc/mL (less coffee)<br />
Pushing 2 cup button pump, time will be lengthen with<br />
0.5 sec is approximately + 3.5 cc/mL (more coffee)<br />
When the volume has to increase with <strong>10</strong> cc for example,<br />
push the 2 cup button 3 times.<br />
The new value will be stored when you switch the<br />
appliance off by pushing the main switch.<br />
(LED will turn off)<br />
11. Turn appliance on again and brew one cup, measure the<br />
volume. In case the volume is not within specification<br />
repeat steps 6 - 11.<br />
12. End.<br />
2-5
REPAIR INSTRUCTION & PARTS LIST<br />
Restoring the Boiler_empty_flag to production default:<br />
Some times it is needed that the boiler of the <strong>Senseo</strong> have to<br />
be emptied.<br />
This for instance in wintertime where the possibility exists<br />
that the boiler becomes frozen during transport e.g.<br />
For those occasions it is handy to restore the Boiler_empty_<br />
flag again to production default in the Eeprom.<br />
Bringing the <strong>Senseo</strong> back into production status, has the<br />
benefit the flush routine will be activated automatically when<br />
installed by the consumer.<br />
<strong>HD7823</strong>/<strong>10</strong><br />
To SET the Boiler_empty_flag can be done by:<br />
Keep the 1-cup button pressed while plugging in the power<br />
cord of the appliance.<br />
The main switch LED will blink very rapidly for<br />
approximately 1 second.<br />
To check if the Boiler_empty_flag is really set, you should<br />
reconnect the power cord a second time to the net and push<br />
the main switch.<br />
The main switch LED should light continuously.<br />
Pos Service code Description<br />
1<br />
2<br />
3<br />
4<br />
5<br />
6<br />
7<br />
8<br />
9<br />
<strong>10</strong><br />
11<br />
12<br />
13<br />
14<br />
15<br />
16<br />
17<br />
18<br />
19<br />
20*<br />
21<br />
22<br />
23<br />
24<br />
25<br />
26<br />
27<br />
4222 259 39150<br />
4222 259 39190<br />
4222 247 42550<br />
4222 247 45990<br />
4222 259 379<strong>10</strong><br />
4222 240 05940<br />
4222 247 41860<br />
4222 259 36430<br />
4222 259 42060<br />
4222 247 41950<br />
4222 240 014<strong>10</strong><br />
4222 247 068<strong>10</strong><br />
4222 240 05990<br />
4222 247 41920<br />
4222 259 34970<br />
4222 259 35440<br />
4222 247 06840<br />
4222 247 05130<br />
4222 259 35500<br />
4222 259 36500<br />
4222 247 60500<br />
4222 259 42290<br />
4222 247 05180<br />
4222 247 35870<br />
4222 247 39890<br />
4222 247 051<strong>10</strong><br />
4213 247 05250<br />
Padholder 1-cup<br />
Padholder 2-cup<br />
Collector<br />
Spout cover<br />
Spout assy<br />
Driptray cover<br />
Driptray<br />
Lever<br />
Lid printed<br />
Pushrod<br />
Slider spring<br />
Sealing ring<br />
Ejector pin<br />
Distribution disk<br />
3-Way valve<br />
Boiler assy<br />
Hose<br />
O-ring (NTC)<br />
NTC assy<br />
Water tank assy TOP<br />
Valve outlet<br />
Back cover<br />
WC sealing<br />
Filter<br />
WC socket hard<br />
Corrugated tube<br />
Foot<br />
Mid Silver Grey<br />
Mid Silver Grey<br />
Black<br />
Mid Silver Grey<br />
Black<br />
Black<br />
Cool Silver<br />
Platinum White<br />
Black<br />
V7.0 - 230 V<br />
Softgrey<br />
Mid Silver Grey<br />
Mid Silver Grey<br />
* Standardized part<br />
3-5
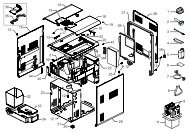
EXPLODED VIEW<br />
<strong>HD7823</strong>/<strong>10</strong><br />
8<br />
1<br />
9<br />
<strong>10</strong><br />
2<br />
11<br />
3<br />
4<br />
12<br />
13<br />
5<br />
14<br />
B<br />
6<br />
B<br />
7<br />
X<br />
4-5
EXPLODED VIEW<br />
<strong>HD7823</strong>/<strong>10</strong><br />
15<br />
A<br />
20<br />
16<br />
18<br />
21<br />
19<br />
17<br />
23<br />
24<br />
25<br />
22<br />
26<br />
X<br />
27<br />
5-5


