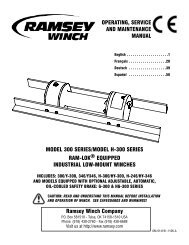
IMPORTANT NOTES! WARNING - Ramsey Winch
IMPORTANT NOTES! WARNING - Ramsey Winch
IMPORTANT NOTES! WARNING - Ramsey Winch

You also want an ePaper? Increase the reach of your titles
YUMPU automatically turns print PDFs into web optimized ePapers that Google loves.
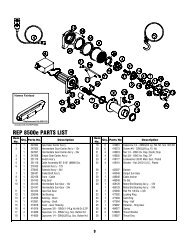
STEP 3<br />
Place frame assembly #3 between bracket assemblies #7 & #8 and R.H. & L.H. side plates #2 to the<br />
outsides of bracket assemblies. Use (3) 1/2-13NC x 1-1/2 lg. carriage bolts #15 and (1) 1/2-13NC x<br />
1-1/4 lg. carriage bolt #14, with lockwashers #21, and nuts #19 (each side), as shown, to attach side<br />
plates and brackets to frame assembly. DO NOT TIGHTEN HARDWARE.<br />
Install (1) tube assembly #6 at top between side plates #2, placing shims #23 between side plates<br />
and ends of tube. Secure using (1) 3/8-16 NC X 3/4 lg. hex socket button head capscrew #17 at<br />
each end. Attach light tube assemblies #9 to side plates, as shown. Use (2) 3/8-16NC x 1 lg.<br />
carriage bolts #10, with lockwashers #20 and nuts #18, each side.<br />
3