Assembly Instructions Combi Deck - Kosche
Assembly Instructions Combi Deck - Kosche
Assembly Instructions Combi Deck - Kosche

You also want an ePaper? Increase the reach of your titles
YUMPU automatically turns print PDFs into web optimized ePapers that Google loves.
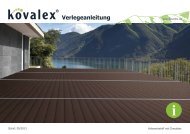
<strong>Assembly</strong> <strong>Instructions</strong> <strong>Combi</strong> <strong>Deck</strong><br />
<strong>Assembly</strong> accessories<br />
wall surround 40x40 mm end profile incl. mounting rail clip caps<br />
aluminium profile<br />
<strong>Assembly</strong> aids<br />
rubber mallet cordless electric screwdriver stainless steel screws handsaw<br />
(continuous thread)<br />
Base for assembly<br />
The assembly with mounting rail is possible on:<br />
• Paving stones (30x30 cm)<br />
• Durably supporting substructures (concrete, tiles, etc.)<br />
• Bearing points must be level, plane and perpendicular<br />
• A gradient of 1 – 3 % must be allowed for<br />
450 - 500 mm<br />
Fitting of the mounting rails<br />
• Angle of 90° to the desired course of deals<br />
• Spaces between supports at most 450 - 500 mm<br />
• Lengthwise an expansion joint of 30 mm must be<br />
left between 2 mounting rails<br />
Expansion joints in general<br />
• Necessary due to the expansion – caused by moisture absorption<br />
• Expansion joints diminish in time<br />
450 mm<br />
450 mm<br />
Expansion joint dimension<br />
Fixed structural part<br />
• Maintain an expansion joint of at least 30 mm all around<br />
• In the case of a length of more than 4 meters leave a joint<br />
of 5 mm each lin. m.<br />
30 mm expansion joint dimension<br />
• Between the individual deck profiles an expansion joint<br />
8 mm expansion joint dimension<br />
of at least 8 mm, between 2 mounting rails an expansion<br />
joint of 30 mm must be maintained<br />
• In the case of an expansion joint in the <strong>Combi</strong> <strong>Deck</strong><br />
150 mm<br />
an additional mounting rail must be attached under it<br />
450-500 mm<br />
450-500 mm<br />
www.kovalex.de • info@kovalex.de<br />
A high-quality product of the KOSCHE-group
<strong>Assembly</strong> of the deal on a mounting rail<br />
• Drill holes (Ø 8 mm) into the substructure every 60 cm so<br />
that rainwater can run off. Insert clips into the mounting rail<br />
according to the number of deals to be mounted.<br />
• Attach the starting end of each mounting rail with a V2A<br />
screw (continuous thread and frame pin). Let the rest of<br />
the mounting rail loose in order not to prevent dimensional<br />
changes.<br />
• Cut the decks to the correct sizes, fasten them via clips,<br />
start at an external longitudinal edge and maintain the<br />
expansion joint dimension.<br />
expansion joint dimension<br />
expansion joint dimension<br />
• Close the ends of the decks with caps. For this purpose, we recommend Remmers Albon Coll Express PU.<br />
Before bonding, the products must be treated with a blowlamp. If required, the caps must be fitted manually.<br />
If caps are used, the profile of the deal-board should be provided with a drill hole from the bottom side<br />
at a 5 mm distance from the edge to prevent moisture accumulation.<br />
• Finally, we recommend our cover profile 40x40 mm and/or our end profile. When using the end profile, the<br />
aluminium bottom part must be fastened to the mounting rail prior to laying the deals (pre-drill aluminium,<br />
increase the diameter of the hole according to the screw head and screw down with V2A screw 3 x 20 mm<br />
continuous thread). Afterwards simply place the end profile on top of it.<br />
• Maintain expansion joints!<br />
www.kovalex.de • info@kovalex.de<br />
A high-quality product of the KOSCHE-group