
Create successful ePaper yourself
Turn your PDF publications into a flip-book with our unique Google optimized e-Paper software.
Rev 3 – Aug 2012<br />
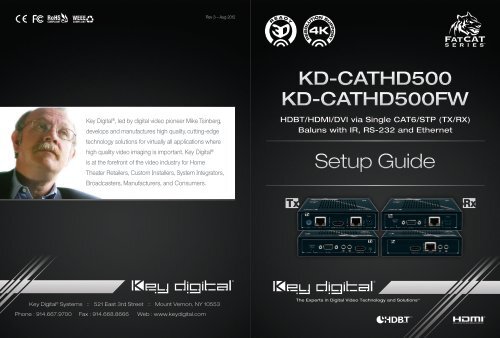
KD-CATHD500<br />
KD-CATHD500FW<br />
<strong>Key</strong> <strong>Digital</strong> ® , led by digital video pioneer Mike Tsinberg,<br />
develops and manufactures high quality, cutting-edge<br />
technology solutions for virtually all applications where<br />
high quality video imaging is important. <strong>Key</strong> <strong>Digital</strong> ®<br />
is at the forefront of the video industry for Home<br />
Theater Retailers, Custom Installers, System Integrators,<br />
Broadcasters, Manufacturers, and Consumers.<br />
HDBT/HDMI/DVI via Single CAT6/STP (TX/RX)<br />
Baluns with IR, RS-232 and Ethernet<br />
<strong>Setup</strong> <strong>Guide</strong><br />
<strong>Key</strong> <strong>Digital</strong> ® Systems :: 521 East 3rd Street :: Mount Vernon, NY 10553<br />
The Experts in <strong>Digital</strong> Video Technology and Solutions <br />
Phone : 914.667.9700 Fax : 914.668.8666 Web : www.keydigital.com
4 1<br />
Table of Contents<br />
About KD-CATHD500 and KD-CATHD500FW ........................... 1<br />
Connections..................................................... 2<br />
Extending Ethernet, IR and RS-232 Control ............................. 4<br />
Application Example............................................... 5<br />
Settings ........................................................ 6<br />
Specifications.................................................... 8<br />
Important Product Warnings......................................... 10<br />
Safety Instructions ................................................ 10<br />
How to Contact <strong>Key</strong> <strong>Digital</strong>.......................................... 11<br />
Warranty........................................................ 11<br />
CAT6/STP cabling is required. All included specifications are based<br />
on the use of CAT6 STP with properly shielded RJ45 connectors<br />
You MUST use the Power Supply provided with your unit or you VOID<br />
the <strong>Key</strong> <strong>Digital</strong> ® Warranty and risk damage to your unit and associated<br />
equipment.<br />
Please read all instructions to insure safe operation of the product.<br />
About KD-CATHD500 and KD-CATHD500FW<br />
Description<br />
½½<br />
KD-CATHD500 HDBT/HDMI/DVI Baluns (Tx & Rx) extension of 1080p/60,<br />
1920x1200, 3D & 4K signals up to 400 ft. via single <strong>Key</strong> <strong>Digital</strong> ® KD-CAT6STP1X<br />
Super CAT6 Shielded cable, or up to 300 ft. using a single third-party CAT6<br />
shielded cable. KD-CATHD500 carries IR and RS-232 for controlling remotely<br />
located equipment. Ethernet ports allow 10/100 LAN Network extension.<br />
½½<br />
KD-CATHD500FW extends 1080i/720p/1080p/24 signals up to 600 ft. with a<br />
single <strong>Key</strong> <strong>Digital</strong> KD-CAT6STP1X Super CAT6/STP Shielded cable, or 500 ft.<br />
using a single third-party CAT6 Shielded cable. 1080p/60, 1920x1200, 4K, and<br />
comparable resolutions are not supported.<br />
<strong>Key</strong> Features<br />
½½<br />
Auto-adjustment of feedback, equalization and amplification depending<br />
on the length of cabling used<br />
½½<br />
Internal EDID Library features 10 default EDID configurations including<br />
native EDID data from any Output/Display<br />
½½<br />
Features both Transmit and Receive IR, RS-232 and Ethernet for bi-directional<br />
control signals<br />
½½<br />
Full support for 12-Bit Deep Color Video<br />
½½<br />
Supports lossless compressed digital audio:<br />
»»<br />
Dolby ® TrueHD, Dolby ® <strong>Digital</strong> Plus and DTS -HD Master Audio<br />
<strong>Key</strong> Benefits<br />
½½<br />
HDMI/DVI, IR, RS-232 and Ethernet signals combined over a single CAT6/STP<br />
½½<br />
HDMI pass-through port on Tx Balun connects additional devices up to 20 ft.<br />
½½<br />
Daisy chaining of Tx and Rx units allows almost unlimited extension<br />
of HDMI/DVI, RS-232, IR and Ethernet signals<br />
½½<br />
Supports HDBaseT Technology<br />
Advanced HDMI Features<br />
½½<br />
3D – Capability to pass 3D stereoscopic signal formats<br />
½½<br />
4K – 4096x2160/24 video resolution support for commercial applications such as<br />
<strong>Digital</strong> Movie Theaters, CAD, Post Production, Graphics and etc.<br />
© 2012 <strong>Key</strong> <strong>Digital</strong>, Inc. All rights reserved.
2 3<br />
Accessories<br />
½ ½ (2) 5V 2A DC Power Supplies<br />
½ ½ (3) Locking HDMI Cable Clips<br />
½ (2) Mounting Brackets<br />
½ (1) Grounding Wire<br />
½½<br />
If desired, you may connect your IR signals to send (port labeled Tx), or receive<br />
(port labeled Rx).<br />
Connections<br />
Before making any connections, power off your source and display devices.<br />
Tx Balun:<br />
½½<br />
Using a short HDMI cable, connect your source device to the HDMI port labeled<br />
“HDMI Input”. To connect DVI, use appropriate DVI to HDMI adapters.<br />
½½<br />
Additionally you may connect a 10/100 Ethernet LAN cable to the “TCP/IP” port<br />
½½<br />
and an RS-232 cable to the DB9 port to transmit RS-232 signals.<br />
½½<br />
Connect the CAT6 STP cable that connects to the Rx Balun at the port labeled<br />
“CAT6 STP Output”.<br />
½½<br />
You may use the port labeled “HDMI Pass-Through” to connect (up to 20 ft.)<br />
your AVR, display or other device to the Tx unit.<br />
Rx Balun:<br />
½½<br />
Using a short HDMI cable, connect your display device to the HDMI port labeled<br />
“HDMI Output”.
4 5<br />
½½<br />
Connect the CAT6 STP cable at the port labeled “CAT6 STP Input”.<br />
½½<br />
If you are using IR, connect it at this time. For Ethernet, connect the cable<br />
to TCP/IP RJ45 port.<br />
½½<br />
IR<br />
»»<br />
You may transmit IR information in either direction. The IR input can be from a<br />
dedicated control system or a standard distribution block’s emitter outputs.<br />
Use a fixed 5v input signal with a 3.5mm mono mini jack.<br />
»»<br />
The sleeve of the 3.5mm Male connector must have good physical contact<br />
with 3.5 mm Female input/output on the KD-CATHD500.<br />
»»<br />
Some 3.5mm Male plugs feature a plastic sleeve that extends longer than an<br />
average sleeve. This may cause poor grounding<br />
contact. See the example to the right of a sleeve<br />
that may cause poor contact.<br />
Application Example<br />
Ethernet LAN<br />
HDMI Pass-through<br />
½½<br />
If you are using RS-232, connect to the RS-232 port.<br />
Blu-Ray<br />
HDMI/DVI*<br />
CAT6/STP<br />
Display<br />
IR Emitter<br />
IR Tx<br />
KD-CATHD500TX<br />
IR Receiver<br />
(to control TV)<br />
CAT6/STP<br />
½½<br />
Power up the Baluns using the included power supplies and then power up your<br />
source and display equipment.<br />
TV Remote<br />
KD-IRKIT300<br />
IR Rx<br />
HDMI/DVI*<br />
Ethernet<br />
IR<br />
Extending Ethernet, IR and RS-232 Control<br />
½½<br />
Ethernet<br />
»»<br />
The KD-CATHD500/KD-CATHD500FW can transmit standard 10/100Base T<br />
LAN data. You can use TIA 568B standards for termination.<br />
½½<br />
RS-232<br />
»»<br />
You can use the KD-CATHD500/KD-CATHD500FW to send RS-232<br />
commands for controlling remote equipment.<br />
»»<br />
Requires the use of a null-modem cable on one (either) side.<br />
Up to 400’ – with <strong>Key</strong> <strong>Digital</strong> ® KD-CAT6STP1X<br />
Up to 300’ – with 3rd Party CAT6/STP<br />
Ethernet LAN<br />
Display<br />
HDMI<br />
CAT6/STP<br />
KD-CATHD500RX<br />
IR Emitter<br />
IR Tx<br />
HDMI<br />
IR Receiver<br />
(to control DVD)<br />
KD-IRKIT300<br />
IR Rx<br />
Blu Ray Remote<br />
Blu-Ray<br />
KD-CATHD500TX<br />
HDMI/DVI*<br />
CAT6/STP<br />
Achieved Distance: up to 860’
6 KD-IRKIT300<br />
7<br />
IR Rx<br />
Blu Ray Remote<br />
Daisy Chain Example:<br />
Blu-Ray<br />
Settings<br />
KD-CATHD500TX<br />
HDMI/DVI*<br />
CAT6/STP<br />
20’<br />
EDID Control<br />
EDID adjustments may be necessary when connecting to or from an AV Receiver, or<br />
for passing 3D content derived from a Cable or Satellite source. They can also speed<br />
up the switching process from Cable or Satellite.<br />
The possible EDID settings can range from ‘0’ to ‘9’ (‘0’ is the default).<br />
0 EDID from connected display<br />
1 1080i w/ PCM 2ch <strong>Digital</strong> Audio<br />
2 1080i w/ HD Audio<br />
3 1080p w/ PCM 2ch <strong>Digital</strong> Audio<br />
4 1080p w/ HD Audio<br />
Up to 400’ – with <strong>Key</strong> <strong>Digital</strong> ® KD-CAT6STP1X<br />
Up to 300’ – with 3rd Party CAT6/STP<br />
KD-CATHD500RX KD-CATHD500TX<br />
5 3D w/ PCM 2ch <strong>Digital</strong> Audio<br />
Achieved Distance: up to 860’<br />
KD-CATHD500RX<br />
CAT6/STP<br />
20’ 20’<br />
HDMI<br />
HDMI<br />
Display<br />
The EDID controls are located on the Tx Balun. To change EDID settings, use a small<br />
flat bladed screwdriver to turn the rotary switch to the desired EDID number. The<br />
switch has click positions to make sure the arrow is pointing at a number and not<br />
in-between. There is no need to power the unit off when adjusting the EDID settings.<br />
The unit will automatically renegotiate the new handshake in a few seconds. Please<br />
follow this procedure for subsequent EDID changes.<br />
When selecting an EDID from the library, your source device will “see” the KD-<br />
CATHD500 EDID choice instead of the display’s EDID, overriding the display’s EDID<br />
information. If your display is not capable of accepting the video resolution or audio<br />
type selected, you may not see a picture or hear sound. In this case please choose<br />
another more compatible EDID, or use the default EDID.<br />
Range and Resolution:<br />
½½<br />
KD-CATHD500 KD-CATHD500 w/ KD-CAT6STP1X Super CAT6 Shielded<br />
cabling: All resolutions up to 1080p, 1920x1200, 3D, 4K up to 400ft<br />
½½<br />
KD-CATHD500 w/ Third-Party CAT6/STP cabling: All resolutions up to 1080p,<br />
1920x1200, 3D, 4K up to 300ft<br />
½½<br />
KD-CATHD500FW w/ KD-CAT6STP1X Super CAT6 Shielded cabling: All<br />
resolutions up to 1080i, 720p, 1080p/24 up to 600ft. 1080p/60 is not available.<br />
½½<br />
KD-CATHD500FW w/ Third-Party CAT6/STP cabling: All resolutions up to<br />
1080i, 720p, 1080p/24 up to 500ft. 1080p/60 is not available.<br />
NOTE: Use metal shielded RJ45 connectors<br />
with soldered ground wires when terminating<br />
the CAT6 STP.<br />
6 3D w/ Dolby Audio<br />
7 3D w/ HD Audio<br />
8 DVI 1080p (no audio)<br />
Rotary EDID Control Switch<br />
9 DVI 1080p with Forced HPD (no audio)
8 9<br />
Firmware Updates:<br />
The KD-CATHD500/KD-CATHD500FW Tx and Rx<br />
have an “Upgrade Mode” switch located near the<br />
RS-232 port. The 2 position slide switch is marked<br />
“Normal” and “Program”. This switch should<br />
only be used in the “Program” position when<br />
updating unit’s firmware. Be sure the switch is in<br />
the “Normal” mode for standard operation.<br />
Specifications<br />
Technical:<br />
½½<br />
Inputs Tx (Each): 1 HDMI/DVI, 1 Serial IR Rx, 1 RS-232, 1 TCP/IP<br />
½½<br />
Outputs Tx (Each): 1 CAT6 STP, 1 HDMI/DVI pass through, 1 Serial IR Tx<br />
½½<br />
Inputs Rx (Each): 1 CAT6 STP, 1 Serial IR Rx<br />
½½<br />
Outputs Rx (Each): 1 HDMI/DVI, 1 Serial IR Tx, 1 TCP/IP, 1 RS-232<br />
½½<br />
HDMI ® and HDCP Licensing: Fully licensed and compatible with all HDMI<br />
and HDCP techologies<br />
½½<br />
KD-CATHD500 Link and Range: 1080p/60, 1920x1200, 1080i/60, 720p, 1080p/24;<br />
up to 400ft when used with KD-CAT6STP1X cabling, 300ft when used with thirdparty<br />
CAT6/STP cabling.<br />
½½<br />
KD-CATHD500FW Link and Range: 1080i/60, 720p, 1080p/24; up to 600ft when<br />
used with KD-CAT6STP1X cabling, 500ft when used with third-party CAT6/STP<br />
cabling.<br />
½½<br />
Lossless Compressed <strong>Digital</strong> Audio Support: Dolby ® TrueHD, Dolby ® <strong>Digital</strong> Plus<br />
and DTS -HD Master Audio<br />
½½<br />
DDC Signal (Data): Input DDC Signal: 5 Volts p-p (TTL)<br />
½½<br />
HDMI Video/Audio Signal: Input Video Signal: 1.2 Volts p-p<br />
½½<br />
HDMI Connector: Type A, 19 Pin Female<br />
½½<br />
RJ45 Connector: Shielded Link Connector<br />
½½<br />
Ethernet RJ45 Connector: Shielded TCP/IP 10/100 BaseT<br />
½½<br />
IR Connector: 3.5 mm monaural mini jack<br />
½½<br />
RS-232 Connector: D-Sub 9 Pin<br />
½½<br />
I2C Communication: EDID and HDCP bi-directional transparency<br />
from Display to Source<br />
General<br />
½½<br />
Regulation: CE, FCC, RoHS, WEEE<br />
½½<br />
Enclosure: Black Metal<br />
½½<br />
Product Dimensions (Each): L = 6” W = 4.1” H = 1.2”<br />
½½<br />
Shipping Carton Dimensions: L = 15.4” W = 8.7” H = 3.6”<br />
½½<br />
Product Weight (Each): 1 lb<br />
½½<br />
Shipping Weight: 3 lbs<br />
½½<br />
Power: UL Certified Power Supply – 5V / 2A, 110-240 VAC, 50-60 Hz<br />
½½<br />
Power Consumption: Tx - 2.5 Watts, Rx - 5 Watts<br />
½½<br />
Accessories: (2) Mounting Brackets, (3) Locking HDMI Cable Clips,<br />
(1) Grounding Wire
10 11<br />
Important Product Warnings:<br />
1. Connect all cables before providing power to the unit.<br />
2. Test for proper operation before securing unit behind walls or in hard to access<br />
spaces.<br />
3. If installing the unit into wall or mounting bracket into sheet-rock, provide proper<br />
screw support with bolts or sheet-rock anchors.<br />
Safety Instructions:<br />
Please be sure to follow these instructions for safe operation of your unit.<br />
1. Read and follow all instructions.<br />
2. Heed all warnings.<br />
4. Do not use this device near water.<br />
5. Clean only with dry cloth.<br />
6. Install in accordance with the manufacturer’s instructions.<br />
7. Do not install near any heat sources such as radiators, heat registers, stoves, or<br />
other apparatus (including amplifiers) that produce heat.<br />
8. Only use attachments/accessories specified by the manufacturer.<br />
9. Refer all servicing to qualified service personnel. Servicing is required when the<br />
device has been damaged in any way including:<br />
»»<br />
Damage to the power supply or power plug<br />
»»<br />
Exposure to rain or moisture<br />
Power Supply Use:<br />
You MUST use the Power Supply provided with your unit or you VOID the<br />
<strong>Key</strong> <strong>Digital</strong> ® Warranty and risk damage to your unit and associated<br />
equipment.<br />
How to Contact <strong>Key</strong> <strong>Digital</strong> ®<br />
System Design Group (SDG)<br />
For system design questions please contact us at:<br />
½½<br />
Phone: 914-667-9700<br />
½½<br />
E-mail: sdg@keydigital.com<br />
Customer Support<br />
For customer support questions please contact us at:<br />
½½<br />
Phone: 914-667-9700<br />
½½<br />
E-mail: customersupport@keydigital.com<br />
Technical Support<br />
For technical questions about using <strong>Key</strong> <strong>Digital</strong> ® products, please contact us at:<br />
½½<br />
Phone: 914-667-9700<br />
½½<br />
E-mail: tech@keydigital.com<br />
Repairs and Warranty Service<br />
Should your product require warranty service or repair, please obtain a <strong>Key</strong> <strong>Digital</strong> ®<br />
Return Material Authorization (RMA) number by contacting us at:<br />
½½<br />
Phone: 914-667-9700<br />
½½<br />
E-mail:<br />
Feedback<br />
rma@keydigital.com<br />
Please email any comments/questions about the manual to:<br />
½½<br />
E-mail:<br />
customersupport@keydigital.com<br />
Warranty<br />
All <strong>Key</strong> <strong>Digital</strong> ® products are built to high manufacturing standards and should provide<br />
years of trouble-free operation. They are backed by a limited two-year parts and<br />
labor warranty.
12 13<br />
Installation Notes<br />
Installation Notes