Computer Manual - Kettler USA
Computer Manual - Kettler USA Computer Manual - Kettler USA
Computer- und Trainingsanleitung ST 2600-9 Kadett D GB F NL E I PL Der Umwelt zuliebe: Wir drucken auf 100% Altpapier!
- Page 2 and 3: GB Computer and training instructio
- Page 4 and 5: GB 5.0 Display during training If y
- Page 6 and 7: GB which should be checked three ti
- Page 8 and 9: D Streckbewegung der Beine beibehal
- Page 10 and 11: D E Leistungstabelle / GB Performan
- Page 12: Heinz KETTLER GmbH & Co.· Postfach
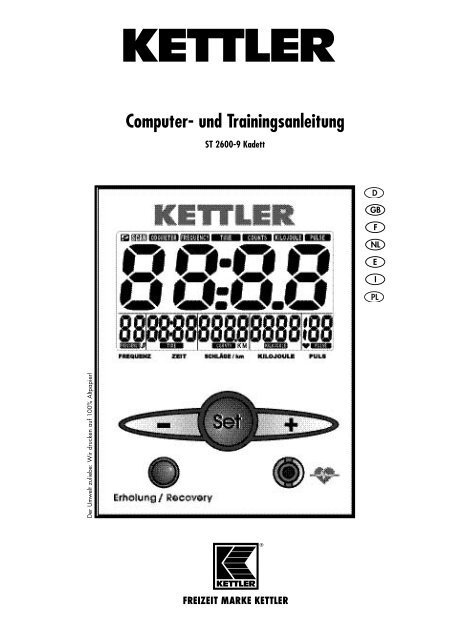
<strong>Computer</strong>- und Trainingsanleitung<br />
ST 2600-9 Kadett<br />
D<br />
GB<br />
F<br />
NL<br />
E<br />
I<br />
PL<br />
Der Umwelt zuliebe: Wir drucken auf 100% Altpapier!
GB<br />
<strong>Computer</strong> and training instructions<br />
Operating instructions for the training computer with digital display (ST2600-9)<br />
Equipment<br />
Symbols:<br />
1. P no training: ready to accept set values<br />
2. SCAN automatic change of display<br />
3. ODOMETER display of total kilometres covered<br />
15. KM<br />
4. FREQUENCY display of stroke frequency<br />
5. TIME display of training time<br />
6. COUNTS display of stroke number<br />
7. KILOJOULE display of energy consumption<br />
8. PULSE display of current pulse<br />
12. Mark acoustic stroke frequency preset is active<br />
17. Heart will flash in accordance with pulse<br />
Values:<br />
9. Large display room temperature [0 - 40 °]<br />
odometer [0 - 9999 km]<br />
fitness value [F1.0 - F6.0]<br />
10. Stroke frequency 0 - 99 [strokes/min.]<br />
13. Time 0:00 - 99:59 [min:sec]<br />
14. Rowing strokes 0.0 - 9999 [km]<br />
16. Energy consumption 0 - 9999 [KJ]<br />
16 Pulse 50 - 199 [beats/min]<br />
Buttons:<br />
Minus button<br />
Set button<br />
Plus button<br />
Recovery button<br />
Connections (at front)<br />
Socket<br />
Connections (at rear)<br />
Socket (2 poles)<br />
Battery compartment<br />
reduce values (Count down display<br />
range)<br />
function button [Set value, change, reset<br />
of display]<br />
increase values (display range backward)<br />
function button [Fitness value determination]<br />
for the ear-clip<br />
for the speed pickup<br />
2 batteries: Mignon1.5 Volt, LR6, AA,<br />
1.0 Displays before starting the training<br />
1. Room temperature fig. 1 [prior to and after training]<br />
2. Complete display fig. 2 [after start of rowing or pressing<br />
a button, 1 sec]<br />
3. Total kilometres coveredfig. 3 [display term:10 seconds or<br />
button]<br />
4. Set value mode fig. 4 [with set button]<br />
Fig. 1 Room temperature<br />
Fig. 2 Complete display<br />
7
GB<br />
Fig. 3 Total kilometres covered<br />
2.0 Pulse measuring<br />
Fig. 4 Set value mode: Frequency flashes<br />
This training computer offers two possibilities of pulse measuring:<br />
1. with the ear-clip<br />
2. with the Cardio Pulse Set (available as accessory from specialised<br />
dealers)<br />
If you press longer on the +/– button, there will be a fast forward<br />
or return motion of the preset values.<br />
If you press the +/– buttons together, the value will return to zero.<br />
With the Set button you will get to the next preset values.<br />
After setting the pulse value you will stay in the standby mode with<br />
the Set button, however, with all preset values being displayed<br />
(Fig. 12).<br />
If you press the Set button longer, the display will skip to the complete<br />
display (reset function) (Fig. 2).<br />
To be noted<br />
If you do not enter any preset values within 4 minutes, the display<br />
will skip to room temperature (Fig. 1).<br />
You adjusted the start display (fig. 4).<br />
Pulse measuring with the ear-clip<br />
Plug the ear-clip into the socket.<br />
Rub one ear lob in order to achieve a better blood circulation.<br />
Put the ear-clip at your ear lob.<br />
fig. 5 fig. 6<br />
Pulse measuring with the cardio pulse set<br />
Please refer to the appropriate instructions.<br />
Pulse display<br />
The heart symbol (17) will flash according to your pulse beat.<br />
The pulse beat is displayed as value (18).<br />
3.0 Training without preset training data<br />
fig. 7 fig. 8<br />
Start training. All values will count upwards.<br />
4.0 Training with preset training data<br />
The right training pulse [Aerobic zone]<br />
The training pulse depends on your age. There is the "right" socalled<br />
aerobic training range for every age (rule of thumb: 180<br />
minus life age) which is marked by an upper and a lower pulse limit<br />
(+/- 10 beats). Your training pulse should always be within the<br />
aerobic zone. The maximum pulse frequency (200 minus life age)<br />
should not be exceeded. Healthy persons may orient themselves<br />
by the following diagram.<br />
220<br />
200<br />
180<br />
160<br />
140<br />
120<br />
100<br />
80<br />
pulse /min.<br />
OK<br />
Aerobc zone<br />
200 less age<br />
20 30 40 50 60 70 80 90 100<br />
age<br />
Adjusting the Stroke frequency (10), Time (13), Strokes (14) Kilojoule<br />
(16,) Pulse limit (18).<br />
Prior to the training and in case of an interruption of training symbol<br />
P (1)(Fig. 4) appears at the left top of the display. If you press<br />
the Set button, you will get into the set mode and can adjust the<br />
requested value with the + or – button.<br />
The adjustable values are represented with flashing segments.<br />
fig. 9 fig. 10<br />
fig. 11 fig. 12<br />
fig. 5: frequency preset mode (frequency flashes)<br />
fig. 6: frequency preset starts with "OFF"<br />
fig. 7: preset frequency: e.g. 30 strokes per minute<br />
fig. 8: preset time: e.g. 18 minutes<br />
fig. 9: preset rowing strokes: e.g. 540 strokes<br />
fig. 10: preset energy consumption: e.g. 270 Kilojoule<br />
fig. 11: preset pulse limit: e.g. 130 pulse beats<br />
fig. 12: standby mode with display of all preset values and stroke<br />
frequency<br />
Function<br />
Start rowing. All preset values (except pulse limit) will count down,<br />
then flash for a few seconds when reaching zero and afterwards<br />
count upwards from the preset value.<br />
If your pulse beat exceeds the preset pulse limit, the pulse value<br />
will flash and a bleep will sound as a warning.<br />
8
GB<br />
5.0 Display during training<br />
If you start training, an automatic display change SCAN (symbol<br />
2 in the display) will take place in a 5-second cycle. With the Set<br />
button you can switch it off. With the +/– button you then can skip<br />
one display range forward or backward. If you activated the stroke<br />
frequency preset mark (12) in the display, there will be a beep<br />
in accordance with the stroke cycle, in order to assist you to maintain<br />
the stroke frequency.<br />
If you press the +/– buttons together, you switch off the acoustic<br />
stroke frequency signal and the mark (12) will no longer be displayed.<br />
This is also possible with a training interruption.<br />
To be noted<br />
If a preset value (except the pulse limit and stroke frequency) is reached,<br />
it will immediately be accepted in the large display (9).<br />
6.0 Display prior to training, at an interruption<br />
of training, at the end of training<br />
If you interrupt rowing, the electronic system will recognise an interruption<br />
of training. The automatic display change will stop, the<br />
SCAN symbol disappears, P will be displayed and the current range<br />
remains standing still in the large display. If you do not continue<br />
training within 4 minutes, the display will change to room<br />
temperature (Fig. 1). In this case, the distance is added to the total<br />
kilometres covered. All other values will not be stored.<br />
To be noted<br />
With the +/– button you can skip one display range forward or<br />
backward.<br />
With the Set button you get back into the input mode. In this case,<br />
all previous training data and preset values are deleted.<br />
7.0 Display after continuation of training<br />
Start training again. The values will count on.<br />
8.0 Recovery pulse measuring<br />
The training computer is equipped with a recovery pulse function<br />
that enables you to measure your recovery pulse at the end of<br />
your training. At the end of your training press the recovery pulse<br />
button. The computer will count down for 60 seconds and measure<br />
your pulse (Fig. 13). Afterwards, a fitness value with ( F ) is<br />
displayed (Fig. 14) the calculation of which is explained in 9.0<br />
General. If pulse measuring is interrupted, ( P ) and an error message<br />
( E ) is displayed instead of a value (Fig. 15). If you press<br />
the recovery button, the current training display will appear<br />
again.<br />
fig. 13 fig. 14<br />
fig. 15<br />
fig. 13: recovery pulse measuring with count down (0:60 - 0:00)<br />
fig. 14: fitness value display<br />
fig. 15: no pulse recognition ( P ) during recovery pulse measuring<br />
To be noted<br />
If no pulse value is displayed, no recovery pulse function will be<br />
performed.<br />
9.0 General<br />
Calculation of total kilometres covered<br />
1 rowing stroke results in a distance of 5 m.<br />
Kilojoule calculation<br />
From the view of sports physicians there is the following energy<br />
consumption during rowing: 1 hour of rowing with a stroke frequency<br />
of 40 strokes per minute will consume 2930 kJ.<br />
1 kilometre results in 244 Kilojoule.<br />
The calculation is based on a medium strain level and is only<br />
changed by means of a variation of the stroke frequency.<br />
Fitness value calculation<br />
The computer calculates and assesses the difference between<br />
strain pulse and recovery pulse and your resulting "fitness value"<br />
on the basis of the following formula:<br />
Value ( F ) = 6 – (<br />
10 x ( P1 – P2 )<br />
) 2<br />
P1<br />
P1 = Strain pulse<br />
P2 = Recovery pulse<br />
Value 1 = very good<br />
Value 6 = unsatisfactory<br />
The comparison of strain and recovery pulse is a simple and fast<br />
possibility to control your physical fitness. The fitness value is a value<br />
of orientation with regard to your recoverability after physical<br />
strain. Before you press the recovery pulse button and have the<br />
computer calculate your fitness value you should have trained in<br />
your strain range for a longer period of time, this means for at<br />
least 10 minutes. With a regular cardiovascular training you will<br />
notice that your "fitness value" will improve.<br />
Information on pulse measuring<br />
Pulse measuring starts when the heart in the display flashes according<br />
to the beat of your pulse.<br />
With ear-clip<br />
The pulse sensor operates with infra-red light and measures the<br />
changes in the light permeability of your skin which are caused<br />
by your pulse beat. Before you fasten the ear-clip to your ear lob<br />
please rub it strongly 10 times, in order to increase blood circulation.<br />
Avoid interfering impulses.<br />
• Fasten the ear-clip carefully at your ear lob and try to find the<br />
most favourable point for sensoring (heart symbol flashes without<br />
interruption).<br />
9
GB<br />
• Do not train directly under strong incidence of light, e.g. neon<br />
light, halogen light, spot light, sunlight.<br />
• Completely avoid any vibrations and wobbling of the ear sensor<br />
including cable. Always fasten the cable with the clip at<br />
your clothes or - even better - at a headband.<br />
others. These groups are shown in the lower illustration.<br />
With cardio pulse set<br />
Please refer to the appropriate instructions.<br />
Failures in the pulse display<br />
Should there once be any problems with pulse detection, please<br />
once again check the above mentioned points.<br />
Check the battery voltage.<br />
Failures in the training computer<br />
Record the kilometres covered. In case of a strange behaviour of<br />
the training computer remove the batteries, check the battery voltage<br />
and insert the batteries again. The stored total value of kilometres<br />
covered will get lost during an exchange of batteries.<br />
10.0 Exercising with the rowing machine<br />
For Your Safety:<br />
■ Before beginning your program of exercise, consult your doctor<br />
to ensure that you are fit enough to use the equipment. Base<br />
your program of exercise on the advice given by your doctor.<br />
Incorrect or excessive exercise may damage your health.<br />
The rowing machine provides all of the advantages of “real life”<br />
rowing without the trouble or expense of “taking to the water”.<br />
The particular boom design of the rowing machine permits a circular<br />
rowing movement coming very close to real rowing on water.<br />
Rowing is a sport that improves not only the performance of<br />
the cardio-vascular system, but also improves stamina and endurance.<br />
The following points should be observed before commencing<br />
a course of training:<br />
Important<br />
Before commencing a course of training, have your family doctor<br />
check that you are fit enough to exercise with the rowing machine.<br />
The result of the medical check-up should be used as a basis<br />
for planning the exercise programme. The following directions are<br />
only to be recommended to healthy persons.<br />
The advantages of rowing<br />
As mentioned above, rowing is an excellent way to increase the<br />
efficiency of the cardio-vascular system. It also improves the ability<br />
to absorb oxygen. In addition, rowing is also suitable for “burning<br />
off” fat by calling up the fat reserves (in the form of fatty<br />
acids) to be transformed into energy.<br />
Another important advantage of rowing lies in the strengthening<br />
of all of the body’s important muscle groups, whereby the strengthening<br />
of the back and shoulder muscles can be considered especially<br />
beneficial from the orthopaedic point of view. The strengthening<br />
of the back muscles can help prevent such orthopaedic<br />
problems as are encountered all too often nowadays. Exercising<br />
with the rowing machine is therefore a comprehensive way to<br />
exercise. It improves endurance and strength while at the same<br />
time not putting the joints under stress.<br />
Which muscles are called on<br />
The movements in the rowing exercise call on all of the body’s musclegroups.<br />
Although some are concentrated upon more than<br />
As can be seen in the illustration, rowing activates the upper and<br />
lower body to the same extent. In the legs, rowing exercises the<br />
extensors (1), the flexors (2) and the shin and calf muscles (5, 4).<br />
The movement of the hips also calls on the seat (gluteus) muscles<br />
(3).<br />
In the torso region, rowing calls primarily upon the latissimus (6)<br />
and the erectors (8), but also on the trapezius (7), the deltoid (9)<br />
and the arm extensor muscles (10).<br />
Planning and controlling your rowing<br />
The basis for planning your course of exercise should be your actual<br />
state of fitness. Your family doctor can put you through an endurance<br />
test to determine your physical performance. The results<br />
of the test should be<br />
used to plan your exercise programme. If you do not go through<br />
an endurance test, you should avoid excessive exercising stresses<br />
at all costs. The following principle should be follow in your planning;<br />
endurance training can be controlled as much by the extent<br />
of effort as by the level of effort and the intensity.<br />
Exercise intensity<br />
The effort intensity when rowing can be determined by checking<br />
the pulse. The maximum pulse rate per minute is equivalent to a<br />
pulse of 200 minus age. This rate should, however, never be exceeded<br />
during exercise. The optimum rate is given by the rule of<br />
thumb of:<br />
180 minus age<br />
This means that a 50-year-old person should arrange his/her endurance<br />
exercising around a pulse at 130. Such a calculation is<br />
considered very favourable by numerous experts. The intensity of<br />
the rowing exercises can be varied on the one hand by altering<br />
the number of strokes per minute, and on the other by altering the<br />
resistance of the “oars”.You can adjust 12 steps of rowing resistance<br />
at the adjusting rings of the oil pressure damping cylinders.<br />
As a beginner, on principle select a low intensity, i.e. the stroke<br />
frequency should be below 20 strokes per minute and the damping<br />
cylinders' resistance should be adjusted at the lowest step.<br />
Beginners should therefore avoid exercising at high stroke rates or<br />
at high resistance levels. The optimum stroke rate and level of resistance<br />
should be determined using the recommended pulse rate,<br />
10
GB<br />
which should be checked three times during each session. Before<br />
starting, check the resting pulse, about 10 minutes into the session<br />
check the effort pulse (which should be in the region of the recommended<br />
level), and after finishing exercising, check the recovery<br />
pulse.<br />
These three values can be entered into the record sheet. Regular<br />
exercising will soon show a reduction in both the rest and the effort<br />
pulse rates. This can be taken as a sign for the positive effects<br />
of the endurance training. The heart is beating more slowly and<br />
more time is available for the heart to take in blood and for the<br />
blood to circulate through the heart’s own muscles.<br />
Extent of exercise<br />
By extent of exercise, we refer to the length of the exercise sessions<br />
and their frequency per week. Experts consider the following<br />
extent of exercise to be especially effective:<br />
Sessions per week<br />
Length of session<br />
Daily 10 minutes<br />
two or three times a week 20-30 minutes<br />
once or twice a week 30-60 minutes<br />
Exercise sessions of 20-30minutes/30-60 minutes are not suitable<br />
for the beginner. The beginner should increase his/her extent of<br />
exercising only gradually, with the first blocks being kept relatively<br />
short. Block exercising can be looked upon as a good variation<br />
at the beginning.<br />
A typical beginner’s programme for the first 4 weeks could be something<br />
like the following:<br />
Frequency<br />
three times a week<br />
four times a week<br />
Length of exercise blocks<br />
1st-2nd week<br />
3 minutes training<br />
1 minute break for gymnastics<br />
3 minutes training<br />
1 minute break for gymnastics<br />
3 minutes training<br />
3rd-4th week<br />
5 minutes training<br />
1 minute break for gymnastics<br />
5 minutes training<br />
Following these 4 weeks of beginner’s exercising, the blocks can<br />
be extended to 10 minutes of continuous rowing without a break.<br />
If 3 weekly sessions of 20-30 minutes are preferred (at later stages),<br />
a free day should be planned between each two days with<br />
exercise.<br />
Accompanying gymnastic exercises<br />
Gymnastik exercises are an ideal complement to rowing. Always<br />
do warming-up exercises before starting rowing. Activate the circulation<br />
with a few minutes of easy rowing (10-15 strokes per minute).<br />
Stretching exercises should then be carried out before the<br />
real rowing exercise is started.<br />
Easy rowing should also be done at the end of the session, with<br />
further stretching exercises during the cooling-down period.<br />
11
D<br />
1. Phase Zum Ablauf der Ruderbewegung<br />
Abstand der Trittflächen auf die Beinlänge einstellen. In der<br />
Ausgangsposition wird der Sitz in die vordere Position gebracht,<br />
indem man Hüft-und Kniegelenke beugt. Die Rudergriffe sind in<br />
vorderer, tiefer Position und werden von oben gegriffen. Der<br />
Oberkörper ist leicht vorgeneigt. Die Arme sind leicht gebeugt.<br />
GB 1st phase Rowing<br />
Adjust the distance of foot plates to your leg's length. In starting<br />
position put the seat into its front position by bending hip and<br />
knee joints. The rowing grips are in front, low position and are<br />
grasped from above. Your upper body is slightly bent forward.<br />
Your arms are slightly<br />
F 1re phase Pratique des mouvements d’aviron<br />
Ajustez la distance des marchepieds à la longueur de vos jambes.<br />
Dans la position de départ, le siège doit être mis en position<br />
antérieure en fléchissant les articulations de la hanche et des<br />
genoux. Les poignées des rames se trouvent en bas, dans la position<br />
antérieure et vous devez les prendre par le haut. Le haut<br />
du corps est légèrement plié en avant. Les bras sont légèrement<br />
pliés également.<br />
NL Fase 1 Roeibeweging<br />
Afstand van de voetplank op de beenlengte instellen. In de uitgangspositie<br />
wordt de zetel in de voorste positie gebracht, doordat<br />
men het heup- en kniegewricht buigt. De roeispaangrepen<br />
zijn in de voorste, diepere positie en worden van boven gegrepen.<br />
Het bovenlichaam is een beetje naar voren gebuigd. De<br />
armen zijn licht gebuigd.<br />
E 1a fase El movimiento de remo<br />
Ajustar la distancia de la superficie reposapiés al largo de las<br />
piernas. En la posición inicial, el asiento se coloca en la primera<br />
posición doblando las articulaciones de las caderas y de las rodillas.<br />
Las empuñaduras para remar se encuentran en la primera<br />
y más baja posición y se agarran por arriba. El tronco está ligeramente<br />
inclinado. Los brazos están ligeramente doblados.<br />
I 1fase Dinamica di remata<br />
Adattate la distanza delle pedane alla lunghezza delle vostre<br />
gambe. Nella posizione iniziale mettete il sedile in posizione<br />
anteriore piegando le articolazioni dell'anca e dei ginocchi. Le<br />
impugnature si trovano in basso nella posizione anteriore e devono<br />
essere prese dall'alto. Il torso è leggermente chinato in<br />
avanti. Le braccia sono leggermente piegati.<br />
PL faza 1 przebieg ruchów<br />
Ustawić odstęp podnóżków do długości nóg. W pozycji wyjściowej<br />
siedzenie ustawiane jest całkowicie z przodu, zginając nogi<br />
w biodrach i w kolanach. Uchwyty wioseł znajdują się w przedniej,<br />
niskiej pozycji, i są chwytane od góry. Górna część ciała<br />
jest lekko pochylona do przodu, ramiona są lekko zgięte.<br />
D<br />
Mit der Streckung der Beine beginnen. Rudergriffe weiterhin mit<br />
leicht gebeugten Armen halten und in Richtung Knie anheben. Auf<br />
einen geraden Rücken achten.<br />
Start stretching your legs. Keep on holding the rowing grips with<br />
slightly bent arms and lift them in direction of your knees. Keep<br />
your back straight.<br />
F<br />
Commencez avec l'extension des jambes. Continuez à tenir les<br />
poignées des rames avec les bras légèrement penchés et soulevez-les<br />
vers le genou. Veillez à ce que le dos soit en position droite.<br />
Met het strekken van de benen beginnen. Roeigrepen nog steeds<br />
met licht gebuigde armen houden en in knierichting opheffen. Op<br />
een rechte rug letten.<br />
E<br />
Comenzar estirando las piernas. Seguir agarrado a las empuñaduras<br />
de remar manteniendo los brazos ligeramente doblados y<br />
elevarlos en dirección a la rodilla. Mantener la espalda recta.<br />
I<br />
2. Phase<br />
GB 2nd phase<br />
1e phase<br />
NL Fase 2<br />
2a fase<br />
2 fase<br />
Cominciate con l'estensione delle gambe. Continuate a tenere le<br />
impugnature dei remi con le braccia leggermente piegati e sollevatele<br />
verso i ginocchi. Fate attenzione alla posizione diritta della<br />
schiena.<br />
PL faza 2<br />
Rozpocząć od wyprostowania nóg. Nadal trzymać uchwyty wioseł<br />
przy lekko zgiętych ramionach i podnieść w kierunku kolan.<br />
Zwracać uwagę na proste plecy.<br />
39
D<br />
Streckbewegung der Beine beibehalten. Mit dem Armzug ( Beugen<br />
der Arme) beginnen, wenn sich die Griffe oberhalb der Knie<br />
befinden. Die Kniegelenke haben zueinander den gleichen Abstand<br />
wie die Fußspitzen. Rückenspannung hält den Oberkörper<br />
aufrecht.<br />
GB 3rd phase<br />
Keep your legs stretched. Start the arm stroke (bending your<br />
arms), if the grips are above your knees. Your knee joints are at<br />
the same distance to each other as the points of your feet. Back<br />
strain will keep your upper body straight.<br />
F<br />
Gardez le mouvement d'extension des jambes. Commencez à tirer<br />
les rames (en pliant les bras), aussitôt que les poignées se trouvent<br />
au-dessus des genoux. Les articulations des genoux doivent<br />
avoir l'une par rapport à l'autre la même distance que les pointes<br />
des pieds. La tension du dos maintient la position droite du haut<br />
du corps.<br />
Strekbeweging van de benen bijhouden. Met de armen (buigen<br />
van de armen) beginnen, als de grepen zich boven de knieën bevinden.<br />
De kniegewrichten hebben tot elkaar dezelfde agstand<br />
als de punten van de voeten. Rugspanning houdt het bovenlichaam<br />
rechtop.<br />
E<br />
3. Phase<br />
3e phase<br />
NL Fase 3<br />
3a fase<br />
Mantener el movimiento de estirado de las piernas. Comenzar<br />
con la tracción del brazo (doblar los brazos) cuando las empuñaduras<br />
se encuentran sobre las rodillas. Las articulaciones de<br />
las rodillas tienen entre si la misma distancia que las puntas de<br />
los piés. La tensión de la espalda mantiene el tronco erguido.<br />
D<br />
Beine nahezu strecken und die Griffe unterhalb der Brust Richtung<br />
Körper ziehen. Den Oberkörper leicht zurückneigen. Die Beine<br />
auch zum Ende der Bewegungsphase leicht gebeugt lassen.<br />
Nearly stretch your legs and pull the grips below your chest towards<br />
your body. Slightly bend your upper body backward. Keep<br />
your legs slightly bent even at the end of the movement.<br />
F<br />
Tendez les jambes presque complètement et tirez les poignées audessous<br />
de la poitrine vers le corps. Penchez légèrement le haut<br />
du corps vers l'arrière. Veillez à ce que les jambes soient encore<br />
légèrement pliées à la fin de cette phase du mouvement.<br />
Benen bijna strekken en de grepen onder de borst in lichaamsrichting<br />
trekken. Het bovenlichaam een betje terugbuigen. De benen<br />
ook op het einde van de bewegingsfase een beetje gebuigd<br />
houden.<br />
E<br />
4. Phase<br />
GB 4th phase<br />
4e phase<br />
NL Fase 4<br />
4a fase<br />
Estirar las piernas casi totalmente y tirar de las empuñaduras por<br />
debajo del pecho en dirección al cuerpo. Volver a retroceder el<br />
tronco ligeramente. Además, mantener las piernas ligeramente<br />
dobladas al final de la fase del movimiento.<br />
I<br />
3 fase<br />
Mantenete il movimento d'estensione delle gambe. Cominciate a<br />
tirare i remi (piegando le braccia), non appena le impugnature si<br />
trovano al di sopra dei ginocchi. Le articolazioni dei ginocchi devono<br />
avere la stessa distanza fra di loro che le punte dei piedi.<br />
La tensione della schiena mantiene il torso diritto.<br />
PL faza 3<br />
Kontynuować ruch prostowania nóg. Rozpocząć ciągnięcie ramionami<br />
(zginanie ramion), gdy uchwyty znajdą się ponad kolanami.<br />
Kolana mają między sobą ten sam odstęp, jak czubki stóp.<br />
Napięcie pleców trzyma górną część ciała w wyprostowanej pozycji.<br />
I<br />
4 fase<br />
Stendete le gambe quasi completamente e tirate le impugnature<br />
sotto il petto verso il corpo. Piegate il torso leggermente indietro.<br />
Fate attenzione al fatto che le gambe devono ancora essere leggermente<br />
piegate al termine di questa fase del movimento.<br />
PL faza 4<br />
Prawie do końca wyprostować nogi i i pociągnąć uchwyty<br />
poniżej piersi w kierunku ciała. Lekko odchylić górną część ciała<br />
do tyłu. Nawet przy końcu fazy ruchu pozostawić nogi lekko<br />
zgięte.<br />
40
D<br />
Rudergriffe senken und in tiefer Position über den Oberschenkeln<br />
nach vorne führen. Streckbewegung der Arme. Durch Beugung<br />
der Hüften Oberkörper vorwärts bewegen.<br />
Lower the rowing grips and bring them forward in deep position<br />
above your thighs. Stretch your arms. Move your upper body forward<br />
by bending your hips.<br />
F<br />
5. Phase<br />
GB 5th phase<br />
5e phase<br />
Baissez les poignées des rames et placez-les en avant dans la position<br />
basse au-dessus des cuisses. Mouvement d'extension des<br />
bras. Penchez le haut du corps vers l'avant en pliant les hanches.<br />
D<br />
Sobald sich in der Vorwärtsbewegung die Rudergriffe etwa in<br />
Höhe der Knie befinden, Beine anziehen und bis in die Ausgangsposition<br />
vorrollen.<br />
Fließender Übergang in die neue Zugphase.<br />
As soon as the rowing grips are on a level with your knees in forward<br />
movement, draw up your legs and roll forward into starting<br />
position.<br />
Flowing transition into a new pulling phase.<br />
F<br />
6. Phase<br />
GB 6th phase<br />
6e phase<br />
Aussitôt que les poignées des rames se trouvent approximativement<br />
à la hauteur des genoux pendant le mouvement vers l'avant,<br />
ramenez les jambes et roulez en avant jusqu'à la position de<br />
départ.<br />
Transition courante à la prochaine phase de traction.<br />
NL Fase 5<br />
Roeigrepen neerlaten en in diepere positie over de dijbenen naar<br />
voren brengen. Strekbeweging van de armen. Door het buigen<br />
van de heup het bovenlichaam naar voren bewegen.<br />
NL Fase 6<br />
Zodra de roeigrepen, die zich in de voorwaartsbeweging bevinden,<br />
op kniehoogte zijn, benen optrekken en tot in de uitgangspositie<br />
voorrollen.<br />
Vliegend overgang in de nieuwe slagfase.<br />
E<br />
5a fase<br />
Descender las empuñaduras de remar a la posición más baja y<br />
conducirlas por los muslos hacia adelante. Movimiento de estirado<br />
de los brazos. Mover el tronco hacia adelante doblando la cadera.<br />
E<br />
6a fase<br />
Atraer las piernas y empujarlas hasta la posición inicial en cuanto<br />
las empuñaduras de remar se encuentren - por el movimiento<br />
de avance - aproximadamente a la altura de las rodillas.<br />
Cambio fluido a la nueva fase de tracción.<br />
I<br />
5 fase<br />
Abbassate le impugnature dei remi e mettetele in avanti nella posizione<br />
bassa sopra le coscie. (Movimento d'estensione delle<br />
braccia). Chinate il torso in avanti piegando le anche.<br />
PL faza 5<br />
Opuścić uchwyty wioseł i w niskiej pozycji poprowadzić je do przodu<br />
ponad udami. Ruch prostujący ramion. Przez zgięcie bioder<br />
poruszyć górną część ciała do przodu.<br />
I<br />
6 fase<br />
Non appena le impugnature dei remi sono press'a poco all'altezza<br />
dei ginocchi durante il movimento in avanti attirate le gambe<br />
e scivolate in avanti fino alla posizione iniziale. Passaggio scorrevole<br />
alla prossima fase di tirata.<br />
PL faza 6<br />
Z chwilą, gdy przy ruchu do przodu uchwyty wioseł znajdą się<br />
mniej więcej na wysokości kolan, należy ściągnąć nogi, aż powrócą<br />
Państwo do pozycji wyjściowej. Płynne przejście do nowej<br />
fazy ciągnięcia.<br />
41
D<br />
E<br />
Leistungstabelle / GB Performance table / F Tableau de performances / NL Prestatietabel /<br />
Tabla de rendimiento / I Tabella delle prestazioni / PL Tabela wyników<br />
D<br />
GB<br />
F<br />
NL<br />
E<br />
I<br />
PL<br />
Datum Ruhepuls P 1 P 2 Belastungs- Zeit Entfernung Energie- Fitnessnote<br />
Belastungspuls Erholungspuls stufe (min.) (km) verbrauch<br />
Date Restpulse Stress pulse Recovery pulse Slope Time (min) Distance Energy- Fitness Mark<br />
(km) consumption<br />
Date Pouls au repos Pouls en Pouls de Angle Temps Distance Dépense Note<br />
charge récupération d´inclination (min.) (km) d´énergie<br />
Datum Rustpols Belastings- Ontspannings- Hellingshoek Tijd (min.) Afstand Calorieen- Waard. cijfer<br />
pols pols (min.) (km) verbruik<br />
Fecha Pulso en reposo Pulso Pulso Escalón de Tiempo Distancìa Consumo Nota<br />
bajo esfuerzo de recuperación carga (min.) (km) de energía<br />
Data Polso riposo Polso Polso Fase dicarico Tempo Percorso Consumo Voto<br />
affaticamento ripresa (min.) (km) energetico<br />
Data tętno tętno przy tętno w stopień Czas odległość Zużycie Ocena<br />
spoczynkowe obciążeniu fazie odpoczynku obciążenia (min.) (km) energii sprawności<br />
42
D<br />
E<br />
Leistungstabelle / GB Performance table / F Tableau de performances / NL Prestatietabel /<br />
Tabla de rendimiento / I Tabella delle prestazioni / PL Tabela wyników<br />
D<br />
GB<br />
F<br />
NL<br />
E<br />
I<br />
PL<br />
Datum Ruhepuls P 1 P 2 Belastungs- Zeit Entfernung Energie- Fitnessnote<br />
Belastungspuls Erholungspuls stufe (min.) (km) verbrauch<br />
Date Restpulse Stress pulse Recovery pulse Slope Time (min) Distance Energy- Fitness Mark<br />
(km) consumption<br />
Date Pouls au repos Pouls en Pouls de Angle Temps Distance Dépense Note<br />
charge récupération d´inclination (min.) (km) d´énergie<br />
Datum Rustpols Belastings- Ontspannings- Hellingshoek Tijd (min.) Afstand Calorieen- Waard. cijfer<br />
pols pols (min.) (km) verbruik<br />
Fecha Pulso en reposo Pulso Pulso Escalón de Tiempo Distancìa Consumo Nota<br />
bajo esfuerzo de recuperación carga (min.) (km) de energía<br />
Data Polso riposo Polso Polso Fase dicarico Tempo Percorso Consumo Voto<br />
affaticamento ripresa (min.) (km) energetico<br />
Data tętno tętno przy tętno w stopień Czas odległość Zużycie Ocena<br />
spoczynkowe obciążeniu fazie odpoczynku obciążenia (min.) (km) energii sprawności<br />
43
Heinz KETTLER GmbH & Co.· Postfach 1020 · D- 59463 Ense-Parsit<br />
D<br />
GB<br />
F<br />
NL<br />
E<br />
Bei Reklamationen bitte diese Kontrollnummer angeben.<br />
In case of complaint, please state this control number.<br />
En cas de réclamation, merci de toujours indiquer le numéro de<br />
contrôle qui figure à l’arrière de la notice de montage.<br />
Bij reclamaties dit controlenummer vermelden<br />
En caso de reclamación le rogamos indicar este número de control.<br />
I<br />
PL<br />
In caso di reclamazione, si prega di indicare questo numero di<br />
controllo.<br />
W przypadku reklamacji proszę podawać ten numer kontrolny.<br />
docu 893c/06.04<br />
44


