Guide to Cementation - Kerr
Guide to Cementation - Kerr
Guide to Cementation - Kerr

Create successful ePaper yourself
Turn your PDF publications into a flip-book with our unique Google optimized e-Paper software.
<strong>Guide</strong> <strong>to</strong> <strong>Cementation</strong><br />
Your practice is our inspiration. <br />
<strong>Guide</strong> <strong>to</strong> <strong>Cementation</strong><br />
Clinical <strong>Guide</strong>
INDEX<br />
<strong>Cementation</strong> in Dentistry 2<br />
Prosthodontic Procedure - All you need is <strong>Kerr</strong> 3-6<br />
Mechanical & Physical Properties 7-8<br />
Temporary <strong>Cementation</strong> 9<br />
TempBond 10<br />
Permanent <strong>Cementation</strong> 11<br />
MaxCem Elite 12-18<br />
Adhesive <strong>Cementation</strong> Review 19-20<br />
NX3 21-32<br />
When <strong>to</strong> use our cements 33-34<br />
Author Biographies 35<br />
Your practice is our inspiration.
All you need is <strong>Kerr</strong><br />
Introduction<br />
<strong>Guide</strong> <strong>to</strong> <strong>Cementation</strong><br />
sï'mûn-tÇ'sh n<br />
e<br />
The act or process of attaching by means of cement<br />
Marika Nemeth<br />
In dentistry we have been using different forms of<br />
cements for as long as there have been<br />
res<strong>to</strong>rations needing <strong>to</strong> be fixed permanently <strong>to</strong><br />
<strong>to</strong>oth structure. Over the past decades there has<br />
been a huge barrage of cementation products<br />
available <strong>to</strong> dentists. Also specializing for use in<br />
different fields of dentistry;<br />
res<strong>to</strong>rative,orthodontic,endodontic, surgery,<br />
implant,etc. Thus making the task of choosing<br />
which type of cement <strong>to</strong> use, how <strong>to</strong> use it, AND<br />
for which indication very confusing.<br />
In recent years there has been an influx of<br />
prosthetic res<strong>to</strong>rative materials <strong>to</strong> choose from.<br />
Choices ranging from traditional PFM, All Ceramic,<br />
Zirconia, Indirect Composite resin and CAD-CAM<br />
milled products have become the standard<br />
options.<br />
Todays dental practice can vary from a single<br />
opera<strong>to</strong>r working from one chair in Nanaimo <strong>to</strong> a<br />
multi associate group practice in Zürich. All have<br />
the expectation of receiving the highest quality in<br />
products <strong>to</strong> give <strong>to</strong> their patients. With so many<br />
different types of procedures and clinical decisions<br />
<strong>to</strong> be made, clearly one type of cement and/or<br />
luting product cannot satisfy all situations.<br />
Therefore it is imperative that dentists have many<br />
types of cements available in their practice.<br />
We at <strong>Kerr</strong> hope you will enjoy reading our guide.<br />
We strive <strong>to</strong> deliver <strong>to</strong> you the highest quality in all<br />
our products that you use everyday.<br />
Your practice is our inspiration!<br />
1
<strong>Cementation</strong> in Dentistry<br />
Inspired by...<br />
“Ideally, dental cements should adhere <strong>to</strong> <strong>to</strong>oth structure as well as<br />
res<strong>to</strong>rative materials. They should exhibit the following characteristics:<br />
• resist functional forces<br />
• be insoluble in oral fluids<br />
• be effective while maintaining a low film thickness<br />
• be compatible with pulp tissue<br />
• exhibit anticariogenic properties<br />
• be easy <strong>to</strong> manipulate and clean up<br />
To date no one cement has achieved all of these properties <strong>to</strong>gether, but<br />
the current offering of resin cements demonstrate high strength, relatively<br />
low solubility, self or dual cure functions; reduced or eliminated post-op<br />
sensitivity, and relative ease of handling. <strong>Kerr</strong> dental cements have been a<br />
part of my daily practice for over 25 years”<br />
Dr. Isaac Novak<br />
2<br />
Your practice is our inspiration.
All you need is <strong>Kerr</strong><br />
The Prosthodontic Procedure<br />
<strong>Guide</strong> <strong>to</strong> <strong>Cementation</strong><br />
STEP PRODUCT KERR PRODUCTS<br />
Impression<br />
for study models<br />
Impression<br />
Material<br />
Take 1 Alginate<br />
Alginot FS<br />
Take 1 Alginate<br />
AlgiNot FS<br />
Pour up<br />
of models<br />
S<strong>to</strong>nes<br />
and Plasters<br />
Snow White Plaster type 2<br />
Orthodontic Model Mix S<strong>to</strong>ne<br />
Hydrocal Denture Model S<strong>to</strong>ne<br />
Impression for<br />
Temporization<br />
Impression<br />
Material<br />
AlgiNot FS<br />
Take1 Alginate<br />
AlgiNot FS<br />
Take 1 Alginate<br />
3
STEP PRODUCT KERR PRODUCTS<br />
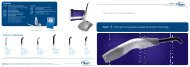
Tooth Preparation<br />
Burs<br />
Beavers Carbide Jet Burs<br />
BlueWhite Diamond Burs<br />
Beavers Carbide Jet Bur BlueWhite Diamond Bur<br />
Final Impression<br />
Impression<br />
Material<br />
Take 1 Advanced<br />
Options: Delivery, viscosity and set time<br />
Flowable, highly<br />
flexible and<br />
hydrophilic<br />
Highly thixotropic<br />
with incredible<br />
tear strength<br />
The perfect<br />
balance between<br />
flow and body<br />
Outstanding<br />
dimensional stability<br />
and elasticity<br />
Ultra-high viscosity<br />
for extra mechanical<br />
compression<br />
Unidose ®<br />
<strong>Kerr</strong>’s unique Unidose delivery offers<br />
dual benefits: targeted syringe<br />
delivery and the elimination of crosscontamination<br />
concerns<br />
Cartridge<br />
Convenient 50 ml cartridges make<br />
mixing & application of Take 1<br />
Advanced precise and easy<br />
Volume<br />
For busy offices, Take 1 Advanced<br />
Volume delivery speeds up<br />
impression taking, reduces hand<br />
fatigue and lowers cost per use<br />
Hand Mix<br />
For instances when a higher<br />
viscosity tray material is desired<br />
and other mixing methods<br />
are unavailable<br />
*LB = Light Body, RB = Regular Body, Med/Mon = Medium/Monophase, HB = Heavy Body<br />
4<br />
Your practice is our inspiration.
All you need is <strong>Kerr</strong><br />
The Prosthodontic Procedure<br />
<strong>Guide</strong> <strong>to</strong> <strong>Cementation</strong><br />
STEP PRODUCT KERR PRODUCTS<br />
Check<br />
Clearance<br />
Clearance<br />
Measurement<br />
Flex Tab<br />
Bite Registration<br />
Impression<br />
Material<br />
Take 1 Advanced Bite Registration<br />
Temporary<br />
Crown & Bridge<br />
fabrication<br />
Temporization<br />
Material<br />
FILL-IN<br />
Temphase<br />
Temporary<br />
Crown & Bridge<br />
cementation<br />
Temporary<br />
Cements<br />
TempBond<br />
5
Temporary<br />
Cement removal<br />
Rotary<br />
Instruments<br />
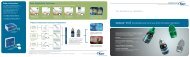
OptiClean<br />
Veneers Step:<br />
Isolate Preps<br />
Plastic<br />
Interproximal<br />
Strips<br />
Hawe Striproll<br />
Hawe Transparent Strips<br />
Permanent<br />
<strong>Cementation</strong> of<br />
Crown & Bridge<br />
Permanent<br />
Cements<br />
Maxcem Elite<br />
NX3<br />
Finishing<br />
& Polishing<br />
Interproximal<br />
Finishing Strips<br />
OptiStrip<br />
Polishers<br />
Iden<strong>to</strong>flex Porcelain / Ceramic Polishers<br />
Iden<strong>to</strong>flex Diamond Ceramic Polishers<br />
6<br />
Your practice is our inspiration.
All you need is <strong>Kerr</strong><br />
<strong>Guide</strong> <strong>to</strong> <strong>Cementation</strong><br />
Mechanical & Physical<br />
Properties...<br />
…what are they and why are they so important<br />
in cementation?<br />
“all mechanical properties are measures of the resistance of a<br />
material <strong>to</strong> a deformation/fracture under an applied force”<br />
A dental prosthesis is designed with multiple functions in mind. It is a man<br />
made object that is replacing natural teeth lost for any number of reasons.<br />
It needs <strong>to</strong> be esthetically pleasing for the patient, provide protection of<br />
underlying teeth, fit in<strong>to</strong> the existing dynamics of the mouth and occlusion,<br />
AND be strong enough <strong>to</strong> last years, resisting the forces of mastication.<br />
Given the fact that in normal biting and chewing the average biting force is<br />
170 pounds, it’s a small miracle that from a dentist’s impression, a dental<br />
technician is able <strong>to</strong> fabricate a piece of functional art so precise!<br />
7
Mechanical Properties<br />
Compressive Strength<br />
The maximum stress a material can withstand when subjected <strong>to</strong><br />
compression.<br />
* A high compressive strength means the cement can better resist the<br />
compressive stress or chewing force.<br />
Tensile Strength<br />
The maximum stress a material can withstand when subjected <strong>to</strong> tension.<br />
* A high tensile strength means the cement can better resist the tensile stress<br />
(e.g. experienced when you chew sticky food).<br />
Bond Strength<br />
Force, normalized with bonding area, required <strong>to</strong> separate<br />
two materials bonded <strong>to</strong>gether with an adhesive.<br />
* A high bond strength will result in a long and lasting res<strong>to</strong>ration.<br />
Shear Bond Strength<br />
Shear force, normalized with bonding area, required <strong>to</strong><br />
separate two materials bonded <strong>to</strong>gether with an adhesive<br />
* A high shear bond strength will result in a long and lasting res<strong>to</strong>ration.<br />
Elastic Modulus<br />
A measure of rigidity of the material.<br />
* Its importance is unknown for a cement. Basically<br />
you do not want a cement that is <strong>to</strong>o soft as it will<br />
not adequately support the res<strong>to</strong>ration under stress.<br />
Flexural Strength<br />
The maximum stress a material can withstand when subjected <strong>to</strong> bending.<br />
* A high flexural strength means the cement can better resist the bending stress when the<br />
<strong>to</strong>oth is flexed.<br />
Physical Properties<br />
Film Thickness<br />
The thickness of a cement under certain pressure.<br />
* If the film thickness is <strong>to</strong>o large, it will interfere with the seating of the res<strong>to</strong>ration.<br />
Solubility<br />
The amount of material soluble in water after the<br />
cured cement is soaked in water for 7 days.<br />
* If the solubility is <strong>to</strong>o high, it will weaken the cured cement<br />
and cause marginal ditching.<br />
Setting Time<br />
Setting time is the time (from the start of mixing) when<br />
the mixed material is fully hardened.<br />
* Once the cement is set, the cement will be strong enough <strong>to</strong><br />
withstand the forces of finishing/polishing.<br />
pH<br />
is a measure of the acidity or basicity of a solution/material.<br />
* If the pH of the cured material is <strong>to</strong>o low (or acidity <strong>to</strong>o high), the bond<br />
may not be durable as the cement may undergo degradation.<br />
Radiopacity<br />
Measures the capacity of a material <strong>to</strong> absorb x-ray.<br />
* A high radiopacity for a cement will allow it <strong>to</strong> show when<br />
examined with x-ray so that it will not be mistaken as gap or void.<br />
Eugene Qian, Ph. D.<br />
Principle Scientist, Dental Materials Center, <strong>Kerr</strong> Corporation<br />
8<br />
Your practice is our inspiration.
All you need is <strong>Kerr</strong><br />
Cements<br />
<strong>Guide</strong> <strong>to</strong> <strong>Cementation</strong><br />
Temporary <strong>Cementation</strong><br />
Inspired by...<br />
TempBond has been a staple in my practice since the start of my dental career. It is easy <strong>to</strong> use,<br />
has sufficient strength over a relatively short period of time <strong>to</strong> withstand mastication and keep<br />
temporary crowns and bridges in place while the eugenol base soothes pulpal tissue. For patients<br />
allergic <strong>to</strong> eugenol the TempBond NE version is equally effective. If a concern arises because a<br />
res<strong>to</strong>ration's bonding ability may be affected by eugenol, the TempBond Clear is a great choice.<br />
With availability in au<strong>to</strong>mix syringe delivery, the convenience of this product takes a seat, second <strong>to</strong><br />
none.<br />
Dr. Isaac Novak<br />
9
TempBond <br />
Temporary Cement<br />
TempBond temporary cement for trial res<strong>to</strong>rations<br />
or temporary crowns and bridges withstands mastication,<br />
seals the res<strong>to</strong>ration and prevents seepage,<br />
yet is easy <strong>to</strong> remove.<br />
Non-eugenol TempBond NE will not inhibit the<br />
polymerization of permanent resin cements and<br />
acrylic temporaries. And resin-based TempBond<br />
Clear with Triclosan is the most translucent provisional<br />
cement in the market for superior esthetics.<br />
Features<br />
• Delivery choices. Unidose ® , tubes and new<br />
au<strong>to</strong>mix syringe offer flexibility in delivery<br />
options.<br />
• Flows and mixes easily. Delivers optimal<br />
consistency for solid, complete seating of<br />
res<strong>to</strong>rations.<br />
• High bond strength. Heightens patient<br />
confidence. Prevents leakage and sensitivity <strong>to</strong><br />
cold and heat.<br />
• Easy <strong>to</strong> remove. Enhances patient comfort.<br />
Minimizes potential for damage <strong>to</strong> the prep or<br />
temporary.<br />
Research<br />
TempBond was developed in 1961 based on zinc<br />
oxide-eugenol chemistry, a classic setting<br />
reaction with over 100 years of clinical his<strong>to</strong>ry.<br />
Then in 1989, <strong>Kerr</strong> introduced TempBond NE with<br />
eugenol-free zinc oxide, substituting carboxylic<br />
acids in place of eugenol. And TempBond Clear<br />
with Triclosan incorporates a unique redox<br />
initia<strong>to</strong>r system and low refractive index fillers for<br />
excellent color stability and high translucency.<br />
Case courtesy of Dr. Tony Soileau<br />
Clinically proven<br />
performance you trust<br />
10<br />
Your practice is our inspiration.
All you need is <strong>Kerr</strong><br />
Cements<br />
<strong>Cementation</strong> Procedure<br />
Permanent <strong>Cementation</strong><br />
Inspired by...<br />
Zirconium-based porcelain crowns represent an alternative res<strong>to</strong>rative material that<br />
enhances the dentist’s and technician’s ability <strong>to</strong> provide durable, aesthetic and functional<br />
res<strong>to</strong>rations in the anterior or posterior region of the mouth especially when metal-free<br />
res<strong>to</strong>rations are a primary desire of the patient. I recently used Maxcem Elite <strong>to</strong> cement Lava ®<br />
crowns for a patient. Excess cement was easily removed from the margins and accomplished<br />
within a short amount of time before final curing with the DEMI curing light for 10 seconds.<br />
No finishing of the cement was necessary along the margins.<br />
Dr. Ara Nazarian<br />
All trademarks are property of their respective owners.<br />
11
Maxcem Elite in Clinical Cases<br />
Zirconia Crowns, Teeth 17-27<br />
Patient case pictures courtesy of Dr. Ara Nazarian<br />
Patient’s original smile<br />
Patient’s original res<strong>to</strong>rations with fracture lines<br />
and failing margins<br />
Patient’s teeth prepped with Expasyl for<br />
gingival retraction before taking impressions<br />
Cementing Lava ® crown using Maxcem Elite<br />
Final zirconia res<strong>to</strong>rations seated using<br />
Maxcem Elite<br />
Patient pleased with final results of her smile<br />
All trademarks are property of their respective owners.<br />
12<br />
Your practice is our inspiration.
All you need is <strong>Kerr</strong><br />
Cements<br />
<strong>Cementation</strong> Procedure<br />
Maxcem Elite Review<br />
Single component; Self-etch resin cement system<br />
Dr. Ara Nazarian<br />
Now is a great time <strong>to</strong> practice aesthetic and<br />
cosmetic res<strong>to</strong>rative dentistry. Today, unlike ever<br />
before, clinicians and technicians have a variety of<br />
indirect res<strong>to</strong>rative materials from which <strong>to</strong> choose<br />
in order <strong>to</strong> quickly, easily and predictably res<strong>to</strong>re a<br />
patient’s smile.<br />
Traditionally, porcelain-fused-<strong>to</strong>-metal res<strong>to</strong>rations<br />
have been placed when strength and durability in<br />
the posterior region were required, and/or in the<br />
anterior region when complete isolation from<br />
moisture could not be achieved, thereby<br />
eliminating all-ceramic res<strong>to</strong>rative possibilities.<br />
Esthetically, all-ceramic res<strong>to</strong>rations have been<br />
this author’s ideal choice for aesthetics, but<br />
problems of sensitivity have developed because of<br />
errors that can occur during the multiple steps<br />
required for bonding, especially when placing<br />
several units of res<strong>to</strong>rations at one seating.<br />
Fortunately, Maxcem Elite by <strong>Kerr</strong> is a single<br />
component; self etch resin cement system that<br />
eliminates multiple steps when bonding indirect<br />
res<strong>to</strong>rations. Clinicians have everything they need<br />
for etching, priming and bonding in one syringe.<br />
Maxcem Elite bonds tenaciously <strong>to</strong> all dental<br />
substrates while maintaining excellent mechanical<br />
and esthetic properties. The cement is<br />
conveniently dispensed directly in<strong>to</strong> the res<strong>to</strong>ration<br />
or cavity preparation using a dual au<strong>to</strong> mix<br />
syringe. Optional curved tips are also available for<br />
inlay/onlays and post placement applications. No<br />
more 90-second wait before tack curing, no hand<br />
mixing and no refrigeration required. Using the<br />
amine free chemistry similar <strong>to</strong> its cousin NX3,<br />
Maxcem Elite has superior color stability enabling<br />
its use under esthetic res<strong>to</strong>rations anywhere in the<br />
mouth. So whether you decide <strong>to</strong> use this cement<br />
for zirconia, all ceramic, indirect composite, or<br />
even porcelain <strong>to</strong> metal res<strong>to</strong>rations, the process<br />
is as easy as 123!<br />
According <strong>to</strong> the manufacturer, some features and<br />
benefits include the following:<br />
Features<br />
• High bond strength and compatibility <strong>to</strong> common<br />
dental substrates<br />
• Ability <strong>to</strong> tack-cure immediately<br />
• Ease of use<br />
• Applicable for common indirect res<strong>to</strong>rations<br />
• Patented Redox System<br />
Benefits<br />
• High bond strength without adhesive needed<br />
• Saves time at patient chair side<br />
• No need <strong>to</strong> refrigerate<br />
• Easy clean-up<br />
• No hand mixing required<br />
• Anterior, posterior / ceramics, PFMs and<br />
CAD/CAM materials<br />
• Color stability, esthetic, works with all substrates<br />
from opaque <strong>to</strong> translucent<br />
13
Shear Bond Strength (MPa) of Maxcem Elite<br />
<strong>to</strong> Various Substrates Self-Cured<br />
Depending on the substrates, bond strengths have been recorded<br />
between 22-36 MPa. When combined with<br />
OptiBond ® All-In-One, <strong>Kerr</strong>’s research team found dentin and enamel<br />
bond strength of Maxcem Elite <strong>to</strong> be 35MPa and 30MPa, respectively.<br />
When combined with OptiBond Solo Plus, <strong>Kerr</strong>’s research team found<br />
dentin and enamel bond strength of Maxcem Elite <strong>to</strong> be 35MPa and<br />
33MPa, respectively. The following chart illustrates these different<br />
levels.<br />
24-hour testing. Internal data. Available upon request.<br />
As dentists, we are always looking for something that is quick and simple <strong>to</strong> use yet very<br />
effective. Maxcem Elite is indeed an enhanced and better version of the traditional<br />
Maxcem cement; one of the first <strong>to</strong> introduce the self etch resin cements <strong>to</strong> the dental<br />
profession. Now with increased bond strengths and the ability <strong>to</strong> spot tack, Maxcem <br />
Elite will prove <strong>to</strong> be a new enhanced leader in the field.<br />
2009 2010<br />
14<br />
Your practice is our inspiration.
All you need is <strong>Kerr</strong><br />
Cements<br />
<strong>Cementation</strong> Procedure<br />
Maxcem Elite <br />
Maxcem Elite self-etch, self-adhesive resin<br />
cement for indirect res<strong>to</strong>rations<br />
Maxcem Elite is <strong>Kerr</strong>’s newest innovation in the<br />
self-adhesive cement space. The market, while<br />
continuing <strong>to</strong> embrace the technology of this<br />
relatively new category, still harbors concerns<br />
about<br />
the bonding capabilities of cements that bypass<br />
the bonding step. Maxcem Elite is formulated <strong>to</strong><br />
ease this concern by taking the science behind<br />
self-adhesive cements and evolving the chemistry<br />
<strong>to</strong> ultimately provide bond strengths and superb<br />
esthetics that surpass competitive claims.<br />
Superior Bond Strengths and Compatibility To All Common Dental Substrates<br />
Maxcem Elite is indicated for cementation of anterior or posterior composites, ceramics, PFMs and metal<br />
res<strong>to</strong>rations, CAD/CAM materials, zirconia-based res<strong>to</strong>rations, posts, and cementing crowns <strong>to</strong> implants.<br />
Maxcem Elite’s enhanced bond strengths are achieved as follows:<br />
• Optimized amount of GPDM and other adhesive monomers <strong>to</strong> improve wettability.<br />
• Modified resin matrix system <strong>to</strong> reduce surface tension <strong>to</strong> etch more effectively, hence eliminating the<br />
90-second wait of previous generation of Maxcem, in addition <strong>to</strong> enhancing shelf life so no refrigeration<br />
is needed.<br />
• Re-designed filler system <strong>to</strong> promote a more intimate contact with <strong>to</strong>oth.<br />
Maxcem was the first in the self-adhesive<br />
cement category <strong>to</strong> offer what is truly the<br />
easiest <strong>to</strong> use and fastest procedure on the<br />
market with the dual-syringe delivery system.<br />
Maxcem Elite continues this legacy with au<strong>to</strong>mix<br />
tips that now come with optional curved tips –<br />
intraoral tips for inlays/onlays, and root-canal<br />
tips for post cementation – <strong>to</strong> dispense cement<br />
in those hard-<strong>to</strong>-reach places in the mouth. No<br />
hand mixing, and no separate activation, mixing<br />
or dispensing device required.<br />
Maxcem was famous for its cleanup. Now,<br />
Maxcem Elite’s cleanup is just as fast as excess<br />
cement is easily removed after reaching a gel<br />
state. Maxcem Elite comes with a technique<br />
guide that summarizes the full instructions for<br />
use, making the cementation process an easy<br />
and user-friendly experience.<br />
The Proprietary Redox Advantage<br />
Most self-cure or dual-cure resin cements use<br />
a benzoyl peroxide (BPO) and tertiary amine<br />
pair <strong>to</strong> initiate polymerization and curing,<br />
resulting in discoloration over time due <strong>to</strong><br />
oxidation of amine. Now with an amine-free<br />
redox initia<strong>to</strong>r system and optimized resin<br />
matrix, Maxcem Elite, <strong>to</strong>gether with NX3,<br />
<strong>Kerr</strong>’s traditional resin cement, are the first<br />
truly color-stable resin cements in the market.<br />
Maxcem Elite’s color stability and high<br />
translucency enable esthetic integrity and<br />
allow for cementation of both anterior and<br />
posterior res<strong>to</strong>rations, making it a universal<br />
cement that helps simplify and minimize the<br />
office inven<strong>to</strong>ry.<br />
Taking simplicity<br />
<strong>to</strong> the next level<br />
15
Maxcem Elite <br />
Application <strong>Guide</strong><br />
1a<br />
1b<br />
Indication<br />
Maxcem Elite is indicated for final<br />
cementation of:<br />
• All-ceramic (including zirconia or alumina<br />
strengthened, and Cerec) and composite<br />
crowns, bridges, inlays and onlays<br />
• Metal and porcelain fused <strong>to</strong> metal<br />
crowns, bridges, inlays and onlays<br />
• Prefabricated metal or fiberglass posts<br />
2 3a<br />
3b<br />
4<br />
5<br />
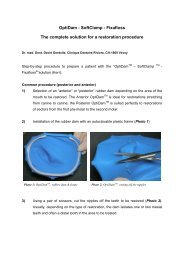
1) Preparation<br />
• Remove provisional res<strong>to</strong>ration.<br />
• Remove temporary cement and<br />
debris using OptiClean or your<br />
instrument of choice. Rinse and<br />
lightly air dry.<br />
• Try in res<strong>to</strong>ration <strong>to</strong> ensure<br />
proper fit.<br />
• Rinse thoroughly and lightly air<br />
dry. Do not desiccate.<br />
• Pre-treat final res<strong>to</strong>ration according<br />
<strong>to</strong> manufacturer’s directions.<br />
2) Dispensing<br />
• Select desired shade of Maxcem<br />
Elite.<br />
• Remove cap and bleed cartridge<br />
once before initial use.<br />
• Place appropriate mixer on dual<br />
syringe cartridge. Mixer with wide<br />
opening is only for use with<br />
curved tips.<br />
• Dispense cement directly in<strong>to</strong><br />
res<strong>to</strong>ration or <strong>to</strong>oth preparation<br />
using intra-oral tip. For posts,<br />
dispense cement directly on<strong>to</strong><br />
Peerless Post or your post of<br />
choice, or dispense directly in<strong>to</strong><br />
canal using root-canal tip.<br />
3) Placement<br />
• Seat res<strong>to</strong>ration on<strong>to</strong> preparation.<br />
Hold in place with light pressure.<br />
• Allow cement <strong>to</strong> flow from all<br />
margins.<br />
• Remove excess cement. Excess<br />
can be removed in gel state (gel<br />
state is achieved in 2-3 minutes).<br />
Immediate tack-curing <strong>to</strong> hasten<br />
gel state is optional.<br />
4) Final cure<br />
• Light cure all surfaces including<br />
margins using Demi curing light<br />
for 10 seconds. See footnote for<br />
recommended curing times for<br />
other curing light models.*<br />
• For non-translucent res<strong>to</strong>rations,<br />
allow cement <strong>to</strong> self-cure for 4-5<br />
minutes.<br />
5) Finish and polish<br />
• Polish margins with Gloss Plus<br />
discs, cups or points. Use<br />
HiLusterPlus polishers for a final<br />
high luster shine.<br />
• Check occlusion.<br />
* Caution: Uncured methacrylate resin may cause contact<br />
dermatitis and damage the pulp. Avoid contact with skin, eyes<br />
and soft tissue. Wash thoroughly with water after contact.<br />
Caution: <strong>Kerr</strong> Gel Etchant contains Phosphoric Acid. Avoid<br />
contact with skin, eyes, and soft tissue. In case of contact with<br />
skin or eyes, flush immediately with water. Get medical attention<br />
for eyes. Do not take internally.<br />
* Recommended Cure Times: Demi and L.E.Demetron II: 10<br />
seconds L.E.Demetron I and Optilux 501: 20 seconds For all<br />
other lights, see manufacturer’s recommendation. Maxcem Elite<br />
is indicated for final cementation<br />
16<br />
Your practice is our inspiration.
All you need is <strong>Kerr</strong><br />
Clinical Cases<br />
<strong>Cementation</strong> Procedure<br />
Maxcem Elite in Clinical Cases<br />
Premise Indirect Composite Inlay, Tooth 16<br />
Case courtesy of Dr. Stephen Poss<br />
1) Shade selection for optimal esthetics 2) Original amalgam res<strong>to</strong>ration 3) Res<strong>to</strong>ration margins should not coincide<br />
with static occlusal contacts<br />
4) Final impression<br />
(Take 1 Advanced impression material)<br />
5) Create temporary with light cure<br />
temporary filling material and<br />
cement in<strong>to</strong> place (Fill-In Temporary<br />
material & TempBond Clear used)<br />
6) Inlay on model 7) Isolation of prepped <strong>to</strong>oth with<br />
rubber dam<br />
7) Clean res<strong>to</strong>ration. Etch inlay with<br />
phosphoric acid if ceramic. If<br />
res<strong>to</strong>ration is a lab resin, blast<br />
internal surface with Aluminum<br />
Oxide<br />
17
9) Coat internal aspect of the ceramic<br />
with silane (<strong>Kerr</strong> Silane Primer)<br />
10) Place thin coat of Maxcem Elite<br />
on the inlay covering all aspects<br />
of the internal surfaces<br />
11) Seat the res<strong>to</strong>ration 12) Carefully floss and light cure the<br />
res<strong>to</strong>ration for 2 seconds <strong>to</strong><br />
obtain cement gel state<br />
13) Remove access and floss again 14) Check occlusion. Clean excess and if<br />
necessary adjust res<strong>to</strong>ration with a<br />
fluted carbide bur<br />
15) Finish/polish res<strong>to</strong>ration with cups<br />
and brushes (Occlubrush used)<br />
16) Final res<strong>to</strong>ration<br />
18<br />
Your practice is our inspiration.
All you need is <strong>Kerr</strong><br />
Cements<br />
<strong>Cementation</strong> Procedure<br />
Clinician Review<br />
Adhesive <strong>Cementation</strong><br />
Prof. Francesco Mangani<br />
The necessity of finding alternatives <strong>to</strong> amalgam<br />
and the growing demand of patients for highly aesthetic<br />
res<strong>to</strong>rations have brought an increase in popularity<br />
of resin composite materials for dental<br />
res<strong>to</strong>rations. These materials have proven effective<br />
in terms of aesthetic results and biomechanical<br />
properties. Polymerization shrinkage 1 is the main<br />
drawback of resin composites and it directly<br />
depends on filler content. In large cavities, especially<br />
when the cervical margins are located in dentine,<br />
the polymerization of large amounts of filling material<br />
may cause a higher shrinkage stress, resulting in<br />
marginal gaps and defects 2 , which open the way <strong>to</strong><br />
bacterial micro-infiltration, secondary caries, pulp<br />
irritation, post operative sensitivity and marginal<br />
discoloration 3 .<br />
A promising method for reducing the problem of<br />
polymerization shrinkage is the use of a thin increment<br />
of resin luting material in conjunction with<br />
indirect res<strong>to</strong>rations, such as veneers, inlays,<br />
onlays, overlays 4 . This thin layer of material will be<br />
the only part of the res<strong>to</strong>ration subjected <strong>to</strong> polymerization<br />
shrinkage.<br />
Today, adhesive cementation represents a predictable<br />
technique, which can be used with both<br />
indirect resin composite and all-ceramic res<strong>to</strong>rations<br />
plus endodontic posts. This procedure is<br />
essential <strong>to</strong> guarantee a favorable long-term prognosis.<br />
However, it is discussed here in terms of<br />
selection of the most suitable materials and techniques.<br />
The criteria which must be taken in<strong>to</strong><br />
account in inlay cementation can be divided in:<br />
• Mechanical: <strong>to</strong> achieve a micro-mechanical and<br />
chemical bonding<br />
• Structural: <strong>to</strong> increase the strength of the res<strong>to</strong>ration<br />
• Biological: <strong>to</strong> produce a tight marginal seal<br />
between the <strong>to</strong>oth and the res<strong>to</strong>ration.<br />
• Aesthetic: <strong>to</strong> achieve a perfect colour match<br />
between the <strong>to</strong>oth and the res<strong>to</strong>ration.<br />
The cementation of an indirect res<strong>to</strong>ration can be<br />
carried out with light-curing, self-curing or dual-curing<br />
5 materials.<br />
Light-curing luting cements are generally available<br />
as a single paste contained in an opaque, lightproof<br />
syringe. They can be easily handled, allow for<br />
a better control of the setting times and ensure high<br />
quality margins, thanks <strong>to</strong> their high filler content.<br />
However, light-activated curing is a drawback in<br />
deep cavities, as the UV light may fail <strong>to</strong> activate<br />
benzoyl peroxide, leaving part of the luting cement<br />
with a low degree of conversion. This will influence<br />
its mechanical properties. Another disadvantage of<br />
these materials is their high polymerization shrinkage.<br />
Among the advantages of self-curing or dual-curing<br />
luting cements is their optimal monomer conversion,<br />
even at low radiant energy intensity; their disadvantage<br />
is their extreme flowability. Moreover, the<br />
need <strong>to</strong> mix two components (i.e., powder – liquid<br />
or paste – paste) is responsible for porosity or void<br />
formation and air bubble inclusion, which may compromise<br />
the bond between the filling material and<br />
the <strong>to</strong>oth substrate.<br />
19
Self-curing luting cements allow for a lower control<br />
on curing time, but ensure a lower shrinkage stress,<br />
which is partially improved by viscous flow.<br />
Light-curing and self-curing luting cements can set<br />
even in those areas which cannot be reached by UV<br />
light. However, in this case, the working time starts<br />
when the two components are mixed <strong>to</strong>gether.<br />
The physical and mechanical properties of composite<br />
materials are closely related <strong>to</strong> the degree of<br />
monomer conversion in<strong>to</strong> polymer 6,7,8 . In light-activated<br />
systems, the degree of conversion decreases<br />
as the distance between the curing light and the filling<br />
material increases, since the radiant energy is<br />
reduced when passing through the res<strong>to</strong>ration 9,10 .<br />
This result, supported by the studies on the degree<br />
of conversion of light-curing flowable resin composites<br />
used in the cementation of increasingly<br />
thicker inlays, has clearly shown the inadequacy of<br />
this class of material, as they fail <strong>to</strong> achieve proper<br />
curing when used <strong>to</strong> cement a res<strong>to</strong>ration with a<br />
3mm thickness or higher 11 . The only indication is<br />
veneer cementation, as their lower thickness permits<br />
the radiant energy <strong>to</strong> reach the composite<br />
material and start the curing process. It has been<br />
shown that light-curing composite pre-heating<br />
increases the degree of monomer conversion,<br />
which improves the properties of the luting material,<br />
resulting in better homogeneity and handling of<br />
the material 12-19 .<br />
In vitro investigations have shown that the degree of<br />
conversion of a light-curing micro-hybrid composite,<br />
pre-heated in an oven at 54°C and used in<br />
increasingly thicker res<strong>to</strong>rations (2, 3, and 4 mm<br />
thickness) is similar <strong>to</strong> that of dual-curing materials<br />
under the same radiant energy, regardless of the<br />
light source (LED or halogen) 20 . Therefore, this<br />
method is particularly interesting, as it combines<br />
the benefits of light-activated materials with a high<br />
degree of monomer conversion. Moreover, this<br />
technique is used in the cementation of anterior and<br />
posterior res<strong>to</strong>rations.<br />
References<br />
1 Ciucchi B, Bouillaguet S, Delaloye M, Holtz J. Volume of the internal gap<br />
formed under composite res<strong>to</strong>rations in vitro. J Dent 1997;25:305–312.<br />
2 Dietschi D, Scampa U, Campanile G, Holtz J. Marginal adaptation and seal<br />
of direct and indirect class II composite resin res<strong>to</strong>rations: An in vitro evaluation.<br />
Quint Int 1995;26:127–138.<br />
3 Browne RM, Tobias RS. Microbial microleakage and pulpal inflammation: A<br />
review. Endod Dent Trauma<strong>to</strong>l 1986;2:177–183.<br />
4 Blankeneau RJ, Kelsey WP, Cavel WT. A direct posterior res<strong>to</strong>rative resin<br />
inlay technique. Quint Int 1984;5:515–516.<br />
5 Ferrari M, Dagostin A, Fabianelli A. Marginal integrity of ceramic inlays luted<br />
with a self-curing resin system. Dent Mater 2003;19:270–276.<br />
6 Oréfice RL, Discacciati JAC, Neves AD, Mansur HS, Jansen WC. In situ evaluation<br />
of the polymerisation kinetics and corresponding evolution of the<br />
mechanical properties of dental composites. Polym Test 2003;22:77–81.<br />
7 Ogunyinka A, Palin WM, Shortall AC, Marquis PM. Pho<strong>to</strong>initiation chemistry<br />
affects light transmission and degree of conversion of curing experimental<br />
dental resin composites. Dent Mater 2007;23:807–819. 12.<br />
8 Caughman WF, Caughman GB, Shiflett RA, Rueggeberg F, Schuster GS.<br />
Correlation of cy<strong>to</strong><strong>to</strong>xicity, filler loading and curing time of dental composites.<br />
Biomaterials 1991;12:737–740.<br />
9 Musanje L, Darvell BW. Curing-light attenuation in filled resin res<strong>to</strong>rative<br />
materials. Dent Mater 2006;22:804–817.<br />
10 Obici AC, Coelho Sinhoreti MA, Frollini E, Correr-Sobrinho L, de Goes MF,<br />
Pessanha Henriques GE. Monomer conversion at different dental composites<br />
using six light-curing methods. Polym Test 2006;25:282–288.<br />
11 Vieno S, Acquaviva PA, Gagliani MM, Re D, Augusti D, Cerutti A.<br />
MicroRaman investigation of luting cements in indirect composite res<strong>to</strong>rations.<br />
Atti del 85th IADR General Session and Exhibition, New Orleans,<br />
march 2007<br />
12 Daronch M, Rueggeberg FA, Hall G, De Goes MF. Effect of composite temperature<br />
on in vitro intrapulpal temperature rise. Dent Mater<br />
2007;23:1283–1288.<br />
13 Dickens SH, Stansbury JW, Choi KM, Floyd CJE, Pho<strong>to</strong>polymerization kinetics<br />
of methacrylate dental resins. Macromolecules 2003;36:6043–6053.<br />
14 Draughn RA. Effects of temperature on mechanical properties of composite<br />
dental res<strong>to</strong>rative materials. J Biomed Mater Res 1981;15:489–495.<br />
15 Lecamp L, Youssef B, Bunel C, Lebaudy P. Pho<strong>to</strong>initiated polymerization of a<br />
dimethacrylate oligomer: 1. Influence of pho<strong>to</strong>initia<strong>to</strong>r concentration, temperature<br />
and light intensity. Polymer 1997;38:6089–6096<br />
16 Lovell LG, Newman SM, Bowman CN. The effects of light intensity, temperature,<br />
and comonomer composition on the polymerization behavior of<br />
dimethacrylate dental resins. J Dent Res 1999;78:1469–1476.<br />
17 Mak Y, Lai SCN, Cheung GSP, Chan AWK, Tay FR, Pashley DH. Micro-tensile<br />
bond testing of resin cements <strong>to</strong> dentin and an indirect resin composite.<br />
Dent Mater 2002;18:609–621.<br />
18 Stansbury JW. Curing dental resins and composites by pho<strong>to</strong>polymerization.<br />
J Esth Dent 2000;12:300–318.<br />
19 Trujillo M, Newman SM, Stansbury JW. Use of near-IR <strong>to</strong> moni<strong>to</strong>r the influence<br />
of external heating on dental composite pho<strong>to</strong>polymerization. Dent<br />
Mater 2004;20:766–777.<br />
20 Acquaviva PA, Cerutti F, Adami G, Gagliani M, Ferrari M, Gherlone E, Cerutti<br />
A. Degree of Conversion of Three Composite Materials Employed in the<br />
Adhesive <strong>Cementation</strong> of Indirect Res<strong>to</strong>rations: A Micro-Raman Analysis.<br />
J Dent 2009;37(8):610-5<br />
20<br />
Your practice is our inspiration.
All you need is <strong>Kerr</strong><br />
Cements<br />
<strong>Cementation</strong> Procedure<br />
NX3 Review and Clinical Case<br />
Clinical cementation procedures for predictable aesthetic results:<br />
tips & tricks<br />
Dr. Montri Chantaramungkorn<br />
Acceptable clinical performance of dental cements<br />
requires an adequate resistance <strong>to</strong> dissolution in the<br />
oral environment, a strong bond through mechanical<br />
interlocking and adhesion, high strength under tension,<br />
good manipulation properties, such as acceptable<br />
working and setting times, and a biologic<br />
acceptability for the substrate.<br />
Resin-based cements are generally used for aesthetic<br />
res<strong>to</strong>rations (ceramic or resin based) and have<br />
become popular because they have addressed the<br />
disadvantages of solubility and lack of adhesion noted<br />
in previous materials. Res<strong>to</strong>rative<br />
dentistry is constantly undergoing change, driven in<br />
part by new clinical applications of existing dental<br />
materials and the introduction of new materials. <strong>Kerr</strong><br />
has recently introduced NX3, a new third generation<br />
dual-cure resin cement, with the following features:<br />
• Proprietary amine-free initia<strong>to</strong>r system and optimized<br />
resin matrix.<br />
• Simplified delivery: a dual-cure au<strong>to</strong>-mix syringe<br />
eliminates hand mixing.<br />
• Light-cure applications: a cement for veneers and<br />
indications requiring unlimited work time.<br />
• Bonds <strong>to</strong> all substrates: excellent adhesion <strong>to</strong><br />
dentin, enamel, CAD/CAM blocks, ceramic, porcelain,<br />
resin and metal.<br />
• Self-etch or <strong>to</strong>tal-etch: bonding pro<strong>to</strong>col compatibility.<br />
No dual-cure activa<strong>to</strong>r required.<br />
• Superior color stability: long-term esthetics for both<br />
dual-cure and light-cure cements.<br />
• Optimal handling: easy clean-up in gel state. The<br />
following article discusses aesthetic adhesive procedure<br />
techniques for the new NX3 in luting leucite<br />
reinforced glass ceramic res<strong>to</strong>rations with predictable<br />
aesthetic results.<br />
An aesthetic resin cementation appointment<br />
may be divided in<strong>to</strong> six steps:<br />
Step 1_ Try-in and shade control of the labora<strong>to</strong>rymade<br />
res<strong>to</strong>ration<br />
Step 2_ Adhesive treatment of the inner surface<br />
Step 3_ Adhesive treatment of the <strong>to</strong>oth surface<br />
Step 4_ Adhesive luting<br />
Step 5_ Control and adjustment of the occlusion<br />
Step 6_ Finishing and polishing<br />
Case presentation:<br />
A 27-year-old male patient was presented with<br />
unsightly black gingival shine through resulting from<br />
dull PFM crowns in both maxillary central incisors<br />
(Figs. 1, 2). After treatment, the newly replaced leucite<br />
reinforced glass ceramic res<strong>to</strong>rations (Empress<br />
Esthetic) (Fig. 3) cemented with NX3, are harmoniously<br />
integrated with the adjacent teeth and the gingival<br />
architecture (Figs. 4, 5).<br />
1 2 3 4 5<br />
21
Step 1: Try-in and shade control of the labora<strong>to</strong>ry-made<br />
res<strong>to</strong>ration<br />
Marginal adaptation and proximal<br />
contact of the labora<strong>to</strong>ry-made<br />
res<strong>to</strong>ration were first checked on<br />
the die-cast model. The better the<br />
fit, the easier excess luting resin<br />
cement can be removed, as there<br />
is less danger of tearing the luting<br />
composite out of the luting space<br />
during excess removal (Fig. 6). The<br />
try-in gels matched both dualand<br />
lightcure cements, a huge<br />
advantage when it comes <strong>to</strong> aesthetic<br />
res<strong>to</strong>rations. The intro kit<br />
contains three colors – yellow,<br />
clear and white – however, other<br />
shades are also available. In my<br />
practice, clear, white and<br />
opaque-white are used the most.<br />
Clear try-in was used while closely matching the work piece <strong>to</strong> the<br />
adjacent <strong>to</strong>oth (Fig. 7).<br />
The fit and shade control was verified by using the try-in gel. This<br />
step is quite helpful in determining<br />
the final shade aspect of the<br />
res<strong>to</strong>ration, luted with the concurrent<br />
shade of resin luting. In<br />
this case, clear shade try-in paste<br />
was used (Fig. 8).<br />
7<br />
Only minimal adjustments of the<br />
workpiece are possible at this<br />
moment, otherwise the res<strong>to</strong>ration<br />
will have <strong>to</strong> be sent back <strong>to</strong> the labora<strong>to</strong>ry for correction and<br />
the luting session will have <strong>to</strong> be postponed.<br />
6<br />
8<br />
Step 2: Adhesive treatment<br />
of the inner surface<br />
After the try-in gel was thoroughly<br />
washed off and gently dried with<br />
oil-free compressed air, the inner<br />
side of the silica-based ceramic<br />
was conditioned with 5 percent<br />
hydrofluoric acid for 60 seconds.<br />
This helps <strong>to</strong> promote optimal morphological<br />
change of the surface<br />
for the penetration of the silane<br />
primer (Fig. 9). For this type of<br />
ceramic, silane acts principally as<br />
promoter of wettability on the<br />
roughened surface and for the successive<br />
application of the luting<br />
agent (Fig. 10).<br />
9<br />
11<br />
10<br />
12<br />
The shiny aspect of the inner surface was visible after drying off the silane primer with hot air for two<br />
minutes (Fig. 11). After the surface adhesive treatment and before insertion, the res<strong>to</strong>ration had <strong>to</strong> be<br />
protected from light (Fig. 12).<br />
Step 3: Adhesive treatment of the <strong>to</strong>oth surface<br />
OptiClean was used for the complete removal of temporary cement and debris. It removes all traces of<br />
temporary cement and delivers a perfectly clean cementation surface of the entire <strong>to</strong>oth preparation.<br />
Used on a slow speed handpiece, OptiClean is a singleuse instrument with a 1.6 mm diameter tip for<br />
excellent interproximal access (Fig.<br />
13). After the <strong>to</strong>tal removal of the<br />
temporary cement, the operating<br />
field and <strong>to</strong>oth preparation surface<br />
was properly prepared with the<br />
application of plumber tape <strong>to</strong> the<br />
adjacent teeth. The gingival was<br />
13<br />
retracted with a #00 Ultrapak ®<br />
14<br />
retraction cord (Fig. 14).<br />
All trademarks are property of their respective owners.<br />
22<br />
Your practice is our inspiration.
All you need is <strong>Kerr</strong><br />
Cements<br />
<strong>Cementation</strong> Procedure<br />
According <strong>to</strong> the manufacturer, NX3 is compatible with self-etch (OptiBond All-In-<br />
One) and <strong>to</strong>tal-etch adhesives (OptiBond Solo Plus, OptiBond FL) and obtains high<br />
bond strength whether the cement is lightcured or dual-cured. In this case I chose a<br />
<strong>to</strong>tal-etch adhesive (OptiBond FL). A <strong>to</strong>tal etch of the enamel dentin and resin surface<br />
of the composite core was done for 15 seconds with <strong>Kerr</strong> gel etchant 37.5% phosphoric<br />
acid. Afterwards, copious amounts of water were used for rinsing until the<br />
etchant was completely removed (Fig. 15). After rinse off and gentle air drying the<br />
etched surface was bonded <strong>to</strong> a proper moist condition. OptiBond FL Prime was<br />
applied on the conditioned surface in a light scrubbing motion for 15 seconds.<br />
Another drying session of five seconds got rid of the volatile solvent. At this point the<br />
dentin/enamel surface should have a slightly shiny appearance (Figs. 16–19). Light<br />
curing is not advisable! The surface was then ready for one adhesive luting of the<br />
res<strong>to</strong>ration with NX3 cement dual cure.<br />
15 16 17 18<br />
19<br />
Step 4: Adhesive luting<br />
NX3 dual-cure resin cement was then easily dispensed on the previously prepared inner surface of<br />
the res<strong>to</strong>rations (Fig. 20). The placement of the res<strong>to</strong>rations on<strong>to</strong> the adhesively prepared <strong>to</strong>oth surface<br />
was done manually by gently pressing at the incisal edge (Figs. 21, 22). This was done immediately<br />
after the cement was dispensed.<br />
Excess cement in the gel state was easily removed with a sharp interproximal carver (Fig. 23). Direct<br />
focus of the operative light on the res<strong>to</strong>ration during placement should be avoided. At this point, more<br />
pressure was exert <strong>to</strong> ensure that the res<strong>to</strong>ration was fully seated and that the thickness of the cement<br />
was as thin as possible.<br />
20<br />
21<br />
22<br />
23<br />
23
After all the<br />
excess<br />
cement<br />
and the<br />
retraction<br />
cords had<br />
b e e n<br />
removed,<br />
24 25 26 27<br />
all surfaces were light cured for 20 seconds each, using a Hi-power LED curing device (Figs. 24–27). Even though<br />
dualcure resin cement was used, light curing helped <strong>to</strong> ensure better polymerization and better bonding <strong>to</strong> the<br />
<strong>to</strong>oth surface. When using dual-cure cements, clinicians should delay the light-curing procedure <strong>to</strong> the maximum<br />
time clinically possible. That way a maximum degree of conversion of the resin cement may be achieved after light<br />
activation, reducing the risk of excessive water uptake.<br />
Step 5: Control and adjustment of the occlusion<br />
The adjustment of the occlusion was safely executed after the res<strong>to</strong>rations were adhesively luted <strong>to</strong> the teeth. This<br />
can be done by checking for a hi-spot in centric and protrusive movement of the jaw. A hi-spot can be corrected<br />
with a fine diamond in a hi-speed handpiece (Figs.28–30).<br />
Step 6: Finishing and polishing<br />
The ceramic surface that was adjusted by grinding was then polished back <strong>to</strong> high-gloss finish with OptraFine<br />
(Ivoclar Vivadent) a new, high-performance diamond polishing system for ceramic materials, which affords a<br />
unique combination of highly efficient application and perfect polishing results.<br />
Interproximal ceramic margins under the gum line were finished and polished <strong>to</strong> a smooth transition with Epitex<br />
Strips (GC). These strips are ultra-thin because abrasive particles are not bonded <strong>to</strong> the strip with adhesive.<br />
This also allows easier access in tight contact points and helps minimize gingival damage.<br />
28 29 30<br />
Conclusion<br />
The ideal luting agent should guarantee:<br />
• a durable bond between the involved structures<br />
and provide a good marginal adaptation<br />
as well as additional attributes like<br />
• optimal biomechanical properties,<br />
• low solubility in the oral cavity,<br />
• radiopacity,<br />
• increased working and setting time for easy<br />
manipulation,<br />
• adequate viscosity for complete seating, and<br />
• optimal esthetic properties.<br />
Currently, no commercially available luting cement<br />
is ideal for all situations. NX3 was created <strong>to</strong> meet<br />
those aforementioned requirements. Clinicians<br />
could work universally with this product in<br />
cementing aesthetic crowns, veneers, inlays,<br />
onlays, CAD/CAM res<strong>to</strong>rations with efficient and<br />
more predictable esthetic results.<br />
The literature list is available from the publisher<br />
This article was originally published in<br />
Cosmetic Dentistry Vol. 2, Issue 1/2008<br />
24<br />
Your practice is our inspiration.
All you need is <strong>Kerr</strong><br />
NX3 <br />
Permanent cement<br />
NX3 Nexus ® Third Generation is an esthetic<br />
permanent cement that represents a<br />
breakthrough in resin cement technology.<br />
Employing a proprietary redox initia<strong>to</strong>r system<br />
and a well-balanced resin matrix, NX3 retains all<br />
the desirable attributes a resin cement has <strong>to</strong><br />
offer – color stability, high bond strengths, good<br />
mechanical properties, low water solubility and<br />
good translucency. Universally indicated for all<br />
indirect applications including veneers, NX3<br />
dual-cure and light-cure cements deliver<br />
unmatched esthetics, excellent handling<br />
properties, enhanced adhesion <strong>to</strong> all substrates<br />
and great versatility. NX3 has excellent adhesion<br />
<strong>to</strong> CAD/CAM blocks in addition <strong>to</strong> dentin,<br />
enamel, ceramic, porcelain, resin and metal.<br />
Unparalleled Colour<br />
Stability<br />
CAD/CAM res<strong>to</strong>rations such as Vitablocs ,<br />
ProCAD ® and Zirconia are more opaque<br />
than traditional porcelain res<strong>to</strong>rations.<br />
Therefore, using just a light-cure cement is<br />
a concern due <strong>to</strong> inadequate light<br />
penetration. But with NX3, for the first time,<br />
you not only get the reliable curing of a<br />
dual-cure resin cement but more<br />
importantly – you get unmatched color<br />
stability due <strong>to</strong> <strong>Kerr</strong>’s proprietary redox initia<strong>to</strong>r system.<br />
Cements<br />
<strong>Cementation</strong> Procedure<br />
Colour Stability of Dual-Cure Resin Cements – Clear Shade<br />
Initial<br />
After<br />
28 weeks in<br />
37°C water<br />
NX3<br />
Nexus ® Third<br />
Generation<br />
Product 1 Product 2 Product 3<br />
Internal data. Available upon request.<br />
Breakthrough technology is the reason behind the outstanding performance of NX3. Most resin cements on<br />
the market <strong>to</strong>day use a benzoyl peroxide (BPO) and tertiary amine pair as their redox initia<strong>to</strong>r system <strong>to</strong> initiate<br />
polymerization and curing – a system inherent with problems as it compromises the esthetics of ceramic<br />
res<strong>to</strong>rations. The unique redox initia<strong>to</strong>r system in NX3 eliminates these problems.<br />
Initia<strong>to</strong>r systems using BPO/amine have two significant color-stability flaws. First, the catalyst paste on its own<br />
will progressively discolor (yellowish tint) upon s<strong>to</strong>rage on the shelf. Second, the self-cured or dual-cured<br />
cement will progressively discolor over time, compromising long-term esthetics. The proprietary redox initia<strong>to</strong>r<br />
system present in NX3 offers significant advantages over BPO/amine initia<strong>to</strong>r systems, eliminating the<br />
undesirable discoloration for a more esthetic res<strong>to</strong>ration.<br />
Features<br />
• Optimal handling. Easy cleanup in gel state.<br />
• Simplified delivery. Dual-cure au<strong>to</strong>mix syringe eliminates hand mixing.<br />
• Light-cure applications. Cement for veneers and indications requiring unlimited work time.<br />
• Self-etch or <strong>to</strong>tal-etch. Bonding pro<strong>to</strong>col compatibility. No dual-cure activa<strong>to</strong>r required.<br />
• Superior color stability. BPO and Amine-free initia<strong>to</strong>r system offers long-term esthetics.<br />
All trademarks are property of their respective owners.<br />
25
Bonding <strong>to</strong> Composite and<br />
Ceramic Substrates<br />
NX3, which requires an adhesive, achieves excellent<br />
bond strengths and is universally indicated for all<br />
indirect applications – all ceramic-based<br />
res<strong>to</strong>rations, including CAD/CAM blocks, zirconia-<br />
/alumina-strengthened ceramics, and Premise<br />
Indirect – whether NX3 is light-cured or self-cured.<br />
Through the powerful combination of a novel acidresistant<br />
redox initia<strong>to</strong>r system and a unique, wellbalanced<br />
resin matrix, NX3 eliminates the<br />
incompatibility issue that has plagued most resin<br />
cements. The end result is a cement compatible<br />
with the newer generation acidic adhesive systems,<br />
making it well suited for cementing all res<strong>to</strong>rative<br />
materials – even metal-based res<strong>to</strong>rations where<br />
there is limited or no light accessibility.<br />
Internal data. Available upon request. All trademarks are property of their respective owners.<br />
2009 2010<br />
24-hour internal testing. Data available upon request. All trademarks are property of their respective owners.<br />
26<br />
Your practice is our inspiration.
All you need is <strong>Kerr</strong><br />
Application <strong>Guide</strong><br />
<strong>Cementation</strong> Procedure<br />
NX3 Application <strong>Guide</strong><br />
VENEERS<br />
SELF-ETCH<br />
OptiBond ®<br />
All•In•One<br />
A.Dip brush. Apply<br />
OptiBond ® All•In•One<br />
with scrubbing motion<br />
for 20 seconds.<br />
B.Repeat.<br />
C.Gently air dry first.<br />
Then use medium<br />
force for at least<br />
5 seconds.<br />
D. Light cure<br />
for 10<br />
seconds.<br />
1.Apply try-in gel <strong>to</strong><br />
veneer and seat.<br />
Check color and fit.<br />
Remove veneer.<br />
2.Thoroughly wash<br />
out try-in gel. Air<br />
dry. Shield silane<br />
primer from ambient<br />
light and apply.<br />
One set of NX3 try-in gels matches both<br />
dual-cure and light-cure cements.<br />
3.Select bonding<br />
system and<br />
apply <strong>to</strong> prep.<br />
TOTAL-ETCH<br />
OptiBond ®<br />
SoloPlus <br />
A.Etch enamel<br />
and dentin<br />
for 15 seconds.<br />
B. Rinse<br />
and<br />
air dry.<br />
C. Apply<br />
OptiBond ®<br />
Solo Plus <br />
for 15 seconds.<br />
Proceed <strong>to</strong> next step below.<br />
D. Air dry for 3<br />
seconds.<br />
E. Light cure for<br />
10 seconds.*<br />
For veneer indications –<br />
Use NX3 dual-cure when cementing<br />
1–2 units.<br />
Use NX3 light-cure when cementing<br />
multiple units that need longer work time.<br />
RECOMMENDED CURE TIMES<br />
*Demi<br />
5 seconds<br />
*L.E.Demetron II 5 seconds<br />
*L.E.Demetron I 10 seconds<br />
*Optilux 501 10 seconds<br />
**Demi<br />
10 seconds<br />
**L.E.Demetron II 10 seconds<br />
**L.E.Demetron I 20 seconds<br />
**Optilux 501 20 seconds<br />
For all other lights, follow manufacturer’s recommendation.<br />
4.Dispense NX3 cement<br />
(light-cure or dual-cure)<br />
directly in<strong>to</strong> veneer.<br />
5.Seat veneer. Spot cure for several<br />
seconds. Remove mylar strip.<br />
Clean excess cement from margins.<br />
6.Light cure all surfaces<br />
for 20 seconds each.**<br />
7.Finish and polish.<br />
27
NX3 Application <strong>Guide</strong><br />
INLAY/ONLAY<br />
SELF-ETCH<br />
OptiBond ®<br />
All•In•One<br />
A.Dip brush. Apply<br />
OptiBond ® All•In•One<br />
with scrubbing motion<br />
for 20 seconds.<br />
B.Repeat.<br />
C.Gently air dry first.<br />
Then use medium<br />
force for at least<br />
5 seconds.<br />
D. Light cure<br />
for 10<br />
seconds.<br />
1.Apply try-in gel <strong>to</strong><br />
veneer and seat.<br />
Check color and fit.<br />
Remove veneer.<br />
NX3 dual-cure cement<br />
exhibits unparalleled color<br />
stability with its patented<br />
amine-free initia<strong>to</strong>r system.<br />
2.Thoroughly wash<br />
out try-in gel. Air<br />
dry. Shield silane<br />
primer from ambient<br />
light and apply.<br />
3.Select bonding<br />
system and<br />
apply <strong>to</strong> prep.<br />
TOTAL-ETCH<br />
OptiBond ®<br />
SoloPlus <br />
A.Etch enamel<br />
and dentin<br />
for 15 seconds.<br />
B. Rinse<br />
and<br />
air dry.<br />
C. Apply<br />
OptiBond ®<br />
Solo Plus <br />
for 15 seconds.<br />
Proceed <strong>to</strong> next step below.<br />
D. Air dry for 3<br />
seconds.<br />
E. Light cure for<br />
10 seconds.*<br />
RECOMMENDED CURE TIMES<br />
*Demi<br />
5 seconds<br />
*L.E.Demetron II 5 seconds<br />
*L.E.Demetron I 10 seconds<br />
*Optilux 501 10 seconds<br />
**Demi<br />
10 seconds<br />
**L.E.Demetron II 10 seconds<br />
**L.E.Demetron I 20 seconds<br />
**Optilux 501 20 seconds<br />
For all other lights, follow manufacturer’s recommendation.<br />
4.Dispense NX3 cement<br />
(light-cure or dual-cure)<br />
on<strong>to</strong> res<strong>to</strong>ration or prep.<br />
5.Seat res<strong>to</strong>ration on<strong>to</strong> prep, allowing<br />
cement <strong>to</strong> flow from all sides. Tack<br />
cure (1-2 seconds) <strong>to</strong> facilitate<br />
cleanup. Remove excess cement.<br />
6.Light cure all surfaces<br />
for 20 seconds each.**<br />
7.Finish and polish.<br />
28<br />
Your practice is our inspiration.
All you need is <strong>Kerr</strong><br />
Application <strong>Guide</strong><br />
<strong>Cementation</strong> Procedure<br />
NX3 Application <strong>Guide</strong><br />
CERAMIC CROWNS<br />
SELF-ETCH<br />
OptiBond ®<br />
All•In•One<br />
A.Dip brush. Apply<br />
OptiBond ® All•In•One<br />
with scrubbing motion<br />
for 20 seconds.<br />
B.Repeat.<br />
C.Gently air dry first.<br />
Then use medium<br />
force for at least<br />
5 seconds.<br />
D. Light cure<br />
for 10<br />
seconds.<br />
1.Apply try-in gel <strong>to</strong><br />
veneer and seat.<br />
Check color and fit.<br />
Remove veneer.<br />
NX3’s optimal<br />
handling allows<br />
easy cleanup in<br />
gel state.<br />
2.Thoroughly wash<br />
out try-in gel. Air<br />
dry. Shield silane<br />
primer from ambient<br />
light and apply.<br />
3.Select bonding<br />
system and<br />
apply <strong>to</strong> prep.<br />
TOTAL-ETCH<br />
OptiBond ®<br />
SoloPlus <br />
A.Etch enamel<br />
and dentin<br />
for 15 seconds.<br />
B. Rinse<br />
and<br />
air dry.<br />
C. Apply<br />
OptiBond ®<br />
Solo Plus <br />
for 15 seconds.<br />
Proceed <strong>to</strong> next step below.<br />
D. Air dry for 3<br />
seconds.<br />
E. Light cure for<br />
10 seconds.*<br />
RECOMMENDED CURE TIMES<br />
*Demi<br />
5 seconds<br />
*L.E.Demetron II 5 seconds<br />
*L.E.Demetron I 10 seconds<br />
*Optilux 501 10 seconds<br />
**Demi<br />
10 seconds<br />
**L.E.Demetron II 10 seconds<br />
**L.E.Demetron I 20 seconds<br />
**Optilux 501 20 seconds<br />
For all other lights, follow manufacturer’s recommendation.<br />
4.Dispense NX3 dual-cure<br />
cement on<strong>to</strong> res<strong>to</strong>ration<br />
or prep.<br />
5.Seat res<strong>to</strong>ration on<strong>to</strong> prep,<br />
allowing cement <strong>to</strong> flow from all<br />
sides. Remove excess cement.<br />
6.Light cure all surfaces<br />
for 20 seconds each.**<br />
7.Finish and polish.<br />
29
NX3 <br />
Application <strong>Guide</strong><br />
METAL-BASED<br />
C&B<br />
SELF-ETCH<br />
OptiBond ®<br />
All•In•One<br />
A.Dip brush. Apply<br />
OptiBond ® All•In•One<br />
with scrubbing motion<br />
for 20 seconds.<br />
B.Repeat.<br />
C.Gently air dry first.<br />
Then use medium<br />
force for at least<br />
5 seconds.<br />
D. Light cure<br />
for 10<br />
seconds.<br />
Proceed <strong>to</strong> next step above.<br />
2.Dispense NX3<br />
dual-cure cement<br />
on<strong>to</strong> res<strong>to</strong>ration<br />
or prep.<br />
3.Seat res<strong>to</strong>ration<br />
on<strong>to</strong> prep, allowing<br />
cement <strong>to</strong> flow from<br />
all sides. Remove<br />
excess cement.<br />
1.Select bonding<br />
system and<br />
apply <strong>to</strong> prep.<br />
NX3 simplifies your procedure<br />
not necessary <strong>to</strong> use a<br />
primer/adhesive on the metal<br />
surface.<br />
TOTAL-ETCH<br />
OptiBond ®<br />
SoloPlus <br />
A.Etch enamel<br />
and dentin<br />
for 15 seconds.<br />
B. Rinse<br />
and<br />
air dry.<br />
C. Apply<br />
OptiBond ®<br />
Solo Plus <br />
for 15 seconds.<br />
D. Air dry for 3<br />
seconds.<br />
E. Light cure for<br />
10 seconds.*<br />
4.Light cure all surfaces<br />
for<br />
20 seconds each.**<br />
5.Finish and polish.<br />
NX3 <br />
Application <strong>Guide</strong><br />
POSTS<br />
AND CORE<br />
NX3 can be used as a<br />
core build-up material.<br />
Its excellent darkcure<br />
compatibility<br />
with acidic adhesives<br />
enables bulk filling<br />
ability.<br />
RECOMMENDED CURE TIMES<br />
*Demi<br />
5 seconds<br />
*L.E.Demetron II 5 seconds<br />
*L.E.Demetron I 10 seconds<br />
*Optilux 501 10 seconds<br />
**Demi<br />
10 seconds<br />
**L.E.Demetron II 10 seconds<br />
**L.E.Demetron I 20 seconds<br />
**Optilux 501 20 seconds<br />
For all other lights, follow manufacturer’s recommendation.<br />
1.Prepare post space.<br />
Size and fit post.<br />
Apply adhesive on<strong>to</strong><br />
post, air thin, do not<br />
light cure.<br />
2.Apply NX3 dual-cure<br />
cement on<strong>to</strong> post or<br />
in<strong>to</strong> post prep.<br />
3.Seat post, and vibrate<br />
post <strong>to</strong> avoid trapped<br />
air. Maintain pressure<br />
until post is stable.<br />
4.Remove excess 5.Proceed with core<br />
cement and light buildup.<br />
cure all surfaces for<br />
20 seconds each.**<br />
30<br />
Your practice is our inspiration.
All you need is <strong>Kerr</strong><br />
Clinical Cases<br />
<strong>Cementation</strong> Procedure<br />
NX3 in Clinical Cases<br />
Replacement of Maryland Bridge,<br />
with a zirconia bridge, teeth 13-11.<br />
Porcelain Veneers, teeth 21-23<br />
Case courtesy of Dr. Ara Nazarian<br />
1) Preoperative view of smile<br />
2) Preoperative retracted view 3) Preoperative palatal view<br />
4) Preparation 5) Res<strong>to</strong>ration 6) Loading of veneers with NX3<br />
7) Pos<strong>to</strong>perative palatal view 8) Pos<strong>to</strong>perative retracted view 9) Pos<strong>to</strong>perative view of smile<br />
31
NX3 in Clinical Cases<br />
Premise Indirect Composite Inlay, Tooth 46<br />
Case courtesy of Dr. Joseph Sabbagh<br />
1) Preoperative view 2) Preparation<br />
3) Gel Etchant internal sufaces 4) Tooth dried ready for bonding 5) Bonding internal surfaces with<br />
OptiBond Solo Plus<br />
6) Application of NX3 <strong>to</strong> internal<br />
surfaces of inlay<br />
7) Application of NX3 <strong>to</strong> internal<br />
surfaces of preparation<br />
8) Light cure 9) Clinically finished inlay 10) Pos<strong>to</strong>perative view<br />
32<br />
Your practice is our inspiration.
All you need is <strong>Kerr</strong><br />
When <strong>to</strong> use our cements<br />
<strong>Guide</strong> <strong>to</strong> <strong>Cementation</strong><br />
PRODUCT<br />
MaxCem Elite <br />
NX3 <br />
ADHESION<br />
22-36 MPa 25-35 MPa<br />
PROTOCOL<br />
Self Etch no etch needed<br />
Self Adhesive no bonding agent needed<br />
OptiBond All•In•One no etch needed<br />
OptiBond Solo Plus etch needed<br />
POLYMERIZATION<br />
METHOD<br />
Self Cure/ Light cure<br />
Self Cure/ Light cure<br />
CROWNS<br />
BRIDGES<br />
Metal /<br />
Ceramic Metal<br />
Zirconium /<br />
AluminumOxide<br />
✔<br />
✔<br />
✔<br />
✔<br />
INLAYS<br />
ONLAYS<br />
All Ceramic<br />
Indirect Composite<br />
Resin<br />
✔<br />
✔<br />
✔<br />
✔<br />
SPECIAL<br />
INDICATIONS<br />
Veneers<br />
Adhesive Bridges<br />
Maryland Bridges<br />
Posts<br />
• ✔<br />
• ✔<br />
• •<br />
✔<br />
✔<br />
33<br />
✔ Recommended<br />
• Not recommended
NX3... <strong>to</strong> be used when...<br />
Clinician prefers more traditional procedure<br />
of etch & bond and/or preference for veneer<br />
luting systems specifically for esthetics<br />
Maxcem Elite... <strong>to</strong> be used when...<br />
Clinician prefers fast, easy, one step<br />
procedure. No etching or bonding<br />
procedure is desired<br />
Clinician prefers au<strong>to</strong>mix tips; insuring even mix of<br />
base and catalyst, facilitates cement placement in<br />
prosthesis, on <strong>to</strong>oth structure, in root canal for posts<br />
Existing preps are minimally retentive,<br />
requiring maximum bond strength<br />
Clinician prefers au<strong>to</strong>mix tips; insuring even<br />
mix of base and catalyst, facilitates cement<br />
placement in prosthesis, on <strong>to</strong>oth structure,<br />
in root canal for posts<br />
Veneer cases when time, placement and light<br />
cure are critical. Dentist has time for a longer<br />
cementation procedure<br />
Existing preps have adequate <strong>to</strong><br />
maximum retention<br />
Polymerization method can be<br />
chemical self cure and/ or light cure<br />
The seating of prosthesis will be<br />
straightforward<br />
Suggested bonding agents OptiBond<br />
Solo Plus or OptiBond All in One<br />
Polymerization method can be<br />
chemical self cure<br />
Chemical self cure will begin after mixing<br />
34<br />
Your practice is our inspiration.
All you need is <strong>Kerr</strong><br />
Author Biographies<br />
<strong>Guide</strong> <strong>to</strong> <strong>Cementation</strong><br />
Dr. Montri Chantaramungkorn, DDS<br />
Is a successful full-time private practitioner specializing in Comprehensive Res<strong>to</strong>rative and<br />
Cosmetic Dentistry in Chiangmai, Thailand. He has been teaching Esthetic Dentistry at<br />
Chiangmai University since 1985 and was the Chairman of Department of Res<strong>to</strong>rative<br />
Dentistry at Chiangmai University from 1993 <strong>to</strong> 2002. He is also a Diplomate of the Thai<br />
Board of Operative Dentistry and enjoys giving lectures on current materials and techniques<br />
on newly developed material in Res<strong>to</strong>rative Dentistry.<br />
Dr. Isaac Novak, Bsc, DDS<br />
Is a 1974 graduate of Western Ontario University in London Ontario. For the majority of<br />
his 36 years in practice he has had a special interest in aesthetic full mouth reconstruction.<br />
Dr. Novak enjoys a rewarding career as the senior practitioner in his family practice in<br />
Mississauga, Ontario, Canada. He is an active consultant for several dental manufacturers,<br />
has authored articles, and continues <strong>to</strong> lecture on aesthetic rehabilitation, as well as<br />
new product development. He is a member of American Academy of Cosmetic Dentistry,<br />
Ontario Dental Association, Hal<strong>to</strong>n Peel Dental Association and serves as dental advisor<br />
<strong>to</strong> Alternative Dental Labora<strong>to</strong>ries. In his free time Dr. Novak enjoys skiing, hockey, golf,<br />
and pho<strong>to</strong>graphy.<br />
Prof. Francesco Mangani, MD, DDS<br />
Prof. Mangani is a graduate of Medicine and General Surgery and he received his Post Graduate<br />
Certificate in Odon<strong>to</strong>s<strong>to</strong>ma<strong>to</strong>logy. He is Associate Professor at the Faculty of Medicine and<br />
Surgery and Chair of Res<strong>to</strong>rative Dentistry at School of Dentistry Tor Vergata University Rome.<br />
He is also Chair of Dental Aesthetics, School of Dental Hygienist, Tor Vergata University Rome<br />
and Head of the Aggregate Functional Area of Res<strong>to</strong>rative Aesthetic Dentistry, Tor Vergata<br />
University Clinical Hospital Rome.<br />
He is an active member of Italian Academy of Conservative Dentistry, Italian Academy of<br />
Aesthetic Dentistry, Italian Society of Endodontics, Italian Society of Conservative Dentistry.<br />
He has authored over 180 scientific publications and more than 50 abstracts from research<br />
sessions concerning conservative dentistry and endodontics.<br />
He has also authored 5 books of Res<strong>to</strong>rative Dentistry.<br />
Dr. Ara Nazarian<br />
Ara Nazarian, DDS is a graduate of the University of Detroit-Mercy School of Dentistry.<br />
Upon graduation, he completed an AEGD residency in San Diego, California with the<br />
United States Navy. Currently, he maintains a private practice in Troy, Michigan with an<br />
emphasis in comprehensive and res<strong>to</strong>rative care. In 2002, he received the Excellence in<br />
Dentistry Award and Scholarship. His articles have been published in various professional<br />
dental journals including: Contemporary Esthetics, Dental Equipment and Materials, Dental<br />
Products Report, Dentistry Today and Dental<strong>to</strong>wn Magazine.<br />
Dr. Nazarian also serves as a clinical consultant for the Dental Advisor, testing new products<br />
on the market. He is a member of the Academy of General Dentistry and the<br />
American Academy of Cosmetic Dentistry and is a Fellow with the International Congress<br />
of Oral Implan<strong>to</strong>logists.<br />
Marika Nemeth<br />
Product Manager Prosthetics<br />
<strong>Kerr</strong>Hawe Europe<br />
marika.nemeth@kerrhawe.com<br />
Marika received her Certified Dental Assistant Diploma from George Brown College in<br />
Toron<strong>to</strong> Canada in 1984 & 2003 from University of British Columbia in Orthodontics.<br />
Marika has had a long career in clinical dentistry. She now works as product manager for<br />
Europe managing products in the cements and impression material lines.<br />
Dr. Stephen Poss<br />
Dr. Stephen Poss is a graduate of the University of Tennessee and maintains an aesthetic<br />
based practice in Brentwood, Tennessee. Dr. Poss has directed numerous live patient<br />
continuums at various teaching institutes emphasizing anterior and posterior aesthetic<br />
dentistry since 1995. Dr. Poss is presently the Clinical Direc<strong>to</strong>r at The Center for<br />
Exceptional Practices in Cleveland, Ohio. He is also on the edi<strong>to</strong>rial team of Reality<br />
publishing.<br />
Dr. Poss lectures internationally on esthetic dentistry and TMD. He is an active consultant<br />
<strong>to</strong> several dental manufacturers in the area of new product development and refinement.<br />
He has had numerous articles published in the leading dental journals. He maintains a<br />
cosmetic oriented res<strong>to</strong>rative practice in Brentwood, Tennessee.<br />
Dr. Joseph Sabbagh<br />
Dr. Joseph Sabbagh graduated from the Saint-Joseph University (Beirut) in 1996 and in<br />
2000 he obtained a Master in Operative Dentistry (Res<strong>to</strong>rative Dentistry and Endodontics)<br />
from the Catholic University of Louvain (Belgium). He also obtained two certificates of<br />
Advanced Studies in Biomaterials and Operative Dentistry from the University of Paris-VII<br />
(France) in 1997 and 1998.<br />
In 2004, he obtained his PhD in Biomaterials from the Catholic University of Louvain.<br />
He has published many papers in the dental literature and has lectured locally and<br />
internationally. He is fellow of the International College of Dentists, a member of the<br />
Lebanese Dental Association and member of the Academy of Operative Dentistry.<br />
- Assistant Professor in the department of Conservative and Aesthetic Dentistry in the<br />
Lebanese University, Lebanon.<br />
- Senior Lecturer in Operative and Cosmetic Dentistry in the “Dental College” (a<br />
Lebanese private college for dental continuing education) Beirut, Lebanon.<br />
- Fellow researcher in the Catholic University of Louvain (Cribio division), Belgium.<br />
- Private practices in Beirut and Brussels specialized in Cosmetic Dentistry and<br />
Endodontics.<br />
35
<strong>Kerr</strong>Hawe SA | Via Strecce 4 | P.O.Box 268 | CH-6934 Bioggio | Phone ++41 91 610 05 05 | Fax ++41 91 610 05 14 | www.<strong>Kerr</strong>Hawe.com<br />
© 2010 <strong>Kerr</strong>Hawe SA
<strong>Kerr</strong>Hawe SA | Via Strecce 4 | P.O.Box 268 | CH-6934 Bioggio | Phone ++41 91 610 05 05 | Fax ++41 91 610 05 14 | www.<strong>Kerr</strong>Hawe.com<br />
P46000-05-’10