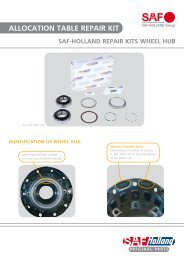
Maintenance and Repair Manual - saf-holland
Maintenance and Repair Manual - saf-holland
Maintenance and Repair Manual - saf-holland

You also want an ePaper? Increase the reach of your titles
YUMPU automatically turns print PDFs into web optimized ePapers that Google loves.
E) Installation instructions<br />
Check the proper mounting of the cam roller on the brake shoes.<br />
The cam roller must not jam in the mounting. It must turn easily, but<br />
without radial clearance.<br />
Replace the cam roller if the journal is severaly worn.<br />
When installing new cam rollers, a secure mounting in the brake<br />
shoe can be achieved by pressing in the two side faces in a vice.<br />
Apply copper paste to the brake shoes, to the ball surface <strong>and</strong> to<br />
the two journals of the cam roller.<br />
See chapter “<strong>Maintenance</strong> instructions” for recommended media.<br />
Apply copper paste to the<br />
two balls in the brake carrier.<br />
See chapter<br />
“<strong>Maintenance</strong> instructions”<br />
for recommended media.<br />
Hook a new return spring into the tabs of the brake shoes.<br />
Position the upper brake shoe on the ball pivot point <strong>and</strong> the cam<br />
roller surface.<br />
Tilt the lower brake shoe towards the cover plate until the correct<br />
seating on the cam <strong>and</strong> on the ball pivot point is achieved; if<br />
necessary, turn the camshaft into the required position. Insert<br />
the spring clip into the groove on the lower brake shoe <strong>and</strong> hook<br />
into the retainer on the upper brake shoe using a screwdriver.<br />
Ensure that the spring clip is fitted securely.<br />
Check the assembly <strong>and</strong> the proper operational condition of the<br />
installed brakes.<br />
Turn the camshaft by actuating the slack adjuster by h<strong>and</strong> <strong>and</strong><br />
check the correct positioning <strong>and</strong> smooth return of the brake shoes;<br />
readjust the camshaft bearing, if necessary.<br />
23