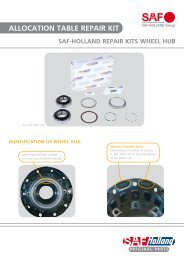
Maintenance and Repair Manual - saf-holland
Maintenance and Repair Manual - saf-holland
Maintenance and Repair Manual - saf-holland

You also want an ePaper? Increase the reach of your titles
YUMPU automatically turns print PDFs into web optimized ePapers that Google loves.
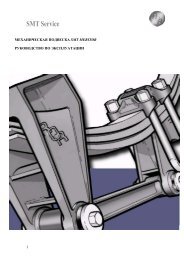
E) Installation instructions<br />
Note:<br />
The compact wheel bearing units are not removed when turning<br />
down the brake drum.<br />
Centre wheel hub on the brake drum lathe using clamping device,<br />
SAF Part No. 3 343 1040 01.<br />
Further machining of the brake drum can then be carried out as<br />
normal in the workshop.<br />
Replacing the brake drum<br />
In order to remove the brake drum from the wheel hub, drive all<br />
the wheel studs out of the wheel hub using a plastic hammer.<br />
Removal of the circlips (33) is not necessary. Before assembling the<br />
wheel hub <strong>and</strong> brake drum, remove any corrosion from the contact<br />
surfaces.<br />
Drive the wheel studs into the brake drum flange until they are<br />
flush with the inner surface using a normal workshop drift.<br />
Ensure that the twist lock engages correctly.<br />
The circlips (33) are no longer required.<br />
If necessary, the wheel studs can also be correctly positioned by<br />
pulling in using a wheel nut.<br />
Installing the brake shoes<br />
Check the proper mounting seat of the two balls in the brake carrier.<br />
The balls can still be moved easily by h<strong>and</strong> in their mountings.<br />
If a ball has come loose in its mounting, a secure fit can be achieved<br />
again by tapping the sides of the mounting lightly with a hammer.<br />
22