Cardy Twin pH Meter Operation Manual (PDF) - John Morris Scientific
Cardy Twin pH Meter Operation Manual (PDF) - John Morris Scientific
Cardy Twin pH Meter Operation Manual (PDF) - John Morris Scientific
Create successful ePaper yourself
Turn your PDF publications into a flip-book with our unique Google optimized e-Paper software.
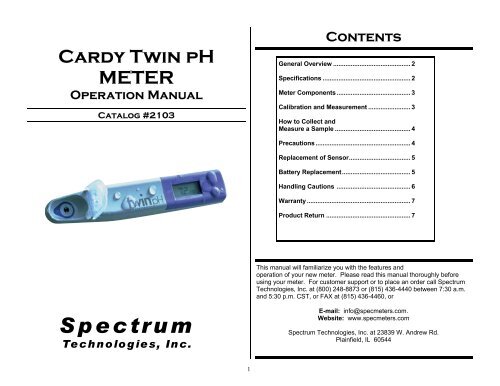
<strong>Cardy</strong> <strong>Twin</strong> <strong>pH</strong><br />
METER<br />
<strong>Operation</strong> <strong>Manual</strong><br />
Catalog #2103<br />
Contents<br />
General Overview ............................................ 2<br />
Specifications .................................................. 2<br />
<strong>Meter</strong> Components .......................................... 3<br />
Calibration and Measurement ........................ 3<br />
How to Collect and<br />
Measure a Sample ........................................... 4<br />
Precautions ...................................................... 4<br />
Replacement of Sensor ................................... 5<br />
Battery Replacement ....................................... 5<br />
Handling Cautions .......................................... 6<br />
Warranty ........................................................... 7<br />
Product Return ................................................ 7<br />
This manual will familiarize you with the features and<br />
operation of your new meter. Please read this manual thoroughly before<br />
using your meter. For customer support or to place an order call Spectrum<br />
Technologies, Inc. at (800) 248-8873 or (815) 436-4440 between 7:30 a.m.<br />
and 5:30 p.m. CST, or FAX at (815) 436-4460, or<br />
Spectrum<br />
Technologies, Inc.<br />
E-mail: info@specmeters.com.<br />
Website: www.specmeters.com<br />
Spectrum Technologies, Inc. at 23839 W. Andrew Rd.<br />
Plainfield, IL 60544<br />
1
General Overview<br />
Congratulations on the purchase of your <strong>Cardy</strong> <strong>Twin</strong> <strong>pH</strong> <strong>Meter</strong>. This manual<br />
describes your <strong>Cardy</strong> <strong>pH</strong> <strong>Meter</strong>, tells you how to use it, and keep it working<br />
accurately.<br />
The <strong>Cardy</strong> <strong>Twin</strong> <strong>pH</strong> <strong>Meter</strong> delivers high quality answers with an accuracy of<br />
+/- 0.1 <strong>pH</strong>. This self-contained digital meter allows you to test the <strong>pH</strong> levels<br />
in water, soil, sap and much more.<br />
The replaceable sensor makes measurement of small samples much more<br />
convenient. See page 7 for details.<br />
There is a two-point automatic calibration (4.0, and 7.0 <strong>pH</strong>), with a range of<br />
<strong>pH</strong> 2.0-12.0. The display will read out your results to the hundredth place.<br />
Model: B-213<br />
Specifications<br />
Measurement: Glass electrode method<br />
Calibration: Automatic two point calibration<br />
Display: LCD, digital. (Resolution: 0.1 <strong>pH</strong>)<br />
Range: <strong>pH</strong> 2.0 - <strong>pH</strong> 12.0<br />
Reproducibility: +/- 0.1<strong>pH</strong><br />
Accuracy: +/- 0.1<strong>pH</strong><br />
Operating<br />
Temperature: 5 - 40ºC (41 - 104ºF)<br />
Temperature<br />
Compensation: Automatic temperature<br />
compensation sensor<br />
Power Source: 3V (Lithium dry cell CR2032) x 2<br />
Dry Cell<br />
Service Life: Approx. 150 hours for continuous<br />
use, except dry cells supplied with the <strong>pH</strong><br />
meter<br />
Dimensions: 165 x 29 x 19 mm (5.6 x 1.1 x 0.6”)<br />
Weight: 48 g (1.7 oz)<br />
2
<strong>Meter</strong> Components<br />
1. Glass Electrode Sensor (B)<br />
2. Reference Junction (A) - Measurement is made when the Liquid<br />
Junction and the Sensor are connected by a<br />
solution<br />
3. LCD<br />
CAL<br />
Lighting: Calibrate, or lighting won’t<br />
be made<br />
Blinking: During Calibration<br />
Off: Measurement can be made<br />
BATTERY<br />
Lighting: Replace the Dry Cells with<br />
new ones<br />
4. Power Switch- On/Off switch of power supply<br />
5. CAL Switch- Button for Calibration<br />
6. Sensor Guard- Protects the sensor during and after<br />
measurement<br />
1) Turn power supply on.<br />
Calibration &<br />
Measurement<br />
2) Rinse the Sensor with distilled water. Gently blot the drops of water dry.<br />
3) Apply a few drops of <strong>pH</strong> 7.0 Standard Solution to the Sensor. Confirm<br />
that the Sensor and the Liquid Junction are connected with the Standard<br />
Solution.<br />
4) Press the CAL button once. “CAL” will blink on the LCD; Calibration has<br />
started.<br />
5) Calibration is complete when “CAL” symbol disappears and the readout<br />
shows around <strong>pH</strong> 7.0 .<br />
6) Rinse the Sensor with distilled water. Blot the drops of water dry.<br />
7) Apply a few drops of <strong>pH</strong> 4 standard solution to the Sensor. Make sure<br />
that the Sensor and the Liquid junction are covered with the Standard<br />
Solution.<br />
8) Press and hold the CAL button until CAL and <strong>pH</strong> 4.01 appear on the<br />
display, or press and release the CAL button twice.<br />
9) Calibration is complete when “CAL” symbol disappears and the readout<br />
shows around <strong>pH</strong> 4.0.<br />
10) Apply the sample to the Sensor by placing a small amount of the<br />
sample (use the pipet) on the Sensor, immersing the Sensor in the sample,<br />
or by spooning-out a representative measurement sample. Confirm that the<br />
Glass Sensor Chip and the Liquid Junction are entirely covered by the<br />
sample.<br />
11) Read the data when figure on the LCD is stabilized and a smiley face<br />
appears.<br />
12) After measurement, rinse the sensor with distilled water thoroughly.<br />
Replace the sensor cap on the sensor.<br />
3
How to Collect and Measure<br />
a Soil Sample<br />
1) Collect a representative soil sample.<br />
2) Mix the soil and distilled water using a 1:1 proportion; stir for 30 seconds.<br />
3) Allow 1 to 2 minutes before you begin the test.<br />
4) Submerge the sensor into the mixture of soil and distilled water. Read<br />
the results.<br />
5) Wash the sensor with distilled water and blot dry.<br />
How to Measure Samples<br />
1) Apply the sample solution to the sensor. There are three ways to apply<br />
the sample to the sensor.<br />
Precautions<br />
• Prior to the first use, always calibrate the meter. It is recommended that<br />
the calibration is made daily.<br />
<strong>Meter</strong> will not function correctly when calibration is performed under the<br />
following conditions:<br />
-No Standard Solution on the Sensor<br />
-Bubbles on the surface of the Sensor<br />
-No connection between the Sensor and the Liquid<br />
Junction by means of the Standard Solution<br />
-Sensor not properly set in the <strong>pH</strong> <strong>Meter</strong><br />
-Sensor service life over<br />
• Measurement cannot be made while the LCD shows “CAL.”<br />
• Don’t calibrate with a standard solution other than <strong>pH</strong> 7.0 or <strong>pH</strong> 4.0.<br />
Otherwise, inaccurate data will be shown.<br />
• Should inaccurate data be shown during operation, or should the display<br />
not change after applying <strong>pH</strong> calibration agent, stop the measurement<br />
immediately and contact the distributor.<br />
• Measurement will not be made correctly when the Reference Electrode<br />
exceeds the service life.<br />
1. Open the slide cap of the sensor guard and submerge the sensor into the<br />
sample solution.<br />
2. Open the sensor guard and apply the solution to the sensor<br />
3. Open the slide cap, spoon-out measurement and then set meter on a<br />
level surface.<br />
Note: This <strong>pH</strong> meter is water resistant. However, do not make any<br />
measurements by completely submerging the meter in the sample solution.<br />
If by mistake the meter is dropped into the sample solution, recover it<br />
immediately and dry it quickly and thoroughly.<br />
• In measurement of tap water, rainwater, or other solution with extremely<br />
low ion concentration, note the following:<br />
-Rinse the Sensor thoroughly before the measurement.<br />
-Apply to the Sensor a few drops of solution to be measured. The<br />
<strong>pH</strong> value might be unstable when the sensor is immersed into the<br />
solution to be measured.<br />
• In measurement of soil or other solid matter, dissolve it in distilled<br />
water.<br />
• Do not apply excessive pressure to the glass sensor for it will break<br />
easily if mishandled.<br />
4
Replacement of<br />
Sensor<br />
1) Wipe water off the <strong>pH</strong> <strong>Meter</strong>.<br />
2) Pull the bottom part of the housing away from meter by pushing the<br />
tongue located on the backside of the meter and sliding the sensor away<br />
from the unit body.<br />
3) Confirm that the watertight O-Ring is properly seated.<br />
4) Insert the new Sensor into the <strong>pH</strong> meter firmly.<br />
5) Confirm that the calibration is accurate.<br />
NOTE:<br />
• Do not remove the Reference Electrode when the <strong>pH</strong> <strong>Meter</strong> is wet.<br />
Water entering the <strong>pH</strong> <strong>Meter</strong> will cause trouble.<br />
• Insufficient watertightness will result in error.<br />
When Reference Electrode is to be Replaced<br />
• Sensor response is slow, measured value is unstable, or calibration<br />
cannot be made.<br />
• Measured value does not change when the sample is changed.<br />
• Display of 0.0 blinks during measurement. Temperature warning ºC<br />
blinks.<br />
Cleaning the Sensor:<br />
1) Thoroughly wipe any existing moisture from the surface of the<br />
<strong>Meter</strong>.<br />
2) Wipe the Sensor by means of soft material moistened with water<br />
until the Sensor gets shiny.<br />
3) Confirm that the calibration is accurate.<br />
Battery Replacement<br />
When the batteries need to be replaced:<br />
• LCD shows “B” while the power is turned on.<br />
• LCD shows nothing when you press the POWER switch.<br />
Replacement:<br />
1. Wipe water off the <strong>pH</strong> <strong>Meter</strong> thoroughly.<br />
2. Pull out upper Housing of the <strong>pH</strong> <strong>Meter</strong>.<br />
3. Remove the Dry Cell Holder.<br />
4. Put two new batteries in with the “+” surface facing upward.<br />
5. Confirm that the watertight O-Ring is properly placed in the Housing<br />
of the <strong>pH</strong> <strong>Meter</strong>. Re-assemble Housing of the <strong>pH</strong> <strong>Meter</strong>.<br />
6. Confirm that the power supply is turned on.<br />
7. Calibrate the <strong>pH</strong> <strong>Meter</strong>.<br />
CAUTIONS<br />
• Don’t remove Housing of the <strong>pH</strong> <strong>Meter</strong> when the <strong>pH</strong> <strong>Meter</strong> is wet.<br />
Water entering the <strong>pH</strong> <strong>Meter</strong> will cause error.<br />
• Insufficient watertightness will result in error if...<br />
1) Housing of the <strong>pH</strong> <strong>Meter</strong> isn’t in its place<br />
2) Watertight O-Ring is not in its proper place<br />
3) Watertight O-Ring is placed together with<br />
a foreign matter.<br />
• Re-calibrate the <strong>pH</strong> <strong>Meter</strong> after the batteries are replaced.<br />
Calibration value is deleted when the batteries are removed.<br />
• If the <strong>pH</strong> <strong>Meter</strong> does not work properly, check the voltage of the<br />
batteries and repeat the<br />
procedure.<br />
Make sure that battery is properly<br />
seated and in good contact<br />
with the Battery Clips as shown.<br />
-<br />
5
Handling Cautions<br />
Handling Cautions<br />
• Measurement cannot be made while the LCD indicates “CAL”.<br />
• Prior to the first use, never fail to calibrate.<br />
• Don’t scratch or apply excessive force to the Sensor, or it will be<br />
damaged.<br />
• Don’t pull or supply excessive force to the Reference Electrode, or<br />
it will be damaged.<br />
• Keep the Sensor Chip clean. Refer to “Cleaning of the Sensor.”<br />
• Measurement cannot be made without covering the entire Sensor<br />
and Reference Junction. Sensor is replaceable.<br />
• Don’t press the POWER or the CAL Switches in water.<br />
• Don’t replace the batteries or the Reference Electrode when the <strong>pH</strong><br />
<strong>Meter</strong> is wet. Water may enter inside and cause error.<br />
• Don’t press the POWER or the CAL Switches with a needle-like<br />
object.<br />
• Don’t use the <strong>pH</strong> <strong>Meter</strong> at temperatures out of the working range of<br />
5ºC-40ºC(41ºF-104ºF). Otherwise, the service life of the Sensor<br />
will be shortened.<br />
• When the irregular data is shown, stop the measurement immediately<br />
and calibrate the <strong>pH</strong> <strong>Meter</strong>.<br />
• Keep the Sensor away from direct sunrays or strong light during<br />
calibration and measurement as accuracy will be adversely affected.<br />
Pay careful attention to this point especially when using outdoors.<br />
• For the first use or use after a long interval, immerse the Sensor in water<br />
for five minutes and calibrate before measurement. Otherwise, unstable<br />
data will be displayed.<br />
• White powder or solution generated at the Sensor is not a symptom of<br />
trouble. Rinse the Sensor before use.<br />
• Accuracy will be heightened when the Standard Solution is at the same<br />
temperature as that of sample to be measured.<br />
• In cleaning, don’t use thinner, benzene, or other organic solvents. Wipe<br />
with a soft dry or cloth dipped in neutral detergent and wrung dry.<br />
• Don’t place the <strong>pH</strong> <strong>Meter</strong> close to heaters or where the <strong>pH</strong> <strong>Meter</strong> might<br />
be exposed to direct sunrays. Avoid extremes of temperature.<br />
• Don’t bend or drop the <strong>pH</strong> <strong>Meter</strong>.<br />
• Don’t disassemble the Sensor.<br />
• Standard solution is caustic acid. If the Standard Solution is in contact<br />
with skin, wash the skin thoroughly with water.<br />
• Don’t measure the following, or the Sensor will be damaged:<br />
Organic Solvent (thinner, benzene, etc.) Strong acid (<strong>pH</strong> 0-2),<br />
Strong alkali (<strong>pH</strong> 12-14), Surface active agent, Alcohol, Oil,<br />
Adhesive and Cement.<br />
6
Warranty<br />
This product has been brought to you having passed severe quality control<br />
and inspections. Should any trouble occur during the course of normal use,<br />
the meter shall be repaired or replaced free of charge in accordance with the<br />
stipulations laid down herein. The term of this warranty shall be for one year<br />
from date of purchase. This warranty excludes batteries, sensor and<br />
accessories.<br />
Warranty Stipulations:<br />
1. The product shall be repaired or replaced free of charge should any<br />
trouble occur during the course of normal use if returned within the warranty<br />
period (one year from date of purchase). In which event, contact the dealer<br />
of purchase. Return the meter with proof of date of purchase.<br />
2. Expenses shall be incurred in the following instances within the warranty<br />
period. (Costs such as postage shall be born by the customer)<br />
a) When the date of purchase and store name is not written on the<br />
warranty.<br />
b) When trouble or damage has been incurred due to misuse, abuse, and/or<br />
improper handling.<br />
c) When the meter has been repaired, modified and dismantled by persons<br />
other than the designated agent or service shop.<br />
d) In the event of changes in external appearance such as scratches or dirt<br />
caused during use or battery fluid leakage.<br />
e) In the event of unsuitable movement, dropping or accidents such as fire,<br />
earthquakes, floods or a burglary.<br />
f) When replacing consumables and accessories.<br />
g) When cause of trouble lies not in the meter itself.<br />
h) When this warranty is not shown and when necessary particulars have<br />
not been written in the warranty.<br />
Our obligation under this warranty is to repair or replace the meter free of<br />
charge in accordance with the conditions laid down herein. Accordingly, this<br />
warranty doesn’t limit your specific legal rights.<br />
Product Return<br />
If for any reason you are not satisfied, or the meter has failed and you need<br />
to return the product for service, you will need to contact Spectrum<br />
Technologies, Inc.<br />
Before returning a failed unit, you must obtain a Returned Goods<br />
Authorization (RGA) number from Spectrum Technologies. You must ship<br />
the product(s), properly packaged against further damage, back to Spectrum<br />
Technologies (at your expense) with the RGA number marked clearly on the<br />
outside of the package. Spectrum Technologies is not responsible for any<br />
package that is returned without a valid RGA number, or for the loss of the<br />
package by any shipping company.<br />
SERVICE AND SUPPORT<br />
For technical service and support call your distributor or Spectrum<br />
Technologies, Inc.<br />
When calling for technical support have a detailed explanation of the<br />
problem that you are experiencing. The more information you can provide<br />
the faster and easier a technical support person will be able to assist you.<br />
For technical support call (800) 248-8873 or (815) 436-4440.<br />
Spectrum Technologies, Inc.<br />
23839 W. Andrew Rd.<br />
Plainfield, IL 60544<br />
(800) 248-8873 or (815) 436-4440<br />
Fax (815) 436-4460<br />
E-Mail: specmeters@aol.com<br />
Website: www.specmeters.com<br />
7


