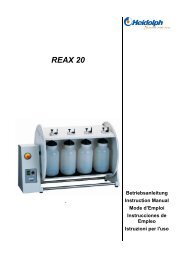
RZR 2020 RZR 2021 RZR 2041 - John Morris Scientific
RZR 2020 RZR 2021 RZR 2041 - John Morris Scientific
RZR 2020 RZR 2021 RZR 2041 - John Morris Scientific

You also want an ePaper? Increase the reach of your titles
YUMPU automatically turns print PDFs into web optimized ePapers that Google loves.
<strong>RZR</strong> <strong>2020</strong> <strong>RZR</strong> <strong>2021</strong><br />
<strong>RZR</strong> <strong>2041</strong><br />
Betriebsanleitung<br />
Instruction Manual<br />
Mode d’Emploi<br />
Instrucciones de<br />
Empleo<br />
Istruzioni per l'uso
D<br />
E<br />
F<br />
ES<br />
I<br />
DEUTSCH Seite 3 - 13<br />
ENGLISH page 14 - 24<br />
FRANCAISE page 25 - 35<br />
ESPAÑOL página 36 - 46<br />
ITALIANO pagina 47 - 57<br />
2
E<br />
Thank you for purchasing a Heidolph Instruments product. This item has been designed, made<br />
and inspected in compliance with DIN EN ISO 61010 for long-term and flawless operation.<br />
SUMMARY<br />
SUMMARY ................................................................................................................................14<br />
STANDARD HARDWARE & ACCESSORIES ..........................................................................15<br />
GENERAL INFORMATION .......................................................................................................16<br />
SAFETY INFORMATION...........................................................................................................16<br />
SET-UP......................................................................................................................................17<br />
OPERATION AND CONTROLS................................................................................................18<br />
1.DESCRIPTION.........................................................................................................................18<br />
2.Turn item ON .......................................................................................................................19<br />
3.Speed setting.......................................................................................................................19<br />
4.Speed display……………………………………………………………………………………….20<br />
CLEANING & SERVICING ........................................................................................................20<br />
DISASSEMBLE & STORAGE...................................................................................................20<br />
DISPOSAL.................................................................................................................................21<br />
TROUBLESHOOTING...............................................................................................................21<br />
SPECIFICATIONS.....................................................................................................................22<br />
WARRANTY, LIABILITY & COPYRIGHT .................................................................................23<br />
QUESTIONS / REPAIR WORK .................................................................................................23<br />
CE-DECLARATION OF CONFORMITY....................................................................................24<br />
Important information<br />
Advice about power cord / mains supply<br />
Caution: mandatory action<br />
Caution: fire- and explosion hazard<br />
Advice about maintenance / repair<br />
14
STANDARD HARDWARE & ACCESSORIES<br />
E<br />
Standard Hardware<br />
product quantity P/N<br />
230 V / 50 Hz<br />
P/N<br />
115 V / 60 Hz<br />
<strong>RZR</strong> <strong>2020</strong> or 1 501-<strong>2020</strong>0-00 501-<strong>2020</strong>0-01<br />
<strong>RZR</strong> <strong>2021</strong> or 1 501-<strong>2021</strong>0-00 501-<strong>2021</strong>0-01<br />
<strong>RZR</strong> <strong>2041</strong> 1 501-<strong>2041</strong>0-00 501-<strong>2041</strong>0-01<br />
support rod 1 22-02-14-01-08 22-02-14-01-08<br />
2,5 mm Allen key 1 02-07-01-01-04 02-07-01-01-04<br />
3,0 mm Allen key 1 02-07-01-01-02 02-07-01-01-02<br />
10.5 mm chuck 1 509-02000-00 509-02000-00<br />
T-handle (for chuck) 1 02-07-03-01-02 02-07-03-01-02<br />
Instruction Manual 1 01-005-002-94 01-005-002-94<br />
Accessories & Stirring tools (optional)<br />
product<br />
P/N<br />
stand 570-12000-00<br />
clamp 570-22000-00<br />
protective sheath 509-08000-00<br />
flexible stirrer coupling shaft 509-03000-00<br />
stirring paddle BR 10 509-10000-00<br />
stirring paddle BR 11 509-11000-00<br />
stirring paddle BR 12 509-12000-00<br />
stirring paddle BR 13 509-13000-00<br />
stirring paddle BR 14 509-14000-00<br />
prop-type stirring paddle PR 30 509-30000-00<br />
prop-type stirring paddle PR 31 509-31000-00<br />
prop-type stirring paddle PR 32 509-32000-00<br />
prop-type stirring paddle PR 33 509-33000-00<br />
turbine TR 20 509-20000-00<br />
turbine TR 21 509-21000-00<br />
half moon HR 18 509-18000-00<br />
anchor AR 19 509-19000-00<br />
prop-type stirring paddle PR 39 509-39000-00<br />
enclosure NS 29/32 509-09000-00<br />
15
E<br />
GENERAL INFORMATION<br />
Unpack your item carefully.<br />
Inspect for damage and report such damage or missing parts to your supplier right away.<br />
Read your Instruction Manual carefully. Take time to save time when working with your<br />
product. Make sure that every user has read and understood the Instruction Manual.<br />
Please store the Instruction Manual in a place easily accessible to every user.<br />
IF ALL ELSE FAILS, READ THESE INSTRUCTIONS !<br />
A so-called EURO-plug (DIN 49441 CEE 7/VII 10/ 16 A 250 V) is standard on all of the<br />
products.<br />
For the Continental US they feature a US-standard plug (NEMA Pub.No.WDI.1961 ASA<br />
C 73.1 . 1961 page 8 15A 125V).<br />
For using the item in a country with deviating outlet / plug systems, we recommend to<br />
use approved adapters or to have an electrician replace the standard plug with one suiting<br />
your needs.<br />
As shipped, the item features a protective ground wire. When replacing the original plug,<br />
make sure to reconnect this protective ground wire in the new plug !<br />
SAFETY INFORMATION<br />
Please comply with all safety and accident-prevention regulations as in force for<br />
laboratory work !<br />
Use extra care when working with flammable substances; refer to safety data<br />
sheets.<br />
When connecting your item with your local power supply, please make sure your<br />
item is designed for your local voltage; go by the data plate on the item.<br />
Turn your power switch OFF whenever the item is not used, or before disconnecting<br />
the plug.<br />
Repair work is limited to technicians approved by Heidolph Instruments.<br />
Use extra care when working in the vicinity of flammable and explosive substances.<br />
Motors are of non-sparking type, the item itself however is not explosionproof.<br />
Please connect your stirrer with a protective-ground outlet only.<br />
Please strictly comply with current safety regulations for machines exposing rotating<br />
shafts.<br />
Your item needs a solid stand.<br />
16
E<br />
SET-UP<br />
1. Install stand<br />
make sure the indent (A) of the rod is in line with threaded pin (B).<br />
Install stand in hole (C) in the rear of the item. Secure (pull tight)<br />
threaded pin (B) using Allen key (D).<br />
E F H G<br />
B<br />
C<br />
A<br />
D<br />
2. Install chuck<br />
make sure the indent (E) in the drive shaft is in line with threaded<br />
pin (F) in the chuck. Secure threaded pin (F) with allen key (H) in<br />
your hardware bag.<br />
K<br />
L<br />
J<br />
I<br />
3. Install stirrer on stand<br />
Install clamp (I) on stand (J).<br />
Now introduce stirrer attaching rod (K) into clamp (I).<br />
Adjust position and secure (pull tight) with two clamp screws (L).<br />
L<br />
M<br />
G<br />
N<br />
4. Install stirring tool<br />
Introduce stirring tool (N) in chuck (G), put in place and secure<br />
with T-handle (M). Immersion depth of your stirring tool (N) is adjusted<br />
by displacing the tool in or out of the open (G) chuck (refer<br />
to arrow mark).<br />
G<br />
5. Install flexible coupling shaft (P/N 509-03000-00)<br />
Hold the flexible coupling shaft (O) in the chuck (G) by its metallic stud<br />
(P) and secure with T-handle. At this point introduce stirring tool’s (N)<br />
shaft end in collet (Q) and pull tight (CW turn).<br />
P<br />
O<br />
Q<br />
N<br />
When using the flexible coupling shaft make<br />
sure to install an adequate run-out protection,<br />
e.g. our enclosure (P/N 509-09000-00)<br />
17
E<br />
S<br />
S<br />
R<br />
6. Install shaft guard (P/N 509-08000-00)<br />
A shaft guard (R) is available as an extra safety protection feature.<br />
This guard tube is held by 2 ea. screws (S) located at the<br />
top of the stirrer chuck.<br />
This guard, attached to the stirrer housing, is used to protect<br />
the user from being hurt by the fast-spinning shaft.<br />
OPERATION AND CONTROLS<br />
1. Description<br />
The HEIDOLPH stirrers <strong>RZR</strong> <strong>2020</strong>, <strong>RZR</strong> <strong>2021</strong> and <strong>RZR</strong> <strong>2041</strong> are user-friendly and are specifically<br />
designed for laboratory use. They are equipped with a maintenance-free capacitor motor<br />
with an effortless variable gear. An easy to use 2-stage gear provides the wide speed range. All<br />
the elements are maintenance-free and free of wear and tear to a large extent.<br />
The hollow drive shaft provides great flexibility for fast and easy paddle adjustment.<br />
1.1 Overload protection<br />
The <strong>RZR</strong> <strong>2020</strong>, <strong>RZR</strong> <strong>2021</strong> and <strong>RZR</strong> <strong>2041</strong> are equipped with a thermal overload protection feature<br />
to prevent damage to the stirrer caused by overloading or blocking. In such cases the motor<br />
shuts itself off automatically. Once this mechanism has been triggered, the stirrer must be<br />
allowed to cool down before being restarted via the ON/OFF switch (C). If the motor shuts itself<br />
off due to overloading, this is indicated by a red pilot lamp (A).<br />
1.2 Stirring shaft protection<br />
A protective device made of plexi-glass (PMMA) is available as an optional accessory to protect<br />
the user from injury. It is fastened to the housing and protects the operator from injuries resulting<br />
from splashes or from unintentional contact with the rotating shaft.<br />
A<br />
E (<strong>RZR</strong> <strong>2021</strong> / <strong>2041</strong>)<br />
C<br />
B<br />
D<br />
18
2. Turn item ON<br />
E<br />
Make sure that the voltage of the instrument is the same as the mains supply. The<br />
instrument's voltage is specified on the serial plate underneath the instrument<br />
Make sure that the speed control knob (D) is turned all the way to the left.<br />
Only plug the instrument into a grounded (earthed) electrical outlet. The on/off switch (C) is<br />
used to turn the instrument on and off. The green pilot lamp (A) should light up when the instrument<br />
is operational.<br />
Always use the mains rotary switch (C) to switch off the mixer. Do not pull out the<br />
plug. The friction ball of the friction gear is disengaged by using the mains rotary<br />
switch (C), which prevents any knocking noises when starting the mixer.<br />
3. Speed setting<br />
Set the desired speed range using the selection switch (B).<br />
The stirrer has two speed ranges:<br />
Range I: 40 - 400 rpm<br />
Range II: 200 - 2000 rpm.<br />
Only change the speed range when the instrument<br />
is switched off, so as not to damage<br />
the gear. It is recommended to turn the<br />
chuck slightly while selecting another speed<br />
range. Only operate the instrument when the<br />
marker is exactly on I or II -(no intermediate<br />
settings).<br />
The selection switch (D) is used to select the desired speed<br />
within range I or II.<br />
The scales are numbered from 1 to 10 and only serve as a guide. The speeds pertaining to the<br />
two ranges are specified separately on the side of the stirrer <strong>RZR</strong> <strong>2020</strong>.<br />
When changing over from speed I to speed II, the stirrer speed increases fivefold.<br />
(from 40 - 400 rpm to 200 - 2000 rpm). As this gives rise to splashing (especially in<br />
conjunction with open containers), the instrument must be switched off before the<br />
operator can switch from speed range I to speed range II.<br />
If the operator attempts to switch from range I to range II or vice versa while the instrument is<br />
in operation, the motor shuts off and the red pilot lamp (A) lights up.<br />
19
E<br />
An integrated safety feature ensures that it is only possible to switch from range I<br />
to II or vice versa under the following conditions:<br />
Procedure:<br />
• Switch stirrer off via the ON/OFF switch (C).<br />
• Turn speed control knob (D) all the way to the left.<br />
• Set speed range from I to II (or vice versa) with switch (B). Switch instrument<br />
back on with ON/OFF switch (C).<br />
• Set desired speed via speed control knob (D).<br />
4. Speed display<br />
<strong>RZR</strong> <strong>2021</strong> and <strong>RZR</strong> <strong>2041</strong> are equipped with a digital display (E) for reading the mixer speed.<br />
CLEANING & SERVICING<br />
Cleaning: wipe housing clean with a damp cloth (add some sort of mild liquid soap).<br />
Note<br />
To avoid damage to the surface finish, avoid using chlorine bleach, chlorine-based<br />
detergents, abrasive substances, ammonia, rags or cleaning<br />
agents containing metal particles.<br />
The item is maintenance-free. Repair work is limited to technicians approved or appointed by<br />
Heidolph Instruments. Please call your local Heidolph Instruments Dealer or a Heidolph Instruments<br />
Field Representative (also refer to page 23)<br />
DISASSEMBLE & STORAGE<br />
Disassamble (refer to page 17, „set-up“)<br />
Turn the item OFF and pull power plug.<br />
To disassamble the item easely, remove all flasks, containers or other appliances in the vicinity<br />
of the stirrer.<br />
Open chuck with T-handle and remove stirring tool.<br />
Unlock clamp and remove stirrer head from head clamp.<br />
With 2,5 mm Allen key loosen threaded pin and remove chuck. With the 3 mm Allen key loosen<br />
and remove stand rod.<br />
Forward & Store<br />
1. We recommend to store the item and its components in its original box, or a similar container<br />
that offers adequate protection against damage in transit. Tape the box securely.<br />
2. Store the item in a dry place.<br />
Caution<br />
Do not jolt or shake the item during transport.<br />
20
E<br />
DISPOSAL<br />
For disposal, please comply with your local or national regulations.<br />
Split by metal, plastic, etc.<br />
Packing material to be treated as described above (material split).<br />
1. pilot lamp dim<br />
- check power supply and power cord<br />
2. won’t stir:<br />
TROUBLESHOOTING<br />
- safety installation intervened, refer to display reading (refer to 5 „safety installations“)<br />
3. LED (A) illuminates red:<br />
- The mixer motor stops during the attempt to switch the device from area I to II or vice<br />
versa during operation and the warning light (A) illuminates red. (Compare with 3.<br />
"Speed setting")<br />
4. When switching from area I to II or vice versa, switch gets stuck or is difficult to move: In order<br />
to aid the process, it is advantageous to use a slight twisting motion on the chuck while<br />
switching. After this, only operate the device if the indicator of the rotary switch is precisely in<br />
position l or II (meaning not an intermediate position). (Compare with 3. "Speed setting")<br />
In case of a malfunction and you cannot correct with above instructions, contact your authorized<br />
Heidolph Instruments Dealer.<br />
21
E<br />
Ncm<br />
SPECIFICATIONS<br />
power dissipation (nom. load) <strong>RZR</strong> <strong>2020</strong> / <strong>2021</strong> P = 50 watts<br />
power dissipation (nom. load) <strong>RZR</strong> <strong>2041</strong> P = 70 watts<br />
power rating, motor, <strong>RZR</strong> <strong>2020</strong> / <strong>2021</strong> P = 27 watts<br />
power rating, motor, <strong>RZR</strong> <strong>2041</strong> P = 37 watts<br />
dimensions (in mm) <strong>RZR</strong> <strong>2020</strong> / <strong>2021</strong> 82 wide; 206 high; 176 deep<br />
dimensions (in mm) <strong>RZR</strong> <strong>2041</strong> 82 wide; 211 high; 176 deep<br />
weight <strong>RZR</strong> <strong>2020</strong> / <strong>2021</strong><br />
3 kg<br />
weight <strong>RZR</strong> <strong>2041</strong><br />
3.8 kg<br />
operating temperature 0 – 40 °C<br />
storage temperature - 20 to + 80 °C<br />
relative humidity<br />
95 % (avoid reaching dewpoint)<br />
protection class IP 40<br />
Torque<br />
refer to graphs below<br />
speed range 40 – 2000 rpm range 1: 40 – 400 rpm<br />
range 2: 200 – 2000 rpm<br />
stirrer coupling<br />
10,5 mm chuck, drive shaft features bore to hold tool<br />
shafts of up to 10 mm dia.<br />
stirrer attaching system<br />
13 mm dia. Rod (stand)<br />
motor protector<br />
thermal circuit breaker disconnects motor in an overload<br />
situation - permanent cut-off - pilot lamp (green);<br />
RESET with ON/OFF key<br />
pilot light, „item ON“<br />
pilot lamp (green)<br />
shaft guard<br />
fits shaft guard (optional)<br />
BCI/TVI suppression complies with EN 50081<br />
operational mode<br />
100% continuous<br />
display ( <strong>RZR</strong> <strong>2021</strong> und <strong>RZR</strong> <strong>2041</strong> ) 4-digit LCD, 8 mm high characters<br />
measuring range, display<br />
40 – 2000 rpm<br />
Resolution<br />
1 rpm<br />
Display accuracy<br />
+/- 0,1% of final value<br />
Measuring principle<br />
hall sensor with ring magnet (5 pairs of poles)<br />
Torque<br />
350<br />
300<br />
250<br />
200<br />
150<br />
100<br />
50<br />
0<br />
<strong>RZR</strong> <strong>2020</strong> / <strong>2021</strong> <strong>RZR</strong> <strong>2041</strong><br />
Range 1<br />
Range 2<br />
0 400 800 1200 1600 2000<br />
1/min<br />
Ncm<br />
500<br />
450<br />
400<br />
350<br />
300<br />
250<br />
200<br />
150<br />
100<br />
50<br />
0<br />
Range 1<br />
Range 2<br />
0 400 800 1200 1600 2000<br />
1/min<br />
22
WARRANTY, LIABILITY & COPYRIGHT<br />
E<br />
Warranty<br />
Heidolph Instruments guarantees warranty that the present product shall be free from defects in<br />
material (except wear parts) and workmanship for 3 years from the date shipped off the manufacturer’s<br />
warehouse.<br />
Transit damage is excluded from this warranty.<br />
To obtain such warranty service, contact Heidolph Instruments (Tel.: +49 - 9122 - 9920-68) or<br />
your local Heidolph Instruments Dealer. If defects in material or workmanship are found, your<br />
item will be repaired or replaced at no charge.<br />
Misuse, abuse, neglect or improper installation are not covered by this warranty guarantee..<br />
Alterations to the present warranty guarantee need Heidolph Instruments’ consent in writing.<br />
Exclusion Clause<br />
Heidolph Instruments cannot be held liable for damage from improper use or misuse. Remedy<br />
for consequential damage is excluded.<br />
Copyright<br />
Copyright in pictures and wording of the present Instruction Manual is held by Heidolph Instruments.<br />
QUESTIONS / REPAIR WORK<br />
If any aspect of installation, operation or maintenance remains unanswered in the present<br />
Manual, please contact the following address:<br />
For repair services please call Heidolph Instruments (phone: +49 - 9122 - 9920-68) or your local,<br />
authorized Heidolph Instruments Dealer.<br />
Note<br />
You will receive approval for sending your defective item to the following address:<br />
Heidolph Instruments GmbH & Co. KG<br />
Lab Equipment Sales<br />
Walpersdorfer Str. 12<br />
D-91126 Schwabach / Germany<br />
Tel.: +49 – 9122 - 9920-68<br />
Fax: +49 – 9122 - 9920-65<br />
E-Mail: sales@heidolph.de<br />
Note<br />
If you are based in the United States of America, please contact Heidolph US :<br />
Heidolph Instruments, LLC<br />
Lab Equipment Sales<br />
2615 River Rd.<br />
Cinnaminson, NJ 08077<br />
Phone: 856-829-6160<br />
Fax: 856-829-7639<br />
E-Mail: heidolph@snip.net<br />
23
E<br />
Safety Information<br />
When shipping items for repair that may have been contaminated by hazardous substances,<br />
please:<br />
- advise exact substance<br />
- take proper protective meason to ensure the safety of our receiving and service<br />
personnel<br />
- mark the pack IAW Hazardous Materials Act<br />
CE-DECLARATION OF CONFORMITY<br />
We herewith declare that the present product complies with the following standards and harmonized<br />
documents:<br />
EMC-guideline (89/336/EWG) :<br />
EN 61326: 1997 + A1:1998 + A2:2001+ A3 2003<br />
EN 61000-3-2: 2000<br />
EN 61000-3-3: 1995 + 1997 + A1:2001<br />
EN 61326: 1997 + A1:1998 + A2: 2001+ A3 2003<br />
EN 61000-4-3:2002 +A1:2002<br />
EN 61000-4-5:1995 +A1:2001<br />
EN 61000-4-6:1996 +A1:2001<br />
EN 61000-4-8: 1993<br />
EN 61000-4-11:1994 + A1:2001<br />
Low-voltage guideline (73/23/EWG):<br />
EN 61010-1<br />
EN 61010-2-051<br />
24
01-005-002-94-1 23/01/06<br />
© Heidolph Instruments GmbH & Co. KG<br />
Technische Änderungen sind ohne vorherige Ankündigung vorbehalten.<br />
Technical changes reserved. Publication not mandatory.<br />
Sous réserve de modifications techniques sans notification préalable.<br />
Nos reservamos el derecho de introducir modificaciones técnicas sin previo aviso.<br />
Ci si riserva il diritto di apportare modifiche tecniche senza preavviso.