1986-1993 Mustang Novi 2000 - Paxton Superchargers
1986-1993 Mustang Novi 2000 - Paxton Superchargers
1986-1993 Mustang Novi 2000 - Paxton Superchargers
Create successful ePaper yourself
Turn your PDF publications into a flip-book with our unique Google optimized e-Paper software.
S U P E R C H A R G E R S<br />
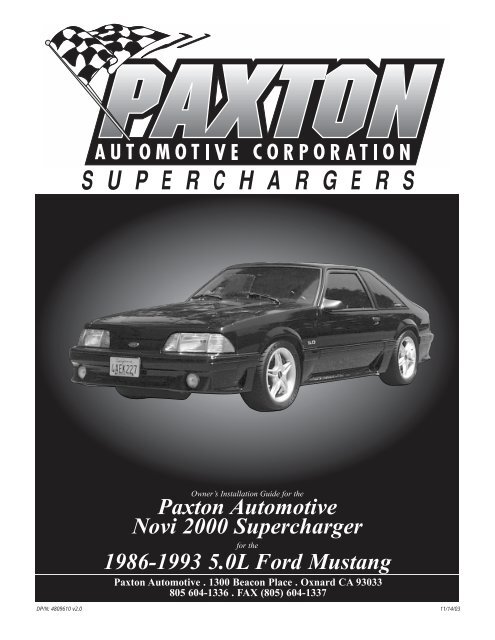
Owner’s Installation Guide for the<br />
<strong>Paxton</strong> Automotive<br />
<strong>Novi</strong> <strong>2000</strong> Supercharger<br />
for the<br />
<strong>1986</strong>-<strong>1993</strong> 5.0L Ford <strong>Mustang</strong><br />
<strong>Paxton</strong> Automotive . 1300 Beacon Place . Oxnard CA 93033<br />
805 604-1336 . FAX (805) 604-1337<br />
DP/N: 4809610 v2.0 11/14/03
© 2003 PAXTON AUTOMOTIVE<br />
All rights recerved. No parts of this publication may be reproduced, transmitted, transcrived, or translated into<br />
another language in any form, by any means without written permission of <strong>Paxton</strong> Automotive.<br />
P/N: 4809610<br />
©2003 <strong>Paxton</strong> Automotive<br />
All Rights Reserved, Intl. Copr. Secured<br />
05DEC03 v2.0 MusGT(4809610 v2.0)<br />
ii
TABLE OF CONTENTS<br />
FOREWORD . . . . . . . . . . . . . . . . . . . . . . . . . . . . . . . . . . . . . . . . . . . . . . . . . . . . . . . . . . . . . . . . . . . . .ii<br />
TABLE OF CONTENTS . . . . . . . . . . . . . . . . . . . . . . . . . . . . . . . . . . . . . . . . . . . . . . . . . . . . . . . . . . . .iii<br />
IMPORTANT NOTES . . . . . . . . . . . . . . . . . . . . . . . . . . . . . . . . . . . . . . . . . . . . . . . . . . . . . . . . . . . . . .iv<br />
1.1 INTRODUCTION . . . . . . . . . . . . . . . . . . . . . . . . . . . . . . . . . . . . . . . . . . . . . . . . . . . . . . . . . .1-1<br />
2.1 INITIAL PREPARATION AND REMOVAL . . . . . . . . . . . . . . . . . . . . . . . . . . . . . . . . . . . . . .2-1<br />
3.1 SUPERCHARGER INSTALLATION AND ASSEMBLY . . . . . . . . . . . . . . . . . . . . . . . . . . . . .3-1<br />
4.1 FINAL ASSEMBLY AND CHECK . . . . . . . . . . . . . . . . . . . . . . . . . . . . . . . . . . . . . . . . . . . . . .9-1<br />
APPENDIX . . . . . . . . . . . . . . . . . . . . . . . . . . . . . . . . . . . . . . . . . . . . . . . . . . . . . . . . . . . . . . . . . . . . . .A-1<br />
List of Appendices<br />
. . . . . . . . . . . . . . . . . . . . . . . . . . . . . . . . . . . . . . . . . . . . . . . . . .A-2<br />
Appendix A 1011810 KIT, PARTS LIST . . . . . . . . . . . . . . . . . . . . . . . . . . . . . . . . . . . .A-3<br />
Appendix B 1016410 ASY, S/C NOVI <strong>2000</strong> FORWARD ROTATION . . . . . . . . . . . . .A-4<br />
Appendix C 1016611 ASY, S/C MOUNTING BRACKET . . . . . . . . . . . . . . . . . . . . . .A-5<br />
Appendix D 1016710 ASY, CRANK PULLEY . . . . . . . . . . . . . . . . . . . . . . . . . . . . . . .A-6<br />
Appendix E 1017110 ASY, AIR INTAKE . . . . . . . . . . . . . . . . . . . . . . . . . . . . . . . . . . .A-7<br />
Appendix F 1017010 ASY, AIR DISCHARGE . . . . . . . . . . . . . . . . . . . . . . . . . . . . . . .A-8<br />
Appendix G 1017200 ASY, UPPER RADIATOR HOSE MODIFICATION . . . . . . . . .A-9<br />
Appendix H 1017400 KIT, BELT TENSIONER . . . . . . . . . . . . . . . . . . . . . . . . . . . . . .A-10<br />
Appendix I 1017702 KIT, FUEL CONTROL. . . . . . . . . . . . . . . . . . . . . . . . . . . . . . . .A-11<br />
Appendix J 1015515 ASY, COMPRESSOR BYPASS . . . . . . . . . . . . . . . . . . . . . . . . .A-12<br />
Appendix K 7009308 OIL RETURN . . . . . . . . . . . . . . . . . . . . . . . . . . . . . . . . . . . . . .A-13<br />
Appendix L 7009312 ASY, OIL SUPPLY . . . . . . . . . . . . . . . . . . . . . . . . . . . . . . . . . .A-13<br />
Appendix M 7002718 ASY, FAN SPACER . . . . . . . . . . . . . . . . . . . . . . . . . . . . . . . . . .A-13<br />
Appendix N 7007300 ASY, SMOG PUMP MODIFICATION . . . . . . . . . . . . . . . . . . .A-13<br />
iii<br />
P/N: 4809610<br />
©2003 <strong>Paxton</strong> Automotive<br />
All Rights Reserved, Intl. Copr. Secured<br />
05DEC03 v2.0 MusGT(4809610 v2.0)
IMPORTANT NOTES<br />
This manual provides information on the installation, maintenance and service<br />
of the <strong>Paxton</strong> supercharger kit expressly designed for the <strong>1986</strong>-93 5.0 Ford<br />
<strong>Mustang</strong> Contact <strong>Paxton</strong> Automotive Corporation for any additional information<br />
regarding this kit and any of these modifications at (805) 604-1336 7:00am-<br />
3:45pm PST.<br />
An understanding of the information contained herein will help novices, as well as<br />
experienced technicians, to correctly install and receive the greatest possible benefit<br />
from their <strong>Paxton</strong> supercharger. When reference is made in this manual to a brand<br />
name, number, specific tool or technique, an equivalent product may be used in<br />
place of the item mentioned. All information, illustrations and specifications contained<br />
herein are based on the latest product information available at the time of this<br />
publication. All rights reserved to make changes at any time without notice.<br />
P/N: 4809610<br />
©2003 <strong>Paxton</strong> Automotive<br />
All Rights Reserved, Intl. Copr. Secured<br />
05DEC03 v2.0 MusGT(4809610 v2.0)<br />
iv
Never rely solely on a hydraulic lift, when<br />
working under a vehicle. Always use<br />
approved jackstands to support the vehicle<br />
and place them under the manufactures recommended<br />
lift points.<br />
When lifting the vehicle, make sure it is on a level<br />
surface, preferably concrete or asphalt. The transmission<br />
should be in “PARK” or “FIRST”, the<br />
parking brake engaged, and the wheels blocked.<br />
Never start the car with out first verifying that the<br />
transmission is in neutral and the parking brake is<br />
set.<br />
Never remove the radiator cap while the engine is<br />
still hot. Always wear eye protection when using<br />
power tools such as drills, saws, grinders, etc., or<br />
when working under a vehicle.<br />
Never smoke, use an open flame, or have sparkproducing<br />
items around gasoline or flammable solvents.<br />
Always have a fire extinguisher rated for<br />
chemical and electrical fires handy when working<br />
on motor vehicles.<br />
Run engines only in a well ventilated area.<br />
Carbon monoxide, gasoline and solvent vapors are<br />
colorless, and sometimes odorless. These can<br />
asphyxiate or explode without warning.<br />
Always disconnect at least the (-) negative or<br />
ground terminal of the battery when doing any<br />
electrical, fuel system, or under dash work.<br />
We look forward to hearing from you, particularly<br />
if you have any comments or suggestions regarding<br />
this manual at (805) 604-1336 <strong>Paxton</strong> Automotive<br />
Corporation, 1300 Beacon Place, Oxnard, CA<br />
93033. E-mail Address:<br />
info@paxtonauto.com<br />
RECOMMENDED TOOLS<br />
FOR INSTALLATION:<br />
1. Metric and Standard sockets<br />
sets<br />
2. Metric and Standard combination<br />
wrenches<br />
3. Phillips and common screw<br />
drivers<br />
4. 12” crescent wrench or 36mm open<br />
end wrench<br />
5. Pliers<br />
6. Wire cutters and wire crimping tool.<br />
7. Hose cutters<br />
8. 1/8” drill bit and hand drill<br />
37/64 drill bit<br />
9. Allen wrenches<br />
10. Small heat source<br />
11. 3/8 Tap NPT<br />
12. Air Hammer<br />
13. Air Compressor<br />
***NOTE***<br />
Through these procedures the word “discard” is<br />
used periodically in relationship to items that will no<br />
longer be utilized in conjunction with the supercharger<br />
installation. It is recommended that these items be<br />
saved for future use should it become necessary.<br />
v<br />
P/N: 4809610<br />
©2003 <strong>Paxton</strong> Automotive<br />
All Rights Reserved, Intl. Copr. Secured<br />
05DEC03 v2.0 MusGT(4809610 v2.0)
This Page Left Intentionally Blank<br />
P/N: 4809610<br />
©2003 <strong>Paxton</strong> Automotive<br />
All Rights Reserved, Intl. Copr. Secured<br />
05DEC03 v2.0 MusGT(4809610 v2.0)<br />
vi
Section 1<br />
INTRODUCTION<br />
Congratulations! You have purchased the<br />
finest street Supercharger available for the<br />
<strong>1986</strong>-<strong>1993</strong> Ford <strong>Mustang</strong> 5.0. The centerpiece<br />
of this kit is the highly efficient and reliable<br />
<strong>Paxton</strong> Automotive Corp. NOVI-<strong>2000</strong> supercharger.<br />
A mechanically driven (by belt) centrifugal<br />
supercharger.<br />
This kit comes with all of the parts you’ll need for<br />
a successful installation. The operations required<br />
have been grouped in order of sequence. Photos<br />
and drawings accompany the text, allowing quick<br />
orientation and parts identification.<br />
Installation requires a selection of tools which are<br />
listed in a table at the end of this section.<br />
We also suggest that you obtain a Ford shop manual<br />
and become familiar with the details of your cars<br />
systems. Manuals may be obtained from your<br />
local Ford dealer or you can order one from Helm<br />
publications at (800) 782-4356.<br />
For best results follow the instructions closelyand<br />
in sequence. The average installation time for this<br />
kit is 8-10 hours. Your actual installation time will<br />
depend on skill level and working conditions. The<br />
estimate does not include time for initial vehicle<br />
inspection, cleaning, fine<br />
tuning or troubleshooting. Before even picking up<br />
a wrench, read this entire manual. We are available<br />
for technical assistance at<br />
(805) 604-1336, 7am-3:30pm pacific time.<br />
After reading the manual, verify that all major<br />
assembly groups are present in the main kit box.<br />
You should have ample space to layout the components.<br />
As you remove a box or bag from the main<br />
kit, note the identification label<br />
and compare it with the parts list. Please check the<br />
box for small parts.<br />
<strong>Paxton</strong> makes every effort to insure that all parts<br />
are included in the box. However, if you discover<br />
any missing or mislabeled parts, please contact<br />
<strong>Paxton</strong> by phone for service.<br />
***WARNING***<br />
DO NOT attempt installation if any part(s) are missing<br />
from this kit. Failure to contact <strong>Paxton</strong> prior to<br />
beginning installation will result in a charge for any<br />
missing parts.<br />
Before starting the installation, we suggest your<br />
engine compartment be clean. You can clean the<br />
engine and compartment with a pressure washer<br />
(such as those used at self serve car washes) and a<br />
safe-for-aluminum cleaner/degreaser. Cover the<br />
distributor with a plastic bag to prevent water from<br />
entering.<br />
***CAUTION***<br />
We do not recommend proceeding with the kit installation<br />
unless your vehicle is within normal operating<br />
parameters.<br />
You are undoubtedly enthusiastic about getting<br />
started on your project, but take just a little more<br />
time to insure that your safety is not jeopardized. A<br />
moment’s lack of attention can result in an accident,<br />
as can failure to observe certain simple safety<br />
precautions. The possibility of an accident will<br />
always exist, and the following points should not<br />
be considered a comprehensive list of all dangers.<br />
Rather, they are intended to make you aware of the<br />
risk and to encourage a safety conscious approach<br />
to all work you do on your vehicle.<br />
1-1<br />
P/N: 4809610<br />
©2003 <strong>Paxton</strong> Automotive<br />
All Rights Reserved, Intl. Copr. Secured<br />
05DEC03 v2.0 MusGT(4809610 v2.0)
This Page Left Intentionally Blank<br />
P/N: 4809610<br />
©2003 <strong>Paxton</strong> Automotive<br />
All Rights Reserved, Intl. Copr. Secured<br />
05DEC03 v2.0 MusGT(4809610 v2.0)<br />
1-2
Section 2<br />
INITIAL PREPARATION AND REMOVAL<br />
Begin the initial preparation and disassembly<br />
process by disconnecting the battery cables.<br />
2.1 Fuel tank/Fuel pump removal<br />
A. The installation of a higher flowing fuel<br />
pump is necessary. Before the removal of<br />
the fuel tank, be sure the fuel tank is completely<br />
empty.<br />
B. Using a hydraulic lift, lift the rear of the<br />
Vehicle up and place securely on jack<br />
stands.<br />
C. Remove the three 10mm hex head sheet<br />
metal screws securing the fill pipe to the<br />
quarter panel. (See Fig. 2-a.)<br />
Fig. 2-b<br />
Fig. 2-a<br />
D. Place a jack underneath the fuel tank to<br />
lightly hold pressure on the tank to assist in<br />
the lowering of the tank and removal of the<br />
retainment straps. (See Fig. 2-b.) When the<br />
gas tank is on the ground unplug the fuel<br />
pump and sensor wires, from the sending<br />
unit.<br />
E. Disconnect the three hoses using the supplied<br />
fuel fitting removal tools (fuel feed,<br />
fuel return and fuel vapor) up in front of the<br />
fuel tank.<br />
F. Twist the retainer ring that is securing the<br />
fuel sending unit in the top of the tank. Lift<br />
the pickup/sending unit assembly out of the<br />
tank.<br />
G. Carefully pry off the sock on the end of the<br />
pump. Remove the pump from the assembly<br />
and install the new pump (it should be a<br />
direct replacement). Reinstall the sock on<br />
the new pump.<br />
H. Replace the assembly into the tank and<br />
secure it with the retainer ring. Be certain<br />
that the O-ring is in its proper place and that<br />
the ring is turned all the way to its stop position.<br />
I. Plug the wires/hoses back in and re-install<br />
the fuel tank back up into the vehicle.<br />
2-1<br />
P/N: 4809610<br />
©2003 <strong>Paxton</strong> Automotive<br />
All Rights Reserved, Intl. Copr. Secured<br />
05DEC03 v2.0 MusGT(4809610 v2.0)
J. Loosen the petcock at the bottom of the<br />
radiator and drain approximately one gallon<br />
of coolant into a drain pan. (Save fluid for<br />
re-use.)<br />
K. Disconnect the overflow hose from the neck<br />
of the radiator and unplug the electrical connector<br />
from the coolant bottle.<br />
L. Using a 7/16" combination wrench, loosen<br />
the four bolts that are securing the fan to the<br />
water pump. With an18mm combination<br />
wrench release the tension on the belt tensioner<br />
and remove the factory drive belt.<br />
Now remove the four bolts that are securing<br />
the fan to the water pump. (See Figs. 2-c.)<br />
Fig. 2-d<br />
Fig. 2-e<br />
Fig. 2-c<br />
M. Using a 10mm socket & ratchet or screw<br />
driver, loosen the clamps and remove the<br />
upper radiator hose from the vehicle. Save<br />
for re-use.(See Fig. 2-d.)<br />
N. Using a 7/16" wrench or socket, remove the<br />
two sheet metal screws securing the fan<br />
shroud to the radiator core support and<br />
remove the shroud fan clutch from the vehicle.<br />
(See Fig. 2-e.)<br />
O. Using a nut driver or screwdriver, remove<br />
the clamps securing the rubber inlet tube to<br />
the throttle body and mass air flow sensor<br />
and remove the inlet tube.<br />
P. Loosen the clamp securing the mass air flow<br />
sensor to the rubber sleeve at the air filter<br />
assembly. Unplug the sensor and un-bolt it<br />
from the strut tower with a 7/16" socket.<br />
Q. Using a 7/16" deep socket, loosen the nuts<br />
securing the air filter assembly to its rubber<br />
mounts and remove the filter from the vehicle.<br />
Unscrew the rubber mounts from the<br />
inner fender. (See Fig. 2-f.)<br />
Fig. 2-f<br />
P/N: 4809610<br />
©2003 <strong>Paxton</strong> Automotive<br />
All Rights Reserved, Intl. Copr. Secured<br />
05DEC03 v2.0 MusGT(4809610 v2.0)<br />
2-2
R. Using a 19mm wrench, loosen the bolt<br />
securing the accessory drive belt tensioner to<br />
the factory bracket and remove the tensioner<br />
from the bracket. Set aside to be used in a<br />
later step of the installation. (See Fig. 2-f.)<br />
Fig. 2-f<br />
S. Unplug the electrical connection at the alternator,<br />
and using a 9/16" and a 1/2" socket,<br />
remove the alternator from the factory<br />
bracket. (See Fig. 2-g.)<br />
T. Using a 5/16” nut driver, loosen the clamps<br />
and remove the air injection hose from the<br />
smog pump and diverter valve up next to the<br />
valve cover. Disconnect the vacuum line<br />
behind the smog pump and remove the hose<br />
from the vehicle. Set aside for re-use<br />
U. Remove the bolt at the rear of the smog<br />
pump using a 9/16" socket and the two at<br />
the front of the pump, remove the smog<br />
pump from the vehicle.<br />
V. Using a 9/16" socket and extension, remove<br />
the remaining bolts securing the factory<br />
bracket to the engine. Set the bracket aside,<br />
this bracket will not be re-used.<br />
W. Using a 9/16" deep socket and extension,<br />
remove the fuel line bracket from the front<br />
head retaining stud and un-clip it from the<br />
factory fuel lines.<br />
X. On the frame rail, there is an evaporator<br />
canister. From underneath the vehicle, use a<br />
1/2" socket and remove the two bolts securing<br />
the canister bracket to the frame rail.<br />
Reposition the canister forward, towards the<br />
front of the vehicle, using one of the stock<br />
bolts. Resecure the canister to the frame rail<br />
using the forward hole in the frame rail and<br />
the rear hole in the bracket.<br />
Y. Remove the four factory crank pulley bolts<br />
with a 9/16" socket and extension and<br />
remove the pulley from the vehicle. (See<br />
Fig. 2-h.)<br />
Fig. 2-g<br />
Fig. 2-h<br />
2-3<br />
P/N: 4809610<br />
©2003 <strong>Paxton</strong> Automotive<br />
All Rights Reserved, Intl. Copr. Secured<br />
05DEC03 v2.0 MusGT(4809610 v2.0)
This Page Left Intentionally Blank<br />
P/N: 4809610<br />
©2003 <strong>Paxton</strong> Automotive<br />
All Rights Reserved, Intl. Copr. Secured<br />
05DEC03 v2.0 MusGT(4809610 v2.0)<br />
2-4
Section 3<br />
SUPERCHARGER BRACKET ASSEMBLY<br />
3.1 Supercharger kit Assembly<br />
***IMPORTANT***<br />
Before continuing drain the motor oil from the vehicle.<br />
A. From underneath the vehicle you will need<br />
to drill a pilot hole in the oil pan on the passenger<br />
side by using a 1/8" drill bit approximately<br />
1-1/2" from the top and 2" from the<br />
front of the oil pan. (See Fig. 3-a.)<br />
B. Upon completion of the drilled pilot hole,<br />
insert a rigid thin piece of wire through the<br />
drilled pilot hole to ensure that there is a<br />
straight shot for the punch to go into. If<br />
there is anything blocking the path, rotate<br />
the engine by hand using the appropriate<br />
size socket and ratchet, to rotate the crankshaft.<br />
Insert the punch into the pilot hole and<br />
evenly enlarge the hole to 9/16".<br />
C. Using a 3/8 NPT tap (not supplied) tap the<br />
punched hole to accommodate the threaded<br />
brass fitting. Before tapping, coat the tap<br />
with thick lithium grease to retain the metal<br />
shavings while you tap the oil pan.<br />
D. Upon completion of the tapped oil pan hole,<br />
coat the threaded end of the brass fitting<br />
with silicone and thread into the oil pan, be<br />
cautious not to over tighten or to strip the oil<br />
pan threads.<br />
E. Remove the four bolts securing the factory<br />
accessory drive pulley.<br />
F. With the 4 supplied bolts 3/8 x 1 in length<br />
install the new crank pulley and torque the<br />
bolts to 25-28ft pounds. (See Fig. 3-b.)<br />
G. Locate the two bolts insert these from the<br />
rear of the bracket. (See Fig. xxx.)<br />
H. Using the 7/16” x 1” bolts and washers, and<br />
the 3/8” x 1.5” bolts and washers, secure the<br />
cast bracket to the front of the cylinder<br />
head.(See Fig. 3-c.)<br />
Fig. 3-a<br />
Fig. 3-b<br />
Fig. 3-c<br />
3-1<br />
P/N: 4809610<br />
©2003 <strong>Paxton</strong> Automotive<br />
All Rights Reserved, Intl. Copr. Secured<br />
05DEC03 v2.0 MusGT(4809610 v2.0)
G. Using the main Supercharger bracket bolt it<br />
onto the previously installed cast bracket<br />
using two of the bolts that measure 3/8" x 6<br />
3/4" and two of the flat washers these bolts<br />
will go through the lower two holes on the<br />
main S/C bracket then through the cast<br />
bracket, and into the cylinder head threads.<br />
Do not tighten yet, just get them started.<br />
(See Fig. 3-d.)<br />
I. Below the smog pump, The alternator will<br />
be mounted. Use the 7/16" x 4" bolt and<br />
washer through the mounting plate, through<br />
the alternator and into the bracket.<br />
J. Off the side of the Smog pump, Use the 3/8"<br />
x 1" bolt and the supplied lock washer to<br />
mount the alternator stay. Use the 3/8" x 1"<br />
bolt and lock washer to secure the alternator<br />
stay to the ear of the alternator. Do not tighten.<br />
K. Following the accessory belt routing diagram,<br />
(see Appendix C) route the belt<br />
around the pulley’s. This will have to be<br />
moved later, however it is necessary to put<br />
the belt in place before the support plate is<br />
installed.<br />
L. Insert the solid idler, arbor and 1/2"-13 x 3"<br />
allen bolt into the lower corner of the support<br />
plate with the 1/2" nut and flat washer.<br />
Tighten this bolt.<br />
M. Attach the 1/2" drain hose to the nipple at<br />
the bottom of the supercharger. Secure with<br />
the provided clamp. Route the hose down<br />
the side of the engine and connect to the<br />
nipple previously installed in the oil pan.<br />
(See Fig. 3-f.)<br />
Fig. 3-d<br />
H. The Smog pump is secured with a 3/8" x 5"<br />
bolt and flat washer, from the front, through<br />
the mounting plate, through the smog pump<br />
spacer, through the smog pump and into the<br />
bracket boss. The lower mounting is done<br />
with a 3/8 x 2" bolt and washer from the<br />
back of the bracket into the smog pump. Do<br />
not tighten. (See Fig. 3-e.)<br />
Fig. 3-f<br />
N. Remove the factory oil pressure sensor at<br />
the front of the engine on the drivers side of<br />
the engine next to the oil filter. Use pipe<br />
sealant and install the supplied street tee<br />
adapter into the factory fitting where the<br />
sensor was. Re-install the factory sensor on<br />
one of the ends of the street TEE and tighten<br />
using pipe sealant.<br />
Fig. 3-e<br />
P/N: 4809610<br />
©2003 <strong>Paxton</strong> Automotive<br />
All Rights Reserved, Intl. Copr. Secured<br />
05DEC03 v2.0 MusGT(4809610 v2.0)<br />
3-2
O. Install the steel braided -4 oil line on to the<br />
-4 fitting of the street TEE. Neatly route the<br />
hose across the front of the engine, behind<br />
the accessories and under the supercharger.<br />
(See Fig. 3-g.)<br />
Fig. 3-i<br />
Fig. 3-g<br />
P. Bolt the Supercharger to the mounting<br />
bracket with one of the 3/8" x 1" bolts and<br />
washers through the upper most hole and the<br />
two lower holes in the mounting plate. Place<br />
the support plate over the front of the supercharger<br />
and secure with the 3/8" countersunk<br />
bolts. (See Fig. 3-h, 3-i.)<br />
Q. Install the 3/8" x 2 1/2" countersunk bolt<br />
through the lower most hole in the support<br />
plate and thread it into the mounting plate.<br />
Do not tighten this bolt. (See Appendix B.)<br />
R. Above that, insert two of the 3/8" x 3 1/4"<br />
bolts with washers through the support plate,<br />
spacer and mounting plate. Secure the<br />
accessory drive belt tensioner to the back of<br />
the mounting plate with the upper of these<br />
two bolts holes, the lower with the 3/8" x 1"<br />
bolt and washer provided. Secure the other<br />
side of the belt tensioner bracket to the stud<br />
at the top of the water pump with the 3/8"<br />
nut and washer. Do not tighten these bolts.<br />
(See Fig. 3-i)<br />
S. There are three (3) countersunk holes left in<br />
the support plate. They each take the<br />
remaining 3/8" x 3 1/4" counter sunk bolts.<br />
Install these bolts and tighten to 28-30 ft<br />
pounds. Upon completion of this step, tighten<br />
all of the remaining bolts that have been<br />
left hand tight, as well as the Smog and<br />
alternator assemblies.<br />
T. Use the supplied 1/2" x 3 1/2" carriage bolt,<br />
nut and washer to secure the factory belt<br />
tensioner to the new bracket. Tighten nut to<br />
28-30 ft lbs.. (See Figs. 3-j, 3-k.)<br />
ATTACH THE OIL HOSE FROM THE<br />
STREET TEE TO THE FITTING ON<br />
THE SIDE OF THE SUPERCHARGER<br />
Fig. 3-h<br />
3-3<br />
P/N: 4809610<br />
©2003 <strong>Paxton</strong> Automotive<br />
All Rights Reserved, Intl. Copr. Secured<br />
05DEC03 v2.0 MusGT(4809610 v2.0)
Fig. 3-j<br />
the end of the adjustable idler so that it will<br />
not back off.<br />
X. Find the rubber air injection hose from the<br />
diverter valve removed in an earlier step.<br />
Shorten the hose by cutting 3" out of the<br />
middle of the hose and 1-1/2" off the back<br />
end of the hose. Reconnect the two formed<br />
pieces together with the sleeve and clamps<br />
provided. Re-install the short end hose<br />
between the diverter valve and fitting on the<br />
side of the smog pump.<br />
Y. Cut the upper radiator hose. Re-install the<br />
longer piece on the thermostat housing<br />
angled forward. Install the shorter 90º<br />
degree piece on the radiator angled to the<br />
side. Install the stainless tube between the<br />
two pieces of hose and secure with the supplied<br />
clamps. (See Fig. 3-l.)<br />
2"<br />
3"<br />
2"<br />
3"<br />
Fig. 3-l<br />
Fig. 3-k<br />
U. Install the new fan spacer on the water<br />
pump. Place the fan and shroud back into<br />
the engine compartment together. Re-install<br />
the factory fan and clutch using the 5/16"<br />
bolts and washers. Tighten with a 1/2"<br />
wrench to the factory specifications. Use<br />
the factory screws to re-install the shroud<br />
onto the radiator core support.<br />
V. Use an 18mm wrench to rotate the accessory<br />
belt tensioner and reinstall the factory belt in<br />
the correct routing. (See Appendix C.)<br />
W. Install the supercharger drive belt between<br />
the crank pulley and the supercharger pulley.<br />
Route the belt inside the idlers. Use a 3/8"<br />
socket and extension and tighten the belt.<br />
Once the belt is tensioned, tighten the nut on<br />
Z. Remove the vent tube from the throttle body<br />
and the oil fill cap and clamp, plug the nipple<br />
on the throttle body with a nipple plug<br />
and using a hose clamp securely retain the<br />
nipple cover.<br />
AA. Install the intake u-bend with the supplied 3<br />
1/2" x 4" adapter sleeve and clamps. On the<br />
other end of the U-bend, install the 3 1/2" x<br />
3 1/4" adapter sleeve. (See Appendix E.)<br />
BB. Plug in the Mass air flow (MAF) sensor and<br />
install the sensor into the opposite side of<br />
the adapter sleeve with the supplied clamps.<br />
(see Appendix E)<br />
CC. Install the K&N air filter on the end of the<br />
MAF sensor. Tighten the clamp to secure the<br />
filter. (See Appendix E.)<br />
DD. Install the brass fitting into the hole in the<br />
front of the filter cover and tighten. Place<br />
the filter cover over the filter and secure it to<br />
the inner fender with the supplied screws.<br />
Install the supplied crankcase breather hose<br />
on this nipple and route it back to the oil<br />
filler cap. Trim to fit and install this end of<br />
the hose to the nipple on the side of the oil<br />
fill spout clamp to secure.<br />
P/N: 4809610<br />
©2003 <strong>Paxton</strong> Automotive<br />
All Rights Reserved, Intl. Copr. Secured<br />
05DEC03 v2.0 MusGT(4809610 v2.0)<br />
3-4
EE. Place the supplied rubber sleeves on the<br />
throttle body inlet and the supercharger outlet.<br />
Now place two hose clamps each on<br />
both ends of the rubber sleeves. Install the<br />
discharge duct onto the outlet of the supercharger<br />
and then the throttle body. Adjust<br />
the sleeves and tighten the hose clamps<br />
using a screwdriver.<br />
FF. Install the hose that connects the compressor<br />
bypass valve to the filter cover between the<br />
intake and discharge tubes. Use the supplied<br />
1" rubber sleeves and clamps. Install the<br />
valve so that the bottom of the valve points<br />
toward the intake duct. Tighten all the<br />
clamps. Connect the supplied vacuum hose<br />
from the bypass valve to the manifold vacuum<br />
tree located on the fire wall next to the<br />
brake booster. (See Appendices.)<br />
GG. Using the supplied yellow fuel line separator,<br />
separate the return line fitting at the fuel<br />
rail. Snap the two supplied rubber hoses<br />
onto the stock fittings and route both hoses<br />
behind the passenger side strut tower.<br />
HH. Use the F.C.U. bracket as a guide, mark and<br />
drill two 1/8" holes in the fenderwell. Secure<br />
the F.C.U. to the fenderwell with the supplied<br />
sheet metal screws. (See Appendices.)<br />
II. Connect the fuel hoses to the F.C.U. in such<br />
a way that the fuel flows from the factory<br />
regulator, through the “in” side of the F.C.U.<br />
out the bottom of the outside back to the<br />
fuel tank.<br />
JJ. On top of the F.C.U. run a length of hose<br />
over and TEE it into the vacuum hose running<br />
to the boost bypass valve. Re-using the<br />
previously drained coolant, bring the reservoir<br />
up to it’s stock fill limit, and also verify<br />
that the radiator is topped off.<br />
***IMPORTANT NOTE***<br />
Due to tight tolerances , be very careful when closing<br />
the hood for the first time, making sure that there is<br />
not any interference between the s/c and the hood of<br />
the car. By doing this you will eliminate damaging<br />
your vehicle and/or supercharger.<br />
Completed Installation on a 5.0L Ford <strong>Mustang</strong> Motor<br />
3-5<br />
P/N: 4809610<br />
©2003 <strong>Paxton</strong> Automotive<br />
All Rights Reserved, Intl. Copr. Secured<br />
05DEC03 v2.0 MusGT(4809610 v2.0)
This Page Left Intentionally Blank<br />
P/N: 4809610<br />
©2003 <strong>Paxton</strong> Automotive<br />
All Rights Reserved, Intl. Copr. Secured<br />
05DEC03 v2.0 MusGT(4809610 v2.0)<br />
3-6
Section 4<br />
FINAL CHECK OUT AND START UP<br />
This section covers pre-start checks and inspections,<br />
as well as initial start-up.<br />
4.1 Inspect the following:<br />
A. Wires, harnesses and electrical connections.<br />
Are all items properly dressed, connected<br />
and secured? If any electrical connections<br />
have been dis-connected, re-connect them<br />
before you start your vehicle.<br />
B. Hoses, lines and fittings. Are all items properly<br />
dressed, connected and secured?<br />
C. Fasteners, brackets, and clamps. Are all<br />
items properly installed and tightened?<br />
D. Fluid levels. Is the radiator coolant and the<br />
engine oil at their proper levels? Are there<br />
any fluid leaks?<br />
C. Belt(s). Is the serpentine drive belt (or<br />
accessory drive and supercharger drive belts,<br />
depending on the requirement of your vehicle)<br />
properly installed, aligned and tensioned?<br />
4.2 Perform the following:<br />
A. Cycle the ignition key from “off “ to “on”<br />
position three (3) times at fifteen (15) second<br />
intervals. Afterwards, check the entire<br />
fuel system for any leaks.<br />
B. Start the car. Verify that the oil pressure is<br />
within the normal operating range. Listen<br />
closely. The engine should idle and sound<br />
the same as it did before you began the<br />
installation. Shutdown the engine, disconnect<br />
the oil feed line from the blower.<br />
Remove the oil jet from the blower. Blow<br />
through the oil jet to ensure there is no<br />
blockage or foreign matter plugging it. Reinstall<br />
oil jet and oil feed line and proceed.<br />
C. Allow the engine to come to normal operating<br />
temperatures. Bleed the cooling system<br />
and top off as necessary.<br />
4.3 Check for the following:<br />
A. Fuel leaks.<br />
B. Fluid leaks.<br />
C. Belt slippage.<br />
D. Throttle response.<br />
***CAUTION***<br />
See the supercharger service manual included in<br />
your kit for information on supercharger servicing<br />
and maintenance, belt tightening, troubleshooting,<br />
special tuning, and warranty information.<br />
Now that the work is down, it’s time to enjoy<br />
your labor of love. Take the car out on the road<br />
and let it flex it’s muscles, but remember, the<br />
response and performance will now be different<br />
from that to which you have been accustomed.<br />
Have fun!<br />
4-1<br />
P/N: 4809610<br />
©2003 <strong>Paxton</strong> Automotive<br />
All Rights Reserved, Intl. Copr. Secured<br />
05DEC03 v2.0 MusGT(4809610 v2.0)
This Page Left Intentionally Blank<br />
P/N: 4809610<br />
©2003 <strong>Paxton</strong> Automotive<br />
All Rights Reserved, Intl. Copr. Secured<br />
05DEC03 v2.0 MusGT(4809610 v2.0)<br />
4-2
Appendix<br />
Please realize that PAXTON Automotive is constantly improving the performance<br />
and look of the NOVI <strong>2000</strong> supercharger. Parts in your kit may appear<br />
differently than what is pictured in this manual. This is due to photographs<br />
taken in pre-production, a change in material costs, or an improvement in performance.<br />
Rest assured that you have purchased to best quality kit that PAXTON Automotive<br />
manufactures at this time. The installation of the materials will remain the same.<br />
Appendix Part Number Description Page<br />
1 #1016410 Asy, 96-93 5.0L <strong>Novi</strong> <strong>2000</strong> A-2<br />
2 #1016611 Asy, Mtg Brkt 5.0L <strong>Novi</strong> <strong>2000</strong> A-3<br />
3 #1016710 Asy, Crank Pulley, 86-93 5.0L <strong>Novi</strong> <strong>2000</strong> A-4<br />
4 #1017010 Asy, Air Discharge, 86-93 5.0L <strong>Novi</strong> <strong>2000</strong> A-5<br />
5 #1017110 Asy, Air Intake, 86-93 5.0L <strong>Novi</strong> <strong>2000</strong> A-6<br />
6 #1017702 Asy, Fuel Control A-7<br />
7 #1015515 Asy, Compressor Bypass A-8<br />
8 #1019312 Asy, Oil Supply A-9<br />
9 #1017300 Asy, Smog Pump Modification A-10<br />
A-1<br />
P/N: 4809610<br />
©2003 <strong>Paxton</strong> Automotive<br />
All Rights Reserved, Intl. Copr. Secured<br />
05DEC03 v2.0 MusGT(4809610 v2.0)
ALIGN VOLUTE WITH<br />
1/2 HOLE SHOWN<br />
12<br />
14<br />
13<br />
11<br />
10<br />
S/C ROTATION<br />
SHORT HUB<br />
TOWARD S/C<br />
8<br />
15<br />
2<br />
16<br />
17<br />
4 REQD 19<br />
?<br />
AS REQD<br />
28 27 26 2<br />
AS REQD<br />
31 30 29 25 2<br />
9<br />
7<br />
6<br />
4<br />
2<br />
1<br />
3<br />
3<br />
23 3 REQD<br />
26 6 REQD<br />
5 4<br />
7<br />
20<br />
2<br />
4<br />
21<br />
22 3<br />
2<br />
2<br />
ITEM NO. QTY. PART NO. DESCRIPTION<br />
ASY, GEARCASE, NOVI <strong>2000</strong>, CW<br />
9<br />
10<br />
11<br />
12<br />
13<br />
14<br />
15<br />
16<br />
17<br />
18<br />
19<br />
20<br />
21<br />
22<br />
23<br />
24<br />
25<br />
26<br />
27<br />
28<br />
29<br />
30<br />
31<br />
1<br />
1<br />
2<br />
2<br />
1<br />
1<br />
2<br />
2<br />
2<br />
1<br />
1<br />
1<br />
1<br />
1<br />
1<br />
1<br />
1<br />
1<br />
4<br />
1<br />
1<br />
1<br />
3<br />
6<br />
0<br />
0<br />
0<br />
0<br />
0<br />
0<br />
0<br />
1<br />
2<br />
3<br />
4<br />
5<br />
6<br />
7<br />
8<br />
2H238-000<br />
7PP375-017<br />
7P375-016<br />
7J375-024<br />
7PP375-090<br />
7P375-104<br />
008704<br />
7U100-075<br />
2H017-125<br />
4PFA031-350<br />
2H040-021<br />
2H040-011<br />
008718<br />
7B375-110<br />
2H018-051<br />
008706<br />
008719<br />
2H100-035<br />
7U100-021<br />
2H021-051<br />
2H017-021<br />
7G010-155<br />
2H100-045<br />
7A250-050<br />
2H060-030<br />
2H100-003<br />
2H100-005<br />
2H100-010<br />
2H060-031<br />
2H060-040<br />
2H060-041<br />
FTG, NIPPLE, 3/8NPT x 1/2 HOSE BARB<br />
FTG, PLUG, 3/8NPT WITH MAGNET<br />
WASHER, COPPER CRUSH, 3/8<br />
OIL JET, LONG<br />
SCREW, SCHD, 3/8-16UNC-2A x 1.00 LG.<br />
CAP, SHIPPING, T2<br />
KEY, 1/8 SQ x 1.25 LG.<br />
SPACER, PULLEY, .125 THK.<br />
PULLEY, S/C 10 GRV, 3.50<br />
RET, CUP BLWR PULLEY<br />
RET, PULLEY, S/C 3/8<br />
CAP, TAMPER PROOF<br />
SCREW, HXHD, 3/8-24UNF-2A x 1.00 LG.<br />
VOLUTE, NOVI <strong>2000</strong>, CRV DIS, CW<br />
CAP, SHIPPING, 3"<br />
CAP, SHIPPING, 4"<br />
NAMEPLATE, NOVI <strong>2000</strong><br />
SCREW, DRIVE, #4 x .187 LG.<br />
IMPELLER, NOVI <strong>2000</strong>, CW , BALANCED<br />
WASHER, ANTI-ROTATION<br />
NUT, 3/8-24UNF-2B, FLG LOCK<br />
CLAMP, VOLUTE<br />
SCREW, SCHD, 1/4-20UNC-2A x .50 LG.<br />
MATING RING, .090 THK.<br />
SHIM, IMP, .003 THK.<br />
SHIM, IMP, .005 THK.<br />
SHIM, IMP, .010 THK.<br />
MATING RING, .099 THK.<br />
MATING RING, .103 THK.<br />
MATING RING, .112 THK.<br />
UNLESS OTHERWISE SPECIFIED<br />
DIMENSIONS ARE IN INCHES<br />
TOLERANCES ARE:<br />
MATERIAL<br />
FINISH<br />
DECIMALS:<br />
NONE<br />
.XX± .01<br />
.XXX±.005<br />
FRACTIONS: ±1/2•<br />
ANGLES: ±1/16<br />
SEE PARTS LIST<br />
DRAWN<br />
ENGINEERING<br />
R&D<br />
APPR.<br />
CAD GENERATED DRAWING,<br />
DO NOT MANUALLY UPDATE<br />
APPROVALS<br />
DTP<br />
DATE<br />
6/3/97<br />
-----<br />
-----<br />
----- -----<br />
-----<br />
-----<br />
WEIGHT 21.8 LBS SCALE: 3:4<br />
SIZE DWG. NO.<br />
D<br />
1300 BEACON PLACE OXNARD, CA 93033<br />
TEL: (805) 604-1336 FAX: (805) 604-1337<br />
86-93 5.0L MUSTANG<br />
ASY, S/C NOVI <strong>2000</strong><br />
FORWARD ROTATION, 86-93 5.0L, SATIN<br />
1016410<br />
DO NOT SCALE DRAWING<br />
REV.<br />
B<br />
SHEET 1 OF 1<br />
Part Number: 1016410 Supercharger Asy, 86-93 5.0 <strong>Novi</strong> <strong>2000</strong><br />
P/N: 4809610<br />
©2003 <strong>Paxton</strong> Automotive<br />
All Rights Reserved, Intl. Copr. Secured<br />
05DEC03 v2.0 MusGT(4809610 v2.0)<br />
A-2
17<br />
18<br />
17 25<br />
13<br />
25<br />
19<br />
10<br />
17<br />
12<br />
11<br />
30<br />
17<br />
17 26<br />
1<br />
23 17<br />
33<br />
17<br />
29<br />
17 16<br />
31 27<br />
19<br />
15<br />
15<br />
4<br />
17<br />
5<br />
9<br />
8<br />
14<br />
6<br />
31<br />
24<br />
2<br />
17 20<br />
4<br />
31<br />
21 17 32<br />
14<br />
7<br />
25 14<br />
3<br />
17<br />
22<br />
ITEM NO.<br />
9<br />
10<br />
11<br />
12<br />
13<br />
14<br />
15<br />
16<br />
17<br />
18<br />
19<br />
20<br />
21<br />
22<br />
23<br />
24<br />
25<br />
26<br />
27<br />
28<br />
29<br />
30<br />
31<br />
32<br />
33<br />
1<br />
2<br />
3<br />
4<br />
5<br />
6<br />
7<br />
8<br />
QTY.<br />
2<br />
16<br />
1<br />
1<br />
1<br />
4<br />
1<br />
1<br />
1<br />
2<br />
1<br />
3<br />
2<br />
2<br />
3<br />
3<br />
3<br />
1<br />
2<br />
1<br />
1<br />
1<br />
1<br />
1<br />
3<br />
1<br />
1<br />
1<br />
1<br />
1<br />
2<br />
1<br />
1<br />
PART NO.<br />
4FA011-021<br />
4PFA010-054<br />
4PFA010-044<br />
2A017-875-11<br />
7A375-251<br />
4PFA010-031<br />
7PA375-500<br />
7A250-077<br />
7PB500-263<br />
7A375-102<br />
7A375-302<br />
4PFA017-011<br />
1210508<br />
7J375-044<br />
7A375-300<br />
7A375-124<br />
7J500-001<br />
7B500-300<br />
7F500-025<br />
7A375-751<br />
7A375-675<br />
7A375-175<br />
7A375-625<br />
4PFA017-071<br />
7A375-100<br />
7A375-200<br />
7A437-175<br />
7J438-081<br />
4FA017-021<br />
4FA015-015<br />
7F375-016<br />
4832500<br />
7A375-650<br />
DESCRIPTION<br />
MTNG BRCKT, S/C<br />
PLATE, FRONT<br />
PLATE, REAR<br />
SPACER, 875 x 1.482 L<br />
3/8-16 x 2 1/2 FL SHCS<br />
IDLR SCREW<br />
SCREW, IDLR ADJR<br />
5/16-18 x 3/8 HHCS-SS<br />
ARBOR, SC TENS PLY<br />
3/8-16 x 1.0 FL SHCS<br />
3/8-16 x 3.0 F HD<br />
COLLAR, 10 RIB PLY, NOVI<br />
PULLEY, IDLR SMOOTH<br />
WASHER, 3/8 SAE PLTD<br />
3/8-16 x 3 HXCS<br />
3/8-16 x 1-1/4 HXHD<br />
WASHER, 1/2 ID x 1.12 OD<br />
1/2-20 x 3 HXHD<br />
1/2-20 x 1.5 HHCS<br />
3/8-16 x 7 HXHD<br />
3/8-16 x 6.75 HXHD<br />
3/8-16 x 1.75 HXHD<br />
SCREW, HXHD,3/8-16UNC-2A x 6.25 LG.<br />
SPACER, ALT BRCKT<br />
3/8-16 x 1 HXHD<br />
3/8-16 x 2 HXHD<br />
7/16-14 x 1.75 HXHD<br />
7/16 SAE WASHER<br />
SPACER, SMOG<br />
ALTERNATOR STAY<br />
3/8-16 HX NUT<br />
LABEL, ALTERNATOR DATA<br />
3/8-16 x 6.50 HXHD<br />
UNLESS OTHERWISE SPECIFIED<br />
DIMENSIONS ARE IN INCHES<br />
TOLERANCES ARE:<br />
MATERIAL<br />
FINISH<br />
DECIMALS:<br />
NONE<br />
.XX± .01<br />
.XXX±.005<br />
FRACTIONS: ±1/2•<br />
ANGLES: ±1/16<br />
SEE PARTS LIST<br />
DRAWN<br />
ENGINEERING<br />
R&D<br />
APPR.<br />
CAD GENERATED DRAWING,<br />
DO NOT MANUALLY UPDATE<br />
APPROVALS<br />
TAP<br />
DATE<br />
01/27/03<br />
-----<br />
-----<br />
----- -----<br />
-----<br />
-----<br />
WEIGHT ----- SCALE: 1:1.5<br />
99-01 3.5L PLYMOUTH PROWLER WITH UPGRADE<br />
SIZE DWG. NO.<br />
D<br />
1300 BEACON PLACE OXNARD, CA 93033<br />
TEL: (805) 604-1336 FAX: (805) 604-1337<br />
ASY, S/C MTG BRKT<br />
'86-'93 MUSTANG 5.0L w/NOVI <strong>2000</strong><br />
1016611<br />
DO NOT SCALE DRAWING<br />
REV.<br />
L<br />
SHEET 1 OF 1<br />
Part Number: 1016611 Asy, Mounting Bracket 5.0 <strong>Novi</strong> <strong>2000</strong><br />
A-3<br />
P/N: 4809610<br />
©2003 <strong>Paxton</strong> Automotive<br />
All Rights Reserved, Intl. Copr. Secured<br />
05DEC03 v2.0 MusGT(4809610 v2.0)
ACCESSORY<br />
TENSIONER<br />
PULLEY<br />
SMOG PUMP<br />
PULLEY<br />
A/C<br />
COMPRESSOR<br />
PULLEY<br />
WATER PUMP<br />
PULLEY<br />
ALT<br />
PULLEY<br />
PART OF 1016610<br />
POWER STEERING<br />
PUMP PULLEY<br />
PART OF 1016410<br />
5<br />
1<br />
2 3 TO CRANKSHAFT<br />
PARTS LIST<br />
ITEM QTY PART NUMBER<br />
DESCRIPTION<br />
1 2 3 4 1 4 4 1 8002615 4815801 1046290 4831232 PULLEY, CRANK 10 GRV 7.034 P DIA<br />
SCREW, 3/8-16 x 1.00 SHCS GR8<br />
WASHER, FLAT 3/8 AN960-616<br />
BELT, S/C DRIVE 10 GRV POLYCOG 1441mm x 35.7mm<br />
5 1 4831201 BELT, ACCESSORY DRIVE 6 GRV MICRO-V 2525mm x 21mm<br />
6 1 4813000 STICKER, BELT ROUTING<br />
4<br />
UNLESS OTHERWISE SPECIFIED<br />
DIMENSIONS ARE IN INCHES<br />
TOLERANCES ARE:<br />
MATERIAL<br />
FINISH<br />
DECIMALS:<br />
NONE<br />
.XX± .01<br />
.XXX±.005<br />
FRACTIONS: ±1/2•<br />
ANGLES: ±1/16<br />
SEE PARTS LIST<br />
DRAWN<br />
ENGINEERING<br />
R&D<br />
APPR.<br />
CAD GENERATED DRAWING,<br />
DO NOT MANUALLY UPDATE<br />
APPROVALS<br />
CFB<br />
DATE<br />
8/14/01<br />
-----<br />
-----<br />
----- -----<br />
-----<br />
-----<br />
WEIGHT --- LBS SCALE: NONE<br />
SIZE DWG. NO.<br />
C<br />
1300 BEACON PLACE OXNARD, CA 93033<br />
TEL: (805) 604-1336 FAX: (805) 604-1337<br />
'86-'93 MUSTANG 5.0L w/NOVI<br />
ASY, CRANK PULLEY<br />
8/14/01<br />
DO NOT SCALE DRAWING<br />
REV.<br />
F<br />
SHEET 1 OF 1<br />
Part Number: 1016710 Asy, Crank Pulley 86-93 5.0 <strong>Novi</strong> <strong>2000</strong><br />
TENSIONER<br />
PULLEY<br />
S/C<br />
PULLEY<br />
P/N: 4809610<br />
©2003 <strong>Paxton</strong> Automotive<br />
All Rights Reserved, Intl. Copr. Secured<br />
05DEC03 v2.0 MusGT(4809610 v2.0)<br />
A-4
4<br />
TO COMPRESSOR BYPASS ASY<br />
3<br />
2<br />
3<br />
TO THROTTLE BODY<br />
1<br />
3<br />
2<br />
3<br />
ITEM NO.<br />
TO S/C ASY<br />
1<br />
2<br />
3<br />
4<br />
QTY.<br />
1<br />
2<br />
4<br />
1<br />
PART NO.<br />
4PFA012-031<br />
7PS300-200<br />
7R002-048<br />
7P750-100<br />
DESCRIPTION<br />
TUBE, DISCHARGE<br />
SLV, BLK, 3.00D X 2.00<br />
CLAMP, HOSE #48<br />
FTG, NIPPLE, 3/4NPT X 1.00 HOSE BARB<br />
UNLESS OTHERWISE SPECIFIED<br />
DIMENSIONS ARE IN INCHES<br />
TOLERANCES ARE:<br />
MATERIAL<br />
FINISH<br />
DECIMALS:<br />
NONE<br />
.XX± .01<br />
.XXX±.005<br />
FRACTIONS: ±1/2•<br />
ANGLES: ±1/16<br />
SEE PARTS LIST<br />
DRAWN<br />
ENGINEERING<br />
R&D<br />
APPR.<br />
CAD GENERATED DRAWING,<br />
DO NOT MANUALLY UPDATE<br />
APPROVALS<br />
DTP<br />
DATE<br />
5/29/97<br />
-----<br />
-----<br />
----- -----<br />
-----<br />
-----<br />
WEIGHT 2.6 LBS SCALE: 1:2<br />
SIZE DWG. NO.<br />
C<br />
1300 BEACON PLACE OXNARD, CA 93033<br />
TEL: (805) 604-1336 FAX: (805) 604-1337<br />
86-93 5.0L MUSTANG<br />
ASY, AIR DISCHRGE<br />
1017010<br />
DO NOT SCALE DRAWING<br />
REV.<br />
C<br />
SHEET 1 OF 1<br />
Part Number: 1017010 Asy, Air Discharge 5.0 <strong>Novi</strong> <strong>2000</strong><br />
A-5<br />
P/N: 4809610<br />
©2003 <strong>Paxton</strong> Automotive<br />
All Rights Reserved, Intl. Copr. Secured<br />
05DEC03 v2.0 MusGT(4809610 v2.0)
7<br />
11<br />
2<br />
1<br />
10<br />
8<br />
TO OIL FILL<br />
BREATHER<br />
9<br />
3<br />
TO S/C INLET<br />
6<br />
9<br />
WELL<br />
TO WHEEL<br />
12<br />
14<br />
PAXTON<br />
AUTOMOTIVE<br />
CORPORATION<br />
12 TO WHEEL WELL<br />
8<br />
4<br />
13<br />
STOCK M.A.F.<br />
P/O<br />
5<br />
5<br />
ITEM QTY PART NO.<br />
10<br />
11<br />
12<br />
13<br />
14<br />
1<br />
2<br />
3<br />
4<br />
5<br />
6<br />
7<br />
8<br />
9<br />
1.6'<br />
1<br />
1<br />
1<br />
1<br />
1<br />
1<br />
1<br />
2<br />
1<br />
1<br />
2<br />
1<br />
1<br />
4PFA012-010<br />
7PS350-301<br />
7PS400-200<br />
4PFA013-010<br />
8H040-050<br />
8H040-020<br />
7P750-100<br />
7U030-056<br />
7R002-064<br />
7R002-048<br />
7R002-056<br />
7E010-052<br />
7P250-047<br />
3863517<br />
PARTS LIST<br />
DESCRIPTION<br />
TUBE, AIR INTAKE MACHINED '86-'93 MUST 5.0L<br />
HOSE, REDUCER 3.5" x 3"<br />
HOSE, TURBO 4" x 2" LG<br />
COVER, AIR INTAKE FILTER<br />
FILTER, AIR HIGH FLOW w/CLAMP 3.5" INLET<br />
FILTER, FUEL 3/8 TUBE ENDS<br />
FTG, NIPPLE 3/4 NPT x 1" HOSE BARB<br />
HOSE, FUEL 3/8 x 20" LG<br />
CLAMP, HOSE #64<br />
CLAMP, HOSE #48<br />
CLAMP, HOSE #56<br />
SCREW, #10 x .50 PAN HEAD SHEET METAL<br />
FTG, ELBOW 90° 1/4 NPT x 3/8 HOSE BARB<br />
DECAL, KIT IDENTIFICATION '86-'93 MUSTANG 5.0L<br />
UNLESS OTHERWISE SPECIFIED<br />
DIMENSIONS ARE IN INCHES<br />
TOLERANCES ARE:<br />
MATERIAL<br />
FINISH<br />
DECIMALS:<br />
NONE<br />
.XX± .01<br />
.XXX±.005<br />
FRACTIONS: ±1/2•<br />
ANGLES: ±1/16<br />
SEE PARTS LIST<br />
DRAWN<br />
ENGINEERING<br />
R&D<br />
APPR.<br />
CAD GENERATED DRAWING,<br />
DO NOT MANUALLY UPDATE<br />
APPROVALS<br />
DRB<br />
-----<br />
DATE<br />
07/10/97<br />
-----<br />
----- -----<br />
-----<br />
-----<br />
WEIGHT --- LBS SCALE: NONE<br />
SIZE DWG. NO.<br />
C<br />
1300 BEACON PLACE OXNARD, CA 93033<br />
TEL: (805) 604-1336 FAX: (805) 604-1337<br />
'86-'93 MUSTANG 5.0L w/NOVI<br />
ASY, AIR INTAKE<br />
1017110<br />
DO NOT SCALE DRAWING<br />
REV.<br />
F<br />
SHEET 1 OF 1<br />
Part Number: 1017110 Asy, Air Intake 5.0 <strong>Novi</strong> <strong>2000</strong><br />
P/N: 4809610<br />
©2003 <strong>Paxton</strong> Automotive<br />
All Rights Reserved, Intl. Copr. Secured<br />
05DEC03 v2.0 MusGT(4809610 v2.0)<br />
A-6
TO FUEL RAIL<br />
NOTES: UNLESS OTHERWISE SPECIFIED<br />
1. TO BE SHIPPED LOOSE<br />
TO GAS TANK<br />
TO VEHICLE FIREWALL<br />
2<br />
11<br />
12<br />
4<br />
13<br />
TO VACUUM SOURCE<br />
3<br />
1<br />
1<br />
1<br />
1<br />
1<br />
ITEM NO.<br />
9<br />
10<br />
11<br />
12<br />
13<br />
2<br />
3<br />
4<br />
6<br />
7<br />
8<br />
QTY.<br />
2<br />
1<br />
1<br />
1<br />
2<br />
1<br />
1<br />
1<br />
1<br />
1<br />
1<br />
PART NO.<br />
7E010-048<br />
1018900<br />
1019000<br />
7P250-125<br />
7U100-055<br />
4822100<br />
7T375-001<br />
8F001-190<br />
1211800-TOP<br />
7U030-218x45<br />
7P250-125<br />
DESCRIPTION<br />
SCREW, #10-24 x .75 PANHD SLT SHTMTL, GR5<br />
ASY, FUEL LINE INLET, FEMALE<br />
ASY, FUEL LINE OUTLET, MALE<br />
FTG, VACUUM TEE, 1/4<br />
WRAPS, NYLON TIE 5.50 LG<br />
INSTALLATION INSTRUCTIONS FCU<br />
TOOL, SPRING LOCK CPLR<br />
PUMP, FUEL, 190 LPH<br />
UNLESS OTHERWISE SPECIFIED<br />
DIMENSIONS ARE IN INCHES<br />
TOLERANCES ARE:<br />
MATERIAL<br />
FINISH<br />
DECIMALS:<br />
NONE<br />
.XX± .01<br />
.XXX±.005<br />
FRACTIONS: ±1/2•<br />
ANGLES: ±1/16<br />
SEE PARTS LIST<br />
DRAWN<br />
ENGINEERING<br />
R&D<br />
APPR.<br />
CAD GENERATED DRAWING,<br />
DO NOT MANUALLY UPDATE<br />
APPROVALS<br />
JFC<br />
DATE<br />
8/10/98<br />
G. COMPTON 10/4/01<br />
G. COMPTON 10/4/01<br />
G. COMPTON 10/4/01<br />
WEIGHT 3.6 LBS SCALE: 1:1.5<br />
SIZE DWG. NO.<br />
D<br />
1300 BEACON PLACE OXNARD, CA 93033<br />
TEL: (805) 604-1336 FAX: (805) 604-1337<br />
86-93 5.0L MUSTANG<br />
KIT, FUEL CONTROL<br />
1017702<br />
DO NOT SCALE DRAWING<br />
REV.<br />
C<br />
SHEET 1 OF 1<br />
Part Number: 1017702 Asy, Fuel Control<br />
A-7<br />
P/N: 4809610<br />
©2003 <strong>Paxton</strong> Automotive<br />
All Rights Reserved, Intl. Copr. Secured<br />
05DEC03 v2.0 MusGT(4809610 v2.0)
4<br />
TO AIR DISCHARGE ASY<br />
7<br />
11.00 ±.06<br />
3<br />
4.50 ±.06<br />
ITEM 3 MODIFICATION DETAIL<br />
1<br />
4<br />
9<br />
4<br />
8<br />
6<br />
TO FUEL CONTROL VALVE<br />
SPLICE INTO EXISTING LINE<br />
TO VACUUM MANIFOLD<br />
4<br />
ITEM NO. QTY. PART NO. DESCRIPTION<br />
1<br />
4<br />
6<br />
7<br />
8<br />
9<br />
1<br />
4<br />
1<br />
1<br />
1<br />
1<br />
8D001-001<br />
7R002-016<br />
7P218-156<br />
7U034-016x2<br />
7U133-100-08<br />
7U030-046x18<br />
VALVE, BY-PASS<br />
CLAMP, HOSE #16<br />
TEE, VACUUM, 7/32 x 7/32 x 5/32<br />
TO AIR INTAKE ASY<br />
UNLESS OTHERWISE SPECIFIED<br />
DIMENSIONS ARE IN INCHES<br />
TOLERANCES ARE:<br />
MATERIAL<br />
FINISH<br />
DECIMALS:<br />
NONE<br />
.XX± .01<br />
.XXX±.005<br />
FRACTIONS: ±1/2•<br />
ANGLES: ±1/16<br />
SEE PARTS LIST<br />
DRAWN<br />
ENGINEERING<br />
R&D<br />
APPR.<br />
CAD GENERATED DRAWING,<br />
DO NOT MANUALLY UPDATE<br />
APPROVALS<br />
G. COMPTON<br />
DATE<br />
4/17/01<br />
-----<br />
-----<br />
----- -----<br />
-----<br />
-----<br />
WEIGHT 3.9 LBS SCALE: 1:1<br />
SIZE DWG. NO.<br />
D<br />
1300 BEACON PLACE OXNARD, CA 93033<br />
TEL: (805) 604-1336 FAX: (805) 604-1337<br />
86-93 5.OL MUSTANG<br />
ASY, COMPRESSOR BYPASS<br />
1015515<br />
DO NOT SCALE DRAWING<br />
REV.<br />
NC<br />
SHEET 1 OF 1<br />
Part Number: 1015515 Asy, Compressor Bypass<br />
P/N: 4809610<br />
©2003 <strong>Paxton</strong> Automotive<br />
All Rights Reserved, Intl. Copr. Secured<br />
05DEC03 v2.0 MusGT(4809610 v2.0)<br />
A-8
5<br />
STOCK OIL SENDER<br />
3<br />
2<br />
TO STOCK OIL SENDING UNIT OUTLET<br />
1<br />
ITEM NO.<br />
1<br />
TO S/C ASY<br />
2<br />
3<br />
5<br />
QTY.<br />
1<br />
1<br />
1<br />
1<br />
PART NO.<br />
7P125-004<br />
7P250-034<br />
7P250-031<br />
7U250-000-420<br />
DESCRIPTION<br />
FTG, ELBOW 90°, AN4 x 1/8NPT<br />
FTG, STREET ELBOW, 1/4<br />
FTG, STR, AN4 x 1/4NPT<br />
UNLESS OTHERWISE SPECIFIED<br />
DIMENSIONS ARE IN INCHES<br />
TOLERANCES ARE:<br />
MATERIAL<br />
FINISH<br />
DECIMALS:<br />
NONE<br />
.XX± .01<br />
.XXX±.005<br />
FRACTIONS: ±1/2•<br />
ANGLES: ±1/16<br />
SEE PARTS LIST<br />
DRAWN<br />
ENGINEERING<br />
R&D<br />
APPR.<br />
CAD GENERATED DRAWING,<br />
DO NOT MANUALLY UPDATE<br />
APPROVALS<br />
CFB<br />
DATE<br />
6/9/97<br />
-----<br />
-----<br />
----- -----<br />
-----<br />
-----<br />
WEIGHT 1.2 LBS SCALE: 3:4<br />
SIZE DWG. NO.<br />
C<br />
1300 BEACON PLACE OXNARD, CA 93033<br />
TEL: (805) 604-1336 FAX: (805) 604-1337<br />
86-93 5.0L MUSTANG<br />
ASY, OIL SUPPLY<br />
1019312<br />
DO NOT SCALE DRAWING<br />
REV.<br />
E<br />
SHEET 1 OF 1<br />
Part Number: 1019312 Asy, Oil Supply<br />
2<br />
A-9<br />
P/N: 4809610<br />
©2003 <strong>Paxton</strong> Automotive<br />
All Rights Reserved, Intl. Copr. Secured<br />
05DEC03 v2.0 MusGT(4809610 v2.0)
STOCK PLASTIC HOSE<br />
FROM EVAPORATOR CANISTER<br />
(CUT)<br />
2<br />
1<br />
STOCK PLASTIC HOSE<br />
FROM EVAPORATOR CANISTER<br />
(CUT)<br />
STOCK PREFORMED HOSE<br />
(SEE MANUAL FOR CUTTING<br />
INSTRUCTIONS)<br />
5<br />
2<br />
4<br />
2<br />
STOCK PREFORMED HOSE<br />
(SEE MANUAL FOR<br />
CUTTING<br />
STOCK DIVERTER VALVE<br />
2<br />
3<br />
PARTS LIST<br />
ITEM QT PART NO.<br />
DESCRIPTION<br />
1<br />
2<br />
1<br />
4<br />
7R002-010<br />
4PFA012-101<br />
FTG, SMOG PUMP ELBOW<br />
CLAMP, HOSE #10<br />
3<br />
4<br />
5<br />
.3'<br />
1<br />
1'<br />
7U038-000<br />
7P375-075<br />
7U030-030<br />
HOSE, PCV 3/4" I.D. x 4.00" LG<br />
TUBE, CONNECTOR 3/4" O.D. x .049 WALL x 1.00" LG<br />
HOSE, VAC 1/4" I.D. x 12.00" LG<br />
UNLESS OTHERWISE SPECIFIED<br />
DIMENSIONS ARE IN INCHES<br />
TOLERANCES ARE: .XX± .01<br />
MATERIAL<br />
FINISH<br />
DECIMALS:<br />
FRACTIONS:<br />
ANGLES: ±1/16<br />
NONE<br />
.XXX±.005<br />
±1/2•<br />
SEE PARTS LIST<br />
DRAWN<br />
ENGINEERING<br />
R&D<br />
APPR.<br />
CAD GENERATED DRAWING,<br />
DO NOT MANUALLY UPDATE<br />
APPROVALS<br />
JFC<br />
DATE<br />
8/10/98<br />
-----<br />
-----<br />
----- -----<br />
-----<br />
-----<br />
WEIGHT --- LBS SCALE: ---<br />
SIZE DWG. NO.<br />
B<br />
1300 BEACON PLACE OXNARD, CA 93033<br />
TEL: (805) 604-1336 FAX: (805) 604-1337<br />
'86-'93 MUSTANG 5.0L w/NOVI<br />
ASY, SMOG PUMP MODIFICATION<br />
1017300<br />
DO NOT SCALE DRAWING<br />
REV.<br />
D<br />
SHEET 1 OF 1<br />
Part Number: 1017300 Asy, Smog Pump Modification<br />
P/N: 4809610<br />
©2003 <strong>Paxton</strong> Automotive<br />
All Rights Reserved, Intl. Copr. Secured<br />
05DEC03 v2.0 MusGT(4809610 v2.0)<br />
A-10
This Page Left Intentionally Blank<br />
A-11<br />
P/N: 4809610<br />
©2003 <strong>Paxton</strong> Automotive<br />
All Rights Reserved, Intl. Copr. Secured<br />
05DEC03 v2.0 MusGT(4809610 v2.0)
<strong>Paxton</strong> Automotive . 1300 Beacon Place . Oxnard CA 93033<br />
805 604-1336 . FAX (805) 604-1337<br />
DP/N: 4809610 v2.0 12/05/03


