

PDF Download - Glidewell Dental Labs
PDF Download - Glidewell Dental Labs
PDF Download - Glidewell Dental Labs

You also want an ePaper? Increase the reach of your titles
YUMPU automatically turns print PDFs into web optimized ePapers that Google loves.
Inclusive®<br />
Restorative Driven Implant Solutions<br />
Vol. 1, Issue 2<br />
A Mulitimedia Publication of <strong>Glidewell</strong> Laboratories<br />
Hygiene and the<br />
Implant Patient:<br />
A Preventive<br />
Perspective (Page 32)<br />
Optimizing Implant<br />
Placement and<br />
Aesthetics: Technology<br />
to the Rescue by<br />
Dr. Timothy Kosinski (Page 6)<br />
Dr. Bradley Bockhorst<br />
The Importance of the<br />
Scan Appliance (Page 20)<br />
Dr. John Kois on<br />
Predictable Peri-Implant<br />
Esthetic Outcome (Page 11)<br />
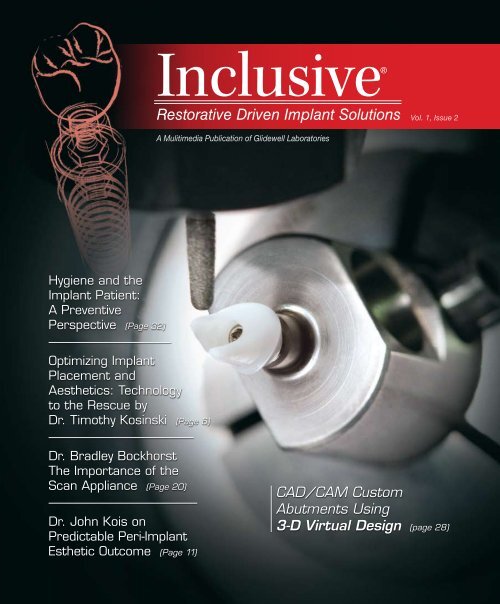
CAD/CAM Custom<br />
Abutments Using<br />
3-D Virtual Design (page 28)
inclusivemagazine.com<br />
Here’s some of what you’ll find online at inclusivemagazine.com:<br />
– Original clinical videos<br />
“Optimizing Implant Placement and<br />
Aesthetics: Technology to the Rescue!”<br />
by Dr. Timothy Kosinski<br />
– Exclusive video lectures<br />
Watch <strong>Glidewell</strong> Director of Business Development Greg<br />
Minzenmayer walk you through the process of fabricating<br />
an Inclusive ® Custom Abutment using 3-D virtual design.<br />
– Photo Essays<br />
Dr. John Kois illustrates a case demonstrating<br />
the five diagnostic keys for predictable<br />
single-tooth peri-implant esthetics.<br />
– Free CE credit<br />
Log on to take short tests<br />
worth 2 CE credits, at no charge to you.<br />
– Plus…<br />
Inclusive magazine’s editor-in-chief looks at<br />
the importance of the scan appliance.<br />
When you see this icon at the end of an article, it means we have even more information on that topic<br />
available online. Take advantage of Inclusive magazine’s interactivity by logging on for in-depth coverage.<br />
Check out<br />
inclusivemagazine.com<br />
to see what the implant<br />
industry is buzzing about.
Contents<br />
Features<br />
26 R&D Corner:<br />
A Tightening Technique to Minimize<br />
Loosening of Prosthetic Screws<br />
by Grant Bullis<br />
31 Product Spotlight:<br />
BioTemps ® Over Implants<br />
by Robert Rosen, CDT<br />
6<br />
11<br />
20<br />
28<br />
32<br />
Optimizing Implant Placement and Aesthetics:<br />
Technology to the Rescue!<br />
Dr. Timothy Kosinski presents a case study, utilizing digital treatment<br />
planning and guided surgery, for a maxillary anterior reconstruction.<br />
Included is extraction and immediate implant placement<br />
and temporization through delivery of the final restorations.<br />
Predictable Single-Tooth Peri-Implant Esthetics:<br />
Five Diagnostic Keys<br />
Dr. John Kois presents a discussion on diagnostic factors such as<br />
relative tooth position, form of the periodontium, biotype of the<br />
periodontium, tooth shape and position of the osseous crest in his<br />
article on accurately predicting the peri-implant esthetic outcome<br />
before removal of a failing tooth.<br />
Digital Implant Treatment Planning:<br />
The Importance of the Scan Appliance<br />
Editor-in-Chief Dr. Bradley Bockhorst offers an overview of the<br />
critical role of the scan appliance in digital treatment planning<br />
and guided implant surgery. This article is designed to aid the<br />
clinician’s understanding of the benefits as well as the proper use<br />
of the scan appliance.<br />
Inclusive ® Custom Abutments Using 3-D Virtual<br />
Design<br />
Greg Minzenmayer, Director of Business Development for Implants<br />
at <strong>Glidewell</strong> Laboratories, offers an introduction to the lab’s<br />
line of precision-milled CAD/CAM custom abutments. He discusses<br />
the results provided thanks to the use of a 3-D virtual design<br />
process. Read the overview here and be sure to watch Greg’s full<br />
demonstration at inclusivemagazine.com.<br />
Hygiene and the Implant Patient:<br />
A Preventive Perspective<br />
Ann Drewenski, RDH, stresses the role hygiene plays in the success<br />
of implant restorations. She advocates that routine evaluation,<br />
regular maintenance and patient education and commitment will<br />
help implants last a lifetime.<br />
– Contents – 1
Letter from the Editor<br />
Welcome to the second issue of Inclusive. On behalf of everyone on the Inclusive team,<br />
I’d like to thank you for your kind feedback on the inaugural issue. Hopefully you all<br />
had a chance to visit inclusivemagazine.com and view the expanded articles, videos and<br />
CE opportunities. Our second issue contains an equal variety of information, from how<br />
to prevent prosthetic screw loosening to how to maintain your implants once they have<br />
been restored.<br />
As part of our services, we will include milestone articles that have been published previously.<br />
One of these is Dr. John Kois’ article on predictable single-tooth peri-implant<br />
esthetics. This is a must-read article for any dentist considering restoring implants in the<br />
esthetic zone.<br />
Speaking of esthetics, we also have a case report from Dr. Timothy Kosinski that involves<br />
extraction, immediate implant placement and provisionalization of the maxillary incisors<br />
utilizing digital treatment planning and guided surgery. Online you will find video footage<br />
of the procedure, as well as a wonderful patient testimonial.<br />
The dental world has gone CAD/CAM, and <strong>Glidewell</strong> Laboratories has incorporated<br />
many of these technologies to provide you with a more precise, consistent product. Greg<br />
Minzenmayer, Director of Business Development, walks you through the virtual design<br />
and milling of Inclusive ® Custom Implant Abutments and explains how they can benefit<br />
you and your patients.<br />
Another technology that has generated a tremendous amount of interest and continues<br />
to gain popularity is digital treatment planning of implant cases utilizing CT or CBCT<br />
scans. A key to making the most out of this technology is the scan appliance. The proper<br />
fabrication and use of this appliance is critical, as it presents the ideal positions of the<br />
teeth to be replaced. We have included an overview of the types of scan appliances, as<br />
well as their role in the procedure.<br />
In this issue’s R&D Corner, find out how to accomplish recommended torque to reduce<br />
the occurrence of screw loosening with a simple technique.<br />
As always, we welcome your feedback. We look forward to receiving your questions and<br />
comments, and we are excited to hear what you would like to see in future issues.<br />
Regards,<br />
Dr. Bradley C. Bockhorst<br />
Editor-in-Chief, Clinical Editor<br />
inclusivemagazine@glidewelldental.com<br />
– Letter from the Editor – 3
Publisher<br />
Jim <strong>Glidewell</strong>, CDT<br />
Editor-in-Chief<br />
Bradley C. Bockhorst, DMD<br />
Managing Editors<br />
Jim Shuck; Mike Cash, CDT<br />
Creative Director<br />
Rachel Pacillas<br />
Clinical Editor<br />
Bradley C. Bockhorst, DMD<br />
Contributing editors<br />
Dzevad Ceranic, Greg Minzenmayer<br />
Copy EditorS<br />
Melissa Manna, Kim Watkins<br />
Magazine/AD Coordinators<br />
Lindsey Lauria, Vivian Tsang<br />
Graphic Designers/Web Designers<br />
Jamie Austin, Deb Evans, Joel Guerra, Lindsey Lauria,<br />
Phil Nguyen, Gary O’Connell, Rachel Pacillas<br />
Staff Photographers/Clinical Images<br />
Jennifer Brunst, RDAEF; Sharon Dowd;<br />
James Kwasniewski<br />
IllustratIONS<br />
Kevin Greene, Phil Nguyen<br />
Ad Representative<br />
Vivian Tsang (vivian.tsang@glidewelldental.com)<br />
If you have questions, comments or suggestions, e-mail us at<br />
inclusivemagazine@glidewelldental.com. Your comments may be<br />
featured in an upcoming issue or on our Web site.<br />
© 2010 <strong>Glidewell</strong> Laboratories<br />
Neither Inclusive magazine nor any employees involved in its publication<br />
(“publisher”), makes any warranty, express or implied, or assumes<br />
any liability or responsibility for the accuracy, completeness, or usefulness<br />
of any information, apparatus, product, or process disclosed, or<br />
represents that its use would not infringe proprietary rights. Reference<br />
herein to any specific commercial products, process, or services by<br />
trade name, trademark, manufacturer or otherwise does not necessarily<br />
constitute or imply its endorsement, recommendation, or favoring<br />
by the publisher. The views and opinions of authors expressed<br />
herein do not necessarily state or reflect those of the publisher and<br />
shall not be used for advertising or product endorsement purposes.<br />
CAUTION: When viewing the techniques, procedures, theories and materials<br />
that are presented, you must make your own decisions about<br />
specific treatment for patients and exercise personal professional judgment<br />
regarding the need for further clinical testing or education and<br />
your own clinical expertise before trying to implement new procedures.<br />
Contributors<br />
■ Bradley C. Bockhorst, DMD<br />
After receiving his dental degree from<br />
Washington University School of <strong>Dental</strong><br />
Medicine, Dr. Bradley Bockhorst served<br />
as a Navy <strong>Dental</strong> Officer. Today, Dr. Bockhorst<br />
is Director of Clinical Technologies<br />
at <strong>Glidewell</strong> Laboratories, where he oversees<br />
Inclusive ® Digital Implant Treatment<br />
Planning Services and is editor-in-chief and clinical<br />
editor of Inclusive magazine. A member of the CDA,<br />
ADA, the Academy of Osseointegration, International Congress<br />
of Oral Implantologists and the American Academy<br />
of Implant Dentistry, Dr. Bockhorst lectures internationally<br />
on an array of dental implant topics. He maintains<br />
a private practice focused on implant prosthetics in Mission<br />
Viejo, Calif. Contact Dr. Bockhorst at 800-521-0576 or<br />
inclusivemagazine@glidewelldental.com.<br />
■ GRANT BULLIS<br />
Grant Bullis, <strong>Glidewell</strong> Laboratories Research<br />
& Development Department Manager,<br />
began his career in the dental industry<br />
at Steri-Oss in 1997. After Nobel Biocare<br />
acquired Steri-Oss, Grant worked in the<br />
R&D Department, where he was responsible<br />
for the development of implants, prosthetics,<br />
surgical tools and packaging. Grant, who joined<br />
<strong>Glidewell</strong> Laboratories in 2007, now manages CAD/CAM<br />
and implant product development at the lab. He directs<br />
manufacturing for more than 150 implant laboratory and<br />
prosthetic components. Grant has a degree in mechanical<br />
CAD/CAM from Irvine Valley College in Orange County,<br />
Calif., and an MBA from Keller Graduate School of Management.<br />
To contact Grant, call 800-521-0576 or e-mail<br />
inclusivemagazine@glidewelldental.com.<br />
Inclusive is a registered trademark of <strong>Glidewell</strong> Laboratories.<br />
4<br />
– www.inclusivemagazine.com –
■ Dzevad Ceranic, CDT<br />
Dzevad Ceranic, a graduate of Pasadena<br />
City College’s two-year dental technology<br />
program, began at <strong>Glidewell</strong> in 1999 as<br />
a wax and metal finisher. He quickly was<br />
promoted to the position of ceramist. Later,<br />
Dzevad became manager of the Full-Cast<br />
Department, overseeing a team of more<br />
than 70 employees. In this role, Dzevad was part of the<br />
team that facilitated the lab’s transition to CAD/CAM. In<br />
2008, Dzevad was handpicked to manage <strong>Glidewell</strong>’s Implant<br />
Department, where he leads a team of 100. Recently,<br />
Dzevad completed an eight-month implants course at<br />
UCLA School of Dentistry. Contact him at 800-521-0576 or<br />
inclusivemagazine@glidewelldental.com.<br />
■ TIMOTHY F. KOSINSKI, DDS, MAGD<br />
Dr. Timothy Kosinski graduated from the<br />
University of Detroit Mercy School of Dentistry<br />
and received an MS degree in biochemistry<br />
from Wayne State University<br />
School of Medicine. He is an adjunct assistant<br />
professor at the Mercy School of Dentistry<br />
and serves on the editorial review board<br />
of numerous dental journals. Dr. Kosinski<br />
is a Diplomate of ABOI/ID, ICOI and AO. He is a Fellow<br />
of the American Academy of Implant Dentistry and<br />
received his Mastership in the AGD, from which he received<br />
the 2009 Lifelong Learning and Service Recognition honor.<br />
Contact Dr. Kosinski at 248-646-8651, drkosin@aol.com or<br />
smilecreator.net.<br />
■ Ann M. Drewenski, RDH<br />
Ann Drewenski has been in clinical practice<br />
since 1997. She is a member of the<br />
American <strong>Dental</strong> Hygiene Association<br />
and has served on the board of trustees<br />
for the Chicago component of the ADHA.<br />
Ann has lectured alongside Dr. Russell A.<br />
Baer, conducting presentations in the Chicago<br />
area on implant maintenance and<br />
implant longevity. Her professional affiliations include the<br />
American Academy of Cosmetic Dentistry and the American<br />
Academy of Laser Dentistry. To contact Ann, e-mail<br />
inclusivemagazine@glidewelldental.com.<br />
■ Greg Minzenmayer<br />
<strong>Glidewell</strong> Laboratories Director of Business<br />
Development Greg Minzenmayer<br />
joined the lab in 2006. With a career in<br />
the dental industry that spans nearly 15<br />
years, Greg has a proven track record in<br />
sales, product management, marketing<br />
and business development. Greg attended<br />
Chapman University in Orange, Calif. In<br />
1994, he began at Den-Mat and in 1996 moved to Steri-<br />
Oss. In 1998, Steri-Oss was acquired by Nobel Biocare, and<br />
Greg was later promoted to product manager in charge of<br />
the Steri-Oss family of products. In 2002, he was promoted<br />
to Director of Marketing for the Americas. Contact him at<br />
inclusivemagazine@glidewelldental.com.<br />
■ John C. Kois, DMD, MSD<br />
Dr. John Kois is a graduate of the<br />
UPenn School of <strong>Dental</strong> Medicine. He<br />
holds an MSD/Certificate in Periodontal<br />
Pros-thodontics. Dr. Kois maintains a private<br />
practice focused on prosthodontics in<br />
Seattle-Tacoma, Wash., and is an affiliate<br />
professor at UW. He is reviewer for the<br />
International Journal of Prosthodontics<br />
and is a member of the editorial board for the Compendium<br />
of Continuing Education in Dentistry. A member of<br />
AARD and AAED, Dr. Kois works with dentists at the Kois<br />
Center, a didactic and clinical teaching program. Contact<br />
him at 206-515-9500 or drkois.com.<br />
■ Robert rosen, CDT<br />
Robert began his career in dental technology<br />
in 1973 and received his <strong>Dental</strong> Technology<br />
degree from Albrecht Dürer College<br />
in Düsseldorf, Germany, in 1977. After<br />
serving in the German Air Force from<br />
1977 to 1979, Robert promptly returned to<br />
work as a CDT in various German dental<br />
laboratories. He joined <strong>Glidewell</strong> Laboratories in 1986<br />
and helped establish the BioTemps Department, which focuses<br />
on creating highly esthetic provisional restorations.<br />
In 2002, Robert became president of BDL Prosthetics, a<br />
comprehensive fixed ceramics lab, where he currently leads<br />
350 employees. To contact Robert, visit bdlprosthetics.com<br />
or call 800-411-9723.<br />
– Contributors – 5
Optimizing Implant<br />
Placement and Aesthetics:<br />
Technology to the Rescue!<br />
by Timothy F. Kosinski, DDS, MAGD<br />
The continually evolving science of implant dentistry has<br />
led to a growing recognition that many treatment options<br />
offer predictable long-term results. <strong>Dental</strong> implants have certainly developed<br />
into a viable alternative to conventional prosthodontic reconstruction<br />
of edentulous spaces, and have afforded us a restorative tool for use<br />
in difficult aesthetic cases. Optimizing aesthetics in the anterior maxillary<br />
incisor area is critical to a successful outcome.<br />
The therapeutic goal of implant dentistry is not merely tooth replacement,<br />
but total oral rehabilitation. Implants provide excellent support<br />
for fixed appliances, increasing function as compared to conventional<br />
dental therapies. Implant dentistry has gone through many phases over<br />
the years. Modern design allows us to predictably place dental implants<br />
in immediate extraction sites. 1-3 Single tooth-by-tooth reconstruction provides<br />
the patient with easy access to floss and clean the affected area<br />
compared with the relative difficulty of maintaining splinted crowns.<br />
There is now a low risk of abutments loosening under function, as was<br />
the case in the past.<br />
This case study will serve to demonstrate a maxillary anterior reconstruction<br />
using immediate placement of dental implants, following diagnosis<br />
using Computed Tomography (CT) scanning software, immediate<br />
loading using transitional abutments, splinted composite crowns, and<br />
dynamic and aesthetic smile design using zirconia abutments and freestanding<br />
all-ceramic crowns. 4-6<br />
Advantages of Computed<br />
Tomography Scanning Technology<br />
Figure 1: NobelGuide software is used to idealize implant<br />
size and position.<br />
Figure 2: Virtually planning the case proves a tremendous<br />
advantage.<br />
CT scanning is becoming more and more prevalent for use in ensuring<br />
proper dental implant placement. Bitewings, periapicals, panoramic<br />
radiographs, and even medical CT scans only give a two-dimensional<br />
image for implant planning. One of the latest CT planning software programs<br />
(NobelGuide CT [Nobel Biocare; Yorba Linda, CA]) provides as<br />
much information as possible to assist during surgical planning.<br />
We can now visualize vital anatomy in 2-D and 3-D prior to surgery, and<br />
can virtually assess the location of implants prior to surgical intervention.<br />
7 Diagnosing anatomic issues specific to the patient, planning the<br />
implant type, and determining position and orientation in the bone are<br />
Figure 3: Retracted view of preoperative dentition.<br />
6<br />
– www.inclusivemagazine.com –
all easily accomplished with the help of this technology. The process is<br />
both user-friendly and intuitive.<br />
NobelGuide CT scanning software, as demonstrated in this article, allows<br />
us to simulate the placement of implants accurately prior to surgery. A<br />
Surgical Template created from the 3-D images helps place the implants in<br />
the proper positions, without the need for a flap incision. 8,9 This technique<br />
proves to be a cost-effective solution for assisting the implant dentist in the<br />
planning of an aesthetic final result and minimizing any surgical challenges<br />
that are faced. The CAD/CAM planning and placement system supplied<br />
by NobelGuide provides a high level of comfort and safety for the patient<br />
by reducing surgical and restorative time. This is done by utilizing an accurate<br />
3-D plan prior to implant placement. There are obvious advantages,<br />
including: easy visual understanding for clear case presentation, reduced<br />
surgical chairtime, reduced restorative chairtime in certain cases, reduced<br />
stress for the clinician and the patient, the avoidance of surprises during<br />
surgery, implants that are placed optimally for long-term implant and prosthetic<br />
success and, most importantly, an improved aesthetic result. 10-12<br />
Figure 4: This radiograph illustrates severe root resorption.<br />
Computed Tomography<br />
Scanning Technique<br />
Prior to the CT scan, a Radiographic Guide is fabricated. This will serve<br />
to aid in the visualization of the optimal prosthetic outcome. The teeth<br />
are positioned properly in wax, and then a master cast is fabricated to<br />
illustrate what the case will look like finished before ever starting. All appropriate<br />
dental anatomy is included. The Radiographic Guide is placed in<br />
the mouth during the CT scan. This allows us to see the ideal position of<br />
the teeth on a 3-D model. The entire 3-D image is analyzed and the implant<br />
planning and simulation of implant placement completed using the computer<br />
(Fig. 1, 2). The surgical placement of dental implants can be done in<br />
a conventional manner using the newly created Surgical Template to help<br />
direct the implant in the ideal position. However, optimally the surgery can<br />
be completed without making any incisional flap. The implants are placed<br />
to the desired depth using the computer software and Surgical Template.<br />
Figure 5: Laboratory casts and components used for immediate<br />
transitional splinted crowns for teeth #7-10.<br />
Materials and Methods:<br />
Advantages of Tapered Design<br />
Nobel Biocare’s Replace Implant System has evolved considerably since<br />
its introduction in 1997. The implants and all related surgical and prosthetic<br />
components incorporate a color-coded system that allows users to<br />
identify at a glance which restorative parts go with which size implant<br />
placed. In 1999, the Replace Tapered Implants became available with an<br />
internal connection that simplifies the impression technique, seating of<br />
abutments and crown & bridge placement. Three locking channels guide<br />
the positioning of the abutment. Once torqued into place, the zirconia<br />
abutment does not loosen, making single-tooth restoration reliable. The<br />
system can be used in one- or two-stage surgical procedures. Primary<br />
stability is the key factor for successful early and immediate loading.<br />
The tapered design of Replace Select gives placement alternatives in sites<br />
with anatomical limitations, such as labial concavities in the premaxilla<br />
and converging adjacent tooth roots. Since they approximate the shape<br />
of a natural tooth root, they provide better stability in extraction sites.<br />
Figure 6: Laboratory casts and components used for immediate<br />
transitional splinted crowns for teeth #7-10.<br />
Figure 7: Flapless extraction site.<br />
– Optimizing Implant Placement and Aesthetics: Technology to the Rescue! – 7
There are several collar heights and designs available in these titanium<br />
surface-treated (TiUnite; Nobel Biocare) implants, including no collar,<br />
1.5 mm and 2 mm. The shorter collar designs are indicated for aesthetic<br />
areas. Nobel Biocare’s NobelProcera process produces custom-shaped<br />
zirconium oxide abutments to create the most natural form and emergence<br />
profile. The ultimate aesthetic solution, especially for patients with<br />
a high smile line and thin tissue, is achieved using NobelProcera abutments.<br />
Every aspect of the implant system makes the restoration of teeth<br />
on implants as easy as crown & bridge. 13-15<br />
The Replace Select implant has a tapered body and an internal prosthetic<br />
connection. The internal connection is tri-channeled. The internal<br />
lengths of the channels are approximately 1.5 mm. The implant has a<br />
wide crestal interface with a tapered thread design. The diameters, at the<br />
crest of the implant, are 3.5 mm, 4.3 mm, 5 mm and 6 mm. This allows<br />
for a better emergence profile from the top of the implant. Anatomical<br />
considerations for the use of the implant include converging roots and<br />
concavities with the bone, which makes placing a parallel-walled implant<br />
more difficult. Interface of the implant increases dramatically as implant<br />
diameter increases. This may be more relevant than implant length.<br />
The tapered design of the implant promotes elevated levels of fatigue<br />
endurance because the coronal portion is wider in diameter than the<br />
apical portion. This taper also ensures a tight fit and promotes function<br />
coronally to help offset stress shielding along the narrow, smooth crestal<br />
band on the implant. This reduces bone resorption that may result from<br />
hypo function, which is especially important during placement of the<br />
implant in a fresh extraction site.<br />
Figure 8: NobelGuide Surgical Template with precision<br />
openings for drills.<br />
Figure 9: The NobelGuide Surgical Template with precision<br />
openings for drills is placed in the mouth.<br />
Taper also reduces the incidence of cortical plate bone perforation during<br />
osteotomy preparation near anatomic undercut areas and protects<br />
adjacent natural tooth roots. Also, the tapered design of the implant<br />
often allows for better angulation of the implant. It is important to have<br />
an implant design that allows for placement of the fixture in a way that<br />
places the forces down the long axis. The implant has versatility and allows<br />
for aesthetic and variable bone morphology.<br />
Case Report<br />
A 38-year-old female presented with mobile maxillary anterior lateral<br />
and central incisors. These teeth had been orthodontically treated in the<br />
years before, resulting in resorption, mobility and aesthetic problems<br />
(Fig. 3). Her main concerns were that she would have to go without teeth<br />
for any length of time, or the possibility of having to wear a removable<br />
appliance. The patient requested something she referred to as “teeth in<br />
a day.” Oral and radiographic evaluation indicated severe root resorption<br />
around teeth #7-10 (Fig. 4). Her teeth were deemed to be untreatable<br />
using traditional dental techniques.<br />
Figure 10: Surgical Template in place with narrow platform<br />
guide, used for pilot drill angulation and depth.<br />
Diagnosis and Treatment Planning<br />
The decision was made to have a Cone Beam CT scan done and evaluated<br />
using the NobelGuide software. Virtually placing the dental implants<br />
using the computer, prior to ever touching the patient, would prove to<br />
be a tremendous advantage in diagnosing and preparing for this case<br />
(Fig. 5, 6).<br />
Figure 11:. A 3.5 mm surgical drill is used.<br />
8<br />
– www.inclusivemagazine.com –
There were no medical conditions, allergies or sensitivities that would preclude<br />
the use of necessary implant procedures or medications. Because<br />
there was no need to work around any habits involving the use of nicotine<br />
or alcohol, healing was expected to be good and uncomplicated.<br />
Proper diagnosis for dental reconstruction is the most critical aspect of<br />
any surgical intervention. Determining the design of the final prosthetic<br />
reconstruction may be the most difficult procedure. It is this author’s belief<br />
that the restoring dentist should be dictating dental implant position<br />
and angulation prior to surgical placement. To help achieve this goal,<br />
Diagnostic Wax-Ups, modern computer-generated scanning or simple<br />
common-sense design should be considered.<br />
The Diagnostic Wax-Up is an invaluable aid in determining the proper<br />
placement of implants in the center, between the proposed abutment<br />
teeth. The wax-up is particularly valuable when cement-retained or screwretained<br />
crown & bridge is planned. NobelGuide software is used to create<br />
a Surgical Template that is used pre-surgically in determining the ideal<br />
location and angulation of the implant site, and to optimize placement of<br />
dental implants for maximum aesthetic and functional results.<br />
Figure 12: A 3.5 mm Replace Select (Nobel Biocare)<br />
dental implant treated to depth and angulation using the<br />
Surgical Template.<br />
Surgical Template, Extractions<br />
and Implant Placement<br />
Prior to extraction of the mobile teeth (Fig. 7), a surgical template was<br />
fabricated using a master cast of the patient’s existing bridgework (Fig.<br />
8, 9). Tapered drills of increasing widths were used to prepare the bone<br />
to accept the proper-size implant. Replace Select 3.5 x 13 mm dental implants<br />
were guided into place using the NobelGuide surgical template in<br />
the #7 and #10 areas, and 4.3 x 13 mm Replace Select implants surgically<br />
guided into the #8 and #9 areas (Fig. 10, 11).<br />
A color-coded threadformer, corresponding to the implant diameter selected,<br />
was then used. The maximum recommended setting is 30 rpm.<br />
Firm pressure was applied to the threadformer and it was rotated slowly.<br />
Once the threads were engaged, the threadformer was allowed to feed<br />
without pressure. The osteotomy was threaded to the single depth reference<br />
line on each drill. The dental implants were then removed from<br />
their sterile packaging and threaded into the prepared site. When more<br />
torque is needed to complete the placement, a ratchet and insertion assembly<br />
is used to place the implant to its final depth. A marking indicates<br />
that one of the three tri-channeled internal connections is placed to the<br />
facial (Fig. 12-14).<br />
Figure 13: A 4.3 mm Replace Select dental implant is positioned.<br />
Figure 14: Implants placed ideally with flapless procedure.<br />
Immediate loading of dental implants has proven to be a predictable<br />
method of improving emergence profile and smile design. The Nobel<br />
Biocare immediate temporary abutments were used to secure transitional<br />
splinted crowns and allow the gingiva to respond positively (Fig. 15).<br />
Immediate aesthetics and function were achieved (Fig. 16). Simple colorcoded<br />
transfer assembly can duplicate the position of the dental implant<br />
on a working cast. NobelProcera abutments were reshaped in the dental<br />
laboratory with slightly subgingival margins. These abutments were tightened<br />
to 35 Ncm to ensure that they would not loosen (Fig. 17).<br />
Figure 15: Immediate conical abutments positioned.<br />
– Optimizing Implant Placement and Aesthetics: Technology to the Rescue! – 9
Summary<br />
The goal for this patient<br />
was to create an aesthetic<br />
smile design using individual<br />
dental implants to<br />
reconstruct the edentulous<br />
spaces. NobelProcera<br />
crowns aesthetically restored<br />
the separate and distinct<br />
teeth (Fig. 18, 19). The<br />
patient was thrilled with the<br />
final aesthetic result, and<br />
she was able to smile confidently<br />
again (Fig. 20). n<br />
Figure 16: Retracted view of transitional splinted crowns,<br />
cemented temporarily during healing.<br />
Figure 17: NobelProcera abutments torqued into position.<br />
References<br />
1. Locante WM. Single-tooth replacements in the esthetic zone with an immediate function implant: a<br />
preliminary report. J Oral Implantol. 2004;30:369-375.<br />
2. Degidi M, Piattelli A. Comparative analysis study of 702 dental implants subjected to immediate<br />
functional loading and immediate nonfunctional loading to traditional healing periods with a followup<br />
of up to 24 months. Int J Oral Maxillofac Implants. 2005;20:99-107.<br />
3. Villa R, Rangert B. Early loading of interforaminal implants immediately installed after extraction of<br />
teeth presenting endodontic and periodontal lesions. Clin Implant Dent Relat Res. 2005;7(suppl<br />
1):28-35.<br />
4. Glauser R, Rée A, Lundgren A, et al. Immediate occlusal loading of Brånemark implants applied<br />
in various jawbone regions: a prospective, 1-year clinical study. Clin Implant Dent Relat Res.<br />
2001;3:204-213.<br />
5. Lozada JL, Ardah AJ, Rungcharassaeng K, et al. Immediate functional load of mandibular implant<br />
overdentures: a surgical and prosthodontic rationale of 2 implant modalities. J Oral Implantol.<br />
2004;30:297-306.<br />
6. Ganeles J, Wismeijer D. Early and immediately restored and loaded dental implants for singletooth<br />
and partial-arch applications. Int J Oral Maxillofac Implants. 2004;19(suppl):92-102.<br />
7. van Steenberghe D, Glauser R, Blombäck U, et al. A computed tomographic scan-derived<br />
customized surgical template and fixed prosthesis for flapless surgery and immediate loading of<br />
implants in fully edentulous maxillae: a prospective multicenter study. Clin Implant Dent Relat Res.<br />
2005;7(suppl 1):111-120.<br />
8. Balshi SF, Wolfinger GJ, Balshi TJ. A prospective study of immediate functional loading, following<br />
the Teeth in a Day protocol: a case series of 55 consecutive edentulous maxillas. Clin Implant Dent<br />
Relat Res. 2005;7:24-31.<br />
9. Maló P, Rangert B, Nobre M. All-on-4 immediate function concept with Brånemark System implants<br />
for completely edentulous maxillae: a 1-year retrospective clinical study. Clin Implant Dent<br />
Relat Res. 2005;7(suppl 1):88-94.<br />
10. Lee CY. Immediate load protocol for anterior maxilla with cortical bone from mandibular ramus.<br />
Implant Dent. 2006;15:153-159.<br />
11. Olsson M, Urde G, Andersen JB, et al. Early loading of maxillary fixed cross-arch dental prostheses<br />
supported by six or eight oxidized titanium implants: results after 1 year of loading, case series.<br />
Clin Implant Dent Relat Res. 2003;5(suppl 1):81-87.<br />
12. Ostman PO, Hellman M, Sennerby L. Direct implant loading in the edentulous maxilla using a<br />
bone density-adapted surgical protocol and primary implant stability criteria for inclusion. Clin<br />
Implant Dent Relat Res. 2005;7(suppl 1):60-69.<br />
13. Scortecci G. Immediate function of cortically anchored disk-design implants without bone<br />
augmentation in moderately to severely resorbed completely edentulous maxillae. J Oral Implantol.<br />
1999;25:70-79.<br />
14. Babbush CA. Provisional implants: surgical and prosthetic aspects. Implant Dent. 2001;10:113-<br />
120.<br />
15. Becker W, Wong J. Early functional loading in the fully edentulous mandible after mandibular<br />
resection and reconstruction due to anameloblastoma: case report. Clin Implant Dent Relat Res.<br />
2003;5:47-51.<br />
Figure 18: Individual NobelProcera crowns in place.<br />
Figure 19: Panoramic view of implant, zirconia abutments<br />
and crowns in place.<br />
Reprinted with permission of Dentistry Today. Copyright ©2009 Dentistry Today, Inc.<br />
All rights reserved.<br />
Figure 20: Final smile line, with individual all-ceramic<br />
crowns (NobelProcera Zirconia) in place.<br />
10<br />
– www.inclusivemagazine.com –
Predictable Single-Tooth<br />
Peri-Implant Esthetics<br />
Five Diagnostic Keys<br />
by John C. Kois, DMD, MSD<br />
ABSTRACT: The creation of an esthetic implant restoration with gingival architecture that harmonizes<br />
with the adjacent dentition is a formidable challenge. The predictability of the peri-implant esthetic outcome<br />
may ultimately be determined by the patient’s own presenting anatomy rather than the clinician’s ability to manage<br />
state-of-the-art procedures. To more accurately predict the peri-implant esthetic outcome before removing a failing<br />
tooth, five diagnostic keys are discussed. These keys include relative tooth position, form of the periodontium, biotype of<br />
the periodontium, tooth shape and position of the osseous crest.<br />
After the loss of an anterior tooth, the normal sequela of wound healing will create an unfavorable esthetic soft-tissue<br />
complex. The remaining facial mucosa often recedes apically and palatally. 1-4 Typically, this cervical recession results<br />
in a restoration that appears too long and may be compounded with the loss of the interdental papilla. 5 In addition,<br />
using a single-tooth replacement minimizes the restoration and surgical options necessary to the optimal management<br />
of the problem. Therefore, the creation of an esthetic implant restoration with gingival architecture that harmonizes<br />
with the adjacent dentition is a formidable challenge.<br />
Five Diagnostic Keys<br />
To more accurately predict the peri-implant esthetic outcome<br />
before removing a failing tooth, an understanding of five<br />
diagnostic keys is essential:<br />
1. Relative tooth position.<br />
2. Form of the periodontium.<br />
3. Biotype of the periodontium.<br />
4. Tooth shape.<br />
5. Position of the osseous crest.<br />
Any of these five keys can be combined or altered independently. Ultimately, the predictability of peri-implant esthetics<br />
may be determined by the patient’s presenting anatomy rather than the clinician’s ability to manage state-of-the-art<br />
procedures. In addition, these five diagnostic keys will enable the clinician to develop treatment options and clinical<br />
procedures that are more specific to the desired therapeutic outcome.<br />
– Predictable Single-Tooth Peri-Implant Esthetics: Five Diagnostic Keys – 11
1. Relative Tooth Position<br />
The hopeless tooth must be evaluated based on its relative position to the remaining<br />
dentition in three planes of space because the existing tooth position<br />
will influence the presenting configuration of the gingival architecture. The<br />
alteration of this tooth position will be reflected by the change in the configuration<br />
of the gingival architecture.<br />
Gingival recession<br />
is the most common<br />
complication of anterior<br />
single-tooth implants.<br />
Figure 1a: Preoperative clinical presentation with a hopeless<br />
right central incisor.<br />
Figure 1b: Initial radiograph. Note the square tooth shape,<br />
which creates thinner interproximal bone.<br />
In the vertical (apicocoronal) plane, the cervical portion of the tooth may be<br />
more apical, more coronal, or ideal and mimic the facial level of the free gingival<br />
margin (FGM). After tooth removal, a minimum of 2 mm of apical migration<br />
of the facial FGM may occur during pontic site development, and up to 1 mm<br />
of apical migration of the facial FGM will occur during immediate implant site<br />
development. 8,9 Therefore, hopeless teeth with the FGM 1 mm to 2 mm more<br />
coronal to their harmonious facial gingival position are in a more favorable position<br />
(Fig. 1a, 1b). A hopeless tooth with the FGM positioned ideally or more apically would benefit from orthodontic<br />
extrusion before extraction (Fig. 2a, 2b). 10,11 In this way, the ensuing apical resorption after wound healing can provide<br />
a more harmonious gingival level. In the facial-lingual plane, the tooth position may create different concerns. Teeth<br />
positioned too far facially often result in very thin or nonexistent labial bone. These teeth compound the predictability<br />
of determining the cervical position of the facial FGM, because there may be more vertical loss and facial collapse of<br />
the gingival architecture. These situations are also poor candidates for orthodontic correction because of the inadequate<br />
underlying labial bone. It would be preferable to consider grafting procedures both before and after tooth extraction<br />
as part of a proactive treatment protocol. In contrast, a tooth positioned lingually may allow for a thicker labial portion<br />
of bone or facial tissue. This position is more favorable before extraction because the resultant cervical discrepancy in<br />
the facial FGM may be minimal.<br />
The mesiodistal tooth position has two concerns. The first concern is the proximity of adjacent teeth necessary for providing<br />
proximal support and volume of the interdental papilla. The second concern is the inclination, which contributes<br />
to proximal support but also influences the position of the contact point. The mesially inclined tooth usually creates a<br />
contact point more incisally located and a gingival embrasure much larger spatially, which would require more volume<br />
to attain the same vertical height. This problem is a more significant concern when the tooth is present. When this tooth<br />
is removed, however, the same mesial inclination may be an advantage because the interproximal bone is thicker and<br />
at less risk of resorption after wound healing. Hopeless teeth with diastemas have similar advantages because of their<br />
thicker interproximal bone. Teeth with root proximity possess very thin interproximal bone. This thin bone creates a<br />
greater risk of lateral resorption, which will decrease the vertical bone height after extraction or implant management.<br />
Ideally, interproximal bone width should be about 1.5 mm at the crest before extraction to minimize lateral resorp-<br />
12<br />
– www.inclusivemagazine.com –
Figure 2a: Preoperative clinical presentation with a hopeless<br />
right central incisor.<br />
Figure 2b: Initial radiograph. Note the triangular tooth shape,<br />
which creates thicker interproximal bone.<br />
tion of the osseous crest and further resorption caused by lateral violation of biologic width after implant restoration. 12<br />
When teeth are present, the creation of close parallel roots with orthodontics is beneficial for support of the proximal<br />
gingival architecture. However, this may be a concern when extraction of one of these teeth is necessary because of the<br />
thinner interproximal bone at the height of the crest.<br />
2. Form of the Periodontium<br />
The basic human periodontal forms have been previously described. 13-15 For discussion, three categories of gingival<br />
scallop will be included: high, normal and flat. Based on a clinical survey of 100 patients, the average or normal gingival<br />
scallop is positioned 4 mm to 5 mm more incisally than the FGM. 16 The same clinical survey found that visually,<br />
because a central incisor is approximately 10 mm from the facial FGM to the incisal edge, the interdental tissue will<br />
occupy about 50 percent of the exposed tooth length. 16<br />
Of importance is the relationship to the underlying osseous crest. In the healthy periodontium, the underlying bony<br />
crest is about 2 mm apical to the cementoenamel junction (CEJ) and follows the scallop of the CEJ. This scallop of<br />
the central incisors is 3.5 mm. Therefore, in the normal and high-scalloped gingival architecture, there is more tissue<br />
coronal to the bone interproximally than facially for this scallop (Fig. 2a). The greater this discrepancy, the higher the<br />
scallop and the higher the risk for gingival loss after extraction.<br />
Figure 3: Diagnostic total dentogingival complex measurement<br />
of 3 mm facially.<br />
Figure 4: Diagnostic total dentogingival complex measurement<br />
of 3 mm to the interproximal crest of mesial tooth #9.<br />
– Predictable Single-Tooth Peri-Implant Esthetics: Five Diagnostic Keys – 13
Figure 5: Diagnostic total dentogingival complex measurement<br />
of 3 mm to the interproximal crest of adjacent mesial tooth #7.<br />
Figure 6: A Periotomea was used to atraumatically remove<br />
compromised tooth #8.<br />
In contrast, the flatter gingival scallop tends to mimic the osseous scallop, creating less discrepancy and more predictable<br />
maintenance of the interproximal papilla (Fig. 1a). A highly scalloped gingival architecture that is the result of facial<br />
recession can be misleading. In this scenario, the interproximal papilla may be in the normal or flat position, relative to<br />
interproximal bone, but appear to have a highly scalloped form. This interdental papilla is also in a favorable position<br />
and not at risk of being lost after extraction.<br />
3. Biotype of the Periodontium<br />
The biotype of the gingiva is typically considered thick or thin. The thick or dense biotype may be fibrotic. 13 Thicker<br />
tissue is usually more resistant to recession and results often include pocket formation after any apical migration of the<br />
junctional epithelium (Fig. 1a). The thin gingival biotype is often friable and results in increased risk of facial recession<br />
and interproximal loss of gingival tissue after any surgical procedure (Fig. 2a).<br />
Gingival recession is the most common complication of anterior single-tooth implants. 17 Thicker tissue is inherently<br />
more favorable and thin tissue provides more concerns. For thin tissue, minimally invasive or flapless surgery is more<br />
appealing because it minimizes compromises to the blood supply of underlying bone and decreases the risk of recession<br />
after implant management protocols.<br />
4. Tooth Shape<br />
Three basic tooth shapes — square, ovoid and triangular — influence peri-implant<br />
esthetics. The impact is both coronal and apical to the FGM. Coronal to the FGM, the<br />
tooth shape will influence the volume and height of the gingival embrasure. Apical<br />
to the FGM, the tooth shape will influence the proximity of the roots and support of<br />
the gingival tissue both facially and interproximally.<br />
Coronal to the FGM, the square tooth shape is the most favorable because the proximal<br />
contact is longer and more tooth structure fills the interdental area (Fig. 1a). This<br />
creates less risk of “black holes.” The triangular tooth shape creates the highest risk<br />
for black holes because the proximal contact point is more incisally positioned and<br />
would require more tissue height to fill the interproximal area (Fig. 2a). Therefore,<br />
even minimal amounts of tissue loss may create large black holes. These situations<br />
may require modification of the adjacent tooth shape with either direct composite<br />
or porcelain veneers after an implant-retained restoration.<br />
Tooth shape will<br />
influence the volume<br />
and height of the<br />
gingival embrasure.<br />
14<br />
– www.inclusivemagazine.com –
Figure 7: The socket is inspected for the presence of an intact<br />
labial plate.<br />
Figure 8: The surgical protocol is followed without a flap to position<br />
the fixture with a surgical guide. The position is slightly lingual<br />
to allow for ensuing facial shrinkage and 3 mm apical to the<br />
predicted free gingival margin to develop the emergence profile.<br />
Surgery performed by Dr. Lloyd Dixon.<br />
Figure 9: Implant diameter chosen to allow for thickness of the<br />
interproximal osseous crest to minimize vertical loss as a result<br />
of lateral resorption after restoration.<br />
Figure 10: Graphic depicts fixture diameter selected not to fill<br />
socket, but to provide interproximal crest thickness of 1.5 mm.<br />
Apical to the FGM, the tooth shape creates very different diagnostic concerns. Triangular tooth shapes allow for roots<br />
that are positioned farther apart, which provides potentially thicker interproximal bone (Fig. 2b). This may actually<br />
minimize loss of vertical bone height after extraction procedures and implant placement as a result of lateral resorption<br />
with lateral violation of biologic width. 12 The ovoid and square tooth shape with proximal contact may, therefore, be<br />
at a greater risk of more vertical bone loss because the osseous crest is thinner (Fig. 1b). This shape, however, provides<br />
more proximal support for the interdental gingival tissue.<br />
The presenting tooth shape will influence the implant-retained restoration shape. The implant restoration will need to<br />
mimic its contralateral natural tooth coronal to the FGM; however, apical to the FGM, the implant restoration will not<br />
be an anatomic replica. An often-delicate balance must be developed that provides support of the gingival architecture<br />
yet does not provide excessive pressure. Although the implant position will dictate the emergence profile of the implant<br />
restoration, ideally, the facial contour should be slightly flatter than the contralateral natural tooth to minimize apical<br />
displacement of the FGM after insertion. 18<br />
The interproximal position of the fixture is below the osseous crest of the adjacent teeth. The interproximal emergence<br />
profile of the abutment should be straight and scalloped until it is coronal to the osseous crest. This distance occupies<br />
approximately 3 mm.<br />
– Predictable Single-Tooth Peri-Implant Esthetics: Five Diagnostic Keys – 15
The greater the<br />
distance of the<br />
osseous crest to the<br />
FGM, the greater the<br />
risk of tissue loss after<br />
an invasive procedure.<br />
5. Position of the Osseous Crest<br />
The osseous crest is a critical foundation for gingival levels. The position of this<br />
relationship is an important predictor for gingival levels after any intervention.<br />
Previous clinical data on 100 healthy patients developed quantitative data for<br />
three different biologic variations. 16 These variations — normal, high, and low<br />
— are based on the vertical distance of the osseous crest to the FGM. The greater<br />
the distance of the osseous crest to the FGM, the greater the risk of tissue loss<br />
after an invasive procedure. If the vertical distance of the total dentogingival<br />
complex on the midfacial aspect is 3 mm, a slight apical loss of tissue (up to 1<br />
mm) is anticipated after extraction and immediate fixture placement (Fig. 3).<br />
Greater or less than 3 mm of vertical distance indicates the change will be relative<br />
and range from negligible change to potentially >1 mm apical. Measuring<br />
the distance from the FGM to the osseous crest before extraction is an important<br />
and valuable diagnostic procedure. If the facial gingival levels are harmonious<br />
Figure 11: Graphic depicts ideal vertical fixture position measure<br />
of 3 mm to 4 mm apical to the harmonious free gingival<br />
margin position.<br />
Figure 12: A 3 mm healing abutment with vertical emergence<br />
profile is placed.<br />
Figure 13: An interim removable partial denture is positioned<br />
for lateral tissue support coronal to the healing abutment.<br />
Figure 14: Final impressions without stage 2 surgery. The adjacent<br />
teeth are prepared for veneers for esthetic reasons.<br />
and the distance to the osseous crest is 3 mm or more, orthodontic extrusion is recommended to move the osseous crest<br />
more coronally to account for subsequent osseous resorption and potentially greater soft tissue loss.<br />
The interproximal relationship has consistent logic, but the measurement is different. In the interproximal area, a vertical<br />
distance up to 4 mm measured from the FGM to the osseous crest would present less risk. It is possible to generate<br />
greater interproximal distances, 19 but these are not predictably maintained after any surgical intervention. The inter-<br />
16<br />
– www.inclusivemagazine.com –
Figure 15: Laboratory result using a milled titanium custom<br />
abutment metal-ceramic crown on tooth #8 and porcelain<br />
veneers on teeth #6, 7, 9, 10 and 11. Ceramics by Steve<br />
McGown, CDT, Arcus <strong>Dental</strong> Laboratory.<br />
Figure 16: Graphic depicts fixture relationship to the restorative<br />
result. For this patient, a variety of implant systems and restorative<br />
options are possible.<br />
Figure 17: Final radiograph implant in the #8 position. The implant<br />
diameter (4.3 mm) allows for adequate interproximal crest<br />
width.<br />
Figure 18: Final restorative result with predictable peri-implant<br />
esthetics.<br />
proximal numbers are based on the most coronal portion of the interproximal osseous crest of adjacent teeth and are<br />
not related to the interproximal position of the osseous crest of the tooth being removed (Fig. 4, 5). Therefore, if the<br />
interdental papilla measures >4 mm (low crest) on the adjacent teeth, there will predictably be some interproximal tissue<br />
loss after extraction to the 3 mm to 4 mm vertical distance.<br />
Conclusion<br />
This article has focused on the five diagnostic keys for predictable peri-implant esthetics.<br />
Each key is intimately related to the others, making treatment decisions difficult.<br />
For example, it is possible to have a thin biotype and triangular tooth in a<br />
highly scalloped periodontium that appears at high risk of facial recession and “black<br />
holes” after extraction and implant placement. However, because the tooth is positioned<br />
slightly more coronally with a vertical distance of
a variety of implant systems, surgical protocols and restorative options can provide similar therapeutic outcomes for<br />
this anatomical clinical situation. 20 In contrast, if the patient presented with unfavorable anatomical keys, the clinician<br />
would face much higher risk and a less predictable outcome for peri-implant esthetics, despite state-of-the-art procedures<br />
(Table 1).<br />
Using a proactive protocol that alters the periodontium toward less risk and more favorable assessment of the five diagnostic<br />
keys before implant placement will provide the most predictable peri-implant esthetic outcome. Reliance on<br />
“state-of-the-art procedures” provides different options; however, these results are not as predictable. n<br />
Table 1<br />
References<br />
1. Abrams H, Kopczyk RA, Kaplan AL. Incidence of anterior ridge deformities in partially edentulous patients. J Prosthet Dent. 1987;57:191-194.<br />
2. Abrams L. Augmentation of the deformed residual edentulous ridge for fixed prosthesis. Compend Contin Educ Dent. 1980;1:205-213.<br />
3. Tarnow DP, Eskow RN. Considerations for single-unit esthetic implant restorations. Compend Contin Educ Dent. 1995;16:778-788.<br />
4. Jansen CE, Weisgold A. Presurgical treatment planning for the anterior single-tooth implant restoration. Compend Contin Educ Dent. 1995;16:745-761.<br />
5. Weisgold AS, Arnoux JP, Lu J. Single-tooth anterior implant: a word of caution. Part I. J Esthet Dent. 1997;9:225-233.<br />
6. Garber D. The esthetic dental implant: letting restoration be the guide. J Am Dent Assoc. 1995;126:319-325.<br />
7. Becker W, Ochsenbein C, Tibbets L, et al. Alveolar bone anatomic profiles as measured from dry skulls. Clinical ramifications. J Clin Periodontol. 1997;24:727-731.<br />
8. Kois JC. Esthetic extraction site development: the biologic variables. Contemporary Esthetics and Restorative Practice. 1998;2:10-18.<br />
9. Saadoun A, LeGall M, Touati B. Selection and ideal tridimensional implant position for soft tissue aesthetics. Pract Periodontics Aesthet Dent. 1999;11:1063-1072.<br />
10. Salama H, Salama M, Garber D, et al. Developing optimal peri-implant papillae within the esthetic zone: guided soft tissue augmentation. J Esthet Dent. 1995;7:125-<br />
129.<br />
11. Salama H, Salama M. The role of orthodontic extrusive remodeling in the enhancement of soft and hard tissue profiles prior to implant placement: a systematic approach<br />
to the management of extraction site defects. Int J Periodontics Restorative Dent. 1993;13:312-333.<br />
12. Tarnow DP, Cho SC, Wallace SS. The effect of interimplant distance on the height of inter-implant bone crest. J Periodontol. 2000;71:546-549.<br />
13. Weisgold AS. Contours of the full crown restoration. Alpha Omegan. 1977;70:77-89.<br />
14. Olsson M, Lindhe J. Periodontal characteristics in individuals with varying forms of the upper central incisors. J ClinPeriodontol. 1991;18:78-82.<br />
15. Sanavi F, Weisgold AS, Rose LF. Biologic width and its relation to periodontal biotypes. J Esthet Dent. 1998;10:157-163.<br />
16. Kois JC. Altering gingival levels: the restorative connection part I: biologic variables. J Esthet Dent. 1994;6:3-9.<br />
17. Goodacre CJ, Kan JY, Rungcharassaeng K. Clinical complications of osseointegrated implants. J Prosthet Dent. 1999;81:537-552.<br />
18. Phillips K, Kois JC. Aesthetic peri-implant site development. The restorative connection. Dent Clin North Am. 1998;42:57-70.<br />
19. Tarnow DP, Magner AW, Fletcher P. The effect of the distance from the contact point to the crest of bone on the presence or absence of the interproximal dental<br />
papilla. J Periodontol. 1992;63:995-996.<br />
20. Kan JY, Rungcharassaeng K, Umezu K, Kois JC. Dimensions of peri-implant mucosa: an evaluation of maxillary anterior single implants in humans. J Periodontol.<br />
2003;74:557-562.<br />
Reprinted with permission of Compendium. John C. Kois, DMD, MSD: Predictable single-tooth peri-implant esthetics: five diagnostic keys. Compendium. 2004:25<br />
(11):585. AEGIS Communications ©2004.<br />
18<br />
– www.inclusivemagazine.com –
Digital Implant Treatment Planning<br />
The Importance of the Scan Appliance<br />
by Bradley C. Bockhorst, DMD<br />
One of the fastest growing segments of implant dentistry is the utilization of CT scan data and treatment<br />
planning software in conjunction with guided surgery for implant reconstruction cases. The scan appliance<br />
is critical to the process and success of these cases. The primary purpose of the scan appliance is to show the<br />
ideal prosthetic positions of the teeth to be replaced in the digital plan. 1 By utilizing a scan appliance, the case can be<br />
planned from both a prosthetic and surgical perspective, making implantology a truly restoratively-driven process.<br />
There are several excellent implant treatment planning and guided surgery systems available. We will focus on two of<br />
the most popular programs on the market: NobelGuide from Nobel Biocare and SimPlant ® from Materialise (Fig. 1).<br />
While the names of their scan appliances are different, their purpose is the same. Which system you choose is typically<br />
driven by the implant system you are utilizing. NobelGuide is designed for use with Nobel Biocare implants. SimPlant<br />
has an open architecture, so most available implants can be planned with its software.<br />
Digital Treatment Planning and Guided Surgery<br />
NobelGuide #<br />
Nobel Biocare implants only<br />
Planning Software<br />
SimPlant #<br />
Open architecture — most implant systems<br />
Radiographic Guide<br />
(Clear acrylic with gutta percha markers)<br />
Radiographic Index (bite registration)<br />
Dual-scan protocol<br />
Surgical Template<br />
Drill direction and depth control<br />
NobelGuide Surgical Kit required<br />
Radiographic Guide/<br />
CT Scan Appliance<br />
Surgical Template/Guide<br />
Scan Appliance<br />
(Clear acrylic with gutta percha markers)<br />
Scan Index (bite registration)<br />
Dual-scan protocol<br />
Scan Appliance<br />
(Barium sulphate -acrylic mix)<br />
Tissue-supported (20% teeth /10% base)<br />
Tooth or Bone-supported (20% teeth /clear base)<br />
Scan Index (bite registration)<br />
Single-scan protocol<br />
Safe SurgiGuide<br />
Classic SurgiGuide<br />
Pilot SurgiGuide<br />
Universal SurgiGuide<br />
Drill direction and depth control<br />
One Surgical Guide<br />
Requires Guided Surgical Kit<br />
Astra Facilitate<br />
Biomet 3i Navigator<br />
Straumann Guided Surgery<br />
NobelGuide Compatible<br />
Drill direction control<br />
Multiple SurgiGuides # (One per drill Ø)<br />
Standard Surgical Kit may be utilized<br />
Drill direction control<br />
One SurgiGuide #<br />
Standard Surgical Kit may be utilized<br />
Drill direction control<br />
One SurgiGuide #<br />
Requires Universal SurgiGuide Drill Keys<br />
Standard Surgical Kit may be utilized<br />
Figure 1: NobelGuide and SimPlant flow chart of terms and options.<br />
20<br />
– www.inclusivemagazine.com –
Role of the Scan Appliance<br />
The primary purpose of the scan appliance is to show<br />
the ideal prosthetic positions of the tooth or teeth to be<br />
replaced. It provides an invaluable diagnostic tool to relate<br />
the tooth-to-bone relationship. 2 This is critical for the<br />
planning process. While the SimPlant “virtual teeth” function<br />
is useful for short spans such as single tooth replacement<br />
(Fig. 2), an appliance in which the teeth have been<br />
set in the ideal position(s) provides the most accuracy.<br />
Both NobelGuide and SimPlant advocate a dual-scan protocol.<br />
In these cases, the surgical guide is literally fabricated<br />
from the CT scan of the scan appliance (Fig. 3a-3d).<br />
Figure 2: “Virtual teeth” are inserted to represent teeth #8-10.<br />
Figure 3a: Radiographic Guide<br />
Figure 3b: Virtual rendering of<br />
Radiographic Guide<br />
Figure 3c: Virtual rendering of Surgical<br />
Template<br />
Figure 3d: Surgical Template<br />
Types of Scan Appliances<br />
The types of scan appliances can be split into single- and dual-scan protocols (Fig. 4a,<br />
4b). SimPlant traditionally utilizes a single-scan protocol. With the introduction of its<br />
dual-scan module, Materialise now recommends the dual scan. NobelGuide utilizes a<br />
dual-scan protocol.<br />
Single-Scan Appliance: Barium sulphate is mixed with acrylic to identify various<br />
structures radiographically. The teeth to be replaced contain a 20 percent barium sulphate<br />
mix. If the goal is to perform a flapless procedure on a fully edentulous case,<br />
the teeth are made with a 20 percent BaSO4 mix and the base a 10 percent mix. This<br />
allows the teeth to be identified as well as the soft tissue in the CT study. 3 For partially<br />
edentulous cases, the scan appliance can be a flipper-type design or it can overlay the<br />
remaining teeth, depending on the clinician’s preference.<br />
The types of scan<br />
appliances can basically<br />
be split into single- and<br />
dual-scan protocols.<br />
Figure 4a: Single-scan appliances<br />
Figure 4b: Dual-scan appliance<br />
Dual-Scan Appliance:<br />
Scatter from neighboring<br />
restorations can obscure<br />
the view of the teeth in the<br />
scan appliance during single<br />
scans. Barium sulphate<br />
can also cause a minor<br />
amount of scatter and potentially<br />
obscure the view<br />
of vital structures. The<br />
dual scan avoids this potential<br />
complication. The<br />
patient is scanned with the<br />
– Digital Implant Treatment Planning: The Importance of the Scan Appliance – 21
scan appliance, and then the scan appliance is scanned alone. The dual-scan appliance is typically fabricated from clear<br />
acrylic with approximately eight 1 mm to 1.5 mm spherical gutta percha markers. The planning software converts the<br />
CT scan files and merges the two scans by matching the gutta percha markers, aligning the radiopaque markers so that<br />
the prosthesis will be visible over the available osseous anatomy. 4<br />
Utilizing the Patient’s Existing Denture as a Scan Appliance<br />
While utilizing the patient’s existing denture as a scan appliance is possible, it can be problematic. Gutta percha markers<br />
can be added to the patient’s existing denture, or the denture can be duplicated and utilized only if it is well-fitting<br />
Figure 5a: View of well-fitting scan appliance<br />
Figure 5b: Radiolucent area shows crestal and facial ridge atrophy. The Radiographic<br />
Guide should be hard relined and the case rescanned.<br />
and the teeth are in the correct positions (Fig. 5a, 5b). If<br />
the denture is worn down and has a poor fit, a new appliance<br />
should be fabricated. For fully edentulous cases,<br />
this involves the same steps as fabricating a new denture<br />
including wax rims to establish the occlusal records and<br />
a wax try-in to evaluate the VDO, CR, tooth set-up and<br />
esthetics. (NOTE: This set-up will not only be used to create a<br />
proper scan appliance, it can also be used as a guide for the<br />
provisional and final prostheses.) By receiving the patient’s<br />
acceptance of the prosthesis before CT scans are done,<br />
the potential for success is also increased. 5<br />
Figure 6: The patient’s existing denture was used as the scan appliance. The thin<br />
flanges will result in fenestrations and potential weak areas in the surgical guide.<br />
Another issue that can arise when utilizing the patient’s existing denture is the thickness, particularly in the flange areas.<br />
Dentures, by design, are thin for patient comfort. The scan appliance should ideally be about 3 mm thick. The use of a<br />
thin denture could result in fenestrations and potential weak areas in the surgical guide (Fig. 6).<br />
Verify Fit of the Scan Appliance<br />
Once the scan appliance has been fabricated it should<br />
be tried-in to verify fit (Fig. 7). If the lab did not provide<br />
one, a scan index should be fabricated. The scan index,<br />
or Radiographic Index as it is called in the NobelGuide<br />
system, is a bite registration of the scan appliance to the<br />
opposing dentition (Fig 8). The purpose of the scan index<br />
is to ensure that the appliance remains completely seated<br />
during the scan. It must be made out of a radiolucent<br />
material so that it does not block out the teeth. We have<br />
Figure 7: Try-in of the scan appliance<br />
to verify fit. Note: Inspection windows<br />
can be used as an aid in partially<br />
edentulous cases.<br />
Figure 8: Scan appliance and scan<br />
index on articulated models.<br />
22<br />
– www.inclusivemagazine.com –
Figure 9a: SimPlant Scan protocol<br />
Figure 9b: NobelGuide Scan protocol<br />
found Capture ® Clear Bite (<strong>Glidewell</strong> Laboratories) to be an acceptable material.<br />
Once the fit of the scan appliance and scan index are verified, the patient can<br />
be sent for the CT scan.<br />
The CT scan protocol for the system you intend to utilize should be followed<br />
(Fig. 9a, 9b). The scan protocols for NobelGuide and SimPlant can be found at<br />
inclusivedental.com. The scan appliance and scan index must be fully seated<br />
for the patient scan. If a dual scan is being utilized (Fig. 10a), the second scan<br />
is taken of the scan appliance alone (without the scan index). The appliance<br />
should be up off the metal table or bar in the same orientation as it was in the<br />
patient’s mouth (Fig. 10b). The standard files generated by a CT scan are called<br />
DICOM files (Digital Imaging Communication of Medical Images). The radiologist<br />
should reconstruct the scan per the protocol. Typically, the radiology lab<br />
burns the CT scan data onto a CD. In order to avoid confusion, request that the<br />
radiologist create two folders: one containing the DICOM files of the patient<br />
scan and, if a dual scan was done, a second folder of the scan appliance. If you<br />
are using the NobelGuide or SimPlant software yourself or are utilizing <strong>Glidewell</strong><br />
Laboratories’ Digital Implant Treatment Planning Services, the DICOM files<br />
are converted and utilized to virtually plan the case.<br />
The scan appliance<br />
and scan index<br />
must be fully seated<br />
for the patient scan.<br />
Scan 1 Scan 2<br />
Patient<br />
Radiographic<br />
Guide<br />
Radiographic<br />
Index<br />
Figure 10a, 10b: Dual scan: The patient is scanned with the scan appliance and scan index. A second scan of the scan appliance alone is performed.<br />
– Digital Implant Treatment Planning: The Importance of the Scan Appliance – 23
Single Tooth<br />
Figure 11a: Plan for replacement of tooth #19. The cross-sectional slice<br />
through tooth #19 can be seen on the right side of the screen.<br />
Figure 11b: Virtual plan to replace congenitally missing lateral incisors.<br />
Multiple Teeth<br />
Full Arch<br />
Figure 11c: Multiple implants can be planned with appropriate implant-implant<br />
and implant-root spacing, as can areas to be grafted.<br />
Figure 11d: Case planned for eight implants for a fixed restoration.<br />
Figure 11e: Case plan for a mandibular All-on-4 restoration.<br />
24<br />
– www.inclusivemagazine.com –
Restoratively Driven Treatment Planning<br />
The whole point of the diagnostic work-up and utilization of the scan appliance is to show the ideal positions of the<br />
tooth or teeth to be replaced. While digital treatment planning guided surgery protocol was initially developed for the<br />
fully edentulous patient, it has advantages for partially edentulous patients as well. 6 Whether you are replacing one<br />
tooth, multiple teeth or a full arch, digital treatment planning allows you to virtually plan the case from both a surgical<br />
and prosthetic perspective in a 3-D environment (Fig. 11a-e). This allows you to make almost all of the clinical decisions<br />
up front. The result is implants that are more ideally placed and, therefore, simpler prosthetics and superior restorations.<br />
In appropriate cases, the prosthesis can be prefabricated for an immediately loaded restoration. 7 If you plan to<br />
immediately load the case, we recommend you deliver a provisional restoration at the time of surgery and then proceed<br />
to the definitive prosthesis at a later date.<br />
Fabrication of the Surgical Guide<br />
Once completed, the virtual plan can be transferred to the<br />
clinical setting through the use of a surgical guide. The<br />
guide produced for NobelGuide is referred to as a Surgical<br />
Template (Fig. 12a). The guide from Materialise (Sim-<br />
Plant) is called a SurgiGuide (Fig. 12b). Using the surgical<br />
guides allows the surgeon to place the implants according<br />
to a restoratively driven treatment plan. 8 We will review<br />
the various types of guides in a future article.<br />
Conclusion<br />
Figure 12a: NobelGuide Surgical<br />
Template<br />
Figure 12b: Materialise Simplant<br />
SurgiGuide<br />
Digital treatment planning and guided surgery is rapidly gaining popularity and is becoming a standard of care. A key<br />
benefit to this approach is that the case can be planned from the beginning with the final restoration in mind. The scan<br />
appliance can be utilized to its fullest by:<br />
• Working with an experienced lab to ensure it is properly fabricated<br />
• Verifying clinically that it and the scan index fit well and are completely seated for the CT scan<br />
• Ensuring the radiologist is familiar with the scan protocol.<br />
By understanding the role and proper use of the scan appliance in the digital implant treatment planning and guided<br />
surgery process, the clinician can take full advantage of this technology. n<br />
References<br />
1. Kosinski T. Optimizing implant placement and aesthetics: technology to the rescue! Dentistry Today Aug 1009.<br />
2. Ganz S. CT scan technology; an evolving tool for avoiding complications and achieving predictable implant placement and restoration. International Magazine of Oral<br />
Implantology-1/2001.<br />
3. Rosenfeld A, Mandelaris G. Prosthetically directed implant placement using computer software to ensure precise placement and predictable prosthetic outcomes.<br />
Int J Periodontics Restorative Dent. 2006 Jun; 26(3):215-21.<br />
4. Moy P, Palacci P, Ericson I. Immediate function & esthetics in implant dentistry. Odont PhD, Quintessence Publishing Co. Ltd.<br />
5. Amet E, Ganz S. Implant treatment planning using a patient acceptance prosthesis, radiographic record base, and surgical template. Part 1: Presurgical Phase.<br />
Implant Dent 1997;6: p.193-197.<br />
6. Balshi T, Balshi S. CT-generated surgical guides and flapless surgery. Int J Oral Maxillofac Implants 2008; Vol 23, Num 2.<br />
7. Marchack C. An immediately loaded CAD/CAM-guided definitive prosthesis: A clinical report. J Prosthetic Dent 2005;93:8-12.<br />
8. Orentlicher G, Goldsmith D, Horowitz A. Compendium Apr 2009, Vol. 30, Num 3.<br />
– Digital Implant Treatment Planning: The Importance of the Scan Appliance – 25
R&D Corner<br />
A Tightening Technique to Minimize<br />
Loosening of Prosthetic Screws<br />
by Grant Bullis<br />
While the use of torque wrenches has greatly decreased its occurrence, screw loosening<br />
remains a prosthetic complication. When a screw is tightened by the application of torque,<br />
the screw elongates and a clamping force, called preload, is produced under the screw head. Preload<br />
prevents the implant prosthetic screw joint from separating under occlusal loading. As long as the screw<br />
preload is greater than the external forces, the screw joint will not loosen.<br />
Insufficient preload of the<br />
screw joint can result in<br />
screw loosening and fatigue<br />
failure of the prosthetic<br />
assembly. Excessive<br />
preload can exceed the<br />
elastic limit of the screw,<br />
causing screw breakage<br />
or damage to the screw<br />
threads and prosthetic<br />
hardware. Preload is proportional<br />
to the torque<br />
applied, and the use of a<br />
torque wrench provides a<br />
simple means of control<br />
(Fig. 1).<br />
Figure 1<br />
Because loss of preload or insufficient preload to resist the external forces acting on the screw joint<br />
is a major cause of screw loosening, careful attention to the implant manufacturer’s screw tightening<br />
parameters is a must. An additional factor to consider when tightening prosthetic screws is embedment<br />
relaxation of the prosthetic screw joint once tightened.<br />
The surfaces underneath the prosthetic screw head and of the screw seat are not perfectly smooth.<br />
26<br />
– www.inclusivemagazine.com –
When the screw is tightened to the recommended torque setting, the opposing surface imperfections<br />
experience localized stress concentrations above the yield strength of the material. At these points the<br />
material will deform until the stress is sufficiently relieved, diminishing the screw preload. Although<br />
embedment relaxation occurs to some degree during prosthetic screw tightening, loss of preload due to<br />
embedment relaxation can be mitigated by technique. 1,3<br />
One technique is to tighten the prosthetic screw to the manufacturer’s recommended torque, then wait<br />
approximately 10 minutes and re-torque the screw. 3 This allows time for embedment relaxation to take<br />
place. The second time the screw is tightened, there should be less decay in the screw preload. 2<br />
If loosening still occurs, the clinician should go through a troubleshooting list to determine possible<br />
causes, including 3 :<br />
• Passive fit of the prosthe sis (this should<br />
have been evaluated at the try-in/delivery<br />
appointment)<br />
• Occlusion<br />
• Parafunctional habits<br />
• Excessive transverse loading.<br />
Once the probable cause is identified and addressed,<br />
the screws can be retightened.<br />
By understanding basic engineering principles<br />
and then incorporating techniques around them,<br />
you can minimize potential complications on<br />
your implant cases. The recommendation is to<br />
use a torque wrench and to tighten the screws at<br />
least twice, preferably waiting at least 10 minutes<br />
between each tightening. n<br />
References<br />
1. Siamos G, Winkler S, Boberick KG. The relationship between<br />
implant preload and screw loosening on implant-supported restorations.<br />
J Oral Implantol. 2002;28:67–73.<br />
2. Byrne D, Jacobs S, O’Connell B, Houston F, Claffey N. Preloads<br />
generated with repeated tightening in three types of screws used in<br />
dental implant assemblies. J Prosthodont 2006;15(3):164-171.<br />
3. Winker S, Ring K, Ring JD, Boberick KG. Implant screw mechanics<br />
and the settling effect: an overview. J Oral Implantol. 2003;29:242–245.<br />
Go to inclusivemagazine.com to<br />
see an animation of this technique.<br />
– A Tightening Technique to Minimize Loosening of Prosthetic Screws – 27
Inclusive® Custom Abutments<br />
Using 3-D Virtual Design<br />
CAD/CAM technology is at the heart of the design process.<br />
by Greg Minzenmayer<br />
It seems that everywhere you turn<br />
today, people are promoting one or<br />
another form of CAD/CAM application. This technology<br />
often brings synergy and efficiency to the<br />
lab, but the ultimate benefit to the dentist is not<br />
always immediately apparent.<br />
In the video available at inclusivemagazine.com,<br />
I will demonstrate how this technology allows<br />
<strong>Glidewell</strong> to provide precision-milled CAD/CAM<br />
custom abutments at the price of a standard stock<br />
abutment using Computer-Aided Design.<br />
This line of custom CAD/CAM abutments is sold<br />
under the brand name of Inclusive ® and is available<br />
in titanium, all-zirconia and zirconia with a<br />
titanium insert. For many implant systems, you<br />
will actually pay less for this custom solution.<br />
Without this advanced technology, the only way to<br />
make a custom abutment is to use a gold cylinder<br />
or UCLA abutment, and hand-wax the appropriate<br />
design. We then cast that design using a noble alloy.<br />
This approach requires skilled hands and expensive<br />
implant components.<br />
The virtual design process utilized begins by scanning<br />
your implant model using the Inclusive Scanning<br />
Abutment Kit. Inclusive abutments are then designed<br />
utilizing CAD/CAM technology and milled from precision-machined<br />
blanks. Extensive mechanical testing<br />
is performed and high-strength materials utilized, to<br />
provide you with a consistent, quality product.<br />
In an online presentation, we will take you through<br />
the process of creating and milling Inclusive Custom<br />
Abutments, from the scanning process to the final design,<br />
so you can see for yourself how CAD/CAM provides<br />
you and your patients with superior results. n<br />
To watch Greg’s video presentation on the fabrication of<br />
Inclusive Custom Abutments using 3-D virtual design,<br />
log on to inclusivemagazine.com.<br />
28<br />
– www.inclusivemagazine.com –
Product Spotlight<br />
BioTemps® Over Implants<br />
by Robert Rosen, CDT<br />
Provisional restorations can<br />
play a huge role in managing<br />
clinical situations to ensure the success<br />
of the final prosthesis. From sculpting<br />
the tissues for an ideal emergence profile<br />
to papilla and ovate pontic development,<br />
BioTemps ® (<strong>Glidewell</strong> Laboratories; Newport<br />
Beach, CA) are the ideal soft tissue<br />
template for shaping gingival tissues to<br />
match your esthetic needs.<br />
BioTemps also provide an excellent prototype<br />
to evaluate shade and contours,<br />
leading to greater patient acceptance and<br />
a superior definitive restoration.<br />
Whether you are restoring vertical dimension<br />
or undertaking months of periodontal<br />
therapy, you won’t find a better longterm<br />
provisional.<br />
BioTemps improve your productivity, allowing<br />
you to accomplish more dentistry<br />
in a single visit due to decreased time<br />
spent fabricating provisionals chairside.<br />
They offer true versatility and can be utilized<br />
for all your implant-borne crown &<br />
bridge cases, from single tooth to full-arch<br />
temporization.<br />
To see clinical videos of the BioTemps<br />
provisional, go to inclusivemagazine.com.<br />
Three-unit BioTemps bridge with pontic<br />
over healing abutment<br />
Immediate BioTemps crown on zirconia abutment (#29)<br />
Screw-retained BioTemps crown<br />
– Product Spotlight: BioTemps Over Implants – 31
Hygiene and the Implant Patient<br />
A Preventive Perspective<br />
by Ann M. Drewenski, RDH<br />
<strong>Dental</strong> implants are a major investment<br />
that with proper care can last a lifetime.<br />
Advantages of implants include comfort, heightened selfesteem,<br />
ease of eating, and improved appearance, speech<br />
and oral health. With comprehensive education from the<br />
entire dental team, patients can better understand the importance<br />
of home care and regular maintenance visits.<br />
Infection control lies at the heart of peri-implant treatment.<br />
With regular evaluation, plaque and calculus removal,<br />
and patient commitment to an infection-free environment,<br />
implant longevity can be lifelong. As dental<br />
hygienists, we are obligated to educate and motivate every<br />
patient. In doing so, it’s imperative that we take into<br />
consideration each patient’s home care, systemic health<br />
and periodontal history.<br />
Clinical inspection for signs of inflammation, exudate,<br />
mobility, increased sulcus depth and occlusal trauma are<br />
very important in evaluating the status and durability of<br />
the dental implant or prosthesis. Clinical assessments<br />
used routinely, with the exception of periodontal probing<br />
around the peri-implant, should be documented. Routine<br />
periodontal probe readings are not recommended. Probe<br />
readings should be used only when needed due to signs<br />
of inflammation, bleeding or loose implant. Routine probing<br />
could cause damage to the weak epithelial attachment<br />
around the implant, possibly creating a pathway for periodontal<br />
pathogens. Should probing be indicated, use of a<br />
plastic rather than a metal probe is recommended.<br />
Proper monitoring and maintenance is essential to ensure<br />
the durability and health of a dental implant. The key<br />
to long-term maintenance is to begin with a customized<br />
treatment plan for each patient. Preoperative oral hygiene<br />
instructions will greatly benefit the patient and enhance<br />
the long-term predictability of the implant. The goal is to<br />
maintain a stable, infection-free, healthy environment. n<br />
Figure 1: An implant with plaque and<br />
debris causes irritation and infection.<br />
Figure 3: Plastic instrumentation removes<br />
infection-causing debris.<br />
Figure 2: Probing with a plastic<br />
probe.<br />
Figure 4: A torque wrench is used to<br />
uncover implants.<br />
To read Ann's full article on proper hygiene for the implant patient,<br />
please visit inclusivemagazine.com.<br />
Figure 5: Removal of an “All-on-4”<br />
prosthesis.<br />
Figure 6: Implant is checked for<br />
mobility.<br />
32<br />
– www.inclusivemagazine.com –
“<br />
What People Are Saying”<br />
“<br />
I loved the first issue of Inclusive magazine!<br />
I am looking forward to receiving the next<br />
issue, as well as the Removable and Digital<br />
Treatment Planning technical guides. ”<br />
Michael B. Cook, DDS<br />
Toledo, Ohio<br />
“<br />
Hope this note finds you warm and smiling in Southern<br />
California! I wanted to high-five you on the great new publication<br />
you produced. I just looked through the first issue of Inclusive<br />
and felt compelled to write and congratulate you. The<br />
layout and graphics are clean and the information presented<br />
is very well done and timely. Keep up the great work. ”<br />
Thomas J. Balshi, DDS, FACP<br />
Fort Washington, Pa.<br />
“<br />
<strong>Glidewell</strong> Laboratories has done a fantastic job<br />
with Inclusive magazine. I am impressed with the<br />
informative articles and will be sending in a few<br />
implant cases as a result. ”<br />
Tom Northway, DDS<br />
Grandville, Mich.<br />
– What People Are Saying – 33


