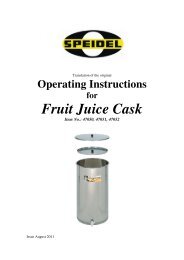
Operating and brewing instructions 50l april 2008 - Speidel Tank
Operating and brewing instructions 50l april 2008 - Speidel Tank
Operating and brewing instructions 50l april 2008 - Speidel Tank

You also want an ePaper? Increase the reach of your titles
YUMPU automatically turns print PDFs into web optimized ePapers that Google loves.
<strong>Speidel</strong>’s Master Brewer<br />
the activity of organisms in the beer yeast, which convert the fermentable sugar into<br />
alcohol <strong>and</strong> carbonic acid. The cask is sealed with a lid <strong>and</strong> a fermenting bung<br />
immediately after adding the yeast. Sulphurous acids should be filled in the fermenting<br />
bung, so that no foreign organisms can enter the cask. You must also bear in mind that<br />
you should be working in absolutely sterile conditions, in order to prevent the beer<br />
from becoming infected with foreign organisms. The cask is never allowed to be<br />
sealed completely: the CO2 that arises from the fermentation can thus escape. Put the<br />
cask in a darkened room, which has the requisite temperature for the yeast. The<br />
fermentation of bottom-fermented beer can also take place in a refrigerator that is not<br />
too cold, whereas top-fermented beer can be fermented at room temperature. It is<br />
therefore suitable for the novice to begin with top-fermented beers because certainly<br />
not everyone has an extra refrigerator available. It is particularly important to maintain<br />
the temperature. The yeast cells can become active only slowly or even not at all when<br />
temperatures are too low. The yeast cells can die when temperatures are too high. The<br />
fermentation should be active 6 to 12 hours after adding the yeast: which can be easily<br />
established when bubbles of gas escape through the fermenting bung. The fermenting<br />
duration amounts to between 2 <strong>and</strong> 4 days. Dark flakes of yeast can occur on the<br />
fermenting foam during the fermenting process, which can be skimmed off with a<br />
sterilized wooden spoon. The stop cock must be cleaned immediately <strong>and</strong> disinfected<br />
by applying sulphurous acid with swab of cotton wool, if you remove wort via the stop<br />
cock during the main fermentation (e.g., for taking measurements with the beer<br />
spindle), in order to prevent it from drying out <strong>and</strong> to avoid it from becoming infected<br />
subsequently by bacteria sticking to it.<br />
4.9 Maturation (ripening)<br />
The sugar that remains from the main fermentation <strong>and</strong> is added afterwards, is<br />
fermented during the subsequent fermentation or maturation – the fresh beer is<br />
enriched with carbonic acid, which is significant for the foam’s formation <strong>and</strong><br />
maintenance later on: it matures to a tasty full-bodiedness. The beer is clarified<br />
naturally during the maturation. If the fermenting activity is now set (no fermenting<br />
gases escape), then one can commence with the decanting [i.e., bottling]. The<br />
following preparations have to be made for this purpose: prepare the maturing<br />
containers or bottles <strong>and</strong> thaw out the frozen wort.<br />
Subsequent fermentation in bottles is the best possibility available to you <strong>and</strong> it is also<br />
preferred by most hobby brewers. Further possibilities are various, pressure-resistant<br />
containers like special 5 litre tins or appropriate beer <strong>and</strong> pressure casks. Working in<br />
sterile conditions is always vital at this stage too. All equipment must therefore by<br />
thoroughly cleaned <strong>and</strong> disinfected before use. The following method of procedure is<br />
recommended when using stirrup bottles: rinse out <strong>and</strong> clean the bottles thoroughly<br />
with warm water, in order to remove liquid <strong>and</strong> dried residues. Then put the bottles in<br />
the oven (leave space between the bottles <strong>and</strong> remove the seals) <strong>and</strong> heat them up to<br />
130°C. The temperature must be maintained for a maximum of 5 minutes. Leave the<br />
bottles lying there to cool down as well. The rubber seals are disinfected separately in<br />
boiling water. The bottles are sealed immediately after they have cooled down in order<br />
for them to be airtight <strong>and</strong> they are then prepared for filling. This preparation should<br />
have already taken place during the fermenting process or even earlier, so that you do<br />
not have to work at a frantic pace on the filling day <strong>and</strong> so that you can concentrate on<br />
the essentials. Larger bottles can also be used, in order to limit the outlay of time for<br />
cleaning the bottles <strong>and</strong> filling them.<br />
The thawed-out wort is now added carefully to the fresh beer in the fermenting<br />
container about 1 to 2 hours before the filling begins. The thawed-out cooler sludge<br />
Page 13 of 26