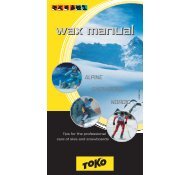
Swix Wax Guide - Reliable Racing
Swix Wax Guide - Reliable Racing
Swix Wax Guide - Reliable Racing

Create successful ePaper yourself
Turn your PDF publications into a flip-book with our unique Google optimized e-Paper software.
APPLICATION OF HARD WAXES<br />
T11<br />
1. Sanding<br />
The kick zone should first be sanded with #100 grit<br />
sandpaper approx. 60 cm (about 2 feet). Sand the<br />
zone back and forth parallel to the length of the ski.<br />
The <strong>Swix</strong> Combi <strong>Wax</strong>ing Cork (T11) with sandpaper<br />
on one side is an ideal tool.<br />
V30<br />
2. Base wax<br />
At temperatures below 0°C (32°F) a relatively hard<br />
wax, such as V30 Blue, is recommended as a basewax.<br />
Base Binder VG35 is applied as the first layer<br />
when the snow becomes coarser.<br />
VG35<br />
3. Ironing base wax<br />
The first layer of wax should be ironed into<br />
the base. The heat will improve the bond between<br />
the wax and base giving longer wear. Iron setting<br />
should be 100°C (212°F).<br />
T74220<br />
V40<br />
VR45<br />
4. Hard wax application<br />
The actual hard wax should be applied in 4-5 thin<br />
layers, smoothing each layer with the cork.<br />
Above freezing and wet snow 2 layers are sufficient.<br />
Note: Leave 2 cm (1 inch) at each end of the kick<br />
zone. With corking, the wax is expanded into these<br />
areas.<br />
5. Corking<br />
Corking in between each layer of wax.<br />
T10<br />
6 SWIX SPORT - NORDIC SKI PREPARATION