Fluency Tutor Training Guide - Texthelp
Fluency Tutor Training Guide - Texthelp
Fluency Tutor Training Guide - Texthelp

You also want an ePaper? Increase the reach of your titles
YUMPU automatically turns print PDFs into web optimized ePapers that Google loves.
Sept 2011<br />
<strong>Fluency</strong> <strong>Tutor</strong> <strong>Training</strong> <strong>Guide</strong>
Account Details<br />
Schools <strong>Fluency</strong> Website:<br />
www.fluencytutor.co.uk/____________________________<br />
Website Administrator:<br />
Name: _____________________________________________<br />
For technical support please phone:<br />
028 94 428105<br />
Or email:<br />
support@texthelp.com
Contents<br />
Introduction ........................................................................................................................... 6<br />
System Requirements for <strong>Fluency</strong> <strong>Tutor</strong> ............................................................................... 7<br />
Administration ....................................................................................................................... 8<br />
Log in ................................................................................................................................ 8<br />
Setting up and managing teachers .................................................................................... 9<br />
Adding teachers ............................................................................................................. 9<br />
Modifying a teacher’s details ........................................................................................ 10<br />
Setting up and managing students .................................................................................. 11<br />
Adding students individually ......................................................................................... 11<br />
Importing multiple students .......................................................................................... 13<br />
Modifying a student’s details ........................................................................................ 14<br />
Exporting Student Results ............................................................................................... 15<br />
Customising the website .................................................................................................. 16<br />
Teachers ............................................................................................................................. 17<br />
Log in .............................................................................................................................. 17<br />
Creating a group .............................................................................................................. 18<br />
Setting Students a Target <strong>Fluency</strong> Level ......................................................................... 20<br />
Modify a Group ................................................................................................................ 21<br />
View/Print Login Details ................................................................................................... 22<br />
Assign a practise or assessment exercise to a group ...................................................... 23<br />
Assign a practise or assessment exercise to an individual ............................................... 28<br />
Marking completed assessments ..................................................................................... 32<br />
Mark, Re-marking, reviewing or removing an assessment ............................................... 38<br />
View the exercises for the group...................................................................................... 44<br />
View a student’s progress................................................................................................ 45<br />
View a group’s progress .................................................................................................. 50<br />
Students.............................................................................................................................. 53<br />
Log in .............................................................................................................................. 53<br />
Practise your reading ....................................................................................................... 55<br />
Measure my reading ........................................................................................................ 59<br />
See marked assessments ............................................................................................... 62<br />
See your progress graphs ............................................................................................... 64<br />
Appendix ............................................................................................................................. 67<br />
Username and Password Limitations .............................................................................. 67
CSV Files ........................................................................................................................ 67<br />
Approximate Age to Lexile Level ..................................................................................... 68<br />
Scoring Students Assessment ......................................................................................... 70<br />
<strong>Texthelp</strong> Systems Limited Page 5
Introduction<br />
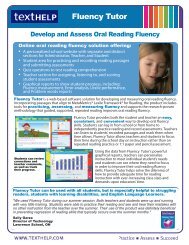
<strong>Fluency</strong> <strong>Tutor</strong> is designed to address the issues of struggling readers. This online product<br />
will develop and improve reading ability and fluency levels. The software allows users to<br />
record and listen to themselves reading passages of text aloud and then submit them for<br />
scoring. A teacher can utilise the software to score users recorded passages, identifying the<br />
type of fluency errors made, frequency of errors, they can record the number of words<br />
correct per minute and score the reading expression levels. <strong>Fluency</strong> <strong>Tutor</strong> collates<br />
individual’s scores and can generate reports measuring the improvement in fluency and<br />
comprehension levels over time.<br />
This innovative software package from <strong>Texthelp</strong> Systems can therefore assist early and<br />
struggling readers to gain confidence in their ability to read with ease, ensuring that reading<br />
becomes a more enjoyable and progressive experience.<br />
This training guide is divided into three sections:<br />
Administrators<br />
This section is for those responsible in the school for administering the <strong>Fluency</strong> <strong>Tutor</strong><br />
account. It explains:<br />
<br />
<br />
<br />
<br />
<br />
How to log in<br />
How to set up and manage the teachers using <strong>Fluency</strong> <strong>Tutor</strong><br />
How to set up and manage the students using <strong>Fluency</strong> <strong>Tutor</strong><br />
How to export Student results<br />
How to customise the schools <strong>Fluency</strong> <strong>Tutor</strong> website<br />
Teachers<br />
This section is for those teachers who will be using <strong>Fluency</strong> <strong>Tutor</strong> with their students. It<br />
explains:<br />
<br />
<br />
<br />
<br />
<br />
How to log in<br />
How to create a group of students<br />
How to assign an exercise to a group/student<br />
How to mark a student’s assessment<br />
How to view the progress of a student<br />
Students<br />
This section is for those teachers who will be using <strong>Fluency</strong> <strong>Tutor</strong> with their students. This is<br />
to help them teach the students how to use <strong>Fluency</strong> <strong>Tutor</strong>. It explains:<br />
<br />
<br />
<br />
<br />
<br />
How to log in<br />
How to practise their reading<br />
How to complete an assessment<br />
How to see the scores for their assessments<br />
How to see their progress<br />
Page 6<br />
<strong>Texthelp</strong> Systems Limited
System Requirements<br />
Computer:<br />
- Windows PC or Apple Mac<br />
- Fast Internet access (broadband speed or equivalent)<br />
Web browser to be at least:<br />
- Internet Explorer 8<br />
- Firefox 3<br />
- Google Chrome 10<br />
- Safari 4<br />
Minimum Flash Version:<br />
- Adobe Flash Player version 10.1<br />
Note: it is recommended that you always use the most up-to-date version of your browser<br />
software and Flash.<br />
Other hardware:<br />
- Headphones or speakers<br />
- Microphone for students<br />
- A headset with microphone<br />
If you would like to check that the computer can run <strong>Fluency</strong> <strong>Tutor</strong> go to:<br />
www.texthelp.com/ftcheck<br />
<strong>Texthelp</strong> Systems Limited Page 7
Administration<br />
<strong>Fluency</strong> <strong>Tutor</strong><br />
Administration<br />
In this section you will learn how to:<br />
<br />
<br />
<br />
<br />
<br />
Log in<br />
Set up and manage the teachers<br />
Set up and manage the students<br />
Export student results<br />
Customise the website<br />
Log in<br />
N.B. To log in to your schools <strong>Fluency</strong> <strong>Tutor</strong> website you will need the User Name and<br />
Password provided by <strong>Texthelp</strong>.<br />
1. Open your web browser and enter the schools <strong>Fluency</strong> <strong>Tutor</strong> website address.<br />
When the homepage opens, enter your User Name and Password.<br />
2. Click on Login.<br />
3. You will now be in your schools <strong>Fluency</strong> <strong>Tutor</strong> website. From here you will be able<br />
to:<br />
a. Manage the teachers who have access to your school’s <strong>Fluency</strong> <strong>Tutor</strong>.<br />
b. Manage the students who have access to your school’s <strong>Fluency</strong> <strong>Tutor</strong>.<br />
c. Export the student results.<br />
d. Customise the schools <strong>Fluency</strong> <strong>Tutor</strong> website.<br />
Page 8<br />
<strong>Texthelp</strong> Systems Limited
<strong>Fluency</strong> <strong>Tutor</strong><br />
Administration<br />
This is an example of a school’s <strong>Fluency</strong> <strong>Tutor</strong> website:<br />
Customisable<br />
picture<br />
Manage the<br />
Teachers<br />
and Students<br />
School’s Name<br />
Help<br />
Logout<br />
Export<br />
Student<br />
Results<br />
Customise<br />
the website<br />
4. At any time when you have finished with <strong>Fluency</strong> <strong>Tutor</strong> you should Logout.<br />
5. If you need help in using <strong>Fluency</strong> <strong>Tutor</strong>, click on Help.<br />
Setting up and managing teachers<br />
As the Administrator you set up and manage the teachers who have access to your school’s<br />
<strong>Fluency</strong> <strong>Tutor</strong>. This includes assigning a password for each teacher. Before continuing with<br />
this exercise have the list of teachers prepared and decide how best to assign passwords.<br />
For information on Username and Password limitations please see the Appendix.<br />
Adding teachers<br />
1. Click on Manage Teachers. This will bring up the Teacher Management section:<br />
Teachers List<br />
2. To add a teacher click on Add new Teacher to bring up the Add New Teacher<br />
section:<br />
Teacher<br />
fields<br />
Save<br />
3. Complete all Teacher fields with the relevant information. For information on<br />
Username and Password limitations please see the Appendix.<br />
N.B. you will not be able to save unless you have entered information in the<br />
First Name, Last Name, Email address, User Name and Password fields.<br />
<strong>Texthelp</strong> Systems Limited Page 9
Administration<br />
<strong>Fluency</strong> <strong>Tutor</strong><br />
4. Once complete click on Save.<br />
5. You will be returned back to the Teacher Management section. There will be a<br />
message saying the Teacher details have been added successfully and the Teachers<br />
name will now appear in the Teachers List. Make sure you give the log in information<br />
to all your teachers.<br />
Teachers List<br />
6. Repeat steps 2-4 to add more teachers as required.<br />
Modifying a teacher’s details<br />
You may need to change the details held for a teacher. For example, you may need to<br />
reassign a password or Disable/Enable the teacher’s ability to use <strong>Fluency</strong> <strong>Tutor</strong>.<br />
1. To modify a Teacher’s details, click on the Teacher in the Teacher List and then click<br />
on Modify Selected Teacher. This will bring up the Modify Teacher section:<br />
Teacher<br />
fields<br />
Enable/Disable<br />
2. From here you can:<br />
a. Edit any fields for the teacher, including the Password.<br />
b. Enable or Disable the teacher from using <strong>Fluency</strong> <strong>Tutor</strong>.<br />
3. Once you have made the changes, click on Save.<br />
4. You will be returned to the Teacher Management section. There will be a message<br />
to say that the Teacher’s details have been updated successfully.<br />
Page 10<br />
<strong>Texthelp</strong> Systems Limited
<strong>Fluency</strong> <strong>Tutor</strong><br />
Administration<br />
N.B. Any teacher who has been disabled will be shown with Inactive beside their name:<br />
Inactive<br />
Setting up and managing students<br />
As the Administrator you set up and manage the students who have access to your school’s<br />
<strong>Fluency</strong> <strong>Tutor</strong>. This includes assigning a password for each student. Before continuing with<br />
this exercise have the list of students prepared and decide how best to assign a password.<br />
For information on Username and Password limitations please see the Appendix. You can<br />
add students individually or import multiple students using a *.CSV file. For more<br />
information on .CSV files please see the Appendix.<br />
Adding students individually<br />
1. Click on Manage Students. This will bring up the Student Management section:<br />
Student List<br />
2. To add a student, click on Add New Student to bring up the Add New Student<br />
section:<br />
Student fields<br />
Save<br />
3. Complete all Student fields with the relevant information.<br />
<strong>Texthelp</strong> Systems Limited Page 11
Administration<br />
<strong>Fluency</strong> <strong>Tutor</strong><br />
N.B. you will need to share the User Name and Password with the student as they will<br />
need it to login.<br />
4. Once complete click on Save.<br />
N.B. You will not be able to save unless you have entered information in the First<br />
Name, Last Name, User Name, Year, Date of Birth, Gender and Application Skin fields.<br />
5. You will be returned back to the Student Management section. There will be a<br />
message saying the Student details have been added successfully and the Student’s<br />
name will now appear in the Student List.<br />
Student<br />
List<br />
6. Repeat steps 2-4 to add all students required.<br />
Page 12<br />
<strong>Texthelp</strong> Systems Limited
<strong>Fluency</strong> <strong>Tutor</strong><br />
Administration<br />
Importing multiple students<br />
If you have a .CSV file with the students who are to use <strong>Fluency</strong> <strong>Tutor</strong> you can easily add<br />
them.<br />
1. Click on Manage Students. This will bring up the Student Management section:<br />
2. Click on Import Multiple Students.<br />
3. This will bring up the Import Students section:<br />
Choose File<br />
Preview<br />
4. Click on Choose File and find the relevant *.csv file.<br />
5. Click on Open.<br />
6. Click on Preview and a processing bar will ask you to wait:<br />
7. The details for the students will appear:<br />
<strong>Texthelp</strong> Systems Limited Page 13
Administration<br />
<strong>Fluency</strong> <strong>Tutor</strong><br />
8. Check the details and then click on Import.<br />
9. There will be a processing bar and then you will be returned to the Student<br />
Management section:<br />
Student<br />
List<br />
10. There will be a message to say that the student details have been imported<br />
successfully.<br />
11. The students that you have imported will appear in the Student List.<br />
Modifying a student’s details<br />
You may need to change the details held for a student. For example, you may need to<br />
reassign a password or Disable/Enable the student’s ability to use <strong>Fluency</strong> <strong>Tutor</strong>.<br />
1. To modify a Student’s details, click on the Student in the Student List and then click<br />
on Modify Student. This will bring up the Modify Student section:<br />
Student fields<br />
Enable/Disable<br />
2. From here you can:<br />
a. Edit any fields for the student, including the Password.<br />
b. Enable or Disable the student from using <strong>Fluency</strong> <strong>Tutor</strong>.<br />
3. Once you have made the changes, click on Save.<br />
4. You will be returned to the Student Management section. There will be a message to<br />
say that the Student’s details have been updated successfully.<br />
N.B. Any students who have been Disabled will be shown with Inactive beside their<br />
name:<br />
Page 14<br />
<strong>Texthelp</strong> Systems Limited
<strong>Fluency</strong> <strong>Tutor</strong><br />
Administration<br />
Inactive<br />
Exporting Student Results<br />
You can export student results.<br />
1. To export student results click on Export student results. This will bring up the<br />
Export Student Results section:<br />
2. Click on the link and choose to open or save the file.<br />
3. The .CSV file that is produced will have data for each marked student exercise in the<br />
school to include:<br />
a. Student Last Name<br />
b. Student First Name<br />
c. Student Middle Initials<br />
d. Teacher Last Name<br />
e. Teacher First Name<br />
f. Teacher Middle Initials<br />
g. Group Name<br />
h. Completion Date<br />
i. Exercise Title<br />
j. Lexile Level<br />
k. WCPM<br />
l. % Words Correct<br />
m. <strong>Fluency</strong> Score<br />
n. Comprehension Score<br />
<strong>Texthelp</strong> Systems Limited Page 15
Administration<br />
<strong>Fluency</strong> <strong>Tutor</strong><br />
Customising the website<br />
You can customise the appearance of your schools <strong>Fluency</strong> <strong>Tutor</strong> website by adding a<br />
picture and a welcome message.<br />
1. To customise the website click on Website Customization. This will bring up the<br />
Website Customization section:<br />
Preview<br />
2. If you want to add a picture click on Browse. Navigate to where the picture is and<br />
then click on Open.<br />
3. You can edit the School Name.<br />
4. To see how it will appear click on Preview.<br />
5. If you are happy with the Preview click on Save. If you don’t want to save the<br />
customisation click on Cancel.<br />
Page 16<br />
<strong>Texthelp</strong> Systems Limited
<strong>Fluency</strong> <strong>Tutor</strong><br />
Teachers<br />
Teachers<br />
In this section you will learn how to:<br />
<br />
<br />
<br />
<br />
<br />
<br />
<br />
<br />
6.<br />
Log in<br />
Creating a group<br />
Assign a practise exercise<br />
Assign an assessment<br />
View completed assessments<br />
Mark completed assessments<br />
View a student’s fluency record<br />
View a group’s progress<br />
Log in<br />
N.B. To log in to your school’s <strong>Fluency</strong> <strong>Tutor</strong> website you will need the User Name and<br />
Password provided by your school’s <strong>Fluency</strong> <strong>Tutor</strong> Administrator.<br />
1. Open your web browser and enter the school’s <strong>Fluency</strong> <strong>Tutor</strong> website address.<br />
When the homepage opens, enter your User Name and Password.<br />
2. Click on Login.<br />
<strong>Texthelp</strong> Systems Limited Page 17
Teachers<br />
<strong>Fluency</strong> <strong>Tutor</strong><br />
3. <strong>Fluency</strong> <strong>Tutor</strong> will open and display the Dashboard:<br />
Resources<br />
4. When you first start to use <strong>Fluency</strong> <strong>Tutor</strong>, your Dashboard will be empty because<br />
you have not set up your groups. As you use <strong>Fluency</strong> <strong>Tutor</strong> with your students this<br />
will have information about how they are progressing.<br />
5. To see resources to help you use <strong>Fluency</strong> <strong>Tutor</strong> with your students click on<br />
Resources.<br />
6. At any time when you have finished with <strong>Fluency</strong> <strong>Tutor</strong> you should Logout.<br />
7. If you need help in using <strong>Fluency</strong> <strong>Tutor</strong>, click on Help.<br />
Creating a group<br />
Before you can begin to use <strong>Fluency</strong> <strong>Tutor</strong> you will first need to create a group or groups.<br />
These will be made up of the students you will be using <strong>Fluency</strong> <strong>Tutor</strong> with.<br />
1. Click on the Group Settings tab.<br />
2. The Group Settings section will open:<br />
Create<br />
New<br />
Group<br />
3. Click on Create New Group.<br />
Page 18<br />
<strong>Texthelp</strong> Systems Limited
<strong>Fluency</strong> <strong>Tutor</strong><br />
Teachers<br />
4. This will bring up the Create New Group window:<br />
Group<br />
Name<br />
Group<br />
Notes<br />
Student<br />
List<br />
5. Type in a name for the Group in the Group Name field. You can add notes for the<br />
group if you wish.<br />
6. The Available students list will be a list of all the students you have available to work<br />
with.<br />
N.B. This list is created by the Administrator. If a student is not in the list you will<br />
need to get the Administrator to add them.<br />
7. From the list of Available students, select a student and then click on the button.<br />
8. If you wish to add all the students from the Available students list click on the<br />
button.<br />
9. To remove a student from the group, select them in the Students in group list and<br />
click on the<br />
button.<br />
10. To remove all the students from the group, click on the button.<br />
N.B. You can filter the list of Available Students by Year or by Partial Name.<br />
11. When you have all the students you need for the group added to the Students in<br />
Group list, click on Save:<br />
12. You will be returned to the Groups Settings tab.<br />
13. You can create as many groups as you need. Students can be in more than one<br />
group.<br />
<strong>Texthelp</strong> Systems Limited Page 19
Teachers<br />
<strong>Fluency</strong> <strong>Tutor</strong><br />
14. At any time when you need to work with a group select it from the Select a group<br />
drop down list:<br />
Select a group<br />
drop down list<br />
Setting Students a Target <strong>Fluency</strong> Level<br />
It is possible to set students a target fluency level that you wish them to aim for.<br />
1. In the Group Settings tab when you choose any group that you have created from<br />
the Select a group drop down you will notice that beside each student there is<br />
Target WCPM, Target WCPM Date, Lexile Level and Theme:<br />
Tick boxes to<br />
select<br />
students<br />
2. These were automatically set depending on the student’s year.<br />
3. If you wish to change these, choose which student(s) you wish to change by<br />
checking or unchecking the tick box to the left of each student’s name. By default all<br />
students are selected.<br />
4. You can enter Target Words Correct Per Minute, Target Words Correct Per Minute<br />
Date and Lexile Level.<br />
5. In the theme, you have the choice of Primary or Secondary. The Primary theme has<br />
a younger appealing interface, while the Secondary theme has a more mature look.<br />
6. Enter the new values for whichever target(s) you want changed and/or choose the<br />
different Theme then click on Update:<br />
Save<br />
Page 20<br />
<strong>Texthelp</strong> Systems Limited
<strong>Fluency</strong> <strong>Tutor</strong><br />
Teachers<br />
7. Then click on Save.<br />
8. A message will appear asking if you are sure you want to apply the changes:<br />
9. If you are happy with the changes, click on OK.<br />
10. If you don’t want to make the changes, click on Cancel.<br />
Modify a Group<br />
1. If you need to modify a group select the group from the Select a group drop down<br />
list in the Group Settings tab and then click on Modify this group:<br />
Modify<br />
this group<br />
2. This will open the Modify Group Settings section:<br />
Save<br />
3. From here you can add or remove students from the group.<br />
4. If you wish to delete the whole group, click on Delete this Group.<br />
<strong>Texthelp</strong> Systems Limited Page 21
Teachers<br />
<strong>Fluency</strong> <strong>Tutor</strong><br />
5. A message will appear asking if you are sure you want to delete the group. If you<br />
wish to delete the group, click on OK:<br />
6. If you make any changes to the group, click on Save.<br />
7. You will be returned to the Group Settings tab.<br />
View/Print Login Details<br />
1. There is the ability to view and print a list of the students in a group, with the schools<br />
<strong>Fluency</strong> <strong>Tutor</strong> website details and each student’s User Name and Password. To do<br />
this select the group from the Select a group drop down list in the Group Settings<br />
tab and then click on View/Print Login Details:<br />
View/Print<br />
Login<br />
Details<br />
2. You can Open or Save the file.<br />
3. A PDF document will be created with each of the students in the group, the <strong>Fluency</strong><br />
<strong>Tutor</strong> school website (School URL) and each student’s User Name and Password:<br />
4. This can then be printed and separated for each student. The student can take this<br />
home to easily access <strong>Fluency</strong> <strong>Tutor</strong> from a computer at home.<br />
Page 22<br />
<strong>Texthelp</strong> Systems Limited
<strong>Fluency</strong> <strong>Tutor</strong><br />
Teachers<br />
Assign a practise or assessment exercise to a group<br />
You can assign exercises to a group as a practise or as an assessment.<br />
Practise exercises:<br />
- allow the student to practise their reading<br />
- allow the student to check their comprehension<br />
- are not marked by the teacher<br />
- do not have a completion date<br />
Assessment exercises:<br />
- are to assess the student’s reading fluency<br />
- test their comprehension<br />
- are marked by the teacher and <strong>Fluency</strong> <strong>Tutor</strong> (comprehension questions)<br />
- have a completion date<br />
For information on assigning exercises according to Lexile level, please see the Appendix:<br />
Approximate Age to Lexile Level.<br />
1. Click on the Group Assessments tab.<br />
2. If you need to change to a different group, select it from the Select a group<br />
dropdown list:<br />
3. Click on Assign exercises to this group. The Assign group exercise section<br />
appears:<br />
Exercise<br />
List<br />
Filter<br />
exercise list<br />
Description<br />
Assign<br />
exercise<br />
Preview<br />
<strong>Texthelp</strong> Systems Limited Page 23
Teachers<br />
<strong>Fluency</strong> <strong>Tutor</strong><br />
4. First, if you wish, you can filter the exercises by Content type:<br />
5. Next you can choose the Exercise Rating Type:<br />
6. Once you have the score type you can filter the exercise range, click on either of the<br />
drag arrows and keeping the left mouse click down, drag the arrow across:<br />
Drag arrow<br />
Drag arrow<br />
7. As you do this the range will change:<br />
8. When you are happy with the filter, click on Search.<br />
Page 24<br />
<strong>Texthelp</strong> Systems Limited
<strong>Fluency</strong> <strong>Tutor</strong><br />
Teachers<br />
9. To see an exercise, click on it in the Exercise List and click Preview. The exercise<br />
will open:<br />
10. To view the Quiz for this exercise, click on View Questions.<br />
11. The Quiz questions will be shown:<br />
12. You can navigate through the questions by clicking on the Next or Prev buttons.<br />
13. If you wish to return to the exercise, click on View Text.<br />
14. After reviewing the exercise return to the Assign group exercise section by clicking<br />
on Back.<br />
<strong>Texthelp</strong> Systems Limited Page 25
Teachers<br />
<strong>Fluency</strong> <strong>Tutor</strong><br />
15. To assign the exercise as an Assessment, have the Assessment option selected:<br />
Calendar<br />
button<br />
16. To change the Due Date for the assessment from the current date, click on the<br />
Calendar button.<br />
17. Choose the required date by clicking on it and then click on Assign.<br />
18. A message will appear above the group name to say the exercise has been assigned<br />
successfully:<br />
19. To assign an exercise as a Practise, select the Practise option:<br />
20. Then click on Assign.<br />
21. A message will appear above the group name to say the exercise has been assigned<br />
successfully.<br />
22. You can continue to assign further exercises if needed.<br />
23. When you have finished assigning exercises to the group, click on Home or Back to<br />
return to the Dashboard.<br />
Page 26<br />
<strong>Texthelp</strong> Systems Limited
<strong>Fluency</strong> <strong>Tutor</strong><br />
Teachers<br />
Dashboard<br />
24. Beside each of the student’s names you will see the number of assessments that are<br />
pending:<br />
25. If you click on a student’s name, a list of pending assessments and assigned practise<br />
exercises will be shown. You can see if an exercise has been set as an assessment<br />
or a practise under Type:<br />
26. An assessment will be shown with the Assessment button beside it.<br />
27. A practise will be shown with the Practise button beside it.<br />
28. To return to the Dashboard, click on Back.<br />
<strong>Texthelp</strong> Systems Limited Page 27
Teachers<br />
<strong>Fluency</strong> <strong>Tutor</strong><br />
Assign a practise or assessment exercise to an individual<br />
1. To assign a practise or assessment exercise to an individual, click on the Assign<br />
Individual Exercise<br />
button beside the student on the Dashboard:<br />
2. This will bring up the Assign individual exercises section:<br />
3. First, if you wish, you can filter the exercises by Content type:<br />
4. Next you can choose the Exercise Rating Type:<br />
Page 28<br />
<strong>Texthelp</strong> Systems Limited
<strong>Fluency</strong> <strong>Tutor</strong><br />
Teachers<br />
5. Once you have the score type you can filter the exercise range, click on either of the<br />
drag arrows and keeping the left mouse click down, drag the arrow across:<br />
Drag arrow<br />
Drag arrow<br />
6. As you do this the range will change:<br />
7. When you are happy with the filter, click on Search.<br />
8. The list of exercises available will change to reflect the adjusted range.<br />
N.B. Alternatively you can search the exercises by Keyword by typing the keyword in<br />
to the Keyword text box and clicking on Search.<br />
9. To see an exercise, click on it in the Exercise List and click Preview. The exercise<br />
will open:<br />
<strong>Texthelp</strong> Systems Limited Page 29
Teachers<br />
<strong>Fluency</strong> <strong>Tutor</strong><br />
10. To view the Quiz for this exercise, click on View Questions.<br />
11. The Quiz questions will be displayed:<br />
12. You can navigate through the questions by clicking on the Next or Prev buttons.<br />
13. If you wish to return to the exercise, click on View Text.<br />
14. After reviewing the exercise return to the Assign individual exercise section by<br />
clicking on Back.<br />
15. To assign the exercise as an Assessment, have the Assessment option selected:<br />
Calendar<br />
button<br />
16. To change the Due Date for the assessment from the current date, click on the<br />
Calendar button.<br />
17. Choose the required date by clicking on it, then click Assign.<br />
18. A message will appear above the student’s name to say the exercise has been<br />
assigned successfully:<br />
Page 30<br />
<strong>Texthelp</strong> Systems Limited
<strong>Fluency</strong> <strong>Tutor</strong><br />
Teachers<br />
19. To assign an exercise as a Practise, select the Practise radio option:<br />
20. Click on Assign.<br />
21. A message will say the exercise has been assigned successfully.<br />
22. You can continue to assign further exercises if needed.<br />
23. Click on Home or Back to return to the Dashboard.<br />
24. Beside each of the student’s names you will see the number of assessments that are<br />
pending:<br />
25. If you click on a student’s name, a list of pending assessments and assigned practise<br />
exercises will be shown. You can see if an exercise has been set as an assessment<br />
or a practise under Type:<br />
<strong>Texthelp</strong> Systems Limited Page 31
Teachers<br />
<strong>Fluency</strong> <strong>Tutor</strong><br />
26. An assessment will be shown with the Assessment button beside it.<br />
27. A practise will be shown with the Practise button beside it.<br />
28. To return to the Dashboard, click on Back.<br />
Marking completed assessments<br />
1. To mark any assessments which have been completed, click on the Marking tab.<br />
The number of assessments that are waiting for you to mark will be shown in<br />
brackets:<br />
Marking<br />
2. This will bring up a list of assessments that have been completed by your students:<br />
3. To mark an assessment, click on the button that appears beside the assessment<br />
in the Actions column:<br />
Page 32<br />
<strong>Texthelp</strong> Systems Limited
<strong>Fluency</strong> <strong>Tutor</strong><br />
Teachers<br />
4. The exercise will appear:<br />
Playback<br />
controls<br />
Exercise<br />
Error<br />
Details<br />
View<br />
Questions<br />
Re-assign<br />
exercise<br />
Complete<br />
5. By clicking View Questions, you can see your students’ answers on the<br />
comprehension quiz that have been automatically marked by <strong>Fluency</strong> <strong>Tutor</strong>:<br />
6. To navigate through the questions, click on Next or Prev.<br />
7. To return to the exercise, click on View Text.<br />
8. To begin marking the assessment, click on the Play button.<br />
9. You will hear the student read the text.<br />
<strong>Texthelp</strong> Systems Limited Page 33
Teachers<br />
<strong>Fluency</strong> <strong>Tutor</strong><br />
10. When the student makes an error, click on the word and choose the type of error<br />
from the list that appears:<br />
11. The word will change to red unless you choose Self-correction in which case the<br />
word will turn green.<br />
12. If the student inserts a word, click on the blue arrow that appears between the words<br />
and choose Insertion:<br />
13. A popup window will appear where you can type in the word that the student inserted<br />
and then click OK. If you do now want to add the word click Cancel.<br />
14. If you choose Substitution as the type of error a popup window will appear:<br />
15. Type in the word that the student substituted and then click OK. If you do not wish to<br />
add the word click Cancel.<br />
16. If the student omits a word or skips words, select the relevant text and select<br />
Omission:<br />
Page 34<br />
<strong>Texthelp</strong> Systems Limited
<strong>Fluency</strong> <strong>Tutor</strong><br />
Teachers<br />
17. If it is a Transposition you should select all the relevant words involved then click on<br />
Transposition.<br />
18. If the student self-corrects, select “Self Correction.” The word will turn green to show<br />
that self-correction is not an error and will not be deducted from the student’s score.<br />
19. If you need to stop at any stage, click on Stop.<br />
20. If you need to listen again to any part of the recording, you can click and drag the<br />
play back control using your mouse:<br />
Click and<br />
drag<br />
21. The recording will stop after one minute of the recording. If the student has failed to<br />
read the whole exercise, click on the last word read and select Set last word.<br />
22. To review any marked error hover your mouse over the word. The type of error will<br />
be displayed:<br />
<strong>Texthelp</strong> Systems Limited Page 35
Teachers<br />
<strong>Fluency</strong> <strong>Tutor</strong><br />
23. As you mark the exercise the Details panel will change to reflect the type of errors<br />
and the Words Correct Per Minute (WCPM):<br />
24. At any stage, you can start the marking process again by clicking on Clear all errors.<br />
25. When you have finished marking the assessment, click Complete.<br />
26. The next stage of the marking process is to rate the student for:<br />
a. Expression:<br />
Choose which description best fits the student’s reading of the passage and then click<br />
Next.<br />
Page 36<br />
<strong>Texthelp</strong> Systems Limited
<strong>Fluency</strong> <strong>Tutor</strong><br />
Teachers<br />
b. Phrasing:<br />
Choose which description best fits the student’s reading of the passage and then click<br />
Next.<br />
c. Smoothness:<br />
Choose which description best fits the student’s reading of the passage and then click<br />
Next.<br />
d. Pace:<br />
Choose which description best fits the student’s reading of the passage and then click<br />
Next.<br />
<strong>Texthelp</strong> Systems Limited Page 37
Teachers<br />
<strong>Fluency</strong> <strong>Tutor</strong><br />
27. The program will automatically average the prosody scores. If you wish, you can<br />
provide written feedback for the student:<br />
28. Click on Finish.<br />
29. You will be returned to the Marking tab.<br />
Mark, Re-marking, reviewing or removing an assessment<br />
1. On the Dashboard first if you need to change to a different group, choose it from the<br />
Select a group dropdown list.<br />
Dashboard<br />
Select a<br />
group<br />
dropdown<br />
2. Click on any student to view a list of assessments and assigned practise exercises:<br />
Page 38<br />
<strong>Texthelp</strong> Systems Limited
<strong>Fluency</strong> <strong>Tutor</strong><br />
Teachers<br />
3. In the Actions column you can:<br />
a. Mark a completed assessment.<br />
b. Remark a completed assessment.<br />
c. Review a completed assessment.<br />
d. Preview an exercise.<br />
e. Remove a practise or assessment exercise.<br />
4. Click on the Mark button to mark a completed assessment – this will bring up the<br />
exercise and you can mark it as explained in the previous section:<br />
5. Click on the Remark button to remark a completed assessment – you will be<br />
asked if you wish to remark the exercise:<br />
<strong>Texthelp</strong> Systems Limited Page 39
Teachers<br />
<strong>Fluency</strong> <strong>Tutor</strong><br />
6. Click on OK and this will bring up the exercise and you will be able to remark it by<br />
clicking on Re-mark Exercise:<br />
7. Click on the Review button to review the marks for a completed assessment –<br />
this will bring up the exercise and show all the markings:<br />
Page 40<br />
<strong>Texthelp</strong> Systems Limited
<strong>Fluency</strong> <strong>Tutor</strong><br />
Teachers<br />
8. You can see the Rubric by clicking on View Rubric. This will bring up the Rubric<br />
showing the marks for Expression, Phrasing, Smoothness, Pace, the average score<br />
for prosody and any written feedback for the student:<br />
9. Click on Back to return to the exercise and Back again to return to the list of<br />
exercises.<br />
10. Click on the Preview button to see the exercise:<br />
View<br />
Questions<br />
11. To see the questions for the exercise, click on View Questions.<br />
12. Click on Back to return to the list of exercises.<br />
<strong>Texthelp</strong> Systems Limited Page 41
Teachers<br />
<strong>Fluency</strong> <strong>Tutor</strong><br />
13. Click on the Remove button to remove a practise or assessment exercise – you<br />
will be asked to confirm if you wish to remove the exercise:<br />
14. Click on Yes to remove or No to keep the exercise:<br />
15. The Title column will have the title of each practise or assessment exercise:<br />
16. The Completed column will have the date on which any completed assessment was<br />
submitted by the student or the last date practised when it is a practise exercise:<br />
17. The Due column will have the date you have set for each assessment to be<br />
completed by:<br />
If the date is shown in red, it is overdue.<br />
18. The Time column will have the amount of time that a student has spent practising on<br />
an exercise you have set them as a practise:<br />
Page 42<br />
<strong>Texthelp</strong> Systems Limited
<strong>Fluency</strong> <strong>Tutor</strong><br />
Teachers<br />
19. The Type column will show if an exercise is a practise or an assessment:<br />
a. Is a practise exercise<br />
b. Is an assessment<br />
20. The Status column will show if an assessment is new or completed:<br />
a. Is a New assessment<br />
b. Is a Completed assessment<br />
c. The column will be blank if it is a practise exercise<br />
21. The Scope column will show if an exercise has be set for an individual or for the<br />
group:<br />
a. Shows it has been set for the individual<br />
b. Shows that is has been set for the group<br />
22. The WCPM will show the current Words Correct Per Minute:<br />
This may adjust once you mark the assessment.<br />
23. Click on Back or Home to return to the Dashboard.<br />
<strong>Texthelp</strong> Systems Limited Page 43
Teachers<br />
<strong>Fluency</strong> <strong>Tutor</strong><br />
View the exercises for the group<br />
1. It is possible to see the exercises that have been set for the group including how the<br />
students in that group have all performed on the same exercise.<br />
2. Click on the Group Assignments tab.<br />
3. Choose the group from the Select a group drop down list:<br />
4. A list of exercises will be shown below:<br />
5. You will see the list of exercises that have been assigned for the group, the type of<br />
exercise, how many responses have been received and the due date.<br />
6. In the Actions Column you can choose to:<br />
a. Preview the exercise<br />
b. View a group report for that exercise<br />
c. Remove the exercise<br />
7. To view a report for any selected assessment, click on the View Group Report<br />
button or click on the Exercise Title.<br />
Page 44<br />
<strong>Texthelp</strong> Systems Limited
<strong>Fluency</strong> <strong>Tutor</strong><br />
Teachers<br />
8. A report will appear below showing the WCPM, <strong>Fluency</strong> Score and Quiz Score for<br />
each of the students who have completed the exercise:<br />
Median<br />
9. The Median (middle) score is in bold.<br />
View a student’s progress<br />
1. To view a student’s progress, click on the Dashboard. If necessary, select the group<br />
from the Select a group dropdown list:<br />
2. The graph at the bottom will show the progress for each of the students in the group:<br />
<strong>Texthelp</strong> Systems Limited Page 45
Teachers<br />
<strong>Fluency</strong> <strong>Tutor</strong><br />
3. If you click on the Progress button beside the student, the associated graph<br />
will be highlighted:<br />
N.B If a student has not completed any assessment the Progress button will appear<br />
like this:<br />
4. When you hover your mouse over any of the points in the graph, a tooltip will provide<br />
more detail – the student’s name, the Exercise title, the Lexile Level, the Words<br />
Correct Per Minute (WCPM) and the date the exercise was completed:<br />
5. To remove the highlight, click on the button beside the student’s name:<br />
6. To the right of each student, is the number of Pending assessments and the number<br />
of assessments overdue.<br />
7. Each student’s performance is listed under Target WCPM, Highest WCPM, Highest<br />
% Words Correct and % Target Reached.<br />
8. Under the Progress you will see a small thumbnail picture showing the<br />
student’s progress.<br />
9. To see more detail on how a student is progressing, click on the View Reports<br />
button to the left of each student’s name, under the Actions column.<br />
10. This will display the reports for the student:<br />
Page 46<br />
<strong>Texthelp</strong> Systems Limited
<strong>Fluency</strong> <strong>Tutor</strong><br />
Teachers<br />
11. You can choose the Report from the Report drop down:<br />
12. There is a choice of 5 different reports that can be created:<br />
a. <strong>Fluency</strong> measurement<br />
b. Error analysis<br />
c. Lexile level performance<br />
d. Problem words report<br />
e. Summary report<br />
13. To set the Time period, click on the relevant Calendar button. This will open the<br />
calendar and choose the date.<br />
14. For the <strong>Fluency</strong> measurement report, you can also choose to display the different<br />
types of error which were made, <strong>Fluency</strong> Score, Quiz Score, WCPM and the target<br />
WCPM.<br />
15. Click on Go to display the report.<br />
16. The report will be created and displayed:<br />
a. <strong>Fluency</strong> measurement with all errors, WCPM, <strong>Fluency</strong> Score, Quiz Score and<br />
target WCPM:<br />
If you hover your mouse over any of the exercise bars a tooltip will provide more<br />
detail – the title of the Exercise, the Lexile Level and the WCPM:<br />
<strong>Texthelp</strong> Systems Limited Page 47
Teachers<br />
<strong>Fluency</strong> <strong>Tutor</strong><br />
If you click on an exercise bar, the marked exercise will appear:<br />
To return to the report, click on Back.<br />
b. Error analysis:<br />
If you hover your mouse over any of the exercise bars, a tooltip will provide more detail<br />
– the error type and the number:<br />
Page 48<br />
<strong>Texthelp</strong> Systems Limited
<strong>Fluency</strong> <strong>Tutor</strong><br />
Teachers<br />
c. Lexile level performance graph:<br />
If you hover your mouse over any of the points, a tooltip will provide more detail – the<br />
title of the exercise, the Lexile Level and the percentage Words Correct:<br />
d. Problem words report:<br />
<strong>Texthelp</strong> Systems Limited Page 49
Teachers<br />
<strong>Fluency</strong> <strong>Tutor</strong><br />
e. Summary report:<br />
If you hover your mouse over any of the points, a tooltip will provide more detail, for<br />
example the title of the exercise, the Lexile Level, % Words Correct and the date:<br />
17. If you wish to print out any of the graphs, click on Print friendly version at the<br />
bottom of the screen.<br />
18. A new webpage will open with the graph. Print as you would a normal webpage.<br />
N.B. For further information on the graphs please see the online help.<br />
View a group’s progress<br />
1. Click on the Group Assignments tab.<br />
2. Choose the group from the Select a group drop down list:<br />
3. Click on View group report.<br />
4. Choose the date range by clicking on the Start and End date calendars;<br />
Page 50<br />
<strong>Texthelp</strong> Systems Limited
<strong>Fluency</strong> <strong>Tutor</strong><br />
Teachers<br />
5. You can then choose to show:<br />
a. WCPM Improvement<br />
b. (%) Words Correct Improvement<br />
c. <strong>Fluency</strong> Score<br />
<strong>Texthelp</strong> Systems Limited Page 51
Teachers<br />
<strong>Fluency</strong> <strong>Tutor</strong><br />
d. Quiz score<br />
6. If you hover your mouse over any of the data points a tooltip will provide:<br />
a. The student’s name<br />
b. The time spent practising<br />
c. The first and last Lexile level of the exercise assigned<br />
d. Student improvement in the chosen score type<br />
If you wish to print this report click on Print friendly version.<br />
Page 52<br />
<strong>Texthelp</strong> Systems Limited
<strong>Fluency</strong> <strong>Tutor</strong><br />
Students<br />
In this section you will learn how to:<br />
Students<br />
<br />
<br />
<br />
<br />
<br />
Log in<br />
Practise your reading<br />
Measure your reading<br />
View marked assessments<br />
See your progress<br />
N.B. The examples shown in this section are displayed with the Primary theme. Please be<br />
aware that if the Secondary theme has been set for the student the screen will look slightly<br />
different.<br />
Log in<br />
N.B. To log in to your school’s <strong>Fluency</strong> <strong>Tutor</strong> website you will need the User Name and<br />
Password provided by your teacher.<br />
1. Open your web browser and enter the schools <strong>Fluency</strong> <strong>Tutor</strong> website address.<br />
When the homepage opens, enter your User Name and Password.<br />
2. Click on Login.<br />
<strong>Texthelp</strong> Systems Limited Page 53
Students<br />
<strong>Fluency</strong> <strong>Tutor</strong><br />
3. The Microphone Assessment Page will open.<br />
4. Put on your headset and have the microphone close to your mouth.<br />
5. If everything is working you will see the meter bar moving:<br />
Meter bar<br />
6. Click on Continue.<br />
7. Your home page will open:<br />
8. From here you can:<br />
a. Practise your reading (when exercises have been assigned by a teacher)<br />
b. Measure your reading (when assessments have been assigned by a teacher)<br />
c. See the scores for your reading (when assessments have been completed)<br />
d. See your progress graphs (when assessments have been completed)<br />
9. You can choose how the text in the exercises will appear by clicking on Colours.<br />
Page 54<br />
<strong>Texthelp</strong> Systems Limited
<strong>Fluency</strong> <strong>Tutor</strong><br />
Students<br />
10. This will bring up the themes:<br />
11. To move to the next Theme, click on the button.<br />
12. To move back to a previous Theme, click on the button.<br />
13. When you find the one you wish to use, click on the OK button.<br />
14. When you have finished using <strong>Fluency</strong> <strong>Tutor</strong>, you should always Logout.<br />
Practise your reading<br />
1. To practise your reading, click on Practise my reading.<br />
2. This will bring up a list of the exercises the teacher has provided for you to practise<br />
your reading:<br />
3. To see a summary of the exercise, click on the title of the exercise and it will be<br />
shown at the bottom of the screen.<br />
4. Once you have chosen an exercise to practise, click on the Start.<br />
<strong>Texthelp</strong> Systems Limited Page 55
Students<br />
<strong>Fluency</strong> <strong>Tutor</strong><br />
5. If your microphone is not working you will get a message:<br />
6. The exercise will be displayed:<br />
Record<br />
Quiz<br />
Read<br />
back<br />
controls<br />
Dictionary<br />
Adobe<br />
Flash<br />
Players<br />
Settings<br />
7. If the Adobe Flash Player Settings panel appears click on Allow. To prevent this<br />
message appearing again, select Remember and then click on Close:<br />
8. You can have the exercise read to you using the Read back controls.<br />
9. To have the exercise read, click on the Play button.<br />
10. To pause the reading at any time, click on the Pause button.<br />
11. To stop the exercise being read, click on the Stop button.<br />
12. To have the last part again, click on the Rewind button.<br />
Page 56<br />
<strong>Texthelp</strong> Systems Limited
<strong>Fluency</strong> <strong>Tutor</strong><br />
Students<br />
13. To have the reading skip forward, click on the Forward button.<br />
14. If you want the whole exercise to be read select Continuous Reading before you<br />
click Play.<br />
15. To look a word up in the dictionary, select the word and click on the Dictionary<br />
button:<br />
16. You can have the text read from the dictionary by clicking on the button.<br />
17. When you have finished, click on the OK button.<br />
18. To turn to the next page of the exercise click the button.<br />
19. To turn the page back click on the button.<br />
20. If you wish to practise recording this exercise, click on Record.<br />
21. The display will change:<br />
22. When you are ready click on Start.<br />
23. When you have finished reading the exercise click Stop.<br />
<strong>Texthelp</strong> Systems Limited Page 57
Students<br />
<strong>Fluency</strong> <strong>Tutor</strong><br />
24. You will be told your reading speed:<br />
25. You can replay your recording by clicking Replay.<br />
26. To see the Quiz questions for the exercise click on Quiz.<br />
27. The Quiz panel will open:<br />
28. To have any of the text read click on the button beside it.<br />
29. Select an answer by clicking on it and then click Next.<br />
30. You can return to the passage at any time to find the answers by clicking on Read.<br />
31. If you wish to return to a previous question, click Previous.<br />
32. When you have answered all of the questions, click Finish.<br />
33. A panel will appear showing you how many questions you got correct:<br />
34. Click on OK.<br />
35. When you have finished with the exercise click on Back. You will be returned to your<br />
Practise reading list.<br />
36. To return to your homepage, click Back.<br />
Page 58<br />
<strong>Texthelp</strong> Systems Limited
<strong>Fluency</strong> <strong>Tutor</strong><br />
Students<br />
Measure my reading<br />
1. To complete any exercises that your teacher has set as an assessment, click on<br />
Measure my reading. The list of exercises that have been assigned will appear:<br />
2. To see a summary of the exercise, click on the title of the exercise and it will be<br />
shown at the bottom of the screen.<br />
3. To begin an exercise, click on the Start beside it.<br />
4. If your microphone is not working you will get a message:<br />
<strong>Texthelp</strong> Systems Limited Page 59
Students<br />
<strong>Fluency</strong> <strong>Tutor</strong><br />
5. The exercise will be displayed:<br />
Adobe<br />
Flash<br />
Players<br />
Settings<br />
6. If the Adobe Flash Player Settings panel appears click on Allow. To prevent this<br />
message appearing again, select Remember and then click on Close:<br />
7. When you are ready click on Start.<br />
8. To turn to the next page of the exercise, click on the button.<br />
9. To turn the page back, click on the button.<br />
10. When you have finished reading the exercise, click on Finish.<br />
Page 60<br />
<strong>Texthelp</strong> Systems Limited
<strong>Fluency</strong> <strong>Tutor</strong><br />
Students<br />
11. Next the Quiz questions will appear:<br />
12. Select an answer and then click Next.<br />
13. When you have answered all the questions, click on Finish.<br />
14. You will be taken back to the list of exercises and there will be a message to tell you<br />
that the exercise has been completed:<br />
15. To return to your homepage, click Back.<br />
<strong>Texthelp</strong> Systems Limited Page 61
Students<br />
<strong>Fluency</strong> <strong>Tutor</strong><br />
See marked assessments<br />
1. To see any assessments which your teacher has marked click on How did I do?<br />
This will open a list of any assessments which have been marked:<br />
2. To see an exercise click on Start.<br />
3. The exercise will open and you will be able to see the marks:<br />
Page 62<br />
<strong>Texthelp</strong> Systems Limited
<strong>Fluency</strong> <strong>Tutor</strong><br />
Students<br />
4. Any words where you made a mistake will be highlighted in red. If you click on any of<br />
these you will see a message saying what was wrong:<br />
5. To have any of the text read in the panel click on the button beside it.<br />
6. To close the panel, click on OK.<br />
7. To hear your reading of the exercise, click Play.<br />
8. To pause your reading of the exercise, click on Pause.<br />
9. To stop your reading of the exercise, click on Stop.<br />
10. Any mistakes that you corrected yourself will be shown in green.<br />
11. You will see the Score the teacher gave you for the assessment as stars. If you<br />
click on See Details a panel will open giving more detail about your <strong>Fluency</strong> Score<br />
Summary:<br />
12. To have any of the text read click on the button.<br />
13. To return to the How did I do click on OK.<br />
14. You will also be able to see the mark for the quiz, any notes from the teacher, the<br />
number of Words correct per minute and the Percentage of words correct.<br />
15. If you wish the notes from the teacher read click on the button beside it.<br />
16. When you have finished, click on Back.<br />
17. To return to your homepage, click Back.<br />
<strong>Texthelp</strong> Systems Limited Page 63
Students<br />
<strong>Fluency</strong> <strong>Tutor</strong><br />
See your progress graphs<br />
1. To see your progress click on See my Progress.<br />
2. This will open with your exercise graph:<br />
3. It shows the Words Correct Per Minute, <strong>Fluency</strong> Score, Quiz Score and Target<br />
WCPM (Words Correct Per Minute) for the last 10 marked exercises you have<br />
completed.<br />
4. If you wish you can:<br />
a. View all marked exercises<br />
b. Select a date range.<br />
5. If you hover your mouse over any of the exercises it will give you the name of the<br />
exercise, the WCPM (Words Correct Per Minute) and the date the exercise was<br />
completed:<br />
Page 64<br />
<strong>Texthelp</strong> Systems Limited
<strong>Fluency</strong> <strong>Tutor</strong><br />
Students<br />
6. If you click on one of the columns, the exercise will open so you can see your marks<br />
for it:<br />
7. To return to the Exercise Graph, click on Finish.<br />
8. To see your progress over time, click on the Time Graph:<br />
9. This will make another graph to show your progress over time:<br />
10. The last 10 marked exercises will be shown. If you wish you can:<br />
a. View all marked exercises<br />
b. Select a date range.<br />
<strong>Texthelp</strong> Systems Limited Page 65
Students<br />
<strong>Fluency</strong> <strong>Tutor</strong><br />
11. If you hover your mouse over any date it will give you the reading speed for that date:<br />
12. If you click on one of the columns, the exercise will open so you can see your marks<br />
for it:<br />
13. To return to the Time Graph, click on Finish.<br />
14. To return to your homepage, click Back.<br />
Page 66<br />
<strong>Texthelp</strong> Systems Limited
<strong>Fluency</strong> <strong>Tutor</strong><br />
Appendix<br />
Appendix<br />
Username and Password Limitations<br />
Username: 100 characters limit. Can use alpha-numeric and underscore characters - only<br />
the a to z, A to Z, 0 to 9 and _.<br />
Password: 20 characters limit. Can use alpha-numeric and underscore characters - only the<br />
a to z, A to Z, 0 to 9 and _.<br />
CSV Files<br />
This is a sample of a .csv file with the necessary field names and examples of values:<br />
<strong>Texthelp</strong> Systems Limited Page 67
Appendix<br />
<strong>Fluency</strong> <strong>Tutor</strong><br />
Approximate Age to Lexile Level<br />
A Lexile text level is based on two strong predictors of how difficult a text is to comprehend:<br />
word frequency and sentence length. For those new to Lexile levels we have produced an<br />
approximate age to Lexile level table (below). If you do not know at what Lexile level your<br />
student is reading we recommend that you set 3 exercises in the Lexile level range for the<br />
student’s age based on the Lexile level table.<br />
Age<br />
Year<br />
Key<br />
Stage<br />
Text Measures<br />
6 2 1 200L to 400L<br />
7 3 1 300L to 500L<br />
8 4 1 500L to 700L<br />
9 5 2 650L to 850L<br />
10 6 2 750L to 950L<br />
11 7 2 850L to 1050L<br />
12 8 3 950L to 1075L<br />
13 9 3 1000L to 1100L<br />
14 10 3 1050L to 1150L<br />
15 11 4 1100L to 1200L<br />
16 and 17 12 &13 5 1100L to 1300L<br />
Page 68<br />
<strong>Texthelp</strong> Systems Limited
<strong>Fluency</strong> <strong>Tutor</strong><br />
Appendix<br />
After marking the exercises look at the Lexile. A sample graph is shown here:<br />
You should always be aiming to have the student’s results in the Med (yellow) region.<br />
Results in this region means that the text exercises being set are neither too easy or too<br />
hard for the student.<br />
If the results fall in the High (Green) region the text is too easy for the student and you<br />
should set the student exercises at a higher Lexile level.<br />
If the results fall in the Med (Yellow) region the text is set at a level that correct for the<br />
student. You should continue to set exercises at this Lexile Level. As the students reading<br />
improves the results will start to fall into the High (green) region. At this stage you should set<br />
the student exercises at a higher Lexile level.<br />
If the results fall in the Low (Pink) region the text is set at too high a level for the student.<br />
You should set the student exercises at a lower Lexile level until the results start to fall into<br />
the Med (yellow) region.<br />
<strong>Texthelp</strong> Systems Limited Page 69
Appendix<br />
<strong>Fluency</strong> <strong>Tutor</strong><br />
Scoring Students Assessment<br />
Expression<br />
1. Reads with little expression or enthusiasm in voice. Reads words as if simply to get<br />
them out. Little sense of trying to make text sound like natural language.<br />
2. Some expression. Begins to use voice to make text sound like natural language in<br />
some areas of the text, but not others. Focus remains largely on saying the words.<br />
3. Sounds like natural language throughout the better part of the passage.<br />
Occasionally slips into expressionless reading.<br />
4. Reads with good expression and enthusiasm throughout the text. Sounds like<br />
natural language. The reader is able to vary expression to match his/her<br />
interpretation of the passage.<br />
Phrasing<br />
1. Monotonic with little sense of phrase boundaries, frequent word-by-word reading.<br />
2. Frequent two- and three- word phrases giving the impression of choppy reading;<br />
improper stress and intonation that fail to mark ends of sentences and clauses.<br />
3. Mixture of run-ons, mid-sentence pauses for breath, and possibly some choppiness;<br />
reasonable stress/intonation.<br />
4. Generally well phrased, mostly in clause and sentence units, with adequate attention<br />
to expression.<br />
Smoothness<br />
1. Frequent extended pauses, hesitations, false starts, sound-outs, repetitions, and/or<br />
multiple attempts.<br />
2. Several ‘rough spots’ in text where extended pauses, hesitations, etc., are more<br />
frequent and disruptive.<br />
3. Occasional breaks in smoothness caused by difficulties with specific works and/or<br />
structures.<br />
4. Generally smooth reading with some breaks, but work and structure difficulties are<br />
resolved quickly, usually through self-correction.<br />
Pace (during sections of minimal disruption)<br />
1. Slow and laborious.<br />
2. Moderately slow.<br />
3. Uneven mixture of fast and slow reading.<br />
4. Consistently conversational.<br />
Page 70<br />
<strong>Texthelp</strong> Systems Limited