Chapter 4 Dish Antenna Installation - DBSInstall.com
Chapter 4 Dish Antenna Installation - DBSInstall.com Chapter 4 Dish Antenna Installation - DBSInstall.com
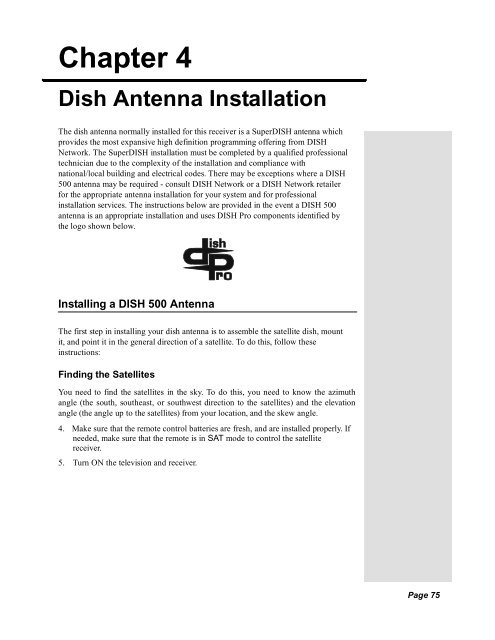
Chapter 4 Dish Antenna Installation The dish antenna normally installed for this receiver is a SuperDISH antenna which provides the most expansive high definition programming offering from DISH Network. The SuperDISH installation must be completed by a qualified professional technician due to the complexity of the installation and compliance with national/local building and electrical codes. There may be exceptions where a DISH 500 antenna may be required - consult DISH Network or a DISH Network retailer for the appropriate antenna installation for your system and for professional installation services. The instructions below are provided in the event a DISH 500 antenna is an appropriate installation and uses DISH Pro components identified by the logo shown below. Installing a DISH 500 Antenna The first step in installing your dish antenna is to assemble the satellite dish, mount it, and point it in the general direction of a satellite. To do this, follow these instructions: Finding the Satellites You need to find the satellites in the sky. To do this, you need to know the azimuth angle (the south, southeast, or southwest direction to the satellites) and the elevation angle (the angle up to the satellites) from your location, and the skew angle. 4. Make sure that the remote control batteries are fresh, and are installed properly. If needed, make sure that the remote is in SAT mode to control the satellite receiver. 5. Turn ON the television and receiver. Page 75
- Page 2 and 3: Chapter 4 Dish Antenna Installation
- Page 4 and 5: Chapter 4 Dish Antenna Installation
- Page 6 and 7: Chapter 4 Dish Antenna Installation
- Page 8 and 9: Chapter 4 Dish Antenna Installation
- Page 10 and 11: Chapter 4 Dish Antenna Installation
- Page 12 and 13: Chapter 4 Dish Antenna Installation
- Page 14 and 15: Chapter 4 Dish Antenna Installation
- Page 16 and 17: Chapter 4 Dish Antenna Installation
- Page 18: Chapter 4 Dish Antenna Installation
<strong>Chapter</strong> 4<br />
<strong>Dish</strong> <strong>Antenna</strong> <strong>Installation</strong><br />
The dish antenna normally installed for this receiver is a SuperDISH antenna which<br />
provides the most expansive high definition programming offering from DISH<br />
Network. The SuperDISH installation must be <strong>com</strong>pleted by a qualified professional<br />
technician due to the <strong>com</strong>plexity of the installation and <strong>com</strong>pliance with<br />
national/local building and electrical codes. There may be exceptions where a DISH<br />
500 antenna may be required - consult DISH Network or a DISH Network retailer<br />
for the appropriate antenna installation for your system and for professional<br />
installation services. The instructions below are provided in the event a DISH 500<br />
antenna is an appropriate installation and uses DISH Pro <strong>com</strong>ponents identified by<br />
the logo shown below.<br />
Installing a DISH 500 <strong>Antenna</strong><br />
The first step in installing your dish antenna is to assemble the satellite dish, mount<br />
it, and point it in the general direction of a satellite. To do this, follow these<br />
instructions:<br />
Finding the Satellites<br />
You need to find the satellites in the sky. To do this, you need to know the azimuth<br />
angle (the south, southeast, or southwest direction to the satellites) and the elevation<br />
angle (the angle up to the satellites) from your location, and the skew angle.<br />
4. Make sure that the remote control batteries are fresh, and are installed properly. If<br />
needed, make sure that the remote is in SAT mode to control the satellite<br />
receiver.<br />
5. Turn ON the television and receiver.<br />
Page 75
<strong>Chapter</strong> 4<br />
<strong>Dish</strong> <strong>Antenna</strong> <strong>Installation</strong><br />
6. Display the Point <strong>Dish</strong> and Signal Strength menu by pressing MENU and<br />
and then 6-1-1 (unless the receiver already displays this menu).<br />
7. If you Point <strong>Dish</strong>/Signal screen looks like the one on the left, continue to<br />
step 6. If your Point <strong>Dish</strong>/Signal screen looks like the one on the right,<br />
select Peak Angles.<br />
8. Enter your ZIP code in the ZIP Code field.<br />
9. Select the <strong>Dish</strong> 500 option.<br />
Azimuth:<br />
Elevation:<br />
Skew:<br />
10. The menu displays the azimuth, elevation, and skew angles. Write down<br />
these numbers in the blanks provided in the margin.<br />
11. Select Cancel to exit out of this menu and return to the Point<br />
<strong>Dish</strong>/Signal menu.<br />
12. Go to Mounting the <strong>Dish</strong> on page 77.<br />
Page 76
Installing a DISH 500 <strong>Antenna</strong><br />
Mounting the <strong>Dish</strong><br />
1. Using these azimuth and elevation angles, find a location for the satellite<br />
dish which can be pointed towards the satellites located at these angles.<br />
With a <strong>com</strong>pass, find the required azimuth angle. Then, use the elevation<br />
angle to find out how high the satellites are in the sky from your location.<br />
Make sure nothing blocks the line of sight between the dish and the<br />
satellites.<br />
2. Mount the mast to a solid surface so that the dish antenna cannot move or be<br />
bumped out of adjustment. Keep in mind that physical and environmental<br />
conditions can block your satellite dish’s ability to receive a clear satellite<br />
signal. The conditions to be aware of are: Eaves and overhangs on your<br />
building or house, wind, plant growth, and deterioration of the mounting<br />
surface. Never mount to a tree.<br />
3. Align the top part of the mast so that it is absolutely vertical, as shown<br />
below. If the top part of the mast is off vertical by only a few degrees, it will<br />
be difficult or maybe even impossible for you to find the satellites. Take at<br />
least two readings with a bubble level, on the upper mast, that are 90 degrees<br />
apart from one another.<br />
Page 77
<strong>Chapter</strong> 4<br />
<strong>Dish</strong> <strong>Antenna</strong> <strong>Installation</strong><br />
4. Assemble the satellite dish as shown below, except do not attach the Y-<br />
bracket or LNBF at this time.<br />
5. Loosen both skew bolts and set the skew by rotating the dish mounting<br />
bracket to align the red mark with the required angle on the skew scale which<br />
you wrote down on 76. Tighten the skew bolts securely to keep the dish from<br />
rotating. Once the skew is set, do not try to fine-tune this angle when<br />
aiming the dish.<br />
6. Set the elevation by tilting the dish mounting bracket to align the red edge<br />
with the required angle from page 76 on the elevation scale. Tighten the<br />
elevation bolts, but do not tighten the pivot bolt at this time.<br />
Note: You can have as much as 200 feet of cable between the DISH Pro<br />
LNBF and the DISH Pro receiver. However, you must use only RG-6<br />
coaxial cables rated for 950 to 2150 MHz. Some cables may say "Swept<br />
tested for 2150 MHz." If you have any doubt about this, ask your DISH<br />
retailer, or look on the container the cable came in. Do not use cable<br />
<strong>com</strong>pany TV cables or cables from other satellite TV systems not rated for<br />
950-2150 MHz. These other cables may cause signal loss. Do not use<br />
existing cables such as RG-59. Also, be sure that any outdoor connections<br />
are made using waterproof F-connectors.<br />
Page 78
Installing a DISH 500 <strong>Antenna</strong><br />
Tighten all of the coaxial cable connection only by hand. If you use a<br />
wrench, you may over-tighten the connections and damage your<br />
equipment. Such damage is not covered by the Limited Warranty.<br />
7. Thread the RG-6 coaxial cable through the mast support arm and<br />
the Y-bracket. This cable should be long enough to run from your receiver to<br />
your LNBF.<br />
Note: See Running Coaxial Cables on for cable installation guidance.<br />
Tip: Using cable<br />
labels makes it<br />
easy to tell which<br />
cables connect to<br />
the receiver ports.<br />
Inside the front<br />
cover of this guide<br />
are stickers that<br />
are color coded<br />
the same way as<br />
the coaxial<br />
connections.<br />
8. Attach the Y-bracket, using the Y-bracket screw.<br />
9. Connect the RG-6 cable from the DISH Pro SAT IN connection on the back of<br />
the receiver directly to port 1 of the DISH Pro Twin LNBF, as shown below.<br />
Be sure there are no multi-dish switches between the LNBF and the receiver.<br />
Peel off the blue sticker and place it on the cable near where it connects to the<br />
receiver.<br />
P o r t 2<br />
P o r t 1<br />
Connect to Port 1. It’s on<br />
the left when the LNBF is<br />
pointed towards you<br />
10. Attach the LNBF to the Y-bracket using the two LNBF screws.<br />
11. Slide the dish assembly down onto the mast. Make sure the pivot bolt rests<br />
on the top of the mast. Turn the dish assembly so that it points in the general<br />
direction of the satellites, using the azimuth angle from page 80.<br />
Page 79
<strong>Chapter</strong> 4<br />
<strong>Dish</strong> <strong>Antenna</strong> <strong>Installation</strong><br />
12. You should see the Point <strong>Dish</strong>/Signal menu. If not, open the Main Menu,<br />
select System Setup, then <strong>Installation</strong>, then Point <strong>Dish</strong>/Signal (press<br />
MENU and then press 6-1-1 on the remote).<br />
13. Select Check Switch. The Check Switch screen will open.<br />
14. Select Check or Test. The receiver shows you a message that it is checking<br />
the switches.<br />
15. When the check switch procedure finishes, you will see an installation<br />
summary screen similar to the one below. In the Satellite line, you will see<br />
“Conn.” In the Device line, you will “Twin” twice. This indicates that your<br />
receiver has confirmed the connection with your DISH Pro Twin LNBF is<br />
working. The Transponder line may show two “Xs.” This is OK and does not<br />
indicate a problem with the receiver.<br />
Tip: Have one<br />
person aim the dish<br />
while another<br />
watches the signal<br />
strength or listens<br />
to the signal tone.<br />
16. Select Cancel or OK to return to the Point <strong>Dish</strong>/Signal screen. Make sure<br />
the check mark is next to 119 West. If not, move the highlight to 119 West<br />
and press SELECT. Notice the signal strength bar. This is used to help you<br />
aim the dish by showing the strength of the signal you are receiving. Look at<br />
the signal strength bar while you aim the dish.<br />
Don’t stand in front of the dish while you aim it, because your body will<br />
block the satellite signal. After you adjust the aim, let go of the dish so that<br />
you can get a good signal reading after the dish settles back in place by itself.<br />
Do not change the skew setting.<br />
Page 80
Installing a DISH 500 <strong>Antenna</strong><br />
17. Turn the dish back and forth very slowly, until the signal strength bar turns<br />
green. This shows you’ve found the signal.<br />
Note: If you cannot find the signal, turn the dish back to the first azimuth<br />
angle. Then, loosen both elevation bolts just enough so you can tilt the dish.<br />
Tilt the dish elevation up by two degrees, and then tighten both bolts. Now,<br />
turn the dish back and forth again. If you still can’t find the signal, tilt the<br />
dish up again very slightly and turn the dish back and forth until you find the<br />
signal.<br />
18. Once the signal strength bar is green, turn the dish back and forth just a<br />
little, to where the signal strength bar shows the strongest signal. When you<br />
find the strongest signal, tighten both mast clamp bolts. Then loosen both<br />
elevation bolts, just enough so you can tilt the dish. Tilt the dish up and<br />
down just a little, to where the signal strength bar shows the strongest<br />
signal. Do not adjust the skew. When you find the strongest signal, tighten<br />
all bolts in the dish assembly so the dish cannot be moved.<br />
19. You are now ready to verify reception from both satellites. Select the<br />
Check Switch option. When the Check Switch menu opens, select<br />
Check or Test. The receiver shows you a message that it is checking the<br />
switches. When the procedure is finished, you will see an <strong>Installation</strong><br />
Summary screen. This screen may look different than the one shown<br />
below. However, you must see that you have signals from both the 110<br />
West and 119 West Satellites, you see “All” twice in the Transponder<br />
line, and the message “Satellite reception verified. Press CANCEL or OK to<br />
exit this menu.”<br />
20. If you do not see “110” under <strong>Dish</strong> Input 2:<br />
Page 81
<strong>Chapter</strong> 4<br />
<strong>Dish</strong> <strong>Antenna</strong> <strong>Installation</strong><br />
• Make sure the skew angle you wrote down on page 76 is exactly the<br />
same as the skew angle you set in step 5 on page 78. If it is not, reset the<br />
skew angle as described on page 78. After you reset the skew angle, go<br />
back page 80 and start over from step step 16.<br />
• If “119” is shown under <strong>Dish</strong> Input 2, move the dish approximately 9°<br />
to the east and restart the procedure at step step 12.<br />
21. Look at the Point <strong>Dish</strong>/Signal menu. If you have good signal strength<br />
with the check mark in 119 West, move the check mark to 110 West. If<br />
you have good signal strength on 110 West, go to step 22.<br />
If you do not have good signal strength with the check mark in 110 West,<br />
go back to Step 17, and fine-tune the dish but with the check mark in 110<br />
West instead of 119 West. While the 110 West and 119 West signals will<br />
not be equal, you should be able to fine-tune the dish until you have the<br />
strongest possible signal from both satellites.<br />
22. Select Cancel to exit the Point <strong>Dish</strong>/Signal menu. An Attention screen will<br />
open asking the mounting and positioning of your dish is <strong>com</strong>plete with a<br />
“Locked” indication in the Point <strong>Dish</strong>/Signals screen. If the answer is yes,<br />
select Yes.<br />
If the answer is No, you will need to repoint your dish following the<br />
preceding steps until the mounting and positioning is <strong>com</strong>plete and you do<br />
have the “Locked” indication.<br />
23. After you select Yes, the receiver will begin taking a software upgrade. You<br />
will see a Warning that “Vital program information will now be downloaded<br />
into your receiver.” You will also see a status bar showing the progress of this<br />
upgrade.<br />
24. Once the software upgrade is <strong>com</strong>plete, you will see a message that your<br />
receiver’s memory is being upgraded.<br />
Do not disturb the receiver while the receiver’s memory is being upgraded.<br />
Note: If you are installing other DISH Pro receivers, be sure to run Check<br />
Switch on all of them, and allow them to take the necessary software<br />
upgrade.<br />
Page 82
Installing a Multiple <strong>Dish</strong> DISH Pro System<br />
Installing a Multiple <strong>Dish</strong> DISH Pro System<br />
Note: You cannot use DISH Pro LNBFs and switches (those marked with the<br />
DISH Pro logo) with Legacy switches and LNBFs (those without the DISH Pro<br />
logo). You must install your DISH antenna system with either all DISH Pro<br />
LNBFs and switches or all Legacy LNBFs and switches. If you mix the two, the<br />
system will not work.<br />
Note: You can have as much as 200 feet of cable between the DISH Pro LNBF<br />
and the DISH Pro receiver. However, you must use only RG-6 coaxial cables<br />
rated for 950 to 2150 MHz. Some cables may say "Swept tested for 2150 MHz." If<br />
you have any doubt about this, ask your DISH retailer, or look on the container<br />
the cable came in. Do not use cable <strong>com</strong>pany TV cables or cables from other<br />
satellite TV systems not rated for 950-2150 MHz. These other cables may cause<br />
signal loss. Do not use existing cables such as RG-59. Also, be sure that any<br />
outdoor connections are made using waterproof F-connectors.<br />
Once you have installed the DISH 500 with its DISH Pro Twin LNBF using the<br />
preceding instructions, you can add a DISH 300 with a DISH Pro LNBF and<br />
switch as follows:<br />
1. Turn on the television and the receiver if they are not already on. You<br />
should see the Point <strong>Dish</strong> screen. If not, open the Main Menu and press<br />
6-1-1 on the remote.<br />
2. Select the satellite your dish will be pointed toward.<br />
3. Select 300 under the <strong>Dish</strong> System.<br />
4. Use the number buttons on the remote to enter your ZIP code to get the<br />
necessary azimuth and elevation. Write these numbers down in the spaces<br />
provided in the margin.<br />
5. Mount the dish antenna and multi-dish switches following the mounting<br />
instructions that came with them and the DISH Pro Wiring Diagrams<br />
starting on page 85.<br />
6. Connect two RG-6 cables from both SATELLITE IN connections on the<br />
receiver to two available ports on the switch(es).<br />
7. Connect the LNBF on the DISH 300 to LNBF port 1 on the switch(es) using<br />
RG-6 cable.<br />
Azimuth:<br />
Elevation:<br />
Page 83
<strong>Chapter</strong> 4<br />
<strong>Dish</strong> <strong>Antenna</strong> <strong>Installation</strong><br />
8. Select Check Switch from the Point <strong>Dish</strong> menu. When the Check Switch<br />
screen opens, select Retest.<br />
9. When Check Switch is <strong>com</strong>plete, you will see an <strong>Installation</strong> Summary<br />
screen similar to the one shown next. It will show a connection (“Conn” next<br />
to satellite) and Single device under 1 (<strong>Dish</strong> Input). It may also show an X<br />
on the Transponder line. This is okay and does not mean there is a problem<br />
with the system.<br />
10. Press CANCEL to exit back to the Point <strong>Dish</strong> menu.<br />
11. Point the dish for the strongest possible signal, following the instructions<br />
that came with it.<br />
12. Connect tow RG-6 cables between both ports on your DISH Pro Twin LNBF<br />
and your switch(es) using the switch instructions and the DISH Pro wiring<br />
diagrams that start on page 85.<br />
13. Select Check Switch from the Point <strong>Dish</strong> menu. When the Check<br />
Switch menu opens, select Retest. When the procedure <strong>com</strong>pletes, you will<br />
see the <strong>Installation</strong> Summary screen again. This time you should see<br />
confirmation for all satellites your dishes are pointed at, and “Satellite<br />
reception verified.” You should also see that the switch(es) in your system<br />
has been correctly identified.<br />
Refer to the DISH Pro wiring diagrams for examples of installation<br />
summary screens.<br />
14. Press CANCEL to exit this menu, and then Cancel to exit the Point<br />
<strong>Dish</strong> screen. If you have any other receivers in your system, make sure you<br />
run Check Switch on each of them, and allow each to take the software<br />
upgrade, as needed.<br />
Page 84
DISH Pro Wiring Diagrams<br />
DISH Pro Wiring Diagrams<br />
DISH 500, One DISH Pro Twin LNBF<br />
This diagram leaves out grounding to be clear. Make sure<br />
you ground the system per the National Electrical Code<br />
(NEC) and all local electrical codes.<br />
Note: Each cable<br />
carries both the 119<br />
and 110 signals<br />
after you use each<br />
receiver to check<br />
the setup.<br />
To two DISH Pro<br />
Receivers or one DISH<br />
Pro Plus Receiver<br />
When you set up your system following this diagram and run Check Switch<br />
the <strong>Installation</strong> Summary screen should look similar to the one shown<br />
below.<br />
Page 85
<strong>Chapter</strong> 4<br />
<strong>Dish</strong> <strong>Antenna</strong> <strong>Installation</strong><br />
DISH 500, One DISH Pro Quad LNBF<br />
This diagram leaves out grounding to be clear. Make sure<br />
you ground the system per the National Electrical Code<br />
(NEC) and all local electrical codes.<br />
Note: Each cable<br />
carries both the 119<br />
and 110 signals<br />
after you use each<br />
receiver to check<br />
the setup.<br />
To four DISH Pro<br />
Receivers or two DISH<br />
Pro Plus Receivers<br />
When you set up your system following this diagram and run Check Switch<br />
the <strong>Installation</strong> Summary screen should look similar to the one shown below.<br />
Page 86
DISH Pro Wiring Diagrams<br />
DISH 500 with a DISH Pro Twin LNBF, One DISH 300 with a<br />
DISH Pro LNBF, DP34 Switch<br />
This diagram leaves out grounding to be clear. Make sure<br />
you ground the system per the National Electrical Code<br />
(NEC) and all local electrical codes.<br />
To four DISH Pro<br />
Receivers or two DISH<br />
Pro Plus Receivers<br />
When you set up your system following this diagram and run Check Switch<br />
the <strong>Installation</strong> Summary screen should look similar to the one shown<br />
below.<br />
Page 87
<strong>Chapter</strong> 4<br />
<strong>Dish</strong> <strong>Antenna</strong> <strong>Installation</strong><br />
DISH 500, DISH 300, Three DISH Pro LNBFs, DP34 Switch<br />
This diagram leaves out grounding to be clear. Make sure<br />
you ground the system per the National Electrical Code<br />
(NEC) and all local electrical codes.<br />
To four DISH Pro<br />
Receivers or two DISH<br />
Pro Plus Receivers<br />
When you set up your system following this diagram and run Check Switch<br />
the <strong>Installation</strong> Summary screen should look similar to the one shown below.<br />
Page 88
DISH Pro Wiring Diagrams<br />
DISH 500, DISH 300, One DISH Pro Twin LNBF, One DISH Pro<br />
Single LNBF, One DISH Pro Compliant Splitter, Two DISH Pro<br />
21 Switches<br />
This diagram leaves out grounding to be clear. Make sure<br />
you ground the system per the National Electrical Code<br />
(NEC) and all local electrical codes.<br />
*<br />
* When using a DISH Pro<br />
<strong>com</strong>pliant splitter to split the signal<br />
from a DISH Pro single LNBF, the<br />
receiver tuner whose DP21 switch is<br />
connected to the passing side of the<br />
splitter must be plugged into a live<br />
power outlet at all times. If not, the<br />
DISH Pro single LNBF will not<br />
have any power and will not be able<br />
to provide satellite signal to the<br />
other receiver tuner.<br />
When you set up your system following this diagram and run Check Switch<br />
the <strong>Installation</strong> Summary screen should look similar to the one shown<br />
below.<br />
Page 89
<strong>Chapter</strong> 4<br />
<strong>Dish</strong> <strong>Antenna</strong> <strong>Installation</strong><br />
Two DISH 300s, Two DISH Pro Single LNBFs, Two DISH Pro<br />
Compliant Splitters, Two DISH Pro 21 Switches<br />
This diagram leaves out grounding to be clear. Make sure<br />
you ground the system per the National Electrical Code<br />
(NEC) and all local electrical codes.<br />
*<br />
* When using a DISH Pro<br />
<strong>com</strong>pliant splitter to split the signal<br />
from a DISH Pro single LNBF, the<br />
receiver tuner whose DP21 switch is<br />
connected to the passing side of the<br />
splitter must be plugged into a live<br />
power outlet at all times. If not, the<br />
DISH Pro single LNBF will not<br />
have any power and will not be able<br />
to provide satellite signal to the<br />
other receiver tuner.<br />
When you set up your system following this diagram and run Check Switch<br />
the <strong>Installation</strong> Summary screen should look similar to the one shown below.<br />
Page 90
DISH Pro Wiring Diagrams<br />
One DISH 500 with a DISH Pro Twin LNBF, One DISH 300 with<br />
a DISH Pro Single LNBF, and One DP21 Switch<br />
This diagram leaves out grounding to be clear. Make sure you<br />
ground the system per the National Electrical Code (NEC) and all<br />
local electrical codes.<br />
Note: This setup supports only one receiver from three satellite locations and<br />
the other receiver from only two satellite locations.<br />
Page 91
<strong>Chapter</strong> 4<br />
<strong>Dish</strong> <strong>Antenna</strong> <strong>Installation</strong><br />
Running Coaxial Cable<br />
1. Using the shortest path possible, run the coaxial cable(s) from the ground<br />
block or switch to the satellite receiver(s). Do not kink or pinch any cable.<br />
Cables should be bent only in gentle curves.<br />
Do not use a longer cable between the satellite dish and the<br />
receiver than is specified in the DISH Pro or Legacy system<br />
installation instructions. If your system requires more cable than<br />
the limit specified in these installation instructions, you should<br />
consider having the system professionally installed.<br />
2. Put a drip loop in each cable at a point before it enters the building. A drip<br />
loop allows moisture to drip from the cable before it runs into the building.<br />
Before drilling any holes in the wall or roof of your building,<br />
make sure that there are no wires or pipes in the area of the<br />
holes. If you are not <strong>com</strong>fortable doing this, contact a<br />
professional in your area. Make sure that you follow all safety<br />
instructions and building codes.<br />
3. Locate each receiver inside the building, against or near an outside wall. Then<br />
drill a hole through the outer wall to pass a cable inside the building. If a<br />
receiver is located in an interior room, run a cable through the outside wall,<br />
and into an attic, basement, or crawl space in order to reach the receiver.<br />
4. Seal all holes that you drill in the building with silicone or other weatherproof<br />
sealant after installation. Once each cable is inside the building, you<br />
may attach it to a wall receptacle or directly to a receiver.<br />
Tighten the back panel coaxial cable connections only by<br />
hand. Using a wrench may over-tighten the connections,<br />
causing damage. Such damage is not covered by the Limited<br />
Warranty in the User Guide that came with the system.<br />
Page 92


