71-1929-250 Warbonnet set - Lionel
71-1929-250 Warbonnet set - Lionel
71-1929-250 Warbonnet set - Lionel

Create successful ePaper yourself
Turn your PDF publications into a flip-book with our unique Google optimized e-Paper software.
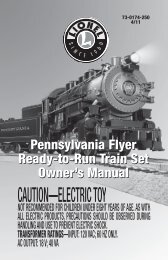
<strong>71</strong>-<strong>1929</strong>-<strong>250</strong><br />
Rev. 1/97<br />
ready-to-run<br />
O-27 passenger <strong>set</strong><br />
Owner’s Manual<br />
CAUTION—ELECTRIC TOY<br />
NOT RECOMMENDED FOR CHILDREN UNDER EIGHT YEARS OF AGE.<br />
AS WITH ALL ELECTRIC PRODUCTS, PRECAUTIONS SHOULD BE OBSERVED<br />
DURING HANDLING AND USE TO REDUCE THE RISK OF ELECTRIC SHOCK.<br />
TRANSFORMER RATINGS—INPUT: 120 VAC; 60 HZ ONLY.<br />
AC OUTPUT: 18 V; 54 VA, 3.0 AMPS
Congratulations!<br />
You’re now the proud owner of the<br />
<strong>Lionel</strong> <strong>Warbonnet</strong> ready-to-run O-27<br />
passenger train <strong>set</strong>. Everything you need<br />
to get started is included. You’re already<br />
off to a great start by reading this<br />
instruction manual. It has important<br />
information on train <strong>set</strong>up and operation.<br />
This booklet also covers proper<br />
maintenance procedures to help your<br />
<strong>Lionel</strong> trains live long, healthy lives.<br />
If you have any questions after<br />
reading this booklet, contact your<br />
nearest authorized <strong>Lionel</strong> Service<br />
Center using the list included in a separate<br />
flier in this <strong>set</strong> or call <strong>Lionel</strong><br />
Service at 810-949-4100. And have fun!<br />
Table of contents<br />
Track layout<br />
Getting started 3<br />
Joining the track sections 3<br />
Attaching the lockon to the track 4<br />
Suggested track layouts 4<br />
Controller operations<br />
Stripping the wire 5<br />
Attaching the controller wires to the lockon 5<br />
Controller functions 6<br />
Controller and short circuits 7<br />
Train operations<br />
Reverse unit procedure 8<br />
Using your FA2’s magnetic couplers 9<br />
Maintaining and servicing your <strong>Warbonnet</strong> <strong>set</strong><br />
Lubricating your FA2 diesel locomotive 10<br />
Enhanced tractive effort 10<br />
Replacing your FA2’s headlamp 11<br />
Replacing your passenger car lamps 12<br />
<strong>Lionel</strong> Service 12<br />
2
Track layout<br />
Getting started<br />
B<br />
efore you do anything else, we<br />
recommend you check the contents<br />
of your <strong>set</strong> box to ensure all of<br />
the parts of your <strong>set</strong> have been<br />
included and that the quantities<br />
(when applicable) are correct.<br />
• FA2 diesel locomotive 1<br />
• Passenger cars 3<br />
• Controller 1<br />
• 40-watt power pack 1<br />
• Lockon 1<br />
• Straight track 8<br />
Joining the track sections<br />
J<br />
oin the track sections together<br />
by inserting the pins of one track<br />
section into the rail<br />
openings of another.<br />
For good electrical<br />
contact, pins<br />
must be carefully<br />
inserted and track<br />
joints tightly fitted.<br />
If the track is difficult<br />
to connect,<br />
try this installation<br />
tip. You can “break<br />
in” O-27 track sections<br />
by inserting<br />
and withdrawing a<br />
track pin into one<br />
rail at a time before<br />
joining the entire<br />
track section.<br />
If the openings<br />
become too open<br />
(causing the track<br />
to fit loosely), pinch the rail together<br />
The parts list below will tell you<br />
what’s included and the correct quantities.<br />
If you find any discrepancies,<br />
contact the dealer you purchased<br />
your <strong>set</strong> from for more information or<br />
call <strong>Lionel</strong> Service at 810-949-4100.<br />
• Curved track 8<br />
• Instruction manual 1<br />
• Service Center list 1<br />
• Railroader Club application 1<br />
• Warranty card 1<br />
around a track pin with a pair of pliers.<br />
If any pins fall out of the track<br />
and are missing,<br />
replace them with<br />
extras available<br />
from your <strong>Lionel</strong><br />
dealer.<br />
Maintenance tip:<br />
The rails should be<br />
kept clean, dry, and<br />
free from oil and<br />
grease. Clean rust<br />
and dirt spots with a<br />
track eraser. Wipe the<br />
track using a cloth<br />
dampened with track<br />
cleaner from the<br />
<strong>Lionel</strong> Lubrication<br />
and Maintenance kit<br />
(no. 6-62927), available<br />
from your nearest<br />
<strong>Lionel</strong> Authorized<br />
Value Added Dealer<br />
or <strong>Lionel</strong> Service.<br />
3
Track layout<br />
Attaching the lockon to the track<br />
The lockon connects power from<br />
your controller to the track.<br />
Attaching the lockon to the track<br />
is quick and easy. First, place<br />
the lockon under any<br />
straight section of track.<br />
Fit the center lip of<br />
the lockon onto the<br />
edge of an outside rail.<br />
1<br />
2<br />
LIONEL<br />
CTC<br />
LOCKON<br />
Press the lockon upward so that the<br />
spring contact snaps onto the<br />
center rail. The lockon<br />
should face outward<br />
when <strong>set</strong>ting up your<br />
track and make sure it is<br />
firmly connected. Use the illustrations<br />
below as a step-by-step<br />
guide.<br />
2<br />
Snap spring contact<br />
to the middle rail<br />
Hook lip to the<br />
1<br />
outside of the rail<br />
Once the lockon is securely<br />
attached to the track, it’s time to<br />
insert the wires from the controller<br />
into the two spring clips on the lockon.<br />
See page 5 for easy-to-follow<br />
steps.<br />
Suggested track layouts<br />
Here are some examples of layouts you can build with 8 straight and 8 curved sections of<br />
track. Remember—the more track you own, the more variations you can create in your<br />
train layout. And that means more action and more fun!<br />
4
R<br />
Controller operations<br />
Stripping the wire<br />
O<br />
nce your track is assembled and<br />
the lockon is<br />
securely attached,<br />
you can connect<br />
the wires from<br />
the controller to<br />
the lockon.<br />
First you‘ll want<br />
to check the ends of the<br />
wires to make sure that the insulation is<br />
stripped back about 1 ⁄4" to 3 ⁄8". To strip<br />
the wires, use a pair of<br />
wire strippers<br />
or a sharp<br />
knife.<br />
Caution:<br />
Only an adult<br />
should perform<br />
this task!<br />
Always use care when stripping wires.<br />
Attaching the controller wires to the lockon<br />
Now you’ll need to insert a controller<br />
wire into each of the two spring clips<br />
on the lockon. It’s easy! Depress the<br />
spring clip with your finger and insert<br />
the bare end of the wire into the<br />
exposed opening. Release the spring<br />
clip. Give the wire a little tug to make<br />
sure it’s secure. Repeat these steps with<br />
the other spring clip. Next, insert the<br />
small plug end of the power pack into<br />
the back of your controller, and plug the<br />
other end into a standard outlet.<br />
Plug power pack<br />
into standard<br />
wall outlet<br />
Make sure that the bare end<br />
of each wire is securely<br />
attached to the spring clip.<br />
OFF<br />
FULL<br />
SPEED<br />
Plug this end into<br />
back of controller.<br />
5
Controller operations<br />
Controller functions<br />
As you turn the throttle control knob<br />
to the right, power to the track is<br />
increased. When the indicator reaches<br />
the green band, there should be sufficient<br />
power to operate the locomotive.<br />
The further into the green area the knob<br />
is turned, the faster your train will go.<br />
Remember that the greater the load on<br />
the engine (adding more cars for the<br />
engine to pull, for example), the farther<br />
into the green the knob must be turned<br />
before it will operate the locomotive.<br />
The yellow band indicates the average<br />
power range that the train will be<br />
operating in. The red band represents<br />
maximum power output.<br />
Pressing the horn button<br />
will produce no sound<br />
because your FA2 is not<br />
equipped with a diesel horn.<br />
R<br />
The LED indicator<br />
shows when your controller<br />
is ON.<br />
Press this button to go<br />
OFF<br />
forward or reverse, or to<br />
place the locomotive in<br />
“neutral” OFF (no movement,<br />
headlight is on).<br />
OFF<br />
FULL<br />
SPEED<br />
FULL<br />
SPEED<br />
FULL<br />
SPEED<br />
OFF<br />
Green band<br />
FULL<br />
Yellow band SPEED<br />
OF<br />
Turn the throttle control<br />
knob to the right for<br />
more power.<br />
Red band<br />
6
Controller and short circuits<br />
Your <strong>Lionel</strong> power pack is listed by<br />
Underwriters Laboratories Inc. and<br />
has been carefully designed and tested<br />
to ensure peak performance. The controller<br />
is equipped with a built-in electronic<br />
circuit breaker that alternately<br />
cuts off and restores the flow of power<br />
to the track whenever a short circuit<br />
exists—for example, when the train<br />
derails. The circuit breaker’s action continues<br />
until the cause of the short circuit<br />
is eliminated. This circuit breaker is<br />
incorporated into the controller to protect<br />
it from possible damage. It will not<br />
protect the locomotive or electrically<br />
operated accessories, so it’s important<br />
to eliminate short circuits as soon as<br />
possible.<br />
Note!<br />
The power pack must be<br />
unplugged from the wall<br />
socket when a short circuit<br />
is noticed, and the short circuit<br />
must be corrected.<br />
A short circuit is caused by a direct<br />
connection between the center rail and<br />
one of the outside rails or by a direct<br />
connection between bare wires. The<br />
axles of a derailed car or locomotive are<br />
the most frequent cause of short circuits,<br />
so make sure that all wheels are properly<br />
<strong>set</strong> on the rails. Some other causes of<br />
short circuits might be staples, nails,<br />
paper clips, or other metallic objects<br />
lying across the rails, or two bare wires<br />
touching each other.<br />
If too many cars or accessories are<br />
used, your controller will exceed its<br />
power limit and begin to cycle on and<br />
off. To correct this problem, cars or<br />
accessories must be removed before<br />
normal operation can resume. The same<br />
condition can occur if the power is<br />
turned up too quickly. This also could<br />
cause your train to move too fast and<br />
derail.<br />
After your power pack has been operating<br />
for a while, you will find it warm<br />
to the touch. It is the nature of all electrical<br />
power equipment to become warm<br />
when in use. If your controller is loaded<br />
to capacity, it is a good idea to let it cool<br />
down after an hour or two of continuous<br />
use. Always unplug the power<br />
pack from the wall when the controller<br />
is not in use.<br />
For more power, see the line of <strong>Lionel</strong><br />
high-output transformers at your<br />
authorized <strong>Lionel</strong> Value Added Dealer.<br />
7
R<br />
Train operations<br />
Reverse unit procedure<br />
T<br />
he reverse unit inside your <strong>Lionel</strong><br />
FA2 is an electronic device that acts<br />
like the transmission in your car. When<br />
you apply power to the track, the locomotive<br />
moves in the direction specified<br />
by the reverse unit—or it sits in neutral,<br />
awaiting another<br />
power interruption.<br />
Power interruptions<br />
are the signal that<br />
tells the reverse unit<br />
to sequence to the<br />
next operational state.<br />
To interrupt power<br />
and sequence the<br />
locomotive’s reverse<br />
unit, press the direction<br />
control button or<br />
turn the throttle to the<br />
OFF position and ON again. The reverse<br />
unit alternates between three states:<br />
forward, neutral, and reverse.<br />
Also, the locomotive can be “locked”<br />
into a certain mode of operation by<br />
throwing the switch located on the<br />
underside of the frame (see illustration<br />
above). When the switch is thrown to the<br />
OFF position, the locomotive will be<br />
locked in the next mode of operation in<br />
Position your reverse unit switch to the<br />
OFF position to deactivate it.<br />
the sequence. For instance, if the locomotive<br />
is moving forward, then is stopped<br />
and the switch is thrown back, the locomotive<br />
will be “locked” in neutral. If the<br />
switch is thrown back while the locomotive<br />
is under power, the locomotive will<br />
remain in the mode it<br />
was in when the<br />
switch was thrown.<br />
The controller direction<br />
control will then<br />
ON<br />
have no effect on the<br />
OFF<br />
direction of the locomotive.<br />
Additionally, this<br />
reverse unit has a<br />
“power-up re<strong>set</strong>”<br />
feature, which<br />
means that should<br />
the locomotive sit without power for a<br />
short period of time, the reverse unit<br />
will automatically re<strong>set</strong> and start in the<br />
forward direction when the transformer<br />
is turned on or “powered up,”<br />
regardless of the locking switch position.<br />
If the locking switch is in the OFF<br />
position, the locomotive will start in<br />
the forward direction and be “locked”<br />
there.<br />
Horn control<br />
button<br />
Direction control<br />
button<br />
OFF<br />
FULL<br />
SPEED<br />
8
Using your FA2’s magnetic couplers<br />
Y<br />
our FA2 and passenger cars are<br />
equipped with operating magnetic<br />
knuckle couplers, a<br />
revolutionary<br />
design first introduced<br />
by <strong>Lionel</strong> in<br />
1945.<br />
<strong>Lionel</strong> magnetic<br />
couplers react to the<br />
magnetic field generated<br />
by a <strong>Lionel</strong><br />
remote-control track<br />
section (available<br />
Position the coupler’s trigger disc over<br />
the remote-control section, then press<br />
UNCOUPLE. The coupler opens.<br />
separately).<br />
Place the coupler<br />
trigger disc over<br />
the central coil of a<br />
remote-control track section and press<br />
UNCOUPLE on the controller. The magnetic<br />
field pulls the disc downward,<br />
and the knuckle opens.<br />
One operating technique<br />
favored by<br />
<strong>Lionel</strong> railroaders is<br />
the “moving uncouple.”<br />
Press the<br />
UNCOUPLE button as<br />
the locomotive passes<br />
over a remote-control<br />
section. The magnetic<br />
field will open the<br />
coupler; the consist<br />
remains behind as the<br />
locomotive moves<br />
on. But be careful—<br />
the speed of a newly<br />
uncoupled and moving locomotive can<br />
increase dramatically.<br />
9
Maintaining and servicing your <strong>Warbonnet</strong> <strong>set</strong><br />
Lubricating your FA2 diesel locomotive<br />
H<br />
elp your <strong>Lionel</strong> FA2 lead a long and<br />
productive life on your railroad by<br />
maintaining it properly.<br />
We recommend you purchase a<br />
<strong>Lionel</strong> Lubrication and Maintenance<br />
Kit (no. 6-62927), available from your<br />
<strong>Lionel</strong> dealer. Two basic rules to keep<br />
in mind: never over-lubricate (a small<br />
amount will do), and avoid getting<br />
grease or oil on the FA2’s wheels, contact<br />
rollers, or your track.<br />
You’ll know your FA2 requires lubrication<br />
when visual inspection reveals<br />
dryness on the parts indicated in the<br />
illustration. Remove accumulated dirt<br />
and dust before lubricating, and always<br />
lubricate any locomotive emerging from<br />
prolonged storage.<br />
LUBRICATE WITH<br />
LIONEL OIL<br />
SPARINGLY<br />
LUBRICATE WITH<br />
LIONEL GREASE<br />
LUBRICATE WITH<br />
LIONEL OIL<br />
SPARINGLY<br />
LUBRICATE WITH<br />
LIONEL GREASE<br />
LUBRICATE WITH<br />
LIONEL OIL<br />
SPARINGLY<br />
Enhanced tractive effort<br />
Your locomotive is equipped with<br />
Tire-Traction . This means that<br />
two of the drive wheels on each truck<br />
are fitted with rubber traction tires to<br />
enhance tractive effort so your locomotive<br />
can pull many cars at once.<br />
<strong>Lionel</strong> locomotives with Tire-<br />
Traction grip the track, enabling<br />
them to pull heavy loads at higher<br />
speeds.<br />
10
Replacing your FA2’s headlamp<br />
To replace the headlamp, first remove<br />
the four chassis screws on the underside<br />
of the locomotive. Carefully lift off<br />
the body. Pull the lamp straight up and<br />
out of the lamp housing and replace it<br />
with <strong>Lionel</strong> part no. 600-8352-311, available<br />
from your local authorized <strong>Lionel</strong><br />
Service Center or <strong>Lionel</strong> Service. For<br />
more service information, see the <strong>Lionel</strong><br />
Service section on page 12.<br />
<strong>Lionel</strong> part no. 600-8352-311<br />
Lamp housing<br />
Remove the two front and<br />
two rear chassis screws.<br />
11
Replacing your passenger car lamps<br />
To replace the lamps in your illuminated<br />
passenger cars, first remove the<br />
two screws at the bottom of the car and<br />
lift off the car roof. Grasp the lamp base<br />
and pull the bulb straight up. Replace the<br />
bulb with <strong>Lionel</strong> part no. 600-8352-311,<br />
available at your local authorized <strong>Lionel</strong><br />
Service Center or <strong>Lionel</strong> Service.<br />
<strong>Lionel</strong> part no. 600-8352-311<br />
<strong>Lionel</strong> Service<br />
Your <strong>Lionel</strong> <strong>Warbonnet</strong> O-27 passenger<br />
<strong>set</strong> is built with pride by <strong>Lionel</strong> and<br />
carries a warranty to support continued<br />
reliable operation. If service is required,<br />
bring it and its warranty card to your local<br />
authorized <strong>Lionel</strong> Service Center. To find<br />
the nearest dealer or Service Center, simply<br />
call 1-800-4-LIONEL or search on our<br />
website: www.lionel.com.<br />
If you prefer a <strong>Lionel</strong> factory repair,<br />
call 810-949-4100, fax 810-949-5429, or<br />
write <strong>Lionel</strong> Service, P.O. Box 748, New<br />
Baltimore, MI 48047-0748. State the<br />
problem and the product’s purchase<br />
date. We’ll send a return authorization<br />
letter to assure proper handling while<br />
at <strong>Lionel</strong>. You may choose to have your<br />
product repaired by <strong>Lionel</strong> Service<br />
after its warranty has expired. A reasonable<br />
service fee will be charged.<br />
CAUTION: Make sure your product<br />
is properly packed to prevent shipping<br />
damage. The shipment must be prepaid<br />
and we recommend it be insured.<br />
Please follow these instructions carefully.<br />
This warranty gives you specific<br />
legal rights. You may have other rights<br />
that vary from state to state.<br />
© 1997 LIONEL LLC, CHESTERFIELD MI 48051-2493<br />
UNITED STATES OF AMERICA