CASMED 740 Vital Signs Monitor - Implox
CASMED 740 Vital Signs Monitor - Implox
CASMED 740 Vital Signs Monitor - Implox

Create successful ePaper yourself
Turn your PDF publications into a flip-book with our unique Google optimized e-Paper software.
<strong>CASMED</strong> <strong>740</strong> <strong>Monitor</strong>s<br />
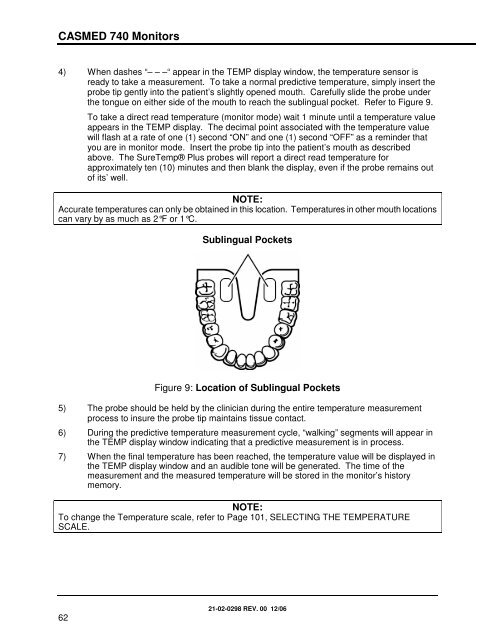
4) When dashes “– – –“ appear in the TEMP display window, the temperature sensor is<br />
ready to take a measurement. To take a normal predictive temperature, simply insert the<br />
probe tip gently into the patient’s slightly opened mouth. Carefully slide the probe under<br />
the tongue on either side of the mouth to reach the sublingual pocket. Refer to Figure 9.<br />
To take a direct read temperature (monitor mode) wait 1 minute until a temperature value<br />
appears in the TEMP display. The decimal point associated with the temperature value<br />
will flash at a rate of one (1) second “ON” and one (1) second “OFF” as a reminder that<br />
you are in monitor mode. Insert the probe tip into the patient’s mouth as described<br />
above. The SureTemp® Plus probes will report a direct read temperature for<br />
approximately ten (10) minutes and then blank the display, even if the probe remains out<br />
of its’ well.<br />
NOTE:<br />
Accurate temperatures can only be obtained in this location. Temperatures in other mouth locations<br />
can vary by as much as 2°F or 1°C.<br />
Sublingual Pockets<br />
Figure 9: Location of Sublingual Pockets<br />
5) The probe should be held by the clinician during the entire temperature measurement<br />
process to insure the probe tip maintains tissue contact.<br />
6) During the predictive temperature measurement cycle, “walking” segments will appear in<br />
the TEMP display window indicating that a predictive measurement is in process.<br />
7) When the final temperature has been reached, the temperature value will be displayed in<br />
the TEMP display window and an audible tone will be generated. The time of the<br />
measurement and the measured temperature will be stored in the monitor’s history<br />
memory.<br />
NOTE:<br />
To change the Temperature scale, refer to Page 101, SELECTING THE TEMPERATURE<br />
SCALE.<br />
62<br />
21-02-0298 REV. 00 12/06