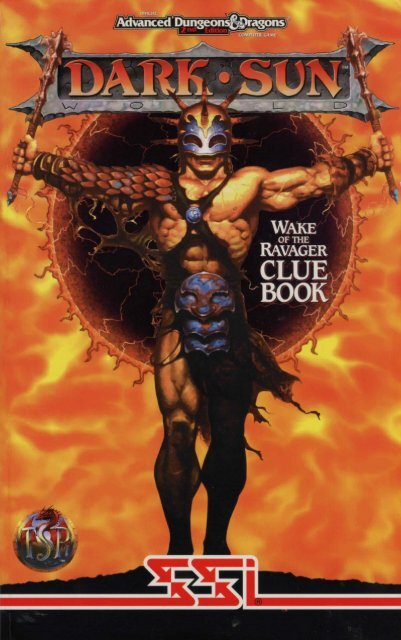
darksun2-cluebook - Museum of Computer Adventure Game History
darksun2-cluebook - Museum of Computer Adventure Game History
darksun2-cluebook - Museum of Computer Adventure Game History

You also want an ePaper? Increase the reach of your titles
YUMPU automatically turns print PDFs into web optimized ePapers that Google loves.
t TABLE OF CONTENTS t<br />
DENIZENS OF .THE DESERT .•...................... 1<br />
OVERLAND MAP •.......•.•..•......•...••.. · ... : . 8<br />
ADVENTURERS' GUIDE ........................... 9<br />
Emrances and Exits from Region to Region ........... 9<br />
City o(Tyr ..............•.................... 10<br />
Veiled Alliance Headquarler5 .................... 21<br />
Veiled AlliQnce Secret Archives ................... 30<br />
Kalak',s Pyramid . . . . . ........................ 31<br />
Humbleton Forest ..•.......................... 35<br />
Yuan-TI Thnnels .............................. 41<br />
El's Temple . . . . . . ........................... 46<br />
Tyrian Mines, Levell .......................... 50<br />
'fyrian Mines, Level 2 .......................... 56<br />
The Underdark ............................... 60<br />
Jann Tribe . . . . . . . . . . . . .................•.... 67<br />
Silt Sea Island ...... , .•....................... 71<br />
The Clouds • . . . . . . . . . ....•.................. 75<br />
Volcano Temple ......... , ..................... 79<br />
•<br />
Volcano Wings ............................. .. , 8 7<br />
Volcano Core ....••....•...................... 96<br />
Lord Warrior's Crypt .......................... 101<br />
'ftmple <strong>of</strong> the Cosmos .••...................... 108<br />
Under fyr (The Sorrows) .... : ......... : ........ 112<br />
Mosaic ACtventures ........................... 116<br />
~URE GUIDE ......•..........•............ 120
I<br />
t DENIZENS OF THE DESERT t<br />
Adventuring in and around Tyr, the party <strong>of</strong> characters is sure to encounter<br />
many strange, devious, and dangerously vicious creatures. Below are suggestions<br />
on defeating these creatures.<br />
• AURUMVORAX<br />
t INTRODUCTION t<br />
Are your characters prepared for Athas? They'd better be . . . . It's a desert<br />
planet laboring under the oppressive heat <strong>of</strong> a crimson sun. Almost all<br />
<strong>of</strong> its mines have been tapped out, and monsters deformed by magic continue<br />
to emerge from its endless wastelands and plague all who inhabit the surface.<br />
Now, vicious, seldom-seen sorcererkings<br />
rule through religious organizations<br />
and enslave vast numbers <strong>of</strong><br />
people, order assassinations, and<br />
plot to gain evil power - power<br />
which, if unleashed, could devour<br />
the remaining life on Athas.<br />
The second computer role-playing<br />
game based on the highly acclaimed<br />
AD&D® 2nd Edition DARK SUN"'<br />
game world, WAKF. OF THE RAVAGER,<br />
begins when your characters enter<br />
the ancient City <strong>of</strong> Tyr and are met<br />
by a woman claiming to be from the<br />
mysterious "Veiled Alliance." She<br />
warns the party <strong>of</strong> the evil that has<br />
come to T'yr, but before she can<br />
reveal her secret, she is killed.<br />
Can your characters find the Veiled<br />
Alliance and stop those who would<br />
destroy all <strong>of</strong> Athas?<br />
The information in this clue book is a<br />
companion guide to WAKF. OF THE<br />
RAVAGER, and focuses on all aspects<br />
<strong>of</strong> the game. The "Denizens <strong>of</strong> the<br />
Desert" section contains specific<br />
hints on fighting the various enemies<br />
and monsters; the "<strong>Adventure</strong>rs'<br />
Guide" section contains maps,<br />
descriptions <strong>of</strong> the various regions,<br />
locations, and encounters that make<br />
up the adventure; and the "Treasure<br />
Guide" lists all the items found<br />
throughout the game.<br />
Use this book to answer questions<br />
about how the story <strong>of</strong> WAKE OF THE<br />
RAVAGER unfolds. If you have any<br />
questions about how to play the<br />
game, check the rule book; or, if you<br />
have installation questions, check<br />
your data card. Armed with this<br />
knowledge, and a bottle <strong>of</strong> sunscreen,<br />
your success is assured!<br />
t DEFILERS<br />
•DRAKES, AnlAsIAN<br />
These vicious little creatures can be deadly in large<br />
numbers. The best way to defeat them is by brute force.<br />
The whole party should rush forward and attack them<br />
with melee weapons.<br />
Defilers are quite skilled, and can cast 9th-level mage<br />
spells. Their favorites are cone <strong>of</strong> cold, fireball, ice storm,<br />
and lightning bolt. The best defense in this case is a strong<br />
<strong>of</strong>fense. Remember that hitting a spellcaster in combat<br />
prevents him or her from casting in that combat round.<br />
Drakes are gargantuan,<br />
reptilian<br />
monsters that use<br />
Athas as their<br />
personal hunting<br />
grounds. The best<br />
bet is to have<br />
characters with<br />
the most hit<br />
points and lowest Armor Class engage them. Spellcasters should move far<br />
away from these beasts and cast haste upon themselves as well as <strong>of</strong>fensive<br />
spells at the drakes.
2<br />
• ELDER-BRAIN<br />
• ELEMENTALS -<br />
The center <strong>of</strong> a mind flayer community is its Elder Brain,<br />
a pool <strong>of</strong> briny fluid that contains the brains <strong>of</strong> dead mind<br />
flayers. Due to the mental powers <strong>of</strong> the mind flayers, the<br />
Elder Brain is still sentient, and the telepathic union <strong>of</strong> its<br />
brains rules the community.<br />
AIR, EARTH, FIRE, AND WATER<br />
•GIANTS<br />
The giants <strong>of</strong> Athas are formidable opponents.<br />
They can sustain a significant amount<br />
<strong>of</strong> damage before dying, and the mighty<br />
blows <strong>of</strong> their powerful fists leave the characters<br />
staggering. The characters should use<br />
preparatory spells such as haste and enlarge<br />
and take the battle to them.<br />
3<br />
• GOLEMS<br />
Make sure that when the characters are fighting<br />
golems, they have magical weapons<br />
readied, as normal weapons and fists do not<br />
affect golems.<br />
The tactic used for defeating all the different kinds <strong>of</strong> elementals is basically the<br />
same. The best-defended warriors should engage the elemental in melee combat<br />
while the spellcasters bombard it with <strong>of</strong>fensive spells. Elementals have the<br />
ability to engulf the characters and suffocate them to death unless they are<br />
freed. Remember, +2 or better magical weapons are required in order to hit elementals,<br />
so make sure the characters have some before taking them on.<br />
•GREATER FEYRS<br />
Be fully prepared with spells that help saving throws and<br />
spells to remove fear when fighting these dangerous<br />
creatures. They have the ability to send even the most<br />
powerful warriors fleeing in terror.<br />
• ILLITIUDS (MIND FLAYERS)<br />
• INTELLECT DEVOURERS<br />
The mind flayer has 90% magic resistance and can use<br />
psionics. Some mind flayers have magic abilities which<br />
make them even more difficult to defeat. They have an average<br />
Armor Class which is their only weakness. Charge them<br />
with all <strong>of</strong> the characters and defeat them with cold steel.<br />
Intellect devourers are dangerous opponents. They can<br />
only be hit by characters with magical weapons <strong>of</strong> +3 or<br />
better, and even then the monsters only take a single point<br />
<strong>of</strong> damage from any source. Make sure that the party has a<br />
means <strong>of</strong> defending itself against psionics, as intellect<br />
devourers use their powers to prevent the party from attacking<br />
or tum some characters against the rest <strong>of</strong> the party.
4<br />
5<br />
• PSURLONS<br />
• KAISHARGA<br />
The jann are the weakest <strong>of</strong> the genie types. They tend to<br />
be nomadic by nature and are wary <strong>of</strong> outsiders. They<br />
have magic resistance and should be attacked like any<br />
other group <strong>of</strong> humanoids - with brute force.<br />
Psurlons are particularly nasty creatures to fight. They<br />
possess 30% magic resistance, characters need + 1 or<br />
greater weapons to hit them, and they are immune to<br />
sleep and charm spells. To make things worse, they can<br />
also use psionics against the party. Characters can fight<br />
back with psionic powers such as ego whip, disintegrate,<br />
mind blank, and synaptic static. The party may also wish<br />
to summon a monster or elemental to assist in defeating<br />
the psurlons.<br />
t<br />
The best chance <strong>of</strong> defeating a kaisharga is for spellcasters<br />
to dispel the defensive spells that it has cast upon itself<br />
and then send warriors to take it apart. If the characters<br />
are unable to dispel its defensive spells and there is a<br />
psioniscist, they can use energy containment to defend<br />
against the kaisharga's fire shield during melee. If the characters<br />
are unable to do any <strong>of</strong> these things, they should<br />
just keep shooting the kaisharga with ranged weapons to<br />
prevent it from casting spells.<br />
• PYREENS<br />
•<br />
Pyreens are mysterious beings that roam the world <strong>of</strong><br />
Athas. They are very powerful druids and psionicists.<br />
They travel about Athas attempting to set things right,<br />
although it appears to be a hopeless battle .<br />
t l
6<br />
7<br />
• SKELETONS, GIANT<br />
• UMBER HULKS<br />
The most deadly thing about giant skeletons is their<br />
ability to throw fireballs at the party. The characters<br />
should just move forward and destroy the giant<br />
skeletons in melee.<br />
These large creatures surprise opponents and then, when<br />
looked upon, cause confusion to would-be attackers. They<br />
can be difficult if not taken seriously. First, have a fighter<br />
kill the umber hulks that are attacking the spellcasters,<br />
then dispatch the rest.<br />
• VERINI<br />
• SNAPPER-SAWS<br />
These plants allow the party to practice their sword play.<br />
The snapper-saw is very easy to destroy.<br />
The verini have a spit ranged attack and a claw melee<br />
attack. They can be very formidable in large numbers.<br />
Otherwise they should be a very easy victory.<br />
•YUAN-TI<br />
• SOUL SHARDS<br />
This magical creature is actually an imprisoned humanoid<br />
that had its soul turned into six pieces <strong>of</strong> the magical<br />
Chandelier. By fixing the Chandelier, the soul is cured and<br />
the soul shards are destroyed. This is an easy fight; just fix<br />
the Chandelier.<br />
• ZOMBIE PLANTS<br />
The yuan-ti attack in numbers and are formidable fighters.<br />
They also have spellcasters that rival most defilers. They<br />
should be approached with caution. Use area effect spells<br />
and have spellcasters stay back from the fight. Haste the<br />
party before any fight with them, and make sure the party<br />
is fully healed.<br />
• SUNDEWS, GIANT<br />
This plant is very easy to kill. It does a minimal amount <strong>of</strong><br />
damage to the characters.<br />
The zombie plant itself is no real threat to the party.<br />
Captive humanioids <strong>of</strong> the zombie plant, on the other<br />
hand, can be dangerous as they tend to attack in numbers<br />
and without fear. Rush forward and bring the attack to<br />
them. This should be an easy victory for the party.
8<br />
... • ' ' -- I • ••<br />
9<br />
ADVENTURERS' GUIDE<br />
Entrances and Exits from Region to Region<br />
WCATION lN REGION LEADS TO WCATION lN REGION<br />
11 City <strong>of</strong> Tyr UnderTyr<br />
13 City <strong>of</strong>Tyr Kalak's Pyramid<br />
31 City <strong>of</strong>Tyr 5 Mosaic <strong>Adventure</strong>s<br />
35 City <strong>of</strong>Tyr Veiled Alliance Headquarters<br />
37 City <strong>of</strong> Tyr Lord Warrior's Crypt<br />
38 City <strong>of</strong> Tyr Humbleton Forest<br />
13 Veiled Alliance Headquarters Mosaic <strong>Adventure</strong>s/Chandelier<br />
14 Veiled Alliance Headquarters Mosaic <strong>Adventure</strong>s/<strong>Museum</strong><br />
24 Veiled Alliance Headquarters Volcano Temple<br />
26 Veiled Alliance Headquarters Slit Sea Island<br />
24 Kalak's Pyramid 21 Mosaic <strong>Adventure</strong>s<br />
1 Humbleton Forest 38 City <strong>of</strong> Tyr<br />
35 Humbleton Forest 8 Tyrian Mines, Level 1<br />
37 Humbleton Forest 8 Yuan-ti Tunnels<br />
38 Humbleton Forest 35 Yuan-ti Tunnels<br />
39A Humbleton Forest 10 El's Temple<br />
39B Humbleton Forest 11 El's Temple<br />
2 Yuan-ti Tunnels 8 El's Temple<br />
8 Yuan-ti Tunnels 35 Humbleton Forest<br />
35 Yuan-ti Tunnels 38 Humbleton Forest<br />
8 El's Temple 2 Yuan-ti Tunnels<br />
10 El's Temple 39A Humbleton Forest<br />
11 El's Temple 39B Humbleton Forest<br />
31 Tyrian Mines, Level 2 Underdark<br />
26 Jann Tribe 1 City <strong>of</strong> Tyr<br />
1 Silt Sea Islands 26 Veiled Alliance Headquarters<br />
10 Silt Sea Islands 33 The Clouds<br />
15 Silt Sea Islands 34 The Clouds<br />
16 Silt Sea Islands 35 The Clouds<br />
33 The Clouds 10 Silt Sea Islands<br />
34 The Clouds IS Silt Sea Islands<br />
35 The Clouds 16 Silt Sea Islands<br />
Volcano Temple 24 Veiled Alliance Headquarters<br />
1 Lord Warrior's Crypt 37 City <strong>of</strong> Tyr<br />
36 Lord Warrior's Crypt 1 Temple <strong>of</strong> the Cosmos<br />
Temple <strong>of</strong> the Cosmos 36 Lord Warrior's Crypt<br />
UnderTyr 11 City <strong>of</strong>Tyr<br />
1 Mosaic <strong>Adventure</strong>s 13 Veiled Alliance Headquarters<br />
5 Mosaic <strong>Adventure</strong>s 31 City <strong>of</strong>Tyr<br />
20 Mosaic <strong>Adventure</strong>s 14 Veiled Alliance Headquarters<br />
21 Mosaic <strong>Adventure</strong>s 24 Kalak's Pyramid<br />
24 Mosaic <strong>Adventure</strong>s 2 Jann Tribe
10<br />
tCITYOFTYR<br />
Synopsis<br />
The City <strong>of</strong> Tyr is stil recovering from the upheaval <strong>of</strong> Kalak's death and the templars<br />
(at the Lord Warrior's urging) have sealed the city gates to all incoming or<br />
outgoing traffic, except caravans. The templars control the bureaucracy, but with<br />
the sorcerer-king dead they have no power to enforce any <strong>of</strong> their edicts and<br />
everyone knows it. The absence <strong>of</strong> power attracts all sorts <strong>of</strong> undesirables to the<br />
city. Tyr has become quite a dangerous place as it walks the thin line between<br />
anarchy and elation at its freedom .<br />
The center <strong>of</strong> activity in the City <strong>of</strong> Tyr is the Shadow Square in the elven market;<br />
it is filled with merchants hawking their wares from tents, though not all the merchants<br />
are what they seem. On the east side <strong>of</strong> the city are inns, taverns, and the<br />
templars' <strong>of</strong>fices. Kalak's Pyramid, apparently abandoned, rises majestically<br />
above the city.<br />
One peculiar feature <strong>of</strong> the City <strong>of</strong> Tyr is that it is built upon the ruins <strong>of</strong> an even<br />
older city, now known as Under Tyr. Many <strong>of</strong> the buildings lead to other regions<br />
such as: the Veiled Alliance Headquarters, the tunnels <strong>of</strong> Under Tyr, Kalak's<br />
Pyramid, and the Lord Warrior's Crypt.<br />
The party arrives in the City <strong>of</strong> Tyr and is met by a woman claiming to be from<br />
the Veiled Alliance. She warns the party <strong>of</strong> the evil that has come to Tyr, but<br />
refuses to reveal details in the open street. Before she can escort the party to the<br />
Veiled Alliance Headquarters, she is killed by a group <strong>of</strong> Draxans.<br />
The party next makes contact with the Veiled Alliance in a tavern <strong>of</strong>f the main<br />
street <strong>of</strong> the town, but Arslan, the Alliance member, is suspicious - he is worried<br />
that the party was working against them in the assassination attempt. To prove its<br />
good intentions, the party must investigate a group <strong>of</strong> templars whom the Veiled<br />
Alliance believes have turned to "defiling" as a way to replace their lost magic.<br />
The party is advised to use methods other than a frontal assault in completing this<br />
task since the Veiled Alliance would not appreciate the party drawing attention to it<br />
by blatant shows <strong>of</strong> force, and the templars are not without resources <strong>of</strong> their own.<br />
Upon first entering the <strong>of</strong>fices, the party does not find too much amiss. The templars<br />
appear to be going about their bureaucratic duties, but are perhaps a little<br />
too eager to admit the party into certain areas, and to keep it out <strong>of</strong> others. Most<br />
worrisome is the strong presence <strong>of</strong> Draxans.<br />
When the party gains access to the inner <strong>of</strong>fices, it learns the truth <strong>of</strong> the templars<br />
doings. Upon his arrival in Tyr, the Lord Warrior quickly determined that<br />
the templars who still controlled the city government were easily converted minions.<br />
If they aided him, he promised the return <strong>of</strong> their magical powers when the<br />
Dragon <strong>of</strong> Ur Draxa came. The templars jumped at this opportunity, sensing correctly<br />
that it was only a matter <strong>of</strong> time before they would be ousted from Tyr if<br />
they did not gain a new patron. Returning to Arslan with this vital information,<br />
the party is accepted into the Veiled Alliance.<br />
Until the party gains access to the Veiled Alliance Headquarters, it needs to purchase<br />
a room at the inn to rest. There are several shops in the Shadow Square where<br />
the party can buy equipment and other necessities. Notaku makes a re-appearance<br />
in the Shadow Square and sends the party on more quests to collect components.<br />
The party is also likely to have several random encounters as it walks the streets<br />
and alleys <strong>of</strong> the City <strong>of</strong> Tyr. Thieves and muggers are a constant nuisance until the<br />
party's reputation grows to the point where the common folk know it's useless to<br />
attack the party. The party also suffers attacks from the Draxans sent by the Lord<br />
Warrior. These attacks become more ferocious and desperate as the party proceeds.<br />
11
12<br />
Non-Player Characters in This Region<br />
Bakula<br />
Location 1<br />
Bakula is a young member <strong>of</strong> the Veiled Alliance. She is at the city gates to<br />
meet other members <strong>of</strong> the Alliance who are visiting from another city. Bakula<br />
gives the party its first hints about the Lord Warrior.<br />
Uhubito<br />
Location 2<br />
Uhubito is the caravan master who oversees the caravans which enter and<br />
leave the city. Uhubito has useful information about Tyr in general: where the<br />
party can rest, buy equipment, and so forth .<br />
Stitches<br />
Location 3<br />
Stitches is a rags-to-riches character who made his fortune finding treasure in<br />
Under Tyr. These days Stitches has settled into the comfortable and quiet life<br />
<strong>of</strong> a tavern owner. Stitches is the owner <strong>of</strong> the tavern where the party meets<br />
Arslan. Stitches has vague information about the entrance to Under Tyr.<br />
Arslan<br />
Location 4<br />
Arslan is a male dwarf the party needs to contact in order to gain entry to the<br />
Veiled Alliance Headquarters. Like most miners, Arslan spends most <strong>of</strong> his free<br />
time in a tavern. He has also gained something <strong>of</strong> a reputation as one <strong>of</strong> the<br />
few miners who can actually turn a pr<strong>of</strong>it under the templars' corrupt system.<br />
Unlike other miners, though, Arslan is a member <strong>of</strong> the Veiled Alliance and his<br />
time in the tavern is spent gathering information and serving as a contact point<br />
for the Veiled Alliance. Arslan can lead the party to the secret entrance to the<br />
Veiled Alliance if it completes an errand for him. Namely, the party must get<br />
Fayina to help it enter the templars' <strong>of</strong>fice and find pro<strong>of</strong> <strong>of</strong> the templars' misdeeds.<br />
The pro<strong>of</strong> is the letter to the high templar Kalaobuta from the Lord<br />
Warrior which orders the Tyrian templars to cooperate with the Draxans.<br />
Reyhan<br />
Location 6<br />
Reyhan is the innkeeper at the Harbinger's Roost. The Harbinger's Roost has<br />
been owned by Reyhan's family for three generations. Reyhan is quite proud<br />
<strong>of</strong> her establishment and gladly tells the party its history. She is also willing to<br />
talk about several other topics, though her mind is not as keen as her ears,<br />
<strong>of</strong>ten drawing the wrong conclusions from the rumors she hears. The party is<br />
able to rent a room for as long as a month. This is the only place in the City <strong>of</strong><br />
Tyr where the party can rest. She can tell the party about Fayina and where<br />
they can find Arslan.<br />
Fayina<br />
Location 7<br />
Fayina is a female thief who is staying at the Harbinger's Roost Inn. She has<br />
just finished "a job," and is in her room counting the loot she took from the<br />
templars. Unfortunately, the take is not nearly enough to pay <strong>of</strong>f her debt to<br />
Acar, the wealthy merchant on the other side <strong>of</strong> town at location 29. If the<br />
characters take care <strong>of</strong> that debt, in return she reveals the secret knock which<br />
allows entry into the templars <strong>of</strong>fice, as well as <strong>of</strong>fers them the key to the back<br />
storeroom <strong>of</strong> the templars' <strong>of</strong>fices. Fayina is very close-mouthed and unlikely<br />
to help the characters unless the lead character is a thief, or unless they state<br />
that Arslan sent them to talk to her.<br />
Beggar<br />
Location 9<br />
The beggar is an ex-adventurer who has fallen on hard times and is trying to<br />
get money for food. Once the party has given the beggar money, he tells it<br />
about the Fire Ruby and the verini in the volcano.<br />
Miners ('fylek, Grakar, and Render)<br />
Location 12<br />
These miners have returned to 1)'r to rest after working in the mines - and to<br />
escape the horror which has been happening to other miners. They give the party<br />
general information about the mines, and can buy ore vouchers from the party.<br />
Oberhan<br />
Location 17<br />
Oberhan is a 'I)'rian templar and a mid-level bureaucrat who helps run the<br />
'fyrian templars' <strong>of</strong>fices. He has the key to the room east <strong>of</strong> his desk. He can<br />
also be convinced to "look the other way" as the party deals with Kalaobuta.<br />
Sirah<br />
Location 19<br />
Sirah is a poor citizen. She is waiting for an audience with the 'fyrian templars<br />
so she can try to free her brother, Abelard. Sirah gives the characters a magical<br />
fruit if they show concern for her brother.<br />
13
14<br />
Kalaobuta<br />
Location 24<br />
Kalaobuta is the high templar in charge <strong>of</strong> the <strong>of</strong>fices in T'yr. She is plotting<br />
with the Draxans to help bring the Dragon <strong>of</strong> Ur Draxa to T'yr in exchange for<br />
the return <strong>of</strong> the T'yrian templars' magic. The characters must retrieve the<br />
piece <strong>of</strong> parchment she is carrying which details her plans with the Draxans<br />
and show it to Arslan. Once they have defeated her, the characters can also<br />
find the Toothed Club on Kalaobuta's body.<br />
Dhukkar<br />
Location 26<br />
Dhukkar, a male elf, is a servant to Kovar, a T'yrian high templar. For a full<br />
description <strong>of</strong> Kovar see the "Non-Player Characters" section in the Crypt<br />
region, starting on page 103. Dhukkar is content, though a bit pompous, in his<br />
role <strong>of</strong> servant and he eschews his master's opinion that slaves are better <strong>of</strong>f as<br />
slaves. He is worried about Kovar's disappearance and cooperates with the characters<br />
once they prove they are not common "rabble." If the characters convince<br />
Dhukkar that they are T'yrian citizens by showing him the papers Tasarla gives<br />
them, Dhukkar reveals clues about the secret entrance to the Pyramid.<br />
Ulean<br />
Location 28<br />
Ulean is a male jann. He is plotting treachery against his Sultan with the<br />
Draxan templar, Zentrat.<br />
Zentrat<br />
Location 28<br />
Zentrat is a Draxan templar gathering information for the Lord Warrior who is<br />
planning the assassination <strong>of</strong> the Sultan in the Jann Tribe region.<br />
Bohumir<br />
Location 29<br />
Bohumir is a male elf who serves as Acar's butler and manservant, as well as<br />
operating a small business in black market ore vouchers. Bohumir can buy ore<br />
vouchers from the party.<br />
Boric<br />
Location 32<br />
Boric is a Tyrian high templar who is the overseer <strong>of</strong> the Tyrian Mines. The party<br />
must buy the key to the mines from him in order to enter the Tyrian Mines.<br />
Fermin<br />
Location 36<br />
Fermin is a male defiler who guards the entrance to the Crypt where the Lord<br />
Warrior has made his base.<br />
Satinka<br />
Location 39<br />
Satinka is a weaver <strong>of</strong> fine rugs and tapestries in Shadow Square. She has<br />
information on how the party can have the torn tapestry from the Veiled<br />
Alliance Headquarters repaired.<br />
Notaku<br />
Location 40<br />
Notaku is a male elf preserver who sells minor magic items. His true business,<br />
however, is spell components. He collects these components for his clients,<br />
<strong>of</strong>ten hiring agents (such as the party) to do the dangerous work <strong>of</strong> actually<br />
acquiring the components. Notaku pays the party ceramic pieces for the various<br />
components, along with giving it a deck <strong>of</strong> illusions, a magical chatchka ,<br />
and a psionic bracelet.<br />
Thief Merchants<br />
Location 41<br />
The thief merchants are fences for the thieves in Under T'yr and sell their<br />
stolen goods at cut-rate prices. The thief merchants have information about<br />
the entrance to Under Tyr.<br />
Tasarla<br />
Location 42<br />
Tasarla is a female human who runs a merchant stall in Shadow Square. She<br />
is also a member <strong>of</strong> the Veiled Alliance. Tasarla earns her living selling<br />
weapons, though her true vocation is to provide help and information to the<br />
Veiled Alliance. She tells the party about Kovar and that he holds the key to<br />
entering the Pyramid. Tasarla lowers the price <strong>of</strong> her goods once the party<br />
identifies themselves as fellow members <strong>of</strong> the Veiled Alliance.<br />
Random Encounters<br />
The characters can encounter many pedestrians, citizens <strong>of</strong> Tyr, and visitors<br />
from other cities as they wander about the city. The pedestrians tell the party<br />
the latest gossip in Tyr, and may sometimes <strong>of</strong>fer items for sale.<br />
The party may also encounter roving Draxan warriors bent on eliminating any<br />
opposition to the Lord Warrior's plans.<br />
15
'{<br />
16<br />
• Locations and Events<br />
I The party begins the game by entering the caravan gates to the City <strong>of</strong><br />
1)'r. Immediately, Bakula, a Veiled Alliance member, rushes up to the<br />
party whom she has mistaken for visiting Alliance members, to beg the<br />
party's help. Before she can reveal her vital infonnation, she is disintegrated<br />
by a Draxan templar. The party is then attacked by the Draxans,<br />
who assume the party is with the Veiled Alliance. After the battle, the<br />
party is able to pick up the orders Bakula was carrying which mention<br />
that Arslan is an Alliance contact. This is also where the characters can<br />
leave Tyr once they have made arrangements with Uhubito at location 2.<br />
2 This is the Caravan <strong>of</strong>fice. Uhubito, the caravan master, tells the<br />
party where to find the basic necessities: an inn to rest at and shops<br />
to buy gear at. Later in the game the party may return here to arrange<br />
transportation to the Jann Tribe region.<br />
3 If the party talks to Stitches, the owner <strong>of</strong> this tavern, he tells the<br />
party where to find Arslan and gives vague clues about Under 'fyr.<br />
4 The characters meet Arslan, a Veiled Alliance member who can help<br />
them join the Alliance. First, however, he asks the characters to check<br />
out the templars' <strong>of</strong>fices as a test. He has heard the templars are turning<br />
to defiling to regain their magic powers and wants them stopped.<br />
(If the characters have already completed the templar <strong>of</strong>fices, they<br />
can present him with this information immediately.) When they<br />
return with the information, Arslan leads them to the bath house on<br />
the west side <strong>of</strong> town and describes how to open the secret entrance.<br />
s<br />
These areas are popular sites for muggers; they <strong>of</strong>ten ambush people<br />
at these locations.<br />
6 The party can rent a room from the innkeeper, Reyhan, at the<br />
Harbinger's Roost. Reyhan may tell the party about Fayina, the thief<br />
staying at the inn, as well as where to find Arslan, the Veiled Alliance<br />
member it needs to contact.<br />
7 Fayina, a thief, is staying in this room. She is tallying up the loot she<br />
has stolen from the templars' <strong>of</strong>fices. If questioned, she tells the party<br />
about her adventure, but knows nothing about what the templars are<br />
doing. She has the key to the storeroom in back <strong>of</strong> the templars'<br />
<strong>of</strong>fices and gives it to the party if it agrees to settle a debt she owes<br />
the merchant Acar at location 30. Fayina also tells the party the<br />
secret knock which allows it entry into the main <strong>of</strong>fices. Unless the<br />
active character is a thief, the party must tell Fayina that Arslan sent<br />
it before she asks it to settle her debt.<br />
A )\<br />
8<br />
9<br />
10<br />
I I<br />
I2<br />
13<br />
I4<br />
IS<br />
I6<br />
I7<br />
This is the room where the party can rest after renting it from Reyhan.<br />
The campfire ring only remains for the number <strong>of</strong> the days that the<br />
party rents the room for.<br />
At this location the party meets a beggar who is an ex-adventurer. He<br />
has fallen on hard times and must now beg for food. If the party gives<br />
him money, he tells it valuable information about the Fire Ruby and<br />
the volcano in which it is hidden.<br />
The party can talk to Zhur, the tavern owner, at this location.<br />
The entrance to Under 'fyr is hidden behind the false bottom <strong>of</strong> the<br />
crate at this location if the thief merchants at location 41 have told<br />
the party where to look, or if the active character is a thief. Using the<br />
ladder takes the party to location 1 in the Under 'fyr region.<br />
The party may meet miners at these locations. They tell the party<br />
about the 'fyrian Mines. At one point, a panicked miner just back<br />
from the mines enters and talks about the worsening troubles in the<br />
mines: miners are mysteriously disappearing. The miners may also<br />
buy any ore vouchers the party gets in the mines at a fair price.<br />
A statue dedicated to Kalak is at this location. The statue has recently<br />
been defaced. The party can enter the Pyramid here once it gets the<br />
medallion, hidden in Kovar's bookshelf at location 27, and uses it to<br />
reveal the stairs hidden within the statue. The stairs within the statue<br />
lead to location 1 in the Pyramid.<br />
This storeroom door is locked. The party can get the key from Fayina,<br />
the thief at the inn, after taking care <strong>of</strong> her debt to Acar.<br />
A crack in the wall at this location allows the party to overhear a conversation<br />
between two Draxan templars. The party can use this information<br />
when talking to Oberhan at location 17 to convince him to<br />
give the party the key to the east <strong>of</strong>fice. The party can also find a<br />
psionic bracelet and memorizable scroll in the chest in this room.<br />
The door to the templars' <strong>of</strong>fices is warded. The party must learn the<br />
secret knock from Fayina at location 7 before it may enter.<br />
Oberhan, a mid-level bureaucrat, presides over the templars' <strong>of</strong>fices at<br />
this location. He is contemptuous <strong>of</strong> the party and calls his guards at the<br />
slightest <strong>of</strong>fense. If, however, the party tells him <strong>of</strong> the Draxan templars'<br />
conversation from location 15, Oberhan drops the key; this allows the<br />
party to enter the room to the east. If the party gives Oberhan the book<br />
from the cabinet at location 18, he tells the party about the portals at<br />
locations 20 and then leaves the <strong>of</strong>fices along with the Tyrian guardsmen.<br />
17
18<br />
19<br />
18<br />
19<br />
20<br />
21<br />
22<br />
23<br />
24<br />
25<br />
26<br />
The cabinet in this room is guarded by an aurumvorax and contains a<br />
journal describing the Draxans' plan to betray the 'fYrian templars<br />
once their usefulness is at an end. The cabinet also contains magic<br />
scrolls and an axe +2 .<br />
Sirah, a poor citizen, is waiting for an audience with the Tyrian templars.<br />
She tells the party what she knows about the templars, but she is most<br />
concerned about her brother, Abelard, whom the templars arrested. If the<br />
party shows enough concern for her brother, she gives it a magical fruit.<br />
The portals at these locations allow the party to move between the<br />
rooms and avoid the guards in the hall.<br />
The Draxan warriors at this location do not allow the party entry into<br />
the meeting room to the west.<br />
The characters can overhear snatches <strong>of</strong> the meeting between<br />
Kalaobuta and the Draxan templars if they stand next to the north<br />
wall <strong>of</strong> this room. The party can find magical fruit in the chest in<br />
this room. The party can also use the information it gathers to help<br />
convince Oberhan <strong>of</strong> the Draxans' treachery.<br />
Tyrian warriors stand guard.<br />
Kalaobuta, the high templar in charge <strong>of</strong> the fyian <strong>of</strong>fices, is in<br />
conference with the Draxan templars. If the party surprises her by<br />
coming through the portal at location 20, the Draxans abandon<br />
Kalaobuta and flee the <strong>of</strong>fices without a fight. The party must take<br />
the piece <strong>of</strong> parchment which Kalaobuta drops to Arslan as pro<strong>of</strong><br />
<strong>of</strong> the Draxans' and 'fYrian templars' plans. Once she has been<br />
defeated, the party can find the Toothed Club on Kalaobuta's body. -<br />
These two buildings are shops which cater to the wealthier citizens<br />
<strong>of</strong> ryr. The shops <strong>of</strong>f the main street primarily <strong>of</strong>fer general clothing,<br />
weapons and armor for sale. The party can sometimes find the same<br />
items for sale in the Shadow Square at lower prices.<br />
Dhukkar is servant to the high templar Kovar Illyasch Ahbadhu and<br />
quite proud <strong>of</strong> the fact. He challenges the characters when they enter<br />
the house, but is powerless to do anything else. Dhukkar can tell the<br />
party who Kovar was and that he went missing a few weeks ago. He<br />
may, however, call the city guard if his pride is too deeply wounded.<br />
If the characters show Dhukkar the pro<strong>of</strong> <strong>of</strong> citizenship which Tasarla<br />
at location 42 gives them, he cowers and cooperates fully with them.<br />
Dhukkar gives the party hints on how to enter the Pyramid and to<br />
search his master's study at location 27.<br />
27<br />
28<br />
29<br />
30<br />
31<br />
32<br />
33<br />
34<br />
35<br />
If the party knows what it is looking for, a stone medallion is in the<br />
bookshelf. The characters can also find books written by the 'fYrian<br />
templar, Kovar, which describe King Kalak's "glorious" rule.<br />
This is a small cafe where the characters may overhear Asim Drac's<br />
henchman, Ulean, plotting with a Draxan templar named Zentrat. If<br />
questioned, they deny everything. The party may find the information<br />
it learns useful in the Jann Tribe region.<br />
This is Acar's house. He is a wealthy merchant who trades mostly in<br />
iron. Bohumir, Acar's servant, greets the characters and shows them to<br />
Acar if they are polite or tell him they are there on business; however,<br />
any belligerence prompts him to call the city guard. Later, Bohumir<br />
buys ore vouchers from the characters at the highest rate available.<br />
These are Acar's rooms. He is friendly to the party and graciously<br />
accepts the party's <strong>of</strong>fer to pay Fayina's debt. The party may, if it<br />
appeals to Acar's desire for high pr<strong>of</strong>its, prompt him to <strong>of</strong>fer a way <strong>of</strong><br />
settling Fayina's debt without paying cash. If successful, Acar gives<br />
the party a note to deliver to Boric at location 32 which allows Acar to<br />
smuggle iron out <strong>of</strong> the mines. If the party comes without meeting<br />
Fayina, Acar soon realizes the party has nothing to <strong>of</strong>fer him and dismisses<br />
it. Acar is an excellent source <strong>of</strong> information, and buys and<br />
sells information at various points in the game. If the party manages<br />
to smuggle any iron ore out <strong>of</strong> the mines, Acar can buy it.<br />
A magical tapestry on this wall takes the party to location 1 in the<br />
Confused WtZard section, at location 5 <strong>of</strong> the Mosaic <strong>Adventure</strong>s region.<br />
Boric, the overseer <strong>of</strong> the 'fYrian Mines, is at this location. Later in the<br />
game he can sell the party a key which it needs to enter the mines.<br />
Threatening Boric prompts him to lower his already poor exchange<br />
rate on ore vouchers.<br />
'fYrian warriors stand guard at this location.<br />
This is the haunted bath house under which the Veiled Alliance<br />
Headquarters are hidden. Once the party is accepted by Arslan at<br />
location 4, he leads it here. Arslan warns the party about the giant<br />
skeletons and poses them as a final test <strong>of</strong> the party's worth. The<br />
giant skeletons attack the party as soon as it enters the building.<br />
Stairs leading to the Veiled Alliance Headquarters are hidden in the<br />
cabinet in this room. After Arslan tells the party about the button hidden<br />
in the basin, it can be used to open the cabinet. Entering the cabinet<br />
takes the party to location 1 in the Veiled Alliance Headquarters.
20<br />
36 An old man, Fermin, appears here later in the game. Fermin is a<br />
defiler charged with guarding the entrance to the Crypt, where the<br />
Lord Warrior has made his base. He has placed obsidian golems in<br />
front <strong>of</strong> the entrance and does not allow the party into the back room.<br />
If the party approaches him, Draxans come to his aid.<br />
37 Behind the tapestry on the north wall is a thick iron door with a massive<br />
lock, that leads to location 1 in the Lord Warrior's Crypt. The<br />
door is locked and trapped. To get through the door, the characters<br />
must use Promere's Hammer, the Lyre <strong>of</strong> the Winds , the Cup <strong>of</strong> Life,<br />
and the Fire Ruby to dispel the elemental wards that have been<br />
placed on the door. If the characters attempt to open the door before<br />
the wards are dispelled, they find it an unpleasant experience.<br />
38 Leaving the City <strong>of</strong> Tyr through the gates at this location takes the<br />
party to location 1 in the Humbleton Forest region.<br />
39 Satinka, a weaver <strong>of</strong> fine rugs and tapestries, rents this stall in the<br />
Shadow Square. Though she has no goods the party would want to<br />
buy, Satinka does have information about the jann tribe, the magic<br />
tapestries, and where the party can go to have the torn tapestry from<br />
the Veiled Alliance Headquarters repaired.<br />
40 Notaku, the spell component merchant from the SHATIERED LANDS, is<br />
here, having found Draj a little shy <strong>of</strong> clients since the heroes<br />
defeated the army. He once again hires the party to find rare and<br />
unique spell components for him.<br />
41 This stall is actually run by thief merchants who fence their stolen<br />
goods. They have good equipment at cheap prices. If pressed, the _<br />
fences <strong>of</strong>fer information about the entrance to Under Tyr at location 11 .<br />
42 This is Tasarla's stall. Once the characters are told that Tasarla is a<br />
member <strong>of</strong> the Veiled Alliance by Aleka in the Alliance Headquarters,<br />
they come ask her help in finding an entrance to the Pyramid. She<br />
sends them to Kovar's house, because he holds the key to entering the<br />
Pyramid. Tasarla gives them forged citizenship papers to help convince<br />
Dhukkar to help them, and lowers her prices once they have identified<br />
themselves as Alliance members. She primarily sells ranged weapons.<br />
43 This merchant primarily sells melee weapons.<br />
44 This merchant primarily sells ranged weapons.<br />
45 This merchant primarily sells armor.<br />
46 This merchant primarily sells armor.<br />
• VEILED ALLIANCE HEADQUARTERS<br />
continues ...<br />
21
22<br />
Synopsis<br />
The Veiled Alliance Headquarters is located beneath the haunted ruins <strong>of</strong> an<br />
ancient bath house. The party enters through a secret trap door in the bath house<br />
directly into the Headquarters.<br />
Age has taken its toll on the once majestic marble walls and roars. The Headquarters<br />
is divided into two wings, both physically and philosophically. The Veiled<br />
Alliance is split between those supporting the movement called Divulgence and<br />
those who caution secrecy; with the new freedom in T}'r and the threat <strong>of</strong> anarchy,<br />
this split is likely spark more than a few lively debates in the near future.<br />
The Veiled Alliance Headquarters appears in two stages: before the Lord<br />
Warrior's attack, and after it. Before the attack everything is well-ordered and<br />
rerects the Veiled Alliance's strict efficiency. This orderliness is destroyed in the<br />
attack leaving walls, roars, and furniture charred from fire and magical blasts.<br />
Once the party gains the trust <strong>of</strong> the Veiled Alliance, it is shown the secret<br />
entrance to the Veiled Alliance Headquarters where Matthias greets the party. He<br />
explains what the Veiled Alliance is all about, and what the Dragon's arrival in<br />
Tyr would mean. After urging the party to help them prepare for that time,<br />
Matthias retreats to his rooms.<br />
The party can talk to Matthias in his rooms in the north west portion <strong>of</strong> the<br />
Headquarters. Matthias wants to stick to the old ways <strong>of</strong> secrecy. He cautions<br />
the party against any rash acts, preferring to gather strength instead <strong>of</strong> attempting<br />
a pre-emptive strike.<br />
Though Matthias is not precisely a man <strong>of</strong> action, he is one <strong>of</strong> great learning;<br />
and one <strong>of</strong> the main advantages <strong>of</strong> joining the Veiled Alliance at this point is to<br />
gain access to the research done by Matthias and his subordinates. When the<br />
time comes, Matthias' guidance makes the difference for the party in its fight<br />
against the Tarrasque.<br />
The eastern portion <strong>of</strong> the Headquarters is where Romila and the other supporters<br />
<strong>of</strong> Divulgence meet. Romila is ready for action in the worst way. She views Kalak's<br />
death and the subsequent freeing <strong>of</strong> the slaves as the Veiled Alliance's first real<br />
chance (and likely the last) to gain wide-spread acceptance and even support. Of<br />
course, the arrival <strong>of</strong> another Dragon king would dash all those hopes in a second.<br />
She urges the party to go to Kalak's abandoned Pyramid, where she is sure the<br />
Dragon will come; it is the one building in the thriving city which is both<br />
deserted and reeking <strong>of</strong> evil magic. Romila is correct in her thinking, but she is<br />
too late. The Lord Warrior has planned an attack on the Veiled Alliance, specifically<br />
to recover the artifact which Matthias guards. This artifact, the Urn <strong>of</strong><br />
Utatci, holds the key to the Lord Warrior's plan <strong>of</strong> awakening the Tarrasque.<br />
When the party returns from the Pyramid mission, the Lord Warrior has managed<br />
to kill many <strong>of</strong> the Veiled Alliance members, destroy most <strong>of</strong> their work, and<br />
stealth~ Urn <strong>of</strong> Utatci. The party needs to stop the Draxans from completely<br />
destroymg the Headquarters and ki/Ting all within it.<br />
After .the characters have cleared the Headquarters <strong>of</strong> the Draxan invaders, they<br />
are given access to the secret Alliance archives where the Urn <strong>of</strong> Utatci was kept.<br />
Matthias explains that he is unsure <strong>of</strong> its exact properties, but does know it contains<br />
power beyond comprehension. He also mentions the Cup <strong>of</strong> Life, which<br />
Si/vain is guarding, saying that it seems to have some power over the Urn <strong>of</strong><br />
Utatci. Matthias is, at best, vague in his clues but promises to spend all <strong>of</strong> his<br />
energy researching the matter further.<br />
Aft~r this point, the Veiled Alliance Headquarters serves as a focal point from<br />
which the party learns news that helps it in the quests for the three remaining<br />
artifacts. As the party completes the quests and returns to the Veiled Alliance<br />
Headquarters, Matthias or Romila may send the party into the City <strong>of</strong> T}'r on<br />
minor missions such as a meeting with someone to gather information or retrieving<br />
something that has fallen into the templars' hands.<br />
The tapestry which leads to the Silt Sea Islands was damaged in the Lord Warrior's<br />
attack, so the party needs to take it to the Jann Tribe region to have it repaired.<br />
Non-Player Characters in This Region<br />
Matthias Morthen<br />
Location 1, 10<br />
Matthias is a male human preserver who has been a member <strong>of</strong> the Veiled<br />
Alliance since he was nine years <strong>of</strong> age and is now the leader <strong>of</strong> the Alliance<br />
in TYr· He is a man <strong>of</strong> great learning and bureaucratic skills, though his<br />
extreme conservatism does not sit well with some <strong>of</strong> the members <strong>of</strong> the<br />
Alliance, primarily Romila. He is a valuable source <strong>of</strong> information for the characters<br />
as they progress through the game. He gives the characters a gythka +3<br />
and a wand <strong>of</strong> power word stun when they complete the major quests in the<br />
game (retrieving the Fire Ruby, Lyre <strong>of</strong> the Winds , or Promere's Hammer).<br />
Veiled Alliance Guards<br />
Location 2<br />
The guards are male human fighters. They are usually people who have run<br />
afoul <strong>of</strong> the templars and were given sanctuary in the Alliance.<br />
23
24<br />
Silvain<br />
Location 4<br />
Silvain is a female human water druid. She is concerned only with healing the<br />
wounds <strong>of</strong> Athas, and has joined the Alliance because it <strong>of</strong>fers her the best<br />
chance <strong>of</strong> making a difference. Silvain heals the characters if they are<br />
wounded, and tells them where to find the Cup <strong>of</strong> Life.<br />
Romila Parthian<br />
Location 6, 9<br />
Romila is a female human preserver/thief who was recruited into the Alliance<br />
by a preserver whose pocket she had picked. Her innate talent and fiery<br />
nature has allowed her to rise swiftly through the Alliance ranks and she is<br />
now second-in-command <strong>of</strong> the Alliance in 'fyr. Romila also leads the<br />
Divulgence movement. Romila is the one to talk to when the party desires<br />
action. She tells the party where to find the Lord Warrior's forces in the<br />
Pyramid, and later, she is the one who discovers the Lord Warrior's hiding<br />
place. She also gives the party a ring <strong>of</strong> strength after the Lord Warrior's attack.<br />
Aleka<br />
Location 7<br />
Aleka is a female human. She is the administrative backbone <strong>of</strong> the Veiled<br />
Alliance, coordinating the Alliance's various activities throughout Tyr. The<br />
characters must speak to Aleka in order to learn the password that identifies<br />
them as Alliance members to Tasarla in a Shadow Square shop in Tyr.<br />
Veiled Alliance Members<br />
Location B<br />
Veiled Alliance members come from many different backgrounds. nie two<br />
things they have in common are their magic and their hatred <strong>of</strong> defilers. The<br />
Veiled Alliance members use the Headquarters as a hidden base from which<br />
they can work against defilers and other evils threatening Athas.<br />
Nnamdi<br />
Location 15<br />
Nnamdi is an old human preserver who joined the Veiled Alliance so he could<br />
pursue his research in peace. In many ways, Nnamdi is a genius <strong>of</strong> elemental<br />
magic, but his eccentricities make him undependable. The Lord Warrior captures<br />
Nnamdi during the attack in hopes <strong>of</strong> gaining his knowledge <strong>of</strong> the Um<br />
<strong>of</strong> Utatci. Nnamdi can explain to the characters how to use his alchemy<br />
devices. He may also give the characters a scarab <strong>of</strong> protection if they are<br />
patient and persistent enough to get past his absent-mindedness.<br />
• Locations and Events<br />
1 These stairs lead up to the cabinet at location 35 in the bath house in<br />
the City <strong>of</strong> Tyr. When the characters arrive for the first time, Matthias<br />
greets them and asks for the news that they bring. This is a formal meeti~g<br />
where Matthias accepts the characters into the Alliance, explains its<br />
aims, and assigns the characters rooms where they can rest. If the characters<br />
refuse to answer Matthias' questions, they are attacked and<br />
driven from the Alliance. After the meeting, Matthias returns to his quarters<br />
at location 10 and the characters are free to wander.<br />
2<br />
3<br />
4<br />
5<br />
6<br />
This is a guard room with a few Veiled Alliance members. The party is<br />
able to get basic information from them about their members and<br />
their whereabouts, and about the debate between Divulgence and<br />
continued secrecy (once the party has been told about Divulgence).<br />
As game play progresses they may <strong>of</strong>fer information on current topics.<br />
This is the guest quarters where the party may rest: the characters will<br />
not want.to store valuables in the Veiled Alliance Headquarters, since<br />
much <strong>of</strong> 1t may be looted by the Draxans in their attack.<br />
~is ~s the sickroo~ where Veiled Alliance members can seek healing.<br />
S1lvam, a water druid, runs the sickroom and heals the characters<br />
using the restorative waters <strong>of</strong> the font at location 5. In fact, if the<br />
cha.racters talk to her when they are hurt, Silvain talks <strong>of</strong> nothing else<br />
u.nt1l t~ey have accepted her aid. Silvain is uninterested in politics,<br />
either m 'fyr or in the Veiled Alliance, and does not commit to supporting<br />
any faction . She wants to do her best to heal Athas <strong>of</strong> its<br />
wou~ds a~d her work for the Veiled Alliance is more <strong>of</strong> a symbiotic<br />
relat10nsh1p than one <strong>of</strong> idealistic fervor.<br />
Using the font on the north wall at this location will heal one member<br />
<strong>of</strong> the party, as well as raise a dead party member if there is enough<br />
water. The font holds enough water for two uses. Once the water is<br />
used up, it takes two full days for the font to recharge enough to be<br />
used again. Remember, resting only uses eight hours, so the party<br />
woul? ne~d to rest three times before a day passes. Along the east<br />
wall m this room are a magical pear and banana.<br />
~is is th~ Second Room where Romila and her colleagues meet to<br />
discuss D1vulgence strategy. The characters first meet Romila here.<br />
She invites them to join in the discussion and praises them for their<br />
valor (if they defeated the templars at their <strong>of</strong>fices) or thanks them for<br />
their discretion.<br />
25
26<br />
7<br />
8<br />
9<br />
10<br />
11<br />
12<br />
13<br />
This <strong>of</strong>fice is where Aleka conducts her business <strong>of</strong> managing the<br />
Veiled Alliance. Although Matthias and Romila are the highest r~nking<br />
members, Aleka is the one who keeps open lines <strong>of</strong> comm.umcation<br />
between Alliance factions , keeps the Headquarters supphed, and<br />
organizes small missions to help member~ in 'fyr. A.s a result, she is<br />
an excellent source <strong>of</strong> information <strong>of</strong> all kinds and 1s the one most<br />
likely capable <strong>of</strong> getting the party what it needs when it needs it.<br />
The characters must talk to Aleka after Romila has told them to look<br />
for the Draxans in the Pyramid in order to get the password which<br />
identifies them as Alliance members to Tasarla at location 42 in the<br />
City <strong>of</strong> Tyr.<br />
These are the sleeping quarters for the lower ranking Veiled Alliance<br />
members. The party is able to talk to any members who happen to<br />
be here. Some talk about Divulgence, either supporting it or not, others<br />
relate personal stories and tell the party about any rumors they<br />
have heard.<br />
These are Romila's quarters. She can be found here when she is not<br />
in the Second Room, and she is always willing to talk to the characters<br />
about Divulgence and advise them (especially toward action).<br />
When the characters talk to her after meeting her at location 6,<br />
Romila advises them to search for the Draxans in Kalak's abandoned<br />
Pyramid, and directs them to Aleka for help in contacting Tasarla in<br />
the City <strong>of</strong> 'fyr.<br />
These are Matthias' quarters. He rarely ventures from his rooms, preferring<br />
to study in private. He is a source <strong>of</strong> great wisdom, if not specific<br />
information, and always welcomes the party to a pleasant<br />
conversation. In counterpoint to Romila, Matthias advises caution,<br />
patience, and the need to build resources.<br />
A large book is on a pedestal; it can be read if the active characte; is a<br />
spellcaster. This is a very special book, requiring great concentrat1?n<br />
to read, and a character is limited in how long he or she can read 1t.<br />
Many things, both good and bad, can happen when a. character reads<br />
the book: he or she can learn a spell, become feeblemmded , learn crucial<br />
information, or some other effect can occur.<br />
This is the <strong>of</strong>ficial Meeting Room for the Veiled Alliance.<br />
This is an archive where the Veiled Alliance keeps many <strong>of</strong> its<br />
records. The bookshelf to the left <strong>of</strong> the tapestry contains books about<br />
the Veiled Alliance, Under Tyr, and the 'fyrian Mines which the party<br />
can read. The bookshelf to the right <strong>of</strong> the tapestry contains books<br />
about Kalak, the dead sorcerer-king <strong>of</strong> 'fyr, which the party can read.<br />
The magical tapestry at this location takes the party to location 1 in<br />
the Chandelier section <strong>of</strong> the Mosaic <strong>Adventure</strong>s region.<br />
14 This is one <strong>of</strong> the Headquarters research rooms. The magical tapestry<br />
at this location takes the party to location 1 in the <strong>Museum</strong> section <strong>of</strong><br />
the Mosaic <strong>Adventure</strong>s region. The party can find two magical scrolls<br />
in the bookshelf to the right <strong>of</strong> the tapestry.<br />
15 Nnamdi, an old preserver, is at this location working on his various<br />
research projects. Nnamdi is absent-minded and <strong>of</strong>ten abruptly ends a<br />
conversation to return to his work. A patient and persistent party, however,<br />
can elicit information on how the alchemy devices work. He may<br />
also give the party a scarab <strong>of</strong> protection if he is asked about his work.<br />
16 The party can make a potion <strong>of</strong> cure critical wounds at this location by<br />
using the green beaker on the alchemy device at this location.<br />
17 The party can make a potion <strong>of</strong> cloak <strong>of</strong> bravery at this location by<br />
pouring the pink liquid into the green beaker on the tripod first, and<br />
then pouring the red liquid into the beaker.<br />
Veiled Alliance Headquarters - After the Attack<br />
The party can find random treasure in many <strong>of</strong> the chests throughout the Veiled<br />
Alliance Headquarters. During the attack the Draxans loot much <strong>of</strong> this treasure.<br />
If the Headquarters is abandoned (either because Matthias and Romila are<br />
killed in the Draxan's attack, or because the party attacks them), random<br />
monsters and Draxans appear.<br />
1 The Veiled Alliance guards are being attacked by Draxans as the<br />
characters return from the Pyramid, and are immediately thrown into<br />
combat. If any <strong>of</strong> the guards survive the fight, they are able to tell the<br />
characters about the attack and follow the characters as they try to<br />
drive the Draxans from the Headquarters.<br />
2 If the guards in this room survive the Draxan's assault, they follow<br />
the party until the Draxans have been driven out <strong>of</strong> the Alliance<br />
Headquarters.<br />
3 The campfire ring is not present at this location until the Draxans<br />
have been defeated.<br />
27
28<br />
4<br />
Silvain was made keeper <strong>of</strong> the Cup <strong>of</strong> Life and has hidden it i~ th~ ,<br />
font in the wall at location 5. The Cup <strong>of</strong> Life is the source <strong>of</strong> S1lvam s<br />
healing abilities. After the attack, Silvain tells the party w~ere ~o fi~d<br />
the Cup <strong>of</strong> Life after the meeting at location 12, and descnbes its history.<br />
Silvain is also the best source <strong>of</strong> information about the Temple <strong>of</strong><br />
the Cosmos.<br />
11<br />
12<br />
.. '<br />
. . - \<br />
Matthias' tome is at this location.<br />
...<br />
29<br />
Matthias and any other surviving Veiled Alliance members meet after<br />
the attack. Matthias explains about the Urn <strong>of</strong> Utatci and sends the<br />
party on quests to find the Fire Ruby, the Lyre <strong>of</strong> the Winds, and<br />
Promere's Hammer. Matthias also hints that the Dragon's coming is<br />
the least <strong>of</strong> their worries now. The true enemy is the Lord Warrior.<br />
5<br />
Once Silvain has told the characters where to look, they can find the<br />
Cup <strong>of</strong> Life hidden in the font at this location. The Cup <strong>of</strong> Life operates<br />
in the same manner as the font, but must be placed in the font for it<br />
to recharge.<br />
If Matthias was killed in the Draxan's attack, then Romila leads the<br />
meeting. If both Matthias and Romila were killed in the attack, a Veiled<br />
Alliance member informs the party that the cause is hopeless and the<br />
Headquarters is abandoned. In this case, the party is on its own.<br />
6<br />
7<br />
8<br />
The Second Room has been destroyed in the Draxan's attack.<br />
Aleka is dead.<br />
The sleeping quarters are noticeably vacant after the attack, though<br />
some members may still be found if the party manages to save them.<br />
If the characters convinced Dmitri to join the Alliance in Humbleton<br />
Forest, then they may meet him again at one <strong>of</strong> these locations.<br />
13<br />
This is an archive where the Veiled Alliance keeps many <strong>of</strong> its<br />
records. The bookshelf to the left <strong>of</strong> the tapestry contains books about<br />
the Veiled Alliance, Under Tyr, and the Tyrian Mines which the party<br />
can read. The bookshelf to the right <strong>of</strong> the tapestry contains books<br />
about Kalak, the dead sorcerer-king <strong>of</strong> Tyr, which the party can read.<br />
The magical tapestry at this location takes the party to location 1 in<br />
the Chandelier section <strong>of</strong> the Mosaic <strong>Adventure</strong>s region.<br />
9<br />
10<br />
After the Draxan's attack, Romila leaves to search out the Lord<br />
Warrior's hiding place while the party seeks the relics. When she<br />
returns, she tells the party where the entrance to the Lord Warrior's<br />
Crypt is located. If Matthias was killed during the Draxan's attack,<br />
Romila does not leave the Headquarters, but remains to serve as the<br />
Alliance's leader. In that case, Romila directs the characters on the<br />
three quests for the ancient relics which they must ac.quire to g.ain<br />
entry into the Lord Warrior's Crypt. If the party questions Rom1la<br />
about the Lord Warrior and expresses concern for her murdqed<br />
friend, she tells the party where to find a ring <strong>of</strong> strength at location 21 .<br />
As the characters rush to Matthias' room, they find him engaged in a<br />
desperate fight against the Draxans. Matthias urge~ them to the secret<br />
archives where the Lord Warrior is pillaging the art1facts!<br />
After the meeting at location 12, the party can talk to Matthias. He<br />
advises the party on the quests for the Fire Ruby, the Lyre <strong>of</strong> t~e<br />
Winds, and Promere's Hammer. Matthias, <strong>of</strong> course, also has information<br />
on the relics and the Urn <strong>of</strong> Utatci, and directs the party to the<br />
archives for further information. Matthias' information becomes more<br />
and more accurate as he conducts research <strong>of</strong> his own. As the party<br />
completes the quests, Matthias rewards it with a gythka +3 and a<br />
wand <strong>of</strong> power word stun.<br />
14<br />
15<br />
18<br />
19<br />
20<br />
21<br />
The magical tapestry at this location takes the party to location 1 in<br />
the <strong>Museum</strong> section <strong>of</strong> the Mosaic <strong>Adventure</strong>s region.<br />
The research room and many <strong>of</strong> its alchemy devices have been<br />
destroyed. Nnamdi is gone - captured by the Draxans.<br />
Romila is driving a group <strong>of</strong> Draxans out <strong>of</strong> this wing <strong>of</strong> the<br />
Headquarters. She urges the party to help Matthias once this group <strong>of</strong><br />
Draxans are defeated. After the battle she patrols the halls.<br />
Once Matthias has revealed its location, the party finds the entrance<br />
to the secret archives. Stepping through the entrance takes the party<br />
to location 29 in the Veiled Alliance Secret Archives.<br />
When the party returns from the Secret Archives after defeating the<br />
Draxans there, the party should seek out the Draxans who Romila is<br />
pursuing. Once that group <strong>of</strong> Draxans are defeated, a meeting <strong>of</strong> all<br />
surviving Alliance members is called at location 12. If the party spends<br />
too much time in the Secret Archives, it is too late to help Romila.<br />
The party can find a ring <strong>of</strong> strength hidden in the drain at this location<br />
if Romila mentioned it, or if a thief in the party can successfully<br />
find it without Romila's help.
30<br />
Veiled Alliance Secret Archives<br />
22 The party rushes to this room, only to see the Lord Warrior teleport<br />
away gloating over his acquisition <strong>of</strong> the Um <strong>of</strong> Utatci. The Lord<br />
Warrior leaves behind his minions to try to kill the party. The party<br />
should return to the main wing <strong>of</strong> the Headquarters to help Romila as<br />
soon as it defeats the Draxans. Otherwise, the party will be too late to<br />
save Romila.<br />
23 This is another archive room where Matthias has stored the more<br />
valuable and powerful records. The party can find a potion <strong>of</strong> cure<br />
light wounds as well as treasure in the chests. The books on the shelf<br />
in this room contain information about the ancient artifacts and other<br />
pertinent information.<br />
24 A magical tapestry hangs on the a wall at this location which takes<br />
the party to location 1 in the Volcano Temple. Before using this<br />
tapestry, the party must activate the tapestry by touching it with the<br />
coal ember found at location 28.<br />
25 This chest contains a magical Feather Fan, which can be used to activate<br />
the tapestry at location 26, and a bottle <strong>of</strong> worm dye, which the<br />
party needs to have to repair the tapestry at location 26.<br />
26<br />
27<br />
28<br />
29<br />
The magical tapestry at this location was torn by the Lord Warrior's<br />
troops and must be repaired before it can be used. The characters<br />
must take it, and the worm dye they find at location 25 to the jann<br />
tribe, where a weaver repairs it. Once the repaired tapestry is replaced<br />
on the wall, the characters can activate it by touching it with the magical<br />
Feather Fan they find at location 25. When used, the tapestry<br />
takes the party to location 1 in the Silt Sea Island region. -<br />
There is a magical scroll on the bookshelf at this location.<br />
The party is able to take an ember <strong>of</strong> coal from the brazier at this<br />
location which can be used to activate the tapestry at location 24.<br />
The exit from the secret archives is at this location, and takes the<br />
party to location 19.<br />
• KALAK'S PYRAMID<br />
Synopsis<br />
The Veiled Alliance sends the party to investigate Kalak's Pyramid, which has<br />
been abandoned.since the sorcerer-king's death. The party finds that portals are<br />
bringing feyrs into the outennost ring <strong>of</strong> halls and chambers. Searching the<br />
grates, the party finds magical covers for these portals, as well as other hidden<br />
treasures and, occasionally, monsters.<br />
After finding a few pieces <strong>of</strong> treasure and perhaps dealing with a skeletal warrior<br />
or two, the party's way is blocked by a statue so ugly that no living creature may<br />
pass before it. A well-aimed missile can tum its hideous face to the wall.<br />
Inside the inner area, Draxans are preparing the Pyramid's heart for the arrival <strong>of</strong><br />
the Dragon. With patience, the party can slip among the Draxan patrols and<br />
reach the upper levels <strong>of</strong> the Pyramid. Wards set by the Lord Warrior's second-incommand,<br />
the defiler Raenika, warn the party not to enter the innocent-looking<br />
Garden because it is rife with magical traps.<br />
31<br />
continues ...
32<br />
The characters find a grate that allows them to enter rooms below the Garden.<br />
There they find the preserver Abelard, who has quarantined himself because he<br />
has been afflicted with a magical plague. The characters invade the quarters <strong>of</strong><br />
the templars to find a magical cabinet that transports them past the magical<br />
traps into Raenika's circle <strong>of</strong> power. Although Raenika summons many minions<br />
to her defense, the deadly magic <strong>of</strong> the Garden works against them. With<br />
Raenika dead and the Garden turned to ash, the Draxans are forced to abandon<br />
their plans to welcome the Dragon to fyr.<br />
Non-Player Characters in This Region<br />
Dream<br />
Various locations in the outer ring <strong>of</strong> chambers<br />
Dream is a ragged man with white hair who wanders the outer chambers <strong>of</strong><br />
the Pyramid. This citizen <strong>of</strong> fyr has been tormented by nightmares. Desperate<br />
for sleep, he pursued the feyrs (which are creatures created from people's<br />
nightmares) into the Pyramid. Because he does not sleep, the feyrs do not<br />
dare attack him and he is more than slightly crazed. Among his mad ramblings,<br />
Dream can tell the party where feyrs come from , how to enter the<br />
Draxan's enclave, and who is in charge <strong>of</strong> the Draxan's operations.<br />
Abelard<br />
Location 20<br />
Abelard is a preserver <strong>of</strong> fyr, who was captured some months ago by the<br />
Draxans and now sits dejectedly in a cage. They have infected him with a<br />
magical plague and hope that he will escape to infect all the other preservers<br />
<strong>of</strong> Tyr. Abelard learned <strong>of</strong> their plans, however, and used his waning powers to<br />
erect a magical barrier around himself. He now waits within the barrier for the<br />
plague to pass. If the party gives Abelard enough magical fruit, he is able to<br />
survive the plague and escape. The party should find Abelard's sister, Sirah, in<br />
the City <strong>of</strong> fyr to tell her <strong>of</strong> his whereabouts and condition. Sirah was waiting<br />
earlier by the Templar's Offices in Tyr, hoping to learn something about her<br />
brother's disappearance. If the party agrees to look for her brother, she may<br />
give it a magical fruit.<br />
Raenika<br />
Location 26<br />
Raenika is a proud l 4th level defiler wearing a white gown. She is second-incommand<br />
to the Lord Warrior. She is overseeing the preparation <strong>of</strong> a Garden<br />
which shall become the Dragon's personal source <strong>of</strong> power when he arrives.<br />
Defeating Raenika demoralizes the defilers that serve her, and ruins the magic<br />
powers <strong>of</strong> the Garden.<br />
t Locations and Events<br />
1 Entry and Exit: The stairs under the statue in Tyr at location 11 , lead<br />
to here. The madman Dream wanders throughout this outer ring <strong>of</strong><br />
halls and corridors.<br />
2, 3 These two openings are connected by a tunnel. The strongest character<br />
in the party should be selected to break through the grates.<br />
4 The treasure behind these grates includes a cover for the portals at<br />
locations marked 5, a cone <strong>of</strong> cold scroll, a scare scroll, a +2 sword, and<br />
a star fruit. A skeletal warrior can also be lurking behind the grate.<br />
5 Tunnels beneath fyr gather feyrs and release them at these portals.<br />
The party can use the covers collected at location 4 and 6 to seal the<br />
portals, but the madman Dream may uncap them again.<br />
6 Covers for the portals at the locations marked 5.<br />
7 Skeletal warriors may break through these grates to ambush the party.<br />
Searching the grates first may scare them away.<br />
8 Campfire ring. If the party has nightmares while resting, feyrs (spawned<br />
by the bad dreams) ambush the party after the rest period is over.<br />
9 To pass through, the party must first turn the Ugly Statue's face to the<br />
wall by shooting the statue (or the lever at location 10) with a missile<br />
weapon. When returning, the party may find two feyrs lurking nearby.<br />
10 The Draxans use this lever to pass the Ugly Statue.<br />
11 , 12 Draxan patrols pause nearby. When relieved by other guards, they<br />
eventually return to the teleport gate at location 13.<br />
13 The Dragon's stronghold regularly sends troops into Kalak's Pyramid.<br />
If trouble is detected or a Draxan patrol is overdue, an interceptor<br />
patrol is sent through the gate to investigate. A seeing eye turns <strong>of</strong>f the<br />
teleport gate if the party gets too close.<br />
14,15 Smaller Draxan patrols pause nearby.<br />
16 Through these magical wards Raenika warns the party not to defile<br />
her Garden at location 17. She may also cast a wall <strong>of</strong> fire to dissuade<br />
the party from entering.<br />
17 The Garden <strong>of</strong> His Welcome Arrival. Because defilers use living<br />
things as fuel for their magic, the Lord Warrior has ordered this<br />
Garden to be planted. If the characters enter the Garden, they may be<br />
attacked by Raenika's attendant defilers and her magical traps, a barrage<br />
<strong>of</strong> magic only the most adept <strong>of</strong> parties can survive.<br />
33
34<br />
18, 19 Entry and Exit: Grate under the Garden. The grate at location 18<br />
leads to the templar's secret rooms under the Garden at location 19.<br />
The party's strongest character should be selected to break through<br />
the grate.<br />
20 The preserver Abelard, a victim <strong>of</strong> a magical plague, begs for magical<br />
fruit from the party.<br />
21, 22 If the characters work to open the grate at location 21 , they may overhear<br />
templars in the room at location 22 debating whether or not to<br />
use the teleportation cabinet at location 23 to join Raenika in the<br />
Garden at location 26. If the characters listen, they learn that the<br />
Lord Warrior is a kaisharga, and gain clues about his plans. If they<br />
wait too long, or make too much noise, however, the templars flee to<br />
join Raenika. If the character breaking open the grate knows thief<br />
skills, the templars are Jess likely to hear the characters at the grate.<br />
23, 24 Teleportation cabinets: the party is teleported from one cabinet to<br />
another. To enter a cabinet, the party must be standing close to it.<br />
Later, the party may be teleported to the cabinet at location 24 from<br />
the Mosaic <strong>Adventure</strong>s region. TWo Draxan templars, expecting to<br />
meet Magnolia's kidnappers, try to talk their way out <strong>of</strong> being captured<br />
by the party.<br />
25 A templar's chest is loaded with elegant traps that test a thief's skill,<br />
but is empty.<br />
26 Raenika. When she is dead, the Garden's destructive magic is set loose,<br />
and her defilers cower or flee in fear. When this happens, the Garden is<br />
ruined and the party's mission for the Veiled Alliance is complete.<br />
I HUMBLETON FOREST<br />
Synopsis<br />
Humbleton Forest is a dangerous region on the road from 1)!r to the 1)!rian Mines.<br />
Once, Humbleton and Glastow thrived from the trade along the road. Now, the<br />
yuan-ti have almost destroyed both villages with their constant raids. The halfiings<br />
<strong>of</strong> Humbleton and the hermit Dariya desperately need the party's help to survive.<br />
The leader <strong>of</strong> the beasthead giants, Ptar, has also kidnapped Magnolia, the daughter<br />
<strong>of</strong> the Sultan, and holds her captive outside his cave.<br />
35<br />
continues ...
36<br />
Non-Player Characters in This Region<br />
Wandering Miners . .<br />
These miners can be found at various locations, headed either towards 'I)'r or<br />
the Tyrian Mines, and can describe the mysterious deaths.<br />
Ptar<br />
Location 3<br />
The gang leader <strong>of</strong> the beasthead giant~ , P.tar is here to .extr~ct tribute from the<br />
denizens <strong>of</strong> Humbleton Forest. Ptar is mchned to negotiate 1f the strongest<br />
fighter or gladiator is the lead character. Ptar carries th~ ~east ~lub, ~ +2 we?pon<br />
that casts a charm. Ptar also carries the key to Magnolias cham, which a thief<br />
can pick from his pocket if the thief is the lead character and approaches Ptar<br />
while he is asleep. The characters can have a contest <strong>of</strong> strength for Magnolia,<br />
and they may win if the lead character has a strength greater than 21. They can<br />
also <strong>of</strong>fer to buy her - but they must start the bidding at 1 OOO ceramic pieces.<br />
Otherwise if the characters win at the 100 level, Magnolia will be <strong>of</strong>fended and<br />
cause a fi~ht anyway. The characters can always attack Ptar if they so wish,<br />
though he may call several friends to help him.<br />
Dariya<br />
Location 7<br />
Dariya is a female cleric/preserver under siege by the yuan-ti. She is po~~rless<br />
as long as Solurnis exists. She is trapped because ?fa spell t~at Solurm~ is casting.<br />
If the characters do a few simple tasks for Danya they gam her gratitude, ~s<br />
well as access to the magical fruit at location 8. If the characters defeat Solurms,<br />
Dariya is freed and the party meets Dmitri. Dariya's first requ~st is that. the characters<br />
pick some hedgerun root and return it to her. The root is at locat1.on .13<br />
and cannot be picked until Dariya instructs the characters on how to p1Ck it. The<br />
zombie berries, which she asks for next, are located at 16a. When the characters<br />
return to Dariya with the berries, she allows them to pick magic fruit: Th.e characters<br />
should pick as much fruit as they can now, because once Danya is gone<br />
the characters will no longer be able to pick fruit in this area.<br />
Dmitri<br />
Location 7<br />
Dmitri is a young preserver, the son <strong>of</strong> Dariya. He wants to meet the party and<br />
to join the Veiled Alliance. If the party successfully defeats the yuan-ti without<br />
hurting Dariya, Dmitri meets the party in Dariya's cave. If t~e chara~ters can<br />
convince Dmitri to join the Veiled Alliance, they can meet him back m the<br />
Veiled Alliance Headquarters at location 8.<br />
Magnolia<br />
Location 11<br />
The daughter <strong>of</strong> the jann Sultan Akhmed Windcaller, Magnolia was captured<br />
by a beasthead giant named Ptar. All the party has to do is save her. That<br />
could entail defeating Ptar, picking his pockets, picking the lock on Magnolia's<br />
chains, buying her freedom, or winning a contest <strong>of</strong> strength with Ptar. If the<br />
party comes and goes without saving her, Magnolia rescues herself, but the<br />
party's treasure is greatly reduced.<br />
Snaggle<br />
Location 17, 19 or Room 1<br />
The temporary leader <strong>of</strong> Humbleton, Snaggle is leading the village in lieu <strong>of</strong><br />
Glade, who has been missing for quite a while. Snaggle tells the characters<br />
about the plight <strong>of</strong> the halflings, and asks if they want to help. The characters<br />
gain experience points for accepting.<br />
Firegazer<br />
Location 17, 19 or Room 2<br />
A hot-tempered warrior <strong>of</strong> Humbleton, Firegazer loves to fight. Firegazer is<br />
also entrusted with the delivery <strong>of</strong> the berries to the yuan-ti hole at location<br />
37. If the characters pick berries with Soothsurg, they may then ask Firegazer<br />
to take the berries. The characters may then follow Firegazer to the berry box<br />
at location 22, then take the box to location 37. After setting down the box, if<br />
the lead character is a fighter or fighter sub-class, Firegazer asks the characters<br />
if they would like to ambush a yuan-ti hunting party. If the characters agree,<br />
they may follow him to location 38 and an encounter ensues.<br />
Glade<br />
Location 23, Room 1<br />
Glade is a female halfling who is the true leader <strong>of</strong> Humbleton and was<br />
wounded on the quest. She just appears after the party has: destroyed the<br />
yuan-ti, brought back the water from the Pool <strong>of</strong> Heroism , and rescued the<br />
halflings held by Runner. Glade then congratulates the party and gives it experience<br />
points.<br />
Ash, Axestopper, Branch, Sureshot<br />
Locations 23, 24, 25, and 26<br />
These villagers are trying to keep Humbleton alive until the village can be reunited.<br />
Sureshot has a Bow <strong>of</strong> Accuracy +3 for sale, along with some magic<br />
arrows +3 and magic arrows + 1.<br />
37
38<br />
Cleave<br />
Location 24<br />
One <strong>of</strong> the champions who searched for the Pool <strong>of</strong> Heroism, Cleave was<br />
wounded early in the expedition and dragged back to Humbleton, where he<br />
now recovers. The characters may use the water from the Pool <strong>of</strong> Heroism<br />
served in the Hero Flask to revive him fully.<br />
Soothsurg<br />
Location 25<br />
A food gatherer for Humbleton, Soothsurg is an elder <strong>of</strong> Humbleton.<br />
If the party agrees to help Soothsurg, the characters may join him at location<br />
18 and help pick berries. Characters get SOO experience points for each unit <strong>of</strong><br />
berries they put in the box, which is located near location 22. After picking<br />
berries and talking to Soothsurg, the party may go to Firegazer at location 20<br />
and help him.<br />
• Locations and Events<br />
1 Entrance to the City <strong>of</strong> Tyr, location 38.<br />
2<br />
3<br />
4<br />
5<br />
6<br />
7<br />
8<br />
9<br />
10<br />
11<br />
Exit from Ptar's cave, goes to location 36.<br />
Ptar is sleeping; the party can wake him up at long range, or sneak up<br />
on him with a thief as the lead character.<br />
The party can challenge Ptar to a contest <strong>of</strong> strength. This entails the<br />
party pushing the gray rock farther than Ptar can push the brown<br />
rock. This requires a 21 strength.<br />
Entrance to Dariya's cave, leads to location 6.<br />
Exit from Dariya's cave, leads to location 5.<br />
Dariya stands in the protective circle to defend herself from the yuanti<br />
magic. If the characters successfully defeat the yuan-ti, they can<br />
then meet Dmitri here.<br />
Once the characters have brought the roots and the berries to Dariya,<br />
she shows the party how to pick the magical fruit in these bushes.<br />
Entrance to the hedgerun root farm, leads to location 10.<br />
Exit from the hedgerun root farm, leads to location 9.<br />
Magnolia the jann is chained here.<br />
l 2A<br />
12B<br />
A snapper-saw lies in wait at these locations. It is possible to avoid<br />
being attacked by this creature by not getting too close.<br />
A giant sundew lies in wait at these locations. The creature inflicts<br />
minimal damage.<br />
13 Hedgerun root, which can be picked as soon as Dariya has instructed<br />
the party on how to do so.<br />
14 Entrance to Zombie Berry Circle, location 15.<br />
15 Exit from Zombie Berry Circle, location 14.<br />
16a<br />
16b<br />
Zombie plants: the party only needs one zombie berry to give Dariya.<br />
Zombie plant zombies attack the party.<br />
17 At the tree the party meets Snaggle, Firegazer, and halflings if the<br />
party has not met them yet. A thief or ranger can climb the tree and<br />
ambush non-player characters who pass under the tree.<br />
18 Berry bushes, which the party can pick with Soothsurg.<br />
19<br />
20<br />
21<br />
22<br />
23<br />
24<br />
25<br />
26<br />
27<br />
28<br />
Entrance leads to Humbleton Room 1, location 23. Snaggle, Firegazer,<br />
and halfling warriors may meet the party if they have not met it already.<br />
Entrance leads to Humbleton Room 2, location 24. Snaggle, Firegazer,<br />
and halfling warriors may meet the party if they have not met it already.<br />
Entrance leads to Humbleton Room 3,location 25. Snaggle, Firegazer,<br />
and halfling warriors may meet the party if they have not met it already.<br />
Entrance leads to Humbleton Room 4, location 26. Snaggle, Firegazer,<br />
and halfling warriors may meet the party if they have not met it<br />
already. To open the door, the party needs the crowbar at location 27.<br />
Exit from Humbleton Room 1 to location 19.<br />
Exit from Humbleton Room 2 to location 20.<br />
Exit from Humbleton Room 3 to location 21.<br />
Exit from Humbleton Room 4 to location 22.<br />
A crowbar, which can be used on location 22 and on the large rocks<br />
blocking the doors in the Yuan-ti Tunnels.<br />
The party can use the Hero Flask from location 41 to bring the water<br />
from the Pool <strong>of</strong> Heroism at the Yuan-ti Tunnels, location l, to<br />
Soothsurg at this location. The Hero Flask must be used on the ground.<br />
39
40<br />
29 If the characters walk over this square, they find a diary left by Runner.<br />
30 Entrance to the hidden cave, location 31.<br />
31 Exit from the hidden cave, location 30.<br />
32 There are some Ranger Boots hidden behind the middle barrel.<br />
33 A campfire ring where the party may rest.<br />
34 Glastow obelisk. If a ranger approaches it, he or she may see yuan-ti<br />
trails on the ground.<br />
35 Leads to the 'fyrian Mines. The party needs a key from Boric at location<br />
32, City <strong>of</strong> Tyr.<br />
36 This entrance to Ptar's cave goes to location 2.<br />
37 The yuan-ti hole which leads to the Yuan-ti Tunnels, at location 8.<br />
38 Leads to the Yuan-ti Tunnels, at location 35.<br />
39A Leads to El's Temple at location 10.<br />
39B Leads to El's Temple at location 11.<br />
40 Runner stands at this location after ambushing the party.<br />
41 The Hero Flask is at this location.<br />
42 Snaggle, if wounded, lies at this location.<br />
43<br />
44<br />
45<br />
The party finds a campfire ring here.<br />
Firegazer protects Cleave who can only be healed by the Hero Flask<br />
and water from the Pool <strong>of</strong> Heroism.<br />
Soothsurg waits here.<br />
t YUAN-TI TUNNELS<br />
Synopsis<br />
While traversing the twisting corridors <strong>of</strong> the yuan-ti tunnels, the characters may<br />
encounter yuan-ti patrols, umber hulks, and mind fiayers.<br />
Many <strong>of</strong> the tunnels are controlled by Traxiss, a sentient kartang, although there<br />
are some places that Traxiss can't get to. Runner, a greedy and ambitious halfiing,<br />
has a hidden corner <strong>of</strong> the tunnels, where he corrals halfiings he has kidnapped in<br />
order to trade them to Traxiss for sips <strong>of</strong> his potion <strong>of</strong> vitality. To make matters<br />
worse, El's shadow wanders the corridors, searching for his mystic weapons.<br />
the halfiings' salva<br />
This is also where the characters find the Pool <strong>of</strong> Heroism -<br />
tion - as well as a false pool which poisons the unwary.<br />
41<br />
continues ...
42<br />
Non-Player Characters in This Region<br />
Solumis<br />
Location random, unless El is dead, then location 6<br />
The senior mage for the yuan-ti. Solumis is trying to summon El, an evil spirit,<br />
because Solumis thinks that he can control the godling.<br />
Senturnis<br />
Location 7 or B<br />
Sentumis is the leader <strong>of</strong> a yuan-ti hunting party. Sentumis questions the characters<br />
as to why they have come to the tunnels. There is no way to avoid a fight<br />
with Sentumis.<br />
'Ii'axiss<br />
Location 10<br />
A sentient kartang, Traxiss rules this area <strong>of</strong> the tunnels. He does not interfere<br />
with yuan-ti hunting parties, because their wrath would be more than he<br />
could survive. A character who drinks from Traxiss's cup is be severely damaged.<br />
Traxiss believes that the potion charms the character who drinks, but it<br />
does not. Most kartang are not sentient, but when one comes along (as a gold<br />
kartang egg), then Traxiss guards it carefully.<br />
Traxiss is being fed halflings by Runner in exchange for water from the Pool <strong>of</strong><br />
Heroism mixed with Traxiss' blood. He is thus charming Runner, despite the<br />
water from the Pool.<br />
Runner<br />
Location 10, 16, or 24<br />
A halfling who has gained enormous power through his camaraderie with<br />
Traxiss. Runner is paying <strong>of</strong>f Traxiss for doses <strong>of</strong> the potion <strong>of</strong> vitality which<br />
makes him so strong. Runner starts <strong>of</strong>f at location 24, where he'll try to get information<br />
about the party's plans in the tunnels. If the party attacks the wall to<br />
break it, he'll run away to location 10. The party can ambush him with the help<br />
<strong>of</strong> Halla by opening up the northwest rocks at location 15. Tell Halla to use the<br />
rocksap to block Runner's exit, then close both doors at location 15. Runner will<br />
walk in and approach Leaftop at location 16. If the characters defeat him, they<br />
can pick up the map and give it to Halla. The halflings should all stand up and<br />
walk out <strong>of</strong> the room. If Runner escapes, he runs to location 10.<br />
Scout<br />
Location 11<br />
Scout was one <strong>of</strong> the original champions who is now controlled by an intellect<br />
devourer. He is here to lead victims into the clutches <strong>of</strong> the mind flayers. Scout<br />
cannot be saved.<br />
Leaftop<br />
Location 16<br />
The ex-leader <strong>of</strong> Humbleton, Leaftop is Runner's pawn. He is an old man who<br />
has deluded himself into believing that he is still the leader <strong>of</strong> Humbleton. The<br />
party can completely ignore Leaftop.<br />
Halla<br />
Location 17<br />
A villager from Humbleton who has been captured by Runner, Halla is a prisoner<br />
until the party can kill Runner and bring the map he carries to her. Halla<br />
is willing to help the party any way she can, including blocking the exit when<br />
Runner approaches. She reminds the party to close all <strong>of</strong> the doors to the<br />
room, at locations 15, after she is in position. Only then will Runner appear.<br />
Donno<br />
Location 18<br />
Donno is a warrior who was mortally wounded in single combat with Runner,<br />
and is now held captive. The party can use water from the Pool <strong>of</strong> Heroism to<br />
heal Donno.<br />
t Locations and Events<br />
I The Pool <strong>of</strong> Heroism: if the characters drink from it, they are healed,<br />
and re-memorize all <strong>of</strong> their spells. The characters may also fill the<br />
Hero Flask, which may be quaffed at any time for healing.<br />
2 Exit to the El's Temple, location 8.<br />
3 A group <strong>of</strong> yuan-ti guard the exit. The party is warned about their<br />
presence as they walk up the corridor past location 4.<br />
4 After the characters has been warned about the yuan-ti to the north,<br />
they can hide at this location and wait for the majority <strong>of</strong> the yuan-ti<br />
to pass.<br />
43
44<br />
5<br />
6<br />
7<br />
8<br />
9<br />
10<br />
11<br />
12<br />
13<br />
14<br />
15<br />
16<br />
Entrance to cavern 2 <strong>of</strong> the tunnels, location 14. There is a root<br />
blocking most <strong>of</strong> the passage, but a halfling or dwarf may still walk<br />
through. Attacking the small horizontal root allows all characters<br />
except half-giants to pass through.<br />
Solurnis' final battle.<br />
This leads to cavern 5, location 29.<br />
This leads to Humbleton Forest, location 35.<br />
TWo brainless umber hulks wait for intellect devourers to jump into<br />
their heads and animate their bodies.<br />
Traxiss, sometimes Runner, and several non-sentient kartang live here.<br />
Scout sees the party and beckons it northward, into the clutches <strong>of</strong><br />
the dreaded mind flayers.<br />
A pit which a thief as the lead character can detect. Once it is<br />
detected, no one falls in. The pit leads to cavern 3, location 21.<br />
False treasure.<br />
This leads to cavern 1, location 5.<br />
TWo large rocks which block the exits to the caves. The stronger the<br />
character, the better the chance to move the rock. A fumbled roll may<br />
damage the lead character. Alternatively, the lead character can use a<br />
crowbar, which opens the door immediately. After the characters have<br />
told Halla what to do and Halla says she's ready, both <strong>of</strong> these doors<br />
must be closed for Runner to appear.<br />
Leaftop, greets the party coldly.<br />
17 Halla is trapped here with the rest <strong>of</strong> the prisoners.<br />
18 Donno lies here, wounded by Runner.<br />
19 This leads to cavern 4, location 25.<br />
20 This leads to cavern 4, location 24.<br />
21 A pit <strong>of</strong> hissing poisonous snakes that can damage, poison, and even<br />
paralyze the party. At the center is a nest <strong>of</strong> kartang eggs, which the<br />
party can sell to Notaku.<br />
22 A thief may climb back up to cavern 1, at location 21 at this part <strong>of</strong><br />
the cave. Alternatively, the party may either use a grappling hook, or<br />
agree to drink from Traxiss' potion.<br />
23<br />
24<br />
25<br />
26<br />
27<br />
28<br />
29<br />
30<br />
31<br />
32<br />
33<br />
34<br />
35<br />
36<br />
This crack in the wall can be talked into when Runner beckons the<br />
party from location 24.<br />
This is where Runner hides. The passage from this alcove leads to<br />
cavern 2, location 20.<br />
This leads to cavern 2, location 19.<br />
This leads to cavern 5, location 28.<br />
A ranger can find this false wall by walking nearby. Anybody can<br />
break it down by attacking it.<br />
This leads to cavern 4, location 26.<br />
This leads to cavern 1, location 7.<br />
This leads to cavern 6, location 31 .<br />
This leads to cavern 5, location 30.<br />
This leads to cavern 7, location 33.<br />
This leads to cavern 6, location 32.<br />
Halflings and dwarves can squeak through the stone barrier, and<br />
characters with high strengths can break through the barrier.<br />
This leads to Humbleton Forest at location 38.<br />
A poisoned well.<br />
45
46<br />
t EL'S TEMPLE<br />
Non-Player Characters in This Region<br />
El<br />
Location 1<br />
El is a powerful anti-hero from ages past. Through the rituals <strong>of</strong> Solumis, El<br />
has been revived and is using this temple to gain power on Athas. El attempts<br />
to kill the party if he gets the chance.<br />
47<br />
Tantris<br />
Location 1<br />
A powerful yuan-ti warrior. He has usurped the throne while Koriss is gone.<br />
Tantris attacks the characters if they ever get close enough for Tantris' troops<br />
to see them. This is the big battle <strong>of</strong> the region.<br />
Thesisa<br />
Location 4<br />
A human prisoner from Glastow, Thesisa is waiting for a chance to escape.<br />
Thesisa is too full <strong>of</strong> hatred for the yuan-ti to give out useful information.<br />
Synopsis<br />
The yuan-ti are in a struggle for power. ]estris, the sub-leader <strong>of</strong> the yuan-ti, was<br />
left in control by Koriss, but he has neither the fighting ability to control Tantris,<br />
nor the magic ability to defeat Solum is. Tantris and his warriors control the temple<br />
proper, and Solum is is attempting to summon and control El. The characters<br />
can save Humbleton by attacking the yuan-ti near the temple, and ultimately, by<br />
destroying El. El carries his legendary sword, El's Drinker.<br />
Greshard<br />
Location 4<br />
Greshard is a halfling prisoner <strong>of</strong> the yuan-ti, who, like Donno, fought Runner<br />
alone and was mortally wounded. The party can use water from the Pool <strong>of</strong><br />
Heroism to heal him. Greshard escapes by himself if the party engages the<br />
yuan-ti to the north.<br />
Irma<br />
Location 4<br />
Irma is another halfling prisoner <strong>of</strong> the yuan-ti who was captured while on a<br />
gathering expedition. Irma knows quite a bit about the yuan-ti. The characters<br />
can talk to Irma and Greshard through the window to the south and thus<br />
avoid the yuan-ti.<br />
Jestris<br />
Location 6<br />
The sub-leader <strong>of</strong> the yuan-ti, Jestris cannot approach his rightful place on the<br />
throne until Tantris is dead. Jestris gives the party a pendant which is poisonous<br />
to Dariya, and if the party approaches her while carrying it, it kills her.<br />
Jestris stops the combat after Tantris has been killed in order to ~scend to the<br />
throne, and remains non-hostile to the party as long as he fears 1t.
48<br />
Paviss<br />
Location 6<br />
The scribe <strong>of</strong> the yuan-ti, Paviss is fulfilling the original order <strong>of</strong> Koriss, the great<br />
leader <strong>of</strong> the yuan-ti who is now gone. He is following Jestris' commands. Paviss<br />
can write a note for the party that can be combined with a rock at or around<br />
location 7 and thrown at Tantris if he is sitting on his throne at location 1. The<br />
party can choose the contents <strong>of</strong> the note from options Paviss provides.<br />
Surrakina<br />
Location 9<br />
The champion <strong>of</strong> the ruined village <strong>of</strong> Glastow, Surrakina wants to avenge its<br />
destruction. If the characters want to help, Surral
50<br />
t TYRIAN MINES, LEVEL 1<br />
Synopsis<br />
One <strong>of</strong> Tjr's most valuable possessions is the Tjrian Mines. Although the supply<br />
<strong>of</strong> iron that comes out <strong>of</strong> the mines is small, the ore it produces is enough to<br />
make Tyr the most powerful iron-producing city on Athas. Before Kalak's death,<br />
the mines were worked by slaves or prisoners, sent there to die at the whim <strong>of</strong> the<br />
templars. Since the Dragon's death, the templars have abandoned the mines,<br />
fearing retribution from the now-freed slaves. In order to keep control <strong>of</strong> the<br />
mines, the templars appointed some <strong>of</strong> the miners to positions <strong>of</strong> power. This not<br />
only has eased the tensions between the templars and the workers, but keeps the<br />
mines turning out more ore to pad the pockets <strong>of</strong> the templars.<br />
Recently, something has gone wrong in the mines. Miners on Level 2 have started to<br />
vanish. Rumors <strong>of</strong> murder, ghosts, and curses have circulated throughout the city<br />
and the mines. Workers are more reluctant to enter Level 2, and the usually steady<br />
stream <strong>of</strong> ore that fiows from the mines is starting to ebb. Whatever this menace is,<br />
the party has arrived in time to investigate it. The fate <strong>of</strong> the Tyrian Mines and the<br />
City <strong>of</strong> Tyr are at stake. The party must make its way through Level 1, a maze <strong>of</strong><br />
confusing passages and narrow chambers in hopes <strong>of</strong> reaching Level 2.<br />
Non-Player Characters in This Region<br />
Miners<br />
Location (all throughout the mines)<br />
The miners vary in race, level, and gender throughout the mines. Although the<br />
work is hard, the mines <strong>of</strong>fer a steady job with at least a chance <strong>of</strong> making some<br />
pr<strong>of</strong>it. This has drawn many people from all over Athas to come to work in the<br />
'fyrian Mines. Some <strong>of</strong> the miners can give the party directions if the party<br />
becomes lost. Others have certain information relating to their location. In general,<br />
it's a good idea to talk to a miner in each new area that the party enters.<br />
Melody<br />
Location 1, 2<br />
Melody is a 15th-level female half-giant gladiator. She is the foreman for the<br />
Tyrian Mines, and was put in charge after Kalak's death. The templars chose<br />
her because <strong>of</strong> her sensibility and strength - and because there are not many<br />
miners that want to challenge Melody. Melody will not let the characters into<br />
the mines until they agree to help her with "the problem" in Level 2. Whether<br />
or not the characters tell her they're the "team from Urik" is beside the point,<br />
although saying they are the team produces some humorous responses at various<br />
places throughout the entire game.<br />
Melody is the only one in the mines that can exchange raw ore for iron ore<br />
vouchers. Every piece <strong>of</strong> ore is worth ten vouchers. These vouchers can be<br />
taken back to Tyr to be sold to Boric, Acar's butler, or one <strong>of</strong> the in-town miners.<br />
(See the "City <strong>of</strong> Tyr" section starting on page 10 for more information on<br />
where to find these people.)<br />
After defeating the Underdark and returning to the first level <strong>of</strong> the Mines,<br />
Melody gives the party a reward <strong>of</strong> 30,000 ceramic pieces and also "tips the<br />
scales," giving the party some extra vouchers the next time it gives her ore.<br />
Zeegrat<br />
Location 3<br />
Zeegrat is Melody's assistant, in charge <strong>of</strong> mine operations and work details.<br />
Although Zeegrat is not one who looks like he should be in the mines, he does<br />
his job well. He was put in his position by the templars in Tyr on Melody's recommendation.<br />
Zeegrat is a good source <strong>of</strong> information for the mines, and can<br />
give the party a general feel for the types <strong>of</strong> things to expect in the mines.<br />
51
52<br />
Mug<br />
Location 7<br />
Mug is an 8th-level dwarf. Currently, he is the cook for the miners. He was a<br />
good miner to begin with, but when the mines became free he took the opportunity<br />
to explore one <strong>of</strong> his favorite activities, cooking. Since most <strong>of</strong> the other<br />
miners wouldn't think <strong>of</strong> working over a hot kettle in the already hot confines <strong>of</strong><br />
the mines, Mug was given complete reign. While his meals may not be the most<br />
attractive to look at (or smell for that matter) they are very nutritious. Eating one<br />
<strong>of</strong> Mug's creations heals the party leader as if he or she rested for 8 hours.<br />
Winchester<br />
Location 12 at first, then anywhere<br />
Winchester is a 15th-level dwarf fighter who loves to dig tunnels. Exactly how<br />
long he's been doing this and why exactly he really does is still questioned. He<br />
is here because he wants to be. There is no outside motivation anyone can<br />
fathom. Winchester appears after the party calls for help when ambushed by<br />
umber hulks.<br />
He knows something about what is going on in the mines, and can also dig a<br />
tunnel down to the Underdark for the characters if they need to re-forge El's<br />
Drinker and create a powerful weapon.<br />
Winchester may appear in other parts <strong>of</strong> the game as well as the mines. If the<br />
characters ever drop an item required to win the game, Winchester appears<br />
and returns the item to them. This only works in areas <strong>of</strong> the game that the<br />
characters cannot return to once they have left.<br />
Blick<br />
Location at 14<br />
Blick is an 8th-level elven fighter. He is in charge <strong>of</strong> running the elevator that<br />
goes between the Levels 1 and 2 <strong>of</strong> the mines. The templars, realizing that to<br />
stay in the mines would be death, kept a small part <strong>of</strong> their control through<br />
the use <strong>of</strong> the elevator between the levels. By making Blick the elevator operator<br />
they can still extract a petty amount <strong>of</strong> pleasure from the problems he<br />
causes because he is so unreliable. Blick is unconscious, trapped by a gas<br />
leak. In order to rescue him, the fans have to be aligned to blow away the gas<br />
pocket he accidentally breached.<br />
Once freed, Blick makes excuses to get back to looking for his "motherlode."<br />
The party can demand the key to the elevator from him, or it can let him go.<br />
Either way, a note is left behind. Reading it gives the party the "key" to using<br />
the elevator.<br />
Wren<br />
Location 15<br />
Wren is a lOth-level fighter/cleric, who serves as medic to the miners. Wren is<br />
also a treasure-seeker. His latest quest, the search for Promere's Hammer, has<br />
Jed him to the T'yrian Mines. Melody has allowed him to pursue his endeavor<br />
on the condition that he act as medic to the miners. Wren knows much about<br />
the origin <strong>of</strong> Promere and his forge. He can also tell the party about the sick<br />
miner whom he looks after. Asking many questions about the miner causes<br />
Wren to start talking about the cover-up taking place to keep the other miners<br />
working instead <strong>of</strong> running.<br />
t Locations and Events<br />
A-Z Many tunnels provide shortcuts to different sections <strong>of</strong> these mines.<br />
Each tunnel's entrance and exit points are indicated by an alphabetical<br />
letter (A, B, C, etc.). For example, if the party enters the tunnel at<br />
location Tin the northwest corner <strong>of</strong> Level 1, it can exit from the<br />
same tunnel at location T in the southwest corner <strong>of</strong> Level 1.<br />
I<br />
2<br />
3<br />
4<br />
5<br />
6<br />
7<br />
8<br />
The entrance and exit to the mines. When the characters first enter,<br />
Melody waits at the gate. If the characters agree to investigate the<br />
murders, then Melody opens the gate and lets them into the mines.<br />
Melody is at this location for most <strong>of</strong> the adventure. As mentioned<br />
above, she can exchange iron ore for vouchers.<br />
Zeegrat and some miners are found here.<br />
Once the small car has been released from the dig site at location 17,<br />
this device can call the ore car. The party can ride it to the dig site or<br />
to the center junction.<br />
Once the large ore car has been repaired, this device calls the large<br />
ore car to the party. Using it takes the party to the elevator shaft<br />
which leads to Level 2 <strong>of</strong> the mines.<br />
All the miners that live in the mines eat at this location. Several are<br />
here at any time. Most <strong>of</strong> them give generic advice.<br />
Mug, the cook, is at this location for the entire adventure.<br />
The miner in this bed is suffering from some kind <strong>of</strong> shock. He was<br />
found on the second level <strong>of</strong> the mines with the rest <strong>of</strong> his group dead<br />
around him. Brought back to the first level, he is slowly dying. Using<br />
a psionicist as the lead character allows the party to probe the miner's<br />
mind and glimpse what happened to his friends.<br />
9 A campfire ring is at this location for the party to use.<br />
53
54<br />
10<br />
11<br />
12<br />
13<br />
14<br />
The derailed freight car Behemoth is at this location. In order to fix the<br />
car, the party must first get the car wheel from location 25 and attach it<br />
to the car. Once that is done, the party must upright it. A party with a<br />
greater strength has a much easier time at this, but it is not impossible<br />
for a low-strength party to do. Keep trying if it doesn't work the first time.<br />
Air blows into this chamber from a hole in the ceiling. This is where<br />
the fan puzzle starts. The fans must be positioned to blow the air from<br />
this room into the room with the gas in order to rescue Blick.<br />
Crossing through the middle <strong>of</strong> this cavern triggers a cave-in and an<br />
attack by umber hulks. Once the battle is over, looking at the barricades<br />
and calling out for help triggers Winchesters appearance. Winchester<br />
bursts from the ground and destroys the blockades, introduces himself,<br />
chats with the party, and then tunnels <strong>of</strong>f again. As he leaves, Winchester<br />
gives the party a whistle that allows the party to call him when needed.<br />
This room is filled with deadly gas. Any canaries the characters are<br />
carrying when they enter this room fall over dead. Walking through<br />
the gas damages the characters for 25% <strong>of</strong> their hit points, then 50%,<br />
then it kills them. The only way to get through the gas and to Blick<br />
(the unconscious miner) is to clear the gas by dispersing it with the<br />
fans. Dispersing the gas earns the characters 25,000 experience points.<br />
Blick, the elevator control miner, is trapped by the gas. Left-click on<br />
him to wake him up.<br />
15 Wren, the elven treasure hunter, has set up his operations at this<br />
location. He tells the party <strong>of</strong> Promere's Hammer and the legend surrounding<br />
it. Wren can also give the party some more information on<br />
the cover-up that is taking place in the mines.<br />
16 Some miners are at this location, working the dig. This is where the<br />
small ore car drops the characters <strong>of</strong>f if they choose the current dig site.<br />
17 The small ore car is locked at this station by this device. Once unlocked,<br />
the small ore car can be called from any <strong>of</strong> the small track devices on<br />
the level. The ore car called from this location can take the party to the<br />
center junction at location 20 or the staging area at location 4.<br />
18 This wall can be broken apart with a pick, creating an entrance to an<br />
adjacent cavern, which opens passage X.<br />
19<br />
20<br />
Although Blick was sure there was only gas in this area, he's wrong;<br />
there are three high-yield ore veins.<br />
This is the center junction <strong>of</strong> the small ore track. After the ore car is<br />
released at location 17 it can take the party to the staging area at<br />
location 4 or the dig site at location 16.<br />
21<br />
22<br />
23<br />
24<br />
25<br />
26<br />
27<br />
28<br />
Some miners are fighting some umber hulks at this location. Rescuing<br />
the miners earns the characters 8,000 experience points.<br />
This area has little ore left.<br />
Once the large ore car has been repaired at location 10, this device<br />
calls the car. The party can ride it back to the staging area at location 5.<br />
The elevator can only be activated once the party has gotten the<br />
"key" paper from Blick and memorized the fonnula. Using this device<br />
turns the elevator on.<br />
The ore car wheel needed to repair the ore car Behemoth at location 1 O.<br />
A group <strong>of</strong> umber hulks who attack on sight.<br />
This area may contain miners or umber hulks.<br />
Umber hulks may be in these areas.<br />
Fan Punle<br />
In order to get to the second level <strong>of</strong> the mines, Blick must be rescued. The<br />
only way to do that is to clear the gas room at location 13. Starting at the fresh<br />
air room location 11, a path must be made for the clean air to blow along.<br />
Below are the exact positions the fans must be aligned to in order to solve the<br />
puzzle. Note that not all the fans are used to solve the puzzle.<br />
29 Fan West.<br />
30 Fan South.<br />
31 Fan West.<br />
32 Fan West.<br />
33 Fan West.<br />
34 Fan West.<br />
35 Fan North.<br />
36 Fan West.<br />
37 Fan North.<br />
38 Fan West.<br />
If all the other fans are aligned and spinning, turning the fan at location 38<br />
clears the gas and solve the puzzle. This must be the last fan that the party<br />
aligns to solve the puzzle, otherwise the fan is automatically turned away from<br />
the correct position by the draft from the other fans.<br />
55
56<br />
• TYRIAN MINES, LEVEL 2<br />
Non-Player Characters in This Region<br />
Half-Giant Miners<br />
Location 1<br />
A group <strong>of</strong> male half-giant miners in gray tunics wait for the elevator to come<br />
down so they can learn more about what is happening on Level l. To get them<br />
to move aside, the characters must talk to them.<br />
57<br />
The Mushroom Lady<br />
Location 16<br />
A diminutive woman sitting on a toadstool, the Mushroom Lady raises mushrooms<br />
and sells them as food to the miners.<br />
The Master Switchman<br />
Location 17<br />
In a room full <strong>of</strong> switches, Mui, the Master Switchman, controls the ore cars<br />
and hoists, as well as other operations <strong>of</strong> the mines.<br />
Kimindi<br />
Location 19<br />
Kiminidi is a halfling woman in a purple tunic. She is illegally selling ore so<br />
that she may feed her family.<br />
Synopsis<br />
The characters hear rumors <strong>of</strong> disappearing miners, but no one seems to know<br />
exactly why or how. While investigating the mining area known as Luckout<br />
Tunnels, the characters find the first solid evidence <strong>of</strong> evil; an excavation that has<br />
been recently abandoned for no apparent reason. After this, mining gangs begin<br />
to be murdered, and a close examination <strong>of</strong> the bodies (by a cleric) reveals that<br />
the victims' brains have been eaten. The party must determine which group <strong>of</strong><br />
miners is responsible for the deaths and attack them to halt the annihilation.<br />
After the murderers are defeated, the party can descend to the Old Digs to confront<br />
the monsters there, and thus gain entrance to the Underdark.<br />
Slobogan<br />
Location 21<br />
A red-haired male dwarf miner in a red tunic, Slobogan whistles to bring down<br />
the hoist basket.<br />
Boss <strong>of</strong> the Plummet Crew<br />
Location 22<br />
A black-haired male dwarf miner dressed in a brown tunic is the boss <strong>of</strong> the<br />
Plummet Crew. Greed keeps the miners at their digs, even though they know<br />
murders are occurring close by.<br />
Melody<br />
Location 29<br />
A half-giant woman and boss <strong>of</strong> the mine's upper levels, Melody has learned<br />
that creatures from the Underdark are invading people's brains. She intends to<br />
prevent any such creatures from progressing any further into the mines.
58<br />
• Locations and Events<br />
1 Entry and Exit Elevator to the upper levels <strong>of</strong> the mines. When the<br />
characters first arrive they find a crowd <strong>of</strong> half-giant miners waiting<br />
for the elevator. Talking to the miners persuades them to move aside.<br />
If the party fails to intercept the murdering miners who come out <strong>of</strong><br />
the elevator, the mining crews are murdered first, then an ambush is<br />
laid for the party.<br />
2 This contraption raises or lowers the elevator.<br />
3 This switch controls whether the elevator ascends to Level 1, location<br />
5, or descends to the Stumbledowns section at location 8.<br />
4 Blowing these whistles calls an ore car which appears at location 5.<br />
5 When an ore car appears, the party can board it by standing at the<br />
locations marked 6.<br />
6 Boarding spots for an ore car (usually atop a boarding platform).<br />
7 Railhead switches. Throwing this switch changes the destination <strong>of</strong><br />
an outbound ore car.<br />
8 Lowest stop for the Elevator - the Stumbledowns.<br />
9 These tell the name <strong>of</strong> the mining area the party is in.<br />
10 Umber hulks.<br />
11 Using this winch raises or lowers the hoist basket at location 12 or 13.<br />
12 Top <strong>of</strong> the hoist shaft. If the basket is up, the party may climb into it,<br />
and descend to location 13.<br />
13 Bottom <strong>of</strong> the hoist shaft. If the basket is down, the characters may<br />
climb into it and ascend to location 12. If the basket is not here, only<br />
a thief character may try to climb up and lower it.<br />
14 A tunnel to Frazzlevein at location 15.<br />
15 This tunnel leads back to location 14.<br />
16 The characters may barter with the Mushroom Lady for her mushrooms<br />
which are useful for healing wounds. If the characters freely pick several<br />
<strong>of</strong> the mushrooms growing here, they tum out to be poisonous.<br />
17<br />
18<br />
19<br />
20<br />
21<br />
22<br />
23<br />
24<br />
25<br />
26<br />
27<br />
28<br />
29<br />
30<br />
31<br />
The Master Switchman. To talk to the Master Switchman, speak into<br />
the voice tube .when he is close to the other end. Among other things,<br />
the Master Sw1tchman can give the party directions to certain areas<br />
in the mines.<br />
The Focused Dwarf. If the strongest member <strong>of</strong> the party uses a pick<br />
on the dirt areas around the Focused Dwarf, she tells what she knows<br />
about the murderers in the mines. The party may also unearth valuable<br />
gems.<br />
Kimindi.<br />
Mining crew: the Dewclaws.<br />
Slobogan.<br />
Mining crew: Plummet.<br />
Mining crew: the Children <strong>of</strong> Morg, the Earthbound Mother.<br />
Mining crew: the Rumble Crumble.<br />
Mining crew: the Pi thole Phaetons.<br />
Mining crew: the Quarry Slurry Slag.<br />
Mining crew: the Wellshaft Pickmen.<br />
Mining crew: the Gullywhackers.<br />
The party finds several pickaxes and other evidence <strong>of</strong> who is killing<br />
the miners. The party learns that not all the miners are being murdered,<br />
but are being forced to drop their tools and abandon their digs<br />
and ore. When the party travels back up to the Hadro's Half Acre section<br />
it sees the murdering miners as they drop into the car the party<br />
has just vacated, and begin to kill the miners in the Redrock section<br />
<strong>of</strong> the Tyrian Mines region, Level 2.<br />
After the characters defeat the murderous miners in random locations<br />
and return from the Underdark, Melody and her crew stop them to<br />
make sure they are not under the control <strong>of</strong> the intellect devourers.<br />
A campfire ring where the characters can rest.<br />
The party may discover that a secret door exists, but there is no way<br />
to open it from their side. After the possessed miners and the intellect<br />
devourers inside them have been killed, the party finds mind flayers<br />
waiting at this location. The door is now open into the Underdark.<br />
59
60<br />
• THE UNDERDARK<br />
Synopsis<br />
Deep below the surface <strong>of</strong> Athas is another world, unseen by most, feared by<br />
all - the Underdark. It is the place creatures dwell whose descriptions only exist<br />
in stories told late at night. One group <strong>of</strong> these creatures are the illithids, more<br />
commonly known as mind ~ayers . In the darkness <strong>of</strong> the earth, they move towards<br />
their goal <strong>of</strong> domination, patiently waiting for the time to attack the surface world.<br />
The characters, chasing a mind ~ayer from Level 2 <strong>of</strong> the mines, descend into the<br />
Underdark. To their surprise, they discover the mind ~ayers have been busy<br />
establishing a new Elder Brain below fyr.<br />
... . . . . - \<br />
Non-Player Characters in This Region<br />
~<br />
Granger<br />
Location 3<br />
Granger is a human miner who was one <strong>of</strong> the first slaves brought down into<br />
the Underdark by the mind flayers. He was a slave, until his "master" let his<br />
control slip and Granger killed him. Granger has been sent to the holding area<br />
to be used as food for the flayers. Although Granger is a useful source <strong>of</strong> information,<br />
he is under the control <strong>of</strong> an intellect devourer. Following his directions<br />
on how to reach the Elder Brain leads the party into a trap. It is best to<br />
kill Granger immediately, or to just avoid him. When Granger is killed, an<br />
intellect devourer pops out <strong>of</strong> his head and attacks the party.<br />
Dining Mind Flayers<br />
Location 9<br />
All <strong>of</strong> the dining flayers are <strong>of</strong> the magical type. Some <strong>of</strong> the mind flayers<br />
choose to eat the brains <strong>of</strong> their victims in unusual ways; these prefer it in a<br />
potent soup. If the party enters the dining room all <strong>of</strong> the mind flayers get up<br />
and attack the party and all <strong>of</strong> the kitchen slaves attack as well. It is much easier<br />
to poison all <strong>of</strong> the mind flayers, even though the party receives less experience.<br />
To do this, all four vials <strong>of</strong> the cooking poison at location 8 must be<br />
poured into the flayer's soup. The next time that soup is called for, the slave<br />
delivers the poisoned soup to the flayers. One by one, all <strong>of</strong> them fall face-first<br />
into their soup. The party should wait until all <strong>of</strong> them are dead before entering<br />
the room, or they may shake <strong>of</strong>f the effects <strong>of</strong> the poison and attack the party.<br />
Chef Kratchek<br />
Location 11<br />
Kratchek is a psionic mind flayer who is in charge <strong>of</strong> preparing the meals for<br />
the mind flayers. Although most flayers prefer to eat the brain right out <strong>of</strong> the<br />
victim, there is a growing faction <strong>of</strong> flayers that enjoy brains prepared in<br />
unique ways. Kratchek manages the food supply <strong>of</strong> the group and prepares<br />
the meals for the flayers as requested. The party should fight Kratchek immediately.<br />
Otherwise, if the party surrenders when it is confronted by Kratchek,<br />
reinforcements arrive before combat begins. On Kratchek's body, the party<br />
finds the key to the chest located in the same room.<br />
61<br />
Captured Slave<br />
Location 18<br />
This human slave was one <strong>of</strong> the first to be captured by the flayers and is currently<br />
being tortured for the Inquisitor's amusement. There is no way to have<br />
this slave follow the party. Once freed , the slave thanks the party and leaves.<br />
If Granger is with the party, there is a confrontation that reveals Granger is<br />
controlled by an intellect devourer.
62<br />
Inquisitor Karcanis<br />
Location 28<br />
Inquisitor Karcanis is a spellcasting mind flayer that is in charge <strong>of</strong> the conquering<br />
aspect <strong>of</strong> mind flayer society. Currently, he is working on a gas to use<br />
in the mines. If this gas were to be released above ground, it would be<br />
instantly fatal to all creatures that come in contact with it. Instead <strong>of</strong> fighting<br />
the Inquisitor and all his guards, the party can sabotage the chemicals that he<br />
is analyzing and thereby defeat him. On his body, the party finds the key to<br />
his safe at location 21.<br />
<strong>Game</strong>master Yiss<br />
Location 36, 37<br />
Yiss is a psionic mind flayer whose cruelty and cunning have earned him the<br />
duty <strong>of</strong> <strong>Game</strong>master. He is responsible for arranging the arena fights featuring<br />
slaves and creatures which amuse the mind flayer audience. Yiss keeps throwing<br />
creatures at the party as long as it remains in the area. The only way for the<br />
party to stop this is to climb the wall and confront Yiss directly. On his body,<br />
the party finds a part <strong>of</strong> the Tri-key needed to enter the Elder Brain's sanctum.<br />
Primarch Marakian<br />
Location 45, 46<br />
Primarch Marakian is a mind flayer with magical powers who is responsible<br />
for organizing the three aspects <strong>of</strong> mind flayer society and relating all its information<br />
to the Elder Brain. Although the Elder Brain could speak to all <strong>of</strong> the<br />
flayers, it has chosen Marakian to be its voice. Marakian and his group attack<br />
the minute the party enters the Elder Brain sanctum. Upon dispatching<br />
Marakian, the party finds the key to his quarters.<br />
• Locations and Events<br />
I The party enters the Underdark from the Tyrian Mines Level 2, location<br />
31 . When the characters arrive, one <strong>of</strong> the mind flayers shoots a<br />
fireball at them, collapsing the entrance. The only way to pass this<br />
barricade is by attacking it with Promere's Hammer. The wand <strong>of</strong> fireballs<br />
found on one <strong>of</strong> the flayers has 25 charges remaining on it.<br />
2 These slaves are to be used as food for the mind flayers. They are all<br />
beyond help, having been reduced to frothing animals by the mind<br />
flayers' tortures. They only talk to the party as it approaches, and<br />
some <strong>of</strong> them may even go so far as to attack the party.<br />
3 The slave Granger. Once the party has talked to him, he follows the<br />
party and provide information about how to get to the Elder Brain.<br />
His real motives are not as noble as they seem, however, because he<br />
is possessed by an intellect devourer.<br />
4<br />
5<br />
6<br />
7<br />
8<br />
9<br />
10<br />
11<br />
12<br />
13<br />
14<br />
15<br />
A slave's last words are written on the wall <strong>of</strong> this cell.<br />
Where the victims are "prepared" for the mind flayers. Human slaves<br />
under mind control work here, preparing their comrades for meals.<br />
This soup is being served to the mind flayers in the dining room. If all<br />
the cooking poisons at location 8 are poured into the soup, the next<br />
time the illithids call for it, they are poisoned.<br />
This room has crates with various mind flayer cooking spices in them.<br />
Cooking poisons, used to enhance the illithids' meals, are kept in<br />
these crates. If all <strong>of</strong> them are poured into the soup at location 6 the<br />
mind flayers can be poisoned.<br />
The mind flayers in this room attack if the party enters. Using the poisons<br />
on them, via the soup at location 6, earns the party 15,000 experience<br />
points, and avoids a fight.<br />
Reception area for the dining hall. An orb describes the current menu<br />
<strong>of</strong>fered by the kitchen.<br />
Chef Kratchek and his cooks are in this room. Upon entering, the<br />
Chef challenges the party. Surrendering only brings more mind flayers.<br />
Regardless, the chef and his cooks attack. The orb in this room<br />
describes some <strong>of</strong> the Chef's preparation techniques.<br />
This chest can be opened with the key found on the Chef's body, by a<br />
character with high Strength, or by a high-level thief. In the chest is<br />
the Chef's part <strong>of</strong> the Tri-key which fits the lock mechanism at location<br />
44 and a memorizable scroll <strong>of</strong> delayed blast fireball.<br />
This is the central junction room for this part <strong>of</strong> the Underdark.<br />
Passages lead to the activity centers, and there are always mind flayers<br />
here. If Granger is still with the party, he points the party west,<br />
towards the games portal. As long as the Elder Brain is alive, there are<br />
three mind flayers in this room every time the party enters it.<br />
Several orbs in this room further describe the mind flayers' plans for<br />
conquest <strong>of</strong> the mines and eventually, <strong>of</strong> Tyr.<br />
This chemical shelf contains an assortment <strong>of</strong> different chemicals. If the<br />
party wants to sabotage the mind flayers' experiments, it takes a vial <strong>of</strong><br />
chemical E4 for use at the lab at location 26. Smashing the shelf damages<br />
the entire party and calls the hallway guards to the room.<br />
63
64<br />
65<br />
16<br />
17<br />
18<br />
19<br />
20<br />
21<br />
22<br />
23<br />
24<br />
25<br />
26<br />
Thro slaves patrol this hallway, making circular rounds. Getting too<br />
close to them triggers a fight. It is possible to sneak through the gaps<br />
in their patrol route.<br />
One <strong>of</strong> the mind flayers is testing new means <strong>of</strong> torture and is accompanied<br />
by a group <strong>of</strong> slaves. Walking into the room triggers an attack.<br />
This slave can be freed once all the mind flayers have been dispatched.<br />
He thanks the party and leaves. If Granger is with the party, the slave<br />
recognizes him and an argument starts. Regardless <strong>of</strong> the outcome <strong>of</strong><br />
the argument, Granger kills the slave and is revealed as a traitor.<br />
Random items can be found on these skeletons.<br />
This room is Inquisitor Karcanis' study. Several orbs describe the<br />
experiments being carried out in the Underdark.<br />
This safe can only be opened by the key on Inquisitor Karcanis at<br />
location 28. Inside, there is the Inquisitor's part <strong>of</strong> the Tri-key and a<br />
bottle <strong>of</strong> the poison gas the flayers have been working on.<br />
Opening the door to this guard room triggers the guards inside as well<br />
as in the hallway. The door to the lab at location 24 also locks.<br />
Hallway guards. Getting within sight <strong>of</strong> these guards makes them<br />
attack. Guards from the guard room at location 22 join the fight as well.<br />
This door can only be opened from inside the lab, and even then it<br />
only opens once Inquisitor Karcanis at location 28 is dead.<br />
This secondary lab is currently not being used by the illithids; some<br />
orbs describing their evil activities can be found here.<br />
Approaching this room lets the party overhear the mind flayers in the<br />
adjacent lab. When asked for, the assistant opens the door to the lab<br />
and enters this room in search <strong>of</strong> a chemical rack. This is where the<br />
vial <strong>of</strong> chemical E4 from location 15 can be used to sabotage the<br />
mind flayers' plans. One <strong>of</strong> the racks contains chemical 09. Using the<br />
vial <strong>of</strong> E4 on the rack <strong>of</strong> 09 mixes the chemicals. Next time the mind<br />
flayers take that rack, it explodes, hopefully killing the mind flayers<br />
and starting combat with all the guards.<br />
If the assistant sees the party, he raises the alarm which triggers all<br />
the guards at locations 22, 23 , and 27.<br />
The door to the active lab can only be opened by the assistant, or<br />
when the sabotaged chemicals explode.<br />
27<br />
28<br />
29<br />
30<br />
31<br />
32<br />
33<br />
34<br />
35<br />
36<br />
37<br />
38<br />
39<br />
40<br />
41<br />
42<br />
43<br />
Where the Inquisitor and his assistant are conducting experiments to<br />
further the mind flayers' conquests. After approaching the storage<br />
area, the Inquisitor sends his assistant to fetch chemical racks.<br />
Inquisitor Karcanis. On his body the party can find the key to the safe<br />
at location 21.<br />
Several slaves and an intellect devourer are in this chamber. They<br />
attack on sight.<br />
Entering this area, a mind flayer down the hall sees the party and<br />
runs for a lever. If he makes it there, the door behind the party closes.<br />
He then begins throwing levers to release all the monsters.<br />
Several monsters are in each one <strong>of</strong> these pens.<br />
If the mind flayer made it to this switch and pulled it, the passageway<br />
the party came through is closed. There is no way to re-open the passage<br />
once it has been shut.<br />
These levers control the various pen doors. Pulling the levers releases<br />
monsters which hunt down the nearest creatures, namely the party.<br />
Upon entering the arena, the door closes and the party is trapped.<br />
<strong>Game</strong>master Yiss then begins to throw opponents into the arena.<br />
A grappling hook conveniently located in case the party forgot to<br />
bring one.<br />
Behind this wall, Yiss observes the fights going on in the arena. The<br />
only way to end the endless onslaught <strong>of</strong> creatures is to use a grappling<br />
hook. When the characters scale the wall and appear on the<br />
other side, Yiss retreats into his room and attacks with his slaves.<br />
This is where Yiss retreats to once one <strong>of</strong> the party members has<br />
climbed the glass wall. When Yiss is defeated, the <strong>Game</strong>master's part<br />
<strong>of</strong> the Tri-key can be found on his body.<br />
This door opens once the <strong>Game</strong>master has been killed.<br />
This location contains slaves who attack on sight.<br />
When the door to this room is opened, the mind flayer finishes his<br />
meal and turns to attack.<br />
This orb describes some <strong>of</strong> the events in the arena.<br />
This location contains slaves and intellect devourers which attack.<br />
Several orbs are on this shelf, each containing more information on<br />
the mind flayers and the Elder Brain.
66<br />
44<br />
45<br />
Sanctum Door. This door can only be opened with the three key<br />
pieces that can be found at locations 12, 21 , and 37. When all the<br />
keys are placed in the Jock mechanism, the door opens, allowing passage<br />
into the Elder Brain's sanctum.<br />
Primarch Marakian and his minions. Directly behind the Primarch is<br />
the Elder Brain, the center <strong>of</strong> this flayer community. The Primarch<br />
briefly chats with the party, then all <strong>of</strong> the creatures in the room attack.<br />
46 Primarch Marakian has the key to his quarters on him.<br />
4 7 The Elder Brain must be killed to end the mind flayer threat to Tyr. As<br />
long as there are creatures alive in the room, however, the Elder Brain<br />
cannot be destroyed. All <strong>of</strong> the creatures must be dispatched before the<br />
Elder Brain's tank can be shattered. If the tank is not shattered quickly,<br />
the Elder Brain summons more and more mind flayers and slaves.<br />
48 This door can only be opened with the key found on the Primarch<br />
from location 46.<br />
49 Inside this chest is the Forge key, a set <strong>of</strong> bracers AC2 and a wand <strong>of</strong><br />
magic missiles with SO charges.<br />
50 This door cannot be opened until the Elder Brain has been destroyed.<br />
Even then it requires the Forge key from location 49 to be opened.<br />
51<br />
52<br />
53<br />
54<br />
Once the Elder Brain has been destroyed, a campfire ring appears.<br />
Upon entering the ancient forge, a quake occurs, awakening the<br />
earth drakes.<br />
The skeleton does not release the Promere's Hammer until the drakes<br />
have been destroyed. Even then, trying to take the Promere's Hammer<br />
activates the obsidian golems. Once they have been killed, the party<br />
can retrieve it. Promere's Hammer is a +3 two-handed hammer with<br />
strength <strong>of</strong> one on it.<br />
Inside this chest is a full suit <strong>of</strong> Promere's Armor. Each piece is +3<br />
plate mail.<br />
55 If the party has El's Drinker and knows that the sword can be reforged<br />
(see the section "El's Temple" on page 46 for more information),<br />
El's Drinker can be thrown into the forge. Once it has, using<br />
Promere's Hammer on the forge re-forges El's Drinker into Jasmine, a<br />
+3 mace with cloak <strong>of</strong> bravery on it. •<br />
56 This cave-in can only be removed by equipping Promere's Hammer<br />
and attacking the barrier with it.<br />
t]ANNTRIBE<br />
Synopsis<br />
The jann are a highly magical race who are not native to Athas. They live in<br />
tents that are far bigger on the inside than they look from the outside. The jann<br />
are far closer to Ur Draxa than Tyr, but through concealing magic and clever<br />
diplomacy the Sultan has fended <strong>of</strong>f a takeover by Ur Draxa. Asim Drac, however,<br />
has agreed to work for the Dragon, and therefore is plotting the assassination<br />
<strong>of</strong> the Sultan. The party must uncover Asim Drac, so that he does not take<br />
over the Sultanship after the Sultan dies.<br />
continues ...<br />
67
68<br />
Non-Player Characters in This Region<br />
Utella<br />
Location 1<br />
A female jann who weaves goods and other necessary supplies, Utella can fix<br />
the broken tapestry found in the Veiled Alliance Headquarters at location 24.<br />
For this, Utella requires a thread from the robe <strong>of</strong> the templar Zorani's tunic at<br />
location 25, and worm dye from Veiled Alliance Headquarters, or Notaku.<br />
Asim Drac<br />
Location 4<br />
A spy for the Dragon <strong>of</strong> Ur Draxa, Asim Drac hopes to usurp the throne with<br />
the Dragon's help. The party should get information and accuse him in front <strong>of</strong><br />
the Sultan. The Sultan, however, does not allow the party to kill Asim Drac.<br />
Magnolia<br />
Location 8<br />
An adventuress and heiress to the Sultanship, Magnolia returns after being<br />
saved (or ignored) by the party. She is trying to prove that Asim Drac is guilty<br />
<strong>of</strong> treachery. Magnolia can help the party with whatever information she has,<br />
and may dress up like Zorani at location 25 to trick Asim Drac into giving himself<br />
away. Magnolia is also the target <strong>of</strong> the Draxans, who kidnap her and<br />
attempt to escape through the Mosaic <strong>Adventure</strong>s region.<br />
Heroga<br />
Location 6<br />
Heroga is an old, blind, jann storyteller. Heroga's stories are the end <strong>of</strong> a long<br />
oral tradition, which is dying with the last <strong>of</strong> the jann on Athas.<br />
Sultan<br />
Location 12<br />
Sultan Akhmed Windcaller <strong>of</strong> the jann, rewards the party first for saving<br />
Magnolia, then for uncovering Asim's plot. Only the Sultan can tell his guards to<br />
step aside and allow the party to leave the tent, grant access his treasure room, or<br />
permit the party to talk to Magnolia. The characters should speak to him <strong>of</strong>ten.<br />
Alhena<br />
Location 19 to 24<br />
The female champion <strong>of</strong> the jann, Alhena protects and leads them in combat. The<br />
characters may challenge Alhena to a duel and meet her and her compatriots for<br />
battle at location 28. Before the fight, however, the characters can talk her out <strong>of</strong> it.<br />
They may also challenge her to a contest involving fighting giant snakes. When<br />
Alhena fights the snakes the characters should be prepared to help her.<br />
Jerrid<br />
Location 9, then 6<br />
Jerrid suspects Asim Drac <strong>of</strong> treachery but doesn't know what to do. He can first<br />
be found near location 23, then goes to location 9. Jerrid has little information.<br />
Zorani<br />
Location 25<br />
A Draxan templar who spys on the jann, Zorani can be scared away easily.<br />
His tunic, however, is very important if the party is going to fool Asim Drac.<br />
• Locations and Events<br />
1 Utella sits and weaves. She inspects and repairs the broken tapestry from<br />
the Veiled Alliance Headquarters. After the characters have learned what<br />
they need to repair the tapestry, they can find thread on the templar's vest<br />
and worm dye in the Veiled Alliance Headquarters or at Notaku's. They<br />
must have these when they talk to Utella if she is to fix the tapestry.<br />
2 This is the rim <strong>of</strong> a magical tapestry which the Draxans use to kidnap<br />
Magnolia. Once the characters take the tapestry from location 27 after<br />
Magnolia has been kidnapped, they can use it with the tapestry rim<br />
and enter the Maze section at location 24.<br />
3 This doorway leads to location 19.<br />
4 Asim Drac is here until either he goes to location 25 to talk to the character<br />
disguised as Zorani, or the Sultan finds out what he has done.<br />
5 This doorway leads to location 23.<br />
6 Heroga the storyteller. Jerrid is here after leaving his tent.<br />
7<br />
8<br />
9<br />
10<br />
11<br />
12<br />
13<br />
This doorway leads to location 21 .<br />
Magnolia's tent. She'll be here if the party has been to Humbleton<br />
unless she is kidnapped.<br />
Jerrid's tent. The characters should wait for an invitation to enter, or<br />
face the consequences.<br />
This doorway leads to location 24.<br />
This doorway leads to location 22.<br />
The Sultan. The characters should talk to him: before they rescue<br />
Magnolia, after Magnolia has returned, and when the characters get<br />
the note from Asim.<br />
This doorway leads location 20. Guards block the exit until the<br />
Sultan grants the party permission to leave.<br />
69
70<br />
14<br />
15<br />
Guards block the access to Magnolia until the Sultan grants the party<br />
permission to visit her.<br />
Magnolia waits until the Sultan is killed, then leaves the tent and<br />
goes looking for the party.<br />
16 Guards block access to the treasure room, unless the Sultan grants<br />
the party permission to enter.<br />
1 7 The Sultan's treasure. When Magnolia returns to the jann, the characters<br />
are rewarded with a couple pieces <strong>of</strong> treasure, but they are rewarded with<br />
the entire treasure trove when they prove Asim has betrayed the jann. A<br />
thief as the lead character may steal treasure multiple times, but the difficulty<br />
increases to the point <strong>of</strong> being nearly impossible after 15-20 tries.<br />
18 Ring the bell and snakes appear out <strong>of</strong> the hole to attack the party.<br />
Alhena suggests this as a contest if there is a dispute to be settled.<br />
When Alhena fights, however, she runs into some bad luck and<br />
needs the party's help.<br />
19 Leads to location 3.<br />
20 Two guards stand in front <strong>of</strong> the door. They let the party in if the<br />
Sultan has something to say, or if the party has useful information for<br />
the Sultan. The door leads to location 13.<br />
21 Leads to location 7.<br />
22<br />
23<br />
24<br />
25<br />
26<br />
Leads to location 11.<br />
Leads to location 5.<br />
An exit from the Maze section which leads to location 10.<br />
Zorani is sitting, spying on the jann and waiting for news from Asim<br />
Drac. The party may scare him away and, if the lead character puts<br />
on Zorani's cloak and waits around the campfire, Asim Drac comes<br />
up and, mistaking the character for the Templar, gives him or her a<br />
note which proves Asim Drac's guilt. This can be taken to the Sultan<br />
for a big reward. If the characters have talked to Utella about the broken<br />
tapestry, they can find the thread <strong>of</strong> a templar on Zorani's tunic.<br />
Leads to the City <strong>of</strong> Tyr, location 1.<br />
2 7 This "merchant" is really a Draxan who has the tapestry used to kidnap<br />
Magnolia. The jann let him go because they didn't realize that<br />
the wagon cover was really a magical tapestry.<br />
28 The fighting circle that Alhena meets the party at if there is to be a<br />
fight. The party should talk Alhena out <strong>of</strong> fighting.<br />
t SILT SEA ISLANDS<br />
Synopsis<br />
The major purpose <strong>of</strong> adventuring in the Silt Sea Island region is to gather information<br />
from different sources on how to acquire the Lyre <strong>of</strong> the Winds. The Silt<br />
Sea giants had the Lyre in their village at one time, but it was carried <strong>of</strong>f by air<br />
drakes who attacked the village. Now the village is in chaos; the fann is being<br />
taken over by bugs, the air drakes are killing all <strong>of</strong> the creatures that the giants<br />
hunt for food, and one <strong>of</strong> the giant's children was carried <strong>of</strong>f by the drakes. The<br />
rest <strong>of</strong> the islands in the Silt Sea area are inhabited by less civilized groups.<br />
continues ...<br />
71
72<br />
Non-Player Characters in This Region<br />
Gilad<br />
Location 21,25<br />
Gilad is a farmer for the Silt Sea giants. He is almost always at his farm trying<br />
to get rid <strong>of</strong> the insects that are eating his crops.<br />
Kiril<br />
Location 22<br />
Kiri! is the leader <strong>of</strong> the Silt Sea giants, and tries to keep her village together<br />
and safe from the constant attack from air drakes.<br />
Velden<br />
Location 23<br />
The blacksmith for the Silt Sea giants, Velden makes the weapons and armor<br />
for the giants in his village. He can make a suit <strong>of</strong> magical +3 leather armor for<br />
the party out <strong>of</strong> an air drake hide.<br />
Davin<br />
Location 24<br />
Davin is the hunter for the Silt Sea giant population. He is always very busy<br />
hunting for food for his people because the air drakes are taking away the<br />
food supply.<br />
Drisha<br />
Location 28<br />
Drisha is an acolyte and student <strong>of</strong> Generoe. She was out seeking components<br />
when she was captured by Keign and his cohorts. She has valuable information<br />
about getting the Lyre <strong>of</strong> the Winds if the party frees her.<br />
Keign<br />
Location 32<br />
The crazy leader <strong>of</strong> the wolf-headed giants, Keign is in the Silt Sea area to take<br />
control <strong>of</strong> the entire area and rule as king.<br />
Generoe<br />
Location 33<br />
Generoe is a crotchety old man in a rocking chair who lives on this island as a<br />
hermit. He does not like people in general, but the party can get information<br />
about the Lyre <strong>of</strong> the Winds from him.<br />
• Locations and Events<br />
1 This is where the party arrives from the repaired tapestry in the Veiled<br />
Alliance Headquarters at location 26. This tree also takes the characters<br />
back to the Veiled Alliance Headquarters at location 26 when<br />
they have acquired the Lyre <strong>of</strong> the Winds .<br />
2 This tunnel takes the party to location 3.<br />
3 This tunnel takes the party to location 2.<br />
4 This tunnel takes the party to location 5.<br />
5 This tunnel takes the party to location 4.<br />
6 This tunnel takes the party to location 7.<br />
7 This tunnel takes the party to location 6.<br />
8 This is the wreckage <strong>of</strong> the skimmer. The pieces needed to fix it are at<br />
or near locations 21, 23 and 24. Once the party has fixed the skimmer,<br />
it can carry the party to location 9.<br />
9 This is where the skimmer lands from location 8. The party can use<br />
the skimmer to return to location 8.<br />
10 This tunnel takes the party to location 33 in the Cloud region.<br />
11 This tunnel takes the party to location 12.<br />
12 This tunnel takes the party to location 11.<br />
13 This tunnel takes the party to location 14.<br />
14 This tunnel takes the party to location 13.<br />
15 This tunnel takes the party to location 34 in the Cloud region.<br />
16 This tunnel takes the party to location 35 in the Cloud region.<br />
17 This tunnel takes the party to location 19.<br />
18 This tunnel takes the party to location 20.<br />
19 This tunnel takes the party to location 17.<br />
20 This tunnel takes the party to location 18.<br />
21 This house belongs to Gilad. In the upper right corner <strong>of</strong> the room,<br />
the party can find the canvas used to repair the skimmer.<br />
73
74<br />
22<br />
23<br />
24<br />
25<br />
This house belongs to Kiri!, the leader <strong>of</strong> the Silt Sea giants.<br />
This house belongs to Velden, the giant blacksmith. If the party brings<br />
him an air drake hide, he makes a suit <strong>of</strong> magical +3 leather armor<br />
from it. There is a pole in the corner <strong>of</strong> his house that makes a fine<br />
replacement mast for the skimmer wreckage.<br />
The party can sometimes find Davin hunting on this island. Along the<br />
west shore, the characters can find another piece <strong>of</strong> wreckage needed<br />
to repair the skimmer.<br />
This is the giants' farm. Occasionally, Gilad works to get rid <strong>of</strong> the<br />
bugs eating his crops.<br />
26 This is another island that the giants use for hunting.<br />
27 This island is inhabited by minotaur-headed giants. They are not hostile<br />
unless provoked and can pay the party to rid the Silt Sea area <strong>of</strong><br />
Keign and his minions.<br />
28 Drisha, the acolyte that was captured by Keign and his cohorts, is<br />
being held in a cage. If the characters free her, she gives them some<br />
clues as to how they might acquire the Lyre <strong>of</strong> the Winds. A skilled<br />
thief has a chance <strong>of</strong> picking the lock to the cage, but if he or she fails,<br />
the only way to free Drisha is to use the key Keign wears at all times.<br />
29<br />
30<br />
31<br />
32<br />
33<br />
34<br />
The tree has vines on it that can be used to repair the bridge at<br />
location 31.<br />
There is an axe which can be used to cut some <strong>of</strong> the vines from the<br />
tree and make rope to repair the bridge at location 31.<br />
A broken bridge. The party must repair it in order to free Drisha,<br />
the acolyte.<br />
This is where Keign and his minions live. They guard the entrance to<br />
the Cloud region and do not like visitors.<br />
Generoe the hermit sits in his rocking chair. The party can talk to him<br />
and get information about the Lyre <strong>of</strong> the Winds .<br />
Where the party finds the ingredients which kill the insects on<br />
Gilad's farm.<br />
I THE CLOUDS<br />
Synopsis<br />
Poking through the clouds are the majestic, Silt Sea Mountains. The party can<br />
see air drakes wheeling above the mountains in the distance. Nearby is a crude<br />
hut with giant planters outside. Inside is Melantha, a giantess exiled from the<br />
Silt Sea Islands giant tribe below. She lives alone at the top <strong>of</strong> this mountain. As<br />
the party walks around the region, it finds many traps set by Generoe, an old<br />
man living in the Silt Sea Islands. He set the traps to discourage Melantha or<br />
anyone else from searching for the Lyre <strong>of</strong> the Winds, a very powerful instrument<br />
which could easily be misused.<br />
continues ...<br />
75
78<br />
19 This lever is used to turn <strong>of</strong>f the traps around the entrance to the<br />
mountain at location 20.<br />
20 These traps can be deactivated by the hidden switch at location 19.<br />
21 A beasthead giant hides underground at each <strong>of</strong> these locations, only<br />
rising when the party is near.<br />
22 When these levers are used, various effects can occur: a monster may<br />
appear, a magical fruit may be created, or nothing at all may happen.<br />
23 On this tree can be found a magical apple and a magical lime.<br />
24 This cave entrance leads to a cave at location 25 where half <strong>of</strong> the<br />
Flute can be found at location 5.<br />
25 The north exit <strong>of</strong> this tunnel leads to the air elementals area at location<br />
24.<br />
t VOLCANO TEMPLE<br />
79<br />
26 This teleporter leads to a small island at location 27.<br />
2 7 This teleporter leads to the teleporter near the air drakes at location 26.<br />
28 This pressure plate lowers the huge rocks at location 29 which block<br />
the nest area.<br />
29 These rocks can only be lowered by stepping on a pressure plate at<br />
location 28.<br />
30<br />
31<br />
32<br />
33<br />
34<br />
35<br />
A crowbar is behind a planter. The party can use it to tear a plank<br />
from the hut at location 31.<br />
The party can use a crowbar to tear a plank <strong>of</strong>f <strong>of</strong> the hut at this location<br />
and make a bridge to the next mountain at location 32.<br />
The party can use the plank torn <strong>of</strong>f the hut at location 31 to make a<br />
bridge to the next mountain.<br />
A pathway down to the Silt Sea Islands, location 10.<br />
This tunnel leads the party to location 15 in the Silt Sea Islands region.<br />
This tunnel leads the party to location 16 in the Silt Sea Islands region.<br />
The characters appear here and face air elementals and greater air<br />
elementals.<br />
Synopsis<br />
Hundreds <strong>of</strong> years ago, the Verini preserver, Lorvus, came to this temple and conquered<br />
the "angry fire," a brilliant ruby that burned from within with an intense<br />
fire. In the process, Lorvus created the Great Seal, an artifact used to control the<br />
volcano and keep the Fire Ruby's power in check. Lorvus eventually brought his<br />
tribe to the temple and they claimed it as their own. Since that time, the verini<br />
have lived peacefully in the temple . .. until recently.<br />
The Draxans, desperate to stop the Veiled Alliance from recovering all <strong>of</strong> the elemental<br />
items, have sent a large group <strong>of</strong> warriors to get the Fire Ruby from the verini.<br />
To make matters worse, there is dissension within the verini tribe. A young group <strong>of</strong><br />
"rebels" have challenged the established order and the power <strong>of</strong> the Seal which has<br />
supposedly "guided" the tribe since its creation.<br />
The characters arrive in the middle <strong>of</strong> this conrict. After proving themselves to the<br />
tribe, they must investigate a supposedly accidental death and discover who is<br />
responsible. During this, another murder occurs and the Seal is broken. The party<br />
must enter the core and retrieve the mythical Fire Ruby. Once recovered, the Fire<br />
Ruby can be used to re-seal the volcano and bring order back to the verini temple.
80<br />
Non-Player Characters in This Region<br />
Note: If the location number is followed by a "W", it means that it is in<br />
one <strong>of</strong> the Volcano Wings, and the party should refer to that section for<br />
more information.<br />
Rhone<br />
Locations 6, 7, 14, 31 , 4W, 22W<br />
Rhone moves about quite a bit during the game, so it might <strong>of</strong>ten be hard to<br />
find her. She is a lSth-level verini psionicist put in charge after the last captain<br />
<strong>of</strong> the guard was killed by a drake. Although in command <strong>of</strong> the guards and<br />
working for the Order, she remains neutral in the issue <strong>of</strong> the Seal. Rhone is<br />
the leader <strong>of</strong> the guards because <strong>of</strong> her stern but fair disposition. She is a<br />
gifted psionicist and uses her abilities whenever she can.<br />
Galinix<br />
Locations 14, 21, 31, 7W, 37W<br />
Galinix may be found in the Seal antechamber, talking with Nortemus,<br />
walking the halls, or in his quarters. He can occasionally be found in the<br />
rebel's side <strong>of</strong> the temple. Galinix is a lSth-level verini fire cleric, and he is<br />
second-in-command <strong>of</strong> the order Nortemus' right-hand man. He is in charge<br />
<strong>of</strong> security and predicting the earthquakes that frequent this area. Galinix<br />
has been passed up as Keeper for some time, and the resentment at this has<br />
grown into an obsession. His normally surly attitude hides his insecurity<br />
and jealously.<br />
Galinix tries to hamper the party's investigation; he gives misleading information<br />
and makes cynical remarks.<br />
Chander<br />
Locations 14, 28, 31 , 23W, 24W, 25W<br />
Chander is in the guests' quarters, eating area, or in the Volcano Wings, talking<br />
to the verini artisans. She is a 9th-level merchant. Chander was rescued by<br />
the verini from the wreckage <strong>of</strong> a raided caravan and brought to the temple to<br />
recover. She refuses to burden the verini with her care, so she has decided to<br />
wait until this Draxan episode is done with before leaving. Chander is another<br />
good source <strong>of</strong> information for the party. She can provide some insight and<br />
suggestions as to what the party should do next.<br />
Brotel<br />
Locations 14, 31 , 37W<br />
Brotel first appears in the council meeting, then is in his chambers or harassing<br />
Nortemus when large numbers <strong>of</strong> people are around. He is a young verini and<br />
the leader <strong>of</strong> the "rebels." As Nortemus' apprentice, Brotel is tired <strong>of</strong> having the<br />
"Order <strong>of</strong> the Seal" hammered into his head day after day, so he has decided<br />
to challenge its authority. He is brash and thinks very highly <strong>of</strong> himself, doing<br />
anything to gather attention to his cause. He believes himself to be correct,<br />
and calls all <strong>of</strong> the secrecy <strong>of</strong> the Order as nothing but a front to enhance the<br />
illusion that they really do protect something. Brotel is very antagonistic and<br />
cynical. Although at first he does not answer the characters' questions, he<br />
eventually accepts them for who they are and talks. He can answer some questions<br />
and point the characters in certain directions, but he is not important to<br />
solving the mystery behind Sorval's death.<br />
Fori, the Storyteller<br />
Locations 20, 14, 31<br />
Although she may be at various locations, Fori is always in the main part <strong>of</strong><br />
the temple. Fori is an old verini, the storyteller <strong>of</strong> the Order. The storyteller<br />
serves a high position in the verini, passing down the legends <strong>of</strong> the past and<br />
weaving them into engrossing stories. Both young and old listen to her stories,<br />
and many seek her advice in times <strong>of</strong> trouble. Fori, being the oldest living<br />
verini, has the honor <strong>of</strong> that position.<br />
Nortemus<br />
Locations 21 , 14, 31 , lOW<br />
Nortemus is first encountered in the Seal antechamber. After meeting the party<br />
he goes about his duties in his chambers, the Seal antechamber, and the eating<br />
area. Nortemus is a 20th-level verini preserver. He is the leader <strong>of</strong> the verini<br />
tribe that resides in the Volcano Temple and the head <strong>of</strong> the Order <strong>of</strong> the Seal.<br />
Nortemus is old and set in his ways. He is somewhat blind to all the problems<br />
that are going on in the temple. He firmly believes that the rebels are behind<br />
the looting and he is ready to blame the Draxan presence on the rebels as well.<br />
Although Nortemus knows a lot about the verini and the temple itself, he is<br />
not the best source <strong>of</strong> information available. His bias against the rebels can<br />
sometimes result in misleading information.<br />
In order to enter the temple wings, the party must get permission from<br />
Nortemus to investigate Sorval's death. Galinix contests this, but the party is<br />
given permission anyway. Once the party has found the reference to the "eyes<br />
<strong>of</strong> the beast" and the beast scroll, bringing it to Nortemus calls the second<br />
meeting and advances the investigation.<br />
81
82<br />
Ulbin<br />
Locations 28, 31 , 20W<br />
Ulbin is in the visitor's area, the eating area, the guest area, or lurking around<br />
near the mausoleum. He is a 9th-level elven merchant/thief/preserver. Ulbin,<br />
along with Chander, was rescued from the raided caravan. He was brought<br />
here to recover from the ordeal. Unlike Chander, he sees the verini's trust as<br />
naive and schemes to take advantage <strong>of</strong> it. Ulbin was a part <strong>of</strong> the same caravan<br />
that Chander was, but was in league with the bandits. The bandits doublecrossed<br />
Ulbin and left him to die. He was also rescued by the verini but since<br />
discovering the mausoleum, he has been slowly stealing verini gold and jewelry<br />
and melting it down so he can smuggle it back to sell in Tyr. Ulbin is not very<br />
receptive to the party. Once he has been caught and thrown in the cell, however,<br />
the party can "persuade" him (with Silvan's help) to cooperate with it.<br />
Talo, Head Cook<br />
Locations 31, 27W<br />
Talc is in the waiting area, or in his quarters in the southern wing. Talc is a<br />
medium-aged verini who loves to cook. With his passion for cooking there was<br />
no one else to choose when the last chef moved to another tribe. Talc is a<br />
great source <strong>of</strong> gossip, for he loves to listen to the conversations that go on at<br />
the tables when he serves food.<br />
• Locations and Events<br />
Note: Unlike other regions in the game, the entire Volcano Temple and<br />
Wings has a working clock. What this means is that at certain times <strong>of</strong><br />
the "simulated" day, the verini go about their own business. The party<br />
may need to check several locations in order to be able to find the character<br />
that it's looking for. If the party is having a lot <strong>of</strong> trouble finding one <strong>of</strong><br />
the NPCs, go to a place the verini eventually go to (like their quarters) and<br />
wait there, with the cursor in move mode. This may take a while, but eventually,<br />
they come to that location.<br />
Also, if the party is waiting for an item to be completed, such as a weapon,<br />
a scroll, or potions, the best thing to do is not leave the volcano (if the<br />
party can) but to REST at the campfire ring at locaton 29. This causes 8<br />
hours to pass each time it is used.<br />
Finally, many encounters are based on the difficulty setting in the game;<br />
the more difficult the setting, the more monsters may appear.<br />
1<br />
2<br />
3<br />
4<br />
5<br />
6<br />
7<br />
8<br />
9<br />
The first time the characters enter the volcano from Veiled Alliance<br />
Headquarters, location 24, they appear here.<br />
1\vo fire drakes have made this cave their home. They attack on sight,<br />
although they can't see that far.<br />
Travelling though this pass triggers a Draxan ambush. A ranger or<br />
high-level thief can detect the ambush, earning some experience and<br />
canceling the Draxan's surprise. If the party does not detect the<br />
ambush, the Draxans get the initiative in the fight.<br />
Getting too close to this pool causes elementals to leap from it.<br />
Prosser is being attacked by fire elementals. If the party rescues him<br />
from them, it receives an experience point bonus. Prosser then <strong>of</strong>fers<br />
his thanks and leaves. If the party does not rescue Prosser before<br />
entering the temple, he is killed by the elementals and does not<br />
appear later in the game.<br />
On the party's approach to this pass for the first time, verini guards<br />
emerge and question the party. Once this is done, another verini<br />
emerges, warning the others <strong>of</strong> an impending Draxan attack. The<br />
verini help the party fight the Draxans.<br />
Once this fight is over with, Rhone appears and asks the party to<br />
clean out the Draxan's camp at location 8. If this has already been<br />
done, the party may enter the temple by asking. If not, once the party<br />
cleans out the temple and returns, Rhone gives it permission to enter.<br />
After the Draxan's attack or whenever returning to the outside <strong>of</strong> the<br />
temple (as long as the party has not attacked the verini) there are<br />
guards stationed at this location. Rhone can also be found at this<br />
location during certain times <strong>of</strong> the day.<br />
Some Draxans have set up a camp, threatening the verini temple.<br />
There is no other way into the camp but walking through a narrow<br />
pass, which the Draxans are guarding. They attack immediately.<br />
Several verini are guarding some workable soil. Although suspicious,<br />
they let the party look around.<br />
83
84<br />
85<br />
10<br />
11<br />
12<br />
13<br />
14<br />
15<br />
16<br />
17<br />
Some <strong>of</strong> the farmers work the soil. If asked about the temple, they<br />
refer the party to Rhone.<br />
Some <strong>of</strong> these plants can be picked for groza roots. These roots can<br />
be given to Talo to be cooked.<br />
Searching the Draxan's body, the party discovers a scroll with orders<br />
from the Lord Warrior on it, along with some ceramic pieces.<br />
Talking to these guards allows the party to leave the temple once it<br />
has entered. The party cannot leave the temple while a meeting is<br />
going on. When the party first enters the temple, the guards welcome<br />
it and direct it to the meeting in progress.<br />
This large hall is where all the verini hold their meetings. TWice during<br />
the game, there are meetings held in this hall. When the party first<br />
enters, a meeting is going on. Approaching allows the party to listen<br />
in on what is happening in the volcano. After the first speaker finishes,<br />
the party can walk out onto the mosaic and interrupt the session.<br />
This allows the lead character to talk briefly to Nortemus before<br />
Brotel interrupts. Once Brotel has finished arguing, the meeting ends<br />
and Chander introduces herself to the party. She steers the characters<br />
toward Fori. After they are done talking with Fori, Galinix appears<br />
and questions them. Once this is done, the party is on its own.<br />
The second meeting takes place at this location as well. Once the<br />
party gives Nortemus the scroll from the statue at 32W, he calls the<br />
second meeting. He announces the murder and the meeting ends.<br />
A magical tapestry, depicting Tyr, is on this wall. Once the party has<br />
the Fire Ruby, clicking it on the tapestry activates it. The party must<br />
be facing the tapestry in order for it to work. The tapestry leads to<br />
location 24 in the Veiled Alliance Headquarters. Any other time that<br />
the characters return to the Volcano after the Fire Ruby has been<br />
recovered, they appear in this room instead <strong>of</strong> at Location 1.<br />
This passage leads to the northern wing <strong>of</strong> the temple. The party is<br />
not allowed to enter the wings <strong>of</strong> the temple until Nortemus has given<br />
it permission to do so.<br />
The recent looting has prompted Rhone to put guards on duty at the<br />
Crypt. When first approached, the guards question the characters,<br />
then let them go about their business. Once the Crypt has been<br />
robbed, the guards tell the characters this information.<br />
18<br />
19<br />
20<br />
21<br />
22<br />
23<br />
24<br />
25<br />
26<br />
Some <strong>of</strong> the dead verini are interred in these crypts.<br />
Once the looting has occurred, investigating this crypt triggers the<br />
guard to come and inform the party <strong>of</strong> Ulbin's capture.<br />
Fori, the storyteller, is here most <strong>of</strong> the day. Fori is generally a good<br />
source <strong>of</strong> information for the party and can usually point it in the<br />
right direction. If the party mentions Chander to Fori, she eventually<br />
asks the party to investigate Sorval's death. Agreeing to this allows the<br />
party to ask Nortemus for permission to investigate Sorval's death.<br />
This is the antechamber <strong>of</strong> the Seal, and Nortemus' workplace during<br />
some <strong>of</strong> the time each day. Before the party has agreed to investigate,<br />
Galinix and Nortemus are both here. Galinix keeps interrupting the<br />
party's conversation with Nortemus, but Nortemus scolds him for it.<br />
Once the party has talked to Fori, it can ask Nortemus about Sorval's<br />
death. Following this query, the party can agree to investigate.<br />
Nortemus gives the party permission to do so, and the characters are<br />
given access to the entire temple.<br />
This is the verini library, where the keepers have maintained records<br />
since they first arrived in the temple.<br />
A book <strong>of</strong> the tales <strong>of</strong> the Prince <strong>of</strong> Pagnasta.<br />
Searching this shelf once the characters have read the "eyes <strong>of</strong> the<br />
beast" entry in the statue book from location 35W or location 38W,<br />
they find Sorval's journal and a small key. After getting the key,<br />
Galinix appears and questions the party. He discounts the key<br />
because he thinks it is for a lock Jong unused.<br />
This barrier is kept in place by the Keeper, and can not be passed<br />
unless the volcano has started to erupt or the Seal has been mended.<br />
This is the Great Seal that Lorvus created all those years ago. When<br />
Galinix tries to control the volcano, this is where it takes place. Once<br />
the Seal is opened, a spiral set <strong>of</strong> stairs leads down into the core <strong>of</strong><br />
the volcano. On returning from the core, the Fire Ruby must be used<br />
on the Seal in order to stop the eruption and re-seal the volcano. The<br />
party receives 500,000 experience points for completing the volcano<br />
scenario, plus additional experience for other actions performed. If<br />
the verini are attacked outright, the party is able to enter the core <strong>of</strong><br />
the volcano as soon as it reaches the stairs. Otherwise, the party<br />
enters once Galinix fails to control the Seal.
86<br />
27 This statue falls and kills Nortemus once the party finds Sorval's<br />
amulet and discovers who is responsible for the murders. Other<br />
important non-player characters also join the party here. Regardless<br />
<strong>of</strong> the accusations, Galinix is allowed to try and control the Seal. After<br />
the conversation, the party is moved to the Seal Chamber at location<br />
26 for the attempt.<br />
28 This area was set aside for visitors to the verini temple. Currently,<br />
there are only two visitors, Chander and Ulbin. Either can be found<br />
at this location at various times during the day.<br />
29 A campfire ring is located here for the party to use. This campfire ring<br />
passes time in the volcano, so if the party is waiting for a potion,<br />
scroll, or weapon to be done, this campfire ring passes 8 hours <strong>of</strong> time<br />
for each left-click.<br />
30 Behind this rock is Ulbin's hiding space, where Sorval's amulet has<br />
been hidden. The party can only find it once Ulbin has told the characters<br />
<strong>of</strong> its location. When the party does find it, and if the characters<br />
are carrying the key, the amulet is immediately opened and its contents<br />
revealed. This brings about Nortemus' death and sets up the Volcano<br />
Core mission. The party is moved to Location 27 when this happens.<br />
31 This is the eating area for the tribe. Most <strong>of</strong> the characters that wander<br />
around can be found at this location at some time during the day.<br />
32 The entrance to the southern wing.<br />
t VOLCANO WINGS<br />
Synopsis<br />
The side wings <strong>of</strong> the volcano house many <strong>of</strong> the verini that live in this tribe.<br />
Once the characters are allowed into the volcano wings, they can meet many <strong>of</strong><br />
the characters that help them solve the mystery <strong>of</strong> Sorval's death.<br />
The wings have become separated by faction; one wing houses the order and its<br />
supporters, and the other is home to the rebels.<br />
87<br />
continues ...
88<br />
Non-Player Characters in This Region<br />
Zydeko<br />
Location 1<br />
Zydeko is in his quarters until Nortemus is killed, th.en ~e is in the Seal.<br />
Chamber. Once the volcano is sealed, he'll be back m his quarters. He 1s a<br />
20th-level verini preserver and uses his power to protect the tribe. Zydeko is<br />
one <strong>of</strong> the only people who really doesn't know that there's a conflict going on.<br />
Wrapped up in his work, he doesn't have time to ?o out .and see w.hat. is ~oing<br />
on. He is one <strong>of</strong> the verini's best preservers, but his studies keep him m his<br />
own little world. Zydeko can sell scrolls to the party. The scrolls take various<br />
amounts <strong>of</strong> time to create, and, depending on the level <strong>of</strong> the spell, can take<br />
anywhere from 20 hours to 200 hours to finish. Zydeko can make scrolls for<br />
the following spells: blur, chaos, fire shield, ~ame arrow, meteor swarm, mindblank,<br />
and Melf's minute meteors. All <strong>of</strong> these spells, with the exception <strong>of</strong><br />
meteor swarm can be learned. Each <strong>of</strong> these scrolls can only be made once.<br />
Zydeko can give the party some information about the glassy powder location 31,<br />
but his help is not required to solve the murder.<br />
Yerath<br />
Location 14<br />
Yerath is a verini guard. He is the watch commander for the prison area.<br />
Yerath repeats that the party needs permission from Rhone in order to be able<br />
to talk to the prisoners.<br />
Kranix<br />
Location 18<br />
Kranix is in this cell the entire adventure. He is a Draxan high templar who was<br />
caught by one <strong>of</strong> the verini patrols and brought into the temple for interrogation.<br />
The recent troubles have prevented this, however, so he's been sitting in his cell<br />
for some time. Thanks to Zydeko, he can't use his magic to escape. Kranix knows<br />
all about the plans for the Fire Ruby, and knows that the Draxans are going to<br />
tunnel under the temple and seize the Fire Ruby without the verini's knowledge.<br />
He does not communicate any <strong>of</strong> this to the party, though. Nevertheless, Kranix<br />
knows a great deal about the Fire Ruby. Returning to talk to Kranix once the volcano<br />
has been sealed makes him open up about the Fire Ruby's history.<br />
If the party gives the Fire Ruby to Kranix when he asks to look at it, the Fire<br />
Ruby reflects the spell back and destroys him.<br />
Silvan<br />
Location 19, 16<br />
A verini guard, Silvan is in charge <strong>of</strong> the prison area in the temple. Silvan does<br />
not let the characters into the prison area until Rhone has given the characters<br />
permission to talk to Ulbin. Once this has happened, he lets the characters in<br />
to the area as they please. Once Ulbin has told the characters to go away, they<br />
can get Silvan to help "persuade" Ulbin to talk to them. Silvan goes along with<br />
this as long as the characters agree not to hurt Ulbin. He lets them into Ulbin's<br />
cell so they can learn the location <strong>of</strong> Sorval's amulet.<br />
Elovan<br />
Location 23<br />
Elovan, a verini metalworker, is in his quarters the entire game. Elovan is another<br />
<strong>of</strong> the artists that lives in the temple. He is a jeweler and a smith, able to make<br />
anything, from the finest jewelry to the deadliest weapon. If the party agrees to<br />
look for drake claws, Elovan can take the drake claws (found in the Volcano Core<br />
location 15) and make them into the Drake Gloves, a set <strong>of</strong> +3 gloves. Once the<br />
party has found the key to Sorval's locket, the key must be taken to Elovan. He<br />
tells the party that this locket was commissioned by Sorval for his mate. Elovan<br />
also tells the party that Sorval was buried with this locket.<br />
Kell<br />
Location 24<br />
Kell is one <strong>of</strong> the female verini artisans that lives in the temple. She is a talented<br />
glassblower, and can make many lovely things out <strong>of</strong> glass. Kell can<br />
analyze the glass powder that the party finds at the fallen statue at location<br />
31. Her information, however, does not help the party in its investigation.<br />
If the party brings Kell the crystal shard from the Mosaic <strong>Adventure</strong>s region, she<br />
can forge the sword into the Crystal Sword, a +3 sword with cause blindness on it.<br />
Jakath<br />
Location 25<br />
Jakath, a sculptor, is the most flamboyant <strong>of</strong> all the verini artisans, easily supporting<br />
almost anything. Currently, it's the rebels, which he speaks <strong>of</strong> with deep<br />
commitment (until he is distracted). He is a marvelous sculptor, and is hard at<br />
work on several sculptures that are scattered about his workshop. Jakath, while<br />
amusing, does not play a significant role in the murder investigation.<br />
89
90<br />
Xarax<br />
Location 29<br />
xarax is a 18th-level verini earth cleric. He is another <strong>of</strong> the temple's highest<br />
members. Once a wanderer and explorer, xarax came to this temple several<br />
years ago and now serves as the temple's advisor on anything having to do<br />
with the earth. xarax can make potions for the party. Each potion takes acertain<br />
amount <strong>of</strong> time to complete, depending on the type <strong>of</strong> potion requested.<br />
Unlike Zydeko's scrolls, xarax can make potions repeatedly. The potions<br />
Xarax can make are: cloak <strong>of</strong> bravery, cure critical wounds, cure light wounds,<br />
cure serious wounds, free action, healing, and protection from fire.<br />
Xarax can make a batch <strong>of</strong> 5 potions instead <strong>of</strong> one. This multiplies the price,<br />
but not the time, by (<strong>of</strong> course) 5.<br />
Verini Children<br />
Location 34<br />
Verini children are just that, children. This is a playroom which many <strong>of</strong> the<br />
children like to spend time in. It keeps them out <strong>of</strong> trouble. The children are<br />
playing games and don't think it's right that adults can join in. If Prosser was<br />
not rescued from the fire elementals, asking them about the murder prompts<br />
them to tell the party about Winter. Of course, the party can only ask them<br />
about the murder once Nortemus has announced it.<br />
Winter<br />
Location 35<br />
Winter is a young verini. Normally, Winter comes to play with the other children,<br />
but since the murder she has been distant and depressed. If Prosser was<br />
not rescued, then Winter has Sorval's book <strong>of</strong> the statues. When the party<br />
talks to her about the murder she gives the party the book.<br />
Prosser<br />
Location 38<br />
If Prosser was rescued from the fire elementals outside the temple, then he is<br />
at this location for the remainder <strong>of</strong> the game. Prosser is Brotel's brother. He is<br />
caught between what he wants to do and what the rebels think he should do.<br />
If Prosser was rescued, he is the one to talk to after the second meeting.<br />
Asking him about the murders makes him reveal that he has Sorval's book on<br />
the statues. This book is necessary to complete the volcano adventure.<br />
If Prosser was not rescued, it is assumed that he did not survive the encounter<br />
with the elementals. Winter will have the book at location 35 instead.<br />
• Locations and Events<br />
Northern Wing<br />
1<br />
2<br />
3<br />
4<br />
5<br />
6<br />
7<br />
8<br />
9<br />
10<br />
11<br />
12<br />
Zydeko. Entering his room for the first time triggers an explosion. If the<br />
characters speak with him, they find out about creating magic scrolls<br />
and the game called "Elements and Influences," a game like chess.<br />
After talking to Zydeko, approaching this table prompts Zydeko to<br />
invite the characters for a game <strong>of</strong> "Elements and Influences." A character<br />
with a high Intelligence will fare better. Choosing one <strong>of</strong> the mild<br />
strategies almost surely fails, as Zydeko eats up timid characters.<br />
A character with a high Dexterity can avoid having this shelf collapse.<br />
Searching the bookcase (or the book piles) has a random effect.<br />
Persistence pays <strong>of</strong>f, however, in the form <strong>of</strong> scrolls <strong>of</strong> charm monster,<br />
disintegrate, wall <strong>of</strong> fire, and web.<br />
Rhone can be found here at certain times <strong>of</strong> the day.<br />
A grappling hook can be found in this room.<br />
This passage leads back to location 16 in the Volcano Temple.<br />
Galinix is in his quarters constantly after the murder announcement.<br />
On first inspection, this pile <strong>of</strong> papers <strong>of</strong>fers nothing <strong>of</strong> importance. If<br />
the party looks at it four or five times, however, a list <strong>of</strong> earthquake<br />
times that Galinix discarded can be found. Although not part <strong>of</strong> the<br />
main quest, this can be taken to Rhone. She examines it, but can find<br />
nothing <strong>of</strong> importance.<br />
This door cannot be opened unless the party has Rhone's key. Any<br />
attempt to smash the door down or pick it results in failure. The door<br />
does not open while Galinix is in his quarters, either. Once Galinix has<br />
been tricked, the party can enter the room by using the door and keeping<br />
the door key in the party's inventory. Once open, the party has<br />
about a minute <strong>of</strong> time before Galinix returns. If he finds the party<br />
inside his room upon return, he'll forcibly eject the party from the room.<br />
At certain times <strong>of</strong> the day, this is where Nortemus can be found.<br />
This room was Sorval's.<br />
A diary that Sorval kept. This diary talks about the statues in the<br />
southern wing that Sorval was researching. Reading the reference to<br />
the "eyes <strong>of</strong> the beast" tells the party where to look when examining<br />
the beast statue.<br />
91
92<br />
13<br />
14<br />
15<br />
16<br />
17<br />
18<br />
19<br />
20<br />
Once Rhone has given the party the key to Galinix's quarters, a ruse<br />
can be started by entering Sorval's room and closing the door. If the<br />
door is open or the party is in sight, Galinix does not leave.<br />
Yerath, the watch commander.<br />
Several guards who have some information about Draxan activities<br />
outside the volcano.<br />
Knocking on this door calls Silvan at location 19. If the party has permission<br />
from Rhone to question Ulbin, Silvan lets it into the area.<br />
Otherwise, there is no other way to get in to the area.<br />
Approaching this door initiates the conversation with Kranix, the captured<br />
Draxan templar.<br />
Kranix, unless he was destroyed by the Fire Ruby.<br />
Silvan.<br />
After the guard informs the party <strong>of</strong> Ulbin 's capture, Ulbin can be<br />
found in this cell.<br />
21 Approaching this door when Ulbin is in the cell initiates conversation.<br />
22 Rhone can <strong>of</strong>ten be found here.<br />
23 Elovan, the smith, and Chander.<br />
24 Kell, the glassblower, and Chander, at times.<br />
25 Jakath, the sculptor, and Chander, at times.<br />
Southern Wing<br />
26 This passage leads back to location 32 in the Volcano Temple region.<br />
2 7 Talo, the cook, can be found here during some parts <strong>of</strong> the day.<br />
28 Talc's cookbook. It contains some recipes.<br />
29<br />
30<br />
31<br />
32<br />
Xarax, the earth cleric.<br />
The six magma statues that Sorval was researching.<br />
If this statue is examined by a character <strong>of</strong> high Intelligence, the characters<br />
find some glassy powder. This can be taken to Kell and Zydeko<br />
to be examined.<br />
Once the party has read Sorval's journal and found the reference to<br />
the "eyes <strong>of</strong> the beast," at location 12, examining this statue opens its<br />
mouth and reveals the beast scroll.<br />
33<br />
34<br />
35<br />
36<br />
37<br />
38<br />
A grappling hook.<br />
Verini children are in this room, playing.<br />
Winter. If Prosser at location 38 was not rescued outside the temple,<br />
the party can get the statue book from Winter, but only after<br />
Nortemus has called the second meeting.<br />
Some <strong>of</strong> the rebels are in this room. When approached, they come<br />
out and question the party. Although they seem hostile, they do not<br />
attack the party and back down quickly. They give the party some<br />
information on the rebels and how they feel about the order.<br />
Some times during the day, Brotel can be found at this location, and<br />
Galinix, at times.<br />
If Prosser was saved outside the temple, he is here for the remainder<br />
<strong>of</strong> the adventure. Once Nortemus has held the second meeting and<br />
announced the murder, questioning Prosser about the murder gets<br />
the party the statue book.<br />
Volcano Solution Step-by-Step<br />
Because <strong>of</strong> the sub-plots and false leads that are in the Volcano Temple, following<br />
this step-by-step process completes the region and gets the party into<br />
the core <strong>of</strong> the volcano. Follow the instructions to the letter and the party<br />
should do fine. The numbers are the locations to refer to on the overhead<br />
maps. If this number is followed by a "W", it means that the location number<br />
is in one <strong>of</strong> the Volcano Wings, and the party should refer to that section for<br />
more information. This walk-through skips all the sub-plots and items that are<br />
not necessary, so the party may want to do those after the volcano has been<br />
re-sealed. Also, sometimes the numbers may refer to people's quarters when<br />
the party is asked to find them. If the people are not there, remember that the<br />
non-player characters do have schedules, but will return to these locations<br />
eventually. If the party can't find them anywhere else, wait for them to return.<br />
Assuming that the party just entered the volcano for the first time:<br />
I)<br />
2)<br />
3)<br />
4)<br />
Enter the narrow pass and get ambushed by the Draxans at location 3.<br />
Walk up to the temple entrance at location 6, fight the Draxans, and<br />
agree to clean out the camp.<br />
Enter the Draxan's camp at location 8 and defeat them.<br />
Return to Rhone at location 6 and tell her the party defeated the<br />
Draxans. The party is allowed entrance into the temple.<br />
93
94<br />
5) After the guards are done talking to the party at location 13, walk to the<br />
meeting hall at location 14 and listen to what is going on. The party can<br />
do whatever it wants during the meeting.<br />
6) Once the meeting is over, talk to Chander and Galinix.<br />
7) Go talk to Fori at location 20 and tell her that Chander sent the party.<br />
She asks the party to investigate Sorval's death. Agree to do so.<br />
8) Talk to Nortemus and Galinix at location 21 . Tell Nortemus that Fori<br />
wanted the party to investigate. When Nortemus asks the party if it will,<br />
agree to do it.<br />
9) Go to the northern wing at location 16.<br />
10) Once in the northern wing, go to Sorval's quarters at location 11 Wand<br />
read his journal at location 12W.<br />
11) Leave the northern wing at location 6W and return to the temple.<br />
12) Enter the southern wing at location 32.<br />
13) Go to the beast statue at location 32W and look at it. The party should<br />
get the beast scroll. Read it.<br />
14) Go back to the temple at location 26W.<br />
15) Take the scroll to Nortemus at location 21. Tell him the party has matters<br />
to discuss and tell him about the scroll. He reads it and calls a<br />
meeting at location 14.<br />
16) Once the meeting is done, go to the southern wing at location 32.<br />
17) Go and talk to Winter at location 35W. Tell her about the murders. She<br />
gives the party the statue book. Read the section on the beast statue.<br />
18) Go back to the temple at location 26W.<br />
19) Go to the library at location 22 and look on the bookshelf at location 24.<br />
The party should find Sorval's journal and the key. Galinix appears and<br />
talks to the party.<br />
20) Once finished with Galinix, go to the northern wing at location 16.<br />
21) Once in the northern wing, go talk to Elovan at location 23W and show<br />
him the key.<br />
22) Go back to the temple at location 6W.<br />
23) Go to the Crypt guards at location 17 and talk to them.<br />
24) Examine Sorval's tomb at location 19 and leave.<br />
25) Go to the northern wing at location 16. On the way there, a guard stops<br />
the party and tells it that Ulbin was caught for stealing.<br />
26) Find Rhone at location 22W and talk to her about Ulbin. Get pennission<br />
to question Ulbin.<br />
27) If not already there, go to the northern wing at location 16.<br />
28) Go to the prison door at location 16W and knock on it. Once Silvan<br />
arrives, tell him Rhone sent the party.<br />
29) Go talk to Ulbin in the cell at location 21W. Once he's refused to speak,<br />
go talk to Silvan about it. at location l 9W.<br />
30) Agree not to hurt Ulbin and follow Silvan back to Ulbin's Cell at location<br />
21W. Once Silvan opens the door, keep walking towards Ulbin. As<br />
the party gets closer to him, he keeps talking.<br />
31) Once the party get close enough, Ulbin tells it where the amulet is hidden.<br />
32) Return to the temple at location 6W.<br />
33) Go to Ulbin's hiding place and look at location 30. This triggers the<br />
crash and Nortemus' death at location 27. Note: before looking under<br />
that rock it is a good idea to use the campfire ring at location 29; the<br />
party won't get another chance before entering the Volcano Core region.<br />
34) Accuse Galinix <strong>of</strong> murder. He attempts to repair the Seal but fails,<br />
resulting in his death.<br />
35) Talk to Fori, then enter the core and retrieve the Fire Ruby at location<br />
26. Refer to the Volcano Core region below for more information.<br />
36) Once back in the Seal Chamber, use the Fire Ruby on the Seal at location<br />
26 and save the verini.<br />
37) Use the Fire Ruby on the tapestry and activate it at location 15.<br />
38) Leave the volcano via the tapestry at location 15 or go explore all the<br />
places the party missed by using this walk-through.<br />
95
96<br />
t VOLCANO CORE<br />
t Locations and Events<br />
Note: Unlike most regions in WAKE OF THE RAVAGER, the volcano eruption<br />
is actually timed! The amount <strong>of</strong> time that the party has to make it<br />
through the region is governed by the difficulty setting that the party is<br />
playing under when the volcano begins to erupt. You might wish to consider<br />
performing a SAVE prior to beginning this section <strong>of</strong> the game. The<br />
party can know roughly how much time it has left by the number <strong>of</strong><br />
quakes that the volcano goes through. Each one <strong>of</strong> these violent shakes<br />
represents 25% <strong>of</strong> the total time to reach the core <strong>of</strong> the volcano. Once at<br />
the core, another (shorter) timer starts for the party's escape. If you have a<br />
very fast computer, standing still and scrolling around the screen can<br />
waste an incredible amount <strong>of</strong> time. Be sure that you have the cursor in<br />
look mode while scrolling around, as time only runs while you are in move<br />
mode. We recommend turning <strong>of</strong>f turbo for some parts (like the Sinking<br />
Stones Maze).<br />
If you find that your characters cannot complete the core in time no matter<br />
what they do, try setting the difficulty down to EASY. Although less <strong>of</strong> a<br />
challenge, this gives the party an almost unlimited amount <strong>of</strong> time to complete<br />
the region.<br />
97<br />
Synopsis<br />
The Fire Ruby, imprisoned in the core <strong>of</strong> the volcano for hundreds <strong>of</strong> years,<br />
finally weakens the bonds <strong>of</strong> the Seal and breaks it. Drawing on all <strong>of</strong> its powers,<br />
it forces the volcano to erupt. If the Seal cannot be mended in time, everything in<br />
and around the volcano is vaporized in the eruption. As the characters descend<br />
into the sweltering heat <strong>of</strong> the core, they find that the Draxans are also determined<br />
to get the Fire Ruby and they have a head start. The party must race to<br />
the core <strong>of</strong> the volcano and retrieve the Fire Ruby before everything is destroyed.<br />
I<br />
2<br />
3<br />
4<br />
These stairs spiral back up into the Volcano Temple. Leaving the core<br />
<strong>of</strong> the volcano without the Fire Ruby causes an eruption in a matter <strong>of</strong><br />
seconds. Once the characters have recovered the Fire Ruby, they must<br />
get back to these stairs and up to the Seal before the volcano erupts.<br />
Fire drakes in this cave attack on sight. The party can avoid them by<br />
simply not getting too close to them.<br />
If the party does not already have a grappling hook with it, the characters<br />
must get this one. The party cannot complete the Volcano<br />
Core region without one.<br />
A message tells the party that the volcano is beginning to erupt. At<br />
this time, a party <strong>of</strong> Draxan warriors begins to hunt the party. The<br />
number <strong>of</strong> Draxans is based on the difficulty setting.<br />
5 If the party moves towards the Draxans that are hunting it (as it<br />
should since there is a time constraint), the party should run into<br />
them about here.
98<br />
6<br />
7<br />
8<br />
9<br />
10<br />
11<br />
12<br />
13<br />
14<br />
A section <strong>of</strong> the ceiling collapses, sending a part <strong>of</strong> the floor above<br />
into the magma with four verini children clinging to it in terror. The<br />
stone sinks rapidly into the magma, and the children will die unless<br />
rescued. There is not much time, so act rapidly.<br />
This rock can either be pushed over or a grappling hook used on it in<br />
order to rescue the verini children. Rescuing the children earns the<br />
party an immediate 10,000 experience points, plus 10,000 more upon<br />
completion <strong>of</strong> the volcano. Once the children are rescued, they ask<br />
the party to escort them back to the spiral stairs. If the party opts to<br />
do this, the verini children must be led back to the stairs at location l.<br />
This earns the party another 15,000 experience points upon completion<br />
<strong>of</strong> the volcano.<br />
If at this location the party decides to leave the children and go deeper<br />
into the core, the children leave on their own. The party does not receive<br />
the 15,000 experience point bonus on completion <strong>of</strong> the volcano.<br />
Draxans lying in wait in an adjacent tunnel, leap out to attack the party.<br />
Galinix's body can be found. Injured by the fall and dragged here by<br />
fire drakes. Galinix can answer three or four <strong>of</strong> the party's questions<br />
before dying.<br />
A Draxan templar, waiting on the other side <strong>of</strong> the bridge for the party,<br />
yells and proceeds to destroy the bridge. Combat starts immediately.<br />
Using a grappling hook on these pillars allows the characters to swing<br />
back and forth between the columns. If the party is in combat when this<br />
happens, the character who swung across has his or her tum ended.<br />
If playing on HARD or HIDEOUS difficulty, some <strong>of</strong> these pits erupt with<br />
fire when the characters pass by them.<br />
Stepping here begins the Sinking Stones Maze. See the "Sinking<br />
Stones Maze" section on page 100, for step-by-step instructions (and<br />
a map) on how to complete it.<br />
15 Some drake claws. These are the claws that Elovan (see Temple<br />
Wings section for specifics) can use to make the Drake Gloves.<br />
16<br />
17<br />
18<br />
19<br />
20<br />
21<br />
22<br />
23<br />
24<br />
After completing the Sinking Stones Maze, Draxans leap from their<br />
hiding places behind some tall rocks. The difficulty setting determines<br />
the number <strong>of</strong> enemies to appear.<br />
These rocks can be attacked (with either a melee weapon or ranged<br />
weapon) and damage anything nearby as they collapse.<br />
A Draxan templar and some warriors. As the party approaches, the<br />
templar leaps to a nearby platform and the warriors attack. The Fire<br />
Ruby, however, is not used to being disrupted in such a manner and<br />
summons magma golems to deal with both groups.<br />
After the fight in the core, stones fall from the ceiling and allow passage<br />
for pursuing the templar.<br />
If playing on HARD or HIDEOUS difficulty, fire elementals jump from the<br />
magma. Difficulty setting determines the quantity <strong>of</strong> fire elementals.<br />
If the templar that escaped from the core fight makes it to this platform,<br />
he leaps across and awaits the party at location 22. If he's dead<br />
and the party has the Fire Ruby, the jump may knock the Fire Ruby<br />
from the party's hands. Be sure to look for it on the ground once the<br />
party is across.<br />
If the templar from the core makes it to this point, he animates the<br />
surrounding skeletons and throws the Fire Ruby onto a nearby rock.<br />
Every time a new round begins in combat, the rock with the Fire Ruby<br />
sinks a little further towards the magma. Once combat ends, the Fire<br />
Ruby sinks rapidly towards the magma. If it does sink into the<br />
magma, wait several seconds (in move mode) and the Fire Ruby is<br />
shot out <strong>of</strong> the magma and lands on the platform.<br />
A stone falls from the ceiling and gives the party convenient access<br />
back out <strong>of</strong> the core. This stone falls either after the Fire Ruby is<br />
recovered (if the Draxan's final stand has taken place) or when the<br />
party leaps across the magma jump at location 21 .<br />
99
100 ........................ llill ... llllll~ ...........<br />
Sinking Stones Ma:e<br />
The Sinking Stones Maze can be difficult to navigate. Some <strong>of</strong> the stones can trigger<br />
other ones to rise and fall. The way to trigger the stones is to walk over the middle<br />
<strong>of</strong> the stone. There is a "bloop" sound, and some <strong>of</strong> the stones will change.<br />
the party cannot get into a situa<br />
Go ahead and experiment with the stones -<br />
tion that cannot be undone.<br />
.... mliil ......................... lllli ........... 01<br />
•LORD WARRIOR'S CRYPT<br />
Step-by-step solution to the Maze:<br />
Unless specified otherwise, these directions require the party to step on the<br />
middle <strong>of</strong> each <strong>of</strong> the stones mentioned below. Those stones that the party<br />
should not step on the middle <strong>of</strong> have an "N" after the number.<br />
After jumping onto the first stone, step on the stones in the following order:<br />
1, 4N, 5, 9, 10, 9N, SN, 6, 7, 8.<br />
The party should now be over by the drake claws. Pick them up. To get<br />
through the rest <strong>of</strong> the maze:<br />
8, 7, 6, 5, 9, 10, 9N, 5, 4, 1, 2, 3, 12, 14, 15, 13, 11, 13, 16, 18, 20, 21 , 25, 21 ,<br />
19, 17, 17, 19, 17, 22, 35, 22,23,34, 26, 25,26N, 34N, 23N,24N, 27,29,31<br />
The party should now be through the entire Sinking Stones Maze.<br />
Synopsis<br />
This region is a catacomb <strong>of</strong> tombs and sarcophagi where many <strong>of</strong> the rooms<br />
have been converted for the Lord Warrior's use.<br />
The Crypt is located in an isolated area <strong>of</strong> Under T)'r where the Lord Warrior<br />
directs his forces and conducts his research and rituals for summoning the<br />
Tarrasque. It is well defended by monsters and traps. The Crypt was once the<br />
mausoleum for the kings and heroes <strong>of</strong> the people who lived in the ancient city<br />
upon which T)'r was built.<br />
The death <strong>of</strong> Kalak, the sorcerer-king <strong>of</strong> T)'r, while granting freedom to the citizens<br />
<strong>of</strong> T)'r, has unfortunately opened the door for an even greater evil. The .<br />
Dragon <strong>of</strong> Ur Draxa in the Valley <strong>of</strong> Dust and Fire sees the city as a way to gam<br />
a foothold in the City <strong>of</strong> T)'r region unopposed by other Dragons, the only opposition<br />
he takes seriously. To pave the way, he sent his Lord Warrior to stir terror<br />
in the hearts <strong>of</strong> the citizenry and secure a sanctuary for him.<br />
continues ...
102 .... mi; ........................... ~ ........ ...<br />
The Lord Warrior has fulfilled his master's wishes perhaps too well, secretly hoping<br />
to escape his servitude to the Dragon and set himself up as an equally powerful<br />
force in the world by awakening the Tarrasque, which he hopes to control in<br />
order to guarantee his safety from the Dragon and his grip over the lands <strong>of</strong> the<br />
City <strong>of</strong> Tyr region.<br />
Imprisoned in the Crypt is Kovar, a templar who was a warlord for Kalak. Kovar<br />
refused to be taken in by the Lord Warrior's plans. He is still intensely loyal to<br />
the dead Kalak and believes Tyr is headed for ruin without its sorcerer-king.<br />
Kovar desperately wishes to return to "the way things were." While he knows this<br />
is impossible, this drives his every action and makes him unpredictable. The Lord<br />
Warrior has not killed him because Kovar holds many <strong>of</strong> the city's military<br />
secrets. Despite indescribable tortures, Kovar has not revealed those secrets.<br />
Although Kovar knows the Lord Warrior is not responsible for Kalak's death,<br />
Kovar sees him as the embodiment <strong>of</strong> all that has gone wrong in Tyr and wants<br />
only to kill him, even if it means his own death. Of course, the party is only a little<br />
better in Kovar's eyes. He is a rather distasteful ally, but one the party may<br />
wish to employ since his focus on revenge against the Lord Warrior and his<br />
knowledge <strong>of</strong> the city are powerful forces in themselves and gets the party<br />
through some <strong>of</strong> the stickier spots in the Crypt.<br />
Wards and traps guard the corridors and chambers leading to the Lord Warrior's<br />
lair. If the party gets past these protections it can find information on what the Lord<br />
Warrior plans, how he will implement those plans, and how he can be stopped.<br />
In the lower ranks, Draxan templars are disgruntled with the Lord Warrior's plans<br />
and suspect him <strong>of</strong> treachery against the Dragon. The party may be able to prove<br />
this to the high templar, f umah, and so eliminate one <strong>of</strong> the Lord Warrior's weapons.<br />
Deep in the Crypt, the Lord Warrior makes final preparations for the awakening<br />
<strong>of</strong> the Tarrasque. All that remains is to activate the portal and step through to the<br />
Temple <strong>of</strong> the Cosmos where he can awaken the Tarrasque from its imprisonment<br />
in the Um <strong>of</strong> Utatci.<br />
The Lord Warrior senses the presence <strong>of</strong> the party in his Crypt, and throws a few<br />
extra defenses at it to assure that the party is eliminated. When the party reaches<br />
the Lord Warrior, it is too late. The portal is opened and the Lord Warrior steps<br />
through, leaving the party to face his giant skeletons.<br />
.. .. mi; ........................... ~ .......... 103<br />
Non-Player Characters in This Region<br />
Draxan Templar<br />
Location 2<br />
The Draxan templar is in the service <strong>of</strong> the Lord Warrior. He is delivering a<br />
message from the Lord Warrior to Jumah when the party intercepts him. The<br />
Draxan templar is cowardly and deceitful and lies to the party unless it threatens<br />
him with death. If the party lets him escape, he sounds the alarm to the<br />
other Draxans.<br />
Kovar lllyasch Ahbadhu<br />
Location 6<br />
Kovar is a Tyrian high templar who was in charge <strong>of</strong> city defenses before he<br />
was kidnapped by the Lord Warrior. The Lord Warrior captured Kovar in<br />
hopes <strong>of</strong> discovering any secrets Kalak may have had about Tyr, but soon he<br />
wearied <strong>of</strong> Kovar's obnoxious pretensions and chained him to a wall in the<br />
Crypt to feed to the monsters. The party may want to rescue Kovar since his<br />
hatred for the Lord Warrior is enough to provide a distraction when the party<br />
confronts the Lord Warrior in the King's House. Kovar also provides the party<br />
with the pro<strong>of</strong> it needs to give to Jurnah in order to convince the templars to<br />
abandon the Lord Warrior. Kovar may also warn the party <strong>of</strong> traps or <strong>of</strong>fer<br />
other useful information.<br />
Nnamdi<br />
Location 7<br />
The Lord Warrior captured Nnamdi in the attack on the Veiled Alliance<br />
Headquarters. After torturing Nnamdi and extracting from him all the information<br />
he needed, the Lord Warrior tossed Nnamdi down a pit.<br />
Jumah<br />
Location 26<br />
Jumah is a Draxan high templar. He is overseeing the Dragon's interest in Tyr,<br />
and ostensibly there to aid the Lord Warrior in preparing the Dragon's sanctuary.<br />
Jumah, however, suspects the Lord Warrior <strong>of</strong> treachery and finds himself<br />
faced with a choice between death at the Lord Warrior's hands or death<br />
at the Dragon's.
104 .... mlil ..................................... ...<br />
• Locations & Events<br />
Level 1<br />
Skeletal warriors, revenants, and greater feyrs prowl the corridors and chambers<br />
<strong>of</strong> the Crypt, attacking the characters whenever they are encountered.<br />
Though the characters are free to leave the crypt, they find the Drax.ans prepared<br />
for them when they return.<br />
1 The party enters the Crypt through a secret entrance. The other side<br />
<strong>of</strong> the entrance is at location 3 7 in 1)'r.<br />
2 A Drax.an templar who was about to leave turns and flees to location 3<br />
as soon as he sees the party. The party should catch him before he can<br />
sound the alarm. It is possible to interrogate him and convince him to<br />
leave with~ut sounding the alarm. The party should be very aggressive,<br />
ho~ever, since the Dr~an lies if he thinks the party does not follow up<br />
on its threats. He has information about Nnamdi, the Lord Warrior, the<br />
Drax.ans on the lower level, and Kovar. Killing the templar prevents the<br />
alarm from being sounded, but the party does not get the information.<br />
If the party lets him go, it can watch him to discover the entrance to the<br />
lower tunnels at location 3, even though the Drax.ans are alerted.<br />
3 The party may descend through the niche in the wall to location 22 on<br />
level 2 <strong>of</strong> the Crypt. If the templar from location 2 reaches this niche,<br />
he alerts the other Drax.ans to the party's presence. They then send out<br />
a force to stop the party and prepare defenses in the lower tunnels.<br />
4<br />
5<br />
6<br />
The party can climb down this niche to location 23 on level 2 <strong>of</strong> the<br />
Crypt. If the Drax.ans have been alerted, a group <strong>of</strong> Draxan warriors<br />
and templars attack the party when it descends.<br />
The characters can climb through the grates into a chamber below. If<br />
the ch~racters step on the grate, they may fall through into the cham<br />
~er. Giant skeletons attack the characters the first time they descend<br />
into the chamber, and there are random treasures and monsters in the<br />
niches. The characte:s must use a grappling hook to climb out. If they<br />
do not have a grappling hook, they can find one in one <strong>of</strong> the niches.<br />
Kovar, 1)'rian high templar captured by the Lord Warrior, is chained<br />
up in this room. Freeing him earns his grudging appreciation and he<br />
tells the party about the Lord Warrior and the Crypt. If the party asks<br />
Kovar about the Lord Warrior being a renegade, he gives the characters<br />
a scrap <strong>of</strong> paper torn from the Lord Warrior's diary which the<br />
party must show Jumah in order to convince him to leave the Crypt.<br />
Once Kovar is freed, he follows the party.<br />
.. .. mllil ................ llmiiil ..................... 05<br />
7 The characters can climb into the grate holes at these locations.<br />
Nnamdi can be found in the pit under these grates. The grates are not<br />
trapped. A giant snake nest is in the pit where Nnamdi is trapped. In<br />
order to rescue Nnamdi, the characters should kill the snakes before<br />
they attack. There are random treasures and monsters in the niches<br />
in the chamber. The characters must use a grappling hook to climb<br />
out <strong>of</strong> the chamber. If the characters do not have a grappling hook,<br />
they can find one in one <strong>of</strong> the niches.<br />
8 This is the Hall <strong>of</strong> Heroes where the best warriors <strong>of</strong> the ancient Tyr were<br />
laid to rest to guard their king. Several Drax.an templars and warriors are<br />
guarding this room now. They attack the party when it enters the room.<br />
9 The party may listen at the floor grates in this room to overhear a<br />
conversation between Jumah and one <strong>of</strong> his subordinates. These<br />
grates cannot be opened and are trapped.<br />
10 The door to the Hall <strong>of</strong> Heroes is locked. The party must retrieve the key<br />
from Jumah's <strong>of</strong>fice at location 28 on level 2 in order to open the door.<br />
11 The grates at these locations are trapped. If a thief is the active character,<br />
the trap may be disarmed.<br />
12 The party finds random treasure in these niches.<br />
13 Giant skeletons attack the characters if they look in this niche. If the<br />
characters look in the niche a second time, however, they find two<br />
magic scrolls.<br />
14 The party finds random monsters in these niches.<br />
15 This grate cannot be opened; it is not trapped.<br />
16 The party can find a psionic bracelet <strong>of</strong> mind bar and a magical star<br />
fruit in this niche.<br />
17 The party can find several magical fruits in this niche.<br />
18 If the party searches any <strong>of</strong> the sarcophagi at these locations, a skeletal<br />
warrior emerges and attacks.<br />
19 The party can descend through this niche into a chamber below.<br />
Greater feyrs attack the party when it arrives. The niche on the far right<br />
<strong>of</strong> the chamber takes the party back to level 1. The second niche from<br />
the left leads to another chamber where the party can find a potion <strong>of</strong><br />
invisibility to undead and a potion <strong>of</strong> cure serious wounds, as well as a<br />
pile <strong>of</strong> gems and coins. Skeletal warriors guard the treasure. The party<br />
must climb into the niche second from the right to return to the first<br />
chamber. The other niches in these chambers contain random treasure.
106 .... mliil .......... llli ...... l;m .... llil ..........<br />
20 The doors to the King's House are protected by lightning. The party must<br />
use the lightning rod from location 2 7 on level 2 <strong>of</strong> the Crypt to deactivate<br />
the lightning. When the party uses the lightning rod, it becomes a<br />
wand <strong>of</strong> lightning with one charge and the doors are opened. Entering<br />
the doors takes the party to location 29 on level 3 <strong>of</strong> the Crypt.<br />
21 If the party stands next to the wall at this location, it can break through<br />
the wall to a chamber beneath the King's House. There, the party finds<br />
the dead bodies <strong>of</strong> the team from Urik, along with a sleeping earth drake<br />
and a campfire ring where the characters can rest. If the party searches,<br />
it finds a magical star fruit a lotulis +2, arrows +3, a psionic bracelet <strong>of</strong><br />
inertial barrier, and a one use scroll <strong>of</strong> chain lightning. If the party uses<br />
the campfire ring in this chamber, the earth drake may awaken and<br />
attack. The party can return to the Hall <strong>of</strong> Heroes by climbing into the<br />
second niche from the left. The other niches contain random treasure.<br />
Level 2<br />
22 The niche on the north wall takes the party to location 3 on level 1 <strong>of</strong><br />
the Crypt. If the Draxans have been alerted to the party's presence, a<br />
large contingent <strong>of</strong> them attack.<br />
23 The niche on the north wall takes the party to location 4 on level 1 <strong>of</strong><br />
the Crypt.<br />
24 These niches are empty.<br />
25 These rooms are barracks for the Draxans. The Draxan warriors and<br />
templars attack if they see the party.<br />
26 Jumah, the high templar commanding the Draxans in Tyr, is in this<br />
room. He realizes the characters are more than a match for him, but<br />
nevertheless tries to convince them that their cause is hopeless. If the<br />
characters play against Jumah's loyalty to the Dragon <strong>of</strong> Ur Draxa<br />
using the scrap <strong>of</strong> paper from the Lord Warrior's diary that they get<br />
from Kovar, they can convince him that the Lord Warrior's defeat is<br />
also in his best interest. Jumah then tells the characters that the lightning<br />
rod, which opens the door at location 20 <strong>of</strong> level 1, is in his private<br />
study at location 27, and calls <strong>of</strong>f the other Draxan templars.<br />
2 7 The niche at this location takes the party to the chamber below which<br />
Jumah uses as his private study. The party can disarm the trap in the<br />
niche on the far left if Jumah was cooperative and told the party<br />
about the trap, or if the active character is a thief and successfully<br />
disarms it. Once the trap has been disarmed, or triggered, the party<br />
can find the lightning rod which opens the doors at location 20 on<br />
level 1. The second niche from the left contains a scroll <strong>of</strong> dispel<br />
.....a................-.-;....i..<br />
liilll ......... 107<br />
magic, while the niche on the far right contains random treasure. The<br />
second niche from the right takes the party back to Jumah's room.<br />
Unless the party obtained Jumah's permission to take the lightning<br />
rod, a group <strong>of</strong> Draxan warriors and templars attack.<br />
28 The key to the door at location 10 on level 1 is under the table.<br />
Level 3<br />
29 The stairs at this location lead back to the Hall <strong>of</strong> Heroes at location<br />
20 on level 1. When the party first enters, it finds the Lord Warrior<br />
preparing to leave for the Temple <strong>of</strong> the Cosmos. If Kovar is with the<br />
party, the Lord Warrior directs his anger at the templar. In either case,<br />
the Lord Warrior steps through the portal, leaving giant skeletons and<br />
skeletal warriors to fight the party. If the characters did not make a<br />
deal with Jumah, Draxan templars are also at this location to fight. If<br />
the characters leave the Crypt, they find obsidian golems and other<br />
monsters at this location when they return.<br />
30 The Lord Warrior's diary.<br />
31 If the party searches the sarcophagus at this location, it finds the<br />
Rune Staff, a quarterstaff +3. Behind the sarcophagus is a scroll in<br />
which the Lord Warrior has detailed his efforts to gain control <strong>of</strong> the<br />
Temple <strong>of</strong> the Cosmos and to awaken the Tarrasque.<br />
32 The party can use the Rune Staff it found at location 31 on the pyre to<br />
create an elemental rune <strong>of</strong> fire.<br />
33 The party can use the Rune Staff it found at location 31 on the bellows<br />
to create an elemental rune <strong>of</strong> air.<br />
34 The party can use the Rune Staff it found at location 31 on the rock to<br />
create an elemental rune <strong>of</strong> earth.<br />
35 The party can use the Rune Staff it found at location 31 on the basin<br />
to create an elemental rune <strong>of</strong> water.<br />
36 The portal at this location can be activated by placing the four run~s<br />
from locations 32-35 in the matching section <strong>of</strong> the arch. Once activated,<br />
the party can step through the portal and be taken to location 1<br />
in the Temple <strong>of</strong> the Cosmos region. Note, however, that once the party<br />
steps through, there is no way back. Also, if the party does not have<br />
Promere's Hammer, the Lyre <strong>of</strong> the Winds, the Cup <strong>of</strong> Life, or the Fire<br />
Ruby in their possession, an imbalance between the elemental spheres<br />
is created and the party cannot pass through to the Temple <strong>of</strong> the<br />
Cosmos. If this happens, the characters can make more runes in the<br />
manner described above, and try again when they have all four items.
108 .... mllilml ............... llmrillilil ...................<br />
t TEMPLE OF THE COSMOS<br />
.. ...a...........<br />
llii ......... 11111! .............. 109<br />
Synopsis<br />
The Temple <strong>of</strong> the Cosmos, a ring <strong>of</strong> megaliths in the middle <strong>of</strong> a forest, is a focus<br />
<strong>of</strong> elemental energy on the world <strong>of</strong> Athas. The Lord Warrior needs the Temple <strong>of</strong><br />
the Cosmos in order to draw enough power to break the imprisoning spell <strong>of</strong> the<br />
Urn <strong>of</strong> Utatci which holds the Tarrasque.<br />
Aravinda, a pyreen, came to the temple when its guardian was slain by the Lord<br />
Warrior, but she too was beaten, almost to the point <strong>of</strong> death, by the Lord<br />
Warrior. She can sacrifice the last <strong>of</strong> her strength to heal the party and thus rid<br />
Athas <strong>of</strong> the Tarrasque and Lord Warrior. She is also able to tell the party about<br />
the temple and the statues. If the party declines her <strong>of</strong>fer <strong>of</strong> healing, she fights on<br />
the party's side anyway.<br />
When the party makes it to the ring <strong>of</strong> stones, the Lord Warrior is swelled with<br />
power and he dismisses the party as insignificant as he releases the Tarrasque.<br />
He finishes the ritual, which blasts the surrounding region as his defiler magic<br />
saps the life from the land.<br />
All appears lost and a desperate battle ensues, but defeating the Tarrasque and<br />
Lord Warrior is only half the battle. A piece <strong>of</strong> the Tarrasque ~oats to the central<br />
altar where the Urn <strong>of</strong> Utatci is placed, and the Tarrasque begins to regenerate.<br />
The party must use the four artifacts with the statues <strong>of</strong> the elements which animate<br />
and encircle the altar. The statues use their elemental energy to imprison<br />
the Tarrasque, hopefully forever.<br />
Non-Player Characters in This Region<br />
Aravinda<br />
Location 2<br />
Aravinda is a female pyreen. She came to the Temple <strong>of</strong> the Cosmos when she<br />
felt the death <strong>of</strong> the druid who guarded the temple. The Lord Warrior, however,<br />
was too strong for her and drove her away. When the party meets her, she is<br />
half-dead from her fight with the Lord Warrior. Aravinda heals the party at the<br />
cost <strong>of</strong> her life, or follows the party and helps it fight. Aravinda has crucial<br />
information about how the party can seal the Tarrasque in the Um <strong>of</strong> Utatci.<br />
Lord Warrior<br />
Location 9<br />
The Lord Warrior is a male kaisharga. In life, the Lord Warrior was a 15thlevel<br />
templar, 20th-level defiler. The Lord Warrior came to the Temple <strong>of</strong> the<br />
Cosmos in order to complete his plan to awaken the Tarrasque as a means <strong>of</strong><br />
escaping the Dragon <strong>of</strong> Ur Draxa and establishing himself as an equally powerful<br />
force on Athas. The party wants to be careful when attacking the Lord<br />
Warrior since he has cast fire shield on himself.
110 .... mliii .......................... ~ ........ ..<br />
• Locations and Events<br />
I This is where the party appears after coming through the portal in the<br />
Crypt. When the party first arrives, a shambling mound moves from<br />
the underbrush and attacks.<br />
2 Aravinda, the pyreen protector <strong>of</strong> the Temple <strong>of</strong> Cosmos, is struggling<br />
along the path after an unsuccessful attempt to stop the Lord Warrior.<br />
She calls to the characters for help and explains how to enter the temple<br />
and what the they must do to seal the Tarrasque in the Um <strong>of</strong> Utatci. She<br />
is badly wounded, but <strong>of</strong>fers to use the last <strong>of</strong> her strength in order to<br />
heal the characters before their battle with the Tarrasque. If, in a gesture<br />
<strong>of</strong> heroism, the characters refuse her <strong>of</strong>fer, Aravinda follows them and<br />
gives them advice which may help in the fight against the Lord Warrior.<br />
3 Shambling mounds hide in the bushes at these locations, waiting to<br />
ambush the unwary.<br />
4<br />
5<br />
6<br />
The skeletal warriors who took the Cosmic Scepter from Aravinda<br />
patrol the path circling the temple. The party must find and defeat<br />
this group to retrieve the Cosmic Scepter, found on the leader's body.<br />
The Cosmic Scepter is used to lower the magic field at any <strong>of</strong> the four<br />
gates into the temple.<br />
This gate to the Temple <strong>of</strong> the Cosmos is attuned to the element <strong>of</strong> air.<br />
Two greater air elementals guard the gate. The party must use the<br />
Cosmic Scepter it retrieved from the skeletal warriors at location 4 on the<br />
capstone <strong>of</strong> the gate to lower the magical field which blocks entry into<br />
the temple. If the active character is a druid or cleric <strong>of</strong> the elemental<br />
sphere <strong>of</strong> air, he or she may be able to call upon the elemental forces to<br />
summon an air elemental. If the active character is not a druid or cleric<br />
<strong>of</strong> the appropriate sphere, greater elementals appear and attack the<br />
party. Once the magical field is lowered, the party may enter the temple<br />
where the Lord Warrior is performing the ritual to awaken the Tarrasque.<br />
This gate to the Temple <strong>of</strong> the Cosmos is attuned to the element <strong>of</strong><br />
fire. 1\vo greater fire elementals guard the gate. This gate operates in<br />
the same manner as the gate at location 5.<br />
.... m;a .................. J9i; .................... lll<br />
7<br />
8<br />
9<br />
This gate to the Temple <strong>of</strong> the Cosmos is attuned to the element <strong>of</strong><br />
earth. Two greater earth elementals guard the gate. The gate operates<br />
in the same manner as the gate at location 5.<br />
This gate to the Temple <strong>of</strong> the Cosmos is attuned to the element <strong>of</strong><br />
water. 1\vo greater water elementals guard the gate. The gate operates<br />
in the same manner as the gate at location 5.<br />
The statues at the center <strong>of</strong> the temple are the source <strong>of</strong> elemental power,<br />
placed there to guard against the Tarrasque eons ago. The Lord Warrior,<br />
however, has corrupted that power, and as the party steps into the temple,<br />
he releases the Tarrasque with a blast <strong>of</strong> defiler magic which leaves<br />
the entire area devastated. Once the Tarrasque has arisen, the gates lock<br />
and the party must defeat the Lord Warrior and the Tarrasque. The Lord<br />
Warrior has also summoned skeletal warriors, and the greater elementals<br />
at the gates join the battle as well. Be careful when attacking the Lord<br />
Warrior because he has cast fire shield on himself.<br />
As soon as the battle is over, the party must use Promere's Hammer,<br />
the Fire Ruby, the Lyre <strong>of</strong> the Winds , and the Cup <strong>of</strong> Life on the appropriate<br />
statues. If the party does not replace the artifacts quickly, the<br />
Tarrasque reforms and attacks again. When all four artifacts have<br />
been returned, the Tarrasque is safely sealed within the Urn <strong>of</strong> Utatci.<br />
Congratulations, the party wins!
112 .... .a .................. &:iim ..... llil ......... ..<br />
t UNDER TYR (THE SORROWS)<br />
.. ...a............<br />
illl .... lm ..... 1111 ............. 3<br />
Non-Player Charaders in This Region<br />
Gargal<br />
Location 2<br />
Gargal is an 8th-level human fighter, part <strong>of</strong> Shandel's group. Gargal lets the<br />
party into the sorrows if it shows pity for the predicament his band is in, then<br />
he asks if the party can help them. Otherwise, the party has to pay him SOO<br />
ceramic pieces to enter.<br />
Frangel<br />
Location 3<br />
Frangel is an 8th-level human fighter who was put in charge because <strong>of</strong> his<br />
bright wit. Frangel guards the entrance to the garbage area where everyone<br />
has been hearing strange sounds. The party can only pass Frangel after it has<br />
gotten permission from Shandel to look into the strange sounds.<br />
Trash Guards<br />
Location 4<br />
These are 8th-level humans who are members <strong>of</strong> Shandel's band that have<br />
been posted to guard duty. The guards <strong>of</strong>fer only vague information.<br />
Synopsis<br />
Before the city <strong>of</strong> Tyr was ravaged by the Dragon, before Athas underwent a<br />
transfonnation to a desert waste, there existed another city <strong>of</strong> Tyr, Old Tyr.<br />
This older city was destroyed in the cataclysm that transfonned Athas, and the<br />
new city was erected on top <strong>of</strong> it. Nevertheless, there are still some areas <strong>of</strong> the<br />
old city that are accessible from above. Many <strong>of</strong> these areas are homes to monsters<br />
and creatures who fear the daylight. Other areas have been cleaned out<br />
and are now homes for bands <strong>of</strong> thieves. Vast riches still lie below the streets<br />
<strong>of</strong> Tyr, for any <strong>of</strong> those that are strong or foolish enough to brave the monsters<br />
that protect them.<br />
Shandel<br />
Location 5<br />
Shandel is a mu! fighter who has organized some <strong>of</strong> Tyr's rabble into a group<br />
and taught them how to work together to survive. After a confrontation with<br />
another gang, Shandel brought his people down into Under Tyr to escape the<br />
other gangs that were threatening their existence. The character needs to talk to<br />
Shandel before they are allowed into the trash area at location 3. Once they face<br />
the umber hulks and return to tell Shandel, more umber hulks break through the<br />
west wall at location 10 and capture the citizens at location 9. Once the characters<br />
agree to rescue his people, Shandel gives them a staff sling +3.<br />
Ladle<br />
Location 6<br />
Ladle is a dwarven cook. He was one <strong>of</strong> Shandel's good friends, so when<br />
Shandel fled to the Sorrows, Ladle came with him. He serves as the healer for<br />
the group. Ladle can heal the party if it asks him.<br />
Citizens<br />
Location 9<br />
The citizens are 3rd-level human fighters. The weaker members <strong>of</strong> Shandel's<br />
band, they are currently clearing some trash from what they believe is a passage<br />
to another part <strong>of</strong> the Sorrows. These citizens are the ones that are captured<br />
by umber hulks when they burst through the west wall.
114 .......................... 111 ..... ~ ........ ...<br />
.. ....................... 111 ..... ~ ........... 115<br />
t Locations and Events<br />
1 This passage takes the party back up to the City <strong>of</strong> fyr, location 11 .<br />
2<br />
3<br />
Gargal the door guard blocks the entrance to the Sorrows until the<br />
party has paid him, attacked him, or asked him to help Shandel out.<br />
Frangel has been sent to watch the trash area and control access.<br />
After getting permission from Shandel at location 5 the party can<br />
enter this area.<br />
4 Other guards, also on trash guard duty.<br />
5 Shandel, who is bedridden because <strong>of</strong> two broken legs.<br />
6 Ladle.<br />
7 Several <strong>of</strong> Shandel's group are in these beds, recovering from wounds.<br />
8 This is the hole that Shandel has asked the party to check out.<br />
Upon close examination, a trio <strong>of</strong> umber hulks burst out <strong>of</strong> the<br />
hole and attack.<br />
9 Some <strong>of</strong> Shandel's people, clearing away some trash.<br />
10 This is where the umber hulks burst from the wall. They carry away<br />
the citizens and retreat into the ancient temple. The entrance to the<br />
temple can be found by wading through the trash.<br />
So"ows Temple<br />
This temple has been buried under fyr for centuries. Many creatures frequent<br />
this area. In fact, there are so many creatures that the supply seems endless -<br />
it is. There are always creatures in the Sorrows temple, and there are different<br />
ones each time the party enters it. The list <strong>of</strong> monsters includes greater feyrs,<br />
umber hulks, aurumvoraxes, and revenants.<br />
Treasure is also scattered throughout the level randomly. Skeletons may also<br />
hold treasure some are easier to loot than others. There are also chests located<br />
throughout the level. There is a 70% chance that any given chest has a trap on<br />
it on first inspection. Having a skilled thief in the party is the only reliable way<br />
to detect traps. Be careful, for some <strong>of</strong> the traps can be deadly!<br />
11 At this point the characters can go back into the Sorrows. If the characters<br />
have escorted the citizen from location 14 to here, when he<br />
leaves, he'll give them part <strong>of</strong> the c<strong>of</strong>fer key for location 18 and they<br />
get a 10,000 experience point bonus when he exits.<br />
12<br />
13<br />
14<br />
15<br />
16<br />
17<br />
18<br />
19<br />
20<br />
If the citizen at Location 14 is still alive, the party hears him crying<br />
for help.<br />
Umber hulks burst from the walls and attack.<br />
One <strong>of</strong> Shandel's party is trapped. The party needs to stand close to<br />
him in order to rescue him. Refusing to help causes his death. If the<br />
citizen gets to the exit, he gives the party part <strong>of</strong> the c<strong>of</strong>fer-key for<br />
location 18. If he dies, the key piece is on or near his body.<br />
If the citizen from location 14 is being escorted to the exit, more<br />
umber hulks burst from the walls.<br />
The skeleton in this room calls six revenants when searched.<br />
Searching again, after the battle, another part <strong>of</strong> the c<strong>of</strong>fer key for<br />
location 18 is found on the skeleton.<br />
Revenant guards appear as the party approaches the interior <strong>of</strong><br />
the temple.<br />
Opening the c<strong>of</strong>fer, the party receives Bloodletter, a +4 sword.<br />
However, this sword penalizes the user +4 Armor Class when in use.<br />
The guardians <strong>of</strong> the temple - four obsidian golems - activate when<br />
the c<strong>of</strong>fer opens. If the party puts the two pieces <strong>of</strong> the c<strong>of</strong>fer key<br />
together from location 16 and location 14 and uses the whole key on<br />
the c<strong>of</strong>fer, the golems do not activate.<br />
This book tells the tale <strong>of</strong> Bloodletter's effect on the defender <strong>of</strong><br />
the temple.<br />
Using a pick on this trash pile 40-50 times awards the party 15,000<br />
experience points.
116 .... mllil ....................................<br />
•MOSAIC ADVENTURES<br />
.........................<br />
ll\lm ..... i.i ........... 117<br />
The <strong>Museum</strong><br />
This room used to be part <strong>of</strong> an ancient castle. The busts in the room represent<br />
past rulers <strong>of</strong> the land. To escape the room, each bust must be properly manipulated.<br />
The Maze<br />
One <strong>of</strong> the few tapestries that connects two areas on Athas, the maze connects the<br />
Pyramid to the Jann Tribe region. The Draxans use this corridor to sneak kidnappers<br />
into the camp <strong>of</strong> the jann, in order to steal Magnolia. Unfortunately for the<br />
Draxans, there is a strange side effect in this area which causes amnesia.<br />
Elsewhere, two champions are fighting, similarly affected by the amnesia.<br />
Non-Player Characters in This Region<br />
Asquir<br />
Location 2<br />
Asquir is trapped until the Chandelier is repaired. Asquir interferes with the<br />
characters when they try to talk to Ludwig, unless he is placated.<br />
Ludwig<br />
Location 4<br />
The former king <strong>of</strong> the land which has been devastated. Like Asquir, Ludwig is<br />
trapped by the broken Chandelier. Ludwig, over the course <strong>of</strong> the battle, tells<br />
the characters his life story and eventually tells the party how to get out.<br />
Synopsis<br />
The Chandelier <strong>of</strong> Ancestry<br />
This ~o?m us~d to be an ancient banquet hall. The Chandelier <strong>of</strong> Ancestry was a<br />
benef1c1al art1fact used by the king <strong>of</strong> the land, now Ludwig the shadow. Until the<br />
Chandelier is repaired, any living form that enters its infiuence can be shattered into<br />
six pieces_, called Soul Shards, which attack all remaining living creatures. To fix the<br />
Chandelier, the party must put all <strong>of</strong> the shards into the Chandelier.<br />
The Confused Wizard<br />
Ikibod needs to find the formula which allows him to escape his magical prison.<br />
The party must put the ingredients which are scattered around the room into the<br />
pot at location 6 in the proper order.<br />
Ikibod<br />
Location 7<br />
Ikibod is a confused wizard who has been trapped and searches for the formula<br />
to free himself. Ikibod can't really help the party because <strong>of</strong> the curse<br />
that's been placed on him.<br />
Fletch<br />
Location 18<br />
An old man who can no longer talk, Fletch was dusting the busts when the room<br />
was sealed <strong>of</strong>f and he never found out how to get out. Because Fletch is limited to<br />
answering yes or no questions, he has little information. 1 tap - I don't know; 2<br />
taps - yes; 3 taps - no; 4 taps - he can't answer that question with "yes" or "no".<br />
The Parrot<br />
Location 19<br />
A parrot which is trapped like Fletch. The parrot has a number <strong>of</strong> valuable clues<br />
about how to solve the puzzle. If the characters feed the parrot crackers, the parrot<br />
automatically answers the next few questions correctly. If the lead character is<br />
a druid, he or she may be able speak to it, and possibly glean more information.
118 .... mi; .............. lill ............................<br />
.... miil .......... llli ......;m.... ~ .......... 119<br />
Hiuwar<br />
Location 22<br />
A champion from another land, fighting for the honor <strong>of</strong> his people. He<br />
believes that Quelle's people stole some gold from them. As it turns out,<br />
Quelle's people are allergic to gold, so they couldn't have stolen it.<br />
Quelle<br />
Location 22<br />
Quelle is a champion from a far land but has been affected by the amnesia <strong>of</strong><br />
the Maze, and therefore doesn't know enough to settle his dispute with Hiuwar.<br />
Magnolia<br />
Location 23<br />
The same Magnolia the party met in Humbleton and the Jann Tribe regions,<br />
but this time with amnesia. Magnolia has been kidnapped. Magnolia thinks<br />
that the Draxans that kidnapped her are her friends. She is much more likely<br />
to help the characters if they agree to help the Draxans too.<br />
• Locations and Events<br />
1 Leads to the Veiled Alliance Headquarters at location 13, after the<br />
Chandelier at location 3 has been repaired.<br />
2<br />
3<br />
4<br />
5<br />
6<br />
7<br />
8<br />
Asquir interferes with the characters talking to Ludwig, unless he is<br />
placated.<br />
The broken Chandelier can be repaired as soon as all <strong>of</strong> the shards on<br />
the ground are added to the broken mass.<br />
Ludwig, the insane, dead king. When the Chandelier is repaired, he is<br />
healed and disappears. Before he goes, however, he leaves a crystal<br />
shard on the ground for the characters, which can be forged into the<br />
Crystal Sword in the Volcano Wings.<br />
A magical tapestry, which leads to 'fyr at location 31 after the ingredients<br />
have been added into the pot at 6 in the proper order.<br />
This is the pot where the ingredients must be added. The proper order<br />
is: Baya Leaves, Erdlu's Blood, Randar's Powder, Hirvelian Herb,<br />
Bartini's Elixer, Gavinalia Blossom, and Sethuli Oil.<br />
Ikibod and Ikibod's book. Ikibod explains his problem to the characters,<br />
and recommends that they help, as they're trapped too. He diligently<br />
writes in his book any answers that the party finds.<br />
The magic scales reveal some <strong>of</strong> the clues to the puzzle if different<br />
ingredients are placed upon it and the results are read.<br />
9<br />
10<br />
11<br />
12<br />
13<br />
14<br />
15<br />
16<br />
17<br />
18<br />
19<br />
20<br />
21<br />
22<br />
23<br />
24<br />
Take the book from under the bookcase at location 17 and put it on<br />
the bust <strong>of</strong> Biblid.<br />
Take the sheet from under the parrot at location 19 and put it over the<br />
bust <strong>of</strong> Tamind.<br />
Take the mirror from the ground and put it on the bust <strong>of</strong> Finali.<br />
Leave the bust <strong>of</strong> Terris alone.<br />
Take the bust <strong>of</strong> Horace <strong>of</strong>f <strong>of</strong> his stand and place him on the empty<br />
stand at location 16, after the characters have taken Ellith <strong>of</strong>f.<br />
Put the bag <strong>of</strong> money from the ground in the slot on the top <strong>of</strong><br />
Kaldumeir's head.<br />
Break the bust <strong>of</strong> Khildril.<br />
Take the bust <strong>of</strong> Ellith <strong>of</strong>f <strong>of</strong> the pedestal and put it in the characters'<br />
inventory.<br />
This bookcase is moveable. Under it is the book used with Biblid.<br />
Fletch, who knows very little.<br />
The parrot, who has quite a bit <strong>of</strong> information if a druid talks to it or<br />
another character feeds him some crackers. The sheet to be put on<br />
Tamind is found at the base <strong>of</strong> the parrot's perch.<br />
After all <strong>of</strong> the busts in locations 9 to 16 have been manipulated, add<br />
all <strong>of</strong> the pieces <strong>of</strong> the mirror which are scattered about the room to<br />
the broken mirror. This repairs it. The party can then go back to the<br />
Veiled Alliance Headquarters at location 14.<br />
Leads to the Pyramid at location 24. Magnolia waits for the party in<br />
the maze and the Draxan soldiers disappear if the characters use this<br />
exit while Magnolia is following them. The cabinet in the Pyramid<br />
returns the party to the Mosaic.<br />
Hiuwar and Quelle, who are in a never-ending combat. The characters<br />
can solve their problem by: 1) Finding out Quelle's name from Hiuwar,<br />
and the fact that he stole gold. 2) Finding out from Quelle that Hiuwar is<br />
using a "poisoned" weapon. 3) Finding out from Hiuwar that the sword<br />
is made with gold. At this point, Quelle mentions that he coulc.:n't have<br />
possibly stolen gold, for it is poisonous to his people, and the fight stops.<br />
Magnolia and the Draxan soldiers. No one.remembers anything,. so<br />
the party can convince the group to follow it to s~fety. At that pomt<br />
Magnolia remembers and orders the Draxans slam.<br />
Exit to the Jann Tribe region, location 2.
120 ................... lilm .... lili:il ....... ~ ............<br />
• TREASURE GUIDE •<br />
The following pages list the majority <strong>of</strong> magical items found in WAKE OF THE<br />
RAVAGER. If an item's special ability is similar to that <strong>of</strong> a spell, please refer to<br />
the appropriate spell description in the rule book for information on what that<br />
spell does. Items are divided by type, so all rings are listed together, all wands,<br />
together, all fruit together, etc.<br />
•Armor<br />
The characters must wear armor on the appropriate parts <strong>of</strong> their body to get the<br />
desired effects. Simply carrying them around in the their inventories won't do.<br />
NAME<br />
Helm +I<br />
Helm +3<br />
Helm <strong>of</strong> Domination<br />
Leathers +3<br />
Promere's Armor<br />
Shield +1<br />
SPECIAL AITRIBUTE<br />
+l to AC<br />
+3 to AC<br />
Domination<br />
+3 to AC<br />
+3 to AC per Piece<br />
+l to AC<br />
LOCATION<br />
(Location Varies)<br />
Cloud<br />
City <strong>of</strong>Tyr<br />
Silt Sea Islands<br />
The Underdark<br />
(Location Varies)<br />
•Bracelets<br />
Note that only psionicists can use bracelets. Use bracelets the same way the<br />
party would use a scroll. Like the fruit below, bracelets can be found at various<br />
locations scattered throughout WAKE OF THE RAVAGER, so we have not listed<br />
their locations.<br />
BRACELET POWERS<br />
Animal Affinity<br />
Bi<strong>of</strong>eedback<br />
Detonate<br />
Ego Whip<br />
Energy Containment<br />
Flesh Armor<br />
Graft Weapon<br />
Inertial Barrier<br />
Intellect Fortress<br />
Lend Health<br />
Life Drain<br />
Mind Bar<br />
Project Force<br />
Psionic Blast<br />
Share Strength<br />
Synaptic Static<br />
.. .. m; .......... mil .............. llill .......... 121<br />
•Fruit<br />
Fruit is scattered all through WAKE OF THE RAVAGER, so we have not listed their<br />
locations. The party may also buy (and sell) fruit. Note that some fruit have<br />
different attributes than in DARK SUN"': THE SHATIERED LANDS.<br />
NAME<br />
Acorn<br />
Apple<br />
Banana<br />
Blue Berry<br />
Corn<br />
Green Grape<br />
Lemon<br />
Lime<br />
Orange<br />
Orange Grapes<br />
Orange Pear<br />
Purple Grapes<br />
Raspberry<br />
Red Pear<br />
Star Fruit<br />
White Grapes<br />
SPECIAL ATTRIBUTES<br />
Ironskin<br />
Protection from Lightning<br />
Cure Disease<br />
Remove Paralysis<br />
Barks kin<br />
Bless<br />
Psionic Restore<br />
Cure Critical Wounds<br />
Aid<br />
Neutralize Poison<br />
Cure Light Wounds<br />
Cure Blindness<br />
Find Traps<br />
Cure Serious Wounds<br />
Remove Fear<br />
Free Action<br />
•Potions<br />
Potions are usable by every class in the game. They act as one-use spells.<br />
THE POTION'S POWER<br />
Cloak <strong>of</strong> Bravery<br />
Creeping Doom<br />
Cure Critical Wounds<br />
Cure Light Wounds<br />
Cure Serious Wounds<br />
Free Action<br />
Heal<br />
Invisibility to Undead<br />
Magical Vestment<br />
Protection From Fire<br />
LOCATION<br />
Veiled Nliance Headquarters<br />
Silt Sea Islands<br />
Volcano<br />
Volcano<br />
Volcano<br />
(Location Varies)<br />
Volcano<br />
(Location Varies)<br />
(Location Varies)<br />
Volcano
122 123<br />
•Scrolls<br />
One-Use Scrolls<br />
Only preservers can use scrolls. Scrolls give the preserver spells that he or she SPECIAL ATIRIBUTES LOCATION<br />
doesn't have in his or her spellbook. If you right-click on a scroll in the party<br />
Armor<br />
(Location Varies)<br />
inventory, a description window appears with the appropriate spell icon.<br />
Blink<br />
(Location Varies)<br />
Clicking on the spell icon allows a character to memorize the spell and add it<br />
to his or her spellbook. If the character already knows the spell, clicking on<br />
Burning Hands<br />
(Location Varies)<br />
the icon simply casts it. There are also one-use scrolls, which when right- Chain Lightning (Location Varies)<br />
clicked cast it and then disappear from the character's inventory. Charm Monster (Location Varies)<br />
Cone <strong>of</strong> Cold<br />
(Location Varies)<br />
Standard Scrolls<br />
Control Undead<br />
(Location Varies)<br />
SPECIAL ATIRIBUTES LOCATION Death Spell (Location Varies)<br />
Blur (Location Varies) Disintegrate (Location Varies)<br />
Chain Lightning (Location Varies) Dismissal (Location Varies)<br />
Chaos Volcano Dispel Magic (Location Varies)<br />
Chill Touch (Location Varies) Globe <strong>of</strong> Invulnerability (Location Varies)<br />
Cloud kill (Location Varies) Domination (Location Varies)<br />
ColorSpray (Location Varies) Enlarge (Location Varies)<br />
Delayed Blast Fireball The Underdark Finger <strong>of</strong> Death Kalak's Pyramid<br />
Feeblemind (Location Varies) Flame Sphere (Location Varies)<br />
Fire Shield Volcano Forcecage (Location Varies)<br />
Flame Arrow Volcano Haste (Location Varies)<br />
Fog Cloud (Location Varies) Hold Monster (Location Varies)<br />
Gaze Re~ection (Location Varies) Ice Storm (Location Varies)<br />
Glitterdust (Location Varies) Incendiary Cloud (Location Varies)<br />
Grease (Location Varies) Lightning Bolt (Location Varies)<br />
Hold Undead (Location Varies) Magic Missile (Location Varies)<br />
Improved Slow (Location Varies) Melfs Acid Arrow (Location Varies)<br />
Minor Globe <strong>of</strong> Invulnerability Veiled Alliance Headquarters Meteor Swarm Volcano<br />
Me/fs Minute Meteors (Location Varies) Monster Summoning VI (Location Varies)<br />
Mirror Image (Location Varies) Power Word, Kill (Location Varies)<br />
Mordenkainen's Sword Kalak's Pyramid Protection from Paralysis (Location Varies)<br />
Pebble to Boulder Kalak's Pyramid Serten's Spell Immunity (Location Varies)<br />
Psionic Damper (Location Varies) Spider Strand Veiled Alliance Headquarters<br />
Reincarnation (Location Varies) Stinking Cloud (Location Varies)<br />
Otiluke's Resilient Sphere (Location Varies) Stoneskin (Location Varies)<br />
Scare (Location Varies) Summon Greater Elemental (Location Varies)<br />
Shocking Grasp (Location Varies) Vampiric Touch (Location Varies)<br />
Slow City <strong>of</strong> Tyr Wall <strong>of</strong> Fire (Location Varies)<br />
Spirit Armor (Location Varies) Wall <strong>of</strong> Fog (Location Varies)<br />
Tenser's Transformation (Location Varies) Web (Location Varies)
124 ........................ ~ ............... ...<br />
t Swords and Daggers<br />
NAME<br />
Blood letter<br />
Crystal Sword<br />
Dagger +2<br />
Dragons bane<br />
El's Drinker<br />
Life Stealer<br />
Steel Sword + 1<br />
Steel Sword +2<br />
Sword +2<br />
Two-handed Sword +3<br />
SPECIAL ATIRIBUTES<br />
+4 (to hit & damage)<br />
Cause Blindness, +3 (to hit & damage)<br />
+2 (to hit & damage)<br />
+4 (to hit & damage)<br />
Vampiric Touch, +2 (to hit & damage)<br />
Disintegrate, +2 (to hit & damage)<br />
+ 1 (to hit & damage)<br />
+2 (to hit & damage)<br />
+2 (to hit & damage)<br />
+3 (to hit & damage)<br />
LOCATION<br />
UnderTyr<br />
Volcano<br />
City <strong>of</strong>Tyr<br />
Beginning Party<br />
El's Temple<br />
Kalak's Pyramid<br />
Beginning Party<br />
City <strong>of</strong>Tyr<br />
Kalak's Pyramid<br />
(Location Varies)<br />
• Miscellaneous Items<br />
As this section's name implies, the items below do not fit in one <strong>of</strong> the other<br />
treasure categories. While some items are very powerful, some are also very<br />
weak. Items without charges listed either have unlimited charges or cast a<br />
constant spell on the wearer.<br />
NAME SPECIAL ATIRIBUTES LOCATION<br />
Bracers <strong>of</strong> AC 2 Gives user AC 2 The Underdark,<br />
Kalak's Pyramid<br />
Bracers <strong>of</strong> AC 4 Gives user AC 4 Veiled Nliance Headquarters<br />
Deck <strong>of</strong> Illusions Monster Summoning V City <strong>of</strong>Tyr<br />
Drake Gloves +3 (to hit & damage) Volcano<br />
Psi Powerstone Psionic Restore City <strong>of</strong>Tyr<br />
Feather Fan Activates Magic Tapestry Veiled Nliance Headquarters<br />
Ranger Boots +6 to Movement Humbleton Forest<br />
Ring <strong>of</strong> Strength + 1 to Strength (Location Varies)<br />
Scarab <strong>of</strong> Protection Protection From Evil, + 1 AC Veiled Nliance Headquarters<br />
Stalker Cloak Invisibility The Clouds<br />
Wand <strong>of</strong> Fireball Fireballs The Underdark<br />
Wand <strong>of</strong> Lightning Lightning (Location Varies)<br />
Wand <strong>of</strong> Magic Missiles Magic Missiles The Underdark<br />
Wand <strong>of</strong> Power Power Word-Stun (Location Varies)<br />
t Miscellaneous Weapons<br />
NAME SPECIAL ATTRIBUTES LOCATION<br />
Arrows +1 + 1 (to hit & damage) Beginning Party<br />
Arrows +2 +2 (to hit & damage) (Location Varies)<br />
Arrows +3 +3 (to hit & damage) (Location Varies)<br />
Axe+l + 1 (to hit & damage) (Location Varies)<br />
Axe+2 +2 (to hit & damage) Silt Sea Islands<br />
Beast Club Charm, + l (hit/dam) Humbleton<br />
Bow <strong>of</strong> Accuracy +3 (to hit & damage) Humbleton<br />
Cahulaks +3 +3 (to hit & damage) (Location Varies)<br />
Chatchka +1 + 1 (to hit & damage) (Location Varies)<br />
Chatchka <strong>of</strong> Focus Heal Focus Heat, +2 (to hit & damage) City <strong>of</strong> Tyr<br />
Double Spear + 1 + 1 (to hit & damage) Kalak's Pyramid<br />
Great Axe +3 +3 (to hit & damage) (Location Varies)<br />
Gythka +1 + 1 (to hit & damage) Beginning Party<br />
Gythka +3 +3 (to hit & damage) Veiled Nliance<br />
Headquarters<br />
Jasmine<br />
Cloak <strong>of</strong> Bravery, +3(to hit & damage) The Underdark<br />
Latu/is +1 + 1 (to hit & damage) Kalak's Pyramid<br />
Latu/is +2 +2 (to hit & damage) Kalak's Pyramid<br />
Latu/is +3 +3 (to hit & damage) (Location Varies)<br />
Mace +1 + 1 (to hit & damage) Kalak's Pyramid<br />
Mace+2 +2 (to hit & damage) Volcano<br />
Polearm +2 +2 (to hit & damage) (Location Varies)<br />
Quarterstaff+ 1 + 1 (to hit & damage) Beginning Party<br />
Quarterstaff +2 +2 (to hit & damage) Veiled Nliance<br />
Headquarters<br />
Quarterstaff +3 +3 (to hit & damage) Crypt<br />
Sling +1 + 1 (to hit & damage) Beginning Party<br />
Sling+2 +2 (to hit & damage) Volcano<br />
Staff <strong>of</strong> Paralysis Paralysis, +2 (to hit & damage) Yuan-ti Tunnels<br />
Staff Sling +3 +3 (to hit & damage) UnderTyr<br />
Toothed Club Shocking Grasp, +2 (to hit & damage) City <strong>of</strong>Tyr<br />
125
•CREDITS•<br />
Authors<br />
CHRIS CARR, ADAM lsGREEN, DoN McCLURE<br />
Contributing Authors and Editors<br />
JONATHAN KROMREY, MARK WHISLER<br />
Documentation Manager<br />
EILEEN MATSUMI<br />
Producer<br />
DAN CERMAK<br />
Associate Producer<br />
RICK WHITE<br />
Test Supervisor<br />
GLEN CURETON<br />
Product Testers<br />
CHRIS LANKA, BEN COOLEY<br />
Special Thanks To<br />
}IM WARD<br />
Graphic Design and DTP<br />
Louis Saekow Design: DAVE BOUDREAU, LEEDARA ZOLA<br />
STRATEGIC SIMULATIONS, INC. reserves the right to make improvements in the product described in this clue book<br />
at any time and without notice.<br />
Strategic Simulations, Inc. makes no warranties, expressed or implied, with respect to this clue book, its quality, merchantability<br />
or fitness for any particular purpose. This clue book is provided "as is."<br />
ADVANCED DUNGEONS & DRAGONS, AD&D, DARK SUN and the TSR logo are trademarks owned by and used under<br />
license from TSR, Inc. Lake Geneva, WI USA. All TSR characters, character names, and the distinctive likenesses<br />
there<strong>of</strong> are trademarks owned by and used under license from TSR, Inc.<br />
©1994 TSR, Inc. ©1994 Strategic Simulations, Inc. All Rights Reserved.<br />
This clue book is copyrighted and includes proprietary information belonging to TSR, Inc. and Strategic Simulations,<br />
Inc. No one is permitted to sell copies <strong>of</strong> this clue book to any person or institution except as provided for by written<br />
agreement with TSR, Inc. and Strategic Simulations, Inc. No one may copy, photocopy, reproduce, translate, or reduce<br />
to machine-readable form this clue book without the prior written consent <strong>of</strong> TSR, Inc. and Strategic Simulations, Inc.<br />
Any persons reproducing any portion <strong>of</strong> this clue book for any reason, an any media, shall be guilty <strong>of</strong> copyright violation<br />
and subject to the appropriate civil or criminal action at the discretion <strong>of</strong> the copyright holder(s).
S!<br />
..... he DARK SUN'" game world<br />
<strong>of</strong> Athas is a ferociously<br />
hostile land. For most <strong>of</strong> its<br />
inhabitants, mere survival is a<br />
full-time job. So, what kind <strong>of</strong><br />
odds does that give one whose<br />
quest it is to face the fire - to<br />
challenge the very powers that<br />
scorch this infernal wasteland?<br />
Fear not - that's where<br />
the WAKE OF TIIE RAVAGER<br />
CLUE BooK comes in. As your<br />
most powerful ally, it prepares<br />
you for your trial by fire!<br />
Here's what's inside:<br />
• DETMLED MAPS.<br />
All events are pinpointed as you<br />
easily navigate the entire game.<br />
•LISTS.<br />
Don't miss a thing - all magical<br />
treasures are revealed.<br />
• DESCRIPTIONS.<br />
All encounters and treasures are<br />
described in detail - you won't miss any<br />
<strong>of</strong> the adventure or loot!<br />
WAKE OF THE RAVAGER CLUE BooK:<br />
The Sunscreen <strong>of</strong> Champions.<br />
A<br />
Detailed maps<br />
keep you on the<br />
path to victory.<br />
ADVANCW DUNGWNS & DRAGONS. AO&D. DARK SUN. lh< TSR logo, ond 1U TSR characl,<br />
characl