61-721 model: 61-722 - Ideal Industries Inc.
61-721 model: 61-722 - Ideal Industries Inc.
61-721 model: 61-722 - Ideal Industries Inc.

You also want an ePaper? Increase the reach of your titles
YUMPU automatically turns print PDFs into web optimized ePapers that Google loves.
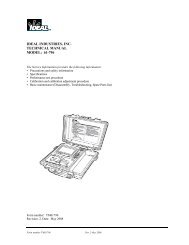
IDEAL INDUSTRIES, INC.<br />
TECHNICAL MANUAL<br />
MODEL: <strong>61</strong>-<strong>721</strong><br />
MODEL: <strong>61</strong>-<strong>722</strong><br />
The Service Information provides the following information:<br />
• Precautions and safety information<br />
• Specifications<br />
• Performance test procedure<br />
• Calibration and calibration adjustment procedure<br />
• Basic maintenance (replacing the battery)<br />
Form number: TM<strong>61</strong><strong>721</strong>-2<br />
Revision: 2. Date: May 2002<br />
Form number TM<strong>61</strong><strong>721</strong>-2 Rev 2 May 2002
TABLE OF CONTENTS<br />
Title<br />
Page<br />
Introduction 1<br />
Precautions and Safety Information 1<br />
Safety Information 1<br />
Specifications 2<br />
General Specification 2<br />
Voltage Specifications 2<br />
Current Specifications 2<br />
Resistance Specifications 2<br />
Frequency Specification 2<br />
Diode Specifications 2<br />
Continuity Specifications 2<br />
Performance Verification 3<br />
Calibration 4<br />
Replacing the Battery 5<br />
Form number TM<strong>61</strong><strong>721</strong>-2 Rev 2 May 2002
Page 2<br />
General specifications<br />
Characteristics<br />
Description<br />
Display<br />
3 ½ Digit LCD display<br />
Display Count 2000 count, maximum reading 1999<br />
Over range Indication<br />
“OL” is displayed<br />
Sampling Rate<br />
2.5 time/second<br />
Operating Environment:<br />
Relative Humidity<br />
0°C to 50°C (32°F to 122°F)<br />
0 ~ 75% RH<br />
Storage Environment:<br />
-20°C to 60°C (-4°F to 140°F) at
Page 3<br />
PERFORMANCE VERIFICAITONS<br />
Perform the following analysis, if the meter conforms to the limits listed in Table 1 the meter is functioning<br />
correctly. If the meter does not conform to any of the listed limits the calibration procedure must be<br />
performed.<br />
Performance Verification Preparation<br />
1. Turn on the Calibrator, allow calibrator to warm up. Temperature Stabilization<br />
should be reached after 30 minutes.<br />
2. Remove battery cover and using a calibrated meter to ensure the battery measures a minimum of 7.5V<br />
DC. If the battery measures under 7.5V DC, replace the battery before beginning the performance test.<br />
3. Input the values listed in Table 1<br />
Table 1 Performance Verification<br />
Function<br />
Input Low Limit High Limit<br />
Setting/Range<br />
ACV 200 190V AC @ 50Hz 187.3 192.7<br />
ACV 200 190V AC @ 500Hz 185.8 194.2<br />
ACV 600 500V AC @ 50Hz 490 510<br />
ACV 600 500V AC @ 500Hz 486 514<br />
DCV 600 500V DC 496 503<br />
ACA 20A 10A @ 50Hz 9.81 10.19<br />
ACA 20A 10A @ 500Hz 9.60 10.40<br />
ACA 200A 100A @ 50Hz 98.1 101.9<br />
ACA 200A 100A @ 500Hz 96.0 104.0<br />
ACA 1000A 1000A @ 50Hz 882.5 917<br />
Hz 2.0 KHz @ 80V rms .996 1.004<br />
Hz 20 KHz @ 80V rms 9.96 10.04<br />
Ω 2.000K 100 .986 1.014<br />
Ω 200k 100.0k 98.6 101.4<br />
Diode Test 500mV DC .467 .533<br />
Continuity Test 80Ω, Beep on<br />
120Ω, Beep off.<br />
Continuity Test 2K<br />
20 Ω Beep on,<br />
40 Ω Beep off<br />
Form number TM<strong>61</strong><strong>721</strong>-2 Rev 2 May 2002
Page 4<br />
CALIBRATION<br />
Calibration Preparation<br />
1. Turn on the Calibrator, allow calibrator to warm up. Temperature Stabilization<br />
should be reached after 30 minutes.<br />
2. Disconnect the test leads and turn the range switch to “OFF”.<br />
3. Remove the screws holding the battery cover and one at the jaw.<br />
4. Remove the case bottom using care not to damage the battery connector and leads<br />
to the continuity beeper. (Beeper is attached to the bottom case cover.)<br />
5. Using a calibrated meter ensure the battery measures a minimum of 7.5V DC.<br />
If the battery measures under 7.5V DC, replace the battery.<br />
Calibration Procedure<br />
It is recommended that all IDEAL meters undergo the following calibration procedure on<br />
an annual basis.<br />
The class of calibrator or equipment should have an accuracy that exceeds, by an expectable ratio the<br />
accuracy of this instrument.<br />
Model <strong>61</strong>-<strong>721</strong><br />
DCV Calibration<br />
1. Set the function/range to the 600V DC.<br />
2. Apply 600V DC to the V and COM input jacks.<br />
3. Adjust R40 until display reads 600.<br />
Disconnect the source from the meter.<br />
ACA Calibration<br />
1. Set the function/range to the 200A AC.<br />
2. Apply 100A@50Hz to the meter, making sure the measured wire is in the center of the jaw.<br />
3. Adjust R022 until display reads 100.0 +/-1digit.<br />
Disconnect the source from the meter.<br />
Model <strong>61</strong>-<strong>722</strong><br />
DCV Calibration<br />
1. Set the function/range to the 600V DC.<br />
2. Apply 600V DC to the V and COM input jacks.<br />
3. Adjust R43 until display reads 600.<br />
Disconnect the source from the meter.<br />
ACA Calibration<br />
1. Set the function/range to the 200A AC.<br />
2. Apply 100A@50Hz to the meter, making sure the measured wire is in the center of the jaw.<br />
3. Adjust R022 until display reads 100.0 +/-1digit.<br />
Disconnect the source from the meter.<br />
Form number TM<strong>61</strong><strong>721</strong>-2 Rev 2 May 2002
Page 5<br />
Battery Replacement (refer to Figure 2)<br />
1. Disconnect the test leads from any circuit under test and turn off meter.<br />
2. Use a Philips head screwdriver to remove the two screws on battery cover.<br />
3. Remove battery from compartment and unsnap the battery connector.<br />
4. Install new 9V battery (NEDA #1604). An alkaline type is recommended.<br />
5. Install new battery into compartment using care not to pinch or bind battery leads.<br />
6. Reinstall battery cover.<br />
Form number TM<strong>61</strong><strong>721</strong>-2 Rev 2 May 2002