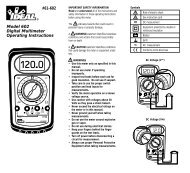
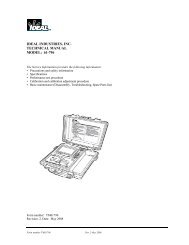
61-312 Resi-Pro⢠Multimeter Manual - Ideal Industries Inc.
61-312 Resi-Pro⢠Multimeter Manual - Ideal Industries Inc.
61-312 Resi-Pro⢠Multimeter Manual - Ideal Industries Inc.

Create successful ePaper yourself
Turn your PDF publications into a flip-book with our unique Google optimized e-Paper software.
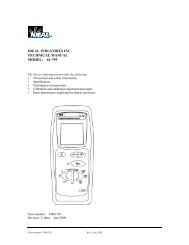
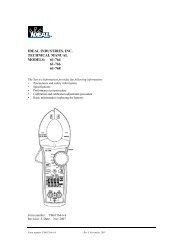
IDEAL INDUSTRIES, INC.<br />
TECHNICAL MANUAL<br />
MODELS: <strong>61</strong>-<strong>312</strong><br />
<strong>61</strong>-314<br />
The Service Information provides the following information:<br />
● Precautions and safety information<br />
● Specifications<br />
● Basic maintenance (cleaning, replacing the battery and fuses)<br />
● Performance test procedures<br />
● Calibration and calibration adjustment procedures<br />
Form Number: TM<strong>61</strong><strong>312</strong>-4<br />
Revision: 2. Date: August 2007<br />
Form Number TM<strong>61</strong><strong>312</strong>-4 Rev 2 Aug 2007
TABLE OF CONTENTS<br />
Introduction<br />
Page<br />
Precautions and Safety Information 1<br />
Symbols 1<br />
Safety 2<br />
Specifications 3<br />
General Specification 3<br />
Measurement Characteristics 4<br />
Voltage Specification 4<br />
Current Specifications 5<br />
<strong>Resi</strong>stance, Diode, Continuity, Capacitance Specifications<br />
6<br />
Frequency, Temperature Specification 7<br />
Auto Power Off, Data Hold 7<br />
Physical and Environmental Characteristics<br />
8<br />
Certifications and Compliances 8<br />
Required Equipment 9<br />
Basic Maintenance 10<br />
Opening the Meter Case 10<br />
Replacing the Battery 10<br />
Replacing Fuses 11<br />
Fuse Replacement 11<br />
Cleaning 11<br />
Performance Tests 12<br />
Testing the Display 12<br />
Testing the Voltage Function<br />
13<br />
Testing the DC Current Functions<br />
14<br />
Testing the AC Current Functions 14/15<br />
Testing the <strong>Resi</strong>stance Function 16<br />
Testing the Capacitance, Diode, Continuity Functions<br />
17<br />
Testing the Frequency Function 17/18<br />
Testing the Temperature Function 18<br />
Calibration 19<br />
Calibrating Adjustment, DCV, ACV DCA and Temperature Functions 19/20<br />
1<br />
Form Number TM<strong>61</strong><strong>312</strong>-4 Rev 2 Aug 2007
Introduction<br />
Page 1<br />
Warning<br />
To avoid shock or injury, do not perform the verification tests or calibration procedures<br />
described in the manual unless you are qualified to do so.<br />
The information provided in this document is for the use of qualified personnel only.<br />
Caution<br />
The <strong>61</strong>-<strong>312</strong> and <strong>61</strong>-314 series contain parts that can be damaged by static discharge.<br />
Follow the standard practices for handling static sensitive devices.<br />
For additional information about IDEAL INDUSTRIES, INC. and its products, and services, visit<br />
IDEAL INDUSTRIES, INC. web site at:<br />
www.idealindustries.com<br />
Precautions and Safety Information<br />
Use the meter only as described in the Service <strong>Manual</strong>. If you do not do so, the protection<br />
pr ovided by the meter may be impaired. Read the “Safety Information” page before servicing this<br />
product.<br />
In this manual, a Warning identifies conditions and actions that pose hazard (s) to the user; a<br />
Caution identifies conditions and actions that may damage the meter or the test instruments.<br />
The Symbols<br />
The symbols used on the meter and in this manual are explained in Table A.<br />
Table A. The Symbols<br />
Risk of electric shock<br />
Refer to the manual. Important information.<br />
DC measurement<br />
Equipment protected by double or reinforced<br />
insulation<br />
Battery<br />
Earth<br />
AC measurement<br />
Conforms to EU directives<br />
Form Number TM<strong>61</strong><strong>312</strong>-4 Rev 2 Aug 2007
Page 2<br />
SAFETY<br />
Re view the following safety precautions to avoid injury and prevent damage to this product or<br />
any products connected to it. To avoid potential hazards, use the product only as specified.<br />
For operating instructions, see the <strong>61</strong>-<strong>312</strong> / <strong>61</strong>-314 Digital <strong>Multimeter</strong> Instruction <strong>Manual</strong>.<br />
CAUTION: These statements identify conditions or practices that could result in damage to<br />
the equipment or other property.<br />
WARNING: These statements identify conditions or practices that could result in personal<br />
injury or loss of life.<br />
Use proper Fuse. To avoid fire hazard, use only the fuse type and rating specified for this<br />
product.<br />
Do not operate without covers. To avoid personal injury, do not apply any voltage or current to<br />
the product without covers in place.<br />
Do not Exceed the maximum rated input limits, as marked on the meter.<br />
Electric overload. Never apply a voltage to a connector on the product that is outside the range<br />
specified for that connector.<br />
Avoid electric shock. To avoid injury or loss of life, do not connect or disconnect probes or test<br />
leads while they are connected to a voltage source.<br />
Do not operate in wet/damp conditions. To avoid electric shock,<br />
do not operate this product in<br />
wet or damp conditions.<br />
Use great care when you are required to make measurements on live circuits that exceed 50V.<br />
Form Number TM<strong>61</strong><strong>312</strong>-4 Rev 2 Aug 2007
SPECIFICATIONS<br />
Page 3<br />
All specifications are warranted unless noted typical and apply to the <strong>61</strong>-<strong>312</strong> & <strong>61</strong>-314<br />
Stated accuracies are at 23°C±5°C at less than 80% relative humidity and without the battery<br />
indicator displayed.<br />
General specifications<br />
Characteristics<br />
Description<br />
Display count 3 3/4 digit liquid crystal display, max count 3999<br />
Numeric update rate<br />
Polarity display<br />
Over range display<br />
Low battery indicator<br />
Automatic power-off time<br />
Power source<br />
*Maximum input voltage<br />
*Maximum floating voltage<br />
Maximum input current<br />
Overload protection mA connector<br />
Overload protection 10A connector<br />
1.5 times / sec<br />
Automatic<br />
“OL” is displayed<br />
is indicated<br />
Automatic backlight off ≈ 15minutes<br />
1.5V AAA ×2 battery for <strong>61</strong>-<strong>312</strong><br />
9.0V battery: types- NEDA 1604, JIS006P, IEC6F22 for<br />
<strong>61</strong>-314<br />
600Vrms CAT II between V and COM<br />
600Vrms CAT II between any terminal and earth ground<br />
400mA between mA and COM<br />
500mA (250V) fast blow fuse.<br />
10A (250V) fast blow fuse.<br />
V connector V , V , Ω, , , , Hz, mA, Temp<br />
Temperature Coefficient<br />
Battery Life<br />
0.1×(Spec. Accuracy) per °C, 28°C<br />
Alkaline 1.5V×2 AA, ≈ 200 hours for <strong>61</strong>-<strong>312</strong> Alkaline 9V, ≈<br />
200 hours for <strong>61</strong>-314<br />
Form Number TM<strong>61</strong><strong>312</strong>-4 Rev 2 Aug 2007
Page 4<br />
Measurement Characteristics<br />
Accuracy is ±(% reading + number of digits) at 23°C ± 5°C, less than 80% R.H.<br />
(1) DC Volts(for <strong>61</strong>-<strong>312</strong> / <strong>61</strong>-314)<br />
Range Resolution Accuracy<br />
400.0mV 0.1mV<br />
4.000V 1mV<br />
40.00V 10mV<br />
400.0V 100mV<br />
600V<br />
1V<br />
Input Impedance: 10MΩ<br />
Over voltage<br />
protection<br />
±(0.8% reading + 4 digits) 600V rms<br />
(2a) AC Volts (<strong>61</strong>-<strong>312</strong> only)<br />
Range Resolution Accuracy<br />
Over voltage<br />
protection<br />
4.000V 1mV<br />
40.00V 10mV 50-60Hz 40-400Hz<br />
600V rms<br />
400.0V 100mV 1.2% + 5 1.5% + 5<br />
600V<br />
1V<br />
Input Impedance: 4.5MΩ<br />
AC Conversion Type: <strong>61</strong>-<strong>312</strong>: Average sensing rms indication calibrated to the sine wave<br />
input.<br />
(2b) AC Volts (<strong>61</strong>-314 only)<br />
Range Resolution Accuracy<br />
Over voltage<br />
Protection<br />
4.000V 1mV<br />
40.00V 10mV 50-60Hz 40-400Hz<br />
600V rms<br />
400.0V 100mV 1.2% + 8 1.5% + 8<br />
600V<br />
1V<br />
Input Impedance: 4.5MΩ<br />
AC Conversion Type:<strong>61</strong>-314 model only: AC conversion is ac-coupled, True RMS responding,<br />
calibrated to a sinusoidal waveform<br />
Crest Factor: C.F. = Peak/RMS<br />
For non-sinusoidal waveform, C.F. > 2 add ±1% to accuracy,<br />
Form Number TM<strong>61</strong><strong>312</strong>-4 Rev 2 Aug 2007
(3a) DC micro-amp and milli-amps (for <strong>61</strong>-<strong>312</strong> / <strong>61</strong>-314)<br />
Page 5<br />
Range Resolution Accuracy Input Prodection<br />
400.0µA<br />
0.1μA<br />
4000µA 1μA<br />
40.00mA<br />
400.0mA<br />
10μA<br />
0.1mA<br />
±(1.2% reading + 5 digits)*<br />
Overload Protection: mA Input: 500mA, 250V Fast Blow fuse. (<strong>61</strong>-<strong>312</strong> / <strong>61</strong>-314)<br />
500mA, 250V Fast<br />
Blow Fuse<br />
(3b) DC Current (<strong>61</strong>-<strong>312</strong> / <strong>61</strong>-314)<br />
Range Resolution Accuracy Input Protection<br />
4.000A .001mA<br />
10.00A*<br />
.01mA<br />
±(1.5% reading + 5 digits)<br />
10A, 250V<br />
Fast Blow Fuse<br />
Overload Protection: A Input: 10A, 250V Fast Blow fuse. (<strong>61</strong>-<strong>312</strong> / <strong>61</strong>-314)<br />
* Caution: Do not make high current measurements on the 10A scale for longer that 15 seconds.<br />
This should be followed by a 15 minute cool down period. Exceeding 15 seconds may cause damage<br />
to the meter and/or the test leads.<br />
(4a) AC micro-amp and milli-amps Current (<strong>61</strong>-<strong>312</strong> / <strong>61</strong>-314)<br />
Range Resolution Accuracy Input Protection<br />
400.0µA<br />
0.1μA<br />
4000µA 1μA<br />
40.00mA<br />
10μA<br />
±(1.5% reading + 5 digits) * 1<br />
40Hz ~ 400Hz<br />
400.0mA 0.1mA<br />
Overload Protection: mA Input: 500mA, 250V Fast Blow fuse. (<strong>61</strong>-<strong>312</strong> / <strong>61</strong>-314)<br />
500mA, 250V<br />
Fast Blow Fuse<br />
(4b) AC Current (<strong>61</strong>-<strong>312</strong> / <strong>61</strong>-314)<br />
Range Resolution Accuracy Input Protection<br />
4.000A .001mA ±(2.0% reading + 5 digits) * 1 10A, 250V<br />
10.00A* .01mA<br />
40Hz ~ 400Hz<br />
Fast Blow Fuse<br />
Overload Protection: A Input: 10A (250V) Fast Blow fuse.<br />
AC Conversion Type: AC conversions are ac-coupled, true rms responding, calibrated to the<br />
sine wave input.<br />
* 1 The specified accuracy is for sine wave at full scale and non-sine wave at half scale with crest<br />
factor up to 2.<br />
* Caution: Do not make high current measurements on the 10A scale for longer that 15 seconds.<br />
This should be followed by a 15 minute cool down period. Exceeding 15 seconds may cause damage<br />
to the meter and/or the test leads.<br />
Form Number TM<strong>61</strong><strong>312</strong>-4 Rev 2 Aug 2007
Page 6<br />
(5) <strong>Resi</strong>stance (for <strong>61</strong>-<strong>312</strong> / <strong>61</strong>-314)<br />
Range Resolution Accuracy<br />
400.0Ω * 1 0.1Ω<br />
4.000KΩ<br />
40.00KΩ<br />
400.0KΩ<br />
1Ω<br />
10Ω<br />
100Ω<br />
±(1.0% reading + 4 digits)<br />
4.000MΩ 1KΩ ±(1.2% reading + 4 digits)<br />
40.00MΩ * 2 10KΩ ±(1.5% reading + 5 digits)<br />
Open circuit Voltage: -1.5V approx.<br />
* 1 < 5 digit of reading rolling.<br />
* 2 < 2% of reading rolling.<br />
Over voltage<br />
protection<br />
250V rms<br />
(6) Diode Check and Continuity (for <strong>61</strong>-<strong>312</strong> / <strong>61</strong>-314)<br />
Range Resolution Accuracy<br />
Max. Test<br />
Current<br />
Max. Open<br />
Circuit Voltage<br />
1mV Not specified * 40.00μF will take ≈ 8 seconds or greater<br />
Form Number TM<strong>61</strong><strong>312</strong>-4 Rev 2 Aug 2007
Page 7<br />
(8) Frequency (for <strong>61</strong>-<strong>312</strong> / <strong>61</strong>-314)<br />
Range Resolution Sensitivity Accuracy<br />
10.00Hz<br />
100.0Hz<br />
1.000KHz<br />
10.00KHz<br />
100.0KHz<br />
1.000MHz<br />
10.00MHz<br />
.01Hz<br />
.1Hz<br />
1Hz<br />
10Hz<br />
100Hz<br />
1KHz<br />
10KHz<br />
1V rms<br />
5V rms<br />
Frequency:<br />
(±0.3% + 4 digits)<br />
Overload<br />
protection<br />
250V rms<br />
(9) Temperature: Type K thermocouple (for <strong>61</strong>-<strong>312</strong> / <strong>61</strong>-314)<br />
Range Resolution Accuracy<br />
-20 to 300 ºC 1º ±1.0% + 4<br />
301 to 750 ºC 1º ±3.0% + 5<br />
-4 to 572 ºF 1º ±1.0% + 4<br />
573 to 1382ºF 1º ±3.0% + 5<br />
Overload<br />
protection<br />
Not Specified<br />
(10) Auto Power Off (APO)<br />
If the meter idles for more than ≈ 15 minutes, the meter automatically turns the power off.<br />
(11) Data Hold<br />
Press the HOLD button to freeze the reading in the display, “H” will appear on LCD display.<br />
Press the HOLD button again to release the data hold function.<br />
Form Number TM<strong>61</strong><strong>312</strong>-4 Rev 2 Aug 2007
Page 8<br />
Physical and Environmental Characteristics<br />
Characteristics<br />
Dimensions (H×W×D)<br />
Weight (with battery& holster)<br />
Environmental characteristics<br />
Temperature operating<br />
Non-Operating<br />
Humidity (operating)<br />
Altitude<br />
Indoor Use<br />
Description<br />
150mm(H) ×76mm (W) ×38mm(D) (with holster)<br />
5.9” (H) x 3.0”(W) x1.5”(D)<br />
0.219Kg (7.1 oz.)<br />
Description<br />
0 to +40°C<br />
-20 to +60°C
Required Equipment<br />
Required equipment is listed in Table B. If the recommended models are not available,<br />
equipment with equivalent specifications may be used.<br />
Repairs or servicing should be performed only by qualified personnel.<br />
Page 9<br />
Table B. Required Equipment<br />
Equipment Required Characteristics Recommended Model<br />
Calibrator<br />
AC Voltage Range: 0 ~ 750V AC<br />
Accuracy: ±0.07% (Basic)<br />
Frequency Range: 40 ~ 1KHz<br />
Accuracy: ±2%<br />
Fluke 5500 or Wavetek<br />
9100 Calibrator or<br />
equipment<br />
DC Voltage Range: 0 ~ 1000V DC<br />
Accuracy: ±0.006% (Basic)<br />
Current Range: 0 ~ 10A<br />
Accuracy: AC (40Hz to 1KHz): ±0.08% (Basic)<br />
DC: ±0.02% (Basic)<br />
Frequency Source: 5.00Hz ~ 100MHz<br />
Accuracy: ±0.001%<br />
Amplitude: 0.5V p-p ~ 1.0V p-p (square wave)<br />
Accuracy: ±5%<br />
<strong>Resi</strong>stance Range: 1Ω ~ 100MΩ<br />
Accuracy: ±0.03% (Basic)<br />
Capacitance Range: 1pF ~ 10mF<br />
Accuracy: ±0.10% (Basic)<br />
Form Number TM<strong>61</strong><strong>312</strong>-4 Rev 2 Aug 2007
Page 10<br />
Basic Maintenance<br />
Warning<br />
To avoid shock, remove the test leads and any input signals before opening the case or replacing<br />
the battery or fuses.<br />
Opening the Meter Case<br />
Caution<br />
To avoid unintentional shock circuit, always place the uncovered meter assembly on a protective<br />
surface. When the case of the meter is open, circuit connections are exposed.<br />
1. Disconnect test leads from any live source, turn the rotary switch to OFF, and remove the<br />
test leads from front terminals.<br />
2. For battery replacement, follow instructions under Replacing the Battery section<br />
3. For Fuse replacement, follow instructions under Fuse Replacement section.<br />
Replacing the Battery<br />
The <strong>61</strong>-<strong>312</strong> Meter is powered by (2) AAA 1.5V batteries,<br />
The <strong>61</strong>-314 Meter is powered by (1) 9V battery, types are, NEDA 1604, JIS006P, IEC 6F22<br />
1. Remove the rubber holster<br />
2. Remove the two screws on the battery cover and open the battery cover<br />
3. Unsnap or remove the old battery(s) and snap or install the new battery(s)<br />
4. Return the battery cover and reinstall the two battery cover screws.<br />
5. Replace the rubber boot.<br />
Battery and Fuse Replacement<br />
Figure 1<br />
Form Number TM<strong>61</strong><strong>312</strong>-4 Rev 2 Aug 2007
Page 11<br />
Replacing Fuses<br />
Warning<br />
To avoid electrical shock, remove the test leads and any input signals before replacing the<br />
battery or fuses. To prevent damage or injury, INSTALL ONLY quick acting fuses with the<br />
following Volt/Amp current interrupt rating:<br />
F<strong>312</strong>: 500mV, 250V Fast Blow Fuse<br />
F314: 10A, 250V Fast Blow Fuse<br />
Fuse Replacement<br />
The <strong>61</strong>-<strong>312</strong> and <strong>61</strong>-314 are fused in both the VmA input and 10A input port.<br />
The VmA input port is fused by a F<strong>312</strong>: 500mV, 250V FAST BLOW fuse.<br />
The 10A input port is fused by F314: 10A, 250V FAST BLOW fuse.<br />
1. Remove the rubber holster<br />
2. Remove the two screws on the battery cover and open the battery cover<br />
3. Remove the two screws under the battery cover.<br />
4. Unsnap or remove the old battery, and remove the back case cover.<br />
5. * Replace the defective fuse with the standard rated fuse for this meter<br />
6. Return the back case cover. Reinsert the case screws.<br />
a. It is recommended you replace the old battery(s) with new battery(s).<br />
7. Return the battery cover and reinstall the two battery cover screws.<br />
8. Replace the rubber boot.<br />
* CAUTION: Use only a fuse with the amperage, interrupt voltage, and speed rating<br />
specified.<br />
Cleaning<br />
Warning<br />
To avoid electrical shock or damage to the meter, never allow water inside the case. To avoid<br />
damaging the meter’s housing, never apply solvents to the meter.<br />
Form Number TM<strong>61</strong><strong>312</strong>-4 Rev 2 Aug 2007
Page 12<br />
Performance Tests<br />
The following performance tests verify the complete operability of the meter and check the<br />
accuracy of each meter function against the meter’s specifications.<br />
For operating instructions, see the <strong>61</strong>-<strong>312</strong> / <strong>61</strong>-314 Digital <strong>Multimeter</strong> Instruction <strong>Manual</strong>.<br />
Accuracy specifications are valid for a period of one year after calibration, when measured at an<br />
operating temperature of 18°C to 28°C and a maximum of 80% relative humidity.<br />
To perform the following tests, it is not necessary to open the case, no adjustments are<br />
necessary, merely make the required connections, apply the designated inputs, and determine if<br />
the reading on the meter display falls within the acceptable range indicated.<br />
If the meter fails any of these tests, it needs calibration adjustment or repair.<br />
Testing the Display<br />
Check display as unit is powered up. You may need to power up and down several times to<br />
confirm display segments and HOLD indicator.<br />
LCD Graphics <strong>61</strong>-<strong>312</strong> / <strong>61</strong>-314<br />
Figure 2 Display Test<br />
Form Number TM<strong>61</strong><strong>312</strong>-4 Rev 2 Aug 2007
Page 13<br />
Testing the Voltage Function (for <strong>61</strong>-<strong>312</strong> / <strong>61</strong>-314)<br />
To verify accuracy in the AC and DC voltage ranges, do the following:<br />
1. Turn the rotary switch to “V ” position.<br />
Press the SEL Button to select the DC function<br />
2. Connect the calibrator to the VΩ Hz and COM inputs on the meter.<br />
3. Set the calibrator for the voltage and frequency for steps 1 through 7 in Table 1.<br />
4. Compare the reading on the meter display with the display reading shown in Table 1.<br />
5. If the display reading falls outside of the range shown in Table 1, the meter does not<br />
meet specification.<br />
Table 1 DC Voltage Test:<br />
Step Range Input Reading<br />
1 400mV -300.0mV -297.2 to –302.8<br />
2 400mV 4.0mV 3.6 to 4.4<br />
3 400mV 300.0mV 297.2 to 302.8<br />
4 4V 3.000V 2.972 to 3.028<br />
5 40V 30.00V 29.72 to 30.28<br />
6 400V 300.0V 297.2 to 302.8<br />
7 600V 600V 591 to 609<br />
6. Turn the rotary switch to position. “V ”<br />
Press the SEL Button to select the AC function<br />
7. Set the calibration for the voltage for steps 1 through 10 in Table 2.<br />
8. Compare the reading on the meter display with the display reading shown in Table 2.<br />
9. If the display reading falls outside of the range shown in Table 2, the meter does not<br />
meet specification.<br />
Form Number TM<strong>61</strong><strong>312</strong>-4 Rev 2 Aug 2007
Page 14<br />
Table 2 AC Voltage Test:<br />
Step Range Input Frequency Reading <strong>61</strong>-<strong>312</strong> Reading <strong>61</strong>-314<br />
1 4V 3.000V 60Hz 2.959 to 3.041 2.959 to 3.041<br />
2 4V 3.000V 400Hz 2.950 to 3.050 2.947 to 3.053<br />
3 40V 30.00V 60Hz 29.59 to 30.41 29.59 to 30.50<br />
4 40V 30.00V 400Hz 29.50 to 30.50 29.47 to 30.53<br />
5 400V 300.0V 60Hz 295.9 to 304.1 295.9 to 304.1<br />
6 400V 300.0V 400Hz 295.0 to 305.0 294.7 to 305.3<br />
7 600V 600V 60Hz 588 to <strong>61</strong>2 588 to <strong>61</strong>2<br />
8 600V 600V 400Hz 586 to <strong>61</strong>4 583 to <strong>61</strong>7<br />
Testing the DC microamperes Function (for <strong>61</strong>-<strong>312</strong> and <strong>61</strong>-314)<br />
To verify the accuracy of AC and DC current measurement functions, do the following:<br />
1. Connect the calibrator to the VΩ Hz and COM inputs on the meter.<br />
2. Turn the rotary switch to µA .<br />
a. Press the SEL Button to select the DC function<br />
3. Apply the inputs for steps 1 through 3 in Table 3a.<br />
4. For each input, compare the reading on the meter display to the reading for your meter<br />
in Table 3a<br />
5. If the display reading falls outside of the range shown in Table 3a, the meter does not<br />
meet specification.<br />
Table 3a DC microamperes Test:<br />
Step Range Source Reading<br />
1 400µA 4.0µA 3.5 to 4.5<br />
2 400µA 300.0µA 295.9 to 304.1<br />
3 4000µA 3000µA 2959 to 3041<br />
Testing the DC milliamperes Function (for <strong>61</strong>-<strong>312</strong> and <strong>61</strong>-314)<br />
1. Connect the calibrator to the VΩ Hz and COM inputs on the meter.<br />
2. Turn the rotary switch to mA .<br />
a. Press the SEL button to select the DC function<br />
3. Apply the inputs for steps 1 through 2 in Table 3b.<br />
4. For each input, compare the reading on the meter display to the reading for your meter<br />
in Table 3b<br />
5. If the display reading falls outside of the range shown in Table 3b, the meter does not<br />
meet specification.<br />
Form Number TM<strong>61</strong><strong>312</strong>-4 Rev 2 Aug 2007
Table 3b DC mA Test:<br />
Page 15<br />
Step Range Source Reading<br />
1 40mA 30.00mA 29.59 to 30.41<br />
2 400mA 300.0mA 295.9 to 304.1<br />
Testing the DC ampere Function (for <strong>61</strong>-<strong>312</strong> and <strong>61</strong>-314)<br />
1. Connect the calibrator to the 10A and COM inputs on the meter.<br />
2. Turn the rotary switch to A .<br />
a. Press the SEL button to select the DC function<br />
3. Apply the inputs for steps 1 through 2 in Table 3c.<br />
4. For each input, compare the reading on the meter display to the reading for your meter<br />
in Table 3c<br />
5. If the display reading falls outside of the range shown in Table 3c, the meter does not<br />
meet specification.<br />
Table 3c DCA Test:<br />
Step Range Source Reading<br />
1 4A 3.000A 2.959 to 3.041<br />
2 10A 10.00A 9.80 to 10.20<br />
Testing the AC microampere Function (for <strong>61</strong>-<strong>312</strong> and <strong>61</strong>-314)<br />
To verify the accuracy of AC and DC current measurement functions, do the following:<br />
1. 1.Connect the calibrator to the VΩ Hz and COM inputs on the meter.<br />
2. Turn the rotary switch to µA .<br />
a. Press the SEL button to select the AC function<br />
3. Apply the inputs for steps 1 through 6 in Table 4a.<br />
4. For each input, compare the reading on the meter display to the reading for your<br />
meter in Table 4a<br />
5. If the display reading falls outside of the range shown in Table 4a, the meter does not<br />
meet specification.<br />
Form Number TM<strong>61</strong><strong>312</strong>-4 Rev 2 Aug 2007
Page 16<br />
Table 4a AC microampere Test:<br />
Step Range Source Frequency Reading<br />
1 400µA 40µA 60Hz 29.0 to 40.9<br />
2 400µA 40µA 400Hz 29.0 to 40.9<br />
3 400µA 300.0µA 60Hz 295.0 to 305.0<br />
4 400µA 300.0µA 400Hz 295.0 to 305.0<br />
5 4000µA 3000µA 60Hz 2950 to 3050<br />
6 4000µA 3000µA 400Hz 2950 to 3050<br />
Testing the AC milliampere function: (for <strong>61</strong>-<strong>312</strong> and <strong>61</strong>-314)<br />
1. Connect the calibrator to the VΩ Hz and COM inputs on the meter.<br />
2. Turn the rotary switch to mA .<br />
a. Press the SEL button to select the AC function<br />
3. Apply the inputs for steps 1 through 4 in Table 4b.<br />
4. For each input, compare the reading on the meter display to the reading for your meter<br />
in Table 4b<br />
5. If the display reading falls outside of the range shown in Table 4b, the meter does not<br />
meet specification.<br />
Table 4b AC mA Test:<br />
Step Range Source Frequency Reading<br />
1 40mA 30.00mA 60Hz 29.50 to 30.50<br />
2 40mA 30.00mA 400Hz 29.50 to 30.50<br />
3 400mA 300.0mA 60Hz 295.0 to 305.0<br />
4 400mA 300.0mA 400Hz 295.0 to 305.0<br />
Testing the AC A function (for <strong>61</strong>-<strong>312</strong> / <strong>61</strong>-314)<br />
1. Connect the calibrator to the VΩ Hz and COM inputs on the meter.<br />
2. Turn the rotary switch to A .<br />
a. Press the SEL button to select the AC function<br />
3. Apply the inputs for steps 1 through 4 in Table 4c.<br />
4. For each input, compare the reading on the meter display to the reading for your meter<br />
in Table 4c<br />
5. If the display reading falls outside of the range shown in Table 4c, the meter does not<br />
meet specification.<br />
Form Number TM<strong>61</strong><strong>312</strong>-4 Rev 2 Aug 2007
Table 4c AC A Test:<br />
Page 17<br />
Step Range Source Frequency Reading<br />
1 4A 3.000A 60Hz 2.935 to 3.065<br />
2 4A 3.000A 400Hz 2.935 to 3.065<br />
3 10A 10A 60Hz 9.75 to 10.25<br />
4 10A 10A 400Hz 9.75 to 10.25<br />
Testing the <strong>Resi</strong>stance Function (for <strong>61</strong>-<strong>312</strong> / <strong>61</strong>-314)<br />
To verify the accuracy of the resistance function, do the following:<br />
1. Connect the calibrator to VΩ Hz and COM on the meter.<br />
2. Turn the rotary switch to Ω.<br />
3. Apply the inputs for steps 1 through 7 in Table 5.<br />
4. Compare the meter display readings to the display readings in Table 5.<br />
5. If the display reading falls outside of the range shown in Table 5, the meter does not<br />
meet specification.<br />
Table 5 Ω <strong>Resi</strong>stance Test:<br />
Step Range Source Reading<br />
1 400Ω* 4.0Ω 3.6 to 4.4<br />
2 400Ω* 300.0Ω 296.6 to 303.4<br />
3 4kΩ 3.000KΩ 2.966 to 3.034<br />
4 40kΩ 30.00KΩ 29.66 to 30.34<br />
5 400kΩ 300.0KΩ 296.6 to 303.4<br />
6 4MΩ 3.000MΩ 2.960 to 3.040<br />
7 40MΩ 30.00MΩ 29.50 to 30.50<br />
*Lead resistance on the 400Ω range is not included in error.<br />
Form Number TM<strong>61</strong><strong>312</strong>-4 Rev 2 Aug 2007
Page 18<br />
Testing the Capacitance Function (for <strong>61</strong>-<strong>312</strong> / <strong>61</strong>-314)<br />
The meter measures capacitance by charging the capacitor with a known direct current,<br />
measuring the resultant voltage, and calculating the capacitance. If the same capacitance is<br />
m easured on an impedance bridge, a different reading may result. This variance is likely to be<br />
greater at higher frequencies.<br />
To verify the accuracy of the capacitance measuring function, do the following:<br />
1. Apply the capacitor to the VΩ Hz and COM inputs on the meter. For steps1 through 6 in<br />
Table 6.<br />
2. Turn the rotary switch to .<br />
3. Compare the reading on the meter display to the reading in Table 6.<br />
Note: The meter selects the proper range automatically. Each measurement takes about<br />
one second per range. Readings >40.00μF will take ≥ 5 to 10seconds<br />
4. If the display reading falls outside of the range shown in Table 6, the meter does not meet<br />
specification.<br />
Table 6 Capacitance Test:<br />
Step Range Source Reading<br />
1 40nF 10.000nF 9.65 to 10.35<br />
2 40nF 30.00nF 29.05 to 30.95<br />
3 400nF 300.0nF 290.5 to 309.5<br />
4 4µF 3.000µF 2.905 to 3.095<br />
5 40.00µF 30.00µF 29.05 to 30.95<br />
6 100.0µF 100.0µF 96.5 to 103.5<br />
Checking the Diode Test Function (for <strong>61</strong>-<strong>312</strong> / <strong>61</strong>-314)<br />
To check the diode test function, do the following:<br />
1. Connect the DVM (Digital Voltage Meter) leads to the VΩ Hz and COM inputs on the<br />
meter.<br />
2. Turn the meter’s rotary switch to .<br />
• The DVM display should display OL<br />
.<br />
3. Insert a Si diode with correct polarity “+” and “-“<br />
• The meter display should read within 0.5~0.7Vdc<br />
4. Reverse polarity on the Si diode<br />
• The meter display should read OL<br />
5. Apply a 20-ohm resistor to the meter, the built-in buzzer buzzes.<br />
Form Number TM<strong>61</strong><strong>312</strong>-4 Rev 2 Aug 2007
Page 19<br />
Testing the Frequency Function (for <strong>61</strong>-<strong>312</strong> / <strong>61</strong>-314)<br />
To verify the accuracy of the meter’s frequency function, do the following:<br />
1. Connect the calibrator to the VΩ Hz and COM inputs on the meter.<br />
Note: The accuracy of the calibrator’s frequency function must be appropriate for the<br />
specified accuracy of the meter.<br />
2. Set the rotary switch to Hz.<br />
3. Set the calibrator or function generator for the square wave voltage and frequency<br />
for steps 1 through 6 of Table 7.<br />
4. Compare the reading on the meter display with the display reading shown in Table 7.<br />
5. If the display reading falls outside of the range shown in Table 7, the meter does not<br />
meet specification.<br />
Table 7 Frequency Test:<br />
Step Range Source Level Reading<br />
1 10Hz 9.0Hz 3V rms 8.969 to 9.031<br />
2 100Hz 90Hz 3V rms 89.69 to 90.31<br />
3 1kHz 900Hz 3V rms 896.9 to 903.1<br />
4 10kHz 9kHz 3V rms 8.969 to 9.031<br />
5 100kHz 90kHz 3V rms 89.69 to 90.31<br />
6 1MHz 900kHZ 3V rms 896.9 to 903.1<br />
Form Number TM<strong>61</strong><strong>312</strong>-4 Rev 2 Aug 2007
Page 20<br />
Testing the Temperature Function (for <strong>61</strong>-<strong>312</strong> / <strong>61</strong>-314)<br />
To verify the accuracy of the meter’s frequency function, do the following:<br />
1. Connect the calibrator to the VΩ Hz and COM inputs on the meter.<br />
2. Set the rotary switch to the ºC or ºF as instructed in Table 8.<br />
3. Set the calibrator temperature output to the source values in Table 8, steps 1 through 7.<br />
4. Compare the reading on the meter display with the display reading shown in Table 8.<br />
5. If the display reading falls outside of the range shown in Table 8, the meter does not<br />
meet specification.<br />
Table 8 Temperature Test:<br />
Step<br />
Range Source Reading<br />
1 ºC -20 ºC -24 to –16<br />
2 ºC 0 ºC -4 to 4<br />
3 ºC 300 ºC 293 to 307<br />
4 ºC 750 ºC 722 to 778<br />
5 ºF -4 ºF -8 to 0<br />
6 ºF 32 ºF 28 to 36<br />
7 ºF 1382 ºF 1336 to 1428<br />
Form Number TM<strong>61</strong><strong>312</strong>-4 Rev 2 Aug 2007
Page 21<br />
Calibration Procedure<br />
Recalibrate your meter:<br />
It is recommended that the multimeter be calibrated once each year.<br />
1. Perform calibration at an ambient temperature of 23°C±2°C and a relative humidity of<br />
Page 22<br />
( D) ºC Calibration (Adjust VR3)<br />
1. Set the rotary switch to the "ºC " position.<br />
2. Set the output of the calibrator to 0 ºC<br />
3. Connect the calibrator temperature output to the V/Ω/Temp and COM input terminals<br />
4. Using a small flat-tipped screwdriver to adjust VR3 for a 0 ºC ±1ºC (-1 to 1) display<br />
(E) ºC Calibration (Adjust VR5)<br />
1. Set the rotary switch to the "ºC " position.<br />
2. Set the output of the calibrator to 300 ºC<br />
3. Connect the calibrator temperature output to the V/Ω/Temp and COM input<br />
4. Using a small flat-tipped screwdriver adjust VR5 for a 300 ºC ±1 ºC (299 to 301) display<br />
(F) ºF Calibration (Adjust VR4)<br />
1. Set the rotary switch to the "ºF " position.<br />
2. Set the output of the calibrator to 32 ºF<br />
3. Connect the calibrator temperature output to the V/Ω/Temp and COM input<br />
4. Using a small flat-tipped screwdriver adjust VR4 for a 32 ºF ±1ºF (31 to 33) display<br />
(G) ºF Calibration (Adjust VR6)<br />
1. Set the rotary switch to the "ºF " position.<br />
2. Set the output of the calibrator to 572 ºF<br />
3. Connect the calibrator temperature output to the V/Ω/Temp and COM input<br />
4. Using a small flat-tipped screwdriver adjust VR6 for a 572 ºF ±2ºF (570 to 574) display<br />
Form Number TM<strong>61</strong><strong>312</strong>-4 Rev 2 Aug 2007
Form Number TM<strong>61</strong><strong>312</strong>-4 Rev 2 Aug 2007<br />
Page 23