61-796 Earth Ground Resistance Tester Manual - Ideal Industries Inc.
61-796 Earth Ground Resistance Tester Manual - Ideal Industries Inc.
61-796 Earth Ground Resistance Tester Manual - Ideal Industries Inc.

Create successful ePaper yourself
Turn your PDF publications into a flip-book with our unique Google optimized e-Paper software.
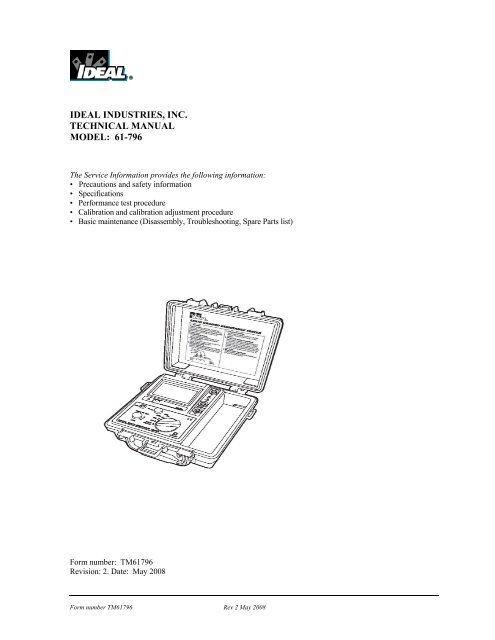
IDEAL INDUSTRIES, INC.<br />
TECHNICAL MANUAL<br />
MODEL: <strong>61</strong>-<strong>796</strong><br />
The Service Information provides the following information:<br />
• Precautions and safety information<br />
• Specifications<br />
• Performance test procedure<br />
• Calibration and calibration adjustment procedure<br />
• Basic maintenance (Disassembly, Troubleshooting, Spare Parts list)<br />
Form number: TM<strong>61</strong><strong>796</strong><br />
Revision: 2. Date: May 2008<br />
Form number TM<strong>61</strong><strong>796</strong> Rev 2 May 2008
TABLE OF CONTENTS<br />
Title<br />
Page<br />
Introduction 1<br />
Precautions and Safety Information 1<br />
Symbols 1<br />
Safety Information 1<br />
Specifications 2<br />
General Specification 2<br />
<strong>Ground</strong> <strong>Resistance</strong> Specifications 2<br />
<strong>Ground</strong> Voltage Potential Specifications 2<br />
Required Standards and Equipment 3<br />
Performance Verifications 3<br />
Battery Test 3<br />
Frequency Test 3<br />
<strong>Resistance</strong> Test 3<br />
AC Voltage Test 4<br />
Disassembly and Setup For Calibration 4<br />
Calibration 4<br />
Procedure 4/5<br />
Calibration Verification Test 5<br />
Calibration Adjustment Locations 6<br />
Component Layout 7<br />
Troubleshooting 8<br />
Spare Parts List 9<br />
Form number TM<strong>61</strong><strong>796</strong> Rev 2 May 2008
Page 1<br />
Introduction<br />
Warning<br />
To avoid shock or injury, do not perform the verification tests or calibration<br />
procedures described in this manual unless you are qualified to do so.<br />
The information provided in this document is for the use of qualified personnel only.<br />
Caution<br />
The <strong>61</strong>-<strong>796</strong> Three Pole <strong>Ground</strong> <strong>Resistance</strong> <strong>Tester</strong> contains parts that can be damaged by static discharge.<br />
Follow the standard practices for handling static sensitive devices.<br />
For additional information about IDEAL INDUSTRIES, INC. and its products,<br />
and services, visit IDEAL INDUSTRIES, INC. web site at:<br />
www.idealindustries.com<br />
Precautions and Safety Information<br />
Use the meter only as described in the Users <strong>Manual</strong>. If you do not<br />
do so, the protection provided by the meter may be impaired.<br />
Read the “Safety Information” page before servicing this product.<br />
In this manual, a Warning identifies conditions and actions that<br />
pose hazard(s) to the user; a Caution identifies conditions and<br />
actions that may damage the meter or the test instruments.<br />
The Symbols<br />
The symbols used on the meter and in this manual are explained in Table A.<br />
Table A. Symbols<br />
Meter Safety Description<br />
Symbol<br />
Battery<br />
Cautionary or important information in manual<br />
Danger - Risk of electrical shock<br />
CAT III<br />
Double Insulation- Protection Class II<br />
IEC Over-voltage Category III<br />
SAFETY<br />
Review the following safety precautions to avoid injury and prevent damage to this product or any products<br />
connected to it. To avoid potential hazards, use the product only as specified.<br />
CAUTION.<br />
These statements identify conditions or practices that could result in damage to the equipment or other property.<br />
WARNING.<br />
These statements identify conditions or practices that could result in personal injury or loss of life.<br />
Before beginning read all warnings and precautions stated in the “Instruction <strong>Manual</strong>”<br />
Form number TM<strong>61</strong><strong>796</strong> Rev 2 May 2008
Page 2<br />
General Specifications<br />
Characteristics<br />
Description<br />
Display LCD 3 ½ with 2000 counts, maximum display count of 1999<br />
Over-range Indication<br />
“1” in the Most Significant Digit (MSD)<br />
Operation Frequency of Ω current 820Hz to 1.6kHz at approx. 2mA.<br />
<strong>Earth</strong> <strong>Resistance</strong> Range<br />
20Ω/200Ω/2000Ω<br />
<strong>Resistance</strong> resolution<br />
0.00 - 19.99 (0.01Ω)<br />
00.0 - 199.9 (0.1Ω)<br />
000 – 1999 (1Ω or .001KΩ)<br />
<strong>Earth</strong> <strong>Resistance</strong> Accuracy ±(2% reading + 2 digits) or± 0.1Ω<br />
Max <strong>Earth</strong> Voltage<br />
0-200V AC, 40-500Hz<br />
<strong>Earth</strong> Voltage Accuracy<br />
± (1% reading + 2 digits)<br />
Power on/off<br />
Switch only / No auto power off mode<br />
Low Battery Indicator:<br />
Symbol indicates low battery voltage<br />
Data Hold Indicator<br />
Symbol indicates data hold<br />
Power<br />
8 x 1.5V AA Batteries (Alkaline preferred)<br />
Applicable standards<br />
IEC/EN <strong>61</strong>010-1: (CAT III 200V) pollution degree2<br />
Dimensions<br />
8.3”H x 8.3”W x 4.0”D<br />
Weight:<br />
Approximately 3.0 lbs. (13<strong>61</strong>g) including battery<br />
Storage Environment:<br />
32°F to 122°F at
Page 3<br />
Required Standards and Equipment<br />
• Precision AC voltage source with a range of 0 to 200V AC @60Hz with an accuracy of .25% or better.<br />
• To test the performance of the <strong>61</strong>-<strong>796</strong>, you will need a set of fixed standard resistors with an accuracy<br />
of 0.5% or better. Values required are 1Ω, 10Ω, 100Ω, and 1000Ω.<br />
• All three test leads should be of equal length. C and P lead connections should be made at<br />
the standard resistors. This Source/Since method will reduce the lead resistance error in<br />
the measurement. See Figure 1 below.<br />
E, P, and C should be equal in length<br />
and as short as possible<br />
For best results P and C should be<br />
connected together at the measurement<br />
points as shown in this figure.<br />
Figure 1<br />
PERFORMANCE VERIFICATIONS<br />
Perform the following analysis. If the meter conforms to the limits listed in Table 1, steps 1 - 6, the meter is<br />
functioning correctly. If the meter does not conform to any of the listed limits, the calibration procedure must be<br />
performed.<br />
Battery Test<br />
• Remove the battery cover and use a calibrated meter to ensure the battery pack measures a minimum of<br />
11.5V DC. If the battery pack measures under 11.5V DC, replace all 8 x 1.5V batteries before<br />
beginning the performance test.<br />
Frequency Test<br />
• Turn the function switch to 20Ω range,<br />
• Connect a frequency counter to terminals E and P.<br />
• Press and lock the TEST button. The output frequency should be 820Hz ±15Hz (805Hz~835Hz).<br />
<strong>Resistance</strong> Test<br />
• Connect the standard resistors to the unit under test as described in Figure 1.<br />
• Select 20Ω range.<br />
• Short E, P, and C together, adjust 0Ω adj dial for 0.00 ±0.01 ohms on the LCD display.<br />
• Connect E, P, and C to the 1.0Ω standard resistor and verify the reading in Table 1, step 1.<br />
• Repeat this process for steps 2 - 6 in Table 1.<br />
• It is not necessary to do the 0Ω adj in the 200 and 2000 range.<br />
• If the display reading falls outside of the range shown in Table 1, the meter does not meet specification.<br />
Note: Error for the lead resistance is not included or accounted for in the test data in Table 1<br />
Table 1. <strong>Resistance</strong> Test<br />
Step Range Input Low Limit High Limit<br />
1 20 1.00Ω 0.90 1.10<br />
2 20 10.00Ω 9.90 10.10<br />
3 200 10.0Ω 9.6 10.4<br />
4 200 100.0Ω 97.8 102.2<br />
5 2000 100.0Ω 96 104<br />
6 2000 1000.0Ω 978 1022<br />
Form number TM<strong>61</strong><strong>796</strong> Rev 2 May 2008
Page 4<br />
AC Voltage Test<br />
• Connect meter terminals E and P to the output of a precision AC voltage source.<br />
• Apply the AC voltage listed in Table 2, steps 1 - 3.<br />
• If the display reading falls outside of the limits shown in Table 2, the meter does not meet specification.<br />
Table 2. AC Voltage Test<br />
Steps Range Input Low Limit High Limit<br />
1 <strong>Earth</strong> Voltage 12V @ 60Hz 11.7 12.3<br />
2 <strong>Earth</strong> Voltage 120V @ 60Hz 118.6 121.4<br />
3 <strong>Earth</strong> Voltage 190V @ 60Hz 187.9 192.1<br />
Disassembly Instructions and Setup for Calibration (refer to Figure 3)<br />
• Start with the unit top case lid closed.<br />
• From the bottom, remove the battery cover.<br />
• Remove the 2 screws that hold the measurement unit into the case.<br />
• One screw is in the top right corner of the battery compartment and one screw is in the<br />
lower right, just left of the fuse.<br />
• Replace the battery cover and loosely tighten the screws.<br />
• Open the case and carefully lift the unit from the case. There are several sets of wires attached to the<br />
bottom case so be very careful not to damage them.<br />
• You should now have access to the main circuit board and adjustments.<br />
Calibration<br />
Qualified personnel should only perform calibration procedures described in this manual.<br />
During this calibration it will be necessary to have the electronics of the instrument exposed.<br />
A potential for hazardous voltage can be present during this procedure. Use extreme caution.<br />
ACV Adjustment (refer to Figure 2)<br />
Turn the function switch to EARTH VOLTAGE position.<br />
• Press and lock the TEST button. The display should read AC 00.0V.<br />
• Set the precision AC power source to standby with an output of 100V @ 60 Hz.<br />
• Connect terminals E and P of the <strong>61</strong>-<strong>796</strong> to the output of the AC source. (C should be left open.)<br />
• Energize the AC source.<br />
• Adjust VR6 on the circuit board for a display reading of AC 100.0V.<br />
• Change the AC source to 190V @ 60Hz.<br />
• Displayed should be 190V ±1.5V.<br />
• Maximum allowable error during calibration should not exceed ±0.7% reading ±2 digits.<br />
• Release the TEST button. Turn off AC source and remove test leads. ACV calibration is complete.<br />
Frequency Adjustment (refer to Figure 2)<br />
• Turn the function switch to 20Ω range.<br />
• Connect a frequency counter to terminals E and P.<br />
• Press and lock the TEST button and adjust VR1 for a frequency output of 820Hz ±15Hz<br />
(805Hz~835Hz).<br />
• Release the TEST button and remove the counter. Frequency adjustment is complete.<br />
Form number TM<strong>61</strong><strong>796</strong> Rev 2 May 2008
Page 5<br />
Ω Adjustment (refer to Figure 2)<br />
Connect the <strong>61</strong>-<strong>796</strong> to the standard resistors as described in the performance test section, Figure 1.<br />
Select 20Ω Range.<br />
• Short E, P, and C together, adjust 0Ω adj dial for 0.00 ±0.01 ohms on the LCD display.<br />
• Connect E, P, and C to the 10Ω standard resistor; adjust VR3 for a reading of 10.00Ω ±0.02.<br />
Select 200Ω Range.<br />
• Short E, P, and C together, check that the display reads 00.0 ±.2<br />
• Connect E, P, and C to the 100Ω standard resistor; adjust VR4 for a reading of 100. 0Ω ±0.2.<br />
Select 2000Ω stage.<br />
• Short E, P, and C together, check that the display reads 000 ±2<br />
• Connect E, P, and C to the 1000Ω standard resistor; adjust VR5 for a reading of 1000Ω ±2.<br />
Ω Calibration Verification Test<br />
The maximum allowable error just after calibration should not exceed those listed in Table 3.<br />
Table 3. Ω Verification Test<br />
Ranges Ω Source Adjustment Accuracy LCD indication<br />
20Ω 10Ω VR3 ±1.0%rdg or± 0.1Ω 9.90~ 10.10Ω<br />
200Ω 100Ω VR4 ±0.5%rdg±1dgt 99.50~100.5Ω<br />
2000Ω 1000Ω VR5 ±0.5%rdg±1dgt 995~1005Ω<br />
Form number TM<strong>61</strong><strong>796</strong> Rev 2 May 2008
Page 6<br />
Calibration Adjustment Locations<br />
VR6 ADJUST ACV<br />
VR1 ADJUST Hz<br />
VR3 ADJUST 10Ω<br />
VR4 ADJUST 100Ω<br />
VR5 ADJUST 1000Ω<br />
Figure 2<br />
Form number TM<strong>61</strong><strong>796</strong> Rev 2 May 2008
Page 7<br />
Figure 3<br />
Form number TM<strong>61</strong><strong>796</strong> Rev 2 May 2008
Page 8<br />
Troubleshooting<br />
Symptoms Possible Causes Remedies<br />
The LCD has no display No batteries<br />
Install the batteries<br />
Faulty battery polarity Install the batteries in correct polarity<br />
Battery terminal oxidized Replace new battery terminal<br />
Wire broken<br />
Solder wire<br />
Q1 or Q8 broken Replace Q1 (IC-7809FA) or Q8 (IC-<br />
78L05)<br />
Poor contact of battery<br />
harness<br />
Replace the battery contacts<br />
Insufficient capacity of Replace the batteries<br />
battery<br />
Unable to measure due<br />
to unclear LCD<br />
U4 or U21 broken Replace U4 (IC-27M2) or U21 (IC-<br />
5106Q)<br />
Digit incomplete U21 broken Replace U21 (IC-5106Q)<br />
Vague font U4 broken Replace U4 (IC-27M2)<br />
Reading not stable U21 or CON2 broken Replace U21 (IC-5106Q) or CON2<br />
Hz no reading Power transformer broken Replace power transformer (PT-1505)<br />
C6, C10 broken Replace C6 (CPE-220uF) C10 (CDM-<br />
1uF)<br />
ACV no reading C21 or Z2 broken Replace C21 (CPE-22uF) or Z2 (TVS-<br />
6.5CA)<br />
Fuse broken<br />
Replace Fuse<br />
U14 broken<br />
Replace U14 (IC-062)<br />
ACV reading abnormal Diode broken Replace Diode<br />
ACV ≠ 0 (no test) Z2 broken Replace Z2 (TVS-6.5CA)<br />
Ω reading shows “1” Power transformer broken Replace power transformer (PT-1505)<br />
L2 broken<br />
Replace L2 (IND-254K)<br />
U4 broken<br />
Replace U4 (IC-27M2)<br />
When measuring “Ω”<br />
LED no indication<br />
Q5 or Q6 broken Replace Q5 (TRA-A673) OR Q6<br />
(TRA-A673)<br />
When “2KΩ” range, not<br />
going to zero<br />
U13 broken<br />
Replace U13 (IC-4053)<br />
When “20Ω” range, not<br />
going to zero<br />
When measuring “Ω”,<br />
the reading drops<br />
gradually<br />
U3, Q6 broken Replace U3 (IC-LM358) Q6 (TRA-<br />
A673)<br />
U3 broken<br />
Replace U3 (IC-LM358)<br />
Unable to measure “Ω” Fuse broken Replace Fuse<br />
Form number TM<strong>61</strong><strong>796</strong> Rev 2 May 2008
Page 9<br />
Spare Parts List<br />
No. Description Parts No. Qty. Note<br />
1 Nameplate 3<br />
2 UP-cover 1<br />
3 PCB 2<br />
4 Function switch 1<br />
5 Test button 1<br />
6 Hold button 1<br />
7 0 Ω adjust 1<br />
8 Housing case 1<br />
9 Protection cover 4<br />
10 Battery 8<br />
11 Battery case 1<br />
12 Handle 1<br />
13 Latch 1<br />
Others Test leads 1 Kit<br />
Simplified measurement<br />
1<br />
probe<br />
Auxiliary earth spikes 2<br />
Shoulder belt 1<br />
Instruction manual 1<br />
Form number TM<strong>61</strong><strong>796</strong> Rev 2 May 2008