61-795 Hand-held Insulation Tester Manual - Ideal Industries Inc.
61-795 Hand-held Insulation Tester Manual - Ideal Industries Inc.
61-795 Hand-held Insulation Tester Manual - Ideal Industries Inc.

Create successful ePaper yourself
Turn your PDF publications into a flip-book with our unique Google optimized e-Paper software.
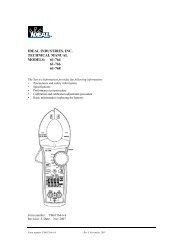
IDEAL INDUSTRIES INC.<br />
TECHNICAL MANUAL<br />
MODEL: <strong>61</strong>-<strong>795</strong><br />
The Service Information provides the following:<br />
• Precautions and safety information<br />
• Specifications<br />
• Performance test procedure<br />
• Calibration and calibration adjustment procedure<br />
• Basic maintenance (replacing the battery and fuses)<br />
Form number: TM<strong>61</strong><strong>795</strong><br />
Revision: 3. Date: June 2008<br />
Form number TM<strong>61</strong><strong>795</strong> Rev 3 Jun 2008
TABLE OF CONTENTS<br />
Title<br />
Page<br />
Introduction 1<br />
Precautions and Safety Information 1<br />
Safety Information 1<br />
Required Equipment 2<br />
Performance Verification 3<br />
Table 1 Performance Verification Model <strong>61</strong>-<strong>795</strong> 3<br />
Calibration 4/5<br />
Table 2 Calibration Range Inputs Model <strong>61</strong>-<strong>795</strong> 5<br />
Replacing the Battery 5<br />
Replacing Fuses 5<br />
Circuit Board Drawing 6<br />
Battery and Fuse Replacement Drawing 7<br />
Form number TM<strong>61</strong><strong>795</strong> Rev 3 Jun 2008
Page 1<br />
Introduction<br />
Warning<br />
To avoid shock or injury, do not perform the verification<br />
tests or calibration procedures described in this manual<br />
unless you are qualified to do so.<br />
The information provided in this document is for the use<br />
of qualified personnel only.<br />
Caution<br />
The <strong>61</strong>-<strong>795</strong> contains parts that can be damaged by static discharge.<br />
Follow the standard practices for handling static sensitive devices.<br />
For additional information about IDEAL INDUSTRIES and its products,<br />
and services, visit IDEAL INDUSTRIES web site at:<br />
www.idealindustries.com<br />
SAFETY<br />
Review the following safety precautions to avoid injury and prevent damage to this product or any<br />
products connected to it. To avoid potential hazards, use the product only as specified.<br />
It is recommended that you read through the Operation or User manual before starting. Not all Caution,<br />
Warning, or Danger precautions are listed in this manual.<br />
CAUTION.<br />
These statements identify conditions or practices that could result in damage to the equipment or other<br />
property.<br />
WARNING.<br />
These statements identify conditions or practices that could result in personal injury or loss of life.<br />
Specific precautions<br />
Use proper Fuse. To avoid fire hazard, use only the fuse type and rating specified for this product.<br />
Do not operate without covers. To avoid personal injury, do not apply any voltage or current to the<br />
product without the covers in place.<br />
Electric overload. Never apply a voltage to a connector on the product that is outside the range specified<br />
for that connector.<br />
Avoid electric shock. To avoid injury or loss of life, do not connect or disconnect probes or test leads<br />
while they are connected to a voltage source.<br />
Avoid electric shock. To avoid injury or loss of life, do not come in contact with tested material or probes<br />
while the Test Button is pressed. High Voltage potentials are present during <strong>Insulation</strong> Tests..<br />
Do not operate in wet/damp conditions. To avoid electric shock, do not operate this product in wet or<br />
damp conditions.<br />
Form number TM<strong>61</strong><strong>795</strong> Rev 3 Jun 2008
Page 2<br />
Required Equipment<br />
Required equipment is listed in Table B. If the recommended<br />
models are not available, equipment with equivalent specifications may be used.<br />
Only qualified personnel should perform repairs or servicing.<br />
Table B. Required Equipment<br />
Equipment<br />
Calibrator<br />
Required Characteristics<br />
AC Voltage Range: 0-750V ac<br />
Accuracy: ±0.04% (Basic)<br />
Frequency Range: 10 ~ 500KHz<br />
Accuracy: ± 2%<br />
Recommended<br />
Model<br />
Fluke 5500A<br />
Calibrator or<br />
equivalent<br />
DC Voltage Range: 0-1000V dc<br />
Accuracy: ±0.006% (Basic)<br />
Current Range: 0 ~ 10A<br />
Accuracy:<br />
AC (45Hz to 65Hz): ±0.05% (Basic)<br />
DC: ± 0.008% (Basic)<br />
Frequency Source:<br />
0.01Hz ~ 2.0000MHz<br />
Accuracy: ±0.0025%<br />
Amplitude:<br />
0.5V p-p ~ 1.0V p-p (square wave)<br />
Accuracy: ± 5%(45Hz-1KHz)<br />
Ω range: 0.01Ω ~ 330M<br />
Accuracy: ±0.007% (Basic)<br />
Capacitance Range: 1pF ~ 1.1mF<br />
Accuracy: ±0.19% (Basic)<br />
Temperature Range: -200°C ~ 1800°C<br />
Accuracy: ±0.1°C (Basic)<br />
Required fixed resistors: 0Ω, 5Ω, 19Ω, 190Ω, 0.0MΩ, 1MΩ, 10MΩ, 100MΩ, 1000MΩ<br />
Simulated Test leads: With a total resistance of < .1Ω ±10mΩ or .05Ω per simulated lead.<br />
Form number TM<strong>61</strong><strong>795</strong> Rev 3 Jun 2008
Page 3<br />
PERFORMANCE VERIFICATIONS<br />
Perform the following analysis, if the meter conforms to the limits listed in Table 1 the meter is functioning<br />
correctly. If the meter does not conform to any of the listed limits, the calibration procedure must be<br />
performed.<br />
Check the fuse as a BBS, 1A/600V, 10.4*35 (0.41x1.38 inch) UL/CSA, interrupting rating 10kA.<br />
Check case, leads, display, etc, for any defects.<br />
Table 1 Performance Verification: Model <strong>61</strong>-<strong>795</strong><br />
Function Setting<br />
/Range<br />
Apply Reading Specification<br />
DCV 550V DC 547.2 to 552.8 [±0.5% ±1 digits]<br />
ACV 550V AC 545.2 to 554.8 [±0.8% ±4 digits]<br />
Continuity Ω/
Page 4<br />
CALIBRATION<br />
Calibration Preparation<br />
Required Equipment<br />
The class of calibrator or equipment should have an accuracy that exceeds, by an expectable ratio,<br />
the<br />
accuracy of the instrument under test.<br />
Required fixed resistors: 0Ω, 5Ω, 19Ω, 190Ω, 0.0MΩ, 1MΩ, 10MΩ, 100MΩ, 1000MΩ<br />
Simulated Test leads. With a total resistance of < .1Ω ±10mΩ or .05Ω per simulated lead.<br />
Calibration Procedure<br />
It is recommended that all IDEAL meters undergo the following calibration procedure<br />
on an annual basis.<br />
Calibration<br />
1. Press the key to switch off the instrument.<br />
2. Remove test leads from the input terminals.<br />
3. Remove hood and battery compartment cover by using a screwdriver. (Refer to Figure 2)<br />
4. Loosen the screws from the case bottom. Remove the case bottom.<br />
5. Short JP1, then replace the case bottom and battery compartment cover. (Refer to Figure 1)<br />
6. Press the key to turn on the instrument. The LCD displays the version of the software.<br />
7. Push the “TEST” key to enter the calibration mode.<br />
8. Press the key to select the range to calibrate.<br />
9. Input the range standard value as listed in Table 2. Push the “TEST” key for more than 2 seconds.<br />
The LCD will display the A/D reading value.<br />
10. Push the “TEST” key to save the range. Calibration is complete for that range.<br />
11. If you want to calibrate the other ranges, repeat steps 8 - 10.<br />
12. When complete, exit the calibration mode. Press the key to switch off the instrument.<br />
13. Remove the case bottom and remove the short on JP1. (Refer to Figure 1)<br />
14. Replace the case bottom and battery compartment cover, pressing to close it, and secure with screw.<br />
15. Install the hood.<br />
Form number TM<strong>61</strong><strong>795</strong> Rev 3 Jun 2008
Page 5<br />
Table 2 Calibration Range Inputs: Model <strong>61</strong>-<strong>795</strong><br />
Range Function Input the calibrator standard value<br />
1 DCV DC600.0V<br />
2 ACV AC600.0V<br />
3 Ω 190.0Ω<br />
4 Ω 0.00Ω<br />
5 LOΩ 19.00Ω<br />
6 LOΩ 0.00Ω<br />
7 LOΩ 5.00Ω<br />
8 LOΩ 0.00Ω<br />
9 250V/MΩ 1000MΩ<br />
10 250V/MΩ 100.0MΩ<br />
11 250V/MΩ 10.00MΩ<br />
12 250V/MΩ 1.000MΩ<br />
13 250V/MΩ 0.000MΩ<br />
14 500V/MΩ 1000MΩ<br />
15 500V/MΩ 100.0MΩ<br />
16 500V/MΩ 10.00MΩ<br />
16 500V/MΩ 1.000MΩ<br />
18 500V/MΩ 0.000MΩ<br />
19 1000V/MΩ 1000MΩ<br />
20 1000V/MΩ 100.0MΩ<br />
21 1000V/MΩ 10.00MΩ<br />
22 1000V/MΩ 1.000MΩ<br />
23 1000V/MΩ 0.000MΩ<br />
Battery Replacement (Refer to Figure 2)<br />
1. Disconnect the test leads from any circuit under test.<br />
2. Press the key to switch off the instrument.<br />
3. Remove the hood and battery compartment cover by using a screwdriver.<br />
4. Remove the batteries replacing them with new ones all of the same type (1.5×6 NEDA 15F IEC R6 JIS<br />
UM-3) (Alkaline batteries are recommended.) making sure of polarity while installing.<br />
5. Install bottom case cover and secure with screws.<br />
6. Install the hood.<br />
Replacing Fuse (Refer to Figure 2)<br />
1. Disconnect the test leads from any circuit under test.<br />
2. Press the key to switch off the instrument.<br />
3. Remove the hood and battery compartment cover by using a screwdriver.<br />
4. Loosen the screws from the case bottom. Remove the case bottom.<br />
5. Remove input cover using a screwdriver.<br />
6. Check the fuse with a digital multimeter with a source current < 10mA in low resistance range.<br />
(Replace fuse with a BBS 1A/600V, 10.3*38 (1.5x0.41 inch) UL/CSA, interrupting rating 10kA.)<br />
7. Install input cover and secure with screw.<br />
8. Replace the case bottom and secure with screw.<br />
9. Replace the battery compartment cover, pressing to close it, and secure with screw.<br />
10. Install the hood.<br />
Form number TM<strong>61</strong><strong>795</strong> Rev 3 Jun 2008
Page 6<br />
Figure 1<br />
Form number TM<strong>61</strong><strong>795</strong> Rev 3 Jun 2008
Page 7<br />
Figure 2<br />
Form number TM<strong>61</strong><strong>795</strong> Rev 3 Jun 2008