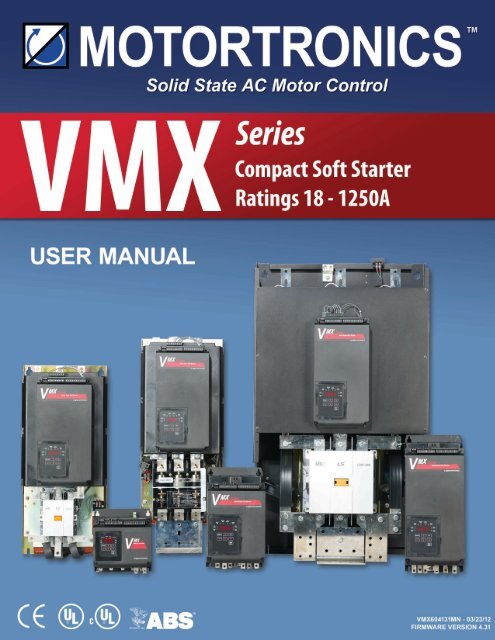
VMX User Manual - Motortronics
VMX User Manual - Motortronics
VMX User Manual - Motortronics

You also want an ePaper? Increase the reach of your titles
YUMPU automatically turns print PDFs into web optimized ePapers that Google loves.
Table of Contents<br />
Chapter 1: Introduction 1.1 General Description …………………… 1<br />
1.2 Sizes and Ratings ……………………… 4<br />
Chapter 2 - Installation 2.1 Receiving and Unpacking …………….. 5<br />
2.2 Choosing a Location …………………... 5<br />
2.3 Initial Unit Inspection …………………... 5<br />
2.4 SERVICE WARNING! …………………. 6<br />
2.5 Mounting and Cleaning ……………….. 6<br />
2.6 Power Terminations …………………… 7<br />
2.7 Remote Keypad Mounting 9<br />
2.8 Dimensions ……………………………... 10<br />
Chapter 3 - Motor Overload Protection 3.1 Solid State Overload Protection ……… 11<br />
3.2 NEMA Class Trip Curves ……………... 13<br />
Chapter 4 – Connections 4.1 Power Connections ……………………. 15<br />
4.2 Control Connections …………………… 16<br />
Chapter 5 – Programming 5.1 Introduction ……………………………... 23<br />
5.2 Digital Interface ………………………… 23<br />
5.3 Display Modes …………………………. 24<br />
5.4 Program Mode …………………………. 25<br />
Page<br />
5.4.5 Fault Mode ………………………… 28<br />
5.5 The <strong>VMX</strong> Function List ………………... 30<br />
5.6 Function Descriptions …………………. 36<br />
5.6.1 Motor and Overload Functions …. 36<br />
5.6.2 Starting Mode ……………………. 38<br />
5.6.3/4 Jog Mode / Kick Start Mode ……. 42<br />
5.6.5 Pump-Flex Decel Mode ………… 43<br />
5.6.6 Restart Delay ……………………. 44<br />
5.6.7 Current and Ground Fault Protection 45<br />
5.6.8 Lockouts, Reset & Internal Protection 47<br />
5.6.9 Output Relays ……………………. 54<br />
5.6.10 Communications …………………. 55<br />
5.6.11 System Settings …………………. 56<br />
5.6.12 Fault History and Statistical Data 58<br />
Chapter 6 - Start-up 6.1 Basic Startup ……………………………. 60<br />
6.2 Start-up Check List …………………….. 61<br />
6.3 Sequence of Operation ………………... 61<br />
6.4 Testing with a smaller motor ………….. 62<br />
Chapter 7 - Fault Conditions 7.1 Fault Codes and Numbers ……………... 63<br />
7.1 Fault Explanation ……………................. 64<br />
Appendices<br />
Appendix 1: Ramp Profile Details ……………………………………………………………….. 65<br />
Appendix 2: Pump-Flex Decel Mode Application Considerations …………………………… 68<br />
Appendix 3: Parameter Lock / <strong>User</strong> Password Instructions …………………………………… 71<br />
Appendix 4: External Over Load Relay Application……………………………………………... 73<br />
Appendix 5: Soft Starter Settings Record ………………………….…………….……………… 78<br />
Warranty Information...………….………………………………………………………………….. 83
Chapter 1 - Introduction<br />
1.1 General Description<br />
The <strong>VMX</strong> Series is a digitally programmable solid-state reduced voltage<br />
soft starter. Its six SCR design features a voltage/current ramp with an<br />
anti-oscillation circuit for smooth load acceleration. The SCRs are sized<br />
to withstand starting currents of 500% for 20 seconds (Standard Duty)<br />
and up to 500% for 60 seconds (Heavy Duty). The <strong>VMX</strong> Series features<br />
smooth, step-less ramp control, which reduces motor inrush current and<br />
excessive wear on the mechanical drive train components. The <strong>VMX</strong><br />
Series includes a programmable keypad for setting operating<br />
parameters for the ideal starting cycle and protection features, plus easy<br />
to understand diagnostic LEDs. Starting torque, ramp time, current limit,<br />
dual ramp, and Decel control are standard features on the <strong>VMX</strong> Series.<br />
By simply adjusting the unit’s starting torque, ramp time and current limit<br />
functions, the starting electrical characteristics of the motor can be<br />
matched to the mechanical characteristics of the drive train for<br />
controlled acceleration of the load. The <strong>VMX</strong> Series includes solid-state<br />
electronic overload protection in addition to numerous other protective<br />
features. It requires 120VAC (220VAC optional) control power and uses<br />
dry contact inputs for Start / Stop control. Programmable auxiliary<br />
contacts and provisions for interlocking are also included.<br />
Acceleration Adjustments<br />
Dual Ramp Settings<br />
Deceleration Adjustments<br />
1.1.1 Control Features<br />
Programmable Ramp Types:<br />
Voltage Ramp (VR) or closed loop Current Ramp (CR)<br />
Starting Torque: 0 - 100% of line voltage (VR)<br />
or 0 - 600% of motor FLA (CR)<br />
Ramp Time: 1 to 120 seconds<br />
Current Limit: 200 - 600% (VR or CR)<br />
4 Options:<br />
Ramps 1 & 2 = VR,<br />
Ramp 1 = VR, Ramp 2 = CR,<br />
Ramps 1 & 2 = CR;<br />
Ramp 1 = CR, Ramp 2 = VR<br />
Dual Ramp Control:<br />
Ramp #1 = Default,<br />
Ramp #2 = Selectable via dry contact input<br />
Begin Decel Level: 0 - 100% of line voltage<br />
Stop Level: 0 to 1% less than Begin Decel Level<br />
Decel Time: 1 - 60 seconds<br />
Programmable to Decel or coast to stop upon overload trip<br />
Jog Settings<br />
Kick Start Settings<br />
Jog function selected via dry contact closure input.<br />
Jog Voltage: 5 - 100%<br />
Time of Jog Voltage: 1 - 20 seconds<br />
Jog Current: 100 - 500%<br />
Kick Voltage: 10 - 100%<br />
Kick Time: 0.1 - 2 seconds<br />
Real Time Clock (RTC)<br />
Controller<br />
24/7 Time Clock Controller<br />
Range: 1-24 hours, and 1- 7 days per week,<br />
1 - 7 start events per day, works with Process Timer for run time<br />
<strong>VMX</strong> Series Digital Solid State Soft Starter <strong>User</strong> <strong>Manual</strong> 1 | P a g e
1.1.2 Advanced Motor Protection Features<br />
Thermal Model Electronic<br />
Overload Protection<br />
Two Stage<br />
Overload Curves<br />
A sophisticated Thermal Model of the motor operation is created in the<br />
microprocessor to accurately track all starting, stopping and running conditions<br />
thus, providing maximum motor protection.<br />
Starting: Programmable for Class 5 or 10<br />
Run: Programmable for Class 5 through 30 when "At-Speed" is detected.<br />
Overload Reset<br />
<strong>Manual</strong> (default) or automatic.<br />
Retentive Thermal Memory<br />
Dynamic Reset Capacity<br />
Current Imbalance Trip<br />
PTC Input Trip<br />
Over Current Trip<br />
(Electronic Shear Pin)<br />
Phase Loss<br />
Equipment Ground Fault<br />
Protection<br />
Load Loss Trip<br />
Coast Down (Back Spin)<br />
Lockout Timer<br />
Overload circuit retains thermal condition of the motor regardless of control<br />
power status. Unit uses real time clock to adjust for off time.<br />
Overload will not reset until thermal capacity available in the motor is enough for<br />
a successful restart. Starter learns and retains this information by monitoring<br />
previous successful starts.<br />
Trip Level: 5 - 30% Imbalance in any two phases<br />
Trip Delay: 1 -20 seconds<br />
Trips on greater than 750 ohms resistance on a dedicated PTC input. Can be<br />
used with an Emergency Stop or any other External Lockout.<br />
Trip Level: 50 - 300% of motor FLA<br />
Trip Delay: 1 - 20 seconds<br />
Trips on any phase current less than 20% of unit rating.<br />
Can be disabled in programming for testing with smaller loads.<br />
Type: Residual Current Trip<br />
Range: 5 – 90% of unit CT ratio<br />
Trip Delay: 1 – 60 seconds<br />
Under Current Trip Level: 10 –90 % of motor FLA<br />
Trip Delay: 1 – 60 seconds<br />
Prevents restart when motor may be spinning backwards.<br />
Coast Down Time Range: 1 – 60 minutes.<br />
Starts-per-hour Lockout<br />
1 – 10 successful starts per hour<br />
Minimum Time between<br />
Starts Lockout<br />
Restart Delay<br />
Auto Reset<br />
Power Device Monitoring<br />
Range: 1 – 60 minutes between start attempts<br />
Sequential Start Feature for restarting delay after a power outage.<br />
1-999 seconds after a power loss.<br />
Can be programmed to attempt resetting after selected faults.<br />
0 – 10 Attempts, 0 – 999 minutes delay between attempts.<br />
Shorted SCR Lockout (1 shorted SCR) and independent Shunt Trip (multiple<br />
shorted SCRs). Can be disabled in programming.<br />
<strong>VMX</strong> Series Digital Solid State Soft Starter <strong>User</strong> <strong>Manual</strong> 2 | P a g e
1.1.3 Design Specifications<br />
Type of Load:<br />
AC Supply Voltage:<br />
Three phase AC induction motors.<br />
Universal, 208 - 600VAC ±10%, 50/60 Hz.<br />
Power Ratings: 18 - 1250 Amps, 7.5 - 1000 HP @ 460V.<br />
Unit Capacity - Continuous<br />
Unit Capacity - Overload Rating<br />
(Percent of motor FLA)<br />
Power Circuit<br />
SCR Firing Angle Detection<br />
SCR PIV Ratings<br />
(Peak Inverse Voltage)<br />
Phase Rotation<br />
Transient Protection<br />
Cooling<br />
Bypass Contactor<br />
Bypass Contactor Rating<br />
Bypass Contactor Control<br />
Max. Amp rating is UL Listed continuous rating.<br />
500% - 20 seconds. (Standard Duty)<br />
500% - 60 seconds. (Heavy Duty)<br />
6 SCRs, full phase angle firing using a hard fire picket firing circuit and “Back<br />
Porch” DC carryover to avoid motor transient problems.<br />
6 pulse Independent Locked Phase Tracking with Auto-synchronization,<br />
prevents misfiring on unstable source frequency.<br />
1600V<br />
Operates with any phase sequence, or<br />
programmable rotation trip, ABC / ACB / Off.<br />
RC snubber dV/dt networks on each phase.<br />
Fan assisted convection.<br />
Standard on all NEMA 12 enclosed units.<br />
Shunt rated or can be sized for Line start rated contactor. (see charts)<br />
Integral control is included, but contactor can be externally controlled as well.<br />
Open panel mount units: 0° to 50 °C (32° to 122°F)<br />
Ambient Condition Design<br />
Factory enclosed units: 0° to 40°C (32° to 104°F)<br />
5 - 95% relative humidity.<br />
0 - 3300 ft. (1000m) above sea level without derating.<br />
Control Power<br />
Inputs<br />
Programmable Outputs<br />
Output Relay Contact Rating<br />
Dedicated Fault Output<br />
Approvals<br />
120VAC (customer supplied), 240VAC optional.<br />
6 Dry (voltage free) contact inputs using 24VDC from an internal power supply.<br />
3 relays, 2 each Form C (SPDT), 1 each Form A (SPST).<br />
Can be programmed for 26 functions, with delays or flashing.<br />
5 Amps, 240VAC max. (1200VA)<br />
AC Triac solid state switch.<br />
240VAC, 50mA max.<br />
UL Listed, Canadian UL (cUL) Listed CE Approved.<br />
<strong>VMX</strong> Series Digital Solid State Soft Starter <strong>User</strong> <strong>Manual</strong> 3 | P a g e
1.2 Sizes and Ratings<br />
The <strong>Motortronics</strong> <strong>VMX</strong> Series starters are current rated controllers.<br />
Max. Amp ratings are for continuous duty and must not be exceeded.<br />
Always check the motor nameplate FLA and Service Factor to ensure<br />
proper sizing.<br />
Each size has an adjustable current range from 50% to 100% of the<br />
Max Amp rating. Table 1.2 shows the Current Ratings available.<br />
Table 1.2 <strong>VMX</strong> Series Range<br />
Model<br />
Number<br />
Current<br />
Range<br />
Min.- Max.<br />
<strong>VMX</strong>-18-BP 9 - 18<br />
<strong>VMX</strong>-28-BP 14 - 28<br />
<strong>VMX</strong>-39-BP 19 - 39<br />
<strong>VMX</strong>-48-BP 24 - 48<br />
<strong>VMX</strong>-62-BP 36 - 62<br />
<strong>VMX</strong>-78-BP 39 - 78<br />
<strong>VMX</strong>-92-BP 46 - 92<br />
<strong>VMX</strong>-112-BP 56 - 112<br />
<strong>VMX</strong>-150-BP 75 - 150<br />
<strong>VMX</strong>-160-BP 80 - 160<br />
<strong>VMX</strong>-210-BP 105 - 210<br />
<strong>VMX</strong>-276-BP 138 - 275<br />
<strong>VMX</strong>-360-BP 181 – 361<br />
<strong>VMX</strong>-450-BP 225 – 450<br />
<strong>VMX</strong>-550-BP 275 – 550<br />
<strong>VMX</strong>-600-BP 300 - 600<br />
<strong>VMX</strong>-862-BP 431 - 862<br />
<strong>VMX</strong>-900-BP 450 - 900<br />
<strong>VMX</strong>-1006-BP 503 - 1006<br />
<strong>VMX</strong>-1250-BP 625 - 1250<br />
1.2.1 Selecting for Service Factor Utilization<br />
Many NEMA design motors include a design rating referred to<br />
as Service Factor (SF) that may allow continuous operation<br />
above the nameplate current rating. If using this Service<br />
Factor, the <strong>VMX</strong> Series starter must be sized for the total<br />
amps used. For proper selection of the <strong>VMX</strong> Series starter<br />
when using SF continuously, multiply the nameplate FLA by<br />
the stated Service Factor, or use stated Service Factor Amps<br />
(SFA) if listed on the nameplate. The following excerpt is from<br />
the NEMA MG-1 standards for AC Motors that describes the<br />
issues concerning the use of Service Factor ratings.<br />
"When an induction motor is operated at any service factor<br />
greater than 1.0, it may have efficiency, power factor and<br />
speed different than those at rated load. Locked rotor torque<br />
and current and breakdown torque will remain the same. A<br />
motor operating continuously at any service factor greater than<br />
1.0 will have a reduced life expectancy compared to operating<br />
at its nameplate horsepower."<br />
When using this feature, simply program the <strong>VMX</strong> Series<br />
Service Factor (F002) to the nameplate rating. (See section<br />
5.6.1.) All other adjustments to the protection circuits are done<br />
automatically within the <strong>VMX</strong> Series.<br />
1.2.2 Selecting for Across the Line Bypass<br />
If you need to be able to start the motor Across-the-Line when<br />
the <strong>VMX</strong> Series electronics are out of service, the starter can<br />
also be selected based upon the rating of the Bypass<br />
Contactor. Some users may also elect to size their Bypass<br />
Contactors per NEMA guidelines. When doing this, please<br />
refer to the Product Selection Guide for details and notes, and<br />
see Appendix 4 for special considerations regarding Overload<br />
Protection.<br />
1.2.3 The <strong>VMX</strong>…-BP Series starters include the ability to connect a<br />
dry contact directly to the Bypass Contactor coil control circuit.<br />
These terminals are covered when shipped and should be used<br />
ONLY when necessary for Emergency Bypass operation and with<br />
an external Overload Relay. See Appendix 4 for additional<br />
information.<br />
No field wiring to these terminals is necessary if this feature is not<br />
used.<br />
<strong>VMX</strong> Series Digital Solid State Soft Starter <strong>User</strong> <strong>Manual</strong> 4 | P a g e
Chapter 2 - Installation<br />
2.1 Receiving and Unpacking<br />
Upon receipt of the product, you should immediately do the following:<br />
• Carefully unpack the unit from the shipping carton and inspect it for<br />
shipping damage. If damaged, notify the freight carrier and file a<br />
claim within 15 days of receipt.<br />
• Verify that the model number on the unit matches your purchase<br />
order.<br />
• Confirm that the ratings nameplate on the unit matches or is greater<br />
than the motor’s HP and current rating with which it is to be used.<br />
2.2 Choosing a Location<br />
Proper location of the <strong>VMX</strong> Series is necessary to achieve specified<br />
performance and normal operational lifetime. The <strong>VMX</strong> Series should<br />
always be installed in an area where the following conditions exist:<br />
• Ambient operating temperature:<br />
Panel (open chassis) unit: 0 to 50°C (32 to 122°F)<br />
Enclosed unit: 0 to 40°C (32 to 104°F)<br />
• Protected from rain, moisture and direct sun.<br />
• Humidity: 5 to 95% non-condensing<br />
• Free from metallic particles, conductive dust and corrosive gas.<br />
• Free from excessive vibration. (below 0.5G)<br />
• Open panel units must be mounted in the appropriate type of<br />
enclosure. Enclosure size and type must be suitable to dissipate<br />
heat generated by the soft starter and any other components<br />
mounted inside with it.<br />
• Throughout all sizes, maximum heat dissipation of the <strong>VMX</strong>…-BP<br />
Series electronics, contactor coils and fans is less than 50W.<br />
• Care should always be taken to maximize the available space<br />
inside of the enclosure. See section 2.5.1 or contact factory for<br />
assistance in sizing enclosures.<br />
2.3 Initial Unit Inspection<br />
Make a complete visual check of the unit for damage that may have<br />
occurred during shipping and handling. Do not attempt to continue<br />
installation or start up the unit if it is damaged.<br />
• Check for loose mechanical assemblies or broken wires which may<br />
have occurred during transportation or handling. Loose electrical<br />
connections will increase resistance and cause the unit to function<br />
improperly.<br />
• Prior to beginning the installation, verify that the motor and <strong>VMX</strong><br />
Series unit are rated for the proper amperage and voltage.<br />
<strong>VMX</strong> Series Digital Solid State Soft Starter <strong>User</strong> <strong>Manual</strong> 5 | P a g e
2.4 SERVICE WARNING!<br />
Do not service equipment with voltage applied! The unit can be the<br />
source of fatal electrical shocks! To avoid shock hazard,<br />
disconnect main power and control power before working on the<br />
unit. Warning labels must be attached to terminals, enclosure and<br />
control panel to meet local codes. Use Lock Out tags such as the<br />
one shown when servicing equipment.<br />
2.5 Mounting and Cleaning<br />
When drilling or punching holes in the enclosure, cover the electrical<br />
assembly to prevent metal filings from becoming lodged in areas which<br />
can cause clearance reduction or actual electrical shorts. After work is<br />
complete, thoroughly clean, vacuum the area, and re-inspect the unit for<br />
foreign material.<br />
2.5.1 Clearances<br />
Make sure there is sufficient clearance all around the unit for cooling,<br />
wiring and maintenance purposes. To conserve panel space, the <strong>VMX</strong><br />
Series – BP models were designed for close vertical clearances of only<br />
1 inch (25mm) on either side. A minimum horizontal clearance of 4”<br />
(100 mm) on the top and bottom is necessary to maximize effective<br />
airflow and cooling. Also the unit must be installed with its heat sink ribs<br />
oriented vertically and running parallel to the mounting surface. Keep in<br />
mind that these are minimums. Wiring may require more clearance,<br />
particularly on the bottom.<br />
1" minimum (25 mm)<br />
4" minimum (100 mm)<br />
<strong>VMX</strong> Series<br />
Starter<br />
4" minimum (100 mm)<br />
1" minimum (25 mm)<br />
Figure 2.5: <strong>VMX</strong> minimum mounting clearances<br />
<strong>VMX</strong> Series Digital Solid State Soft Starter <strong>User</strong> <strong>Manual</strong> 6 | P a g e
WARNING!<br />
Remove all sources of power before cleaning the unit.<br />
In dirty or contaminated atmospheres, the unit should be cleaned on a<br />
regular basis to ensure proper cooling. Do not use any chemicals to<br />
clean the unit. To remove surface dust use clean, dry compressed air<br />
only, 80 to 100 psi. A three-inch, high quality, dry paintbrush is helpful to<br />
loosen up the dust prior to using compressed air on the unit. Do not use<br />
wire brushes or other conductive cleaning materials<br />
2.6 Power Terminations<br />
All line and load power terminations are to be made to tin plated copper<br />
Bus Tabs located on each unit. Bus tabs are pre-drilled to accept<br />
industry standard bolts. Some sizes come with saddle clamp terminals,<br />
however the connecting lugs are the responsibility of the user.<br />
<strong>Motortronics</strong> recommends using crimp-on lugs, although mechanical<br />
lugs are suitable as well. The following diagrams show sizes of the bus<br />
tab holes and critical spacing between them for determining the size of<br />
lug that can be used.<br />
Note: All wiring must be sized according to local code standards.<br />
<strong>VMX</strong>-18 ~<br />
<strong>VMX</strong>-48<br />
<strong>VMX</strong>-62 ~<br />
<strong>VMX</strong>-112<br />
Load<br />
Line<br />
Line<br />
Load<br />
R/L1 S/L2 T/L3<br />
V/T2<br />
U/T1 W/T3/<br />
Line<br />
Load<br />
1.50"<br />
(38.07 mm)<br />
1.10"<br />
(27.92 mm)<br />
0.19"<br />
(4.82 mm)<br />
1.82"<br />
(46.19 mm)<br />
1.73"<br />
(43.91 mm)<br />
0.38"<br />
(9.64 mm)<br />
0.45"<br />
(11.42 mm)<br />
0.60"<br />
(15.23 mm)<br />
S/L2<br />
U/T1<br />
W/T3<br />
1.23"<br />
(31.22 mm)<br />
R/L1<br />
Line<br />
T/L3<br />
V/T2<br />
Load<br />
1.13"<br />
(28.68 mm)<br />
Figure 2.6.1 Critical clearances for bus tab connections<br />
Figure 2.6.2 Critical clearances for bus tab connections<br />
<strong>VMX</strong> Series Digital Solid State Soft Starter <strong>User</strong> <strong>Manual</strong> 7 | P a g e
2.6 Power Connections (cont.)<br />
<strong>VMX</strong>-150 ~<br />
<strong>VMX</strong>-160<br />
Line<br />
Load<br />
1.52"<br />
(38.58 mm)<br />
1.54"<br />
(39.09 mm)<br />
2.81"<br />
(71.32 mm)<br />
0.38"<br />
(9.64 mm)<br />
0.60"<br />
(15.23 mm)<br />
0.14"<br />
(3.55 mm)<br />
R/L1<br />
S/L2<br />
T/L3<br />
U/T1<br />
V/T2<br />
W/T3<br />
Line<br />
Load<br />
Figure 2.6.3 Critical clearances for bus tab connections<br />
Note: Consult factory for bus tab critical dimensions for units 210A and above<br />
<strong>VMX</strong> Series Digital Solid State Soft Starter <strong>User</strong> <strong>Manual</strong> 8 | P a g e
2.6.1 Power Terminals:<br />
Connection points are bus tabs with pre-drilled holes (see below). Use<br />
appropriate compression or mechanical lugs for termination to these<br />
bus tabs.<br />
Suggested wire sizes and tightening torques for factory-supplied<br />
connectors for conductors rated for 75C are shown in the chart below.<br />
Always consult local codes and industry standard practices for proper<br />
wires sizes to accommodate voltage drop and ambient conditions.<br />
Model<br />
Number<br />
Table 2.6: <strong>VMX</strong> Series Wire Ranges and Torque Specifications<br />
Current Range<br />
Min.- Max.<br />
Suggested<br />
Wire Size<br />
AWG<br />
Tightening<br />
Torque<br />
in.-lbs.<br />
Screw / Bolt<br />
Size<br />
Tightening<br />
Torque<br />
Nm<br />
Suggested<br />
Wire Size<br />
ISOmm 2<br />
<strong>VMX</strong>-18-BP 9 - 18 12<br />
6<br />
<strong>VMX</strong>-28-BP 14 - 28 10 1 x M5<br />
10<br />
35<br />
4<br />
<strong>VMX</strong>-39-BP 19 - 39 8 (included)<br />
16<br />
<strong>VMX</strong>-48-BP 24 - 48 6 16<br />
<strong>VMX</strong>-62-BP 36 - 62 4<br />
25<br />
<strong>VMX</strong>-78-BP 39 - 78 3 1 x M8<br />
35<br />
45<br />
5<br />
<strong>VMX</strong>-92-BP 46 - 92 2 (included)<br />
35<br />
<strong>VMX</strong>-112-BP 56 - 112 2 50<br />
<strong>VMX</strong>-150-BP 75 - 150 0<br />
1 x M8<br />
70<br />
80<br />
9<br />
<strong>VMX</strong>-160-BP 80 - 160 2/0 (included)<br />
70<br />
<strong>VMX</strong>-210-BP 105 - 210 4/0<br />
120<br />
1 x 0.38" hole<br />
<strong>VMX</strong>-275-BP 138 - 275 300 kCMIL (M10)<br />
150<br />
<strong>VMX</strong>-361-BP 180 - 361 500 kCMIL 200 for <strong>User</strong> 15<br />
300<br />
<strong>VMX</strong>-450-BP 225 - 450 2 x 250 kCMIL<br />
supplied<br />
2 x 150<br />
lugs<br />
<strong>VMX</strong>-550-BP 275 - 550 2 x 250 kCMIL 2 x 150<br />
<strong>VMX</strong>-600-BP 300 – 600 TBD TBD TBD TBD TBD<br />
<strong>VMX</strong>-862-BP 431 – 862 TBD TBD TBD TBD TBD<br />
<strong>VMX</strong>-900-BP 450 – 900 TBD TBD TBD TBD TBD<br />
<strong>VMX</strong>-1006-BP 503 - 1006 TBD TBD TBD TBD TBD<br />
<strong>VMX</strong>-1250-BP 625 - 1250 TBD TBD TBD TBD TBD<br />
Note: TBD = To Be Determined at a later date<br />
2.7 Remote Keypad Mounting<br />
The keypad / operator interface unit can be remotely mounted up to 10’<br />
(3 meters) away from the starter, i.e. on the enclosure door. A remote<br />
mounting kit is necessary, which consists of an adaptor plate, a<br />
doorframe for NEMA 1 or NEMA 12 enclosures and a pre-assembled<br />
ribbon cable available in 1-meter length increments. Detailed assembly<br />
instructions and an enclosure cutout template are included with the kit.<br />
See Product Selection Guide for part numbers of the available kits.<br />
Figure 2.7<br />
Remote Keypad Mounting Kit<br />
Components<br />
NEMA12<br />
Door Frame<br />
Adaptor Plate<br />
Ribbon Cable,<br />
1, 2 or 3 Meters<br />
(3.28, 6.56 or 9.84')<br />
<strong>VMX</strong> Starter<br />
<strong>VMX</strong> Series Digital Solid State Soft Starter <strong>User</strong> <strong>Manual</strong> 9 | P a g e
2.8 Dimensions (consult price catalog for enclosed units)<br />
Table 2.8: <strong>VMX</strong> Dimensions and Weights<br />
Overall<br />
Mounting<br />
Enclosure<br />
Model Number<br />
A<br />
Inches<br />
(mm)<br />
B<br />
Inches<br />
(mm)<br />
C<br />
Inches<br />
(mm)<br />
D<br />
Inches<br />
(mm)<br />
E<br />
Inches<br />
(mm)<br />
F<br />
Inches<br />
(mm)<br />
Weight<br />
lbs<br />
(kg)<br />
<strong>VMX</strong>-18-BP through<br />
<strong>VMX</strong>-48-BP<br />
9.06<br />
(230)<br />
8.00<br />
(203)<br />
6.68<br />
(169.7)<br />
8.06<br />
(204.7)<br />
7.00<br />
(177.8)<br />
0.22<br />
(5.6)<br />
13<br />
(5.9)<br />
<strong>VMX</strong>-62-BP through<br />
<strong>VMX</strong>-112-BP<br />
14.00<br />
(355.6)<br />
8.00<br />
(203)<br />
6.68<br />
(169.7)<br />
13.25<br />
(336.6)<br />
6.75<br />
(171.5)<br />
0.28<br />
(7.1)<br />
23<br />
(10.4)<br />
<strong>VMX</strong>-150-BP and<br />
<strong>VMX</strong>-160-BP<br />
19.21<br />
(487.9)<br />
8.00<br />
(203)<br />
6.68<br />
(169.7)<br />
18.25<br />
(463.6)<br />
6.75<br />
(171.5)<br />
0.28<br />
(7.1)<br />
35<br />
(15.9)<br />
Panel (open)<br />
with integral<br />
bypass<br />
contactor<br />
<strong>VMX</strong> -210-BP and<br />
<strong>VMX</strong>-275-BP<br />
<strong>VMX</strong>-361-BP and<br />
<strong>VMX</strong>-450-BP<br />
28.50<br />
(723.9)<br />
29.29<br />
(744)<br />
12.5<br />
(317.5)<br />
12.5<br />
(317.5)<br />
9.03<br />
(229.4)<br />
9.03<br />
(229.4)<br />
27.38<br />
(695.5)<br />
27.38<br />
(695.5)<br />
10.75<br />
(273.1)<br />
10.75<br />
(273.1)<br />
0.40<br />
(10.2)<br />
0.40<br />
(10.2)<br />
90<br />
(40.9)<br />
105<br />
(47.7)<br />
<strong>VMX</strong>-550-BP through<br />
<strong>VMX</strong> -600-BP<br />
30.98<br />
(786.9)<br />
12.5<br />
(317.5)<br />
9.05<br />
(229.9)<br />
27.38<br />
(695.5)<br />
10.75<br />
(273.1)<br />
0.40<br />
(10.2)<br />
120<br />
(55)<br />
<strong>VMX</strong>-862-BP through<br />
<strong>VMX</strong>-900-BP<br />
44.25<br />
(1124)<br />
25.5<br />
(647.7)<br />
11.86<br />
(301.3)<br />
43.00<br />
(1092.2)<br />
23.00<br />
(584.2)<br />
0.40<br />
(10.2)<br />
Contact<br />
Factory<br />
<strong>VMX</strong>-1006-BP through<br />
<strong>VMX</strong> -1250-BP<br />
46.56<br />
(1182.6)<br />
28.20<br />
(716.3)<br />
13.10<br />
(332.7)<br />
42.75<br />
(1095.9)<br />
23.25<br />
(590.5)<br />
0.40<br />
(10.2)<br />
Contact<br />
Factory<br />
F dia.<br />
Figure 2.8: <strong>VMX</strong> Dimensions<br />
A<br />
~ ~<br />
D<br />
~<br />
E<br />
B<br />
C<br />
<strong>VMX</strong> Series Digital Solid State Soft Starter <strong>User</strong> <strong>Manual</strong> 10 | P a g e
Chapter 3 - Motor Overload Protection<br />
MOTOR FLA (F001)<br />
must be programmed<br />
for unit to operate!<br />
3.1 Solid State Overload Protection<br />
The <strong>VMX</strong> Series Starter provides true U.L. listed I 2 t Thermal Overload<br />
Protection as a built-in function of the main digital processor for<br />
maximum motor protection. It simulates the tripping action of a bimetallic<br />
overload relay, with the accuracy and repeatability of a digital<br />
control system. It is adjustable over a wide range and can be easily<br />
programmed for different trip curves.<br />
3.1.1 Thermal Memory<br />
The <strong>VMX</strong> Series microprocessor uses a sophisticated “Thermal<br />
Register” in the digital memory to keep track of motor heating and<br />
cooling over time regardless of the starter’s power status. By using nonvolatile<br />
memory, the <strong>VMX</strong> Series does not “forget” that the motor has<br />
been running even if power to the starter is turned off and turned back<br />
on. Continuous overload protection is provided based on the true<br />
thermal condition of the motor.<br />
Examples:<br />
3.1.2 Thermal Capacity<br />
The Thermal Register is displayed as a percentage. This percentage is<br />
the motor’s remaining thermal capacity. The percentage value begins at<br />
100; showing that the motor is cool (has 100% of its capacity available).<br />
As the motor heats up or moves toward an overload condition, the<br />
percentage begins to drop. The Thermal Capacity is derived from the<br />
programmed motor nameplate Full Load Amps (FLA) in Function F001,<br />
the Service Factor rating in Function F002, and the Overload Trip Class<br />
in Functions F003 and F004. Setting these functions to the proper<br />
values provides maximum protection and eliminates nuisance tripping.<br />
H100<br />
100% Thermal<br />
Capacity remaining<br />
at rest<br />
H057<br />
57% Thermal Capacity<br />
remaining after starter<br />
(43% used)<br />
The Remaining Thermal Capacity can be viewed by using the UP or<br />
DOWN arrow keys when in the Status Display mode. From the default<br />
Phase A Current screen (dot on right side), press the UP arrow key 4<br />
times to display [H100] meaning there is 100% of the Thermal Capacity<br />
(H = Heat capacity) remaining in the motor. After starting or running, the<br />
motor will use this capacity and the display will show a lower number.<br />
For example, after a cold start, the display may read [H065] which<br />
indicates that the motor has 65% of its thermal capacity remaining (35%<br />
used). The Status Display screens cycle back to the beginning, so the<br />
Down arrow keys can access this display as well.<br />
• 3.1.2.a Motor Full Load (FLA) Setting<br />
Use Function F001 to enter motor FLA as indicated on the motor<br />
nameplate. (Do not calculate for service factor, this is programmed<br />
separately in F002).<br />
• Note:<br />
All <strong>VMX</strong> Series starters are shipped from the factory with F001 set<br />
to a default value of 0000. If F001 is left at the factory default, the<br />
unit will not operate. If the user attempts to start the <strong>VMX</strong> Series<br />
without entering the motor nameplate FLA, the starter will Fault and<br />
the display will read “nFLA” (no Full Load Amps).<br />
<strong>VMX</strong> Series Digital Solid State Soft Starter <strong>User</strong> <strong>Manual</strong> 11 | P a g e
3.1.3 Disabling the Overload Protection<br />
The Overload Protection feature can be disabled if necessary. When<br />
using external devices such as Motor Protection Relays or when the<br />
<strong>VMX</strong> Series is wired downstream from an existing starter, this feature<br />
can be disabled to prevent conflicts with external overload protection<br />
devices. When the <strong>VMX</strong> Series is controlling multiple motors, the builtin<br />
Overload protection must be disabled and individual thermal overload<br />
relays must be installed on the motor leads going to each motor (see<br />
appendix 4 for additional details). To disable the Overload Protection<br />
function, use F005.<br />
WARNING!<br />
Do NOT disable Overload Protection unless another Thermal<br />
Overload Protection device exists in the circuit for all three<br />
phases. Running a motor without Overload Protection presents serious<br />
risk of motor damage or fire.<br />
• 3.1.3.a <strong>Manual</strong> Reset<br />
The factory default setting is <strong>Manual</strong> Reset. This means that when<br />
the Overload Trip is activated, the starter cannot be restarted<br />
without pressing the Reset key. The Overload Trip will not reset<br />
until the motor cools down (see 3.1.3.d). The <strong>Manual</strong> Reset function<br />
is also “trip free”. Holding in the Reset key will not prevent the<br />
Overload Trip from activating and protecting the motor.<br />
• Note:<br />
When the Overload Trip activates, the Overload LED will be on<br />
solid. When the motor cools down, the LED will begin to flash,<br />
indicating that the Overload Trip can be reset.<br />
• 3.1.3.b Automatic Reset<br />
If Automatic Reset is necessary, change from <strong>Manual</strong> Reset to<br />
Automatic Reset by using Function F005. (See Section 5 for<br />
details). In this mode, a 3-wire control circuit will be capable of<br />
restart when the <strong>VMX</strong> Series has reset itself after the cool down<br />
period.<br />
WARNING!<br />
Two-wire control systems may restart without warning when Auto<br />
Reset of the overload protection is selected. Extreme caution<br />
should be exercised. To prevent automatic restarting with 2-wire<br />
control systems, use external interlocking to provide sufficient<br />
warning and safety to operators. A Warning Label similar to that<br />
shown below (and the one provided in the packet with this manual)<br />
must be located where visible (on the starter enclosure and/or the<br />
driven equipment) as required by local code.<br />
WARNING: MOTOR CONNECTED TO THIS EQUIPMENT<br />
MAY START AUTOMATICALLY WITHOUT WARNING<br />
<strong>VMX</strong> Series Digital Solid State Soft Starter <strong>User</strong> <strong>Manual</strong> 12 | P a g e
• 3.1.3.c Overload Protection During Bypass<br />
When an integral Bypass Contactor is used to shunt power around<br />
the SCRs in the <strong>VMX</strong> Series (as in the <strong>VMX</strong>…-BP version),<br />
overload protection is maintained as long as the <strong>VMX</strong> Series is<br />
directly controlling the contactor. No additional Overload Relay is<br />
necessary for normal operation.<br />
• When the Bypass Contactor on a <strong>VMX</strong>…-BP Series has been<br />
selected to be used for Across-the-Line restart (reference section<br />
1.2.3), supplemental overload protection is necessary. For this<br />
application, refer to the External Overload Relay Applications<br />
supplement and wiring diagram in Appendix 4.<br />
• 3.1.3.d Dynamic Reset Capacity<br />
The <strong>VMX</strong> Series includes the ability to dynamically track the<br />
Thermal Capacity needed for a successful restart after an overload<br />
trip. It averages the Thermal Capacity consumed in the previous<br />
three successful starts, and calculates a Thermal Capacity to Start<br />
(viewed in Function F059). After tripping on Overload, the Thermal<br />
Register must have regained the amount recorded in F059 before a<br />
Reset will be allowed. If the display reads [ Inh] when attempting to<br />
reset an overload trip, it is indicating that the starter is Inhibited from<br />
being reset.<br />
Refer to details of Function F071 for information on emergency<br />
override of lockouts such as this.<br />
3.2 NEMA Class Trip Curves<br />
NEMA Class trip curves are based on a common tripping point of 600%<br />
of motor Full Load Amps (FLA). Curves vary by the amount of time<br />
before the unit trips. As an example, a Class 20 curve will trip in 20<br />
seconds at 600% of FLA. The factory default setting of Class 10 will trip<br />
in 10 seconds at 600% of FLA.<br />
3.2.1 Dual Overload Trip Curves<br />
The <strong>VMX</strong> Series Soft Starter provides two separate Overload Trip<br />
Protection Curves, one for starting and one for running conditions. The<br />
starter’s At-Speed detection circuit determines when the motor has<br />
reached full speed. When the At-Speed condition is reached, the<br />
overload trip curve will shift from the Start to the Run level, as<br />
programmed in Functions F003 and F004. See Section 5.6.1 for<br />
programming details.<br />
3.2.2 Starting Overload Trip Curve<br />
During the start mode, Overload Trip Curves are selectable from NEMA<br />
Class 5 through Class 20 only. The default setting of Class 10 allows<br />
protection for the overload capacity of the soft starter as well as the<br />
motor. Use a higher Trip Class only if nuisance tripping occurs with the<br />
default setting.<br />
<strong>VMX</strong> Series Digital Solid State Soft Starter <strong>User</strong> <strong>Manual</strong> 13 | P a g e
3.2.3 Running Overload Curve<br />
During the Run mode, Overload trip curves are selectable from NEMA<br />
Class 5, 10, 15, 20, 25, and 30. Program the appropriate curve<br />
according to the characteristics of your motor and load.<br />
3.2.4 Overload Trip Curve Chart<br />
Figure 3.2.4: <strong>VMX</strong> Series Overload Trip Curves<br />
<strong>VMX</strong> Series Digital Solid State Soft Starter <strong>User</strong> <strong>Manual</strong> 14 | P a g e
Chapter 4 – Connections<br />
Disconnect<br />
or<br />
Circuit<br />
Breaker<br />
R /<br />
L1<br />
S /<br />
L2<br />
T /<br />
L3<br />
<strong>VMX</strong> Starter.<br />
Solid State.<br />
Over Load.<br />
4.1 Power Connections<br />
Referring to local code standards for wire sizing and length, connect<br />
power conductors to the unit input terminals marked L1, L2, L3 (R, S, T<br />
for IEC users). Connection points for units of 160A and below are<br />
saddle clamps suitable for stranded wire. Connection points for units of<br />
210A and above are bus tabs with pre-drilled holes (see section 2). Use<br />
appropriate compression or mechanical lugs for termination to these<br />
bus tabs. Avoid routing power wires over the control board or display.<br />
Connect the motor leads to the unit terminals marked T1, T2, T3 (U, V,<br />
W for IEC users). If control power is present, but line power is<br />
disconnected from L1, L2, L3, the display will show [n3PH] indicating<br />
“no 3 Phase”.<br />
Integral<br />
Bypass<br />
Contactor*<br />
Caution!<br />
Never interchange input and output connections to<br />
the unit. This could cause excessive voltage in the<br />
control logic circuit and may damage the unit.<br />
U /<br />
T1<br />
V /<br />
T2<br />
W /<br />
T3<br />
G<br />
4.1.1 Bypass Contactor<br />
Bypass Contactors are integral (built-in) on all <strong>VMX</strong> versions. See<br />
sections 1.2.3, 3.1.3.c and Appendix 4 for more details on contactor<br />
control and overload protection details.<br />
MTR<br />
Figure 4.1:<br />
<strong>VMX</strong> Power Connections<br />
4.1.2 Power Factor Correction Capacitors<br />
Power factor correction capacitors can be connected to motors<br />
controlled by <strong>VMX</strong> Series starters; however they must be off-line during<br />
ramping. Connect PFC capacitors to the Line side of the starter with a<br />
separate capacitor control contactor.<br />
WARNING!<br />
Never connect power factor correction capacitors on the load side<br />
of the unit. The SCRs will be seriously damaged if capacitors are<br />
located on the load side.<br />
4.1.3 Grounding<br />
Connect the ground cable to the ground terminal as labeled on the unit.<br />
Refer to the National Electrical Code or your local Code for the proper<br />
ground wire sizing and be sure that the ground connector is connected<br />
to earth ground. In ungrounded systems, it is not necessary to connect<br />
a ground to the unit however local codes should always be consulted.<br />
<strong>VMX</strong> Series Digital Solid State Soft Starter <strong>User</strong> <strong>Manual</strong> 15 | P a g e
4.1.4 Testing<br />
The <strong>VMX</strong> Series can be tested with a load smaller than the motor it was<br />
originally selected to control, however additional steps must be taken to<br />
avoid tripping on Phase Current Loss. See section 5.6.8.a under “Phase<br />
Loss Protection” for additional details on performing this task.<br />
• Notes:<br />
The unit cannot be tested without a motor or other test load<br />
connected to the load side of the unit. It may be necessary to use a<br />
load bank to test the unit without a motor.<br />
• Line voltage will appear across the output terminals if there is no<br />
motor or load connected to the unit.<br />
4.1.5 Lightning Protection<br />
As with all electronic power controllers, protection from damage by<br />
lightning surges is recommended in areas where lightning is a<br />
significant problem. Stationary air gap lightning arrestors should be<br />
considered and utilized on the input power source. The best method of<br />
protection is to have an Isolation Contactor in front of the starter that is<br />
open when the soft starter is not in use. Enclosed versions can be<br />
ordered with an OPTIONAL secondary surge absorber.<br />
4.2 Control Connections<br />
Control connections on the <strong>VMX</strong> Series starter are divided into 2<br />
groups. With the unit oriented vertically, TB1 is a 12-point DC terminal<br />
block (on the left), and TB2 is a 10 point AC terminal block (on the right<br />
side). These are removable terminal blocks for ease of connection and<br />
servicing, and are provided with different spacing (pitch) between the<br />
header pins so they are not interchangeable. Following are descriptions<br />
of control connection points.<br />
• Note:<br />
Terminal numbers are shown on the side of the first and last<br />
terminal of each block. An additional 3 point terminal on the far left<br />
side is for serial communication connections (see section 5.6.10).<br />
Figure 4.2: Control Terminal Blocks<br />
<strong>VMX</strong> Series Digital Solid State Soft Starter <strong>User</strong> <strong>Manual</strong> 16 | P a g e
4.2.1 AC Control Power Supply Connection<br />
120VAC<br />
Supply<br />
1 NC NO. C 2 NC NO. C 3 NO. C<br />
1 A1 A2<br />
Figure 4.2.1<br />
Control Power Supply Connection<br />
TB-2<br />
Separate AC Control Power supply is required to power the electronics<br />
of the <strong>VMX</strong> Series starter. 120VAC is standard, order 240 VAC<br />
(optional) if necessary for your line power supply configuration. The<br />
control voltage must be connected to terminals marked A1 and A2 of<br />
TB-2 as shown in figure 4.2.1 (these are also Terminal No.’s 21 and 22).<br />
This control voltage must be customer supplied, unless an optional<br />
control power transformer (see table below) has been supplied with the<br />
unit.<br />
Table 3: <strong>VMX</strong> Series AC Control Power VA Requirements<br />
<strong>VMX</strong> …-BP<br />
Model<br />
PC<br />
Boards<br />
Fans<br />
-BP: Bypass<br />
Contactor<br />
Inrush<br />
-BP: Bypass<br />
Contactor<br />
Sealed<br />
Recommended<br />
minimum<br />
CPT<br />
Rating<br />
<strong>VMX</strong>-18 to 48 48 (inc. in PCB) 95 9 100<br />
<strong>VMX</strong>-62 to 112 48 (inc. in PCB) 220 17 250<br />
<strong>VMX</strong>-150 to 160 48 72 298 12.3 500<br />
<strong>VMX</strong>- 210 to 276 48 100 380 11.6 500<br />
<strong>VMX</strong>-360 to 450 48 150 571 14 750<br />
<strong>VMX</strong>-550 48 200 1000 29 1000<br />
• 4.2.1.a Control Power Requirements<br />
When sizing a control power transformer for the <strong>VMX</strong>…-BP Series<br />
starter use the above chart for minimum sizes or supply capacity.<br />
Any additional control devices powered by the same CPT must be<br />
added to the above values to ensure proper operation of the Bypass<br />
Contactor.<br />
• 4.2.1.b Control Fusing<br />
The output relay contacts (TB2) must be protected from currents in<br />
excess of 5A by either using fuses or other suitable current<br />
protection devices.<br />
• A dedicated fault output for use in PLC or interposing relay control<br />
is available on TB1. This opto-isolated Triac switch is rated for<br />
50mA max., 10-250V AC. Any circuit connected to it must be fused<br />
accordingly.<br />
<strong>VMX</strong> Series Digital Solid State Soft Starter <strong>User</strong> <strong>Manual</strong> 17 | P a g e
4.2.2 Three-Wire Control Connection<br />
1 2 3<br />
Connect 3 wire<br />
control here<br />
as shown<br />
N C<br />
RAMP2 JOG<br />
PTC OPTO<br />
Figure 4.2.2<br />
3 Wire Control Connection<br />
TB-1<br />
For standard 3-wire control, connect dry (voltage free) contacts for the<br />
Stop / Start buttons as shown on the diagram directly above the terminal<br />
strip. Connect the NO contact of the Start button to Terminal 1 (far left<br />
terminal), the common point between the Stop and Start to Terminal 2<br />
(2 nd from left) and the NC from the Stop button to Terminal 3 (3 rd from<br />
left).<br />
• 4.2.2.a Seal In Contact<br />
The <strong>VMX</strong> Series uses an internally pre-wired “seal-in” contact<br />
around the Start button (Terminals 1 and 2). No external relay or<br />
auxiliary output connection is necessary.<br />
4.2.3 Two Wire Control: Relay / PLC Connection<br />
1 2 3<br />
Connect 2 wire<br />
control / PLC<br />
output here<br />
N C<br />
RAMP2 JOG<br />
PTC OPTO<br />
Figure 4.2.3<br />
2 Wire Control Connection<br />
TB-1<br />
An alternate connection for automated or unattended operation replaces<br />
the start/stop push buttons by connecting a dry (voltage free)<br />
maintained contact closure between terminals 1 and 3 as shown in<br />
Figure 4.2.3. When this contact is closed, the <strong>VMX</strong> Series starter will<br />
start and run. When it is opened, it is the same as a Stop command.<br />
• 4.2.3.a Automatic Functions and 2 Wire Control<br />
When using the Auto Reset functions (F052 – F053), special<br />
consideration must be given to using 2 wire control. Refer to section<br />
5.6.8 for details on using Auto-Reset functions.<br />
• Note:<br />
When a maintained contact is used for start/stop it is advisable to<br />
set the overload relay to the manual reset position. This will prevent<br />
the motor from restarting if the thermal overload trips and then cools<br />
down.<br />
CAUTION!<br />
Control Terminals 1-10 of TB1 are configured using solid state<br />
devices powered internally with a 24VDC power supply. To prevent<br />
damage to the <strong>VMX</strong> Series control board, use dry (unpowered)<br />
contact closures only when connecting to these terminals.<br />
If existing 120VAC or other powered control circuit must be<br />
interfaced, use isolating relays.<br />
N C<br />
4 5<br />
RAMP2 JOG<br />
PTC OPTO<br />
Remove factory jumper<br />
and connect external<br />
interlock device here<br />
Figure 4.2.<br />
External Interlock Connection<br />
TB-1<br />
4.2.4 Interlock Connection<br />
TB1 provides a connection point for an external dry (voltage free) N.C.<br />
(Normally Closed) interlock device between terminals 4 and 5.<br />
Examples where this interlock connection would be used include low oil,<br />
high temperature, or excess vibration dropout from user supplied<br />
devices. A factory-installed jumper is provided which allows the <strong>VMX</strong><br />
Series unit to operate if external interlocks are not used. If this jumper is<br />
removed and an interlock is not used, the <strong>VMX</strong> Series unit will not<br />
function.<br />
<strong>VMX</strong> Series Digital Solid State Soft Starter <strong>User</strong> <strong>Manual</strong> 18 | P a g e
4.2.5 Enabling the Dual Ramp and Jog Features<br />
TB1 includes provisions for enabling the Dual Ramp and Jog functions<br />
by using external contact closures. Both features use a common<br />
+24VDC from Terminal 7 however, they can be used independently of<br />
each other or together. See sections 5.6.2 and 5.6.3 for full function<br />
descriptions and setup.<br />
N C<br />
RAMP 1 RAMP 2<br />
RAMP2 JOG<br />
PTC OPTO<br />
6 7 8<br />
Figure 4.2.5.a:<br />
Dual Ramp Connections<br />
TB-1<br />
• 4.2.5.a Dual Ramp Command<br />
Closing a dry (voltage free) contact between TB1, terminals 6 and 7<br />
will enable Ramp 2, and the <strong>VMX</strong> Series starter will respond to the<br />
settings for Ramp 2 in F015 - F018. If no contact closure is present,<br />
the <strong>VMX</strong> Series starter defaults to the Ramp 1 parameters (F011 –<br />
F014). See Section 5.6.2.a for setup of the Dual Ramp Feature.<br />
The Dual Ramp feature is useful in instances where the load<br />
changes significantly. Example: a loaded or unloaded conveyor belt.<br />
The characteristics for starting an unloaded conveyor can be<br />
programmed for ramp 1. The characteristics for starting a loaded<br />
conveyor can be programmed for ramp 2. Ramp 2 can also be<br />
programmed for Full Voltage / Across-the-Line starting by setting<br />
the ramp time to 0 and Current to 600%.<br />
Dual Ramp is also useful in 2-speed motor applications. Simply use<br />
an auxiliary contact from one of the speed contactors to select<br />
Ramp 2 so that separate ramp profiles can be used.<br />
N C<br />
RAMP2 JOG<br />
PTC OPTO<br />
6 7 8<br />
• 4.2.5.b Jog / Remote Command<br />
Connecting a dry (voltage free) contact between TB1, Terminals 7<br />
and 8 will enable the Jog feature. A Start command (Run Command<br />
or Start button) is required to activate the Jog feature. See Section<br />
5.6.3 for setup of the Jog Function.<br />
RUN<br />
Figure 4.2.5.b:<br />
Jog Connections<br />
TB-1<br />
JOG<br />
The Jog feature can be used for tasks such as lining up machines<br />
for blade or bit changes or inching belts along to check tracking.<br />
This input is also used to change the function of the Serial<br />
Communications port control through F068. For additional<br />
information, see instructions of that function in section 5.6.10.<br />
N C<br />
RAMP2 JOG<br />
PTC OPTO<br />
6 7 8<br />
RUN<br />
RAMP 2<br />
JOG<br />
• 4.2.5.c Using Both Commands<br />
It may be useful to initialize the Ramp 2 and Jog command<br />
simultaneously when jogging. If this is the case, terminals 6 and 8<br />
can be jumped together and controlled with one contact closure to<br />
Terminal 7 (the common 24VDC).<br />
Figure 4.2.5.c:<br />
Dual Ramp / Jog Connections<br />
TB-1<br />
<strong>VMX</strong> Series Digital Solid State Soft Starter <strong>User</strong> <strong>Manual</strong> 19 | P a g e
N C<br />
Figure 4.2.6:<br />
PTC Resistor Connection<br />
TB-1<br />
RAMP2 JOG<br />
PTC OPTO<br />
9 10<br />
**<br />
PTC Resistor in Motor<br />
+<br />
** Remove factory jumper<br />
from Terminals 9 and 10<br />
4.2.6 PTC Thermistor Input<br />
The <strong>VMX</strong> Series starter is provided with input terminals for connecting a<br />
PTC (Positive Temperature Coefficient) Thermistor that may be<br />
imbedded in the motor. These are specialized resistors imbedded in<br />
some motor windings that increase in resistance as the temperature<br />
increases. When the <strong>VMX</strong> Series detects that the PTC input resistance<br />
is too high, it initiates a PTC trip, and displays [ PTc ] on the readout.<br />
This is independent of the Thermal Register overload current protection<br />
and provides supplemental protection for high motor ambient<br />
temperature applications. Terminals for this input are provided with a<br />
factory jumper that must be removed if the PTC input is used. These are<br />
Terminals 9 and 10 located on TB1.<br />
PTC resistors are also found in other devices such as bearings, air<br />
receivers, oil or coolant reservoirs and air discharge systems that may<br />
require shutdown of the motor.<br />
PTC Resistor Values:<br />
The resistance must be greater than or equal to 750 at 25ºC. If<br />
multiple resistors are used in the motor, the sum of all resistors in series<br />
must equal or exceed this value.<br />
N C<br />
Optional<br />
Emergency Stop PB<br />
RAMP2 JOG<br />
PTC OPTO<br />
9 10<br />
Figure 4.2.6.a:<br />
External Overload Relay(s)<br />
and/or E-Stop PB Connection<br />
TB-1<br />
**<br />
External OL Relays<br />
OLR 1 OLR 2<br />
** Remove factory jumper<br />
from Terminals 9 and 10<br />
• 4.2.6.a External Over Load Relay Connection<br />
If an external Over Load Relay (OLR) is used (see Section 3.1.3.c<br />
and Appendix 4), connect the NC aux. contact of the OLR to the<br />
PTC input after removing the jumper. When the external OLR trips,<br />
the contact will open, opening the resistance input to the PTC circuit<br />
(the resistance goes to infinity). This indicates an immediate Over<br />
Load to the starter, which trips and displays [ PTc ] on the readout<br />
to differentiate from the internal Thermal Over Load trip. If multiple<br />
OLRs are used, i.e. multiple motors controlled by the same <strong>VMX</strong><br />
Series starter, simply wire the Aux Contacts in series as shown in<br />
Figure 4.2.6.a. See Appendix 4 for additional information.<br />
• Note:<br />
An Emergency Stop Push Button or any other field device may be<br />
wired to the PTC input using NC contacts. When the contacts open,<br />
the starter will detect it as a PTC trip. Even if a PTC is used in the<br />
motor, field devices can still be added as long as the total circuit<br />
resistance is not exceeded.<br />
• This feature is especially useful when using Decel Control because<br />
it will immediately shut off power to the motor even if Decel is<br />
active. If used this way, instruct the users as to the trip indication<br />
issues (i.e. the display will show [ PTc ] and the Overload LED will<br />
be on).<br />
<strong>VMX</strong> Series Digital Solid State Soft Starter <strong>User</strong> <strong>Manual</strong> 20 | P a g e
N C<br />
Control Power or PLC Source<br />
Figure 4.2.7:<br />
Fault Output Opto-Triac Connection<br />
TB-1<br />
RAMP2 JOG<br />
PTC OPTO<br />
11 12<br />
R<br />
External Fault Relay<br />
or PLC Input<br />
4.2.7 Fault Signal<br />
An optically isolated Triac output is dedicated as a fault indicator on<br />
TB1, terminals 11 and 12, labeled “Opto”. The output Triac switch is<br />
rated for 10 - 250 VAC, 50 mA (maximum). If the three programmable<br />
Output Auxiliary Relays are being used for other functions, this output<br />
can easily be hooked up to a PLC or small external relay to provide a<br />
Fault signal. This Fault Output operation is permanently fixed at “Any<br />
Trip”, duplicating the Relay setting 16 as shown in Table 5.6.9.<br />
This output is permanently set to this function and is not<br />
programmable.<br />
K3<br />
AUX.<br />
RELAY #1<br />
Internal Connections<br />
K4<br />
1 NC NO. C 2 NC NO. C 3 NO. C<br />
1 A1 A2<br />
AUX.<br />
RELAY #2<br />
K5<br />
13 14 15 16 17 18 19 20<br />
AUX.<br />
RELAY #3<br />
Figure 4.2.8<br />
Auxiliary Relay Connections<br />
TB-2<br />
4.2.8 Output (Auxiliary) Relay Contacts<br />
Three programmable auxiliary relays are on TB2. The <strong>VMX</strong> Series<br />
starter comes with three programmable dry relay output contacts.<br />
Outputs 1 and 2 are Form C (SPDT), with a Common, N.O. and N.C.<br />
Output 3 is a Form A, (SPST), N.O. contact. It is not necessary to use<br />
the programmable output auxiliary relays in the Start / Stop circuit. An<br />
internal seal-in relay is provided elsewhere (see 4.2.2.a above).<br />
<strong>Motortronics</strong> recommends fusing all outputs with external fuses.<br />
The relays are rated for 240 VAC, 5 A and 1200 VA.<br />
Factory default settings for these relays are as follows:<br />
• AUX 1 – Run / Stop (see F060).This contact changes state upon a<br />
Start command, returns to normal on Stop (or Begin Decel if active).<br />
• AUX 2 – At-Speed / Stop (see F061).This contact changes state<br />
upon the <strong>VMX</strong> Series detecting At-Speed, and returns to normal on<br />
Stop. At-Speed is determined by the <strong>VMX</strong> Series detecting the<br />
current dropping after reaching End-of-Ramp, or a maximum of 30<br />
seconds after Start.<br />
• AUX 3 – Any Trip (see F062) This contact closes when any trip<br />
condition 5 – 15 (as defined in Table 5.6.9) occurs.<br />
All relays can be reprogrammed for a wide variety of functions.<br />
See Section 5.6.9 for additional relay programming details.<br />
<strong>VMX</strong> Series Digital Solid State Soft Starter <strong>User</strong> <strong>Manual</strong> 21 | P a g e
4.2.9 Bypass Contactor Control<br />
On <strong>VMX</strong>…-BP version (and NEMA 12 enclosures) starters, an internal<br />
dedicated connection is used at the factory for automatically controlling<br />
the Bypass Contactor. Field wiring for Bypass Contactor operation is not<br />
required.<br />
• 4.2.9.a Independent Bypass Contactor Control<br />
The <strong>VMX</strong>…-BP Series starters use standard industrial contactors<br />
that can be controlled independent of the starter electronics if<br />
necessary. When doing so, it is necessary to size the starter based<br />
upon the ATL (Across-the-Line) selection chart so that the<br />
contactors are rated for ATL duty instead of normal Shunt Duty.<br />
(see section 1.2.3). Supplemental overload protection will be<br />
required (see section 3.1.3.c).<br />
Units have external terminal blocks marked for this purpose (see<br />
Appendix 4 for drawings). A dry (voltage free) contact closure<br />
between these terminals will close the bypass contactor<br />
immediately. The Bypass Contactor coil voltage is the same as the<br />
control voltage (120VAC unless the optional 240VAC control is<br />
specified), and the voltage on these terminals is the same as the<br />
coil voltage.<br />
No field wiring is necessary to these terminals if this feature is<br />
not used.<br />
For all other styles of <strong>VMX</strong> Series, the At-Speed signaling can be<br />
programmed into any of the three Output relays (section 4.2.8 and<br />
Table 5.6.9).<br />
<strong>VMX</strong> Series Digital Solid State Soft Starter <strong>User</strong> <strong>Manual</strong> 22 | P a g e
Chapter 5 - Programming<br />
MOTOR FLA (F001)<br />
must be programmed<br />
for unit to operate!<br />
5.1 Introduction<br />
It is best to operate the motor at its full load starting conditions to<br />
achieve the proper time, torque and ramp settings. Initial factory settings<br />
are set to accommodate general motor applications and provide basic<br />
motor protection. Advanced features must be enabled via programming.<br />
The only parameter that MUST be set by the user is motor FLA (F001).<br />
5.2 Digital Interface<br />
The <strong>VMX</strong> Series Soft Starter includes a digital keypad with eight LEDs,<br />
seven command keys, and an LED display with four alphanumeric<br />
digits.<br />
Table 5.2: <strong>VMX</strong> Series Display Features<br />
Figure 5.2: Digital Interface<br />
Keys<br />
Green<br />
LEDs<br />
Yellow<br />
LEDs<br />
Reset<br />
Fn<br />
Up and<br />
Down<br />
Arrows<br />
Right<br />
and Left<br />
Arrows<br />
Power<br />
On<br />
At<br />
Speed<br />
Shunt<br />
Trip<br />
Shorted<br />
SCR<br />
Over<br />
Current<br />
Phase<br />
Loss<br />
Over<br />
Temp<br />
Over<br />
Load<br />
Display 8888.<br />
Clears the Trip indication and releases the Trip Relay.<br />
Enters or exits the Program Mode.<br />
Navigates through the Status Display Mode, scrolls up<br />
and down through the Function List, increases or<br />
decreases the value of the active (flashing) digit and<br />
scrolls through the fault history. When entering values,<br />
holding the key down for more than 2 seconds will<br />
activate Auto-step, which increases its rate the longer<br />
the key is held down.<br />
Each keypress shifts the active (flashing) digit to the<br />
right or left by one position, allowing you to change<br />
higher values of functions without waiting to Auto-step<br />
though large numbers.<br />
Control power is available at A1 and A2<br />
The motor is at full power and the Bypass Contactor<br />
has been commanded to pull in.<br />
The SCRs are at full conduction and current has<br />
dropped.<br />
Power is flowing to the motor in the Off mode. See<br />
section 5.6.8.a for additional information.<br />
There is no voltage drop across at least one SCR<br />
phase assembly, indicating that at least one SCR is<br />
shorted. See section 8 for additional information.<br />
Overcurrent LED lights for three sets of fault conditions:<br />
1) During start, the unit saw current exceed the<br />
normal rate of increase in the first 250ms.<br />
2) During Run, current exceeded either the OC setting<br />
in F042 for the delay set in F043. This LED will be<br />
accompanied by oCA, oCC or oCd on the display.<br />
3) The unit has seen a Short Circuit exceeding 10x<br />
FLA for 12.5ms. This LED will be accompanied by<br />
SCA, SCC or SCD display.<br />
One or more of the phase currents dropped below the<br />
threshold during starting or running.<br />
Starter has tripped due to excess heat sink<br />
temperature. This will automatically reset.<br />
Starter has tripped due to the Thermal Register<br />
reaching 0000. The Overload must reset before this<br />
fault can be cleared.<br />
4 digit 7 segment display with a decimal point on the<br />
right side indicating Phase A.<br />
<strong>VMX</strong> Series Digital Solid State Soft Starter <strong>User</strong> <strong>Manual</strong> 23 | P a g e
5.3 Display Modes<br />
There are three modes of display: The Status Display Mode, the<br />
Program Mode, and the Fault Mode.<br />
5.3.1 Status Display Mode (Default Display)<br />
The Status Display Mode displays seven “screens” of information. Motor<br />
Currents (3 phases), Remaining Thermal Capacity, Ground Current,<br />
Remaining Time on the Process Timer, and Time Base of the Time<br />
Clock Controller. This is also the entry screen for going into the Program<br />
Mode.<br />
Status mode:<br />
[0000.] The initial display on power up is four digits and the decimal.<br />
This indicates the motor current for Phase A of the motor.<br />
[0000] Scroll UP to display four digits only (no decimal). This indicates<br />
the motor current for Phase B. While viewing Phase B, press the UP<br />
arrow again to view Phase C current.<br />
[G000] Scroll UP to display the “G”. This shows the value of the current<br />
flowing to ground on the motor leads.<br />
[H000] Scroll UP to display the “H”. This indicates the value of the<br />
remaining thermal capacity percentage of the motor (i.e. H070 = 70%<br />
remaining thermal capacity)<br />
Example: Figure 5.3.1<br />
Reading the Status Display<br />
[0120.] Indicates Phase A is drawing 120 amps.<br />
Press the UP arrow<br />
[0121] Indicates Phase B is drawing 121 amps.<br />
NOTE: Decimal points are not present in the<br />
readouts for Phases B and C.<br />
Press the UP arrow<br />
[0120] Indicates Phase C is drawing 120 amps.<br />
Press the UP arrow<br />
[G002] Indicates that there are 2 amps of current flowing to<br />
ground in the motor leads or motor.<br />
Press the UP arrow<br />
[H083] Indicates the motor has 83% of its thermal capacity<br />
remaining (H = Heat).<br />
Press the UP arrow<br />
[0120.] Loop back to Phase A current indication<br />
<strong>VMX</strong> Series Digital Solid State Soft Starter <strong>User</strong> <strong>Manual</strong> 24 | P a g e
5.4 Program Mode<br />
The starter must be OFF in order to enter the Program Mode.<br />
Use the Program Mode to view or change Function (Fn) settings. To<br />
enter the Program Mode, press the [Fn] key once from the Status<br />
Screen described in 5.3.1 above. The first time you enter the Program<br />
Mode after power has been cycled to the starter, the initial function<br />
[F001] should be displayed with the selected digit flashing. If the <strong>VMX</strong><br />
Series starter has been programmed and power to the unit has not<br />
been cycled, the readout will display the last function viewed or<br />
changed. To change to a different function, use the arrow keys.<br />
5.4.1 Viewing Function Programming and Values<br />
The programming of each individual Function can be viewed without<br />
making changes (values can also be viewed in the Run Mode however,<br />
no changes can be made). Each Function is signified by the letter “F” in<br />
the beginning of the data, the 4 digit value of the function follows after<br />
pushing the [READ/ENTER] key<br />
• [F001] The “F” indicates the programmable Function.<br />
• [0000] This is the present setting of the applicable function. This<br />
display may include decimals between digits depending on the function<br />
setting’s range and incremental steps.<br />
Example: Figure 5.4.1<br />
Viewing a Function’s Set Value:<br />
Motor FLA Setting<br />
[0000.] Indicates that Phase A is drawing no current<br />
(unit is in Off mode).<br />
Press the Fn key<br />
[F001] Indicates that this is Function 001 (Motor FLA).<br />
Press Read / Enter key<br />
to view the F001’s value<br />
[0306] Indicates that the programmed motor FLA is<br />
360 Amps.<br />
Press the Fn key<br />
to return to the function<br />
[F001] Indicates that you have returned to the Function<br />
Select screen.<br />
Press the Fn key again<br />
to return to the Status Display Mode<br />
[0000.] Default screen.<br />
Press<br />
Key...<br />
Fn<br />
READ<br />
ENTER<br />
Fn<br />
Fn<br />
Display<br />
Shows...<br />
0000.<br />
F001<br />
0360<br />
F001<br />
0000.<br />
Means...<br />
Default Display:<br />
Phase A Current<br />
Selecting<br />
Function #1<br />
Fn 1 Value:<br />
FLA = 360A<br />
Figure 5.4.1:<br />
Viewing a Function's Set Value<br />
Return to Function<br />
# Selection<br />
Return to<br />
Default Display<br />
Without Change<br />
• Note:<br />
If password protection has been enabled, the operator will need to<br />
obtain password access before function settings can be changed.<br />
See Section 5.6.11 and Appendix 3.<br />
<strong>VMX</strong> Series Digital Solid State Soft Starter <strong>User</strong> <strong>Manual</strong> 25 | P a g e
5.4.2 Enabling Password Protection / Parameter Lock<br />
The <strong>VMX</strong> Series starter is shipped with the password protection<br />
disabled (F070 = 0). If it becomes necessary to prevent parameters<br />
from being changed inadvertently, set the password in function F070.<br />
See Appendix 3 for details. If the display reads [ Loc] when the<br />
[READ/ENTER] key is pressed, the parameter lock is enabled.<br />
5.4.3 Changing a Function’s Set Value<br />
From the instructions above, after pressing the [READ/ENTER] key the<br />
display will show the value of that function with one digit flashing<br />
(usually the rightmost digit). Flashing indicates this is the digit to be<br />
altered (similar to cursor position). Use the UP arrow key to increment<br />
the value of the flashing digit. Use the DOWN arrow key to decrement<br />
the value of the flashing digit. Use the LEFT or RIGHT arrow to select<br />
the next digit to be altered. Values can only be changed within the<br />
Adjustment Range of the function parameter.<br />
Example 1: Figure 5.4.3<br />
Viewing a Function’s Set Value<br />
[0000.] Indicates Phase A is drawing no current<br />
(unit is in Off mode).<br />
Press the [Fn] key<br />
[F001]<br />
Indicates this is Function 001 (Motor FLA).<br />
Press [READ/ENTER] key<br />
to view the F001 value<br />
[0048] Indicates the programmed motor FLA is 48 Amps.<br />
The right most digit (8) is flashing, indicating that<br />
this is the digit that you will alter (cursor position).<br />
Press the UP Arrow key<br />
to increase this digit value<br />
[0049] Indicates you have increased the right most digit<br />
to a value of 9.<br />
Press the LEFT Arrow key<br />
to shift left to the next digit<br />
[0049] The second digit from the right is now flashing,<br />
indicating a new cursor position.<br />
Press the UP Arrow key<br />
to increase this digit value<br />
[0059] Indicates you have increased the 2 nd to right digit<br />
to a value of 5 (10’s place).<br />
[End]<br />
Press [READ/ENTER] key<br />
to store the new value<br />
The word “End” will flash briefly to indicate that<br />
the new value has been entered and accepted.<br />
After flashing once, the display will revert to<br />
showing the Function number.<br />
Example 1: Setting the Motor FLA<br />
Press<br />
Key...<br />
Fn<br />
READ<br />
ENTER<br />
READ<br />
ENTER<br />
Change FLA from 48 to 59A<br />
Display<br />
Shows...<br />
0000.<br />
F001<br />
0048<br />
0049<br />
0049<br />
0059<br />
End<br />
F001<br />
Means...<br />
Phase A<br />
Current<br />
Figure 5.4.3:<br />
Changing a Function Value<br />
Function #1<br />
Selected<br />
Previous Setting<br />
of Function #1<br />
New Value of<br />
First Digit<br />
Cursor (flashing)<br />
Position Shift<br />
New Value of<br />
Second Digit<br />
Value Accepted<br />
(flashes once)<br />
Return to<br />
Function # Display<br />
<strong>VMX</strong> Series Digital Solid State Soft Starter <strong>User</strong> <strong>Manual</strong> 26 | P a g e
• 5.4.3.a Changing a Value by Increments<br />
Although it may be easier to shift the cursor position, it is also<br />
possible to increase or decrease values by pressing the UP or<br />
DOWN arrow keys successively. This will change the Function<br />
value by the incremental amount associated with that Function. The<br />
Function List shows increment values for each Function.<br />
Example 2: Figure 5.4.3.a<br />
Changing a Function’s Value by Increments<br />
[0000.] Indicates that Phase A is drawing no current<br />
(unit is in Off mode).<br />
Press the [Fn] key<br />
[F001]<br />
Indicates that this is Function 001 (Motor FLA).<br />
The right most digit (1) is flashing, indicating this<br />
is the digit that you will alter (cursor position)<br />
Press the UP Arrow key twice<br />
to increase this digit value to 3<br />
[F003] Indicates that this is Function 003<br />
(OL Class During Start).<br />
Press [READ/ENTER] key<br />
to view the F003 value<br />
[0010] Indicates that the programmed OL is Class 10<br />
during the Start Mode. Cursor flashing on right<br />
most digit.<br />
Press the UP Arrow key<br />
to increase this digit value<br />
[0015] Indicates that you have increased the Function<br />
value by the increment assigned to it, a value of 5<br />
in this case.<br />
Press the UP Arrow key again<br />
to increase this digit value<br />
[0020] Indicates that you have again increased the<br />
Function value by the increment assigned to it.<br />
[End]<br />
Press [READ/ENTER] key<br />
to store the new value<br />
The word “End” will flash briefly to indicate that<br />
the new value has been entered and accepted.<br />
After flashing once, the display will revert to<br />
showing the Function number.<br />
Example 2: Setting the OL Curve<br />
During Start<br />
Change from Class 10 to Class 20<br />
Press<br />
Key...<br />
Fn<br />
READ<br />
ENTER<br />
READ<br />
ENTER<br />
x2<br />
Display<br />
Shows...<br />
0000.<br />
F001<br />
F003<br />
0010<br />
0015<br />
0020<br />
End<br />
F003<br />
Means...<br />
Phase A<br />
Current<br />
Function #1<br />
Displayed<br />
New Value of<br />
First Digit<br />
Previous Setting<br />
of Function #3<br />
Value Increased<br />
by 1 Increment<br />
Value Increased<br />
by 1 Increment<br />
Value Accepted<br />
(flashes once)<br />
Return to<br />
Function # Display<br />
Figure 5.4.3.a:<br />
Changing a Function Value by Increments<br />
5.4.4 Storing the Altered Value of a Function<br />
Once the desired value is displayed, press the [READ/ENTER] key.<br />
This stores the value in memory. The readout momentarily displays<br />
[End] and then returns to the function code.<br />
Caution!<br />
If the Fn key is pressed or power is lost before the [READ/ENTER]<br />
key is pressed, the <strong>VMX</strong> Series Starter will not store the selected<br />
value in memory.<br />
<strong>VMX</strong> Series Digital Solid State Soft Starter <strong>User</strong> <strong>Manual</strong> 27 | P a g e
5.4.5 Fault Mode<br />
The Fault Mode Display provides information to the operator when a<br />
fault occurs and allows the operator to review fault history. Refer to<br />
Section 7 for details. Fault codes are displayed by 3 alpha characters.<br />
The first and second characters (reading left to right) are the initials for<br />
the applicable English-language fault name. The third or right-most<br />
character can be either A, c, or d to denote when the fault occurred. “A”<br />
denotes Acceleration. “c” denotes Constant speed. “d” denotes Decel or<br />
Stop.<br />
Example: Figure 5.4.5<br />
Viewing a Fault and History<br />
[ PLA.] Indicates that there was a Phase Loss during<br />
Acceleration. The Decimal point on the right<br />
signifies that this is the current fault.<br />
Press the UP Arrow key<br />
[IBc]<br />
Displays the previous fault, a Phase Imbalance<br />
during Constant Speed (running)<br />
Press the UP Arrow key<br />
[ oLc] Displays the oldest fault, an Over Load trip during<br />
Constant speed (running).<br />
Press [RESET] key<br />
[rSt ]<br />
Flashes once to indicate a successful Reset of the<br />
current fault. If it cannot be reset, the display will<br />
read [ inH ] for Inhibited.<br />
[0000.] Returns to Default Display, indicating that the unit<br />
is ready to re-start.<br />
This Fault History can only be accessed during a fault condition. While<br />
the active fault number is being displayed, use the Up and Down Arrow<br />
keys to scroll through the Fault History. An additional Fault History<br />
complete with Time and Date stamps is also available for viewing at any<br />
time in F085 through F093.<br />
Figure 5.4.5.b<br />
Remote Reset Connection<br />
TB-2<br />
1 NC NO. C 2 NC NO. C 3 NO. C<br />
1 A1 A2<br />
• 5.4.5.a Resetting Faults<br />
Once a fault condition has been corrected, pressing the Reset key<br />
will return the readout to the Status Display mode. To reset faults,<br />
press the [RESET] key on the keypad. Alternatively, most faults will<br />
reset upon removal and return of control power. Over Load trips will<br />
NOT be reset in this way unless sufficient time has passed for the<br />
Thermal Register to regain sufficient capacity for a successful<br />
restart (see section 3.1).<br />
Control Power<br />
Supply<br />
Remote Reset<br />
• 5.4.5.b Remote Reset<br />
Because most trips can be reset by removing control power, remote<br />
reset can be accomplished this way. A NC remote contact (or pushbutton)<br />
can be placed in the control power supply to A1 or A2 and<br />
opened to facilitate a trip reset. See figure 5.4.5.b for a suggested<br />
connection.<br />
<strong>VMX</strong> Series Digital Solid State Soft Starter <strong>User</strong> <strong>Manual</strong> 28 | P a g e
• 5.4.5.c Automatic Reset<br />
The <strong>VMX</strong> Series starter provides for automatic reset on certain noncritical<br />
faults and Over Load. For non-critical fault resets, see<br />
section 5.6.8 for program details of F052 and F053. For automatic<br />
Over Load reset, see section 3.1 and 5.6.1 for programming details.<br />
• 5.4.5.d Lockout Functions<br />
Lockout functions such as Minimum Time Between Starts and<br />
Starts per Hour are not true fault conditions. They are based on the<br />
internal Real Time Clock (RTC). When control power is removed,<br />
the RTC value is quickly stored. Upon return of power, the timer<br />
values are updated from the RTC for elapsed time. If the Lockout<br />
Time has not expired, the <strong>VMX</strong> Series cannot be started. To reset<br />
the Lockout Times for emergency restart, see section 5.6.11, under<br />
F071.<br />
• 5.4.5.e Changing to Default Screen During Fault<br />
In some cases it may be necessary to alter programmed<br />
parameters in order to test or make changes to clear a fault (such<br />
as Phase Loss) or to view the more detailed fault history in F085 –<br />
F097. To accomplish this, you must get to the Status Screen so the<br />
Fn button becomes active. When in a Fault Screen, pressing the<br />
Right or Left Arrow buttons will take you to the Status Screen. From<br />
there, you can press the [Fn] key to enter the Programming Mode<br />
and move to different functions.<br />
<strong>VMX</strong> Series Digital Solid State Soft Starter <strong>User</strong> <strong>Manual</strong> 29 | P a g e
5.5 The <strong>VMX</strong> Function List<br />
5.5.1 Motor FLA, Service Factor and Overload Protection<br />
Functions<br />
Fn # Group Function Description Adjustment / Display Range<br />
Setting<br />
Increments<br />
Factory<br />
Setting<br />
Section<br />
F001<br />
F002<br />
Motor and Overload Info.<br />
Motor Nameplate FLA<br />
FLA must be programmed for<br />
starter to function.<br />
Motor Nameplate<br />
Service Factor<br />
50-100% of Max Amp Rating.<br />
Upper limit of range automatically<br />
adjusts downward as Service factor<br />
is increased.<br />
1 amp 0<br />
1.00 - 1.30 SF 0.05 1.0 SF<br />
F003 Overload Class During Start NEMA / UL Class 5 - 20 5 Class 10<br />
F004 Overload Class During Run NEMA / UL Class 5 - 30 5 Class 10<br />
F005<br />
Overload Reset<br />
0 = <strong>Manual</strong><br />
1 = Auto<br />
2 = Disabled Overload<br />
1<br />
0<br />
(<strong>Manual</strong>)<br />
5.6.1<br />
and<br />
3.2<br />
F006<br />
-<br />
F009<br />
Reserved for factory use<br />
Table 5.5.1: Motor and Overload Function Group<br />
5.5.2 Starting Mode Functions<br />
Fn # Group Function Description Adjustment / Display Range<br />
Setting<br />
Increments<br />
Factory<br />
Setting<br />
Section<br />
F010<br />
Starting and Stopping Modes<br />
Ramp Type Selection:<br />
VR = Voltage Ramp<br />
CR = Current PID Ramp<br />
1 = Ramp 1, 2 = Ramp 2<br />
Setting 1 = VR1 + VR2<br />
Setting 2 = CR1 + CR2<br />
Setting 3 = VR1 + CR2<br />
Setting 4 = CR1 + VR2<br />
1<br />
1<br />
VR1+VR2<br />
F011 Initial Torque (VR) of Ramp 1 0-100% Line Voltage 1% 60%<br />
F012 Initial Torque (CR) of Ramp 1 0-600% Motor Current 1% 200%<br />
F013 Accel Ramp Time of Ramp 1 1-120 seconds 1 second<br />
10<br />
seconds<br />
F014 Max Current Limit of Ramp 1 200 - 600% Motor Current 1% 350%<br />
F015 Initial Torque (VR) of Ramp 2 0-100% Line Voltage 1% 60%<br />
F016 Initial Torque (CR) of Ramp 2 0-600% Motor Current 1% 200%<br />
F017 Accel Ramp Time of Ramp 2 1-120 seconds 1 second<br />
10<br />
seconds<br />
F018 Max Current Limit of Ramp 2 200 - 600% Motor Current 1% 350%<br />
5.6.2<br />
and<br />
Append.<br />
1<br />
5.6.2,<br />
Append.<br />
1<br />
and<br />
4.2.5.b<br />
Table 5.5.2: Starting Mode Function Group<br />
<strong>VMX</strong> Series Digital Solid State Soft Starter <strong>User</strong> <strong>Manual</strong> 30 | P a g e
5.5.3 Jog Mode Functions<br />
Fn # Group Function Description Adjustment / Display Range<br />
Setting<br />
Increments<br />
Factory<br />
Setting<br />
Section<br />
F019<br />
Jog Modes<br />
Voltage Jog 5 – 100% Line Voltage 1% 50%<br />
F020 Time of Voltage Jog 1 – 20 Seconds 1 second<br />
10<br />
seconds<br />
F021 Current Jog 100 – 500% Motor Current 1% 150%<br />
5.6.3<br />
and<br />
4.2.5.b<br />
Table 5.5.3: Jog Mode Function Group<br />
5.5.4 Kick Start Mode Functions<br />
Fn # Group Function Description Adjustment / Display Range<br />
F022<br />
Kick Mode<br />
Kick Start Voltage<br />
0 = Disabled, or<br />
10 - 100% Line Voltage<br />
Setting<br />
Increments<br />
F023 Kick Start Time 0.1 - 2 Seconds 0.1second<br />
Table 5.5.4: Kick Start Mode Function Group<br />
1%<br />
Factory<br />
Setting<br />
0<br />
Disabled<br />
0.8<br />
seconds<br />
Section<br />
5.6.4<br />
5.5.5 Decel Mode Functions<br />
Fn # Group Function Description Adjustment / Display Range<br />
Setting<br />
Increments<br />
Factory<br />
Setting<br />
Section<br />
F024<br />
F025<br />
Pump Flex Decel Mode<br />
Pump Flex Control /<br />
Deceleration Ramp<br />
Begin Decel Level (BDL),<br />
Immediate Drop Down Torque<br />
0 = Disabled (coast to stop)<br />
1 = Enabled, except after OL trip<br />
2 = Enabled, continued Decel even<br />
if there is an OL trip<br />
1<br />
0<br />
Disabled<br />
0 - 100 % of Output Voltage 1% 60%<br />
F026 Decel Shut Off Voltage 0 to (BDL minus 1)% Voltage 1% 30%<br />
F027 Decel Ramp Time 1 – 60 Seconds 1 second<br />
10<br />
seconds<br />
5.6.5<br />
and<br />
Append.<br />
2<br />
Table 5.5.5: Pump Flex Decel Mode Function Group<br />
5.5.6 Restart Function<br />
Fn # Group Function Description Adjustment / Display Range<br />
Setting<br />
Increments<br />
Factory<br />
Setting<br />
Section<br />
F028<br />
F029<br />
Restart<br />
Restart Delay Time<br />
(Sequential Start Delay)<br />
Reserved for Factory Use<br />
0 = Disabled, or<br />
1-999 seconds after a Power Loss<br />
(Status can be read in F054)<br />
1 second<br />
0<br />
Disabled<br />
5.6.6<br />
Table 5.5.6: Restart Function Group<br />
<strong>VMX</strong> Series Digital Solid State Soft Starter <strong>User</strong> <strong>Manual</strong> 31 | P a g e
5.5.7 Current and Ground Fault Protection Features<br />
Fn # Group Function Description Adjustment / Display Range<br />
F040<br />
Current and Ground Fault Protection<br />
Current Imbalance Trip<br />
0 = Disabled, or<br />
5 - 30% imbalance<br />
Setting<br />
Increments<br />
F041 Current Imbalance Trip Delay 1 - 20 seconds 1 second<br />
F042<br />
Over Current Trip<br />
0 = Disabled, or<br />
100 - 300% of motor FLA<br />
1%<br />
1%<br />
Factory<br />
Setting<br />
0<br />
Disabled<br />
2<br />
seconds<br />
0<br />
Disabled<br />
F043 Over Current Trip Delay 1 - 20 seconds 1 second 1 second<br />
F044<br />
Under Current Trip<br />
0 = Disabled, or<br />
10 - 90% of motor FLA<br />
F045 Under Current Trip Delay 1 - 60 seconds 1 second<br />
F046<br />
Ground Fault Trip<br />
0 = Disabled, or<br />
5 - 90% of CT ratio from Fn 74<br />
F047 Ground Fault Trip Delay 1 - 60 seconds 1 second<br />
1%<br />
1%<br />
0<br />
Disabled<br />
2<br />
seconds<br />
0<br />
Disabled<br />
2<br />
seconds<br />
Section<br />
5.6.7<br />
Table 5.5.7: Current and Ground Protection Features Group<br />
5.5.8 Lockouts, Reset and Internal Protection Functions<br />
Fn # Group Function Description Adjustment / Display Range<br />
F048<br />
Lockouts, Reset and Internal Protection<br />
Coast Down (Back Spin)<br />
Lockout Timer<br />
Setting<br />
Increments<br />
0 = Disabled, or 1 - 60 minutes 1 minute<br />
F049 Maximum Starts per Hour 0 = Disabled, or 1 – 10 starts 1<br />
F050<br />
F051<br />
F052<br />
Minimum Time Between<br />
Starts<br />
Internal Protection Settings<br />
Auto Reset<br />
on Selected Faults<br />
0 = Disabled, or 1 - 60 minutes 1 minute<br />
1 – 127<br />
See“ F051 Definition Table”<br />
Fault Preferences 1 – 12<br />
See Table 5.6.7:<br />
”Auto-Reset Selected Faults”<br />
F053 Auto Reset Attempts 0 = Disabled, or 1-10 attempts 1<br />
F054<br />
F055<br />
F056<br />
F057<br />
F058<br />
F059<br />
Restart Delay Time Value<br />
Readout (for F028)<br />
Coast Down Timer Value<br />
for F048<br />
Starts Per Hour Timer Value<br />
for F049<br />
Starts Per Hour<br />
For F049<br />
Time Value Between Starts<br />
for F050<br />
Thermal Capacity to Start<br />
for F005<br />
Table 5.5.8: Lockouts, Reset and Internal Protection Group<br />
Factory<br />
Setting<br />
0<br />
Disabled<br />
0<br />
Disabled<br />
0<br />
Disabled<br />
Section<br />
5.6.8<br />
1 126 5.6.8.a<br />
1<br />
4,<br />
Phase<br />
Loss only<br />
0<br />
Disabled<br />
0-999 Minutes 1 0<br />
1-3600 Seconds 1 0<br />
1-3600 Seconds 1 0<br />
1-10 Starts 1 0<br />
1-3600 Seconds 1 0<br />
0-100 % Thermal Capacity 1 0<br />
5.6.8.b<br />
5.6.8.c<br />
<strong>VMX</strong> Series Digital Solid State Soft Starter <strong>User</strong> <strong>Manual</strong> 32 | P a g e
5.5.9 Output Relay Programming Features<br />
Fn # Group Function Description Adjustment / Display Range<br />
F060<br />
F061<br />
F062<br />
F063<br />
Output Relays<br />
Aux Relay 1 setting<br />
Aux Relay 2 setting<br />
Aux Relay 3 setting<br />
Aux. Relay Delay Timer<br />
(for Operations 23-26)<br />
Operation # 1 – 26: see<br />
”Aux. Relay Settings Chart”<br />
Operation # 1 – 26: see<br />
”Aux. Relay Settings Chart”<br />
Operation # 1 – 26: see<br />
”Aux. Relay Settings Chart”<br />
Setting<br />
Increments<br />
0 (Disabled), or 1-999 seconds 1 second<br />
Factory<br />
Setting<br />
1 1<br />
1 2<br />
1 16<br />
0<br />
No Delay<br />
Section<br />
5.6.9<br />
F064<br />
Reserved for factory use<br />
Table 5.5.9: Output Relay Function Group<br />
Notes:<br />
Check wiring to each relay before changing programming to ensure<br />
there are no unintended consequences.<br />
Relays programmed to some protection features will not operate if<br />
function is disabled elsewhere.<br />
5.5.10 Serial Communications<br />
Fn # Group Function Description Adjustment / Display Range<br />
Setting<br />
Increments<br />
Factory<br />
Setting<br />
Section<br />
F065<br />
Communications<br />
Communications<br />
0 = Disabled<br />
1 = Enabled (11Bit)<br />
2 = Enabled (10Bit)<br />
1 0<br />
F066 Baud Rate 4.8, 9.6 and 19.2 KB 3 rates 9.6 KB<br />
F067 Modbus Address 1 - 247 1 1<br />
F068<br />
F069<br />
Remote Starter Control<br />
Reserved for factory use<br />
0 = Disabled<br />
1 = Enabled w/ Start button<br />
2 = Enabled w/o Start button<br />
3 = Enabled via Jog-Remote Input<br />
1 0<br />
5.6.10<br />
Table 5.5.10: Serial Communications Function Group<br />
<strong>VMX</strong> Series Digital Solid State Soft Starter <strong>User</strong> <strong>Manual</strong> 33 | P a g e
5.5.11 System Settings<br />
Fn # Group Function Description Adjustment / Display Range<br />
Setting<br />
Increments<br />
Factory<br />
Setting<br />
Section<br />
F070<br />
Parameter Lock<br />
Customer Password<br />
0 – 999<br />
0 = Disabled<br />
Any Other Numbers = Password<br />
1<br />
0<br />
(displays<br />
encrypted<br />
code)<br />
5.6.11<br />
and<br />
Append.<br />
3<br />
F071<br />
System Clear / Reset<br />
0 = Disabled<br />
1 = Clear THR and Lockout Timers<br />
2 = Reset to Factory Default Settings<br />
1 0 5.6.11<br />
F072<br />
Reserved for Factory Use<br />
F073 Frame Rating 18 - 1250 1<br />
System Settings<br />
F074 CT Value 40-1200 5<br />
By Model<br />
(defaults<br />
to 48)<br />
By Model<br />
(defaults<br />
to 40)<br />
F075 Year 2000 - 2047 1 year 2000<br />
F076 Month 1 - 12 1 Month 1<br />
5.6.11<br />
F077 Day 1 - 31 1 Day 1<br />
F078 Hour 0 - 23 1 Hour 0<br />
5.6.11.a<br />
F079 Minute 0 - 59 1 Minute 0<br />
F080 Second 0 - 59 1 Second 0<br />
F081 Revision # - -<br />
F082 –<br />
F084<br />
Reserved for factory use<br />
Table 5.5.11: System Settings Function Group<br />
Factory<br />
Setting<br />
<strong>VMX</strong> Series Digital Solid State Soft Starter <strong>User</strong> <strong>Manual</strong> 34 | P a g e
5.5.12 Fault History and Run Time<br />
Fn # Group Function Description Adjustment / Display Range<br />
F085<br />
F086<br />
F087<br />
F088<br />
Fault History and Run Data<br />
Fault History #1, Latest Fault<br />
Time Stamp, Fault #1<br />
Based on F078-80<br />
Date Stamp, Fault #1<br />
Based on F076-77<br />
Fault History #2, Previous<br />
Fault<br />
F089 Time Stamp, Fault #2<br />
F090 Date Stamp, Fault #2<br />
F091<br />
Fault History #3, Oldest Fault<br />
F092 Time Stamp, Fault #3<br />
F093 Date Stamp, Fault #3<br />
0 = No fault history, or<br />
Fault # 1 - 27: see Fault code list<br />
00.00-23.59 (hh.mm)<br />
[hh = 00-23; mm = 00-59]<br />
01.01 – 12.31 (MM.DD)<br />
[MM = 01-12; DD = 01-31]<br />
0 = No fault history, or<br />
Fault # 1 - 27: see Fault code list<br />
00.00-23.59 (hh.mm)<br />
[hh = 00-23; mm = 00-59]<br />
01.01 – 12.31 (MM.DD)<br />
[MM = 01-12; DD = 01-31]<br />
0 = No fault history, or<br />
Fault # 1 - 27: see Fault code list<br />
00.00-23.59 (hh.mm)<br />
[hh = 00-23; mm = 00-59]<br />
01.01 – 12.31 (MM.DD)<br />
[MM = 01-12; DD = 01-31]<br />
Setting<br />
Increments<br />
1 0<br />
Factory<br />
Setting<br />
00.01 00.00<br />
00.01 01.01<br />
1 0<br />
00.01 00.00<br />
00.01 01.01<br />
1 0<br />
00.01 00.00<br />
00.01 01.01<br />
Section<br />
5.6.12<br />
F094 Run Time, Hours 000.0 – 999.9 hours 0.1 hours 0<br />
F095<br />
Run Time,<br />
1000 Hour Overflow<br />
0000 – 9999 thousand hours 1 k-hour 0<br />
F096 Run Cycle Counter 0000 – 9999 times 1 times 0<br />
5.6.12.<br />
a<br />
F097<br />
Run Cycle Counter<br />
10K overflow<br />
0000 – 9999 10 thousand times 10k times 0<br />
Table 5.5.12: Fault History and Run Data Group<br />
<strong>VMX</strong> Series Digital Solid State Soft Starter <strong>User</strong> <strong>Manual</strong> 35 | P a g e
5.6 Function Descriptions<br />
Your <strong>VMX</strong> Series starter is set at the factory with typical default settings<br />
that perform well in most applications. Following are detailed<br />
descriptions of each Function and the factory default settings.<br />
5.6.1 Motor and Overload Function Descriptions<br />
MOTOR FLA (F001)<br />
must be programmed<br />
for unit to operate!<br />
F001= Motor FLA<br />
Factory Setting = 0<br />
Range = 50 - 100% of Unit Max. Current.<br />
Set the value of this function to the motor nameplate Full Load<br />
Amps (FLA). Adjustments for service factor are not necessary<br />
when programming this function. (See note below). If the motor<br />
nameplate FLA is not available, use typical values as shown in<br />
NEC, NEMA standard MG-1 or other reputable third party<br />
source (motor manufacturer, etc.).<br />
• Note:<br />
To prevent adjusting the settings beyond the starter Max Amp<br />
rating, the range of adjustment for the Motor Nameplate FLA will<br />
vary in accordance with the Service Factor as programmed into<br />
F002. At the default setting of 1.0SF, the full range of adjustment<br />
from 50 - 100% of the Max Amp rating is available. As the Service<br />
Factor is increased, the FLA range will drop by an equal ratio. For<br />
example if F002 = 1.15 (a 1.15 Service Factor), the maximum FLA<br />
programmable into F001 will be limited to 85% of the starter Max.<br />
Amp rating (100% - 15%).<br />
F002 = Service Factor<br />
Factory Setting = 1.0 S.F.<br />
Range = 1.00 - 1.30<br />
Set value according to the Service Factor (SF) data provided on<br />
the motor’s nameplate. This value affects several protection<br />
features so it must be accurate. Setting the SF too high may<br />
result in motor damage in an overload condition. Setting SF too<br />
low may cause nuisance trips however; a 1.0 SF setting is<br />
safest if SF is unknown.<br />
• Note:<br />
The combination of F002 and F001 (FLA x SF) cannot exceed the<br />
Unit Max Amp rating. If when programming F002 you are not<br />
allowed to raise the setting, the combined total has been exceeded.<br />
F003 = Overload Class During Start<br />
Factory Setting = 10 (Class 10)<br />
Range = NEMA / UL Class 5 - 20<br />
Set value to the motor protection overload class required for the<br />
application. It is recommended that you try the factory setting<br />
first. (If possible, keep values for F003 and F004 the same.)<br />
Increase F003 above F004 only if nuisance tripping occurs<br />
during start. See Section 3.2 for details on trip curves.<br />
<strong>VMX</strong> Series Digital Solid State Soft Starter <strong>User</strong> <strong>Manual</strong> 36 | P a g e
F004 = Overload Class During Run<br />
Factory Setting = 10 (Class 10)<br />
Range = 5 - 30 NEMA / UL Class<br />
Set value according to the instructions provided by your motor /<br />
equipment manufacturer. This trip curve will not be enabled until<br />
the motor has reached full speed.<br />
F005 = Overload Reset<br />
Factory Setting = 0 (<strong>Manual</strong>)<br />
Range = 0 – 2<br />
Set value to determine starter behavior after an overload<br />
condition has cleared.<br />
When set to 0 = <strong>Manual</strong>, the operator must press the [RESET]<br />
key before restarting the motor. Once the motor windings have<br />
cooled sufficiently AND the [RESET] key is pressed, the unit<br />
will accept a restart command.<br />
When set to 1 = Automatic mode, and once sufficient time has<br />
elapsed allowing motor windings to cool, the motor will be<br />
restarted upon a start command. If 2-wire control is used, the<br />
unit will restart immediately.<br />
When set to 2 = Disabled Overload, the <strong>VMX</strong> Series will not<br />
trip on Motor Thermal Overload. This is provided for<br />
applications where either an external Overload Relay or Motor<br />
Protection Relay is used, or where multiple motors are<br />
connected and each one requires having an individual Overload<br />
Relay. See Appendix 4 for more details.<br />
WARNING:<br />
Setting F005 = 1 (Automatic) may present significant operational<br />
risk.<br />
When F005 = 2 (Disabled Overload), a separate external thermal<br />
overload protection device must be in the circuit.<br />
• Note:<br />
Because of the risk of fire or equipment damage, cycling control<br />
power will NOT reset an Overload Trip. If F005 = 2 (Automatic<br />
Reset), cycling control power will allow reset ONLY if the Thermal<br />
Register has determined that the motor has regained sufficient<br />
thermal capacity to allow it to restart successfully.<br />
F006 - F009 = Reserved<br />
<strong>VMX</strong> Series Digital Solid State Soft Starter <strong>User</strong> <strong>Manual</strong> 37 | P a g e
5.6.2 Starting Mode<br />
The <strong>VMX</strong> Series is capable of several different starting modes, but is<br />
set from the factory for the most common applications. A second ramp<br />
profile is available for use should it be required. Unless wired to do so,<br />
the <strong>VMX</strong> Series defaults to Ramp 1. This section describes functions for<br />
Ramp 1, with references to function numbers that do the same thing for<br />
Ramp 2 (if required). Refer to Appendix 2 for a detailed description<br />
of the differences in Ramp Profiles and their uses. All current<br />
percentages are based on the Motor FLA as programmed in F001.<br />
F010 = Ramp Profile Selection<br />
Factory Setting = 1<br />
Range = 1 – 4<br />
This Function selects the type of Ramp Profile desired. Ramp<br />
profiles can be either Voltage Ramp or Current Ramp. See<br />
Appendix 2 for details. Each Ramp Profile consists of 3 settings:<br />
Initial Torque, Ramp Time and Maximum Current Limit.<br />
Because there are two ramps available, there are 4 settings to<br />
cover the combinations of profiles possible. If you are not using<br />
the 2 nd ramp, the <strong>VMX</strong> Series will ignore all settings in<br />
reference to Ramp 2.<br />
Ramp 1<br />
(Dual Ramp Input Open)<br />
Ramp 2<br />
(Dual Ramp Input Closed)<br />
F010<br />
Setting<br />
Ramp Profile<br />
Ramp Profile<br />
1 Voltage Voltage<br />
2 Current Current<br />
3 Voltage Current<br />
4 Current Voltage<br />
Table 5.6.2: Ramp Type selection Settings<br />
Select Voltage Ramp by setting F010 = 1 (factory default)<br />
When Voltage Ramp is selected,<br />
Set Initial Torque (Voltage) with F011 (see below)<br />
Set Ramp Time with F013 (see below)<br />
Set Maximum Current Limit with F014 (see below)<br />
Or;<br />
Select Current Ramp by setting F010 = 2<br />
When Current Ramp is selected,<br />
Set Initial Torque (Current) with F012 (see below)<br />
Set Ramp Time with F013 (see below)<br />
Set Maximum Current Limit with F014 (see below)<br />
• Note:<br />
When either Ramp is set to “Voltage Ramp”, the corresponding<br />
“Initial Torque (Current)” setting is ignored. Conversely, when set to<br />
“Current Ramp”, the “Initial Torque (Voltage)” is ignored.<br />
<strong>VMX</strong> Series Digital Solid State Soft Starter <strong>User</strong> <strong>Manual</strong> 38 | P a g e
F011 = Initial Voltage of Ramp 1<br />
Factory Setting = 60%<br />
Range = 0 - 100%<br />
Sets the initial voltage of ramp 1 when F010 = 1 or 3. The initial<br />
torque level should be set to provide just enough torque to<br />
make the motor shaft begin to rotate while preventing torque<br />
shock damage to mechanical components.<br />
F012 = Initial Current of Ramp 1<br />
Factory Setting = 200%<br />
Range = 0 - 600%<br />
Sets the initial current of ramp 1 when F010 = 2 or 4. The initial<br />
torque level should be set to provide just enough torque to<br />
make the motor shaft begin to rotate while preventing torque<br />
shock damage to mechanical components.<br />
F013 = Accel Ramp Time of Ramp 1<br />
Factory Setting = 10 seconds<br />
Range = 1 - 120 seconds<br />
Sets the time between the initial torque set with F011 or F012<br />
and either the Max Current Limit set with F014 or full output<br />
voltage. Set the time to enable soft starts without stalls. Also,<br />
consider the motor’s application. For example, centrifugal<br />
pumps may require a shorter ramp time.<br />
• Note:<br />
Ramp time is affected by the following conditions:<br />
1. Current limit will extend the ramp time if the motor does not reach<br />
full speed while in current limit mode.<br />
2. Anti-oscillation circuit may shorten the ramp time if the motor<br />
reaches full speed before end of ramp.<br />
F014 = Max Current Limit of Ramp 1<br />
Factory Setting = 350%<br />
Range = 200 - 600%<br />
Sets the maximum motor current that the <strong>VMX</strong> Series starter<br />
will allow during Ramp 1. This limit applies to both voltage and<br />
current ramping. Current will be limited to this setting until either<br />
the motor reaches full speed or the over load protection feature<br />
trips (F003).<br />
<strong>VMX</strong> Series Digital Solid State Soft Starter <strong>User</strong> <strong>Manual</strong> 39 | P a g e
• 5.6.2.a Ramp 2 (user-optional ramp)<br />
This ramp is selected by closing the input for Ramp 2, TB1 –<br />
terminals 5 & 6 (see section 4.2.5). If this input is left open, the <strong>VMX</strong><br />
Series will respond only to Ramp 1 settings as listed above. Since<br />
ramp 2 is always used as an alternate to the default Ramp 1,<br />
different combinations of ramp profiles can be selected in F010.<br />
Refer to Appendix 1 for additional information on ramp profiles.<br />
F015 = Initial Torque (Voltage) of Ramp 2<br />
Factory Setting = 60%<br />
Range = 0 - 100%<br />
Sets the initial voltage of Ramp 2 when F010 = 1 or 4. The<br />
initial torque level should be set to provide just enough torque to<br />
make the motor shaft begin to rotate while preventing torque<br />
shock damage to mechanical components.<br />
F016 = Initial Torque (Current) of Ramp 2<br />
Factory Setting = 200%<br />
Range = 0 - 600%<br />
Sets the initial current of Ramp 2 when F010 = 2 or 3. The<br />
initial torque level should be set to provide just enough torque to<br />
make the motor shaft begin to rotate while preventing torque<br />
shock damage to mechanical components.<br />
F017 = Accel Ramp Time of Ramp 2<br />
Factory Setting = 10 seconds<br />
Range = 1 - 120 seconds<br />
Sets the time between the initial torque set with F015 or F016<br />
and either the Max Current Limit set with F018 or full output<br />
voltage. Set the time to enable soft starts without stalls. Also<br />
consider the motor’s application. For example, centrifugal<br />
pumps may require a shorter time. See notes for F013 for more<br />
details.<br />
F018 = Max Current Limit of Ramp 2<br />
Factory Setting = 350%<br />
Range = 200 - 600%<br />
Sets the maximum motor current that the <strong>VMX</strong> Series starter<br />
will allow during ramp 2. (This limit applies to both voltage and<br />
current-type ramping.) The current will be limited to this setting<br />
until either the motor reaches full speed or the over load<br />
protection feature trips (F003).<br />
• Note:<br />
Ramp 2 is often useful as a “bump start” or as a temporary Acrossthe-Line<br />
start mode. Consult Appendix 1 for details.<br />
<strong>VMX</strong> Series Digital Solid State Soft Starter <strong>User</strong> <strong>Manual</strong> 40 | P a g e
5.6.3 Jog Mode<br />
The Jog Function is another user optional feature and is controlled by<br />
closing the input on TB1 Terminals 6 and 7. If this input is left open, the<br />
<strong>VMX</strong> Series will ignore all Jog settings. Engaging the Jog feature along<br />
with the Start / Run Command provides an output from the SCRs, but<br />
will not continue ramping to full acceleration. This feature can Jog the<br />
motor at either a preset Voltage (F019 – F021) or a preset Current<br />
(F021) depending upon the settings of the Ramp Type from F010, and<br />
can be initiated along with Ramp 1 or Ramp 2 (see Dual Ramp Select,<br />
Section 4.2.5 and 5.6.2.a). It is also sometimes useful to use Jog in<br />
combination with Ramp 2, see section 4.2.5.c.<br />
Note: Jog functions may become disabled by Comm port function F068 setting 3.<br />
See section 5.6.10 for details.<br />
Setting<br />
from<br />
F010<br />
Ramp 1 (Dual Ramp Input<br />
Open)<br />
Ramp & Initial Jog<br />
Jog Torque Torque<br />
Type from… from…<br />
Ramp 2 (Dual Ramp Input<br />
Closed)<br />
Ramp & Initial Jog<br />
Jog Torque Torque<br />
Type from… from…<br />
1 Voltage F011 F019 Voltage F015 F019<br />
2 Current F012 F021 Current F016 F021<br />
3 Voltage F011 F019 Current F016 F021<br />
4 Current F012 F021 Voltage F015 F019<br />
Table 5.6.3: Jog Settings<br />
Caution:<br />
Although the Thermal Register tracks all motor current use,<br />
continuous usage of the Jog feature risks thermal motor damage<br />
or nuisance tripping.<br />
Voltage<br />
Jog Voltage<br />
Setting<br />
Jog<br />
Command<br />
Max.<br />
Jog<br />
Time<br />
Time<br />
Voltage Ramp<br />
New Start<br />
Command<br />
F019 = Voltage Jog<br />
Factory Setting = 50%<br />
Range = 5 - 100%<br />
Sets the voltage level of the Jog feature and is typically used to<br />
check rotation, alignment, or to slowly move a load into position.<br />
Jogging at a set voltage has no current control so the duration<br />
of the applied voltage must be limited to prevent excessive<br />
motor heating.<br />
Jog Current<br />
Setting<br />
Figure 5.6.3.1:<br />
Voltage Jog and Jog Time<br />
Current Ramp<br />
F020 = Time of Voltage Jog<br />
Factory Setting = 10 seconds<br />
Range = 1 - 20 seconds<br />
Set to minimize motor heating during a voltage jog. This setting<br />
is the maximum allowable time for jogging the motor using<br />
voltage only.<br />
Current<br />
Jog<br />
Command<br />
Time<br />
Figure 5.6.3.2:<br />
Current Jog<br />
New Start<br />
Command<br />
F021 = Current Jog<br />
Factory Setting = 150%<br />
Range = 100 - 500%<br />
Sets output of a current Jog. The current jog feature is typically<br />
used to check rotation, alignment, or slowly move a load into<br />
position. This is not time-limited but should be used cautiously.<br />
<strong>VMX</strong> Series Digital Solid State Soft Starter <strong>User</strong> <strong>Manual</strong> 41 | P a g e
Kick Start<br />
Voltage Setting<br />
Normal Ramp<br />
5.6.4 Kick Start Mode<br />
Kick Start applies a pulse of voltage to the motor producing a<br />
momentary “kick” of high torque to break the motor load free from high<br />
friction or frozen components. This pulse is limited to 2 seconds.<br />
Torque<br />
Kick<br />
Time<br />
Time<br />
Start<br />
Command<br />
Figure 5.6.4:<br />
Kick Start<br />
F022 = Kick Start Voltage<br />
Factory Setting = 0 (Disabled)<br />
Range = 10 - 100%<br />
When F022 ≠ 0, a voltage “pulse” is applied before the initial<br />
torque setting of F011 (or F012 if Current Ramp). This sets the<br />
voltage level and the duration of the pulse is set by F023. This<br />
setting should be higher than F011 (except for Dwell Starting,<br />
see below) and high enough to provide a benefit in the worst<br />
starting condition.<br />
F023 = Kick Time<br />
Factory Setting = 0.8 seconds<br />
Range = 0.1 - 2 seconds<br />
Sets the duration of time the Kick Start voltage is applied.<br />
Torque<br />
Kick Start<br />
Voltage Setting<br />
=<br />
Ramp Initial<br />
Voltage Setting<br />
Kick<br />
Time<br />
Normal<br />
Voltage Ramp<br />
• 5.6.4.a “Dwell” operation using Kick Start<br />
In some applications such as chain drive machinery, the Kick Start<br />
feature can be used to slowly take up slack in the drive chain before<br />
applying full torque. This is referred to as “Dwell Starting” because<br />
the torque output stays low for a short time. To take advantage of<br />
this feature, simply set the Kick Start to the same level as the Initial<br />
Torque setting. This will only work in Voltage Ramp mode.<br />
Time<br />
Figure 5.6.4.a:<br />
Dwell Start Using Kick Start<br />
• Note:<br />
Do not use the Kick Start feature unless you determine that you<br />
need it. Using this feature may eliminate many of the mechanical<br />
and electrical benefits of using a Soft Starter.<br />
<strong>VMX</strong> Series Digital Solid State Soft Starter <strong>User</strong> <strong>Manual</strong> 42 | P a g e
5.6.5 Pump-Flex Decel Mode (F025 through F028)<br />
Pump-Flex deceleration is a feature of the <strong>VMX</strong> Series Soft Starter<br />
that slowly decreases the applied voltage to the motor when a stop<br />
command is given, resulting in a gentle decrease in motor torque.<br />
Deceleration provides a way to extend the stopping time so that abrupt<br />
stopping does not occur. Deceleration is useful with centrifugal pumps,<br />
material handlers, and conveyors where abrupt stopping could be<br />
damaging to the equipment and/or load.<br />
SEE APPENDIX 2 AT THE END OF THIS MANUAL for typical Pump-<br />
Flex Decel feature applications and more detailed descriptions of the<br />
following functions.<br />
F024 = Deceleration Ramp<br />
Factory Setting = 0 (Disabled)<br />
Range = 0 – 2<br />
When F024 = 0, the deceleration feature is disabled.<br />
When F024 = 1, the deceleration feature is enabled AND the overload<br />
protection feature (F003 - F005) remains active (power off on<br />
OL trip).<br />
When F024 = 2, the deceleration feature is enabled and deceleration<br />
will continue even when an overload condition trips.<br />
WARNING!<br />
Setting F024 = 2 presents significant risk of over-heating the<br />
motor beyond its design limits which could result in motor<br />
damage and fire hazard. Do this only in circumstances where<br />
the potential for mechanical damage outweighs the risk of<br />
motor damage.<br />
Stop Command<br />
(Bypass Contactor Opens)<br />
Full Speed<br />
Voltage<br />
Time<br />
F025: Begin Decel Level<br />
(Immediate step down)<br />
F026: Stop Level<br />
(<strong>VMX</strong> Output Off)<br />
F027: Decel Ramp Time<br />
(Determines slope)<br />
Figure 5.6.5:<br />
Pump-Flex Decel Ramp Settings<br />
F025 = Begin Decel Level (BDL)<br />
Factory Setting = 60%<br />
Range = 0 - 100% of line voltage<br />
Used to drop voltage to a level where there is a noticeable<br />
effect on motor torque during initial Decel mode.<br />
F026 = Decel Shut Off Voltage<br />
Factory Setting = 30%<br />
Range = 0 to (BDL -1)%<br />
Sets the level where the starter is turned off, corresponding to<br />
where motor torque during Decel is no longer effective. Always<br />
set this function lower than the setting of F026.<br />
F027 = Decel Ramp Time<br />
Factory Setting = 10 seconds<br />
Range = 1 - 60 seconds<br />
Sets the maximum time for the deceleration ramp to go from the<br />
Begin Decel Level setting (F026) to the Decel Shut Off Voltage<br />
(F027).<br />
Note:<br />
When using the Decel function, count these cycles as additional<br />
“starts” when determining maximum starts-per-hour of the motor.<br />
<strong>VMX</strong> Series Digital Solid State Soft Starter <strong>User</strong> <strong>Manual</strong> 43 | P a g e
Caution!<br />
Decel is THE OPPOSITE of braking. Enabling the Decel feature will make the motor take<br />
LONGER to stop than if it were simply turned off.<br />
5.6.6 Restart Delay<br />
The <strong>VMX</strong> Series can be programmed to delay restarting upon<br />
restoration of line power after an outage. This allows multiple units to be<br />
programmed to restart at staggered times in an effort to avoid causing<br />
additional problems with the power supply system. Another term for this<br />
is “Sequential Start Delay”.<br />
F028 = Restart Delay Time<br />
Factory Setting = 0 (Disabled)<br />
Range = 0 = Disabled (no delay), or 1 - 999 seconds<br />
Sets a delay time before the starter can be restarted after a<br />
complete loss of power. Use this if multiple motors are<br />
connected to a supply system that may have trouble providing<br />
adequate power to restart them all at the same time. By using<br />
different Restart Delay Times on each unit, a sequential restart<br />
can be achieved.<br />
• Note:<br />
This is similar to the Coast Down Lockout Timer in F048, however it<br />
only activates on Power Loss.<br />
F029 = Reserved<br />
<strong>VMX</strong> Series Digital Solid State Soft Starter <strong>User</strong> <strong>Manual</strong> 44 | P a g e
5.6.7 Current and Ground Fault Protection Features<br />
F040 – F050 set extended protection features that may be used in the<br />
<strong>VMX</strong> Series starter. Percentages shown are all based automatically<br />
upon the Motor FLA setting from F001 except Ground Fault, F046. No<br />
additional calculations are necessary.<br />
• Note:<br />
All of these features are disabled at the factory and must be<br />
enabled via user programming as follows:<br />
F040 = Current Imbalance Trip<br />
Factory Setting = 0 (Disabled)<br />
Range = 5 - 30% or 0 (Disabled)<br />
Use to set the trip level for when current imbalance between<br />
any two phases exceeds this amount for the time specified<br />
F041.<br />
F041 = Current Imbalance Trip Delay<br />
Factory Setting = 2 seconds<br />
Range = 1 - 20 seconds<br />
Provides a time delay to prevent nuisance trips from shortduration<br />
transients. Using default settings, if the difference in<br />
output current between two phases exceeds 10% of FLA for<br />
more than 2 seconds, the starter will trip.<br />
F042 = Over Current Trip / Shear Pin Trip<br />
Factory Setting = 0 (Disabled)<br />
Range = 100 - 300%, 0 (Disabled)<br />
When a value other than 0 is entered for F042, the starter will<br />
trip when the output current of any phase exceeds the amount<br />
set and the time specified in F043. This is also referred to as a<br />
“Shear Pin Trip” and can be used to protect mechanical<br />
components from damage due to jammed loads.<br />
F043 = Over Current Trip<br />
Delay<br />
Factory Setting = 1 second<br />
Range = 1 - 20 seconds<br />
Provides a time delay to prevent nuisance trips from shortduration<br />
transients. For example using default settings, if the<br />
output current of any phase exceeds F042 for more than 1<br />
second, the starter will trip.<br />
F044 = Under Current Trip<br />
Factory Setting = 0 (Disabled)<br />
Range = 10 - 90%, or 0 (Disabled)<br />
When a value other than 0 is entered for F044, the starter will<br />
trip when the output current of any phase drops below the<br />
amount set, and the time specified by F045. This fault condition<br />
is often referred to as a “Load Loss Trip” and can be used to<br />
detect a broken shaft, V belt or other mechanical drive system<br />
component failure. In pumping applications, this can be used as<br />
a “Loss of Prime” trip.<br />
F045 = Under Current Trip<br />
Delay<br />
Factory Setting = 2 seconds<br />
Range = 1 - 60 seconds<br />
Provides a time delay to prevent nuisance trips from shortduration<br />
transients. Using the default setting, if the output<br />
<strong>VMX</strong> Series Digital Solid State Soft Starter <strong>User</strong> <strong>Manual</strong> 45 | P a g e
current of any phase drops below F044 for more than 2<br />
seconds, the starter will trip.<br />
• 5.6.7.a Ground Fault<br />
F046 – F047 provides Ground Fault protection for equipment only<br />
(a.k.a. Arcing Ground Fault) using the Residual Current method.<br />
Trip settings are based on the CT ratio as shown in F074 (see<br />
below). A delay time can be set by F047 to help prevent nuisance<br />
trips. Ground current can always be viewed in the Status Display,<br />
shown with a “G” prefix (see section 5.3.1).<br />
WARNING!<br />
THIS IS NOT INTENDED TO BE USED AS "PERSONNEL<br />
PROTECTION" GROUND FAULT!<br />
This feature is only intended to provide a level of equipment<br />
protection against damaging ground currents. Ground faults are<br />
potentially dangerous conditions and must be corrected<br />
immediately for safety of operating personnel.<br />
F046 = Ground Fault Trip<br />
Factory Setting = 0 (Disabled)<br />
Range = 5 - 90% of CT value, or 0 (Disabled)<br />
When a value other than 0 is entered for F046, the starter will<br />
trip if current to ground exceeds this percentage of the unit CT<br />
value. The CT value is shown in F074 (see section 5.6.11). This<br />
value is different from the Unit Rating or FLA setting. To<br />
calculate actual ground current, multiply the CT value of F074<br />
by the setting of F046.<br />
Example:<br />
210A starter, desired Ground Fault Trip level is 20A:<br />
On this unit, the CT value reading from F074 will be 250 (250:5)<br />
20 / 250 = 0.08 (8%).Set F046 to 8<br />
F047 = Ground Fault Trip Delay<br />
Factory Setting = 2 seconds<br />
Range = 1 - 60 seconds<br />
Provides a time delay to prevent nuisance trips from shortduration<br />
transients. Using default setting, if the Ground Fault<br />
current exceeds the level set in F046 for more than 2 seconds,<br />
the starter will trip.<br />
CAUTION:<br />
This method of Ground Fault sensing may not provide adequate<br />
equipment protection in resistance-grounded systems. We<br />
recommend providing external GF protection using a core<br />
balanced Zero Sequence CT for those types of applications.<br />
Consult factory for additional assistance.<br />
<strong>VMX</strong> Series Digital Solid State Soft Starter <strong>User</strong> <strong>Manual</strong> 46 | P a g e
5.6.8 Lockouts, Reset and Internal Protection Features<br />
F048 – F050 provide lockout protection for motors and equipment that<br />
may have potentially damaging consequences from premature restart or<br />
with limited duty cycles. Time and count values for these lockouts can<br />
be viewed in F055 – F058. Time values are based on the Real Time<br />
Clock and DONOT reset when power is lost or disconnected.<br />
Emergency clearing of lockouts can be accomplished in F071.<br />
• Note:<br />
When F048 through F050 are used with 3 wire control systems, a<br />
Start command will not seal in during lockout time. When time has<br />
expired, a new Start command will be necessary.<br />
WARNING!<br />
When F048 through F050 are used with 2-wire control, the starter<br />
may re-start automatically when time has expired. Adequate<br />
warnings similar to those in Section 3.1.3.b should be observed.<br />
F048 = Coast Down Lockout Timer (Back Spin Timer)<br />
Factory Setting = 0 (Disabled)<br />
Range = 1 - 60 minutes, or 0 (Disabled)<br />
F048 = 1 - 60, sets the number of minutes that the starter must<br />
be off before a restart can be attempted. This function is useful<br />
in applications such as pump motor backspin protection (where<br />
you need to prevent the pump motor from restarting if it is<br />
spinning backwards), 2 speed operations where speed changes<br />
require a minimum disconnect (spin-down timer), or reversing<br />
applications to prevent plugging (anti-plugging timer).<br />
F049 = Maximum Starts per Hour Lockout<br />
Factory Setting = 0 (Disabled)<br />
Range = 1 - 10 or 0 (Disabled)<br />
F049= 1 - 10, counts the number of start commands within a 1<br />
hour period. If the setting (maximum starts per hour) is<br />
exceeded, starting is prohibited until sufficient time has expired.<br />
This timer initiates upon the first start in an hour. It resets after 1<br />
hour from that start and waits until another subsequent start to<br />
initiate again. (Often used in conjunction with F050).<br />
• Notes:<br />
• Consult the motor manufacturer for a “Starts-per-Hour” or “Starting<br />
Duty Cycle” rating. Larger motors tend to have lower starts-per-hour<br />
ratings.<br />
• When using the Decel function (F025) or an electronic braking<br />
option, count these cycles as additional “starts” when determining<br />
maximum starts-per-hour.<br />
<strong>VMX</strong> Series Digital Solid State Soft Starter <strong>User</strong> <strong>Manual</strong> 47 | P a g e
F050 = Minimum Time Between Starts Lockout<br />
Factory Setting = 0 (Disabled)<br />
Range = 1 - 60 minutes, or 0 (Disabled)<br />
When F050 is set to 1 through 60, the motor cannot be<br />
restarted within the time specified after the first start. Time<br />
between starts is calculated from the time of the first start<br />
command to the next regardless of run time or off time.<br />
Example:<br />
If F050 = 15, motor will not be allowed to re-start within 15<br />
minutes of the first start.<br />
This function is useful as a “Short-Cycle Timer” to prevent<br />
excessive motor wear when automatic demand control may<br />
occasionally cycle on and off too quickly. e.g. compressors or<br />
sump pumps.<br />
• 5.6.8.a Internal Protection Features<br />
The <strong>VMX</strong> Series starter contains additional protection features that<br />
are built-into the hardware and are factory preset. Function F051 is<br />
provided to alter these settings via numerical preset programming.<br />
For maximum protection, all of these features, except Phase<br />
Rotation are turned ON as factory default and should not be<br />
changed unless necessary for service purposes, testing or to<br />
accommodate non-standard applications. Factory default settings<br />
are as follows:<br />
• Phase Rotation: Protection is OFF. The expected rotation<br />
sequence is set for A-B-C.<br />
• Phase Current Loss (Running): Protection is ON. The unit trips at<br />
The decimal values for each feature are as follows:<br />
Phase Rotation Protection:<br />
The <strong>VMX</strong> Series is set up to monitor an expected phase rotation and<br />
will trip if this changes. Control of this feature is divided into two<br />
categories: On-Off and Expected Sequence. The default setting is On,<br />
with an Expected Sequence of A-B-C.<br />
The ability to turn this feature ON or OFF is useful in applications where<br />
the <strong>VMX</strong> Series starter is going to be used downstream from an existing<br />
reversing contactor / starter, or to avoid conflicts with other protection<br />
devices.<br />
• Rotation Trip On-Off Control Decimal value = 1 (b 00000001)<br />
If this feature is On (default setting) and you want to turn it Off,<br />
Subtract 1 from F051. If this feature is Off and you want to turn it<br />
On, add 1 to F051.When set to On, a trip will occur when the<br />
Expected Sequence (see below) is incorrect.<br />
On large motors where large multiple cables are used, it may be easier<br />
to change the Expected Sequence in the <strong>VMX</strong> Series starter rather than<br />
to swap the cables.<br />
• Expected Phase Rotation Sequence Decimal Value = 2<br />
(b 00000010<br />
The A-B-C rotation is the default setting. To change to A-C-B, subtract 2<br />
from F051. To change from A-C-B rotation to A-B-C, add 2 to F051.<br />
If the Rotation Trip is set to Off (see above), this setting is ignored.<br />
Phase Current Loss (Running) Protection:<br />
This feature will cause a Trip if the current in any phase (or all 3) is less<br />
than 12% of the CT value after 3 seconds from a Start Command. (Note<br />
that this is based on the Max Amp rating and not the programmed FLA).<br />
Turn it OFF if the motor no-load current is exceptionally low such as in<br />
high inertia machines, or if you are testing a large starter with a<br />
small motor.<br />
• Phase Loss (Running) Protection Decimal Value = 4<br />
(b 00000100)<br />
This feature is On (default setting). To turn it Off, Subtract 4 from F051.<br />
If this feature is Off and you want to turn it On, add 4 to F051.<br />
Shorted SCR Lockout protection:<br />
This feature will cause a Lockout if at least one SCR is shorted, based<br />
on the expected voltage drop across the SCR assembly when the unit is<br />
OFF. (Note- A shorted SCR cannot be detected while the unit is running<br />
or in Bypass mode). If qualified personnel knowing the ramifications of<br />
having a shorted SCR issue requires an emergency restart, this feature<br />
can be turned to OFF. This is not the same as a Shunt Trip circuit (see<br />
below). This is a lockout of the NEXT start command.<br />
• Shorted SCR Lockout Decimal Value = 8 (b 00001000)<br />
This feature is On (default setting). To turn it Off, Subtract 8 from<br />
F051. If this feature is Off and you want to turn it On, add 8 to F051<br />
<strong>VMX</strong> Series Digital Solid State Soft Starter <strong>User</strong> <strong>Manual</strong> 49 | P a g e
Shunt Trip:<br />
Shunt Trip is a feature that will cause an immediate Trip if the <strong>VMX</strong><br />
Series detects current flowing through any phase (or all) while the <strong>VMX</strong><br />
is in the Off state. The trip function is typically associated with the Aux.<br />
Relay setting 7 (see F060-63), wired to a Shunt Trip coil in an upstream<br />
circuit breaker or an in-line contactor. This function is to interrupt power<br />
flow to the motor windings in order to prevent damage. The usual cause<br />
is multiple shorted SCRs or a welded Bypass Contactor. The only time<br />
this function should be turned off is for troubleshooting by qualified<br />
service personnel.<br />
• Shunt Trip Decimal Value = 16 (b 00010000)<br />
This feature is On (default setting). To turn it Off, Subtract 16 from<br />
F051. To turn it On, add 16 to F051.<br />
PTC Trip:<br />
This feature controls the inclusion of the PTC Input (see Section 4.2.7).<br />
When it is ON (default setting), a jumper wire or other circuit must be<br />
installed on the PTC input if a PTC resistor is not included in the motor.<br />
Turn this feature to OFF for troubleshooting or if a jumper wire is not<br />
used.<br />
• PTC Trip Decimal Value = 32 (b 00100000)<br />
This feature is On (default setting). To turn it Off, Subtract 32 from<br />
F051.To turn it On, add 32 to F051.<br />
Line Phase Loss (Stopped) Trip:<br />
This feature will prevent the <strong>VMX</strong> Series starter from attempting to start<br />
if the voltage in one (or more) of the incoming phases is not present.<br />
This can be used to detect a blown fuse or power supply loss provided<br />
control power is still available. It differs from the Phase Loss (Running)<br />
Trip in that it is based upon line voltage and does not require that a Start<br />
Command be given. This trip function resets itself after determining that<br />
all 3 phases have voltage applied. The voltage level at which this<br />
feature activates is fixed at approximately 100VAC. It is not adjustable<br />
and should not be used as Under Voltage protection.<br />
• Line Phase Loss (Stopped) Trip Decimal Value = 64<br />
(b 01000000)<br />
This feature is On (default setting). To turn it Off, Subtract 64 from F051.<br />
To turn it On, add 64 to F051.<br />
• Notes:<br />
1) When using an In-Line Isolation Contactor, it may be necessary<br />
to turn Off this protection (by subtracting a numeric value of 64<br />
from F051) in order to avoid nuisance tripping whenever the In-Line<br />
Contactor opens.<br />
2) This protection will automatically reset itself when line voltage is<br />
present on all 3 phases. When using 3-wire control, the <strong>VMX</strong> Series<br />
will not attempt to restart unless the Start Command is re-initiated.<br />
• Caution:<br />
When using 2-wire control, the starter will restart when this<br />
feature resets itself after all 3 phases are present.<br />
<strong>VMX</strong> Series Digital Solid State Soft Starter <strong>User</strong> <strong>Manual</strong> 50 | P a g e
5.6.8.a (continued) Function 51: Internal Protection Features<br />
Bit<br />
#<br />
Fault<br />
Display<br />
Code<br />
0 ROT*<br />
Protection<br />
Function<br />
Phase<br />
Rotation<br />
Trip<br />
Description<br />
Phase Rotation protection.<br />
Phase rotation must match selection in Bit #2<br />
below. Setting to Off (0) will make the <strong>VMX</strong><br />
insensitive for use behind a reversing contactor<br />
Default<br />
Bit<br />
Setting<br />
Decimal<br />
Value<br />
0 (Off) 1<br />
1 ABC<br />
Expected<br />
Phase<br />
Sequence<br />
2 = A-B-C Phase Rotation Sequence Only<br />
0 = A-C-B Phase Rotation Sequence Only<br />
1<br />
(A-B-C<br />
Rotation)<br />
2<br />
2<br />
PLa or<br />
PLc*<br />
3 SS*<br />
4 ST*<br />
5 PTc*<br />
6<br />
PLd or<br />
n3Ph<br />
Phase<br />
Current<br />
Loss<br />
Shorted<br />
SCR<br />
Shunt<br />
Trip<br />
PTC Input<br />
Trip<br />
Line Phase<br />
Loss Trip<br />
Phase Current Loss, any phase current reading<br />
that is less than 12% of the CT rating after 3<br />
seconds from Start command.<br />
At least one SCR is shorted; There is no voltage<br />
drop across the SCR phase assembly.<br />
Shunt Trip of the main Circuit Breaker or Isolation<br />
Contactor (if provided and wired to an Aux. relay<br />
in F060-F061). Two or more SCRs have shorted<br />
in opposing phases so current is flowing to the<br />
motor while the <strong>VMX</strong> was in the Off state.<br />
PTC Trip function. This can be disabled so that a<br />
jumper is not required across the PTC inputs.<br />
Protection against loss of input line voltage.<br />
Disable when using an In-Line Isolation Contactor<br />
or any other system that normally removes line<br />
power from the starter. Resets automatically when<br />
line voltage returns.<br />
1 (On) 4<br />
1 (On) 8<br />
1 (On) 16<br />
1 (On) 32<br />
1 (On)<br />
7 --- Reserved Reserved for factory use 0 (Off) 128<br />
* = Operating Mode designation. See Fault Code List for description.<br />
Table 5.6.8.a: Function 51 table of Hardware Protection Features<br />
64<br />
• Note:<br />
To restore all settings back to the factory default, enter a value of<br />
127. A value other than the default value of 127 indicates that one<br />
or more functions have been changed. To determine which of the<br />
protective functions have been changed/turned-off subtract the<br />
value displayed from 127 and compare the result against the<br />
‘decimal value’ column shown in table 5.6.8.a.<br />
Example: F051 reads a value of 109. Subtract 109 from 127 and a<br />
value of 18 remains. The value 18 does not represent a single bit<br />
value indicating that more than one function has been changed.<br />
Referring to Table 5.6.8.a, find the largest decimal value as shown<br />
in the ‘decimal value’ column smaller than 18. In this case a value of<br />
16 (bit 4). This leaves a value of 2 (18 minus 16) which represents<br />
bit 1 (2). So in this example a value of 109 indicates that the Shunt<br />
Trip feature had been turned off (bit 4), and the Expected Phase<br />
Sequence had been changed to A-C-B (bit 1).<br />
Instead of determining the previous selection add up all values in<br />
‘decimal value’ column of the functions to be turned off and subtract<br />
this value from 127 and program the result into F051.<br />
<strong>VMX</strong> Series Digital Solid State Soft Starter <strong>User</strong> <strong>Manual</strong> 51 | P a g e
F052<br />
Setting<br />
• 5.6.8.b Auto-Reset Programming (F052 – F054)<br />
The <strong>VMX</strong> Series can be programmed to automatically attempt a<br />
reset based on the selected ‘auto-reset’ faults (F52), provided a<br />
Start Command is present (see Section 4.2) and no fault condition<br />
is active. Function F52 selects the ‘Auto-Reset’ faults and function<br />
F53 sets the number of reset attempts. If F053 is set to 0 (default<br />
setting), the <strong>VMX</strong> Series auto-reset function is disabled.<br />
• Note:<br />
When using 3 wire control:<br />
For safety reasons the <strong>VMX</strong> Series will not attempt restarting<br />
unless the Start Command is reinitiated and maintained during a<br />
restart attempt.<br />
F052 = Auto-Reset Selected Faults<br />
Factory Setting = 0 (Disabled)<br />
Range = 1 - 12, or 0 (Disabled)<br />
If F052 = 1 through 12, the <strong>VMX</strong> Series will attempt to restart<br />
after the fault(s) coded in the following table. Only one selection<br />
can be entered.<br />
Fault Condition Description<br />
Display Readout<br />
Reference<br />
0 Auto Reset Disabled ---<br />
1 Over Temperature Trip OT<br />
2 Over Current (Shear Pin) Trip OC<br />
3 Under Current Trip UC<br />
4 Phase Loss Trip PLa or PLc<br />
5 Current Unbalance Trip UB<br />
6 Ground Fault Trip GF<br />
7 Short Circuit Trip SC<br />
8 Faults 1, 2 or 3 above OT, OC or UC<br />
9 Faults 4, 5 or 6 above PL, UB or GF<br />
10 Any Fault except 7 No SC<br />
11 Any Fault except 6 & 7 No GF and no SC<br />
12 Any Fault above, 1 - 7 OT, OC, UC, PL, UB or GF<br />
Note 1: UC, OC or UB require operation to resume before the fault can be detected.<br />
Note 2: Cycling and / or restoration of control power will reset all of the above faults.<br />
Note 3: Overload Trip reset function is programmed only in F005. See Section 3 for details<br />
Note 4: Reset attempts with a fault condition present will cause a new fault. This will be logged<br />
into the the fault history (F085 – F093) and may overwrite previous fault records. Line Loss Trip<br />
(see F051) will automatically reset and is not included in this list.<br />
Table 5.6.8.b: Faults Selected for Auto-Restart<br />
F053 = Auto-Restart Attempts<br />
Factory Setting = 0 (Disabled)<br />
Range = 1 - 10 Attempts, or 0 (Disabled)<br />
If F053 = 1 through 10, the <strong>VMX</strong> Series will attempt to restart if<br />
the Start Command is present for this number of times. If set to<br />
Zero, the starter will not attempt to reset automatically.<br />
<strong>VMX</strong> Series Digital Solid State Soft Starter <strong>User</strong> <strong>Manual</strong> 52 | P a g e
• 5.6.8.c Timer Value Readouts for Protection Features<br />
F054 – F059 provide display of timer or register values for<br />
information only. The user cannot alter them. Upon power loss and<br />
restoration, these values are updated for time elapsed.<br />
F054 = Restart Delay Time Readout<br />
Factory Setting = Not Applicable<br />
Range = 1 - 999 Seconds<br />
Remaining time value readout of F028, the Auto-Restart Delay<br />
Timer.<br />
F055 = Coast Down (Backspin) Timer Value<br />
Factory Setting = Not Applicable<br />
Range = 1 - 3600 Seconds<br />
Remaining time value readout of F048, the Coast Down<br />
Lockout Timer.<br />
F056 = Starts per Hour Timer Value<br />
Factory Setting = Not Applicable<br />
Range = 1 - 3600 Seconds<br />
Remaining time value readout of F049, the Starts-per-Hour<br />
Lockout Timer.<br />
F057 = Starts per Hour Counter Readout<br />
Factory Setting = Not Applicable<br />
Range = 1 - 10 Starts<br />
Incremental counter value readout of F050, the Starts-per-Hour<br />
Lockout.<br />
F058 = Time Value Between Starts Readout<br />
Factory Setting = Not Applicable<br />
Range = 1 - 3600 Seconds<br />
Remaining time value readout of F050, the Minimum Time<br />
Between Starts Timer.<br />
F059 = Thermal Capacity to Start Readout<br />
Factory Setting = Not Applicable<br />
Range = 0 - 100 % Thermal Capacity<br />
Readout only for the user’s viewing of the motor Thermal<br />
Capacity percentage required to allow a Reset after an<br />
Overload Trip. Use this function in conjunction with the<br />
Remaining Thermal Capacity (in the Status Screen group) to be<br />
able to predict when a restart will be allowed. This value is<br />
automatically updated by the <strong>VMX</strong> Series CPU whenever a<br />
successful start sequence has been accomplished. The <strong>VMX</strong><br />
Series essentially “learns” how much Thermal Capacity is<br />
needed in the motor in order to successfully restart, and stores<br />
the information at this Function. Upon power loss and<br />
restoration, this value is updated for elapsed time.<br />
<strong>VMX</strong> Series Digital Solid State Soft Starter <strong>User</strong> <strong>Manual</strong> 53 | P a g e
5.6.9 Output Relays<br />
There are three programmable relays (rated 240VAC, 5A, 1200 VA) in<br />
the <strong>VMX</strong> Series. They can be programmed for change of state<br />
indication for any one of the 25 conditions identified in the following<br />
chart.<br />
F060 = Aux Relay 1: Form C (SPDT)<br />
Factory Setting = 1 (Run / Stop)<br />
Range = 1 - 27 (See list)<br />
Use to program the desired operation for Relay # 1.<br />
F061 = Aux Relay 2: Form C (SPDT)<br />
Factory Setting = 2 (At Speed / Stop)<br />
Range = 1 - 27 (See list)<br />
Use to program the desired operation for Relay # 2.<br />
F062 = Aux Relay 3: Form A (SPST, N.O.)<br />
Factory Setting = 16 (Any Trip, 5 - 15)<br />
Range = 1 - 27 (See list)<br />
Use to program the desired operation for Relay # 3.<br />
F063 = Aux Relay Delay Timer for Settings 23 – 26<br />
Factory Setting = 0 (Disabled)<br />
Range = 1 – 999 seconds, or 0 (Disabled)<br />
Use to program the desired On Delay for any Aux. Relay that<br />
has been programmed for Settings 23 through 26 from the chart<br />
below.<br />
Setting<br />
Relay Operation Description<br />
1 Run / Stop (Changes on Start Command, resets on Stop)<br />
2 At Speed / Stop<br />
3 At Speed / End of Decel<br />
4 Start / End of Decel<br />
5 Short SCR Trip<br />
6 Phase Loss Trip<br />
7 Shunt Trip<br />
8 OL (Motor Thermal Overload) Trip<br />
9 OT (Starter Thermal Over Temperature) Trip<br />
10 Short Circuit Trip<br />
11 Current Unbalance Trip<br />
12 Over Current (Shear-Pin) Trip<br />
13 Under Current Trip<br />
14 Ground Fault Trip<br />
15 Phase Rotation Trip<br />
16 Any Trip (#5 - #15)<br />
17 Any Trip, (#5-#15) flashing output*<br />
18 Coast Down Time Lockout<br />
19 Starts Per Hour Lockout<br />
20 Time Between Starts Lockout<br />
21 Any Lockout (#18-#20)<br />
22 Run Timer (F030) Engaged<br />
23 Run / Stop with On-delay from F063<br />
24 At Speed / Stop with On-delay from F063<br />
25 At Speed / End of Decel with On-delay from F063<br />
26 Start / End of Decel with On-delay from F063<br />
27 Power Loss (nCP No Control Power) Trip<br />
*Note: Flash rate for Setting #17 is ½ second On and Off<br />
Table 5.6.9: Output Relay Programming<br />
F064 = Reserved<br />
<strong>VMX</strong> Series Digital Solid State Soft Starter <strong>User</strong> <strong>Manual</strong> 54 | P a g e
Special Note when using Serial Comm:<br />
When F068 = 3, the function of the Jog /<br />
Remote Input on TB-1 terminals 7 and 8 will<br />
change. Closing the Input will cause the<br />
Comm. port control to function as per setting<br />
F068=1. Leaving the input open will cause<br />
the Comm. port to function as per setting<br />
F068=0.<br />
When F068 = 1, 2 or 3, the Jog function will<br />
cease to operate. Since Jogging is a local<br />
function, set F068 to 0 when using it.<br />
N C<br />
RAMP2 JOG<br />
PTC OPTO<br />
6 7 8<br />
Local<br />
Remote<br />
Figure 5.6.11:<br />
Local - Remote Control Connections to TB-1<br />
Only when F068 = 3<br />
5.6.10 Communications<br />
The <strong>VMX</strong> Series starter is shipped from the factory ready to accept<br />
RS-485 Serial Communications using Modbus RTU protocol. F065 –<br />
F067 are used to set the communications parameters in the starter for<br />
use by the adaptor module. F068 determines how the Start / Stop<br />
functions work through the comm. port.<br />
F065 = Communications<br />
Factory Setting = 0 (Disabled)<br />
Range = 0 – 2<br />
This enables serial communications with remote monitoring and<br />
control systems and sets the format for Modbus RTU protocol.<br />
Once Enabled, the local start / stop inputs are altered to avoid<br />
inadvertent starting. See F068 for details.<br />
F065 = 0, communications are disabled.<br />
F065 = 1, uses the std 11 bit Modbus format w/ parity bit.<br />
F065 = 2, a non-standard 10-bit format without a parity bit is<br />
used to accommodate some systems using this<br />
method.<br />
F066 = Baud Rate<br />
Factory Setting = 9.6 KB<br />
Range = 4.8 to 19.2 KB<br />
Set value to either 4.8 KB, 9.6 KB or 19.2 KB and match the<br />
setting of the host device.<br />
F067 = Modbus Address<br />
Factory Setting = 1<br />
Range = 1 – 247<br />
Using Modbus communications protocol, up to 247 <strong>VMX</strong> Series<br />
starters can be networked using RS485 standard<br />
communication, each having a unique address. Two devices<br />
with the same address will result in a communications error.<br />
F068 = Remote Starter Control<br />
Factory Setting = 0 (disabled)<br />
Range = 0 – 3<br />
This determines how the <strong>VMX</strong> Series starter is to be controlled<br />
when using serial communications.<br />
When F068 = 0, the starter can be monitored by the Comm<br />
port, but not controlled.<br />
When F068 = 1, the starter will be controlled by the comm port.<br />
In addition, the Start / Stop inputs are altered as follows: The<br />
hard-wired Start command is put in “AND” logic with the Comm<br />
port; both Start commands must be on for the <strong>VMX</strong> to start. The<br />
Stop function is put in “OR” logic; either the Comm. port Stop<br />
command OR the hard-wired Stop will cause the <strong>VMX</strong> to stop.<br />
When F068 = 2, the <strong>VMX</strong> starter is in full control of the Comm.<br />
port only. Local Start / Stop inputs become completely inactive.<br />
Use this function only when controlled shutdown is a priority.<br />
When F068 = 3, the <strong>VMX</strong> starter will change the function of the<br />
Jog / Remote Input to cause a switch between the functions of<br />
setting 0 and setting 1 as listed above. When the input is open,<br />
the starter will respond to the Comm port as per setting F068=0<br />
above. When the Jog / Remote Input is closed, the starter will<br />
respond as per setting F068=1 above. Use this function if it is<br />
necessary to have a return to local start/stop control should the<br />
communications system fail or become disconnected.<br />
F069= Reserved<br />
<strong>VMX</strong> Series Digital Solid State Soft Starter <strong>User</strong> <strong>Manual</strong> 55 | P a g e
5.6.11 System Settings<br />
The following functions set operator interface controls and unit<br />
programming. Also contained here are the Clock settings used for<br />
history functions. Change the Clock settings if accurate time values are<br />
important.<br />
F070 = Parameter Lock / <strong>User</strong> Password<br />
Factory Setting = 0 (disabled)<br />
Range = 0 – 999<br />
Use only when necessary to prevent unauthorized access.<br />
Provides users with the ability to prevent unauthorized<br />
operators from making changes to the programmed functions. If<br />
you do NOT need to take advantage of this feature, do not enter<br />
anything into this function. The factory default is disabled, and<br />
no Password is necessary to make changes to the program.<br />
See Appendix 3 at the end of this manual for detailed instructions<br />
on using and altering the Parameter Lock / <strong>User</strong> Password<br />
feature.<br />
F071 = Emergency Clear / Reset<br />
Factory Setting = 0 (disabled)<br />
Range = 0 – 2<br />
This Function serves two purposes. It can clear the memory<br />
values used for lockouts and overload protection, and it can<br />
reset all functions to the factory default settings. This is a “One-<br />
Shot” feature, so when another value is entered as shown<br />
below, this function automatically returns to the default state.<br />
• When F071 = 0, the feature is disabled.<br />
• When F071 = 1, the values stored in the Thermal Register and all of<br />
the Lockout Timers will be cleared. This will allow an Emergency<br />
Restart without having to wait for proper cool down time or lockout<br />
timers to expire.<br />
WARNING!<br />
Clearing the Thermal Register to allow restarting without proper<br />
cool-down time after an Overload Trip can result in motor damage<br />
and fire. Use only where emergency restart is necessary with<br />
knowledge of these potential hazards.<br />
• When F071 = 2, the values of all functions will be reset to the<br />
factory default settings. Use this feature when setting conflicts have<br />
occurred or parameters have been tampered with. The Fault History<br />
is also cleared with this function.<br />
• Note:<br />
This will not reset F070 = Parameter Lock / <strong>User</strong> Password. See<br />
Appendix 3 for resetting this feature.<br />
F072 = Reserved<br />
<strong>VMX</strong> Series Digital Solid State Soft Starter <strong>User</strong> <strong>Manual</strong> 56 | P a g e
F073 = Unit Frame Rating:<br />
Read Only. Reserved for Factory Use<br />
F074 = CT Ratio:<br />
Read Only. Primary value of the <strong>VMX</strong> Series internal Current<br />
Transformers (CTs) for use in determining the GF trip settings<br />
(F046). CTs cannot be used for external metering. Alteration is<br />
reserved for factory use only.<br />
• 5.6.11.a Real Time Clock Settings<br />
Functions F075 through F080 set the system real time clock. The<br />
time clock is used for date/time stamping of the Fault History. The<br />
clock automatically adjusts for leap years and is backed up by a<br />
Lithium ion battery for long life.<br />
• Note:<br />
The time clock does not automatically adjust for daylight savings<br />
time.<br />
F075= Year<br />
Factory Setting = Year of manufacture<br />
Range = 2000 to 2047<br />
F076 = Month<br />
Factory Setting = Month of manufacture<br />
Range = 1 – 12<br />
F077 = Day<br />
Factory Setting = Day of manufacture<br />
Range = 1 – 31<br />
F078 = Hour<br />
Factory Setting = Actual (EST)<br />
Range = 0 - 23 (12:00 midnight is hour 0)<br />
F079 = Minute<br />
Factory Setting = Actual (EST)<br />
Range = 0 – 59<br />
F080 = Second<br />
Factory Setting = Actual (EST)<br />
Range = 0 – 59<br />
F081 = Firmware revision number for Factory Use<br />
F082 -F084 = Reserved<br />
<strong>VMX</strong> Series Digital Solid State Soft Starter <strong>User</strong> <strong>Manual</strong> 57 | P a g e
5.6.12 Fault History and Statistical Data<br />
F085 – F097 contain the Fault History and Statistical data for the Run<br />
Mode.<br />
Fault code:<br />
(See Chapter 7)<br />
Time Stamp<br />
(HH.mm)<br />
Date Stamp<br />
(MM.DD)<br />
Table 5.6.12.a: Fault History Configuration<br />
• 5.6.12.a Fault History<br />
Fault codes for each of the three latest events are stored with time<br />
and date stamps; see Chapter 7 for a complete list of fault codes<br />
and corresponding error displays.<br />
Time stamps use the 24hr HH.MM format, so for example 3:19 PM<br />
would display as [15.19]<br />
Date stamps use the MM.DD format, so for example September 3 rd<br />
would display [09.03]<br />
Fault #1<br />
(Latest Fault)<br />
Fault #2<br />
(Previous Fault)<br />
Fault #3<br />
(Oldest Fault)<br />
F085 F088 F091<br />
F086 F089 F092<br />
F087 F090 F093<br />
F085 = Latest Fault Code (Fault #1)<br />
Factory Setting = 0 (No Fault)<br />
Range = 0 – 27<br />
This Function displays the Fault Code of the latest fault event.<br />
F086 = Time Stamp of the Latest Fault<br />
Factory Setting = 00.00 (No Fault)<br />
Range = 00.00 – 23.59 (24hr time format)<br />
This Function displays the time of the latest fault event.<br />
F087 = Date Stamp of the Latest Fault<br />
Factory Setting = 00.00 (No Fault)<br />
Range = 01.01 – 12.31<br />
This Function displays the date of the latest fault event.<br />
F088 = Same as F085 except for the Previous Fault (Fault #2)<br />
F089 = Same as F086 except for the Previous Fault.<br />
F090 = Same as F087 except for the Previous Fault.<br />
F091 = Same as F085 except for the Oldest Fault (Fault #3)<br />
F092 = Same as F086 except for the Oldest Fault<br />
F093 = Same as F087 except for the Oldest Fault<br />
<strong>VMX</strong> Series Digital Solid State Soft Starter <strong>User</strong> <strong>Manual</strong> 58 | P a g e
• 5.6.12.b Statistical Data<br />
F094 - F097 display information from the Run Time / Elapsed Time<br />
meter and Run-Cycle counter.<br />
Run Time includes Accel, Run, Decel, and Jog operations.<br />
Run Cycles are counted only when the starter reaches At-Speed<br />
mode.<br />
F094 = Run Time, Hours<br />
Factory Setting = 0000<br />
Range = 000.9 - 999.9 hours<br />
Run times in excess of 999.9 are recorded in F095.<br />
F095 = Run Time, K Hours<br />
Factory Setting = 0000<br />
Range = 0000 - 9999 K hours<br />
0001 in readout means a run time of 1,000 hours.<br />
F096 = Run Counts<br />
Factory Setting = 0000<br />
Range = 0000 – 9999<br />
Run counts in excess of 9999 are recorded in F097.<br />
F097 = Run Counts, 10K Times<br />
Factory Setting = 0000<br />
Range = 0000 - 9999, 10 thousand times<br />
0001 in readout means a run count of 10,000 operations.<br />
Examples:<br />
Overflow<br />
Value<br />
Basic<br />
Value<br />
Run Time<br />
23,047 Hours<br />
Run Counts<br />
18,702 Starts<br />
F095 F094<br />
0002 3047<br />
F097 F096<br />
0001 8702<br />
Table 5.5.15: Statistical Data Examples<br />
<strong>VMX</strong> Series Digital Solid State Soft Starter <strong>User</strong> <strong>Manual</strong> 59 | P a g e
Chapter 6 - Start-up<br />
6.1 Basic Startup<br />
Your new <strong>VMX</strong> Series Soft Starter is factory preset for a wide variety of<br />
applications and often can be used with minimal adjustment.<br />
6.1.1 Three Step Process<br />
1. Connect L1, L2, and L3 to the input voltage source and<br />
T1, T2, and T3 to motor.<br />
2. Connect control wires and control power.<br />
3. Program motor FLA (F001).<br />
6.1.2 Start-up Parameters and Factory Defaults<br />
In the initial start-up, test the performance of the starter with the<br />
initial factory presets, if required adjust or enable the more<br />
advanced features to meet your specific application<br />
requirements.<br />
Fn #<br />
Function<br />
Name<br />
F001 Motor Nameplate FLA. 0<br />
F002<br />
Motor Nameplate<br />
Service Factor<br />
Factory<br />
Setting<br />
1.0 SF<br />
Description / Factory Setting<br />
FLA must be programmed for<br />
the starter to operate.<br />
Change only if necessary and for<br />
motors rated above 1.0SF<br />
F003 Overload Class During Start Class 10 NEMA / UL Class 10<br />
F004 Overload Class During Run Class 10 NEMA / UL Class 10<br />
F005 Overload Reset 0 (<strong>Manual</strong>) 0 = <strong>Manual</strong><br />
F010 Ramp Profile 1<br />
Ramp 1 and Ramp 2 =<br />
Voltage Ramp with Current Limit<br />
F011 Initial Torque 60 60% Initial Voltage<br />
F013 Ramp Time 10 10 Second Ramp (Ramp 1)<br />
F014 Current Limit 350 350% of programmed FLA<br />
F015 – F018 Ramp 2 settings ---<br />
F019 – F052<br />
Software protection and control<br />
features<br />
Inactive unless Ramp 2 Input is<br />
closed<br />
--- Inactive unless selected<br />
F051 Internal hardware protection features 126 All active except Phase Rotation<br />
F054 – F059 Timer and counter value readouts --- Read only<br />
F060 Aux Relay #1 1 Run / Stop<br />
F061 Aux Relay #2 2 At-Speed / Stop<br />
F062 Aux Relay #3 16 Any Fault<br />
F063 Aux Relay Delay 0 No Delay<br />
F065 – F068 Communications ----<br />
Not Used unless without optional<br />
Comm Adaptor.<br />
F070 Parameter Lock 0 <strong>User</strong> password disabled<br />
F071 Reset Function 0 Use to reset to default values<br />
F073 – F080 System settings and time clock --- <strong>User</strong> choice to adjust clock<br />
F085 – F093 Fault History --- Read only<br />
Table 6.1.2: Factory Presets<br />
<strong>VMX</strong> Series Digital Solid State Soft Starter <strong>User</strong> <strong>Manual</strong> 60 | P a g e
6.2 Start-up Check List<br />
Supply voltage matches the rated supply voltage of the unit.<br />
Horsepower and current ratings of the motor and starter have the<br />
same rating or the starter has a higher rating.<br />
Initial ramp time and torque adjustments have been checked.<br />
Input voltage source are connected to the starters input terminals<br />
L1, L2 and L3.<br />
Motor leads are connected to the starter output terminals T1, T2,<br />
and T3.<br />
Appropriate control power is applied and/or control connections<br />
have been made.<br />
“Power On” light located on the front of the unit turns on when<br />
control power is applied.<br />
Four 7-segment LED readout is visible.<br />
The motor’s FLA has been programmed in function F001.<br />
The thermal overload is properly set. (Use F003 and F004 to set OL<br />
Class.)<br />
The motor area and equipment are clear of personnel and parts<br />
before start-up.<br />
6.3 Sequence of Operation<br />
• Apply three-phase power to the unit. The motor should not run until<br />
the start command is applied.<br />
• Apply control power and check that the “Power On” LED comes on.<br />
• Status Display should read [0000.] showing no current in Phase A<br />
(minor flickering of the first digit is common).<br />
• Apply the Run (Start) command. The motor should begin to<br />
accelerate. Status display will read Phase A Amps at an increasing<br />
rate.<br />
• When the motor reaches full speed, the “At Speed” LED comes on.<br />
Status display should show a sharp decrease in Phase-A amps.<br />
• The Bypass Contactor should pull in.<br />
• If the motor does not fully accelerate, decelerates, or stops during<br />
the acceleration period, push the Stop button immediately and open<br />
the disconnect line.<br />
If Pump-Flex Decel is programmed in F025:<br />
• Remove the Run Command (or push the Stop button). At-Speed<br />
LED will go out.<br />
• The Bypass Contactor should drop out.<br />
• Status display should read Phase-A amps increasing as motor<br />
begins to decelerate.<br />
• Motor should begin to slow down. Status display should begin to<br />
show decreasing motor amps.<br />
• When motor reaches Stop Level, starter should turn off. Status<br />
display will again show [0000.]<br />
If the unit does not follow this operational sequence please refer to the<br />
Service and Troubleshooting Guide section.<br />
<strong>VMX</strong> Series Digital Solid State Soft Starter <strong>User</strong> <strong>Manual</strong> 61 | P a g e
6.4 Testing with a smaller motor<br />
• To test the <strong>VMX</strong> Series starter in combination with a motor that<br />
draws less than 20% of the starters Max Amp rating, the Phase<br />
Current Loss (Running) protection must be disabled as per<br />
instructions in section 5.6.8.a. If this feature is not disabled, the<br />
<strong>VMX</strong> Series will trip on a Phase Loss fault after running for 3<br />
seconds at low current levels.<br />
Chapter 7 - Fault Conditions<br />
7.1 Fault Codes and Numbers (in History)<br />
A three-character fault code is displayed in the LED display at the time<br />
of the trip event. The first two digits indicate the trip condition (see Table<br />
7.1). The third digit is a suffix showing the <strong>VMX</strong> Series operating mode<br />
when the trip occurred. Operating modes are as follows:<br />
Code suffix “A”: Acceleration, meaning that the <strong>VMX</strong> Series was<br />
ramping up but had not yet achieved “At-Speed” status (see section<br />
4.2.9.b for a brief description of At-Speed indication).<br />
Code suffix “c”: Constant Speed (running), meaning that the <strong>VMX</strong><br />
Series has reached the At-Speed condition and the motor was running<br />
when the trip occurred.<br />
Code suffix “d”: Decel or Stop, meaning that <strong>VMX</strong> Series was either<br />
stopped (off, but power applied), or if the Pump-Flex Decel function was<br />
enabled, it was engaged in the Soft Stop routine set up by F024-27.<br />
IMPORTANT NOTE:<br />
Fault code SSd may display if there is no output load (motor)<br />
connection when control power is applied!<br />
In addition to these fault display codes, each trip condition has a<br />
corresponding numeric code that is stored in the Fault History (see<br />
section 5.6.12.a). The numeric codes follow the display codes exactly.<br />
Table 7.1 shows the Fault Display Codes, Fault Number Codes and<br />
LED indicators for each fault condition. Additional details are available in<br />
the Service and Troubleshooting Guide.<br />
Example: If Function F003 (starting overload protection) is set too low<br />
for the size of the load and causes a trip, the fault code “oLA” will be<br />
displayed. Its corresponding number will be entered into the fault<br />
history. In this case, the number 0010 will be shown on the display in<br />
function F085 (Fault History). The time the fault occurred is available in<br />
function F086 shown as “hh.mm.” Example: if the “oLA” fault occurred at<br />
10:00 am, F086 would display “10.00.” The date the fault occurred is<br />
available in function F087. The date is shown as “mm.dd”. If the “oLA”<br />
fault occurred on March 1, F077 shows “03.01.” If no fault history is<br />
available F085 reads 0000.<br />
<strong>VMX</strong> Series Digital Solid State Soft Starter <strong>User</strong> <strong>Manual</strong> 62 | P a g e
Display Message Description<br />
Fault Display<br />
Code<br />
Readout<br />
Fault Number<br />
Code used in<br />
History,<br />
F085, F088<br />
and F091<br />
LED<br />
Indicator<br />
No Full Load Amps entered into F001<br />
nFLA<br />
Over Current during Acceleration ocA 1<br />
Over<br />
Over Current during Constant speed occ 2<br />
Current<br />
Over Current during Deceleration ocd 3<br />
Phase Loss during Acceleration PLA 4<br />
Phase Loss during Constant speed PLc 5 Phase<br />
Phase Loss during Deceleration PLd 6 Loss<br />
Line Voltage Loss (no 3 phase prior to start) n3Ph 6<br />
Over Temperature during Acceleration oTA 7<br />
Over<br />
Over Temperature during Constant speed otc 8<br />
Temp<br />
Over Temperature during Deceleration otd 9<br />
Over Load during Acceleration oLA 10<br />
Over Load during Constant speed oLc 11 Over Load<br />
Over Load during Deceleration oLd 12<br />
Shorted SCR during Acceleration SSA 13 Shorted<br />
Shorted SCR during Constant speed SSc 14 SCR or<br />
Shorted SCR during Deceleration or Stop SSd 15 no load<br />
Shunt Trip during Acceleration st 16<br />
Shunt Trip during Constant speed st 17 Shunt Trip<br />
Shunt Trip during Deceleration st 18<br />
Current Imbalance during Acceleration IbA 19<br />
Current Imbalance during Constant speed Ibc 20 ---<br />
Current Imbalance during Deceleration Ibd 21<br />
Under Current during Acceleration UcA 22<br />
Under Current during Constant speed Ucc 23 ---<br />
Under Current during Deceleration Ucd 24<br />
Short Circuit during Acceleration ScA 25<br />
Over<br />
Short Circuit during Constant speed Scc 26<br />
Current<br />
Short Circuit during Deceleration Scd 27<br />
Ground Fault during Acceleration GFA 28<br />
Ground Fault during Constant speed GFc 29 ---<br />
Ground Fault during Deceleration GFd 30<br />
Bypass Discrepancy during Acceleration bPA 31<br />
Bypass Discrepancy during Constant speed bPc 32 ---<br />
Bypass Discrepancy during Deceleration bPd 33<br />
PTC Trip during Acceleration PtA 34<br />
PTC Trip during Constant speed Ptc 35 Over Load<br />
PTC Trip during Deceleration Ptd 36<br />
Rotation Trip during Acceleration rtA 37<br />
Rotation Trip during Constant speed rtc 38 ---<br />
Rotation Trip during Deceleration rtd 39<br />
Table 7.1: Message Fault code List<br />
<strong>VMX</strong> Series Digital Solid State Soft Starter <strong>User</strong> <strong>Manual</strong> 63 | P a g e
7.2 Fault Explanation - Probable Cause - Solution<br />
Fault<br />
Code /<br />
#<br />
nFLA<br />
rSt<br />
Inh<br />
LED<br />
None<br />
None<br />
None<br />
Fault # or<br />
Code<br />
Description<br />
No Full Load Amps<br />
Reset<br />
Inhibited<br />
FLt ??? Multiple Faults<br />
CdLo None Coast Down Lock Out<br />
SHLo None Start per Hour Lock Out<br />
tSLo None Time between Starts Lock Out<br />
Explanation : Probable Cause : Solution<br />
Motor nameplate Full Load Amps (FLA) was not entered by the<br />
user. Starter will not operate without this information. See section<br />
3.1.<br />
Reset of fault condition is successful. The starter is ready for the<br />
next Start command.<br />
Attempted action is not possible. Probable cause:<br />
1) The starter is in the Run mode. The starter must be in the<br />
Stopped mode before changes can be entered.<br />
2) The parameter that is being entered has been locked out with<br />
the Customer Password. See section 5.5.11 for details.<br />
Indicates the rare occurrence of multiple simultaneous faults. The<br />
LEDs associated with those faults should illuminate.<br />
The Coast Down Lock Out timer has been enabled by the user<br />
and the time has not yet expired when a Start command is given.<br />
See section 5.5.8 for details.<br />
The Starts per Hour Lock Out timer has been enabled by the<br />
user, and the time has not yet expired when a Start command is<br />
given. See section 5.5.8 for details.<br />
The Time Between Starts Lock Out timer has been enabled by<br />
the user, and the time has not yet expired when a Start<br />
command is given. See section 5.5.8 for details.<br />
Fn List<br />
Ref<br />
F001<br />
N/A<br />
N/A<br />
N/A<br />
F048<br />
F049<br />
F50<br />
Loc None Lock Out Timer engaged<br />
Any one of the above Lock Out Protection features is preventing<br />
operation until the timer expires. See section 5.5.8 for additional<br />
details. Remaining time values are located at F055 - F059.<br />
F048 - F050<br />
PASS None Successful password entry<br />
Customer password was entered and accepted. Parameter lock<br />
is now released. All user functions can be accessed.<br />
F070 – F072<br />
Err<br />
None<br />
Password entry Error<br />
The password that you are trying to enter is invalid. Check with<br />
authorized user personnel for password information.<br />
Any<br />
End<br />
None<br />
Successful parameter change<br />
The data or setpoint entered into a Function has been accepted<br />
and stored into memory as the new value.<br />
All<br />
dFLt<br />
None<br />
Default<br />
Parameters have been successfully returned to the Factory<br />
Default settings.<br />
F071<br />
triP<br />
None<br />
Tripped<br />
Control power was cycled and the Start command given while<br />
the starter was in a tripped condition. The existing fault<br />
condition will display after the Start command is removed.<br />
N/A<br />
HXXX<br />
None<br />
Remaining Thermal Capacity<br />
(XXX will show number value<br />
from 000 to 100)<br />
Thermal capacity remaining in the motor. As this number counts<br />
down toward zero, the motor is approaching an overload<br />
condition. After Overload Trip occurs, this number will increase<br />
back toward 100% as the motor cools. The value at which an<br />
Overload Trip can be reset will dynamically changes as the <strong>VMX</strong><br />
starter learns the amount of Thermal capacity that is used on<br />
successful start attempts. Required Thermal Capacity to start<br />
can be displayed in F059.<br />
F001-F004,<br />
F059<br />
CLr None Retentive memory has been<br />
Cleared<br />
After entering a value of "2" into F071, the Thermal Register and<br />
all Lock Out Timer values will be cleared (reset to 0). Use this<br />
function only for emergency restart. Motor damage may result.<br />
F071<br />
<strong>VMX</strong> Series Digital Solid State Soft Starter <strong>User</strong> <strong>Manual</strong> 64 | P a g e
Appendix 1 - Ramp Profile Details<br />
The <strong>VMX</strong> Series offers four different types of starting ramp profiles.<br />
Simply select the one that best matches your motor / load requirements.<br />
In addition, two separate ramps are available that can be selected via<br />
contact closure (see section 4.2.5.a), and each one can be set up for<br />
any ramp type as shown in the table below.<br />
Voltage<br />
Voltage<br />
Ramp<br />
Type<br />
Ramp 1 Settings<br />
Initial<br />
Torque<br />
from…<br />
Ramp<br />
Time<br />
from…<br />
Current<br />
Limit<br />
from…<br />
“Ramp Type<br />
Selection”<br />
from F010<br />
Ramp<br />
Type<br />
Following are descriptions of the four types of Ramp Profiles<br />
1. Voltage Ramping is the most reliable starting method, due to the fact<br />
that at some point the starter will reach an output voltage high enough<br />
to allow the motor to draw full current and develop full torque. This<br />
method is useful for applications where the load conditions change<br />
frequently and significantly enough to require different levels of starting<br />
torque. Examples where this is effective are:<br />
• Material handling conveyers<br />
• Positive displacement pumps<br />
• Drum mixers, grinders etc.<br />
Voltage is increased from a starting point (Initial Torque) to full voltage<br />
over an adjustable time period (Ramp Time). To achieve Voltage<br />
Ramping, set the Ramp Profile (F010) to 0001 or 0003 (Voltage Ramp),<br />
and the Maximum Current Limit setting (F014) to maximum (600%).<br />
Since this is essentially Locked Rotor Current on most motors, there will<br />
be little or no Current Limit effect on the Ramp profile. Initial Torque<br />
setting comes from the Initial Voltage function F011.<br />
2. Voltage Ramping with Current Limit works similar to mode 1,<br />
except this mode adds an adjustable maximum current output. Voltage<br />
is increased gradually until the motor current reaches the Maximum<br />
Current Limit setting (F014) . The motor current is held at this level until<br />
the motor accelerates to full speed. When the motor current drops<br />
below the limit setting the output voltage is automatically increased to<br />
maximize torque until the <strong>VMX</strong> Series is At-Speed. This may be<br />
necessary in applications where the electrical power is limited.<br />
Examples would be:<br />
• Portable or emergency generator supplies<br />
Ramp 2 Settings<br />
Initial<br />
Torque<br />
from…<br />
Ramp<br />
Time<br />
from…<br />
Current<br />
Limit<br />
from…<br />
Voltage F011 F013 F014 1 Voltage F015 F017 F018<br />
Current F012 F013 F014 2 Current F016 F017 F018<br />
Voltage F011 F013 F014 3 Current F016 F017 F018<br />
Current F012 F013 F014 4 Voltage F015 F017 F018<br />
Table APP 1.1: Ramp Selection Choices and Settings<br />
Initial Torque<br />
Time<br />
Initial Torque<br />
Time<br />
Ramp Time<br />
Ramp Time<br />
Full Speed<br />
Figure APP 1.1:<br />
Voltage Ramp w/o Current Limit<br />
Full Speed<br />
Current<br />
Limit Setting<br />
Figure APP 1.2:<br />
Voltage Ramp with Current Limit<br />
• Utility power near the end of a transmission line or other starting<br />
power demand restrictions.<br />
Using Current Limit will override the Ramp Time setting if necessary, so<br />
use this feature when acceleration time is not critical. The Ramp Time<br />
setting however still determines the slope of the ramp up to the Current<br />
Limit setting to apply the softest possible acceleration. To achieve<br />
Voltage Ramping with Current Limit, set the Ramp Profile (F010) to<br />
0001 or 0003 (Voltage Ramp), and the Maximum Current Limit setting<br />
(F014) to a desired lower setting, as determined by your application<br />
requirements.<br />
<strong>VMX</strong> Series Digital Solid State Soft Starter <strong>User</strong> <strong>Manual</strong> 65 | P a g e
Current<br />
Time<br />
Initial Torque<br />
Ramp Time<br />
Current Limit<br />
Figure APP 1.3:<br />
Current / Torque Ramp<br />
At<br />
Speed<br />
3. Closed Loop Current (Torque) Ramping provides smooth linear<br />
acceleration of output torque. Ramp Time becomes the time from Initial<br />
Torque and Current Limit settings. Output torque is constantly updated<br />
using an internal PID feedback loop to provide a linear ramp, therefore<br />
the available torque is maximized at any given speed. The best use of<br />
this feature is for applications where rapid changes in torque may result<br />
in load damage or equipment changes. Examples would be:<br />
• Long overland conveyors where belt stretching may occur.<br />
• Low pressure pumps where slight surges at the end-of-ramp may<br />
pose mechanical problems.<br />
• Fans and mixers where blade warping is a problem.<br />
• Material handling systems where stacked products may fall over or<br />
break.<br />
This feature can be used with or without the Maximum Current Limit<br />
setting.<br />
To achieve Torque Ramping with the <strong>VMX</strong> Series, set the Ramp Profile<br />
(F010) to 0002 or 0004 (Current Ramp), and the Maximum Current Limit<br />
setting (F014) to the desired level. Initial Torque setting comes from the<br />
Initial Current function F012.<br />
Current<br />
Time<br />
Initial Torque<br />
Current Limit<br />
Figure APP 1.4:<br />
Current Step Starting<br />
At<br />
Speed<br />
4. Current Limit Only (Current Step) uses the Current Limit feature<br />
exclusively without the benefit of soft starting by ramping the voltage or<br />
current first (also known as Pedestal Starting). This will maximize the<br />
effective application of motor torque within the limits of the motor. In this<br />
mode, Initial Torque is set to maximum and Ramp Time is set to<br />
minimum, so that the output current jumps to the Current Limit setting<br />
immediately. Examples of when to use this mode are:<br />
• Applications with a severely limited power supply<br />
• When starting a difficult load such as a centrifuge or deep well<br />
pump<br />
• When the motor capacity is barely adequate without stalling or<br />
overloading.<br />
• It is a good choice when other starting modes fail.<br />
Since ramp times are set to minimum, this mode functions in either<br />
Voltage Ramp or Current Ramp setting.<br />
Ramp Parameter Descriptions<br />
Following are detailed descriptions of the individual settings that make<br />
up each ramp profile.<br />
Initial Torque (Initial Voltage or Initial Current).<br />
These functions set the initial start point of either the Voltage Ramp or<br />
Current Ramp as programmed in F010. Every load requires at least<br />
some amount of torque to start from a standstill. It is not efficient to<br />
begin ramping the motor from zero every time, since between zero and<br />
the (WK2) breakaway torque level, no useful work is being performed.<br />
The initial torque level should be set to provide just enough torque to<br />
make the motor shaft begin to rotate, enabling the softest possible start<br />
and preventing torque shock damage to the mechanical components.<br />
Setting this function too high will not damage the starter, but may<br />
reduce or eliminate the soft start advantages.<br />
<strong>VMX</strong> Series Digital Solid State Soft Starter <strong>User</strong> <strong>Manual</strong> 66 | P a g e
Accel Ramp Time. This Function sets the maximum allowable time for<br />
ramping from the Initial Torque setting to either of the following:<br />
1) Current limit setting when the motor is still accelerating, or<br />
2) Full output voltage if the Current Limit is set to maximum.<br />
Increasing the Ramp Time softens the start process by lowering the<br />
slope of increase in voltage or current. This should be set to provide the<br />
softest possible start without stalling unless it is determined that the<br />
application has other considerations. Applications where this setting<br />
should be shorter include Centrifugal Pumps, because pump problems<br />
may occur as a result of insufficient torque during acceleration through<br />
the pump curve.<br />
• Note:<br />
Ramp Time is affected by the following conditions:<br />
1. Current Limit will automatically override the Ramp Time if set<br />
to Voltage Ramp (F010=1) and if the motor does not reach full<br />
speed while in current limit mode.<br />
2. An “Anti-Oscillation” circuit built-in to the <strong>VMX</strong> Series will<br />
shorten the Ramp Time if the motor reaches full speed before<br />
end of ramp.<br />
Current Limit. This Function sets the maximum motor current that the<br />
starter allows during Ramping. It is active in both the Voltage Ramp and<br />
Current Ramp modes. As the motor begins to ramp, this feature will set<br />
a maximum at which the current draw will be held. Current Limit will<br />
remain in effect until one of the following two events occur:<br />
1. The motor reaches full speed as detected by the At-Speed<br />
detection circuit.<br />
2. The Overload Protection trips on Motor Thermal Overload (see<br />
Ch.3).<br />
Once the motor has reached full speed, the Current Limit feature<br />
becomes inactive.<br />
• In the Voltage Ramp Profile, the Voltage output is increased until<br />
the Current Limit is reached. The Ramp Time is the maximum time<br />
it will take for the voltage to increase until the Current Limit setting<br />
takes over. Under some load conditions, Current Limit may be<br />
reached before the Ramp Time has expired.<br />
• In the Current Ramp Profile, output voltage varies to provide a<br />
linear increase in current up to the Current Limit setting, and Ramp<br />
Time is the time that it will take to get there. A closed loop feedback<br />
of motor current allows continuous updating of the output to<br />
maintain this ramp profile.<br />
Because most AC induction motors will not start below 200% current,<br />
the current limit set point is adjustable down to only 200%.<br />
Caution:<br />
While in the Start mode there is no maximum Current Limit time.<br />
Excessive start time may lead to motor stalling, causing an<br />
Overload Trip. If this happens, try raising the Current Limit setting<br />
to accommodate your load conditions. If the Current Limit setting<br />
cannot be increased, try using Current Limit without ramping<br />
features (“Current Limit Only” as described previously).<br />
<strong>VMX</strong> Series Digital Solid State Soft Starter <strong>User</strong> <strong>Manual</strong> 67 | P a g e
Appendix 2: Pump-Flex Decel Mode Application Considerations<br />
Pump On<br />
Pump Off<br />
Pump Off<br />
Coast-to-Stop<br />
(using Electro-Mech. starter)<br />
Check Valve<br />
Open<br />
Check Valve<br />
Slams<br />
Check Valve<br />
Closed<br />
Pump Flow<br />
Back Flow<br />
((( SHOCK WAVE )))<br />
Pump-Flex Deceleration (Soft Stop) is a unique feature of <strong>Motortronics</strong><br />
Solid State Soft Starters. It provides a slow decrease in the output<br />
voltage, accomplishing a gentle decrease in motor torque during the<br />
stopping mode. This is the OPPOSITE OF BRAKING in that it will take<br />
longer to come to a stop than if the starter were just tuned off.<br />
The primary use of this function is with centrifugal pumps as a means to<br />
reduce the sudden changes in pressure that are associated with “Water<br />
Hammer” and slamming of check valves. Decel control in pump<br />
applications is often referred to as Pump Control.<br />
In a pump system, liquid is being pushed uphill. The force exerted by<br />
gravity on the column of liquid as it goes up hill is called the “Head<br />
Pressure” in the system. The pump is sized to provide enough Output<br />
Pressure to overcome the Head Pressure and move the fluid up the<br />
pipe. When the pump is turned off, the Output Pressure rapidly drops to<br />
zero and the Head Pressure takes over to send the fluid back down the<br />
hill. A “Check Valve” is used somewhere in the system to prevent this (if<br />
necessary) by only allowing the liquid to flow in one direction.<br />
Kinetic energy in that moving fluid is suddenly trapped when the valve<br />
slams closed. Since fluids can’t compress, that energy is transformed<br />
into a “Shock Wave” that travels through the piping system looking for<br />
an outlet in which to dissipate. The sound of that shock wave is referred<br />
to as “Water Hammer”. The energy in that shock wave can be extremely<br />
damaging to pipes, fittings, flanges, seals and mounting systems.<br />
Pump<br />
Soft Stop<br />
Pump-Flex Soft Stop<br />
(using <strong>VMX</strong> Series starter)<br />
Check Valve<br />
Closes Slowly<br />
Neutralized Flow<br />
SOLUTION:<br />
By using the Pump-Flex Decel feature of the <strong>VMX</strong> Series, the pump<br />
output torque is gradually and gently reduced, which slowly reduces the<br />
pressure in the pipe. When the Pump Output Pressure is just slightly<br />
lower than the System Head Pressure, the flow slowly reverses and<br />
closes the Check Valve. By this time there is very little energy left in the<br />
moving fluid and the Shock Wave is avoided. When the output voltage<br />
to the motor is low enough to no longer be needed, the <strong>VMX</strong> Series will<br />
end the Pump-Flex Decel cycle and turn itself off.<br />
Pump Off<br />
NO SHOCK WAVE<br />
Check Valve<br />
Closed<br />
Caution!<br />
Decel is THE OPPOSITE of braking. Enabling the Decel<br />
feature will make the motor take LONGER to stop than if it<br />
were simply turned off.<br />
<strong>VMX</strong> Series Digital Solid State Soft Starter <strong>User</strong> <strong>Manual</strong> 68 | P a g e
Setup and Use<br />
Pump systems vary greatly. To accommodate this, the Pump-Flex <br />
Decel control feature is designed to provide complete flexibility in how<br />
the deceleration process takes place by using the following settings.<br />
Decel begins when a Stop command is given (or the Run command is<br />
removed). If there is a Bypass Contactor, it will open immediately,<br />
putting the power control back to the SCRs.<br />
Stop Command<br />
(Bypass Contactor Opens)<br />
F025: Begin Decel Level<br />
(Immediate step down)<br />
Full Speed<br />
Check Valve<br />
Closes<br />
F026: Decel Shut Off<br />
(<strong>VMX</strong> Output Off)<br />
Voltage<br />
Time<br />
F027: Decel Ramp Time<br />
= Motor Torque<br />
= Pump Output<br />
Figure APP2.2: Pump-Flex Decel Graph<br />
F024 = Deceleration Ramp<br />
Factory Setting = 0 (Disabled)<br />
Range = 0 – 2<br />
When F024 = 0, the deceleration feature is disabled.<br />
When F024 = 1, the deceleration feature is enabled AND the overload<br />
protection feature (from F003 - F005) remains active. When a<br />
Stop command is given, the starter begins to apply Decel<br />
voltage. However, if an overload trip occurs, the starter ceases<br />
applying Decel voltage and the motor coasts to a stop to<br />
prevent additional motor heating and potential motor damage.<br />
When F024 = 2, the deceleration feature is enabled and deceleration<br />
will continue even when an overload condition trips. This is<br />
to be used only when the risk of damage due to an uncontrolled<br />
shutdown is considered worse than the potential damage to the<br />
motor.<br />
WARNING!<br />
Setting F025 = 2 presents significant risk of over-heating<br />
the motor beyond its design limits which could result in<br />
motor damage and fire hazard. Do this only in<br />
circumstances where the potential for mechanical damage<br />
outweighs the risk of motor damage and fire.<br />
• Note:<br />
The PTC Input will act as an Overload trip (disable), however it<br />
ALWAYS shuts the starter down WITHOUT Decel (as in setting<br />
F025=1 above) even if F025 is set to 2.<br />
<strong>VMX</strong> Series Digital Solid State Soft Starter <strong>User</strong> <strong>Manual</strong> 69 | P a g e
F025 = Begin Decel Level (BDL)<br />
Factory Setting = 60%<br />
Range = 0 - 100% of line voltage<br />
Used to drop voltage to a level where there is a noticeable<br />
effect on motor torque during Decel mode. Generally, systems<br />
with high head pressure need to start Decel near the top of the<br />
ramp (85-95%). Low head systems can drop to lower settings<br />
(50-60%). System conditions vary greatly by pump type, pipe<br />
size and system head. Some experimentation with settings may<br />
be necessary.<br />
F026 = Decel Shut Off Voltage<br />
Factory Setting = 30%<br />
Range = 0 to (BDL -1)%<br />
Sets the level where the starter is turned off, corresponding to<br />
where motor torque during Decel is no longer effective. Always<br />
set this function lower than the setting of F026, Begin Decel<br />
Level (this function is restricted from being less than F026<br />
minus 1%). This function is used to shut the motor off once the<br />
check valve closes. Again, because systems vary greatly this<br />
setting may require adjustment several times. If you cannot<br />
hear or see the check valve close, observe fluid pressure or<br />
flow if available.<br />
F027 = Decel Ramp Time<br />
Factory Setting = 10 seconds<br />
Range = 1 - 60 seconds<br />
Sets the maximum time for the deceleration ramp to go from the<br />
Begin Decel Level setting (F026) to the Decel Shut Off Voltage<br />
(F027). This function is used to dampen the effect of reducing<br />
pump torque as much as possible. If the check valve still slams<br />
at the end of ramp, try extending this time function a little. Since<br />
motor heating increases as voltage is lowered, the setting<br />
should not exceed the time necessary to achieve the<br />
deceleration effect.<br />
• Note:<br />
When using the Decel function, count these cycles as additional<br />
“starts” when determining maximum starts-per-hour.<br />
Other Applications:<br />
Another common application for Decel control is on material handling<br />
conveyors as a means to prevent sudden stops that may cause<br />
products to shift, fall over or to bump into one another.<br />
In overhead crane applications, Soft Stopping of the Bridge or Trolley<br />
can prevent loads from beginning to over swing on sudden stops.<br />
<strong>VMX</strong> Series Digital Solid State Soft Starter <strong>User</strong> <strong>Manual</strong> 70 | P a g e
Appendix 3: Parameter Lock / <strong>User</strong> Password Instructions<br />
Provides users with the ability to prevent unauthorized operators from<br />
making changes to the programmed functions. If you do not need to<br />
take advantage of this feature, do not enter anything into this<br />
function. The factory default is disabled, and no Password is necessary<br />
to make changes to the program.<br />
When any value other than 0000 is entered into this Function, the<br />
Parameter Lock is enabled and that number becomes the <strong>User</strong><br />
Password. From that point forward, it will be necessary to enter the <strong>User</strong><br />
Password in this Function prior to making changes in any programmed<br />
function, including this one. When the Parameter Lock has been<br />
enabled, attempts to alter the program will result in the display reading<br />
[Err ] whenever the [READ/ENTER] key is pressed.<br />
To alter the program after the Parameter Lock has been enabled, go to<br />
Function F070 and enter the correct user Password. The display will<br />
read an encoded value representing the existing password. As soon as<br />
you press the first Arrow key, the display will change to [0000] and start<br />
showing the actual value of your password entry. When the [READ/<br />
ENTER] button is pressed, the display will read [PASS], indicating that<br />
the <strong>User</strong> Password is correct and the system is unlocked. You will have<br />
5 minutes in which to make a change in the program. This 5-minute<br />
window resets whenever any key is pressed, so it floats to give you 5<br />
minutes after the last entry. After 5 minutes of no keypad activity, the<br />
Parameter Lock is reinstated with the current user Password.<br />
Subsequent changes will require re-entering the <strong>User</strong> Password.<br />
To change the <strong>User</strong> Password or to disable the Parameter Lock<br />
function, enter the programmed <strong>User</strong> Password first, and then set<br />
Function F070 to 0, disabling the Parameter Lock. If you do not re-enter<br />
the Password or enter a new user password, the Parameter Lock<br />
feature will remain disabled. If you enter a different number into this<br />
Function, the new number becomes your new <strong>User</strong> Password. Existing<br />
passwords are encoded to “hide” them in the display.<br />
Caution:<br />
DO NOT LOSE YOUR PASSWORD.<br />
If the password has been lost or forgotten, contact <strong>Motortronics</strong> for assistance.<br />
<strong>VMX</strong> Series Digital Solid State Soft Starter <strong>User</strong> <strong>Manual</strong> 71 | P a g e
Example: Figure App 3<br />
Enabling Password Protection / Parameter Lock<br />
Starting from the Status Display Mode, no previous function<br />
number entered, no existing password...<br />
Press the Fn key.<br />
Displays F001 to indicate the beginning of the function list.<br />
Press the LEFT arrow key<br />
Selects the second digit (from the right). Note: do it in this<br />
order because F000 would not have been a valid number<br />
Press the UP arrow key seven times (7X)<br />
Changes the function code to F071.<br />
Press the RIGHT arrow key<br />
Selects the first digit (from the right).<br />
Press the DOWN arrow key<br />
Changes the function code to F070.<br />
Press the Read Enter key<br />
The default display will show [3552] as long as no password<br />
has been previously entered. This is the default code for<br />
“0000”, meaning that there is no password. As soon as you<br />
press the first Arrow key, the display will change to [0000]<br />
and begin showing the actual value of your password entry.<br />
Any initial display other than [3552] signifies that a password<br />
already exists. This means that you will need to change, rather<br />
than enter a new one (see below).<br />
Use the UP arrow and the LEFT arrow keys…<br />
to display the password you desire (Valid range is 0000 to<br />
0999). In this example, 0123 has been selected.<br />
Press the Read Enter key<br />
The display will flash [End] to confirm you have entered a<br />
password. Then it will return to displaying thee Function #.<br />
Press<br />
Key...<br />
Fn<br />
READ<br />
ENTER<br />
READ<br />
ENTER<br />
Example: Setting a Password<br />
x 3<br />
x 2<br />
Using Password 123<br />
Display<br />
Shows...<br />
0000.<br />
F070<br />
3552<br />
0003<br />
0003<br />
0023<br />
0023<br />
0123<br />
End<br />
F070<br />
Means...<br />
Phase A<br />
Current<br />
Select<br />
Function #70<br />
Default Setting<br />
of Function #70<br />
New Value of<br />
First Digit<br />
Cursor (flashing)<br />
Position Shift<br />
New Value of<br />
Second Digit<br />
Cursor (flashing)<br />
Position Shift<br />
New Value of<br />
Second Digit<br />
Value Accepted<br />
(flashes once)<br />
Return to<br />
Function # Display<br />
Figure App 3:<br />
Entering a Passw ord<br />
Changing passwords:<br />
To change an existing password, the steps are essentially the same as<br />
outlined above, except you must first enter the existing password. At<br />
F070, press the [READ/ENTER] key to reveal the encoded password<br />
(you must know that password before it can be changed). Use the<br />
Arrow keys to enter the password. As soon as you press the first Arrow<br />
key, the display will change to [0000] and start showing the actual value<br />
of your entry. When you get to the existing password, press the<br />
[READ/ENTER] key again. The display will flash [PASS] to indicate that<br />
the password was accepted. If it flashes [ Err ], you have entered the<br />
wrong password.<br />
Resetting to Factory Defaults using F071 will NOT reset the password.<br />
Disabling Password Protection / Parameter Lockout<br />
Changing function F070 to [0000] will disable the user password. If the<br />
initial display reads [3552], the password is already set to [0000]. 2<br />
<strong>VMX</strong> Series Digital Solid State Soft Starter <strong>User</strong> <strong>Manual</strong> 72 | P a g e
Ramp 0mofile<br />
Appendix 4 – External Over Load Relay Applications<br />
Your <strong>VMX</strong> Series starter comes equipped with a very intelligent internal<br />
electronic overload protection system, and does not need an external<br />
Over Load Relay (OLR). There are instances however where external<br />
OLRs are needed or desired because of the application. These fall into<br />
three categories; Higher Level Protection systems, Redundant Backup<br />
applications and Special Motor applications.<br />
• Note:<br />
If the Decel Function is activated (F024), additional consideration<br />
must be put into determining how the starter is to operate in the<br />
event of an Over Load Trip. See Section 5.6.5 for issues regarding<br />
this application.<br />
HIGHER LEVEL PROTECTION SYSTEMS<br />
Because of a desire for uniformity and/or operator familiarity in some<br />
facilities, Motor Protection Relays or other coordinated OEM protection<br />
systems may be used in lieu of the <strong>VMX</strong> Series protection (even though<br />
most of the features are the same or better). In these instances the<br />
<strong>VMX</strong> Series Over Load protection can simply be turned off, deferring<br />
protection to the external devices. Care should be taken however to<br />
ensure that the external device is properly wired into the starter control<br />
circuit to facilitate shutdown of the motor. The <strong>VMX</strong> Series provides a<br />
PTC input that can be wired to the NC aux contact of the external<br />
device so that a fault will still shut down the <strong>VMX</strong> Series and be<br />
annunciated on the display. See section 4.7.2.a for more details on<br />
using the PTC input.<br />
REDUNDANT BYPASS STARTER APPLICATIONS:<br />
In some applications, it may be necessary to provide an independent<br />
means of starting and protecting the motor should be <strong>VMX</strong> Series<br />
starter become inoperable. If this were the case, the Bypass Contactor<br />
could be used for Across-the-Line (D.O.L) starting of the motor. The<br />
<strong>VMX</strong>…BP version with Integral Bypass Contactors is designed for that<br />
possibility, as long as the starter is properly selected when ordered. To<br />
do so, select the starter based upon the ATL (Across-the-Line) selection<br />
chart so that the contactor is rated for ATL duty instead of the normal<br />
Shunt Duty (see section 1.2.3 for Selection charts).<br />
Under normal operations, the Bypass Contactor is controlled internally<br />
by the <strong>VMX</strong> Series PC board and an internal pilot relay. For redundant<br />
backup purposes however, terminals B1 and B2 of TB4 are provided for<br />
field connection of a dry contact closure in parallel to the pilot relay<br />
contact, allowing control even if the electronics are out of service. AC<br />
control power must still be applied to TB2 terminals A1 and A2, but no<br />
other electronics or power supplies need to be functioning. It is in this<br />
instance that an external OLR must be added to the motor power circuit<br />
and wired into that coil control circuit. TB4 is located in different areas of<br />
each frame size in the <strong>VMX</strong> Series. Refer to the following diagram for<br />
the location on your unit.<br />
<strong>VMX</strong> Series Digital Solid State Soft Starter <strong>User</strong> <strong>Manual</strong> 73 | P a g e
<strong>VMX</strong> Bypass Control Terminal Location Diagrams<br />
Bypass Control<br />
Terminals<br />
18 - 48A Units<br />
Bypass Control<br />
Terminals<br />
62 - 160A Units<br />
Note:<br />
Use these terminals only when separate control of the Bypass Contactor is necessary<br />
Bypass Control<br />
Terminals<br />
210 – 600A with or<br />
without integral<br />
bypass<br />
<strong>VMX</strong> Series Digital Solid State Soft Starter <strong>User</strong> <strong>Manual</strong> 74 | P a g e
Appendix 4 (cont.) External OL Relay Applications<br />
Across-the-Line (Direct-on-Line) Bypass<br />
A suggested control schematic is shown below for using the <strong>VMX</strong> …-BP<br />
Series rated for Across-the-Line Bypass with an External Overload:<br />
(Included as standard on all<br />
<strong>VMX</strong>B-CD enclosed units.)<br />
AC CONTROL POWER<br />
Disconnect<br />
or<br />
Circuit<br />
Breaker<br />
Start / Run<br />
Command<br />
(2-wire or 3-wire)<br />
CR<br />
97 98<br />
R /<br />
L1<br />
S /<br />
L2<br />
T /<br />
L3<br />
<strong>VMX</strong> Starter.<br />
S S<br />
Off<br />
A-T-L<br />
External<br />
OL<br />
Solid State.<br />
Over Load.<br />
CR<br />
CR<br />
U /<br />
T1<br />
V /<br />
T2<br />
W /<br />
T3<br />
Bypass<br />
Contactor<br />
"BP"<br />
External<br />
Over Load<br />
G<br />
1 2 3 B1 B2 A1 A2<br />
<strong>VMX</strong>-TB-1<br />
(24VDC)<br />
<strong>VMX</strong>-<br />
TB-4<br />
Internal Bypass<br />
Pilot Relay<br />
AC<br />
Control Pow er<br />
Potential<br />
<strong>VMX</strong>-<br />
TB-2<br />
BP<br />
Bypass<br />
Contactor<br />
Coil<br />
MTR<br />
<strong>VMX</strong>...-BP Series<br />
Internal Wiring<br />
Figure APP4.2: <strong>VMX</strong> Wiring for Across-the-Line Bypass Operation with External Overload Relay<br />
(Only the terminals necessary for this operation are shown)<br />
In this example:<br />
The Start / Run command (2-wire or 3-wire) energizes a control Relay<br />
“CR”. If the selector Switch is in the “SS” (Soft Start) position, the<br />
contact of CR closes the 24VDC control signal to TB1, terminals 1 and 3<br />
of the <strong>VMX</strong> Series, which begins ramping. When At-Speed status is<br />
reached, an internal Bypass Pilot Relay is used to close the Bypass<br />
Contactor. While in this mode, the <strong>VMX</strong> Series CPU provides full motor<br />
protection, even when the Bypass Contactor closes.<br />
When the Selector Switch is placed in the “A-T-L” (Across-the-Line)<br />
position, a 2 nd isolated contact of CR is used to close the circuit between<br />
B1 and B2 of TB4 which are internally connected in parallel to the<br />
Bypass Pilot Relay contact in the Bypass Contactor coil circuit. Since<br />
the <strong>VMX</strong> Series electronics may be out of service, an External Overload<br />
is added which only operates in this mode and protects the motor by<br />
dropping out the connection between B1 and B2.<br />
Caution:<br />
The circuit on TB-4 is at the same potential as the AC control<br />
<strong>VMX</strong> Series Digital Solid State Soft Starter <strong>User</strong> <strong>Manual</strong> 75 | P a g e
voltage, but should not be directly connected to it. PC board<br />
damage may result.<br />
Appendix 4 (cont.) External OL Relay Applications<br />
SPECIAL MOTOR APPLICATIONS<br />
Multiple Motors<br />
When more than one motor is connected downstream from the <strong>VMX</strong><br />
Series starter, the internal electronic overload protection cannot provide<br />
proper protection of the individual motors. Codes require the use of<br />
separate OLRs for each motor, which would need to be external<br />
devices.<br />
In these instances the <strong>VMX</strong> Series Over Load protection should be<br />
turned off, deferring protection to the separate OLRs. Care should be<br />
taken to ensure that the External OLR is properly wired into the starter<br />
control circuit to facilitate shutdown of the motor. The <strong>VMX</strong> Series<br />
provides a PTC input that can be wired to the NC auxiliary contact of the<br />
external OLR so that a trip will still shut down the <strong>VMX</strong> Series and be<br />
annunciated on the display. Multiple OLRs would then be wired in series<br />
for the same effect. See section 4.7.2.a for details on using the PTC<br />
input.<br />
120VAC CONTROL POWER<br />
Disconnect<br />
or<br />
Circuit<br />
Breaker<br />
A1<br />
A2<br />
<strong>VMX</strong>-TB-2<br />
R /<br />
L1<br />
S /<br />
L2<br />
T /<br />
L3<br />
<strong>VMX</strong> Starter.<br />
Start / Run<br />
Command<br />
External<br />
OL 1<br />
External<br />
OL 2<br />
Solid State.<br />
Over Load.<br />
1 2 3<br />
<strong>VMX</strong>-TB-1<br />
(24VDC)<br />
9 10<br />
<strong>VMX</strong>-TB-1<br />
(PTC Input)<br />
Bypass<br />
Contactor<br />
"BP"<br />
<strong>VMX</strong>...-BP Series<br />
Control Wiring<br />
U /<br />
T1<br />
V /<br />
T2<br />
W /<br />
T3<br />
G<br />
External<br />
Over Load 1<br />
External<br />
Over Load 2<br />
MTR<br />
1<br />
MTR<br />
2<br />
<strong>VMX</strong> Series Digital Solid State Soft Starter <strong>User</strong> <strong>Manual</strong> 76 | P a g e
Appendix 4 (cont.) External OL Relay Applications<br />
SPECIAL MOTOR APPLICATIONS<br />
2S2W Motors<br />
2 speed / 2 winding motor applications require a separate OLR sized for<br />
each set of windings. These would need to be external OLRs.<br />
120VAC CONTROL POWER<br />
Disconnect<br />
or<br />
Circuit<br />
Breaker<br />
2S2W Starter<br />
(Logic not shown for clarity)<br />
A1<br />
A2<br />
<strong>VMX</strong>-TB-2<br />
MS<br />
MF<br />
R /<br />
L1<br />
S /<br />
L2<br />
T /<br />
L3<br />
<strong>VMX</strong> Starter.<br />
Solid State.<br />
Over Load.<br />
MF<br />
Slow<br />
OL<br />
Fast<br />
OL<br />
MS<br />
MF<br />
1 2 3<br />
6 7<br />
9 10<br />
U /<br />
T1<br />
V /<br />
T2<br />
W /<br />
T3<br />
Bypass<br />
Contactor<br />
"BP"<br />
G<br />
<strong>VMX</strong>-TB1<br />
(24VDC)<br />
<strong>VMX</strong>-TB1<br />
(Ramp 2)<br />
<strong>VMX</strong>-TB1<br />
(PTC Input)<br />
<strong>VMX</strong>...-BP Series<br />
Control Wiring<br />
External 2-Speed 2-Winding (2S2W) Starter<br />
MS<br />
Slow<br />
Over Load<br />
MF<br />
Fast<br />
Over Load<br />
2S2W<br />
MTR<br />
In this example:<br />
The <strong>VMX</strong> Series is used ahead of an existing 2S2W starter, which<br />
already has separate OLRs for each speed. Dry Aux. contacts of the<br />
2S2W starter are used to provide a Run command to the <strong>VMX</strong> Series<br />
so that all existing controls can be used. In addition, another dry Aux. of<br />
the Fast contactor is used to select Ramp 2. When started in Slow,<br />
Ramp 1 (default) is used. If started in Fast, different ramp settings are<br />
necessary so Ramp 2 is used. (See section 4.2.5.a for Dual Ramp info.)<br />
Either OLR will trip the <strong>VMX</strong> Series, which will display [ Ptc] and light the “Overload” LED.<br />
<strong>VMX</strong> Series Digital Solid State Soft Starter <strong>User</strong> <strong>Manual</strong> 77 | P a g e
Appendix 5 - Soft Starter Settings Record<br />
The following chart may be used to record the changes made to the factory settings.<br />
Fn # Group Function Description Adjustment / Display Range<br />
Setting<br />
Increments<br />
Factory<br />
Setting<br />
Setting<br />
F001<br />
F002<br />
Motor and Overload Info.<br />
Motor Nameplate FLA<br />
FLA must be programmed for<br />
starter to function.<br />
Motor Nameplate<br />
Service Factor<br />
50-100% of Max Amp Rating.<br />
Upper limit of range automatically<br />
adjusts downward as Service factor<br />
is increased.<br />
1 amp 0<br />
1.00 - 1.30 SF 0.05 1.0 SF<br />
F003 Overload Class During Start NEMA / UL Class 5 - 20 5 Class 10<br />
F004 Overload Class During Run NEMA / UL Class 5 - 30 5 Class 10<br />
F005<br />
Overload Reset<br />
F006-9 Reserved for factory use<br />
0 = <strong>Manual</strong><br />
1 = Auto<br />
2 = Disabled Overload<br />
1<br />
0<br />
(<strong>Manual</strong>)<br />
F010<br />
Starting and Stopping Modes<br />
Ramp Type Selection<br />
VR = Voltage Ramp<br />
CR = Current PID Ramp<br />
1 = Ramp 1, 2 = Ramp 2<br />
Setting 1 = VR1 + VR2<br />
Setting 2 = CR1 + CR2<br />
Setting 3 = VR1 + CR2<br />
Setting 4 = CR1 + VR2<br />
1<br />
1<br />
VR1+VR2<br />
F011 Initial Torque (VR) of Ramp 1 0-100% Line Voltage 1% 60%<br />
F012 Initial Torque (CR) of Ramp 1 0-600% Motor Current 1% 200%<br />
F013 Accel Ramp Time of Ramp 1 1-120 seconds 1 second<br />
10<br />
seconds<br />
F014 Max Current Limit of Ramp 1 200 - 600% Motor Current 1% 350%<br />
F015 Initial Torque (VR) of Ramp 2 0-100% Line Voltage 1% 60%<br />
F016 Initial Torque (CR) of Ramp 2 0-600% Motor Current 1% 200%<br />
F017 Accel Ramp Time of Ramp 2 1-120 seconds 1 second<br />
10<br />
seconds<br />
F018 Max Current Limit of Ramp 2 200 - 600% Motor Current 1% 350%<br />
F019<br />
Jog Modes<br />
Voltage Jog 5 – 100% Line Voltage 1% 50%<br />
F020 Time of Voltage Jog 1 – 20 Seconds 1 second<br />
10<br />
seconds<br />
F021 Current Jog 100 – 500% Motor Current 1% 150%<br />
F022<br />
Kick<br />
Mode<br />
Kick Start Voltage<br />
0 = Disabled, or<br />
10 - 100% Line Voltage<br />
1%<br />
0<br />
Disabled<br />
F023 Kick Start Time 0.1 - 2 Seconds 0.1second 0.8 sec<br />
<strong>VMX</strong> Series Digital Solid State Soft Starter <strong>User</strong> <strong>Manual</strong> 78 | P a g e
Appendix 5 (cont.) Soft Starter Settings Record<br />
Fn # Group Function Description Adjustment / Display Range<br />
Setting<br />
Increments<br />
Factory<br />
Setting<br />
Setting<br />
F024<br />
F025<br />
Pump Flex Decel Mode<br />
Pump Flex Control /<br />
Deceleration Ramp<br />
Begin Decel Level (BDL),<br />
Immediate Drop Down Torque<br />
0 = Disabled (coast to stop)<br />
1 = Enabled, except after OL trip<br />
2 = Enabled, continued Decel even<br />
if there is an OL trip<br />
1<br />
0<br />
Disabled<br />
0 - 100 % of Output Voltage 1% 60%<br />
F026 Decel Shut Off Voltage 0 to (BDL minus 1)% Voltage 1% 30%<br />
F027 Decel Ramp Time 1 – 60 Seconds 1 second<br />
10<br />
seconds<br />
F028<br />
F029<br />
Restart<br />
Restart Delay Time<br />
(Sequential Start Delay)<br />
Reserved for Factory Use<br />
0 = Disabled, or<br />
1-999 seconds after a Power Loss<br />
(Status can be read in F054)<br />
1 second<br />
0<br />
Disabled<br />
<strong>VMX</strong> Series Digital Solid State Soft Starter <strong>User</strong> <strong>Manual</strong> 79 | P a g e
Appendix 5 (cont.) Soft Starter Settings Record<br />
Fn # Group Function Description Adjustment / Display Range<br />
F040<br />
Current and Ground Fault Protection<br />
Current Imbalance Trip<br />
0 = Disabled, or<br />
5 - 30% imbalance<br />
Setting<br />
Increments<br />
F041 Current Imbalance Trip Delay 1 - 20 seconds 1 second<br />
F042<br />
Over Current Trip<br />
0 = Disabled, or<br />
100 - 300% of motor FLA<br />
1%<br />
1%<br />
Factory<br />
Setting<br />
0<br />
Disabled<br />
2<br />
seconds<br />
0<br />
Disabled<br />
F043 Over Current Trip Delay 1 - 20 seconds 1 second 1 second<br />
F044<br />
Under Current Trip<br />
0 = Disabled, or<br />
10 - 90% of motor FLA<br />
F045 Under Current Trip Delay 1 - 60 seconds 1 second<br />
F046<br />
Ground Fault Trip<br />
0 = Disabled, or<br />
5 - 90% of CT ratio from Fn 74<br />
F047 Ground Fault Trip Delay 1 - 60 seconds 1 second<br />
1%<br />
1%<br />
0<br />
Disabled<br />
2<br />
seconds<br />
0<br />
Disabled<br />
2<br />
seconds<br />
Setting<br />
F048<br />
Lockouts, Reset and Internal Protection<br />
Coast Down (Back Spin)<br />
Lockout Timer<br />
0 = Disabled, or 1 - 60 minutes 1 minute<br />
F049 Maximum Starts per Hour 0 = Disabled, or 1 – 10 starts 1<br />
F050<br />
F051<br />
F052<br />
Minimum Time Between<br />
Starts<br />
Internal Protection Settings<br />
Auto Reset<br />
on Selected Faults<br />
0 = Disabled, or 1 - 60 minutes 1 minute<br />
1 – 127<br />
See 5.6.8.a<br />
Fault Preferences 1 – 12<br />
See 5.6.8.b Fault Reset Selection<br />
Table<br />
F053 Auto Reset Attempts 0 = Disabled, or 1-10 attempts 1<br />
F054<br />
F055<br />
F056<br />
F057<br />
F058<br />
F059<br />
Restart Delay Time Value<br />
Readout (for F028)<br />
Coast Down Timer Value<br />
for F048<br />
Starts Per Hour Timer Value<br />
for F049<br />
Starts Per Hour<br />
For F049<br />
Time Value Between Starts<br />
for F050<br />
Thermal Capacity to Start<br />
for F005<br />
0<br />
Disabled<br />
0<br />
Disabled<br />
0<br />
Disabled<br />
1 126<br />
1<br />
4:<br />
Phase<br />
Loss only<br />
0<br />
Disabled<br />
0-999 Minutes 1 0<br />
1-3600 Seconds 1 0<br />
1-3600 Seconds 1 0<br />
1-10 Starts 1 0<br />
1-3600 Seconds 1 0<br />
0-100 % Thermal Capacity 1 0<br />
F060<br />
Aux Relay 1 setting<br />
Operation # 1 – 27: see<br />
”Aux. Relay Settings Chart”<br />
1 1<br />
F061<br />
F062<br />
F063<br />
Output Relays<br />
Aux Relay 2 setting<br />
Aux Relay 3 setting<br />
Aux. Relay Delay Timer<br />
(for Operations 22-26)<br />
Operation # 1 – 27: see<br />
”Aux. Relay Settings Chart”<br />
Operation # 1 – 27: see<br />
”Aux. Relay Settings Chart”<br />
0 (Disabled), or 1-999 seconds 1 second<br />
1 2<br />
1 16<br />
0<br />
No Delay<br />
F064<br />
Reserved for factory use<br />
<strong>VMX</strong> Series Digital Solid State Soft Starter <strong>User</strong> <strong>Manual</strong> 80 | P a g e
Appendix 5 (cont.) Soft Starter Settings Record<br />
Fn # Group Function Description Adjustment / Display Range<br />
Setting<br />
Increments<br />
Factory<br />
Setting<br />
Setting<br />
F065<br />
Communications<br />
Communications<br />
0 = Disabled<br />
1 = Enabled (11Bit)<br />
2 = Enabled (10Bit)<br />
1 0<br />
F066 Baud Rate 4.8, 9.6 and 19.2 KB 3 rates 9.6 KB<br />
F067 Modbus Address 1 - 247 1 1<br />
F068<br />
F069<br />
Remote Starter Control<br />
Reserved for factory use<br />
0 = Disabled<br />
1 = Enabled w/ Start button<br />
2 = Enabled w/o Start button<br />
3 = Enabled by Jog / Remote Input<br />
1 0<br />
F070<br />
Parameter Lock<br />
Customer Password<br />
0 – 999<br />
0 = Disabled<br />
Any Other Numbers = Password<br />
1<br />
0<br />
(displays<br />
encrypted<br />
code)<br />
F071<br />
System Clear / Reset<br />
0 = Disabled<br />
1 = Clear THR and Lockout Timers<br />
2 = Reset to Factory Default Settings<br />
1 0<br />
F072<br />
Reserved for Factory Use<br />
F073 Frame Rating 18 - 1250 1<br />
System Settings<br />
F074 CT Value 40-1200 5<br />
By Model<br />
(defaults<br />
to 48)<br />
By Model<br />
(defaults<br />
to 40)<br />
F075 Year 2000 - 2047 1 year 2000<br />
F076 Month 1 - 12 1 Month 1<br />
F077 Day 1 - 31 1 Day 1<br />
F078 Hour 0 - 23 1 Hour 0<br />
F079 Minute 0 - 59 1 Minute 0<br />
F080 Second 0 - 59 1 Second 0<br />
F081 Revision # - -<br />
F082 –<br />
F084<br />
Reserved for factory use<br />
Factory<br />
Setting<br />
<strong>VMX</strong> Series Digital Solid State Soft Starter <strong>User</strong> <strong>Manual</strong> 81 | P a g e
Appendix 5 (cont.) Soft Starter Settings Record<br />
Fn # Group Function Description Adjustment / Display Range<br />
F085<br />
F086<br />
F087<br />
F088<br />
Fault History and Run Data<br />
Fault History #1, Latest Fault<br />
Time Stamp, Fault #1<br />
Based on F078-80<br />
Date Stamp, Fault #1<br />
Based on F076-77<br />
Fault History #2, Previous<br />
Fault<br />
F089 Time Stamp, Fault #2<br />
F090 Date Stamp, Fault #2<br />
F091<br />
Fault History #3, Oldest Fault<br />
F092 Time Stamp, Fault #3<br />
F093 Date Stamp, Fault #3<br />
0 = No fault history, or<br />
Fault # 1 - 27: see Fault code list<br />
00.00-23.59 (hh.mm)<br />
[hh = 00-23; mm = 00-59]<br />
01.01 – 12.31 (MM.DD)<br />
[MM = 01-12; DD = 01-31]<br />
0 = No fault history, or<br />
Fault # 1 - 27: see Fault code list<br />
00.00-23.59 (hh.mm)<br />
[hh = 00-23; mm = 00-59]<br />
01.01 – 12.31 (MM.DD)<br />
[MM = 01-12; DD = 01-31]<br />
0 = No fault history, or<br />
Fault # 1 - 27: see Fault code list<br />
00.00-23.59 (hh.mm)<br />
[hh = 00-23; mm = 00-59]<br />
01.01 – 12.31 (MM.DD)<br />
[MM = 01-12; DD = 01-31]<br />
Setting<br />
Increments<br />
1 0<br />
Factory<br />
Setting<br />
00.01 00.00<br />
00.01 01.01<br />
1 0<br />
00.01 00.00<br />
00.01 01.01<br />
1 0<br />
00.01 00.00<br />
00.01 01.01<br />
Setting<br />
F094 Run Time, Hours 000.0 – 999.9 hours 0.1 hours 0<br />
F095<br />
Run Time,<br />
1000 Hour Overflow<br />
0000 – 9999 thousand hours 1 k-hour 0<br />
F096 Run Cycle Counter 0000 – 9999 times 1 times 0<br />
F097<br />
Run Cycle Counter<br />
10K overflow<br />
0000 – 9999 10 thousand times<br />
1 10k<br />
times<br />
0<br />
<strong>VMX</strong> Series Digital Solid State Soft Starter <strong>User</strong> <strong>Manual</strong> 82 | P a g e
Warranty information.<br />
1 Year Warranty: Phasetronics Inc., dba <strong>Motortronics</strong>, (hereinafter “Company”) warrants the <strong>VMX</strong> Series<br />
products to be free from defects in material and/or workmanship for a period of one (1) year from the date of<br />
sale, or a maximum of 18 months from the date of manufacture (if no sales records are available) as indicated by<br />
the unit’s date code. The Company reserves the right to repair or replace any malfunctioning units or subassemblies<br />
under warranty at the Company’ sole option. Warranty repairs may be performed at the Company’s<br />
facility, in the field by a factory-authorized technician, or by the customer only with prior approval and at the<br />
specific direction of the Company’s Technical Services personnel. During the 1 year period, malfunctions of the<br />
control boards will be dealt with by replacement of the Modular Control Assembly (MCA), which contains the<br />
<strong>User</strong> Interface Panel, Digital Control Unit, Bypass control (if any) and Communications Interface. The MCA is<br />
designed to be replaced quickly without the need for tools (plug-in), and as such will constitute the majority of<br />
warranty replacements.<br />
Warranty Service Procedure:<br />
In the event that warranty service becomes necessary, contact the distributor where the starter was purchased,<br />
or <strong>Motortronics</strong> Technical Services department directly at (727) 573-1819. Be prepared to provide the complete<br />
Model number, Serial Number, date and place of purchase. It is also helpful to know the date of initial<br />
commissioning. When Technical Services has determined the nature of the problem and that sending<br />
replacement parts or assemblies can repair it, they will require a purchase order for replacement parts and issue<br />
a Return Material Authorization (RMA) for the defective parts or assemblies. If any components or assemblies<br />
are received at the factory without the proper RMA documentation, the shipment(s) will be refused.<br />
When the replacement parts are received and evaluated at the factory, any warranty determination will result in<br />
an offsetting credit being issued for the replacement parts already sent out. If the unit is not needed for<br />
immediate operation, an alternative is to have the Technical Services representative provide an RMA for the<br />
components, and they will be evaluated and repaired at the factory, and returned. In either circumstance,<br />
freight/shipping costs are the responsibility of the purchaser.<br />
Responsibility:<br />
Company is not responsible for the misuse or misapplication of its products, intentional or otherwise. Improper<br />
application, installation, failure to provide safety devices or protective measures, or operation above its ratings,<br />
and failure to properly maintain or service products are all beyond the control and responsibility of the Company.<br />
Under no circumstances shall the Company be liable for loss of profits, indirect, incidental, special, consequential<br />
or other similar damages arising out of the misuse, misapplication or failure to maintain the Company’s products.<br />
SCR power devices used in the <strong>VMX</strong> Series (and all other solid state motor control products) are covered under<br />
warranty only when it has been determined by the Company that a failure of another system within the MCA or<br />
firing board circuit has directly caused damage to the SCRs. Although every effort is provided to prevent SCR<br />
damage, it can still occur as a result of circumstances beyond the control of the Company. Improper starting<br />
conditions such as under sizing, rapid duty cycling and improper settings, or external power problems such as<br />
lightning strikes, capacitor switching, shorted motor windings or locked rotor currents can all cause damage to<br />
SCRs under the wrong circumstances. Failures under those conditions are not covered under warranty.<br />
<strong>VMX</strong> Series Digital Solid State Soft Starter <strong>User</strong> <strong>Manual</strong> 83 | P a g e
For the latest product information<br />
visit us at www.motortronics.com<br />
<strong>VMX</strong> Series Digital Solid State Soft Starter <strong>User</strong> <strong>Manual</strong> 84 | P a g e