CHAPTER 1
CHAPTER 1
CHAPTER 1

Create successful ePaper yourself
Turn your PDF publications into a flip-book with our unique Google optimized e-Paper software.
<strong>CHAPTER</strong> 1<br />
Preface
1-2<br />
Preface<br />
Preface<br />
Table of Content<br />
Table of Content............................................................................................................................ 1-2<br />
Regulations Information............................................................................................................... 1-5<br />
FCC-B Radio Frequency Interference Statement .................................................................... 1-5<br />
FCC Conditions ........................................................................................................................ 1-6<br />
CE Conformity .......................................................................................................................... 1-6<br />
Safety Instructions........................................................................................................................ 1-7<br />
Safety Guideline for Using Lithium Battery ..............................................................................1-11<br />
WEEE Statement ......................................................................................................................... 1-15<br />
Optical Device Drive Notice ....................................................................................................... 1-22<br />
Trademarks.................................................................................................................................. 1-22<br />
Reversion History....................................................................................................................... 1-22<br />
Introductions<br />
Manual Map ................................................................................................................................... 2-2<br />
Unpacking...................................................................................................................................... 2-3<br />
Specification.................................................................................................................................. 2-4<br />
Product Overview ......................................................................................................................... 2-9<br />
Top-Open View ......................................................................................................................... 2-9<br />
Front Side View ...................................................................................................................... 2-14
1-3<br />
Preface<br />
Right Side View ...................................................................................................................... 2-17<br />
Left Side View......................................................................................................................... 2-19<br />
Rear Side View....................................................................................................................... 2-20<br />
Bottom Side View ................................................................................................................... 2-21<br />
Getting Started<br />
Power Management ...................................................................................................................... 3-2<br />
Connecting the AC Power ........................................................................................................ 3-2<br />
Using the Battery Power........................................................................................................... 3-4<br />
ECO Engine -- Power Saving Function.................................................................................... 3-9<br />
TurboBattery+ Function.......................................................................................................... 3-12<br />
Power Management in Windows OS ..................................................................................... 3-15<br />
Energy Saving Tips................................................................................................................. 3-17<br />
Basic Operations ........................................................................................................................ 3-18<br />
Safety and Comfort Tips......................................................................................................... 3-18<br />
Having a Good Work Habit..................................................................................................... 3-19<br />
Knowing the Keyboard ........................................................................................................... 3-20<br />
Knowing the Smart Pad.......................................................................................................... 3-27<br />
About Hard Disk Drive............................................................................................................ 3-34<br />
Using the Optical Storage Device........................................................................................... 3-35<br />
Connecting the External Devices.............................................................................................. 3-38<br />
Connecting the Peripheral Devices........................................................................................ 3-38<br />
Connecting the Communication Devices ............................................................................... 3-41
1-4<br />
Preface<br />
Components Replacement and Upgrade ................................................................................. 3-44<br />
BIOS Setup<br />
About BIOS Setup......................................................................................................................... 4-2<br />
When to Use BIOS Setup......................................................................................................... 4-2<br />
How to Run BIOS Setup........................................................................................................... 4-2<br />
Control Keys ............................................................................................................................. 4-3<br />
BIOS Setup Menu.......................................................................................................................... 4-4<br />
Main menu................................................................................................................................ 4-5<br />
Advanced menu........................................................................................................................ 4-7<br />
Boot menu ................................................................................................................................ 4-9<br />
Security menu......................................................................................................................... 4-10<br />
Save & Exit menu....................................................................................................................4-11
1-5<br />
Preface<br />
Regulations Information<br />
FCC-B Radio Frequency Interference Statement<br />
This equipment has been tested and found to comply with the limits for a Class B digital device,<br />
pursuant to part 15 of the FCC rules. These limits are designed to provide reasonable protection<br />
against harmful interference in a residential installation. This equipment generates, uses and<br />
radiates radio frequency energy, and, if not installed and used in accordance with the instructions,<br />
may cause harmful interference to radio communications. However, there is no guarantee that<br />
interference will not occur in a particular installation. If this equipment does cause harmful<br />
interference to radio or television reception, which can be determined by turning the equipment off<br />
and on, the user is encouraged to try to correct the interference by one or more of the following<br />
measures:<br />
• Reorient or relocate the receiving antenna.<br />
• Increase the separation between the equipment and receiver.<br />
• Connect the equipment into an outlet on a circuit different from that to which the receiver is<br />
connected.<br />
• Consult the dealer or an experienced radio TV technician for help.<br />
NOTE<br />
• The changes or modifications not expressly approved by the party responsible for<br />
compliance could void the user’s authority to operate the equipment.
1-6<br />
Preface<br />
• Shield interface cables and AC power cord, if any, must be used in order to comply with the<br />
emission limits.<br />
FCC Conditions<br />
This device complies with part 15 of the FCC Rules. Operation is subject to the following two<br />
conditions:<br />
• This device may not cause harmful interference.<br />
• This device must accept any interference received, including interference that may cause<br />
undesired operation.<br />
CE Conformity<br />
This device is in compliance with the essential safety requirements and other relevant<br />
provisions set out in the European Directive.
1-7<br />
Preface<br />
Safety Instructions<br />
Read the safety instructions carefully and thoroughly.<br />
All cautions and warnings on the equipment or user’s manual should be noted.<br />
Keep the User’s Guide that comes with the package for future reference.<br />
Keep this equipment away from humidity and high temperature.<br />
Lay this equipment on a stable surface before setting it up.<br />
The openings on the enclosure are used for air convection and to prevent the<br />
equipment from overheating. Do not cover the openings.<br />
Do not leave the equipment in an unconditioned environment with a storage<br />
temperature above 60 O C (140 O F) or below 0 O C (32 O F), which may damage the<br />
equipment.
1-8<br />
Preface<br />
• Make sure the power voltage is within safety range and has been adjusted<br />
properly to the value of 100~240V before connecting the equipment to the<br />
power outlet.<br />
• Always unplug the AC power cord before installing any add-on card or module<br />
to the equipment.<br />
• Always disconnect the AC power cord or uninstall the battery pack or switch off<br />
the wall socket if the equipment would be left unused for a certain time to<br />
achieve zero energy consumption.<br />
Never pour liquid into the opening that could damage the equipment or cause an<br />
electrical shock.<br />
Place the power cord in a way that people are unlikely to step on it. Do not place<br />
anything on top of the power cord.<br />
Always keep the strong magnetic or electrical objects away from the equipment.
1-9<br />
Preface<br />
When installing the coaxial cable to the TV Tuner, it is necessary to ensure that the<br />
metal shield is reliable connected to protective earthing system of the building.<br />
Cable distribution system should be grounded (earthed) in accordance with<br />
ANSI/NFPA 70, the National Electrical Code (NEC), in particular Section 820.93,<br />
Grounding of Outer Conductive Shield of a Coaxial Cable.<br />
• To prevent explosion caused by improper battery replacement, use the same or<br />
equivalent type of battery recommended by the manufacturer only.<br />
• Always keep the battery in a safe place.<br />
If any of the following situations arises, get the equipment checked by a service<br />
personnel:<br />
• The power cord or plug is damaged.<br />
• Liquid has penetrated into the equipment.<br />
• The equipment has been exposed to moisture.<br />
• The equipment has not worked well or you can not get it work according to<br />
User’s Manual.<br />
• The equipment was dropped and damaged.<br />
• The equipment has obvious signs of breakage.
1-10<br />
Preface<br />
Green Product Features<br />
• Reduced energy consumption during use and stand-by<br />
• Limited use of substances harmful to the environment and health<br />
• Easily dismantled and recycled<br />
• Reduced use of natural resources by encouraging recycling<br />
• Extended product lifetime through easy upgrades<br />
• Reduced solid waste production through take-back policy<br />
Environmental Policy<br />
• The product has been designed to enable proper reuse of parts and recycling<br />
and should not be thrown away<br />
• Users should contact the local authorized point of collection for recycling and<br />
disposing of their end-of-life products.
1-11<br />
Preface<br />
Safety Guideline for Using Lithium Battery<br />
(English) CAUTION: Danger of explosion if battery is incorrectly replaced. Replace only with the same or equivalent type<br />
recommended by the equipment manufacturer. Discard used batteries according to manufacturer’s instructions.<br />
(French) (Français) ATTENTION: II y a danger d’explosion s’il y a remplacement incorrect de la batterie. Remplacer<br />
uniquement avec une batterie du meme type ou d’un type équivalent recommandé par le constructeur. Mettre au rebut<br />
les batteries usages conformément aux instructions du fabricant.<br />
(German) (Deutsch) VORSICHT: Explosionsgefahr bei unsachgemäßem Austausch der Batterie. Ersatz nur durch<br />
denselben oder einen vom Hersteller empfohlenen gleich-wertigen Typ. Entsorgung gebrauchter Batterien nach<br />
Angaben des Herstellers.<br />
(Spanish) (Español) PRECAUCIÓN: Peligro de explosión si la batería es reemplazada incorrectamente. Cámbiela solo<br />
por la misma o un tipo equivalente recomendado por el fabricante. Descarte usar baterías usadas de acuerdo con las<br />
instrucciones del fabricante.<br />
(Italian) (Italiano) ATTENZIONE: Pericolo di esplosione della batteria se sostituita in modo non corretto. Sostituire solo<br />
con la stesso tipo o con uno equivalente come indicato nel manuale del produttore. Smaltire le batterie usate come da<br />
istruzioni del produttore.<br />
(Russian) (Русский) Внимание: Существует опасность взрыва батареи в случае неправильной замены. Для<br />
замены всегда используйте такую же или эквивалентную, рекомендованную производителем оборудования.<br />
Следуйте инструкциям производителя при утилизации использованных батарей.<br />
(Turkish) (Türkçe) UYARI: Pil yanlıs yerleştirilirse patlayabilir. Aynı ya da muadili bir pille degistiriniz. Kullanılmış pilleri
1-12<br />
Preface<br />
üreticinin talimatlarına göre degerlendiriniz.<br />
(Greek) (Ελληνικά) ΠΡΟΣΟΧΗ: Κίνδυνος έκρηξης εάν η μπαταρία τοποθετηθεί λανθασμένα. Να αντικαθιστάτε μόνο με<br />
τον ίδιο ή αντίστοιχο τύπο με αυτό που συνιστά ο κατασκευαστής του εξοπλισμού. Να απορρίπτετε τις χρησιμοποιημένες<br />
μπαταρίες ως απορρίμματα σύμφωνα με τις οδηγίες του κατασκευαστή.<br />
(Polish) (Polski) OSTRZEŻENIE: Nieprawidłowa wymiana może spowodować eksplozję baterii. Zamianę można wykonać<br />
wyłącznie na baterię tego samego lub równoważnego typu zalecaną przez producenta urządzenia. Zużyte baterie można<br />
wyrzucać zgodnie z instrukcjami producenta.<br />
(Hungarian) (Magyar) VIGYÁZAT: A nem megfelelő akkumul tor haszn lata robban svesz lyes. Kizárólag ugyanolyan,<br />
vagy a berendezés gyártója által ajánlott, egyenértékű típust használjon. Az elhasznált akkumulátorokat a gyártó<br />
utasításának megfelelően ártalmatlanítsák.<br />
(Czech) (Čeština) UPOZORNĚNÍ: Nebezpečí výbuchu při chybné výměně baterie. Nahraďte pouze stejným nebo<br />
ekvivalentním typem doporučeným výrobcem zařízení. Použité baterie zlikvidujte podle pokynů výrobce<br />
(Traditional Chinese ) ( 繁 體 中 文 ) 注 意 : 若 電 池 未 正 確 更 換 , 可 能 會 爆 炸 。 請 用 原 廠 建 議 之 同 款 或 同 等 級 的 電 池 來 更 換 。<br />
請 依 原 廠 指 示 處 理 廢 棄 電 池 。<br />
(Simplified Chinese ) ( 简 体 中 文 ) 注 意 : 若 电 池 未 正 确 更 换 , 可 能 会 爆 炸 。 请 用 原 厂 建 议 之 同 款 或 同 等 级 的 电 池 来 更 换 。 请<br />
依 原 厂 指 示 处 理 废 弃 电 池 。<br />
(Japanese) ( 日 本 語 ) 警 告 :バッテリーの 取 り 扱 いを 誤 ると、 液 漏 れや 破 裂 などにより 生 命 や 財 産 に 重 大 な 影 響 を 及 ぼす<br />
恐 れがあります。 指 定 された 型 番 以 外 のバッテリーは 使 用 しないでください。バッテリーを 廃 棄 する 場 合 は、 各 自 治 体<br />
の 規 則 に 従 って 適 切 に 処 理 して 下 さい。<br />
(Korean) (한국어) 주의: 배터리를 올바로 교체하지 않으면 폭발할 위험이 있습니다. 타입이 장치 제조업체에서
1-13<br />
Preface<br />
권장하는 것과 동일하거나 동등한 배터리로만 교체하십시오. 사용한 배터리는 제조업체의 지침에 따라<br />
폐기하십시오.<br />
(Vietnamese) (Tieng Viet) LƯU Ý: Thay thế pin không tương thích có thể dẫn đến nguy cơ bị nổ. Chỉ thay thế bằng pin<br />
cùng loại hoặc loại tương ứng khuyên dùng bởi nhà sản xuất thiết bị. Vứt bỏ pin đã sử dụng theo hướng dẫn của nhà sản<br />
xuất.<br />
(Thai) (ไ ทย) ขอควรระวัง: ถาใสแบตเตอรี่อยางไมถูกตอง อาจมีอันตรายจากการระเบิดขึ้นได ใชเฉพาะแบตเตอรี่ชนิดเดียวกัน<br />
หรือเทียบเทา ที่แนะนําโดยผูผลิตอุปกรณเทานั้น ทิ้งแบตเตอรี่ที่ใชแลวตามคําแนะนําของผูผลิต<br />
(Indonesian) (Bahasa Indonesia) PERHATIAN: Bahaya ledakan dapat terjadi jika salah memasang baterai. Ganti<br />
baterai hanya dengan jenis yang sama atau setara sesuai rekomendasi pabrik peralatan tersebut. Buang baterai bekas<br />
sesuai petunjuk pabrik<br />
(Serbian) (Srpski) OPREZ: Ukoliko baterija nije ispravno postavljena, postoji opasnost od eksplozije. Zamenu izvršite<br />
koristeći isključivo istu ili ekvivalentnu bateriju koju preporučuje proizvođač opreme. Odbacite iskorišćene baterije u<br />
skladu sa uputstvima proizvođača.<br />
(Netherlands) (Nederlands) LET OP: Er is explosiegevaar als de batterij niet goed geplaatst wordt. Uitsluitend te<br />
vervangen door een batterij van hetzelfde of een gelijkwaardig type,zoals aanbevolen door de fabrikant. Gooi batterijen<br />
weg volgens de plaatselijke instructies.<br />
(Romanian) (Română) ATENŢIE: Pericol de explozie dacă bateria este înlocuită incorect. Înlocuiţi doar cu acelaşi tip sau<br />
echivalent recomandat de fabricantul echipamentului. Evacuaţi bateriile folosite conform instrucţiunilor fabricantului.<br />
(Portuguese) (Português) ADVERTÊNCIA: Perigo de explosão se a bateria é substituída incorrectamente. Substitua<br />
somente com o mesmo tipo ou equivalente recomendado por o fabricante do seu equipamento. Descarte as baterias
1-14<br />
Preface<br />
utilizadas de acordo com as instruções do fabricante.<br />
(Swedish) (Svenska) VARNING: Explosionsfara vid felaktigt batteribyte. Använd samma batterityp eller en ekvivalent<br />
typ som rekommenderas av apparattillverkaren. Kassera använt batteri enligt fabrikantens instruction.<br />
(Finnish) (Suomi) VAROITUS: Paristo voi räjähtää, jos se on virheellisesti asennettu. Vaihda paristo ainoastaan<br />
valmistajan suosittelemaan tyyppiin. Hävitä käytetty paristo valmistajan ohjeiden mukaisesti.<br />
(Slovak) (Slovenčina) UPOZORNENIE: V prípade nesprávnej výmeny batérie existuje nebezpečenstvo výbuchu.<br />
Vymeňte iba za rovnakú batériu alebo za rovnocenný typ batérie, ktorý odporúča výrobca zariadenia. Batérie zneškodnite<br />
podľa pokynov výrobcu.<br />
(Slovenian) (Slovenščina) POZOR: V primeru nepravilne zamenjave baterije obstaja nevarnost njene eksplozije.<br />
Baterijo zamenjajte le z enako ali ekvivalentno vrsto, ki jo priporoča proizvajalec. Odpadne baterije odstranite skladno z<br />
navodili proizvajalca.<br />
(Danish) (Dansk) ADVARSEL! Lithiumbatteri --- Eksplosionsfare ved fejlagtig håndtering. Udskiftning må kun ske med<br />
batteri af same fabrikat og type. Levé det brugte batteri tilbage til leverandøren.<br />
(Norwegian) (Norsk) ADVARSEL: Eksplosjonsfare ved feilaktig skifte av batteri. Benytt same batteritype eller en<br />
tilsvarende type anbefalt av apparatfabrikanten. Brukte batterier kasseres I henhold til fabrikantens instruksjoner.<br />
(Bulgarian) (български) ВНИМАНИЕ: Опасност от експлозия ако батерията бъде неправилно поставена. Поставете<br />
батерия от същия вид или еквивалентна батерия, която се препоръчва от производителя. Изхвърлете<br />
използваните батерии като спазвате указанията на производителя.<br />
(Croatian) (Hrvatski) OPREZ: Opasnost od eksplozije ako se baterija zamijeni neprikladnom. Zamijenite je samo<br />
jednakom ili nadomjesnom vrstom prema preporuci proizvođača. Istrošene baterije zbrinite u skladu s uputama
1-15<br />
Preface<br />
proizvođača.<br />
(Estonian) (Eesti) ETTEVAATUST! Plahvatusoht, kui aku on valesti paigaldatud. Asendage ainult sama või tootja poolt<br />
soovitatud võrdväärse akuga. Hävitage kasutatud aku vastavalt tootja juhistele.<br />
(Persian) (فارسي)<br />
اخطار: در صورت عدم نصب و جا گذاری صحيح باتری، احتمال انفجار باتری وجود دارد. در صورت تعويض باتری، تنها از باتريهای پيشنهادی شرکت توليد کننده<br />
استفاده نماييد. از دور انداختن باتری خودداری کنيد و بر طبق راهنمايی شرکت توليد کننده عمل نماييد .<br />
(Arabic) (العربية)<br />
تحذير: خطر، قد تتعرض البطارية للانفجار والتلف إذا تم استبدالها بنوع غير أصلى. أستبدل فقط بنفس أو نوع مكافئ أوصى به من قبل<br />
منتج الجهاز. تجاهل البطاريات المستعملة وفقا لإرشادات الشرآة المصنعة.<br />
WEEE Statement<br />
(English) Under the European Union ("EU") Directive on Waste Electrical and Electronic Equipment, Directive<br />
2002/96/EC, which takes effect on August 13, 2005, products of "electrical and electronic equipment" cannot be discarded<br />
as municipal waste anymore and manufacturers of covered electronic equipment will be obligated to take back such<br />
products at the end of their useful life.<br />
(French) (Français) Au sujet de la directive européenne (EU) relative aux déchets des équipement électriques et<br />
électroniques, directive 2002/96/EC, prenant effet le 13 août 2005, que les produits électriques et électroniques ne<br />
peuvent être déposés dans les décharges ou tout simplement mis à la poubelle. Les fabricants de ces équipements<br />
seront obligés de récupérer certains produits en fin de vie.
1-16<br />
Preface<br />
(German) (Deutsch) Gemäß der Richtlinie 2002/96/EG über Elektro- und Elektronik-Altgeräte dürfen Elektro- und<br />
Elektronik-Altgeräte nicht mehr als kommunale Abfälle entsorgt werden, die sich auf 13.August, 2005 wirken. Und der<br />
Hersteller von bedeckt Elektronik-Altgeräte gesetzlich zur gebrachten Produkte am Ende seines Baruchbarkeitsdauer<br />
zurückzunehmen.<br />
(Spanish) (Español) Bajo la directiva 2002/96/EC de la Unión Europea en materia de desechos y/o equipos electrónicos,<br />
con fecha de rigor desde el 13 de agosto de 2005, los productos clasificados como "eléctricos y equipos electrónicos" no<br />
pueden ser depositados en los contenedores habituales de su municipio, los fabricantes de equipos electrónicos, están<br />
obligados a hacerse cargo de dichos productos al termino de su período de vida.<br />
(Italian) (Italiano) In base alla Direttiva dell’Unione Europea (EU) sullo Smaltimento dei Materiali Elettrici ed Elettronici,<br />
Direttiva 2002/96/EC in vigore dal 13 Agosto 2005, prodotti appartenenti alla categoria dei Materiali Elettrici ed Elettronici<br />
non possono più essere eliminati come rifiuti municipali: i produttori di detti materiali saranno obbligati a ritirare ogni<br />
prodotto alla fine del suo ciclo di vita.<br />
(Russian) (Русский) В соответствии с директивой Европейского Союза (ЕС) по предотвращению загрязнения<br />
окружающей среды использованным электрическим и электронным оборудованием (директива WEEE<br />
2002/96/EC), вступающей в силу 13 августа 2005 года, изделия, относящиеся к электрическому и электронному<br />
оборудованию, не могут рассматриваться как бытовой мусор, поэтому производители вышеперечисленного<br />
электронного оборудования обязаны принимать его для переработки по окончании срока службы.<br />
(Turkish) (Türkçe) Avrupa Birliği (AB) Kararnamesi Elektrik ve Elektronik Malzeme Atığı, 2002/96/EC Kararnamesi altında<br />
13 Ağustos 2005 tarihinden itibaren geçerli olmak üzere, elektrikli ve elektronik malzemeler diğer atıklar gibi çöpe<br />
atılamayacak ve bu elektonik cihazların üreticileri, cihazların kullanım süreleri bittikten sonra ürünleri geri toplamakla<br />
yükümlü olacaktır.
1-17<br />
Preface<br />
(Greek) (Ελληνικά) Σύμφωνα με την Οδηγία 2002/96/ΕΚ της Ευρωπαϊκής Ένωσης («ΕΕ») περί Απόρριψης Ηλεκτρικού<br />
και Ηλεκτρονικού Εξοπλισμού (WEEE), η οποία λαμβάνει ισχύ στις 13 Αυγούστου 2005, τα προϊόντα «ηλεκτρικού και<br />
ηλεκτρονικού εξοπλισμού» δεν είναι δυνατόν να απορριφθούν πλέον ως κοινά απορρίμματα και οι κατασκευαστές<br />
κεκαλυμμένου ηλεκτρονικού εξοπλισμού είναι υποχρεωμένοι να πάρουν πίσω αυτά τα προϊόντα στο τέλος της ωφέλιμης<br />
ζωής τους.<br />
(Polish) (Polski) Zgodnie z Dyrektywą Unii Europejskiej ("UE") dotyczącą odpadów produktów elektrycznych i<br />
elektronicznych (Dyrektywa 2002/96/EC), która wchodzi w życie 13 sierpnia 2005, tzw. “produkty oraz wyposażenie<br />
elektryczne i elektroniczne " nie mogą być traktowane jako śmieci komunalne, tak więc producenci tych produktów będą<br />
zobowiązani do odbierania ich w momencie gdy produkt jest wycofywany z użycia.<br />
(Hungarian) (Magyar) Az Európai Unió („EU") 2005. augusztus 13-án hatályba lépő, az elektromos és elektronikus<br />
berendezések hulladékairól szóló 2002/96/EK irányelve szerint az elektromos és elektronikus berendezések többé nem<br />
kezelhetőek lakossági hulladékként, és az ilyen elektronikus berendezések gyártói kötelessé válnak az ilyen termékek<br />
visszavételére azok hasznos élettartama végén.<br />
(Czech) (Čeština) Podle směrnice Evropské unie ("EU") o likvidaci elektrických a elektronických výrobků 2002/96/EC<br />
platné od 13. srpna 2005 je zakázáno likvidovat "elektrické a elektronické výrobky" v běžném komunálním odpadu a<br />
výrobci elektronických výrobků, na které se tato směrnice vztahuje, budou povinni odebírat takové výrobky zpět po<br />
skončení jejich životnosti.<br />
(Traditional Chinese ) ( 繁 體 中 文 ) 歐 盟 已 制 訂 有 關 廢 電 機 電 子 設 備 法 令 , 亦 即 自 2005 年 8 月 13 日 生 效 的 2002/96/EC, 明<br />
文 規 定 「 電 機 電 子 設 備 產 品 」 不 可 再 以 都 市 廢 棄 物 處 理 , 且 所 有 相 關 電 子 設 備 製 造 商 , 均 須 在 產 品 使 用 壽 命 結 束 後 進 行 回<br />
收 。<br />
(Simplified Chinese ) ( 简 体 中 文 ) 欧 盟 已 制 订 有 关 废 电 机 电 子 设 备 法 令 , 亦 即 自 2005 年 8 月 13 日 生 效 的 2002/96/EC, 明
1-18<br />
Preface<br />
文 规 定 「 电 机 电 子 设 备 产 品 」 不 可 再 以 都 市 废 弃 物 处 理 , 且 所 有 相 关 电 子 设 备 制 造 商 , 均 须 在 产 品 使 用 寿 命 结 束 后 进 行 回<br />
收 。<br />
(Japanese) ( 日 本 語 ) 2005 年 8 月 13 日 以 降 に EU 加 盟 国 を 流 通 する 電 気 ・ 電 子 製 品 には WEEE 指 令 によりゴミ 箱 に× 印 のリサ<br />
イクルマークの 表 示 が 義 務 づけられており、 廃 棄 物 として 捨 てることの 禁 止 とリサイクルが 義 務 づけられています。<br />
(Korean) (한국어) 2005 년 8월 13 일자로 시행된 폐전기전자제품에 대한 유럽연합("EU") 지침, 지침 2002/96/EC 에<br />
의거하여, "전기전자제품"은 일반 쓰레기로 폐기할 수 없으며 제품의 수명이 다하면 해당 전자제품의 제조업체가<br />
이러한 제품을 회수할 책임이 있습니다.<br />
(Vietnamese) (Tieng Viet) Theo Hướng dẫn của Liên minh Châu Âu ("EU") về Thiết bị điện & điện tử đã qua sử dụng,<br />
Hướng dẫn 2002/96/EC, vốn đã có hiệu lực vào ngày 13/8/2005, các sản phẩm thuộc "thiết bị điện và điện tử" sẽ không<br />
còn được vứt bỏ như là rác thải đô thị nữa và các nhà sản xuất thiết bị điện tử tuân thủ hướng dẫn sẽ phải thu hồi các<br />
sản phẩm này vào cuối vòng đời.<br />
(Thai) (ไทย) ภายใตขอกําหนดของสหภาพยุโรป ("EU") เกี่ยวกับของเสียจากอุปกรณไฟฟา และอิเล็กทรอนิกส เลขที่ 2002/96/EC<br />
ซึ่งมีผลบังคับใชตั้งแตวันที่ 13 สิงหาคม 2005 ผูใชไมสามารถทิ้งผลิตภัณฑที่เปน "อุปกรณไฟฟาและอิเล็กทรอนิกส"<br />
ปะปนกับของเสียทั่วไปของชุมชนไดอีกตอไป และผูผลิตอุปกรณอิเล็กทรอนิกสดังกลาวจะถูกบังคับใหนําผลิตภัณฑดังกลาวกลับคืนเมื่อ<br />
สิ้นสุดอายุการใชงานของผลิตภัณฑ<br />
(Indonesian) (Bahasa Indonesia) Sesuai dengan Regulasi Uni Eropa ("UE") perihal WEEE (Limbah Peralatan Listrik dan<br />
Elektronik), Directive 2002/96/EC, yang berlaku sejak 13, 2005, produk "peralatan listrik dan elektronik" tidak lagi dapat<br />
dibuang sebagai sampah umum dan pabrik peralatan elektronik diwajibkan untuk mengambil kembali produk tersebut<br />
pada saat masa pakainya habis.<br />
(Serbian) (Srpski) Po Direktivi Evropske unije ("EU") o odbačenoj ekektronskoj i električnoj opremi, Direktiva 2002/96/EC,<br />
koja stupa na snagu od 13. Avgusta 2005, proizvodi koji spadaju pod "elektronsku i električnu opremu" ne mogu više biti
1-19<br />
Preface<br />
odbačeni kao običan otpad i proizvođači ove opreme biće prinuđeni da uzmu natrag ove proizvode na kraju njihovog<br />
uobičajenog veka trajanja.<br />
(Netherlands) (Nederlands) De richtlijn van de Europese Unie (EU) met betrekking tot Vervuiling van Electrische en<br />
Electronische producten (2002/96/EC), die op 13 Augustus 2005 in zal gaan kunnen niet meer beschouwd worden als<br />
vervuiling. Fabrikanten van dit soort producten worden verplicht om producten retour te nemen aan het eind van hun<br />
levenscyclus..<br />
(Romanian) (Română) În baza Directivei Uniunii Europene ("UE") privind Evacuarea Echipamentului Electric şi Electronic,<br />
Directiva 2002/96/EC, care intră în vigoare pe 13 august, 2005, produsele din categoria "echipament electric şi electronic"<br />
nu mai pot fi evacuate ca deşeuri municipale, iar fabricanţii echipamentului electronic vizat vor fi obligaţi să primească<br />
înapoi produsele respective la sfârşitul duratei lor de utilizare.<br />
(Portuguese) (Português) De acordo com a Directiva 2002/96/EC de Resíduos de Equipamentos Eléctricos e<br />
Electrónicos da União Europeia (UE), efectiva desde o 13 de Agosto do ano 2005, os produtos de "equipamento eléctrico<br />
e electrónico" não podem ser descartados como resíduo municipal e os fabricantes do equipamento electrónico sujeitos a<br />
esta legislação estarão obligados a recolhar estes produtos ao finalizar sua vida útil.<br />
(Swedish) (Svenska) Under Europeiska unionens ("EU") Weee-direktiv (Waste Electrical and Electronic Equipment),<br />
Direktiv 2002/96/EC, vilket trädde i kraft 13 augusti, 2005, kan inte produkter från "elektriska och elektroniska<br />
utrustningar" kastas i den vanliga hushållssoporna längre och tillverkare av inbyggd elektronisk utrustning kommer att<br />
tvingas att ta tillbaka sådan produkter när de är förbrukade.<br />
(Finnish) (Suomi) Euroopan unionin (EU) 13.8.2005 voimaan tulleen sähkö- ja elektroniikkalaiteromua koskevan<br />
direktiivin 2002/96/EY mukaisesti ”sähkö- ja elektroniikkalaitteita” ei saa enää hävittää talousjätteiden mukana. Direktiivin<br />
alaisen sähkö- tai elektroniikkalaitteen valmistajan on otettava laitteet takaisin niiden käyttöiän päättyessä.
1-20<br />
Preface<br />
(Slovak) (Slovenčina) Na základe smernice Európskej únie („EU“) o elektrických a elektronických zariadeniach číslo<br />
2002/96/ES, ktorá vstúpila do platnosti 13. augusta 2005, výrobky, ktorými sú „elektrické a elektronické zariadenia” nesmú<br />
byť zneškodňované spolu s komunálnym odpadom a výrobcovia patričných elektronických zariadení sú povinní takéto<br />
výrobky na konci životnosti prevziať naspäť.<br />
(Slovenian) (Slovenščina) Skladno z določili direktive Evropske unije ("EU") o odpadni električni in elektronski opremi,<br />
Direktiva 2002/96/ES, ki je veljavna od 13. avgusta, izdelkov "električne in elektronske opreme" ni dovoljeno odstranjevati<br />
kot običajne komunalne odpadke, proizvajalci zadevne elektronske opreme pa so zavezani, da tovrstne izdelke na koncu<br />
njihove življenjske dobe sprejmejo nazaj.<br />
(Danish) (Dansk) I henhold til direktiv fra den europæiske union (EU) vedrørende elektrisk og elektronisk affald , Direktiv<br />
2002/96/EC, som træder i kraft den 13. august 2005, må produkter som "elektrisk og elektronisk udstyr" ikke mere<br />
bortskaffes som kommunalt affald. Producenter af det pågældende, elektroniske udstyr vil være forpligtet til at tage disse<br />
produkter tilbage ved afslutningen på produkternes levetid.<br />
(Norwegian) (Norsk) Under den europeiske unionens ("EU") direktiv om deponering av elektronisk og elektrisk utstyr,<br />
direktiv 2002/96/EC, som trer i effekt 13. august 2005, kan ikke produkter av "elektronisk og elektrisk ustyr" lenger<br />
deponeres som husholdningsavfall og fabrikantene av disse produktene er forpliktet å ta tilbake slike produkter ved<br />
slutten av produktets levetid.<br />
(Bulgarian) (български) Според директивата на Европейския съюз относно отпадъците от електрическо и<br />
електронно оборудване, директива 2002/96/EC, важаща от 13 август, 2005 г., електрическо и електронно<br />
оборудване не може да се изхвърля заедно с битовите отпадъци и производителите на такова оборудване са<br />
задължени да приемат обратно съответните продукти в края на експлоатационния им период.<br />
(Croatian) (Hrvatski) U okviru Direktive Europske Unije ("EU") o Otpadnim električnim i elektroničkim uređajima, Direktiva
1-21<br />
Preface<br />
2002/96/EC, koja je na snazi od 13. kolovoza 2005., "električni i elektronički uređaji" se ne smiju više bacati zajedno s<br />
kućnim otpadom i proizvođači su obvezni zbrinuti takve proizvode na kraju njihovog životnog vijeka.<br />
(Estonian) (Eesti) Vastavalt Euroopa Liidu ("EL") direktiivile 2002/96/EÜ (elektri- ja elektroonikaseadmete jäätmete kohta),<br />
mis jõustus 13. augustil 2005, on keelatud kodumajapidamiste "elektri- ja elektroonikaseadmete" jäätmete hävitamine<br />
koos majapidamisjäätmetega, ja elektri- ja elektroonikaseadmete tootjad on kohustatud sellised tooted pärast nende<br />
kasutuselt kõrvaldamist tagasi võtma.<br />
(Persian) (فارسي)<br />
اتحاديه اروپا که از تاريخ 13 آگوست سال 2005 ميلادی قابل اجراست ، کليه شرکت های 2002/96/ECبر طبق قانون دفع زباله های الکتريکی و الکترونيکی (بند<br />
توليد کننده موظف به جمع آوری زباله محصولات خود پس از پايان دوره مصرف می باشند .<br />
(<br />
(Arabic) (العربية)<br />
في إطار اتفاقية الإتحاد الأوربي ("الإتحاد الأوربي") التوجيه بشأن نفايات المعدات و الأجهزة الكهربائية والإلكترونية، توجيه 2002/96/EC<br />
للمجموعة الأوربية، الذى أصبح ساري المفعول في 13 أغسطس/آب، 2005، ان منتجات "أجهزة آهربائية وإلكترونية" لا يمكن التخلي<br />
عنها بوصفها نفايات، ومنتجو المعدات الالكترونية سيكون لزاما عليهم استرداد مثل هذه المنتجات في نهاية مدة صلاحيتها.
1-22<br />
Preface<br />
Optical Device Drive Notice<br />
CAUTION: This appliance contains a laser system and is classified as a “CLASS 1 LASER<br />
PRODUCT.” To use this model properly, read the instruction manual carefully and keep this manual<br />
for your future reference. In case of any trouble with this model, please contact your nearest<br />
“AUTHORIZED service station.” To prevent direct exposure to the laser beam, do not try to<br />
disassemble the enclosure.<br />
Trademarks<br />
• All trademarks are the properties of their respective owners.<br />
• THX and THX TruStudio Pro are trademarks of THX Ltd. which may be registered in some<br />
jurisdictions. All rights reserved.<br />
Revision History<br />
Version Revision History Date<br />
1.0 First Released 01, 2011
<strong>CHAPTER</strong> 2<br />
Introductions
2-2<br />
Introductions<br />
Congratulations on becoming an user of this notebook, the finely designed notebook. This<br />
brand-new exquisite notebook will give you a delightful and professional experience in using<br />
notebook. We are proud to tell our users that this notebook is thoroughly tested and certified by<br />
our reputation for unsurpassed dependability and customer satisfaction.<br />
Manual Map<br />
This User’s Manual provides instructions and illustrations on how to operate this notebook. It is<br />
recommended to read this manual carefully before using this notebook.<br />
Chapter 1, Preface, gives users the basic safety information and caution that is interrelated to using<br />
this notebook. It is recommended to read this information or caution when using this notebook for<br />
the first time.<br />
Chapter 2, Introductions, includes the descriptions of all the accessories of this notebook. It is<br />
recommended to check out if you have all the accessories included when you open the packing box.<br />
If any of these accessories is damaged or missing, please contact the vendor where you purchased<br />
this notebook. Also, this chapter provides the specification of this notebook, and introduces the<br />
function buttons, quick launch buttons, connectors, LEDs and externals of this notebook.<br />
Chapter 3, Getting Started, gives the basic operation instructions on using keyboard, touchpad,<br />
hard disk drive, and optical storage drive. Beside, the steps of installing and uninstalling the<br />
battery; and the procedures of connecting the various external devices, communication devices,<br />
and so on, are also provided to help users getting familiar with this notebook.
2-3<br />
Introductions<br />
Chapter 4, BIOS Setup, provides information on BIOS Setup program and allows you to configure<br />
the system for optimum use.<br />
Unpacking<br />
First, unpack the shipping carton and check all items carefully. If any item contained is damaged or<br />
missing, please contact your local dealer immediately. Also, keep the box and packing materials in<br />
case you need to ship the unit in the future. The package should contain the following items:<br />
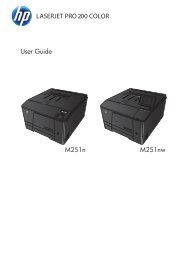
Notebook<br />
Quick Start Manual<br />
High-capacity Li-ion battery<br />
AC/DC adapter and AC power<br />
cord<br />
Carry bag (optional)<br />
These accessories listed<br />
above may change without<br />
notice.<br />
All-in-one application disk, containing the full version of user’s manual,<br />
drivers, utilities, and optional recovery function, etc.
2-4<br />
Introductions<br />
Specification<br />
CPU<br />
Support Processor<br />
L2 / L3 Cache<br />
Special Notification<br />
Intel ® Huron River Quad / Dual Core<br />
8MB (Based on CPU)<br />
The actual processor preinstalled in the notebook depends on<br />
the model you purchased. Please contact the local dealer for<br />
detailed information.<br />
Core Chips<br />
Chipset<br />
Special Notification<br />
Intel ® Cougar Point HM65<br />
The actual core chip(s) preinstalled in the notebook depends<br />
on the model you purchased. Please contact the local dealer<br />
for detailed information.<br />
Memory<br />
Technology<br />
Supports DDR3 800/ 1066/ 1333 MHz<br />
(1600MHz is supported when Quad Core CPU is installed)<br />
Slot DDR3 SO-DIMM slot X 2<br />
Maximum 8 GB (4GB DDR3 SO-DIMM x 2)
2-5<br />
Introductions<br />
Storage<br />
HDD form factor<br />
Optical Device<br />
Special Notification<br />
2.5”, SATA HDD<br />
Super Multi / Blu-Ray (optional)<br />
The actual HDD and ODD preinstalled in the notebook<br />
depends on the model you purchased, and may vary without<br />
notice.<br />
Video<br />
Graphics<br />
LCD Resolution<br />
CRT Output<br />
HDMI Output<br />
Dual View functions<br />
Discrete or UMA (optional)<br />
HD (1366 x 768) / Full HD (1920 x 1080) (optional)<br />
Supported<br />
Supported<br />
LCD or CRT will be auto detected when connected.<br />
Display<br />
LCD Type 15.6” 16:9 WXGA<br />
Brightness<br />
Brightness controlled by K/B hot-keys<br />
Webcam<br />
CMOS<br />
HD CMOS Camera
2-6<br />
Introductions<br />
Audio<br />
Sound Controller<br />
Realtek ® ALC892<br />
Internal Speaker<br />
4 speakers<br />
Internal Microphone x 1<br />
Sound Volume<br />
K/B hot-key & SW<br />
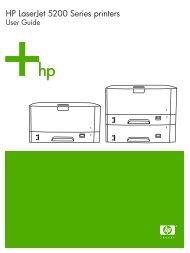
I/O Port<br />
Monitor (VGA) 15 pin D-Sub x 1<br />
USB<br />
x 3 (USB 2.0 x 1, USB 3.0 x 2 optional)<br />
Mic-in/ Line-in x 1<br />
Headphone-out/ SPDIF-out x 1<br />
RJ45 x 1<br />
HDMI x 1<br />
Card Reader<br />
x 1 (SD/ SDHC/ MMC/MS/SDXC)<br />
The supported memory cards may vary without notice.<br />
Communication Port (Items listed here may vary without notice)<br />
LAN<br />
10/100/1000 (optional)<br />
Wireless LAN<br />
802.11b/g/n (optional)<br />
Bluetooth<br />
Supported (optional)<br />
Wimax<br />
Supported (optional)
2-7<br />
Introductions<br />
Power<br />
AC/DC Adapter (1) (optional)<br />
AC/DC Adapter (2) (optional)<br />
AC/DC Adapter (3) (optional)<br />
Battery Type<br />
RTC Battery<br />
Special Notification<br />
65W, 19V<br />
Input: 100~240V, 1.5A~2.0A 50~60Hz<br />
Output: 19V 3.42A<br />
90W, 19V<br />
Input: 100~240V, 1.5A~2.0A 50~60Hz<br />
Output: 19V 4.74A<br />
120W, 19V<br />
Input: 100~240V, 1.5A~2.0A 50~60Hz<br />
Output: 19V 6.3A<br />
6-cell<br />
Yes<br />
The actual battery pack that comes with the package may vary<br />
without notice. Please contact the local dealer for detailed<br />
information.<br />
Software & BIOS<br />
USB Flash Boot<br />
BIOS<br />
Yes, USB floppy boot up DOS only<br />
Fast Boot Support --- Yes<br />
Physical Characteristic<br />
Dimension<br />
Weight<br />
383(W)*249.5(L)*37.6~32.3(H)mm<br />
2.4 kg
2-8<br />
Introductions<br />
Others<br />
Kensington Lock Hole<br />
Compliance<br />
x1<br />
WHQL
2-9<br />
Introductions<br />
Product Overview<br />
This section provides the description of basic aspects of the notebook. It will help you to know<br />
more about the appearance of this notebook before using it. Please be aware that the notebook<br />
shown in this section may vary from the actual one that users purchased.<br />
Top-open View<br />
The figure of top-open view and description shown below will lead you to browse the main operating<br />
area of your notebook.<br />
1 2<br />
1. Internal Microphone<br />
2. Webcam / Webcam LED<br />
3. Quick Launch Buttons<br />
4. Touchpad Switch Button<br />
5. Touch Pad<br />
6. Keyboard /<br />
Quick Launch [Fn] Buttons<br />
4<br />
3<br />
The figures show here are<br />
for reference only.<br />
5<br />
6
2-10<br />
Introductions<br />
1. Internal Microphone<br />
There is built-in microphone and its function is the same with microphone.<br />
2. Webcam/ Webcam LED<br />
• This built-in Webcam can be used for picture taking, video recoding or conference, and any<br />
other interactive applications.<br />
• Webcam LED indicator, next to the webcam, glows orange when webcam function is<br />
activated; LED goes out when this function is turned off.<br />
3. Quick Launch Buttons<br />
Press the quick launch buttons to activate the specific applications or tools. The following<br />
Quick Launch Buttons will only be functional in the Operating System with the S-Bar<br />
application installed. Find the S-Bar application in the all-in-one disk that comes with the<br />
package for easy and convenient operation. It is strongly recommended to install the<br />
S-Bar application.<br />
ODD Eject<br />
• Press this button to eject the disc tray of the optical device drive.<br />
• Press this button again to retrieve the disc tray.<br />
• Please Note: The ODD Eject button is functional under pure DOS<br />
system. However, in an Operating System without the S-Bar<br />
application installed, the Eject button will not be functional.<br />
In such a case, users can right-click the ODD in "My Computer"<br />
and select "Eject" to eject the ODD tray.
2-11<br />
Introductions<br />
Display Off<br />
TurboBattery+<br />
• Press this button to switch the display off instantly to economize the<br />
power consumption.<br />
• Press this button again to switch on the display.<br />
• Press this button to enable the TurboBattery+ function to<br />
maximize the battery running time.<br />
• Press this button again to disable the TurboBattery+ function.<br />
• Refer to chapter 3 of this manual for the further information.<br />
Device Key<br />
• Press this button to activate the S-Bar application.<br />
• Refer to chapter 3 of this manual for the further information.<br />
Cinema Pro<br />
• Press this button to activate the Cinema Pro function which<br />
enhances the playback quality from your display device and sound<br />
system. Press again to turn this function off.<br />
4. Touchpad Switch Button<br />
Press this button to enable or disable the touchpad function.<br />
5. Touchpad<br />
This is a pointing device of the notebook.
2-12<br />
Introductions<br />
6. Keyboard<br />
The built-in keyboard provides all the functions of a full-sized keyboard.<br />
Quick Launch [Fn] Buttons<br />
Use the [Fn] buttons on the keyboard to activate the specific applications or tools.<br />
With the help of these quick launch buttons, users will be able to do work more efficiently.<br />
The descriptions mentioned here are for reference only, and may be optional supported<br />
depending on the models users purchased.<br />
+<br />
Smart Pad<br />
• Press and hold the Fn button, and then press the F3 button<br />
repeatedly to enable or disable the Smart Pad function recurrently.<br />
+<br />
User Defined<br />
• Press and hold the Fn button, and then press the F4 button to<br />
launch the User Defined application.<br />
+<br />
ECO Engine<br />
(Power Saving)<br />
• Press and hold the Fn button, and then press the F5 button<br />
repeatedly to switch among various power saving modes provided<br />
by ECO Engine, or to turn this function off recurrently.<br />
• Refer to the Power Management section in chapter 3 of this<br />
manual for the detailed information of this ECO Engine, Power<br />
Saving Function.
2-13<br />
Introductions<br />
+<br />
Webcam<br />
• Note that ECO Engine is an optional function.<br />
• Press and hold the Fn button, and then press the F6 button to turn<br />
the Webcam function on. Press again to turn it off.<br />
+<br />
Wireless LAN<br />
or WiMax<br />
(optional)<br />
• Press and hold the Fn button, and then press the F8 button to turn<br />
the Wireless LAN or WiMax function on. Press again to turn it off.<br />
+<br />
Bluetooth<br />
(optional)<br />
• Press and hold the Fn button, and then press the F9 button to turn<br />
the Bluetooth function on. Press again to turn it off.<br />
+<br />
3G (optional)<br />
• This function is NOT supported on this model.
2-14<br />
Introductions<br />
Front View<br />
1. Status LED<br />
2. Card Reader<br />
1 2<br />
1. Status LED<br />
Sleep State:<br />
• Blinking blue when the system is in Sleep state.<br />
• Glowing blue when the system is activated.<br />
• LED goes out when the system is turned off.<br />
Num Lock: Glowing blue when the Num Lock function is activated.<br />
Caps Lock: Glowing blue when the Caps Lock function is activated.
2-15<br />
Introductions<br />
Battery:<br />
• Glowing blue when the battery is being charged.<br />
• Glowing amber when the battery is in low battery status.<br />
• Blinking amber if the battery fails and it is recommended to replace a<br />
new battery. Consult the local dealer for purchasing an equivalent<br />
type of battery recommended by the manufacturer.<br />
• Battery LED goes out when it is fully charged or when the AC/DC<br />
adapter is disconnected.<br />
Wireless LAN<br />
Wireless LAN (optional)<br />
• Wireless LAN LED indicator glows blue when Wireless LAN function<br />
is enabled.<br />
• LED indicator goes out when this function is disabled.<br />
• Warning: For flight safety consideration, make sure this LED<br />
indicator goes out when you are in flight.<br />
• Contact the local distributor for further information if necessary.
2-16<br />
Introductions<br />
Bluetooth<br />
Bluetooth<br />
• Bluetooth LED indicator glows blue when Bluetooth function is<br />
enabled.<br />
• Warning: For flight safety consideration, make sure this LED<br />
indicator goes out when you are in flight.<br />
• Note: The Bluetooth Function may be optionally supported<br />
depending on the model users purchased.<br />
• Contact the local distributor for further information if necessary.<br />
Hard Disk/ Optical Drive Device In-use:<br />
Blinking blue when the system is accessing the hard disk drive or the<br />
optical drive device.<br />
2. Card Reader<br />
The built-in card reader may support various types of memory card, such as MMC (Multi-Media<br />
Card), SD (Secure Digital), SDHC (SD High Capacity), MS (Memory Stick) or SDXC(SD<br />
eXtended Capacity) cards. Contact the local dealer for further and correct information and be<br />
noted that the supported memory cards may vary without notice.
2-17<br />
Introductions<br />
Right Side View<br />
1 2 3<br />
4 5 5 6<br />
1. Kensington Lock Hole<br />
2. Power Connector<br />
3. Ventilator<br />
4. HDMI Connector<br />
5. USB Port<br />
6. Audio Port Connectors<br />
1. Kensington Lock Hole<br />
This notebook provides a Kensington Lock hole, which allows users to secure the notebook in<br />
place with a key or some mechanical PIN device and attached through a rubberised metal cable.<br />
The end of the cable has a small loop which allows the whole cable to be looped around a<br />
permanent object, such as a heavy table or other similar equipment, thus securing the notebook<br />
in place.<br />
2. Power Connector<br />
To connect the AC/DC adapter and supply power for the notebook.<br />
3. Ventilator<br />
The ventilator is designed to cool the system. DO NOT block the ventilator for air circulation.
2-18<br />
Introductions<br />
4. HDMI Connector<br />
HDMI (High Definition Multimedia Interface) is a new interface standard for PCs, displays and<br />
consumer electronics devices that supports standard, enhanced and high-definition video, plus<br />
multi-channel digital audio on a single cable.<br />
5. USB Port<br />
The USB port allows you to connect USB-interface peripheral devices, such as the mouse, keyboard,<br />
modem, portable hard disk module, printer and more.<br />
6. Audio Port Connector<br />
Make high quality sound blaster with stereo system and Hi-Fi function supported. Connect your<br />
speakers to the proper connectors as shown below.<br />
Headphone out/ SPDIF-out: Used for speakers or<br />
headphones. The S/PDIF connector is also provided for<br />
digital audio transmission to external speakers through an<br />
optical fiber cable.<br />
Mic In/Line In: Used for an external microphone.
2-19<br />
Introductions<br />
Left Side View<br />
1. Optical Drive Device<br />
2. USB Port<br />
3. VGA Port<br />
1 2 3<br />
4<br />
4. RJ-45 Connector<br />
1. Optical Drive Device<br />
The optical device allows you to use the CD/ DVD disc for installing software, accessing data<br />
and playing music/movie on the computer.<br />
2. USB Port<br />
The USB port allows you to connect USB-interface peripheral devices, such as the mouse, keyboard,<br />
modem, portable hard disk module, printer and more.<br />
3. VGA Port<br />
The 15-pin D-Sub VGA port allows you to connect an external monitor or other standard<br />
VGA-compatible device (such as a projector) for a great view of the computer display.<br />
4. RJ-45 Connector<br />
The Ethernet connector is used to connect a LAN cable for network connection.
2-20<br />
Introductions<br />
Rear Side View<br />
1. Battery Pack<br />
1<br />
1. Battery Pack<br />
This notebook will be powered by the battery pack when the AC adapter is disconnected.
2-21<br />
Introductions<br />
Bottom Side View<br />
3<br />
2<br />
1<br />
1. Battery Lock/ Unlock Button<br />
2. Battery Pack<br />
3. Battery Release Button<br />
4<br />
4. Ventilator<br />
5. Stereo Speaker<br />
5<br />
1. Battery Lock/ Unlock Button<br />
Battery cannot be moved when the button is positioned on lock status. Once the button is slid to<br />
unlock position, the battery is removable.<br />
2. Battery Pack<br />
This notebook will be powered by the battery pack when the AC adapter is disconnected.
2-22<br />
Introductions<br />
3. Battery Release Button<br />
It is a bounce-back device as a preparation for releasing the battery pack. Slide it with one hand<br />
and pull the battery pack carefully with the other.<br />
4. Ventilator<br />
The ventilator is designed to cool the system. DO NOT block the ventilator for air circulation.<br />
5. Stereo Speaker<br />
Give high quality sound blaster with stereo system and Hi-Fi function supported.
<strong>CHAPTER</strong> 3<br />
Getting Started
3-2<br />
Getting Started<br />
Power Management<br />
Connecting the AC power<br />
It is strongly recommended to connect the AC/DC adapter to the notebook and use the AC power<br />
while using this notebook for the first time. When the AC power is connected, recharging the<br />
battery will start immediately.<br />
Note that the AC/DC adapter included in the package is approved for your notebook; using other<br />
adapter model may damage either the notebook or other devices attached to it.<br />
Do not cover the AC/DC adapter since it may produce a certain heat while in use. Always be<br />
aware of heat coming from the AC/DC adapter in use.
3-3<br />
Getting Started<br />
Connecting the AC Power<br />
1. Unpack the package to find the AC/DC adapter and power cord.<br />
2. Attach the power cord to the connector of the AC/DC adapter.<br />
3. Plug the DC end of the adapter to the notebook, and the male end of the power cord to the<br />
electrical outlet.<br />
Disconnecting the AC Power<br />
When you disconnect the AC/DC adapter, you should:<br />
4. Unplug the power cord from the electrical outlet first.<br />
5. Unplug the connector from the notebook.<br />
6. Disconnect the power cord and the connector of AC/DC adapter.<br />
7. When unplugging the power cord, always hold the connector part of the cord. Never pull the<br />
cord directly!<br />
4<br />
2<br />
6<br />
3<br />
3<br />
6
3-4<br />
Getting Started<br />
Using the Battery Power<br />
This notebook is equipped with a high-capacity Li-ion battery pack. The rechargeable Li-ion battery<br />
pack is an internal power source of the notebook.<br />
Be aware of that this battery pack may be damaged if users try to disassemble the battery pack on<br />
their own. Also, note that the limited warranty to the battery pack may also lose its efficacy when<br />
this battery pack is disassembled not by an authorized machinist.<br />
To prevent explosion caused by improper battery replacement, use the same or equivalent type of<br />
battery recommended by the manufacturer only.<br />
Always keep the battery which is not in use in a safe place.<br />
Please follow your local laws and regulations to recycle the unused battery pack.
3-5<br />
Getting Started<br />
Installing the Battery Pack<br />
To insert the battery pack, following the steps below:<br />
1. Locate the locking gutter of the<br />
battery and the battery tray.<br />
1<br />
2<br />
2. You must make sure the battery<br />
gutter match the battery tray gutter<br />
firstly. Use your hand to align and<br />
insert the battery pack into the<br />
compartment with correct<br />
orientation.<br />
3<br />
3. Press down the battery pack to<br />
fasten the battery pack in the battery<br />
tray.<br />
4<br />
4. Press the lock/unlock button to the<br />
Lock position.
3-6<br />
Getting Started<br />
Releasing the Battery Pack<br />
It is always recommended to have another battery pack in reserve for enough power supply.<br />
Please contact your local dealer to purchase a battery pack that is compliant to your notebook.<br />
To remove the battery pack, following the steps below:<br />
1. Make sure the notebook is turned off,<br />
and the AC power is disconnected.<br />
2<br />
2. Press the lock/unlock button to the<br />
unlocked position.<br />
3. Locate the battery release button on<br />
the bottom side.<br />
3<br />
4<br />
4. Push and hold the release button to<br />
the battery releasing direction as<br />
shown on the bottom side.<br />
5. Dig the edge of battery pack out of<br />
the battery tray with your finger tip.<br />
Be careful with your finger while<br />
trying to take out the battery pack.<br />
5
3-7<br />
Getting Started<br />
6. And then pull the battery pack out.<br />
6<br />
Battery Safety Tips<br />
Replacing or handling the battery incorrectly may present a risk of fire or explosion, which could<br />
cause serious injury.<br />
• Only replace the main battery pack with the same or equivalent type of battery.<br />
• Do not disassemble, short-circuit or incinerate batteries or store them to temperatures above<br />
+60° C (+140° F).<br />
• Do not temper with batteries. Keep away from the reach of children.<br />
• Do not use rusty or damaged batteries.<br />
• Dispose of batteries according to local regulations. Check with your local solid waste<br />
officials for details about recycling options or for proper disposal in your area.<br />
Conserving Battery Power<br />
Efficient battery power is critical to maintain a normal operation. If the battery power is not<br />
managed well, the saved data and customized settings may be lost.<br />
To optimize battery life and avoid a sudden power loss, read the tips below:
3-8<br />
Getting Started<br />
• Suspend system operation if the system will be idle for a while or shorten the suspend timer’s<br />
time period.<br />
• Turn off the system if you won’t be using it for a period of time.<br />
• Disable unnecessary settings or remove idle peripherals.<br />
• Connect an AC/DC adapter to the system whenever possible.<br />
Charging the Battery Pack<br />
The battery pack can be recharged while it is installed in the notebook. Please pay attention to the<br />
following tips before recharging the battery:<br />
• If a charged battery pack is not available, save your work and close all running programs and<br />
shut down the system or Save-to-Disk.<br />
• Plug in an external AC/DC adapter.<br />
• You can use the system, suspend system operation or shut down and turn off the system<br />
without interrupting the charging process.<br />
• The battery pack uses Lithium-ion battery cells that have no “memory effect.” It is<br />
unnecessary to discharge the battery before recharging. However, to optimize the life of<br />
battery, we suggest that consuming the battery power completely once a month is necessary.<br />
• If you do not use the notebook for a long time, it is suggested to remove the battery pack from<br />
your notebook. This may be helpful to extend your battery life.<br />
• The actual charging time will be determined by the applications in use.
3-9<br />
Getting Started<br />
ECO Engine -- Power Saving Function<br />
ECO Engine, the outstanding and unique power saving function, provides various power saving<br />
modes – Movie mode, Game mode, Presentation mode, and Office mode, to extend the battery<br />
running time while performing different tasks with this notebook.<br />
Note that the ECO Engine will only be functional in the Operating System with the S-Bar application<br />
installed. Find the S-Bar application in the all-in-one disk that comes with the package for easy and<br />
convenient operation. It is strongly recommended to install the S-Bar application.
3-10<br />
Getting Started<br />
Movie Mode<br />
Game Mode<br />
Presentation<br />
Mode<br />
Select this mode while playing multimedia applications<br />
Select this mode while performing game applications.<br />
Select this mode while performing presentation applications.<br />
Office Mode<br />
Select this mode while dealing with office documentation tasks.<br />
ECO Off<br />
Selected to disable ECO Engine.<br />
To select the ECO Engine mode, please:<br />
1. Find the icon on the display, and then point the icon with the mouse cursor to unfold the tool<br />
bar of the system control manager.<br />
2. Move the mouse cursor to point the icon (Config Fn), and then left click the mouse on it.<br />
3. Move the mouse cursor to point the icon (ECO Engine), and then left click the mouse on it.
3-11<br />
Getting Started<br />
4. Move the mouse cursor to point the desired ECO mode, and then left click the mouse on the<br />
selected icon.<br />
5. To learn which ECO mode is selected presently, read the icon on behalf of each mode<br />
appearing on the display when selected.<br />
6. To switch to a different ECO mode, follow the steps above again.<br />
7. Users may also switch among the different modes of the ECO Engine, or to turn it off recurrently<br />
by pressing the Quick Launch button [Fn] key and [F5] key equipped on the keyboard at the<br />
same time repeatedly.
3-12<br />
Getting Started<br />
TurboBattery+ Function<br />
In addition to ECO Engine function, this notebook also provides a battery power management<br />
function, which named TurboBattery+, for users to manage the battery power status on their own.<br />
With the TurboBattery+ Setting menu, users will be able to enable or disable the particular devices<br />
preinstalled, such as Wireless LAN, or Webcam, etc., to maximize the battery running time or<br />
process the better system performance.<br />
Note that the TurboBattery+ function will only be functional in the Operating System with the S-Bar<br />
application installed.<br />
Activating the TurboBattery+ Function<br />
While the AC power is disconnected, follow the instructions below to activate the TurboBattery+<br />
Function:<br />
1. Find the icon on the display, and then point the icon<br />
with the mouse cursor to unfold the tool bar of the<br />
system control manager.<br />
TurboBattery+<br />
2. Move the mouse cursor to point the icon<br />
(programs), and then left click the mouse on it.<br />
OFF ON
3-13<br />
Getting Started<br />
3. Move the mouse cursor to point the icon (TurboBattery+), and then left click the mouse on<br />
it to activate the TurboBattery+ Function.<br />
4. Users may also press the TurboBattery+ Quick Launch Button, if equipped on the notebook, to<br />
activate the TurboBattery+ function promptly and directly without going through the above steps.<br />
5. When the TurboBattery+ Function is activated, the display will be turned into monochrome.<br />
Read the icon on the tool bar of the system control manager to learn the function status.<br />
Using TurboBattery+ Setting menu<br />
This TurboBattery+ Function provides a setting menu for users to decide that which devices<br />
preinstalled in the notebook should be switched off manually, such as Bluetooth, Wireless LAN, or<br />
Webcam, etc., when these devices are not going to be used temporarily to achieve the demand of<br />
power saving. To proceed the setting, follow the instructions below:<br />
1. Find the icon on the display, and then point the icon with the mouse cursor to unfold the tool<br />
Note that the devices listed<br />
in TurboBettery+ Setting<br />
menu may vary from the<br />
actual ones, depending on<br />
the model users purchased.<br />
bar of the system control manager.<br />
2. Move the mouse cursor to point the icon (programs), and then left click the mouse on it.<br />
3. Move the mouse cursor to point the icon, and then left click the mouse on it to bring up the<br />
TurboBattery+ Setting menu.
3-14<br />
Getting Started<br />
4. To disable the devices in the setting menu when<br />
the TurboBattery+ Function is activated, move<br />
the mouse cursor to point the particular device<br />
and then left click the mouse on it.<br />
5. Be aware of that the devices which are set to be<br />
disabled will only take effect when the<br />
TurboBattery+ Function is activated.<br />
Note that if ODD is selected to be disabled when the TurboBattery+ Function is activated later,<br />
make sure that there is no disc left in the ODD tray, otherwise, the selection of disabling the ODD<br />
won’t become effective.<br />
To resume the function of the optical device drive, please do the following instructions and wait for<br />
the ODD to be resumed.<br />
(1) simply press the Eject button of the optical device drive;<br />
(2) press the ODD Eject Quick Launch button above the keyboard;<br />
(3) disable the TurboBattery+ Function.
3-15<br />
Getting Started<br />
Power Management in Windows OS<br />
Power management of personal computers (PCs) and monitors has the potential to save significant<br />
amounts of electricity as well as deliver environmental benefits. To be energy efficient, turn off your<br />
display or set your PC to standby/hibernate mode after a period of user inactivity.<br />
Follow the instructions below to adjust the power management settings in Windows OS:<br />
1. Power Options in Windows OS allow you to control the power management features of your<br />
display, hard drive, and battery. Go to the Start menu and click on the Control Panel. Click on<br />
the System and Security.<br />
2. Then click on the Power Options.<br />
3. Then select a power plan that meets your personal needs<br />
4. The Shut Down Computer menu will present the options to Sleep (S3/S4), Shut Down (S5), or<br />
Restart your computer.<br />
5. The computer should be able to wake up from power saving mode in response to a command<br />
from the power button.
1<br />
2<br />
3<br />
3-16<br />
4<br />
Getting Started
3-17<br />
Getting Started<br />
Energy Saving Tips<br />
• Activate the ECO power saving function to manage the computer’s energy consumption.<br />
• Turn off the monitor after a period of user inactivity.<br />
• Utilize the Fn and F12 sleep mode keys to turn into power saving mode.<br />
• Tune the settings in Power Options under Windows OS to optimize the computer’s power<br />
management.<br />
• Always disconnect the AC power cord or uninstall the battery pack or switch off the wall socket if<br />
the computer would be left unused for a certain time to achieve zero energy consumption.
3-18<br />
Getting Started<br />
Basic Operations<br />
If you are a beginner to the notebook, please read the following instructions to assure your own<br />
safety, and make yourself comfortable during the operations.<br />
Safety and Comfort Tips<br />
The notebook is a portable platform that allows you to work anywhere. However, choosing a good<br />
workspace is important if you have to work with your notebook for a long period of time.<br />
• Your work area should have enough illumination.<br />
• Choose the proper desk and chair and adjust their height to fit your posture when operating.<br />
• When sitting on the chair, adjust the chair’s back (if available) to support your back<br />
comfortably.<br />
• Place you feet flat and naturally on the floor, so that your knees and elbows have the proper<br />
position (about 90-degree) when operating.<br />
• Put your hands on the desk naturally to support your wrists.<br />
• Adjust the angle/position of the LCD panel to have an optimal view.<br />
• Avoid using your notebook in the space where may cause you discomfort (such as on the<br />
bed).<br />
• The notebook is an electrical device, please treat it with great care to avoid personal injury
3-19<br />
Getting Started<br />
1. Keep your hands and feet with<br />
optimal comfort.<br />
2. Adjust the angle and position of LCD<br />
2<br />
1<br />
4<br />
panel.<br />
3. Adjust the desk’s height.<br />
4. Sit straight and keep a good posture.<br />
3<br />
1<br />
5. Adjust the chair’s height.<br />
5<br />
Having a Good Work Habit<br />
Have a good work habit is important if you have to work with your notebook for long periods of time;<br />
otherwise, it may cause discomfort or injury to you. Please keep the following tips in mind when<br />
operating.<br />
• Change your posture frequently.<br />
• Stretch and exercise you body regularly.<br />
• Remember to take a break after working for a period of time.
3-20<br />
Getting Started<br />
Knowing the Keyboard<br />
This notebook provides a full-functioned keyboard. This keyboard can be divided into four<br />
categories: Typewriter keys, Cursor keys, Numeric keys and Function keys.<br />
Typewriter keys<br />
Numeric keys<br />
The keyboard shown here<br />
Cursor keys /<br />
Function keys<br />
may vary from the actual<br />
one, depending on which<br />
county users purchase the<br />
notebook.
3-21<br />
Getting Started<br />
Typewriter Keys<br />
In addition to providing the major function of the keyboard, these typewrite keys also provide several<br />
keys for special purposes, such as [Ctrl,] [Alt,] and [Esc] key.<br />
When the lock keys are pressed, the corresponding LEDs will light up to indicate their status:<br />
• Num Lock: Press and hold the [Fn] key and press this key to toggle the Num Lock on and off.<br />
When this function is activated, you can use the numeric keys that are embedded in the<br />
typewriter keys.<br />
• Caps Lock: Press this key to toggle the Caps Lock on and off. When this function is activated,<br />
the letters you type are kept in uppercase.<br />
• Scroll Lock: Press and hold the [Fn] key and press this key to toggle the Scroll Lock on and off.<br />
This function is defined by individual programs, and is usually used under DOS.<br />
Numeric Keys<br />
Find the numeric keys among the keyboard, and activate the Num Lock function to use these<br />
numeric keys to enter numbers and calculations.
3-22<br />
Getting Started<br />
Cursor Keys<br />
The four cursor (arrow) keys and [Home], [PgUp], [PgDn], [End] keys are used to control the cursor<br />
movement.<br />
Move the cursor left for one space.<br />
Move the cursor right for one space.<br />
Move the cursor up for one line.<br />
Move the cursor down for one line.<br />
Move to the previous page.<br />
Move to the next page.<br />
+<br />
Move to the beginning of the line (or document).
3-23<br />
Getting Started<br />
Move to the end of the line (or document).<br />
+<br />
The Backspace key, [Ins] and [Del] keys at upper right corner are used for editing purpose.<br />
This key is used to switch the typing mode between “insert” and “overtype”<br />
modes.<br />
Press this key to delete one character to the right of the cursor and move the<br />
following text left for one space.<br />
Press this key to delete one character to the left of the cursor and move the<br />
following text left for one space.<br />
Function Keys<br />
• Windows Keys<br />
You can find the Windows Logo key ( ) and one Application Logo key ( ) on the<br />
keyboard, which are used to perform Windows-specific functions, such as opening the Start<br />
menu and launching the shortcut menu. For more information of the two keys, please refer to<br />
your Windows manual or online help.
3-24<br />
Getting Started<br />
• [Fn] Key<br />
+<br />
Switch the display output mode between the LCD, external monitor and<br />
both.<br />
+<br />
Enable or disable the touchpad function.<br />
+<br />
Decrease the LCD brightness.<br />
+<br />
Increase the LCD brightness.<br />
+<br />
Decrease the built-in speaker’s volume.<br />
+<br />
Increase the built-in speaker’s volume.<br />
+<br />
Disable the computer’s audio function.
3-25<br />
Getting Started<br />
+<br />
Force the computer into sleep state (depending on the system<br />
configuration).<br />
• Quick Launch [Fn] Buttons<br />
Use the [Fn] buttons on the keyboard to activate the specific applications or tools.<br />
With the help of these quick launch buttons, users will be able to do work more efficiently.<br />
+<br />
User Defined<br />
• Press and hold the Fn button, and then press the F4 button to<br />
launch the User Defined application.<br />
+<br />
ECO Engine<br />
(Power Saving)<br />
• Press and hold the Fn button, and then press the F5 button<br />
repeatedly to switch among various power saving modes provided<br />
by ECO Engine, or to turn this function off recurrently.<br />
• Refer to the Power Management section in chapter 3 of this<br />
manual for the detailed information of this ECO Engine, Power<br />
Saving Function.<br />
• Note that ECO Engine is an optional function.
3-26<br />
Getting Started<br />
+<br />
Webcam<br />
• Press and hold the Fn button, and then press the F6 button to turn<br />
the Webcam function on. Press again to turn it off.<br />
+<br />
Wireless LAN<br />
or WiMax<br />
(optional)<br />
• Press and hold the Fn button, and then press the F8 button to turn<br />
the Wireless LAN or WiMax function on. Press again to turn it off.<br />
+<br />
Bluetooth<br />
(optional)<br />
• Press and hold the Fn button, and then press the F9 button to turn<br />
the Bluetooth function on. Press again to turn it off.<br />
+<br />
3G (optional)<br />
• This function is NOT supported on this model.
3-27<br />
Getting Started<br />
Knowing the Smart Pad<br />
The Smart Pad integrated in your notebook allows users to perform various actions with multi-finger<br />
taps and gestures while operating the notebook, and is capable to detect the changes of the<br />
multi-finger movement performed by users precisely. This significant Smart Pad will surely bring<br />
users not only an efficient but also an enjoyable experience of using the notebook.<br />
1. Cursor Movement Area<br />
This pressure-sensitive area of the touchpad,<br />
allows you to place your finger on and<br />
control the cursor on the screen by moving<br />
one of your finger.<br />
1<br />
2<br />
The touchpad figures shown<br />
here are for reference only,<br />
and may be different from<br />
the notebook that users<br />
purchased<br />
2. Right / Left Buttons<br />
Acts as the mouse’s right/ left button.<br />
2
3-28<br />
Getting Started<br />
Enabling the Smart Pad<br />
Press and hold the Fn button, and then press the F3 button repeatedly to<br />
+<br />
enable or disable the Smart Pad function recurrently.<br />
Smart Pad<br />
Brief Usages to the Smart Pad<br />
For the further information on how to use the Smart Pad function specifically, please refer to the<br />
instructions of Smart Pad by double clicking the Smart Pad icon ( ) on the lower right side of<br />
the screen.
3-29<br />
Getting Started<br />
Gestures Actions Functions<br />
• Taping the touchpad once with<br />
one finger.<br />
• Single clicking the Left button<br />
of the mouse.<br />
• Double taping the touchpad<br />
with one finger.<br />
• Double clicking the Left button<br />
of the mouse.<br />
• Touch the touchpad with single<br />
finger and move around your<br />
finger on the touchpad.<br />
• Cursor moving.<br />
• Move the cursor to a particular<br />
object with single finger.<br />
• Select the object by tap the<br />
touchpad once<br />
• Double tap the selected object<br />
with single finger, and remain<br />
your finger on the touchpad.<br />
• Move your finger to drag the<br />
selected object<br />
• Dragging an object.
3-30<br />
Getting Started<br />
Gestures Actions Functions<br />
• Touch the touchpad with two<br />
fingers and remain the fingers<br />
on the touchpad.<br />
• Move the two fingers on the<br />
touchpad vertically.<br />
• Scrolling a page vertically.<br />
• Touch the touchpad with two<br />
fingers and remain both fingers<br />
on the touchpad.<br />
• Move the two fingers on the<br />
touchpad horizontally.<br />
• Touch the touchpad with two<br />
fingers and remain both fingers<br />
on the touchpad.<br />
• Move two fingers to close each<br />
other to Zoom In the screen.<br />
• Move two fingers away each<br />
other to Zoom Out the screen.<br />
• Scrolling a page horizontally.<br />
• Zoom In/ Out the screen.
3-31<br />
Getting Started<br />
Gestures Actions Functions<br />
• Touch the touchpad with three<br />
fingers and remain it on the<br />
touchpad.<br />
• Double tapping the touchpad<br />
with one finger to enable the<br />
Magnifying Glass function.<br />
• To control the magnifying<br />
glass, touch the touchpad with<br />
single finger and move around<br />
your finger on the touchpad.<br />
• To disable this function, simply<br />
tapping the touchpad once with<br />
single finger.<br />
• Enabling or Disabling the<br />
Magnifying Glass function.<br />
• Using the Magnifying Glass<br />
function.<br />
• Touch the touchpad with three<br />
fingers and remain the fingers<br />
on the touchpad.<br />
• Move the three fingers to the<br />
Left on the touchpad to<br />
Page-up the screen.<br />
• Touch the touchpad with three<br />
fingers and remain the fingers<br />
on the touchpad.<br />
• Move the three fingers to the<br />
Right on the touchpad to<br />
Page-down the screen.<br />
• Page Up<br />
• Page Down
3-32<br />
Getting Started<br />
Gestures Actions Functions<br />
• Touch the touchpad with three<br />
fingers and remain the fingers<br />
on the touchpad.<br />
• Move the three fingers to the<br />
upper side of the touchpad to<br />
browse “Computer.”<br />
• Browse the directory of<br />
“Computer”<br />
• Touch the touchpad with three<br />
fingers and remain the fingers<br />
on the touchpad.<br />
• Move the three fingers to the<br />
lower side of the touchpad and<br />
remain the fingers on the<br />
touchpad still.<br />
• Move a finger to the right or to<br />
the left to select the expected<br />
window.<br />
• All fingers leave from the<br />
touchpad and the selected<br />
window will be popped up.<br />
• Switching between all the<br />
windows that have been<br />
activated currently.
3-33<br />
Getting Started<br />
Gestures Actions Functions<br />
• Touch the touchpad with two<br />
fingers and remain both fingers<br />
on the touchpad.<br />
• Move a finger clockwise while<br />
another remains still to rotate a<br />
selected object clockwise.<br />
Refer to the first gesture.<br />
• Move a finger counterclockwise<br />
while another remains still to<br />
rotate a selected object<br />
counterclockwise.<br />
Refer to the second gesture.<br />
• Rotating a selected object<br />
clockwise or counterclockwise.<br />
• Taping the touchpad once with<br />
two fingers.<br />
• May be defined by Users.<br />
• Taping the touchpad once with<br />
three fingers.<br />
• May be defined by Users.<br />
• Place and remain a finger on<br />
the touchpad for a while.<br />
• Reading and measuring the<br />
dimension of the finger by the<br />
Smart Pad.<br />
• Avoiding improper gesture<br />
reading
3-34<br />
Getting Started<br />
About Hard Disk Drive<br />
Your notebook is equipped with a 2.5-inch hard disk drive. The hard disk drive is a storage device<br />
with much higher speed and larger capacity than other storage devices, such as the floppy disk drive<br />
and optical storage device. Therefore, it is usually used to install the operating system and<br />
software applications.<br />
To avoid unexpected data loss in your system, please backup your critical files regularly.<br />
Do not turn off the notebook when the hard disk In-use LED is on.<br />
Do not remove or install the hard disk drive when the notebook is turned on. The replacement of<br />
hard disk drive should be done by an authorized retailer or service representative.
3-35<br />
Getting Started<br />
Using the Optical Disc Drive<br />
Your notebook is equipped with an optical drive device. The actual device preinstalled in your<br />
notebook depends on the model you purchased.<br />
• Super Multi: Works as a multi-functional DVD Dual Drive and a DVD RAM Drive.<br />
• Blu-ray: It is a high-capacity optical disc that holds 4.5 hours of high-definition video (HD) on a<br />
single-sided, single-layer 25GB disk. Blu-ray supports the more advanced H.264 and VC-1<br />
video encoding algorithms (codecs) as well as MPEG-2, which is used for DVD. It also supports<br />
1080p, the highest HDTV resolution.
3-36<br />
Getting Started<br />
Inserting the Disk<br />
The following instructions describe the<br />
general procedure when operating the<br />
optical storage device:<br />
1. Confirm that the notebook is turned on.<br />
2<br />
2. Press the eject button on the panel and<br />
the disk tray will slide out partially.<br />
3<br />
3. Gently pull the tray out until fully extended.<br />
4. Place your disk in the tray with its label facing<br />
4<br />
1. Confirm that the disk is<br />
placed correctly and<br />
securely in the tray<br />
before closing the tray.<br />
2. Do not leave the disk<br />
tray open.<br />
up. Slightly press the center of the disk to secure it into<br />
place.<br />
5. Push the tray back into the drive.<br />
5
3-37<br />
Getting Started<br />
Removing the Disk<br />
Follow the instructions below to remove the<br />
disk<br />
that is placed in the optical storage device:<br />
6. Press the eject button on the panel<br />
and the disk tray will slide out partially.<br />
6<br />
7<br />
7. Gently pull the tray out until fully extended.<br />
8. Hold the disk by its edge with your fingers and<br />
lift it up from the tray.<br />
8<br />
9. Push the tray back into the drive.<br />
9
3-38<br />
Getting Started<br />
Connecting the External Devices<br />
The I/O (input/output) ports on the notebook allow you to connect peripheral devices. All devices<br />
listed here are for reference only.<br />
Connecting the Peripheral Devices<br />
Connecting the USB devices<br />
This notebook provides USB ports for connecting various USB devices, such as mouse, keyboard,<br />
digital camera, webcam, printer, and external optical storage device, ete.. To connect these<br />
devices, install the drivers for each device first if necessary, and then connect the device to the<br />
notebook. This notebook is capable to auto detect the USB devices installed, and if there is no<br />
detection of the devices, please manually enable the USB devices by going to Start Menu / Control<br />
Panel / Add Hardware to add the new device.<br />
The devices shown in the<br />
reference figures here may<br />
be different from the devices<br />
users have.
3-39<br />
Getting Started<br />
Connecting the External Display Devices<br />
This notebook provides a VGA port for connecting a larger display with higher resolution. The<br />
15-pin-D-sub VGA port allows users to connect an external monitor or other standard<br />
VGA-compatible device (such as a projector) for a great view of the notebook display.
3-40<br />
Getting Started<br />
This notebook provides a HDMI port for connecting a larger display with higher resolution. HDMI<br />
(High Definition Multimedia Interface) is a new interface standard for PCs, displays and consumer<br />
electronics devices that supports standard, enhanced and high-definition video, plus multi-channel<br />
digital audio on a single cable.<br />
To connect the external display, make sure the notebook and the external display are both powered<br />
off, and then connect the display to the notebook.<br />
Once the display is connected to the notebook, power on the notebook and the external display<br />
should respond by default. If not, you can switch the display mode by pressing [Fn]+[F2].<br />
Alternately, you can change the display mode by configuring the settings in Display Properties of<br />
Windows operating system.
3-41<br />
Getting Started<br />
Connecting the Communication Devices<br />
Using the LAN<br />
The RJ-45 connector of the notebook allows you to connect the LAN (local area network) devices,<br />
such as a hub, switch and gateway, to build a network connection.<br />
For more instructions or detailed steps on connecting to the LAN, please ask your MIS staff or<br />
network manager for help.
3-42<br />
Getting Started<br />
Using Wireless LAN Connection (optional supported)<br />
This notebook is equipped with wireless LAN module which allows users to perform fast data<br />
transmission with the standard IEEE 802.11 for wireless LAN. This gives users the mobility to<br />
move around within a broad coverage area and still be connected to the network.<br />
By using the 64-bit/128-bit Wired Equivalent Privacy (WEP) encryption technology and Wi-Fi<br />
Protected Access feature, the optional built-in wirelesses LAN is capable to achieve a more efficient<br />
and a more secure solution to the wireless communication.<br />
For more instructions or detailed steps on connecting to the Wireless LAN, please ask your MIS staff<br />
or network manager for help.
3-43<br />
Getting Started<br />
Using Bluetooth Connection (optional supported)<br />
This notebook is equipped with Bluetooth module which allows to users to connect various<br />
Bluetooth-enabled devices to the notebook. Bluetooth provides a way to connect and exchange<br />
information between devices such as mobile phones, personal computers, printers, GPS receivers,<br />
PDAs, digital cameras, and video game consoles through a secure, globally unlicensed Industrial,<br />
Scientific and Medical (ISM) 2.4 GHz short-range radio frequency bandwidth.<br />
For more instructions or detailed steps on using the Bluetooth function, please ask your MIS staff or<br />
network manager for help.
3-44<br />
Getting Started<br />
Components Replacement and Upgrade<br />
Please be noticed that the memory, hard disk drive, wireless LAN / Bluetooth module and battery<br />
pack preinstalled in the product users purchased may be upgradable or replaceable by user’s<br />
request depending on the models users purchased.<br />
1<br />
2<br />
5<br />
3<br />
4
3-45<br />
Getting Started<br />
1<br />
This notebook is equipped with a high-capacity Li-ion battery<br />
pack, and the battery pack is replaceable by users.<br />
To replace the battery pack, please refer to the section of<br />
Using Battery power for details.<br />
2<br />
This notebook is equipped with a wireless LAN/ Bluetooth<br />
module, and the module may be upgradable and replaceable<br />
by authorized dealer or service center.<br />
3<br />
This notebook is equipped with a hard disk drive, and this<br />
storage device may be upgradable and replaceable by the<br />
authorized dealer or service center.<br />
4<br />
Additional memory module may be installed, by the authorized<br />
dealer or service center, to increase the performance of this<br />
notebook, depending on the specification limitation.
3-46<br />
Getting Started<br />
5<br />
This notebook is equipped with an optical drive device, and<br />
this storage device may be upgradable and replaceable by the<br />
authorized dealer or service center.<br />
To learn more about upgrade limitation, please refer to the specification in the User’s Manual<br />
provided. For any further information about the product users purchased, please contact the local<br />
dealer.<br />
Do not attempt to upgrade or replace any component of the product, if you are not an authorized<br />
dealer or service center, since it may cause the warranty void. It is strongly recommended to contact<br />
the authorized dealer or service center for any upgrade or replace service.
<strong>CHAPTER</strong> 4<br />
BIOS Setup
4-2<br />
BIOS Setup<br />
About BIOS Setup<br />
When to Use BIOS Setup?<br />
You may need to run the BIOS Setup when:<br />
• An error message appears on the screen during the system booting up and is requested to<br />
run SETUP.<br />
• You want to change the default settings for customized features.<br />
• You want to reload the default BIOS settings.<br />
How to Run BIOS Setup?<br />
To run the BIOS Setup Utility, turn on the notebook and press the [Del] key during the POST<br />
procedure.<br />
If the message disappears before you respond and you still wish to enter Setup, either restart the<br />
system by turning it OFF and ON, or simultaneously pressing [Ctrl]+[Alt]+[Delete] keys to restart.<br />
Be noted that the screen snaps and setting options in this chapter are for your references only.<br />
The actual setting screens and options on your Notebook may be different because of BIOS update.
4-3<br />
BIOS Setup<br />
Control Keys<br />
You can use only the keyboard to control the cursor in the BIOS Setup Utility.<br />
Press left arrow to select one menu<br />
Press right arrow to select one<br />
title.<br />
menu title.<br />
Press up arrow to select one item<br />
under the menu title.<br />
Press down arrow to select one<br />
item under the menu title.<br />
+<br />
Increase the setting value or make changes.<br />
Decrease the setting value or make changes.<br />
1) Open the selected item to change setting options.<br />
2) Bring up a sub-menu when available.<br />
In some items, press this key to change setting field.<br />
Bring up help screen providing the information of control keys.<br />
1) Exit the BIOS Setup Utility.<br />
2) Return to the previous screen in a sub-menu.
4-4<br />
BIOS Setup<br />
BIOS Setup Menu<br />
Once you enter the BIOS Setup Utility, the Main Menu will appear on the screen. Select the tags to<br />
enter the other menus.<br />
Main Menu<br />
Show system overview information about BIOS version, CPU features, memory<br />
size and setting of system time and date.<br />
Advanced Menu<br />
Adjust the advanced settings, such as power consumption, USB/ PCI devices,<br />
of the notebook in order to achieve a better performance.<br />
Boot Menu<br />
Set up boot type and boot sequence.<br />
Security Menu<br />
Install or clear the password settings for supervisor and user.<br />
Save & Exit Menu<br />
The BIOS items and<br />
Save or discard the changes before leaving the BIOS Setup Menu.<br />
figures shown here are<br />
for reference only.
4-5<br />
BIOS Setup<br />
Main Menu<br />
• System Date<br />
This item allows you to set the system date. The date format is<br />
[day:month:date:year].<br />
Day<br />
Month<br />
Day of the week, from Sun to Sat, which is determined by<br />
BIOS (read-only).<br />
The month from 01 (January) to 12 (December).<br />
Date The date from 01 to 31.<br />
Year<br />
The year can be adjusted by users.<br />
• System Time<br />
This item allows you to set the system time. The system clock will go on<br />
no matter you shut down the PC or get into sleep mode. The time format<br />
is [hour:minute:second].<br />
• SATA Information<br />
These items display the types of the SATA devices installed in the notebook.<br />
Press [Enter] to bring up a window showing the detailed information of the<br />
device, including the device name, vendor, LBA mode, PIO mode and<br />
more.
4-6<br />
BIOS Setup<br />
• System Information<br />
This item provides the information about the firmware, processor, and<br />
system memory.
4-7<br />
BIOS Setup<br />
Advanced Menu<br />
• Intel(R) SpeedStep(tm) tech.<br />
This item allows you to enable or disable Intel SpeedStep technology.<br />
When set to Disabled, the system always operates in a conserve power<br />
mode. If you want optimize the processor, set this item to Enabled, so<br />
that the processor’s speed will be controlled by the use of your operating<br />
system and applications. Setting options: Enabled, and Disabled.<br />
• SATA Mode Selection<br />
Use this item to enable or disable the AHCI (Advanced Host Controller<br />
Interface) Mode.<br />
• PCI Latency Timer<br />
This item controls how long each PCI device can hold the bus before<br />
another takes over. When set to higher values, every PCI device can<br />
conduct transactions for a longer time and thus improve the effective PCI<br />
bandwidth.<br />
For better PCI performance, you should set the item to higher values.<br />
Setting options: 32, 64, 96, 128, 160, 192, 224, and 248.<br />
• iCharger Function<br />
This item allows you to enable/disable iCharger function.
4-8<br />
BIOS Setup<br />
• USB Configuration<br />
Select this item to enter the sub-menu:<br />
Legacy USB Support<br />
Selecting Enabled allows users to use USB devices, such as mouse,<br />
keyboard, or portable disk, in DOS system; or allows users to boot the<br />
system by USB device. Setting options: Enabled, Disabled and Auto.
4-9<br />
BIOS Setup<br />
Boot menu<br />
• Boot Configuration<br />
Configure settings during system boot.<br />
• Bootup NumLock State<br />
This setting is to set the Num Lock State when the system is powered on.<br />
Setting to On will turn on the Num Lock key when the system is powered<br />
on. Setting to Off will allow the users to use the arrow keys on the numeric<br />
keypad.<br />
• Quiet Boot<br />
This setting is to show POST message during POST process, if not, then it<br />
will show OEM logo.<br />
• Boot Option Priority<br />
These items showing the sequence of boot devices where BIOS attempts<br />
to load the disk operating system.
4-10<br />
BIOS Setup<br />
Security menu<br />
• Supervisor Password<br />
When this item is selected, a message box shall appear on the screen as<br />
below:<br />
Enter New Password<br />
Type a maximum of twenty-digit password and press [Enter]. The<br />
password typed now will replace any previously set password from CMOS<br />
memory. You may also press [ESC] to abandon new password setting.<br />
When the Supervisor Password is set, new items User Password and<br />
Password Check will be added in the menu.<br />
Select User Password to give or to abandon password setting same as<br />
Change Supervisor Password item above.<br />
Note that Supervisor Password field allows users to enter and change the<br />
settings of the BIOS SETUP UTILITY, while User Password field only<br />
allows users to enter the BIOS SETUP UTILITY without having the<br />
authorization to make any change.
4-11<br />
BIOS Setup<br />
The Password Check item is used to specify the type of BIOS password<br />
protection that is implemented. Settings are described below:<br />
The password is required only when users try to access to<br />
Setup<br />
BIOS SETUP UTILITY.<br />
Always<br />
The password is required every time when the Notebook is<br />
powered on or when users try to access to BIOS SETUP<br />
UTILITY.<br />
To clear a set Supervisor Password/ User Password, just press [Enter]<br />
under Supervisor Password/ User Password field when you are<br />
prompted to enter the password. Please note that when Supervisor<br />
Password has been cleared, User Password will be cleared as well. A<br />
message box will pop up confirming password will be disabled. Once the<br />
password is disabled, the system will boot and user can enter setup without<br />
entering password.
4-12<br />
BIOS Setup<br />
Save & Exit menu<br />
• Save Changes and Reset<br />
Save the changes you have made and reset the utility.<br />
• Discard Changes and Exit<br />
Exit the utility without saving the changes you have made.<br />
• Load Setup Defaults<br />
Select this item to load the default settings.