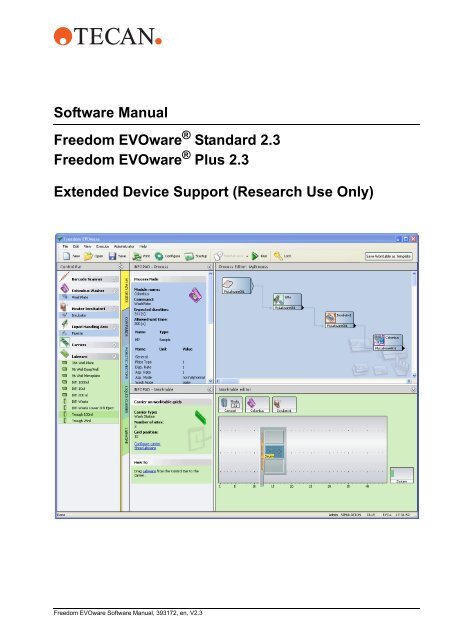
Software Manual Freedom EVOware Standard 2.3 Freedom ...
Software Manual Freedom EVOware Standard 2.3 Freedom ...
Software Manual Freedom EVOware Standard 2.3 Freedom ...

You also want an ePaper? Increase the reach of your titles
YUMPU automatically turns print PDFs into web optimized ePapers that Google loves.
<strong>Software</strong> <strong>Manual</strong><br />
<strong>Freedom</strong> <strong>EVOware</strong> ® <strong>Standard</strong> <strong>2.3</strong><br />
<strong>Freedom</strong> <strong>EVOware</strong> ® Plus <strong>2.3</strong><br />
Extended Device Support (Research Use Only)<br />
<strong>Freedom</strong> <strong>EVOware</strong> <strong>Software</strong> <strong>Manual</strong>, 393172, en, V<strong>2.3</strong>
Document Status Sheet<br />
Title: <strong>Freedom</strong> <strong>EVOware</strong> <strong>Software</strong> <strong>Manual</strong> Part number: 10393172.09<br />
ID: 393172, en, Version <strong>2.3</strong> Translated from: -<br />
Version Revision Issue Document History<br />
1 0 2004-04-30 New edition (released with <strong>Freedom</strong> <strong>EVOware</strong> V1.0)<br />
1 1 2004-07-31 Only published as context-sensitive help file<br />
1 2 2005-03-30 Updated for <strong>Freedom</strong> <strong>EVOware</strong> V1.1<br />
1 3 2005-08-18 Updated for <strong>Freedom</strong> <strong>EVOware</strong> V1.19<br />
1 4 2005-12-16 Updated for <strong>Freedom</strong> <strong>EVOware</strong> V1.20<br />
1 5 2006-03-31 Updated for <strong>Freedom</strong> <strong>EVOware</strong> V1.21<br />
1 6 2006-06-30 Updated for <strong>Freedom</strong> <strong>EVOware</strong> V1.3<br />
1 7 2006-09-30 Updated for <strong>Freedom</strong> <strong>EVOware</strong> V1.4<br />
2 0 2006-12-31 Updated for <strong>Freedom</strong> <strong>EVOware</strong> V2.0<br />
2 1 2007-12-01 Updated for <strong>Freedom</strong> <strong>EVOware</strong> V2.1<br />
2 2 2008-09-05 Updated for <strong>Freedom</strong> <strong>EVOware</strong> V2.2<br />
2 3 2009-04-01 Updated for <strong>Freedom</strong> <strong>EVOware</strong> V<strong>2.3</strong><br />
© 2009, Tecan Schweiz AG, Switzerland, all rights reserved<br />
Information contained in this document is subject to change without notice.
Table of Contents<br />
Table of Contents<br />
1 About This <strong>Manual</strong><br />
1.1 Conventions Used in This <strong>Manual</strong> . . . . . . . . . . . . . . . . . . . . . . . . . . . . . . . 1-2<br />
1.2 Reference Documents . . . . . . . . . . . . . . . . . . . . . . . . . . . . . . . . . . . . . . . . 1-3<br />
1.2.1 Related Documentation and <strong>Software</strong> . . . . . . . . . . . . . . . . . . . . . . . . . 1-3<br />
1.3 Trademarks . . . . . . . . . . . . . . . . . . . . . . . . . . . . . . . . . . . . . . . . . . . . . . . . 1-4<br />
1.4 Abbreviations . . . . . . . . . . . . . . . . . . . . . . . . . . . . . . . . . . . . . . . . . . . . . . . 1-4<br />
1.5 Context-Sensitive Help System . . . . . . . . . . . . . . . . . . . . . . . . . . . . . . . . . 1-5<br />
2 Safety<br />
2.1 User Qualification. . . . . . . . . . . . . . . . . . . . . . . . . . . . . . . . . . . . . . . . . . . . 2-1<br />
2.2 Warning Notices Used in the <strong>Manual</strong>s . . . . . . . . . . . . . . . . . . . . . . . . . . . . 2-2<br />
<strong>2.3</strong> Use of the <strong>Software</strong> . . . . . . . . . . . . . . . . . . . . . . . . . . . . . . . . . . . . . . . . . . 2-2<br />
2.4 Specific Hazards . . . . . . . . . . . . . . . . . . . . . . . . . . . . . . . . . . . . . . . . . . . . 2-3<br />
2.5 Safety of the Overall System . . . . . . . . . . . . . . . . . . . . . . . . . . . . . . . . . . . 2-4<br />
2.6 Safety Features of the Pipetting Instrument. . . . . . . . . . . . . . . . . . . . . . . . 2-4<br />
2.6.1 Safe Operation of the Pipetting Instrument and the Doorlocks . . . . . . 2-5<br />
2.7 General Safety Rules . . . . . . . . . . . . . . . . . . . . . . . . . . . . . . . . . . . . . . . . . 2-6<br />
2.8 Specific Safety Rules . . . . . . . . . . . . . . . . . . . . . . . . . . . . . . . . . . . . . . . . . 2-6<br />
2.8.1 Unintended or Unexpected Movement of Robot Arms and Other Devices 2-6<br />
2.8.2 General Rules When Using the Pipetting Instrument . . . . . . . . . . . . . 2-6<br />
3 Product Description<br />
3.1 Overview of <strong>Freedom</strong> <strong>EVOware</strong> . . . . . . . . . . . . . . . . . . . . . . . . . . . . . . . . 3-1<br />
3.1.1 <strong>Freedom</strong> <strong>EVOware</strong> <strong>Standard</strong> and <strong>Freedom</strong> <strong>EVOware</strong> Plus . . . . . . . . 3-2<br />
3.1.2 Hardlocks for <strong>Freedom</strong> <strong>EVOware</strong> <strong>Standard</strong> and <strong>Freedom</strong> <strong>EVOware</strong> Plus 3-2<br />
3.1.3 Tecan <strong>Software</strong> Add-ons for <strong>Freedom</strong> <strong>EVOware</strong> . . . . . . . . . . . . . . . . 3-3<br />
3.1.4 3D Simulation Tool for the Pipetting Instrument . . . . . . . . . . . . . . . . . 3-3<br />
3.2 Intended Use of the <strong>Freedom</strong> <strong>EVOware</strong> <strong>Software</strong>. . . . . . . . . . . . . . . . . . . 3-3<br />
3.3 What’s New in <strong>Freedom</strong> <strong>EVOware</strong> <strong>2.3</strong> . . . . . . . . . . . . . . . . . . . . . . . . . . . 3-4<br />
3.4 Supported Pipetting Instruments and Tecan Options . . . . . . . . . . . . . . . . 3-4<br />
3.4.1 Supported Combinations of Robot Arms . . . . . . . . . . . . . . . . . . . . . . . 3-6<br />
3.4.2 Supported Firmware Versions for the Optional Devices . . . . . . . . . . . 3-6<br />
3.5 Computer Requirements . . . . . . . . . . . . . . . . . . . . . . . . . . . . . . . . . . . . . . 3-7<br />
4 Installation<br />
4.1 Before You Start. . . . . . . . . . . . . . . . . . . . . . . . . . . . . . . . . . . . . . . . . . . . . 4-1<br />
4.2 Installing <strong>Freedom</strong> <strong>EVOware</strong> . . . . . . . . . . . . . . . . . . . . . . . . . . . . . . . . . . . 4-2<br />
4.3 Modifying, Removing or Repairing Your Installation . . . . . . . . . . . . . . . . . 4-8<br />
4.3.1 Upgrading to the Latest <strong>Software</strong> Version . . . . . . . . . . . . . . . . . . . . . . 4-10<br />
4.3.2 Installation of Service Packs and Hotfixes . . . . . . . . . . . . . . . . . . . . . . 4-11<br />
4.4 The <strong>Freedom</strong> <strong>EVOware</strong> Hardlock . . . . . . . . . . . . . . . . . . . . . . . . . . . . . . . 4-12<br />
4.5 Installing the USB driver for the <strong>Freedom</strong> EVO pipetting instrument . . . . . 4-12<br />
4.5.1 USB Power Management Setting . . . . . . . . . . . . . . . . . . . . . . . . . . . . 4-14<br />
4.5.2 USB Hubs . . . . . . . . . . . . . . . . . . . . . . . . . . . . . . . . . . . . . . . . . . . . . . 4-15<br />
<strong>Freedom</strong> <strong>EVOware</strong> <strong>Software</strong> <strong>Manual</strong>, 393172, en, V<strong>2.3</strong><br />
i
Table of Contents<br />
5 Starting <strong>Freedom</strong> <strong>EVOware</strong><br />
5.1 Login Screen . . . . . . . . . . . . . . . . . . . . . . . . . . . . . . . . . . . . . . . . . . . . . . . 5-1<br />
5.1.1 Loading the device drivers . . . . . . . . . . . . . . . . . . . . . . . . . . . . . . . . . 5-1<br />
5.1.2 Driver pre-loading. . . . . . . . . . . . . . . . . . . . . . . . . . . . . . . . . . . . . . . . . 5-2<br />
5.1.3 Driver loading errors. . . . . . . . . . . . . . . . . . . . . . . . . . . . . . . . . . . . . . . 5-3<br />
5.1.4 Instrument and Hardlock Detection . . . . . . . . . . . . . . . . . . . . . . . . . . . 5-3<br />
5.2 Startup Wizard, <strong>Freedom</strong> <strong>EVOware</strong> <strong>Standard</strong> . . . . . . . . . . . . . . . . . . . . . 5-5<br />
5.2.1 Startup Wizard for <strong>Freedom</strong> <strong>EVOware</strong> <strong>Standard</strong> Operators . . . . . . . . 5-6<br />
5.3 Startup Wizard, <strong>Freedom</strong> <strong>EVOware</strong> Plus . . . . . . . . . . . . . . . . . . . . . . . . . 5-7<br />
5.3.1 Startup Wizard for <strong>Freedom</strong> <strong>EVOware</strong> Plus Operators . . . . . . . . . . . . 5-8<br />
5.4 Overview of the Main Window in <strong>Freedom</strong> <strong>EVOware</strong> . . . . . . . . . . . . . . . . 5-9<br />
5.4.1 Control Bar . . . . . . . . . . . . . . . . . . . . . . . . . . . . . . . . . . . . . . . . . . . . . . 5-9<br />
5.4.2 Infopads . . . . . . . . . . . . . . . . . . . . . . . . . . . . . . . . . . . . . . . . . . . . . . . . 5-15<br />
5.4.3 The Process Editor (<strong>Freedom</strong> <strong>EVOware</strong> Plus) . . . . . . . . . . . . . . . . . . 5-17<br />
5.4.4 The Script Editor . . . . . . . . . . . . . . . . . . . . . . . . . . . . . . . . . . . . . . . . . 5-19<br />
5.4.5 Worktable Editor. . . . . . . . . . . . . . . . . . . . . . . . . . . . . . . . . . . . . . . . . . 5-21<br />
5.5 Exiting <strong>Freedom</strong> <strong>EVOware</strong>. . . . . . . . . . . . . . . . . . . . . . . . . . . . . . . . . . . . . 5-24<br />
ii <strong>Freedom</strong> <strong>EVOware</strong> <strong>Software</strong> <strong>Manual</strong>, 393172, en, V<strong>2.3</strong>
Table of Contents<br />
6 Menus<br />
6.1 File Menu . . . . . . . . . . . . . . . . . . . . . . . . . . . . . . . . . . . . . . . . . . . . . . . . . . 6-1<br />
6.1.1 New . . . . . . . . . . . . . . . . . . . . . . . . . . . . . . . . . . . . . . . . . . . . . . . . . . . 6-1<br />
6.1.2 Open . . . . . . . . . . . . . . . . . . . . . . . . . . . . . . . . . . . . . . . . . . . . . . . . . . 6-3<br />
6.1.3 Save . . . . . . . . . . . . . . . . . . . . . . . . . . . . . . . . . . . . . . . . . . . . . . . . . . 6-5<br />
6.1.4 Save As ... . . . . . . . . . . . . . . . . . . . . . . . . . . . . . . . . . . . . . . . . . . . . . . 6-6<br />
6.1.5 Delete . . . . . . . . . . . . . . . . . . . . . . . . . . . . . . . . . . . . . . . . . . . . . . . . . 6-6<br />
6.1.6 Print . . . . . . . . . . . . . . . . . . . . . . . . . . . . . . . . . . . . . . . . . . . . . . . . . . . 6-6<br />
6.1.7 Start Up Wizard . . . . . . . . . . . . . . . . . . . . . . . . . . . . . . . . . . . . . . . . . . 6-7<br />
6.1.8 Recent Scripts . . . . . . . . . . . . . . . . . . . . . . . . . . . . . . . . . . . . . . . . . . . 6-7<br />
6.1.9 Lock <strong>EVOware</strong> . . . . . . . . . . . . . . . . . . . . . . . . . . . . . . . . . . . . . . . . . . 6-7<br />
6.1.10 Exit . . . . . . . . . . . . . . . . . . . . . . . . . . . . . . . . . . . . . . . . . . . . . . . . . . . . 6-8<br />
6.1.11 Exit, Unload Drivers . . . . . . . . . . . . . . . . . . . . . . . . . . . . . . . . . . . . . . . 6-8<br />
6.2 Edit Menu. . . . . . . . . . . . . . . . . . . . . . . . . . . . . . . . . . . . . . . . . . . . . . . . . . 6-8<br />
6.2.1 Undo / Redo. . . . . . . . . . . . . . . . . . . . . . . . . . . . . . . . . . . . . . . . . . . . . 6-8<br />
6.2.2 Undo / Redo Configuration . . . . . . . . . . . . . . . . . . . . . . . . . . . . . . . . . 6-8<br />
6.<strong>2.3</strong> Cut / Copy / Paste . . . . . . . . . . . . . . . . . . . . . . . . . . . . . . . . . . . . . . . . 6-9<br />
6.2.4 Search & Replace . . . . . . . . . . . . . . . . . . . . . . . . . . . . . . . . . . . . . . . . 6-9<br />
6.2.5 Auto-Validation. . . . . . . . . . . . . . . . . . . . . . . . . . . . . . . . . . . . . . . . . . . 6-9<br />
6.2.6 Validate Script . . . . . . . . . . . . . . . . . . . . . . . . . . . . . . . . . . . . . . . . . . . 6-9<br />
6.3 View Menu . . . . . . . . . . . . . . . . . . . . . . . . . . . . . . . . . . . . . . . . . . . . . . . . . 6-9<br />
6.3.1 Worktable. . . . . . . . . . . . . . . . . . . . . . . . . . . . . . . . . . . . . . . . . . . . . . . 6-9<br />
6.3.2 Infopads . . . . . . . . . . . . . . . . . . . . . . . . . . . . . . . . . . . . . . . . . . . . . . . . 6-10<br />
6.3.3 Log Window . . . . . . . . . . . . . . . . . . . . . . . . . . . . . . . . . . . . . . . . . . . . 6-10<br />
6.4 Execute Menu . . . . . . . . . . . . . . . . . . . . . . . . . . . . . . . . . . . . . . . . . . . . . . 6-10<br />
6.4.1 Run . . . . . . . . . . . . . . . . . . . . . . . . . . . . . . . . . . . . . . . . . . . . . . . . . . . 6-10<br />
6.4.2 Run Maintenance. . . . . . . . . . . . . . . . . . . . . . . . . . . . . . . . . . . . . . . . . 6-10<br />
6.4.3 Clear Recovery Status . . . . . . . . . . . . . . . . . . . . . . . . . . . . . . . . . . . . . 6-11<br />
6.4.4 Tools . . . . . . . . . . . . . . . . . . . . . . . . . . . . . . . . . . . . . . . . . . . . . . . . . . 6-11<br />
6.4.5 VB Scripts . . . . . . . . . . . . . . . . . . . . . . . . . . . . . . . . . . . . . . . . . . . . . . 6-12<br />
6.4.6 Declare Variables . . . . . . . . . . . . . . . . . . . . . . . . . . . . . . . . . . . . . . . . 6-12<br />
6.4.7 Move Arms. . . . . . . . . . . . . . . . . . . . . . . . . . . . . . . . . . . . . . . . . . . . . . 6-15<br />
6.4.8 Switch to real mode . . . . . . . . . . . . . . . . . . . . . . . . . . . . . . . . . . . . . . . 6-15<br />
6.5 Administrator Menu . . . . . . . . . . . . . . . . . . . . . . . . . . . . . . . . . . . . . . . . . . 6-15<br />
6.5.1 Change User . . . . . . . . . . . . . . . . . . . . . . . . . . . . . . . . . . . . . . . . . . . . 6-15<br />
6.5.2 Change Password . . . . . . . . . . . . . . . . . . . . . . . . . . . . . . . . . . . . . . . . 6-16<br />
6.5.3 Configure . . . . . . . . . . . . . . . . . . . . . . . . . . . . . . . . . . . . . . . . . . . . . . . 6-16<br />
6.6 Help Menu . . . . . . . . . . . . . . . . . . . . . . . . . . . . . . . . . . . . . . . . . . . . . . . . . 6-17<br />
6.6.1 Contents . . . . . . . . . . . . . . . . . . . . . . . . . . . . . . . . . . . . . . . . . . . . . . . 6-17<br />
6.6.2 Index . . . . . . . . . . . . . . . . . . . . . . . . . . . . . . . . . . . . . . . . . . . . . . . . . . 6-17<br />
6.6.3 Using Help . . . . . . . . . . . . . . . . . . . . . . . . . . . . . . . . . . . . . . . . . . . . . . 6-17<br />
6.6.4 Error History. . . . . . . . . . . . . . . . . . . . . . . . . . . . . . . . . . . . . . . . . . . . . 6-17<br />
6.6.5 Service Contact . . . . . . . . . . . . . . . . . . . . . . . . . . . . . . . . . . . . . . . . . . 6-17<br />
6.6.6 About . . . . . . . . . . . . . . . . . . . . . . . . . . . . . . . . . . . . . . . . . . . . . . . . . 6-17<br />
6.7 <strong>Freedom</strong> <strong>EVOware</strong> Toolbar . . . . . . . . . . . . . . . . . . . . . . . . . . . . . . . . . . . 6-18<br />
6.7.1 Toolbar Buttons for the Script Editor (<strong>Freedom</strong> <strong>EVOware</strong> Plus) . . . . . 6-19<br />
6.7.2 Toolbar Buttons for the Worktable Editor. . . . . . . . . . . . . . . . . . . . . . . 6-20<br />
6.7.3 Status Bar . . . . . . . . . . . . . . . . . . . . . . . . . . . . . . . . . . . . . . . . . . . . . . 6-20<br />
<strong>Freedom</strong> <strong>EVOware</strong> <strong>Software</strong> <strong>Manual</strong>, 393172, en, V<strong>2.3</strong><br />
iii
Table of Contents<br />
7 Tecan User Management System<br />
7.1 Main Features of the Tecan User Management System . . . . . . . . . . . . . . 7-2<br />
7.1.1 User Management Audit Trail . . . . . . . . . . . . . . . . . . . . . . . . . . . . . . . 7-2<br />
7.2 <strong>Freedom</strong> <strong>EVOware</strong> Access Rights (User Levels) . . . . . . . . . . . . . . . . . . . 7-3<br />
7.3 Special configuration options for the User Management System. . . . . . . . 7-3<br />
7.3.1 <strong>Freedom</strong> <strong>EVOware</strong> login using the Microsoft Windows login name instead of<br />
the Tecan user database7-4<br />
7.3.2 Sharing the Tecan user management database in a network environment 7-5<br />
iv <strong>Freedom</strong> <strong>EVOware</strong> <strong>Software</strong> <strong>Manual</strong>, 393172, en, V<strong>2.3</strong>
Table of Contents<br />
8 Configuration Tool<br />
8.1 Toolbar Buttons and Menus . . . . . . . . . . . . . . . . . . . . . . . . . . . . . . . . . . . . 8-1<br />
8.1.1 Toolbar Buttons . . . . . . . . . . . . . . . . . . . . . . . . . . . . . . . . . . . . . . . . . . 8-1<br />
8.1.2 File Menu . . . . . . . . . . . . . . . . . . . . . . . . . . . . . . . . . . . . . . . . . . . . . . . 8-2<br />
8.1.3 Edit Menu. . . . . . . . . . . . . . . . . . . . . . . . . . . . . . . . . . . . . . . . . . . . . . . 8-2<br />
8.1.4 View Menu . . . . . . . . . . . . . . . . . . . . . . . . . . . . . . . . . . . . . . . . . . . . . . 8-2<br />
8.1.5 Help Menu . . . . . . . . . . . . . . . . . . . . . . . . . . . . . . . . . . . . . . . . . . . . . . 8-3<br />
8.2 Backing Up and Restoring Your Configuration . . . . . . . . . . . . . . . . . . . . . 8-3<br />
8.2.1 Making an External Backup . . . . . . . . . . . . . . . . . . . . . . . . . . . . . . . . . 8-3<br />
8.2.2 Copying Scripts and Processes Between Different Pcs . . . . . . . . . . . 8-3<br />
8.3 General Settings . . . . . . . . . . . . . . . . . . . . . . . . . . . . . . . . . . . . . . . . . . . . 8-4<br />
8.3.1 General Section . . . . . . . . . . . . . . . . . . . . . . . . . . . . . . . . . . . . . . . . . . 8-4<br />
8.3.2 Notifications Section . . . . . . . . . . . . . . . . . . . . . . . . . . . . . . . . . . . . 8-12<br />
8.3.3 User Management Section . . . . . . . . . . . . . . . . . . . . . . . . . . . . . . . . 8-16<br />
8.4 Device Settings . . . . . . . . . . . . . . . . . . . . . . . . . . . . . . . . . . . . . . . . . . . . . 8-21<br />
8.4.1 General Section . . . . . . . . . . . . . . . . . . . . . . . . . . . . . . . . . . . . . . . . . . 8-21<br />
8.4.2 Instrument Options Tab . . . . . . . . . . . . . . . . . . . . . . . . . . . . . . . . . . . 8-22<br />
8.4.3 Communication Section . . . . . . . . . . . . . . . . . . . . . . . . . . . . . . . . . . . . 8-35<br />
8.4.4 Scheduling Section . . . . . . . . . . . . . . . . . . . . . . . . . . . . . . . . . . . . . . . 8-38<br />
8.5 Device Driver Configuration . . . . . . . . . . . . . . . . . . . . . . . . . . . . . . . . . . . . 8-39<br />
8.5.1 Settings for the Barcode Scanner . . . . . . . . . . . . . . . . . . . . . . . . . . . . 8-39<br />
8.5.2 Settings for the Carousel . . . . . . . . . . . . . . . . . . . . . . . . . . . . . . . . . . 8-42<br />
8.5.3 Settings for the Carousel NT . . . . . . . . . . . . . . . . . . . . . . . . . . . . . . . . 8-45<br />
8.5.4 Settings for the Hettich Centrifuge . . . . . . . . . . . . . . . . . . . . . . . . . . . 8-49<br />
8.5.5 Settings for the CNS (Common Notification Server) . . . . . . . . . . . . . . 8-50<br />
8.5.6 Settings for the Columbus Washer . . . . . . . . . . . . . . . . . . . . . . . . . . . 8-50<br />
8.5.7 Settings for the FlaskFlipper . . . . . . . . . . . . . . . . . . . . . . . . . . . . . . . . 8-54<br />
8.5.8 Settings for Heated Incubators 1 to 3 . . . . . . . . . . . . . . . . . . . . . . . . . 8-55<br />
8.5.9 Settings for the Base Incubator . . . . . . . . . . . . . . . . . . . . . . . . . . . . . . 8-58<br />
8.5.10 Settings for the Room Temperature Incubator . . . . . . . . . . . . . . . . . . 8-59<br />
8.5.11 Settings for the Liquid Handling Arm (LiHa). . . . . . . . . . . . . . . . . . . . . 8-60<br />
8.5.12 Settings for the MCA96 (Multi Channel Arm 96) . . . . . . . . . . . . . . . . . 8-63<br />
8.5.13 Settings for the MCA384 (Multi Channel Arm 384) . . . . . . . . . . . . . . . 8-66<br />
8.5.14 Settings for the Magellan Driver . . . . . . . . . . . . . . . . . . . . . . . . . . . . . 8-71<br />
8.5.15 Settings for the PW384 Washer . . . . . . . . . . . . . . . . . . . . . . . . . . . . . 8-73<br />
8.5.16 Settings for the PW384GP Washer . . . . . . . . . . . . . . . . . . . . . . . . . . . 8-75<br />
8.5.17 Settings for the 96PW Washer . . . . . . . . . . . . . . . . . . . . . . . . . . . . . . 8-76<br />
8.5.18 Settings for the Tube Robot (PnP) . . . . . . . . . . . . . . . . . . . . . . . . . . . 8-77<br />
8.5.19 Settings for the PosID-3 . . . . . . . . . . . . . . . . . . . . . . . . . . . . . . . . . . . 8-80<br />
8.5.20 Settings for the REMP PHS . . . . . . . . . . . . . . . . . . . . . . . . . . . . . . . . 8-82<br />
8.5.21 Settings for the REMP Reatrix . . . . . . . . . . . . . . . . . . . . . . . . . . . . . . 8-82<br />
8.5.22 Settings for the REMP ACD96 . . . . . . . . . . . . . . . . . . . . . . . . . . . . . . 8-84<br />
8.5.23 Settings for the Plate Robot (RoMa) . . . . . . . . . . . . . . . . . . . . . . . . . . 8-85<br />
8.5.24 Settings for the Te-Shake . . . . . . . . . . . . . . . . . . . . . . . . . . . . . . . . . . 8-89<br />
8.5.25 Settings for the Symbol MS-954 Barcode Scanner . . . . . . . . . . . . . . . 8-90<br />
8.5.26 Settings for the Te-Link . . . . . . . . . . . . . . . . . . . . . . . . . . . . . . . . . . . 8-92<br />
8.5.27 Settings for the Te-MagS . . . . . . . . . . . . . . . . . . . . . . . . . . . . . . . . . . 8-95<br />
8.5.28 Settings for the Te-Stack and Te-Stack Te-MO . . . . . . . . . . . . . . . . . 8-96<br />
8.5.29 Settings for the Te-VacS . . . . . . . . . . . . . . . . . . . . . . . . . . . . . . . . . . . 8-105<br />
8.5.30 Settings for the Te-MO . . . . . . . . . . . . . . . . . . . . . . . . . . . . . . . . . . . . 8-109<br />
8.5.31 Settings for the Pooling Balance . . . . . . . . . . . . . . . . . . . . . . . . . . . . . 8-110<br />
8.5.32 Settings for the Process Script. . . . . . . . . . . . . . . . . . . . . . . . . . . . . . . 8-111<br />
8.5.33 Settings for the Transfer Station . . . . . . . . . . . . . . . . . . . . . . . . . . . . . 8-113<br />
<strong>Freedom</strong> <strong>EVOware</strong> <strong>Software</strong> <strong>Manual</strong>, 393172, en, V<strong>2.3</strong><br />
v
Table of Contents<br />
8.5.34 Settings for Microplate Reader Devices . . . . . . . . . . . . . . . . . . . . . . . 8-113<br />
8.5.35 Driver Tab of the Configure Device Driver Properties Dialog Box . . . 8-116<br />
vi <strong>Freedom</strong> <strong>EVOware</strong> <strong>Software</strong> <strong>Manual</strong>, 393172, en, V<strong>2.3</strong>
Table of Contents<br />
9 Specifying Your Instrument Setup<br />
9.1 Instrument Configuration . . . . . . . . . . . . . . . . . . . . . . . . . . . . . . . . . . . . . 9-1<br />
9.2 Basic Concepts . . . . . . . . . . . . . . . . . . . . . . . . . . . . . . . . . . . . . . . . . . . . . 9-2<br />
9.2.1 Introduction to Carriers and Labware. . . . . . . . . . . . . . . . . . . . . . . . . . 9-2<br />
9.3 Moving the Arms and Other Devices . . . . . . . . . . . . . . . . . . . . . . . . . . . . . 9-3<br />
9.3.1 Moving the LiHa . . . . . . . . . . . . . . . . . . . . . . . . . . . . . . . . . . . . . . . . . 9-4<br />
9.3.2 Moving the RoMa (Plate Robot) . . . . . . . . . . . . . . . . . . . . . . . . . . . . . 9-5<br />
9.3.3 Moving the PnP (Tube Robot) . . . . . . . . . . . . . . . . . . . . . . . . . . . . . . 9-6<br />
9.3.4 Moving the MCA96 . . . . . . . . . . . . . . . . . . . . . . . . . . . . . . . . . . . . . . . 9-8<br />
9.3.5 Moving the MCA384 . . . . . . . . . . . . . . . . . . . . . . . . . . . . . . . . . . . . . . 9-9<br />
9.3.6 Moving the CGM . . . . . . . . . . . . . . . . . . . . . . . . . . . . . . . . . . . . . . . . . 9-11<br />
9.3.7 Moving the Te-MO . . . . . . . . . . . . . . . . . . . . . . . . . . . . . . . . . . . . . . . 9-12<br />
9.3.8 Moving the PosID Barcode Scanner . . . . . . . . . . . . . . . . . . . . . . . . . . 9-14<br />
9.4 Configuring Labware . . . . . . . . . . . . . . . . . . . . . . . . . . . . . . . . . . . . . . . . . 9-15<br />
9.4.1 Editing Labware, Well Dimensions Tab . . . . . . . . . . . . . . . . . . . . . . . 9-19<br />
9.4.2 Editing Labware, Advanced Tab . . . . . . . . . . . . . . . . . . . . . . . . . . . . . 9-22<br />
9.4.3 Labware Coordinates. . . . . . . . . . . . . . . . . . . . . . . . . . . . . . . . . . . . . . 9-25<br />
9.4.4 Teaching the Labware Coordinates . . . . . . . . . . . . . . . . . . . . . . . . . . 9-26<br />
9.4.5 Labware Types and DITI Types. . . . . . . . . . . . . . . . . . . . . . . . . . . . . . 9-32<br />
9.4.6 Well Alignment . . . . . . . . . . . . . . . . . . . . . . . . . . . . . . . . . . . . . . . . . . . 9-33<br />
9.4.7 Y-distance of Wells . . . . . . . . . . . . . . . . . . . . . . . . . . . . . . . . . . . . . . . 9-33<br />
9.4.8 Labware Attributes . . . . . . . . . . . . . . . . . . . . . . . . . . . . . . . . . . . . . . . 9-34<br />
9.5 Configuring Carriers . . . . . . . . . . . . . . . . . . . . . . . . . . . . . . . . . . . . . . . . . 9-39<br />
9.5.1 Carrier Dimensions and X/Y Offsets . . . . . . . . . . . . . . . . . . . . . . . . . . 9-45<br />
9.5.2 Z Offsets for Carriers . . . . . . . . . . . . . . . . . . . . . . . . . . . . . . . . . . . . . . 9-46<br />
9.5.3 Custom Objects . . . . . . . . . . . . . . . . . . . . . . . . . . . . . . . . . . . . . . . . . . 9-47<br />
9.5.4 Teaching the MCA384 System Carrier with DITI Racks . . . . . . . . . . . 9-47<br />
9.5.5 Carrier Attributes . . . . . . . . . . . . . . . . . . . . . . . . . . . . . . . . . . . . . . . . . 9-47<br />
9.6 Creating and Editing Plate Robot Vectors . . . . . . . . . . . . . . . . . . . . . . . . . 9-55<br />
9.6.1 Using RoMa Vectors . . . . . . . . . . . . . . . . . . . . . . . . . . . . . . . . . . . . . . 9-58<br />
9.6.2 Teach Plate Robot Vector Dialog Box . . . . . . . . . . . . . . . . . . . . . . . . 9-59<br />
9.6.3 Absolute Positions in RoMa Vectors . . . . . . . . . . . . . . . . . . . . . . . . . . 9-61<br />
9.6.4 Defining the Home Position for a RoMa. . . . . . . . . . . . . . . . . . . . . . . . 9-62<br />
9.7 Creating and Editing Tube Robot Vectors . . . . . . . . . . . . . . . . . . . . . . . . . 9-63<br />
9.7.1 Using PnP Vectors. . . . . . . . . . . . . . . . . . . . . . . . . . . . . . . . . . . . . . . . 9-65<br />
9.7.2 Teach Tube Robot Vector Dialog Box . . . . . . . . . . . . . . . . . . . . . . . . 9-65<br />
9.7.3 Absolute Positions in PnP Vectors. . . . . . . . . . . . . . . . . . . . . . . . . . . . 9-68<br />
9.7.4 Defining the Home Position for a PnP . . . . . . . . . . . . . . . . . . . . . . . . . 9-69<br />
9.8 Creating and Editing MCA Vectors . . . . . . . . . . . . . . . . . . . . . . . . . . . . . . 9-69<br />
9.8.1 MCA96 Vectors . . . . . . . . . . . . . . . . . . . . . . . . . . . . . . . . . . . . . . . . . . 9-69<br />
9.8.2 MCA384 Vectors . . . . . . . . . . . . . . . . . . . . . . . . . . . . . . . . . . . . . . . . . 9-70<br />
9.9 Configuring Device Drivers . . . . . . . . . . . . . . . . . . . . . . . . . . . . . . . . . . . . 9-70<br />
9.10 Local Settings for Process Steps (Context Menu) . . . . . . . . . . . . . . . . . . . 9-70<br />
9.10.1 Execution Parameters . . . . . . . . . . . . . . . . . . . . . . . . . . . . . . . . . . . . . 9-71<br />
9.10.2 Adjust Time/Error handling . . . . . . . . . . . . . . . . . . . . . . . . . . . . . . . . . 9-71<br />
9.10.3 Pre-actions / Post-actions (Custom) . . . . . . . . . . . . . . . . . . . . . . . . . . 9-72<br />
9.10.4 Locations . . . . . . . . . . . . . . . . . . . . . . . . . . . . . . . . . . . . . . . . . . . . . . . 9-75<br />
9.10.5 Comment . . . . . . . . . . . . . . . . . . . . . . . . . . . . . . . . . . . . . . . . . . . . . . 9-76<br />
9.10.6 Copy. . . . . . . . . . . . . . . . . . . . . . . . . . . . . . . . . . . . . . . . . . . . . . . . . . . 9-76<br />
9.10.7 Delete. . . . . . . . . . . . . . . . . . . . . . . . . . . . . . . . . . . . . . . . . . . . . . . . . . 9-76<br />
9.11 Local Settings for Labware Source Icons (Context Menu). . . . . . . . . . . . . 9-77<br />
<strong>Freedom</strong> <strong>EVOware</strong> <strong>Software</strong> <strong>Manual</strong>, 393172, en, V<strong>2.3</strong><br />
vii
Table of Contents<br />
10 Configuring Liquid Classes<br />
10.1 Liquid Classes Editor . . . . . . . . . . . . . . . . . . . . . . . . . . . . . . . . . . . . . . . . . 10-1<br />
10.1.1 Global Parameters for Liquid Classes . . . . . . . . . . . . . . . . . . . . . . . . . 10-4<br />
10.1.2 Type Parameters for Liquid Classes . . . . . . . . . . . . . . . . . . . . . . . . . . 10-7<br />
10.2 LiHa Liquid Classes for Fixed Tips and DiTis. . . . . . . . . . . . . . . . . . . . . . . 10-7<br />
10.2.1 LiHa Aspirate Parameters (Fixed Tips and DiTis) . . . . . . . . . . . . . . . . 10-7<br />
10.2.2 LiHa Dispense Parameters (Fixed Tips and DiTis) . . . . . . . . . . . . . . . 10-12<br />
10.<strong>2.3</strong> LiHa Calibration Parameters (Fixed Tips and DiTis) . . . . . . . . . . . . . . 10-15<br />
10.3 MCA96 Liquid Classes. . . . . . . . . . . . . . . . . . . . . . . . . . . . . . . . . . . . . . . . 10-17<br />
10.3.1 MCA96 Aspirate Parameters . . . . . . . . . . . . . . . . . . . . . . . . . . . . . . . 10-17<br />
10.3.2 MCA96 Dispense Parameters . . . . . . . . . . . . . . . . . . . . . . . . . . . . . . . 10-20<br />
10.3.3 MCA96 Calibration Parameters . . . . . . . . . . . . . . . . . . . . . . . . . . . . . 10-22<br />
10.3.4 MCA96 Plunger Parameters . . . . . . . . . . . . . . . . . . . . . . . . . . . . . . . . 10-22<br />
10.4 MCA384 Liquid Classes . . . . . . . . . . . . . . . . . . . . . . . . . . . . . . . . . . . . . . . 10-24<br />
10.4.1 MCA384 Aspirate Parameters . . . . . . . . . . . . . . . . . . . . . . . . . . . . . . . 10-24<br />
10.4.2 MCA384 Dispense Parameters . . . . . . . . . . . . . . . . . . . . . . . . . . . . . . 10-27<br />
10.4.3 MCA384 Calibration Parameters . . . . . . . . . . . . . . . . . . . . . . . . . . . . . 10-29<br />
10.4.4 MCA384 Plunger Parameters . . . . . . . . . . . . . . . . . . . . . . . . . . . . . . . 10-30<br />
10.5 Te-MO 96 Liquid Classes. . . . . . . . . . . . . . . . . . . . . . . . . . . . . . . . . . . . . . 10-32<br />
10.5.1 Te-MO 96 Aspirate Parameters . . . . . . . . . . . . . . . . . . . . . . . . . . . . . 10-32<br />
10.5.2 Te-MO 96 Dispense Parameters . . . . . . . . . . . . . . . . . . . . . . . . . . . . 10-35<br />
10.5.3 Te-MO 96 Calibration Parameters . . . . . . . . . . . . . . . . . . . . . . . . . . . 10-37<br />
10.6 Te-MO 384 Liquid Classes. . . . . . . . . . . . . . . . . . . . . . . . . . . . . . . . . . . . . 10-38<br />
10.6.1 Te-MO 384 Aspirate Parameters . . . . . . . . . . . . . . . . . . . . . . . . . . . . 10-38<br />
10.6.2 Te-MO 384 Dispense Parameters . . . . . . . . . . . . . . . . . . . . . . . . . . . 10-39<br />
10.6.3 Te-MO 384 Calibration Parameters . . . . . . . . . . . . . . . . . . . . . . . . . . 10-39<br />
10.6.4 Te-MO 384 Plunger Parameters . . . . . . . . . . . . . . . . . . . . . . . . . . . . . 10-41<br />
10.7 Overview of Liquid Classes Supplied With <strong>Freedom</strong> <strong>EVOware</strong> . . . . . . . . . 10-42<br />
10.7.1 General . . . . . . . . . . . . . . . . . . . . . . . . . . . . . . . . . . . . . . . . . . . . . . . . 10-42<br />
10.7.2 Dispense Modes . . . . . . . . . . . . . . . . . . . . . . . . . . . . . . . . . . . . . . . . . 10-43<br />
10.7.3 Installed Liquid Classes . . . . . . . . . . . . . . . . . . . . . . . . . . . . . . . . . . . . 10-44<br />
10.7.4 Liquid Classes on the <strong>Freedom</strong> <strong>EVOware</strong> CD. . . . . . . . . . . . . . . . . . . 10-49<br />
viii <strong>Freedom</strong> <strong>EVOware</strong> <strong>Software</strong> <strong>Manual</strong>, 393172, en, V<strong>2.3</strong>
Table of Contents<br />
11 Getting Started - Setting Up a New Script or Process<br />
11.1 First Steps . . . . . . . . . . . . . . . . . . . . . . . . . . . . . . . . . . . . . . . . . . . . . . . . . 11-1<br />
11.2 Setting Up a New Pipetting Instrument . . . . . . . . . . . . . . . . . . . . . . . . . . . 11-1<br />
11.3 Pre-requirements . . . . . . . . . . . . . . . . . . . . . . . . . . . . . . . . . . . . . . . . . . . . 11-2<br />
11.3.1 Setting Up Carriers on the Worktable . . . . . . . . . . . . . . . . . . . . . . . . . 11-2<br />
11.4 Setting Up a Pipetting Script in <strong>Freedom</strong> <strong>EVOware</strong> <strong>Standard</strong> . . . . . . . . . . 11-4<br />
11.4.1 Choosing Labware for a Pipetting Script . . . . . . . . . . . . . . . . . . . . . . . 11-4<br />
11.4.2 Creating a Pipetting Script . . . . . . . . . . . . . . . . . . . . . . . . . . . . . . . . . . 11-5<br />
11.4.3 Adding Robot Movement Commands to the Script . . . . . . . . . . . . . . . 11-6<br />
11.4.4 Saving the Script . . . . . . . . . . . . . . . . . . . . . . . . . . . . . . . . . . . . . . . . . 11-6<br />
11.4.5 Running the Script . . . . . . . . . . . . . . . . . . . . . . . . . . . . . . . . . . . . . . . . 11-7<br />
11.4.6 Example Scripts and Example Process . . . . . . . . . . . . . . . . . . . . . . . . 11-7<br />
11.5 Setting Up a Process in <strong>Freedom</strong> <strong>EVOware</strong> Plus . . . . . . . . . . . . . . . . . . . 11-7<br />
11.5.1 Choosing Labware for a Process. . . . . . . . . . . . . . . . . . . . . . . . . . . . . 11-7<br />
11.5.2 Adding Device Commands to the Process . . . . . . . . . . . . . . . . . . . . . 11-10<br />
11.5.3 Adding Robot Movement Commands to the Process . . . . . . . . . . . . . 11-10<br />
11.5.4 Choosing Labware for a Pipette Command . . . . . . . . . . . . . . . . . . . . . 11-11<br />
11.5.5 Creating a Script for the Pipette Command . . . . . . . . . . . . . . . . . . . . . 11-12<br />
11.5.6 Closing the Script Editor . . . . . . . . . . . . . . . . . . . . . . . . . . . . . . . . . . . 11-12<br />
11.5.7 Adding Final Position Icons to your Process . . . . . . . . . . . . . . . . . . . . 11-13<br />
11.5.8 Linking the Process Steps in the Order of Execution. . . . . . . . . . . . . . 11-13<br />
11.5.9 Adding On-the-fly Actions . . . . . . . . . . . . . . . . . . . . . . . . . . . . . . . . . . 11-15<br />
11.5.10 Saving the Process . . . . . . . . . . . . . . . . . . . . . . . . . . . . . . . . . . . . . . . 11-15<br />
11.5.11 Running the Process . . . . . . . . . . . . . . . . . . . . . . . . . . . . . . . . . . . . . . 11-15<br />
11.6 Labware Generator (<strong>Freedom</strong> <strong>EVOware</strong> Plus) . . . . . . . . . . . . . . . . . . . . . 11-16<br />
11.6.1 Creating a labware repository in a feeder device. . . . . . . . . . . . . . . . . 11-16<br />
11.6.2 Creating a labware repository on the worktable. . . . . . . . . . . . . . . . . . 11-17<br />
11.6.3 Context Menu of the Labware Generator. . . . . . . . . . . . . . . . . . . . . . . 11-19<br />
11.7 Additional Information on Labware and Carriers . . . . . . . . . . . . . . . . . . . . 11-19<br />
11.7.1 Assigning a Label (Name) to the Labware . . . . . . . . . . . . . . . . . . . . . 11-19<br />
11.7.2 Example of a Worktable With Several Carriers and Labware Items . . 11-20<br />
11.7.3 System Liquid Icon. . . . . . . . . . . . . . . . . . . . . . . . . . . . . . . . . . . . . . . . 11-20<br />
12 Running Scripts and Processes<br />
12.1 Running a Liquid Handling Script . . . . . . . . . . . . . . . . . . . . . . . . . . . . . . . 12-1<br />
12.1.1 Buttons in <strong>Standard</strong> View. . . . . . . . . . . . . . . . . . . . . . . . . . . . . . . . . . . 12-2<br />
12.1.2 Runtime Controller, Extended View (Running a Script) . . . . . . . . . . . 12-4<br />
12.1.3 Buttons in Extended View . . . . . . . . . . . . . . . . . . . . . . . . . . . . . . . . . . 12-5<br />
12.2 Running and Optimizing a Process (<strong>Freedom</strong> <strong>EVOware</strong> Plus) . . . . . . . . . 12-5<br />
12.2.1 Process Controller during process runtime . . . . . . . . . . . . . . . . . . . . . 12-9<br />
12.2.2 Additional Runtime Settings for Processes . . . . . . . . . . . . . . . . . . . . . 12-10<br />
12.<strong>2.3</strong> Buttons in <strong>Standard</strong> View. . . . . . . . . . . . . . . . . . . . . . . . . . . . . . . . . . . 12-12<br />
12.2.4 Runtime Controller, Extended View (Running a Process) . . . . . . . . . 12-14<br />
12.2.5 Buttons in Extended View . . . . . . . . . . . . . . . . . . . . . . . . . . . . . . . . . . 12-16<br />
<strong>Freedom</strong> <strong>EVOware</strong> <strong>Software</strong> <strong>Manual</strong>, 393172, en, V<strong>2.3</strong><br />
ix
Table of Contents<br />
13 Overview of <strong>Freedom</strong> <strong>EVOware</strong> Commands<br />
13.1 Overview of Script Commands. . . . . . . . . . . . . . . . . . . . . . . . . . . . . . . . . . 13-1<br />
13.1.1 Liquid Handling Arm (LiHa) Commands, Overview . . . . . . . . . . . . . . . 13-1<br />
13.1.2 Wizards, Overview . . . . . . . . . . . . . . . . . . . . . . . . . . . . . . . . . . . . . . . . 13-4<br />
13.1.3 Programming Commands, Overview . . . . . . . . . . . . . . . . . . . . . . . . . . 13-4<br />
13.1.4 Commands for the Te-MO, Overview . . . . . . . . . . . . . . . . . . . . . . . . . 13-6<br />
13.1.5 Commands for the Plate Robot, Overview. . . . . . . . . . . . . . . . . . . . . . 13-7<br />
13.1.6 Commands for the Tube Robot, Overview. . . . . . . . . . . . . . . . . . . . . . 13-8<br />
13.1.7 Commands for Identification Devices, Overview . . . . . . . . . . . . . . . . . 13-8<br />
13.1.8 Miscellaneous Commands, Overview . . . . . . . . . . . . . . . . . . . . . . . . . 13-9<br />
13.1.9 Commands for the MCA96 (Multi Channel Arm 96), Overview . . . . . . 13-9<br />
13.1.10 Commands for the MCA384 (Multi Channel Arm 384), Overview . . . . 13-10<br />
13.1.11 Commands for the Common Notification Server, Overview. . . . . . . . . 13-11<br />
13.2 Overview of Device Commands . . . . . . . . . . . . . . . . . . . . . . . . . . . . . . . . . 13-12<br />
13.2.1 Commands for the Barcode Scanner, Overview . . . . . . . . . . . . . . . . . 13-12<br />
13.2.2 Commands for the Carousel, Overview . . . . . . . . . . . . . . . . . . . . . . . . 13-13<br />
13.<strong>2.3</strong> Commands for the Carousel NT, Overview . . . . . . . . . . . . . . . . . . . . . 13-14<br />
13.2.4 Commands for the Hettich Centrifuge, Overview. . . . . . . . . . . . . . . . . 13-15<br />
13.2.5 Commands for the Columbus Washer, Overview . . . . . . . . . . . . . . . . 13-16<br />
13.2.6 Commands for the FlaskFlipper, Overview . . . . . . . . . . . . . . . . . . . . . 13-17<br />
13.2.7 Commands for the GENios Reader, Overview . . . . . . . . . . . . . . . . . . 13-17<br />
13.2.8 Commands for the GENios Pro Reader, Overview . . . . . . . . . . . . . . . 13-18<br />
13.2.9 Commands for the Heated Incubator, Overview . . . . . . . . . . . . . . . . . 13-19<br />
13.2.10 Commands for the Base Incubator, Overview . . . . . . . . . . . . . . . . . . . 13-20<br />
13.2.11 Commands for the Room Temperature Incubator, Overview . . . . . . . 13-20<br />
13.2.12 Commands for the Liquid Handling Arm (LiHa), Overview . . . . . . . . . 13-20<br />
13.2.13 Commands for the Multi Channel Arm (MCA) Overview . . . . . . . . . . . 13-21<br />
13.2.14 Commands for the MCA384 (Multi Channel Arm) Overview . . . . . . . . 13-21<br />
13.2.15 Commands for the Magellan option, Overview . . . . . . . . . . . . . . . . . . 13-21<br />
13.2.16 Commands for the PW384 Washer, Overview . . . . . . . . . . . . . . . . . . 13-22<br />
13.2.17 Commands for the PW384 GP Washer, Overview . . . . . . . . . . . . . . . 13-22<br />
13.2.18 Commands for the 96PW Washer, Overview . . . . . . . . . . . . . . . . . . . 13-23<br />
13.2.19 Commands for the PosID-3, Overview. . . . . . . . . . . . . . . . . . . . . . . . . 13-24<br />
13.2.20 Commands for the REMP PHS, Overview. . . . . . . . . . . . . . . . . . . . . . 13-25<br />
13.2.21 Commands for the REMP Reatrix, Overview. . . . . . . . . . . . . . . . . . . . 13-25<br />
13.2.22 Commands for the REMP ACD96, Overview. . . . . . . . . . . . . . . . . . . . 13-25<br />
13.2.23 Commands for the Tube Robot, Overview. . . . . . . . . . . . . . . . . . . . . . 13-25<br />
13.2.24 Commands for the Process Starter, Overview. . . . . . . . . . . . . . . . . . . 13-26<br />
13.2.25 Commands for the Plate Robot, Overview. . . . . . . . . . . . . . . . . . . . . . 13-26<br />
13.2.26 Commands for the Safire Reader, Overview . . . . . . . . . . . . . . . . . . . . 13-27<br />
13.2.27 Commands for the Te-Shake Shaker, Overview . . . . . . . . . . . . . . . . . 13-28<br />
13.2.28 Commands for the Symbol MS-954 Barcode Scanner, Overview . . . . 13-29<br />
13.2.29 Commands for the Spectra Fluor Reader, Overview . . . . . . . . . . . . . . 13-29<br />
13.<strong>2.3</strong>0 Commands for the Sunrise Reader, Overview. . . . . . . . . . . . . . . . . . . 13-30<br />
13.<strong>2.3</strong>1 Commands for the Magnetic Bead Separator (Te-MagS), Overview. . 13-30<br />
13.<strong>2.3</strong>2 Commands for the Te-Stack Te-MO, Overview . . . . . . . . . . . . . . . . . . 13-31<br />
13.<strong>2.3</strong>3 Commands for the Te-Stack, Overview . . . . . . . . . . . . . . . . . . . . . . . . 13-31<br />
13.<strong>2.3</strong>4 Commands for the Vacuum Separator (Te-VacS), Overview . . . . . . . 13-32<br />
13.<strong>2.3</strong>5 Commands for the Te-MO, Overview . . . . . . . . . . . . . . . . . . . . . . . . . 13-33<br />
13.<strong>2.3</strong>6 Commands for the Ultra Reader, Overview . . . . . . . . . . . . . . . . . . . . . 13-34<br />
13.<strong>2.3</strong>7 Commands for the Ultra Evolution Reader, Overview . . . . . . . . . . . . . 13-34<br />
13.<strong>2.3</strong>8 Commands for the Process Script, Overview . . . . . . . . . . . . . . . . . . . 13-35<br />
13.<strong>2.3</strong>9 Commands for the Transfer Station, Overview . . . . . . . . . . . . . . . . . . 13-35<br />
x <strong>Freedom</strong> <strong>EVOware</strong> <strong>Software</strong> <strong>Manual</strong>, 393172, en, V<strong>2.3</strong>
Table of Contents<br />
13.2.40 Commands for the Te-Link, Overview . . . . . . . . . . . . . . . . . . . . . . . . . 13-35<br />
14 Advanced Programming Features for Scripts<br />
14.1 Variables and Expressions in Scripts. . . . . . . . . . . . . . . . . . . . . . . . . . . . . 14-1<br />
14.1.1 Declaring Variables in Scripts . . . . . . . . . . . . . . . . . . . . . . . . . . . . . . . 14-1<br />
14.1.2 Script Commands That Write to Variables. . . . . . . . . . . . . . . . . . . . . . 14-2<br />
14.1.3 Querying the Value of a Variable During Script Runtime. . . . . . . . . . . 14-3<br />
14.1.4 Pre-Defined Variables . . . . . . . . . . . . . . . . . . . . . . . . . . . . . . . . . . . . . 14-4<br />
14.1.5 Script Commands That Accept String Variables . . . . . . . . . . . . . . . . . 14-10<br />
14.1.6 Mathematical Expressions . . . . . . . . . . . . . . . . . . . . . . . . . . . . . . . . . . 14-11<br />
14.1.7 Script Commands That Accept Numeric Variables and Expressions . 14-12<br />
14.1.8 Converting Numeric Variables and Expressions to Strings . . . . . . . . . 14-13<br />
14.1.9 Array Variables . . . . . . . . . . . . . . . . . . . . . . . . . . . . . . . . . . . . . . . . . . 14-15<br />
14.1.10 Script Commands That Accept Variables and Expressions Converted to a<br />
String14-16<br />
14.1.11 Labware Attributes and String Variables . . . . . . . . . . . . . . . . . . . . . . . 14-16<br />
14.1.12 Validating a Script Which Contains Variables . . . . . . . . . . . . . . . . . . . 14-18<br />
14.2 Conditions . . . . . . . . . . . . . . . . . . . . . . . . . . . . . . . . . . . . . . . . . . . . . . . . . 14-19<br />
14.3 Sub-routines. . . . . . . . . . . . . . . . . . . . . . . . . . . . . . . . . . . . . . . . . . . . . . . . 14-19<br />
14.3.1 Creating a Sub-Routine . . . . . . . . . . . . . . . . . . . . . . . . . . . . . . . . . . . . 14-19<br />
14.3.2 Sub-Routine Command . . . . . . . . . . . . . . . . . . . . . . . . . . . . . . . . . . . . 14-19<br />
14.3.3 Exchanging Data With Sub-Routines. . . . . . . . . . . . . . . . . . . . . . . . . . 14-22<br />
14.3.4 Validating a Script Which Contains Sub-Routines . . . . . . . . . . . . . . . . 14-22<br />
14.3.5 Log file for a Script Which Contains Sub-Routines . . . . . . . . . . . . . . . 14-23<br />
14.4 Loop Options . . . . . . . . . . . . . . . . . . . . . . . . . . . . . . . . . . . . . . . . . . . . . . . 14-23<br />
<strong>Freedom</strong> <strong>EVOware</strong> <strong>Software</strong> <strong>Manual</strong>, 393172, en, V<strong>2.3</strong><br />
xi
Table of Contents<br />
15 Script Commands<br />
15.1 Aspirate Command . . . . . . . . . . . . . . . . . . . . . . . . . . . . . . . . . . . . . . . . . . 15-1<br />
15.2 Dispense Command . . . . . . . . . . . . . . . . . . . . . . . . . . . . . . . . . . . . . . . . . 15-3<br />
15.3 Mix Command . . . . . . . . . . . . . . . . . . . . . . . . . . . . . . . . . . . . . . . . . . . . . . 15-5<br />
15.4 Wash Tips Command . . . . . . . . . . . . . . . . . . . . . . . . . . . . . . . . . . . . . . . . 15-8<br />
15.5 Periodic Wash Command . . . . . . . . . . . . . . . . . . . . . . . . . . . . . . . . . . . . . 15-10<br />
15.6 Activate DITI Handling Command . . . . . . . . . . . . . . . . . . . . . . . . . . . . . . . 15-12<br />
15.7 Get DITIs Command . . . . . . . . . . . . . . . . . . . . . . . . . . . . . . . . . . . . . . . . . 15-13<br />
15.8 Drop DITIs Command . . . . . . . . . . . . . . . . . . . . . . . . . . . . . . . . . . . . . . . . 15-14<br />
15.9 Set DITI Position Command . . . . . . . . . . . . . . . . . . . . . . . . . . . . . . . . . . . 15-15<br />
15.10 Pick Up DITIs Command . . . . . . . . . . . . . . . . . . . . . . . . . . . . . . . . . . . . . . 15-16<br />
15.11 Set DITIs Back Command . . . . . . . . . . . . . . . . . . . . . . . . . . . . . . . . . . . . . 15-18<br />
15.12 Pickup ZipTip Command . . . . . . . . . . . . . . . . . . . . . . . . . . . . . . . . . . . . . . 15-19<br />
15.13 Detect Liquid Command . . . . . . . . . . . . . . . . . . . . . . . . . . . . . . . . . . . . . . 15-20<br />
15.14 Te-Fill Aspirate Command . . . . . . . . . . . . . . . . . . . . . . . . . . . . . . . . . . . . . 15-22<br />
15.15 Te-Fill Dispense Command . . . . . . . . . . . . . . . . . . . . . . . . . . . . . . . . . . . . 15-24<br />
15.16 Te-Fill Prime Command . . . . . . . . . . . . . . . . . . . . . . . . . . . . . . . . . . . . . . 15-26<br />
15.17 Te-Fill Switch Valve Command . . . . . . . . . . . . . . . . . . . . . . . . . . . . . . . . . 15-28<br />
15.18 Activate PMP Command . . . . . . . . . . . . . . . . . . . . . . . . . . . . . . . . . . . . . . 15-29<br />
15.19 Deactivate PMP Command . . . . . . . . . . . . . . . . . . . . . . . . . . . . . . . . . . . . 15-30<br />
15.20 Tip Alignment Check Command . . . . . . . . . . . . . . . . . . . . . . . . . . . . . . . . 15-30<br />
15.21 Move LiHa Command . . . . . . . . . . . . . . . . . . . . . . . . . . . . . . . . . . . . . . . . 15-33<br />
15.22 Waste Command . . . . . . . . . . . . . . . . . . . . . . . . . . . . . . . . . . . . . . . . . . . . 15-35<br />
15.23 Active WashStation Command . . . . . . . . . . . . . . . . . . . . . . . . . . . . . . . . . 15-36<br />
15.24 Worklist Command . . . . . . . . . . . . . . . . . . . . . . . . . . . . . . . . . . . . . . . . . . 15-36<br />
15.24.1 Decontamination Wash Settings . . . . . . . . . . . . . . . . . . . . . . . . . . . . . 15-39<br />
15.24.2 Worklist File Format . . . . . . . . . . . . . . . . . . . . . . . . . . . . . . . . . . . . . . . 15-39<br />
15.24.3 Worklist Examples Using Labware Labels . . . . . . . . . . . . . . . . . . . . . . 15-43<br />
15.24.4 Worklist Examples Using Labware Barcodes . . . . . . . . . . . . . . . . . . . 15-44<br />
15.24.5 Worklist Examples Using Tube Barcodes . . . . . . . . . . . . . . . . . . . . . . 15-45<br />
15.24.6 Worklist Examples for the Reagent Distribution Record . . . . . . . . . . . 15-45<br />
15.24.7 Advanced Worklists . . . . . . . . . . . . . . . . . . . . . . . . . . . . . . . . . . . . . . . 15-46<br />
15.25 Worklist Import Command . . . . . . . . . . . . . . . . . . . . . . . . . . . . . . . . . . . . . 15-46<br />
15.26 Export Data Command . . . . . . . . . . . . . . . . . . . . . . . . . . . . . . . . . . . . . . . 15-48<br />
15.26.1 File Names for Labware Report Files. . . . . . . . . . . . . . . . . . . . . . . . . . 15-50<br />
15.26.2 Simulated Barcodes for the Export Data Command . . . . . . . . . . . . . . 15-50<br />
15.26.3 Report File Format . . . . . . . . . . . . . . . . . . . . . . . . . . . . . . . . . . . . . . . . 15-50<br />
15.26.4 Pooling balance data in report files . . . . . . . . . . . . . . . . . . . . . . . . . . . 15-56<br />
15.27 <strong>Manual</strong> Tip Alignment Command . . . . . . . . . . . . . . . . . . . . . . . . . . . . . . . 15-57<br />
15.27.1 Tip Alignment Results . . . . . . . . . . . . . . . . . . . . . . . . . . . . . . . . . . . . . 15-58<br />
15.28 Copy Plate Wizard . . . . . . . . . . . . . . . . . . . . . . . . . . . . . . . . . . . . . . . . . . . 15-59<br />
15.28.1 Copy Plate Wizard, Step 1 of 4 . . . . . . . . . . . . . . . . . . . . . . . . . . . . . . 15-59<br />
15.28.2 Copy Plate Wizard, Step 2 of 4 . . . . . . . . . . . . . . . . . . . . . . . . . . . . . . 15-60<br />
15.28.3 Copy Plate Wizard, Step 3 of 4 . . . . . . . . . . . . . . . . . . . . . . . . . . . . . . 15-62<br />
15.28.4 Copy Plate Wizard, Step 4 of 4 . . . . . . . . . . . . . . . . . . . . . . . . . . . . . . 15-62<br />
15.29 Replicates Wizard . . . . . . . . . . . . . . . . . . . . . . . . . . . . . . . . . . . . . . . . . . . 15-63<br />
15.29.1 Replicates Wizard, Step 1 of 5. . . . . . . . . . . . . . . . . . . . . . . . . . . . . . . 15-64<br />
15.29.2 Replicates Wizard, Step 2 of 5 . . . . . . . . . . . . . . . . . . . . . . . . . . . . . . 15-65<br />
15.29.3 Replicates Wizard, Step 3 of 5 . . . . . . . . . . . . . . . . . . . . . . . . . . . . . . 15-66<br />
15.29.4 Replicates Wizard, Step 4 of 5 . . . . . . . . . . . . . . . . . . . . . . . . . . . . . . 15-68<br />
15.29.5 Replicates Wizard, Step 5 of 5 . . . . . . . . . . . . . . . . . . . . . . . . . . . . . . 15-69<br />
15.30 Serial Dilution Wizard . . . . . . . . . . . . . . . . . . . . . . . . . . . . . . . . . . . . . . . . 15-69<br />
15.30.1 Serial Dilution Wizard, Step 1 of 6 . . . . . . . . . . . . . . . . . . . . . . . . . . . . 15-70<br />
xii <strong>Freedom</strong> <strong>EVOware</strong> <strong>Software</strong> <strong>Manual</strong>, 393172, en, V<strong>2.3</strong>
Table of Contents<br />
15.30.2 Serial Dilution Wizard, Step 2 of 6 . . . . . . . . . . . . . . . . . . . . . . . . . . . 15-72<br />
15.30.3 Serial Dilution Wizard, Step 3 of 6 . . . . . . . . . . . . . . . . . . . . . . . . . . . 15-73<br />
15.30.4 Serial Dilution Wizard, Step 4 of 6 . . . . . . . . . . . . . . . . . . . . . . . . . . . 15-75<br />
15.30.5 Serial Dilution Wizard, Step 5 of 6 . . . . . . . . . . . . . . . . . . . . . . . . . . . 15-76<br />
15.30.6 Serial Dilution Wizard, Step 6 of 6 . . . . . . . . . . . . . . . . . . . . . . . . . . . 15-77<br />
15.31 Merge Plates Wizard . . . . . . . . . . . . . . . . . . . . . . . . . . . . . . . . . . . . . . . . . 15-77<br />
15.31.1 Merge Plates Wizard, Step 1 of 7 . . . . . . . . . . . . . . . . . . . . . . . . . . . . 15-78<br />
15.31.2 Merge Plates Wizard, Step 2 of 7 . . . . . . . . . . . . . . . . . . . . . . . . . . . . 15-79<br />
15.31.3 Merge Plates Wizard, Step 3 of 7 . . . . . . . . . . . . . . . . . . . . . . . . . . . . 15-80<br />
15.31.4 Merge Plates Wizard, Step 4 of 7 . . . . . . . . . . . . . . . . . . . . . . . . . . . . 15-81<br />
15.31.5 Merge Plates Wizard, Step 5 of 7 . . . . . . . . . . . . . . . . . . . . . . . . . . . . 15-83<br />
15.31.6 Merge Plates Wizard, Step 6 of 7 . . . . . . . . . . . . . . . . . . . . . . . . . . . . 15-84<br />
15.31.7 Merge Plates Wizard, Step 7 of 7 . . . . . . . . . . . . . . . . . . . . . . . . . . . . 15-85<br />
15.32 Transfer Wizard . . . . . . . . . . . . . . . . . . . . . . . . . . . . . . . . . . . . . . . . . . . . . 15-85<br />
15.32.1 Transfer Wizard, Step 1 of 4 . . . . . . . . . . . . . . . . . . . . . . . . . . . . . . . . 15-86<br />
15.32.2 Transfer Wizard, Step 2 of 4 . . . . . . . . . . . . . . . . . . . . . . . . . . . . . . . . 15-87<br />
15.3<strong>2.3</strong> Transfer Wizard, Step 3 of 4 . . . . . . . . . . . . . . . . . . . . . . . . . . . . . . . . 15-89<br />
15.32.4 Transfer Wizard, Step 4 of 4 . . . . . . . . . . . . . . . . . . . . . . . . . . . . . . . . 15-90<br />
15.33 MCA Merge Plate Wizard . . . . . . . . . . . . . . . . . . . . . . . . . . . . . . . . . . . . . 15-90<br />
15.33.1 MCA Merge Plate Wizard, Step 1 of 4 . . . . . . . . . . . . . . . . . . . . . . . . . 15-90<br />
15.33.2 MCA Merge Plate Wizard, Step 2 of 4 . . . . . . . . . . . . . . . . . . . . . . . . 15-92<br />
15.33.3 MCA Merge Plate wizard, Step 3 of 4 . . . . . . . . . . . . . . . . . . . . . . . . . 15-93<br />
15.33.4 MCA Merge Plate wizard, Step 4 of 4 . . . . . . . . . . . . . . . . . . . . . . . . . 15-94<br />
15.34 Start Timer Command . . . . . . . . . . . . . . . . . . . . . . . . . . . . . . . . . . . . . . . . 15-95<br />
15.35 Wait for Timer Command . . . . . . . . . . . . . . . . . . . . . . . . . . . . . . . . . . . . . 15-95<br />
15.35.1 Wait for Timer Message Box . . . . . . . . . . . . . . . . . . . . . . . . . . . . . . . . 15-96<br />
15.36 Execute Application Command . . . . . . . . . . . . . . . . . . . . . . . . . . . . . . . . . 15-96<br />
15.37 Comment Command . . . . . . . . . . . . . . . . . . . . . . . . . . . . . . . . . . . . . . . . . 15-97<br />
15.38 User Prompt Command . . . . . . . . . . . . . . . . . . . . . . . . . . . . . . . . . . . . . . 15-98<br />
15.38.1 User Prompt Message Box . . . . . . . . . . . . . . . . . . . . . . . . . . . . . . . . . 15-99<br />
15.39 Begin Loop Command . . . . . . . . . . . . . . . . . . . . . . . . . . . . . . . . . . . . . . . 15-100<br />
15.40 End Loop Command . . . . . . . . . . . . . . . . . . . . . . . . . . . . . . . . . . . . . . . . . 15-100<br />
15.41 Set Variable Command . . . . . . . . . . . . . . . . . . . . . . . . . . . . . . . . . . . . . . . 15-101<br />
15.41.1 Set Variable, Operator Prompt. . . . . . . . . . . . . . . . . . . . . . . . . . . . . . . 15-102<br />
15.41.2 Set Variable - User Query At Script Start. . . . . . . . . . . . . . . . . . . . . . . 15-103<br />
15.42 Import Variable Command . . . . . . . . . . . . . . . . . . . . . . . . . . . . . . . . . . . . 15-103<br />
15.42.1 Import Variable Default Values Dialog Box . . . . . . . . . . . . . . . . . . . . . 15-106<br />
15.42.2 Field Separator for the Import Variable and Export Variable Commands 15-<br />
<strong>Freedom</strong> <strong>EVOware</strong> <strong>Software</strong> <strong>Manual</strong>, 393172, en, V<strong>2.3</strong><br />
xiii
Table of Contents<br />
107<br />
15.43 Export Variable Command . . . . . . . . . . . . . . . . . . . . . . . . . . . . . . . . . . . . 15-107<br />
15.44 Condition Command . . . . . . . . . . . . . . . . . . . . . . . . . . . . . . . . . . . . . . . . . 15-109<br />
15.45 If - Then Command . . . . . . . . . . . . . . . . . . . . . . . . . . . . . . . . . . . . . . . . . . 15-111<br />
15.46 Else Command. . . . . . . . . . . . . . . . . . . . . . . . . . . . . . . . . . . . . . . . . . . . . . 15-111<br />
15.47 End If Command . . . . . . . . . . . . . . . . . . . . . . . . . . . . . . . . . . . . . . . . . . . . 15-112<br />
15.48 Group Command . . . . . . . . . . . . . . . . . . . . . . . . . . . . . . . . . . . . . . . . . . . . 15-112<br />
15.49 Sub-Routine Command . . . . . . . . . . . . . . . . . . . . . . . . . . . . . . . . . . . . . . . 15-113<br />
15.50 Execute VB Script Command . . . . . . . . . . . . . . . . . . . . . . . . . . . . . . . . . . 15-114<br />
15.50.1 Menu Items for VB Scripts . . . . . . . . . . . . . . . . . . . . . . . . . . . . . . . . . . 15-116<br />
15.51 Notification Command . . . . . . . . . . . . . . . . . . . . . . . . . . . . . . . . . . . . . . . . 15-116<br />
15.52 Start Script Command . . . . . . . . . . . . . . . . . . . . . . . . . . . . . . . . . . . . . . . . 15-117<br />
15.53 On Error Goto Command . . . . . . . . . . . . . . . . . . . . . . . . . . . . . . . . . . . . . 15-118<br />
15.54 Resume Command . . . . . . . . . . . . . . . . . . . . . . . . . . . . . . . . . . . . . . . . . . 15-119<br />
15.55 End Script Command . . . . . . . . . . . . . . . . . . . . . . . . . . . . . . . . . . . . . . . . 15-120<br />
15.56 Te-MO Commands. . . . . . . . . . . . . . . . . . . . . . . . . . . . . . . . . . . . . . . . . . . 15-121<br />
15.56.1 Te-MO Aspirate Command . . . . . . . . . . . . . . . . . . . . . . . . . . . . . . . . . 15-122<br />
15.56.2 Te-MO Dispense Command . . . . . . . . . . . . . . . . . . . . . . . . . . . . . . . . 15-124<br />
15.56.3 Te-MO Mix Command . . . . . . . . . . . . . . . . . . . . . . . . . . . . . . . . . . . . . 15-125<br />
15.56.4 Te-MO Wash Command . . . . . . . . . . . . . . . . . . . . . . . . . . . . . . . . . . . 15-127<br />
15.56.5 Te-MO 384 Wash Tip Head Command . . . . . . . . . . . . . . . . . . . . . . . . 15-130<br />
15.56.6 Te-MO Get DITIs Command . . . . . . . . . . . . . . . . . . . . . . . . . . . . . . . . 15-132<br />
15.56.7 Te-MO Drop DITIs Command . . . . . . . . . . . . . . . . . . . . . . . . . . . . . . . 15-133<br />
15.56.8 Te-MO Get Tip Block Command . . . . . . . . . . . . . . . . . . . . . . . . . . . . . 15-134<br />
15.56.9 Te-MO Drop Tip Block Command . . . . . . . . . . . . . . . . . . . . . . . . . . . . 15-135<br />
15.56.10 Te-MO Refill Trough Command . . . . . . . . . . . . . . . . . . . . . . . . . . . . . 15-135<br />
15.56.11 Te-MO Relative Movements Command . . . . . . . . . . . . . . . . . . . . . . . 15-136<br />
15.56.12 Load the Te-MO Command . . . . . . . . . . . . . . . . . . . . . . . . . . . . . . . . 15-138<br />
15.56.13 Fill system (Te-MO 384) Command . . . . . . . . . . . . . . . . . . . . . . . . . . 15-138<br />
15.57 Move RoMa Command . . . . . . . . . . . . . . . . . . . . . . . . . . . . . . . . . . . . . . . 15-140<br />
15.58 RoMa Vector Command . . . . . . . . . . . . . . . . . . . . . . . . . . . . . . . . . . . . . . 15-141<br />
15.58.1 Moving labware with the RoMa Vector command . . . . . . . . . . . . . . . . 15-142<br />
15.59 Transfer Labware Command . . . . . . . . . . . . . . . . . . . . . . . . . . . . . . . . . . . 15-143<br />
15.60 Move PnP Command . . . . . . . . . . . . . . . . . . . . . . . . . . . . . . . . . . . . . . . . 15-145<br />
15.61 PnP Vector Command . . . . . . . . . . . . . . . . . . . . . . . . . . . . . . . . . . . . . . . . 15-146<br />
15.61.1 Moving tubes with the PnP Vector command . . . . . . . . . . . . . . . . . . . 15-148<br />
15.62 Transfer Tube Command . . . . . . . . . . . . . . . . . . . . . . . . . . . . . . . . . . . . . 15-148<br />
15.63 PosID Command . . . . . . . . . . . . . . . . . . . . . . . . . . . . . . . . . . . . . . . . . . . . 15-150<br />
15.63.1 PosID Command (Barcode Types Tab) . . . . . . . . . . . . . . . . . . . . . . . 15-153<br />
15.64 Waterbath Control Command . . . . . . . . . . . . . . . . . . . . . . . . . . . . . . . . . . 15-154<br />
15.65 Balance Command . . . . . . . . . . . . . . . . . . . . . . . . . . . . . . . . . . . . . . . . . . 15-155<br />
15.66 Balance Send Command Command . . . . . . . . . . . . . . . . . . . . . . . . . . . . . 15-157<br />
15.67 Send Command Command . . . . . . . . . . . . . . . . . . . . . . . . . . . . . . . . . . . . 15-158<br />
15.68 MCA96 Commands . . . . . . . . . . . . . . . . . . . . . . . . . . . . . . . . . . . . . . . . . . 15-159<br />
15.68.1 MCA96 Aspirate Command . . . . . . . . . . . . . . . . . . . . . . . . . . . . . . . . 15-159<br />
15.68.2 MCA96 Dispense Command . . . . . . . . . . . . . . . . . . . . . . . . . . . . . . . . 15-161<br />
15.68.3 MCA96 Mix Command . . . . . . . . . . . . . . . . . . . . . . . . . . . . . . . . . . . . 15-162<br />
15.68.4 MCA96 Wash Command . . . . . . . . . . . . . . . . . . . . . . . . . . . . . . . . . . 15-164<br />
15.68.5 MCA96 Get DITIs Command . . . . . . . . . . . . . . . . . . . . . . . . . . . . . . . 15-167<br />
15.68.6 MCA96 Drop DITIs Command . . . . . . . . . . . . . . . . . . . . . . . . . . . . . . 15-168<br />
15.68.7 MCA96 Get Tip Block Command . . . . . . . . . . . . . . . . . . . . . . . . . . . . 15-170<br />
15.68.8 MCA96 Drop Tip Block Command . . . . . . . . . . . . . . . . . . . . . . . . . . . 15-171<br />
15.68.9 MCA96 Relative Movements Command . . . . . . . . . . . . . . . . . . . . . . . 15-171<br />
xiv <strong>Freedom</strong> <strong>EVOware</strong> <strong>Software</strong> <strong>Manual</strong>, 393172, en, V<strong>2.3</strong>
Table of Contents<br />
15.68.10 MCA96 Move Command . . . . . . . . . . . . . . . . . . . . . . . . . . . . . . . . . . . 15-174<br />
15.68.11 MCA96 Vector Command . . . . . . . . . . . . . . . . . . . . . . . . . . . . . . . . . . 15-175<br />
15.68.12 MCA96 Transfer Labware Command . . . . . . . . . . . . . . . . . . . . . . . . . 15-177<br />
15.69 MCA384 Commands . . . . . . . . . . . . . . . . . . . . . . . . . . . . . . . . . . . . . . . . . 15-179<br />
15.69.1 Overview of MCA384 head adapters . . . . . . . . . . . . . . . . . . . . . . . . . . 15-180<br />
15.69.2 MCA384 Aspirate Command . . . . . . . . . . . . . . . . . . . . . . . . . . . . . . . 15-181<br />
15.69.3 MCA384 Dispense Command . . . . . . . . . . . . . . . . . . . . . . . . . . . . . . 15-183<br />
15.69.4 MCA384 Mix Command . . . . . . . . . . . . . . . . . . . . . . . . . . . . . . . . . . . 15-185<br />
15.69.5 MCA384 Wash Command . . . . . . . . . . . . . . . . . . . . . . . . . . . . . . . . . 15-187<br />
15.69.6 MCA384 Get Head Adapter Command . . . . . . . . . . . . . . . . . . . . . . . 15-189<br />
15.69.7 MCA384 Drop Head Adapter Command . . . . . . . . . . . . . . . . . . . . . . 15-190<br />
15.69.8 MCA384 Get DITIs Command . . . . . . . . . . . . . . . . . . . . . . . . . . . . . . 15-191<br />
15.69.9 MCA384 Drop DITIs Command . . . . . . . . . . . . . . . . . . . . . . . . . . . . . 15-194<br />
15.69.10 MCA384 Move Command . . . . . . . . . . . . . . . . . . . . . . . . . . . . . . . . . . 15-198<br />
15.69.11 MCA384 Vector Command . . . . . . . . . . . . . . . . . . . . . . . . . . . . . . . . . 15-199<br />
15.69.12 MCA384 Transfer Labware Command . . . . . . . . . . . . . . . . . . . . . . . . 15-201<br />
15.69.13 MCA384 Dock CGM Command. . . . . . . . . . . . . . . . . . . . . . . . . . . . . . 15-204<br />
15.69.14 MCA384 Undock CGM Command . . . . . . . . . . . . . . . . . . . . . . . . . . . 15-204<br />
15.70 CNS SendNotification command . . . . . . . . . . . . . . . . . . . . . . . . . . . . . . . . 15-205<br />
<strong>Freedom</strong> <strong>EVOware</strong> <strong>Software</strong> <strong>Manual</strong>, 393172, en, V<strong>2.3</strong><br />
xv
Table of Contents<br />
16 Device Commands<br />
16.1 Service Functions. . . . . . . . . . . . . . . . . . . . . . . . . . . . . . . . . . . . . . . . . . . . 16-1<br />
16.2 Commands for the Symbol LS-1220 Barcode Scanner . . . . . . . . . . . . . . . 16-1<br />
16.2.1 Barcode Scanner - Read Barcode Command . . . . . . . . . . . . . . . . . . . 16-2<br />
16.3 Commands for the Carousel . . . . . . . . . . . . . . . . . . . . . . . . . . . . . . . . . . . 16-2<br />
16.3.1 Carousel - PresentPlate Command . . . . . . . . . . . . . . . . . . . . . . . . . . . 16-2<br />
16.3.2 Carousel - PreReturnPlateByBC Command . . . . . . . . . . . . . . . . . . . . 16-3<br />
16.3.3 Carousel - ReturnPlate Command . . . . . . . . . . . . . . . . . . . . . . . . . . . . 16-3<br />
16.3.4 Carousel - ReturnPlateByBarcode Command . . . . . . . . . . . . . . . . . . . 16-4<br />
16.3.5 Carousel - ReadAllBarcodes command . . . . . . . . . . . . . . . . . . . . . . . . 16-5<br />
16.3.6 Carousel - InitCarousel Command. . . . . . . . . . . . . . . . . . . . . . . . . . . . 16-5<br />
16.3.7 Carousel - MoveToCartridge Command . . . . . . . . . . . . . . . . . . . . . . . 16-5<br />
16.3.8 Carousel - EndAccess Command . . . . . . . . . . . . . . . . . . . . . . . . . . . . 16-6<br />
16.3.9 Carousel - ReadPlatesInCartridge Command . . . . . . . . . . . . . . . . . . . 16-6<br />
16.3.10 Carousel - PresentPlateByBarcode Command . . . . . . . . . . . . . . . . . . 16-7<br />
16.3.11 Carousel - PrePresentPlate Command . . . . . . . . . . . . . . . . . . . . . . . . 16-7<br />
16.3.12 Carousel - UndoPrePresent Command . . . . . . . . . . . . . . . . . . . . . . . . 16-8<br />
16.3.13 Carousel - LoadBCFromFile Command . . . . . . . . . . . . . . . . . . . . . . . 16-8<br />
16.4 Commands for the Carousel NT . . . . . . . . . . . . . . . . . . . . . . . . . . . . . . . . 16-8<br />
16.4.1 Carousel NT - OpenDoorlock command . . . . . . . . . . . . . . . . . . . . . . . 16-9<br />
16.4.2 Carousel NT - CloseDoorlock command . . . . . . . . . . . . . . . . . . . . . . . 16-9<br />
16.4.3 Carousel NT - VerifyCartridges command . . . . . . . . . . . . . . . . . . . . . . 16-9<br />
16.4.4 Carousel NT - ScanAllCartridges command . . . . . . . . . . . . . . . . . . . . 16-9<br />
16.4.5 Carousel NT - ScanCartridge Command . . . . . . . . . . . . . . . . . . . . . . . 16-10<br />
16.4.6 Carousel NT - ScanLocation Command . . . . . . . . . . . . . . . . . . . . . . . 16-10<br />
16.4.7 Carousel NT - PresentPlate Command . . . . . . . . . . . . . . . . . . . . . . . . 16-11<br />
16.4.8 Carousel NT - ReturnPlate Command . . . . . . . . . . . . . . . . . . . . . . . . . 16-12<br />
16.4.9 Carousel NT - PresentPlateByBC Command . . . . . . . . . . . . . . . . . . . 16-13<br />
16.4.10 Carousel NT - ReturnPlateByBC Command . . . . . . . . . . . . . . . . . . . . 16-14<br />
16.4.11 Carousel NT - MoveToCartridge Command . . . . . . . . . . . . . . . . . . . . 16-14<br />
16.4.12 Carousel NT - Initialize Command . . . . . . . . . . . . . . . . . . . . . . . . . . . . 16-15<br />
16.4.13 Carousel NT - Shutdown Command . . . . . . . . . . . . . . . . . . . . . . . . . . 16-15<br />
16.4.14 Carousel NT - PrePresentPlate Command . . . . . . . . . . . . . . . . . . . . . 16-15<br />
16.4.15 Carousel NT - UndoPrePresent Command . . . . . . . . . . . . . . . . . . . . . 16-16<br />
16.4.16 Carousel NT - LoadBCFromFile Command . . . . . . . . . . . . . . . . . . . . 16-16<br />
16.5 Commands for the Hettich Centrifuge . . . . . . . . . . . . . . . . . . . . . . . . . . . . 16-16<br />
16.5.1 Hettich Centrifuge - Init Command. . . . . . . . . . . . . . . . . . . . . . . . . . . . 16-16<br />
16.5.2 Hettich Centrifuge - Open Command. . . . . . . . . . . . . . . . . . . . . . . . . . 16-17<br />
16.5.3 Hettich Centrifuge - Close Command . . . . . . . . . . . . . . . . . . . . . . . . . 16-17<br />
16.5.4 Hettich Centrifuge - ExecuteN Command . . . . . . . . . . . . . . . . . . . . . . 16-17<br />
16.5.5 Hettich Centrifuge - MoveToPos Command . . . . . . . . . . . . . . . . . . . . 16-18<br />
16.6 Commands for the Columbus Washer . . . . . . . . . . . . . . . . . . . . . . . . . . . . 16-19<br />
16.6.1 Columbus Washer - WashPlate command . . . . . . . . . . . . . . . . . . . . . 16-19<br />
16.6.2 Columbus Washer - Prime Command . . . . . . . . . . . . . . . . . . . . . . . . . 16-22<br />
16.6.3 Columbus Washer- Rinse Command. . . . . . . . . . . . . . . . . . . . . . . . . . 16-23<br />
16.6.4 Columbus Washer - Remote Command . . . . . . . . . . . . . . . . . . . . . . . 16-24<br />
16.6.5 Columbus Washer - ExitRemote Command . . . . . . . . . . . . . . . . . . . . 16-24<br />
16.6.6 Columbus Washer - Status Command. . . . . . . . . . . . . . . . . . . . . . . . . 16-24<br />
16.6.7 Columbus Washer - Init Command . . . . . . . . . . . . . . . . . . . . . . . . . . . 16-24<br />
16.6.8 Columbus Washer - StopRinse Command . . . . . . . . . . . . . . . . . . . . . 16-25<br />
16.6.9 Columbus Washer - StartProg Command . . . . . . . . . . . . . . . . . . . . . . 16-25<br />
16.6.10 Columbus Washer - WashPlateEx Command . . . . . . . . . . . . . . . . . . 16-26<br />
16.6.11 Columbus Washer - DisableAutoPrime Command . . . . . . . . . . . . . . . 16-29<br />
xvi <strong>Freedom</strong> <strong>EVOware</strong> <strong>Software</strong> <strong>Manual</strong>, 393172, en, V<strong>2.3</strong>
Table of Contents<br />
16.6.12 Columbus Washer - AllowAutoPrime Command . . . . . . . . . . . . . . . . . 16-29<br />
16.7 Commands for the FlaskFlipper . . . . . . . . . . . . . . . . . . . . . . . . . . . . . . . . 16-29<br />
16.7.1 FlaskFlipper - ExecuteScript Command . . . . . . . . . . . . . . . . . . . . . . . 16-30<br />
16.7.2 FlaskFlipper - LoadUnloadFlask Command. . . . . . . . . . . . . . . . . . . . . 16-30<br />
16.7.3 FlaskFlipper - PrepareForPipette Command . . . . . . . . . . . . . . . . . . . . 16-31<br />
16.7.4 FlaskFlipper - Shake Command . . . . . . . . . . . . . . . . . . . . . . . . . . . . . 16-31<br />
16.7.5 FlaskFlipper - Knock Command. . . . . . . . . . . . . . . . . . . . . . . . . . . . . . 16-32<br />
16.8 Commands for the GENios Reader . . . . . . . . . . . . . . . . . . . . . . . . . . . . . . 16-32<br />
16.8.1 GENios Reader - Status Command. . . . . . . . . . . . . . . . . . . . . . . . . . . 16-33<br />
16.8.2 GENios Reader - Excitation Out Command. . . . . . . . . . . . . . . . . . . . . 16-33<br />
16.8.3 GENios Reader - Emission Out Command . . . . . . . . . . . . . . . . . . . . . 16-33<br />
16.8.4 GENios Reader - Open Command . . . . . . . . . . . . . . . . . . . . . . . . . . . 16-33<br />
16.8.5 GENios Reader - Close Command . . . . . . . . . . . . . . . . . . . . . . . . . . . 16-33<br />
16.8.6 GENios Reader - Measure Command . . . . . . . . . . . . . . . . . . . . . . . . . 16-34<br />
16.8.7 GENios Reader - Multilabel Command . . . . . . . . . . . . . . . . . . . . . . . . 16-34<br />
16.9 Commands for the GENios Pro Reader. . . . . . . . . . . . . . . . . . . . . . . . . . . 16-36<br />
16.9.1 GENios Pro Reader - Status Command . . . . . . . . . . . . . . . . . . . . . . . 16-36<br />
16.9.2 GENios Pro Reader - Excitation Out Command . . . . . . . . . . . . . . . . . 16-36<br />
16.9.3 GENios Pro Reader - Emission Out Command . . . . . . . . . . . . . . . . . . 16-36<br />
16.9.4 GENios Pro Reader - Open Command . . . . . . . . . . . . . . . . . . . . . . . . 16-37<br />
16.9.5 GENios Pro Reader - Close Command . . . . . . . . . . . . . . . . . . . . . . . . 16-37<br />
16.9.6 GENios Pro Reader - Measure Command . . . . . . . . . . . . . . . . . . . . . 16-37<br />
16.9.7 GENios Pro Reader - Multilabel Command . . . . . . . . . . . . . . . . . . . . . 16-38<br />
16.9.8 GENios Pro Reader - Prime<strong>Manual</strong> Command . . . . . . . . . . . . . . . . . . 16-39<br />
16.9.9 GENios Pro Reader - Dispense<strong>Manual</strong> Command . . . . . . . . . . . . . . . 16-39<br />
16.10 Commands for the Heated Incubator . . . . . . . . . . . . . . . . . . . . . . . . . . . . 16-39<br />
16.10.1 Heated Incubator - Incubate Command. . . . . . . . . . . . . . . . . . . . . . . . 16-40<br />
16.10.2 Heated Incubator - CloseDoor Command . . . . . . . . . . . . . . . . . . . . . . 16-40<br />
16.10.3 Heated Incubator - StartShaker Command . . . . . . . . . . . . . . . . . . . . . 16-41<br />
16.10.4 Heated Incubator - StopShaker Command . . . . . . . . . . . . . . . . . . . . . 16-41<br />
16.10.5 Heated Incubator - InsertPlate Command . . . . . . . . . . . . . . . . . . . . . 16-41<br />
16.10.6 Heated Incubator - RemovePlate Command . . . . . . . . . . . . . . . . . . . . 16-42<br />
16.10.7 Heated Incubator - SetTemperature Command . . . . . . . . . . . . . . . . . 16-43<br />
16.11 Commands for the Base Incubator . . . . . . . . . . . . . . . . . . . . . . . . . . . . . . 16-44<br />
16.11.1 Base Incubator - BaseIncubate Command . . . . . . . . . . . . . . . . . . . . . 16-44<br />
16.12 Commands for the Room Temperature Incubator . . . . . . . . . . . . . . . . . . 16-45<br />
16.12.1 Room Temperature Incubator - Incubate Command . . . . . . . . . . . . . . 16-45<br />
16.13 Commands for the Liquid Handling Arm . . . . . . . . . . . . . . . . . . . . . . . . . . 16-46<br />
16.13.1 Liquid Handling Arm - Flush RSP Command . . . . . . . . . . . . . . . . . . . 16-46<br />
16.13.2 Liquid Handling Arm - Pipette Command. . . . . . . . . . . . . . . . . . . . . . . 16-47<br />
16.14 Commands for the MCA96. . . . . . . . . . . . . . . . . . . . . . . . . . . . . . . . . . . . . 16-47<br />
16.14.1 MCA96 - Pipette Command . . . . . . . . . . . . . . . . . . . . . . . . . . . . . . . . . 16-48<br />
16.15 Commands for the MCA384. . . . . . . . . . . . . . . . . . . . . . . . . . . . . . . . . . . . 16-48<br />
16.15.1 MCA384 - Pipette Command . . . . . . . . . . . . . . . . . . . . . . . . . . . . . . . . 16-48<br />
16.16 Commands for the Magellan option . . . . . . . . . . . . . . . . . . . . . . . . . . . . . . 16-48<br />
16.16.1 Magellan - Status Command . . . . . . . . . . . . . . . . . . . . . . . . . . . . . . . . 16-48<br />
16.16.2 Magellan - Excitation Out Command . . . . . . . . . . . . . . . . . . . . . . . . . . 16-49<br />
16.16.3 Magellan - Emission Out Command . . . . . . . . . . . . . . . . . . . . . . . . . . 16-49<br />
16.16.4 Magellan - Open Command. . . . . . . . . . . . . . . . . . . . . . . . . . . . . . . . . 16-49<br />
16.16.5 Magellan - Close Command . . . . . . . . . . . . . . . . . . . . . . . . . . . . . . . . 16-49<br />
16.16.6 Magellan - Measure Command . . . . . . . . . . . . . . . . . . . . . . . . . . . . . . 16-49<br />
16.17 Commands for the PW384 Washer . . . . . . . . . . . . . . . . . . . . . . . . . . . . . . 16-51<br />
16.17.1 PW384 Washer - Status Command. . . . . . . . . . . . . . . . . . . . . . . . . . . 16-52<br />
<strong>Freedom</strong> <strong>EVOware</strong> <strong>Software</strong> <strong>Manual</strong>, 393172, en, V<strong>2.3</strong><br />
xvii
Table of Contents<br />
16.17.2 PW384 Washer - Prime Command . . . . . . . . . . . . . . . . . . . . . . . . . . . 16-52<br />
16.17.3 PW384 Washer - Rinse Command . . . . . . . . . . . . . . . . . . . . . . . . . . . 16-52<br />
16.17.4 PW384 Washer - Wash Command . . . . . . . . . . . . . . . . . . . . . . . . . . . 16-52<br />
16.17.5 PW384 Washer - Stop Command . . . . . . . . . . . . . . . . . . . . . . . . . . . . 16-53<br />
16.17.6 PW384 Washer - PrepareEmptyWaste Command . . . . . . . . . . . . . . . 16-53<br />
16.18 Commands for the PW384GP Washer . . . . . . . . . . . . . . . . . . . . . . . . . . . 16-54<br />
16.18.1 PW384GP Washer - Aspirate Command . . . . . . . . . . . . . . . . . . . . . . 16-54<br />
16.18.2 PW384GP Washer - Dispense Command . . . . . . . . . . . . . . . . . . . . . 16-55<br />
16.18.3 PW384GP Washer - Prime Command . . . . . . . . . . . . . . . . . . . . . . . . 16-57<br />
16.18.4 PW384GP Washer - Rinse Command . . . . . . . . . . . . . . . . . . . . . . . . 16-57<br />
16.18.5 PW384GP Washer - Stop Command. . . . . . . . . . . . . . . . . . . . . . . . . . 16-58<br />
16.18.6 PW384GP Washer - PrepareEmptyWaste Command. . . . . . . . . . . . . 16-59<br />
16.18.7 PW384GP Washer - DownloadWash Command . . . . . . . . . . . . . . . . 16-59<br />
16.18.8 PW384GP Washer - StartWash Command . . . . . . . . . . . . . . . . . . . . 16-62<br />
16.18.9 PW384GP Washer - Wash Command . . . . . . . . . . . . . . . . . . . . . . . . 16-62<br />
16.19 Commands for the 96PW Washer . . . . . . . . . . . . . . . . . . . . . . . . . . . . . . . 16-65<br />
16.19.1 96PW Washer - WashPlate Command . . . . . . . . . . . . . . . . . . . . . . . . 16-66<br />
16.19.2 96PW Washer - Dispense Command . . . . . . . . . . . . . . . . . . . . . . . . . 16-67<br />
16.19.3 96PW Washer - Aspirate Command . . . . . . . . . . . . . . . . . . . . . . . . . . 16-68<br />
16.19.4 96PW Washer - Prime Command . . . . . . . . . . . . . . . . . . . . . . . . . . . . 16-68<br />
16.19.5 96PW Washer - Rinse Command . . . . . . . . . . . . . . . . . . . . . . . . . . . . 16-69<br />
16.19.6 96PW Washer - Remote Command. . . . . . . . . . . . . . . . . . . . . . . . . . . 16-69<br />
16.19.7 96PW Washer - ExitRemote Command. . . . . . . . . . . . . . . . . . . . . . . . 16-70<br />
16.19.8 96PW Washer - Status Command . . . . . . . . . . . . . . . . . . . . . . . . . . . . 16-70<br />
16.20 Commands for the PosID-3 . . . . . . . . . . . . . . . . . . . . . . . . . . . . . . . . . . . . 16-70<br />
16.20.1 PosID-3 - Initialize Command . . . . . . . . . . . . . . . . . . . . . . . . . . . . . . . 16-70<br />
16.20.2 PosID-3 - Scan Command . . . . . . . . . . . . . . . . . . . . . . . . . . . . . . . . . 16-70<br />
16.21 Commands for the REMP PHS . . . . . . . . . . . . . . . . . . . . . . . . . . . . . . . . . 16-74<br />
16.21.1 REMP PHS - SealPlate Command . . . . . . . . . . . . . . . . . . . . . . . . . . . 16-74<br />
16.22 Commands for the REMP Reatrix . . . . . . . . . . . . . . . . . . . . . . . . . . . . . . . 16-74<br />
16.22.1 REMP Reatrix - Read Command . . . . . . . . . . . . . . . . . . . . . . . . . . . . . 16-76<br />
16.22.2 REMP Reatrix - Initialize Command. . . . . . . . . . . . . . . . . . . . . . . . . . . 16-77<br />
16.23 Commands for the REMP ACD96 . . . . . . . . . . . . . . . . . . . . . . . . . . . . . . . 16-77<br />
16.23.1 REMP ACD96 - Cap Command. . . . . . . . . . . . . . . . . . . . . . . . . . . . . . 16-78<br />
16.23.2 REMP ACD96 - Decap Command . . . . . . . . . . . . . . . . . . . . . . . . . . . . 16-78<br />
16.24 Commands for the Process Starter . . . . . . . . . . . . . . . . . . . . . . . . . . . . . . 16-78<br />
16.24.1 Process Starter - Start Command . . . . . . . . . . . . . . . . . . . . . . . . . . . . 16-78<br />
16.24.2 Process Starter - WaitForProcess Command . . . . . . . . . . . . . . . . . . . 16-82<br />
16.25 Commands for the Tube Robot . . . . . . . . . . . . . . . . . . . . . . . . . . . . . . . . . 16-83<br />
16.25.1 Tube Robot - ExecuteScript Command . . . . . . . . . . . . . . . . . . . . . . . . 16-83<br />
16.26 Commands for the Plate Robot . . . . . . . . . . . . . . . . . . . . . . . . . . . . . . . . . 16-83<br />
16.26.1 Plate Robot - ExecuteSingleVector Command . . . . . . . . . . . . . . . . . . 16-84<br />
16.26.2 Plate Robot - Initialize Command. . . . . . . . . . . . . . . . . . . . . . . . . . . . . 16-85<br />
16.26.3 Plate Robot - MoveObject Command . . . . . . . . . . . . . . . . . . . . . . . . . 16-85<br />
16.26.4 Plate Robot - ReplaceObject Command . . . . . . . . . . . . . . . . . . . . . . . 16-85<br />
16.26.5 Plate Robot - MoveToBase Command . . . . . . . . . . . . . . . . . . . . . . . . 16-85<br />
16.26.6 Plate Robot - ChangeObject Command. . . . . . . . . . . . . . . . . . . . . . . . 16-86<br />
16.26.7 Plate Robot - MoveInsert Command . . . . . . . . . . . . . . . . . . . . . . . . . . 16-86<br />
16.26.8 Plate Robot - SwapInsert Command . . . . . . . . . . . . . . . . . . . . . . . . . . 16-86<br />
16.26.9 Plate Robot - ClearLocation Command . . . . . . . . . . . . . . . . . . . . . . . . 16-86<br />
16.27 Commands for the Safire Reader. . . . . . . . . . . . . . . . . . . . . . . . . . . . . . . . 16-86<br />
16.27.1 Safire Reader - Status Command . . . . . . . . . . . . . . . . . . . . . . . . . . . . 16-87<br />
16.27.2 Safire Reader - Open Command . . . . . . . . . . . . . . . . . . . . . . . . . . . . . 16-87<br />
xviii <strong>Freedom</strong> <strong>EVOware</strong> <strong>Software</strong> <strong>Manual</strong>, 393172, en, V<strong>2.3</strong>
Table of Contents<br />
16.27.3 Safire Reader - Close Command. . . . . . . . . . . . . . . . . . . . . . . . . . . . . 16-87<br />
16.27.4 Safire Reader - Measure Command . . . . . . . . . . . . . . . . . . . . . . . . . . 16-87<br />
16.27.5 Safire Reader - Multilabel Command. . . . . . . . . . . . . . . . . . . . . . . . . . 16-88<br />
16.28 Commands for the Te-Shake Shaker. . . . . . . . . . . . . . . . . . . . . . . . . . . . . 16-90<br />
16.28.1 Te-Shake shaker - Init Command . . . . . . . . . . . . . . . . . . . . . . . . . . . . 16-90<br />
16.28.2 Te-Shake shaker - Shake Command . . . . . . . . . . . . . . . . . . . . . . . . . 16-90<br />
16.28.3 Te-Shake shaker - Start Command . . . . . . . . . . . . . . . . . . . . . . . . . . 16-92<br />
16.28.4 Te-Shake shaker - Stop Command . . . . . . . . . . . . . . . . . . . . . . . . . . . 16-92<br />
16.28.5 Te-Shake shaker - SetTemperature Command . . . . . . . . . . . . . . . . . 16-92<br />
16.28.6 Te-Shake shaker - SetFrequency Command . . . . . . . . . . . . . . . . . . . 16-93<br />
16.29 Commands for the Symbol MS-954 Barcode Scanner . . . . . . . . . . . . . . . 16-93<br />
16.29.1 Symbol MS-954 Barcode Scanner - Read Barcode Command. . . . . . 16-94<br />
16.30 Commands for the Spectra Fluor Reader . . . . . . . . . . . . . . . . . . . . . . . . . 16-94<br />
16.30.1 Spectra Fluor Reader - Status Command . . . . . . . . . . . . . . . . . . . . . . 16-94<br />
16.30.2 Spectra Fluor Reader - Excitation Out Command . . . . . . . . . . . . . . . . 16-95<br />
16.30.3 Spectra Fluor Reader - Emission Out Command . . . . . . . . . . . . . . . . 16-95<br />
16.30.4 Spectra Fluor Reader - Open Command . . . . . . . . . . . . . . . . . . . . . . . 16-95<br />
16.30.5 Spectra Fluor Reader - Close Command. . . . . . . . . . . . . . . . . . . . . . . 16-95<br />
16.30.6 Spectra Fluor Reader - Measure Command . . . . . . . . . . . . . . . . . . . . 16-95<br />
16.30.7 Spectra Fluor Reader - Multilabel Command. . . . . . . . . . . . . . . . . . . . 16-96<br />
16.31 Commands for the Sunrise Reader . . . . . . . . . . . . . . . . . . . . . . . . . . . . . . 16-97<br />
16.31.1 Sunrise Reader - Status Command . . . . . . . . . . . . . . . . . . . . . . . . . . . 16-98<br />
16.31.2 Sunrise Reader - Open Command . . . . . . . . . . . . . . . . . . . . . . . . . . . 16-98<br />
16.31.3 Sunrise Reader - Close Command . . . . . . . . . . . . . . . . . . . . . . . . . . . 16-98<br />
16.31.4 Sunrise Reader - Measure Command . . . . . . . . . . . . . . . . . . . . . . . . . 16-98<br />
16.31.5 Sunrise Reader - Multilabel Command . . . . . . . . . . . . . . . . . . . . . . . . 16-99<br />
16.32 Commands for the Magnetic Bead Separator . . . . . . . . . . . . . . . . . . . . . . 16-100<br />
16.32.1 Magnetic Bead Separator - MoveToPosition Command . . . . . . . . . . . 16-100<br />
16.32.2 Magnetic Bead Separator - ActivateHeater Command . . . . . . . . . . . . 16-101<br />
16.3<strong>2.3</strong> Magnetic Bead Separator - DeactivateHeater Command . . . . . . . . . . 16-102<br />
16.32.4 Magnetic Bead Separator - Execution Command . . . . . . . . . . . . . . . . 16-102<br />
16.33 Commands for the Te-Stack Te-MO . . . . . . . . . . . . . . . . . . . . . . . . . . . . . 16-105<br />
16.33.1 Te-Stack Te-MO - InitStacker Command. . . . . . . . . . . . . . . . . . . . . . . 16-105<br />
16.33.2 Te-Stack Te-MO - MoveObject Command . . . . . . . . . . . . . . . . . . . . . 16-105<br />
16.33.3 Te-Stack Te-MO - DropPlate Command . . . . . . . . . . . . . . . . . . . . . . . 16-106<br />
16.33.4 Te-Stack Te-MO - GetPlate Command . . . . . . . . . . . . . . . . . . . . . . . . 16-106<br />
16.34 Commands for the Te-Stack . . . . . . . . . . . . . . . . . . . . . . . . . . . . . . . . . . . 16-107<br />
16.34.1 Te-Stack - InitStacker Command. . . . . . . . . . . . . . . . . . . . . . . . . . . . . 16-108<br />
16.34.2 Te-Stack - MoveObject Command. . . . . . . . . . . . . . . . . . . . . . . . . . . . 16-108<br />
16.34.3 Te-Stack - ReturnPlate Command. . . . . . . . . . . . . . . . . . . . . . . . . . . . 16-108<br />
16.34.4 Te-Stack - PrepareReturnPlate Command . . . . . . . . . . . . . . . . . . . . . 16-109<br />
16.34.5 Te-Stack - PresentPlate Command . . . . . . . . . . . . . . . . . . . . . . . . . . . 16-109<br />
16.35 Commands for the Te-VacS . . . . . . . . . . . . . . . . . . . . . . . . . . . . . . . . . . . 16-110<br />
16.35.1 Te-VacS - SetPressureDiff Command . . . . . . . . . . . . . . . . . . . . . . . . . 16-110<br />
16.35.2 Te-VacS - ApplyVacuumRear Command . . . . . . . . . . . . . . . . . . . . . . 16-111<br />
16.35.3 Te-VacS - ApplyVacuumFront Command . . . . . . . . . . . . . . . . . . . . . . 16-111<br />
16.35.4 Te-VacS - VentRear Command . . . . . . . . . . . . . . . . . . . . . . . . . . . . . . 16-112<br />
16.35.5 Te-VacS - VentFront Command . . . . . . . . . . . . . . . . . . . . . . . . . . . . . 16-112<br />
16.35.6 Te-VacS - DeactivateSystem Command . . . . . . . . . . . . . . . . . . . . . . . 16-112<br />
16.35.7 Te-VacS - CheckWasteLevel Command . . . . . . . . . . . . . . . . . . . . . . . 16-112<br />
16.35.8 Te-VacS - CheckPlateWithBlock Command . . . . . . . . . . . . . . . . . . . . 16-112<br />
16.35.9 Te-VacS - Filtration Command . . . . . . . . . . . . . . . . . . . . . . . . . . . . . . 16-113<br />
16.35.10 Te-VacS - PositionPlateRear Command . . . . . . . . . . . . . . . . . . . . . . 16-118<br />
<strong>Freedom</strong> <strong>EVOware</strong> <strong>Software</strong> <strong>Manual</strong>, 393172, en, V<strong>2.3</strong><br />
xix
Table of Contents<br />
16.35.11 Te-VacS - PositionPlateFront Command . . . . . . . . . . . . . . . . . . . . . . 16-118<br />
16.35.12 Te-VacS - OpenDesaltingValve Command . . . . . . . . . . . . . . . . . . . . . 16-119<br />
16.36 Commands for the Te-MO . . . . . . . . . . . . . . . . . . . . . . . . . . . . . . . . . . . . . 16-119<br />
16.36.1 Te-MO - Init Command . . . . . . . . . . . . . . . . . . . . . . . . . . . . . . . . . . . . 16-120<br />
16.36.2 Te-MO - Pipette Command . . . . . . . . . . . . . . . . . . . . . . . . . . . . . . . . . 16-120<br />
16.37 Commands for the Ultra Reader . . . . . . . . . . . . . . . . . . . . . . . . . . . . . . . . 16-120<br />
16.37.1 Ultra Reader - Status Command . . . . . . . . . . . . . . . . . . . . . . . . . . . . . 16-120<br />
16.37.2 Ultra Reader - Excitation Out Command . . . . . . . . . . . . . . . . . . . . . . . 16-120<br />
16.37.3 Ultra Reader - Emission Out Command. . . . . . . . . . . . . . . . . . . . . . . . 16-121<br />
16.37.4 Ultra Reader - Open Command . . . . . . . . . . . . . . . . . . . . . . . . . . . . . . 16-121<br />
16.37.5 Ultra Reader - Close Command. . . . . . . . . . . . . . . . . . . . . . . . . . . . . . 16-121<br />
16.37.6 Ultra Reader - Measure Command . . . . . . . . . . . . . . . . . . . . . . . . . . . 16-121<br />
16.37.7 Ultra Reader - Multilabel Command. . . . . . . . . . . . . . . . . . . . . . . . . . . 16-122<br />
16.38 Commands for the Ultra Evolution Reader. . . . . . . . . . . . . . . . . . . . . . . . . 16-123<br />
16.38.1 Ultra Evolution Reader - Status Command . . . . . . . . . . . . . . . . . . . . . 16-123<br />
16.38.2 Ultra Evolution Reader - Excitation Out Command . . . . . . . . . . . . . . . 16-124<br />
16.38.3 Ultra Evolution Reader - Emission Out Command. . . . . . . . . . . . . . . . 16-124<br />
16.38.4 Ultra Evolution Reader - Open Command . . . . . . . . . . . . . . . . . . . . . . 16-124<br />
16.38.5 Ultra Evolution Reader - Close Command . . . . . . . . . . . . . . . . . . . . . . 16-124<br />
16.38.6 Ultra Evolution Reader - Measure Command . . . . . . . . . . . . . . . . . . . 16-124<br />
16.38.7 Ultra Evolution Reader - Multilabel Command . . . . . . . . . . . . . . . . . . . 16-125<br />
16.39 Commands for the Process Script Driver . . . . . . . . . . . . . . . . . . . . . . . . . . 16-126<br />
16.39.1 Process Script - Script Command . . . . . . . . . . . . . . . . . . . . . . . . . . . . 16-127<br />
16.40 Commands for the Transfer Station . . . . . . . . . . . . . . . . . . . . . . . . . . . . . . 16-127<br />
16.40.1 Transfer Station - Transfer Command . . . . . . . . . . . . . . . . . . . . . . . . . 16-127<br />
16.41 Commands for the Te-Link. . . . . . . . . . . . . . . . . . . . . . . . . . . . . . . . . . . . . 16-127<br />
16.41.1 Te-Link - Move Command . . . . . . . . . . . . . . . . . . . . . . . . . . . . . . . . . . 16-128<br />
16.42 Specifying Output Filenames for Reader Data. . . . . . . . . . . . . . . . . . . . . . 16-128<br />
xx <strong>Freedom</strong> <strong>EVOware</strong> <strong>Software</strong> <strong>Manual</strong>, 393172, en, V<strong>2.3</strong>
Table of Contents<br />
17 Special Features, Example Scripts and Processes,<br />
17.1 Using the Automatic DITI Handling feature . . . . . . . . . . . . . . . . . . . . . . . . 17-1<br />
17.1.1 Automatic DITI handling in <strong>Freedom</strong> <strong>EVOware</strong> <strong>Standard</strong> . . . . . . . . . . 17-1<br />
17.1.2 Automatic DITI handling in <strong>Freedom</strong> <strong>EVOware</strong> Plus . . . . . . . . . . . . . . 17-3<br />
17.2 Script and process recovery function . . . . . . . . . . . . . . . . . . . . . . . . . . . . 17-5<br />
17.2.1 Script Recovery Function . . . . . . . . . . . . . . . . . . . . . . . . . . . . . . . . . . 17-5<br />
17.2.2 Process Recovery Function . . . . . . . . . . . . . . . . . . . . . . . . . . . . . . . . 17-9<br />
17.3 Site-specific RoMa vectors. . . . . . . . . . . . . . . . . . . . . . . . . . . . . . . . . . . . . 17-13<br />
17.4 Safe Pathways Feature . . . . . . . . . . . . . . . . . . . . . . . . . . . . . . . . . . . . . . . 17-14<br />
17.5 Columbus Washer - Washing a Variable Number of Strips in the Plate . . 17-15<br />
17.6 Configuring and Using PMP (Pressure Monitored Pipetting) . . . . . . . . . . . 17-16<br />
17.6.1 Activating the PMP Option . . . . . . . . . . . . . . . . . . . . . . . . . . . . . . . . . . 17-17<br />
17.6.2 Permissible sequence of script commands for the PMP option. . . . . . 17-18<br />
17.6.3 PMP Pressure Viewer Tool . . . . . . . . . . . . . . . . . . . . . . . . . . . . . . . . . 17-18<br />
17.6.4 PMP Error and Success Messages . . . . . . . . . . . . . . . . . . . . . . . . . . . 17-22<br />
17.7 Configuring the Waste Option of the Te-Stack in <strong>Freedom</strong> <strong>EVOware</strong> Plus 17-24<br />
17.8 Handling inserts in <strong>Freedom</strong> <strong>EVOware</strong> Plus . . . . . . . . . . . . . . . . . . . . . . . 17-25<br />
17.9 Using <strong>Freedom</strong> <strong>EVOware</strong> with the Tecan Magellan <strong>Software</strong> . . . . . . . . . . 17-29<br />
17.9.1 Compatibility . . . . . . . . . . . . . . . . . . . . . . . . . . . . . . . . . . . . . . . . . . . . 17-29<br />
17.9.2 Preparing the Magellan <strong>Software</strong>. . . . . . . . . . . . . . . . . . . . . . . . . . . . . 17-29<br />
17.9.3 Configuring <strong>Freedom</strong> <strong>EVOware</strong> for the Magellan software . . . . . . . . . 17-30<br />
17.9.4 <strong>Freedom</strong> <strong>EVOware</strong> <strong>Standard</strong> Script for the Magellan software . . . . . . 17-32<br />
17.9.5 Additional Settings for the Magellan Method . . . . . . . . . . . . . . . . . . . . 17-37<br />
17.9.6 <strong>Freedom</strong> <strong>EVOware</strong> Plus Process for the Magellan software. . . . . . . . 17-38<br />
17.10 Example Scripts and Processes . . . . . . . . . . . . . . . . . . . . . . . . . . . . . . . . 17-40<br />
<strong>Freedom</strong> <strong>EVOware</strong> <strong>Software</strong> <strong>Manual</strong>, 393172, en, V<strong>2.3</strong><br />
xxi
Table of Contents<br />
18 Error Handling<br />
18.1 Error Dialogs . . . . . . . . . . . . . . . . . . . . . . . . . . . . . . . . . . . . . . . . . . . . . . . 18-1<br />
18.1.1 Liquid Detection Error . . . . . . . . . . . . . . . . . . . . . . . . . . . . . . . . . . . . . 18-1<br />
18.1.2 Clot Error . . . . . . . . . . . . . . . . . . . . . . . . . . . . . . . . . . . . . . . . . . . . . . . 18-2<br />
18.1.3 Clot Error (PMP) . . . . . . . . . . . . . . . . . . . . . . . . . . . . . . . . . . . . . . . . . 18-3<br />
18.1.4 PMP Instrument Error . . . . . . . . . . . . . . . . . . . . . . . . . . . . . . . . . . . . . 18-4<br />
18.1.5 Liquid Arrival Check Error . . . . . . . . . . . . . . . . . . . . . . . . . . . . . . . . . . 18-5<br />
18.1.6 Volume Monitoring Error (Diluter Overflow) . . . . . . . . . . . . . . . . . . . . 18-6<br />
18.1.7 Diluter Error . . . . . . . . . . . . . . . . . . . . . . . . . . . . . . . . . . . . . . . . . . . . . 18-7<br />
18.1.8 Error Fetching DITIs . . . . . . . . . . . . . . . . . . . . . . . . . . . . . . . . . . . . . . 18-9<br />
18.1.9 Error Mounting DITIs . . . . . . . . . . . . . . . . . . . . . . . . . . . . . . . . . . . . . . 18-10<br />
18.1.10 Lost DITI Error . . . . . . . . . . . . . . . . . . . . . . . . . . . . . . . . . . . . . . . . . . . 18-11<br />
18.1.11 DITI Already Mounted Error . . . . . . . . . . . . . . . . . . . . . . . . . . . . . . . . 18-12<br />
18.1.12 Error Reading Barcodes . . . . . . . . . . . . . . . . . . . . . . . . . . . . . . . . . . . 18-13<br />
18.1.13 Carrier Barcode Error . . . . . . . . . . . . . . . . . . . . . . . . . . . . . . . . . . . . . 18-13<br />
18.1.14 Barcode Error . . . . . . . . . . . . . . . . . . . . . . . . . . . . . . . . . . . . . . . . . . . 18-14<br />
18.1.15 Labware or Tube Barcode Error . . . . . . . . . . . . . . . . . . . . . . . . . . . . . 18-15<br />
18.1.16 Enter Barcode . . . . . . . . . . . . . . . . . . . . . . . . . . . . . . . . . . . . . . . . . . 18-16<br />
18.1.17 Enter Barcode (Double Blind Entry) . . . . . . . . . . . . . . . . . . . . . . . . . . 18-17<br />
18.1.18 Instrument Error . . . . . . . . . . . . . . . . . . . . . . . . . . . . . . . . . . . . . . . . . 18-18<br />
18.1.19 Doorlock Error . . . . . . . . . . . . . . . . . . . . . . . . . . . . . . . . . . . . . . . . . . . 18-19<br />
18.1.20 Grip Error . . . . . . . . . . . . . . . . . . . . . . . . . . . . . . . . . . . . . . . . . . . . . . 18-20<br />
18.1.21 Te-Stack Errors . . . . . . . . . . . . . . . . . . . . . . . . . . . . . . . . . . . . . . . . . . 18-20<br />
18.1.22 Te-MO DITI Error . . . . . . . . . . . . . . . . . . . . . . . . . . . . . . . . . . . . . . . . 18-22<br />
18.1.23 WRC/Te-MO Error . . . . . . . . . . . . . . . . . . . . . . . . . . . . . . . . . . . . . . . 18-23<br />
18.1.24 WRC Errors . . . . . . . . . . . . . . . . . . . . . . . . . . . . . . . . . . . . . . . . . . . . . 18-24<br />
18.1.25 WinWash Liquid Error . . . . . . . . . . . . . . . . . . . . . . . . . . . . . . . . . . . . . 18-26<br />
18.1.26 Vacuum Waste Container Error . . . . . . . . . . . . . . . . . . . . . . . . . . . . . 18-27<br />
18.1.27 Liquid Error (PW384) . . . . . . . . . . . . . . . . . . . . . . . . . . . . . . . . . . . . . 18-27<br />
18.1.28 Liquid Error (PW384GP) . . . . . . . . . . . . . . . . . . . . . . . . . . . . . . . . . . . 18-28<br />
18.2 Editing Messages in Message Boxes. . . . . . . . . . . . . . . . . . . . . . . . . . . . . 18-29<br />
18.3 List of Error Messages . . . . . . . . . . . . . . . . . . . . . . . . . . . . . . . . . . . . . . . 18-32<br />
xxii <strong>Freedom</strong> <strong>EVOware</strong> <strong>Software</strong> <strong>Manual</strong>, 393172, en, V<strong>2.3</strong>
Table of Contents<br />
19 Customer Support<br />
A Appendix A<br />
A.1 Overview of the Log Files. . . . . . . . . . . . . . . . . . . . . . . . . . . . . . . . . . . . . . A-1<br />
A.1.1 Structure of Log Files of Type EVO . . . . . . . . . . . . . . . . . . . . . . . . . . . A-2<br />
A.1.2 Structure of Log Files of Type USR . . . . . . . . . . . . . . . . . . . . . . . . . . . A-9<br />
A.1.3 Structure of Log Files of Type ERR . . . . . . . . . . . . . . . . . . . . . . . . . . . A-9<br />
A.1.4 Log Files of Type MACRO . . . . . . . . . . . . . . . . . . . . . . . . . . . . . . . . . . A-10<br />
A.1.5 Log Files of Type DB . . . . . . . . . . . . . . . . . . . . . . . . . . . . . . . . . . . . . . A-10<br />
A.1.6 Log Files of Type MCS . . . . . . . . . . . . . . . . . . . . . . . . . . . . . . . . . . . . A-10<br />
A.1.7 Structure of the Trace File (Audit Trail) . . . . . . . . . . . . . . . . . . . . . . . . A-11<br />
A.2 Structure of the Barcode Files . . . . . . . . . . . . . . . . . . . . . . . . . . . . . . . . . . A-11<br />
A.2.1 Barcode files written by the Carousel commands . . . . . . . . . . . . . . . . A-11<br />
A.2.2 Barcode file written by the PosID and PosID-3 commands . . . . . . . . . A-13<br />
A.<strong>2.3</strong> Barcode File for the PosID-3 Driver . . . . . . . . . . . . . . . . . . . . . . . . . . . A-13<br />
A.2.4 Barcode File for the Labware Generator . . . . . . . . . . . . . . . . . . . . . . . A-14<br />
A.2.5 Barcode File for the <strong>Freedom</strong> <strong>EVOware</strong> Plus Runtime Controller. . . . A-15<br />
A.3 Parameters in the Evoware.opt file . . . . . . . . . . . . . . . . . . . . . . . . . . . . . . A-17<br />
A.4 Parameters in the Evoware.inf file . . . . . . . . . . . . . . . . . . . . . . . . . . . . . . . A-24<br />
A.5 <strong>Freedom</strong> <strong>EVOware</strong> Directory Structure and Files . . . . . . . . . . . . . . . . . . . A-25<br />
A.6 Command Line Parameters (<strong>Freedom</strong> <strong>EVOware</strong>) . . . . . . . . . . . . . . . . . . . A-29<br />
A.7 <strong>Freedom</strong> EVO 75 Pipetting Instrument - LiHa Configuration . . . . . . . . . . . A-30<br />
A.8 Frequently Asked Questions (FAQ) . . . . . . . . . . . . . . . . . . . . . . . . . . . . . . A-31<br />
A.9 System Tools for <strong>Freedom</strong> <strong>EVOware</strong> . . . . . . . . . . . . . . . . . . . . . . . . . . . . A-32<br />
A.9.1 Data Explorer Tool . . . . . . . . . . . . . . . . . . . . . . . . . . . . . . . . . . . . . . . A-35<br />
A.9.2 Validate Configuration Tool . . . . . . . . . . . . . . . . . . . . . . . . . . . . . . . . . A-36<br />
A.9.3 Duplicate Device Tool . . . . . . . . . . . . . . . . . . . . . . . . . . . . . . . . . . . . . A-36<br />
A.9.4 Export/Import Tool . . . . . . . . . . . . . . . . . . . . . . . . . . . . . . . . . . . . . . . A-38<br />
A.9.5 Zip & Send Tool . . . . . . . . . . . . . . . . . . . . . . . . . . . . . . . . . . . . . . . . . A-42<br />
A.9.6 Audit Trail Archiving tool . . . . . . . . . . . . . . . . . . . . . . . . . . . . . . . . . . . A-47<br />
A.9.7 EVOTransfer . . . . . . . . . . . . . . . . . . . . . . . . . . . . . . . . . . . . . . . . . . . . A-50<br />
A.9.8 Gemini Migration Tool . . . . . . . . . . . . . . . . . . . . . . . . . . . . . . . . . . . . . A-54<br />
A.9.9 Shutdown <strong>EVOware</strong> drivers. . . . . . . . . . . . . . . . . . . . . . . . . . . . . . . . . A-55<br />
A.9.10 IQ Wizard . . . . . . . . . . . . . . . . . . . . . . . . . . . . . . . . . . . . . . . . . . . . . . A-55<br />
A.9.11 Registration Wizard . . . . . . . . . . . . . . . . . . . . . . . . . . . . . . . . . . . . . . . A-63<br />
A.9.12 Import vCards Tool . . . . . . . . . . . . . . . . . . . . . . . . . . . . . . . . . . . . . . . A-68<br />
A.9.13 Version Checker Tool . . . . . . . . . . . . . . . . . . . . . . . . . . . . . . . . . . . . . A-70<br />
A.10 LogViewer Tool . . . . . . . . . . . . . . . . . . . . . . . . . . . . . . . . . . . . . . . . . . . . . A-72<br />
A.10.1 Using the Channels window. . . . . . . . . . . . . . . . . . . . . . . . . . . . . . . . . A-72<br />
A.10.2 Using the Message List window. . . . . . . . . . . . . . . . . . . . . . . . . . . . . . A-74<br />
A.10.3 Using the Message Detail window . . . . . . . . . . . . . . . . . . . . . . . . . . . . A-74<br />
A.10.4 Configuring the user interface . . . . . . . . . . . . . . . . . . . . . . . . . . . . . . . A-74<br />
A.10.5 LogViewer Menus . . . . . . . . . . . . . . . . . . . . . . . . . . . . . . . . . . . . . . . . A-75<br />
A.10.6 LogViewer Channel assignments for <strong>Freedom</strong> <strong>EVOware</strong> . . . . . . . . . . A-79<br />
A.11 Tecan Driver Installer . . . . . . . . . . . . . . . . . . . . . . . . . . . . . . . . . . . . . . . . . A-80<br />
A.12 Common Notification Server (CNS) . . . . . . . . . . . . . . . . . . . . . . . . . . . . . . A-82<br />
A.12.1 CNS Web Server . . . . . . . . . . . . . . . . . . . . . . . . . . . . . . . . . . . . . . . . . A-83<br />
A.12.2 CNS Configuration Tool . . . . . . . . . . . . . . . . . . . . . . . . . . . . . . . . . . . A-84<br />
A.13 ASTM Interface Module . . . . . . . . . . . . . . . . . . . . . . . . . . . . . . . . . . . . . . . A-90<br />
A.13.1 Access rights . . . . . . . . . . . . . . . . . . . . . . . . . . . . . . . . . . . . . . . . . . . . A-90<br />
A.13.2 ASTM File Parser . . . . . . . . . . . . . . . . . . . . . . . . . . . . . . . . . . . . . . . . A-90<br />
A.13.3 Configuration file . . . . . . . . . . . . . . . . . . . . . . . . . . . . . . . . . . . . . . . . . A-92<br />
<strong>Freedom</strong> <strong>EVOware</strong> <strong>Software</strong> <strong>Manual</strong>, 393172, en, V<strong>2.3</strong><br />
xxiii
Table of Contents<br />
A.13.4 ASTM Configurator . . . . . . . . . . . . . . . . . . . . . . . . . . . . . . . . . . . . . . . A-96<br />
A.14 Configuring and Using the 3D Simulation Tool EVOSim . . . . . . . . . . . . . . A-103<br />
A.14.1 Communication Between EVOSim and <strong>Freedom</strong> <strong>EVOware</strong> . . . . . . . . A-104<br />
A.14.2 Data Splitter Tool EVOSim Splitter . . . . . . . . . . . . . . . . . . . . . . . . . . . A-105<br />
A.14.3 Using EVOSim Splitter . . . . . . . . . . . . . . . . . . . . . . . . . . . . . . . . . . . . A-106<br />
A.14.4 EVOSim Configuration Wizard. . . . . . . . . . . . . . . . . . . . . . . . . . . . . . . A-106<br />
A.14.5 Simulating the Loading Interface . . . . . . . . . . . . . . . . . . . . . . . . . . . . . A-109<br />
A.14.6 EVOSim Views . . . . . . . . . . . . . . . . . . . . . . . . . . . . . . . . . . . . . . . . . . A-110<br />
A.14.7 EVOSim Toolbar . . . . . . . . . . . . . . . . . . . . . . . . . . . . . . . . . . . . . . . . . A-110<br />
A.14.8 EVOSim Menus . . . . . . . . . . . . . . . . . . . . . . . . . . . . . . . . . . . . . . . . . . A-110<br />
A.14.9 Replay Package feature. . . . . . . . . . . . . . . . . . . . . . . . . . . . . . . . . . . . A-112<br />
A.14.10 Command Line Parameters (EVOSim) . . . . . . . . . . . . . . . . . . . . . . . . A-115<br />
A.14.11 Adding custom labware to EVOSim . . . . . . . . . . . . . . . . . . . . . . . . . . . A-115<br />
A.15 Advanced Worklist Commands . . . . . . . . . . . . . . . . . . . . . . . . . . . . . . . . . A-118<br />
A.15.1 Command Syntax and Parameter Types . . . . . . . . . . . . . . . . . . . . . . . A-119<br />
A.15.2 Example Worklist with Three Advanced Worklist Commands . . . . . . . A-119<br />
A.15.3 Well Selection . . . . . . . . . . . . . . . . . . . . . . . . . . . . . . . . . . . . . . . . . . . A-120<br />
A.15.4 Advanced Worklist Commands for Script Commands . . . . . . . . . . . . . A-123<br />
A.15.5 Advanced Worklist Commands for the Carousel . . . . . . . . . . . . . . . . . A-157<br />
A.15.6 Advanced Worklist Commands for the Hettich Centrifuge . . . . . . . . . . A-162<br />
A.15.7 Advanced Worklist Commands for the Magellan Option . . . . . . . . . . . A-164<br />
A.15.8 Advanced Worklist Commands for the PosID-3 Barcode Scanner . . . A-167<br />
A.15.9 Advanced Worklist Commands for the Te-Shake Shaker . . . . . . . . . . A-170<br />
A.15.10 Advanced Worklist Commands for the Te-MagS . . . . . . . . . . . . . . . . . A-173<br />
A.15.11 Advanced Worklist Commands for the Te-Stack Stacker . . . . . . . . . . A-176<br />
xxiv <strong>Freedom</strong> <strong>EVOware</strong> <strong>Software</strong> <strong>Manual</strong>, 393172, en, V<strong>2.3</strong>
Table of Contents<br />
B Appendix B - FDA 21 CFR Part 11 Compliance<br />
B.1 Related Documentation . . . . . . . . . . . . . . . . . . . . . . . . . . . . . . . . . . . . . . . B-1<br />
B.2 Purpose of this Appendix . . . . . . . . . . . . . . . . . . . . . . . . . . . . . . . . . . . . . . B-1<br />
B.3 Definitions and Acronyms . . . . . . . . . . . . . . . . . . . . . . . . . . . . . . . . . . . . . B-2<br />
B.4 Recommendations . . . . . . . . . . . . . . . . . . . . . . . . . . . . . . . . . . . . . . . . . . . B-5<br />
B.4.1 Assigning and Using <strong>Freedom</strong> <strong>EVOware</strong> User Names . . . . . . . . . . . . B-6<br />
B.5 Security Features in the <strong>Software</strong> Which Assist 21 CFR Part 11 Compliance B-6<br />
B.5.1 Closed Systems . . . . . . . . . . . . . . . . . . . . . . . . . . . . . . . . . . . . . . . . . . B-6<br />
B.5.2 <strong>Freedom</strong> <strong>EVOware</strong> User Levels . . . . . . . . . . . . . . . . . . . . . . . . . . . . . B-7<br />
B.5.3 Tecan User Management System . . . . . . . . . . . . . . . . . . . . . . . . . . . . B-7<br />
B.5.4 Checksums . . . . . . . . . . . . . . . . . . . . . . . . . . . . . . . . . . . . . . . . . . . . . B-8<br />
B.5.5 Electronic Signatures . . . . . . . . . . . . . . . . . . . . . . . . . . . . . . . . . . . . . . B-9<br />
B.5.6 Trace File (Audit Trail) . . . . . . . . . . . . . . . . . . . . . . . . . . . . . . . . . . . . . B-10<br />
B.5.7 Log Files . . . . . . . . . . . . . . . . . . . . . . . . . . . . . . . . . . . . . . . . . . . . . . . B-11<br />
B.5.8 Backing Up Files . . . . . . . . . . . . . . . . . . . . . . . . . . . . . . . . . . . . . . . . . B-11<br />
B.6 Part A - General Provisions . . . . . . . . . . . . . . . . . . . . . . . . . . . . . . . . . . . . B-11<br />
B.6.1 § 11.1 Scope . . . . . . . . . . . . . . . . . . . . . . . . . . . . . . . . . . . . . . . . . . . . B-11<br />
B.6.2 § 11.2 Implementation . . . . . . . . . . . . . . . . . . . . . . . . . . . . . . . . . . . . . B-13<br />
B.7 Part B - Electronic Records . . . . . . . . . . . . . . . . . . . . . . . . . . . . . . . . . . . . B-14<br />
B.7.1 § 11.10 Control of Closed Systems . . . . . . . . . . . . . . . . . . . . . . . . . . . B-14<br />
B.7.2 § 11.30 Controls for Open Systems. . . . . . . . . . . . . . . . . . . . . . . . . . . B-23<br />
B.7.3 § 11.50 Signature Manifestations . . . . . . . . . . . . . . . . . . . . . . . . . . . . B-24<br />
B.7.4 § 11.70 Signature/ Record Linking. . . . . . . . . . . . . . . . . . . . . . . . . . . . B-25<br />
B.8 Part C - Electronic Signatures . . . . . . . . . . . . . . . . . . . . . . . . . . . . . . . . . . B-26<br />
B.8.1 § 11.100 General Requirements . . . . . . . . . . . . . . . . . . . . . . . . . . . . . B-26<br />
B.8.2 § 11.200 Electronic Signature Components and Controls . . . . . . . . . . B-27<br />
B.8.3 § 11.300 Controls for Identification Codes and Passwords . . . . . . . . . B-28<br />
B.9 <strong>Freedom</strong> <strong>EVOware</strong> Installation Checklist. . . . . . . . . . . . . . . . . . . . . . . . . . B-29<br />
B.9.1 Before Installing <strong>Freedom</strong> <strong>EVOware</strong> . . . . . . . . . . . . . . . . . . . . . . . . . . B-30<br />
B.9.2 Installing <strong>Freedom</strong> <strong>EVOware</strong> . . . . . . . . . . . . . . . . . . . . . . . . . . . . . . . . B-30<br />
B.9.3 After Installing <strong>Freedom</strong> <strong>EVOware</strong> . . . . . . . . . . . . . . . . . . . . . . . . . . . B-30<br />
C Validation of <strong>Freedom</strong> <strong>EVOware</strong> Applications<br />
C.1 Important Points to Check When Validating <strong>Freedom</strong> <strong>EVOware</strong> Applications C-1<br />
C.2 Setting the Validation Status of Scripts and Processes . . . . . . . . . . . . . . . C-4<br />
C.3 Recommendations when using barcodes . . . . . . . . . . . . . . . . . . . . . . . . . C-4<br />
D Glossary<br />
D.1 Glossary of Terms and Instrument Options . . . . . . . . . . . . . . . . . . . . . . . . D-1<br />
D.2 Important GUI features in MS Windows Applications . . . . . . . . . . . . . . . . D-27<br />
IX<br />
Index<br />
<strong>Freedom</strong> <strong>EVOware</strong> <strong>Software</strong> <strong>Manual</strong>, 393172, en, V<strong>2.3</strong><br />
xxv
Table of Contents<br />
xxvi <strong>Freedom</strong> <strong>EVOware</strong> <strong>Software</strong> <strong>Manual</strong>, 393172, en, V<strong>2.3</strong>
1 - About This <strong>Manual</strong><br />
1 About This <strong>Manual</strong><br />
Purpose of This<br />
Chapter<br />
This chapter points out the purpose of the manual, specifies the product the<br />
manual deals with and who the manual is intended for. Furthermore, it explains<br />
the symbols, conventions and abbreviations used and offers other general<br />
information.<br />
Purpose of This<br />
<strong>Manual</strong><br />
This manual describes the <strong>Freedom</strong> <strong>EVOware</strong> software, provides the information<br />
required for proper installation, instructs how to run the software and how to make<br />
use of all its features.<br />
Target Group<br />
For Your Safety<br />
Scope<br />
This manual is intended for application specialists who need to develop programs<br />
(laboratory processes and/or pipetting programs) for controlling the <strong>Freedom</strong> EVO<br />
series of pipetting instruments. It is assumed that such specialists are already<br />
acquainted with standard laboratory procedures for handling and pipetting liquids<br />
as described in standard textbooks on this subject.<br />
This manual is also helpful for operators of the <strong>Freedom</strong> EVO pipetting instrument<br />
to give an overview of the wide range of potential applications and instrument<br />
options which are available, and to help to understand the function of the<br />
processes and/or pipetting scripts which they want to run.<br />
Please read this manual carefully before installing and running the <strong>Freedom</strong><br />
<strong>EVOware</strong> software, in particular Chapter 2, “Safety”.<br />
This manual applies to <strong>Freedom</strong> <strong>EVOware</strong> <strong>Standard</strong> <strong>2.3</strong> and <strong>Freedom</strong> <strong>EVOware</strong><br />
Plus <strong>2.3</strong>. For additional information on the <strong>Freedom</strong> <strong>EVOware</strong> software, see<br />
3.4 “Supported Pipetting Instruments and Tecan Options”, 3-4.<br />
<strong>Freedom</strong> <strong>EVOware</strong> <strong>Software</strong> <strong>Manual</strong>, 393172, en, V<strong>2.3</strong> 1 - 1
1 - About This <strong>Manual</strong><br />
Conventions Used in This <strong>Manual</strong><br />
1.1 Conventions Used in This <strong>Manual</strong><br />
The following list provides an overview of the conventions as used throughout this<br />
manual:<br />
Names • <strong>Freedom</strong> EVO: To facilitate reading, the term “pipetting instrument” stands for<br />
the <strong>Freedom</strong> EVO series of pipetting instruments.<br />
User Interface • Names of screens (menus, windows, dialog boxes, message boxes) are<br />
printed in italic, e.g.: “The Select Components window appears.”<br />
• Menus and command sequences are printed in bold type and connected<br />
with a > sign, e.g., “Start the function with Options > Te-MO > Wash Unit.”<br />
• Names of controls in dialog boxes, windows or message boxes<br />
(command buttons, checkboxes, option buttons etc.) are printed in bold type,<br />
e.g. “Select the Automatic checkbox.”<br />
• Directory and file names are printed as follows:<br />
– Path and file names are quoted directly,<br />
e.g.: C:\Program Files\Tecan\<strong>EVOware</strong>\database<br />
– or a placeholder is given for the directory, e.g: , which<br />
stands for the “real” directory name (the default installation path for<br />
<strong>Freedom</strong> <strong>EVOware</strong> is C:\Program Files\Tecan\<strong>EVOware</strong>. Also see the<br />
next point.<br />
• Placeholders (for file names, numbers dates etc.) are set in angle brackets<br />
< >, e.g.: TeSonic___.any.<br />
• Cross references appear as follows, e.g: “Refer to section 1.1.1, 1-1<br />
– 1.1.1 refers to the corresponding section number.<br />
– The symbol denotes the page number.<br />
– 1-1 stands for the chapter number followed by the page number.<br />
1 - 2 <strong>Freedom</strong> <strong>EVOware</strong> <strong>Software</strong> <strong>Manual</strong>, 393172, en, V<strong>2.3</strong>
1 - About This <strong>Manual</strong><br />
Reference Documents<br />
1.2 Reference Documents<br />
This section provides a list of documents which are needed or may be useful in<br />
connection with the <strong>Freedom</strong> <strong>EVOware</strong> software. They either concern the<br />
pipetting instrument itself or the optional devices.<br />
1.2.1 Related Documentation and <strong>Software</strong><br />
The following Tecan documentation provides additional information which can be<br />
useful when using this manual:<br />
What Does the<br />
Doc. ID Tell<br />
You?<br />
The Doc. IDs listed below are root numbers. Therefore, they do not contain<br />
information about the language, document version or the medium (data storage<br />
medium, hardcopy, downloadable file, etc.) of the document.<br />
Check the scope of the corresponding document to make sure that you are in<br />
possession of the correct version.<br />
Note: The Doc. ID does not represent ordering information. For orders refer to the<br />
number on the binder, CD casing, etc.<br />
Operating and<br />
<strong>Software</strong><br />
<strong>Manual</strong>s<br />
• <strong>Freedom</strong> <strong>EVOware</strong> Sample Oriented Add-On (Doc ID 394284 and 394285)<br />
• <strong>Freedom</strong> <strong>EVOware</strong> Sample Tracking Add-On (Doc ID 393933)<br />
• Hit-Picking Wizard for <strong>Freedom</strong> <strong>EVOware</strong> (Doc ID 395128)<br />
• Normalization <strong>Software</strong> for <strong>Freedom</strong> <strong>EVOware</strong> (Doc ID 394288)<br />
• <strong>Freedom</strong> <strong>EVOware</strong> Runtime Controller <strong>Manual</strong> (Doc ID 394329) 1)<br />
• PMP Option Application <strong>Manual</strong> (Doc ID 395390)<br />
• <strong>Freedom</strong> EVO Operating <strong>Manual</strong> (Doc ID 392886)<br />
• Carousel Operating <strong>Manual</strong> (Doc ID 391209)<br />
• Microplate Auto Sealer Operating <strong>Manual</strong> (Doc ID 391749)<br />
• Te-Flow Operating <strong>Manual</strong> (Doc ID 391584)<br />
• Te-MagS Operating <strong>Manual</strong> Doc ID 391237)<br />
• Te-MO Operating <strong>Manual</strong> (Doc ID 391733)<br />
• Te-MO 384 Multichannel Pipetting Option Operating <strong>Manual</strong> (Doc ID 391352)<br />
• Te-MO 384 Pipetting Head Operating <strong>Manual</strong> (Doc ID 391358)<br />
• Te-MO 384 WRS Operating <strong>Manual</strong> (Doc ID 391768)<br />
• Te-MO 3/3 96 Operating <strong>Manual</strong> Multi-pipetting Option (Doc ID 392553)<br />
• Te-MO 3/3 384 Operating <strong>Manual</strong> Multi-pipetting Option (Doc ID 392679)<br />
• Te-MO Active Positioning Carrier Operating Instructions (Doc ID 391864)<br />
• Te-Shake Operating <strong>Manual</strong> (Doc ID 391496)<br />
• Te-Stack Operating <strong>Manual</strong> (Doc ID 391862)<br />
• Te-VacS Operating <strong>Manual</strong> (Doc ID 391236)<br />
• WRC Tower Operating <strong>Manual</strong> (Doc ID 391865)<br />
• Columbus Washer (Doc ID 30008658)<br />
• 96PW Washer (Doc ID 30001495)<br />
• PW384 Washer (Doc ID 30003394)<br />
• Magellan Data Reduction <strong>Software</strong> (Doc ID 30001495)<br />
• Magellan Data Reduction <strong>Software</strong>, two manuals (Doc ID I 117519)<br />
1) This manual is intended for operators of the pipetting instrument. The same information is also contained in<br />
the <strong>Freedom</strong> <strong>EVOware</strong> <strong>Software</strong> <strong>Manual</strong>.<br />
<strong>Freedom</strong> <strong>EVOware</strong> <strong>Software</strong> <strong>Manual</strong>, 393172, en, V<strong>2.3</strong> 1 - 3
1 - About This <strong>Manual</strong><br />
Trademarks<br />
• GENios, GENios FL, GENios plus (DocID 1 112904)<br />
• GENios Pro (DocID 1 112935)<br />
• Safire Microplate Reader (Doc ID I 112913)<br />
• SpectraFluor Microplate Reader (Doc ID I 112903)<br />
• SpectraFluor+ Microplate Reader (Doc ID I 112905)<br />
• Sunrise Microplate Reader (Doc ID I 137301 and 1 137302)<br />
• Ultra Evolution Microplate Reader (Doc ID I 112929)<br />
• Cellerity system Operating <strong>Manual</strong> (DocID 394070)<br />
Firmware<br />
<strong>Manual</strong>s<br />
• PosID-2 Command Set (Doc ID 391141)<br />
• Te-Flow Commands (Doc ID 391845)<br />
• Te-MagS Command Set (DocID 391294)<br />
• Te-VacS Command Set SPE (DocID 3912216)<br />
• Te-Shake ORBI Command Set (DocID 391543)<br />
• Te-Stack Command Set (DocID 392118)<br />
The following Tecan documentation describes the Setup & Service software,<br />
which is one of the components of the Tecan Instrument <strong>Software</strong>:<br />
• Instrument <strong>Software</strong> <strong>Manual</strong> (Doc ID 392888)<br />
The Setup & Service software is used for calibration, adjustment and<br />
commissioning of the pipetting instrument. Setup and service must only be carried<br />
out by suitably qualified personnel or by the Tecan Field Service Engineer.<br />
The above manuals can be ordered from your nearest Tecan representative (see<br />
19 “Customer Support”, 19-1).<br />
1.3 Trademarks<br />
The following product names and any registered and unregistered trademarks<br />
mentioned in this manual are used for identification purposes only and remain the<br />
exclusive property of their respective owners (for simplicity reasons, the symbols<br />
for trademarks, such as ® and are not repeated later in the manual):<br />
• <strong>Freedom</strong> <strong>EVOware</strong> ® , <strong>Freedom</strong> EVO ® and Genesis <strong>Freedom</strong> ® are registered<br />
trademarks of Tecan Group Ltd. in major countries.<br />
• Windows ® is a registered trademark of Microsoft Corporation.<br />
• Excel ® is a registered trademark of Microsoft Corporation.<br />
• Roboflask ® is a registered trademark of Corning Inc.<br />
1.4 Abbreviations<br />
See D.1 “Glossary of Terms and Instrument Options”, D-1 for information on<br />
common abbreviations. You can also search for abbreviations in the index.<br />
1 - 4 <strong>Freedom</strong> <strong>EVOware</strong> <strong>Software</strong> <strong>Manual</strong>, 393172, en, V<strong>2.3</strong>
1 - About This <strong>Manual</strong><br />
Context-Sensitive Help System<br />
1.5 Context-Sensitive Help System<br />
<strong>Freedom</strong> <strong>EVOware</strong> is provided with extensive context-sensitive help (more than<br />
900 pages when printed out). When <strong>Freedom</strong> <strong>EVOware</strong> is running, press F1 or<br />
click the Help button to get help on the current screen, dialog box or operation you<br />
are performing. Some of the dialog boxes do not have a Help button. Press F1 in<br />
this case. You can also open the help file with the shortcut in Start > All Programs<br />
> Tecan > <strong>EVOware</strong>.<br />
Note: The help system contains all of the information which is provided in the<br />
<strong>Software</strong> <strong>Manual</strong> PDF file on the <strong>Freedom</strong> <strong>EVOware</strong> installation CD. It uses the<br />
same numbering scheme for chapter headings, figures and tables as the software<br />
manual. Help is not provided for standard Windows operations such as Cut and<br />
Paste.<br />
The Index tab has the same entries as the index of the printed manual or PDF file.<br />
The Search tab (full text search function) lets you use the wild cards ? (one<br />
additional character) and * (zero or more additional characters). For example,<br />
scan* finds scan and scanner. The wild cards can also be used at the beginning of<br />
the search string. For example, *allbarcodes will find the ReadAllBarcodes<br />
command.<br />
If you specify more than one search term, they are treated as alternatives (OR<br />
function). The search terms are not case sensitive. Use quotes "" to search for<br />
strings which contain space characters (e.g. “file names”).<br />
Refer to the standard Microsoft documentation if you need more information on<br />
using Microsoft HTML Help.<br />
The <strong>Freedom</strong> <strong>EVOware</strong> <strong>Software</strong> <strong>Manual</strong> was written using Adobe FrameMaker.<br />
The context-sensitive help was created from the FrameMaker files using a special<br />
software tool.<br />
Glossary<br />
This manual has an extensive glossary with descriptions of general terms and<br />
instrument options (e.g. Te-MagS). The glossary terms are included in the index of<br />
the printed manual or PDF file and the Index tab of the online help. They are<br />
marked with “overview”, for example “Te-MagS (overview)”.<br />
<strong>Freedom</strong> <strong>EVOware</strong> commands<br />
See 13 “Overview of <strong>Freedom</strong> <strong>EVOware</strong> Commands”, 13-1 for an overview of<br />
the <strong>Freedom</strong> <strong>EVOware</strong> commands in the Control Bar. Also see 5.4 “Overview of<br />
the Main Window in <strong>Freedom</strong> <strong>EVOware</strong>”, 5-9.<br />
<strong>Freedom</strong> <strong>EVOware</strong> <strong>Software</strong> <strong>Manual</strong>, 393172, en, V<strong>2.3</strong> 1 - 5
1 - About This <strong>Manual</strong><br />
Context-Sensitive Help System<br />
1 - 6 <strong>Freedom</strong> <strong>EVOware</strong> <strong>Software</strong> <strong>Manual</strong>, 393172, en, V<strong>2.3</strong>
2 - Safety<br />
User Qualification<br />
2 Safety<br />
Purpose of This<br />
Chapter<br />
This chapter covers only the general introductory safety instructions applicable to<br />
the <strong>Freedom</strong> <strong>EVOware</strong>. Specific safety instructions of the hardware devices are<br />
laid down in the respective hardware manuals.<br />
Significance of<br />
These Safety<br />
Instructions<br />
The <strong>Freedom</strong> <strong>EVOware</strong> is a pure software product and as such it does not contain<br />
any hazardous parts. However, the software is used to control hardware devices<br />
and options, which may contain parts that can move with great force and at<br />
considerable speed.<br />
As a consequence, the safety of users and personnel can only be ensured if the<br />
safety instructions in this <strong>Software</strong> <strong>Manual</strong> as well as the safety instructions of the<br />
hardware devices controlled with the software described here are strictly<br />
observed and followed.<br />
Therefore, all relevant manuals must always be available to all users working with<br />
the <strong>Freedom</strong> <strong>EVOware</strong>.<br />
2.1 User Qualification<br />
What Users<br />
Must Know<br />
Users must be qualified and trained to run <strong>Freedom</strong> <strong>EVOware</strong>.<br />
In particular, they must fulfill the following qualifications:<br />
• They must have a basic knowledge of the Windows operating system.<br />
• They must have read and understood the instructions in this <strong>Software</strong> <strong>Manual</strong>.<br />
• Only users that meet the qualifications prescribed here are authorized to run<br />
the program described in this <strong>Software</strong> <strong>Manual</strong>.<br />
Training<br />
Courses<br />
Note: Tecan recommends that users attend a software training course. Please<br />
ask your nearest Tecan representative about the available courses.<br />
<strong>Freedom</strong> <strong>EVOware</strong> <strong>Software</strong> <strong>Manual</strong>, 393172, en, V<strong>2.3</strong> 2 - 1
2 - Safety<br />
Warning Notices Used in the <strong>Manual</strong>s<br />
2.2 Warning Notices Used in the <strong>Manual</strong>s<br />
The symbols used for safety-related notices have the following significance:<br />
WARNING<br />
Symbols<br />
WARNING notices appear as follows:<br />
WARNING<br />
Generally, the triangular warning symbol indicates the possibility of personal injury<br />
or even loss of life if the instructions are not followed.<br />
ATTENTION<br />
Symbols<br />
ATTENTION notes appear as follows:<br />
ATTENTION<br />
With the general “Read This!” symbol, ATTENTIONs indicate the possibility of<br />
equipment damage, malfunctions or incorrect process results, if instructions are<br />
not followed.<br />
<strong>2.3</strong> Use of the <strong>Software</strong><br />
Intended Use<br />
The intended use of the <strong>Freedom</strong> <strong>EVOware</strong> software is defined in chapter<br />
3.2 “Intended Use of the <strong>Freedom</strong> <strong>EVOware</strong> <strong>Software</strong>”, 3-3.<br />
The software must not be used for applications other than listed there.<br />
2 - 2 <strong>Freedom</strong> <strong>EVOware</strong> <strong>Software</strong> <strong>Manual</strong>, 393172, en, V<strong>2.3</strong>
2 - Safety<br />
Specific Hazards<br />
2.4 Specific Hazards<br />
The following hazards are associated with the use of the <strong>Freedom</strong> <strong>EVOware</strong><br />
software:<br />
Cellular Phones<br />
If you have a cellular phone<br />
PROHIBITION<br />
Turn off all cellular phones. Do not use or keep them on standby within the<br />
laboratory. The use of cellular phones may cause faulty liquid detection and<br />
unreliable results.<br />
Electrostatic<br />
Discharge<br />
Care must be taken when it is unavoidable to touch delicate electronic circuits.<br />
ATTENTION<br />
Discharge static electricity from your body. Wear a wrist wrap that is connected to<br />
ground when handling delicate electronic circuits.<br />
Risks Through<br />
Contamination<br />
Always make sure that the instrument is not contaminated chemically, biologically<br />
or radioactively.<br />
WARNING<br />
• Chemical, biological and radiative hazards can be associated with certain<br />
substances used or processed with the instrument.<br />
• The same applies to waste disposal.<br />
• Always wear appropriate laboratory safety items such as gloves when working<br />
on or operating the pipetting instrument.<br />
Always be aware of possible hazards associated with such substances. Request<br />
a filled out and signed Decontamination Declaration before performing any setup<br />
and test procedures.<br />
Movable Parts<br />
Keep in mind that arm and pipetting devices can move at great speed and with<br />
considerable force.<br />
WARNING<br />
• Keep your hands off the zone in which pipetting devices move.<br />
• Never stick your head into the pipetting instrument when the power is<br />
switched on.<br />
<strong>Freedom</strong> <strong>EVOware</strong> <strong>Software</strong> <strong>Manual</strong>, 393172, en, V<strong>2.3</strong> 2 - 3
2 - Safety<br />
Safety of the Overall System<br />
Laser<br />
Note that barcode readers such as the PosID or Symbol LS-1220 use laser<br />
technology for scanning.<br />
WARNING<br />
Laser beam (Laser Class II).<br />
Radiation may be harmful to your eyes.<br />
• Do not stare into beam.<br />
• Always switch instrument off before servicing devices containing a laser<br />
source.<br />
2.5 Safety of the Overall System<br />
In addition to the safety instructions in this <strong>Software</strong> <strong>Manual</strong>, the safety<br />
instructions in the manuals of the hardware devices must also be observed and<br />
followed.<br />
WARNING<br />
Hazards originating from the hardware devices controlled with this software.<br />
• Mind the safety instructions of all instruments and options which are used in<br />
connection with <strong>Freedom</strong> <strong>EVOware</strong>.<br />
2.6 Safety Features of the Pipetting Instrument<br />
The Access/Status feature for the <strong>Freedom</strong> EVO pipetting instruments consists of<br />
up to four electrically-operated doorlocks for safety hoods or safety doors which<br />
prevent access to the instrument when it is operating, a status lamp and acoustic<br />
alarm device which is mounted above the instrument at a conspicuous position to<br />
ensure that it is visible to the operator from some distance away and an<br />
electrically-operated pause/resume button to stop and then continue the pipetting<br />
script.<br />
The <strong>Freedom</strong> EVO pipetting instrument is always fitted with two doorlocks. Two<br />
additional doorlocks can be fitted to support special hardware arrangements.<br />
<strong>Freedom</strong> <strong>EVOware</strong> controls the status lamp and acoustic alarm device as follows:<br />
• Green, red and acoustic alarm are off: <strong>Freedom</strong> <strong>EVOware</strong> is idle (not<br />
executing a script).<br />
• Green is continuously lit: A script is running and everything is ok.<br />
• Green is flashing: The script has been paused by clicking the Pause button or<br />
the script command “User prompt” or “Set Variable” with user query is<br />
currently waiting for user input.<br />
• Red is flashing and the acoustic alarm is on: An error message is being<br />
displayed.<br />
2 - 4 <strong>Freedom</strong> <strong>EVOware</strong> <strong>Software</strong> <strong>Manual</strong>, 393172, en, V<strong>2.3</strong>
2 - Safety<br />
Safety Features of the Pipetting Instrument<br />
2.6.1 Safe Operation of the Pipetting Instrument and the Doorlocks<br />
<strong>Freedom</strong> <strong>EVOware</strong> supports up to four electrically-operated doorlocks for the<br />
pipetting instrument and the doorlocks are arranged in groups. The following<br />
mechanisms are used to unlock and lock the doorlocks at the appropriate times.<br />
All doorlocks are locked automatically when a pipetting script or process is<br />
started. A mechanical interlock ensures that the script or process cannot be<br />
started unless the safety hoods are closed and locked. The Doorlock Error is<br />
displayed and the script or process will not run if the doorlocks cannot be locked.<br />
The doorlocks are unlocked when the script or process is finished, aborted or<br />
paused by clicking the Pause button.<br />
The doorlocks are locked again when the script or process is continued after<br />
being paused by clicking the Pause button.<br />
For safety reasons, it is not possible to unlock the doorlocks when the script or<br />
process is running.<br />
For additional information on the operation of the doorlocks see 15.38 “User<br />
Prompt Command”, 15-98.<br />
For maximum safety, please observe the following points:<br />
• If you have fitted additional doorlocks, make sure that they are correctly<br />
assigned in the <strong>Freedom</strong> <strong>EVOware</strong> configuration (see 8.4.2.7 “Doorlocks”,<br />
8-31).<br />
• Above all when the instrument is put into service for the first time, run a test<br />
script to check the correct mechanical and electrical function of the doorlocks.<br />
Never unplug the electrical connections to the doorlocks.<br />
• If an error message causes the script or process to pause, the doorlocks are<br />
unlocked to allow operator intervention.<br />
WARNING<br />
Risk of injury to operating personnel.<br />
• Take extra care when designing the script or process if you have programmed<br />
operations which could cause parts of the instrument to move even when the<br />
script or process is stopped. Asynchronous movements can be carried out<br />
e.g. by stacker devices.<br />
<strong>Freedom</strong> <strong>EVOware</strong> <strong>Software</strong> <strong>Manual</strong>, 393172, en, V<strong>2.3</strong> 2 - 5
2 - Safety<br />
General Safety Rules<br />
2.7 General Safety Rules<br />
Legal<br />
Regulations<br />
Modifications<br />
Legal regulations, such as local, state and federal laws which prescribe the use or<br />
application as well as the handling of dangerous materials in connection with the<br />
<strong>Freedom</strong> <strong>EVOware</strong> software must be strictly followed.<br />
Modifications to the <strong>Freedom</strong> <strong>EVOware</strong> software are not permitted. The<br />
manufacturer will decline any claim resulting from unauthorized modifications.<br />
2.8 Specific Safety Rules<br />
2.8.1 Unintended or Unexpected Movement of Robot Arms and Other<br />
Devices<br />
Safety-relevant situations which can cause unintended or unexpected movement<br />
of robot arms and other devices include the following:<br />
• The operator enters an incorrect value in a user prompt.<br />
• The operator enters an incorrect value when teaching a robot movement<br />
vector.<br />
• Faulty algorithm in the user application.<br />
Accordingly:<br />
WARNING<br />
Risk of injury to operating personnel.<br />
• Keep your hands off the zone in which pipetting devices move.<br />
• Never stick your head into the pipetting instrument when the power is<br />
switched on.<br />
• You must not enter the working area of the pipetting instrument when teaching<br />
a robot movement vector.<br />
2.8.2 General Rules When Using the Pipetting Instrument<br />
The following rules must be observed to ensure operator safety, to ensure valid<br />
results from the assays or methods and to avoid damage to the equipment:<br />
• All persons working with the pipetting instrument and/or the <strong>Freedom</strong><br />
<strong>EVOware</strong> software must be suitably trained. See 2.1 “User Qualification”, 2-<br />
1 for more information.<br />
• Users of the pipetting instrument and/or the <strong>Freedom</strong> <strong>EVOware</strong> software<br />
should be aware of responsibility they carry to ensure that the results obtained<br />
are correct and valid. When running <strong>Freedom</strong> <strong>EVOware</strong> scripts and<br />
processes, users should remain alert and observant at all times to minimize<br />
the risk of operator errors and to check for possible equipment malfunctions,<br />
e.g. as a result of hardware failures or incorrect set up of the pipetting<br />
instrument. See also C “Validation of <strong>Freedom</strong> <strong>EVOware</strong> Applications”, C-1.<br />
• If the pipetting instrument will be used with hazardous or contaminating<br />
liquids, it is recommended to fit and activate the LICOS option. The LICOS<br />
2 - 6 <strong>Freedom</strong> <strong>EVOware</strong> <strong>Software</strong> <strong>Manual</strong>, 393172, en, V<strong>2.3</strong>
2 - Safety<br />
Specific Safety Rules<br />
option is a device which monitors the liquid level in the waste liquid and<br />
system liquid containers. It outputs a warning if the waste container is nearly<br />
full or if the system liquid container is nearly empty.<br />
• If DITIs are dropped by mistake, the pipetting instrument must be checked for<br />
contamination.<br />
• To avoid contamination when DITIs are dropped on purpose (e.g. to pick up<br />
new ones), we recommend you to use the Lower DITI Eject option.<br />
• Always wear appropriate laboratory safety items such as gloves when working<br />
on or operating the pipetting instrument.<br />
• After setting up the pipetting instrument and installing the <strong>Freedom</strong> <strong>EVOware</strong><br />
software, use the Configuration Tool to check that the configured dilutor<br />
capacity matches the size of the syringe which is fitted to the pipetting<br />
instrument. The syringe size is on a label which is attached to the syringe.<br />
• All scripts and processes must be validated for correct functioning and for<br />
correct results before they are used for pipetting with real samples. See<br />
11.4.2.1 “Checking the Pipetting Script for Errors”, 11-5.<br />
• Before running a script or process, you must set up the worktable with the<br />
carriers, labware and devices which are needed by the application or assay.<br />
The administrator or owner of the pipetting instrument must establish standard<br />
operating procedures for setting up the worktable and make them available to<br />
everyone who carries out pipetting.<br />
• After setting up the worktable with the carriers, labware and devices which are<br />
needed by the application or assay, inspect the paths that the instrument arms<br />
(LiHa, RoMa, PnP) will take during the hardware initialization sequence to<br />
make sure that there are no obstacles which could obstruct the movements.<br />
See also 8.4.2.8 “Arm Initialization”, 8-31.<br />
• Make sure that the RoMa will not interfere with the tubing and syringes at the<br />
back of the pipetting instrument during the hardware initialization sequence<br />
(the path that the RoMa will take depends to some extent on its initial position,<br />
see 9.6.4 “Defining the Home Position for a RoMa”, 9-62).<br />
• When programming movement vectors for the RoMa and/or PnP, inspect the<br />
paths to make sure that there are no obstacles which could obstruct the<br />
movements when the vector is used; make sure that the RoMa will not<br />
interfere with the tubing and syringes at the back of the pipetting instrument.<br />
• <strong>Manual</strong>ly initialize the arms of the pipetting instrument (e.g. using the Initialize<br />
button in the <strong>Freedom</strong> <strong>EVOware</strong> toolbar), make a visual check that the<br />
initialization sequence has been carried out correctly and check the log file for<br />
initialization errors.<br />
• Only use barcodes with fixed length and check digits for general purpose<br />
pipetting applications in a regulated environment. This ensures that incorrectly<br />
scanned barcodes are always detected.<br />
• If you are using the PosID-3 for general purpose applications in a regulated<br />
environment, you must always activate the Double Blind Entry feature if you<br />
intend to enter barcodes manually when they cannot be read.<br />
• When setting up an assay for a liquid which can clot, make sure that clot<br />
detection is enabled in the liquid classes which are used to handle the liquid.<br />
Refer to the Good Usage information in the Operating <strong>Manual</strong> for the pipetting<br />
instrument for additional recommendations.<br />
• When setting up an assay which uses a trough (container for a reagent liquid),<br />
make sure that the liquid classes which are used for aspirating from the trough<br />
are configured to immerse the tips in the liquid by at least 3 mm.<br />
• If the system pauses for any reason when running a script or process, the<br />
duration of the pipetting script, process step or procedure may differ from the<br />
intended time. For example, sample incubation time may be outside of the<br />
<strong>Freedom</strong> <strong>EVOware</strong> <strong>Software</strong> <strong>Manual</strong>, 393172, en, V<strong>2.3</strong> 2 - 7
2 - Safety<br />
Specific Safety Rules<br />
specified limits. Depending on the application, this can make the assay<br />
invalid.<br />
– A system pause can be caused e.g. by clicking the Pause button in<br />
<strong>Freedom</strong> <strong>EVOware</strong>’s Runtime Controller dialog box, by pressing the<br />
Pause button on the pipetting instrument, by a pipetting error or by an<br />
internal timeout if a process step has taken longer than expected or<br />
specified.<br />
– System pauses are not shown in the Gantt chart in the Extended View of<br />
the Runtime Controller (the Gantt chart is only available in <strong>Freedom</strong><br />
<strong>EVOware</strong> Plus).<br />
• After running a script or process, you must check the log files to make sure<br />
that the script or process has completed fully and without errors.<br />
• The results of an assay are only valid if the entire script or process completed<br />
without errors. If this is not the case, the entire script or process must<br />
repeated after rectifying the cause of the error(s).<br />
2 - 8 <strong>Freedom</strong> <strong>EVOware</strong> <strong>Software</strong> <strong>Manual</strong>, 393172, en, V<strong>2.3</strong>
3 - Product Description<br />
Overview of <strong>Freedom</strong> <strong>EVOware</strong><br />
3 Product Description<br />
Purpose of This<br />
Chapter<br />
This chapter provides a brief overview of the <strong>Freedom</strong> <strong>EVOware</strong> software and<br />
defines its scope of application. In addition, it describes the features and specifies<br />
the PC-requirements for running the software.<br />
3.1 Overview of <strong>Freedom</strong> <strong>EVOware</strong><br />
<strong>Freedom</strong> <strong>EVOware</strong> provides a graphical user interface for controlling Tecan’s<br />
<strong>Freedom</strong> EVO series of pipetting instruments that facilitates the liquid handling<br />
needs of a wide range of life science applications, including both routine and<br />
research activities.<br />
The <strong>Freedom</strong> <strong>EVOware</strong> software allows the user to develop pipetting programs<br />
(which are called scripts) and to quickly visualize how a laboratory process or<br />
experiment can be implemented. Commands are provided for a wide range of<br />
Tecan hardware options and third-party devices and the scripting system is<br />
designed for maximum flexibility when developing complex custom processes.<br />
When the script or process is ready, <strong>Freedom</strong> <strong>EVOware</strong> controls the pipetting run<br />
by sending control signals to the pipetting instrument and optional laboratory<br />
devices through a data connection. If operator interaction is necessary, <strong>Freedom</strong><br />
<strong>EVOware</strong> can display a dialog box on the display of the workstation which<br />
prompts for the information which is needed.<br />
<strong>Freedom</strong> <strong>EVOware</strong> has an external programming interface (API) which allows you<br />
to integrate <strong>Freedom</strong> <strong>EVOware</strong> into third party products or custom applications or<br />
to use <strong>Freedom</strong> <strong>EVOware</strong> components within other Tecan products running on<br />
the same computer or on a different computer in the network.<br />
<strong>Freedom</strong> <strong>EVOware</strong>’s modular device driver concept allows a wide range of Tecan<br />
and third-party devices and options to be supported; a plug-in concept allows new<br />
or updated drivers to be easily added to existing <strong>Freedom</strong> <strong>EVOware</strong> installations.<br />
The <strong>Freedom</strong> <strong>EVOware</strong> CD contains drivers for the most commonly used<br />
devices. Contact Tecan for information on additional drivers which are available<br />
for special applications and third-party hardware.<br />
In addition, the device driver API allows external software specialists to develop<br />
and integrate custom device drivers for third party hardware. Furthermore, the<br />
modular help system lets you integrate your own HTML Help components within<br />
the existing, extensive context-sensitive help system.<br />
Please contact the Tecan software specialists for information on the device driver<br />
API and on extending the modular context-sensitive help.<br />
It is instructive for new users of <strong>Freedom</strong> <strong>EVOware</strong> to load the example scripts<br />
and processes which are provided and to work through each of them by reviewing<br />
the on-line help (see 11.4.6 “Example Scripts and Example Process”, 11-7).<br />
In addition, <strong>Freedom</strong> <strong>EVOware</strong>’s “Infopads” give useful tips for new users (see<br />
5.4.2 “Infopads”, 5-15). Click the hyperlinks in the How To section of the Infopad<br />
area to run short animations (films) which demonstrate various commonly needed<br />
tasks. The animations are stored in AVI format and will be shown e.g. in Windows<br />
Media Player.<br />
Also see D.1 “Glossary of Terms and Instrument Options”, D-1.<br />
This manual instructs the user how to:<br />
• Install the <strong>Freedom</strong> <strong>EVOware</strong> software,<br />
• Set up instrument and configuration data,<br />
<strong>Freedom</strong> <strong>EVOware</strong> <strong>Software</strong> <strong>Manual</strong>, 393172, en, V<strong>2.3</strong> 3 - 1
3 - Product Description<br />
Overview of <strong>Freedom</strong> <strong>EVOware</strong><br />
• Define the pipetting worktable,<br />
• Define the pipetting scheme,<br />
• Set up pipetting scripts and processes,<br />
• Run pipetting scripts and processes.<br />
3.1.1 <strong>Freedom</strong> <strong>EVOware</strong> <strong>Standard</strong> and <strong>Freedom</strong> <strong>EVOware</strong> Plus<br />
<strong>Freedom</strong> <strong>EVOware</strong> Plus groups pipetting scripts and device commands into<br />
processes. This concept makes it possible to optimize the efficiency and thus<br />
maximize the throughput of the pipetting instrument through the use of multitasking<br />
and scheduling. This feature is not available for <strong>Freedom</strong> <strong>EVOware</strong><br />
<strong>Standard</strong>.<br />
In addition, <strong>Freedom</strong> <strong>EVOware</strong> Plus allows you to run several processes in<br />
parallel. You can run several copies of the same process and/or several different<br />
processes in parallel.<br />
The <strong>Freedom</strong> <strong>EVOware</strong> installation copies files for both versions of <strong>Freedom</strong><br />
<strong>EVOware</strong> to your PC. Activation of the appropriate <strong>Freedom</strong> <strong>EVOware</strong> version is<br />
done using a hardlock (dongle).<br />
3.1.2 Hardlocks for <strong>Freedom</strong> <strong>EVOware</strong> <strong>Standard</strong> and <strong>Freedom</strong> <strong>EVOware</strong><br />
Plus<br />
<strong>Freedom</strong> <strong>EVOware</strong> is available with two different feature levels - <strong>Freedom</strong><br />
<strong>EVOware</strong> <strong>Standard</strong> and <strong>Freedom</strong> <strong>EVOware</strong> Plus. In addition, a special version is<br />
available for the <strong>Freedom</strong> EVO 75 pipetting instrument. Whereas the software on<br />
the <strong>Freedom</strong> <strong>EVOware</strong> CD is the same in all cases, the additional features<br />
provided by <strong>Freedom</strong> <strong>EVOware</strong> Plus are enabled by purchasing and fitting the<br />
appropriate hardlock (an intelligent USB plug or “dongle”).<br />
Four different hardlocks are available:<br />
• <strong>Freedom</strong> <strong>EVOware</strong> <strong>Standard</strong><br />
• <strong>Freedom</strong> <strong>EVOware</strong> <strong>Standard</strong> for <strong>Freedom</strong> EVO 75<br />
• <strong>Freedom</strong> <strong>EVOware</strong> Plus<br />
• <strong>Freedom</strong> <strong>EVOware</strong> Plus for <strong>Freedom</strong> EVO 75<br />
The hardlock version you are currently using is shown in the <strong>Freedom</strong> <strong>EVOware</strong><br />
status bar (see 6.7.3 “Status Bar”, 6-20, Dongle type). The <strong>Freedom</strong> <strong>EVOware</strong><br />
Plus hardlock also allows you to use <strong>Freedom</strong> <strong>EVOware</strong> <strong>Standard</strong> (but not vice<br />
versa).<br />
Note: <strong>Freedom</strong> <strong>EVOware</strong> will run in offline mode if it cannot detect a hardlock<br />
when it starts (see 5.1.4 “Instrument and Hardlock Detection”, 5-3). Firmware<br />
commands such as movement commands are not sent to the pipetting instrument<br />
in offline mode (i.e. pipetting does not take place).<br />
It is not necessary to fit a hardlock if you want to run <strong>Freedom</strong> <strong>EVOware</strong> in offline<br />
mode or if you are using the 3D simulation program EVOSim.<br />
Several software add-ons are available for <strong>Freedom</strong> <strong>EVOware</strong> which must be<br />
puchased separately. They extend the functionality with special features (see<br />
3.1.3 “Tecan <strong>Software</strong> Add-ons for <strong>Freedom</strong> <strong>EVOware</strong>”, 3-3). To allow the use<br />
of the add-ons, the <strong>Freedom</strong> <strong>EVOware</strong> hardlock must be upgraded. This is<br />
usually done using an activation tool (software). After purchasing the add-on<br />
software, the activation tool is normally sent to you by eMail. The activation tool is<br />
3 - 2 <strong>Freedom</strong> <strong>EVOware</strong> <strong>Software</strong> <strong>Manual</strong>, 393172, en, V<strong>2.3</strong>
3 - Product Description<br />
Intended Use of the <strong>Freedom</strong> <strong>EVOware</strong> <strong>Software</strong><br />
specifically coded for the serial number of your hardlock and will not carry out the<br />
upgrade if the serial number does not match.<br />
3.1.3 Tecan <strong>Software</strong> Add-ons for <strong>Freedom</strong> <strong>EVOware</strong><br />
Several software add-ons are available for <strong>Freedom</strong> <strong>EVOware</strong> which extend the<br />
functionality with special features. The following add-ons are currently available:<br />
• <strong>Freedom</strong> <strong>EVOware</strong> Sample Oriented Add-On<br />
• <strong>Freedom</strong> <strong>EVOware</strong> Sample Tracking Add-On<br />
• Hit-Picking Wizard for <strong>Freedom</strong> <strong>EVOware</strong><br />
• Normalization <strong>Software</strong> for <strong>Freedom</strong> <strong>EVOware</strong><br />
See D “Glossary”, D-1 for an overview of these products. See the help files and/<br />
or software manuals of these add-ons for full details (see 1.2.1 “Related<br />
Documentation and <strong>Software</strong>”, 1-3).<br />
3.1.4 3D Simulation Tool for the Pipetting Instrument<br />
The <strong>Freedom</strong> <strong>EVOware</strong> setup program lets you install a 3D simulation tool<br />
(EVOSim) which can be used to visualize the movements which are carried out by<br />
the arms of the <strong>Freedom</strong> EVO pipetting instrument (LiHa, RoMa, PnP and MCA)<br />
when running <strong>Freedom</strong> <strong>EVOware</strong> scripts and processes. It can also be used to<br />
visualize several other devices such as the Te-MO and the PosID-3.<br />
EVOSim interprets the firmware (hardware) commands which are sent to the<br />
pipetting instrument and sends the appropriate responses to <strong>Freedom</strong> <strong>EVOware</strong>.<br />
To do this, the RS232 connection to the pipetting instrument is configured to<br />
communicate with EVOSim instead.<br />
Using an additional tool, EVOSim can also be used to monitor the communication<br />
between <strong>Freedom</strong> <strong>EVOware</strong> and the pipetting instrument.<br />
For more information, see A.14 “Configuring and Using the 3D Simulation Tool<br />
EVOSim”, A-103.<br />
3.2 Intended Use of the <strong>Freedom</strong> <strong>EVOware</strong> <strong>Software</strong><br />
<strong>Freedom</strong> <strong>EVOware</strong> <strong>2.3</strong> in this configuration is only intended for scientific or<br />
research applications and must not be used for human clinical or diagnostic<br />
procedures.<br />
Certain hardware options are only intended for research applications. If you install<br />
device drivers which are not part of the general purpose configuration, you will<br />
see a warning message during the installation that your <strong>Freedom</strong> <strong>EVOware</strong><br />
installation is now only suitable for research applications.<br />
Choose About in the Help menu to get information on the current configuration of<br />
your <strong>Freedom</strong> <strong>EVOware</strong> installation. Refer to 3.4 “Supported Pipetting<br />
Instruments and Tecan Options”, 3-4 for a list of the options which are<br />
supported by the current configuration. Refer to the Getting Started Guide for a list<br />
of all of the options which are supported by the <strong>Freedom</strong> <strong>EVOware</strong> software.<br />
<strong>Freedom</strong> <strong>EVOware</strong> <strong>Software</strong> <strong>Manual</strong>, 393172, en, V<strong>2.3</strong> 3 - 3
3 - Product Description<br />
What’s New in <strong>Freedom</strong> <strong>EVOware</strong> <strong>2.3</strong><br />
3.3 What’s New in <strong>Freedom</strong> <strong>EVOware</strong> <strong>2.3</strong><br />
In addition to a large number of detail improvements, the key new <strong>Freedom</strong><br />
<strong>EVOware</strong> features in version <strong>2.3</strong> are as follows:<br />
General & Usability<br />
Support and new commands for the Common Gripper Module (CGM) of the<br />
MCA384 pipetting arm (see 15.69, 15-179).<br />
3.4 Supported Pipetting Instruments and Tecan Options<br />
<strong>Freedom</strong> <strong>EVOware</strong> <strong>2.3</strong> is intended for the following Tecan pipetting instruments:<br />
• <strong>Freedom</strong> EVO 100, 150, 200<br />
• <strong>Freedom</strong> EVO 75<br />
<strong>Freedom</strong> <strong>EVOware</strong> <strong>2.3</strong> in this configuration supports the following optional<br />
devices, instrument options and systems:<br />
• Liquid Handling Arm (LiHa) with 2, 4 or 8 tips<br />
• 8 Plus 1 Access option for the <strong>Freedom</strong> EVO 75 pipetting instrument<br />
• Multi Channel Arm (MCA) with 96 tips.<br />
• Multi Channel Arm 384 (MCA384) with 96 or 384 tips.<br />
• CGM option (Common Gripper Module) for the MCA384<br />
• Tecan Pressure Monitored Pipetting (PMP) option<br />
• XP dilutor<br />
• XLP dilutor<br />
• XMP dilutor (for the <strong>Freedom</strong> EVO 75 pipetting instrument)<br />
• <strong>Standard</strong> tips, low volume tips and disposable tips (DITIs)<br />
• Te-PS (Tecan Positioning System) for the <strong>Freedom</strong> EVO pipetting instrument<br />
• Low Volume Option<br />
• Te-Fill Option<br />
• Lower DITI Tip Eject option<br />
• Robot Manipulator (RoMa), standard and long version<br />
• Pick and Place arm (PnP)<br />
• PosID-2 Barcode Scanner<br />
• PosID-3 Barcode Scanner<br />
• Fast Wash Option (FWO)<br />
• Monitored Pump Option (MPO)<br />
• SPO (Sensored Pump Option)<br />
• Liquid Container Supervisor (LICOS)<br />
• Vacuum Assisted Waste option for viscous liquids<br />
• Te-MO 3/3 and Te-MO 5/3 (Tecan Multi-pipetting Option)<br />
• Te-MO 96-tip pipetting head<br />
• Te-MO 384-tip pipetting head<br />
• Wash & Refill Center for the Te-MO<br />
• 6 or 10 x Te-MO Active Positioning Carriers, depending on Te-MO version (2<br />
solenoids)<br />
• 1 x Te-Stack Labware Stacker for the Te-MO (up to 3 stacks per stacker)<br />
3 - 4 <strong>Freedom</strong> <strong>EVOware</strong> <strong>Software</strong> <strong>Manual</strong>, 393172, en, V<strong>2.3</strong>
3 - Product Description<br />
Supported Pipetting Instruments and Tecan Options<br />
• 4 x Te-Stack Labware Stacker, stand-alone (2 stacks per stacker)<br />
• Te-VacS (Tecan SPE Vacuum Separator)<br />
• Collector plate repositioner and de-salter valve options for the Te-VacS<br />
• Te-MagS (Tecan Magnetic Bead Separator)<br />
• Te-Shake (Orbital Shaker)<br />
• MIO (Monitored Incubator Option) with or without shaking option<br />
• Carousel/Carousel HS with or without barcode scanner<br />
• Carousel NT<br />
• Connection Box for the Te-Flow (In Situ Hybridization) option<br />
• Lauda Waterbath for the Te-Flow (In Situ Hybridization) option (GenePaint<br />
chamber racks)<br />
• Symbol LS-1220 Barcode Scanner<br />
• Symbol MS-954 Barcode Scanner<br />
• Hettich Centrifuge<br />
• Te-Link (transfer rail / conveyor system)<br />
• Mettler Balance<br />
• Mettler WM pooling balance (for the Liquid Arrival Check feature)<br />
• 96PW Washer<br />
• PW384 Washer (via WinWash Plus software)<br />
• PW384 Washer (via PW384GP driver)<br />
• Columbus Plate Washer<br />
• REMP Reatrix 2D barcode reader for REMP sample tubes<br />
• REMP PHS Portrait Heat Sealer for microplates<br />
• REMP ACD Automatic Capper Decapper<br />
• Tecan Safety features (4 x doorlocks and pause/resume button)<br />
• Tecan Access/Status feature (status lamp and acoustic alarm device)<br />
• Tecan Magellan data reduction and analysis software for Tecan microplate<br />
readers.<br />
• Tecan microplate readers (raw data mode):<br />
– Sunrise<br />
– SpectraFluor<br />
– SpectraFluor+<br />
– Genios<br />
– Genios Pro<br />
– Safire<br />
– Ultra<br />
– Ultra Evolution<br />
<strong>Freedom</strong> <strong>EVOware</strong> <strong>Software</strong> <strong>Manual</strong>, 393172, en, V<strong>2.3</strong> 3 - 5
3 - Product Description<br />
Supported Pipetting Instruments and Tecan Options<br />
3.4.1 Supported Combinations of Robot Arms<br />
The <strong>Freedom</strong> EVO 100, 150 and 200 pipetting instruments can be configured with<br />
a maximum of three robot arms on the X slide as follows:<br />
• Up to two liquid handling arms (LiHa)<br />
• One Multi Channel Arm (MCA)<br />
• One Multi Channel Arm 384 (MCA384), optionally fitted with one Common<br />
Gripper Module (CGM)<br />
• Up to two plate robot (RoMa) arms<br />
• Up to two tube robot (PnP) arms<br />
The total number of arms of all types is three (e.g. 1 x LiHa and 2 x RoMa or<br />
1 x LiHa, 1 x RoMa and 1 x PnP).<br />
The <strong>Freedom</strong> EVO 75 pipetting instrument can only be fitted with one liquid<br />
handling arm.<br />
3.4.2 Supported Firmware Versions for the Optional Devices<br />
The Device Information tab in the Devices section of the Configuration Tool lists<br />
the device firmware version for which each of the <strong>Freedom</strong> <strong>EVOware</strong> device<br />
drivers was originally developed. In many cases, the device driver will control the<br />
device correctly even if the stated firmware version and the actual firmware<br />
version of the device are not identical. See 8.4.1.1 “Device Information Tab”, 8-<br />
21.<br />
Some devices have a firmware command (e.g. Get_Version) which allows you to<br />
interrogate their firmware version using the <strong>Freedom</strong> <strong>EVOware</strong> Configuration Tool<br />
(see 8.4.3.4 “Test Tab”, 8-37). For descriptions of the pre-configured firmware<br />
commands which are available for each device, see the section “Firmware<br />
commands” for the device (see 8.5 “Device Driver Configuration”, 8-39).<br />
3 - 6 <strong>Freedom</strong> <strong>EVOware</strong> <strong>Software</strong> <strong>Manual</strong>, 393172, en, V<strong>2.3</strong>
3 - Product Description<br />
Computer Requirements<br />
3.5 Computer Requirements<br />
The PC on which <strong>Freedom</strong> <strong>EVOware</strong> will be installed must meet the following<br />
minimum requirements:<br />
Operating<br />
System<br />
<strong>Freedom</strong> <strong>EVOware</strong> <strong>2.3</strong> is compatible with the following operating system:<br />
• Microsoft Windows XP Professional (Service Pack 3)<br />
• Microsoft Windows Vista<br />
Hardware • A CPU that is suitable for running Windows XP Professional (recommended<br />
minimum specification Pentium 4 or Athlon cpu running at 3 GHz; optimum<br />
dual core or multi processor system running at <strong>2.3</strong>3 GHz).<br />
• RAM size should be suitable for running Windows XP Professional<br />
(recommended minimum size 1 GB, optimum 1 GB for <strong>Freedom</strong> <strong>EVOware</strong><br />
<strong>Standard</strong>, 2 GB for <strong>Freedom</strong> <strong>EVOware</strong> Plus).<br />
• Virtual memory as required by the operating system.<br />
• An SVGA monitor with 32,768 colors or more and a minimum resolution of<br />
1024x768 pixels (optimum 1280x1024 or higher). To ensure correct display of<br />
the dialog boxes, we recommend you to configure your display settings in the<br />
Control Panel for Small Fonts;<br />
• Mouse.<br />
• CD-ROM drive.<br />
• Hard disk with about 5 GB of unused space for the <strong>Freedom</strong> <strong>EVOware</strong><br />
software, optional software components, scripts and log files;<br />
• One serial interface for the data interface to the pipetting instrument (if you<br />
intend to connect the pipetting instrument via RS232);<br />
• Additional serial interfaces are required by some of the instrument options<br />
(e.g. the Mettler balance);<br />
• A hardlock (dongle) for either <strong>Freedom</strong> <strong>EVOware</strong> <strong>Standard</strong> or <strong>Freedom</strong><br />
<strong>EVOware</strong> Plus (a hardlock is a copy protection device which is plugged into<br />
the USB port of your PC). See 3.1.2 “Hardlocks for <strong>Freedom</strong> <strong>EVOware</strong><br />
<strong>Standard</strong> and <strong>Freedom</strong> <strong>EVOware</strong> Plus”, 3-2.<br />
• One USB port for the hardlock;<br />
• One USB port for the data interface to the pipetting instrument (if you intend to<br />
connect the pipetting instrument via USB);<br />
• Printer (optional).<br />
ATTENTION<br />
Risk of the script or process aborting.<br />
• The PC must be configured to prevent it from going in to Sleep Mode even if<br />
no user inputs take place for an extended period of time.<br />
• The USB power management in Windows must be switched off to avoid losing<br />
the connection to the pipetting instrument, which may otherwise occur in rare<br />
cases. See 4.5.1 “USB Power Management Setting”, 4-14 for more<br />
information.<br />
If you want to connect the pipetting instrument via USB, it should be connected<br />
directly to the PC. This also applies to USB connections from hardware options, if<br />
they have their own cable. The use of an external USB hub should be avoided. If<br />
an external USB hub is absolutely necessary, use an active USB hub (i.e. with its<br />
<strong>Freedom</strong> <strong>EVOware</strong> <strong>Software</strong> <strong>Manual</strong>, 393172, en, V<strong>2.3</strong> 3 - 7
3 - Product Description<br />
Computer Requirements<br />
own power supply). Data transfer problems may occur if you use a passive USB<br />
hub, especially if you are also using the PMP option. Please note that some port<br />
replicators for laptops contain a USB hub.<br />
Security<br />
The following table shows which permissions are needed for installing and<br />
running the <strong>Freedom</strong> <strong>EVOware</strong> <strong>2.3</strong> software.<br />
Tab. 3-1 Minimum Security Permissions<br />
Activity<br />
Program installation<br />
Running the program<br />
Windows XP<br />
Professional<br />
MS Windows Local<br />
Administrator<br />
MS Windows Power User<br />
<strong>Freedom</strong> <strong>EVOware</strong> has four user levels – Administrator, Application Specialist,<br />
Power User and Operator. The <strong>Freedom</strong> <strong>EVOware</strong> user levels are independent of<br />
the MS Windows user levels.<br />
All four <strong>Freedom</strong> <strong>EVOware</strong> user levels need read/write access to the <strong>Freedom</strong><br />
<strong>EVOware</strong> directory and its subdirectories during program runtime. The <strong>Freedom</strong><br />
<strong>EVOware</strong> user level Operator cannot create or modify scripts or processes, but<br />
<strong>Freedom</strong> <strong>EVOware</strong> still needs read/write access to write log and export files and<br />
audit trail data.<br />
3 - 8 <strong>Freedom</strong> <strong>EVOware</strong> <strong>Software</strong> <strong>Manual</strong>, 393172, en, V<strong>2.3</strong>
4 - Installation<br />
Before You Start<br />
4 Installation<br />
Purpose of This<br />
Chapter<br />
This chapter describes the installation of the <strong>Freedom</strong> <strong>EVOware</strong> software on a<br />
target computer. Read it carefully before starting the installation.<br />
4.1 Before You Start<br />
Cross<br />
References<br />
List of cross references to information provided in other sections:<br />
Information<br />
Supported pipetting instruments and<br />
Tecan options<br />
References<br />
See section 3.4, 3-4<br />
Computer requirements See section 3.5, 3-7<br />
Target<br />
Computers<br />
Other<br />
Requirements<br />
<strong>Freedom</strong> <strong>EVOware</strong> must be installed on target computers that are or will be<br />
connected to the pipetting instrument<br />
The PW384 Plate Washer driver requires the Tecan WinWash Plus software,<br />
which must be installed separately. It is normally provided with the washer.<br />
WinWash Plus is not necessary for the PW384GP Plate Washer driver.<br />
Drivers for microplate readers (e.g. photometers) require the RdrOLE and XFluor4<br />
software, which must be installed separately. It is normally provided with the<br />
reader. <strong>Freedom</strong> <strong>EVOware</strong> can also control microplate readers using the<br />
Magellan software.<br />
The Magellan driver requires the Tecan Magellan software, which must be<br />
installed separately. The Magellan software has built-in drivers for Tecan<br />
microplate readers. If you intend to use the Magellan software, it is not necessary<br />
to install the driver for your reader when you install <strong>Freedom</strong> <strong>EVOware</strong> unless you<br />
also want to use the reader in raw data mode.<br />
Note: You cannot run the FACTS 5.x dynamic scheduling software and <strong>Freedom</strong><br />
<strong>EVOware</strong> on the same computer. Please un-install FACTS before you install<br />
<strong>Freedom</strong> <strong>EVOware</strong>.<br />
Who Should<br />
Install?<br />
Access Rights<br />
The <strong>Freedom</strong> <strong>EVOware</strong> software must be installed by a properly trained<br />
specialist.<br />
To install <strong>Freedom</strong> <strong>EVOware</strong> on the target computer, you need local administrator<br />
access rights for the Microsoft Windows XP operating system. Refer to the<br />
Microsoft documentation for further information on access rights.<br />
For information on the access rights which are required to use <strong>Freedom</strong><br />
<strong>EVOware</strong>, see 3.5 “Computer Requirements”, 3-7, Security.<br />
Saving User<br />
Data<br />
If <strong>Freedom</strong> <strong>EVOware</strong> is already installed on your PC, before running the<br />
installation program we recommend you to back up your <strong>Freedom</strong> <strong>EVOware</strong> data<br />
files, scripts and processes to exchangeable media or to a network or temporary<br />
directory (not within the <strong>Freedom</strong> <strong>EVOware</strong> ). See 8.2 “Backing Up<br />
<strong>Freedom</strong> <strong>EVOware</strong> <strong>Software</strong> <strong>Manual</strong>, 393172, en, V<strong>2.3</strong> 4 - 1
4 - Installation<br />
Installing <strong>Freedom</strong> <strong>EVOware</strong><br />
and Restoring Your Configuration”, 8-3. You can also use the Export Import tool<br />
to save your scripts and processes and other configuration data (see<br />
A.9.4 “Export/Import Tool”, A-38).<br />
Saving these files is especially recommended in the following cases:<br />
• Before un-installing (removing) the <strong>Freedom</strong> <strong>EVOware</strong> software.<br />
• Before installing a newer version of <strong>Freedom</strong> <strong>EVOware</strong>.<br />
• Before modifying an existing <strong>Freedom</strong> <strong>EVOware</strong> installation.<br />
Saving Audit<br />
Trail Data<br />
If you are required to comply with the FDA regulations, make sure you keep<br />
archive copies of all audit trail, trace and log files. These files are located in the<br />
\AuditTrail directory. They are not backed up by the Backup function<br />
- you should use the Audit Trail Archiving function instead. See A.9.6 “Audit Trail<br />
Archiving tool”, A-47 and B “Appendix B - FDA 21 CFR Part 11 Compliance”,<br />
B-1.<br />
4.2 Installing <strong>Freedom</strong> <strong>EVOware</strong><br />
Installation<br />
Directory<br />
The First Steps<br />
By default, <strong>Freedom</strong> <strong>EVOware</strong> will be installed into the \Program<br />
Files\Tecan\<strong>Freedom</strong> <strong>EVOware</strong> directory. is the drive in which the<br />
Windows operating system is installed.<br />
We recommend you to accept this directory. However, you may install <strong>Freedom</strong><br />
<strong>EVOware</strong> into a different drive/directory if you want.<br />
To install <strong>Freedom</strong> <strong>EVOware</strong>:<br />
1 Finish all Windows programs that are currently running.<br />
2 Make sure that anti-virus programs (if installed) are not running and that all<br />
processes associated with anti-virus programs are stopped. Anti-virus<br />
programs can cause the installation of Microsoft .NET Framework and .NET<br />
Framework components to fail.<br />
3 Make sure that you are logged in as the local administrator.<br />
4 Insert the installation CD in the computer’s CD-ROM drive.<br />
5 In the Windows Explorer, open your CD-ROM drive and change to the<br />
<strong>Freedom</strong> <strong>EVOware</strong>\Disk1 directory.<br />
Certain hardware options are only intended for research applications. Refer to<br />
“Supported pipetting instruments and Tecan options” in the Getting Started Guide<br />
for a list of all of the options which are supported by the <strong>Freedom</strong> <strong>EVOware</strong><br />
software.<br />
6 To install <strong>Freedom</strong> <strong>EVOware</strong> with the device drivers which are intended for<br />
general purpose applications, run Setup.exe in the Disk1 directory.<br />
7 To install <strong>Freedom</strong> <strong>EVOware</strong> with all available device drivers (including drivers<br />
for devices which are only intended for research applications), run<br />
Setup_ro.exe in the Disk1 directory.<br />
8 The Welcome window appears.<br />
4 - 2 <strong>Freedom</strong> <strong>EVOware</strong> <strong>Software</strong> <strong>Manual</strong>, 393172, en, V<strong>2.3</strong>
4 - Installation<br />
Installing <strong>Freedom</strong> <strong>EVOware</strong><br />
Fig. 4-1<br />
Welcome window<br />
9 Click Next to continue.<br />
You are then shown a window displaying the license agreement.<br />
Note: The real window may look slightly different from the one shown below.<br />
License<br />
Agreement<br />
Fig. 4-2<br />
License Agreement window<br />
10 Read the license agreement and click I accept the terms ... if you are in<br />
agreement. Continue with Next.<br />
Destination<br />
Path<br />
A destination path for the application is suggested in the Destination Folder<br />
window.<br />
<strong>Freedom</strong> <strong>EVOware</strong> <strong>Software</strong> <strong>Manual</strong>, 393172, en, V<strong>2.3</strong> 4 - 3
4 - Installation<br />
Installing <strong>Freedom</strong> <strong>EVOware</strong><br />
Fig. 4-3<br />
Destination Folder window<br />
11 Do one of the following:<br />
– In most cases, you can accept the suggested destination path. Continue<br />
with Next in this case.<br />
– If necessary, choose a different destination folder with Change….<br />
Continue with Next when you are ready.<br />
Selecting<br />
Components<br />
The Custom Setup window appears.<br />
Fig. 4-4<br />
Custom Setup window<br />
The choices you will see in the Custom Setup window depend on whether you are<br />
installing the general purpose configuration or the research only configuration.<br />
Certain Tecan options are only intended for research applications.<br />
The Custom Setup window lets you choose the components you wish to install.<br />
You can expand the Instrument Configurations, the Devices and Options and<br />
the <strong>Software</strong> Options groups by clicking on the ’+’ box on the left side. This<br />
4 - 4 <strong>Freedom</strong> <strong>EVOware</strong> <strong>Software</strong> <strong>Manual</strong>, 393172, en, V<strong>2.3</strong>
4 - Installation<br />
Installing <strong>Freedom</strong> <strong>EVOware</strong><br />
shows the individual components in these groups. Click the ’-’ box if you want to<br />
collapse the group again.<br />
When you highlight a group, additional information about the installation of the<br />
group is shown in the Feature Description panel on the right side of the window.<br />
• The <strong>EVOware</strong> group contains components which are always needed.<br />
• The Instrument Configurations group contains the drivers for the robot arms<br />
(liquid handling arm, LiHa; plate robots, RoMa; tube robot, PnP; MCA, multichannel<br />
arm; PosID-3, barcode scanner).<br />
• The Options group contains drivers for optional hardware such as the Te-<br />
Shake orbital shaker and the Te-MagS magnetic bead separator.<br />
• The Storage Devices group contains drivers for optional hardware such as<br />
the Te-Stack plate stacker and the Carousel.<br />
• The Incubators group contains drivers for optional hardware such as the MIO<br />
heated incubator.<br />
• The Washers group contains drivers for optional hardware such as the<br />
PW384 Power Washer.<br />
• The Readers group contains drivers for optional hardware such as the<br />
Sunrise microplate absorbance reader and the interface driver for the<br />
Magellan option.<br />
• The REMP group contains drivers for REMP hardware such as the Reatrix 2D<br />
barcode scanner for REMP tubes.<br />
• The 3rd Party group contains drivers for optional hardware from other<br />
manufacturers such as the Hettich centrifuge.<br />
• The <strong>Software</strong> Options group contains drivers for software options such as<br />
<strong>Freedom</strong> EVOSim 3D Simulation Tool (see 3.1.4 “3D Simulation Tool for the<br />
Pipetting Instrument”, 3-3).<br />
• The Legacy Drivers group contains drivers for optional legacy hardware<br />
which is no longer sold by Tecan, such as the Columbus washer, which is now<br />
superseded by other Tecan washers.<br />
• For more information on the optional hardware see 16 “Device Commands”,<br />
16-1.<br />
12 Click on each component you want to install and choose This feature will be<br />
installed on local hard drive:<br />
Fig. 4-5<br />
Selecting components<br />
<strong>Freedom</strong> <strong>EVOware</strong> <strong>Software</strong> <strong>Manual</strong>, 393172, en, V<strong>2.3</strong> 4 - 5
4 - Installation<br />
Installing <strong>Freedom</strong> <strong>EVOware</strong><br />
You should select the devices and options that are currently available on your<br />
pipetting instrument. In the above example, the first plate robot, the liquid handling<br />
arm, the tube robot and the Te-Stack have already been selected for installation.<br />
Each pipetting instrument can be configured with a maximum of three robot arms<br />
as follows:<br />
• Up to two liquid handling arms (LiHa)<br />
• One Multi Channel Arm (MCA)<br />
• One Multi Channel Arm 384 (MCA384), optionally fitted with one Common<br />
Gripper Module (CGM)<br />
• Up to two plate robot (RoMa) arms<br />
• Up to two tube robot (PnP) arms<br />
The total number of arms of all types is three (e.g. 1 x LiHa plus 2 x RoMa or 1 x<br />
LiHa plus 1 x RoMa plus 1 x PnP).<br />
The PW384 Plate Washer driver requires the Tecan WinWash Plus software,<br />
which must be installed separately. It is normally provided with the washer.<br />
WinWash Plus is not necessary for the PW384GP Plate Washer driver.<br />
Drivers for microplate readers (e.g. photometers) require the RdrOLE and XFluor4<br />
software, which must be installed separately. It is normally provided with the<br />
reader. <strong>Freedom</strong> <strong>EVOware</strong> can also control microplate readers using the<br />
Magellan software.<br />
The Magellan driver requires the Tecan Magellan software, which must be<br />
installed separately. The Magellan software has built-in drivers for Tecan<br />
microplate readers. If you intend to use the Magellan software, it is not necessary<br />
to install the driver for your reader when you install <strong>Freedom</strong> <strong>EVOware</strong> unless you<br />
also want to use the reader in raw data mode.<br />
If necessary, you can run the <strong>Freedom</strong> <strong>EVOware</strong> installation program again at a<br />
later time and add missing components or remove components you no longer<br />
need.<br />
When you highlight a component, additional information about that component is<br />
shown in the Feature Description panel on the right side of the window.<br />
13 Click Next after you have made your choices.<br />
You will then be asked if you want to begin the installation:<br />
Fig. 4-6<br />
Ready to Install window<br />
4 - 6 <strong>Freedom</strong> <strong>EVOware</strong> <strong>Software</strong> <strong>Manual</strong>, 393172, en, V<strong>2.3</strong>
4 - Installation<br />
Installing <strong>Freedom</strong> <strong>EVOware</strong><br />
Click Install if you want to continue.<br />
If you have previously installed Tecan software components on your PC which use<br />
the Tecan User Management System (such as <strong>Freedom</strong> <strong>EVOware</strong> or the Tecan<br />
Magellan software), the Tecan User Management System needs to be updated<br />
too and you will be prompted for the name and password of the Administrator<br />
acccount.<br />
After entering the name and password, you will be shown the following window:<br />
Fig. 4-7<br />
Installing <strong>Freedom</strong> <strong>EVOware</strong> window<br />
Installation<br />
Complete<br />
When the installation is finished, the InstallShield Wizard Completed window is<br />
shown:<br />
Fig. 4-8<br />
InstallShield Wizard Completed window<br />
14 Confirm with Finish. The installation of the <strong>Freedom</strong> <strong>EVOware</strong> software is<br />
now complete.<br />
15 Start <strong>Freedom</strong> <strong>EVOware</strong> as the Tecan administrator and carry out the<br />
following checks:<br />
<strong>Freedom</strong> <strong>EVOware</strong> <strong>Software</strong> <strong>Manual</strong>, 393172, en, V<strong>2.3</strong> 4 - 7
4 - Installation<br />
Modifying, Removing or Repairing Your Installation<br />
– Choose About in the Help menu and check that you have installed the<br />
intended software version (version for general purpose applications or<br />
version for scientific research applications with extended device support).<br />
– Check that the correct hardlock (dongle) is fitted to your PC. The hardlock<br />
ID number is shown in the About box. If there is no hardlock fitted, “Non<br />
upgradable hardlock” is shown. See also 6.7.3 “Status Bar”, 6-20,<br />
Dongle type.<br />
– Check that you are running the intended software feature level (<strong>Freedom</strong><br />
<strong>EVOware</strong> <strong>Standard</strong> or <strong>Freedom</strong> <strong>EVOware</strong> Plus). This is shown in the<br />
status bar and is also dependent on your hardlock (see 6.7.3 “Status Bar”,<br />
6-20, Feature level).<br />
Note: If you have made a backup copy of configuration and user data from a<br />
previous <strong>Freedom</strong> <strong>EVOware</strong> installation, you should now use the Restore function<br />
to restore it.<br />
4.3 Modifying, Removing or Repairing Your Installation<br />
If you run the <strong>Freedom</strong> <strong>EVOware</strong> installation program when <strong>Freedom</strong> <strong>EVOware</strong> is<br />
already installed, you are given the options of modifying, removing or repairing the<br />
installation.<br />
Note: You cannot modify, remove or repair <strong>Freedom</strong> <strong>EVOware</strong> by choosing Add<br />
or Remove Programs in the Windows Control Panel.<br />
Insert the <strong>Freedom</strong> <strong>EVOware</strong> CD and proceed as described in 4.2 “Installing<br />
<strong>Freedom</strong> <strong>EVOware</strong>”, 4-2. The installation program automatically detects the<br />
software components which you installed previously and will start the<br />
Maintenance Program.<br />
After confirming the Welcome window by clicking Next you are shown the<br />
Program Maintenance window:<br />
Fig. 4-9<br />
Program Maintenance window<br />
The three options which are provided are as follows:<br />
4 - 8 <strong>Freedom</strong> <strong>EVOware</strong> <strong>Software</strong> <strong>Manual</strong>, 393172, en, V<strong>2.3</strong>
4 - Installation<br />
Modifying, Removing or Repairing Your Installation<br />
• Modify: This function allows you to add further software components to the<br />
existing <strong>Freedom</strong> <strong>EVOware</strong> installation or to remove software components<br />
that are no longer needed.<br />
Certain software components are only intended for research applications. If<br />
you use the installation program Setup_ro.exe to install options which are not<br />
included in the general purpose configuration, you will see a warning<br />
message during the installation that your <strong>Freedom</strong> <strong>EVOware</strong> installation is<br />
now configured for research applications and is no longer intended for general<br />
purpose applications.<br />
If you need to switch back to the general purpose configuration, you must<br />
uninstall and then re-install <strong>Freedom</strong> <strong>EVOware</strong>.<br />
• Repair: This function reinstalls all components of the current software<br />
configuration on the target computer. Note that this option does not allow you<br />
to add new functions or remove existing functions. Repairing an existing<br />
installation may be necessary if the current installation does not run properly<br />
(e.g. due to a corrupt file or a file that was deleted unintentionally).<br />
• Remove: Completely uninstalls (removes) the <strong>Freedom</strong> <strong>EVOware</strong> software<br />
from the target computer.<br />
If you choose to un-install <strong>Freedom</strong> <strong>EVOware</strong> completely, you will be asked if you<br />
also want to delete the user management data. Click No if you want to continue<br />
using other Tecan software components such as Magellan (or if you plan to reinstall<br />
<strong>Freedom</strong> <strong>EVOware</strong> again). If you click Yes, you will have to set up your<br />
Tecan users and groups again (see 7 “Tecan User Management System”, 7-1).<br />
Note: Before modifying, repairing or removing <strong>Freedom</strong> <strong>EVOware</strong>, we<br />
recommend you to back up your <strong>Freedom</strong> <strong>EVOware</strong> data files, scripts and<br />
processes to exchangeable media or to a network or temporary directory (not<br />
within the <strong>Freedom</strong> <strong>EVOware</strong> ). See 8.2 “Backing Up and Restoring<br />
Your Configuration”, 8-3.<br />
Decide What<br />
to Do<br />
Maintenance<br />
Complete<br />
16 Click the appropriate option button:<br />
– Modify to add or remove components.<br />
– Repair to reinstall the program.<br />
– Remove to uninstall.<br />
17 Click Next and continue with your section. You should then follow the<br />
instructions which are displayed.<br />
If you choose Modify, you can choose the <strong>Freedom</strong> <strong>EVOware</strong> components which<br />
you want to add or remove (see Fig. 4-5 “Selecting components”, 4-5). The<br />
installation program automatically detects the software components which you<br />
installed previously.<br />
When the selected operation is finished, the InstallShield Wizard Completed<br />
window is shown:<br />
<strong>Freedom</strong> <strong>EVOware</strong> <strong>Software</strong> <strong>Manual</strong>, 393172, en, V<strong>2.3</strong> 4 - 9
4 - Installation<br />
Modifying, Removing or Repairing Your Installation<br />
Fig. 4-10 InstallShield Wizard Completed window for an un-install operation<br />
18 Click Finish to end the installation program.<br />
4.3.1 Upgrading to the Latest <strong>Software</strong> Version<br />
To upgrade <strong>Freedom</strong> <strong>EVOware</strong> to the latest software version, insert the <strong>Freedom</strong><br />
<strong>EVOware</strong> CD and proceed as described in 4.2 “Installing <strong>Freedom</strong> <strong>EVOware</strong>”,<br />
4-2. The installation program automatically detects the existing installation and<br />
will start the upgrade process.<br />
Additional steps which may be required when upgrading are dependent in part on<br />
the pipetting instrument and system options which you are already using. For this<br />
reason upgrading is normally carried out by a Tecan representative.<br />
Where applicable, please observe your local regulations for re-certification of your<br />
pipetting system following a software upgrade.<br />
We recommend you to back up your <strong>Freedom</strong> <strong>EVOware</strong> data files, scripts and<br />
processes to exchangeable media or to a network or temporary directory before<br />
upgrading (see 8.2 “Backing Up and Restoring Your Configuration”, 8-3).<br />
4.3.1.1 Checking the software version which is currently installed<br />
Choose About <strong>Freedom</strong> <strong>EVOware</strong> in the Help menu if you want to check which<br />
version of <strong>Freedom</strong> <strong>EVOware</strong> you are currently using. The dialog box shows the<br />
<strong>Freedom</strong> <strong>EVOware</strong> version, the service pack level and the software build code.<br />
It also shows the intended use of your <strong>Freedom</strong> <strong>EVOware</strong> configuration - general<br />
purpose applications or research use only. See 3.2 “Intended Use of the <strong>Freedom</strong><br />
<strong>EVOware</strong> <strong>Software</strong>”, 3-3 for more information.<br />
Alternatively, click the Windows Start button and choose Control Panel. Then<br />
double-click on Add or Remove Programs. Navigate in the list to the entry<br />
<strong>EVOware</strong> and choose Click here for support information. You need local<br />
administrator access rights for the Microsoft Windows XP operating system to use<br />
the Control Panel.<br />
4 - 10 <strong>Freedom</strong> <strong>EVOware</strong> <strong>Software</strong> <strong>Manual</strong>, 393172, en, V<strong>2.3</strong>
4 - Installation<br />
Modifying, Removing or Repairing Your Installation<br />
4.3.2 Installation of Service Packs and Hotfixes<br />
Service packs are minor upgrades and/or are used to correct small faults in the<br />
<strong>Freedom</strong> <strong>EVOware</strong> software. To install a service pack, follow the instructions<br />
which are provided.<br />
Note: Some types of service pack require <strong>Freedom</strong> <strong>EVOware</strong> to be re-installed.<br />
Other types of service pack do not require <strong>Freedom</strong> <strong>EVOware</strong> to be re-installed.<br />
You must backup up your system and data files before un-installing <strong>Freedom</strong><br />
<strong>EVOware</strong> (see 8.2 “Backing Up and Restoring Your Configuration”, 8-3). Then<br />
use the Restore function after <strong>Freedom</strong> <strong>EVOware</strong> has been re-installed.<br />
Hotfixes are used to correct small faults in the <strong>Freedom</strong> <strong>EVOware</strong> software.<br />
Hotfixes do not required <strong>Freedom</strong> <strong>EVOware</strong> to be re-installed. To install a hotfix,<br />
follow the instructions which are provided.<br />
Choose About <strong>Freedom</strong> <strong>EVOware</strong> in the Help menu if you want to check which<br />
version of <strong>Freedom</strong> <strong>EVOware</strong> you are currently using. The dialog box shows the<br />
<strong>Freedom</strong> <strong>EVOware</strong> version, the service pack level and the software build code.<br />
<strong>Freedom</strong> <strong>EVOware</strong> <strong>Software</strong> <strong>Manual</strong>, 393172, en, V<strong>2.3</strong> 4 - 11
4 - Installation<br />
The <strong>Freedom</strong> <strong>EVOware</strong> Hardlock<br />
4.4 The <strong>Freedom</strong> <strong>EVOware</strong> Hardlock<br />
To use the full functionality of the <strong>Freedom</strong> <strong>EVOware</strong> software, you must attach a<br />
hardlock (dongle) to a USB port on your PC. <strong>Freedom</strong> <strong>EVOware</strong> checks for the<br />
presence of the hardlock when it starts and will switch to offline mode if the<br />
hardlock cannot be found. See 3.1.2 “Hardlocks for <strong>Freedom</strong> <strong>EVOware</strong> <strong>Standard</strong><br />
and <strong>Freedom</strong> <strong>EVOware</strong> Plus”, 3-2.<br />
4.5 Installing the USB driver for the <strong>Freedom</strong> EVO<br />
pipetting instrument<br />
If you want to connect the <strong>Freedom</strong> EVO pipetting instrument to the PC which is<br />
running <strong>Freedom</strong> <strong>EVOware</strong> through USB instead of using the serial (RS232) port,<br />
you must carry out the following steps to install the USB driver.<br />
The following steps are only necessary when you connect the pipetting instrument<br />
to the PC for the first time.<br />
Please install <strong>Freedom</strong> <strong>EVOware</strong> before connecting the USB cable.<br />
Switch on the PC, switch on the pipetting instrument and plug in the USB cable.<br />
The following dialog box should appear:<br />
Fig. 4-11 Installing the USB driver, step 1<br />
Click No, not this time and click Next. The following dialog box is shown:<br />
4 - 12 <strong>Freedom</strong> <strong>EVOware</strong> <strong>Software</strong> <strong>Manual</strong>, 393172, en, V<strong>2.3</strong>
4 - Installation<br />
Installing the USB driver for the <strong>Freedom</strong> EVO pipetting instrument<br />
Fig. 4-12 Installing the USB driver, step 2<br />
Click Install the software automatically (Recommended) and click Next. The<br />
following dialog box is shown while the driver is being installed:<br />
Fig. 4-13 Installing the USB driver, step 3<br />
The following dialog box is shown when installation is nearly finished.:<br />
<strong>Freedom</strong> <strong>EVOware</strong> <strong>Software</strong> <strong>Manual</strong>, 393172, en, V<strong>2.3</strong> 4 - 13
4 - Installation<br />
Installing the USB driver for the <strong>Freedom</strong> EVO pipetting instrument<br />
Fig. 4-14 Installing the USB driver, step 4<br />
Click Finish to complete the installation of the USB driver.<br />
The following figure shows a view of the PC’s Device Manager with the USB<br />
driver correctly installed (at the bottom of the list).<br />
Fig. 4-15 Device Manager showing the correctly installed USB driver<br />
4.5.1 USB Power Management Setting<br />
The USB power management in Windows must be switched off to avoid losing the<br />
connection to the pipetting instrument, which may otherwise occur in rare cases.<br />
4 - 14 <strong>Freedom</strong> <strong>EVOware</strong> <strong>Software</strong> <strong>Manual</strong>, 393172, en, V<strong>2.3</strong>
4 - Installation<br />
Installing the USB driver for the <strong>Freedom</strong> EVO pipetting instrument<br />
To switch off the USB power management in Windows, choose Start -> Control<br />
Panel -> System -> Hardware -> Device Manager -> Universal Serial Bus<br />
Controllers -> Power Management tab:<br />
Fig. 4-16 Device Manager, USB Power Management tab<br />
4.5.2 USB Hubs<br />
If you want to connect the pipetting instrument via USB, it should be connected<br />
directly to the PC. This also applies to USB connections from hardware options, if<br />
they have their own cable. The use of an external USB hub should be avoided. If<br />
an external USB hub is absolutely necessary, use an active USB hub (i.e. with its<br />
own power supply). Data transfer problems may occur if you use a passive USB<br />
hub, especially if you are also using the PMP option. Please note that some port<br />
replicators for laptops contain a USB hub.<br />
<strong>Freedom</strong> <strong>EVOware</strong> <strong>Software</strong> <strong>Manual</strong>, 393172, en, V<strong>2.3</strong> 4 - 15
4 - Installation<br />
Installing the USB driver for the <strong>Freedom</strong> EVO pipetting instrument<br />
4 - 16 <strong>Freedom</strong> <strong>EVOware</strong> <strong>Software</strong> <strong>Manual</strong>, 393172, en, V<strong>2.3</strong>
5 - Starting <strong>Freedom</strong> <strong>EVOware</strong><br />
Login Screen<br />
5 Starting <strong>Freedom</strong> <strong>EVOware</strong><br />
This chapter describes how to start <strong>Freedom</strong> <strong>EVOware</strong> and gives an overview of<br />
the main window.<br />
5.1 Login Screen<br />
To start <strong>Freedom</strong> <strong>EVOware</strong>, click the Start button in the Windows Task Bar and<br />
choose All Programs > Tecan > <strong>EVOware</strong> > <strong>EVOware</strong> <strong>Standard</strong> or <strong>EVOware</strong><br />
Plus, depending on which version you want to run.<br />
You will be shown the Login dialog box:<br />
Fig. 5-1<br />
Login dialog box<br />
Enter you user name and password for <strong>Freedom</strong> <strong>EVOware</strong> and click the large<br />
green arrow on the right. Contact your <strong>Freedom</strong> <strong>EVOware</strong> Administrator if you do<br />
not have a user name and password.<br />
Note: When <strong>Freedom</strong> <strong>EVOware</strong> is started for the first time after installation, you<br />
will be prompted to assign a user name and password for the <strong>Freedom</strong> <strong>EVOware</strong><br />
Administrator (see 7 “Tecan User Management System”, 7-1).<br />
5.1.1 Loading the device drivers<br />
After clicking the large green arrow you will be shown a progress bar as <strong>Freedom</strong><br />
<strong>EVOware</strong> loads all of the software components and device drivers:<br />
<strong>Freedom</strong> <strong>EVOware</strong> <strong>Software</strong> <strong>Manual</strong>, 393172, en, V<strong>2.3</strong> 5 - 1
5 - Starting <strong>Freedom</strong> <strong>EVOware</strong><br />
Login Screen<br />
Fig. 5-2<br />
Loading the device drivers<br />
5.1.2 Driver pre-loading<br />
To ensure that <strong>Freedom</strong> <strong>EVOware</strong> starts quickly, above all if you have chosen to<br />
install and use a large number of device drivers, the installation program installs a<br />
shortcut which automatically loads all of the Tecan drivers each time the PC is<br />
started. The drivers remain loaded while the PC is running and it is no longer<br />
necessary to load them each time you start <strong>Freedom</strong> <strong>EVOware</strong>.<br />
To unload the Tecan drivers when you quit <strong>Freedom</strong> <strong>EVOware</strong>, choose Exit,<br />
unload drivers in the File menu. Alternatively, check the Unload drivers checkbox<br />
in the Startup Wizard and click Exit. Driver pre-loading will be available again<br />
when you restart your PC.<br />
Remove the shortcut “<strong>EVOware</strong> Prelaunch“ from the MS Windows Autostart<br />
folder if you do not want the drivers to be loaded each time the PC is started. If<br />
you do this, <strong>Freedom</strong> <strong>EVOware</strong> will take somewhat longer to start in future.<br />
The driver pre-loading feature can be disabled in the Configuration Tool (see<br />
8.4.1.1 “Device Information Tab”, 8-21).<br />
5 - 2 <strong>Freedom</strong> <strong>EVOware</strong> <strong>Software</strong> <strong>Manual</strong>, 393172, en, V<strong>2.3</strong>
5 - Starting <strong>Freedom</strong> <strong>EVOware</strong><br />
Login Screen<br />
5.1.3 Driver loading errors<br />
If errors are detected when loading the device drivers, the following dialog box will<br />
show status messages:<br />
Fig. 5-3<br />
Loading the device drivers - status messages and warnings<br />
Use the scroll bar to inspect last column (Info), which explains the reason for the<br />
error.<br />
If one of the error messages is shown truncated because it is too long, lengthen<br />
the field in the dialog box and activate the horizontal scroll bar by double-clicking<br />
on the divider (short vertical line in the header) at the end of the field.<br />
Some of the device drivers will output errors or warnings during loading if<br />
<strong>Freedom</strong> <strong>EVOware</strong> detects configuration errors.<br />
5.1.4 Instrument and Hardlock Detection<br />
<strong>Freedom</strong> <strong>EVOware</strong> will run in offline mode if it cannot detect a hardlock (dongle)<br />
when it starts. See 3.1.2 “Hardlocks for <strong>Freedom</strong> <strong>EVOware</strong> <strong>Standard</strong> and<br />
<strong>Freedom</strong> <strong>EVOware</strong> Plus”, 3-2.<br />
It will also run in offline mode if it cannot detect a pipetting instrument on one of<br />
the USB ports or on the configured COM port (it checks the USB ports first).<br />
The following dialog box will be shown if <strong>Freedom</strong> <strong>EVOware</strong> cannot communicate<br />
with the pipetting instrument:<br />
Fig. 5-4<br />
Starting <strong>Freedom</strong> <strong>EVOware</strong> - no pipetting instrument detected<br />
Click No to continue with offline mode. See also 4.5.1 “USB Power Management<br />
Setting”, 4-14 and 4.5.2 “USB Hubs”, 4-15.<br />
In offline mode, firmware commands such as movement commands are not sent<br />
to the pipetting instrument (i.e. pipetting does not take place).<br />
<strong>Freedom</strong> <strong>EVOware</strong> <strong>Software</strong> <strong>Manual</strong>, 393172, en, V<strong>2.3</strong> 5 - 3
5 - Starting <strong>Freedom</strong> <strong>EVOware</strong><br />
Login Screen<br />
<strong>Freedom</strong> <strong>EVOware</strong>’s current operating mode is shown in the Status Bar (see<br />
6.7.3 “Status Bar”, 6-20).<br />
See 8.4.3.3 “Com Ports Tab”, 8-36 for information on configuring the pipetting<br />
instrument’s COM port. The USB ports do not need configuring.<br />
5 - 4 <strong>Freedom</strong> <strong>EVOware</strong> <strong>Software</strong> <strong>Manual</strong>, 393172, en, V<strong>2.3</strong>
5 - Starting <strong>Freedom</strong> <strong>EVOware</strong><br />
Startup Wizard, <strong>Freedom</strong> <strong>EVOware</strong> <strong>Standard</strong><br />
5.2 Startup Wizard, <strong>Freedom</strong> <strong>EVOware</strong> <strong>Standard</strong><br />
After all of the modules and drivers have been loaded and you have logged in as<br />
the <strong>Freedom</strong> <strong>EVOware</strong> Administrator or Application Specialist, you will be shown<br />
the <strong>Freedom</strong> <strong>EVOware</strong> <strong>Standard</strong> startup wizard.<br />
Fig. 5-5<br />
<strong>Freedom</strong> <strong>EVOware</strong> <strong>Standard</strong> startup wizard<br />
This dialog box is also shown if you choose Startup Wizard from the File menu.<br />
The options in the Startup Wizard are as follows:<br />
Run an existing script<br />
This option opens the Selection dialog box to allow you to choose the script<br />
you want to run. After choosing the script you are shown the Runtime<br />
Controller dialog box (see 12.1 “Running a Liquid Handling Script”, 12-1).<br />
Run maintenance<br />
This option is used to run instrument maintenance tasks.<br />
Create a new script<br />
This option opens the Selection dialog box to allow you to choose a template<br />
for the new script. The template contains information on e.g. the worktable<br />
layout.<br />
Edit an existing script<br />
This option opens the Selection dialog box to allow you to choose the script<br />
you want to edit or view. After loading the script, you can also choose to run it.<br />
Configure system<br />
This option is used to configure general settings for the <strong>Freedom</strong> <strong>EVOware</strong><br />
software (see 8 “Configuration Tool”, 8-1).<br />
Do not show this dialog again<br />
Check this checkbox if you do not want <strong>Freedom</strong> <strong>EVOware</strong> to show the<br />
Startup Wizard when it starts next time. In this case, <strong>Freedom</strong> <strong>EVOware</strong><br />
<strong>Standard</strong> will start by opening the Script Editor with the pipetting script which<br />
was last used. To deactivate this feature again, open the Startup Wizard by<br />
choosing Startup Wizard in the File menu or click the Startup button in the<br />
Toolbar and uncheck the checkbox.<br />
<strong>Freedom</strong> <strong>EVOware</strong> <strong>Software</strong> <strong>Manual</strong>, 393172, en, V<strong>2.3</strong> 5 - 5
5 - Starting <strong>Freedom</strong> <strong>EVOware</strong><br />
Startup Wizard, <strong>Freedom</strong> <strong>EVOware</strong> <strong>Standard</strong><br />
Unload drivers<br />
To ensure that <strong>Freedom</strong> <strong>EVOware</strong> starts quickly, all of the Tecan drivers you<br />
have chosen to use are loaded each time the PC is started and remain loaded<br />
while the PC is running (see 5.1.2 “Driver pre-loading”, 5-2). Check this<br />
checkbox before you click Exit if you want to unload the drivers when you quit<br />
<strong>Freedom</strong> <strong>EVOware</strong>. The drivers should be unloaded e.g. if <strong>Freedom</strong><br />
<strong>EVOware</strong> reports an internal error. The drivers will be loaded again when you<br />
re-start <strong>Freedom</strong> <strong>EVOware</strong>.<br />
Note: If you have made configuration changes using the Configuration Tool, the<br />
drivers will be unloaded automatically when you quit <strong>Freedom</strong> <strong>EVOware</strong>.<br />
Exit<br />
Quit <strong>Freedom</strong> <strong>EVOware</strong>.<br />
5.2.1 Startup Wizard for <strong>Freedom</strong> <strong>EVOware</strong> <strong>Standard</strong> Operators<br />
Operators of <strong>Freedom</strong> <strong>EVOware</strong> <strong>Standard</strong> have less access rights than<br />
Administrators or Application Specialists (see 7.2 “<strong>Freedom</strong> <strong>EVOware</strong> Access<br />
Rights (User Levels)”, 7-3). Accordingly, they are presented with a startup<br />
wizard which has less functions:<br />
Fig. 5-6<br />
<strong>Freedom</strong> <strong>EVOware</strong> <strong>Standard</strong> startup wizard for Operators<br />
See 5.2 “Startup Wizard, <strong>Freedom</strong> <strong>EVOware</strong> <strong>Standard</strong>”, 5-5 for a description of<br />
the functions.<br />
5 - 6 <strong>Freedom</strong> <strong>EVOware</strong> <strong>Software</strong> <strong>Manual</strong>, 393172, en, V<strong>2.3</strong>
5 - Starting <strong>Freedom</strong> <strong>EVOware</strong><br />
Startup Wizard, <strong>Freedom</strong> <strong>EVOware</strong> Plus<br />
5.3 Startup Wizard, <strong>Freedom</strong> <strong>EVOware</strong> Plus<br />
After all of the modules and drivers have been loaded and you have logged in as<br />
the <strong>Freedom</strong> <strong>EVOware</strong> Administrator or Application Specialist, you will be shown<br />
the <strong>Freedom</strong> <strong>EVOware</strong> Plus startup wizard.<br />
Fig. 5-7<br />
<strong>Freedom</strong> <strong>EVOware</strong> Plus startup wizard<br />
This dialog box is also shown if you choose Startup Wizard from the File menu.<br />
The options in the Startup Wizard are as follows:<br />
Run an existing process<br />
This option is used run an existing process or method. Click the large green<br />
arrow and choose the process or method you want to run in the Selection<br />
dialog box which follows. After choosing the process or method, you are<br />
shown the Runtime Controller dialog box (see 12.2 “Running and Optimizing a<br />
Process (<strong>Freedom</strong> <strong>EVOware</strong> Plus)”, 12-5).<br />
A method is a set of one or more processes to be run together (either<br />
sequentially or in parallel). The method file also contains information on the<br />
runtime settings. Methods are created and saved in the Runtime Controller.<br />
Run maintenance<br />
This option is used to run instrument maintenance tasks. See 6.4.2 “Run<br />
Maintenance”, 6-10.<br />
Create a new process<br />
This option opens the Selection dialog box to allow you to choose a template<br />
for the new process. The template contains information on e.g. the worktable<br />
layout.<br />
Edit an existing process<br />
This option opens the Selection dialog box to allow you to choose the process<br />
you want to edit or view. After loading the process, you can also choose to run<br />
it.<br />
Configure system<br />
This option is used to configure general settings for the <strong>Freedom</strong> <strong>EVOware</strong><br />
software (see 8 “Configuration Tool”, 8-1).<br />
<strong>Freedom</strong> <strong>EVOware</strong> <strong>Software</strong> <strong>Manual</strong>, 393172, en, V<strong>2.3</strong> 5 - 7
5 - Starting <strong>Freedom</strong> <strong>EVOware</strong><br />
Startup Wizard, <strong>Freedom</strong> <strong>EVOware</strong> Plus<br />
Do not show this dialog again<br />
Check this checkbox if you do not want <strong>Freedom</strong> <strong>EVOware</strong> to show the<br />
Startup Wizard when it starts next time. In this case, <strong>Freedom</strong> <strong>EVOware</strong> Plus<br />
will start by opening the Process Editor with the process which was last used.<br />
To deactivate this feature again, open the Startup Wizard by choosing Startup<br />
Wizard in the File menu or click the Startup button in the Toolbar and uncheck<br />
the checkbox.<br />
Unload drivers<br />
To ensure that <strong>Freedom</strong> <strong>EVOware</strong> starts quickly, all of the Tecan drivers you<br />
have chosen to use are loaded each time the PC is started and remain loaded<br />
while the PC is running (see 5.1.2 “Driver pre-loading”, 5-2). Check this<br />
checkbox before you click Exit if you want to unload the drivers when you quit<br />
<strong>Freedom</strong> <strong>EVOware</strong>. The drivers should be unloaded e.g. if <strong>Freedom</strong><br />
<strong>EVOware</strong> reports an internal error. The drivers will be loaded again when you<br />
re-start <strong>Freedom</strong> <strong>EVOware</strong>.<br />
Note: If you have made configuration changes using the Configuration Tool, the<br />
drivers will be unloaded automatically when you quit <strong>Freedom</strong> <strong>EVOware</strong>.<br />
Exit<br />
Quit <strong>Freedom</strong> <strong>EVOware</strong>.<br />
5.3.1 Startup Wizard for <strong>Freedom</strong> <strong>EVOware</strong> Plus Operators<br />
Operators of <strong>Freedom</strong> <strong>EVOware</strong> Plus have less access rights than Administrators<br />
or Application Specialists (see 7.2 “<strong>Freedom</strong> <strong>EVOware</strong> Access Rights (User<br />
Levels)”, 7-3). Accordingly, they are presented with a startup wizard which has<br />
less functions:<br />
Fig. 5-8<br />
<strong>Freedom</strong> <strong>EVOware</strong> Plus startup wizard for Operators<br />
See 5.3 “Startup Wizard, <strong>Freedom</strong> <strong>EVOware</strong> Plus”, 5-7 for a description of the<br />
functions.<br />
5 - 8 <strong>Freedom</strong> <strong>EVOware</strong> <strong>Software</strong> <strong>Manual</strong>, 393172, en, V<strong>2.3</strong>
5 - Starting <strong>Freedom</strong> <strong>EVOware</strong><br />
Overview of the Main Window in <strong>Freedom</strong> <strong>EVOware</strong><br />
5.4 Overview of the Main Window in <strong>Freedom</strong> <strong>EVOware</strong><br />
The following section describes the key features of the <strong>Freedom</strong> <strong>EVOware</strong> main<br />
window. See also 6 “Menus”, 6-1 and 13 “Overview of <strong>Freedom</strong> <strong>EVOware</strong><br />
Commands”, 13-1.<br />
5.4.1 Control Bar<br />
The Control Bar is the vertical area at the left of the screen. It is used to select the<br />
objects and commands which you need to set up your process or script. It is also<br />
used to configure the liquid classes for the liquid you want to pipette and to set up<br />
robot vectors.<br />
The Control Bar is only visible for the user levels Administrator, Application<br />
Specialist and Power User (not for operators).<br />
Six colored tabs can be seen to the right of the Control Bar. Click on the tabs to<br />
select the type of object you want to work with. Each of the tabs contains a list of<br />
objects which are arranged in groups. For example, the Labware tab contains<br />
groups for Microplates, Tips, Wash and Waste, Troughs, Tubes, Miscellaneous<br />
and Allowed Labware. Click in the group’s title bar to collapse the group.<br />
Fig. 5-9<br />
Control Bar showing the Commands tab<br />
<strong>Freedom</strong> <strong>EVOware</strong> <strong>Software</strong> <strong>Manual</strong>, 393172, en, V<strong>2.3</strong> 5 - 9
5 - Starting <strong>Freedom</strong> <strong>EVOware</strong><br />
Overview of the Main Window in <strong>Freedom</strong> <strong>EVOware</strong><br />
If necessary, you can resize the Control Bar by dragging the divider to the left of<br />
the colored tabs.<br />
5.4.1.1 My Favorites<br />
Click this tab to view your favorite direct commands, device commands, liquid<br />
handling commands, robot vectors and labware. The list already contains a few<br />
standard items when <strong>Freedom</strong> <strong>EVOware</strong> has just been installed. To add a copy of<br />
an object from another Control Bar group to My Favorites, right-click the object<br />
and choose Add to favorites from the context menu. To remove the object again<br />
from My Favorites, right-click the object (in the My Favorites section or in the<br />
section where the object belongs) and choose Remove from favorites.<br />
If you click My Favorites and select a carrier, you will not see an Allowed Labware<br />
section (below the Labware section) if none of your favorite labware items are<br />
compatible with this carrier. Click the Labware tab instead to see all of the allowed<br />
labware for this carrier.<br />
5.4.1.2 Commands<br />
Click this tab to view the available script commands and device commands. The<br />
commands are divided into groups (e.g. Liquid Handling Arm commands).<br />
In addition, the Commands tab also contains up to seven direct commands (see<br />
5.4.1.3 “Direct commands”, 5-10).<br />
In <strong>Freedom</strong> <strong>EVOware</strong> Plus, when the Script Editor is open the Commands tab of<br />
the Control Bar only shows script commands (commands which are used for<br />
writing pipetting scripts, see 13.1 “Overview of Script Commands”, 13-1). When<br />
the Process Editor is open, the Commands tab of the Control Bar only shows<br />
device commands (commands for the optional devices, see 13.2 “Overview of<br />
Device Commands”, 13-12).<br />
In <strong>Freedom</strong> <strong>EVOware</strong> <strong>Standard</strong>, the Control Bar always shows both command<br />
types (it does not have a Process Editor).<br />
If you cannot find the device that you want to use in the Control Bar, you must run<br />
the installation program again and install the respective device driver (see<br />
4.3 “Modifying, Removing or Repairing Your Installation”, 4-8). Also check<br />
whether the driver has been installed but is currently deactivated (see<br />
8.4.1.1 “Device Information Tab”, 8-21, Start checkbox).<br />
5.4.1.3 Direct commands<br />
Direct commands are used for service purposes, e.g. for picking up DITIs or<br />
flushing the tips. They provide a convenient alternative to creating and running a<br />
pipetting or maintenance script which carries out the same function.<br />
The Control Bar only shows direct commands for devices whose device driver is<br />
installed and loaded. For example, the direct command “Load the Te-MO” is only<br />
shown in the Control Bar if you have installed and have chosen to load the Te-MO<br />
driver. The DITI commands are only shown if the LiHa is configured with DITIs.<br />
To run a direct command, right click on the command and choose Run in the<br />
context menu.<br />
Direct commands are only meaningful If you are running <strong>Freedom</strong> <strong>EVOware</strong> in<br />
real mode and the PC is connected to a pipetting instrument. If <strong>Freedom</strong><br />
<strong>EVOware</strong> is running in offline mode, in most cases the dialog box of the direct<br />
command will not open when you double-click on the command.<br />
Many of the direct commands have an equivalent script command. In these<br />
cases, click the cross-reference link and refer to the script command for a<br />
description of the parameters which are required:<br />
5 - 10 <strong>Freedom</strong> <strong>EVOware</strong> <strong>Software</strong> <strong>Manual</strong>, 393172, en, V<strong>2.3</strong>
5 - Starting <strong>Freedom</strong> <strong>EVOware</strong><br />
Overview of the Main Window in <strong>Freedom</strong> <strong>EVOware</strong><br />
• Prime WRC: This direct command is used to prime the wash block of the Te-<br />
MO 96, Te-MO 384 or MCA. Choose the required wash block from the pull<br />
down list. The list shows all wash blocks which are currently positioned in the<br />
Worktable Editor. Then specify the required priming duration and click Start.<br />
• Load the Te-MO: See 15.56.12 “Load the Te-MO Command”, 15-138.<br />
• Fill Te-MO 384: See 15.56.13 “Fill system (Te-MO 384) Command”, 15-138.<br />
• Flush: This is used to flush the LiHa. See 15.4 “Wash Tips Command”, 15-<br />
8.<br />
• Prime Te-Fill: See 15.16 “Te-Fill Prime Command”, 15-26.<br />
• Drop DITIs: See 15.8 “Drop DITIs Command”, 15-14. Note: <strong>Freedom</strong><br />
<strong>EVOware</strong> automatically opens the dialog box for this command if the Runtime<br />
Controller encounters a Get DITIs command when tips are already mounted<br />
from a previous pipetting operation.<br />
• Set DITI Position: See 15.9 “Set DITI Position Command”, 15-15.<br />
• Get DITIs: See 15.7 “Get DITIs Command”, 15-13.<br />
• LiHa Safe Flush: This direct command is used to discard the contents of the<br />
LiHa tips to a specified location (typically into a microplate, tube rack, a trough<br />
or the wash station waste). If hazardous liquid is left in the tips after<br />
completing a script or process, you can use this command to empty the tips<br />
for safety reasons. It can also be used to recover the contents of the tips if the<br />
script or process was aborted for some reason before it completed.<br />
If your pipetting instrument is fitted with more than one LiHa, choose the one<br />
you want to use and select the labware you want to use by clicking on the<br />
labware in the Worktable Editor. Then click on the well(s) you want to use. See<br />
15.2 “Dispense Command”, 15-3 for information on the other parameters<br />
you need to specify (e.g. tip selection).<br />
• Send Firmware Command:<br />
– Command: Specify the firmware command you want to send to the<br />
instrument. For example, “A1RPZ0” returns the current Z position of each<br />
of the LiHa tips. See the respective instrument manual for a list of<br />
firmware commands. Firmware commands are nearly always written<br />
uppercase.<br />
– Response: Some firmware commands terminate with one or more return<br />
parameters (numeric values) separated by commas. See the respective<br />
instrument manual for information on return parameters from firmware<br />
commands.<br />
– Error Code: All firmware commands terminate with an error code.The<br />
error code is 0 if the command was executed with no errors.<br />
WARNING<br />
Risk of injury to operating personnel or damage to the equipment<br />
• Take care when sending firmware commands. Sending the wrong commands<br />
can damage the instrument or objects in its workspace, hurt yourself or other<br />
people.<br />
5.4.1.4 Direct commands for the MCA96<br />
Direct commands are used for service purposes, e.g. for picking up DITIs or<br />
flushing the tips. They provide a convenient alternative to creating and running a<br />
pipetting or maintenance script which carries out the same function. For general<br />
information on direct commands see 5.4.1.3 “Direct commands”, 5-10.<br />
<strong>Freedom</strong> <strong>EVOware</strong> <strong>Software</strong> <strong>Manual</strong>, 393172, en, V<strong>2.3</strong> 5 - 11
5 - Starting <strong>Freedom</strong> <strong>EVOware</strong><br />
Overview of the Main Window in <strong>Freedom</strong> <strong>EVOware</strong><br />
• MCA96 Get Tips: This direct command is used to get MCA96 DITIs or tip<br />
blocks. See 15.68.5 “MCA96 Get DITIs Command”, 15-167 and<br />
15.68.7 “MCA96 Get Tip Block Command”, 15-170.<br />
• MCA96 Drop Tips: This direct command is used to put down MCA96 DITIs or<br />
tip blocks. See 15.68.6 “MCA96 Drop DITIs Command”, 15-168 and<br />
15.68.8 “MCA96 Drop Tip Block Command”, 15-171.<br />
• MCA96 Safe Flush: This direct command is used to discard the contents of<br />
the MCA96 tips to a specified location (typically into a microplate or a trough).<br />
If hazardous liquid is left in the tips after completing a script or process, you<br />
can use this command to empty the tips for safety reasons. It can also be<br />
used to recover the contents of the tips if the script or process was aborted for<br />
some reason before it completed.<br />
5.4.1.5 Direct commands for the MCA384 and the CGM<br />
Direct commands are used for service purposes, e.g. for picking up DITIs or<br />
flushing the tips. They provide a convenient alternative to creating and running a<br />
pipetting or maintenance script which carries out the same function. For general<br />
information on direct commands see 5.4.1.3 “Direct commands”, 5-10.<br />
• MCA384 Get DITIs: See 15.69.8 “MCA384 Get DITIs Command”, 15-191.<br />
• MCA384 Drop DITIs: See 15.69.9 “MCA384 Drop DITIs Command”, 15-<br />
194.<br />
• MCA384 Get Head Adapter: See 15.69.6 “MCA384 Get Head Adapter<br />
Command”, 15-189.<br />
• MCA384 Drop Head Adapter: See 15.69.7 “MCA384 Drop Head Adapter<br />
Command”, 15-190.<br />
• MCA384 Safe Flush: This direct command is used to discard the contents of<br />
the MCA96 tips to a specified location (typically into a microplate or a trough).<br />
If hazardous liquid is left in the tips after completing a script or process, you<br />
can use this command to empty the tips for safety reasons. It can also be<br />
used to recover the contents of the tips if the script or process was aborted for<br />
some reason before it completed.<br />
• Dock CGM. This direct command is used to dock the common gripper module<br />
of the MCA384. See also 15.69.13 “MCA384 Dock CGM Command”, 15-<br />
204.<br />
• Undock CGM. This direct command is used to undock the common gripper<br />
module of the MCA384 and rotate the gripper to a specified angle (in 0.1<br />
degrees steps). See also 15.69.14 “MCA384 Undock CGM Command”, 15-<br />
204.<br />
5.4.1.6 Robot Vectors<br />
Click this tab to view the movement vectors which have been defined for the plate<br />
robot, the multi channel arm and the tube robot.<br />
This tab only shows home vectors and vectors which were not assigned to<br />
carriers or labware items in the Edit Carrier or Edit Labware dialog boxes.<br />
Plate robot vectors specify movements to be carried out by the RoMa (Robot<br />
Manipulator). Current Tecan pipetting instruments can be fitted with up to two<br />
RoMas. See 9.6 “Creating and Editing Plate Robot Vectors”, 9-55.<br />
Multi channel arm vectors specify movements to be carried out by the MCA.<br />
Current Tecan pipetting instruments can only be fitted with one MCA. MCA<br />
vectors are very similar to RoMa vectors. See 9.8 “Creating and Editing MCA<br />
Vectors”, 9-69.<br />
5 - 12 <strong>Freedom</strong> <strong>EVOware</strong> <strong>Software</strong> <strong>Manual</strong>, 393172, en, V<strong>2.3</strong>
5 - Starting <strong>Freedom</strong> <strong>EVOware</strong><br />
Overview of the Main Window in <strong>Freedom</strong> <strong>EVOware</strong><br />
Tube robot vectors specify movements to be carried out by the PnP (Pick & Place<br />
robot). Current Tecan pipetting instruments can be fitted with up to two PnP arms.<br />
See 9.7 “Creating and Editing Tube Robot Vectors”, 9-63.<br />
Home vectors specify the movements to be carried out by the RoMa and/or PnP<br />
in order to move the robot back to its home (parking) position. See 9.6.4 “Defining<br />
the Home Position for a RoMa”, 9-62 and 9.7.4 “Defining the Home Position for<br />
a PnP”, 9-69. You cannot and do not need to define a home vector for the multi<br />
channel arm.<br />
To create a new plate robot vector, right-click the group heading Robot Vectors,<br />
choose New, enter a descriptive name of your choice and click OK to open the<br />
Teach Plate Robot Vector dialog box (see 9.6.2 “Teach Plate Robot Vector Dialog<br />
Box”, 9-59).<br />
If your pipetting instrument is fitted with more than one plate robot, it is<br />
recommended to suffix the vector name with “1” or “2”, e.g. “MoveBlock2” to<br />
indicate which RoMa was used for teaching (Note: the vector name does not<br />
influence which RoMa is used, either in <strong>Freedom</strong> <strong>EVOware</strong> Plus or in <strong>Freedom</strong><br />
<strong>EVOware</strong> <strong>Standard</strong>). In <strong>Freedom</strong> <strong>EVOware</strong> <strong>Standard</strong>, user-defined plate robot<br />
vectors can be used in Transfer Labware and RoMa Vector commands. See also<br />
17.3 “Site-specific RoMa vectors”, 17-13.<br />
To create a new tube robot vector, right-click the group heading Robot Vectors<br />
(Tubes), choose New, enter a descriptive name of your choice and click OK to<br />
open the Teach Tube Robot Vector dialog box (see 9.7.2 “Teach Tube Robot<br />
Vector Dialog Box”, 9-65). Use the name “Home1” to create a home vector for<br />
tube robot 1.<br />
To create a new multi channel arm vector, right-click the group heading Multi<br />
Channel Arm Vectors, choose New, enter a descriptive name of your choice and<br />
click OK to open the Teach Multi Channel Arm Vector dialog box (see 9.6.2 “Teach<br />
Plate Robot Vector Dialog Box”, 9-59).<br />
To view and/or edit plate robot and multi channel arm vectors which are<br />
associated with carriers, double click on the carrier in the Labware section of the<br />
Control Bar and click Edit. To view and/or edit tube robot vectors which are<br />
associated with labware items, double click on the labware item in the Labware<br />
section of the Control Bar and click Edit.<br />
5.4.1.7 Liquid Classes<br />
Click this tab to view the available liquid classes. A liquid class is a set of liquid<br />
handling parameters. It specifies aspirating and dispensing speeds, airgaps, liquid<br />
detection modes, etc. The values of the parameters are dependent on the<br />
physical characteristics of the liquid. See 10 “Configuring Liquid Classes”, 10-1<br />
for information on creating and editing liquid classes.<br />
5.4.1.8 Carriers<br />
Click this tab to view the available carriers. A carrier is a removable support on the<br />
instrument's worktable (i.e. deck) which holds one or more pieces of labware (e.g.<br />
a microplate) in place. The carrier name indicates the type of labware for which it<br />
is designed. Optional devices which can be placed on the worktable (e.g. the Te-<br />
Shake shaker) are also treated as carriers.<br />
Carriers are normally fitted to the instrument’s worktable at pre-defined grid<br />
positions (see Fig. 11-8, 11-20).<br />
The Carriers tab is subdivided into groups for Devices, Hotels, Microplate<br />
Carriers, DITI Carriers, Wash Stations, Trough Carriers, Tube Carriers (tube<br />
racks) and Miscellaneous Carriers.<br />
See 9.5 “Configuring Carriers”, 9-39 for information on creating and editing<br />
carrier templates.<br />
<strong>Freedom</strong> <strong>EVOware</strong> <strong>Software</strong> <strong>Manual</strong>, 393172, en, V<strong>2.3</strong> 5 - 13
5 - Starting <strong>Freedom</strong> <strong>EVOware</strong><br />
Overview of the Main Window in <strong>Freedom</strong> <strong>EVOware</strong><br />
The <strong>Freedom</strong> <strong>EVOware</strong> database already contains a large selection of predefined<br />
carrier types. You only need to create or edit carriers if you cannot find a<br />
standard item which is suitable for your needs.<br />
5.4.1.9 Labware<br />
5.4.1.10 Search<br />
Click this tab to view the available labware. Labware refers to consumable items<br />
such as microplates or sample tubes. Microplates have a regular arrangement of<br />
containers or cavities (wells) for holding liquids or samples. To allow pipetting,<br />
microplates are normally placed on microplate carriers and tubes are inserted in<br />
tube racks.<br />
The Labware tab is subdivided into groups for Microplates, Tips, Wash and<br />
Waste, Troughs, Tubes, Miscellaneous and Allowed Labware.<br />
Allowed Labware shows the labware types which are compatible with the<br />
currently selected carrier. If you have already put a carrier onto the Worktable<br />
Editor, click on it to see which labware types are allowed.<br />
See 9.4 “Configuring Labware”, 9-15 for information on creating and editing<br />
labware templates.<br />
The <strong>Freedom</strong> <strong>EVOware</strong> database already contains a large selection of predefined<br />
labware types. You only need to create or edit labware if you cannot find a<br />
standard item which is suitable for your needs.<br />
Click this tab to view the Control Bar objects which were found using the search<br />
function.<br />
5.4.1.11 Searching for objects in the Control Bar<br />
To search for any object or command in the Control Bar, enter the name or part of<br />
the name in the text field at the bottom and click . The search results are shown<br />
in the Search tab of the Control Bar.<br />
5.4.1.12 Context Menu for Objects in the Control Bar<br />
Right-click on an object in the Control Bar to open the context menu. The context<br />
menu is context sensitive and the options it contains depend on the currently<br />
active Control Bar tab and on the object you have selected. The available options<br />
in the context menu are as follows:<br />
Edit<br />
Edit the selected object.<br />
Delete<br />
Delete the selected object.<br />
New<br />
Create a new object of the same type.<br />
Duplicate<br />
Duplicate the selected object. You will be prompted for a new name.<br />
Rename<br />
Rename the selected object. You will be prompted for a new name.<br />
Add to favorites<br />
Add the selected object to the My Favorites tab of the Control Bar.<br />
Remove from favorites<br />
Remove the selected object from the My Favorites tab of the Control Bar.<br />
5 - 14 <strong>Freedom</strong> <strong>EVOware</strong> <strong>Software</strong> <strong>Manual</strong>, 393172, en, V<strong>2.3</strong>
5 - Starting <strong>Freedom</strong> <strong>EVOware</strong><br />
Overview of the Main Window in <strong>Freedom</strong> <strong>EVOware</strong><br />
Hide<br />
Hides the selected object. Use this feature if you want to hide items which you<br />
do not normally use. Depending on the Show/Hide status of the Control Bar,<br />
the object will either disappear immediately or it will be shown in gray. See<br />
5.4.1.13 “Context Menu for Group Titles in the Control Bar”, 5-15.<br />
Show<br />
Shows the selected object (cancels the hidden status). Before you can do this<br />
you must make the hidden objects visible (see 5.4.1.13 “Context Menu for<br />
Group Titles in the Control Bar”, 5-15).<br />
Run Command<br />
This option is only available for device commands and is used for service<br />
purposes, e.g. to initialize the device manually or to test correct functioning<br />
(see 16.1 “Service Functions”, 16-1). See 6.4.2 “Run Maintenance”, 6-10<br />
for information on instrument maintenance functions. Maintenance functions<br />
are scripts which are created using the Script Editor.<br />
5.4.1.13 Context Menu for Group Titles in the Control Bar<br />
Right click on a group title in the in the Control Bar to open the context menu. The<br />
context menu is context sensitive and the options it contains depend on the<br />
currently active Control Bar tab and on the group title you have selected (e.g.<br />
“Carriers”). The available options in the context menu are as follows:<br />
Edit<br />
Edit the selected object.<br />
New<br />
Create a new object.<br />
Show hidden items<br />
Shows all objects you have marked as hidden in gray. This allows you to<br />
cancel the hidden status of an object. To cancel the hidden status, right-click<br />
on the object and choose Show.<br />
Hide hidden items<br />
Completely hides all objects you have marked as hidden.<br />
5.4.2 Infopads<br />
Infopads are small windows which contain prompts, hints or context-related<br />
information on the task which is currently being carried out or the object which is<br />
currently selected. The Infopads are positioned to the right of the Control Bar.<br />
<strong>Freedom</strong> <strong>EVOware</strong> <strong>Software</strong> <strong>Manual</strong>, 393172, en, V<strong>2.3</strong> 5 - 15
5 - Starting <strong>Freedom</strong> <strong>EVOware</strong><br />
Overview of the Main Window in <strong>Freedom</strong> <strong>EVOware</strong><br />
Fig. 5-10 Lower infopad with a labware item selected<br />
If your pipetting script contains Comment commands, the comment texts and the<br />
corresponding script line numbers are listed as hyperlinks in the upper Infopad.<br />
Click on one of the entries to jump to the script line which contains the Comment<br />
command (script navigation feature). See 15.37 “Comment Command”, 15-<br />
97 for more information.<br />
If you need more space for the Process Editor or the Worktable Editor, you can<br />
collapse the upper and/or lower Infopad by clicking in the title bars. You can<br />
also resize the windows by dragging the dividers between the windows.<br />
The hyperlinks in the How To section of the infopads take you to short animations<br />
(films) which demonstrate the currently selected task. The animations are stored<br />
in AVI format and will be shown e.g. in Windows Media Player.<br />
5.4.2.1 Hyperlinks in the Infopads<br />
The infopads are provided with hyperlinks (blue underlined text) which are<br />
shortcuts to commonly needed actions. The hyperlinks are context sensitive and<br />
the available options depend on what you have selected (e.g. a carrier or labware<br />
item in the Worktable Editor):<br />
Edit carrier type<br />
This option is shown when you select a carrier or a carrier which is a device. It<br />
opens the Edit Carrier dialog box and is equivalent to double-clicking the<br />
selected carrier in the Control Bar.<br />
Edit labware type<br />
This option is shown when you select a labware item. It opens the Edit<br />
Labware dialog box and is equivalent to double-clicking the selected labware<br />
item in the Control Bar.<br />
Edit liquid class<br />
This opens the Liquid Class Editor and is equivalent to double-clicking the<br />
selected liquid class in the Control Bar.<br />
5 - 16 <strong>Freedom</strong> <strong>EVOware</strong> <strong>Software</strong> <strong>Manual</strong>, 393172, en, V<strong>2.3</strong>
5 - Starting <strong>Freedom</strong> <strong>EVOware</strong><br />
Overview of the Main Window in <strong>Freedom</strong> <strong>EVOware</strong><br />
Show labware<br />
This option is shown when you select a carrier or a carrier which is a device. It<br />
opens the Labware tab of the Control Panel. Allowed Labware then shows the<br />
labware types which are compatible with the selected carrier.<br />
Show me<br />
This runs a short animation (film) to demonstrate the currently selected task.<br />
The animations are stored in AVI format and will be shown e.g. in Windows<br />
Media Player.<br />
5.4.3 The Process Editor (<strong>Freedom</strong> <strong>EVOware</strong> Plus)<br />
In <strong>Freedom</strong> <strong>EVOware</strong> Plus, the sequence of steps which are required to carry out<br />
a particular application or experiment, for example to extract the substance you<br />
are looking for, is called a process. The process specifies the operations you want<br />
the pipetting instrument to execute. Processes are set up in the Process Editor,<br />
which is shown at the top right of the screen.<br />
In the Process Editor, each process step (such as centrifuging a plate or pipetting<br />
to a plate) is shown as an icon, whereby each icon is associated with a single<br />
device such as a centrifuge, a storage device or the liquid handling arm.<br />
See 13.2 “Overview of Device Commands”, 13-12 for a list of device commands<br />
which are provided with the standard <strong>Freedom</strong> <strong>EVOware</strong> installation. When<br />
installing <strong>Freedom</strong> <strong>EVOware</strong>, you normally only install the device drivers which<br />
you want to use.<br />
There are four basic types of icon - process steps, labware source icons, final<br />
position icons and on-the-fly icons:<br />
Fig. 5-11 Process Editor showing an example process<br />
If you need more space for the Process Editor, you can collapse the Worktable<br />
Editor by clicking in the title bar. In addition, you can collapse the Infopad<br />
windows by clicking in the title bars. You can also resize the windows by<br />
dragging the dividers between the windows.<br />
Process steps are created by dragging commands from the Control Bar onto the<br />
Process Editor. A process is then created by interlinking the process steps to<br />
create the workflow which is required by your application or experiment.<br />
The bottom part of each process step icon shows the name or names of the<br />
labware items which are involved in the operation (so-called object parameters).<br />
<strong>Freedom</strong> <strong>EVOware</strong> <strong>Software</strong> <strong>Manual</strong>, 393172, en, V<strong>2.3</strong> 5 - 17
5 - Starting <strong>Freedom</strong> <strong>EVOware</strong><br />
Overview of the Main Window in <strong>Freedom</strong> <strong>EVOware</strong><br />
Each process step is associated with a single device, and devices can typically<br />
carry out several different functions. For example, a plate washer may have a<br />
washing function, a priming function and an initialization function. This is handled<br />
by associating the process step with a command. Each device driver contains a<br />
pre-configured command for each of the device functions (the available<br />
commands are shown in the Commands section of the Control Bar, below the<br />
symbol for the device). Many of the commands have one or more execution<br />
parameters (such as the duration of the washing operation). When you create a<br />
process step by dragging the command onto the Process Editor, you will be<br />
prompted to specify the execution parameters.<br />
Each command can be associated with pre-actions and/or post-actions –<br />
additional commands which are carried out before and after the main command.<br />
For example, if you want to scan a plate in a Tecan Ultra reader with the Measure<br />
command, it is necessary to move the plate to the reader using the plate robot<br />
(with the RoMa_MoveObject command) and to open the reader door before the<br />
plate gets there (with an Ultra_Open command). Another RoMa_MoveObject<br />
command and an Ultra_Close command are needed when the scanning operation<br />
is finished. The process diagram is simplified by implementing these standard<br />
actions using pre-actions and post-actions which are linked to the Measure<br />
command. It avoids having to specify additional process steps. In most cases,<br />
<strong>Freedom</strong> <strong>EVOware</strong> configures suitable pre-actions and post-actions for you<br />
automatically. This applies above all to the plate robot (RoMa_MoveObject<br />
command).<br />
<strong>Freedom</strong> <strong>EVOware</strong> keeps track of the location of the labware on your instrument,<br />
and - to take the above example - automatically configures a suitable<br />
RoMa_MoveObject command to move the plate from its current location to the<br />
reader.<br />
The pipette command for the liquid handling arm has a large number of subcommands<br />
which are used for writing so-called scripts. In <strong>Freedom</strong> <strong>EVOware</strong><br />
Plus, if you drag the pipette command onto the Process Editor, this opens<br />
scripting mode and the Process Editor is replaced by the Script Editor (see<br />
below).<br />
Labware source icons are used at the start of a process to represent the source of<br />
the labware items (e.g. microplates or tubes) which are needed by the process.<br />
See 11.6 “Labware Generator (<strong>Freedom</strong> <strong>EVOware</strong> Plus)”, 11-16 for information<br />
on creating labware source icons.<br />
Final position icons are used to specify the final position of the labware after the<br />
process has finished. They are often associated with a storage device such as a<br />
hotel or with a waste position for discarding used labware. Final position icons are<br />
not necessary if you want to return the labware to its original position after the<br />
process has finished, for example back to a storage device such as a carousel<br />
(the “base” location). Final position icons are created by right-clicking on the<br />
background of the Process Editor and choosing Choose Final Position from the<br />
context menu.<br />
On-the-fly icons represent on-the-fly devices. Such devices always require the<br />
use of a plate robot (RoMa) to carry out their function. A typical example of this<br />
type of icon is the Symbol barcode scanner which is rigidly fixed to the<br />
instrument's deck and cannot move towards the labware to scan it. Instead, a<br />
plate robot is used to move the labware past the barcode scanner “on-the-fly”<br />
while carrying out something else, for example when moving the labware from<br />
one carrier (or process step) to another. The barcode scanner is then instructed to<br />
perform a read operation when the plate robot presents the labware. An on-the-fly<br />
icon for the barcode scanner is created by dragging the Barcode scanner<br />
command from the Control Bar onto a line which links two process steps.<br />
See 11 “Getting Started - Setting Up a New Script or Process”, 11-1 for more<br />
information.<br />
5 - 18 <strong>Freedom</strong> <strong>EVOware</strong> <strong>Software</strong> <strong>Manual</strong>, 393172, en, V<strong>2.3</strong>
5 - Starting <strong>Freedom</strong> <strong>EVOware</strong><br />
Overview of the Main Window in <strong>Freedom</strong> <strong>EVOware</strong><br />
5.4.3.1 Context Menu for the Process Editor<br />
Right-click on the Process Editor to open the context menu. The context menu is<br />
context sensitive and the options it contains depend on what you have selected (a<br />
process step icon or the background). The available options in the context menu<br />
are as follows if you select the background of the Process Editor:<br />
Choose Final Position<br />
This option adds a final position icon for labware. Final position icons are used<br />
to specify the final position of the labware after the process has finished. Final<br />
position icons are not necessary if you want to return the labware to its original<br />
position after the process has finished. See the above description of the<br />
Process Editor.<br />
Paste<br />
This option is available if you have selected a process step and choose Copy.<br />
Arrows<br />
This option allows you to choose between Rectangular and Straight arrows for<br />
the lines which connect the process steps. The choice you make solely<br />
depends on your personal taste.<br />
See 9.10 “Local Settings for Process Steps (Context Menu)”, 9-70 and<br />
9.11 “Local Settings for Labware Source Icons (Context Menu)”, 9-77 for<br />
information on the options in the context menu if you select a process step.<br />
5.4.4 The Script Editor<br />
The Script Editor, which is shown at the top right of the screen, is used to set up a<br />
pipetting (liquid handling) script.<br />
<strong>Freedom</strong><br />
<strong>EVOware</strong> Plus<br />
<strong>Freedom</strong><br />
<strong>EVOware</strong><br />
<strong>Standard</strong><br />
To open the Script Editor in <strong>Freedom</strong> <strong>EVOware</strong> Plus, select the Pipette command<br />
in the Control Bar (Liquid Handling Arm section) and drag it to the Process Editor<br />
window.<br />
After creating the script, click the Accept to accept your changes and return to the<br />
Process Editor. If you want to edit or view the script later, you can open the Script<br />
Editor again by double-clicking on the icon for the Pipette command in the<br />
Process Editor.<br />
<strong>Freedom</strong> <strong>EVOware</strong> <strong>Standard</strong> does not have a Process Editor, and displays the<br />
Script Editor as soon as it has started.<br />
<strong>Freedom</strong> <strong>EVOware</strong> <strong>Software</strong> <strong>Manual</strong>, 393172, en, V<strong>2.3</strong> 5 - 19
5 - Starting <strong>Freedom</strong> <strong>EVOware</strong><br />
Overview of the Main Window in <strong>Freedom</strong> <strong>EVOware</strong><br />
Fig. 5-12 Script Editor with three scripts open<br />
If you have opened more than one pipetting script, click the tabs below the Script<br />
Editor window if you want to view, edit, save or close one of the other scripts.<br />
If you need more space for the Script Editor, you can collapse the Worktable<br />
Editor by clicking in the title bar. In addition, you can collapse the Infopad<br />
windows by clicking in the title bars. You can also resize the windows by<br />
dragging the dividers between the windows.<br />
5.4.4.1 Context Menu for the Script Editor<br />
Right-click on the Script Editor to open the context menu. The available options in<br />
the context menu are as follows:<br />
Edit<br />
Edit the selected script line.<br />
Delete<br />
Delete the selected script line(s).<br />
Cut<br />
Cut the selected script line(s).<br />
Copy<br />
Copy the selected script line(s).<br />
Paste<br />
Paste the script line(s) in the clipboard at the current cursor position.<br />
Seach & Replace<br />
Opens the Search and Replace dialog box which allows you to replace strings<br />
in the pipetting script (e.g. the string you have specified in the User Prompt<br />
command). If you do not specify a string in the Replace with field, matching<br />
strings are deleted (you cannot carry out a search without replacing).<br />
Context Menu for the Tabs of the Script Editor<br />
Save<br />
Save the selected script.<br />
Close<br />
Close the selected script.<br />
5 - 20 <strong>Freedom</strong> <strong>EVOware</strong> <strong>Software</strong> <strong>Manual</strong>, 393172, en, V<strong>2.3</strong>
5 - Starting <strong>Freedom</strong> <strong>EVOware</strong><br />
Overview of the Main Window in <strong>Freedom</strong> <strong>EVOware</strong><br />
Open<br />
Open an additional script.<br />
5.4.5 Worktable Editor<br />
The Worktable Editor at the bottom right of the screen is a graphical<br />
representation of the pipetting instrument's worktable (deck). It shows the carriers<br />
and labware that are physically placed on the worktable. It also shows icons for<br />
the devices which are installed.<br />
Fig. 5-13 Example worktable showing carriers, labware and labware labels<br />
The gray area in the Worktable Editor represents that part of the worktable which<br />
can be accessed by the Liquid Handling Arm. This is called the pipetting area. The<br />
real worktable is normally larger than this. For example, hotels (storage shelves<br />
for plates) are normally put at the rear of the worktable, behind the pipetting area.<br />
The displayed size of the worktable is scaled automatically depending on the size<br />
of the Worktable Editor window. The displayed size of the worktable will be very<br />
small if the Worktable Editor window is small and/or a large number of device<br />
icons are visible (i.e. you have installed a large number of devices).<br />
In the above figure, 84 microplates have been put in the carousel.<br />
If you need more space for the Worktable Editor, you can collapse the Infopad<br />
windows by clicking in the title bars. You can also resize the windows by<br />
dragging the dividers between the windows. In addition, you can rearrange the<br />
device icons by dragging them to the required position.<br />
Before programming your pipetting operations, you need to place the carriers and<br />
labware which you want to use on to the worktable.<br />
The worktable layout is stored in the script or process file together with the<br />
information on the script or process.<br />
5.4.5.1 Shared worktable layouts<br />
<strong>Freedom</strong> <strong>EVOware</strong> detects automatically if scripts, processes, maintenance<br />
scripts and templates use an identical worktable layout. If you save one of these<br />
file types after changing the worktable layout, you will be asked whether you also<br />
want to update the worktable information in the other files which share the same<br />
worktable.<br />
<strong>Freedom</strong> <strong>EVOware</strong> <strong>Software</strong> <strong>Manual</strong>, 393172, en, V<strong>2.3</strong> 5 - 21
5 - Starting <strong>Freedom</strong> <strong>EVOware</strong><br />
Overview of the Main Window in <strong>Freedom</strong> <strong>EVOware</strong><br />
If you are saving a pipetting script, you will only be prompted about other pipetting<br />
scripts, maintenance scripts or script templates which share the same worktable<br />
layout. If you are saving a process, you will only be prompted about other<br />
processes or process templates which share the same worktable layout.<br />
Fig. 5-14 Prompt when saving worktable layouts which are shared<br />
Select the files whose worktable you also want to update or choose Cancel<br />
saving. The list shows all files of the selected file types (Scripts / Processes),<br />
Maintenance and Templates) which share the same worktable layout.<br />
The following options are available:<br />
Cancel saving<br />
Cancel the saving operation.<br />
Only save the active file<br />
Update the file you are saving but do not update the other files which share<br />
this worktable.<br />
Save the file and update the worktable for the selected items too<br />
Update the worktable information for the active file and for the files you have<br />
selected.<br />
If one of the other scripts which shares the same worktable layout is also<br />
currently open in the Script Editor, you will be prompted to save it first before<br />
updating.<br />
Do not show this dialog again<br />
Check this checkbox to hide this dialog box in future. In this case, <strong>Freedom</strong><br />
<strong>EVOware</strong> will only save worktable layout changes for the current file in future.<br />
To make this dialog box appear again (i.e. to uncheck the checkbox), press<br />
the Shift key when you choose Save.<br />
5.4.5.2 Context Menu for the Worktable Editor<br />
Right-click on the Worktable Editor to open the context menu. The context menu<br />
is context sensitive and the options it contains depend on what you have selected<br />
(a carrier, a labware item or the background). The available options in the context<br />
menu are as follows:<br />
5 - 22 <strong>Freedom</strong> <strong>EVOware</strong> <strong>Software</strong> <strong>Manual</strong>, 393172, en, V<strong>2.3</strong>
5 - Starting <strong>Freedom</strong> <strong>EVOware</strong><br />
Overview of the Main Window in <strong>Freedom</strong> <strong>EVOware</strong><br />
Set Grid<br />
This option is used to move a robot-only device (a device which is not<br />
accessible to the liquid handling arm) to a new position on the worktable.<br />
Choose the required grid position and click OK. Tip: If you click on a device<br />
icon in the Worktable Editor, an orange line shows the grid position which is<br />
occupied by the device.<br />
To move a carrier to a new position, click the edge of the carrier to select it<br />
and drag to the required position.<br />
Modify labware<br />
This option is only available for generated labware (labware in feeder devices<br />
or a labware repository on the worktable) and is only for <strong>Freedom</strong> <strong>EVOware</strong><br />
Plus. It opens the labware generator to allow you to edit the settings you have<br />
made (see 11.6 “Labware Generator (<strong>Freedom</strong> <strong>EVOware</strong> Plus)”, 11-16).<br />
Edit labware type<br />
This option is used to edit labware definitions.<br />
Set label<br />
This option is used to assign a label (i.e. a user-defined name) to the selected<br />
labware item.<br />
Edit carrier<br />
This option is used to edit carrier definitions.<br />
Delete<br />
This deletes the selected object. You cannot delete carriers if labware is<br />
already positioned on the carrier (you must delete the labware first).<br />
Automatic replace<br />
This activates the automatic DITI handling feature for the selected site. This<br />
option is only available for <strong>Freedom</strong> <strong>EVOware</strong> Plus and is only available for<br />
DITI racks. See 17.1 “Using the Automatic DITI Handling feature”, 17-1.<br />
Waste for DiTi racks<br />
This activates the automatic DITI rack waste feature for the selected site. This<br />
option is only available for <strong>Freedom</strong> <strong>EVOware</strong> Plus and is only available for<br />
the DITI waste site of a DITI carrier with waste. It is intended for discarding<br />
empty stackable DITI racks and spacers. See 17.1 “Using the Automatic DITI<br />
Handling feature”, 17-1.<br />
Save worktable as template<br />
This option is used to save the current worktable layout as a template. The<br />
template file which is saved contains configuration settings for <strong>Freedom</strong><br />
<strong>EVOware</strong>, for example the positions of the devices and the labware in the<br />
Worktable Editor. To choose this option, right click on the worktable (but not on<br />
labware items).<br />
<strong>Freedom</strong> <strong>EVOware</strong> <strong>Software</strong> <strong>Manual</strong>, 393172, en, V<strong>2.3</strong> 5 - 23
5 - Starting <strong>Freedom</strong> <strong>EVOware</strong><br />
Exiting <strong>Freedom</strong> <strong>EVOware</strong><br />
5.5 Exiting <strong>Freedom</strong> <strong>EVOware</strong><br />
To exit <strong>Freedom</strong> <strong>EVOware</strong>, choose Exit or Exit, unload drivers in the File menu.<br />
In the latter case, you will be shown a progress bar as <strong>Freedom</strong> <strong>EVOware</strong><br />
unloads all of the software components and device drivers. If errors are detected<br />
when unloading the device drivers, a dialog box will appear with status messages.<br />
Use the scroll bar to inspect last column (Info), which explains the reason for the<br />
error.<br />
In <strong>Freedom</strong> <strong>EVOware</strong> Plus, you must first close the Script Editor before you can<br />
exit.<br />
5 - 24 <strong>Freedom</strong> <strong>EVOware</strong> <strong>Software</strong> <strong>Manual</strong>, 393172, en, V<strong>2.3</strong>
6 - Menus<br />
File Menu<br />
6 Menus<br />
This chapter describes the menus in the <strong>Freedom</strong> <strong>EVOware</strong> software. It also<br />
describes the toolbar.<br />
The menus are only available if you have been given <strong>Freedom</strong> <strong>EVOware</strong><br />
Administrator or Application Specialist rights in the Tecan User Management<br />
system. <strong>Freedom</strong> <strong>EVOware</strong> Operators are only allowed to run existing scripts or<br />
processes and/or instrument maintenance scripts (see 7.2 “<strong>Freedom</strong> <strong>EVOware</strong><br />
Access Rights (User Levels)”, 7-3).<br />
Most of the features and dialog boxes in <strong>Freedom</strong> <strong>EVOware</strong> are provided with<br />
context-sensitive help. See 1.5 “Context-Sensitive Help System”, 1-5 for more<br />
information.<br />
6.1 File Menu<br />
<strong>Freedom</strong><br />
<strong>EVOware</strong><br />
<strong>Standard</strong>,<br />
<strong>Freedom</strong><br />
<strong>EVOware</strong> Plus<br />
This menu lets you create a new <strong>Freedom</strong> <strong>EVOware</strong> script or process, to open an<br />
existing script or process, to save the current script or process, to print the<br />
contents of a script or process, to run the Start Up Wizard, to Lock <strong>Freedom</strong><br />
<strong>EVOware</strong> if you want to leave the PC unattended and to quit <strong>Freedom</strong> <strong>EVOware</strong>.<br />
6.1.1 New<br />
<strong>Freedom</strong><br />
<strong>EVOware</strong><br />
<strong>Standard</strong>,<br />
<strong>Freedom</strong><br />
<strong>EVOware</strong> Plus<br />
This option lets you create a new script or process. A dialog box is opened to<br />
allow you to choose an existing script or process template:<br />
Fig. 6-1<br />
Choosing a template file<br />
Choose the required template and click the green arrow.<br />
Click Default Dir to choose a template from the default template directory for<br />
scripts or processes. Click User defined and navigate to another directory to<br />
choose a template from a different location. The currently chosen directory is<br />
shown in the dialog box.<br />
<strong>Freedom</strong> <strong>EVOware</strong> <strong>Software</strong> <strong>Manual</strong>, 393172, en, V<strong>2.3</strong> 6 - 1
6 - Menus<br />
File Menu<br />
If required, click the column headers Name or Date to sort the list by name or<br />
date. Type the first letter of the template name to jump to templates starting with<br />
that letter.<br />
Template files with a green icon (“worktable templates”) only contain worktable<br />
settings for <strong>Freedom</strong> <strong>EVOware</strong>, for example the positions of the devices and the<br />
labware in the Worktable Editor.<br />
Template files which contain pipetting scripts (“script templates”) have a brown<br />
icon.<br />
Template files which contain processes (“process templates”) have a blue icon.<br />
Non-validated files are shown with a gray icon if you have enabled the file<br />
validation feature (see C.2 “Setting the Validation Status of Scripts and<br />
Processes”, C-4).<br />
Click All if you want to see all of the templates which are available. Click History to<br />
see the most recently used templates. Click Favorites to see your favorite<br />
templates.<br />
Context menus for this dialog box<br />
Add to favorites<br />
Right click a template in the All or History view and choose Add to favorites<br />
from the context menu to add the template to the Favorites view.<br />
Remove from favorites<br />
Right click a template in the Favorites view and choose Remove from<br />
favorites from the context menu to remove the template from the Favorites<br />
view.<br />
Views<br />
Right click the Favorites, History or All button to open a context menu. You<br />
can then choose the view which you prefer to use (Favorites, History or All)<br />
the next time you open this dialog box.<br />
Validate, Remove validation<br />
These two options are only shown if you have enabled the file validation<br />
feature. See C.2 “Setting the Validation Status of Scripts and Processes”, C-<br />
4.<br />
6 - 2 <strong>Freedom</strong> <strong>EVOware</strong> <strong>Software</strong> <strong>Manual</strong>, 393172, en, V<strong>2.3</strong>
6 - Menus<br />
File Menu<br />
6.1.2 Open<br />
<strong>Freedom</strong><br />
<strong>EVOware</strong><br />
<strong>Standard</strong><br />
This option opens an existing script. A dialog box is opened to allow you to<br />
choose the script you want:<br />
Fig. 6-2<br />
Choosing an existing script<br />
Choose the required script file and click the green arrow.<br />
Click Default Dir to choose a script from the default script directory. Click User<br />
defined and navigate to another directory to choose a script from a different<br />
location. The currently chosen directory is shown in the dialog box.<br />
If required, click the column headers Name or Date to sort the list by name or<br />
date. Type the first letter of the script name to jump to scripts starting with that<br />
letter.<br />
Click All if you want to see all of the scripts which are available. Click History to<br />
see the most recently used scripts. Click Favorites to see your favorite scripts.<br />
Script files have a green icon. Maintenance scripts have a light orange icon and<br />
are are listed after the normal scripts.<br />
Non-validated files are shown with a gray icon if you have enabled the file<br />
validation feature (see C.2 “Setting the Validation Status of Scripts and<br />
Processes”, C-4). They are not shown at all if your <strong>Freedom</strong> <strong>EVOware</strong> access<br />
level is Operator.<br />
Context menus for this dialog box<br />
Add to favorites<br />
Right click a script in the All or History view and choose Add to favorites from<br />
the context menu to add the script to the Favorites view.<br />
Remove from favorites<br />
Right click a script in the Favorites view and choose Remove from favorites<br />
from the context menu to remove the script from the Favorites view.<br />
Views<br />
Right click the Favorites, History or All button to open a context menu. You<br />
can then choose the view which you prefer to use (Favorites, History or All)<br />
the next time you open this dialog box.<br />
<strong>Freedom</strong> <strong>EVOware</strong> <strong>Software</strong> <strong>Manual</strong>, 393172, en, V<strong>2.3</strong> 6 - 3
6 - Menus<br />
File Menu<br />
Validate, Remove validation<br />
These two options are only shown if you have enabled the file validation<br />
feature. See C.2 “Setting the Validation Status of Scripts and Processes”, C-<br />
4.<br />
<strong>Freedom</strong><br />
<strong>EVOware</strong> Plus<br />
This option opens an existing process. A dialog box is opened to allow you to<br />
choose the process you want:<br />
Fig. 6-3<br />
Choosing an existing process<br />
Choose the required process file and click the green arrow.<br />
Click Default Dir to choose a process from the default process directory. Click<br />
User defined and navigate to another directory to choose a process from a<br />
different location. The currently chosen directory is shown in the dialog box.<br />
Note: You must use the Export/Import Tool if you want to transfer processes<br />
between different <strong>Freedom</strong> <strong>EVOware</strong> installations. Do not open and run a process<br />
which has been saved on a network drive or USB stick by a different <strong>Freedom</strong><br />
<strong>EVOware</strong> installation. The process file may not contain all of the information<br />
required to run the process correctly.<br />
If required, click the column headers Name or Date to sort the list by name or<br />
date. Type the first letter of the process name to jump to processes starting with<br />
that letter.<br />
Click All if you want to see all of the processes which are available. Click History<br />
to see the most recently used processes. Click Favorites to see your favorite<br />
processes.<br />
Non-validated files are shown with a gray icon if you have enabled the file<br />
validation feature (see C.2 “Setting the Validation Status of Scripts and<br />
Processes”, C-4). They are not shown at all if your <strong>Freedom</strong> <strong>EVOware</strong> access<br />
level is Operator.<br />
Context menus for this dialog box<br />
Add to favorites<br />
Right click a process in the All or History view and choose Add to favorites<br />
from the context menu to add the process to the Favorites view.<br />
Remove from favorites<br />
Right click a process in the Favorites view and choose Remove from favorites<br />
from the context menu to remove the process from the Favorites view.<br />
6 - 4 <strong>Freedom</strong> <strong>EVOware</strong> <strong>Software</strong> <strong>Manual</strong>, 393172, en, V<strong>2.3</strong>
6 - Menus<br />
File Menu<br />
Views<br />
Right click the Favorites, History or All button to open a context menu. You<br />
can then choose the view which you prefer to use (Favorites, History or All)<br />
the next time you open this dialog box.<br />
Validate, Remove validation<br />
These two options are only shown if you have enabled the file validation<br />
feature. See C.2 “Setting the Validation Status of Scripts and Processes”, C-<br />
4.<br />
6.1.3 Save<br />
<strong>Freedom</strong><br />
<strong>EVOware</strong><br />
<strong>Standard</strong><br />
This option lets you save the current script. The file which is saved also contains<br />
information on the worktable layout which is used:<br />
Fig. 6-4<br />
Saving a script<br />
Enter the required name of the script and click the green arrow.<br />
Click Default Dir to save the script in the default script directory. Click User defined<br />
and navigate to another directory to save the script in a different location. The<br />
currently chosen directory is shown in the dialog box.<br />
Click Script to save a normal script. Click Template to save a script template. Click<br />
Maintenance to save a maintenance script (see 6.4.2 “Run Maintenance”, 6-<br />
10). Maintenance scripts are normal scripts which are saved in a special directory.<br />
You cannot choose a user defined directory for maintenance scripts.<br />
<strong>Freedom</strong><br />
<strong>EVOware</strong> Plus<br />
This option lets you save the current process. You will be prompted for a file name<br />
if you have not already assigned one. The file which is saved also contains<br />
information on the worktable layout which is used:<br />
<strong>Freedom</strong> <strong>EVOware</strong> <strong>Software</strong> <strong>Manual</strong>, 393172, en, V<strong>2.3</strong> 6 - 5
6 - Menus<br />
File Menu<br />
Fig. 6-5<br />
Saving a process<br />
Enter the required name of the process and click the green arrow.<br />
Click Default Dir to save the process in the default process directory. Click User<br />
defined and navigate to another directory to save the process in a different<br />
location. The currently chosen directory is shown in the dialog box.<br />
Click Process to save a normal process. Click Template to save a process<br />
template.<br />
Note: If you save a process on a network drive or USB stick, do not open it using<br />
a different <strong>Freedom</strong> <strong>EVOware</strong> installation. The process file may not contain all of<br />
the information required to run the process correctly on the other PC. You must<br />
use the Export/Import to to transfer processes between different <strong>Freedom</strong><br />
<strong>EVOware</strong> installations.<br />
6.1.4 Save As ...<br />
<strong>Freedom</strong><br />
<strong>EVOware</strong><br />
<strong>Standard</strong>,<br />
<strong>Freedom</strong><br />
<strong>EVOware</strong> Plus<br />
This option lets you save the current script or process using a different file name<br />
to before. You will be prompted for the file name. See 6.1.3 “Save”, 6-5 for<br />
additional information.<br />
6.1.5 Delete<br />
This option lets you delete a script, process or method.<br />
6.1.6 Print<br />
If you have a printer connected to your computer, this option lets you print<br />
<strong>Freedom</strong> <strong>EVOware</strong> scripts and processes. The following items are printed:<br />
6 - 6 <strong>Freedom</strong> <strong>EVOware</strong> <strong>Software</strong> <strong>Manual</strong>, 393172, en, V<strong>2.3</strong>
6 - Menus<br />
File Menu<br />
<strong>Freedom</strong><br />
<strong>EVOware</strong><br />
<strong>Standard</strong><br />
<strong>Freedom</strong><br />
<strong>EVOware</strong> Plus<br />
• The script<br />
• The worktable layout<br />
• The name of the script<br />
• The name of the currently logged in user<br />
• The page number, time and date<br />
If the Process Editor is open:<br />
• The process diagram<br />
• Information on each of the process steps<br />
• The worktable layout<br />
• The name of the currently logged in user<br />
• The page number, time and date<br />
If the Script Editor is open:<br />
• The script<br />
• The worktable layout<br />
• The name of the script and the name of the process which uses it<br />
• The name of the currently logged in user<br />
• The page number, time and date<br />
6.1.7 Start Up Wizard<br />
This option runs the Start Up Wizard. See 5.2 “Startup Wizard, <strong>Freedom</strong><br />
<strong>EVOware</strong> <strong>Standard</strong>”, 5-5 and/or 5.3 “Startup Wizard, <strong>Freedom</strong> <strong>EVOware</strong> Plus”,<br />
5-7.<br />
6.1.8 Recent Scripts<br />
This menu item is only shown in <strong>Freedom</strong> <strong>EVOware</strong> <strong>Standard</strong>. <strong>Freedom</strong><br />
<strong>EVOware</strong> keeps a list of up to eight of the most recently used scripts. You can<br />
open one of the recent scripts by choosing it from the list.<br />
6.1.9 Lock <strong>EVOware</strong><br />
This option is used to log out the current <strong>Freedom</strong> <strong>EVOware</strong> user. To prevent<br />
unauthorized use of the software, you should do this if you plan to leave the PC<br />
and the pipetting instrument unattended.<br />
You must log in to <strong>Freedom</strong> <strong>EVOware</strong> again to regain control of the program.<br />
Another use of the Lock function is to switch <strong>Freedom</strong> <strong>EVOware</strong> users when you<br />
are handing over to another employee due to a change of laboratory staff<br />
(evening shift etc.). In this case, you should log out and immediately log in again<br />
with the new user name.<br />
If you log out while a script or process is running, the script or process continues<br />
to run. All other <strong>Freedom</strong> <strong>EVOware</strong> functions are disabled until you log in again.<br />
Note: In an emergency, you can stop the script or process (i.e. the pipetting) by<br />
pressing the Pause button on the pipetting instrument.<br />
<strong>Freedom</strong> <strong>EVOware</strong> <strong>Software</strong> <strong>Manual</strong>, 393172, en, V<strong>2.3</strong> 6 - 7
6 - Menus<br />
Edit Menu<br />
Note: Irrespective of the Lock <strong>Freedom</strong> <strong>EVOware</strong> feature, users are automatically<br />
logged out after a specified time during which no keyboard or mouse-click<br />
activities have been detected (see 7 “Tecan User Management System”, 7-1).<br />
6.1.10 Exit<br />
This option closes all currently open scripts and/or processes, de-initializes the<br />
instrument, saves configuration settings and quits <strong>Freedom</strong> <strong>EVOware</strong>.<br />
6.1.11 Exit, Unload Drivers<br />
To ensure that <strong>Freedom</strong> <strong>EVOware</strong> starts quickly, all of the Tecan drivers you have<br />
chosen to use are loaded each time the PC is started and remain loaded while the<br />
PC is running (see 5.1.2 “Driver pre-loading”, 5-2). Choose this option if you<br />
want to unload the Tecan drivers when you quit <strong>Freedom</strong> <strong>EVOware</strong>. The drivers<br />
should be unloaded e.g. if <strong>Freedom</strong> <strong>EVOware</strong> reports an internal error. The<br />
drivers will be loaded again when you re-start <strong>Freedom</strong> <strong>EVOware</strong>.<br />
If you run <strong>Freedom</strong> <strong>EVOware</strong> for an extended period without unloading the<br />
drivers, this can result in a slight degradation of the performance (throughput of<br />
your scripts and processes). Accordingly, we recommend you to unload the<br />
drivers using the menu option Exit, Unload Drivers and then to restart <strong>Freedom</strong><br />
<strong>EVOware</strong> every six or seven days. Microsoft Windows, too, can suffer from a<br />
slight degradation of the performance - independently of <strong>Freedom</strong> <strong>EVOware</strong> - if<br />
you do not shut down and then restart your PC from time to time.<br />
The driver pre-loading feature can be disabled in the Configuration Tool (see<br />
8.4.1.1 “Device Information Tab”, 8-21).<br />
Note: If you have made configuration changes using the Configuration Tool, the<br />
drivers will be unloaded automatically when you quit <strong>Freedom</strong> <strong>EVOware</strong>.<br />
6.2 Edit Menu<br />
This menu lets you cut, copy and paste <strong>Freedom</strong> <strong>EVOware</strong> script commands and<br />
process steps (see 11.4 “Setting Up a Pipetting Script in <strong>Freedom</strong> <strong>EVOware</strong><br />
<strong>Standard</strong>”, 11-4) and 11.5 “Setting Up a Process in <strong>Freedom</strong> <strong>EVOware</strong> Plus”,<br />
11-7.<br />
6.2.1 Undo / Redo<br />
The two options in this sub-menu are used to undo and redo changes you have<br />
made to a pipetting script in the Script Editor.<br />
6.2.2 Undo / Redo Configuration<br />
The two options in this sub-menu are used to undo and redo changes you have<br />
made to the <strong>Freedom</strong> <strong>EVOware</strong> configuration settings for carriers, labware, liquid<br />
classes and robot vectors.<br />
6 - 8 <strong>Freedom</strong> <strong>EVOware</strong> <strong>Software</strong> <strong>Manual</strong>, 393172, en, V<strong>2.3</strong>
6 - Menus<br />
View Menu<br />
6.<strong>2.3</strong> Cut / Copy / Paste<br />
<strong>Freedom</strong> <strong>EVOware</strong> lets you duplicate and move script commands and process<br />
steps using Cut, Copy & Paste. The same options are available if you right-click in<br />
the Script Editor or Process Editor.<br />
6.2.4 Search & Replace<br />
This menu opens the Search and Replace dialog box which allows you to replace<br />
strings in the pipetting script (e.g. the string you have specified in the User Prompt<br />
command). If you do not specify a string in the Replace with field, matching strings<br />
are deleted (you cannot carry out a search without replacing).<br />
6.2.5 Auto-Validation<br />
Pipetting scripts are normally checked for errors automatically when you add each<br />
new command to the script (11.4.2.1 “Checking the Pipetting Script for Errors”,<br />
11-5). Choose this menu item to toggle auto-validation on and off (a check mark<br />
alongside this menu item shows that auto-validation is switched on).<br />
If the script contains errors and auto-validation is switched on, the faulty<br />
command(s) are marked in red and you cannot click Run in the Toolbar to start the<br />
Runtime Controller and run the script.<br />
If the script contains errors and auto-validation is switched off, the faulty<br />
command(s) are not marked in red and you can click Run in the Toolbar to start<br />
the Runtime Controller. Uncheck the Run full script checkbox in the Runtime<br />
Controller if you want to run part of the script only, e.g. for testing purposes. If you<br />
run the full script, you will get errors. The errors are shown in the Log window.<br />
6.2.6 Validate Script<br />
This menu item is used to validate a pipetting script manually (i.e. check for<br />
errors). You can only choose this menu item if you have switched off autovalidation.<br />
If auto-validation is switched on, the script is validated automatically<br />
when you add each new command to the script. See also 11.4.2.1 “Checking the<br />
Pipetting Script for Errors”, 11-5.<br />
6.3 View Menu<br />
This menu lets you view or hide the Worktable Editor, Infopads and Log Window.<br />
6.3.1 Worktable<br />
This option is used to view or hide the Worktable Editor.<br />
<strong>Freedom</strong> <strong>EVOware</strong> <strong>Software</strong> <strong>Manual</strong>, 393172, en, V<strong>2.3</strong> 6 - 9
6 - Menus<br />
Execute Menu<br />
6.3.2 Infopads<br />
This option is used to view or hide the Infopads for the Process Editor or the Script<br />
Editor (upper infopad) or the Worktable Editor (lower infopad).<br />
6.3.3 Log Window<br />
This option is used to view or hide the Log window, a troubleshooting tool that<br />
tracks every command sent by the computer to the instrument, every response<br />
returned from the instrument to the computer and any user input. The content and<br />
format of the log corresponds to a Full log file of type LOG (see A.1 “Overview of<br />
the Log Files”, A-1).<br />
6.4 Execute Menu<br />
This menu lets you run scripts and processes, run instrument maintenance<br />
functions, run tools and VB scripts and declare variables for use in scripts.<br />
6.4.1 Run<br />
This option is used to run scripts and processes. See 12 “Running Scripts and<br />
Processes”, 12-1.<br />
6.4.2 Run Maintenance<br />
This option is used to run maintenance scripts for the pipetting instrument and/or<br />
optional devices. Maintenance scripts are normal scripts which are saved in a<br />
special directory. They are created using the Script Editor. Maintenance scripts<br />
can only be created by the <strong>Freedom</strong> <strong>EVOware</strong> Administrator or Application<br />
Specialist.<br />
The following script commands are mainly intended for use in maintenance<br />
scripts:<br />
• Fill System (384 tip head) (see 15.56.13, 15-138),<br />
• Load the Te-MO (see 15.56.12, 15-138),<br />
• <strong>Manual</strong> Tip Alignment (see 15.27, 15-57).<br />
The following script commands are also useful in maintenance scripts:<br />
• Wash Tips (see 15.4, 15-8),<br />
• Drop DiTis (see 15.8, 15-14),<br />
• Set DiTi Position (see 15.9, 15-15),<br />
• Send Command (see 15.67, 15-158).<br />
The following device command is also useful in maintenance scripts:<br />
• Carousel - ReadAllBarcodes.<br />
A selection of commonly-needed maintenance scripts are provided with the<br />
<strong>Freedom</strong> <strong>EVOware</strong> installation. The purpose of each of the scripts is explained in<br />
a Comment command at the start of the script. The scripts are intended for both<br />
6 - 10 <strong>Freedom</strong> <strong>EVOware</strong> <strong>Software</strong> <strong>Manual</strong>, 393172, en, V<strong>2.3</strong>
6 - Menus<br />
Execute Menu<br />
<strong>Freedom</strong> <strong>EVOware</strong> Plus and <strong>Freedom</strong> <strong>EVOware</strong> <strong>Standard</strong>, but they can only be<br />
viewed and modified by loading <strong>Freedom</strong> <strong>EVOware</strong> <strong>Standard</strong>.<br />
<strong>Freedom</strong><br />
<strong>EVOware</strong><br />
<strong>Standard</strong><br />
<strong>Freedom</strong><br />
<strong>EVOware</strong> Plus<br />
To create a maintenance script, specify the script in the Script Editor, click Save<br />
and click the Maintenance button in the Save File dialog box. The script will then<br />
appear automatically in the Run Maintenance menu. Choose the script from the<br />
maintenance menu when you want to execute the maintenance function. If you<br />
want to make changes to the maintenance script, edit it using the Script Editor and<br />
save it again.<br />
To create a maintenance script, specify the script in the Script Editor, click Save as<br />
Template and click the Maintenance button in the Save File dialog box. The script<br />
will then appear automatically in the Run Maintenance menu. Choose the script<br />
from the maintenance menu when you want to execute the maintenance function.<br />
<strong>Freedom</strong> <strong>EVOware</strong> Plus cannot load a maintenance script to make changes.<br />
Instead, <strong>Freedom</strong> <strong>EVOware</strong> Plus users should load <strong>Freedom</strong> <strong>EVOware</strong> <strong>Standard</strong><br />
instead, which allows you to edit the script using the the Script Editor.<br />
Note: In <strong>Freedom</strong> <strong>EVOware</strong> Plus, you cannot use device commands in scripts. To<br />
create maintenance scripts which contain device commands, <strong>Freedom</strong> <strong>EVOware</strong><br />
Plus users should load <strong>Freedom</strong> <strong>EVOware</strong> <strong>Standard</strong> to create the script. The<br />
maintenance scripts you create with <strong>Freedom</strong> <strong>EVOware</strong> <strong>Standard</strong> are also<br />
available in <strong>Freedom</strong> <strong>EVOware</strong> Plus.<br />
It is recommended to choose descriptive file names for the maintenance scripts to<br />
ensure that their purpose is clear to instrument operators.<br />
6.4.3 Clear Recovery Status<br />
<strong>Freedom</strong> <strong>EVOware</strong> provides functions for script and process error recovery. This<br />
allows aborted pipetting scripts and processes to be restarted where they were<br />
stopped (see 17.2 “ Script and process recovery function”, 17-5).<br />
Use this menu option to clear the Recovery status if you want the script or process<br />
to start again at the beginning, even if it was not fully executed the last time it was<br />
run.<br />
6.4.4 Tools<br />
This option is used to run tools (external programs) manually, without running an<br />
<strong>Freedom</strong> <strong>EVOware</strong> script or process.<br />
6.4.4.1 Creating Custom Menu Items for Tools (External Programs)<br />
When it starts, <strong>Freedom</strong> <strong>EVOware</strong> scans the \database\Tools<br />
directory for executable files with the extensions EXE, COM or BAT. The<br />
filenames then appear as custom entries in the Execute > Tools menu and allow<br />
the tools to be executed manually, without running a script or process.<br />
See 15.36 “Execute Application Command”, 15-96 if you want to execute a tool<br />
from within an <strong>Freedom</strong> <strong>EVOware</strong> script.<br />
<strong>Freedom</strong> <strong>EVOware</strong> <strong>Software</strong> <strong>Manual</strong>, 393172, en, V<strong>2.3</strong> 6 - 11
6 - Menus<br />
Execute Menu<br />
6.4.5 VB Scripts<br />
This option is used to run Visual Basic scripts manually, without running an<br />
<strong>Freedom</strong> <strong>EVOware</strong> script or process.<br />
6.4.5.1 Creating Custom Menu Items for VB Scripts<br />
When it starts, <strong>Freedom</strong> <strong>EVOware</strong> scans the \Database\VBscripts<br />
directory for VB scripts. The filenames then appear as custom entries in the<br />
Execute > Tools menu and allow the VB scripts to be executed manually, without<br />
running a script or process.<br />
See 15.50 “Execute VB Script Command”, 15-114 if you want to execute a VB<br />
script from within an <strong>Freedom</strong> <strong>EVOware</strong> script.<br />
6.4.6 Declare Variables<br />
This option, which is only available in <strong>Freedom</strong> <strong>EVOware</strong> Plus, is used to declare<br />
variables which can be shared between different pipetting scripts.<br />
<strong>Freedom</strong> <strong>EVOware</strong> Plus processes can contain one or more pipetting scripts. in<br />
addition, <strong>Freedom</strong> <strong>EVOware</strong> Plus allows you to run several copies of the same<br />
process in parallel. Each copy of the process is called an instance. <strong>Freedom</strong><br />
<strong>EVOware</strong> Plus also allows you to run different processes in parallel.<br />
All variables (including pre-defined variables) must be declared before use (see<br />
also 14.1.1 “Declaring Variables in Scripts”, 14-1).<br />
Variables in <strong>Freedom</strong> <strong>EVOware</strong> Plus can have one of three scopes (run, instance<br />
and script).<br />
• Run: Variables with this scope are shared globally by all of the pipetting<br />
scripts in all instances of all processes.<br />
• Instance: Variables with this scope are shared by all of the pipetting scripts in<br />
the same process or process copy.<br />
• Script: Variables with this scope are declared in pipetting scripts with the Set<br />
Variable command (see 15.41 “Set Variable Command”, 15-101). They are<br />
not shared with other scripts.<br />
If you declare a variable with scope Run or Instance, do not declare it again<br />
within a script. This will cause an error.<br />
Note: In <strong>Freedom</strong> <strong>EVOware</strong> <strong>Standard</strong>, all variables have the scope Script and<br />
are declared with the Set Variable command.<br />
6.4.6.1 Set Process Variables Dialog Box<br />
This dialog box is used to declare variables of scope Run and/or Instance and is<br />
only available in <strong>Freedom</strong> <strong>EVOware</strong> Plus:<br />
6 - 12 <strong>Freedom</strong> <strong>EVOware</strong> <strong>Software</strong> <strong>Manual</strong>, 393172, en, V<strong>2.3</strong>
6 - Menus<br />
Execute Menu<br />
Fig. 6-6<br />
Set Process Variables dialog box<br />
Name<br />
Specify the required variable name. Variable names can be 1 to 64 characters<br />
in length and must not begin with a digit. Variable names are not casesensitive.<br />
See also 14.1 “Variables and Expressions in Scripts”, 14-1.<br />
Note: You are not allowed to declare pre-defined variables with this dialog box.<br />
See 14.1.4 “Pre-Defined Variables”, 14-4 for information on the reserved names<br />
for pre-defined variables. Pre-defined variables must be declared before use with<br />
the Set Variable command.<br />
Type<br />
Choose either number (numeric variable) or string.<br />
Scope<br />
Choose either “run” or “instance” (see 6.4.6.4 “Scope of a Variable”, 6-15).<br />
Initial value<br />
Specify the required initial value.<br />
Mode<br />
Fixed value: The variable will be assigned the specified initial value.<br />
User Query: The operator will be prompted for the value of the variable when<br />
the process is run (see below).<br />
File import: The value of the variable will be imported from a file (see<br />
6.4.6.3 “Import File for the Declare Variables Feature”, 6-14).<br />
6.4.6.2 Set Process Variable Values Dialog Box<br />
If you have declared variables with the Declare Variables feature in <strong>Freedom</strong><br />
<strong>EVOware</strong> Plus and you chose User Query in the Set Process Variables dialog<br />
box, the following dialog box is shown when the process is run:<br />
<strong>Freedom</strong> <strong>EVOware</strong> <strong>Software</strong> <strong>Manual</strong>, 393172, en, V<strong>2.3</strong> 6 - 13
6 - Menus<br />
Execute Menu<br />
Fig. 6-7<br />
Set Process Variable Values dialog box<br />
Entered the required initial value for the variables in the Initial value column.<br />
In the above example, the variables were declared as shown in Fig. 6-6, 6-13<br />
and the number of process instances (process copies) was set to three in the<br />
Runtime Controller when the process was run.<br />
The scope of the Barcode variable is instance and a different value can be<br />
entered for each of the three process instances. The scope of the Microplates<br />
variable is run; the value you specify will be used for all three process instances.<br />
This is indicated by the value 0 in the Instance column.<br />
6.4.6.3 Import File for the Declare Variables Feature<br />
If you choose File Import in the Mode column of the Set Process Variables dialog<br />
box, you must create a comma-separated text file which contains the required<br />
values of the variables. The file name must be _var.csv, for<br />
example myproc1_var.csv.<br />
The file must be stored in the sub-directory which contains the process (the .epd<br />
file), for example:<br />
C:\Program Files\Tecan\<strong>EVOware</strong>\database\processes\myproc1<br />
Each line of the file should have the following syntax:<br />
variable name,process instance,value<br />
In the following example, the variables were declared as shown in Fig. 6-6, 6-13<br />
and the number of process instances (process copies) will be set to three in the<br />
Runtime Controller when the process is run:<br />
Tubes,1,5<br />
Tubes,2,7<br />
Tubes,3,4<br />
Counter2,0,25<br />
The scope of the Tubes variable is instance and a different value can be specified<br />
for each of the process instances. The scope of the Counter variable is run; the<br />
value you specify will be used for all three process instances. This is indicated by<br />
the value 0 in the Instance field.<br />
For variables of scope instance, make sure that you specify enough lines for all of<br />
the process instances that you will run. If there are not enough entries in the file,<br />
<strong>Freedom</strong> <strong>EVOware</strong> will use the initial value that you specified in the Set Process<br />
Variables dialog box for the missing entries.<br />
6 - 14 <strong>Freedom</strong> <strong>EVOware</strong> <strong>Software</strong> <strong>Manual</strong>, 393172, en, V<strong>2.3</strong>
6 - Menus<br />
Administrator Menu<br />
6.4.6.4 Scope of a Variable<br />
The scope of a variable describes the extent of validity of the variable. For<br />
example, variables with the scope script only have meaningful values within the<br />
script within which they are declared. They are “unknown” to other scripts in the<br />
same process. If you re-use a script from another application and the scope of the<br />
variables it uses is “script”, you don’t need to check whether other scripts in your<br />
process use the same variable names, which could otherwise lead to unexpected<br />
results. On the other hand, if you want to exchange parameters with other scripts<br />
in the process, the scope of the respective variables must be instance or run. See<br />
also 14.1 “Variables and Expressions in Scripts”, 14-1.<br />
Variable scope is only relevant in <strong>Freedom</strong> <strong>EVOware</strong> Plus.<br />
6.4.7 Move Arms<br />
This option is used to move the LiHa, the RoMa, the PnP, the MCA, the MCA384,<br />
the Te-MO or the PosID to the required position by pressing keys on the numeric<br />
keypad. See 9.3 “Moving the Arms and Other Devices”, 9-3.<br />
6.4.8 Switch to real mode<br />
This option is used to switch <strong>Freedom</strong> <strong>EVOware</strong> from offline mode to real mode<br />
(see 6.7.3 “Status Bar”, 6-20). In addition, the pipetting instrument will be<br />
initialized again if necessary.<br />
For example, <strong>Freedom</strong> <strong>EVOware</strong> will switch to offline mode if an instrument error<br />
is detected and you click Abort in the Instrument Error dialog box. After resolving<br />
the cause of the error, you can use this option to switch back to real mode without<br />
needing to restart <strong>Freedom</strong> <strong>EVOware</strong>.<br />
6.5 Administrator Menu<br />
This menu is used to start the Configuration Tool, to change the password of the<br />
currently logged in user and to log in to <strong>Freedom</strong> <strong>EVOware</strong> as a different user<br />
without quitting <strong>Freedom</strong> <strong>EVOware</strong>.<br />
6.5.1 Change User<br />
This option is used to log in to <strong>Freedom</strong> <strong>EVOware</strong> as a different user without<br />
quitting <strong>Freedom</strong> <strong>EVOware</strong> first:<br />
<strong>Freedom</strong> <strong>EVOware</strong> <strong>Software</strong> <strong>Manual</strong>, 393172, en, V<strong>2.3</strong> 6 - 15
6 - Menus<br />
Administrator Menu<br />
Fig. 6-8<br />
Change User dialog box<br />
6.5.2 Change Password<br />
This option is used to change the password of the currently logged in user. You<br />
will be prompted to enter your old password and the new password:<br />
Fig. 6-9<br />
Change Password dialog box<br />
Passwords cannot be reused and must follow certain rules. Password rules are<br />
configured in <strong>Freedom</strong> <strong>EVOware</strong>’s Configuration Tool (see 8.3.3 “User<br />
Management Section”, 8-16.<br />
6.5.3 Configure<br />
This option is used to start the Configuration Tool (see 8 “Configuration Tool”, 8-<br />
1). The Configuration Tool is used to configure general settings for <strong>Freedom</strong><br />
<strong>EVOware</strong>. It also allows you to configure settings for the liquid handling arm,<br />
instrument options and optional devices and to set up <strong>Freedom</strong> <strong>EVOware</strong> users<br />
and groups.<br />
6 - 16 <strong>Freedom</strong> <strong>EVOware</strong> <strong>Software</strong> <strong>Manual</strong>, 393172, en, V<strong>2.3</strong>
6 - Menus<br />
Help Menu<br />
6.6 Help Menu<br />
This menu is used to access the context-sensitive online help and identify the<br />
<strong>Freedom</strong> <strong>EVOware</strong> version that you are using.<br />
6.6.1 Contents<br />
This option opens the first page of the context-sensitive help and selects the<br />
contents tab. Press F1 instead if you want information on the currently selected<br />
item or dialog box.<br />
6.6.2 Index<br />
This option opens the first page of the context-sensitive help and selects the index<br />
tab. Press F1 instead if you want information on the currently selected item or<br />
dialog box.<br />
6.6.3 Using Help<br />
This option opens a help page with brief instructions on using the contextsensitive<br />
help.<br />
6.6.4 Error History<br />
This option opens a dialog box with a list of the last 20 information or error<br />
messages which were displayed while using <strong>Freedom</strong> <strong>EVOware</strong>. In the case of<br />
error messages, the ID column shows the Error ID string (see 18.3 “List of Error<br />
Messages”, 18-32).<br />
Double-click on an entry in the list to see more details of the message.<br />
If required, users with the user level Administrator or Application Specialist can<br />
add more information to each message such as a reason and a possible solution.<br />
The user-defined texts are saved in <strong>Freedom</strong> <strong>EVOware</strong> and appear in future each<br />
time the message is displayed. See 18.2 “Editing Messages in Message Boxes”,<br />
18-29 for more information.<br />
6.6.5 Service Contact<br />
This option opens a window with information on the service engineer who is<br />
responsible for supporting your Tecan hardware and software components. The<br />
contact information which shown on this page can be entered and/or edited using<br />
the IQ Wizard (see A.9.10 “IQ Wizard”, A-55, Customer information).<br />
6.6.6 About<br />
This option shows information on the <strong>Freedom</strong> <strong>EVOware</strong> version which is<br />
installed, the available real memory and hard disk memory, Tecan copyright<br />
<strong>Freedom</strong> <strong>EVOware</strong> <strong>Software</strong> <strong>Manual</strong>, 393172, en, V<strong>2.3</strong> 6 - 17
6 - Menus<br />
<strong>Freedom</strong> <strong>EVOware</strong> Toolbar<br />
information and the hardlock (dongle) ID. If there is no hardlock fitted, “Non<br />
upgradable hardlock” is shown.<br />
Version information for the currently installed device drivers can be viewed using<br />
the Configuration Tool (see 8.4.1.1 “Device Information Tab”, 8-21).<br />
It also shows the intended use of your <strong>Freedom</strong> <strong>EVOware</strong> configuration - general<br />
purpose applications or research use only. See 3.2 “Intended Use of the <strong>Freedom</strong><br />
<strong>EVOware</strong> <strong>Software</strong>”, 3-3 for more information.<br />
See 3.1 “Overview of <strong>Freedom</strong> <strong>EVOware</strong>”, 3-1 for an introduction to the<br />
<strong>Freedom</strong> <strong>EVOware</strong> software.<br />
6.7 <strong>Freedom</strong> <strong>EVOware</strong> Toolbar<br />
The toolbar gives you quick access to commonly used functions:<br />
Fig. 6-10 Toolbar<br />
New<br />
See 6.1.1 “New”, 6-1.<br />
Open<br />
See 6.1.2 “Open”, 6-3<br />
Save<br />
See 6.1.3 “Save”, 6-5.<br />
Initialize<br />
This function is used to manually initialize the arms of the pipetting instrument.<br />
It also initializes all of the optional devices.<br />
Each time <strong>Freedom</strong> <strong>EVOware</strong> or an <strong>Freedom</strong> <strong>EVOware</strong> script or process is<br />
started, the status of the instrument arms (LiHa, RoMa and PnP) and optional<br />
devices (e.g. Te-MO or Te-VacS) is checked and they are initialized if<br />
necessary. In addition, a full initialization sequence is carried out when<br />
<strong>Freedom</strong> <strong>EVOware</strong> is started for the first time after powering up the pipetting<br />
instrument.<br />
<strong>Manual</strong> initialization is not normally necessary, but can be used as a quick<br />
check that the instrument is responding properly. When you use the Initialize<br />
function, <strong>Freedom</strong> <strong>EVOware</strong> determines automatically whether it is necessary<br />
to carry out a full or a partial initialization sequence.<br />
See 8.4.2.8 “Arm Initialization”, 8-31 for more information.<br />
Print<br />
See 6.1.6 “Print”, 6-6.<br />
Configure<br />
See 6.5.3 “Configure”, 6-16.<br />
Startup<br />
See 6.1.7 “Start Up Wizard”, 6-7.<br />
Maintenance<br />
To run a maintenance script, click this button and choose the script from the<br />
pull-down list. See 6.4.2 “Run Maintenance”, 6-10.<br />
6 - 18 <strong>Freedom</strong> <strong>EVOware</strong> <strong>Software</strong> <strong>Manual</strong>, 393172, en, V<strong>2.3</strong>
6 - Menus<br />
<strong>Freedom</strong> <strong>EVOware</strong> Toolbar<br />
Run<br />
This button is used to run scripts and processes (see 12 “Running Scripts and<br />
Processes”, 12-1). Click the small black arrow to choose one of the three<br />
Run options from the pull-down list:<br />
– Run: This option opens the Runtime Controller, where you can choose the<br />
required runtime settings before you run the script or process.<br />
– Run direct: This option runs the currently loaded script or process<br />
immediately using the default settings of the Runtime Controller. In<br />
<strong>Freedom</strong> <strong>EVOware</strong> Plus, you can also choose from the pull-down list how<br />
many process instances (copies of the process) you want to run in<br />
parallel. For more information on process instances, see 12.2 “Running<br />
and Optimizing a Process (<strong>Freedom</strong> <strong>EVOware</strong> Plus)”, 12-5.<br />
– Recover: This option is only available if the script or process was<br />
interrupted while it was running - for example due to a runtime error or<br />
because Pause was clicked - and did not execute completely. See<br />
17.2 “ Script and process recovery function”, 17-5.<br />
Lock<br />
See 6.1.9 “Lock <strong>EVOware</strong>”, 6-7.<br />
Change User<br />
See 6.5.1 “Change User”, 6-15.<br />
6.7.1 Toolbar Buttons for the Script Editor (<strong>Freedom</strong> <strong>EVOware</strong> Plus)<br />
The following buttons are shown on the right side of the toolbar if you click on the<br />
Script Editor window:<br />
Fig. 6-11 Toolbar buttons for the Script Editor<br />
Accept<br />
Accept any changes you have made to the script, close the Script Editor and<br />
return to the Process Editor. To permanently save any changes you have<br />
made for future <strong>Freedom</strong> <strong>EVOware</strong> sessions, you must also choose Save in<br />
the File menu.<br />
Reject<br />
Reject any changes you have made to the script, close the Script Editor and<br />
return to the Process Editor.<br />
Load a Template<br />
Load an existing script template. Please note that the labware definitions are<br />
taken from the currently loaded process, and not from the script template. If<br />
you get script validation errors, open each line of the script and select the<br />
appropriate labware on the worktable.<br />
Save as Template<br />
Save the current script as a template. The file which is saved also contains<br />
configuration settings for <strong>Freedom</strong> <strong>EVOware</strong>, for example the positions of the<br />
devices and the labware in the Worktable Editor.<br />
<strong>Freedom</strong> <strong>EVOware</strong> <strong>Software</strong> <strong>Manual</strong>, 393172, en, V<strong>2.3</strong> 6 - 19
6 - Menus<br />
<strong>Freedom</strong> <strong>EVOware</strong> Toolbar<br />
6.7.2 Toolbar Buttons for the Worktable Editor<br />
The following button is shown on the right side of the toolbar if you click on the<br />
Worktable Editor window.<br />
Fig. 6-12 Toolbar button for the Worktable Editor<br />
Save Worktable as Template<br />
Save the current worktable layout (the positions of the devices and the<br />
labware) as a template.<br />
6.7.3 Status Bar<br />
The status bar displays the following information:<br />
A B C D E<br />
Fig. 6-13 Status bar<br />
A<br />
User level<br />
D<br />
Dongle type<br />
B<br />
Operation mode<br />
E<br />
Clock<br />
C<br />
Feature level<br />
The fields in the status bar are as follows:<br />
User Level<br />
This shows the level of the currently logged in user:<br />
Administrator = Administrator<br />
Specialist = Application Specialist<br />
Operator = Power User<br />
The Status Bar is not shown at all if you are logged in as Operator.<br />
Operation Mode<br />
This shows the operation mode as follows:<br />
REAL MODE = Real mode (normal operation)<br />
OFFLINE = Offline mode (previously called simulation mode).<br />
3D SIMULATION = <strong>Freedom</strong> <strong>EVOware</strong> is connected to EVOSim (see<br />
A.14 “Configuring and Using the 3D Simulation Tool EVOSim”, A-103).<br />
<strong>Freedom</strong> <strong>EVOware</strong> will run in offline mode if (a) you choose to start in offline<br />
mode - see A.6 “Command Line Parameters (<strong>Freedom</strong> <strong>EVOware</strong>)”, A-29 -<br />
or (b) <strong>Freedom</strong> <strong>EVOware</strong> cannot detect a hardlock and/or a pipetting<br />
instrument when it starts (see 5.1.4 “Instrument and Hardlock Detection”, 5-<br />
3). In offline mode, firmware commands such as movement commands are<br />
not sent to the pipetting instrument (i.e. pipetting does not take place).<br />
Feature Level<br />
This field shows the <strong>Freedom</strong> <strong>EVOware</strong> feature level:<br />
STD = <strong>Freedom</strong> <strong>EVOware</strong> <strong>Standard</strong><br />
PLUS = <strong>Freedom</strong> <strong>EVOware</strong> Plus<br />
6 - 20 <strong>Freedom</strong> <strong>EVOware</strong> <strong>Software</strong> <strong>Manual</strong>, 393172, en, V<strong>2.3</strong>
6 - Menus<br />
<strong>Freedom</strong> <strong>EVOware</strong> Toolbar<br />
Dongle Type<br />
This field shows which type of hardlock (dongle) is fitted to your PC:<br />
DEMO= No hardlock detected<br />
EVO = Hardlock for <strong>Freedom</strong> <strong>EVOware</strong> <strong>Standard</strong>.<br />
EVO+ = Hardlock for <strong>Freedom</strong> <strong>EVOware</strong> Plus.<br />
EVO75 = Hardlock for <strong>Freedom</strong> <strong>EVOware</strong> <strong>Standard</strong> and <strong>Freedom</strong> EVO 75.<br />
EVO75+ = Hardlock for <strong>Freedom</strong> <strong>EVOware</strong> Plus and <strong>Freedom</strong> EVO 75.<br />
3D SIM = <strong>Freedom</strong> <strong>EVOware</strong> is being used with the 3D simulator EVOSim; a<br />
dongle is not required in this case.<br />
The hardlocks EVO and EVO+ can be used for all supported pipetting<br />
instruments. The hardlocks EVO75 and EVO75+ can only be used for the<br />
<strong>Freedom</strong> EVO 75 pipetting instrument.<br />
See also 3.1.2 “Hardlocks for <strong>Freedom</strong> <strong>EVOware</strong> <strong>Standard</strong> and <strong>Freedom</strong><br />
<strong>EVOware</strong> Plus”, 3-2.<br />
Clock<br />
This shows the current time as reported by the PC’s clock.<br />
Note: If a blinking message “Your software is not registered yet” is shown in the<br />
middle of the status bar, see A.9.11 “Registration Wizard”, A-63 for more<br />
information.<br />
<strong>Freedom</strong> <strong>EVOware</strong> <strong>Software</strong> <strong>Manual</strong>, 393172, en, V<strong>2.3</strong> 6 - 21
6 - Menus<br />
<strong>Freedom</strong> <strong>EVOware</strong> Toolbar<br />
6 - 22 <strong>Freedom</strong> <strong>EVOware</strong> <strong>Software</strong> <strong>Manual</strong>, 393172, en, V<strong>2.3</strong>
7 - Tecan User Management System<br />
7 Tecan User Management System<br />
<strong>Freedom</strong> <strong>EVOware</strong> is a closed system and access to <strong>Freedom</strong> <strong>EVOware</strong> requires<br />
you to enter a user name and password. Please note that user names and<br />
passwords are case-sensitive. Contact your <strong>Freedom</strong> <strong>EVOware</strong> Administrator if<br />
you are authorized to use <strong>Freedom</strong> <strong>EVOware</strong> but do not have a user name and<br />
password. Some of the features in <strong>Freedom</strong> <strong>EVOware</strong> are only available if you<br />
have been given <strong>Freedom</strong> <strong>EVOware</strong> Administrator or Application Specialist<br />
access rights.<br />
Note: You can only change the settings for users and groups if you have been<br />
given <strong>Freedom</strong> <strong>EVOware</strong> Administrator access rights.<br />
The Tecan User Management system is a central software component which<br />
handles user log in and user authorization for all Tecan software components. It<br />
also provides facilities to log out users after a specified period of inactivity and to<br />
send warnings by eMail to a specified person (usually the <strong>Freedom</strong> <strong>EVOware</strong><br />
Administrator) if an attempt is made to log in to the Tecan software using an<br />
invalid user name and password combination. Furthermore, users are disabled<br />
automatically after entering the password incorrectly a specified number of times<br />
consecutively.<br />
To access the Tecan User Management system, click Configure in the toolbar to<br />
start the Configuration Tool. Then click the General tab and choose either Users<br />
or Groups in the User Management section (see 8.3.3 “User Management<br />
Section”, 8-16). You need to have <strong>Freedom</strong> <strong>EVOware</strong> Administrator rights to do<br />
this.<br />
The Tecan User Management system does not rely on the MS Windows access<br />
rights and log in mechanisms which have been configured for your PC and/or for<br />
your local network. The Tecan User Management system thus provides an<br />
additional security barrier against unauthorized use of the Tecan software.<br />
<strong>Freedom</strong> <strong>EVOware</strong> writes log files and audit trails and can create data files. It is<br />
important to correctly configure the MS Windows access rights to the respective<br />
directories on your PC and/or local network to prevent unauthorized access to and<br />
tampering with this data.<br />
There are four different levels of access rights for the <strong>Freedom</strong> <strong>EVOware</strong><br />
software: Administrator, Application Specialist, Power User and Operator. See<br />
7.2 “<strong>Freedom</strong> <strong>EVOware</strong> Access Rights (User Levels)”, 7-3 for information on<br />
the user levels. After logging in, the user level is shown in the status bar at the<br />
bottom of the screen (see 6.7.3 “Status Bar”, 6-20).<br />
When the <strong>Freedom</strong> <strong>EVOware</strong> software is started for the first time after being<br />
installed, you will be prompted to create a new user with <strong>Freedom</strong> <strong>EVOware</strong><br />
Administrator rights. Try to develop a secure and effective way of remembering<br />
your password. To prevent access to the system by unauthorized persons, make<br />
sure that the Administrator log in is only known to the <strong>Freedom</strong> <strong>EVOware</strong><br />
Administrator and to no-one else.<br />
Users, groups and password rules are configured in <strong>Freedom</strong> <strong>EVOware</strong>’s<br />
Configuration Tool (see 8.3.3 “User Management Section”, 8-16). In addition, a<br />
tool is provided to import user information into the Tecan User Management<br />
System (user database) from vCard files (see A.9.12 “Import vCards Tool”, A-<br />
68).<br />
<strong>Freedom</strong> <strong>EVOware</strong> <strong>Software</strong> <strong>Manual</strong>, 393172, en, V<strong>2.3</strong> 7 - 1
7 - Tecan User Management System<br />
Main Features of the Tecan User Management System<br />
7.1 Main Features of the Tecan User Management System<br />
The Tecan User Management system has the following main features:<br />
• All changes relating to user management require <strong>Freedom</strong> <strong>EVOware</strong><br />
Administrator access rights.<br />
• All changes relating to user management are recorded in the user<br />
management audit trail.<br />
• User accounts are automatically disabled following a configurable number of<br />
consecutive failed attempts to enter the correct user name and password<br />
combination. The disabled account can only be reactivated again by the<br />
<strong>Freedom</strong> <strong>EVOware</strong> Administrator.<br />
• <strong>Freedom</strong> <strong>EVOware</strong> does not allow more than one person to use the software<br />
simultaneously.<br />
• Users can log out without leaving <strong>Freedom</strong> <strong>EVOware</strong> or interrupting a running<br />
pipetting script or process. The same or a different user can then log in to<br />
<strong>Freedom</strong> <strong>EVOware</strong> again while the script or process is still running. See<br />
6.1.9 “Lock <strong>EVOware</strong>”, 6-7.<br />
• Users are automatically logged out after a specified time during which no<br />
keyboard or mouse-click activities have been detected.<br />
• User passwords expire after a configurable number of days. The user must<br />
then choose another password. The new password must be different from the<br />
old password.<br />
• Passwords must contain a specified minimum number of characters.<br />
• Passwords can be forced to contain numeric digits.<br />
• Passwords cannot be reused.<br />
• User names and user name and password combinations are unique within the<br />
system and cannot be assigned more than once.<br />
• The <strong>Freedom</strong> <strong>EVOware</strong> Administrator provides a temporary password when<br />
setting up a user. When the new user first logs on to the system, he or she is<br />
forced to change to change the password immediately. This ensures that no<br />
one other than the individual user knows the particular user name and<br />
password combination.<br />
• If a user forgets his/her password, the <strong>Freedom</strong> <strong>EVOware</strong> Administrator does<br />
not have access to the user’s password. The <strong>Freedom</strong> <strong>EVOware</strong><br />
Administrator is only able to reset the password and provide a new temporary<br />
password.<br />
• If the <strong>Freedom</strong> <strong>EVOware</strong> Administrator forgets his or her password, no one<br />
has access to the password.<br />
• A specified person (typically the <strong>Freedom</strong> <strong>EVOware</strong> Administrator) can be<br />
automatically notified by eMail in case of potential security threats (e.g. a user<br />
account has been disabled after a configurable number of consecutive failed<br />
login attempts).<br />
7.1.1 User Management Audit Trail<br />
All changes relating to user management are recorded in the user management<br />
audit trail. A new file is written to the \AuditTrail\Configuration<br />
directory each time you start and then exit the <strong>Freedom</strong> <strong>EVOware</strong> Configuration<br />
Tool. The file name is UserTrailYYYYMMDD_HHMMSS, where YYYYMMDD is<br />
the file creation date and HHMMSS is the file creation time.<br />
7 - 2 <strong>Freedom</strong> <strong>EVOware</strong> <strong>Software</strong> <strong>Manual</strong>, 393172, en, V<strong>2.3</strong>
7 - Tecan User Management System<br />
<strong>Freedom</strong> <strong>EVOware</strong> Access Rights (User Levels)<br />
7.2 <strong>Freedom</strong> <strong>EVOware</strong> Access Rights (User Levels)<br />
<strong>Freedom</strong> <strong>EVOware</strong> provides four user levels with the following rights:<br />
Tab. 7-1 Access rights for operators, application specialists and administrators<br />
Operator<br />
Power user a)<br />
Application<br />
Specialist<br />
Administrator<br />
has rights to:<br />
• Run a pipetting script (<strong>Freedom</strong> <strong>EVOware</strong> <strong>Standard</strong>)<br />
or process (<strong>Freedom</strong> <strong>EVOware</strong> Plus)<br />
• Run maintenance scripts (see 6.4.2 “Run Maintenance”, 6-<br />
10)<br />
• View a pipetting script (but not change it)<br />
• Handle errors during pipetting<br />
Since operators are not allowed to create or modify scripts and<br />
processes, most of the program interface features are hidden or<br />
disabled.<br />
same as Operator but with additional rights to:<br />
• Start running pipetting scripts at a specified line number.<br />
• Run direct commands (see 5.4.1.3 “Direct commands”, 5-<br />
10).<br />
same as Operator but with additional rights to:<br />
• Create, modify and save pipetting scripts (<strong>Freedom</strong> <strong>EVOware</strong><br />
<strong>Standard</strong> and <strong>Freedom</strong> <strong>EVOware</strong> Plus) and processes (<strong>Freedom</strong><br />
<strong>EVOware</strong> Plus)<br />
• Edit the configuration of the pipetting instrument<br />
• Edit the configurations of carriers and labware<br />
• Edit the liquid classes for pipetting<br />
• Change settings in the <strong>Freedom</strong> <strong>EVOware</strong> Configuration Tool<br />
• Skip pre-programmed timers during pipetting<br />
same as Application Specialist but with additional rights to:<br />
• Create and disable/re-enable users<br />
• Configure the options in the Tecan User Management system<br />
• Enable or disable the Electronic Signatures feature<br />
a) Using the Configuration Tool, you can assign additional rights to the Power User for special<br />
applications. In addition, you can create additional user levels (user groups). See<br />
8.3.3.3 “Groups Tab”, 8-20.<br />
All four <strong>Freedom</strong> <strong>EVOware</strong> user levels need read/write access to the<br />
directory and its subdirectories. The user level Operator cannot<br />
create or modify scripts or processes, but <strong>Freedom</strong> <strong>EVOware</strong> still needs read/<br />
write access to write log and export files and audit trail data.<br />
Other Tecan software components such as Magellan have a different hierarchy of<br />
user levels. Please refer to the respective user manual for more information. The<br />
Tecan User Management system handles user authorization for all of the Tecan<br />
software components.<br />
<strong>Freedom</strong> <strong>EVOware</strong> <strong>Software</strong> <strong>Manual</strong>, 393172, en, V<strong>2.3</strong> 7 - 3
7 - Tecan User Management System<br />
Special configuration options for the User Management System<br />
7.3 Special configuration options for the User<br />
Management System<br />
The following features are intended for experienced systems administrators.<br />
7.3.1 <strong>Freedom</strong> <strong>EVOware</strong> login using the Microsoft Windows login name<br />
instead of the Tecan user database<br />
The Tecan User Management System can be configured to use the Microsoft<br />
Windows user database (with Windows login names) instead of the Tecan user<br />
database. This avoids the need to remember two different user names and<br />
passwords - one for Microsoft Windows and a different one for <strong>Freedom</strong><br />
<strong>EVOware</strong>.<br />
Since <strong>Freedom</strong> <strong>EVOware</strong> 2.1 SP2, the User Management System is implemented<br />
as a server which runs as a Windows service. The Tecan user management<br />
server normally manages users and groups using an encrypted XML database,<br />
but can be configured to use the Microsoft Active Directory user and groups<br />
database or the Windows local machine user database instead (in read-only<br />
mode).<br />
If your company uses Microsoft Active Directory for managing users and groups<br />
and you have more than one <strong>Freedom</strong> <strong>EVOware</strong> system, this allows you to<br />
manage Tecan users and groups centrally for all of your systems.<br />
Use the SwitchProvider tool to switch between using the Tecan user management<br />
database (encrypted XML file) and using the Windows user management<br />
database:<br />
Fig. 7-1<br />
SwitchProvider tool<br />
To start the SwitchProvider tool, navigate to the directory C:\Program<br />
Files\Tecan\Tecan User Management\v1.1 using Windows Explorer and doubleclick<br />
on Tecan.UserManagement.SwitchProvider.exe.<br />
Please exit <strong>Freedom</strong> <strong>EVOware</strong> before using this tool.<br />
Windows Vista users: Windows administrator rights are needed to run this<br />
application.<br />
The status of the radio buttons shows which of the two user management systems<br />
is currently being used by the Tecan software.<br />
After switching to the Windows user database, user accounts for <strong>Freedom</strong><br />
<strong>EVOware</strong> must be created, edited and deleted using Microsoft Active Directory or<br />
the User Accounts feature in the Windows Control Panel and no longer in the<br />
Configuration Tool of <strong>Freedom</strong> <strong>EVOware</strong>.<br />
Run the tool again if you want to switch back to using the Tecan user database.<br />
7 - 4 <strong>Freedom</strong> <strong>EVOware</strong> <strong>Software</strong> <strong>Manual</strong>, 393172, en, V<strong>2.3</strong>
7 - Tecan User Management System<br />
Special configuration options for the User Management System<br />
Tecan user groups and user roles<br />
Windows users are assigned to roles (user groups) in <strong>Freedom</strong> <strong>EVOware</strong> by<br />
assigning them to specially created Windows groups using the following naming<br />
conventions:<br />
Tecan_<br />
i.e. the string “Tecan_” is prefixed to the <strong>Freedom</strong> <strong>EVOware</strong> group name.<br />
Tu run <strong>Freedom</strong> <strong>EVOware</strong> using a Windows login, you must be a member of at<br />
least one of these Windows groups (depending on the <strong>Freedom</strong> <strong>EVOware</strong> rights<br />
you require):<br />
• Tecan_Administrators<br />
• Tecan_Evoware_Application_Specialist<br />
• Tecan_Evoware_Power User<br />
• Tecan_Evoware_Operator<br />
For information on user group names and rights in <strong>Freedom</strong> <strong>EVOware</strong> see<br />
8.3.3.3 “Groups Tab”, 8-20.<br />
7.3.1.1 How the SwitchProvider tool works<br />
SwitchProvider works by modifying the XML configuration file<br />
Tecan.UserManagement.Server.exe.config as follows.<br />
• The line <br />
is changed to<br />
<br />
• The line <br />
is changed to<br />
<br />
• The tool then re-starts the service Tecan.UserManagement.Server.exe.<br />
The default location of Tecan.UserManagement.Server.exe.config is:<br />
• Windows XP and Windows Vista: C:\Program Files\Tecan\Tecan User<br />
Management\v1.1\<br />
7.3.1.2 Compatibility<br />
This feature is not available for the Tecan User Management System concept<br />
which was used prior to <strong>Freedom</strong> <strong>EVOware</strong> 2.1 SP2 (former ERES system).<br />
The ERES system is also used by Tecan Magellan software prior to version 6.5. If<br />
you want to use <strong>Freedom</strong> <strong>EVOware</strong> 2.1 or later and Magellan 6.4 or earlier,<br />
Magellan must be installed before you install <strong>Freedom</strong> <strong>EVOware</strong>. Magellan will<br />
then proceed to use the new user management server instead of ERES. If you<br />
install <strong>Freedom</strong> <strong>EVOware</strong> before Magellan, <strong>Freedom</strong> <strong>EVOware</strong> will revert to using<br />
the former ERES system.<br />
This feature cannot be used together with the feature “Sharing the Tecan user<br />
management database in a network environment” (see 7.3.2, 7-5).<br />
7.3.2 Sharing the Tecan user management database in a network<br />
environment<br />
If you are running multiple <strong>Freedom</strong> <strong>EVOware</strong> installations which are connected<br />
together within the same LAN, you can configure the system to use a central user<br />
management database which can be shared by several pipetting instruments.<br />
This avoids having to set up Tecan users and groups separately on each of the<br />
PCs.<br />
<strong>Freedom</strong> <strong>EVOware</strong> <strong>Software</strong> <strong>Manual</strong>, 393172, en, V<strong>2.3</strong> 7 - 5
7 - Tecan User Management System<br />
Special configuration options for the User Management System<br />
Since <strong>Freedom</strong> <strong>EVOware</strong> 2.1 SP2, the User Management System is implemented<br />
as a server which runs as a Windows service. The Tecan user management<br />
server manages users and groups using an encrypted XML database.<br />
The XML database is normally located in a local directory of each <strong>Freedom</strong><br />
<strong>EVOware</strong> installation as follows:<br />
• Windows XP: C:\Documents and Settings\All Users\Application<br />
Data\Tecan\Tecan User Management\v1.1<br />
• Windows Vista: C:\ProgramData\Tecan\Tecan User Management\v1.1\<br />
Proceed as follows to share the user management database:<br />
• Choose the <strong>Freedom</strong> <strong>EVOware</strong> installation whose XML database you want to<br />
share<br />
• Right-click the directory containing the XML database, click Properties and<br />
click the Sharing tab. Then share the directory which contains the XML<br />
database with other network users and assign a share name. See the MS<br />
Windows documentation for more information on network sharing.<br />
• Still in Properties, click the Security tab and assign read/write permissions to<br />
this directory for the system account of all of the remote <strong>Freedom</strong> <strong>EVOware</strong><br />
installations.<br />
– Note: On the local system, the system account of each remote system is<br />
normally the host name of the remote system.<br />
– Note: On the local system, Tecan.UserManagement.Server.exe runs as a<br />
Windows service under the local account SYSTEM.<br />
On all of the <strong>Freedom</strong> <strong>EVOware</strong> installations except for the installation whose<br />
XML database you want to share - reconfigure the Tecan user management<br />
server to use the shared directory:<br />
• Click Start, choose Run, enter cmd and click OK.<br />
• In the console window, navigate to the directory of the Tecan user<br />
management server:<br />
– Windows XP and Windows Vista: C:\Program Files\Tecan\Tecan User<br />
Management\v1.1\<br />
• Type in "Tecan.UserManagement.Server.exe<br />
/xmlPath:"\\servername\sharename\UserManagement.xml"<br />
Where server name is the host name of the PC with the shared XML database<br />
and sharename is the name you chose for the network share.<br />
• The Tecan user management server is then permanently configured to use<br />
the shared XML file instead of the local XML file<br />
• To revert back to using the local file, use the following console string instead:<br />
"Tecan.UserManagement.Server.exe /xmlPath:localpath"<br />
Where localpath is:<br />
Windows XP: C:\Documents and Settings\All Users\Application<br />
Data\Tecan\Tecan User Management\v1.1<br />
Windows Vista: C:\ProgramData\Tecan\Tecan User Management\v1.1\<br />
Contact Tecan if you need further information on implementing this feature.<br />
7.3.2.1 Compatibility<br />
Users and groups cannot be edited by more than one of the <strong>Freedom</strong> <strong>EVOware</strong><br />
installations simultaneously.<br />
This feature cannot be used together with the feature “<strong>Freedom</strong> <strong>EVOware</strong> login<br />
using the Microsoft Windows login name” (see 7.3.1, 7-4).<br />
See also 7.3.1.2 “Compatibility”, 7-5.<br />
7 - 6 <strong>Freedom</strong> <strong>EVOware</strong> <strong>Software</strong> <strong>Manual</strong>, 393172, en, V<strong>2.3</strong>
8 - Configuration Tool<br />
Toolbar Buttons and Menus<br />
8 Configuration Tool<br />
This chapter describes how to use <strong>Freedom</strong> <strong>EVOware</strong>’s Configuration Tool to<br />
configure general settings for <strong>Freedom</strong> <strong>EVOware</strong>. The Configuration Tool also<br />
allows you to configure settings for the liquid handling arm, instrument options and<br />
optional devices and to set up <strong>Freedom</strong> <strong>EVOware</strong> users and groups.<br />
The Configuration Tool is started by clicking Configure in the <strong>Freedom</strong> <strong>EVOware</strong><br />
toolbar. The Configuration Tool has two main tabs, Instrument and Devices.<br />
You can also start the Configuration Tool by clicking the Start button in the<br />
Windows task bar and choosing All Programs > Tecan > <strong>EVOware</strong> > Configure.<br />
You will be prompted to enter your <strong>Freedom</strong> <strong>EVOware</strong> user name and password.<br />
Note: You can only use the Configuration Tool if you have been given <strong>Freedom</strong><br />
<strong>EVOware</strong> Administrator or Application Specialist access rights. You can only<br />
change the settings for users and groups if you have been given <strong>Freedom</strong><br />
<strong>EVOware</strong> Administrator access rights.<br />
Note: Liquid classes are configured with the Liquid Classes Editor, not with the<br />
Configuration Tool (see 10 “Configuring Liquid Classes”, 10-1).<br />
8.1 Toolbar Buttons and Menus<br />
8.1.1 Toolbar Buttons<br />
The toolbar gives you quick access to commonly used functions:<br />
Fig. 8-1<br />
Toolbar and menus, Configuration Tool<br />
Exit<br />
This function is used to exit the Configuration Tool.<br />
Save<br />
This function saves the configuration changes you have made.<br />
Undo<br />
This function undoes the configuration changes you have made (it resets your<br />
changes to the settings which were last saved). It only resets the changes for<br />
the currently selected page.<br />
Backup<br />
This function is used to back up the <strong>Freedom</strong> <strong>EVOware</strong> configuration and<br />
data files (including scripts and processes). See 8.2 “Backing Up and<br />
Restoring Your Configuration”, 8-3.<br />
The Backup function is not available when <strong>Freedom</strong> <strong>EVOware</strong> is running<br />
(start the Configuration Tool on its own with Start > All Programs > Tecan ><br />
<strong>EVOware</strong> > Configure).<br />
<strong>Freedom</strong> <strong>EVOware</strong> <strong>Software</strong> <strong>Manual</strong>, 393172, en, V<strong>2.3</strong> 8 - 1
8 - Configuration Tool<br />
Toolbar Buttons and Menus<br />
Restore<br />
This function is used to restore a previously made backup of the <strong>Freedom</strong><br />
<strong>EVOware</strong> configuration and data files. A dialog box is shown to allow you to<br />
choose which backup version you want to restore. All existing configuration<br />
and data files will be overwritten.<br />
The Restore function is not available when <strong>Freedom</strong> <strong>EVOware</strong> is running<br />
(start the Configuration Tool on its own with Start > All Programs > Tecan ><br />
<strong>EVOware</strong> > Configure).<br />
Help<br />
This function opens the help page for the currently selected tab. You can also<br />
get help for the currently selected tab by pressing F1.<br />
8.1.2 File Menu<br />
Backup<br />
This function is used to back up the <strong>Freedom</strong> <strong>EVOware</strong> configuration and<br />
data files (including scripts and processes). See 8.2 “Backing Up and<br />
Restoring Your Configuration”, 8-3.<br />
The Backup function is not available when <strong>Freedom</strong> <strong>EVOware</strong> is running<br />
(start the Configuration Tool on its own with Start > All Programs > Tecan ><br />
<strong>EVOware</strong> > Configure).<br />
Restore<br />
This function is used to restore a previously made backup of the <strong>Freedom</strong><br />
<strong>EVOware</strong> configuration and data files. A dialog box is shown to allow you to<br />
choose which backup version you want to restore. Existing configuration and<br />
data files will be overwritten.<br />
The Restore function is not available when <strong>Freedom</strong> <strong>EVOware</strong> is running<br />
(start the Configuration Tool on its own with Start > All Programs > Tecan ><br />
<strong>EVOware</strong> > Configure).<br />
Save changes<br />
This function saves the configuration changes you have made.<br />
Exit Configuration Tool<br />
This function is used to exit the Configuration Tool.<br />
8.1.3 Edit Menu<br />
Undo changes on this page<br />
This function undoes the configuration changes you have made (it resets your<br />
changes to the settings which were last saved). It only resets the changes for<br />
the currently selected page.<br />
8.1.4 View Menu<br />
Status bar<br />
This function is used to show or hide the status bar.<br />
8 - 2 <strong>Freedom</strong> <strong>EVOware</strong> <strong>Software</strong> <strong>Manual</strong>, 393172, en, V<strong>2.3</strong>
8 - Configuration Tool<br />
Backing Up and Restoring Your Configuration<br />
8.1.5 Help Menu<br />
Show help for this page<br />
This function opens the help page for the currently selected tab. You can also<br />
get help for the currently selected tab by pressing F1.<br />
About<br />
This function shows information on the Configuration Tool version which is<br />
installed, the available real memory and hard disk memory and Tecan<br />
copyright information.<br />
8.2 Backing Up and Restoring Your Configuration<br />
The Backup function is used to back up the <strong>Freedom</strong> <strong>EVOware</strong> configuration and<br />
data files (including scripts and processes) to a specified directory.<br />
<strong>Freedom</strong> <strong>EVOware</strong> creates a new sub-directory in the specified directory for each<br />
backup. The name of the new sub-directory is BACKUP_YYYYMMDD_HHMMSS,<br />
where YYYYMMDD is the date and HHMMSS is the time of the backup. The<br />
default backup directory is \Backup. See 8.3.1.4 “Protocol Options<br />
Tab”, 8-8 for information on specifying a different backup directory. You can also<br />
choose a network directory.<br />
The Restore function is used to restore a previously made backup of the <strong>Freedom</strong><br />
<strong>EVOware</strong> configuration and data files. A dialog box is shown to allow you to<br />
choose which backup version you want to restore. Existing configuration and data<br />
files will be overwritten.<br />
The backup and restore operations are reported in the <strong>Freedom</strong> <strong>EVOware</strong> trace<br />
file.<br />
Saving Audit<br />
Trail Data<br />
If you are required to comply with the FDA regulations, make sure you keep<br />
archive copies of all audit trail, trace and log files. These files are located in the<br />
\AuditTrail directory. They are not backed up by the Backup function<br />
- you should use the Audit Trail Archiving function instead. See A.9.6 “Audit Trail<br />
Archiving tool”, A-47 and B “Appendix B - FDA 21 CFR Part 11 Compliance”,<br />
B-1.<br />
8.2.1 Making an External Backup<br />
To make an external backup of your configuration and data files, configure<br />
<strong>Freedom</strong> <strong>EVOware</strong> to use a network directory for backing up. Alternatively, make<br />
a local backup and copy the sub-directory containing the backup files to another<br />
PC, to your backup device or to a network directory.<br />
8.2.2 Copying Scripts and Processes Between Different Pcs<br />
Instead of using the backup and restore functions, you can copy scripts and<br />
processes between <strong>Freedom</strong> <strong>EVOware</strong> installations on different PCs using the<br />
Export Import tool (see A.9.4 “Export/Import Tool”, A-38).<br />
<strong>Freedom</strong> <strong>EVOware</strong> <strong>Software</strong> <strong>Manual</strong>, 393172, en, V<strong>2.3</strong> 8 - 3
8 - Configuration Tool<br />
General Settings<br />
8.3 General Settings<br />
Click the General tab to view or edit the instrument settings. This group of settings<br />
allows you to configure general settings for <strong>Freedom</strong> <strong>EVOware</strong>, eMail notifications<br />
and the Tecan User Management system.<br />
8.3.1 General Section<br />
This section is used to configure general settings for <strong>Freedom</strong> <strong>EVOware</strong>.<br />
8.3.1.1 Timeouts Tab<br />
Timeouts panel<br />
The Initialization and Shutdown fields let you specify the maximum duration of<br />
the initialization and shutdown procedures. An error message will be output if<br />
initialization and/or shutdown is not completed within the specified times.<br />
Specify the times in seconds.<br />
Delay panel<br />
When running in offline mode, <strong>Freedom</strong> <strong>EVOware</strong> <strong>Standard</strong> highlights the<br />
currently active pipetting command and pauses for a specified time before<br />
executing the next command. The pause serves to optimize the visualization<br />
effect. Specify the required duration of the pause.<br />
8.3.1.2 Pause Tab<br />
Specify whether you want to globally enable or disable the system pause. You can<br />
also specify an interval during which the system is not allowed to pause due to an<br />
error. For example, you may want to prevent a system pause during the night<br />
when the system cannot be manually restarted.<br />
8 - 4 <strong>Freedom</strong> <strong>EVOware</strong> <strong>Software</strong> <strong>Manual</strong>, 393172, en, V<strong>2.3</strong>
8 - Configuration Tool<br />
General Settings<br />
8.3.1.3 Scheduler Tab<br />
The settings in the Scheduler tab are only relevant for <strong>Freedom</strong> <strong>EVOware</strong> Plus.<br />
Fig. 8-2<br />
Configuring the Scheduler<br />
Common panel<br />
Timeslice<br />
The Timeslice field specifies the smallest unit of time (scheduling tick) which<br />
the scheduler should use to calculate and optimize processes. With the<br />
default setting of 5 seconds, the scheduler checks every 5 seconds whether<br />
rescheduling is possible or necessary. Increasing this value will speed up the<br />
scheduling process whereas lower values may increase the throughput of the<br />
process (e.g. microplates per hour).<br />
Note: The scheduler can handle a maximum of 65,000 timeslices. The maximum<br />
runtime is then roughly 90 hours with a timeslice setting of 5 seconds. If<br />
necessary, the system specialist can increase the maximum number of timeslices<br />
for advanced applications.<br />
<strong>Freedom</strong> <strong>EVOware</strong> <strong>Software</strong> <strong>Manual</strong>, 393172, en, V<strong>2.3</strong> 8 - 5
8 - Configuration Tool<br />
General Settings<br />
Timeout Buffer<br />
This field lets you specify how many seconds the system should wait before<br />
triggering a timeout. A larger value gives the system more time to potentially<br />
solve the problem that caused the timeout before stopping the system.<br />
Example: If timeout buffer = 60 seconds and the expected duration of the<br />
command is exceeded, a system pause is requested and the timeout buffer of<br />
60s is started. If the command completes within the 60s, the system resumes<br />
and the timeout buffer is reset to 60 s. If the command does not complete<br />
within 60s, a timeout is triggered and an error message is output. The other<br />
actions which are then taken depend on the situation.<br />
Keep in mind that RoMa move times can vary significantly because of<br />
interaction with pipetting operations (the arm collision avoidance algorithms<br />
give a higher priority to LiHa movements than RoMa movements once<br />
pipetting has started and until a wash or drop DiTi command is reached).<br />
Especially if you use close-fitting or optimized move times, the timeout buffer<br />
setting should be large enough to allow for possible RoMa movement delays.<br />
Re-schedule on macro feedback<br />
With the default setting of the Timeslice parameter, the scheduler checks<br />
every 5 seconds for completion messages from internal <strong>Freedom</strong> <strong>EVOware</strong><br />
commands (macros) and will reschedule the macros and the associated<br />
process if they have completed faster than expected. Check this checkbox if<br />
you want the scheduler to re-schedule as soon as possible without waiting for<br />
the timeslice to complete. This can improve the performance (throughput) of<br />
the process.<br />
Optimize Robot Move Times panel<br />
Enable learning mode<br />
If you enable this feature, information is stored on the actual times required by<br />
robot moves (RoMa moves, MCA96 gripper and MCA384 CGM moves, move<br />
times of external robots, pre/post actions but not PnP moves) each time you<br />
run a process. If you also check the Use time fit information checkbox, the<br />
scheduler interprets the stored information when you run the process again.<br />
This allows the scheduler to plan the process more accurately in future and to<br />
optimize the throughput.<br />
This is similar to making a calibration run, but you only need to run a single<br />
process instance to get meaningful data. The stored information becomes<br />
increasingly accurate and thus more beneficial the more times the process is<br />
run.<br />
Click Edit Data if you want to edit the stored time information manually. In the<br />
editing window, each section (e.g. [Hotel_9Pos_Microplate]) refers to the<br />
starting point of a robot move. The entries within the sections list the<br />
destinations of the robot move (e.g. MP_3Pos). The eight numeric parameters<br />
are as follows:<br />
– Move type 1: Time required for normal move (the labware has no lid or the<br />
labware is moved together with the lid)<br />
– Move type 2: Time required to remove the lid from the labware<br />
– Move type 3: Time required to put back the lid on the labware<br />
– Move type 4: Time required to move the labware and the lid separately<br />
(the labware and the lid are put down at different locations)<br />
– Number of moves recorded for move type 1 (do not edit)<br />
– Number of moves recorded for move type 2 (do not edit)<br />
– Number of moves recorded for move type 3 (do not edit)<br />
8 - 6 <strong>Freedom</strong> <strong>EVOware</strong> <strong>Software</strong> <strong>Manual</strong>, 393172, en, V<strong>2.3</strong>
8 - Configuration Tool<br />
General Settings<br />
– Number of moves recorded for move type 4 (do not edit)<br />
All times are in seconds. Both “time required” and “number of moves” are zero<br />
if this move type has not taken place during the learning phase. The accuracy<br />
of the time measurement increases with an increasing number of moves<br />
during the learning phase.<br />
Use optimized move times<br />
Check this checkbox if you want the scheduler to interpret and use information<br />
which has been stored on the actual times required by robot moves. If you<br />
activate this option, make sure that the setting for timeout buffer is long<br />
enough (see Timeout Buffer, above, for more information).<br />
Click Clear Data to delete the stored information. You should do this e.g. if you<br />
have edited or optimized a RoMa vector, for example by re-designing it to use<br />
less waypoints. You then need to re-enable learning mode again.<br />
Tool Optimization panel<br />
Enable pre-emptive tool operations<br />
Check this checkbox if you want <strong>Freedom</strong> <strong>EVOware</strong> to check the process for<br />
device commands which are soon due for execution (look ahead). Depending<br />
on the device type and the command, this allows <strong>Freedom</strong> <strong>EVOware</strong> to send<br />
preparatory instructions to the device to speed up the execution of the<br />
command.<br />
For example, the carousel can be instructed to bring the next labware item to<br />
be processed from the carousel tower to the transfer position, where it can<br />
wait for a subsequent fetch command (RoMa movement). The RoMa then<br />
does not have to wait for the labware to be brought from the tower. This<br />
optimizes the movement times for the carousel.<br />
Pre-emptive tool operations are only available for the carousel and some<br />
third-party incubators.<br />
Look ahead time<br />
Specify how far ahead the scheduler should check the process for device<br />
commands which can be optimized in this way. The time you specify should<br />
be about the same time which is required for the preparatory instructions (e.g.<br />
about the same time which is required to bring the labware from the carousel<br />
tower to the transfer position).<br />
Very long times can increase the risk of unnecessary unloading of labware<br />
from the carousel due to changes in the schedule. This will result in time<br />
wastage since the unloaded labware has to be put back in the carousel tower<br />
before another labware item can be brought.<br />
If the location is an incubator, keep in mind that pre-emptive tool operations<br />
can affect the incubation time specified in the process if the look ahead time is<br />
longer than necessary, since the labware could be removed from the<br />
controlled environment earlier than necessary.<br />
The look ahead time you specify here is a global setting. See 8.4.4.4 “Preemptive<br />
Tool tab”, 8-38 for information on specifying the look ahead time<br />
individually for each optimizable device command.<br />
Show advanced topics<br />
Check this checkbox if you want to make more detailed settings for the scheduler<br />
and the simulator. The first three topics below are always available:<br />
<strong>Freedom</strong> <strong>EVOware</strong> <strong>Software</strong> <strong>Manual</strong>, 393172, en, V<strong>2.3</strong> 8 - 7
8 - Configuration Tool<br />
General Settings<br />
Optimize<br />
If you enable optimization for the scheduler, the resource reservations for the<br />
process will be optimized dynamically if a command finishes earlier than<br />
planned. The default setting for the Scheduler is “enabled”. The default setting<br />
for the Simulator is “disabled” and should not be changed.<br />
Use pre-planning<br />
Check the respective checkboxes to enable or disable pre-planning for the<br />
scheduler and/or the simulator. If pre-planning is enabled, the system will use<br />
more time and schedule more processes during the first scheduling tick<br />
before the pipetting instrument starts to operate. This allows more exact<br />
forecasting of the process timing but reduces flexibility for dynamic planning.<br />
The default setting is “disabled” for both scheduler and simulator.<br />
Timeout for pre-planning<br />
Specify the maximum amount of time in s which the system will wait before<br />
starting process execution, regardless of how many processes have been<br />
scheduled so far. This setting is only relevant if you are using pre-planning.<br />
Latest start for pre-planning / Latest start for execution<br />
These fields specify the maximum amount of time in scheduling ticks between<br />
making resource reservations for a process and starting it. The settings affect<br />
how much advanced planning will be carried out and are important for<br />
rescheduling a process. The scheduling is more dynamic if you choose a<br />
lower value. Latest Start for pre-planning is used during the pre-planning<br />
phase (before scheduling starts) whereas Latest Start for execution is used as<br />
soon as the execution phase begins.<br />
Time per Process<br />
Maximum time in ms which is given to the scheduler to make reservations for<br />
one process during the current planning tick (timeslice). You should choose a<br />
value which is much shorter than one timeslice.<br />
Maximum Time<br />
Maximum time in ms which is given to the scheduler to make reservations for<br />
all processes during the current planning tick (timeslice). You should choose a<br />
value which is shorter than one timeslice.<br />
8.3.1.4 Protocol Options Tab<br />
This is used to configure the paths which <strong>Freedom</strong> <strong>EVOware</strong> uses to store output,<br />
backup and log files.<br />
System path<br />
This non-editable field shows the <strong>Freedom</strong> <strong>EVOware</strong> installation path. See<br />
A.5 “<strong>Freedom</strong> <strong>EVOware</strong> Directory Structure and Files”, A-25 for more<br />
information on the <strong>Freedom</strong> <strong>EVOware</strong> directory structure and file names.<br />
Output panel<br />
Specify the directory which should be used for output files from the Export<br />
Data and PosID commands. Enter the path directly or click Browse and<br />
choose the required directory. You can also choose a network directory.<br />
Backup panel<br />
Specify the directory which should be used to store backup copies of the<br />
<strong>Freedom</strong> <strong>EVOware</strong> configuration and data files. Enter the path directly or click<br />
Browse and choose the required directory. You can also choose a network<br />
directory.<br />
<strong>Freedom</strong> <strong>EVOware</strong> creates a new sub-directory in the specified backup<br />
directory for each backup. See 8.2 “Backing Up and Restoring Your<br />
Configuration”, 8-3 for more information.<br />
8 - 8 <strong>Freedom</strong> <strong>EVOware</strong> <strong>Software</strong> <strong>Manual</strong>, 393172, en, V<strong>2.3</strong>
8 - Configuration Tool<br />
General Settings<br />
Log Options panel<br />
<strong>Freedom</strong> <strong>EVOware</strong> writes log files to document the pipetting, to record user<br />
actions, to help you to check scripts in offline mode and to find errors. In<br />
addition, it writes audit trail data and a trace file. The log files and the trace file<br />
are written to the c:\program files\Tecan\<strong>EVOware</strong>\AuditTrail\Log directory.<br />
<strong>Freedom</strong> <strong>EVOware</strong> always writes log files of type EVO. The information which<br />
is logged can also be viewed in the Tecan/<strong>EVOware</strong>/Log channel of the<br />
LogViewer tool (see A.10 “LogViewer Tool”, A-72).<br />
<strong>Freedom</strong> <strong>EVOware</strong> users with Administrator or Application Specialist rights<br />
can activate two additional log file types (User and/or Error) with different<br />
levels of logging detail, either individually or in combination:<br />
– Check the Input checkbox to write log files of type USR. The information<br />
which is logged can also be viewed in the Tecan/<strong>EVOware</strong>/Usr channel of<br />
the LogViewer tool.<br />
– Check the Error checkbox to write log files of type ERR. The information<br />
which is logged can also be viewed in the Tecan/<strong>EVOware</strong>/Error channel<br />
of the LogViewer tool.<br />
See A.1 “Overview of the Log Files”, A-1 for more information on these log<br />
file types.<br />
You can also view recent log entries by choosing Log Window in the View<br />
menu. The Log Window has the same contents as the log file of type EVO and<br />
initially shows the last 1000 log entries.<br />
Note: <strong>Freedom</strong> <strong>EVOware</strong> can output a large amount of logging information. It is<br />
recommended to back up and then delete the old log files on a regular basis. They<br />
are not backed up by the Backup function - you should use the Audit Trail<br />
Archiving function instead. See A.9.6 “Audit Trail Archiving tool”, A-47.<br />
Evaluate Checksums<br />
<strong>Freedom</strong> <strong>EVOware</strong> uses a checksum system which is based on a CRC<br />
algorithm to protect configuration, script, trace and log files. The checksum is<br />
a computed value which is used to detect corrupted or otherwise altered data.<br />
It is also able to detect whether files have been modified outside of <strong>Freedom</strong><br />
<strong>EVOware</strong> by another program or process.<br />
A warning is shown if an attempt is made to load a file with an incorrect or<br />
missing checksum. The user can then choose to load the file or cancel. In the<br />
latter case, <strong>Freedom</strong> <strong>EVOware</strong> aborts with the exception of script files. In this<br />
case, the file is not loaded but <strong>Freedom</strong> <strong>EVOware</strong> remains running. An entry<br />
is written to the log file each time an incorrect or missing checksum is found.<br />
Uncheck the Evaluate file checksums checkbox if you want to disable the<br />
warning (you need <strong>Freedom</strong> <strong>EVOware</strong> Administrator rights to change this<br />
setting). You should not disable this feature if you need to comply with the<br />
FDA regulations (see B “Appendix B - FDA 21 CFR Part 11 Compliance”, B-<br />
1).<br />
The Data Explorer can be used to check whether <strong>Freedom</strong> <strong>EVOware</strong><br />
configuration and data files have valid checksums (see A.9.1 “Data Explorer<br />
Tool”, A-35).<br />
<strong>Freedom</strong> <strong>EVOware</strong> <strong>Software</strong> <strong>Manual</strong>, 393172, en, V<strong>2.3</strong> 8 - 9
8 - Configuration Tool<br />
General Settings<br />
Log Serial Data<br />
Check the Log serial data checkbox to include serial data (instrument<br />
firmware commands) in the <strong>EVOware</strong>/Log channel of the LogViewer tool. This<br />
will significantly increase the amount of data which is logged. The firmware<br />
commands are marked with an “F” in the log files. See A.1 “Overview of the<br />
Log Files”, A-1 for more information.<br />
The serial data can be useful when investigating communication errors. The<br />
log file also includes firmware commands for devices which are connected to<br />
the instrument’s CAN bus (e.g. LiHa, RoMa, PnP, incubator(s), Te-Shake, Te-<br />
MagS, Te-VacS and Te-Stack). It does not include firmware commands for<br />
devices which have their own RS232 interface.<br />
To avoid logging an excessive amount of data, this logging feature should be<br />
disabled when it is not needed.<br />
See 8.4.3.2 “Logging Option”, 8-36 for information on log files for devices<br />
which have their own RS232 interface.<br />
Electronic signatures<br />
If you check the Electronic Signatures checkbox, users will be forced to enter<br />
a comment to explain the reason when carrying out one of the following<br />
actions:<br />
– Creating, deleting or editing script files and script templates<br />
– Creating, deleting or editing process files and process templates<br />
– Creating, deleting or editing worktable templates<br />
– Creating, deleting or editing carrier definitions<br />
– Creating, deleting or editing labware definitions<br />
– Creating, deleting or editing liquid classes<br />
– Making changes to configuration settings<br />
– Creating, deleting or editing users, groups and password rules<br />
This feature helps to identify why the user performed a specific action. This<br />
feature can only be activated or disabled by a user with <strong>Freedom</strong> <strong>EVOware</strong><br />
Administrator rights.<br />
The Electronic Signatures feature also requires the currently logged in user to<br />
enter his or her <strong>Freedom</strong> <strong>EVOware</strong> password each time one of the above<br />
actions are carried out:<br />
8 - 10 <strong>Freedom</strong> <strong>EVOware</strong> <strong>Software</strong> <strong>Manual</strong>, 393172, en, V<strong>2.3</strong>
8 - Configuration Tool<br />
General Settings<br />
Fig. 8-3<br />
Password prompt when the Electronic Signatures feature is active<br />
The user comment for each of the above files can be viewed in the Data<br />
Explorer (see A.9.1 “Data Explorer Tool”, A-35). Only the most recent<br />
comment is saved. Earlier comments are stored with earlier versions of these<br />
files, which are automatically backed up to the<br />
\AuditTrail\Configuration directory (see A.5 “<strong>Freedom</strong> <strong>EVOware</strong><br />
Directory Structure and Files”, A-25).<br />
If one of the above files has been modified automatically by <strong>Freedom</strong><br />
<strong>EVOware</strong>, a comment is inserted which starts with “<strong>EVOware</strong>:”.<br />
The Electronic Signatures feature also requires the currently logged in user to<br />
enter his or her password if errors occur when running a script or process. The<br />
user name and the errors will be recorded in the <strong>Freedom</strong> <strong>EVOware</strong> log files.<br />
Audit Trail Archiving panel<br />
The Audit Trail Archiving tool (AuditArch) allows you to archive <strong>Freedom</strong><br />
<strong>EVOware</strong> log files and audit trail data either manually or automatically.<br />
Start AuditArch at <strong>EVOware</strong> startup<br />
Check this checkbox if you want AuditArch to archive the log files and the<br />
audit trail data automatically. AuditArch will then start in the background each<br />
time you start <strong>Freedom</strong> <strong>EVOware</strong> and archive the log files if this is required by<br />
the currently configured archiving actions.<br />
Archiving Settings<br />
Click this button to specify the required archiving actions. This opens the<br />
AuditArch dialog box:<br />
See A.9.6 “Audit Trail Archiving tool”, A-47 for more information.<br />
PMP Data panel<br />
Pressure Monitored Pipetting is a hardware option for the liquid handling arm<br />
that monitors the pressure in the airgap between the sample and the system<br />
liquid during aspiration and dispensing. PMP is only available for 200 µl and<br />
1000 µl LiHa DITI tips. Specify the directory to use for storing PMP evaluation<br />
configuration data and pressure curves.<br />
The default setting is as follows:<br />
C:\Program Files\Tecan\<strong>EVOware</strong>\PMP\ (Windows XP) or<br />
C:\ProgramData\Tecan\<strong>EVOware</strong>\PMP\ (Windows Vista).<br />
<strong>Freedom</strong> <strong>EVOware</strong> <strong>Software</strong> <strong>Manual</strong>, 393172, en, V<strong>2.3</strong> 8 - 11
8 - Configuration Tool<br />
General Settings<br />
8.3.1.5 Collision Avoidance Tab<br />
This is used to configure the settings for collision avoidance.<br />
Enable parallel movement<br />
Before moving a robot arm (LiHa, RoMa, MCA etc.) to a new position,<br />
<strong>Freedom</strong> <strong>EVOware</strong> checks whether it could collide with another arm during<br />
the movement and moves the other arm aside to make space. Check this<br />
checkbox if you want to allow the first arm to start its movement before the<br />
other arm has moved fully aside.<br />
Movement delay<br />
Specify how long the first arm should wait before starting its movement<br />
(default: 200 ms). You should allow enough time for the other arm to move<br />
aside before the first arm reaches its destination position.<br />
8.3.2 Notifications Section<br />
<strong>Freedom</strong> <strong>EVOware</strong> can be configured to send notification messages about<br />
system events and error situations to specific groups of users and/or write them to<br />
log files. When you configure this feature for the first time, we recommend you to<br />
configure the users and log files first, then the groups and finally the notifications.<br />
The users and groups for the notification feature are independent of the users and<br />
groups that you configure in the User Management section.<br />
The Notifications feature requires either the MAPI service or access to an SMTP<br />
server (mail server). MAPI is included with many eMail programs, e.g. Microsoft<br />
Outlook.<br />
The groups which you configure here are also used by the script commands<br />
“Notification” (see 15.51 “Notification Command”, 15-116) and “Tip Alignment<br />
Check” (see 15.20 “Tip Alignment Check Command”, 15-30).<br />
8.3.2.1 Settings Tab<br />
This tab is used to configure the eMail settings for the notifications feature.<br />
Note: If you expect to receive replies to the notification eMails, make sure that<br />
you configure an eMail program on another PC to receive the replies. <strong>Freedom</strong><br />
<strong>EVOware</strong> does not provide facilities to receive eMails.<br />
Send User Notifications<br />
Check this checkbox to enable the eMail notifications feature. If you disable<br />
this feature, this does not delete the eMail settings and you can re-enable<br />
them later if required.<br />
MAPI, SMTP<br />
Click the radio buttons to choose whether to send the notifications via MAPI or<br />
SMTP.<br />
MAPI panel<br />
The settings in this panel are only needed if you want to send the notification<br />
eMails using MAPI.<br />
8 - 12 <strong>Freedom</strong> <strong>EVOware</strong> <strong>Software</strong> <strong>Manual</strong>, 393172, en, V<strong>2.3</strong>
8 - Configuration Tool<br />
General Settings<br />
MAPI Profile<br />
Specify the MAPI profile you want to use for sending the notification eMails.<br />
You can get a list of available profiles by double-clicking the Mail button in the<br />
Windows Control Panel. The Mail button will only be present in the Control<br />
Panel if you have installed the MAPI service. MAPI is included with many<br />
eMail programs such as Microsoft Outlook.<br />
MAPI Password<br />
Specify the password for the MAPI profile.<br />
SMTP panel<br />
The settings in this panel are only needed if you want to send the notification<br />
eMails using SMTP.<br />
Server<br />
Specify the address of the SMTP server you want to use for sending the<br />
eMails. You should normally specify the SMTP server address which is<br />
recommended by your eMail provider or eMail administrator.<br />
Port<br />
Specify the SMTP port number (default 25).<br />
Sender Mail<br />
Specify the required eMail address of the sender. It is recommended to<br />
choose an address which allows the <strong>Freedom</strong> <strong>EVOware</strong> PC to be easily<br />
identified in the eMail which is sent (e.g. “EVO_room2@mycompany.com”).<br />
Alternatively, you can specify the Windows host name of the PC (e.g.<br />
“PC185@mycompany.com”).<br />
Sender Host<br />
Specify the name of the eMail domain which you want to use for sending the<br />
notification eMails. This is normally the host name part of the eMail address in<br />
the Sender Mail field (the part after the “@” character, e.g.<br />
“mycompany.com”).<br />
Timeout<br />
Specify the maximum duration of the SMTP send mail command in ms. An<br />
error message will be output if the notification eMail could not be sent within<br />
this time.<br />
Log File<br />
Specify the file name and path of a optional log file which records the sending<br />
of eMail notifications via SMTP. The log file feature is mainly intended for<br />
debugging, e.g. to check that the eMails have been sent correctly.<br />
Authentication<br />
Check this checkbox if the SMTP server (mail server) requires authentication<br />
to allow eMails to be sent. This is normally the case.<br />
User<br />
Specify the user name for SMTP authentication.<br />
Password<br />
Specify the password for SMTP authentication.<br />
The user name and password for SMTP authentication depends on the SMTP<br />
server. In most cases, it is the same user name and password which is used to<br />
collect eMails using the POP3 protocol. With some eMail providers, the user<br />
name is the same as the eMail address.<br />
<strong>Freedom</strong> <strong>EVOware</strong> <strong>Software</strong> <strong>Manual</strong>, 393172, en, V<strong>2.3</strong> 8 - 13
8 - Configuration Tool<br />
General Settings<br />
8.3.2.2 Notifications Tab<br />
The following window is used to configure the notifications:<br />
Fig. 8-4<br />
Notifications<br />
Click in the Notifications panel to add a new notification. Then enter a<br />
descriptive name for the notification. You can change the name later if required.<br />
The Events panel shows all of the system events which are available for the<br />
notification feature. Check the events which you want to include in this notification.<br />
The Receiving groups panel shows the notification groups which you have defined<br />
(see 8.3.<strong>2.3</strong> “Groups Tab”, 8-15). Check the groups which should receive this<br />
notification.<br />
Click to delete the currently selected entry. Click or to change the sort<br />
order of the entries in the list.<br />
The E-mail panel is used to configure the e-mail message that you want to send<br />
for this notification:<br />
Fig. 8-5<br />
Notification e-mail<br />
Enter a subject for the e-mail that will be created in the Subject field. Then enter<br />
the message text for the for the e-mail. Click the buttons if you want to include<br />
placeholders for system variables in the message text. They will be dynamically<br />
replaced with their current values when the message is created.<br />
8 - 14 <strong>Freedom</strong> <strong>EVOware</strong> <strong>Software</strong> <strong>Manual</strong>, 393172, en, V<strong>2.3</strong>
8 - Configuration Tool<br />
General Settings<br />
The available placeholders are as follows:<br />
<br />
The name of the current action.<br />
<br />
The current object (normally a labware item)<br />
<br />
The device driver which producing the error.<br />
<br />
The <strong>EVOware</strong> command currently being executed.<br />
<br />
The starting time of the current command.<br />
<br />
The finishing time of the current command.<br />
<br />
The status of the current command (i.e. the error message).<br />
<br />
Any notes the command writes to trace files.<br />
Note: The placeholders referring to commands will only produce meaningful<br />
information if the system event is related to the execution of a command.<br />
If your recipients list for this notification includes a log file, when the notification e-<br />
mail is created during system runtime the same message will be written to the log<br />
file.<br />
8.3.<strong>2.3</strong> Groups Tab<br />
<strong>Freedom</strong> <strong>EVOware</strong> can be configured to send notification messages about<br />
system events and error situations to specific groups of users and/or write them to<br />
log files. The following window is used to configure recipient groups for the<br />
notification feature:<br />
Fig. 8-6<br />
Groups for notifications<br />
Click in the Groups panel to add a new group for the notification feature. Then<br />
enter a descriptive name for the group. You can change the name later if required.<br />
Click to delete the currently selected entry. Click or to change the sort<br />
order of the entries in the list.<br />
<strong>Freedom</strong> <strong>EVOware</strong> <strong>Software</strong> <strong>Manual</strong>, 393172, en, V<strong>2.3</strong> 8 - 15
8 - Configuration Tool<br />
General Settings<br />
The Users and Files panels show all users and files that you have configured<br />
under Recipients. Check the checkboxes alongside the users and files which<br />
should receive notifications for the currently selected group. Repeat this for all of<br />
the groups you have defined.<br />
The users and groups for the notification feature are independent of the users and<br />
groups that you configure under User Management.<br />
8.3.2.4 Recipients Tab<br />
<strong>Freedom</strong> <strong>EVOware</strong> can be configured to send notification messages about<br />
system events and error situations to specific groups of users and/or to write the<br />
notification messages to log files. The following window is used to configure<br />
recipients for the notification feature:<br />
Fig. 8-7<br />
Recipients for notifications<br />
Click in the User panel to add a new e-mail recipient for the notification feature.<br />
Then enter the recipient’s full name and e-mail address. You can change the<br />
entries later if required.<br />
Click to delete the currently selected entry. Click or to change the sort<br />
order of the entries in the list.<br />
Click in the LogFile panel to add a new log file for the notification feature. Then<br />
enter a descriptive name for the file and the filename (including the full path).<br />
Click to delete the currently selected entry. Click or to change the sort<br />
order of the entries in the list.<br />
The users and groups for the notification feature are independent of the users and<br />
groups that you configure under User Management.<br />
8.3.3 User Management Section<br />
<strong>Freedom</strong> <strong>EVOware</strong> is a closed system and access to <strong>Freedom</strong> <strong>EVOware</strong> requires<br />
you to enter a user name and password. The Tecan User Management system is<br />
a central software component which handles user log in and user authorization for<br />
all Tecan software components.<br />
The User Management section in the Configuration Tool is used to set up the<br />
users who are authorized to use the Tecan software and to configure user groups.<br />
The security features of the User Management system are described in 7 “Tecan<br />
User Management System”, 7-1.<br />
8 - 16 <strong>Freedom</strong> <strong>EVOware</strong> <strong>Software</strong> <strong>Manual</strong>, 393172, en, V<strong>2.3</strong>
8 - Configuration Tool<br />
General Settings<br />
All changes relating to user management are recorded in the user management<br />
audit trail (see 7.1.1 “User Management Audit Trail”, 7-2).<br />
Note: You can only change the settings for users and groups if you have been<br />
given <strong>Freedom</strong> <strong>EVOware</strong> Administrator access rights.<br />
When the <strong>Freedom</strong> <strong>EVOware</strong> software is started for the first time after being<br />
installed, you will be prompted to create a new user with <strong>Freedom</strong> <strong>EVOware</strong><br />
Administrator rights. We recommend you to create one additional user with<br />
<strong>Freedom</strong> <strong>EVOware</strong> Administrator rights in case you need to access the user<br />
management and the normal system administrator is not available.<br />
To prevent access to the system by unauthorized persons, make sure that the<br />
<strong>Freedom</strong> <strong>EVOware</strong> Administrator password is only known to the system<br />
administrator of the Tecan software and to no-one else. Try to develop a secure<br />
and effective way of remembering your password. Please note that user names<br />
and passwords are case-sensitive.<br />
8.3.3.1 Settings Tab<br />
This tab is used to configure settings for the user management.<br />
Security panel<br />
Lock application after x minutes idle time<br />
Users are automatically logged out of <strong>Freedom</strong> <strong>EVOware</strong> after a specified<br />
time during which no keyboard or mouse-click activities have been detected.<br />
Specify the required time interval (range: 1 minute to 24 hours). Logged out<br />
users must log in to <strong>Freedom</strong> <strong>EVOware</strong> again to regain control of the<br />
program.<br />
Exit after x unsuccessful logins<br />
User accounts are automatically disabled after a configurable number of<br />
consecutive failed attempts to enter the correct user name and password<br />
combination. In addition, an optional security alert eMail can be sent to the<br />
<strong>Freedom</strong> <strong>EVOware</strong> Administrator (see below). Specify the required maximum<br />
number of unsuccessful logins (range: 1 to 10).<br />
Enable file validation<br />
All <strong>Freedom</strong> <strong>EVOware</strong> scripts and processes must be validated for correct<br />
functioning and for correct results and approved by the application specialist<br />
before they are used for pipetting with real samples (see C “Validation of<br />
<strong>Freedom</strong> <strong>EVOware</strong> Applications”, C-1). Check this checkbox if you want to<br />
hide non-validated scripts and processes from users with the access level<br />
Operator to ensure that they cannot use them.<br />
If you check this checkbox, non-validated scripts, processes and templates<br />
are shown to <strong>Freedom</strong> <strong>EVOware</strong> Administrators and Application Specialists in<br />
the Selection dialog box with a gray icon instead of a green icon (they are not<br />
visible at all to Operators).<br />
Deactivate user management<br />
Check this checkbox if you want to deactivate user management. You can<br />
only change this setting if you have been given <strong>Freedom</strong> <strong>EVOware</strong><br />
Administrator access rights.<br />
With user management disabled, it is not necessary to enter a user name or<br />
password when <strong>Freedom</strong> <strong>EVOware</strong> is started, and all users will be given<br />
<strong>Freedom</strong> <strong>EVOware</strong> Administrator access rights automatically. Be aware of the<br />
security risk if you deactivate user management and make sure this is<br />
permitted by the security procedures of your laboratory or company.<br />
<strong>Freedom</strong> <strong>EVOware</strong> <strong>Software</strong> <strong>Manual</strong>, 393172, en, V<strong>2.3</strong> 8 - 17
8 - Configuration Tool<br />
General Settings<br />
Validate files on saving<br />
Check this checkbox if you want the file status of the script or process to be<br />
automatically set to Approved when the file is saved.<br />
Password panel<br />
Minimum size of password x characters<br />
Passwords can be forced to contain a specified minimum number of<br />
characters. Specify the required number of characters.<br />
Passwords must contain numeric characters<br />
Check this checkbox if passwords should contain one or more numeric<br />
characters.<br />
Passwords expire after x days<br />
User passwords expire after a configurable number of days. The user must<br />
then choose another password. Specify the required number of days (range: 1<br />
to 365 days).<br />
E-mail panel<br />
A specified person (typically the <strong>Freedom</strong> <strong>EVOware</strong> Administrator) can be<br />
automatically warned by eMail in case of potential security threats (i.e. a user<br />
account has been disabled after a configurable number of consecutive failed login<br />
attempts). This panel is used to configure the settings for the eMail warnings.<br />
Note: If you expect to receive replies to the warning eMails, make sure that you<br />
configure an eMail program on another PC to receive the replies. <strong>Freedom</strong><br />
<strong>EVOware</strong> does not provide facilities to receive eMails.<br />
Notification via e-mail<br />
Check this checkbox if you want <strong>Freedom</strong> <strong>EVOware</strong> to send security<br />
warnings by eMail. If you disable this feature, this does not delete the eMail<br />
settings and you can re-enable them later if required.<br />
Address<br />
Specify the eMail address of the recipient (e.g. the system administrator).<br />
The eMail warnings can be sent using either SMTP or MAPI:<br />
Send with SMTP<br />
Server: Specify the address of the SMTP server you want to use for sending<br />
the eMails. You should normally specify the SMTP server address which is<br />
recommended by your eMail provider or eMail administrator.<br />
Send with MAPI<br />
Profile: Specify the MAPI profile you want to use for sending the warning<br />
eMails. You can get a list of available profiles by double-clicking the Mail<br />
button in the Windows Control Panel. The Mail button will only be present in<br />
the Control Panel if you have installed the MAPI service. MAPI is included with<br />
many eMail programs, e.g. Microsoft Outlook.<br />
Password: Specify the password for the MAPI profile.<br />
Language panel<br />
Choose the required user interface language for the runtime controller and other<br />
software components which are accessible to the operator of the pipetting<br />
instrument. The user interface of the Configuration Tool and parts of the <strong>Freedom</strong><br />
<strong>EVOware</strong> software which are only accessible to the application specialist and/or<br />
system administrator are always shown in English.<br />
8 - 18 <strong>Freedom</strong> <strong>EVOware</strong> <strong>Software</strong> <strong>Manual</strong>, 393172, en, V<strong>2.3</strong>
8 - Configuration Tool<br />
General Settings<br />
8.3.3.2 Users Tab<br />
The top panel on the right lists all users who are currently known to the Tecan<br />
software. The bottom panel lists all available user groups and shows the groups to<br />
which the currently selected user belongs. Check or uncheck the Select<br />
checkboxes to change the group assignments as required. Users inherit the rights<br />
of the groups to which they belong.<br />
You do not need to assign users with Administrator rights to any groups since they<br />
automatically have all rights for the Tecan software. Accordingly, the bottom panel<br />
with the list of groups is hidden if you select a user with Administrator rights.<br />
Check the Admin checkbox if you want to assign Administrator rights for <strong>Freedom</strong><br />
<strong>EVOware</strong> to the currently selected user. The user is then authorized to use the<br />
Tecan User Management system to modify the settings for users and groups (see<br />
7.2 “<strong>Freedom</strong> <strong>EVOware</strong> Access Rights (User Levels)”, 7-3).<br />
Uncheck the Enable checkbox if you want to temporarily disable the log in for the<br />
selected user, for example during a holiday period. Never uncheck all of the<br />
Enable checkboxes because you will not be able to log in to <strong>Freedom</strong> <strong>EVOware</strong><br />
again. We do not recommend you to disable the <strong>Freedom</strong> <strong>EVOware</strong> Administrator<br />
login.<br />
Click in the Password field and then click if you want to change the password<br />
of the currently selected user. This opens the Enter New Password dialog box.<br />
The new password is saved as soon as you click OK. You do not need to click the<br />
Save button. Passwords cannot be reused and must follow certain rules (see<br />
7.1 “Main Features of the Tecan User Management System”, 7-2).<br />
Click in the top panel to create a new user. You will be prompted to specify the<br />
user name, the user’s full name and the user’s password:<br />
Fig. 8-8<br />
Edit User dialog box<br />
Password panel<br />
The password which you assign to the new user is a temporary password. The<br />
user will be forced to enter a new password of his or her choice when logging in to<br />
the Tecan software for the first time. The temporary password is only valid for<br />
three days. You must assign a new temporary password if the user does not<br />
choose a new password within three days.<br />
After creating a new user, you must log out from <strong>Freedom</strong> <strong>EVOware</strong> and log in<br />
again if you want to test the new user account (see 6.1.9 “Lock <strong>EVOware</strong>”, 6-7).<br />
Click to delete the currently selected user. You cannot delete the user<br />
“Administrator”.<br />
<strong>Freedom</strong> <strong>EVOware</strong> <strong>Software</strong> <strong>Manual</strong>, 393172, en, V<strong>2.3</strong> 8 - 19
8 - Configuration Tool<br />
General Settings<br />
8.3.3.3 Groups Tab<br />
The Group Name panel lists all of the user groups which are currently available. If<br />
you have installed more than one Tecan software component (e.g. <strong>Freedom</strong><br />
<strong>EVOware</strong> and Magellan), the list will include default groups for all of the installed<br />
components. The default groups are created automatically when you install and<br />
configure the software components.<br />
The panel to the right lists all available access rights for the currently installed<br />
Tecan software components and shows the access rights which are assigned to<br />
the currently selected user group. Users inherit the rights of the groups to which<br />
they belong.<br />
When <strong>Freedom</strong> <strong>EVOware</strong> is first installed, the user group (user level)<br />
Evoware_Application Specialist is given the access rights “Application<br />
Specialist”. It is not recommended to change this setting since application<br />
specialists normally need all rights.<br />
When <strong>Freedom</strong> <strong>EVOware</strong> is first installed, the user group (user level)<br />
Evoware_Operator is given the access rights “Operator”. For security reasons it<br />
is not recommended to change this setting and/or to assign additional rights.<br />
When <strong>Freedom</strong> <strong>EVOware</strong> is first installed, the user group (user level)<br />
Evoware_Power User is given the access rights “Power User”. If necessary, you<br />
can give this user group additional rights for special applications. You can also<br />
create a new user group and give it a special set of rights to meet your needs.<br />
The available rights are as follows:<br />
Tab. 8-1 Available rights which can be granted<br />
Rights<br />
Application Specialist<br />
Operator<br />
Power User<br />
Change Liquid Classes<br />
Edit Scripts<br />
Partial script running<br />
Bypass Timer<br />
Edit Carriers<br />
Edit Labware<br />
Explanation<br />
Application Specialist has all rights listed in this table.<br />
Operator has rights to:<br />
• Run an existing pipetting script or process<br />
• Run maintenance scripts (see 6.4.2 “Run Maintenance”,<br />
6-10)<br />
• View a pipetting script (but not change it)<br />
• Handle errors during pipetting<br />
Same as Operator plus<br />
• Start running pipetting scripts at a specified line number<br />
• Run direct commands<br />
Edit and create liquid classes<br />
Edit and create pipetting scripts<br />
Start running pipetting scripts at a specified line number<br />
Skip pre-programmed timers during pipetting<br />
Edit and create carriers<br />
Edit and create labware<br />
Run direct commands See 5.4.1.3 “Direct commands”, 5-10.<br />
Configure System<br />
Use the <strong>Freedom</strong> <strong>EVOware</strong> Configuration Tool<br />
You do not need to (and cannot) assign users with Administrator rights to any<br />
groups since they automatically have all rights for the Tecan software.<br />
8 - 20 <strong>Freedom</strong> <strong>EVOware</strong> <strong>Software</strong> <strong>Manual</strong>, 393172, en, V<strong>2.3</strong>
8 - Configuration Tool<br />
Device Settings<br />
See 7.2 “<strong>Freedom</strong> <strong>EVOware</strong> Access Rights (User Levels)”, 7-3 for more<br />
information on <strong>Freedom</strong> <strong>EVOware</strong> access rights and information on the rights of<br />
the System Administrator. Refer to the respective software manual for information<br />
on access rights for other Tecan software components (see 1.2 “Reference<br />
Documents”, 1-3).<br />
Check or uncheck the Select checkboxes to change the access rights<br />
assignments as required.<br />
To create a new group, click and enter the name of the group in the new, blank<br />
line which appears.<br />
To assign to a user to more than one Tecan software component (e.g. <strong>Freedom</strong><br />
<strong>EVOware</strong> and Magellan), it is recommended to create a new, suitably named<br />
group instead of modifying the rights of an existing, group such as<br />
<strong>EVOware</strong>_Operator.<br />
Click to delete the currently selected group. You cannot delete the default<br />
groups for the currently installed Tecan software components.<br />
All changes relating to user management are recorded in the user management<br />
audit trail (see 7.1.1 “User Management Audit Trail”, 7-2).<br />
8.4 Device Settings<br />
Click the Devices tab to view or edit the device settings. This group of settings<br />
allows you to configure global settings for optional devices which can be attached<br />
to your pipetting instrument. It also allows you to configure the liquid handling arm<br />
and the instrument options.<br />
Note: Devices are invisible in the <strong>Freedom</strong> <strong>EVOware</strong> Control Bar and in the<br />
Configuration Tool if the respective device drivers are not installed.<br />
The global device settings apply to all process steps which use the device.<br />
The usage of the dialog boxes is similar for all devices. Device-specific settings<br />
are described in the section on the respective device.<br />
8.4.1 General Section<br />
This section is used to configure general settings for the optional devices, the<br />
liquid handling arm and the instrument options. In addition, you can choose the<br />
colors which are used to display each of the devices in the Gantt chart of the<br />
runtime controller:<br />
8.4.1.1 Device Information Tab<br />
Select a device in the list to get general information on the device driver. The list<br />
only shows devices which have been installed. The following only describes the<br />
fields which are not self-explanatory:<br />
Call name<br />
The device name which used by <strong>Freedom</strong> <strong>EVOware</strong> internally.<br />
File name, Version, Build<br />
The file name, version and build version of the device driver.<br />
<strong>Freedom</strong> <strong>EVOware</strong> <strong>Software</strong> <strong>Manual</strong>, 393172, en, V<strong>2.3</strong> 8 - 21
8 - Configuration Tool<br />
Device Settings<br />
Firmware<br />
The device firmware version for which the driver was originally developed.<br />
Some devices do not have firmware. In many cases, the device driver will<br />
control the device correctly even if the stated firmware version and the actual<br />
firmware version of the device are not identical. However, this field may be<br />
useful to support engineers for the purpose of troubleshooting.<br />
Start checkbox<br />
Select a device in the list and check the Start checkbox if you want <strong>Freedom</strong><br />
<strong>EVOware</strong> to load the device driver when it starts. The checkbox is shown in<br />
gray if the device does not have a loadable driver.<br />
When you install <strong>Freedom</strong> <strong>EVOware</strong>, you normally only install the device<br />
drivers you want to use. If you later choose to disconnect a device from the<br />
pipetting instrument because it is no longer needed for your application or<br />
experiment, you can uncheck the Start checkbox to prevent the driver from<br />
being loaded and thus speed up the startup process.<br />
Settings button<br />
Select a device in the list and click Settings to make global configuration<br />
settings for the device (see 8.5 “Device Driver Configuration”, 8-39).<br />
Unload drivers<br />
To ensure that <strong>Freedom</strong> <strong>EVOware</strong> starts quickly, all of the Tecan drivers you<br />
have chosen to use are loaded each time the PC is started and remain loaded<br />
while the PC is running (see 5.1.2 “Driver pre-loading”, 5-2). Check this<br />
checkbox to disable driver pre-loading. In this case, <strong>Freedom</strong> <strong>EVOware</strong> will<br />
take somewhat longer to start in future.<br />
8.4.1.2 Colors Tab<br />
Select a device in the list, click in the Color column and click to choose the<br />
required color for the device when it is displayed in the Gantt chart of the runtime<br />
controller (see 12.2.4 “Runtime Controller, Extended View (Running a Process)”,<br />
12-14).<br />
8.4.2 Instrument Options Tab<br />
This tab is used to configure settings for the liquid handling arm (LiHa), the PosID<br />
(movable barcode scanner), the MPO/LICOS system (Monitored Pump Option),<br />
system liquids (Chemical System) and the doorlocks. You can also configure<br />
settings for initializing the instrument arms.<br />
8.4.2.1 LiHa (Liquid Handling Arm)<br />
The LiHa (Liquid Handling Arm) is a robot arm on the pipetting instrument which is<br />
mounted on the X-slide and typically holds four or eight pipetting tips.<br />
Initialization panel<br />
<strong>Freedom</strong> <strong>EVOware</strong> detects automatically whether the instrument needs to be<br />
initialized, and carries out initialization if necessary. If your instrument is<br />
equipped with a LiHa, during initialization it is moved above the left-most<br />
waste and all dilutors are initialized. This can cause some liquid to drip from<br />
the tips.<br />
Deep in Waste: If you check this checkbox, <strong>Freedom</strong> <strong>EVOware</strong> lowers the<br />
tips into the waste to minimize the risk of contamination due to stray drops of<br />
liquid during instrument initialization. See also 8.4.2.8 “Arm Initialization”, 8-<br />
31.<br />
8 - 22 <strong>Freedom</strong> <strong>EVOware</strong> <strong>Software</strong> <strong>Manual</strong>, 393172, en, V<strong>2.3</strong>
8 - Configuration Tool<br />
Device Settings<br />
ATTENTION<br />
Risk of the tips colliding with the waste and/or the washer.<br />
• Please check the coordinates of the waste and/or the washer before<br />
activating these options. Otherwise the tips might collide with the labware.<br />
DITI Handling panel<br />
Optimize positions when fetching DITIs<br />
If you check this checkbox, the following method is used to reduce the number<br />
of LiHa movements which are needed when getting DITIs (i.e. to speed up the<br />
Get DITI commands):<br />
If you choose all of the tips in the Get DITI command, they are picked up<br />
starting at the beginning of the DITI rack (for the 8-tip LiHa: positions 1 to 8).<br />
The next eight tips are then picked up at positions 9 to 16.<br />
If you do not choose all of the tips in the Get DITI command, they are picked<br />
up at the end of the DITI rack (starting at position 96).<br />
This feature ensures that the beginning of the DITI rack always has full rows<br />
of fresh DITIs which can be picked up in a single movement.<br />
This optimization feature is permanently activated for the <strong>Freedom</strong> EVO 75<br />
pipetting instrument with the 2-tip LiHa or 8 PLus 1 Access option (see<br />
A.7 “<strong>Freedom</strong> EVO 75 Pipetting Instrument - LiHa Configuration”, A-30).<br />
DITI fetch mode<br />
Specify the required DITI fetch mode as follows:<br />
Sequential: The DITIs are mounted one after the other sequentially..<br />
Even/Odd: All of the even-numbered DITIs are mounted simultaneously (2, 4,<br />
6, 8) followed by all of the odd-numbered DITIs simultaneously (1, 3, 5, 7).<br />
This option requires a reinforced DITI support bracket (hardware option).<br />
All parallel: All of the DITIs are mounted simultaneously. This option is only<br />
allowed for mounting up to four DITIs (maximum). In addition, this option<br />
requires a reinforced DITI support bracket (hardware option).<br />
The options Even/Odd and All Parallel reduce the time required to mount the<br />
DITIs (increased performance).<br />
Speed up Movements panel<br />
Use fast positioning in XZ<br />
When the LiHa moves across a single labware item in the X direction, for<br />
example for reagent distribution, the tips are normally moved upwards (Z<br />
direction), then across to the next column of wells and then down again.<br />
Check this checkbox to enable smart moves. In this case, the X and Z<br />
movements take place simultaneously and the tips follow a curved or<br />
parabolic path instead of a rectangular path. This reduces the time required<br />
for the movement.<br />
<strong>Freedom</strong> <strong>EVOware</strong> <strong>Software</strong> <strong>Manual</strong>, 393172, en, V<strong>2.3</strong> 8 - 23
8 - Configuration Tool<br />
Device Settings<br />
Optimize Z-travel<br />
To avoid a collision, when the LiHa moves across different types of labware or<br />
across the entire worktable, the tips are normally moved upwards to the height<br />
you specify with the global parameter Travel Height (see below). The<br />
Optimize Z-Travel settings allows <strong>Freedom</strong> <strong>EVOware</strong> to make smart moves<br />
by analyzing the height of all obstacles along the path of travel and moving the<br />
tips up just enough to clear the highest obstacle. This reduces the time<br />
required for the movement.<br />
No Z-travel optimization: Do not optimize the z movements. The tips will be<br />
raised to the specified global Travel Height when moving between different<br />
types of labware and across different carriers.<br />
Optimize Z-travel within carriers: Raise the tips to clear all obstacles within<br />
the same carrier. The tips will be raised to the specified Travel Height when<br />
moving between different carriers or across the entire worktable.<br />
Optimize Z-travel for worktable: Raise the tips to clear all obstacles when<br />
moving across the entire worktable.<br />
Instrument tab<br />
If <strong>Freedom</strong> <strong>EVOware</strong> is running in normal mode and connected to a pipetting<br />
instrument, the liquid handling arm configuration (number of tips) and some of the<br />
other parameters are determined automatically by interrogating the instrument.<br />
Such parameters can only be configured manually on the Offline tab.<br />
Note: The settings on the Offline tab only apply to offline mode.<br />
8 - 24 <strong>Freedom</strong> <strong>EVOware</strong> <strong>Software</strong> <strong>Manual</strong>, 393172, en, V<strong>2.3</strong>
8 - Configuration Tool<br />
Device Settings<br />
Click the Instrument tab to see the current settings (you will only see four columns<br />
if you only have four tips):<br />
Fig. 8-9<br />
Configuring the LiHa<br />
Number of tips<br />
Specify the number of pipetting tips on the liquid handling arm.<br />
Instrument type<br />
Choose the width of the instrument’s worktable (measured in grid positions).<br />
Travel height<br />
To avoid a collision, <strong>Freedom</strong> <strong>EVOware</strong> retracts the tips to a certain height<br />
when moving the LiHa across the worktable in the X and Y directions.<br />
When the LiHa moves over a single labware item or between adjacent<br />
identical labware items, it retracts the tips to the Z-Travel value which is<br />
specified in the labware definition (see 9.4.3 “Labware Coordinates”, 9-25).<br />
However, if consecutive commands cause it to move over different types of<br />
labware or across the entire worktable, the tips are retracted to the height you<br />
specify here. This is done to speed up and optimize LiHa movements (to avoid<br />
the need for repeated height changes during the movement). Travel Height<br />
(also called Global Z-Travel) is specified in instrument steps (0.1 mm).<br />
Choose the global parameter Travel Height to be higher than all obstacles on<br />
the woktable. See also Optimize z-travel, above.<br />
A travel height of 0 is the highest position (tips fully retracted). Specify 200 in<br />
this field to lower the tips by 2 cm during global travel.<br />
<strong>Freedom</strong> <strong>EVOware</strong> <strong>Software</strong> <strong>Manual</strong>, 393172, en, V<strong>2.3</strong> 8 - 25
8 - Configuration Tool<br />
Device Settings<br />
ATTENTION<br />
Risk of the tips colliding with the PosID.<br />
• Set Travel Height to the highest position (0) if your pipetting instrument is<br />
equipped with a PosID or PosID-3. Otherwise the tips may collide with the<br />
device.<br />
The settings for the LiHa tips are as follows:<br />
Tip Type<br />
Choose the tip type (Fixed tips or DITIs, disposable tips). <strong>Freedom</strong> <strong>EVOware</strong><br />
automatically sets the correct value for the tip offset. If you want to use a<br />
combination of fixed tips and DITIs, the fixed tips must have lower tip numbers<br />
(e.g. fixed tips at positions 1 to 4 and DITI tips at positions 5 to 8).<br />
Tip is Broken<br />
Check this checkbox to deactivate individual tips (including the corresponding<br />
dilutors and valves) if they are broken. <strong>Freedom</strong> <strong>EVOware</strong> will deactivate the<br />
affected tips/dilutors and check this checkbox automatically if it detects a tip or<br />
diluter problem. This is done to to prevent them being used for any further<br />
pipetting.<br />
Note: <strong>Freedom</strong> <strong>EVOware</strong> will output an error message if you use a broken tip in a<br />
pipetting script. Accordingly, it is also necessary to deselect broken tips in the<br />
pipetting commands.<br />
Low Volume<br />
Check this checkbox if the tip position is equipped with the Low Volume<br />
option. If <strong>Freedom</strong> <strong>EVOware</strong> is running in normal mode and connected to a<br />
pipetting instrument, the Low Volume option is detected automatically.<br />
Accordingly, it can only be configured manually on the Offline tab.<br />
Te-Fill Option<br />
Check this checkbox if the tip position is equipped with the Te-Fill option. Te-<br />
Fill uses a bi-directional pump instead of the diluter to aspirate and dispense<br />
large volumes of liquid, for example buffer solutions.<br />
PMP Option<br />
Check this checkbox if the tip position is equipped with a special tip adapter<br />
for the PMP (Pressure Monitored Pipetting) option. PMP is only available for<br />
200 µl and 1000 µl LiHa DITI tips. If <strong>Freedom</strong> <strong>EVOware</strong> is running in normal<br />
mode and connected to a pipetting instrument, the PMP option is detected<br />
automatically. Accordingly, the PMP option can only be activated manually on<br />
the Offline tab.<br />
Tip Offset<br />
Specify the length of the tip in instrument steps (0.1 mm). <strong>Freedom</strong> <strong>EVOware</strong><br />
uses these values to calculate the correct Z-coordinates when using different<br />
tips in a pipetting run. The offsets are measured relative to the Reference Tip<br />
in increments of 0.1 mm. A positive value indicates that this tip type is longer<br />
than the Reference Tip. For example, 390 means that the tip is 3.9 cm longer<br />
than the Reference Tip. Tip offsets should be changed with great care and<br />
there is normally no need to modify them. Specify -270 for Te-PS tips.<br />
8 - 26 <strong>Freedom</strong> <strong>EVOware</strong> <strong>Software</strong> <strong>Manual</strong>, 393172, en, V<strong>2.3</strong>
8 - Configuration Tool<br />
Device Settings<br />
Pump type<br />
Specify which dilutor pump your pipetting instrument is fitted with (XP or XLP<br />
or XMP). The XP dilutor supports syringe sizes from 25 µl to 5 ml. The XLP<br />
dilutor supports syringe sizes from 50 µl to 50 ml. In addition it has a high<br />
resolution mode which allows more accurate pipetting. The XMP dilutor is<br />
used by the <strong>Freedom</strong> EVO 75 pipetting instrument.<br />
Resolution<br />
Specify the resolution of your dilutor pump (Normal or High). This parameter is<br />
only relevant for XLP dilutors.<br />
Pipetting is more accurate in high resolution mode. However, the maximum<br />
pipetting speed is much less in this mode. This may be a disadvantage for<br />
viscous liquids and/or very low pipetted volumes, since droplets may remain<br />
attached to the tip due to surface tension.<br />
Diluter Capacity<br />
Choose the maximum volume in µl that the dilutor is able to dispense or<br />
aspirate with the current syringe size. The syringe size is on a label which is<br />
attached to the syringe.<br />
System Capacity<br />
Specify the system capacity in µl. For standard tips, this is the volume of the<br />
tubing from the tip to the dilutor valve (typically 3500 µl). If you are using the<br />
Low Volume option, this is the volume of the tubing from the tip to the pinch<br />
valve.<br />
<strong>Freedom</strong> <strong>EVOware</strong> limits the maximum pipetting volume to the System<br />
Capacity or the Diluter Capacity, whichever is smaller.<br />
Tubing Length<br />
Specify the length of the tubing between the diluter and the liquid handling<br />
arm in mm. The PMP option (if fitted) uses this information to calculate the<br />
volume of the liquid system of the pipetting instrument. Specify 3200 mm if the<br />
pipetting instrument only has one LiHa; Specify 3900 mm if the pipetting<br />
instrument has two LiHas and the PMP option is fitted to the left LiHa.<br />
Tubing Diameter<br />
Specify the internal diameter of the tubing between the diluter and the liquid<br />
handling arm in 0.01 mm. The PMP option (if fitted) uses this information to<br />
calculate the volume of the liquid system of the pipetting instrument. The<br />
default value of 100 (= 1 mm) should not be changed. The PMP option does<br />
not currently support other tubing diameters.<br />
Max. Pipetting Speed<br />
Specify the maximum flow rate of liquid through the LiHa dilutor when<br />
pipetting. <strong>Freedom</strong> <strong>EVOware</strong> calculates an appropriate value automatically.<br />
You will get a validation error if the liquid class you are using in your pipetting<br />
script specifies a higher speed than this. You may need to reduce the max.<br />
pipetting speed for viscous liquids.<br />
Max. Wash Speed<br />
Specify the maximum flow rate of liquid through the LiHa dilutor when washing<br />
the tips. <strong>Freedom</strong> <strong>EVOware</strong> calculates an appropriate value automatically.<br />
You can reduce the max. wash speed for viscous liquids.<br />
For standard tips or DITIs, the maximum dilutor speed (pipetting or washing)<br />
depends on the dilutor capacity (syringe size) as follows:<br />
<strong>Freedom</strong> <strong>EVOware</strong> <strong>Software</strong> <strong>Manual</strong>, 393172, en, V<strong>2.3</strong> 8 - 27
8 - Configuration Tool<br />
Device Settings<br />
Tab. 8-2 Max. dilutor speeds for the LiHa (pipetting or washing)<br />
Dilutor capacity Max. dilutor speed Max. breakoff speed<br />
25 µl 21 µl/s 11 µl/s<br />
50 µl 42 µl/s 23 µl/s<br />
100 µl 83 µl/s 45 µl/s<br />
250 µl 208 µl/s 113 µl/s<br />
500 µl 417 µl/s 225 µl/s<br />
1000 µl 833 µl/s 450 µl/s<br />
2500 µl 2083 µl/s 1125 µl/s<br />
5000 µl 4167 µl/s 2250 µl/s<br />
The breakoff speed is the recommended final dilutor speed when dispensing. See<br />
10.2.2 “LiHa Dispense Parameters (Fixed Tips and DiTis)”, 10-12.<br />
If you are using the XLP dilutor pump in high resolution mode, the maximum<br />
dilutor speeds are 12.5% of the values given in the above table (<strong>Freedom</strong><br />
<strong>EVOware</strong> calculates an appropriate value for the XLP dilutor pump automatically).<br />
Offline tab<br />
Click the Offline tab to specify the required configuration of the liquid handling arm<br />
and the tip parameters if <strong>Freedom</strong> <strong>EVOware</strong> is running in offline mode. See<br />
Instrument tab, above, for a description of the parameters.<br />
Copy machine parameters<br />
Click this button to copy the current parameters from the Instrument tab to the<br />
Offline tab. This allows you to create processes and scripts in offline mode<br />
without having to specify all of the liquid handling settings manually.<br />
8.4.2.2 PosID (Moveable Barcode Scanner)<br />
This tab is used to specify custom command strings for the PosID (Positive<br />
Identification System). The PosID is a movable barcode scanner which can be<br />
used to read the barcode labels on carriers, labware and tubes. Note: The allowed<br />
barcode types are configured with the PosID command (see 15.63 “PosID<br />
Command”, 15-150). This tab is not shown if you have installed the driver for<br />
the PosID-3 barcode scanner, which supercedes the PosID barcode scanner.<br />
8 - 28 <strong>Freedom</strong> <strong>EVOware</strong> <strong>Software</strong> <strong>Manual</strong>, 393172, en, V<strong>2.3</strong>
8 - Configuration Tool<br />
Device Settings<br />
Commands for Custom Labware panel<br />
Specify the firmware commands which should be sent to the PosID before<br />
each pipetting script is started. This is normally only necessary for custom<br />
labware; standard Tecan labware is handled by the PosID automatically.<br />
Click to add a new entry to the list. Click to delete the currently selected<br />
entry. Click or to change the sort order of the entries.<br />
The following example shows the three commands which are required to<br />
define a strip rack with carrier code 500, which is similar to a standard strip<br />
rack with code 016:<br />
SPS1,16,3,0,200,188,7,1<br />
SPC1,1,0,0,1<br />
SPA500,1,1<br />
See the manual “Command Set, PosID firmware (Doc ID 391141)” for a list of<br />
firmware commands. Firmware commands are nearly always written<br />
uppercase.<br />
The above commands only define the custom labware for the PosID. You<br />
must also define it as labware in <strong>Freedom</strong> <strong>EVOware</strong> to allow it to be used in a<br />
script. Only use barcode numbers in the range 500 to 999 for custom labware.<br />
The settings on this tab do not apply to the PosID-3.<br />
8.4.<strong>2.3</strong> MPO/SPO and LICOS<br />
The MPO (Monitored Pump Option) consists of FWO (Fast Wash Option) and<br />
LICOS (Liquid Container Supervisor). The Fast Wash Option is used to pump a<br />
large amount of liquid at high speed through the system, normally to rinse the tips.<br />
The LICOS option is a device which monitors the liquid level in the waste and<br />
system liquid containers. The SPO supersedes the MPO and has improved liquid<br />
level sensors for the waste and system liquid containers.<br />
This tab is used to set parameters for the MPO/SPO and for LICOS:<br />
MPO flow rate<br />
MPO is normally used for washing standard tips. This option allows you to<br />
reduce the default flow rate and thus the pressure in the tubing. This can be<br />
useful when special (smaller) tips are used. Do not use a flow rate in excess of<br />
80% if you are using the Pressure Monitored Pipetting (PMP) hardware<br />
option. PMP is only available for DITI tips.<br />
LICOS<br />
Check this checkbox to activate the LICOS option. You can then specify the<br />
liquid levels at which an error message will be output and the system will be<br />
paused. This option is only relevant if your pipetting instrument is fitted with<br />
the LICOS option.<br />
<strong>Freedom</strong> <strong>EVOware</strong> checks the liquid levels in the waste and system liquid<br />
containers each time the tips are washed. It also checks the liquid level in the<br />
system liquid container when the Aspirate script command is executed if you<br />
choose to aspirate the system liquid.<br />
You must use the Tecan Setup & Service software to calibrate the LICOS. See<br />
1.2 “Reference Documents”, 1-3 for information on this software.<br />
<strong>Freedom</strong> <strong>EVOware</strong> <strong>Software</strong> <strong>Manual</strong>, 393172, en, V<strong>2.3</strong> 8 - 29
8 - Configuration Tool<br />
Device Settings<br />
SPO<br />
Check the checkbox to activate the SPO liquid level sensors for the waste and<br />
system liquid containers. An error message will then be output and the system<br />
will be paused if the waste container is full or the system liquid container is<br />
empty. This option is only relevant if your pipetting instrument is fitted with the<br />
SPO option.<br />
<strong>Freedom</strong> <strong>EVOware</strong> checks the liquid levels in the waste and system liquid<br />
containers each time the tips are washed. It also checks the liquid level in the<br />
system liquid container when the Aspirate script command is executed if you<br />
choose to aspirate the system liquid.<br />
8.4.2.4 Te-Fill option<br />
The Te-Fill option uses a bi-directional pump instead of the diluter to aspirate and<br />
dispense large volumes of liquid, for example buffer solutions. The Te-Fill option<br />
can be optionally provided with a 6-way valve, which allows you to switch between<br />
six different liquid containers.<br />
The pipetting commands for the Te-Fill option cause the pipetting instrument to<br />
switch from using the diluter to using the bi-directional pump and to switch back<br />
again when the command is finished.<br />
Te-Fill Pump<br />
6-way valve connected<br />
Check this checkbox if the Te-Fill option is fitted with a 6-way valve. If<br />
required, you can assign the names of the liquids you want to use to the<br />
channels of the 6-way valve (see 8.4.2.6 “6-way valve for Te-Fill”, 8-31).<br />
8.4.2.5 System Liquids<br />
The system liquids option allows you to use up to six different system liquids in the<br />
pipetting instrument. It uses a 6-way valve to choose the required liquid.<br />
The system liquids option is not currently available for the <strong>Freedom</strong> EVO series of<br />
pipetting instruments.<br />
System Liquids panel<br />
Specify the names of the system liquids you want to use in the System Liquids<br />
panel. Click to add a new entry to the list. Click to delete the currently<br />
selected entry. Click or to change the sort order of the entries.<br />
The available system liquids are then shown as green bars in the System icon<br />
at the bottom right of the Worktable Editor, one bar for each liquid. See<br />
Fig. 11-8 “Example worktable showing carriers, labware and labware labels”,<br />
11-20 for an example of the System icon. In the example, only one green<br />
bar is shown (only one system liquid is available).<br />
When you specify an Aspirate script command and want to aspirate the<br />
system liquid, click directly on the green bar in the System icon at the bottom<br />
right of the Worktable Editor. If you need to aspirate large volumes of the<br />
system liquid, this avoids having to place a trough on the worktable.<br />
After clicking on the green bar, the gray (protected) field in the dialog box of<br />
the pipetting command then shows the reserved labware label Systemliquid.<br />
At present, the <strong>Freedom</strong> EVO series of pipetting instruments only allows you<br />
to use one system liquid.<br />
8 - 30 <strong>Freedom</strong> <strong>EVOware</strong> <strong>Software</strong> <strong>Manual</strong>, 393172, en, V<strong>2.3</strong>
8 - Configuration Tool<br />
Device Settings<br />
8.4.2.6 6-way valve for Te-Fill<br />
The Te-Fill option uses a bi-directional pump instead of the diluter to aspirate and<br />
dispense large volumes of liquid, for example buffer solutions. The Te-Fill option<br />
can be optionally provided with a 6-way valve, which allows you to switch between<br />
six different liquid containers.<br />
Specify the names of the liquids you want to use to the channels of the 6-way<br />
valve. Click to add a new entry to the list. Click to delete the currently<br />
selected entry. Click or to change the sort order of the entries.<br />
The assigned names will then be shown in the Te-Fill pipetting commands in the<br />
Channel / Liquid pull-down list.<br />
See also see 8.4.2.4 “Te-Fill option”, 8-30.<br />
8.4.2.7 Doorlocks<br />
<strong>Freedom</strong> <strong>EVOware</strong> supports up to four electrically-operated doorlocks which are<br />
fitted to the pipetting instrument and the doorlocks are arranged in groups. This<br />
function is used to assigned each of the doorlocks to one of the four available<br />
groups.<br />
The doorlocks of all groups are locked automatically when starting or continuing a<br />
script. The doorlocks of all groups are unlocked automatically when finishing,<br />
pausing or aborting a script. See 2.6 “Safety Features of the Pipetting Instrument”,<br />
2-4.<br />
Doorlock panel<br />
The <strong>Freedom</strong> EVO pipetting instrument is always fitted with two doorlocks<br />
(Doorlock 1 and Doorlock 2) and they are permanently assigned to Doorlock<br />
Group 1 (their assignment cannot be changed). A mechanical interlock<br />
ensures that scripts and processes cannot be started unless the safety hoods<br />
are closed and locked. Two additional doorlocks can be fitted to the pipetting<br />
instrument to support special hardware arrangements.<br />
Specify the required doorlock group assignment for doorlocks 3 and 4 by<br />
choosing the required group from the list. Choose none if the additional<br />
doorlocks are not fitted to your instrument.<br />
8.4.2.8 Arm Initialization<br />
Each time <strong>Freedom</strong> <strong>EVOware</strong> or an <strong>Freedom</strong> <strong>EVOware</strong> script or process is<br />
started, the status of the instrument arms (LiHa, RoMa and PnP) and optional<br />
devices (e.g. Te-MO and Te-VacS) is checked and they are initialized if necessary.<br />
In addition, a full initialization sequence is carried out when <strong>Freedom</strong> <strong>EVOware</strong> is<br />
started for the first time after powering up the instrument.<br />
When the instrument arms are initialized, a sequence of movements is carried out<br />
to determine the reference (zero) positions along the X, Y and Z axes. During the<br />
full initialization sequence, the arms need to move fully to the rear of the<br />
instrument to determine the zero position in the Y direction.<br />
You can also initialize the instrument manually by clicking the Initialize button in<br />
the toolbar (see 6.7 “<strong>Freedom</strong> <strong>EVOware</strong> Toolbar”, 6-18).<br />
A progress bar shows the progress of the initialization:<br />
<strong>Freedom</strong> <strong>EVOware</strong> <strong>Software</strong> <strong>Manual</strong>, 393172, en, V<strong>2.3</strong> 8 - 31
8 - Configuration Tool<br />
Device Settings<br />
Fig. 8-10 Initializing the pipetting instrument<br />
Click Pause if you want to pause the initialization procedure. This unlocks the<br />
doorlocks and switches off the electrical power to the motors which move the<br />
instrument arms (LiHa, RoMa, PnP). The arms can then be moved along the<br />
slides manually. To speed up initialization If the arms are far away from their home<br />
(parking) positions, click Pause, move them closer to their home positions and<br />
then click Resume. The doorlocks will lock again and initialization will continue.<br />
If initialization fails, for example because <strong>Freedom</strong> <strong>EVOware</strong> is unable to<br />
communicate with one of the devices, a dialog box is shown with information on<br />
the error(s). If one of the error messages is shown truncated because it is too<br />
long, lengthen the field in the dialog box and activate the horizontal scroll bar by<br />
double-clicking on the divider (short vertical line in the header) at the end of the<br />
field.<br />
The configuration options for the initialization procedure are as follows:<br />
Initialization mode: <strong>Standard</strong><br />
With the <strong>Freedom</strong> EVO series of pipetting instruments, during initialization all<br />
arms move from their current position to the rear of the worktable to initialize<br />
all of the axes. After reaching the rear of the instrument, they then move to the<br />
rear left.<br />
The arms then move to their home (i.e. safe or parking) positions if they have<br />
been defined (see 9.6.4 “Defining the Home Position for a RoMa”, 9-62 and<br />
9.7.4 “Defining the Home Position for a PnP”, 9-69).<br />
Initialization mode: To the front<br />
If the rear of the worktable is occupied by large (i.e. high) objects such as the<br />
Te-MO, choose To the front to avoid a collision during full initialization. You<br />
must then specify a grid position range in the From grid and To grid fields.<br />
Empty space on worktable for Y initialization<br />
Specify a grid position range in the From grid and To grid fields to indicate<br />
where it is safe to move the arms to the rear of the instrument (i.e. where there<br />
are no other objects which could obstruct the arm movements). Since, with<br />
this option, the arms move one at a time to the rear, the grid position range<br />
only needs to be wide enough to accommodate one arm.<br />
8.4.2.9 Te-MO<br />
The Te-MO is a robot pipetting device which can be attached to the worktable of<br />
the pipetting instrument. It is equipped with a specially designed multi-pipetting<br />
head which can pipette to up to 384 wells simultaneously, resulting in an<br />
extremely high throughput and efficiency.<br />
8 - 32 <strong>Freedom</strong> <strong>EVOware</strong> <strong>Software</strong> <strong>Manual</strong>, 393172, en, V<strong>2.3</strong>
8 - Configuration Tool<br />
Device Settings<br />
Settings panel<br />
The following parameters can be configured for the Te-MO.<br />
Number of tips<br />
Specify the number of pipetting head tips you want to use if you are running<br />
<strong>Freedom</strong> <strong>EVOware</strong> in offline mode (96 or 384). If <strong>Freedom</strong> <strong>EVOware</strong> is<br />
running in normal mode and connected to a pipetting instrument which is fitted<br />
with a Te-MO, the number of tips is determined automatically by interrogating<br />
the Te-MO.<br />
Global Z-Travel<br />
To avoid a collision, <strong>Freedom</strong> <strong>EVOware</strong> retracts the Te-MO pipetting head to a<br />
certain height when moving it across the Te-MO deck in the X and Y directions<br />
(see 9.4.3 “Labware Coordinates”, 9-25).<br />
When the Te-MO moves over a single labware item or between adjacent<br />
identical labware items, it retracts the pipetting head to the Z-Travel value<br />
which is specified in the labware definition. However, if two consecutive<br />
commands cause it to move over different pieces of labware, the pipetting<br />
head is retracted to the height you specify here. This is done to speed up and<br />
optimize Te-MO movements (to avoid the need for repeated height changes<br />
during the movement).<br />
Global Z-Travel is specified in instrument steps (0.1 mm). A travel height of 0<br />
is the highest position (pipetting head fully retracted). Specify 200 in this field<br />
to lower the pipetting head by 2 cm during global travel (range: 0 to 200).<br />
Turn PWM checking off<br />
The servo motors of the Te-MO monitor the downwards force which is applied<br />
when mounting DITIs. Check this checkbox to disable force feedback. This is<br />
only necessary for special applications. This setting is only intended for<br />
specialists such as Tecan Field Service Engineers.<br />
8.4.2.10 MCA96<br />
The Multi Channel Arm (MCA) is a special liquid handling arm which is fitted with<br />
a 96-tip pipetting head. The pipetting head can be fitted with a tipblock (a<br />
replaceable block with 96 tips) or with DITIs. The spacing between the tips is fixed<br />
(9 mm).<br />
Initialization panel<br />
Park over washer: Check this checkbox if you want the MCA96 to move<br />
above the MCA96 Wash & Refill Center (WRC) and wait there after the<br />
pipetting script or process has finished.<br />
Instrument tab<br />
Travel height<br />
To avoid a collision, <strong>Freedom</strong> <strong>EVOware</strong> retracts the tips to a certain height<br />
when moving the MCA96 across the worktable in the X and Y directions (see<br />
9.4.3 “Labware Coordinates”, 9-25).<br />
When the MCA96 moves over a single labware item or between adjacent<br />
identical labware items, it retracts the tips to the Z-Travel value which is<br />
specified in the labware definition. However, if two consecutive commands<br />
cause it to move over different pieces of labware, the tips are retracted to the<br />
height you specify here. This is done to speed up and optimize MCA96<br />
<strong>Freedom</strong> <strong>EVOware</strong> <strong>Software</strong> <strong>Manual</strong>, 393172, en, V<strong>2.3</strong> 8 - 33
8 - Configuration Tool<br />
Device Settings<br />
movements (to avoid the need for repeated height changes during the<br />
movement). Travel Height (also called Global Z-Travel) is specified in<br />
instrument steps (0.1 mm). Choose Travel Height to be higher than all<br />
obstacles on the worktable.<br />
A travel height of 0 is the highest position (tips fully retracted). Specify 200 in<br />
this field to lower the tips by 2 cm during global travel.<br />
ATTENTION<br />
Risk of the tips colliding with the PosID.<br />
• Set Travel Height to the highest position (0) if your pipetting instrument is<br />
equipped with a PosID or PosID-3. Otherwise the tips may collide with the<br />
device.<br />
Max. Pipetting Speed<br />
Specify the maximum flow rate of liquid through the dilutor when pipetting.<br />
<strong>Freedom</strong> <strong>EVOware</strong> calculates an appropriate value automatically. You can<br />
reduce the max. pipetting speed for viscous liquids. If you specify higher<br />
speeds in your pipetting script, <strong>Freedom</strong> <strong>EVOware</strong> will limit them to this value.<br />
Washer address<br />
Specify the hardware address of the MCA96 Wash & Refill Center (WRC).<br />
Specify the address as “address on the switch plus 1” (default: O7). Each<br />
physical device (regardless of device type) must have a unique hardware<br />
address.<br />
The MCA96 allows you to use two WRCs. To do this, specify both hardware<br />
addresses separated by a semicolon, e.g. O7;O8. <strong>Freedom</strong> <strong>EVOware</strong> will<br />
then search the worktable for MCA96 WRCs and assign the address O7 to the<br />
first one on the worktable and O8 to the second one. The search order on the<br />
worktable is from rear to front and then from left to right.<br />
Gripper type<br />
Choose the gripper type which is fitted to the MCA96 from the pull-down list.<br />
Offline tab<br />
Click the Offline tab to specify the required configuration of the MCA96 if <strong>Freedom</strong><br />
<strong>EVOware</strong> is running in offline mode. See above, for a description of the<br />
parameters.<br />
Copy machine parameters<br />
Click this button to copy the current parameters from the Instrument tab to the<br />
Offline tab. This allows you to create processes and scripts in offline mode<br />
without having to specify all of the settings manually.<br />
Has gripper<br />
Check this checkbox if you want to simulate an MCA96 with the gripper<br />
hardware option.<br />
Gripper type<br />
Choose the MCA96 gripper type which you want to use for offline mode.<br />
8.4.2.11 MCA384<br />
The MCA384 (Multi Channel Arm 384) is a special liquid handling arm which can<br />
be fitted with 96 or 384 fixed tips or with 96 or 384 disposable tips (DITIs). The<br />
8 - 34 <strong>Freedom</strong> <strong>EVOware</strong> <strong>Software</strong> <strong>Manual</strong>, 393172, en, V<strong>2.3</strong>
8 - Configuration Tool<br />
Device Settings<br />
8.4.2.12 RoMa<br />
spacing between the tips is fixed (9 mm and/or 4.5 mm). So-called head adapters<br />
are used to adapt the pipetting head to the different tip types.<br />
Settings panel<br />
Washer address<br />
Specify the hardware address of the MCA384 Wash & Refill Center (WRC).<br />
Specify the address as “address on the switch plus 1” (default: O7). Each<br />
physical device (regardless of device type) must have a unique hardware<br />
address.<br />
The MCA384 allows you to use two WRCs. To do this, specify both hardware<br />
addresses separated by a semicolon, e.g. O7;O8. <strong>Freedom</strong> <strong>EVOware</strong> will<br />
then search the worktable for MCA384 WRCs and assign the address O7 to<br />
the first one on the worktable and O8 to the second one. The search order on<br />
the worktable is from rear to front and then from left to right.<br />
Advanced Z-Travel<br />
Check this checkbox if you want the MCA384 to make smart moves by<br />
analyzing the height of all obstacles along the path of travel across the entire<br />
worktable and moving the tips up just enough to clear the highest obstacle.<br />
This reduces the time required for the movement. See also 9.5.5.1 “Labware<br />
Carrier Attributes”, 9-49, ZTravel parameter.<br />
The RoMa is a robot arm equipped with special grippers that can pick up,<br />
transport and place objects within the working area of the pipetting instrument.<br />
Optimize vectors<br />
Depending on how the RoMa vectors have been have created, <strong>Freedom</strong><br />
<strong>EVOware</strong> may send consecutive movement commands to the pipetting<br />
instrument which command the RoMa to move to identical position<br />
coordinates. This can occur e.g. if the waypoints in the RoMa vector uses a<br />
mixture of absolute and relative positions to move to different sites in a hotel.<br />
Check this checkbox to suppress the additional (and unnecessary since<br />
identical) movement commands. This reduces the time required by the RoMa<br />
vector by reducing the number of firmware commands which are sent.<br />
Enable round moves<br />
When carrying out a RoMa vector, the RoMa normally moves to each<br />
waypoint which is specified in the vector before starting to move to the<br />
following waypoint. If you check this checkbox, the RoMa will start to move to<br />
the following waypoint before it has fully reached the current waypoint.<br />
Depending on the RoMa vector, the RoMa can be seen to cut corners (round<br />
off the corners) as it moves, instead of moving in a straight line. This reduces<br />
the time required by the RoMa vector. Note: The collision avoidance<br />
algorithms have a higher priority and will ensure that no collisions will occur,<br />
even when cutting corners.<br />
8.4.3 Communication Section<br />
This section is used to configure the data communication between <strong>Freedom</strong><br />
<strong>EVOware</strong>, the pipetting instrument and the optional devices.<br />
<strong>Freedom</strong> <strong>EVOware</strong> <strong>Software</strong> <strong>Manual</strong>, 393172, en, V<strong>2.3</strong> 8 - 35
8 - Configuration Tool<br />
Device Settings<br />
8.4.3.1 I/O State Tab<br />
Select a device in the list and check or uncheck the Active checkbox to enable or<br />
disable data communication with the device.<br />
Set the I/O State to ON for all devices which are installed and physically<br />
connected to the PC.<br />
For devices with an RS232 interface, if you set the I/O state to ON you must also<br />
choose a unique COM port address with the COM Ports tab. This is also<br />
necessary if you are running <strong>Freedom</strong> <strong>EVOware</strong> in offline mode.<br />
Note: After installing <strong>Freedom</strong> <strong>EVOware</strong>, data communication is initially set to<br />
OFF for all devices with a COM interface. The PC cannot communicate with the<br />
device if the I/O status is OFF.<br />
Note: <strong>Freedom</strong> <strong>EVOware</strong> automatically disables data communication with the<br />
LiHa and the RoMa if it cannot detect a hardlock (dongle) when it starts. Pipetting<br />
is not possible in this case.<br />
8.4.3.2 Logging Option<br />
Select a device in the list and check the checkbox if you want to log the exchange<br />
of firmware commands between the device driver and the device, including<br />
commands which are exchanged through an RS232 connection to the device.<br />
This can be useful for testing purposes. The information which is logged can be<br />
viewed in Tecan/Drivers/ channel of the LogViewer tool, where<br />
is the device call name in <strong>Freedom</strong> <strong>EVOware</strong> (see A.10 “LogViewer<br />
Tool”, A-72).<br />
For devices which are connected to the CAN bus of the pipetting instrument, you<br />
can also log the exchange of firmware commands by checking Log serial data in<br />
the Protocol files tab (Instrument settings, General section). See 8.3.1.4 “Protocol<br />
Options Tab”, 8-8.<br />
To avoid logging an excessive amount of data, this logging feature should be<br />
disabled when it is not needed.<br />
8.4.3.3 Com Ports Tab<br />
This tab is used to choose the COM port that you want to use for devices which<br />
are connected to the PC via a dedicated RS 232 interface (serial interface). You<br />
can also choose the COM port for the pipetting instrument.<br />
Note: Some of the devices such as the RoMa, the LiHa and the incubators are<br />
connected to the data bus (CAN bus) of the pipetting instrument. You cannot (and<br />
do not need to) make COM port settings for such devices.<br />
Select a device in the list, click in the Port column and choose the COM port which<br />
you want to use for data communication from the pull-down list. The pull-down list<br />
shows all of the COM ports which are currently installed in the PC.<br />
The Port information panel shows the currently configured interface settings:<br />
Baud rate, Data bits, Stop bits, Parity<br />
This shows the speed of data transmission, the number of data bits, the<br />
number of stop bits and the parity for the data transfer.<br />
Receive Retries, Transmit Timeout<br />
This shows the number of retries and the transmit timeout for the data<br />
connection.<br />
8 - 36 <strong>Freedom</strong> <strong>EVOware</strong> <strong>Software</strong> <strong>Manual</strong>, 393172, en, V<strong>2.3</strong>
8 - Configuration Tool<br />
Device Settings<br />
Flow Control<br />
This shows the flow control method which is used for the data connection<br />
(’none’, ’X-On/X-Off’ ’Hardware’ or ’undefined’).<br />
With the exception of the COM port, <strong>Freedom</strong> <strong>EVOware</strong> automatically sets the<br />
parameters to the appropriate values for each of the devices. If the data<br />
communication settings of the device’s serial interface are configurable, make<br />
sure that you set them to the values shown in the Port information panel. See the<br />
hardware manual for the device for further information (see 1.2 “Reference<br />
Documents”, 1-3).<br />
If <strong>Freedom</strong> <strong>EVOware</strong> is not able to communicate successfully with the device,<br />
make sure that the device’s serial interface has been configured correctly. Also<br />
make sure that you are using the correct serial interface cable. Some devices<br />
have firmware commands (such as Get_Version) which can be used as a simple<br />
test of the data communications (see 8.4.3.4 “Test Tab”, 8-37).<br />
For some devices, you must first switch the device to Remote or Slave mode to<br />
allow <strong>Freedom</strong> <strong>EVOware</strong> to control it remotely through its data interface. Typically,<br />
this is done using the buttons on the front panel of the device. See the hardware<br />
manual for the device for further information (see 1.2 “Reference Documents”,<br />
1-3).<br />
Note: The PC cannot communicate with the device if the I/O Status is OFF (see<br />
8.4.3.1 “I/O State Tab”, 8-36).<br />
8.4.3.4 Test Tab<br />
The Test tab allows you to send firmware commands (command strings) to the<br />
selected device and is only intended for specialists. It can be used e.g. to initialize<br />
the device, test communications with the device and to move the arms etc. to a<br />
specified position.<br />
In many cases, the Command name panel is pre-configured with useful command<br />
strings (but some of the devices have no command strings). Select the device,<br />
select one of the pre-configured strings and click Send. The response string from<br />
the device will be displayed in the Response panel.<br />
To send a custom command string, click , specify the command in the<br />
Command column and click Send. You do not need to specify a command name.<br />
Custom command strings cannot be saved permanently. See the hardware<br />
manual for the device for a full list of command strings (see 1.2 “Reference<br />
Documents”, 1-3). Alphabetic characters in command strings are nearly always<br />
written uppercase.<br />
For descriptions of the pre-configured command strings which are available for<br />
each device, see the section “Firmware commands” for the device (see<br />
8.5 “Device Driver Configuration”, 8-39). The section “Firmware commands” is<br />
only available if the device has pre-configured command strings.<br />
WARNING<br />
Risk of injury to operating personnel or damage to the equipment<br />
• Take care when sending firmware commands. Sending the wrong commands<br />
can damage the instrument or objects in its workspace, hurt yourself or other<br />
people.<br />
<strong>Freedom</strong> <strong>EVOware</strong> <strong>Software</strong> <strong>Manual</strong>, 393172, en, V<strong>2.3</strong> 8 - 37
8 - Configuration Tool<br />
Device Settings<br />
8.4.4 Scheduling Section<br />
The Scheduling section lets you specify how the driver will react if errors occur<br />
during execution of one of its commands. You can also set general scheduling<br />
options for the driver.<br />
8.4.4.1 Resource Locking Tab<br />
Check the Lock checkbox if you want the device to be unavailable for other<br />
actions during execution of its pre-actions and post-actions. You can uncheck this<br />
checkbox to improve scheduling efficiency if you are using standard Tecan<br />
RoMa’s which support automatic collision avoidance. In the case of the LiHa, this<br />
allows the RoMa to fetch new labware while the LiHa is still busy.<br />
The Te-MO is normally treated as two separate resources (the two outer slides<br />
are controlled independently). For example, the RoMa can exchange the<br />
microplates on one of the slides while the other slide is being used for pipetting.<br />
Check the Lock checkbox if you want to treat the Te-MO as one resource, for<br />
example if you only want to use one of the slides.<br />
Do not uncheck this option if you are using third party robots which do not support<br />
automatic collision avoidance.<br />
8.4.4.2 Error Reaction Tab<br />
Check the Pre-action and/or Post action checkboxes if you want a “Loss of<br />
peripheral” error to be triggered for the selected device if an error occurs during<br />
execution of its pre-actions and/or post-actions.<br />
If for example the RoMa_MoveObject command fails when transporting labware<br />
to a device, preventing further access to the device, the “Loss of peripheral error”<br />
stops <strong>Freedom</strong> <strong>EVOware</strong> from trying to use the device in future. For example, if a<br />
labware item is physically obstructing the entrance to an incubator, to prevent<br />
further errors the incubator will no longer be used, even if the incubator is still fully<br />
functional.<br />
8.4.4.3 Pause On Error Tab<br />
The Pause on error panel specifies which kinds of device errors will result in a<br />
system pause. Check the corresponding boxes if you want the system to halt on<br />
all errors, on loss of peripheral errors, on pre-action errors and/or on post-action<br />
errors.<br />
The Pause on error settings can also be made individually for each process step<br />
(see 9.10.2.2 “Pause On Error Tab”, 9-72). Check Enforce these settings if you<br />
want the settings in this tab to override the settings for the process steps.<br />
8.4.4.4 Pre-emptive Tool tab<br />
<strong>Freedom</strong> <strong>EVOware</strong> can be instructed to check the process for device commands<br />
which are soon due for execution (look ahead). Depending on the device type and<br />
the command, this allows <strong>Freedom</strong> <strong>EVOware</strong> to send preparatory instructions to<br />
the device to speed up the execution of the command.<br />
To activate this feature, you must check the Enable pre-emptive tool operations<br />
checkbox on the Scheduler tab (see 8.3.1.3 “Scheduler Tab”, 8-5, Tool<br />
Optimization panel).<br />
For example, the carousel can be instructed to bring the next labware item to be<br />
processed from the carousel tower to the transfer position, where it can wait for a<br />
subsequent fetch command (RoMa movement). The RoMa then does not have to<br />
8 - 38 <strong>Freedom</strong> <strong>EVOware</strong> <strong>Software</strong> <strong>Manual</strong>, 393172, en, V<strong>2.3</strong>
8 - Configuration Tool<br />
Device Driver Configuration<br />
wait for the labware to be brought from the tower. This optimizes the movement<br />
times for the carousel.<br />
Pre-emptive tool operations are only available for the carousel and some thirdparty<br />
incubators.<br />
The parameters in this panel are as follows:<br />
Device<br />
Name of the device which can be optimized by pre-emptive instructions.<br />
Macro name<br />
Choose the internal command (macro) to use for the preparatory instructions.<br />
The pull-down list shows all of the commands which are available for the<br />
selected device. For the carousel and the carousel NT, you should normally<br />
choose the internal command PrePresentPlate (see 16.3.11 “Carousel -<br />
PrePresentPlate Command”, 16-7 and 16.4.14 “Carousel NT -<br />
PrePresentPlate Command”, 16-15).<br />
Time frame<br />
Specify in seconds how far ahead the scheduler should check the process for<br />
the specified internal command (look ahead time). The time you specify<br />
should be about the same time which is required for the preparatory<br />
instructions (e.g. about the same time which is required to bring the labware<br />
from the carousel tower to the transfer position).<br />
Very long times can increase the risk of unnecessary unloading of labware<br />
from the carousel due to changes in the schedule. This will result in time<br />
wastage since the unloaded labware has to be put back in the carousel tower<br />
before another labware item can be brought.<br />
If the location is an incubator, keep in mind that pre-emptive tool operations<br />
can affect the incubation time specified in the process if the look ahead time is<br />
longer than necessary, since the labware could be removed from the<br />
controlled environment earlier than necessary.<br />
8.5 Device Driver Configuration<br />
The optional devices which connected to your pipetting instrument each have<br />
individual settings that can be adjusted to your needs. To access these settings,<br />
start the Configuration Tool, click the Devices tab, click Device Information, select<br />
the required device in the Devices panel, click the Settings button and click the<br />
Settings tab of the Configure Device Driver Properties dialog box.<br />
The Information panel shows general information on the device and the device<br />
driver (see 8.4.1.1 “Device Information Tab”, 8-21).<br />
The usage of the Driver tab is the same for all devices and is described in<br />
8.5.35 “Driver Tab of the Configure Device Driver Properties Dialog Box”, 8-116.<br />
The usage of the Conversion tab is the same for all microplate readers and is<br />
described in 8.5.34.3 “Microplate Reader Configuration - Conversion Tab”, 8-<br />
115. The Settings tab for microplate readers is described in 8.5.34.2 “Microplate<br />
Reader Configuration - Settings Tab”, 8-114.<br />
8.5.1 Settings for the Barcode Scanner<br />
This is used to configure settings for the Symbol LS-1220 barcode scanner. For<br />
general information on this device, see 16.2 “Commands for the Symbol LS-1220<br />
Barcode Scanner”, 16-1.<br />
<strong>Freedom</strong> <strong>EVOware</strong> <strong>Software</strong> <strong>Manual</strong>, 393172, en, V<strong>2.3</strong> 8 - 39
8 - Configuration Tool<br />
Device Driver Configuration<br />
8.5.1.1 Barcode Scanner Configuration - Settings Tab<br />
The Settings tab is used to make general settings for the Barcode Scanner.<br />
Fig. 8-11 Settings tab of the Barcode Scanner driver<br />
Settings panel<br />
Barcode variable name<br />
Specify the name of an internal variable which should be used to store the<br />
barcode which is scanned. The default variable name for barcodes is “ID”.<br />
Enter Barcode <strong>Manual</strong>ly on Timeout, <strong>Manual</strong> Entry Timeout<br />
If you check Enter Barcode <strong>Manual</strong>ly on Timeout, the operator will be<br />
prompted to enter the barcode manually during process runtime if the scanner<br />
was unable to read it, despite retries. A default barcode will be used if the<br />
operator does not enter the barcode within the specified time (<strong>Manual</strong> Entry<br />
Timeout field).<br />
If you do not check Enter Barcode <strong>Manual</strong>ly on Timeout, a default barcode will<br />
always be used if the scanner was unable to read it.<br />
Default Barcode<br />
The following placeholders can be used in the Default Barcode field:<br />
Tab. 8-3 Placeholders for use in default barcodes<br />
Placeholder Example Description<br />
or 123 Counter<br />
or<br />
<br />
004 Counter which is adjusted to a length of n<br />
digits using leading zeros<br />
The placeholders are replaced dynamically with their current values during script<br />
or process runtime. You can combine the placeholders with plain text.<br />
8 - 40 <strong>Freedom</strong> <strong>EVOware</strong> <strong>Software</strong> <strong>Manual</strong>, 393172, en, V<strong>2.3</strong>
8 - Configuration Tool<br />
Device Driver Configuration<br />
Example: Use the following string to generate default barcodes containing the<br />
string “Generated” and a 4-digit counter:<br />
Generated<br />
(e.g. Generated0003).<br />
Example: Use the following string to generate default barcodes containing the<br />
string “Unreadable” and a counter:<br />
Unreadable<br />
(e.g. Unreadable2)<br />
Auto Read Retries<br />
Specify how many times the device should try to read the barcode before<br />
considering it unreadable.<br />
Move Timeout<br />
Specify the timeout for the robot move which is associated with the<br />
ReadBarcode command. An error message will be output if the robot takes<br />
longer than this to move.<br />
Move Robot in Beam<br />
Specify the distances in the x, y and z directions that the robot should move<br />
the labware in the scanner beam when scanning.<br />
Multiplication Factors for Retries<br />
Specify multiplication factors for the distances in the Move Robot in beam<br />
field.<br />
If the labware cannot be scanned on the first try, the distances in Move Robot<br />
in Beam are multiplied by the specified multiplication factors for each<br />
successive attempt, resulting in larger distances each time. This allows<br />
<strong>Freedom</strong> <strong>EVOware</strong> to search for the barcode label with the help of the robot in<br />
case it is not accurately positioned on the labware.<br />
The barcode scanner can be configured to only accept the barcode types which<br />
are expected on your barcode labels. This makes it easier for the scanner to<br />
identify incorrect barcodes. This can be done by the Tecan Field Service Engineer<br />
using special configuration barcodes. The valid barcode types list is stored in the<br />
barcode scanner firmware.<br />
8.5.1.2 Barcode Scanner Configuration - Firmware Commands<br />
The following firmware commands (command strings) are pre-configured for the<br />
Barcode Scanner in the Test tab of the Configuration Tool:<br />
Read Barcode <br />
Performs a single read operation of the barcode scanner.<br />
Refer to the firmware documentation for the device for a complete list of firmware<br />
commands (see also 1.2.1 “Related Documentation and <strong>Software</strong>”, 1-3).<br />
WARNING<br />
Risk of injury to operating personnel or damage to the equipment<br />
• Take care when sending firmware commands. Sending the wrong commands<br />
can damage the instrument or objects in its workspace, hurt yourself or other<br />
people.<br />
<strong>Freedom</strong> <strong>EVOware</strong> <strong>Software</strong> <strong>Manual</strong>, 393172, en, V<strong>2.3</strong> 8 - 41
8 - Configuration Tool<br />
Device Driver Configuration<br />
8.5.2 Settings for the Carousel<br />
This is used to configure settings for the Carousel. For general information on this<br />
device, see 16.3 “Commands for the Carousel”, 16-2.<br />
8.5.2.1 Carousel Configuration - Driver Tab<br />
See 8.5.35 “Driver Tab of the Configure Device Driver Properties Dialog Box”,<br />
8-116.<br />
8.5.2.2 Carousel Configuration - Scanner Settings Tab<br />
This tab is used to make settings for the optional barcode scanner of the carousel.<br />
Fig. 8-12 Scanner Settings tab of the Carousel driver<br />
Settings panel<br />
Barcode variable name<br />
Specify the name of an internal variable which should be used to store the<br />
barcode which is scanned. The default variable name for barcodes is “ID”.<br />
Default Barcode<br />
A default barcode will be used if the carousel barcode scanner was unable to<br />
read the barcode. The following placeholders can be used in the Default<br />
Barcode field:<br />
Tab. 8-4 Placeholders for use in default barcodes<br />
Placeholder Example Description<br />
or 123 Counter<br />
or<br />
<br />
004 Counter which is adjusted to a length of n<br />
digits using leading zeros<br />
8 - 42 <strong>Freedom</strong> <strong>EVOware</strong> <strong>Software</strong> <strong>Manual</strong>, 393172, en, V<strong>2.3</strong>
8 - Configuration Tool<br />
Device Driver Configuration<br />
The placeholders are replaced dynamically with their current values during script<br />
or process runtime. You can combine the placeholders with plain text.<br />
Example: Use the following string to generate default barcodes containing the<br />
string “Generated” and a 4-digit counter:<br />
Generated<br />
(e.g. Generated0003).<br />
Example: Use the following string to generate default barcodes containing the<br />
string “Unreadable” and a counter:<br />
Unreadable<br />
(e.g. Unreadable2)<br />
8.5.<strong>2.3</strong> Carousel Configuration - Barcode File Settings Tab<br />
The Carousel commands ReadAllBarcodes and ReadPlatesInCartridge read the<br />
barcodes of the labware in the carousel and create a barcode list in a text file. This<br />
tab is used to specify the filename and path of the barcode file.<br />
Fig. 8-13 Barcode File Settings tab of the Carousel driver<br />
Barcode File panel<br />
File name<br />
Specify the filename and path of the barcode file. Specify the filename and<br />
path directly or click Browse and choose an existing file. See A.2.1 “Barcode<br />
files written by the Carousel commands”, A-11 for information on the<br />
barcode file which will be created.<br />
Note: When the barcodes are scanned, the barcode file will be overwritten if it<br />
already exists.<br />
8.5.2.4 Carousel Configuration - Barcode Settings Tab<br />
The Barcode Settings tab is used to configure the barcode types which the<br />
carousel barcode scanner option will accept:<br />
<strong>Freedom</strong> <strong>EVOware</strong> <strong>Software</strong> <strong>Manual</strong>, 393172, en, V<strong>2.3</strong> 8 - 43
8 - Configuration Tool<br />
Device Driver Configuration<br />
Fig. 8-14 Barcode Settings tab of the Carousel driver<br />
Barcodes panel<br />
Number of codes<br />
Specify how many different barcode types you want to read (maximum 6).<br />
Depending on your setting, additional tabs will appear (Code1, Code2, etc.)<br />
where you can configure each of the barcode types you expect. You should<br />
only configure the barcode types which are expected on your barcode labels.<br />
This makes it easier for the scanner to identify incorrect barcodes.<br />
If you set this field to 0, <strong>Freedom</strong> <strong>EVOware</strong> will use the settings stored in the<br />
barcode scanner firmware and you do not have to enter any further settings.<br />
The following parameters must be set for each barcode type you want to read:<br />
CodeX<br />
Code Type<br />
Select the barcode type from the list. The supported types are:<br />
Disabled, Code 2/5 interleaved, Code 39 standard, Code 39 full ASCII, Code<br />
32. C.I.P., Codabar, Code 128, EAN 128, Code 93 standard, Code 93 full<br />
ASCII, EAN 13, EAN 8, UPCA, UPCE, EAN 13 add on 2, EAN 8 add on 2,<br />
UPCA add on 2, UPCE add on 2, EAN 13 add on 5, EAN 8 add on 5, UPCA<br />
add on 5 and UPCE add on 5.<br />
Number of Digits<br />
Specify the length of the barcode.<br />
Check Digit<br />
Check this checkbox if the barcode includes a check digit.<br />
Transmit Check Digit<br />
Check this checkbox if you want to transmit the check digit to <strong>Freedom</strong><br />
<strong>EVOware</strong> as part of the barcode.<br />
Transmit Start/Stop<br />
Check this checkbox if you want to transmit a start/stop code to <strong>Freedom</strong><br />
<strong>EVOware</strong> as part of the barcode.<br />
8 - 44 <strong>Freedom</strong> <strong>EVOware</strong> <strong>Software</strong> <strong>Manual</strong>, 393172, en, V<strong>2.3</strong>
8 - Configuration Tool<br />
Device Driver Configuration<br />
8.5.3 Settings for the Carousel NT<br />
This is used to configure settings for the Carousel NT. For general information on<br />
this device, see 16.4 “Commands for the Carousel NT”, 16-8.<br />
8.5.3.1 Carousel NT Configuration - Monitoring Tab<br />
This tab is used to make settings for temperature and moisture monitoring of the<br />
carousel.<br />
Fig. 8-15 StoreX tab of the Carousel NT driver<br />
Monitoring panel<br />
Enable monitoring<br />
The Carousel NT is fitted with sensors which monitor the temperature and<br />
moisture level inside the carousel. Check this checkbox if you want the<br />
carousel to transfer this information to <strong>Freedom</strong> <strong>EVOware</strong>. The measured<br />
values are logged to the driver report file. See 8.4.3.2 “Logging Option”, 8-<br />
36 for information on how to activate the driver report file for the carousel.<br />
In <strong>Freedom</strong> <strong>EVOware</strong> Plus, you can view the measured values by clicking on<br />
Carousel NT in the Devices panel of the runtime controller (extended view)<br />
after you have run the process (see 12.2.4 “Runtime Controller, Extended<br />
View (Running a Process)”, 12-14). The measured values will be shown in<br />
the Event Log panel. The values shown are not refreshed automatically. Click<br />
Carousel NT again to show the new values.<br />
Time interval<br />
Specify the frequency with which the carousel should report the the<br />
temperature and moisture level to <strong>Freedom</strong> <strong>EVOware</strong>.<br />
<strong>Freedom</strong> <strong>EVOware</strong> <strong>Software</strong> <strong>Manual</strong>, 393172, en, V<strong>2.3</strong> 8 - 45
8 - Configuration Tool<br />
Device Driver Configuration<br />
8.5.3.2 Carousel NT Configuration - Hotel - Cartridge Configuration Tab<br />
This tab is used to specify the labware type which can be stored in each of the<br />
carousel cartridges (towers). You must also specify the number of slots in the<br />
cartridge. The configuration of the exchangeable cartridges in the carousel<br />
depends on the requirements of your application, and the settings in this dialog<br />
box may need to be changed if you want to run another script or process.<br />
Fig. 8-16 Hotel - Cartridge Configuration tab of the Carousel NT driver<br />
Cartridge Configuration panel<br />
Cartridge type<br />
Choose the labware type which can be stored in the selected cartridge<br />
(tower). The carousel uses this information to calculate the slot pitch height<br />
(the vertical distance in device steps between the bottoms of adjacent labware<br />
items). This information is required by the carousel feeder mechanism.<br />
Use Custom pitch #1 to #10 heights for labware with non-standard pitch<br />
height (see 8.5.3.3 “Carousel NT Configuration - Hotel - Custom Pitch Height<br />
tab”, 8-46).<br />
Number of slots<br />
Specify the number of slots in the cartridge (the maximum number of labware<br />
items of this type which the selected cartridge can store).<br />
The standard cartridge for microplates has a pitch height of 788 device steps<br />
per slot and has 22 slots. The special microplate cartridge with a pitch height<br />
of 719 device steps per slot has 24 slots.<br />
8.5.3.3 Carousel NT Configuration - Hotel - Custom Pitch Height tab<br />
This tab is used to specify the carousel slot pitch height for labware with nonstandard<br />
pitch height. For standard labware types, the carousel has an internal<br />
table of slot pitch heights.<br />
8 - 46 <strong>Freedom</strong> <strong>EVOware</strong> <strong>Software</strong> <strong>Manual</strong>, 393172, en, V<strong>2.3</strong>
8 - Configuration Tool<br />
Device Driver Configuration<br />
Fig. 8-17 Hotel - Custom Pitch Height tab of the Carousel NT driver<br />
Custom Pitch Height Definition panel<br />
Custom Pitch Height #1 to #10<br />
Specify the slot pitch height (the vertical distance in device steps between the<br />
bottoms of adjacent labware items) for up to 10 custom labware items which<br />
you want to use in the carousel. This information is required by the carousel<br />
feeder mechanism.<br />
See also Cartridge type in 8.5.3.2 “Carousel NT Configuration - Hotel -<br />
Cartridge Configuration Tab”, 8-46.<br />
8.5.3.4 Carousel NT Configuration - Barcode Settings Tab<br />
The Barcode Settings tab is used to configure the barcode types which the<br />
carousel barcode scanner option will accept:<br />
<strong>Freedom</strong> <strong>EVOware</strong> <strong>Software</strong> <strong>Manual</strong>, 393172, en, V<strong>2.3</strong> 8 - 47
8 - Configuration Tool<br />
Device Driver Configuration<br />
Fig. 8-18 Barcode Settings tab of the Carousel NT driver<br />
Barcode Generation Options panel<br />
Default Barcode<br />
The following placeholders can be used in the Default Barcode field:<br />
Tab. 8-5 Placeholders for use in default barcodes<br />
Placeholder Example Description<br />
or 123 Counter<br />
or<br />
<br />
004 Counter which is adjusted to a length of n<br />
digits using leading zeros<br />
The placeholders are replaced dynamically with their current values during script<br />
or process runtime. You can combine the placeholders with plain text.<br />
Example: Use the following string to generate default barcodes containing the<br />
string “Generated” and a 4-digit counter:<br />
Generated<br />
(e.g. Generated0003).<br />
Example: Use the following string to generate default barcodes containing the<br />
string “Unreadable” and a counter:<br />
Unreadable<br />
(e.g. Unreadable2)<br />
8 - 48 <strong>Freedom</strong> <strong>EVOware</strong> <strong>Software</strong> <strong>Manual</strong>, 393172, en, V<strong>2.3</strong>
8 - Configuration Tool<br />
Device Driver Configuration<br />
Enter Barcode <strong>Manual</strong>ly on Timeout, <strong>Manual</strong> Entry Timeout<br />
If you check Enter Barcode <strong>Manual</strong>ly on Timeout, the operator will be<br />
prompted to enter the barcode manually during process runtime if the scanner<br />
was unable to read it, despite retries. A default barcode will be used if the<br />
operator does not enter the barcode within the specified time (<strong>Manual</strong> Entry<br />
Timeout field).<br />
If you do not check Enter Barcode <strong>Manual</strong>ly on Timeout, a default barcode will<br />
always be used if the scanner was unable to read it.<br />
Scan while loading plate<br />
Check this checkbox to scan the barcode when the labware is being loaded<br />
into the carousel.<br />
... at transfer station<br />
Check this checkbox to scan the barcode at the transfer position when the<br />
labware is being loaded into the carousel. In this case, it won’t be scanned<br />
again when it reaches the cartridge (tower).<br />
Scan while unloading plate<br />
Check this checkbox to scan the barcode when the labware is being unloaded<br />
from the carousel.<br />
8.5.4 Settings for the Hettich Centrifuge<br />
This is used to configure settings for the Hettich Centrifuge. For general<br />
information on this device, see 16.5 “Commands for the Hettich Centrifuge”, 16-<br />
16.<br />
8.5.4.1 Hettich Centrifuge Configuration - Driver Tab<br />
See 8.5.35 “Driver Tab of the Configure Device Driver Properties Dialog Box”,<br />
8-116.<br />
8.5.4.2 Hettich Centrifuge Configuration - Settings Tab<br />
The Settings tab is used to make general settings for the Hettich Centrifuge.<br />
Fig. 8-19 Settings tab of the Hettich Centrifuge driver<br />
<strong>Freedom</strong> <strong>EVOware</strong> <strong>Software</strong> <strong>Manual</strong>, 393172, en, V<strong>2.3</strong> 8 - 49
8 - Configuration Tool<br />
Device Driver Configuration<br />
Centrifuge panel<br />
Device Address<br />
Specify the hardware (device) address of the centrifuge. This setting is only<br />
relevant when daisy chaining several devices and should not normally be<br />
changed.<br />
8.5.4.3 Hettich Centrifuge Configuration - Firmware Commands<br />
The following firmware commands (command strings) are pre-configured for the<br />
Hettich Centrifuge in the Test tab of the Configuration Tool:<br />
ClearError <br />
Clears the error condition of the device. In case of an error the device will<br />
block until this command has been executed.<br />
Close <br />
Closes the door of the device.<br />
Open <br />
Opens the door of the device.<br />
PosN <br />
Moves the rotor into position N (1-4).<br />
Status <br />
Requests the device status.<br />
Refer to the firmware documentation for the device for a complete list of firmware<br />
commands (see also 1.2.1 “Related Documentation and <strong>Software</strong>”, 1-3).<br />
WARNING<br />
Risk of injury to operating personnel or damage to the equipment<br />
• Take care when sending firmware commands. Sending the wrong commands<br />
can damage the instrument or objects in its workspace, hurt yourself or other<br />
people.<br />
8.5.5 Settings for the CNS (Common Notification Server)<br />
This is used to make settings for the Common Notification Server. For general<br />
information on this device see A.12 “Common Notification Server (CNS)”, A-82.<br />
8.5.5.1 CNS configuration - Driver tab<br />
See 8.5.35 “Driver Tab of the Configure Device Driver Properties Dialog Box”,<br />
8-116.<br />
8.5.6 Settings for the Columbus Washer<br />
This is used to configure settings for the Columbus Washer. For general<br />
information on this device, see 16.6 “Commands for the Columbus Washer”,<br />
16-19.<br />
8 - 50 <strong>Freedom</strong> <strong>EVOware</strong> <strong>Software</strong> <strong>Manual</strong>, 393172, en, V<strong>2.3</strong>
8 - Configuration Tool<br />
Device Driver Configuration<br />
8.5.6.1 Columbus Washer Configuration - Driver Tab<br />
See 8.5.35 “Driver Tab of the Configure Device Driver Properties Dialog Box”,<br />
8-116.<br />
8.5.6.2 Columbus Washer Configuration - Settings Tab<br />
The Settings tab is used to make general settings for the Columbus washer.<br />
Fig. 8-20 Settings tab of the Columbus Washer driver<br />
Device panel<br />
Manifold type<br />
Choose whether the washer is equipped with an 8, 12 or 16 way manifold.<br />
Strip selection<br />
Enable or disable the strip selection feature of the washer. If enabled, the strip<br />
of the microplate to be washed can be selected before the wash program is<br />
executed. A strip is a row or column of the microplate.<br />
Aerosol protection<br />
Specify whether the washer is equipped with the aerosol protection option.<br />
The aerosol protection option is a special manifold and pump to aspirate any<br />
aerosol vapors away from the microplate when it is washed.<br />
Fill verification<br />
Specify whether the washer is equipped with the fill verification option. The fill<br />
verification option checks whether the wash buffer was dispensed into each<br />
well during an overflow wash step (special manifold required).<br />
Waste full detector<br />
Specify whether the washer is equipped with the optional waste full sensor.<br />
The waste full sensor detects when the waste bottle becomes full and alerts<br />
the user.<br />
<strong>Freedom</strong> <strong>EVOware</strong> <strong>Software</strong> <strong>Manual</strong>, 393172, en, V<strong>2.3</strong> 8 - 51
8 - Configuration Tool<br />
Device Driver Configuration<br />
Rinse when shutdown<br />
Enable: Check this checkbox if you want the washer to carry out an automatic<br />
rinsing procedure when you shut down <strong>Freedom</strong> <strong>EVOware</strong>.<br />
Channel: Choose the channel (liquid container) which contains the required<br />
rinsing liquid.<br />
WashPlateEx folder<br />
Path: Specify the required path for the WashPlateEx configuration file. The<br />
WashPlateEx configuration file is used by the WashPlateEx script command.<br />
External Valve Support panel<br />
Enable<br />
Check this checkbox if you want to use an external two-way valve for liquid<br />
channel 4. This allows you to use five channels (liquid containers) with the<br />
washer instead of four. The external valve is intended for special applications.<br />
Device Address<br />
Specify the hardware address of the external valve. Specify the address as<br />
“address on the switch plus 1”. Each physical device (regardless of device<br />
type) must have a unique hardware address.<br />
Device Sub Address<br />
Specify the hardware sub-address of the external valve.<br />
Set left, Set right<br />
These settings control which input of the external valve is connected to which<br />
liquid container (4 or 5). Refer to the third-party supplier of the external valve<br />
for more information.<br />
Miscellaneous panel<br />
Time for autoprime<br />
Specify the amount of time in seconds which is required by the automatic<br />
priming procedure. The washer is primed automatically each time you change<br />
the channel (liquid container).<br />
Wash procedure time<br />
Specify the amount of time in seconds which is required by one wash cycle.<br />
Overhead for cycle<br />
Specify the overhead time in seconds for each wash cycle.<br />
Overhead for move<br />
Specify the time in seconds which is required to move the washer manifold.<br />
Note: The execution time which <strong>Freedom</strong> <strong>EVOware</strong> uses for scheduling the wash<br />
procedure is calculated from the wash procedure time, overhead for cycle,<br />
overhead for move, soak time, final aspiration time and repetitions (the number of<br />
wash cycles). The latter three parameters are specified when you add the<br />
WashPlate command to your process.<br />
Init Timeout<br />
Specify the maximum duration of the device initialization procedure. An error<br />
message will be output if initialization is not completed within this time.<br />
8.5.6.3 Columbus Washer Configuration - Autopriming Tab<br />
The Autopriming tab is used to configure settings for the auto-priming and autorinsing<br />
functions.<br />
8 - 52 <strong>Freedom</strong> <strong>EVOware</strong> <strong>Software</strong> <strong>Manual</strong>, 393172, en, V<strong>2.3</strong>
8 - Configuration Tool<br />
Device Driver Configuration<br />
Fig. 8-21 Auto Priming tab of the Columbus Washer driver<br />
Auto Priming Channel panels<br />
Auto-priming is used to prime the washer the automatically if it has been left idle<br />
for a specified time. This can be done to prevent blockage of the needles, e.g. due<br />
to crystallization of the washing liquid.<br />
Enable<br />
Check this checkbox if you want to activate the auto-priming procedure using<br />
the selected channel (liquid container).<br />
Idle Time<br />
Specify how long to wait when the washer is idle before starting the autopriming<br />
procedure.<br />
Prime Time<br />
Specify how long to carry out the priming procedure.<br />
Clean after prime<br />
Check this checkbox if you want to clean the washer after priming.<br />
Channel<br />
Choose the channel (liquid container) which contains the required cleaning<br />
liquid.<br />
Cleaning time<br />
Specify how long to carry out the cleaning procedure.<br />
Auto Rinsing Channel panel<br />
Auto-rinsing is used to rinse the washer the automatically if it has been left idle for<br />
a specified time. Rinsing takes place using soak mode (see 16.6.3 “Columbus<br />
Washer- Rinse Command”, 16-23).<br />
Enable<br />
Check this checkbox if you want to activate the auto-rinsing procedure. You<br />
can only activate auto-rinsing if you have not activated auto-priming.<br />
<strong>Freedom</strong> <strong>EVOware</strong> <strong>Software</strong> <strong>Manual</strong>, 393172, en, V<strong>2.3</strong> 8 - 53
8 - Configuration Tool<br />
Device Driver Configuration<br />
Idle Time<br />
Specify how long to wait when the washer is idle before starting the autorinsing<br />
procedure.<br />
Channel<br />
Choose the channel (liquid container) which contains the required rinsing<br />
liquid.<br />
8.5.6.4 Columbus Washer Configuration - Firmware Commands<br />
The following firmware commands (command strings) are pre-configured for the<br />
Columbus washer in the Test tab of the Configuration Tool:<br />
Remote <br />
This firmware command switches the device from local mode to remote mode.<br />
The device can only be controlled remotely by <strong>Freedom</strong> <strong>EVOware</strong> (through<br />
the interface cable) in remote mode.<br />
Exit Remote <br />
This firmware command switches the device from remote mode to local mode.<br />
The device can not be controlled remotely by <strong>Freedom</strong> <strong>EVOware</strong> (through the<br />
interface cable) in local mode.<br />
Refer to the firmware documentation for the device for a complete list of firmware<br />
commands (see also 1.2.1 “Related Documentation and <strong>Software</strong>”, 1-3).<br />
WARNING<br />
Risk of injury to operating personnel or damage to the equipment<br />
• Take care when sending firmware commands. Sending the wrong commands<br />
can damage the instrument or objects in its workspace, hurt yourself or other<br />
people.<br />
8.5.7 Settings for the FlaskFlipper<br />
This is used to make settings for the Flask Flipper. For general information on this<br />
device, see 16.7 “Commands for the FlaskFlipper”, 16-29.<br />
8.5.7.1 FlaskFlipper Configuration - Driver Tab<br />
See 8.5.35 “Driver Tab of the Configure Device Driver Properties Dialog Box”,<br />
8-116.<br />
8.5.7.2 FlaskFlipper Configuration - Settings Tab<br />
The Settings tab is used to make general settings for the Flask Flipper.<br />
8 - 54 <strong>Freedom</strong> <strong>EVOware</strong> <strong>Software</strong> <strong>Manual</strong>, 393172, en, V<strong>2.3</strong>
8 - Configuration Tool<br />
Device Driver Configuration<br />
Fig. 8-22 Settings tab of the Flask Flipper driver<br />
Device Address panel<br />
Device Address<br />
Specify the hardware address of the Flask Flipper. Specify the address as<br />
“address on the switch plus 1” (default: Q3). Each physical device (regardless<br />
of device type) must have a unique hardware address.<br />
Module Variables panel<br />
Name<br />
Parameter name. This field cannot be edited.<br />
Value<br />
FlipperHorizontal: Required rotary position of the flipper hardware when the<br />
flasks are loaded or unloaded, in 0.1° (default: 0, horizontal).<br />
FlipperPipette: Required rotary position of the flipper hardware when<br />
pipetting into the flasks, in 0.1° (default: -900, vertical).<br />
Description<br />
Parameter description. This field cannot be edited.<br />
8.5.8 Settings for Heated Incubators 1 to 3<br />
An incubator is a device which is used to keep labware containing samples or<br />
reagents at a defined temperature for a specified length of time, for example until<br />
the desired biological or biochemical reaction has taken place. The heated<br />
incubator can be fitted with a shaker option.<br />
<strong>Freedom</strong> <strong>EVOware</strong> distinguishes between physical and logical incubators. A<br />
physical incubator is the device you place on the worktable of your instrument. A<br />
logical incubator is a group of incubator slots which are configured for the same<br />
<strong>Freedom</strong> <strong>EVOware</strong> <strong>Software</strong> <strong>Manual</strong>, 393172, en, V<strong>2.3</strong> 8 - 55
8 - Configuration Tool<br />
Device Driver Configuration<br />
incubating temperature. The group of slots can all lie within the same physical<br />
incubator or can extend over more than one physical incubator. In the latter case,<br />
all of the physical incubators must have the same number of slots (4 or 6).<br />
The Settings tab is used to configure the currently selected logical incubator. For<br />
each of the logical incubators you want to use (Incubator1, Incubator2 and<br />
Incubator3), you must specify the physical incubators (“towers”) which it uses and<br />
the first slot of the first tower which is used.<br />
For additional information on this device, see 16.10 “Commands for the Heated<br />
Incubator”, 16-39.<br />
8.5.8.1 Heated Incubator Configuration - Driver Tab<br />
See 8.5.35 “Driver Tab of the Configure Device Driver Properties Dialog Box”,<br />
8-116.<br />
8.5.8.2 Heated Incubator Configuration - Settings Tab<br />
The Settings tab is used to make general settings for the currently selected logical<br />
incubator (Incubator1, Incubator2 or Incubator3).<br />
Fig. 8-23 Settings tab of the Incubator driver<br />
Common panel<br />
First used slot<br />
Choose the first slot that this logical incubator uses. Slots are counted from<br />
top to bottom. The first used slot is one of the slots in the first physical<br />
incubator which is used by this logical incubator (tower 1 in the Towers panel).<br />
Note: Slots are counted from top to bottom. When teaching robot vectors for the<br />
incubator, teach slot 1 (the top slot) and then teach the vertical offset of the slots.<br />
To ensure the correct assignment of slot numbers to slot temperatures, always<br />
teach from slot 1 downwards and not from the bottom slot upwards.<br />
8 - 56 <strong>Freedom</strong> <strong>EVOware</strong> <strong>Software</strong> <strong>Manual</strong>, 393172, en, V<strong>2.3</strong>
8 - Configuration Tool<br />
Device Driver Configuration<br />
Number of slots per tower<br />
Choose the number of slots which are available per physical incubator (4 or<br />
6). If the logical incubator extends over more than one physical incubator, all<br />
of them must have the same number of slots.<br />
Temperature<br />
Specify the temperature of the logical incubator (range, model MIO1: 25° to<br />
47°C; range, model MIO2: 25° to 65°C). The same temperature is used for all<br />
of the slots of the logical incubator. Specify 0 to disable the heater. To ensure<br />
that the incubator reaches and maintains a stable temperature, make sure<br />
that the incubator doors are not left open.<br />
Note: For special applications, you can use the SetTemperature command to<br />
assign a different temperature to individual slots during script or process runtime.<br />
Shaker speed<br />
Specify the speed at which the labware should be shaken during incubation<br />
(range, model MIO1: 1 to 10.5 Hz; range, model MIO2: 1 to 8.5 Hz). Specify 0<br />
to disable shaking. Shaking requires the incubator shaker option.<br />
Towers panel<br />
Number of Towers<br />
Choose how many physical incubators are used by this logical incubator<br />
(maximum 8). Depending on your choice, additional tabs will appear (1, 2, 3<br />
etc.).<br />
Device address<br />
For each of the Towers tabs (physical incubators), choose the device address<br />
which is associated with this logical incubator. Choose the address as<br />
“hardware address plus 1”. On heated incubators, the hardware address is set<br />
with the blue address switch at the back. Each physical device (regardless of<br />
device type) must have a unique hardware address.<br />
Examples<br />
Example 1: Two logical incubators (Incubator1, Incubator2) each have three slots<br />
and share the same physical incubator (tower 1). Incubator1 starts at slot 1 (the<br />
topmost slot) and has a temperature of 35 °C; Incubator2 starts at slot 4 and has a<br />
temperature of 40 °C.<br />
Example 2: One logical incubator has 7 slots and starts at slot 4 of tower 1. The<br />
last used slot is then slot 3 of tower 2.<br />
Additional settings in the configuration file for the incubator driver<br />
Two of the parameters in the [Settings] section of the configuration file for the<br />
incubator driver allow you to adjust the warning level if the incubator temperature<br />
differs from the configured value.<br />
• The configuration file is located in the <strong>Freedom</strong> <strong>EVOware</strong> installation directory<br />
and has the name Te-Incubator1.ini (for the first heated incubator) to Te-<br />
Incubator3.ini (for the third heated incubator).<br />
• The parameter TempRange specifies the threshold for the warning. The<br />
incubator driver interrogates the actual incubator temperature once per<br />
minute and a warning is output if the temperature differs from the configured<br />
temperature by more than the specified range (either hotter or colder).<br />
TempRange is specified as an unsigned integer in °C.<br />
• The parameter TempWarnDelay specifies a time delay after inserting the<br />
labware in the incubator and before the first warning is output. This allows<br />
<strong>Freedom</strong> <strong>EVOware</strong> <strong>Software</strong> <strong>Manual</strong>, 393172, en, V<strong>2.3</strong> 8 - 57
8 - Configuration Tool<br />
Device Driver Configuration<br />
time for the incubator temperature to stabilize. TempWarnDelay is specified as<br />
an unsigned integer in seconds.<br />
Note: <strong>Freedom</strong> <strong>EVOware</strong> must be re-started (and the drivers unloaded) for the<br />
changes to take effect.<br />
Configuration files are protected with checksums. When you re-start <strong>Freedom</strong><br />
<strong>EVOware</strong> after editing this file, you will be warned that the checksum is invalid.<br />
Proceed as follows to repair the checksum:<br />
• Quit <strong>Freedom</strong> <strong>EVOware</strong> and start the Configuration Tool with Start > All<br />
Programs > Tecan > <strong>EVOware</strong> > Configure. You will be warned again that the<br />
checksum is invalid and you will be asked if you want to repair the checksum.<br />
Click Yes. Then Click Exit and re-start <strong>Freedom</strong> <strong>EVOware</strong>. Alternatively, repair<br />
the checksum using the Validate Configuration tool (see A.9.2 “Validate<br />
Configuration Tool”, A-36).<br />
8.5.9 Settings for the Base Incubator<br />
This is used to make settings for the Base Incubator. For general information on<br />
this device, see 16.11 “Commands for the Base Incubator”, 16-44.<br />
8.5.9.1 Base Incubator Configuration - Driver Tab<br />
See 8.5.35 “Driver Tab of the Configure Device Driver Properties Dialog Box”,<br />
8-116.<br />
8.5.9.2 Base Incubator Configuration - Settings Tab<br />
The Settings tab is used to make general settings for the base incubator:<br />
Fig. 8-24 Settings tab of the Base Incubator driver<br />
8 - 58 <strong>Freedom</strong> <strong>EVOware</strong> <strong>Software</strong> <strong>Manual</strong>, 393172, en, V<strong>2.3</strong>
8 - Configuration Tool<br />
Device Driver Configuration<br />
General panel<br />
Positions<br />
Specify the number of positions available for keeping labware at room<br />
temperature.<br />
Resources<br />
This parameter is not configurable.<br />
Variables panel<br />
There are no configurable parameters in this panel.<br />
8.5.10 Settings for the Room Temperature Incubator<br />
This is used to make settings for the Room Temperature Incubator. For general<br />
information on this device, see 16.12 “Commands for the Room Temperature<br />
Incubator”, 16-45.<br />
Note: The same dialog box is used for the Base Incubator settings (see<br />
8.5.9 “Settings for the Base Incubator”, 8-58).<br />
Note: See 8.5.33 “Settings for the Transfer Station”, 8-113 for information on<br />
configuring the Transfer Station.<br />
8.5.10.1 Room Temperature Incubator Configuration - Driver Tab<br />
See 8.5.35 “Driver Tab of the Configure Device Driver Properties Dialog Box”,<br />
8-116.<br />
8.5.10.2 Room Temperature Incubator Configuration - Settings Tab<br />
The Settings tab is used to make general settings for the room temperature<br />
incubator:<br />
Fig. 8-25 Settings tab of the Room Temperature Incubator driver<br />
<strong>Freedom</strong> <strong>EVOware</strong> <strong>Software</strong> <strong>Manual</strong>, 393172, en, V<strong>2.3</strong> 8 - 59
8 - Configuration Tool<br />
Device Driver Configuration<br />
General panel<br />
Positions<br />
Specify the number of positions available for keeping labware at room<br />
temperature.<br />
Resources<br />
This parameter is not configurable.<br />
Variables panel<br />
There are no configurable parameters in this panel.<br />
8.5.11 Settings for the Liquid Handling Arm (LiHa)<br />
This is used to make settings for the Liquid Handling Arm. For general information<br />
on this device, see 16.13 “Commands for the Liquid Handling Arm”, 16-46.<br />
8.5.11.1 Liquid Handling Arm Configuration - Driver Tab<br />
See 8.5.35 “Driver Tab of the Configure Device Driver Properties Dialog Box”,<br />
8-116.<br />
8.5.11.2 Liquid Handling Arm Configuration - Settings Tab<br />
The Settings tab is used to make general settings for the Liquid Handling Arm.<br />
Note: See 8.5.32 “Settings for the Process Script”, 8-111 for information on<br />
configuring the Process Script driver.<br />
Fig. 8-26 Settings tab of the Liquid Handling Arm driver<br />
8 - 60 <strong>Freedom</strong> <strong>EVOware</strong> <strong>Software</strong> <strong>Manual</strong>, 393172, en, V<strong>2.3</strong>
8 - Configuration Tool<br />
Device Driver Configuration<br />
Miscellaneous panel<br />
Initialization timeout<br />
Specify the maximum duration of the device initialization procedure. An error<br />
message will be output if initialization is not completed within this time.<br />
Advanced DITI handling<br />
Check this checkbox if you want to use to use a special driver for exchanging<br />
DITIs. The special driver is not provided with the standard <strong>Freedom</strong> <strong>EVOware</strong><br />
installation.<br />
In case of script error panel<br />
Request system pause<br />
Check this checkbox if you want the driver to request a system pause if a<br />
script error is detected during command execution.<br />
Note: Do not confuse the settings made here with those made in the scheduling/<br />
error handling configuration. The settings in this tab define the reaction of the<br />
system if the Liquid Handling Arm outputs an error message during execution of a<br />
pipetting command. The settings for error handling take effect if the pipetting<br />
command has already been stopped due to an error.<br />
8.5.11.3 Liquid Handling Arm Configuration - Command Generation Tab<br />
The Command Generation tab is used to make settings for the default pre-actions<br />
and post-actions to be used when generating commands for the Liquid Handling<br />
Arm. The settings are only relevant to <strong>Freedom</strong> <strong>EVOware</strong> Plus.<br />
Note: See 8.5.32 “Settings for the Process Script”, 8-111 for information on<br />
configuring the Process Script driver.<br />
Fig. 8-27 Command Generation tab of the Liquid Handling Arm driver<br />
<strong>Freedom</strong> <strong>EVOware</strong> <strong>Software</strong> <strong>Manual</strong>, 393172, en, V<strong>2.3</strong> 8 - 61
8 - Configuration Tool<br />
Device Driver Configuration<br />
Command Generation panel<br />
Default pre-action<br />
Choose the default pre-action to be used by Liquid Handling Arm commands<br />
and specify the execution time to be used when scheduling this operation.<br />
Default post-action<br />
Choose the default post-action to be used by Liquid Handling Arm commands<br />
and specify the execution time to be used when scheduling this operation.<br />
Note: <strong>Freedom</strong> <strong>EVOware</strong> compares the initial worktable layout with the worktable<br />
layout which is required by the script. For each labware item which needs to be<br />
moved, it then uses the specified pre-action and post-action to create and<br />
configure the RoMa movements which will be needed.<br />
Default replace action<br />
Choose the default action to be used by Liquid Handling Arm commands<br />
when replacing DITIs and specify the execution time to be used when<br />
scheduling this operation.<br />
Note: <strong>Freedom</strong> <strong>EVOware</strong> compares the initial worktable layout with the worktable<br />
layout which is required by the script. For each DITI rack, it then uses the<br />
specified replace action to create and configure the RoMa movements which will<br />
be needed when the DITI rack needs to be replaced.<br />
Default start process action for advanced DITI handling<br />
If you are using a special driver for exchanging DITIs, specify the execution<br />
time to be used when scheduling this operation. The special driver is not<br />
provided with the standard <strong>Freedom</strong> <strong>EVOware</strong> installation.<br />
8.5.11.4 Liquid Handling Arm Configuration - Firmware Commands<br />
The following firmware commands (command strings) are pre-configured for the<br />
Liquid Handling Arm in the Test tab of the Configuration Tool:<br />
Get RSP <br />
Requests the pipetting instrument type the device is connected to.<br />
Get VERSION <br />
Requests the firmware version of the pipetting instrument. Only the first two<br />
positions are shown.<br />
Initialize System <br />
Initializes the pipetting instrument.<br />
Refer to the firmware documentation for the device for a complete list of firmware<br />
commands (see also 1.2.1 “Related Documentation and <strong>Software</strong>”, 1-3).<br />
WARNING<br />
Risk of injury to operating personnel or damage to the equipment<br />
• Take care when sending firmware commands. Sending the wrong commands<br />
can damage the instrument or objects in its workspace, hurt yourself or other<br />
people.<br />
8 - 62 <strong>Freedom</strong> <strong>EVOware</strong> <strong>Software</strong> <strong>Manual</strong>, 393172, en, V<strong>2.3</strong>
8 - Configuration Tool<br />
Device Driver Configuration<br />
8.5.12 Settings for the MCA96 (Multi Channel Arm 96)<br />
This is used to make settings for the MCA96. For general information on this<br />
device, see 15.68 “MCA96 Commands”, 15-159.<br />
8.5.12.1 MCA96 Configuration - Driver Tab<br />
See 8.5.35 “Driver Tab of the Configure Device Driver Properties Dialog Box”,<br />
8-116.<br />
8.5.12.2 MCA96 Configuration - Settings Tab<br />
The Settings tab is used to make general settings for the MCA96:<br />
Fig. 8-28 Settings tab of the MCA96 driver<br />
Miscellaneous panel<br />
Initialization timeout<br />
Specify the maximum duration of the device initialization procedure. An error<br />
message will be output if initialization is not completed within this time.<br />
Advanced DITI handling<br />
This checkbox is not relevant for the MCA96 and should be ignored.<br />
Allow stacker commands in script<br />
This setting is only relevant for <strong>Freedom</strong> <strong>EVOware</strong> Plus. When you create a<br />
pipetting script for the MCA96 in an MCA96 Pipette process step, the<br />
Commands section of the Control Bar only shows relevant and/or permissible<br />
script commands. Te-Stack commands are not shown because stacker<br />
actions are normally part of a robot move or programmed using a separate Te-<br />
Stack process step. Check this checkbox to show Te-Stack commands in the<br />
Control Bar when you create a pipetting script for the MCA96. This is intended<br />
for special applications, above all for getting nested DITIs for the MCA96 from<br />
the stacker. The Te-Stack commands are only shown if you have installed the<br />
Te-Stack driver.<br />
<strong>Freedom</strong> <strong>EVOware</strong> <strong>Software</strong> <strong>Manual</strong>, 393172, en, V<strong>2.3</strong> 8 - 63
8 - Configuration Tool<br />
Device Driver Configuration<br />
In case of script error panel<br />
Request system pause<br />
Check this checkbox if you want the driver to request a system pause if a<br />
script error is detected during command execution.<br />
Move panel<br />
Grip Detection<br />
Specify whether grip detection should be used.<br />
Home after move<br />
Specify whether the MCA96 should be moved to its home position after each<br />
move. This may be necessary for some worktable layouts, but will reduce<br />
system performance.<br />
Regrip location<br />
This setting is analogous to the regrip location for the RoMa. See<br />
8.5.23.2 “Plate Robot Configuration - Settings Tab”, 8-86, Regrip location.<br />
8.5.1<strong>2.3</strong> MCA96 Configuration - Command Generation Tab<br />
The Command Generation tab is used to make settings for the default pre-actions<br />
and post-actions to be used when generating commands for the Multi Channel<br />
Arm. The settings are only relevant to <strong>Freedom</strong> <strong>EVOware</strong> Plus.<br />
Fig. 8-29 Command Generation tab of the MCA96 driver<br />
Command Generation panel<br />
Default pre-action<br />
Choose the default pre-action to be used by Liquid Handling Arm commands<br />
and specify the execution time to be used when scheduling this operation.<br />
Default post-action<br />
Choose the default post-action to be used by Liquid Handling Arm commands<br />
and specify the execution time to be used when scheduling this operation.<br />
8 - 64 <strong>Freedom</strong> <strong>EVOware</strong> <strong>Software</strong> <strong>Manual</strong>, 393172, en, V<strong>2.3</strong>
8 - Configuration Tool<br />
Device Driver Configuration<br />
Note: <strong>Freedom</strong> <strong>EVOware</strong> compares the initial worktable layout with the worktable<br />
layout which is required by the script. For each labware item which needs to be<br />
moved, it then uses the specified pre-action and post-action to create and<br />
configure the RoMa movements which will be needed.<br />
Default replace action<br />
Choose the default action to be used by Liquid Handling Arm commands<br />
when replacing DITIs and specify the execution time to be used when<br />
scheduling this operation.<br />
Note: <strong>Freedom</strong> <strong>EVOware</strong> compares the initial worktable layout with the worktable<br />
layout which is required by the script. For each DITI rack, it then uses the<br />
specified replace action to create and configure the RoMa movements which will<br />
be needed when the DITI rack needs to be replaced.<br />
Default start process action for advanced DITI handling<br />
This field is not relevant for the MCA96 and should be ignored.<br />
8.5.12.4 MCA96 Configuration - Plugins Tab<br />
Plugins are software tools from third-party suppliers which are used to control<br />
special devices. The Plugins tab is used to assign the MCA96 commands which<br />
are needed by the device.<br />
Fig. 8-30 Plugins tab of the MCA96 driver<br />
Associate Plugin Tools panel<br />
Choose the plugin in the Tools panel, choose the MCA96 command which the<br />
device should use and click Add.<br />
8.5.12.5 MCA96 Configuration - Firmware Commands<br />
The following firmware commands (command strings) are pre-configured for the<br />
MCA96 in the Test tab of the Configuration Tool:<br />
Get RSP <br />
Requests the pipetting instrument type the device is connected to.<br />
<strong>Freedom</strong> <strong>EVOware</strong> <strong>Software</strong> <strong>Manual</strong>, 393172, en, V<strong>2.3</strong> 8 - 65
8 - Configuration Tool<br />
Device Driver Configuration<br />
Get VERSION <br />
Requests the firmware version of the pipetting instrument. Only the first two<br />
positions are shown.<br />
Initialize System <br />
Initializes the pipetting instrument.<br />
Refer to the firmware documentation for the device for a complete list of firmware<br />
commands (see also 1.2.1 “Related Documentation and <strong>Software</strong>”, 1-3).<br />
WARNING<br />
Risk of injury to operating personnel or damage to the equipment<br />
• Take care when sending firmware commands. Sending the wrong commands<br />
can damage the instrument or objects in its workspace, hurt yourself or other<br />
people.<br />
8.5.13 Settings for the MCA384 (Multi Channel Arm 384)<br />
This is used to make settings for the MCA384. For general information on this<br />
device, see 15.69 “MCA384 Commands”, 15-179.<br />
8.5.13.1 MCA384 Configuration - Driver Tab<br />
See 8.5.35 “Driver Tab of the Configure Device Driver Properties Dialog Box”,<br />
8-116.<br />
8.5.13.2 MCA384 Configuration - Settings Tab<br />
The Settings tab is used to make general settings for the MCA384:<br />
Fig. 8-31 Settings tab of the MCA384 driver<br />
8 - 66 <strong>Freedom</strong> <strong>EVOware</strong> <strong>Software</strong> <strong>Manual</strong>, 393172, en, V<strong>2.3</strong>
8 - Configuration Tool<br />
Device Driver Configuration<br />
Miscellaneous panel<br />
Initialization timeout<br />
Specify the maximum duration of the device initialization procedure. An error<br />
message will be output if initialization is not completed within this time.<br />
Advanced DITI handling<br />
This checkbox is not relevant for the MCA384 and should be ignored.<br />
Allow stacker commands in script<br />
This setting is only relevant for <strong>Freedom</strong> <strong>EVOware</strong> Plus. When you create a<br />
pipetting script for the MCA384 in an MCA384 Pipette process step, the<br />
Commands section of the Control Bar only shows relevant and/or permissible<br />
script commands. Te-Stack commands are not shown because stacker<br />
actions are normally part of a robot move or programmed using a separate Te-<br />
Stack process step. Check this checkbox to show Te-Stack commands in the<br />
Control Bar when you create a pipetting script for the MCA384. This is<br />
intended for special applications, above all for getting nested DITIs for the<br />
MCA384 from the stacker. The Te-Stack commands are only shown if you<br />
have installed the Te-Stack driver.<br />
In case of script error panel<br />
Request system pause<br />
Check this checkbox if you want the driver to request a system pause if a<br />
script error is detected during command execution.<br />
Move panel<br />
Grip Detection<br />
Specify whether grip detection should be used.<br />
Home after move<br />
Specify whether the MCA384 should be moved to its home position after each<br />
move. This may be necessary for some worktable layouts, but will reduce<br />
system performance.<br />
Regrip location<br />
This setting is analogous to the regrip location for the RoMa. See<br />
8.5.23.2 “Plate Robot Configuration - Settings Tab”, 8-86, Regrip location.<br />
<strong>Freedom</strong> <strong>EVOware</strong> <strong>Software</strong> <strong>Manual</strong>, 393172, en, V<strong>2.3</strong> 8 - 67
8 - Configuration Tool<br />
Device Driver Configuration<br />
Dock CGM after move<br />
This setting is only relevant for <strong>Freedom</strong> <strong>EVOware</strong> Plus. In <strong>Freedom</strong><br />
<strong>EVOware</strong> <strong>Standard</strong>, the CGM can be docked and undocked using script<br />
commands.<br />
The CGM (common gripper module) is a hardware option for the MCA384<br />
which can be used to pick up and move labware. The CGM can only be used<br />
for gripping and moving labware when it is undocked.<br />
If sufficient space is available on the worktable, the CGM can be kept<br />
permanently undocked to avoid the time needed for undocking when the CGM<br />
is used. This speeds up commands which use the CGM.<br />
Check this checkbox if you want to automatically dock the CGM again after<br />
using it. In this case, it will be undocked automatically before it is used and<br />
docked again when the operation is finished. Docking reduces the amount of<br />
space required by the MCA384/CGM hardware in the X direction.<br />
If you do not check this checkbox, the CGM is normally kept permanently<br />
undocked. If it has been docked by a previous operation for some reason, it<br />
will be undocked before it is used.<br />
To optimize the speed of more complex operations, you can leave the<br />
checkbox unchecked and specify a MCA384_DockCGM command as a preaction<br />
or post action to the last MCA384 movement command before carrying<br />
out the pipetting sequence.<br />
To dock the CGM, the gripper fingers are lowered below the MCA384 pipetting<br />
head, opened completely and rotated until they point to the left. The grippers<br />
are then raised again until the pipetting head is positioned centrally between<br />
the fingers. When docked, the CGM always moves together with the pipetting<br />
head, and the pipetting head can be moved as if the CGM is not mounted. Tip:<br />
You can test and view docking and undocking using the 3D simulator<br />
EVOSim.<br />
8.5.13.3 MCA384 Configuration - Command Generation Tab<br />
The Command Generation tab is used to make settings for the default pre-actions<br />
and post-actions to be used when generating commands for the MCA384. The<br />
settings are only relevant to <strong>Freedom</strong> <strong>EVOware</strong> Plus.<br />
8 - 68 <strong>Freedom</strong> <strong>EVOware</strong> <strong>Software</strong> <strong>Manual</strong>, 393172, en, V<strong>2.3</strong>
8 - Configuration Tool<br />
Device Driver Configuration<br />
Fig. 8-32 Command Generation tab of the MCA384 driver<br />
Command Generation panel<br />
Default pre-action<br />
Choose the default pre-action to be used by Liquid Handling Arm commands<br />
and specify the execution time to be used when scheduling this operation.<br />
Default post-action<br />
Choose the default post-action to be used by Liquid Handling Arm commands<br />
and specify the execution time to be used when scheduling this operation.<br />
Note: <strong>Freedom</strong> <strong>EVOware</strong> compares the initial worktable layout with the worktable<br />
layout which is required by the script. For each labware item which needs to be<br />
moved, it then uses the specified pre-action and post-action to create and<br />
configure the RoMa movements which will be needed.<br />
Default replace action<br />
Choose the default action to be used by Liquid Handling Arm commands<br />
when replacing DITIs and specify the execution time to be used when<br />
scheduling this operation.<br />
Note: <strong>Freedom</strong> <strong>EVOware</strong> compares the initial worktable layout with the worktable<br />
layout which is required by the script. For each DITI rack, it then uses the<br />
specified replace action to create and configure the RoMa movements which will<br />
be needed when the DITI rack needs to be replaced.<br />
Default start process action for advanced DITI handling<br />
This field is not relevant for the MCA384 and should be ignored.<br />
8.5.13.4 MCA384 Configuration - Plugins Tab<br />
Plugins are software tools from third-party suppliers which are used to control<br />
special devices. The Plugins tab is used to assign the MCA384 commands which<br />
are needed by the device.<br />
<strong>Freedom</strong> <strong>EVOware</strong> <strong>Software</strong> <strong>Manual</strong>, 393172, en, V<strong>2.3</strong> 8 - 69
8 - Configuration Tool<br />
Device Driver Configuration<br />
Fig. 8-33 Plugins tab of the MCA384 driver<br />
Associate Plugin Tools panel<br />
Choose the plugin in the Tools panel, choose the MCA384 command which<br />
the device should use and click Add.<br />
8.5.13.5 MCA384 Configuration - Firmware Commands<br />
The following firmware commands (command strings) are pre-configured for the<br />
MCA384 in the Test tab of the Configuration Tool:<br />
Get RSP <br />
Requests the pipetting instrument type the device is connected to.<br />
Get VERSION <br />
Requests the firmware version of the pipetting instrument. Only the first two<br />
positions are shown.<br />
Initialize System <br />
Initializes the pipetting instrument.<br />
Refer to the firmware documentation for the device for a complete list of firmware<br />
commands (see also 1.2.1 “Related Documentation and <strong>Software</strong>”, 1-3).<br />
WARNING<br />
Risk of injury to operating personnel or damage to the equipment<br />
• Take care when sending firmware commands. Sending the wrong commands<br />
can damage the instrument or objects in its workspace, hurt yourself or other<br />
people.<br />
8 - 70 <strong>Freedom</strong> <strong>EVOware</strong> <strong>Software</strong> <strong>Manual</strong>, 393172, en, V<strong>2.3</strong>
8 - Configuration Tool<br />
Device Driver Configuration<br />
8.5.14 Settings for the Magellan Driver<br />
This is used to make settings for the Tecan Magellan software option. The<br />
Magellan software is used to control microplate readers (e.g. photometers) and to<br />
carry out data analysis using stored procedures. The Magellan software, which<br />
has its own installation procedure, has built-in drivers for Tecan microplate<br />
readers. If you intend to use the Magellan software, it is not necessary to install<br />
the reader driver when you install <strong>Freedom</strong> <strong>EVOware</strong>.<br />
For additional information on this device, see 16.16 “Commands for the Magellan<br />
option”, 16-48.<br />
8.5.14.1 Magellan Configuration - Driver Tab<br />
See 8.5.35 “Driver Tab of the Configure Device Driver Properties Dialog Box”,<br />
8-116.<br />
8.5.14.2 Magellan Configuration - Settings Tab<br />
The Settings tab is used to make general settings for the Magellan driver.<br />
Fig. 8-34 Settings tab of the Magellan driver<br />
Output File Default<br />
Specify the required default filename and path for the calculated results<br />
(workspace file) from the Magellan software. The default filename and path which<br />
you specify here will then be shown in the dialog box of the Magellan Measure<br />
command (see 16.16.6 “Magellan - Measure Command”, 16-49).<br />
<strong>Freedom</strong> <strong>EVOware</strong> <strong>Software</strong> <strong>Manual</strong>, 393172, en, V<strong>2.3</strong> 8 - 71
8 - Configuration Tool<br />
Device Driver Configuration<br />
Magellan<br />
<strong>Standard</strong><br />
Path: Specify the path which is configured in Magellan for workspace files. This<br />
makes it easier to load the generated workspace files if you run Magellan on its<br />
own later on.<br />
Filename: If you are using a barcode scanner, you should specify the placeholder<br />
, which will instruct <strong>Freedom</strong> <strong>EVOware</strong> and thus Magellan to generate the<br />
filename from the labware barcode. It is not necessary to specify the file extension<br />
(which is .wsp). Note: The labware must be scanned in advance of the Magellan<br />
Measure command.<br />
Examples:<br />
c:\Documents and Settings\All Users\Documents\Tecan\Magellan\<br />
or<br />
c:\Documents and Settings\All Users\Documents\Tecan\Magellan\wsp\<br />
Note: To check the paths which are configured in Magellan, start the Magellan<br />
Wizard, click More and click Options. Then choose the Paths tab.<br />
Magellan<br />
Tracker<br />
Path: Magellan Tracker stores the workspace files in the path which is configured<br />
in Magellan and ignores the path that you specify here. Accordingly, it is<br />
recommended to leave the Output File Default field blank for Magellan Tracker.<br />
The filename and path of the workspace file will then be taken from the settings<br />
which were made in the Magellan method.<br />
Filename: If you are using a barcode scanner, you should specify the placeholder<br />
, which will instruct <strong>Freedom</strong> <strong>EVOware</strong> and thus Magellan to generate the<br />
filename from the labware barcode. It is not necessary to specify the file extension<br />
(which is .wsp). Note: The labware must be scanned in advance of the Magellan<br />
Measure command.<br />
Example:<br />
c:\Documents and Settings\All Users\Documents\Tecan\Magellan\wsp\<br />
Note: In both Magellan <strong>Standard</strong> and Magellan Tracker, if you leave the Output<br />
File Default field blank in <strong>Freedom</strong> <strong>EVOware</strong>, the filename and path of the<br />
workspace file will be taken from the settings which were made in the Magellan<br />
method.<br />
Note: In Windows Explorer, the directory c:\Documents and Settings\All<br />
Users\Documents is shown as “Shared Documents” and not “Documents”.<br />
Miscellaneous panel<br />
Temperature, Temperature Control<br />
Check the Temperature Control checkbox if you want to carry out<br />
measurements at a specified temperature. Then specify the required<br />
temperature in the Temperature field.<br />
Initialization Timeout<br />
Specify the maximum duration of the reader initialization procedure. An error<br />
message will be output if initialization is not completed within this time.<br />
Power Down Timeout<br />
Specify the delay after which the reader should go into standby (energy<br />
saving) mode. Specify 0 if you do not want the reader to go into standby<br />
mode. The reader can take several minutes to wake up from standby mode<br />
before it is ready for use.<br />
8 - 72 <strong>Freedom</strong> <strong>EVOware</strong> <strong>Software</strong> <strong>Manual</strong>, 393172, en, V<strong>2.3</strong>
8 - Configuration Tool<br />
Device Driver Configuration<br />
Move plate out during initialization<br />
Check this checkbox if you want to move out the labware during the<br />
initialization procedure.<br />
Sample Tracking panel<br />
Sample Tracking<br />
Check the Sample Tracking checkbox if you are also using the Tecan software<br />
option <strong>Freedom</strong> <strong>EVOware</strong> Sample Tracking. This allows <strong>Freedom</strong> <strong>EVOware</strong><br />
to exchange labware and sample barcodes and Magellan result data with the<br />
Sample Tracking software package. Do not check this checkbox if you are not<br />
using <strong>Freedom</strong> <strong>EVOware</strong> Sample Tracking.<br />
Communication panel<br />
USB reader<br />
Check the USB reader checkbox and choose the reader type if the reader is<br />
connected to the PC via USB.<br />
8.5.15 Settings for the PW384 Washer<br />
This is used to make settings for the PW384 microplate washer. For general<br />
information on this device, see 16.17 “Commands for the PW384 Washer”, 16-<br />
51.<br />
8.5.15.1 PW384 Washer Configuration - Driver Tab<br />
See 8.5.35 “Driver Tab of the Configure Device Driver Properties Dialog Box”,<br />
8-116.<br />
8.5.15.2 PW384 Washer Configuration - Settings Tab<br />
The Settings tab is used to make general settings for the PW384 Plate Washer.<br />
<strong>Freedom</strong> <strong>EVOware</strong> <strong>Software</strong> <strong>Manual</strong>, 393172, en, V<strong>2.3</strong> 8 - 73
8 - Configuration Tool<br />
Device Driver Configuration<br />
Fig. 8-35 Settings tab of the PW384 Washer driver<br />
Miscellaneous panel<br />
Initialization Timeout<br />
Specify the maximum duration of the device initialization procedure. An error<br />
message will be output if initialization is not completed within this time.<br />
Liquid detection panel<br />
Bottle1/2/3<br />
Check the checkboxes if you want to activate liquid detection for the wash<br />
liquid bottles.<br />
Plates after bottle empty warning<br />
If the liquid detection signals an empty wash liquid bottle, specify how many<br />
plates can still be washed before trigerring an error.<br />
Plates after waste full warning<br />
If the liquid detection signals a full waste bottle, specify how many plates can<br />
still be washed before trigerring an error.<br />
In case of liquid error panel<br />
Request system pause<br />
Check this box if you want the driver to request a system pause if the washer<br />
detects a liquid error during command execution.<br />
Note: Do not confuse the settings made here with those made in the scheduling/<br />
error handling configuration. The settings in this tab define the reaction of the<br />
system if the washer outputs an error message during execution of a washer<br />
command. The settings for error handling take effect if the washer command has<br />
already been stopped due to an error.<br />
8 - 74 <strong>Freedom</strong> <strong>EVOware</strong> <strong>Software</strong> <strong>Manual</strong>, 393172, en, V<strong>2.3</strong>
8 - Configuration Tool<br />
Device Driver Configuration<br />
8.5.16 Settings for the PW384GP Washer<br />
This is used to make settings for the PW384GP microplate washer. For general<br />
information on this device, see 16.18 “Commands for the PW384GP Washer”,<br />
16-54.<br />
8.5.16.1 PW384GP Washer Configuration - Driver Tab<br />
See 8.5.35 “Driver Tab of the Configure Device Driver Properties Dialog Box”,<br />
8-116.<br />
8.5.16.2 PW384GP Washer Configuration - Settings Tab<br />
The Settings tab is used to make general settings for the PW384 Plate Washer.<br />
Fig. 8-36 Settings tab of the PW384GP Washer driver<br />
Miscellaneous panel<br />
Initialization Timeout<br />
Specify the maximum duration of the device initialization procedure. An error<br />
message will be output if initialization is not completed within this time.<br />
Head type<br />
Choose the wash head type which is fitted to the washer (96 needle or 384<br />
needle).<br />
Liquid detection panel<br />
Bottle1/2/3<br />
Check the checkboxes if you want to activate liquid detection for the wash<br />
liquid bottles.<br />
<strong>Freedom</strong> <strong>EVOware</strong> <strong>Software</strong> <strong>Manual</strong>, 393172, en, V<strong>2.3</strong> 8 - 75
8 - Configuration Tool<br />
Device Driver Configuration<br />
Plates after bottle empty warning<br />
If the liquid detection signals an empty wash liquid bottle, specify how many<br />
plates can still be washed before trigerring an error.<br />
Plates after waste full warning<br />
If the liquid detection signals a full waste bottle, specify how many plates can<br />
still be washed before trigerring an error.<br />
Request system pause if botle is empty<br />
Check this box if you want the driver to request a system pause if the washer<br />
detects a liquid error during command execution.<br />
Note: Do not confuse the settings made here with those made in the scheduling/<br />
error handling configuration. The settings in this tab define the reaction of the<br />
system if the washer outputs an error message during execution of a washer<br />
command. The settings for error handling take effect if the washer command has<br />
already been stopped due to an error.<br />
8.5.17 Settings for the 96PW Washer<br />
This is used to make settings for the 96PW microplate washer. For general<br />
information on this device, see 16.19 “Commands for the 96PW Washer”, 16-<br />
65.<br />
8.5.17.1 96PW Washer Configuration - Driver Tab<br />
See 8.5.35 “Driver Tab of the Configure Device Driver Properties Dialog Box”,<br />
8-116.<br />
8.5.17.2 96PW Washer Configuration - Settings Tab<br />
The Settings tab is used to make general settings for the 96PW Plate Washer.<br />
Fig. 8-37 Settings tab of the 96PW Washer driver<br />
Miscellaneous panel<br />
Overhead / Wash<br />
Specify the global overhead time to be used when calculating command<br />
execution times.<br />
8 - 76 <strong>Freedom</strong> <strong>EVOware</strong> <strong>Software</strong> <strong>Manual</strong>, 393172, en, V<strong>2.3</strong>
8 - Configuration Tool<br />
Device Driver Configuration<br />
Overhead / Cycle<br />
Specify the overhead time per cycle to be used when calculating command<br />
execution times.<br />
Initialization Timeout<br />
Specify the maximum duration of the device initialization procedure. An error<br />
message will be output if initialization is not completed within this time.<br />
8.5.17.3 96PW Washer Configuration - Firmware Commands<br />
The following firmware commands (command strings) are pre-configured for the<br />
96PW Washer in the Test tab of the Configuration Tool:<br />
Remote <br />
This firmware command switches the device from local mode to remote mode.<br />
The device can only be controlled remotely by <strong>Freedom</strong> <strong>EVOware</strong> (through<br />
the interface cable) in remote mode.<br />
Exit Remote <br />
This firmware command switches the device from remote mode to local mode.<br />
The device can not be controlled remotely by <strong>Freedom</strong> <strong>EVOware</strong> (through the<br />
interface cable) in local mode.<br />
Prime <br />
Prime the washer.<br />
Exit Command Mode <br />
Exit command mode.<br />
Query Status <br />
Query the status.<br />
These commands correspond to the driver commands described in<br />
16.19 “Commands for the 96PW Washer”, 16-65 and perform the actions<br />
described there. Refer to the firmware documentation for the device for a<br />
complete list of firmware commands (see also 1.2.1 “Related Documentation and<br />
<strong>Software</strong>”, 1-3).<br />
WARNING<br />
Risk of injury to operating personnel or damage to the equipment<br />
• Take care when sending firmware commands. Sending the wrong commands<br />
can damage the instrument or objects in its workspace, hurt yourself or other<br />
people.<br />
8.5.18 Settings for the Tube Robot (PnP)<br />
This is used to make settings for the Tube Robot driver. For general information<br />
on this device, see 16.25 “Commands for the Tube Robot”, 16-83.<br />
8.5.18.1 Tube Robot Configuration - Driver Tab<br />
See 8.5.35 “Driver Tab of the Configure Device Driver Properties Dialog Box”,<br />
8-116.<br />
8.5.18.2 Tube Robot Configuration - Settings Tab<br />
The Settings tab is used to make general settings for the Tube Robot:<br />
<strong>Freedom</strong> <strong>EVOware</strong> <strong>Software</strong> <strong>Manual</strong>, 393172, en, V<strong>2.3</strong> 8 - 77
8 - Configuration Tool<br />
Device Driver Configuration<br />
Fig. 8-38 Settings tab of the Tube Robot driver<br />
Miscellaneous panel<br />
Initialization Timeout<br />
Specify the maximum duration of the device initialization procedure. An error<br />
message will be output if initialization is not completed within this time.<br />
Advanced DITI handling<br />
This checkbox is not relevant for the tube robot and should be ignored.<br />
In case of script error panel<br />
Request system pause<br />
Check this checkbox if you want the driver to request a system pause if a<br />
script error is detected during command execution.<br />
8.5.18.3 Tube Robot Configuration - Command Generation Tab<br />
The Command Generation tab is used to make settings for the default pre-actions<br />
and post-actions to be used when generating commands for the tube robot (PnP).<br />
The settings are only relevant to <strong>Freedom</strong> <strong>EVOware</strong> Plus.<br />
8 - 78 <strong>Freedom</strong> <strong>EVOware</strong> <strong>Software</strong> <strong>Manual</strong>, 393172, en, V<strong>2.3</strong>
8 - Configuration Tool<br />
Device Driver Configuration<br />
Fig. 8-39 Command Generation tab of the Tube Robot driver<br />
Command Generation panel<br />
Default pre-action<br />
Choose the default pre-action to be used by tube robot commands and<br />
specify the execution time to be used when scheduling this operation.<br />
Default post-action<br />
Choose the default post-action to be used by tube robot commands and<br />
specify the execution time to be used when scheduling this operation.<br />
Note: <strong>Freedom</strong> <strong>EVOware</strong> compares the initial worktable layout with the worktable<br />
layout which is required by the script. For each labware item which needs to be<br />
moved, it then uses the specified pre-action and post-action to create and<br />
configure the RoMa movements which will be needed. This feature only creates<br />
movement commands for the RoMa; it does not create movement commands for<br />
the PnP.<br />
Default replace action<br />
Choose the default action to be used by tube robot commands when replacing<br />
DITIs and specify the execution time to be used when scheduling this<br />
operation.<br />
Note: <strong>Freedom</strong> <strong>EVOware</strong> compares the initial worktable layout with the worktable<br />
layout which is required by the script. For each DITI rack, it then uses the<br />
specified replace action to create and configure the RoMa movements which will<br />
be needed when the DITI rack needs to be replaced. This feature only creates<br />
movement commands for the RoMa; it does not create movement commands for<br />
the PnP.<br />
Default start process action for advanced DITI handling<br />
This field is not relevant for the the tube robot and should be ignored.<br />
<strong>Freedom</strong> <strong>EVOware</strong> <strong>Software</strong> <strong>Manual</strong>, 393172, en, V<strong>2.3</strong> 8 - 79
8 - Configuration Tool<br />
Device Driver Configuration<br />
8.5.18.4 Tube Robot Configuration - Firmware Commands<br />
The following firmware commands (command strings) are pre-configured for the<br />
PnP in the Test tab of the Configuration Tool:<br />
Get RSP <br />
Requests the pipetting instrument type the device is connected to.<br />
Get VERSION <br />
Requests the firmware version of the pipetting instrument. Only the first two<br />
positions are shown.<br />
Initialize System <br />
Initializes the pipetting instrument.<br />
Refer to the firmware documentation for the device for a complete list of firmware<br />
commands (see also 1.2.1 “Related Documentation and <strong>Software</strong>”, 1-3).<br />
WARNING<br />
Risk of injury to operating personnel or damage to the equipment<br />
• Take care when sending firmware commands. Sending the wrong commands<br />
can damage the instrument or objects in its workspace, hurt yourself or other<br />
people.<br />
8.5.19 Settings for the PosID-3<br />
This is used to make settings for the PosID-3 driver. For general information on<br />
this device, see 16.20 “Commands for the PosID-3”, 16-70.<br />
8.5.19.1 PosID-3 Configuration - Driver Tab<br />
See 8.5.35 “Driver Tab of the Configure Device Driver Properties Dialog Box”,<br />
8-116.<br />
8.5.19.2 PosID-3 Configuration - Settings Tab<br />
The Settings tab is used to make general settings for the PosID-3:<br />
8 - 80 <strong>Freedom</strong> <strong>EVOware</strong> <strong>Software</strong> <strong>Manual</strong>, 393172, en, V<strong>2.3</strong>
8 - Configuration Tool<br />
Device Driver Configuration<br />
Fig. 8-40 Settings tab of the PosID-3 driver<br />
<strong>Manual</strong> Barcode Entry panel<br />
Double Blind Entry<br />
Check this checkbox if you want to activate double blind entry. In this case,<br />
you will be prompted to enter the barcode twice manually during script or<br />
process runtime if the scanner was unable to read it, despite retries. The<br />
barcode characters that you enter are hidden using bullet characters.<br />
<strong>Freedom</strong> <strong>EVOware</strong> will then try to scan the labware again. If the retry is<br />
successful, the scanned barcode will be used. If the retry fails again, the<br />
barcode which was entered manually will be used.<br />
If you are using the PosID-3 for general purpose applications in a regulated<br />
environment, you must always activate the Double Blind Entry feature if you<br />
intend to enter barcodes manually when they cannot be read.<br />
Barcode File panel<br />
For the purpose of testing or training, the PosID-3 driver can be configured to read<br />
simulated barcodes from a text file and return them to <strong>Freedom</strong> <strong>EVOware</strong> through<br />
the PosID-3 - Scan command as if the PosID-3 has actually scanned some<br />
labware.<br />
Proceed as follows to use this feature:<br />
• Create a text file with barcodes using the syntax described in A.<strong>2.3</strong> “Barcode<br />
File for the PosID-3 Driver”, A-13.<br />
• Set the I/O State of the PosID-3 driver to OFF.<br />
• In the configuration of the PosID-3 driver (see above figure), check the Enable<br />
barcode file usage checkbox and specify the path and name of the barcode<br />
file. The suggested file name is PosID3_<strong>Manual</strong>Barcodes.txt.<br />
Enable barcode file usage<br />
Check this checkbox if you want to use the simulated barcodes feature.<br />
<strong>Freedom</strong> <strong>EVOware</strong> <strong>Software</strong> <strong>Manual</strong>, 393172, en, V<strong>2.3</strong> 8 - 81
8 - Configuration Tool<br />
Device Driver Configuration<br />
Barcode file<br />
Specify the filename and path of a text file with the simulated barcodes.<br />
Specify the filename and path directly or click Browse and choose an existing<br />
file.<br />
8.5.20 Settings for the REMP PHS<br />
This is used to make settings for the REMP Reatrix 2D Barcode Scanner. For<br />
general information on this device see 16.21 “Commands for the REMP PHS”,<br />
16-74.<br />
8.5.20.1 REMP PHS configuration - Driver tab<br />
See 8.5.35 “Driver Tab of the Configure Device Driver Properties Dialog Box”,<br />
8-116.<br />
8.5.21 Settings for the REMP Reatrix<br />
This is used to make settings for the REMP Reatrix 2D Barcode Scanner. For<br />
general information on this device see 16.22 “Commands for the REMP Reatrix”,<br />
16-74.<br />
8.5.21.1 REMP Reatrix configuration - Driver tab<br />
See 8.5.35 “Driver Tab of the Configure Device Driver Properties Dialog Box”,<br />
8-116.<br />
8.5.21.2 REMP Reatrix configuration - Settings tab<br />
The Settings tab is used to make general settings for the REMP Reatrix:<br />
Fig. 8-41 Settings tab of the REMP Reatrix driver<br />
8 - 82 <strong>Freedom</strong> <strong>EVOware</strong> <strong>Software</strong> <strong>Manual</strong>, 393172, en, V<strong>2.3</strong>
8 - Configuration Tool<br />
Device Driver Configuration<br />
The parameters are as follows:<br />
Post result as message<br />
Check this checkbox if you want to send the scanned barcodes to the<br />
<strong>Freedom</strong> <strong>EVOware</strong> Message Control Server (MCS). See also LogViewer Tool<br />
on page A.10 “LogViewer Tool”, A-72. This checkbox must always be<br />
checked if you are using <strong>Freedom</strong> <strong>EVOware</strong> with the Tecan Sample Tracking<br />
software option.<br />
Write result to file<br />
Barcode information which is received from the Reatrix scanner is stored by<br />
<strong>Freedom</strong> <strong>EVOware</strong> internally. Check this checkbox if you want to write the<br />
scanned data to an XML file as well, e.g. for testing or documentation<br />
purposes. You must then specify the directory to use for the result file and<br />
placeholders for generating the file name. The screen shot above shows<br />
recommended values for these parameters.<br />
Plate Barcode Handling panel<br />
If barcode cannot be read, enter it manually<br />
If you check this checkbox, the operator will be prompted to enter the plate<br />
barcode manually during process runtime if the scanner was unable to read it.<br />
A default barcode will be used if the operator does not enter the barcode<br />
within the time specified with Dialog for manual entry closes after.<br />
If you do not check this checkbox, a default plate barcode will always be used<br />
if the scanner was unable to read it.<br />
Format of default barcode<br />
The following placeholders can be used in this field:<br />
Tab. 8-6 Placeholders for use in default barcodes<br />
Placeholder Example Description<br />
or 123 Counter<br />
or<br />
<br />
004 Counter which is adjusted to a length of n<br />
digits using leading zeros<br />
The placeholders are replaced dynamically with their current values during script<br />
or process runtime. You can combine the placeholders with plain text.<br />
Example: Use the following string to generate default barcodes containing the<br />
string “Generated” and a 4-digit counter:<br />
Generated<br />
(e.g. Generated0003).<br />
Example: Use the following string to generate default barcodes containing the<br />
string “Unreadable” and a counter:<br />
Unreadable<br />
(e.g. Unreadable2)<br />
8.5.21.3 REMP Reatrix configuration - Communication tab<br />
The Communication tab is used to make communication settings for the REMP<br />
Reatrix:<br />
<strong>Freedom</strong> <strong>EVOware</strong> <strong>Software</strong> <strong>Manual</strong>, 393172, en, V<strong>2.3</strong> 8 - 83
8 - Configuration Tool<br />
Device Driver Configuration<br />
Fig. 8-42 Communication tab of the REMP Reatrix driver<br />
The parameters are as follows:<br />
TCP/IP address<br />
Specify the remote TCP/IP address or remote host name if the Reatrix<br />
software is running on a different PC to <strong>Freedom</strong> <strong>EVOware</strong>. Specify<br />
LOCALHOST if the Reatrix software is running on the same PC as <strong>Freedom</strong><br />
<strong>EVOware</strong>.<br />
TCP/IP port<br />
Specify the TCP/IP port which is configured in the Reatrix.ini file of the Reatrix<br />
software (default port: 6054).<br />
8.5.22 Settings for the REMP ACD96<br />
This is used to make settings for the REMP Reatrix 2D Barcode Scanner. For<br />
general information on this device see 16.23 “Commands for the REMP ACD96”,<br />
16-77.<br />
8.5.22.1 REMP ACD96 configuration - Driver tab<br />
See 8.5.35 “Driver Tab of the Configure Device Driver Properties Dialog Box”,<br />
8-116.<br />
8.5.22.2 REMP ACD96 configuration - Settings tab<br />
The Settings tab is used to make general settings for the REMP ACD96<br />
Automated Capper Decapper.<br />
8 - 84 <strong>Freedom</strong> <strong>EVOware</strong> <strong>Software</strong> <strong>Manual</strong>, 393172, en, V<strong>2.3</strong>
8 - Configuration Tool<br />
Device Driver Configuration<br />
Fig. 8-43 Settings tab of the REMP ACD96 driver<br />
The parameters are as follows:<br />
Server<br />
Specify VBRempCapperDriver.<br />
Computer<br />
Leave this field blank.<br />
Report file<br />
Specify the path and name of a text file if you want to log the output of the<br />
ACD96 driver, e.g. for testing purposes. Create an empty text file, click<br />
Browse and choose the file you created.<br />
Server<br />
Leave this field blank.<br />
Connect<br />
This checkbox must always be checked.<br />
Configure<br />
This button has no effect because the ACD96 driver does not have any other<br />
configurable parameters.<br />
8.5.2<strong>2.3</strong> REMP ACD96 configuration - Macro Variables tab<br />
There are no user-configurable parameters on this tab.<br />
8.5.23 Settings for the Plate Robot (RoMa)<br />
This is used to make settings for the Plate Robot driver. For general information<br />
on this device, see 16.26 “Commands for the Plate Robot”, 16-83.<br />
<strong>Freedom</strong> <strong>EVOware</strong> <strong>Software</strong> <strong>Manual</strong>, 393172, en, V<strong>2.3</strong> 8 - 85
8 - Configuration Tool<br />
Device Driver Configuration<br />
8.5.23.1 Plate Robot Configuration - Driver Tab<br />
See 8.5.35 “Driver Tab of the Configure Device Driver Properties Dialog Box”,<br />
8-116.<br />
8.5.23.2 Plate Robot Configuration - Settings Tab<br />
The Settings tab is used to make general settings for the Plate Robot:<br />
Fig. 8-44 Settings tab of the Plate Robot driver<br />
Move panel<br />
Grip Detection<br />
Specify whether grip detection should be used.<br />
Home after move<br />
Specify whether the robot arm should be moved to its home position after<br />
each move. This may be necessary for some worktable layouts, but will<br />
reduce system performance.<br />
Regrip Location<br />
Choose a location where the plate robot can put down the labware temporarily<br />
for the purpose of changing the grip mode from wide to narrow and vice versa<br />
and/or for changing the grip position (grip height).<br />
Proceed as follows to specify the regrip location (an unused carrier site):<br />
– Right-click the microplate carrier where you want to regrip and choose<br />
Edit Carrier from the context menu.<br />
– Assign a group label (e.g. “Regrip”) to the site you want to use (see<br />
9.5 “Configuring Carriers”, 9-39, “Groups”).<br />
– Save the process.<br />
8 - 86 <strong>Freedom</strong> <strong>EVOware</strong> <strong>Software</strong> <strong>Manual</strong>, 393172, en, V<strong>2.3</strong>
8 - Configuration Tool<br />
Device Driver Configuration<br />
– Return to this dialog box and choose the carrier site you have labeled from<br />
the pull-down list. The group name you have chosen is shown appended<br />
to the end of the carrier name, e.g. MP_3Pos_Regrip.<br />
Regrip location is only relevant for <strong>Freedom</strong> <strong>EVOware</strong> Plus. The regrip<br />
location will be used automatically, e.g. if labware is picked by the RoMa by<br />
gripping the narrow side but must be put down on the destination while<br />
gripping the wide side. In this case, the labware will be picked up from the<br />
source carrier using the Move Narrow RoMa vector, put down on the regrip<br />
location, picked up on the wide side using the Move Wide RoMa vector and<br />
put down on the destination carrier.<br />
For the regrip location, you must always specify at least two RoMa vector<br />
types (Move Narrow and Move Wide). This is usually not necessary for normal<br />
carriers. See 9.6.1 “Using RoMa Vectors”, 9-58 for information on RoMa<br />
vector types.<br />
The regrip feature is necessary e.g. for some reader and washer types which<br />
only allow the RoMa to insert the labware in portrait or landscape orientation<br />
for mechanical reasons.<br />
If the Transfer Station driver was installed when you installed <strong>Freedom</strong><br />
<strong>EVOware</strong>, regrip location is automatically set to Transfer (i.e. use the transfer<br />
station for re-gripping). You do not need to create a group label in this case.<br />
See 8.5.33 “Settings for the Transfer Station”, 8-113. The Transfer Station<br />
driver is only installed if you have installed <strong>Freedom</strong> <strong>EVOware</strong> with two<br />
RoMas.<br />
This field and the above instructions are only relevant for <strong>Freedom</strong> <strong>EVOware</strong><br />
Plus.<br />
Custom grip position<br />
Some special carrier types and device carriers (e.g. readers) may require you to<br />
grip the labware at a non-standard grip height or grip position, for example to<br />
avoid a collision with adjacent mechanical components. The non-standard grip<br />
position is specified with the special carrier attributes Maximum grip offset and<br />
Minimum grip offset. See 9.5.5 “Carrier Attributes”, 9-47, Custom grip position.<br />
In <strong>Freedom</strong> <strong>EVOware</strong> Plus, the labware will be regripped automatically using the<br />
regrip location if the current grip position is not within the range Minimum grip<br />
offset Maximum grip offset for the destination carrier.<br />
In <strong>Freedom</strong> <strong>EVOware</strong> <strong>Standard</strong>, you will get a script validation error if the current<br />
grip position is not within the range Minimum grip offset Maximum grip offset<br />
for the destination carrier. In this case, you must use two Transfer Labware<br />
commands. The first one moves the labware to an unused carrier and the second<br />
one moves the labware from the unused carrier to the destination carrier. This<br />
allows the labware to be re-gripped.<br />
Note: The labware attributes Plate Grip Offset Narrow and Plate Grip Offset Wide<br />
adjust the grip position globally for this labware type (not just for a specific carrier).<br />
Miscellaneous panel<br />
Initialization Timeout<br />
Specify the maximum duration of the device initialization procedure. An error<br />
message will be output if initialization is not completed within this time.<br />
<strong>Freedom</strong> <strong>EVOware</strong> <strong>Software</strong> <strong>Manual</strong>, 393172, en, V<strong>2.3</strong> 8 - 87
8 - Configuration Tool<br />
Device Driver Configuration<br />
8.5.23.3 Plate Robot Configuration - Plugins Tab<br />
Plugins are software tools from third-party suppliers which are used to control<br />
special devices. The Plugins tab is used to assign the RoMa commands which are<br />
needed by the device.<br />
Fig. 8-45 Plugins tab of the Plate Robot driver<br />
Associate Plugin Tools panel<br />
Choose the plugin in the Tools panel, choose the RoMa command which the<br />
device should use and click Add.<br />
8.5.23.4 Plate Robot Configuration - Firmware Commands<br />
The following firmware commands (command strings) are pre-configured for the<br />
RoMa in the Test tab of the Configuration Tool:<br />
Get RSP <br />
Requests the pipetting instrument type the device is connected to.<br />
Get VERSION <br />
Requests the firmware version of the pipetting instrument. Only the first two<br />
positions are shown.<br />
Initialize System <br />
Initializes the pipetting instrument.<br />
Refer to the firmware documentation for the device for a complete list of firmware<br />
commands (see also 1.2.1 “Related Documentation and <strong>Software</strong>”, 1-3).<br />
WARNING<br />
Risk of injury to operating personnel or damage to the equipment<br />
• Take care when sending firmware commands. Sending the wrong commands<br />
can damage the instrument or objects in its workspace, hurt yourself or other<br />
people.<br />
8 - 88 <strong>Freedom</strong> <strong>EVOware</strong> <strong>Software</strong> <strong>Manual</strong>, 393172, en, V<strong>2.3</strong>
8 - Configuration Tool<br />
Device Driver Configuration<br />
8.5.24 Settings for the Te-Shake<br />
This is used to make settings for the Te-Shake. For general information on this<br />
device, see 16.28 “Commands for the Te-Shake Shaker”, 16-90.<br />
<strong>Freedom</strong> <strong>EVOware</strong> is provided with several different types of Te-Shake shaker. If<br />
you want to use more than one shaker in your script or process, you must use the<br />
Duplicate Device tool top create a separate device driver for each of them. For<br />
more information see 16.28 “Commands for the Te-Shake Shaker”, 16-90.<br />
8.5.24.1 Te-Shake Configuration - Driver Tab<br />
See 8.5.35 “Driver Tab of the Configure Device Driver Properties Dialog Box”,<br />
8-116.<br />
8.5.24.2 Te-Shake Configuration - Settings Tab<br />
The Settings tab is used to make general settings for the Te-Shake shaker:<br />
Fig. 8-46 Settings tab of the Te-Shake driver<br />
Device ID<br />
Specify the hardware address of the Te-Shake. Specify the address as<br />
“address on the switch plus 1”. The address switch of the Te-Shake is on the<br />
CC board (inside the device). Each physical device (regardless of device<br />
type) must have a unique hardware address.<br />
Heater<br />
Check this checkbox if you want to activate the optional heating plate.<br />
Initial temperature<br />
Specify the required initial temperature of the heating plate (range: 15 to<br />
90 °C). The heating plate cannot cool, so the minimum temperature of the<br />
labware is room temperature. The working temperature can be set with the<br />
execution parameters when you add the Te-Shake Shake command to your<br />
process.<br />
<strong>Freedom</strong> <strong>EVOware</strong> <strong>Software</strong> <strong>Manual</strong>, 393172, en, V<strong>2.3</strong> 8 - 89
8 - Configuration Tool<br />
Device Driver Configuration<br />
8.5.25 Settings for the Symbol MS-954 Barcode Scanner<br />
This is used to configure settings for the Symbol MS-954 Barcode Scanner. For<br />
general information on this device, see 16.2 “Commands for the Symbol LS-1220<br />
Barcode Scanner”, 16-1.<br />
8.5.25.1 Symbol MS-954 Barcode Scanner Configuration - Settings Tab<br />
The Settings tab is used to make general settings for the Barcode Scanner.<br />
Fig. 8-47 Settings tab of the Symbol MS-954 Barcode Scanner driver<br />
Settings panel<br />
Default Barcode<br />
The following placeholders can be used in the Default Barcode field:<br />
Tab. 8-7 Placeholders for use in default barcodes<br />
Placeholder Example Description<br />
or 123 Counter<br />
or<br />
<br />
004 Counter which is adjusted to a length of n<br />
digits using leading zeros<br />
The placeholders are replaced dynamically with their current values during script<br />
or process runtime. You can combine the placeholders with plain text.<br />
Example: Use the following string to generate default barcodes containing the<br />
string “Generated” and a 4-digit counter:<br />
Generated<br />
(e.g. Generated0003).<br />
Example: Use the following string to generate default barcodes containing the<br />
string “Unreadable” and a counter:<br />
8 - 90 <strong>Freedom</strong> <strong>EVOware</strong> <strong>Software</strong> <strong>Manual</strong>, 393172, en, V<strong>2.3</strong>
8 - Configuration Tool<br />
Device Driver Configuration<br />
Unreadable<br />
(e.g. Unreadable2)<br />
Enter Barcode <strong>Manual</strong>ly on Timeout, <strong>Manual</strong> Entry Timeout<br />
If you check Enter Barcode <strong>Manual</strong>ly on Timeout, the operator will be<br />
prompted to enter the barcode manually during process runtime if the scanner<br />
was unable to read it, despite retries. A default barcode will be used if the<br />
operator does not enter the barcode within the specified time (<strong>Manual</strong> Entry<br />
Timeout field).<br />
If you do not check Enter Barcode <strong>Manual</strong>ly on Timeout, a default barcode will<br />
always be used if the scanner was unable to read it.<br />
Auto Read Retries<br />
Specify how many times the device should try to read the barcode before<br />
considering it unreadable.<br />
Move Timeout<br />
Specify the timeout for the robot move which is associated with the<br />
ReadBarcode command. An error message will be output if the robot takes<br />
longer than this to move.<br />
Move Robot in Beam<br />
Specify the distances in the x, y and z directions that the robot should move<br />
the labware in the scanner beam when scanning.<br />
Multiplication Factors for Retries<br />
Specify multiplication factors for the distances in the Move Robot in beam<br />
field.<br />
If the labware cannot be scanned on the first try, the distances in Move Robot<br />
in Beam are multiplied by the specified multiplication factors for each<br />
successive attempt, resulting in larger distances each time. This allows<br />
<strong>Freedom</strong> <strong>EVOware</strong> to search for the barcode label with the help of the robot in<br />
case it is not accurately positioned on the labware.<br />
The barcode scanner can be configured to only accept the barcode types which<br />
are expected on your barcode labels. This makes it easier for the scanner to<br />
identify incorrect barcodes. This can be done by the Tecan Field Service Engineer<br />
using special configuration barcodes. The valid barcode types list is stored in the<br />
barcode scanner firmware.<br />
8.5.25.2 Symbol MS-954 Barcode Scanner Configuration - Barcodes Tab<br />
The Barcodes tab is used to configure the barcode types which the Symbol MS-<br />
954 barcode scanner will accept:<br />
<strong>Freedom</strong> <strong>EVOware</strong> <strong>Software</strong> <strong>Manual</strong>, 393172, en, V<strong>2.3</strong> 8 - 91
8 - Configuration Tool<br />
Device Driver Configuration<br />
Fig. 8-48 Barcodes tab of the Symbol MS-954 Barcode Scanner driver<br />
Barcodes panel<br />
Use the checkboxes to choose how many different barcode types you want to<br />
read. You should only configure the barcode types which are expected on your<br />
barcode labels. This makes it easier for the scanner to identify incorrect barcodes.<br />
8.5.25.3 Symbol MS-954 Barcode Scanner Configuration - Firmware Commands<br />
The following firmware commands (command strings) are pre-configured for the<br />
Barcode Scanner in the Test tab of the Configuration Tool:<br />
Read Barcode <br />
Performs a single read operation of the barcode scanner.<br />
Refer to the firmware documentation for the device for a complete list of firmware<br />
commands (see also 1.2.1 “Related Documentation and <strong>Software</strong>”, 1-3).<br />
WARNING<br />
Risk of injury to operating personnel or damage to the equipment<br />
• Take care when sending firmware commands. Sending the wrong commands<br />
can damage the instrument or objects in its workspace, hurt yourself or other<br />
people.<br />
8.5.26 Settings for the Te-Link<br />
This is used to make settings for the Te-Link. For general information on this<br />
device, see 16.41 “Commands for the Te-Link”, 16-127.<br />
8 - 92 <strong>Freedom</strong> <strong>EVOware</strong> <strong>Software</strong> <strong>Manual</strong>, 393172, en, V<strong>2.3</strong>
8 - Configuration Tool<br />
Device Driver Configuration<br />
8.5.26.1 Te-Link Configuration - Driver Tab<br />
See 8.5.35 “Driver Tab of the Configure Device Driver Properties Dialog Box”,<br />
8-116.<br />
8.5.26.2 Te-Link Configuration - Settings Tab<br />
The Settings tab is used to make general settings for the Te-Link:<br />
Fig. 8-49 Settings tab of the Te-Link driver<br />
Device ID<br />
Specify the hardware address of the Te-Link. Specify the address as “address<br />
on the switch plus 1”. The address switch of the Te-Link is on the CC board<br />
(inside the device). Each physical device (regardless of device type) must<br />
have a unique hardware address.<br />
Initialization timeout<br />
Specify the maximum duration of the device initialization procedure. An error<br />
message will be output if initialization is not completed within this time.<br />
Locations panel<br />
Location1, Location2<br />
Specify which RoMa should be used to access which position of the Te-Link<br />
shuttle.<br />
Location1 and Location2 are assigned to two absolute positions of the Te-Link<br />
shuttle (normally the two ends of the Te-Link rail) when setting up the<br />
hardware with the Setup & Service software. The absolute positions are<br />
stored in the device EEPROM. <strong>Freedom</strong> <strong>EVOware</strong> uses the stored positions<br />
instead of addressing the absolute positions directly.<br />
Proceed as follows to teach two absolute positions for <strong>Freedom</strong> <strong>EVOware</strong> with the<br />
Setup & Service software:<br />
<strong>Freedom</strong> <strong>EVOware</strong> <strong>Software</strong> <strong>Manual</strong>, 393172, en, V<strong>2.3</strong> 8 - 93
8 - Configuration Tool<br />
Device Driver Configuration<br />
• Move the carrier to the first required position using the Move page of the Te-<br />
Link panel and note the current position in instrument steps.<br />
• Send the following firmware command to the Te-Link to store the first position:<br />
SCP0,<br />
– where is the the hardware address of the Te-Link and<br />
is the absolute position of the carrier in instrument steps, for<br />
example: Q1SCP0,374.<br />
• Move the carrier to the second required position and note the new position.<br />
• Send the following firmware command to the Te-Link to store the second<br />
position: SCP1,<br />
The Setup & Service software is described in the Instrument <strong>Software</strong> <strong>Manual</strong><br />
(Doc ID 392888). Please refer to the Instrument <strong>Software</strong> <strong>Manual</strong> for additional<br />
information.<br />
WARNING<br />
Risk of injury to operating personnel or damage to the equipment<br />
• Take care when sending firmware commands. Sending the wrong commands<br />
can damage the instrument or objects in its workspace, hurt yourself or other<br />
people.<br />
8.5.26.3 Te-Link Configuration - Communications Tab<br />
The Communications tab is used to make communications settings for the device<br />
driver:<br />
Fig. 8-50 Communications tab of the Te-Link driver<br />
Local server<br />
Check this checkbox if the Te-Link is attached to the local <strong>Freedom</strong> <strong>EVOware</strong><br />
installation.<br />
8 - 94 <strong>Freedom</strong> <strong>EVOware</strong> <strong>Software</strong> <strong>Manual</strong>, 393172, en, V<strong>2.3</strong>
8 - Configuration Tool<br />
Device Driver Configuration<br />
Remote server name<br />
Specify the remote TCP/IP address or remote host name if the Te-Link is<br />
connected to another <strong>Freedom</strong> <strong>EVOware</strong> installation running on a different<br />
PC. The local <strong>Freedom</strong> <strong>EVOware</strong> installation will then control the Te-Link<br />
device through the network connection.<br />
8.5.27 Settings for the Te-MagS<br />
This is used to make settings for the Te-MagS (Magnetic Bead Separator). For<br />
general information on this device, see 16.32 “Commands for the Magnetic Bead<br />
Separator”, 16-100.<br />
8.5.27.1 Te-MagS Configuration - Driver Tab<br />
See 8.5.35 “Driver Tab of the Configure Device Driver Properties Dialog Box”,<br />
8-116.<br />
8.5.27.2 Te-MagS Configuration - Settings Tab<br />
The Settings tab is used to make general settings for the Te-MagS:<br />
Fig. 8-51 Settings tab of the Te-MagS driver<br />
Miscellaneous panel<br />
Initialization Timeout<br />
Specify the maximum duration of the device initialization procedure. An error<br />
message will be output if initialization is not completed within this time.<br />
Device Address<br />
Specify the hardware address of the Te-MagS. Specify the address as<br />
“address on the switch plus 1”. The address switch of the Te-MagS is on the<br />
CC board (inside the device). Each physical device (regardless of device<br />
type) must have a unique hardware address.<br />
<strong>Freedom</strong> <strong>EVOware</strong> <strong>Software</strong> <strong>Manual</strong>, 393172, en, V<strong>2.3</strong> 8 - 95
8 - Configuration Tool<br />
Device Driver Configuration<br />
Support Z-Positioning<br />
If you check this checkbox, you can adjust the height (Z position) of the<br />
magnet block in the MoveToPosition and Execute commands to simplify<br />
aspiration of the supernatant or wash liquid if there is only a small volume of<br />
liquid in the labware. This checkbox should only be checked if your Te-MagS<br />
hardware supports this feature.<br />
Heater<br />
Check this checkbox if you want to activate the optional heating function.<br />
Initial Temperature<br />
Specify the required initial temperature of the heating block (range: 15 to<br />
80 °C). The heating block cannot cool, so the minimum temperature of the<br />
labware is room temperature. The working temperature can be set with the<br />
execution parameters when you add the Te-MagS ActivateHeater command<br />
to your process.<br />
8.5.27.3 Te-MagS Configuration - Firmware Commands<br />
The following firmware commands (command strings) are pre-configured for the<br />
Te-MagS in the Test tab of the Configuration Tool:<br />
Get RSP <br />
Requests the pipetting instrument type the device is connected to.<br />
Get VERSION <br />
Requests the firmware version of the pipetting instrument. Only the first two<br />
positions are shown.<br />
Initialize System <br />
Initializes the pipetting instrument.<br />
Refer to the firmware documentation for the device for a complete list of firmware<br />
commands (see also 1.2.1 “Related Documentation and <strong>Software</strong>”, 1-3).<br />
WARNING<br />
Risk of injury to operating personnel or damage to the equipment<br />
• Take care when sending firmware commands. Sending the wrong commands<br />
can damage the instrument or objects in its workspace, hurt yourself or other<br />
people.<br />
8.5.28 Settings for the Te-Stack and Te-Stack Te-MO<br />
This is used to make settings for the Te-Stack and the Te-Stack Te-MO. For<br />
general information on these devices, see 16.34 “Commands for the Te-Stack”,<br />
16-107.<br />
8.5.28.1 Te-Stack and Te-Stack Te-MO Configuration - Driver Tab<br />
See 8.5.35 “Driver Tab of the Configure Device Driver Properties Dialog Box”,<br />
8-116.<br />
8.5.28.2 Te-Stack and Te-Stack Te-MO Configuration - Settings Tab<br />
The following dialog box is used to make general settings:<br />
8 - 96 <strong>Freedom</strong> <strong>EVOware</strong> <strong>Software</strong> <strong>Manual</strong>, 393172, en, V<strong>2.3</strong>
8 - Configuration Tool<br />
Device Driver Configuration<br />
Fig. 8-52 Settings tab of the Te-Stack driver<br />
Barcode panel<br />
Specify the barcode scanner settings for the Te-Stack.<br />
Note: The Te-Stack Te-MO cannot be fitted with a barcode scanner and you<br />
cannot make any entries in the Barcode panel in this case.<br />
Read barcode on store plate<br />
Read the labware barcode when returning labware to the stacker.<br />
Read barcode on get plate<br />
Read the labware barcode when getting labware from the stacker.<br />
Barcode variable name<br />
Specify the name of an internal variable which should be used to store the<br />
barcode which is scanned. The default variable name for barcodes is “ID”.<br />
Enter Barcode <strong>Manual</strong>ly on Timeout, <strong>Manual</strong> Entry Timeout<br />
If you check Enter Barcode <strong>Manual</strong>ly on Timeout, the operator will be<br />
prompted to enter the barcode manually during process runtime if the scanner<br />
was unable to read it. A default barcode will be used if the operator does not<br />
enter the barcode within the specified time (<strong>Manual</strong> Entry Timeout field).<br />
If you do not check Enter Barcode <strong>Manual</strong>ly on Timeout, a default barcode will<br />
always be used if the scanner was unable to read it.<br />
Default Barcode<br />
The following placeholders can be used in the Default Barcode field:<br />
<strong>Freedom</strong> <strong>EVOware</strong> <strong>Software</strong> <strong>Manual</strong>, 393172, en, V<strong>2.3</strong> 8 - 97
8 - Configuration Tool<br />
Device Driver Configuration<br />
Tab. 8-8 Placeholders for use in default barcodes<br />
Placeholder Example Description<br />
or 123 Counter<br />
or<br />
<br />
004 Counter which is adjusted to a length of n<br />
digits using leading zeros<br />
The placeholders are replaced dynamically with their current values during script<br />
or process runtime. You can combine the placeholders with plain text.<br />
Example: Use the following string to generate default barcodes containing the<br />
string “Generated” and a 4-digit counter:<br />
Generated<br />
(e.g. Generated0003).<br />
Example: Use the following string to generate default barcodes containing the<br />
string “Unreadable” and a counter:<br />
Unreadable<br />
(e.g. Unreadable2)<br />
Miscellaneous panel<br />
Initialization Timeout<br />
Specify the maximum duration of the device initialization procedure. An error<br />
message will be output if initialization is not completed within this time.<br />
8.5.28.3 Te-Stack and Te-Stack Te-MO Configuration - Towers Tab<br />
The standard Te-Stack normally has two towers, each of which can hold up to 50<br />
microplates (depending on microplate height). When you fetch labware, the Te-<br />
Stack brings it from the specified tower to the Te-Stack transfer position, where it<br />
can be picked up by the RoMa. To return the labware, the RoMa puts it on the Te-<br />
Stack transfer position and the Te-Stack moves it back into the specified tower.<br />
Both towers share the same transfer position. A moveable carriage (the “shuttle”<br />
or “transfer carrier”) is used to move the labware between the transfer position<br />
and the two towers.<br />
The Te-Stack Te-MO does not have or need a shuttle. It is able to put plates<br />
directly onto the Te-MO slides.<br />
To increase the total storage capacity, <strong>Freedom</strong> <strong>EVOware</strong> can group several<br />
physical Te-Stack devices into one logical Te-Stack device. Each pair of towers<br />
has its own shuttle and each shuttle has its own transfer position.<br />
The number of transfer positions (RoMa sites) in the logical Te-Stack device, the<br />
total number of towers and the number of plates per tower are configured with<br />
Position Layout and Use to offset RoMa vector in the Carrier Definition (see<br />
9.5 “Configuring Carriers”, 9-39).<br />
This dialog box is used to assign the towers to the physical Te-Stack devices:<br />
8 - 98 <strong>Freedom</strong> <strong>EVOware</strong> <strong>Software</strong> <strong>Manual</strong>, 393172, en, V<strong>2.3</strong>
8 - Configuration Tool<br />
Device Driver Configuration<br />
Fig. 8-53 Towers tab of the Te-Stack driver<br />
Towers panel<br />
Number of Towers<br />
Specify the number of towers in the logical Te-Stack device. Depending on<br />
your setting, additional tabs will appear (Tower 1, Tower 2, etc.) where you can<br />
configure each of the towers.<br />
The following parameters must be set for each tower:<br />
Device panel<br />
Device ID<br />
Each tower has a unique device ID (hardware address). Specify the ID for this<br />
tower. On the Te-Stack, the device ID is set with the address switch on the<br />
printed circuit board (inside the device). Each physical device (regardless of<br />
device type) must have a unique hardware address.<br />
Master Device ID<br />
Each shuttle can serve two towers. The master tower is the tower which<br />
controls the shuttle and the optional barcode scanner. Specify the device ID<br />
(hardware address) of the master tower.<br />
Note: If the Te-Stack is mounted above the Te-MO (“Te-MO Stacker”), the Master<br />
ID must be set here to .<br />
<strong>Freedom</strong> <strong>EVOware</strong> <strong>Software</strong> <strong>Manual</strong>, 393172, en, V<strong>2.3</strong> 8 - 99
8 - Configuration Tool<br />
Device Driver Configuration<br />
Transfer Position<br />
The position of the shuttle (sliding carrier) when it is below the selected tower.<br />
The Te-Stack tower can pick up and put down labware on the slide at this<br />
position.<br />
With the default tower configuration for a double Te-Stack:<br />
Tower 1: Shuttle position 1<br />
Tower 2: Shuttle position 1<br />
Tower 3: Shuttle position 2<br />
Tower 4: Shuttle position 2<br />
See Fig. 8-54, 8-100, below.<br />
Note:<br />
RoMa transfer position: Shuttle position 0<br />
Waste position (hardware option): Shuttle Position 3<br />
Location panel<br />
Location<br />
Specify the <strong>Freedom</strong> <strong>EVOware</strong> location associated with this device. Te-<br />
Stack_left is on the left of the worktable. Te-Stack_right is on the right of the<br />
worktable. Te-Stack Te-MO is the Te-MO Stacker option.<br />
X Position<br />
Specify the site index along the X axis for the location for this tower:<br />
Fig. 8-54 Site index, Double Te-Stack Right (with the default tower configuration)<br />
Y Position<br />
Specify the site index along the Y axis for the location for this tower.<br />
Warnings/Pause panel<br />
You can configure the Te-Stack driver to issue a warning or to pause the system<br />
according to a signal from its labware sensor. The labware sensor is mounted<br />
about half way up one of the stacker towers. The number of labware items in the<br />
tower when it is half full depends on the height of each item.<br />
Click Sensor detects no plate if you want the Te-Stack driver to issue a nearly<br />
empty warning or to pause the system when the Te-Stack is being unloaded. Set<br />
Pause system x plates after to 45% - 50% of the number of plates which fit in the<br />
8 - 100 <strong>Freedom</strong> <strong>EVOware</strong> <strong>Software</strong> <strong>Manual</strong>, 393172, en, V<strong>2.3</strong>
8 - Configuration Tool<br />
Device Driver Configuration<br />
tower. Set Send warning x plates after to a slightly higher number of plates. This<br />
ensures that the warning will be issued before the system pauses.<br />
Click Sensor detects plate if you want the Te-Stack driver to issue a nearly full<br />
warning or to pause the system when the Te-Stack is being loaded with plates. Set<br />
Pause system x plates after to 45% - 50% of the number of plates which fit in the<br />
tower. Set Send warning x plates after to a slightly lower number of plates. This<br />
ensures that the warning will be issued before the system pauses.<br />
The above suggestions for how many plates to set for the warning and/or system<br />
pause are guidelines only. Test your stacker system with the plates you plan to<br />
use to get more accurate figures. Specify a large number of plates if you want to<br />
disable the warning and/or the system pause.<br />
<strong>Freedom</strong> <strong>EVOware</strong> <strong>Software</strong> <strong>Manual</strong>, 393172, en, V<strong>2.3</strong> 8 - 101
8 - Configuration Tool<br />
Device Driver Configuration<br />
8.5.28.4 Te-Stack and Te-Stack Te-MO Configuration - Locations Tab<br />
Te-Stack<br />
The Te-Stack is able to move labware to the Te-Stack transfer position without<br />
using the RoMa. Labware on the Te-Stack transfer position can be accessed by<br />
the LiHa for pipetting.<br />
If you want to pipette with the LiHa onto the Te-Stack transfer position(s), they<br />
must be associated with locations in <strong>Freedom</strong> <strong>EVOware</strong>. This is done using this<br />
tab:<br />
Fig. 8-55 Locations tab of the Te-Stack driver<br />
Te-Stack Te-MO<br />
The Te-Stack Te-MO is able to move labware to a site on one of the Te-MO slides<br />
without using the RoMa. Labware on the Te-MO carrier can be accessed by the<br />
Te-MO pipetting head by moving the slides to position the site below the pipetting<br />
head.<br />
The middle slide of the Te-MO is normally only used for DITI racks, troughs, wash<br />
stations and tip blocks. You can only put microplates on the outer two slides.<br />
Specify six locations for the Te-Stack Te-MO if you are using DITIs:<br />
8 - 102 <strong>Freedom</strong> <strong>EVOware</strong> <strong>Software</strong> <strong>Manual</strong>, 393172, en, V<strong>2.3</strong>
8 - Configuration Tool<br />
Device Driver Configuration<br />
Fig. 8-56 Locations tab of the Te-Stack Te-MO driver<br />
If you are not using DiTis you only need to specify four locations for the Te-Stack<br />
Te-MO. See also <strong>EVOware</strong> location, below.<br />
General panel<br />
Number of Locations<br />
Choose the required number of <strong>Freedom</strong> <strong>EVOware</strong> locations (i.e. Te-Stack<br />
transfer positions) for this logical Te-Stack device. For example, a Te-Stack<br />
with two towers and one transfer position has one location.<br />
You only need to specify locations if you want to pipette onto labware which is<br />
on the transfer position. In most cases, you should set the number of locations<br />
to the number of transfer positions which are available. You will then be able<br />
to pipette to all of the transfer positions on the Te-Stack.<br />
Locations Associations panel<br />
To change the assignment of an <strong>Freedom</strong> <strong>EVOware</strong> location to a transfer position,<br />
select it in the list and adjust the settings using the pull-down lists:<br />
<strong>Freedom</strong> <strong>EVOware</strong> location<br />
Choose the <strong>Freedom</strong> <strong>EVOware</strong> location as follows:<br />
Te-Stack<br />
Te-Stack Te-MO<br />
For the Te-Stack, choose Te-Stack_left or Te-Stack_right. Te-Stack_left is on<br />
the left of the worktable. Te-Stack_right is on the right of the worktable.<br />
The three towers of the Te-Stack Te-MO can only put labware on the front two<br />
sites of the respective Te-MO slide (a total of six locations). For mechanical<br />
reasons, the sites at the rear of the Te-MO are not accessible to the stacker.<br />
Use the Groups column in the carrier definition for the Te-MO to group<br />
equivalent sites into a single <strong>Freedom</strong> <strong>EVOware</strong> location. For example,<br />
<strong>Freedom</strong> <strong>EVOware</strong> <strong>Software</strong> <strong>Manual</strong>, 393172, en, V<strong>2.3</strong> 8 - 103
8 - Configuration Tool<br />
Device Driver Configuration<br />
assign Te-MO sites 4 and 5 to “Stack1”, sites 9 and 10 to “StackM” and sites<br />
14 and 15 to “Stack2”. The location groups are then shown in the <strong>Freedom</strong><br />
<strong>EVOware</strong> location pull-down list. See “Groups” in 9.5 “Configuring Carriers”,<br />
9-39.<br />
Te-MO sites are counted from rear to front and then from left to right:<br />
Tab. 8-9 Te-MO 3x5 site numbers<br />
Te-MO 3 x 5<br />
1 6 11<br />
2 7 12<br />
3 8 13<br />
4 9 14<br />
5 10 15<br />
Tab. 8-10 Te-MO 3x3 site numbers<br />
Te-MO 3 x 3<br />
1 4 7<br />
2 5 8<br />
3 6 9<br />
Use the following group labels in the Te-MO 3 x 5 carrier definition if you want<br />
to use the Te-Stack Te-MO to put labware on both outer slides and DITI racks<br />
on the middle slide:<br />
Tab. 8-11 Te-MO 3x5 group labels<br />
Te-MO 3 x 5<br />
Slide1 SlideM Slide2<br />
Slide1 SlideM Slide2<br />
Slide1 SlideM Slide2<br />
Stack1 StackM Stack2<br />
Stack1 StackM Stack2<br />
Then configure the locations as shown in Fig. 8-56, 8-103. For mechanical<br />
reasons, the Te-Stack Te-MO cannot be fitted to the Te-MO 3 x 3. You can use<br />
different group names if you want to, but you should use the same scheme.<br />
8 - 104 <strong>Freedom</strong> <strong>EVOware</strong> <strong>Software</strong> <strong>Manual</strong>, 393172, en, V<strong>2.3</strong>
8 - Configuration Tool<br />
Device Driver Configuration<br />
Position<br />
Choose the position coordinates. For the above example of the Te-Stack Te-<br />
MO, the front two sites on each slide only differ in the Y coordinate. For slide<br />
1, create two locations Te-MO_3x5_Stack1 and assign them to 1,1,1 and 1,2,1<br />
respectively. Follow the same system for both other slides.<br />
Note: The <strong>Freedom</strong> <strong>EVOware</strong> locations and location groups for the Te-MO are<br />
only visible in the pull-down list if you have put a Te-MO on the worktable.<br />
Master Device ID<br />
Choose the device ID (hardware address) of the master tower for the current<br />
location. The master tower is the tower which controls the shuttle and the<br />
optional barcode scanner. On the Te-Stack tower, the device ID is set with the<br />
address switch on the printed circuit board (inside the device).<br />
Note: Make sure that you have correctly set the Allowed Robots field for all<br />
locations which are involved. To do this, click Attributes in the Edit Carrier dialog<br />
box for the Te-Stack.<br />
8.5.28.5 Te-Stack and Te-Stack Te-MO Configuration - Firmware Commands<br />
The following firmware commands (command strings) are pre-configured for the<br />
Te-Stack and the Te-Stack Te-MO in the Test tab of the Configuration Tool:<br />
Get RSP <br />
Requests the pipetting instrument type the device is connected to.<br />
Get VERSION <br />
Requests the firmware version of the pipetting instrument. Only the first two<br />
positions are shown.<br />
Initialize System <br />
Initializes the pipetting instrument.<br />
Refer to the firmware documentation for the device for a complete list of firmware<br />
commands (see also 1.2.1 “Related Documentation and <strong>Software</strong>”, 1-3).<br />
WARNING<br />
Risk of injury to operating personnel or damage to the equipment<br />
• Take care when sending firmware commands. Sending the wrong commands<br />
can damage the instrument or objects in its workspace, hurt yourself or other<br />
people.<br />
8.5.29 Settings for the Te-VacS<br />
This is used to make settings for the Te-VacS (vacuum separator option). For<br />
general information on this device, see 16.35 “Commands for the Te-VacS”, 16-<br />
110.<br />
The Te-VacS carrier has six sites: filtration plate (front and rear), vacuum block<br />
(front and rear) and collection plate (front and rear). The vacuum block supports<br />
the filtration plate. The collection plate is inside the vacuum block and is<br />
underneath the filtration plate. It is supported by a so-called adaptor plate. Seven<br />
different adaptor plates with different heights are available from Tecan. When<br />
setting up the Te-VacS, you must adjust the Te-VacS carrier configuration for the<br />
height of the adaptor plate you are using, which affects the height of the collection<br />
<strong>Freedom</strong> <strong>EVOware</strong> <strong>Software</strong> <strong>Manual</strong>, 393172, en, V<strong>2.3</strong> 8 - 105
8 - Configuration Tool<br />
Device Driver Configuration<br />
plate. The parameter to change is Z-offset for the collection positions, carrier sites<br />
3 and 6 (see 9.5 “Configuring Carriers”, 9-39).<br />
8.5.29.1 Te-VacS Configuration - Driver Tab<br />
See 8.5.35 “Driver Tab of the Configure Device Driver Properties Dialog Box”,<br />
8-116.<br />
8.5.29.2 Te-VacS Configuration - Settings Tab<br />
The Settings tab is used to make general settings for the Te-VacS.<br />
Fig. 8-57 Settings tab of the Te-VacS driver<br />
Miscellaneous panel<br />
Initialization timeout<br />
Specify the maximum duration of the device initialization procedure. An error<br />
message will be output if initialization is not completed within this time.<br />
Device address<br />
Specify the hardware address of the Te-VacS. Specify the address as<br />
“address on the switch plus 1”. The address switch of the Te-VacS is on the<br />
CC board (inside the device). Each physical device (regardless of device<br />
type) must have a unique hardware address.<br />
In case of script error panel<br />
Request system pause<br />
Check this checkbox if you want the driver to request a system pause if a<br />
script error is detected during command execution.<br />
8 - 106 <strong>Freedom</strong> <strong>EVOware</strong> <strong>Software</strong> <strong>Manual</strong>, 393172, en, V<strong>2.3</strong>
8 - Configuration Tool<br />
Device Driver Configuration<br />
Note: Do not confuse the settings made here with those made in the scheduling/<br />
error handling configuration. The settings in this tab define the reaction of the<br />
system if the vacuum separator outputs an error message during execution of a<br />
Te-VacS command. The settings for error handling take effect if the Te-VacS<br />
command has already been stopped due to an error.<br />
8.5.29.3 Te-VacS Configuration - Command Generation Tab<br />
The Command Generation tab is used to make settings for the default pre-actions<br />
and post-actions to be used when generating commands for the Te-VacS. The<br />
settings are only relevant to <strong>Freedom</strong> <strong>EVOware</strong> Plus.<br />
Fig. 8-58 Command Generation tab of the Te-VacS driver<br />
Pre-actions / Post actions panel<br />
LiHa configuration file<br />
Specify the file which contains the LiHa configuration. Specify the path and file<br />
name of the file directly or click Browse and choose an existing file. It is<br />
normally located in the <strong>Freedom</strong> <strong>EVOware</strong> directory.<br />
Move command<br />
Choose the command to use for moving the plates and specify the execution<br />
time to be used when scheduling this command.<br />
Note: <strong>Freedom</strong> <strong>EVOware</strong> compares the initial worktable layout with the worktable<br />
layout which is required by the script. For each object which needs to be moved, it<br />
then uses the specified move command to create and configure the RoMa<br />
movements which will be needed.<br />
<strong>Freedom</strong> <strong>EVOware</strong> <strong>Software</strong> <strong>Manual</strong>, 393172, en, V<strong>2.3</strong> 8 - 107
8 - Configuration Tool<br />
Device Driver Configuration<br />
Replace absorbent command<br />
Choose the command to use for replacing the absorbent station and specify<br />
the execution time to be used when scheduling this command. The absorbent<br />
station uses a blotting pad to remove drops of liquid from the bottom of the<br />
filtration and collection plates (the labware is put on to the pad using the<br />
RoMa). The replacement intervals for the absorbent station are configured in<br />
the Filtration command and depend on your application or experiment.<br />
Note: <strong>Freedom</strong> <strong>EVOware</strong> compares the initial worktable layout with the worktable<br />
layout which is required by the script. It then uses the specified replace action to<br />
create and configure the RoMa movements which will be needed when the<br />
absorbent station needs to be replaced because the blotting pad is used up.<br />
Locations panel<br />
This panel is used to specify the location (carrier site) of the absorbent station.<br />
Absorbent station<br />
The absorbent station uses a blotting pad to remove drops of liquid from the<br />
bottom of the filtration and/or collection plate after each filtration step. It<br />
usually consists of a stand or carrier that contains a piece of fabric or<br />
absorbent material. It can also be programmed to be a replaceable item. The<br />
filtration or collection plate is put on to the absorbent station using the RoMa.<br />
Proceed as follows to configure the absorbent station:<br />
– Create a suitable one-site carrier for the absorbent station and put it on<br />
the worktable. Use the name Absorbent_Station.<br />
– Create labware for the absorbent station. Use the name AbsorbentPlate.<br />
– Create a suitable RoMa vector for the labware.<br />
– Put the labware on the carrier:<br />
• If the absorbent station labware is fixed and not replaceable, you must<br />
create it on the carrier using the labware generator. Select the labware<br />
in the Control Bar, press Ctrl and drag the labware onto the carrier in<br />
the Worktable Editor. This opens the the labware generator. In the<br />
labware generator, assign the name AbsorbentPlate in the Labware<br />
Groupname field. After closing the labware generator, this name will<br />
be shown in the yellow label of the generated labware.<br />
• If the absorbent station labware will be replaced after each use, the<br />
labware must be stored in a hotel or other storage device and be<br />
brought to the worktable using the RoMa with each iteration of the<br />
filtration commmand. Create sufficient absorbent plate labware items<br />
in the hotel using the labware generator.<br />
– Return to the Command Generation dialog box and choose the location<br />
Absorbent_Station in the pull-down list.<br />
– Choose the appropriate options for the absorbent station in the General<br />
tab of the Te-VacS - Filtration command.<br />
The Command Generation dialog box and the above instructions are only<br />
relevant for <strong>Freedom</strong> <strong>EVOware</strong> Plus.<br />
8 - 108 <strong>Freedom</strong> <strong>EVOware</strong> <strong>Software</strong> <strong>Manual</strong>, 393172, en, V<strong>2.3</strong>
8 - Configuration Tool<br />
Device Driver Configuration<br />
8.5.30 Settings for the Te-MO<br />
This is used to make settings for the Te-MO. For general information on this<br />
device, see 15.56 “Te-MO Commands”, 15-121.<br />
8.5.30.1 Te-MO Configuration - Driver Tab<br />
See 8.5.35 “Driver Tab of the Configure Device Driver Properties Dialog Box”,<br />
8-116.<br />
8.5.30.2 Te-MO Configuration - Settings Tab<br />
The Settings tab is used to make general settings for the Te-MO:<br />
Fig. 8-59 Settings tab of the Te-MO driver<br />
Miscellaneous panel<br />
Initialization timeout<br />
Specify the maximum duration of the device initialization procedure. An error<br />
message will be output if initialization is not completed within this time.<br />
In case of script error panel<br />
Request system pause<br />
Check this checkbox if you want the driver to request a system pause if a<br />
script error is detected during command execution.<br />
<strong>Freedom</strong> <strong>EVOware</strong> <strong>Software</strong> <strong>Manual</strong>, 393172, en, V<strong>2.3</strong> 8 - 109
8 - Configuration Tool<br />
Device Driver Configuration<br />
Write pre and post actions panel<br />
This setting is only relevant for <strong>Freedom</strong> <strong>EVOware</strong> Plus. Pipette process steps for<br />
the LiHa, MCA96 and MCA384 allow you to configure custom pre-actions and<br />
post-actions in the Process Editor. They apply to the currently selected process<br />
step. This is not possible for the Te-MO. As an alternative, you can edit the<br />
standard (global) pre-actions and post-actions for the Te-MO in the Configuration<br />
Tool. However, the changes you make are normally overwritten by the default<br />
settings each time the Te-MO pipetting script (the Te-MO Pipette process step) is<br />
modified. Click the radio buttons to change the behaviour, as follows:<br />
Always<br />
Changes to the standard pre-actions and post-actions are always overwritten<br />
when the the Te-MO Pipette process step is modified (default action).<br />
Ask user<br />
Prompt the user before overwriting changes to standard pre-actions and postactions.<br />
Never<br />
Never overwrite changes to standard pre-actions and post-actions.<br />
8.5.30.3 Te-MO Configuration - Firmware Commands<br />
The following firmware commands (command strings) are pre-configured for the<br />
Te-MO in the Test tab of the Configuration Tool:<br />
Get RSP <br />
Requests the pipetting instrument type the device is connected to.<br />
Get VERSION <br />
Requests the firmware version of the pipetting instrument. Only the first two<br />
positions are shown.<br />
Initialize System <br />
Initializes the pipetting instrument.<br />
Refer to the firmware documentation for the device for a complete list of firmware<br />
commands (see also 1.2.1 “Related Documentation and <strong>Software</strong>”, 1-3).<br />
WARNING<br />
Risk of injury to operating personnel or damage to the equipment<br />
• Take care when sending firmware commands. Sending the wrong commands<br />
can damage the instrument or objects in its workspace, hurt yourself or other<br />
people.<br />
8.5.31 Settings for the Pooling Balance<br />
The Liquid Arrival Check (LAC) feature verifies that the correct liquid volumes<br />
have been dispensed by weighing the labware before and after pipetting. The<br />
labware must be put onto a special balance (pooling balance) for the dispense<br />
operation. The LAC feature is only supported by special balance types such as<br />
the Mettler WM pooling balance. See 10.1.1 “Global Parameters for Liquid<br />
Classes”, 10-4, Liquid Arrival Check panel, for more information.<br />
8 - 110 <strong>Freedom</strong> <strong>EVOware</strong> <strong>Software</strong> <strong>Manual</strong>, 393172, en, V<strong>2.3</strong>
8 - Configuration Tool<br />
Device Driver Configuration<br />
Maximum initial weight<br />
Specify the maximum allowed weight of the objects on the pooling balance<br />
before the script or process is started. If the specified maximum is exceeded,<br />
an error will be output when the balance is initialized. In addition, you cannot<br />
run the script or process until the weight on the balance has been reduced.<br />
To ensure maximum accuracy of the balance, it must not be overloaded. Make<br />
sure that the sum of maximum initial weight + weight of the liquids you want to<br />
dispense does not exceed the rated maximum weight for the balance.<br />
8.5.32 Settings for the Process Script<br />
This is used to make settings for the Process Script driver. For general information<br />
on this device, see 16.39 “Commands for the Process Script Driver”, 16-126.<br />
8.5.32.1 Process Script Configuration - Driver Tab<br />
See 8.5.35 “Driver Tab of the Configure Device Driver Properties Dialog Box”,<br />
8-116.<br />
8.5.32.2 Process Script Configuration - Settings Tab<br />
The Settings tab is used to make general settings for the Process Script driver.<br />
Fig. 8-60 Settings tab of the Process Script driver<br />
Miscellaneous panel<br />
Initialization timeout<br />
Specify the maximum duration of the device initialization procedure. An error<br />
message will be output if initialization is not completed within this time.<br />
<strong>Freedom</strong> <strong>EVOware</strong> <strong>Software</strong> <strong>Manual</strong>, 393172, en, V<strong>2.3</strong> 8 - 111
8 - Configuration Tool<br />
Device Driver Configuration<br />
Advanced DITI handling<br />
Check this checkbox if you want to use to use a special driver for exchanging<br />
DITIs. The special driver is not provided with the standard <strong>Freedom</strong> <strong>EVOware</strong><br />
installation.<br />
In case of script error panel<br />
Request system pause<br />
Check this checkbox if you want the driver to request a system pause if a<br />
script error is detected during command execution.<br />
Note: Do not confuse the settings made here with those made in the scheduling/<br />
error handling configuration. The settings in this tab define the reaction of the<br />
system if the Process Script driver outputs an error message during execution of a<br />
pipetting command. The settings for error handling take effect if the pipetting<br />
command has already been stopped due to an error.<br />
8.5.3<strong>2.3</strong> Process Script Configuration - Command Generation Tab<br />
The Command Generation tab is used to make settings for the default pre-actions<br />
and post-actions to be used when generating commands for the Process Script.<br />
The settings are only relevant to <strong>Freedom</strong> <strong>EVOware</strong> Plus.<br />
Fig. 8-61 Command Generation tab of the Process Script driver<br />
Command Generation panel<br />
Default pre-action<br />
This field is not relevant for the Process Script and can be ignored.<br />
Default post-action<br />
This field is not relevant for the Process Script and can be ignored.<br />
Default replace action<br />
This field is not relevant for the Process Script and can be ignored.<br />
8 - 112 <strong>Freedom</strong> <strong>EVOware</strong> <strong>Software</strong> <strong>Manual</strong>, 393172, en, V<strong>2.3</strong>
8 - Configuration Tool<br />
Device Driver Configuration<br />
Default start process action for advanced DITI handling<br />
This field is not relevant for the Process Script and can be ignored.<br />
8.5.33 Settings for the Transfer Station<br />
The Transfer Station is an unused location on the worktable of the pipetting<br />
instrument. If your pipetting instrument is fitted with two RoMa arms, it is used to<br />
transfer labware from one RoMa to another. The Transfer Station driver is only<br />
installed if you have installed <strong>Freedom</strong> <strong>EVOware</strong> with two RoMas.<br />
8.5.33.1 Transfer Station Configuration - Driver Tab<br />
See 8.5.35 “Driver Tab of the Configure Device Driver Properties Dialog Box”,<br />
8-116.<br />
8.5.33.2 Transfer Station Configuration - Settings Tab<br />
The Settings tab is used to make general settings for the Transfer Station driver:<br />
.<br />
Fig. 8-62 Settings tab of the Transfer Station driver<br />
Capacity panel<br />
Positions<br />
This specifies the number of Transfer Station sites. This field should normally<br />
be left at the default value of 1 (one site).<br />
8.5.34 Settings for Microplate Reader Devices<br />
The GENios, GENios Pro, Safire, Spectra, SpectraFluor, Sunrise, Ultra and Ultra<br />
Evolution microplate reader devices are controlled by the same driver and have a<br />
<strong>Freedom</strong> <strong>EVOware</strong> <strong>Software</strong> <strong>Manual</strong>, 393172, en, V<strong>2.3</strong> 8 - 113
8 - Configuration Tool<br />
Device Driver Configuration<br />
common configuration dialog. For general information on these devices, see the<br />
respective section in 16 “Device Commands”, 16-1.<br />
8.5.34.1 Microplate Reader Configuration - Driver Tab<br />
See 8.5.35 “Driver Tab of the Configure Device Driver Properties Dialog Box”,<br />
8-116.<br />
8.5.34.2 Microplate Reader Configuration - Settings Tab<br />
The Settings tab is used to make general settings for the microplate reader driver:<br />
.<br />
Fig. 8-63 Settings tab of the microplate reader driver<br />
Output panel<br />
Output File Default<br />
Specify the default file name and path to be used for the output data. If<br />
necessary, you can overwrite the file name and path when you add the<br />
measurement command to your process. See 16.42 “Specifying Output<br />
Filenames for Reader Data”, 16-128 for a description of the placeholders<br />
which can be used to generate reader data file names.<br />
Format<br />
This setting is used to swap rows and columns in the records of the output file.<br />
E.g. for a 96-well microplate, the data is output as 8 rows x 12 columns or 12<br />
rows x 8 columns.<br />
8 - 114 <strong>Freedom</strong> <strong>EVOware</strong> <strong>Software</strong> <strong>Manual</strong>, 393172, en, V<strong>2.3</strong>
8 - Configuration Tool<br />
Device Driver Configuration<br />
Orientation<br />
This setting is used to reverse the row order in the records of the output file.<br />
E.g. for a 96-well microplate, the first 12 records contain data for row 1 or for<br />
row 8. This can be useful if you want to insert the labware in the reader back<br />
to front.<br />
Start Delimiter<br />
Choose the delimiter to use at the beginning of each data record in the output<br />
file. You can choose none or blank (space character).<br />
End Delimiter<br />
Choose the delimiter to use at the end of each data record in the output file.<br />
You can choose none or blank (space character).<br />
Result Selection for Fluorescence Polarization panel<br />
Select the types of results you want to be written to the output file when carrying<br />
out fluorescence polarization. Each checkbox is only relevant for readers which<br />
support the respective measurement mode. The checkbox will be ignored if the<br />
reader does not support the respective mode.<br />
Result Selection for Fluorescence Lifetime panel<br />
Specify whether you want raw data to be written to the output file or not.<br />
Use old output file format where possible<br />
Check this box if you want the reader to write its output in the file format used<br />
before version 4.8.1 of FACTS and not in the XML format used by later<br />
versions of FACTS and by <strong>Freedom</strong> <strong>EVOware</strong>.<br />
Miscellaneous panel<br />
Temperature, Temperature Control<br />
Check the Temperature Control checkbox if you want to carry out reader<br />
measurements at a specified temperature. The required temperature is<br />
specified in the Temperature field. Refer to your reader manual for the allowed<br />
temperature range.<br />
Move plate out during initialization<br />
Check this checkbox if you want to move out the labware during the<br />
initialization procedure.<br />
Initialization Timeout<br />
Specify the maximum duration of the reader initialization procedure. An error<br />
message will be output if initialization is not completed within this time.<br />
Power Down Timeout<br />
Specify the delay after which the reader should go into standby (energy<br />
saving) mode. Specify 0 if you do not want the reader to go into standby<br />
mode. The reader can take several minutes to wake up from standby mode<br />
before it is ready for use.<br />
8.5.34.3 Microplate Reader Configuration - Conversion Tab<br />
The Conversion tab is used to make settings for measurement result handling.<br />
<strong>Freedom</strong> <strong>EVOware</strong> <strong>Software</strong> <strong>Manual</strong>, 393172, en, V<strong>2.3</strong> 8 - 115
8 - Configuration Tool<br />
Device Driver Configuration<br />
Fig. 8-64 Conversion tab of the microplate reader driver<br />
Measure panel<br />
In some cases it may be necessary to convert the reader output data to a different<br />
data format. Select Message to send a system message to any program<br />
configured to listen to the message that the measurement command has been<br />
completed and that the output data is ready for conversion. Please refer to the<br />
documentation on the <strong>Freedom</strong> <strong>EVOware</strong> Programming Interface (API) for<br />
information on developing external software which listens to <strong>Freedom</strong> <strong>EVOware</strong><br />
system messages.<br />
Alternatively, you can specify an external program to be executed on completion<br />
of the measurement command. Specify the path and file name of the external<br />
program directly or click Browse and choose the required program. The name of<br />
the file to be converted is passed to the external program as a command line<br />
parameter.<br />
8.5.35 Driver Tab of the Configure Device Driver Properties Dialog Box<br />
The Driver tab is used to configure, add and delete device commands. You can<br />
also specify the command execution times which should be used by the prescheduler<br />
during simulation.<br />
The Commands panel lists the device commands which are available for the<br />
device you have selected (the example below is for the Ultra Reader):<br />
8 - 116 <strong>Freedom</strong> <strong>EVOware</strong> <strong>Software</strong> <strong>Manual</strong>, 393172, en, V<strong>2.3</strong>
8 - Configuration Tool<br />
Device Driver Configuration<br />
Fig. 8-65 Configuring commands, pre-actions and post-actions<br />
Device commands are used to implement device-specific functions such as<br />
washing a microplate in a washer or reading a microplate in a reader. Each device<br />
has its own set of commands, whereby each device function has its own<br />
command. Please refer to the section on the respective device driver for a<br />
description of the device commands which are provided with the <strong>Freedom</strong><br />
<strong>EVOware</strong> installation (see 16 “Device Commands”, 16-1).<br />
8.5.35.1 Commands Panel<br />
If you select a command, the currently configured execution time is shown in the<br />
Expected Duration field. If necessary, correct this value by specifying a better<br />
approximation of the command execution time. This is the value which is shown in<br />
the Execution Time field of the Edit Parameters dialog box when you add the<br />
command to your process. The execution time does not include the execution<br />
times of the pre-actions and post-actions of the command, if any (see below).<br />
If necessary, you can fine tune the execution time for each process step<br />
individually when you add the process step to the Process Editor (see<br />
9.10.2.1 “General Tab”, 9-71).<br />
Click Add to add a new command. Then enter a name for the command and<br />
specify the default execution time in the Edit Command dialog box which is then<br />
shown.<br />
<strong>Freedom</strong> <strong>EVOware</strong> <strong>Software</strong> <strong>Manual</strong>, 393172, en, V<strong>2.3</strong> 8 - 117
8 - Configuration Tool<br />
Device Driver Configuration<br />
Fig. 8-66 Edit Command dialog box<br />
By convention, command names start with the underline character “_”.<br />
Commands are already provided for all standard device functions, so it is normally<br />
not necessary or meaningful to create new commands.<br />
Click EdIt to change the name and or default execution time of the currently<br />
selected command. We only recommend you to rename new commands which<br />
you have created (and not the standard commands).<br />
Click Delete to delete the currently selected command.<br />
Note: You can only delete commands which are not currently used in any process<br />
which is stored in the <strong>Freedom</strong> <strong>EVOware</strong> database<br />
8.5.35.2 Parameters Tab<br />
Some commands perform actions on objects such as microplates. The objects are<br />
then defined as parameters of the command (“command parameters”). Click the<br />
Parameters tab to see the parameters of the command which is selected in the<br />
Commands panel (see Fig. 8-65, 8-117).<br />
Click Add to add a new parameter to the command. This opens the Edit<br />
Parameter dialog box:<br />
Fig. 8-67 Edit Parameter dialog box<br />
The list shows all available parameter types. Choose the required parameter type<br />
from the pull-down list, specify the required value of the parameter in the Name<br />
field and click OK when you have made your entries.<br />
To edit an existing parameter, select it in the Parameters tab and click Edit to open<br />
the Edit Parameter dialog box. Choose a new parameter type from the pull-down<br />
list and enter the required value of the parameter in the Name field.<br />
To delete an existing parameter, select it in the Parameters tab and click Delete.<br />
8 - 118 <strong>Freedom</strong> <strong>EVOware</strong> <strong>Software</strong> <strong>Manual</strong>, 393172, en, V<strong>2.3</strong>
8 - Configuration Tool<br />
Device Driver Configuration<br />
8.5.35.3 Pre-actions and Post-actions Tabs<br />
In some cases it is necessary to carry out additional actions before and after the<br />
command is executed. This done using pre-actions and/or post-actions –<br />
commands which are always carried out before and after the main command. For<br />
example, if you want to scan labware in a Tecan Ultra reader with the Measure<br />
command, it is necessary to open the reader door (with the Ultra_Open<br />
command) and to move the labware to the reader using the plate robot (with the<br />
RoMa_MoveObject command). To make sure that the door is opened in time, the<br />
door must be opened before moving the labware. Another RoMa_MoveObject<br />
command and an Ultra_Close command are needed when the scanning operation<br />
is finished. The door must be closed after moving the labware.<br />
The process diagram is simplified by implementing the additional actions as preactions<br />
and post-actions which are linked to the Measure command. <strong>EVOware</strong><br />
then adds the pre-actions and post-actions to the Measure command<br />
automatically. This avoids having to specify these four additional steps for each<br />
Measure command manually.<br />
The pre-actions and post-actions tabs list the pre-actions and post-actions which<br />
are configured for the device command which is selected in the Commands panel:<br />
Fig. 8-68 Configuring pre-actions and post-actions for the device command<br />
With few exceptions (such as Open and Close commands for reader doors), all of<br />
the standard pre-actions and post-actions are movement commands for the plate<br />
robot (RoMa_MoveObject commands). See 8.5.35.5 “RoMa_MoveObject<br />
Command”, 8-121.<br />
Click Delete to delete the currently selected pre-action or post-action. Click Copy<br />
to copy the currently selected pre-action or post-action. The new pre-action or<br />
post-action will have the same settings as the one you copied.<br />
Click the Up and Down buttons to change the sort order of the pre-actions and<br />
post-actions. This changes the sequence with which the pre-actions and postactions<br />
are carried out. Taking the above example of the Measure command for<br />
the Ultra reader, the door must be opened before the plate robot brings the<br />
labware.<br />
<strong>Freedom</strong> <strong>EVOware</strong> <strong>Software</strong> <strong>Manual</strong>, 393172, en, V<strong>2.3</strong> 8 - 119
8 - Configuration Tool<br />
Device Driver Configuration<br />
8.5.35.4 Editing Pre-actions and Post-actions<br />
To edit a pre-action or post-action, click the Pre-actions or the Post-actions tab,<br />
select the required entry and click Edit to display the Pre-actions / Post-actions<br />
dialog box.<br />
Click the Execution Parameters button to edit the execution parameters for the<br />
command (the settings you make only apply to the selected pre-action or post<br />
action; execution parameters for process steps are configured in the Process<br />
Editor). The Execution Parameters button has no effect if the command does not<br />
have any execution parameters.<br />
To add a pre-action or post-action, click the Pre Actions or the Post Actions tab<br />
and click Add to display the Pre-actions / Post-actions dialog box:<br />
Fig. 8-69 Editing pre-actions and post-actions<br />
Then choose the command to be executed as a pre-action or post-action from the<br />
pull-down list and specify its default execution time in the Expected Duration field.<br />
Click the Execution Parameters button to specify the execution parameters. If the<br />
command has any, a dialog box will appear so you can specify them.<br />
The Object Parameters panel lists the parameters which are needed by the<br />
selected command. Select an object parameter and choose the required value<br />
from the list in the Value panel. Click the Parameters radio button to show predefined<br />
constants. Click the Variables radio button to show defined instances of<br />
objects.<br />
The Value panel shows the parameters and variables which can be chosen for the<br />
selected object parameter, as follows:<br />
8 - 120 <strong>Freedom</strong> <strong>EVOware</strong> <strong>Software</strong> <strong>Manual</strong>, 393172, en, V<strong>2.3</strong>
8 - Configuration Tool<br />
Device Driver Configuration<br />
Tab. 8-12 Parameters and variables versus object parameter types<br />
Object parameter<br />
type Placeholder Variables<br />
Object or MP Labware site on the<br />
worktable<br />
Location or Device or labware<br />
site<br />
Tool or On-the-fly tool (e.g.<br />
barcode scanner) a)<br />
a) This field is normally set to . On-the-fly tools are normally<br />
specified in the Process Editor using drag and drop.<br />
is a placeholder which represents the original location of the object (the<br />
labware source). is a placeholder to indicate that the parameter is<br />
unused.<br />
If necessary you can specify custom pre-action and/or post-actions for each<br />
process step individually when you add the process step to the Process Editor<br />
(see 9.10.3 “Pre-actions / Post-actions (Custom)”, 9-72).<br />
8.5.35.5 RoMa_MoveObject Command<br />
With the exception of Open and Close commands (e.g. for reader doors), most of<br />
the pre-actions and post-actions for device commands are RoMa_MoveObject<br />
commands. They are used to move an object - typically a microplate - to and from<br />
the device. The RoMa_MoveObject command has three command parameters<br />
but does not have any pre-actions or post-actions. The three command<br />
parameters (Object, Location and Tool) are shown as three fields when you insert<br />
the command in the Process Editor:<br />
Fig. 8-70 Specifying locations<br />
The above figure is shown as an example only. The RoMa_MoveObject command<br />
is normally only used for pre-actions and post-actions and is not normally used<br />
directly in the Process Editor.<br />
See also 9.10.4 “Locations”, 9-75.<br />
<strong>Freedom</strong> <strong>EVOware</strong> <strong>Software</strong> <strong>Manual</strong>, 393172, en, V<strong>2.3</strong> 8 - 121
8 - Configuration Tool<br />
Device Driver Configuration<br />
8 - 122 <strong>Freedom</strong> <strong>EVOware</strong> <strong>Software</strong> <strong>Manual</strong>, 393172, en, V<strong>2.3</strong>
9 - Specifying Your Instrument Setup<br />
Instrument Configuration<br />
9 Specifying Your Instrument Setup<br />
This chapter describes how to specify the setup of your pipetting instrument in<br />
<strong>Freedom</strong> <strong>EVOware</strong>. <strong>Freedom</strong> <strong>EVOware</strong> automatically detects the presence of<br />
certain instrument options by interrogating the pipetting instrument. However, it is<br />
necessary to provide <strong>Freedom</strong> <strong>EVOware</strong> with additional information which cannot<br />
be determined by interrogation – such as the dimensions and properties of the<br />
carriers and the labware (e.g. microplates) you want to use – and with other<br />
details such as the barcode types which should be accepted by the barcode<br />
scanner. The latter depend on the design of your barcode labels.<br />
9.1 Instrument Configuration<br />
<strong>Freedom</strong> <strong>EVOware</strong> stores information on fixed and variable parts of the pipetting<br />
instrument in an internal database and a set of configuration files. It also stores<br />
information on the dimensions of carriers and labware items and the configuration<br />
settings for the optional devices.<br />
Note: If you are setting up a new pipetting instrument, use the Setup & Service<br />
software to check and calibrate the reference coordinates of the hardware. This is<br />
normally done for you by the Tecan Field Service Engineer when installing the<br />
pipetting instrument and the optional devices. See 1.2 “Reference Documents”,<br />
1-3 for information on this software.<br />
The following lists the items you need to configure when setting up the pipetting<br />
instrument in <strong>Freedom</strong> <strong>EVOware</strong> (some of the items refer to options which may<br />
not be fitted to your instrument):<br />
Carriers<br />
To edit a carrier, double click on the carrier name in the Labware section of the<br />
Control Bar (see 9.5 “Configuring Carriers”, 9-39).<br />
Labware<br />
To edit a labware item, double click on the labware name in the Labware<br />
section of the Control Bar (see 9.4 “Configuring Labware”, 9-15).<br />
Note: The <strong>Freedom</strong> <strong>EVOware</strong> database already contains a large selection of predefined<br />
carrier and labware types. You only need to create or edit carriers or<br />
labware if you cannot find a standard item which is suitable for your needs.<br />
Vectors for the plate robot(s) and the tube robot(s)<br />
To edit a robot vector double click on the vector name in the Robot Vectors<br />
section of the Control Bar (see 9.6 “Creating and Editing Plate Robot Vectors”,<br />
9-55 and 9.7 “Creating and Editing Tube Robot Vectors”, 9-63).<br />
Appropriate robot vectors may already be provided with your <strong>Freedom</strong><br />
<strong>EVOware</strong> installation.<br />
Liquid Handling Arm (LiHa)<br />
The Liquid Handling Arm is configured using the Configuration Tool (see<br />
8.4.2.1, 8-22).<br />
PosID<br />
The PosID barcode scanner is configured using the Configuration Tool (see<br />
8.4.2.2, 8-28).<br />
<strong>Freedom</strong> <strong>EVOware</strong> <strong>Software</strong> <strong>Manual</strong>, 393172, en, V<strong>2.3</strong> 9 - 1
9 - Specifying Your Instrument Setup<br />
Basic Concepts<br />
MPO/SPO LICOS<br />
The MPO/SPO LICOS system is configured using the Configuration Tool (see<br />
8.4.<strong>2.3</strong>, 8-29).<br />
Chemical System<br />
The Chemical System is configured using the Configuration Tool (see<br />
8.4.2.5, 8-30).<br />
Doorlocks<br />
The Doorlocks are configured using the Configuration Tool (see 8.4.2.7, 8-<br />
31).<br />
Liquid Classes<br />
To edit a liquid class, double click on the liquid class name in the Liquid<br />
Classes section of the Control Bar (see 10.1 “Liquid Classes Editor”, 10-1).<br />
Device drivers<br />
Global settings for device drivers are configured using the Configuration Tool<br />
(see 8.4 “Device Settings”, 8-21).<br />
9.2 Basic Concepts<br />
9.2.1 Introduction to Carriers and Labware<br />
<strong>Freedom</strong> <strong>EVOware</strong> allows you to define an object (e.g. a microplate) once only,<br />
and then to use it at any required position on the worktable. This is because<br />
<strong>Freedom</strong> <strong>EVOware</strong> uses a hierarchical system for the coordinates:<br />
• The labware coordinates are relative to the site on which the labware is<br />
placed.<br />
• The site coordinates are relative to the carrier.<br />
• The carrier offsets are relative to the grid position on the worktable (see also<br />
Fig. 9-17 “Carrier dimensions and X/Y offsets”, 9-46).<br />
• The grid positions on the worktable have a periodic spacing of 25 mm.<br />
This hierarchy allows you to place the labware at any suitable site, carrier and<br />
worktable position without having to redefine its coordinates.<br />
The following figure shows the relationship between labware, carriers and the<br />
worktable:<br />
9 - 2 <strong>Freedom</strong> <strong>EVOware</strong> <strong>Software</strong> <strong>Manual</strong>, 393172, en, V<strong>2.3</strong>
9 - Specifying Your Instrument Setup<br />
Moving the Arms and Other Devices<br />
Fig. 9-1<br />
Labware, carrier and worktable<br />
When you set up the worktable for your <strong>Freedom</strong> <strong>EVOware</strong> script, you first<br />
choose a carrier with the required number of sites (see 9.5 “Configuring Carriers”,<br />
9-39). Each of the sites can hold labware. If you cannot find the carrier you<br />
need in the <strong>Freedom</strong> <strong>EVOware</strong> database, you can define a new carrier (see<br />
9.5 “Configuring Carriers”, 9-39).<br />
You then choose the labware you want to use. If you cannot find the labware you<br />
need in the <strong>Freedom</strong> <strong>EVOware</strong> database, you can define a new labware item (see<br />
9.4 “Configuring Labware”, 9-15).<br />
In the third step you position the carriers on the worktable and place the labware<br />
onto the carriers (see 11.3.1 “Setting Up Carriers on the Worktable”, 11-2) and<br />
e.g. 11.4.1 “Choosing Labware for a Pipetting Script”, 11-4.<br />
The procedure to follow to set up a script or process is described in detail in<br />
11.4 “Setting Up a Pipetting Script in <strong>Freedom</strong> <strong>EVOware</strong> <strong>Standard</strong>”, 11-4 and<br />
11.5 “Setting Up a Process in <strong>Freedom</strong> <strong>EVOware</strong> Plus”, 11-7.<br />
9.3 Moving the Arms and Other Devices<br />
Positions in <strong>Freedom</strong> <strong>EVOware</strong> are measured and checked by moving the LiHa,<br />
the RoMa, the PnP, the MCA, the Te-MO or the PosID to the required position by<br />
pressing keys on the numeric keypad. You can then store the current coordinates<br />
in the appropriate dialog box for the object. Positions are defined in instrument<br />
steps, i.e. the smallest unit of movement of the servo motors (0.1 mm). The<br />
pipetting instrument’s coordinate system uses three axes for the LiHa (X, Y, and<br />
Z), five axes for the RoMa (X, Y, Z, R, and G), five axes for the PnP (X, Y, Z, R,<br />
and G), four axes for the MCA96 (X, Y, Z, G), three axes for the MCA384 (X, Y, Z),<br />
five axes for the Te-MO (X, Y1, Y2, Y3 and Z) and three axes for the PosID (X, Y<br />
and B).<br />
<strong>Freedom</strong> <strong>EVOware</strong> <strong>Software</strong> <strong>Manual</strong>, 393172, en, V<strong>2.3</strong> 9 - 3
9 - Specifying Your Instrument Setup<br />
Moving the Arms and Other Devices<br />
9.3.1 Moving the LiHa<br />
The LiHa (Liquid Handling Arm) is mounted on the X-slide and holds the pipetting<br />
tips. On the pipetting instrument, the origin of the LiHa coordinate system (X=0,<br />
Y=0, Z=0) is the rear left of the worktable with the pipetting tips raised. The three<br />
axes of the LiHa are defined as follows:<br />
Tab. 9-1 Movement axes for the LiHa<br />
X<br />
Y<br />
Z<br />
From left to right<br />
From rear to front<br />
From from top to bottom<br />
When editing an object for which a position has to be specified, an additional<br />
dialog box appears which helps you to specify certain movements:<br />
Fig. 9-2<br />
Move LiHa dialog box<br />
The LIHA tab shows the current position of the LiHa in instrument steps (0.1 mm).<br />
If your instrument is not fitted with a LiHa, the LIHA tab is not displayed unless you<br />
are running in offline mode.<br />
The Z-movements panel lets you select which tips should be moved in the Z-<br />
direction. You can specify the first tip to move and the total number of tips to<br />
move.<br />
Get Tips, Drop Tips<br />
If you are teaching with DITIs, click these buttons if you want to pick up or<br />
drop the DITIs. They open the direct commands Get DITIs and Drop DITIs<br />
respectively (see 15.7 “Get DITIs Command”, 15-13 and 15.8 “Drop DITIs<br />
Command”, 15-14). The DITIs must be fetched using these buttons (or<br />
using the direct commands) and not by using any other method such as<br />
mounting by hand.<br />
If necessary, e.g. when teaching a position, you can move the LiHa manually<br />
using the numeric keypad (make sure that the NUM Lock key is pressed):<br />
9 - 4 <strong>Freedom</strong> <strong>EVOware</strong> <strong>Software</strong> <strong>Manual</strong>, 393172, en, V<strong>2.3</strong>
9 - Specifying Your Instrument Setup<br />
Moving the Arms and Other Devices<br />
Tab. 9-2 Moving the LiHa using the keys on the numeric keypad<br />
8 : rear (-Y) 9 : up (-Z)<br />
4 : left (-X) 6 : right (+X)<br />
2 : front (+Y) 3 : down (+Z)<br />
Each time you press one of these keys, the arm is moved by a single step. Keep<br />
the key pressed to move the arm by two steps per second. If you also press the<br />
CONTROL key, the arm is accelerated until it reaches a certain maximum speed.<br />
Note: You cannot use the cursor keys to move the arm since they have default<br />
functions in Windows applications.<br />
9.3.2 Moving the RoMa (Plate Robot)<br />
The RoMa (Robot Manipulator Arm) is a robot arm with gripper fingers that can<br />
grip and move objects such as microplates. On the pipetting instrument, the origin<br />
of the RoMa coordinate system (X=0, Y=0, Z=0) is the rear left of the worktable<br />
with the gripper raised and pointing towards the front of the instrument. The five<br />
axes of the RoMa are defined as follows:<br />
Tab. 9-3 Movement axes for the RoMa<br />
X<br />
Y<br />
Z<br />
R<br />
G<br />
From left to right<br />
From rear to front<br />
From top to bottom<br />
Clockwise rotation of the gripper when<br />
viewed from above<br />
From narrow to wide gripper distance<br />
When editing an object for which a position has to be specified, an additional<br />
dialog box appears which helps you to specify certain movements:<br />
<strong>Freedom</strong> <strong>EVOware</strong> <strong>Software</strong> <strong>Manual</strong>, 393172, en, V<strong>2.3</strong> 9 - 5
9 - Specifying Your Instrument Setup<br />
Moving the Arms and Other Devices<br />
Fig. 9-3<br />
Move RoMa dialog box<br />
The Plate Robot tab shows the current position of the RoMa in instrument steps<br />
(0.1 mm). The R parameter (gripper rotation) is measured in 0.1° steps. If your<br />
instrument is not fitted with a RoMa, the Plate Robot tab is not displayed unless<br />
you are running in offline mode.<br />
If necessary, e.g. when teaching a position, you can move the RoMa manually<br />
using the numeric keypad (make sure that the NUM Lock key is pressed):<br />
Tab. 9-4 Moving the RoMa using the keys on the numeric keypad<br />
7 : clockwise (+R) 8 : rear (-Y) 9 : up (-Z)<br />
4 : left (-X) 6 : right (+X)<br />
1 : counterclockwise (-R) 2 : front (+Y) 3 : down (+Z)<br />
0 : narrow (-G) , : wide (+G)<br />
Each time you press one of these keys, the arm is moved by a single step. Keep<br />
the key pressed to move the arm by two steps per second. If you also press the<br />
CONTROL key, the arm is accelerated until it reaches a certain maximum speed.<br />
Note: You cannot use the cursor keys to move the arm since they have default<br />
functions in Windows applications.<br />
9.3.3 Moving the PnP (Tube Robot)<br />
The PnP (Pick and Place) is a robot arm with gripper fingers that can grip and<br />
move small objects such as tubes. On the pipetting instrument, the origin of the<br />
PnP coordinate system (X=0, Y=0, Z=0) is the rear left of the worktable with the<br />
gripper raised. The five axes of the PnP are defined as follows:<br />
9 - 6 <strong>Freedom</strong> <strong>EVOware</strong> <strong>Software</strong> <strong>Manual</strong>, 393172, en, V<strong>2.3</strong>
9 - Specifying Your Instrument Setup<br />
Moving the Arms and Other Devices<br />
Tab. 9-5 Movement axes for the PnP<br />
X<br />
Y<br />
Z<br />
R<br />
G<br />
From left to right<br />
From rear to front<br />
From top to bottom<br />
Clockwise rotation of the gripper when<br />
viewed from above<br />
From narrow to wide gripper distance<br />
When editing an object for which a position has to be specified, an additional<br />
dialog box appears which helps you to specify certain movements:<br />
Fig. 9-4<br />
Move PnP dialog box<br />
The Tube Robot tab shows the current position of the PnP in instrument steps<br />
(0.1 mm). If your instrument is not fitted with a PnP, the Tube Robot tab is not<br />
displayed unless you are running in offline mode.<br />
If necessary, e.g. when teaching a position, you can move the PnP manually<br />
using the numeric keypad (make sure that the NUM Lock key is pressed):<br />
Tab. 9-6 Moving the PnP using the keys on the numeric keypad<br />
7 : clockwise (+R) 8 : rear (-Y) 9 : up (-Z)<br />
4 : left (-X) 6 : right (+X)<br />
1 : counterclockwise (-R) 2 : front (+Y) 3 : down (+Z)<br />
0 : narrow (-G) , : wide (+G)<br />
Each time you press one of these keys, the arm is moved by a single step. Keep<br />
the key pressed to move the arm by two steps per second. If you also press the<br />
CONTROL key, the arm is accelerated until it reaches a certain maximum speed.<br />
<strong>Freedom</strong> <strong>EVOware</strong> <strong>Software</strong> <strong>Manual</strong>, 393172, en, V<strong>2.3</strong> 9 - 7
9 - Specifying Your Instrument Setup<br />
Moving the Arms and Other Devices<br />
Note: You cannot use the cursor keys to move the arm since they have default<br />
functions in Windows applications.<br />
9.3.4 Moving the MCA96<br />
The MCA96 (Multi Channel Arm 96) is a special liquid handling arm which is fitted<br />
with a 96-tip pipetting head. It is mounted on the X-slide and can be optionally<br />
fitted with gripper fingers to allow it to pick up and move labware. In contrast to the<br />
RoMa, the gripper fingers cannot be rotated (they are always parallel to the X axis<br />
of the pipetting instrument).<br />
On the pipetting instrument, the origin of the MCA96 coordinate system (X=0,<br />
Y=0, Z=0) is the rear left of the worktable with the pipetting tips raised. The four<br />
axes of the MCA96 are defined as follows:<br />
Tab. 9-7 Movement axes for the MCA96<br />
X<br />
Y<br />
Z<br />
G<br />
From left to right<br />
From rear to front<br />
From from top to bottom<br />
From narrow to wide gripper distance<br />
When editing an object for which a position has to be specified, an additional<br />
dialog box appears which helps you to specify certain movements:<br />
Fig. 9-5<br />
Move MCA96 dialog box<br />
The MCA96 tab shows the current position of the MCA96 in instrument steps<br />
(0.1 mm). If your instrument is not fitted with a MCA, the MCA96 tab is not<br />
displayed unless you are running in offline mode.<br />
Get Tips, Drop Tips<br />
If you are teaching labware with wells (such as microplates), click these<br />
buttons if you want to pick up or drop a tipblock or some DITIs. These buttons<br />
are inactive (grey) if you teach an MCA96 tipblock or MCA96 DITI labware.<br />
9 - 8 <strong>Freedom</strong> <strong>EVOware</strong> <strong>Software</strong> <strong>Manual</strong>, 393172, en, V<strong>2.3</strong>
9 - Specifying Your Instrument Setup<br />
Moving the Arms and Other Devices<br />
If necessary, e.g. when teaching a position, you can move the MCA96 manually<br />
using the numeric keypad (make sure that the NUM Lock key is pressed):<br />
Tab. 9-8 Moving the MCA96 using the keys on the numeric keypad<br />
7 : 8 : rear (-Y) 9 : up (-Z)<br />
4 : left (-X) 6 : right (+X)<br />
1 : 2 : front (+Y) 3 : down (+Z)<br />
0 : narrow (-G) , : wide (+G)<br />
Each time you press one of these keys, the arm is moved by a single step. Keep<br />
the key pressed to move the arm by two steps per second. If you also press the<br />
CONTROL key, the arm is accelerated until it reaches a certain maximum speed.<br />
Note: You cannot use the cursor keys to move the arm since they have default<br />
functions in Windows applications.<br />
9.3.5 Moving the MCA384<br />
The MCA384 (Multi Channel Arm MCA384) is a special liquid handling arm which<br />
can be fitted with a 96-tip or 384-tip pipetting head. It is mounted on the X-slide<br />
and can be optionally fitted with a gripper module (CGM, common gripper module)<br />
which can be used to pick up and move labware. The gripper module can be<br />
rotated.<br />
On the pipetting instrument, the origin of the MCA384 coordinate system (X=0,<br />
Y=0, Z=0) is the rear left of the worktable with the pipetting tips raised. The three<br />
axes of the MCA384 are defined as follows:<br />
Tab. 9-9 Movement axes for the MCA384<br />
X<br />
Y<br />
Z<br />
From left to right<br />
From rear to front<br />
From from top to bottom<br />
When editing an object for which a position has to be specified, an additional<br />
dialog box appears which helps you to specify certain movements:<br />
<strong>Freedom</strong> <strong>EVOware</strong> <strong>Software</strong> <strong>Manual</strong>, 393172, en, V<strong>2.3</strong> 9 - 9
9 - Specifying Your Instrument Setup<br />
Moving the Arms and Other Devices<br />
Fig. 9-6<br />
Move MCA384 dialog box<br />
The MCA384 tab shows the current position of the MCA384 in instrument steps<br />
(0.1 mm). If your instrument is not fitted with an MCA384, the MCA384 tab is not<br />
displayed unless you are running in offline mode.<br />
Get Tips, Drop Tips<br />
If you are teaching labware with wells (such as microplates), click these<br />
buttons if you want to to pick up some DITIs. The pipetting head must already<br />
be fitted with a suitable head adapter for DITIs. These buttons cannot be used<br />
to pick up a head adapter with fixed tips. These buttons are inactive (grey) if<br />
you teach an MCA384 head adapter or MCA384 DITI labware.<br />
Lock DITI carrier<br />
Check this checkbox to lock the DITI carrier in place before picking up the<br />
DITIs. The DITI carrier should normally be locked before picking up the DITIs<br />
except for special applications.<br />
If necessary, e.g. when teaching a position, you can move the MCA384 manually<br />
using the numeric keypad (make sure that the NUM Lock key is pressed):<br />
Tab. 9-10 Moving the MCA384 using the keys on the numeric keypad<br />
7 : 8 : rear (-Y) 9 : up (-Z)<br />
4 : left (-X) 6 : right (+X)<br />
1 : 2 : front (+Y) 3 : down (+Z)<br />
Each time you press one of these keys, the arm is moved by a single step. Keep<br />
the key pressed to move the arm by two steps per second. If you also press the<br />
CONTROL key, the arm is accelerated until it reaches a certain maximum speed.<br />
Note: You cannot use the cursor keys to move the arm since they have default<br />
functions in Windows applications.<br />
9 - 10 <strong>Freedom</strong> <strong>EVOware</strong> <strong>Software</strong> <strong>Manual</strong>, 393172, en, V<strong>2.3</strong>
9 - Specifying Your Instrument Setup<br />
Moving the Arms and Other Devices<br />
9.3.6 Moving the CGM<br />
The CGM (Common Gripper Module) is a robot arm with gripper fingers that can<br />
grip and move objects such as microplates. It is a hardware option for the<br />
MCA384 (Multi Channel Arm 384). The gripper module can be rotated.<br />
On the pipetting instrument, the origin of the CGM coordinate system (X=0, Y=0,<br />
Z=0) is the rear left of the worktable with the gripper raised and pointing towards<br />
the front of the instrument. The five axes of the CGM are defined as follows:<br />
Tab. 9-11 Movement axes for the CGM<br />
X<br />
Y<br />
Z<br />
R<br />
G<br />
MCH_Y<br />
From left to right<br />
From rear to front<br />
From top to bottom<br />
Clockwise rotation of the gripper when<br />
viewed from above<br />
From narrow to wide gripper distance<br />
Y position of the MCA384 pipetting head<br />
When editing an object for which a position has to be specified, an additional<br />
dialog box appears which helps you to specify certain movements:<br />
Fig. 9-7<br />
Move CGM dialog box<br />
The CGM tab shows the current position of the CGM in instrument steps<br />
(0.1 mm). The R parameter (gripper rotation) is measured in 0.1° steps. When you<br />
teach a CGM vector, <strong>Freedom</strong> <strong>EVOware</strong> also needs to know the Y position of the<br />
MCA384 pipetting head (MCH Y) to ensure that the CGM will not collide with the<br />
MCA384 as it moves.<br />
If your instrument is not fitted with a CGM, the CGM tab is not displayed unless<br />
you are running in offline mode.<br />
If necessary, e.g. when teaching a position, you can move the CGM manually<br />
using the numeric keypad (make sure that the NUM Lock key is pressed):<br />
<strong>Freedom</strong> <strong>EVOware</strong> <strong>Software</strong> <strong>Manual</strong>, 393172, en, V<strong>2.3</strong> 9 - 11
9 - Specifying Your Instrument Setup<br />
Moving the Arms and Other Devices<br />
Tab. 9-12 Moving the CGM using the keys on the numeric keypad<br />
7 : clockwise (+R) 8 : rear (-Y) 9 : up (-Z)<br />
4 : left (-X) 6 : right (+X)<br />
1 : counterclockwise (-R) 2 : front (+Y) 3 : down (+Z)<br />
0 : narrow (-G) , : wide (+G)<br />
Tab. 9-13 Moving the MCA384 pipetting head using the keys on the numeric keypad<br />
- : rear (-Y)<br />
+ : front (+Y)<br />
Each time you press one of these keys, the arm is moved by a single step. Keep<br />
the key pressed to move the arm by two steps per second. If you also press the<br />
CONTROL key, the arm is accelerated until it reaches a certain maximum speed.<br />
Note: You cannot use the cursor keys to move the arm since they have default<br />
functions in Windows applications.<br />
9.3.7 Moving the Te-MO<br />
Moving the Te-MO (Tecan Multi-pipetting Option) is similar to moving the LiHa or<br />
RoMa. The five axes of the Te-MO are defined as follows:<br />
Tab. 9-14 Movement axes for the Te-MO<br />
X<br />
Y1<br />
Y2<br />
Y3<br />
Z<br />
Te-MO head, from left to right<br />
Left slide, from rear to front<br />
Middle slide, from rear to front<br />
Right slide, from rear to front<br />
Te-MO head, from top to bottom<br />
When editing an object for which a position has to be specified, an additional<br />
dialog box appears which helps you to specify certain movements:<br />
9 - 12 <strong>Freedom</strong> <strong>EVOware</strong> <strong>Software</strong> <strong>Manual</strong>, 393172, en, V<strong>2.3</strong>
9 - Specifying Your Instrument Setup<br />
Moving the Arms and Other Devices<br />
Fig. 9-8<br />
Move Te-MO dialog box<br />
The Te-MO tab shows the current position of the Te-MO in instrument steps<br />
(0.1 mm). If your instrument is not fitted with a Te-MO, the Te-MO tab is not<br />
displayed unless you are running in offline mode.<br />
To move a specified Te-MO site to the RoMa transfer position (also called the<br />
exchange position), for example to test a RoMa (plate robot) vector or to<br />
exchange labware manually, select the slide and site from the pop-up list and click<br />
Move to Transfer Position. In this position, the LiHa or RoMa can access the<br />
specified site without colliding with the Te-MO pipetting head. When the Te-MO<br />
reaches the transfer position and you are using an APC (Active Positioning<br />
Carrier), click Open APC to release the labware. Click Close APC to lock the<br />
labware in position again. You can only release or lock the labware at the transfer<br />
position.<br />
If necessary, e.g. when teaching a position, you can move the Te-MO pipetting<br />
head and slides manually using the numeric keypad (make sure that the NUM<br />
Lock key is pressed):<br />
Tab. 9-15 Moving the Te-MO using the keys on the numeric keypad<br />
7 : Y1 rear (-Y) 8 : Y2 rear (-Y) 9 : Y3 rear (-Y) - : up (-Z)<br />
4 : left (-X) 6 : right (+X) + : down (+Z)<br />
1 : Y1 front (+Y) 2 : Y2 front (+Y) 3 : Y3 front (+Y)<br />
Each time you press one of these keys, the arm is moved by a single step. Keep<br />
the key pressed to move the arm by two steps per second. If you also press the<br />
CONTROL key, the arm is accelerated until it reaches a certain maximum speed.<br />
Note: You cannot use the cursor keys to move the arm since they have default<br />
functions in Windows applications.<br />
<strong>Freedom</strong> <strong>EVOware</strong> <strong>Software</strong> <strong>Manual</strong>, 393172, en, V<strong>2.3</strong> 9 - 13
9 - Specifying Your Instrument Setup<br />
Moving the Arms and Other Devices<br />
9.3.8 Moving the PosID Barcode Scanner<br />
The PosID (Positive Identification System) is a movable barcode scanner which<br />
can be used to read the barcode labels on carriers, labware and tubes. The PosID<br />
is installed at the rear of the pipetting instrument and is provided with a gripper<br />
which pulls the carrier towards the rear for barcode identification and then slides<br />
the carrier back into the pipetting position. The scanning head hinges to read<br />
barcodes which are attached to horizontal or vertical surfaces.<br />
Moving the PosID is similar to moving the LiHa or RoMa. On the pipetting<br />
instrument, the origin of the PosID coordinate system (X=0, Y=0, B=0) is the rear<br />
left of the worktable with the carrier gripper towards the front.<br />
Note: The description in this section also applies to the PosID-3.<br />
The three axes of the PosID are defined as follows:<br />
Tab. 9-16 Movement axes for the PosID<br />
X<br />
Y<br />
B<br />
PosID, from left to right<br />
PosID carrier gripper, from front to rear<br />
PosID scanner head, tilt head from vertical<br />
to horizontal<br />
When editing an object for which a position has to be specified, an additional<br />
dialog box appears which helps you to specify certain movements:<br />
Fig. 9-9<br />
Move Barcode Scanner dialog box<br />
The Barcode Scanner tab shows the current position of the PosID in instrument<br />
steps (0.1 mm). If your instrument is not fitted with a PosID, the Barcode Scanner<br />
tab is not displayed. The Barcode Scanner tab is not displayed either if you are<br />
running <strong>Freedom</strong> <strong>EVOware</strong> in offline mode. The Move Barcode Scanner dialog<br />
box is not intended for the Symbol barcode scanner, which cannot be moved.<br />
If necessary, e.g. when teaching a position, you can move the PosID manually<br />
using the numeric keypad (make sure that the NUM Lock key is pressed):<br />
9 - 14 <strong>Freedom</strong> <strong>EVOware</strong> <strong>Software</strong> <strong>Manual</strong>, 393172, en, V<strong>2.3</strong>
9 - Specifying Your Instrument Setup<br />
Configuring Labware<br />
Tab. 9-17 Moving the PosID using the keys on the numeric keypad<br />
7 : 8 : front (-Y) 9 : tilt to vertical (-B)<br />
4 : left (-X) 6 : right (+X)<br />
2 : rear (+Y) 3 : tilt to horizontal (+B)<br />
Each time you press one of these keys, the arm is moved by a single step. Keep<br />
the key pressed to move the arm by two steps per second. If you also press the<br />
CONTROL key, the arm is accelerated until it reaches a certain maximum speed.<br />
Note: You cannot use the cursor keys to move the arm since they have default<br />
functions in Windows applications.<br />
9.4 Configuring Labware<br />
Labware refers to consumable items such as microplates or sample tubes.<br />
Microplates have a regular arrangement of containers or cavities (wells) for<br />
holding liquids or samples. During pipetting, microplates are normally placed on<br />
carriers and tubes are inserted in tube racks which are placed on carriers.<br />
Carriers are fitted to the instrument’s worktable at pre-defined grid positions (see<br />
Fig. 9-1, 9-3).<br />
Note: The <strong>Freedom</strong> <strong>EVOware</strong> database already contains a large selection of predefined<br />
carrier and labware types. You only need to create or edit carriers or<br />
labware if you cannot find a standard item which is suitable for your needs.<br />
<strong>Freedom</strong> <strong>EVOware</strong> <strong>Software</strong> <strong>Manual</strong>, 393172, en, V<strong>2.3</strong> 9 - 15
9 - Specifying Your Instrument Setup<br />
Configuring Labware<br />
The three tabs of the following dialog box are used to configure labware (to get to<br />
this dialog box, double-click on the labware item in the Labware section of the<br />
Control Bar):<br />
Fig. 9-10 Edit Labware dialog box, Teaching tab<br />
It is recommended not to change the properties of the predefined carrier and<br />
labware types. Make a copy of the object with a new name if you want to alter any<br />
of the properties (see 5.4.1.12 “Context Menu for Objects in the Control Bar”, 5-<br />
14).<br />
9 - 16 <strong>Freedom</strong> <strong>EVOware</strong> <strong>Software</strong> <strong>Manual</strong>, 393172, en, V<strong>2.3</strong>
9 - Specifying Your Instrument Setup<br />
Configuring Labware<br />
The parameters in the Teaching tab are as follows:<br />
Wells (X), (Y)<br />
These two fields specify the well geometry:<br />
(X): Specify the total number of wells in the X-direction (max. 128).<br />
(Y): Specify the total number of wells in the Y-direction (max. 128).<br />
Number of compartments per well<br />
Some special labware types (e.g. for protein crystallography) have wells with<br />
several compartments (cavities). <strong>Freedom</strong> <strong>EVOware</strong> can pipette a different<br />
liquid into each of the compartments. Each well typically has one main<br />
compartment and one or more satellite compartments which are directly<br />
adjacent and are often smaller in size. Specify the number of compartments<br />
per well in this field. Specify 1 for normal labware. See also Compartment,<br />
below.<br />
Device to be used for teaching<br />
Choose the pipetting arm you want to use for teaching the dimensions of this<br />
labware item (Left LiHa, Right LiHa, MCA, MCA384 or Te-MO). The Te-MO<br />
option is only available if you have chosen labware on the Te-MO and<br />
<strong>Freedom</strong> <strong>EVOware</strong> is running in real mode (and attached to a Te-MO) or you<br />
are using the 3D simulation tool EVOSim.<br />
If your pipetting instrument is only fitted with DITIs (disposable tips), this pulldown<br />
list also shows DiTi types in brackets, for example LiHa (DiTi 200 µl).<br />
You must then choose the pipetting arm and DITI type which you want to use<br />
for teaching. <strong>Freedom</strong> <strong>EVOware</strong> uses the DITI type to determine the tip<br />
length. The tip length is specified with Tip Offset in the definition of the DITI<br />
rack for this DITI type (see 9.4.1 “Editing Labware, Well Dimensions Tab”,<br />
9-19).<br />
If the LiHa is fitted with a mixture of fixed tips and DITIs, teaching must be<br />
carried out with the fixed tips and DITI types are not shown in the pull-down<br />
list Device to be used for teaching.<br />
Position during definition<br />
Specify the carrier, grid and site that you want to use to configure the labware:<br />
Choose the carrier from the list and then choose the grid position and the site.<br />
An easy way to choose the correct carrier, grid, site and labware is to click on<br />
the labware in the Worktable Editor. Since you will need to closely observe the<br />
movements of the liquid handling arm, you should choose a site which has<br />
good accessibility.<br />
Position<br />
Compartment<br />
For special labware types which have wells with several compartments,<br />
choose the compartment you want to edit from the pull-down list. Then specify<br />
the position coordinates and the area for the selected compartment. Repeat<br />
this process for all of the compartments in the well. See Number of<br />
compartments per well, above, for more information. This pull-down list is<br />
inactive (gray) if the well only has one compartment.<br />
<strong>Freedom</strong> <strong>EVOware</strong> <strong>Software</strong> <strong>Manual</strong>, 393172, en, V<strong>2.3</strong> 9 - 17
9 - Specifying Your Instrument Setup<br />
Configuring Labware<br />
Well positions<br />
Eight fields are provided for you to specify the X, Y and Z positions of the wells<br />
in instrument steps (0.1 mm). See Tab. 9-18, 9-25 for more information. The<br />
positions are normally specified by manually moving the LiHa or the Te-MO<br />
pipetting head above the first and last wells of the labware and clicking the<br />
corresponding transfer... buttons (see 9.4.4 “Teaching the Labware<br />
Coordinates”, 9-26).<br />
If you have chosen labware with well offsets on the Well Dimensions tab (Well<br />
alignment radio buttons), an additional field is shown for the Y position of the<br />
first well in column 2. See 9.4.6 “Well Alignment”, 9-33 for more information.<br />
The green, blue and red lines illustrate the four Z positions which you have to<br />
specify. After specifying the coordinates, it is recommended to test them on<br />
another site (choose another site in the Site field and click move to to move<br />
the LiHa to the new site).<br />
The “chain” buttons next to the X, Y and Z fields lock the values together:<br />
– Chain locked : If a value is changed in one of the fields, the same<br />
change is also applied to the other fields in the same column. Example: If<br />
the labware is raised or lowered by exchanging a spacer plate, you can<br />
adjust all four Z parameters by the same offset in one step.<br />
– Chain unlocked : The values in each of the fields can be changed<br />
independently of the other fields in the same column.<br />
ATTENTION<br />
Risk of the tips moving to the wrong position on the worktable.<br />
• Choose the correct site before specifying any coordinates. Otherwise the tips<br />
might move to the wrong position on the worktable.<br />
Y-distance of wells<br />
Check that the Y-distance (the spacing between adjacent wells) which is<br />
shown graphically by the vertical bar lies within the green area (see 9.4.7 “Ydistance<br />
of Wells”, 9-33). If the vertical bar lies within the red area, you may<br />
have specified the coordinates incorrectly or inaccurately.<br />
Adjust Site button<br />
The Adjust Site button is used to adjust the carrier definition for a specified,<br />
single site to compensate for small manufacturing inaccuracies in a multi-site<br />
carrier without needing to switch to the Edit Carrier dialog box. To use this<br />
feature, choose the site you want to adjust and click the Move to buttons for<br />
Well #1 and for Z-Max to move the LiHa to the teaching position. Then fine<br />
tune the LiHa position using the numeric keypad and click Adjust Site to<br />
modify the carrier definition to match the current X, Y and Z coordinates. After<br />
saving your changes, they will also be visible in the Edit Carrier dialog box<br />
(the units in the Move dialog box are in 0.1 mm; the units in the Edit Carrier<br />
dialog box are in mm).<br />
9 - 18 <strong>Freedom</strong> <strong>EVOware</strong> <strong>Software</strong> <strong>Manual</strong>, 393172, en, V<strong>2.3</strong>
9 - Specifying Your Instrument Setup<br />
Configuring Labware<br />
9.4.1 Editing Labware, Well Dimensions Tab<br />
The Well dimensions tab is used to configure additional well parameters for<br />
labware:<br />
Fig. 9-11 Edit Labware dialog box, Well Dimension tab<br />
The parameters in the Well dimensions tab are as follows:<br />
Color<br />
Choose a unique color to make it easier for you to identify this labware type in<br />
the Worktable Editor. The default labware colors are as follows:<br />
• Labware (e.g. microplates): blue<br />
• Racks for tubes: blue-green<br />
• DiTi racks: violet<br />
• Labware for the wash station: orange<br />
• Default for all other labware types: blue<br />
Type<br />
Choose the labware type from the pull-down list. If necessary, choose the subtype<br />
from the second pull-down list. See 9.4.5 “Labware Types and DITI<br />
Types”, 9-32 for more information.<br />
<strong>Freedom</strong> <strong>EVOware</strong> <strong>Software</strong> <strong>Manual</strong>, 393172, en, V<strong>2.3</strong> 9 - 19
9 - Specifying Your Instrument Setup<br />
Configuring Labware<br />
Tip Capacity<br />
This field is only shown if you are configuring a LiHa DITI rack, a Te-MO DITI<br />
rack or a Te-MO Tipblock. Specify the DITI Capacity (range: 1 to 1000 µl). To<br />
prevent contamination, <strong>Freedom</strong> <strong>EVOware</strong> limits the total aspirated volume to<br />
the specified tip capacity.<br />
Tip Offset<br />
This field is only shown if you are configuring a LiHa DITI rack, a Te-MO DITI<br />
rack or a Te-MO Tipblock. Specify the DITI Offset in 0.1 mm (range: 0 to<br />
1000). The offset is used to compensate for the length differences of different<br />
tip and tipblock versions.<br />
Tip with filter<br />
This field is only shown if you are configuring a LiHa DITI rack, a Te-MO DITI<br />
rack or a Te-MO Tipblock. Check this checkbox if the tips are fitted with a filter.<br />
The filter serves to minimize the risk of aerosol contamination in the tip<br />
adapter or pipetting head.<br />
Tip Index<br />
<strong>Freedom</strong> <strong>EVOware</strong> automatically assigns a unique numeric index to each<br />
DITI type. You cannot edit the index manually. The DITI index is used e.g. by<br />
the Set DITI Type command in worklists and in advanced worklists.<br />
Vendor Name<br />
Specify the vendor name of the labware. In the case of DITI labware, Vendor<br />
Name refers to the vendor or manufacturer of the DITI tips, not the DITI rack.<br />
The vendor name is optional and is currently intended for documentation<br />
purposes only.<br />
If you are using the pressure-monitored pipetting (PMP) hardware option, the<br />
vendor name is stored in the pressure curve files which are created.<br />
Additional information<br />
This field is for information purposes only and allows you to enter some notes<br />
about this labware type.<br />
Link to<br />
This field is for information purposes only and is intended for the internet<br />
address (website URL) of the labware manufacturer.<br />
Labware shape<br />
Choose the shape of the well bottom.<br />
Well alignment<br />
Choose between “rectangular labware” or “rectangular labware with offset”.<br />
See 9.4.6 “Well Alignment”, 9-33 for more information.<br />
Tip-Touching Distance (mm), X or Y offset while pipetting<br />
This parameter is used when you activate tip touching in the liquid class. Tip<br />
touching is a special movement when dispensing a liquid. When tip touching<br />
is activated, <strong>Freedom</strong> <strong>EVOware</strong> dispenses to the destination container in the<br />
normal way, but then moves the tips to the side of the well and back before<br />
retracting them. This helps to remove any droplets which may be adhering to<br />
the tip.<br />
<strong>Freedom</strong> <strong>EVOware</strong> also uses this parameter if you select an offset (noncenter)<br />
X and/or Y position for aspiration or dispensing. This is done on the<br />
Aspirate or Dispense tab of the liquid class and is mainly used for the<br />
Te-MagS.<br />
9 - 20 <strong>Freedom</strong> <strong>EVOware</strong> <strong>Software</strong> <strong>Manual</strong>, 393172, en, V<strong>2.3</strong>
9 - Specifying Your Instrument Setup<br />
Configuring Labware<br />
Tips per well<br />
This parameter specifies the number of tips which can access the well at the<br />
same time. Specify “1” for normal wells. Specify the appropriate number for<br />
troughs (e.g. “8” for a Trough 100ml; specify “96” or “384” for Te-MO troughs).<br />
Before <strong>Freedom</strong> <strong>EVOware</strong> inserts tips into LiHa troughs, it slides the tips<br />
together to the minimum tip-to-tip spacing of 9 mm. Use this value to calculate<br />
the number of tips which can access the well at the same time.<br />
Depth of bottom<br />
For a well with a v-shaped bottom, specify the vertical distance in mm from the<br />
lowest point of the v (Z-max) to the beginning of the cylindrical part of the well.<br />
This is used for volume calculations and is important for tracking (keeping the<br />
tips immersed when aspirating or dispensing). For wells with a round<br />
(hemispherical) bottom, <strong>Freedom</strong> <strong>EVOware</strong> calculates the volume of the<br />
bottom automatically.<br />
Area<br />
Specify the area of the well in mm². Click Area to display a dialog box which<br />
helps you to calculate the area from the diameter or from the length and the<br />
width.<br />
Note: Troughs are normally specified with length and width. In this case, click<br />
“Area”, click “Length” and enter the length and the width.<br />
Robot vector, Create<br />
Click this button if you want to create or edit a tube robot vector for this<br />
labware (the button changes from Create to Edit if the robot vector has<br />
already been created). If your pipetting instrument is fitted with two tube<br />
robots, first choose the one you want to use (1 or 2). In this case you should<br />
create a vector for both tube robots. Tip: the home position for tube robot 1 is<br />
at the rear left of the pipetting instrument. Only one tube robot is shown in<br />
offline mode.<br />
<strong>Freedom</strong> <strong>EVOware</strong> <strong>Software</strong> <strong>Manual</strong>, 393172, en, V<strong>2.3</strong> 9 - 21
9 - Specifying Your Instrument Setup<br />
Configuring Labware<br />
9.4.2 Editing Labware, Advanced Tab<br />
The Advanced tab is used to configure advanced properties for labware:<br />
Fig. 9-12 Edit Labware dialog box, Advanced tab<br />
The parameters in the Advanced tab are as follows:<br />
Piercing panel<br />
If you activate Pierce through septum, <strong>Freedom</strong> <strong>EVOware</strong> executes special<br />
movements for septum piercing when accessing the labware. It will pierce from Z-<br />
Travel to Z-Start and then retract from Z-Start to Z-Travel. Liquid level detection is<br />
not available with this option activated.<br />
The Te-MO does not support septum piercing. If you make any entries in this<br />
panel, they will be ignored if the labware is used on the Te-MO.<br />
Pierce with<br />
Specify the piercing speed in mm/s.<br />
Retract with<br />
Specify the retract speed after piercing in mm/s.<br />
Piercing force<br />
Specify the required force to use for piercing the septum (range: 0 to 249).<br />
9 - 22 <strong>Freedom</strong> <strong>EVOware</strong> <strong>Software</strong> <strong>Manual</strong>, 393172, en, V<strong>2.3</strong>
9 - Specifying Your Instrument Setup<br />
Configuring Labware<br />
Precise Positioning panel<br />
If you activate this option, <strong>Freedom</strong> <strong>EVOware</strong> executes a special movement to<br />
increase positioning accuracy, e.g. for 1536 well plates. When accessing labware<br />
for the first time in a sequence of pipetting commands, it makes a normal move to<br />
X-Start/Y-Start. It then makes a high resolution move to the actual pipetting<br />
position. This sequence of movements eliminates mechanical backlash and<br />
ensures the highest possible accuracy. X-Start should be set to ca. 0.4 cm to the<br />
left of the first well of the labware. Y-Start should be set to ca. 0.4 cm behind the<br />
first well of the labware. Note: The first well is at the rear left of the labware.<br />
Precise positioning requires LiHa firmware version 1.2 or later. You cannot use<br />
precise positioning with earlier firmware versions.<br />
X-Start<br />
Specify the required X-Start position for the precise X movement. Besides<br />
typing the position manually, you can teach the position by moving the LiHa to<br />
the X-Start/Y-Start position and clicking the transfer button. This copies the<br />
current LiHa coordinates to the X-Start and Y-Start fields. See also<br />
9.3.1 “Moving the LiHa”, 9-4.<br />
Y-Start<br />
Specify the required Y-Start position for the precise Y movement. Besides<br />
typing the position manually, you can teach the position by moving the LiHa to<br />
the X-Start/Y-Start position and clicking the transfer button. This copies the<br />
current LiHa coordinates to the X-Start and Y-Start fields. See also<br />
9.3.1 “Moving the LiHa”, 9-4.<br />
Move with<br />
Specify the speed for the precise positioning movement in mm/s.<br />
Note: The Te-MO does not support precise positioning. If you make any entries in<br />
this panel, they will be ignored if the labware is used on the Te-MO.<br />
Grip Narrow, Wide<br />
Specify the spacing in mm between the RoMa grippers which should be used<br />
to grip the labware on the narrow side and on the wide side, respectively. To<br />
ensure a firm grip, the grippers will close by an additional 1 cm (this is limited<br />
by the specified grip force). To release the labware, the grippers will open by<br />
an additional 0.5 cm (default setting). Example: If Grip Narrow = 85 mm, the<br />
grippers will move to 90 mm to release the labware or to 75 mm to grip the<br />
labware.<br />
Stacker plate type<br />
Specify the plate type (from 1 to 10). This tells the stacker the plate<br />
dimensions and how to handle the plate correctly. Labels (names) can be<br />
assigned to plate types to make it easier to choose the correct plate type in<br />
the pull-down list. The labels are assigned using the Setup & Service software<br />
and are stored in the stacker firmware (see 1.2.1 “Related Documentation and<br />
<strong>Software</strong>”, 1-3 for information on this software.<br />
Washer plate type<br />
Specify the plate type (from 1 to 10). This tells the washer the plate<br />
dimensions and how to handle the plate correctly.<br />
Labware can have lid<br />
Check this checkbox if the labware can be fitted with a lid. Note: The lid must<br />
be removed before pipetting, for example by using the RoMa.<br />
Lid offset<br />
Specify the vertical distance between the bottom of the labware and the lower<br />
edge of the lid.<br />
<strong>Freedom</strong> <strong>EVOware</strong> <strong>Software</strong> <strong>Manual</strong>, 393172, en, V<strong>2.3</strong> 9 - 23
9 - Specifying Your Instrument Setup<br />
Configuring Labware<br />
Lid grip narrow, wide<br />
Specify the spacing in mm between the RoMa grippers which should be used<br />
to grip the lid on the narrow side and on the wide side, respectively. To ensure<br />
a firm grip, the grippers will close by an additional 1 cm (this is limited by the<br />
specified grip force). To release the lid, the grippers will open by an additional<br />
0.5 cm (default setting). Example: If Grip Narrow = 85 mm, the grippers will<br />
move to 90 mm to release the lid or to 75 mm to grip the lid.<br />
Labware can have insert<br />
Check this checkbox if the labware can contain an insert. For more<br />
information on insert plates see 17.8 “Handling inserts in <strong>Freedom</strong> <strong>EVOware</strong><br />
Plus”, 17-25.<br />
Insert offset<br />
Specify the vertical distance between the bottom of the labware and the lower<br />
edge of the insert.<br />
Insert lid offset<br />
Specify the vertical distance between the bottom of the insert and the lower<br />
edge of the lid.<br />
Insert grip narrow, wide<br />
Specify the spacing in mm between the RoMa grippers which should be used<br />
to grip and pick up the insert on the narrow side and on the wide side,<br />
respectively.<br />
Sort in Labware group<br />
The Labware tab in the Control Bar is subdivided into groups for Microplates,<br />
Tips, Wash and Waste, Troughs, Tubes and Miscellaneous. Choose the group<br />
where you want this labware item to be shown in the Control Bar. Choose<br />
Default to use the default Control Bar group for this labware item.<br />
Attributes button<br />
See 9.4.8 “Labware Attributes”, 9-34 for information on labware attributes.<br />
9 - 24 <strong>Freedom</strong> <strong>EVOware</strong> <strong>Software</strong> <strong>Manual</strong>, 393172, en, V<strong>2.3</strong>
9 - Specifying Your Instrument Setup<br />
Configuring Labware<br />
9.4.3 Labware Coordinates<br />
The following table describes the X, Y and Z coordinates in the Teaching tab of the<br />
Edit Labware dialog box:<br />
Tab. 9-18 X, Y and Z coordinates for labware<br />
Coordinate<br />
X,Y<br />
Z-Travel<br />
Z-Travel (global)<br />
Z-Start<br />
Z-Dispense<br />
Z-Max<br />
Position / Function<br />
At this position, the tip is situated above the well/tube of the first/last position<br />
on the labware. See Tab. 9-19, 9-33 for additional information on labware<br />
with offsets.<br />
Tip height at which the tips move from one X/Y position to another. Choose<br />
Z-Travel to be higher than all obstacles on the carrier. Movements that pass<br />
over different pieces of labware use a tip height of Z-Travel (global) instead.<br />
This parameter is also called Travel Height. When the LiHa moves over a<br />
single labware item or between adjacent identical labware items, it retracts<br />
all tips to the Z-Travel value which is specified in the labware definition.<br />
However, if two consecutive commands cause it to move over different<br />
pieces of labware, the tips are retracted to the height you specify with Travel<br />
Height in the Configuration Tool (see 8.4.2.1 “LiHa (Liquid Handling Arm)”,<br />
8-22). This is done to speed up and optimize LiHa movements. Choose<br />
this parameter to be higher than all obstacles on the woktable.<br />
Tip height at which the liquid level detection (ILID) is switched on during<br />
pipetting. For tubes and containers (troughs), choose Z-Start to be at least 1<br />
mm below the rim but above the liquid surface. For microplates, choose Z-<br />
Start to be at least 1 mm above the edge of the well.<br />
Z-Start should be chosen as low as possible to ensure fast liquid level detection.<br />
At the same time, Z-Start must be above the highest possible liquid<br />
level in the well/tube to ensure that the liquid surface is found.<br />
Tip height at which liquid is dispensed. It should be low enough to ensure<br />
that no liquid drops can get into adjacent wells or tubes.<br />
Tip height which is very slightly above the lowest point of the well, tube or<br />
container. It is the lowest position which the tip is allowed to reach without<br />
touching the bottom. When searching for the liquid surface, the pipetting<br />
instrument will search from Z-Start down to Z-Max. If the tip reaches Z-max<br />
without finding liquid, the pipetting instrument reacts according to the configured<br />
liquid level detection error mode.<br />
<strong>Freedom</strong> <strong>EVOware</strong> <strong>Software</strong> <strong>Manual</strong>, 393172, en, V<strong>2.3</strong> 9 - 25
9 - Specifying Your Instrument Setup<br />
Configuring Labware<br />
The figure below illustrates the different Z positions:<br />
Fig. 9-13 Z positions for a tube (example)<br />
9.4.4 Teaching the Labware Coordinates<br />
Teaching is the process of showing <strong>Freedom</strong> <strong>EVOware</strong> the positions on the<br />
worktable or the Te-MO by physically moving the LiHa, MCA or the Te-MO<br />
pipetting head to the correct position above the labware and then clicking the<br />
appropriate buttons in the dialog boxes (see 9.3.1 “Moving the LiHa”, 9-4,<br />
9.3.7 “Moving the Te-MO”, 9-12 and 9.3.4 “Moving the MCA96”, 9-8).<br />
If the labware is intended for use on the worktable, put it on a carrier the worktable<br />
and teach it on the worktable. If the labware is intended for use on the Te-MO, put<br />
it on the Te-MO and teach it on the Te-MO.<br />
A group of eight Position fields for the labware coordinates are shown in the Edit<br />
Labware dialog box. Next to the coordinates you can see buttons labeled with<br />
transfer and move to.<br />
Click the transfer buttons to copy the current LiHa, MCA or Te-MO coordinates<br />
(as shown in the respective tab of the Move dialog box) to the position fields in the<br />
Edit Labware dialog box. Do this when you want to teach the current position.<br />
Note: If you click the move to buttons instead, this moves the LiHa, MCA or Te-<br />
MO to the coordinates shown in the Position fields of the Edit Labware dialog box.<br />
The tips first lift as far as possible, then the LiHa, MCA or Te-MO moves to the<br />
new position and the tips move back to the previous height. The corresponding<br />
tab of the Move dialog box will be updated accordingly.<br />
Collision avoidance is not available when teaching. Accordingly, take care when<br />
using the “Move To” button, which moves the selected arm directly to the<br />
9 - 26 <strong>Freedom</strong> <strong>EVOware</strong> <strong>Software</strong> <strong>Manual</strong>, 393172, en, V<strong>2.3</strong>
9 - Specifying Your Instrument Setup<br />
Configuring Labware<br />
destination using the shortest (diagonal) path. Move other arms out of the way to<br />
avoid the risk of collisions or use the cursor keys, which are slower but safer.<br />
9.4.4.1 Teaching with the LiHa<br />
Specify the carrier, grid and site that you want to use to teach the labware:<br />
Choose the carrier from the list and then choose the grid position and the site.<br />
Alternatively, with the Labware Editor closed, put the labware on the worktable at<br />
the required position, right click the labware and choose Edit Labware Type from<br />
the context menu. This opens the Labware Editor with the correct settings.<br />
In the Edit labware dialog box, choose LiHa from the pull-down list Device to be<br />
used for teaching.<br />
Note: If your pipetting instrument is only fitted with DITIs (disposable tips), the<br />
pull-down list also shows DiTi types in brackets, for example LiHa (DiTi 200 µl).<br />
⌦ Teaching the X and Y coordinates of labware on the worktable:<br />
• Move one of the LiHa tips above the center of the first well of the labware (at<br />
the rear left of the labware) and click the corresponding transfer button. This<br />
copies the current LiHa X and Y coordinates to the position fields in the Edit<br />
Labware dialog box. We recommend you to use one of the middle tips for<br />
teaching (e.g. tip 3).<br />
• Move the same LiHa tip above the center of the last well of the labware (at the<br />
front right of the labware) and click the corresponding transfer button. This<br />
copies the current LiHa X and Y coordinates to the position fields in the Edit<br />
Labware dialog box.<br />
• For labware with offsets, you also need to move the LiHa above the first well<br />
of the second column and click the transfer button next to the field “Y2<br />
(column 2)”. See Tab. 9-19, 9-33.<br />
Note: if the LiHa is fitted with DITIs, you must use the direct command “Get DITIs”<br />
(or the Get Tips button in the Move dialog box) to fetch the tips you want to teach<br />
with and not by using any other method such as mounting by hand. See<br />
9.3.1 “Moving the LiHa”, 9-4.<br />
In addition, you must choose the correct pipetting arm and DiTi type in the pulldown<br />
list “Device to be used for teaching”. <strong>Freedom</strong> <strong>EVOware</strong> uses the DiTi type<br />
to determine the tip length. The tip length is specified with Tip Offset in the<br />
labware definition of the DITI rack which is used for this DITI type (see<br />
9.4.1 “Editing Labware, Well Dimensions Tab”, 9-19).<br />
Note: if the LiHa is fitted with a mixture of fixed tips and DITIs, teaching must be<br />
carried out with the fixed tips and DITI types are not shown in the drop down list<br />
“Device to be used for teaching”.<br />
⌦ Teaching the X and Y coordinates of a LiHa Trough:<br />
A LiHa Trough is treated as labware with only one well, whereby several tips can<br />
access the well at the same time. LiHa troughs are taught just like labware:<br />
• Move one of the LiHa tips above the center of the trough and click the<br />
corresponding transfer button. This copies the current LiHa X and Y<br />
coordinates to the position fields in the Edit Labware dialog box. We<br />
recommend you to use one of the middle tips for teaching (e.g. tip 3). Do not<br />
use select than one tip when teaching the X and Y coordinates of a LiHa<br />
trough, because this can cause a collision with other objects when the trough<br />
is used in a script. Before <strong>Freedom</strong> <strong>EVOware</strong> inserts tips into LiHa troughs, it<br />
<strong>Freedom</strong> <strong>EVOware</strong> <strong>Software</strong> <strong>Manual</strong>, 393172, en, V<strong>2.3</strong> 9 - 27
9 - Specifying Your Instrument Setup<br />
Configuring Labware<br />
slides the tips together to the minimum tip-to-tip spacing of 9 mm. In addition,<br />
it automatically centers the group of tips above the center of the trough.<br />
⌦ Teaching the Z coordinates of labware on the worktable:<br />
• Move one of the LiHa tips to the Z-Travel position above the first well of the<br />
labware (at the rear left of the labware) and click the corresponding transfer<br />
button. This copies the current LiHa Z coordinate to the Z-Travel field in the<br />
Edit Labware dialog box. We recommend you to use one of the middle tips for<br />
teaching (e.g. tip 3).<br />
• Repeat this process for the Z-Dispense, Z-Start and Z-Max positions.<br />
⌦ Teaching labware on the Te-MO with the LiHa<br />
The basic procedure to follow is similar to teaching labware on the worktable with<br />
the LiHa. However, teaching can only be done on sites 3 or 13 for a Te-MO 3x5<br />
and sites 2 or 8 for a Te-MO 3x3. In addition, to ensure that the LiHa can access<br />
the site, you must move the site you want to teach with to the RoMa transfer<br />
position.<br />
Collision avoidance is not available when teaching. Accordingly, take care when<br />
using the “Move To” button, which moves the selected arm directly to the<br />
destination using the shortest (diagonal) path. Move other arms out of the way to<br />
avoid the risk of collisions or use the cursor keys, which are slower but safer.<br />
Proceed as follows (the example is for site 3 of the Te-MO 3x5):<br />
• Make sure that the fixed tips or DITIs you want to use for teaching are already<br />
mounted on the LiHa.<br />
• Put the labware on site 3 of the Te-MO and on the <strong>Freedom</strong> <strong>EVOware</strong><br />
worktable.<br />
• Right-click site 3, choose Edit Labware Type and choose “LiHa”.<br />
• In the Te-MO tab of the Move dialog box, move the Te-MO pipetting head to<br />
the right-hand side using the cursor keys. See 9.3.7 “Moving the Te-MO”, 9-<br />
12.<br />
• In the Te-MO tab of the Move dialog box, choose “Left / 3” from the pull-down<br />
list and click Move to transfer position. If necessary, move other arms out of<br />
the way to avoid the risk of collisions.<br />
• In the LiHa tab of the Move dialog box, move the LiHa to site 3 of the Te-MO<br />
using the cursor keys. See 9.3.1 “Moving the LiHa”, 9-4.<br />
• Teach the X, Y and Z coordinates of the MCA as described in “Teaching the X<br />
and Y coordinates of labware on the worktable, above.<br />
See Tab. 8-9 “Te-MO 3x5 site numbers”, 8-104 and Tab. 8-10 “Te-MO 3x3 site<br />
numbers”, 8-104 for information on Te-MO site numbers.<br />
9.4.4.2 Teaching with the Te-MO pipetting head<br />
Specify the carrier, grid and site that you want to use to teach the labware:<br />
Choose the carrier from the list and then choose the grid position and the site.<br />
Alternatively, with the Labware Editor closed, put the labware on the worktable at<br />
the required position, right click the labware and choose Edit Labware Type from<br />
the context menu. This opens the Labware Editor with the correct settings.<br />
In the Edit labware dialog box, choose Te-MO from the pull-down list Device to be<br />
used for teaching.<br />
9 - 28 <strong>Freedom</strong> <strong>EVOware</strong> <strong>Software</strong> <strong>Manual</strong>, 393172, en, V<strong>2.3</strong>
9 - Specifying Your Instrument Setup<br />
Configuring Labware<br />
⌦ Teaching the X and Y coordinates of labware on the Te-MO:<br />
• Move the Te-MO pipetting head to position the rear left tip above the center of<br />
the first well of the labware (at the rear left of the labware) and click the<br />
corresponding transfer button. This copies the current Te-MO X and Y<br />
coordinates to the position fields in the dialog box.<br />
• Move the Te-MO pipetting head to position the front right tip above the center<br />
of the last well of the labware (at the front right of the labware) and click the<br />
corresponding transfer button. This copies the current Te-MO X and Y<br />
coordinates to the position fields in the dialog box.<br />
• For labware with offsets, you also need to move the Te-MO pipetting head to<br />
position the rear left tip above the center of the first well of the second column<br />
and click the transfer button next to the field “Y2 (column 2)”. See Tab. 9-<br />
19, 9-33.<br />
⌦ Teaching the Z coordinates of labware on the Te-MO:<br />
• Move the Te-MO pipetting head to position the rear left tip above the first well<br />
of the labware (at the rear left of the labware) and click the corresponding<br />
transfer button. This copies the current Te-MO Z coordinate to the Z-Travel<br />
field in the Edit Labware dialog box.<br />
• Repeat this process for the Z-Dispense, Z-Start and Z-Max positions.<br />
⌦ Teaching the X and Y coordinates of labware on the Te-MO 96 Wash<br />
Block:<br />
A teaching block is available which simplifies teaching the coordinates of the Te-<br />
MO 96 Wash Block using the Te-MO pipetting head. Formerly, teaching was<br />
difficult due to the restricted visibility and the view perspective. Using the teaching<br />
block, teaching is done at an offset to the actual positions of the wash block.<br />
Proceed as follows when teaching the coordinates of the Te-MO 96 Wash Block:<br />
Teaching with the Te-MO 96 Wash Block (teaching without offset)<br />
• Make sure the wash block is fitted.<br />
• In the Edit labware dialog box, choose Te-MO from the pull-down list Device to<br />
be used for teaching.<br />
• Teach the X, Y and Z coordinates as described in Teaching the X and Y<br />
coordinates of labware on the Te-MO and Teaching the Z coordinates of<br />
labware on the Te-MO, above. The tips should be lowered into the channels of<br />
the wash block when teaching.<br />
Teaching with the teaching block (teaching with offset).<br />
• Fit the teaching block before you start teaching.<br />
• In the Edit labware dialog box, choose Te-MO with offset from the pull-down<br />
list Device to be used for teaching.<br />
• Teach the X and Y coordinates as described in Teaching the X and Y<br />
coordinates of labware on the Te-MO. The tips should be aligned with the<br />
offset points of the teaching block.<br />
• Teach the Z coordinates as described in Teaching the Z coordinates of<br />
labware on the Te-MO, above. The tips should be lowered into the channels of<br />
the teaching block when teaching.<br />
See Tab. 8-9 “Te-MO 3x5 site numbers”, 8-104 and Tab. 8-10 “Te-MO 3x3 site<br />
numbers”, 8-104 for information on Te-MO site numbers.<br />
<strong>Freedom</strong> <strong>EVOware</strong> <strong>Software</strong> <strong>Manual</strong>, 393172, en, V<strong>2.3</strong> 9 - 29
9 - Specifying Your Instrument Setup<br />
Configuring Labware<br />
9.4.4.3 Teaching with the MCA96 and the MCA384<br />
Specify the carrier, grid and site that you want to use to teach the labware:<br />
Choose the carrier from the list and then choose the grid position and the site.<br />
Alternatively, with the Labware Editor closed, put the labware on the worktable at<br />
the required position, right click the labware and choose Edit Labware Type from<br />
the context menu. This opens the Labware Editor with the correct settings.<br />
In the Edit labware dialog box, choose MCA96 or MCA384 from the pull-down list<br />
Device to be used for teaching.<br />
⌦ Teaching the X and Y coordinates of labware on the worktable:<br />
• Move the MCA pipetting head to position the rear left tip above the center of<br />
the first well of the labware (at the rear left of the labware) and click the<br />
corresponding transfer button. This copies the current MCA X and Y<br />
coordinates to the position fields in the dialog box.<br />
• Move the MCA pipetting head to position the front right tip above the center of<br />
the last well of the labware (at the front right of the labware) and click the<br />
corresponding transfer button. This copies the current MCA X and Y<br />
coordinates to the position fields in the dialog box.<br />
• For labware with offsets, you also need to move the MCA pipetting head to<br />
position the rear left tip above the center of the first well of the second column<br />
and click the transfer button next to the field “Y2 (column 2)”. See Tab. 9-<br />
19, 9-33.<br />
⌦ Teaching the Z coordinates of labware on the worktable:<br />
• Move the MCA pipetting head to position the rear left tip above the first well of<br />
the labware (at the rear left of the labware) and click the corresponding<br />
transfer button. This copies the current MCA Z coordinate to the Z-Travel field<br />
in the Edit Labware dialog box.<br />
• Repeat this process for the Z-Dispense, Z-Start and Z-Max positions.<br />
⌦ Teaching labware on the Te-MO with the MCA96 and the MCA384<br />
The basic procedure to follow is similar to teaching labware on the worktable with<br />
the MCA. However, teaching can only be done on sites 3 or 13 for a Te-MO 3x5<br />
and sites 2 or 8 for a Te-MO 3x3. In addition, to ensure that the MCA can access<br />
the site, you must move the site you want to teach with to the RoMa transfer<br />
position.<br />
Collision avoidance is not available when teaching. Accordingly, take care when<br />
using the “Move To” button, which moves the selected arm directly to the<br />
destination using the shortest (diagonal) path. Move other arms out of the way to<br />
avoid the risk of collisions or use the cursor keys, which are slower but safer.<br />
Proceed as follows (the example is for site 3 of the Te-MO 3x5):<br />
• Put the labware on site 3 of the Te-MO and on the <strong>Freedom</strong> <strong>EVOware</strong><br />
worktable.<br />
• Right-click site 3, choose Edit Labware Type and choose “MCA”.<br />
• In the Te-MO tab of the Move dialog box, move the Te-MO pipetting head to<br />
the right-hand side using the cursor keys. See 9.3.7 “Moving the Te-MO”, 9-<br />
12.<br />
• In the Te-MO tab of the Move dialog box, choose “Left / 3” from the pull-down<br />
list and click Move to transfer position. If necessary, move other arms out of<br />
the way to avoid the risk of collisions.<br />
9 - 30 <strong>Freedom</strong> <strong>EVOware</strong> <strong>Software</strong> <strong>Manual</strong>, 393172, en, V<strong>2.3</strong>
9 - Specifying Your Instrument Setup<br />
Configuring Labware<br />
• In the MCA tab of the Move dialog box, click Get Tips and choose the tipblock<br />
to use or the DITI rack containing the DITIs. See 9.3.4 “Moving the MCA96”,<br />
9-8.<br />
• In the MCA tab of the Move dialog box, move the MCA to site 3 of the Te-MO<br />
using the cursor keys.<br />
• Teach the X, Y and Z coordinates of the MCA as described in “Teaching the X<br />
and Y coordinates of labware on the worktable, above.<br />
• In the Multi Channel Arm tab of the Move dialog box, click Drop Tips to drop<br />
the tipblock or the DITIs.<br />
See Tab. 8-9 “Te-MO 3x5 site numbers”, 8-104 and Tab. 8-10 “Te-MO 3x3 site<br />
numbers”, 8-104 for information on Te-MO site numbers.<br />
9.4.4.4 Additional information on teaching with the MCA384<br />
This section describes how to teach DITI racks using a teaching pin and how to<br />
teach head adapters. See also 9.5.4 “Teaching the MCA384 System Carrier with<br />
DITI Racks”, 9-47.<br />
⌦ Teaching MCA384 DITI racks using the teaching pin<br />
A teaching pin is available from Tecan which simplifies teaching the coordinates of<br />
MCA384 DITI racks.<br />
Before you start teaching, mount the head adapter “Adapter DiTi Combo<br />
MCA384” or the “Adapter Combo MCA384” with the direct command MCA384<br />
Get Head Adapter. Then proceed as follows:<br />
• Insert the teaching pin into a DITI mounting hole at one of the four corners of<br />
the head adapter.<br />
• Open the Edit Labware dialog box and check the Use teaching pin checkbox.<br />
This checkbox is only available if you are teaching an MCA384 DITI rack, and<br />
causes the plunger in the pipetting head to be retracted. This produces a<br />
vacuum which holds the teaching pin in place. In addition, the fields for Z-<br />
Dispense and Z-Max can no longer be edited.<br />
• Remove the four adjacent DITIs from the same corner of the DITI rack to<br />
make room for the teaching pin.<br />
• During teaching, lower the pipetting head until the teaching pin is inserted into<br />
the DITI rack as far as it will go.<br />
• In the Edit Labware dialog box, click the Transfer button for well #1.<br />
• In the Edit Labware dialog box, click the Transfer button for Z-Start. The<br />
values for Z-Dispense and Z-Max will be adjusted automatically.<br />
• Click OK when you are finished.<br />
⌦ Teaching a head adapter with the head adapter mounted<br />
You can also teach the pipetting head with the head adapter already mounted on<br />
the pipetting head. Before you start teaching, check that the head adapter is<br />
mounted. Then proceed as follows:<br />
• Select the head adapter in the Worktable Editor and open the Edit Labware<br />
dialog box.<br />
• A checkbox “Use fetched head adapter” is shown to indicate that the head<br />
adapter is mounted. This checkbox cannot be unchecked. In addition, the<br />
fields for Z-Dispense and Z-Max cannot be edited.<br />
• Move the pipetting head with the head adapter to position it on top of the<br />
support shoe on the system carrier.<br />
• In the Edit Labware dialog box, click the Transfer button for Z-Start. The<br />
values for Z-Dispense and Z-Max will be adjusted automatically.<br />
<strong>Freedom</strong> <strong>EVOware</strong> <strong>Software</strong> <strong>Manual</strong>, 393172, en, V<strong>2.3</strong> 9 - 31
9 - Specifying Your Instrument Setup<br />
Configuring Labware<br />
• Click OK when you are finished.<br />
⌦ Teaching a head adapter without mounting it first<br />
Put the head adapter onto the support shoe on the system carrier and move the<br />
pipetting head over the head adapter until the clamps are just touching the front<br />
edge of the head adapter. The front edge of the clamps on the pipetting head<br />
must be aligned with the front edge of the head adapter. In the X direction, the<br />
center line of the pipetting head should be above the center line of the head<br />
adapter. This Z position of the pipetting head now corresponds to Z-Start (which is<br />
the same as Z-Dispense).<br />
• In the Edit Labware dialog box, click the Transfer buttons for Z-Start and Z-<br />
Dispense.<br />
• Specify a value for Z-Max which is 45 higher than the value for Z-Start. This<br />
corresponds to a head position which is 4.5 mm lower.<br />
• Click OK when you are finished.<br />
9.4.5 Labware Types and DITI Types<br />
When you choose the labware type on the Well Dimensions tab of the Edit<br />
Labware dialog box, in some cases you also have to select the intended usage of<br />
the labware in a second pull-down list. Current Tecan pipetting instruments<br />
support the following labware types:<br />
• Regular<br />
• DITI:<br />
– DITI Type or DITI Waste.<br />
• Muiti-pipetting head:<br />
– Te-MO DITI, Te-MO Tipblock, Te-MO DITI Waste, Te-MO Wash station or<br />
Te-MO Trough.<br />
– These labware types should also be used for MCA96 DITIs, MCA96<br />
Tipblocks, the MCA96 Wash Block and MCA96 Troughs.<br />
• MCA384 (Multi Channel Arm 384):<br />
– MCA384 DITI, MCA384 Fixed Tips, MCA384 Wash Station or MCA384<br />
Head Adapter.<br />
• Washer (wash station):<br />
– Cleaner Short, Cleaner Long or Waste (all of these items are part of a<br />
wash station).<br />
– Cleaner LowVol (part of a LowVol wash station).<br />
• System (this labware type is used internally and should not be selected).<br />
• Te-PS Sensor Plate.<br />
DITI Types<br />
When you choose a DITI type in a script command, the pull-down list all of the<br />
LiHa DITI types which are currently configured in the labware database. When<br />
you want to pick up a DiTi, <strong>Freedom</strong> <strong>EVOware</strong> searches the worktable for a DITI<br />
rack which contains the DITI type you have specified in the script command.<br />
To configure <strong>Freedom</strong> <strong>EVOware</strong> for a new DITI type, create a new DITI rack or<br />
duplicate an existing DITI rack and give the new labware a suitable name (e.g.<br />
“ZipTip”).<br />
Note: DITI racks are also used to store ZipTips.<br />
9 - 32 <strong>Freedom</strong> <strong>EVOware</strong> <strong>Software</strong> <strong>Manual</strong>, 393172, en, V<strong>2.3</strong>
9 - Specifying Your Instrument Setup<br />
Configuring Labware<br />
Note: Te-MO DITI racks should be configured with the labware type “Te-MO<br />
DITI”, not “DITI”.<br />
DiTi Index<br />
<strong>Freedom</strong> <strong>EVOware</strong> automatically assigns a unique numeric index to each<br />
DITI type. You cannot edit the index manually. The DITI index is used e.g. by<br />
the Set DITI Type command in worklists and in advanced worklists. The DITI<br />
index is shown in the Edit Labware dialog box for the DITI labware (Well<br />
Dimensions tab).<br />
Te-PS<br />
This labware type Te-PS must only be used for the Te-PS Sensor Plate. The Te-<br />
PS Sensor Plate is used by the <strong>Manual</strong> Tip Alignment function (see<br />
15.27 “<strong>Manual</strong> Tip Alignment Command”, 15-57) and the Tip Alignment Check<br />
command (see 15.20 “Tip Alignment Check Command”, 15-30).<br />
9.4.6 Well Alignment<br />
The following table describes the two styles of well alignment supported by<br />
<strong>Freedom</strong> <strong>EVOware</strong>:<br />
Tab. 9-19 Well alignment<br />
Type Name Comment<br />
Rectangular labware<br />
Rectangular labware<br />
with offset<br />
This is labware where the wells are arranged in regular rows<br />
and columns, e.g. a standard microplate. The first well is rear<br />
left; the last well is right front.<br />
This labware is similar to the rectangular type, but every second<br />
column is displaced in the +Y direction. The spacing of<br />
the wells in the Y direction is the same for all columns. In<br />
addition to specifying the X and Y positions of the first and<br />
the last well, you must also specify the Y position of the first<br />
well in the second row in the field “Y2 (column 2)”.<br />
9.4.7 Y-distance of Wells<br />
If the pipetting operation specifies the use of more than one tip, <strong>Freedom</strong><br />
<strong>EVOware</strong> adjusts the spacing between the tips in the Y direction to allow pipetting<br />
to take place on several wells simultaneously if possible. The tips are spread by a<br />
servo motor on the LiHa and the spacing is subject to physical limitations. The<br />
minimum spacing between adjacent tips is 9 mm and the maximum spacing is 38<br />
mm, as shown by the light green area in the middle of the indicator. <strong>Freedom</strong><br />
<strong>EVOware</strong> calculates the Y-distance (the spacing between adjacent wells) from the<br />
labware coordinates and the number of wells you have specified. This is shown by<br />
a vertical line which is colored either dark green or dark red. To optimize pipetting<br />
speed, the vertical line should lie within the green area. If the vertical line lies<br />
within the red area, you may have specified the coordinates incorrectly or<br />
inaccurately. Alternatively, you are using labware with a non-standard design.<br />
The yellow line shows half of the minimum Y-distance (i.e. 4.5 mm). If you are<br />
using microplates with 384 wells and choose this Y-distance, pipetting can take<br />
place simultaneously to every other well.<br />
<strong>Freedom</strong> <strong>EVOware</strong> <strong>Software</strong> <strong>Manual</strong>, 393172, en, V<strong>2.3</strong> 9 - 33
9 - Specifying Your Instrument Setup<br />
Configuring Labware<br />
9.4.8 Labware Attributes<br />
The following table describes the standard attributes (parameters) in the <strong>Freedom</strong><br />
<strong>EVOware</strong> database which are available for labware. All attributes are<br />
automatically configured with appropriate values when <strong>Freedom</strong> <strong>EVOware</strong> is<br />
installed. You only need to change the settings for special applications. Labware<br />
attributes should only be changed by specialists.<br />
Tab. 9-20 Labware attributes<br />
Field name Default value Description<br />
Lid is allowed 0 (not allowed) 1 = a lid is allowed on this labware type.<br />
0 = a lid is not allowed on this labware type.<br />
Read-only field - please set this attribute with<br />
the Labware can have lid checkbox in the<br />
advanced labware settings.<br />
Location to store lid Read-only field - <strong>Freedom</strong> <strong>EVOware</strong> writes<br />
the current location of the lid to this field when<br />
the script or process is running.<br />
Lid grip offset narrow 0,0,0 Offset (in cm) from the taught position for gripping<br />
the lid of this labware type on the narrow<br />
a) b)<br />
side.<br />
Lid grip offset wide 0,0,0 Offset (in cm) from the taught position for gripping<br />
the lid of this labware type on the wide<br />
a) b)<br />
side.<br />
Plate grip offset narrow<br />
0,0,0 Offset (in cm) from the taught position for gripping<br />
this labware type on the narrow<br />
a) b)<br />
side.<br />
Plate grip offset wide 0,0,0 Offset (in cm) from the taught position for gripping<br />
this labware type on the wide<br />
a) b)<br />
side.<br />
Force to grip plate 75 Specify the force to use when gripping plates<br />
(range: 0 to 249). A Grip Error message will<br />
be output if no resistance is detected when<br />
gripping.<br />
Force to grip lid 60 Specify the force to use when gripping lids<br />
(range: 0 to 249). A Grip Error message will<br />
be output if no resistance is detected when<br />
gripping.<br />
a) This allows the RoMa positions which have been taught to be shared by different labware types.<br />
b) RoMa offset in the X, Y and Z direction (see 9.4.8.2 “RoMa Coordinate System”, 9-39).<br />
Other lid attributes can be set in the carrier definition. Broadly speaking, the lid<br />
attributes in the labware definition specify how to grip the lid; the lid attributes in<br />
the carrier definition specify where to store the lid if it is removed.<br />
Labware attributes can also be used as variables in pipetting scripts (see<br />
14.1.11 “Labware Attributes and String Variables”, 14-16).<br />
The Attributes dialog box for the Edit Labware dialog box normally shows<br />
descriptive names for the attributes. Check the Show internal names checkbox to<br />
see the internal names which are used.<br />
9 - 34 <strong>Freedom</strong> <strong>EVOware</strong> <strong>Software</strong> <strong>Manual</strong>, 393172, en, V<strong>2.3</strong>
9 - Specifying Your Instrument Setup<br />
Configuring Labware<br />
Click Add to activate a special attribute for the labware and add it to the<br />
Attributes list. Special attributes are used to control advanced features in <strong>Freedom</strong><br />
<strong>EVOware</strong> which normally dormant (inactive).<br />
Check the Show hidden attributes checkbox to see additional, hidden attributes<br />
which should not normally be changed. They only need to be edited for special<br />
applications:<br />
Tab. 9-21 Labware attributes, hidden<br />
Field name Default value Description<br />
Monitoring (obsolete) 1 (shown) This field is no longer used.<br />
Locking (obsolete) 1 This field is no longer used.<br />
Lid arrival (Plus only) 0,0,1 Movement of the RoMa arm (in cm) to remove<br />
the lid. The default moves the arm up by<br />
1cm. a)<br />
Lid grip narrow 8.5 The spacing (in cm) between the RoMa grippers<br />
which should be used to grip the lid on<br />
the narrow side. To ensure a firm grip, the<br />
grippers will try to close by an additional 1 cm<br />
(this is limited by the specified grip force).<br />
Lid grip wide 12.5 The spacing (in cm) between the RoMa grippers<br />
which should be used to grip the lid on<br />
the wide side. To ensure a firm grip, the grippers<br />
will try to close by an additional 1 cm (this<br />
is limited by the specified grip force).<br />
Lid offset 0,0,0.8 Distance (in cm) from the bottom of the labware<br />
to the bottom edge of the lid. a)<br />
Lid position 0,0,0 Read-only field - <strong>Freedom</strong> <strong>EVOware</strong> writes<br />
the current position of the lid within the lid<br />
location to this field when the script or process<br />
is running.<br />
Barcode (Plus only)<br />
Labware type (obsolete)<br />
Scanned barcode data is written to this field. It<br />
contains if the barcode was not yet<br />
scanned; it contains a default barcode if the<br />
scanner was unable to read the barcode See<br />
Default Barcode in 8.5.1.1, 8-40.<br />
0 Labware type (for automatic positioning of the<br />
labware on the worktable):<br />
1 = Source<br />
2 = Pre-dilution<br />
4 = Destination<br />
32 = DiTi<br />
This field is no longer used.<br />
Well count 96 Number of wells in the labware<br />
<strong>Freedom</strong> <strong>EVOware</strong> <strong>Software</strong> <strong>Manual</strong>, 393172, en, V<strong>2.3</strong> 9 - 35
9 - Specifying Your Instrument Setup<br />
Configuring Labware<br />
Tab. 9-21 Labware attributes, hidden (cont.)<br />
Field name Default value Description<br />
Plate type 1 Read-only field - please set this attribute with<br />
the Washer plate type field in the advanced<br />
labware settings. This variable is used by the<br />
Columbus Washer. It overwrites the plate type<br />
specified with the Columbus WashPlate<br />
device command.<br />
File (obsolete) This field is no longer used.<br />
Source barcode (Plus<br />
only)<br />
Base location<br />
Barcode ID of the mother plate<br />
Read-only field - <strong>Freedom</strong> <strong>EVOware</strong> writes<br />
the home location of the labware to this field<br />
when the labware is created.<br />
Base position 1,1,1 Read-only field - <strong>Freedom</strong> <strong>EVOware</strong> writes<br />
the labware position within the base location<br />
to this field when the labware is created.<br />
Finger type (obsolete)<br />
Location<br />
This field is no longer used.<br />
Read-only field - <strong>Freedom</strong> <strong>EVOware</strong> writes<br />
the current location of the labware to this field<br />
when the script or process is running.<br />
Position 1,1,1 Read-only field - <strong>Freedom</strong> <strong>EVOware</strong> writes<br />
the current position of the labware within the<br />
current location to this field when the script or<br />
process is running.<br />
Grip narrow 8.5 The spacing (in cm) between the RoMa grippers<br />
which should be used to grip the labware<br />
on the narrow side. To ensure a firm grip, the<br />
grippers will try to close by an additional 1 cm<br />
(this is limited by the specified grip force).<br />
Grip wide 12.5 The spacing (in cm) between the RoMa grippers<br />
which should be used to grip the labware<br />
on the wide side. To ensure a firm grip, the<br />
grippers will try to close by an additional 1 cm<br />
(this is limited by the specified grip force).<br />
Offset between<br />
stacked plates (obsolete)<br />
0,0,1 For stacked plates, distance from the bottom<br />
of the plate to the bottom of the next plate<br />
above a) . This field is no longer used.<br />
Stacker type 1 Read-only field - please set this attribute with<br />
the Stacker plate type field in the advanced<br />
labware settings.<br />
9 - 36 <strong>Freedom</strong> <strong>EVOware</strong> <strong>Software</strong> <strong>Manual</strong>, 393172, en, V<strong>2.3</strong>
9 - Specifying Your Instrument Setup<br />
Configuring Labware<br />
Tab. 9-21 Labware attributes, hidden (cont.)<br />
Field name Default value Description<br />
Grip delta 0.5 Distance which is added to the grip distance<br />
when releasing the labware or lid. Example: If<br />
Grip_Narrow is 8.5 cm and Grip_delta is 0.5<br />
cm, the grippers will open to 9 cm to release<br />
the labware.<br />
StripCount, StripMask<br />
See 17.5 “Columbus Washer - Washing a<br />
Variable Number of Strips in the Plate”, 17-<br />
15.<br />
BCZoffset 450 Offset in device steps to adjust the vertical<br />
position of the barcode scanner. This setting<br />
is related to the distance between the barcode<br />
label and the bottom edge of the labware.<br />
Run_Parallel (Plus<br />
only)<br />
1 Specifies the locking mode of the labware:<br />
0 = If several process iterations want to use<br />
the same instance of this labware type, only<br />
one of them can run at the same time. The<br />
other processes (if any) must wait until the<br />
first process has finished. For example, this<br />
avoids a second process trying to pipette<br />
while the first process is still incubating the<br />
same labware.<br />
1 = Labware is never locked; several process<br />
iterations can use the same instance of this<br />
labware type simultaneously. This is the<br />
default setting if the attribute Run_Parallel has<br />
not been defined. See also 9.11, 9-77.<br />
a) RoMa offset in the X, Y and Z direction (see 9.4.8.2 “RoMa Coordinate System”, 9-39).<br />
Table legend: “Plus only” - only relevant for <strong>Freedom</strong> <strong>EVOware</strong> Plus.<br />
<strong>Freedom</strong> <strong>EVOware</strong> <strong>Software</strong> <strong>Manual</strong>, 393172, en, V<strong>2.3</strong> 9 - 37
9 - Specifying Your Instrument Setup<br />
Configuring Labware<br />
9.4.8.1 Attributes for MCA384 labware<br />
The following attributes are only relevant for labware which is used by the<br />
MCA384 (Multi Channel Arm with 96 or 384 tips):<br />
Tab. 9-22 Attributes for MCA384 labware<br />
Field name Default value Description<br />
RelMovesAllowed - Only for MCA384 head adapters:<br />
0 = The head adapter can pick up all of the<br />
DITIs but not one row or one column.<br />
1 = The head adapter can pick up one row or<br />
one column of DITIs in addition to picking up<br />
all of the DITIs. This requires a special head<br />
adapter (e.g. “Combo”) and a relative movement<br />
of the pipetting head.<br />
DropOffset - This attribute is no longer used and should be<br />
set to “0”.<br />
TipOffset 0,0,0 Only for MCA384 head adapters for DITIs:<br />
Offset of the tips (in 0.1 mm) compared to the<br />
head adapter for fixed tips. For example, with<br />
the “MCA Adapter 384 DITIs” the tips are displaced<br />
by 0.8 mm in the Y direction (0,8,0).<br />
With the “MCA Adapter 96 DITIs” the tips are<br />
displaced by -3.7 mm in the Y direction<br />
(0,-37,0).<br />
YShift -145 Only for MCA384 head adapters:<br />
The pipetting head movement which is<br />
required in the Y direction to pick up or put<br />
down the head adapter. It is dependent on the<br />
gear ratio of the bayonet locking mechanism<br />
and is normally -145.<br />
PlateHardwareID - Only for MCA384 head adapters:<br />
Head adapter ID. All head adapter types have<br />
an ID (magnetic bit pattern from 1 to 15) to<br />
allow automatic identification by the pipetting<br />
head. It is used to check that the correct head<br />
adapter has been mounted.<br />
MCA384Absolute<br />
PlungerPosition<br />
- Only for MCA384 DITI racks:<br />
The height of the MCA384 DITI racks<br />
depends on the type. This parameter specifies<br />
the plunger height which is required to mount<br />
the DITIs. Specify 27000 for 50 µl and 125 µl<br />
DITIs. Specify 8500 for 15 µl DITIs.<br />
9 - 38 <strong>Freedom</strong> <strong>EVOware</strong> <strong>Software</strong> <strong>Manual</strong>, 393172, en, V<strong>2.3</strong>
9 - Specifying Your Instrument Setup<br />
Configuring Carriers<br />
9.4.8.2 RoMa Coordinate System<br />
The plate robot (RoMa) has it’s own coordinate system which rotates with the<br />
RoMa:<br />
Fig. 9-14 RoMa coordinate system<br />
The Y axis is aligned with the current direction of the gripper fingers. The X axis is<br />
perpendicular to the current direction of the gripper fingers.<br />
In the dialog box for the Move RoMa command, RoMa coordinate “x” is labelled<br />
“A” and “y” is labelled “B” to avoid confusion with the worktable coordinates X, Y<br />
and Z.<br />
9.5 Configuring Carriers<br />
A carrier is a removable support on the instrument's worktable (i.e. deck) which<br />
holds one or more pieces of labware in place. Carriers can be fitted to the<br />
instrument’s worktable at pre-defined grid positions (see Fig. 9-1, 9-3).<br />
In <strong>Freedom</strong> <strong>EVOware</strong>, carriers are also used to represent positions on devices<br />
which can be accessed by the plate or tube robot. For example, the plate robot<br />
can put a microplate onto the shuttle of the Te-Stack stacker when the shuttle is at<br />
the transfer position.<br />
The carrier name indicates the labware type for which it is desiged (for device<br />
carriers, it indicates the device type).<br />
Note: The <strong>Freedom</strong> <strong>EVOware</strong> database already contains a large selection of predefined<br />
carrier and labware types. You only need to create or edit carriers or<br />
labware if you cannot find a standard item which is suitable for your needs.<br />
The following dialog box is used to configure carriers (to get to this dialog box,<br />
double-click on the carrier in the Labware section of the Control Bar):<br />
<strong>Freedom</strong> <strong>EVOware</strong> <strong>Software</strong> <strong>Manual</strong>, 393172, en, V<strong>2.3</strong> 9 - 39
9 - Specifying Your Instrument Setup<br />
Configuring Carriers<br />
Fig. 9-15 Edit Carrier dialog box<br />
It is recommended not to change the properties of the predefined carrier and<br />
labware types. Make a copy of the object with a new name if you want to alter any<br />
of the properties (see 5.4.1.12 “Context Menu for Objects in the Control Bar”, 5-<br />
14).<br />
The parameters in the Edit Carrier dialog box are as follows:<br />
9 - 40 <strong>Freedom</strong> <strong>EVOware</strong> <strong>Software</strong> <strong>Manual</strong>, 393172, en, V<strong>2.3</strong>
9 - Specifying Your Instrument Setup<br />
Configuring Carriers<br />
Carrier is device<br />
Check this checkbox and choose the device type (e.g. “Carousel”) from the<br />
Device pull-down list if the carrier you are configuring represents a device.<br />
The device will then appear as an icon in the Worktable Editor, around the<br />
edge of the pipetting area (the gray area). Do not check Carrier is device if the<br />
carrier is not a device.<br />
For devices which are available in several versions (e.g. Te-Shake Shaker),<br />
Carrier is device must only be checked for the device version which you are<br />
actually using. By default, Carrier is device is only checked for Te-Shake<br />
2Pos. If instead you are using e.g. Te-Shake 1Pos Front, uncheck this<br />
checkbox for Te-Shake 2Pos, check it for Te-Shake 1Pos Front and then<br />
choose Shaker from the Device pull-down list. Tip: The assigned device type<br />
is shown in the device icon in the Worktable Editor.<br />
Use the Duplicate Device tool to create copies of the device driver if you want<br />
to use more than one Te-Shake Shaker (either the same or different versions).<br />
See A.9.3 “Duplicate Device Tool”, A-36.<br />
Note: If you click on a device icon in the Worktable Editor, an orange line shows<br />
the worktable grid position which is occupied by the device. By default, devices<br />
are configured for grid position 1, at the left edge of the worktable. Right-click the<br />
device icon, choose Set Grid and choose the actual grid position. This is not<br />
strictly necessary for devices which are rigidly attached to the pipetting instrument<br />
(you must check and/or teach the RoMa movement vectors in this case). For<br />
devices which are clipped to the locating pins of the worktable, the supplied RoMa<br />
vectors will only work correctly if the actual grid position is set correctly.<br />
Attributes<br />
See 9.5.5 “Carrier Attributes”, 9-47 for information on carrier attributes.<br />
Accessible for liquid handling arm<br />
Check this checkbox if the carrier can be accessed by the LiHa for pipetting.<br />
This allows you to put the carrier on the pipetting area of the worktable (by<br />
dragging it from the Control Bar to the gray area in the Worktable Editor).<br />
Uncheck this checkbox if the carrier can only be accessed by a plate or tube<br />
robot. This is the case with most devices. Devices are normally positioned on<br />
the worktable to the rear of the pipetting area or at the left or right side (some<br />
devices such as the centrifuge are mounted below a cutout in the worktable).<br />
Three exceptions are the Te-Shake shaker (the LiHa can pipette onto labware<br />
on the shaker), the Te-MO (the LiHa can pipette onto labware on Te-MO<br />
slides) and the Te-Stack stacker (the LiHa can pipette onto labware which is<br />
placed on the shuttle at the Te-Stack transfer position).<br />
Color<br />
Choose a unique color to make it easier for you to identify this carrier type in<br />
the Worktable Editor. The default color for carriers is gray.<br />
Dimensions<br />
Specify the X and Y dimensions of the carrier outline in millimeters. See<br />
9.5.1 “Carrier Dimensions and X/Y Offsets”, 9-45.<br />
Reference offset<br />
The X reference offset is the distance in millimeters between the left edge of<br />
the carrier and the closest positioning pin on the worktable below the carrier.<br />
The Y reference offset is the distance in millimeters between the rear edge of<br />
the carrier and the closest positioning pin on the worktable below the carrier.<br />
<strong>Freedom</strong> <strong>EVOware</strong> <strong>Software</strong> <strong>Manual</strong>, 393172, en, V<strong>2.3</strong> 9 - 41
9 - Specifying Your Instrument Setup<br />
Configuring Carriers<br />
The Z reference offset is the vertical distance in millimeters between the top<br />
surface of the worktable and the bottom edge of the labware on the carrier.<br />
See 9.5.1 “Carrier Dimensions and X/Y Offsets”, 9-45 and 9.5.2 “Z Offsets<br />
for Carriers”, 9-46.<br />
Barcode<br />
Specify the carrier code for the carrier. This is the first three digits of the<br />
barcode at the end of the carrier. All standard Tecan carriers have a unique<br />
carrier code. Only use barcode numbers in the range 500 to 999 for custom<br />
carriers.<br />
If the PosID cannot scan the carrier or labware on the carrier due to a special<br />
carrier design, please set the Barcode field to “000”.<br />
You cannot specify a barcode for a Robot only carrier (see the Accessible for<br />
liquid handling arm checkbox, above). The Barcode field is inactive (gray) in<br />
this case. Carriers which are devices do not have barcodes. Specify “000” if<br />
the Barcode field is active (not gray).<br />
Carrier barcodes are not applicable to the Te-MO. The Barcode field should<br />
be left blank or specified as “000” in this case.<br />
Edit and Create buttons: If your pipetting instrument is fitted with a PosID-3<br />
barcode scanner, for some carrier types you will see Edit and Create buttons<br />
next to the Barcode field. These buttons are used to edit and create advanced<br />
barcode properties and barcode position information for the carrier. The<br />
<strong>Freedom</strong> <strong>EVOware</strong> database already contains advanced barcode properties<br />
for most common carrier types.<br />
This configuration feature is only intended for specialists. Please contact<br />
Tecan for further information.<br />
Te-PS Sensor Plate Offset (Z)<br />
<strong>Standard</strong> carriers for microplates normally have a raised plateau which fits into<br />
a recess in the bottom of the plate (Te-PS carriers do not have a raised<br />
plateau and the Te-PS Sensor plate has a flat bottom without a recess).<br />
Accordingly, the Te-PS Sensor plate sits higher on a standard carrier than a<br />
microplate. If the carrier has a raised plateau, specify its height with this<br />
parameter (range: 0 to 10 mm). This parameter is only used if you place a Te-<br />
PS Sensor plate on a standard carrier for the purpose of arm alignment.<br />
Position layout<br />
Specify the number of positions (sites) which are available for labware in the<br />
X, Y and Z directions. The product X * Y * Z is the total number of sites (the<br />
maximum number of labware items that the carrier can accommodate). The<br />
total number of sites must not exceed 396.<br />
The position layout for the 3-position microplate carrier is X=1, Y=3, Z=1 (total<br />
of 3 sites). The RoMa can access all 3 sites by moving in the Y direction.<br />
The position layout for a common type of incubator is X=1, Y=1, Z=6 (total of 6<br />
sites). The RoMa can access all 6 sites by moving in the Z direction.<br />
The Te-MO 3x5 has 5 sites on each of 3 slides (X=3, Y=5, Z=1). To allow the<br />
RoMa to access all 15 sites, the slides move automatically to position the<br />
required site at the RoMa transfer position.<br />
If you are configuring the carousel carrier, see also 9.5.5.3 “Carousel Carrier<br />
Attributes”, 9-50 and 9.5.5.4 “Carousel NT Carrier Attributes”, 9-52.<br />
9 - 42 <strong>Freedom</strong> <strong>EVOware</strong> <strong>Software</strong> <strong>Manual</strong>, 393172, en, V<strong>2.3</strong>
9 - Specifying Your Instrument Setup<br />
Configuring Carriers<br />
Use to offset RoMa vector<br />
Check the checkboxes to indicate how many unique sites the device or carrier<br />
has for the RoMa to access. The total number of RoMa sites is shown in the<br />
Sites field. The checkboxes determine the directions in which the RoMa<br />
needs to move to access the sites (X, Y and/or Z).<br />
For most carrier types, you should check all three checkboxes (X, Y and Z).<br />
Special cases:<br />
A common type of carousel has 9 towers and 21 microplates per tower (X=1,<br />
Y=9, Z=21, 189 labware items) but only one site for the RoMa to access (the<br />
carousel transfer position). In this case, you should only check the X column.<br />
A single Te-Stack has 1 or 2 towers and 50 microplates per tower (X=1 or 2,<br />
Y=1, Z=50) but only one site for the RoMa to access (the Te-Stack transfer<br />
position). In this case, you should only check the Y column.<br />
A double Te-Stack has 4 towers, 50 microplates per tower and two sites<br />
(transfer positions) for the RoMa to access (X=2, Y=2, Z=50). The RoMa can<br />
access both transfer positions by moving in the Y direction, so you should only<br />
check the Y column (total of 2 RoMa sites).<br />
Use the Te-Stack Right carrier if the Te-Stack is mounted on the right side of<br />
the worktable; use the Te-Stack Left carrier if the Te-Stack is mounted on the<br />
left side of the worktable:<br />
Fig. 9-16 Double Te-Stack Right (with the default tower configuration)<br />
The Te-Stack X and Y coordinates are not the same as the worktable grid<br />
coordinates. See also 8.5.28.3 “Te-Stack and Te-Stack Te-MO Configuration -<br />
Towers Tab”, 8-98.<br />
Robot<br />
The pipetting instrument uses robots to pick up and put down labware on<br />
carriers. Movement commands for robots are called “robot vectors”. If you<br />
want to create or edit a robot vector for this carrier, you must first choose the<br />
robot you want to use (RoMa, MCA96 or CGM for the MCA384).<br />
If your pipetting instrument is fitted with two plate robots (RoMa 1 and<br />
RoMa 2), you should create a vector for both plate robots for all carriers which<br />
can be accessed by both robots. Tip: the home position for plate robot 1 is at<br />
the rear left of the instrument.<br />
<strong>Freedom</strong> <strong>EVOware</strong> <strong>Software</strong> <strong>Manual</strong>, 393172, en, V<strong>2.3</strong> 9 - 43
9 - Specifying Your Instrument Setup<br />
Configuring Carriers<br />
Robot vectors<br />
Choose the required robot vector type from the list and click Create (the<br />
button changes to Edit if the robot vector has already been created). .<br />
See 9.6.1 “Using RoMa Vectors”, 9-58 for information on robot vector types.<br />
Additional information<br />
This field is for information purposes only and allows you to enter some notes<br />
about this carrier type. When you first install <strong>Freedom</strong> <strong>EVOware</strong>, this field<br />
shows the Tecan part number of the carrier.<br />
Link to<br />
This field is for information purposes only and is intended for the internet<br />
address (website URL) of the carrier manufacturer.<br />
Sort in Carrier group<br />
The Carriers tab in the Control Bar is subdivided into groups for Devices,<br />
Hotels, Microplate Carriers, DITI Carriers, Wash Stations, Trough Carriers,<br />
Tube Carriers (tube racks) and Miscellaneous Carriers. Choose the group<br />
where you want this carrier to be shown in the Control Bar. Choose Default to<br />
use the default Control Bar group for this carrier.<br />
Table of sites and offsets<br />
The table is used to configure dimensions for the sites and offsets. All dimensions<br />
are in millimeters.<br />
X-Offset, Y-Offset<br />
The X offset for sites is the distance between the left edge of the carrier and<br />
the left edge of the labware at the respective site. The Y offset for sites is the<br />
distance between the rear edge of the carrier and the rear edge of the labware<br />
at the respective site. See Fig. 9-17, 9-46.<br />
Z-Offset<br />
The Z offset for sites is normally “0” and is only specified non-zero if the sites<br />
on the carrier are not at the same height. You can specify either negative or<br />
positive values in this case. See Fig. 9-18, 9-46.<br />
X-Size, Y-Size<br />
X-Size and Y-Size are the outline dimensions of the site. See Fig. 9-17, 9-<br />
46.<br />
Shape<br />
Shape must always be Rectangle.<br />
Groups<br />
For carriers or devices with more than one site, if the sites have different<br />
mechanical characteristics you can specify labels (names) in the groups<br />
column to group equivalent sites into a single <strong>Freedom</strong> <strong>EVOware</strong> location.<br />
<strong>Freedom</strong> <strong>EVOware</strong> Plus automatically chooses which site it will use from the<br />
group when optimizing the schedule.<br />
For example, the three towers of the Te-Stack Te-MO can only put plates on<br />
the front two sites of the respective Te-MO slide. For mechanical reasons, the<br />
sites at the rear of the Te-MO are not accessible to the stacker. In this case,<br />
assign the front two sites of each Te-MO slide to a separate group. For<br />
example, assign the group labels “Stack1” to sites 4 and 5, “StackM” to sites 9<br />
9 - 44 <strong>Freedom</strong> <strong>EVOware</strong> <strong>Software</strong> <strong>Manual</strong>, 393172, en, V<strong>2.3</strong>
9 - Specifying Your Instrument Setup<br />
Configuring Carriers<br />
and 10 and “Stack2” to sites 14 and 15 (see Tab. 8-9 “Te-MO 3x5 site<br />
numbers”, 8-104). Choose descriptive labels with no space characters. See<br />
also <strong>EVOware</strong> location in 8.5.28.4 “Te-Stack and Te-Stack Te-MO<br />
Configuration - Locations Tab”, 8-102.<br />
A group is also needed for the Te-MO if you are using Active Positioning<br />
Carriers (APCs) but you have not fitted them to all sites. Assign the group<br />
label “APC” to the APC sites and put the labware onto one of the APC sites. if<br />
<strong>Freedom</strong> <strong>EVOware</strong> decides to use another Te-MO site or slide for pipetting, it<br />
will only use the APC sites.<br />
The location groups you have created will be shown in dialog boxes which<br />
allow you to choose locations. The group name you have chosen is shown<br />
appended to the end of the carrier name, e.g. Te-MO_3x5_Stack1.<br />
You can also use a label in the Groups column to identify a single site.<br />
For example, you can assign a group label (e.g. “DITI-Waste”) to the waste<br />
site of a DITI carrier if you want <strong>Freedom</strong> <strong>EVOware</strong> Plus to use it for<br />
discarding racks with used DITIs. You must then specify this site for<br />
MoveLocation2 in the respective RoMa_ReplaceObject command (see<br />
9.10.3.1 “Editing Custom Pre-actions and Post-actions”, 9-74, “Usage<br />
Example”). If you don’t specify a specific waste site, <strong>Freedom</strong> <strong>EVOware</strong> Plus<br />
will return DITI racks with used DITIs to their base (labware source) location,<br />
e.g. the carousel.<br />
If you want to use group labels, you must assign labels to all sites of the<br />
carrier, not just one site. See e.g. Tab. 8-11 “Te-MO 3x5 group labels”, 8-<br />
104. For more examples, refer to Group labels for carrier sites in the index.<br />
The Groups function is not relevant for <strong>Freedom</strong> <strong>EVOware</strong> <strong>Standard</strong>.<br />
Allowed Labware on this carrier<br />
For each of the labware types which can be used with this labware carrier or<br />
device carrier, check the checkboxes alongside the allowed sites.<br />
9.5.1 Carrier Dimensions and X/Y Offsets<br />
The figure below shows how to define the various dimensions for a carrier. The<br />
example is for the standard Tecan carrier Microplate, 3 Pos., landscape. The<br />
carrier type which is shown has a nose which extends beyond the rear edge. The<br />
positioning pins (shown in grey) are clipped to the worktable and are partially<br />
hidden from view by the carrier.<br />
<strong>Freedom</strong> <strong>EVOware</strong> <strong>Software</strong> <strong>Manual</strong>, 393172, en, V<strong>2.3</strong> 9 - 45
9 - Specifying Your Instrument Setup<br />
Configuring Carriers<br />
Fig. 9-17 Carrier dimensions and X/Y offsets<br />
9.5.2 Z Offsets for Carriers<br />
The figure below shows how to specify the reference offset Z (the vertical distance<br />
in millimeters between the top surface of the worktable and the bottom edge of the<br />
labware on the carrier). It does not refer to the top edge of the labware:<br />
Fig. 9-18 Specifying the Z offset for carriers<br />
9 - 46 <strong>Freedom</strong> <strong>EVOware</strong> <strong>Software</strong> <strong>Manual</strong>, 393172, en, V<strong>2.3</strong>
9 - Specifying Your Instrument Setup<br />
Configuring Carriers<br />
9.5.3 Custom Objects<br />
Proceed as follows if you want to define a custom object which is neither a carrier<br />
nor labware (i.e. it cannot be disassembled into a carrier and one or more pieces<br />
of labware). Define it as a new carrier and only specify X and Y dimensions for the<br />
carrier and X-Size and Y-Size for the site. Then define a new labware item, assign<br />
it to the site, specify the grid position and measure its coordinates as described in<br />
9.4.4 “Teaching the Labware Coordinates”, 9-26. After saving the configuration<br />
you can use the custom object on the worktable anywhere where it is required.<br />
9.5.4 Teaching the MCA384 System Carrier with DITI Racks<br />
The DITI rack for 15 µl MCA384 DITIs is not as high as the DITI racks for 50 and<br />
125 µl DITIs. The height difference is normally compensated by putting a 19 mm<br />
spacer block onto one or more sites of the MCA384 system carrier. Accordingly,<br />
when you specify dimensions for the MCA384 system carrier, you must increase<br />
the Z-offset of the site or sites to be used for the 15ul DITI rack by 19 mm. To do<br />
this, add 19 to the Z-offset value shown in the table of sites and offsets in the Edit<br />
Carrier dialog box.<br />
If required, you can make a duplicate of the standard MCA384 system carrier<br />
using a new name and configure the copy with a modified Z-offset on one or more<br />
sites. This allows you to set up the worktable with several system carriers for a<br />
different combination of DITI sizes.<br />
9.5.5 Carrier Attributes<br />
The following tables describe the standard attributes (parameters) in the <strong>Freedom</strong><br />
<strong>EVOware</strong> database which are available for carriers (including carriers which are<br />
devices). All attributes are automatically configured with appropriate values when<br />
<strong>Freedom</strong> <strong>EVOware</strong> is installed. You only need to change the settings for special<br />
applications. Carrier attributes should only be changed by specialists.<br />
Carriers which are devices normally require you to specify the server name, as<br />
follows (the example is for the centrifuge):<br />
Tab. 9-23 Carrier attributes, centrifuge<br />
Field name Default value Description<br />
Server Centrifuge Specify the call name for the device (the internal<br />
name of the device driver).<br />
Most of the carriers require you to specify Grip orientation, Lid is allowed, Location<br />
to store lid and Allowed robots. These attributes are described in 9.5.5.1 “Labware<br />
Carrier Attributes”, 9-49. To save space, these descriptions are not repeated for<br />
each of the available carrier types.<br />
The Attributes dialog box for the Edit Carrier dialog box normally shows<br />
descriptive names for the attributes. Check the Show internal names checkbox to<br />
see the internal names which are used.<br />
Click Add to activate a special attribute for the carrier and add it to the Attributes<br />
list. Special attributes are used to control advanced features in <strong>Freedom</strong><br />
<strong>EVOware</strong> which normally dormant (inactive).<br />
<strong>Freedom</strong> <strong>EVOware</strong> <strong>Software</strong> <strong>Manual</strong>, 393172, en, V<strong>2.3</strong> 9 - 47
9 - Specifying Your Instrument Setup<br />
Configuring Carriers<br />
Check the Show hidden attributes checkbox to see additional attributes which<br />
should not normally be changed. They only need to be edited for special<br />
applications.<br />
Custom grip position<br />
Some special carrier types and device carriers (e.g. readers) may require you to<br />
grip the labware at a non-standard grip height or grip position, for example to<br />
avoid a collision with adjacent mechanical components. The non-standard grip<br />
position is specified with the special carrier attributes Maximum grip offset and<br />
Minimum grip offset:<br />
Tab. 9-24 Carrier attributes, custom grip position for labware<br />
Field name Default value Description<br />
Maximum grip offset 0,0,0 Maximum position (in cm) for gripping labware<br />
for use on this carrier. a)<br />
Minimum grip offset 0,0,0 Minimum position (in cm) for gripping labware<br />
for use on this carrier. a)<br />
a) RoMa offset in the X, Y and Z direction (see 9.4.8.2 “RoMa Coordinate System”, 9-39).<br />
See 8.5.23.2 “Plate Robot Configuration - Settings Tab”, 8-86, Custom grip<br />
position, for more information.<br />
If the above two attributes are not visible in the Attributes list, click Add to activate<br />
them (the internal names are Grasp_Location_max and Grasp_Location_min).<br />
Note: The labware attributes Plate Grip Offset Narrow and Plate Grip Offset Wide<br />
adjust the grip position globally globally for this labware type (not just for a specific<br />
carrier).<br />
9 - 48 <strong>Freedom</strong> <strong>EVOware</strong> <strong>Software</strong> <strong>Manual</strong>, 393172, en, V<strong>2.3</strong>
9 - Specifying Your Instrument Setup<br />
Configuring Carriers<br />
9.5.5.1 Labware Carrier Attributes<br />
The attributes which you can configure for labware carriers are as follows:<br />
Tab. 9-25 Labware carrier attributes<br />
Field name Default value Description<br />
Grip orientation narrow (narrow side) This field specifies whether the RoMa should<br />
grip labware on this carrier on the narrow side<br />
or wide side. If you specify “narrow”, make<br />
sure that you have created a “Move Narrow”<br />
RoMa vector for this carrier (vice versa for<br />
“wide”) a) .<br />
Lid is allowed no (not allowed) Specify “yes” if a lid is allowed on labware<br />
which is on this carrier.<br />
Location to store lid<br />
Allowed robots<br />
(original position<br />
of labware)<br />
If lids are not allowed on labware which is on<br />
this carrier, the lid will be removed from the<br />
labware and moved to the location specified in<br />
this field. b)<br />
Comma separated list of all plate robots that<br />
can safely access this location (e.g. “RoMa,<br />
RoMa2”). The robot names are case sensitive.<br />
If this field is left empty, <strong>Freedom</strong><br />
<strong>EVOware</strong> assumes that all plate robots can<br />
safely access this location. The list may be<br />
necessary if e.g. the carrier is positioned at<br />
the extreme left or extreme right of the worktable.<br />
SafeMoveOffset 0 X-offset in mm for safe LiHa movement to and<br />
from the pipetting position (see 17.4 “Safe<br />
Pathways Feature”, 17-14).<br />
SafeMoveSpeed<br />
Speed to use for movements along safe paths<br />
in mm/s (see 17.4 “Safe Pathways Feature”,<br />
17-14).<br />
Safety 1 Only for the MCA384 DITI Carrier:<br />
1 = Close the locking mechanism when<br />
mounting DITIs from the MCA384 DITI Carrier.<br />
0 = Do not close the locking mechanism.<br />
ZTravel - Only if you choose Positioning with advanced<br />
Z-travel in the Configuration Tool (see<br />
8.4.2.11, 8-34). If the ZTravel parameter is<br />
non-zero, it is used for Z-travel height instead<br />
of the taught Z-travel height.<br />
a) If you specify “narrow” and the physical orientation of the carrier site is landscape (e.g. the “MP 3 Pos”<br />
carrier), the RoMa will grip the labware from the side of the worktable (with the grippers pointing in the<br />
direction X or -X), not from the front (vice versa for “wide”).<br />
b) Broadly speaking, the lid attributes in the labware definition specify how to grip the lid; the lid attributes in<br />
the carrier definition specify where to store the lid if it is removed.<br />
<strong>Freedom</strong> <strong>EVOware</strong> <strong>Software</strong> <strong>Manual</strong>, 393172, en, V<strong>2.3</strong> 9 - 49
9 - Specifying Your Instrument Setup<br />
Configuring Carriers<br />
Other lid attributes can be set in the labware definition. Broadly speaking, the lid<br />
attributes in the labware definition specify how to grip the lid; the lid attributes in<br />
the carrier definition specify where to store the lid if it is removed.<br />
Check the Show hidden attributes checkbox to see additional, hidden attributes<br />
which should not normally be changed. They only need to be edited for special<br />
applications:<br />
Tab. 9-26 Labware carrier attributes, hidden<br />
Field name Default value Description<br />
Lid_position 0,0,0 Specify the required position of the lid within<br />
the lid location. a)<br />
Dimension - Read-only field - please set this attribute with<br />
the Position Layout pull-down lists in the Edit<br />
Carrier dialog box.<br />
Occupation 0 For internal use only.<br />
Speed - Allowed maximum speed of RoMa movement<br />
in % of full RoMa speed when moving to this<br />
location.<br />
Dimension_mask 1,1,1 Read-only field - please set this attribute with<br />
the Use to offset RoMa vector checkboxes in<br />
the Edit Carrier dialog box. a)<br />
a) X, Y and Z RoMa movements in cm (see 9.4.8.2 “RoMa Coordinate System”, 9-39).<br />
9.5.5.2 Barcode Scanner Carrier Attributes<br />
The additional attributes which you can configure for the barcode scanner carrier<br />
are as follows:<br />
Tab. 9-27 Carrier attributes, barcode scanner<br />
Field name Default value Description<br />
Server BarcodeScanner Specify the call name for the device (the internal<br />
name of the device driver).<br />
Device requires<br />
release of labware<br />
no<br />
With most devices such as the Te-Shake<br />
shaker, the RoMa puts the labware onto the<br />
device. The barcode scanner is an on-the-fly<br />
device - the RoMa presents the labware to the<br />
scanner but does not release it. Specify “no” in<br />
this field for on-the-fly devices.<br />
See 9.5.5.1 “Labware Carrier Attributes”, 9-49 for descriptions of the other<br />
attributes.<br />
9.5.5.3 Carousel Carrier Attributes<br />
The additional attributes which you can configure for the Carousel carrier are as<br />
follows:<br />
9 - 50 <strong>Freedom</strong> <strong>EVOware</strong> <strong>Software</strong> <strong>Manual</strong>, 393172, en, V<strong>2.3</strong>
9 - Specifying Your Instrument Setup<br />
Configuring Carriers<br />
Tab. 9-28 Carrier attributes, Carousel<br />
Field name Default value Description<br />
Slot pitch height 1925 Specify the vertical distance in device steps<br />
between the bottoms of adjacent labware<br />
items in the same tower. This information is<br />
required by the carousel feeder mechanism.<br />
The slot pitch height also determines how<br />
many labware items will fit in the carousel<br />
tower. If you change this setting, you may<br />
need to correct the YS setting in the position<br />
layout for the carousel carrier (see<br />
9.5 “Configuring Carriers”, 9-39).<br />
Starting cartridge in<br />
carousel<br />
1 The carousel must be subdivided into several<br />
logical carousels (separate sets of towers) if<br />
you want to use it to store a mixture of labware<br />
types with different dimensions. To create<br />
logical carousels, make copies of the<br />
carousel carrier (right-click the carrier in the<br />
Control Bar and choose Duplicate) and specify<br />
the starting tower, the slot pitch height, the<br />
Y dimensions (number of towers) and a new<br />
name for each copy. a)<br />
The settings for starting tower and number of<br />
towers must not overlap the settings of other<br />
logical carousels for this device. You should<br />
not put labware with different dimensions in<br />
the same tower.<br />
Server Carousel Specify the call name for the device (the internal<br />
name of the device driver).<br />
Transfer height 5000 Specify the height of the handler (shuttle) in<br />
device steps when it is positioned at the carousel<br />
transfer position.<br />
a) You must restart <strong>Freedom</strong> <strong>EVOware</strong> after creating the logical carousel(s).<br />
See 9.5.5.1 “Labware Carrier Attributes”, 9-49 for descriptions of the other<br />
attributes.<br />
<strong>Freedom</strong> <strong>EVOware</strong> <strong>Software</strong> <strong>Manual</strong>, 393172, en, V<strong>2.3</strong> 9 - 51
9 - Specifying Your Instrument Setup<br />
Configuring Carriers<br />
9.5.5.4 Carousel NT Carrier Attributes<br />
The additional attributes which you can configure for the Carousel NT carrier are<br />
as follows:<br />
Tab. 9-29 Carrier attributes, Carousel NT<br />
Field name Default value Description<br />
Starting cartridge in<br />
carousel<br />
1 The carousel must be subdivided into several<br />
logical carousels (separate sets of towers) if<br />
you want to use it to store a mixture of labware<br />
types with different dimensions. To create<br />
logical carousels, make copies of the<br />
carousel carrier (right-click the carrier in the<br />
Control Bar and choose Duplicate) and specify<br />
the starting tower, the slot pitch height, the<br />
Y dimensions (number of towers) and a new<br />
name for each copy. a)<br />
The settings for starting tower and number of<br />
towers must not overlap the settings of other<br />
logical carousels for this device. You should<br />
not put labware with different dimensions in<br />
the same tower. For the Carousel NT, slot<br />
pitch height is configured in the driver (see<br />
8.5.3.2 “Carousel NT Configuration - Hotel -<br />
Cartridge Configuration Tab”, 8-46).<br />
BCZOffset 450 Offset in device steps to adjust the vertical<br />
position of the barcode scanner. This setting<br />
is related to the distance between the barcode<br />
label and the bottom edge of the labware.<br />
Server CarouselNT Specify the call name for the device (the internal<br />
name of the device driver).<br />
a) You must restart <strong>Freedom</strong> <strong>EVOware</strong> after creating the logical carousel(s).<br />
See 9.5.5.1 “Labware Carrier Attributes”, 9-49 for descriptions of the other<br />
attributes.<br />
9.5.5.5 Centrifuge Carrier Attributes<br />
The additional attributes which you can configure for the centrifuge carrier are as<br />
follows:<br />
Tab. 9-30 Carrier attributes, centrifuge<br />
Field name Default value Description<br />
Server Centrifuge Specify the call name for the device (the internal<br />
name of the device driver).<br />
See 9.5.5.1 “Labware Carrier Attributes”, 9-49 for descriptions of the other<br />
attributes.<br />
9 - 52 <strong>Freedom</strong> <strong>EVOware</strong> <strong>Software</strong> <strong>Manual</strong>, 393172, en, V<strong>2.3</strong>
9 - Specifying Your Instrument Setup<br />
Configuring Carriers<br />
9.5.5.6 Incubator Carrier Attributes<br />
See 8.5.8 “Settings for Heated Incubators 1 to 3”, 8-55 for information on logical<br />
incubators.<br />
9.5.5.7 Pooling Balance Carrier Attributes<br />
The additional attributes which you can configure for the Mettler pooling balance<br />
are as follows:<br />
Tab. 9-31 Carrier attributes, Mettler pooling balance<br />
Field name Default value Description<br />
Carrier is a pooling<br />
balance<br />
Enforce tip-wise dispensing<br />
No<br />
No<br />
Choose Yes if the balance is a pooling balance.<br />
See 10.1.1 “Global Parameters for Liquid<br />
Classes”, 10-4, Liquid Arrival Check for<br />
more information.<br />
The Liquid Arrival Check feature normally verifies<br />
that the correct liquid volumes have been<br />
dispensed by weighing the labware after<br />
pipetting from all of the tips which are selected<br />
in the pipetting command. If a volume discrepancy<br />
is detected, it is not possible to identify<br />
which tip has pipetted inaccurately. Choose<br />
Yes if you want to verify the pipetted volume<br />
for each tip separately. The pipetting operation<br />
will take significantly longer in this case.<br />
See 9.5.5.1 “Labware Carrier Attributes”, 9-49 for descriptions of the other<br />
attributes.<br />
For more information on the pooling balance, see Liquid Arrival Check in<br />
10.1.1 “Global Parameters for Liquid Classes”, 10-4.<br />
9.5.5.8 Te-Shake Carrier Attributes<br />
The additional attributes which you can configure for the Te-Shake carrier are as<br />
follows:<br />
Tab. 9-32 Carrier attributes, Te-Shake<br />
Field name Default value Description<br />
Server Shaker Specify the call name for the device (the internal<br />
name of the device driver).<br />
DeviceIDs a)<br />
7 Hardware address of the shaker plus 1. Readonly<br />
field - please set this attribute with the<br />
Settings tab of the Te-Shake driver in the Configuration<br />
Tool.<br />
Has heater a) 0 Specify 1 if the shaker is fitted with the heater<br />
option.<br />
Init temperature a) 0 If the shaker is fitted with the heater option,<br />
specify the initial temperature.<br />
a) Hidden attribute. Click the Show hidden attributes checkbox to make it visible.<br />
<strong>Freedom</strong> <strong>EVOware</strong> <strong>Software</strong> <strong>Manual</strong>, 393172, en, V<strong>2.3</strong> 9 - 53
9 - Specifying Your Instrument Setup<br />
Configuring Carriers<br />
See 9.5.5.1 “Labware Carrier Attributes”, 9-49 for descriptions of the other<br />
attributes.<br />
See also 16.28 “Commands for the Te-Shake Shaker”, 16-90 for more<br />
information on the Te-Shake carrier.<br />
9.5.5.9 Te-Stack Carrier Attributes<br />
The additional attributes which you can configure for the Te-Stack carrier are as<br />
follows:<br />
Tab. 9-33 Carrier attributes, Te-Stack<br />
Field name Default value Description<br />
Allowed robots<br />
Comma separated list of all plate robots that<br />
can safely access this location (e.g. “RoMa,<br />
RoMa2”). The robot names are case sensitive.<br />
If this field is left empty, <strong>Freedom</strong><br />
<strong>EVOware</strong> assumes that all plate robots can<br />
safely access this location.<br />
PlateStacker 1 Always specify 1 to indicate that this is a lastin<br />
first-out stacking device (if a microplate is<br />
removed from the stacker, all of the other<br />
ones will slide down one position).<br />
Server Te-Stacker Specify the call name for the device (the internal<br />
name of the device driver).<br />
WasteLocation<br />
0 = Do not use the Te-Stack Waste option.<br />
1 = Use the Te-Stack Waste option. Labware<br />
returned to the Te-Stack will then be discarded<br />
to the Te-Stack Waste. The Te-Stack Waste<br />
hardware option is mainly intended for discarding<br />
empty DITI racks. WasteLocation is a<br />
hidden attribute.<br />
See 9.5.5.1 “Labware Carrier Attributes”, 9-49 for descriptions of the other<br />
attributes.<br />
See also 16.34 “Commands for the Te-Stack”, 16-107 for information on logical<br />
Te-Stack devices.<br />
9 - 54 <strong>Freedom</strong> <strong>EVOware</strong> <strong>Software</strong> <strong>Manual</strong>, 393172, en, V<strong>2.3</strong>
9 - Specifying Your Instrument Setup<br />
Creating and Editing Plate Robot Vectors<br />
9.5.5.10 Te-Stack Te-MO Carrier Attributes<br />
The additional attributes which you can configure for the Te-Stack Te-MO carrier<br />
are as follows:<br />
Tab. 9-34 Carrier attributes, Te-Stack Te-MO<br />
Field name Default value Description<br />
Allowed robots Te-StackTeMO Always specify Te-StackTeMO.<br />
PlateStacker 1 Always specify 1 to indicate that this is a lastin<br />
first-out stacking device (if a microplate is<br />
removed from the stacker, all of the other<br />
ones will slide down one position).<br />
Server Te-StackTeMO Specify the call name for the device (the internal<br />
name of the device driver).<br />
See 9.5.5.1 “Labware Carrier Attributes”, 9-49 for descriptions of the other<br />
attributes.<br />
9.6 Creating and Editing Plate Robot Vectors<br />
The plate robot (RoMa, robot manipulator) is a robot arm with gripper fingers that<br />
can grip and move objects within the working area of the pipetting instrument. It<br />
can be used to transport microplates, reagent blocks, deep well plates, etc.<br />
between carriers, incubators and storage positions (e.g. a RoMa shelf or<br />
carousel). Current Tecan pipetting instruments can be fitted with up to two RoMas.<br />
RoMa actions such as getting a microplate from a RoMa hotel or putting it onto a<br />
carrier are stored in the <strong>Freedom</strong> <strong>EVOware</strong> configuration. Each RoMa action is<br />
called a RoMa vector, which is a predefined sequence of RoMa positions (called<br />
waypoints). RoMa vectors are associated with carriers.<br />
Movement vectors for the MCA96 gripper and the CGM of the MCA384 are very<br />
similar in principle to RoMa vectors, so they will not be described explicitly in this<br />
chapter. See 9.8 “Creating and Editing MCA Vectors”, 9-69 for additional<br />
information on these vector types.<br />
In <strong>Freedom</strong> <strong>EVOware</strong> <strong>Standard</strong>, RoMa actions are specified by adding RoMa<br />
commands to your pipetting script. The RoMa Vector and Transfer Labware<br />
commands specify the RoMa vector you want to execute (see 15.58 “RoMa<br />
Vector Command”, 15-141, 15.59 “Transfer Labware Command”, 15-143 and<br />
15.57 “Move RoMa Command”, 15-140).<br />
In <strong>Freedom</strong> <strong>EVOware</strong> Plus, RoMa movements are carried out automatically when<br />
the process is run. <strong>Freedom</strong> <strong>EVOware</strong> Plus automatically chooses the carriers<br />
and sites which will be used for pipetting to maximize the throughout (efficiency)<br />
of the process. It then chooses the RoMa vectors which are needed to move the<br />
labware to and from these sites. You only need to make sure that the appropriate<br />
RoMa vectors are available for the carrier types you want to use.<br />
RoMa vectors can have up to 7 waypoints, but must have at least two. The first<br />
waypoint is called the safe position and the last waypoint is called the end<br />
position.<br />
• The safe position is where the RoMa starts its movement towards the site to<br />
pick up or to release the object (e.g. the microplate). It should be chosen such<br />
<strong>Freedom</strong> <strong>EVOware</strong> <strong>Software</strong> <strong>Manual</strong>, 393172, en, V<strong>2.3</strong> 9 - 55
9 - Specifying Your Instrument Setup<br />
Creating and Editing Plate Robot Vectors<br />
that the RoMa can move to the safe position of another RoMa vector or to the<br />
RoMa home position without colliding with other objects on the worktable.<br />
• The end position is where the RoMa grips or releases the object.<br />
Each RoMa vector is associated with a carrier. If the carrier is moved on the<br />
worktable, the RoMa vector moves along with it and does not need to be<br />
redefined. Accordingly, you only have to define a RoMa vector once for each<br />
carrier type, and you can then use it for any worktable position of this carrier type.<br />
In addition, <strong>Freedom</strong> <strong>EVOware</strong> automatically recalculates the RoMa vector for<br />
each site of the carrier (it gets information on the spacing between the sites from<br />
the carrier definition). So you only need to define a RoMa vector for one of the<br />
sites (typically the first site).<br />
end position<br />
(site 1)<br />
end position<br />
(site 2)<br />
2<br />
3<br />
2<br />
3<br />
site 1<br />
site 2<br />
1<br />
safe position<br />
(site 1)<br />
1<br />
safe position<br />
(site 2)<br />
y<br />
Fig. 9-19 Two site carrier showing two RoMa movements with three waypoints each<br />
The above figure shows two RoMa vectors for a two site carrier. In the example,<br />
each Roma vector has three waypoints (1, 2 and 3). <strong>Freedom</strong> <strong>EVOware</strong><br />
automatically calculates the RoMa vector for site 2 from the RoMa vector for site<br />
1.<br />
Up to four RoMa vectors can be created for each carrier type:<br />
• Approach Narrow<br />
• Move Narrow<br />
• Approach Wide<br />
• Move Wide<br />
See 9.6.1 “Using RoMa Vectors”, 9-58 for more information on these vectors.<br />
They are associated with carriers and are stored in the carrier definition (see<br />
9.6.2 “Teach Plate Robot Vector Dialog Box”, 9-59).<br />
You also need to create a RoMa vector which moves the RoMa back to the home<br />
(parking) position, out of the way of other objects on the worktable (you need to<br />
define two home vectors if your instrument is fitted with two RoMas). See<br />
9.6.4 “Defining the Home Position for a RoMa”, 9-62.<br />
When <strong>Freedom</strong> <strong>EVOware</strong> moves an object from one position to another, it<br />
typically needs to carry out two RoMa vectors. The first one moves the RoMa from<br />
its current position to the safe position of site 1 and then to the end position of site<br />
1, grips the plate and moves back to the safe position again using the same vector<br />
in reverse. It then moves directly to the safe position of site 2. Using the second<br />
9 - 56 <strong>Freedom</strong> <strong>EVOware</strong> <strong>Software</strong> <strong>Manual</strong>, 393172, en, V<strong>2.3</strong>
9 - Specifying Your Instrument Setup<br />
Creating and Editing Plate Robot Vectors<br />
RoMa vector it moves to the end position of site 2, releases the plate and moves<br />
back to the safe position again. Depending on the configuration, in <strong>Freedom</strong><br />
<strong>EVOware</strong> Plus the RoMa then either waits at this position or moves back to its<br />
home (parking) position out of the way of other objects on the worktable. In<br />
<strong>Freedom</strong> <strong>EVOware</strong> <strong>Standard</strong>, you should use the Move RoMa command to move<br />
the RoMa back to its home position after carrying out a sequence of RoMa<br />
movements.<br />
end position A1<br />
RoMa home position<br />
end position A2<br />
safe position A<br />
end position A3<br />
safe position B<br />
end position B<br />
Fig. 9-20 Moving labware from carrier A to carrier B<br />
The above figure shows how the RoMa moves labware between three sites of<br />
carrier A and one site of carrier B.<br />
When the RoMa transfers a plate from carrier A to carrier B, it first moves from its<br />
current position (not shown in the figure) to the safe position of carrier A, then it<br />
moves to the end position of the required site, grips the plate and moves back to<br />
the safe position of carrier A again. From this position it moves directly to the safe<br />
position of carrier B, moves to its end position, releases the plate and moves back<br />
to the safe position of carrier B. Depending on the configuration of the RoMa, the<br />
RoMa either waits at this position or moves back to its home (parking) position.<br />
See 9.6.4 “Defining the Home Position for a RoMa”, 9-62.<br />
Note: The safe positions of the RoMa vectors and the RoMa home position<br />
should all be chosen such that the RoMa can move between them without<br />
colliding with other objects on the worktable. Also keep in mind that the RoMa<br />
needs to rotate if the two sites have a different orientation (landscape or portrait)<br />
and that it needs to move without obstruction both with and without a microplate.<br />
A so-called “teach plate” is available from Tecan as an aid when teaching the<br />
positions of the labware. The teach plate can be can be mounted on the RoMa<br />
grippers and ensures that the labware is always gripped in the same way.<br />
RoMa vectors can be assigned to regular carriers such as microplate carriers<br />
which are used by the liquid handling arm for pipetting operations. They can also<br />
be assigned to so-called Robot only carriers, which are typically storage devices<br />
such as carousels and hotels or other devices such as shakers and incubators.<br />
Robot only carriers can be accessed by plate or tube robots but are not used for<br />
pipetting operations. See the Accessible for liquid handling arm checkbox in<br />
9.5 “Configuring Carriers”, 9-39.<br />
<strong>Freedom</strong> <strong>EVOware</strong> <strong>Software</strong> <strong>Manual</strong>, 393172, en, V<strong>2.3</strong> 9 - 57
9 - Specifying Your Instrument Setup<br />
Creating and Editing Plate Robot Vectors<br />
9.6.1 Using RoMa Vectors<br />
Movement commands for the robot arms (RoMa, MCA96 gripper and the CGM of<br />
the MCA384) are called vectors. You can create them in the Edit Carrier dialog<br />
box, in which case they are associated with a specific carrier and are stored in the<br />
carrier definition. You can also create “user-defined” vectors. This is done on the<br />
Robot Vectors tab of the Control Bar. User-defined vectors are intended e.g. for<br />
the Vector command of the respective robot arm.<br />
Movement vectors for the MCA96 gripper and the CGM are very similar in<br />
principle to RoMa vectors, so they will not be described explicitly in this chapter.<br />
See 9.8 “Creating and Editing MCA Vectors”, 9-69 for additional information on<br />
these vector types.<br />
<strong>Freedom</strong><br />
<strong>EVOware</strong><br />
<strong>Standard</strong><br />
<strong>Freedom</strong><br />
<strong>EVOware</strong> Plus<br />
In <strong>Freedom</strong> <strong>EVOware</strong> <strong>Standard</strong>, RoMa vectors are executed using the script<br />
commands RoMa Vector and Transfer Labware. Simple RoMa movements are<br />
executed with the Move RoMa command, which does not need a vector.<br />
In <strong>Freedom</strong> <strong>EVOware</strong> Plus, RoMa vectors are mainly used as pre-actions and<br />
post-actions of device commands. The pre-actions and post-actions are executed<br />
automatically when the process step is executed. If your process involves<br />
pipetting to a plate which is initially stored in a carousel, <strong>Freedom</strong> <strong>EVOware</strong> first<br />
uses the robot vector associated with the carousel to take the plate from the<br />
carousel and then uses the robot vector associated with the carrier to put the plate<br />
on the carrier. You do not need to specify the RoMa vectors - <strong>Freedom</strong> <strong>EVOware</strong><br />
gets them from the carrier and device definitions. You only need to make sure that<br />
the RoMa vectors which you want to use are already set up in the <strong>Freedom</strong><br />
<strong>EVOware</strong> configuration.<br />
Note: An example of a special application which requires you to specify RoMa<br />
vectors explicitly is working with insert plates. The sequence of movements which<br />
is required to access a certain part of the plate depends on the laboratory process<br />
which you want to implement.<br />
Up to four RoMa vectors can be created for each carrier type:<br />
• Approach Narrow: Vector for picking up plates on the narrow side. The end<br />
position of this vector is chosen to be a short distance away from the final<br />
position (a few cm).<br />
• Move Narrow: Vector for picking up plates on the narrow side. It moves from<br />
the current position of the robot to the final position where the object is<br />
gripped.<br />
• Approach Wide: Vector for picking up plates on the wide side. The end<br />
position of this vector is chosen to be a short distance away from the final<br />
position (a few cm).<br />
• Move Wide: Vector for picking up plates on the wide side. It moves from the<br />
current position of the robot to the final position where the object is gripped.<br />
It is normally only necessary to specify the Move vectors and not the Approach<br />
vectors. For example, the microplate carrier “MP 3Pos” normally only needs a<br />
Move Narrow vector. Although the labware is put on this carrier in landscape<br />
orientation, the RoMa is instructed to grip the labware on the narrow side and not<br />
from the front (see 9.5.5.1 “Labware Carrier Attributes”, 9-49).<br />
The two Approach vectors can be optionally defined for intelligent devices such as<br />
the carousel, and are used together with the Move vectors to optimize the<br />
throughput. The carousel may take 20 seconds or so to get a plate out of the<br />
specified tower. To save time, the Approach vector can be started while the<br />
carousel is still getting the plate.<br />
If you request a plate from a carousel, <strong>Freedom</strong> <strong>EVOware</strong> proceeds as follows:<br />
9 - 58 <strong>Freedom</strong> <strong>EVOware</strong> <strong>Software</strong> <strong>Manual</strong>, 393172, en, V<strong>2.3</strong>
9 - Specifying Your Instrument Setup<br />
Creating and Editing Plate Robot Vectors<br />
• A RoMa Approach vector instructs the RoMa to move towards the carousel<br />
and stop a few cm away.<br />
• A Carousel LoadPlate command instructs the carousel to take the plate from<br />
the tower and move it to the exchange position, where it can be accessed by<br />
the RoMa.<br />
• To save time, the RoMa Approach movement and the carousel movement<br />
take place simultaneously.<br />
• As soon as the carousel has reached the exchange position, a RoMa Move<br />
vector instructs the RoMa to move to the exchange position, where it grips the<br />
plate and returns with the plate to it’s safe position.<br />
If the RoMa Approach vector is not specified, only the RoMa Move vector is used.<br />
In this case, throughput optimization is not carried out.<br />
9.6.2 Teach Plate Robot Vector Dialog Box<br />
The following dialog box is used to create and edit plate robot (RoMa) vectors.<br />
See 9.6 “Creating and Editing Plate Robot Vectors”, 9-55 for more information<br />
on plate robot vectors.<br />
Fig. 9-21 Teach Plate Robot Vector dialog box<br />
To get to this dialog box, open the Edit Carrier dialog box for the carrier you want<br />
to use, choose the plate robot you want to use (1 or 2), choose a robot vector from<br />
the list and click Create. The button changes to Edit if the respective robot vector<br />
has already been created.<br />
You are then prompted to click on the carrier site which you want to use for<br />
teaching. You can only click on a carrier of the correct type. Since you will need to<br />
<strong>Freedom</strong> <strong>EVOware</strong> <strong>Software</strong> <strong>Manual</strong>, 393172, en, V<strong>2.3</strong> 9 - 59
9 - Specifying Your Instrument Setup<br />
Creating and Editing Plate Robot Vectors<br />
carefully observe the plate robot movements, you should choose a site which has<br />
good visibility.<br />
The parameters in the Teach Plate Robot Vector dialog box are as follows:<br />
Carrier name<br />
Name of the carrier for which the RoMa vector is being defined.<br />
Grid, Site<br />
These fields show the grid position and the site which you chose for teaching.<br />
The adjustment buttons of the Site field are protected (gray) if the carrier only<br />
has one site.<br />
ATTENTION<br />
Risk of the RoMa moving to the wrong position on the worktable.<br />
• Please choose the correct grid position and site before specifying any<br />
coordinates or using any of the movement buttons. Otherwise the RoMa might<br />
move to the wrong position on the worktable.<br />
Define Coordinates panel<br />
This shows the RoMa positions (waypoints) which will be used for the RoMa<br />
vector. Each waypoint is specified by its X, Y and Z coordinates in instrument<br />
steps (0.1 mm) and a value for the rotation of the gripper arms (R, measured in<br />
0.1° steps).<br />
Absolute<br />
Check this checkbox to use absolute positions for the selected waypoint. In<br />
this case, when <strong>Freedom</strong> <strong>EVOware</strong> automatically recalculates the RoMa<br />
vector for each site of the carrier it only changes the X coordinates. This may<br />
be necessary if the RoMa could otherwise collide with other objects on the<br />
worktable. See 9.6.3 “Absolute Positions in RoMa Vectors”, 9-61. The<br />
Absolute checkbox should not be checked for the End position.<br />
The following buttons can be used to edit, insert and delete waypoints and to<br />
move the RoMa along the specified waypoints:<br />
add pos.<br />
This button inserts a new entry in the waypoint list above the currently<br />
selected entry.<br />
delete<br />
This button deletes the currently selected entry in the waypoint list.<br />
transfer<br />
This button copies the current RoMa position (as shown in the Plate Robot tab<br />
of the Move dialog box) to the selected entry in the waypoint list. Do this when<br />
you want to teach the current position of the RoMa.<br />
Note: You can move the RoMa using the keys on the numeric keypad (see the<br />
Move dialog box and 9.3.2 “Moving the RoMa (Plate Robot)”, 9-5).<br />
move to...<br />
This button moves the RoMa to the coordinates of the selected entry in the<br />
waypoint list. The Plate Robot tab of the Move dialog box will be updated<br />
accordingly.<br />
9 - 60 <strong>Freedom</strong> <strong>EVOware</strong> <strong>Software</strong> <strong>Manual</strong>, 393172, en, V<strong>2.3</strong>
9 - Specifying Your Instrument Setup<br />
Creating and Editing Plate Robot Vectors<br />
move to Safe Position<br />
This button moves the RoMa along the defined waypoints from the selected<br />
waypoint to the safe position of the RoMa vector (the first waypoint).<br />
move to End Position<br />
This button moves the RoMa along the defined waypoints from the selected<br />
waypoint to the end position of the RoMa vector (the last waypoint).<br />
Adjust button<br />
The Adjust button is only available if the carrier is not accessible to the liquid<br />
handling arm (example: microplate hotel). It is used to adjust the carrier<br />
definition for a specified, single site to compensate for small manufacturing<br />
inaccuracies in a multi-site carrier without needing to switch to the Edit Carrier<br />
dialog box. To use this feature, choose the site you want to adjust and click<br />
Move to End Position to move the RoMa to the final position of the RoMa<br />
vector. Then fine tune the RoMa position using the numeric keypad and click<br />
the Adjust button to modify the carrier definition to match the current X, Y and<br />
Z coordinates. After saving your changes, they will also be visible in the Edit<br />
Carrier dialog box (the units in the Move dialog box are in 0.1 mm; the units in<br />
the Edit Carrier dialog box are in mm).<br />
Movements panel<br />
XYZ Speed<br />
Specify the required speed for x, y and z movements.<br />
Grip Parameters panel<br />
Grip Distance<br />
This is the distance in mm that the RoMa gripper closes to when gripping an<br />
object with this vector (range: 55 to 140 mm). It should be about 1 to 2 mm<br />
less than the width of the object.<br />
Release Distance<br />
This is the distance in mm that the RoMa gripper opens to when releasing an<br />
object with this vector (range: 55 to 140 mm). It should be about 3 to 4 mm<br />
more than the width of the object.<br />
Force<br />
This is the force that the gripper uses when gripping an object. The force is<br />
specified by a number between 0 and 249. Higher numbers mean higher<br />
force.<br />
Speed<br />
This is the speed in mm/s with which the gripper tries to grip an object.<br />
grip<br />
Click this button to close the gripper to the specified gripping distance for<br />
testing purposes. The gripper remains at the specified gripping distance until<br />
the Release button is clicked.<br />
release<br />
Click this button to open the gripper to the specified release distance for<br />
testing purposes.<br />
9.6.3 Absolute Positions in RoMa Vectors<br />
One or more waypoints in a RoMa vector can be configured as absolute positions.<br />
For such waypoints, when <strong>Freedom</strong> <strong>EVOware</strong> automatically calculates the RoMa<br />
<strong>Freedom</strong> <strong>EVOware</strong> <strong>Software</strong> <strong>Manual</strong>, 393172, en, V<strong>2.3</strong> 9 - 61
9 - Specifying Your Instrument Setup<br />
Creating and Editing Plate Robot Vectors<br />
vector for each site of the carrier it only changes the X coordinates. You can test<br />
this by checking the Absolute checkbox in the Edit Plate Robot Vector dialog box<br />
and changing the specified site.<br />
You may need to specify one or more absolute waypoints in your RoMa vector if<br />
the RoMa could otherwise collide with other objects on the worktable. The Abs.<br />
checkbox should not be checked for the End position.<br />
In the following figure, waypoint 1 is an absolute waypoint (compare this figure<br />
with Fig. 9-19, 9-56).<br />
end position<br />
(site 2)<br />
end position<br />
(site 1)<br />
2<br />
2<br />
3<br />
site 1<br />
1<br />
safe position<br />
(site 1 and 2)<br />
3<br />
site 2<br />
y<br />
Fig. 9-22 Two RoMa vectors with three waypoints each. Waypoint 1 is an absolute<br />
waypoint - it is used by both RoMa vectors<br />
The above figure shows two RoMa Vectors for a two site a carrier; the Absolute<br />
checkbox has been checked for waypoint 1 (the safe position in this case).<br />
Accordingly, <strong>EVOware</strong> uses the same safe position for both sites. This may be<br />
necessary if the RoMa could otherwise collide with other objects on the worktable<br />
(not shown in the figure). When <strong>Freedom</strong> <strong>EVOware</strong> automatically calculates the<br />
RoMa vector for site 2 from the RoMa vector for site 1, it does not change the<br />
coordinates for waypoint 1.<br />
9.6.4 Defining the Home Position for a RoMa<br />
After completing a sequence of movements with the RoMa, it should be moved<br />
back to its home (i.e. parking) position, out of the way of other objects on the<br />
worktable. Otherwise it might obstruct the movement of other arms such as the<br />
LiHa.<br />
The RoMa moves to the home position when you exit <strong>Freedom</strong> <strong>EVOware</strong>. In<br />
<strong>Freedom</strong> <strong>EVOware</strong> <strong>Standard</strong>, the RoMa moves to the home position if you specify<br />
Move to home position with the Move RoMa command. <strong>Freedom</strong> <strong>EVOware</strong> Plus<br />
moves the RoMa back to the home position automatically (see 8.5.23.2 “Plate<br />
Robot Configuration - Settings Tab”, 8-86).<br />
The home position for a RoMa is normally at the extreme left or right of the<br />
worktable, and should be chosen to be out of the way of other objects on the<br />
worktable. The home position is specified by creating a special RoMa vector with<br />
the name “Home 1”, which moves the RoMa to the chosen safe position.<br />
If your instrument is fitted with two RoMas, the home position for RoMa 1 is<br />
normally at the extreme left of the worktable and the home position for RoMa 2 is<br />
9 - 62 <strong>Freedom</strong> <strong>EVOware</strong> <strong>Software</strong> <strong>Manual</strong>, 393172, en, V<strong>2.3</strong>
9 - Specifying Your Instrument Setup<br />
Creating and Editing Tube Robot Vectors<br />
normally at the extreme right of the worktable. The home position for RoMa 2 is<br />
specified by creating a special RoMa vector with the name “Home 2”.<br />
Proceed as follows to define a home vector for the RoMa:<br />
Identify a route across the worktable from right to left (for RoMa 1) or left to right<br />
(for RoMa 2) along which the RoMa can safely move without colliding with other<br />
objects. Then create a RoMa vector for this route with at least five waypoints,<br />
whereby the first waypoint of this vector (the safe position) is the required home<br />
position.<br />
To edit an existing home vector, click Robot Vectors in the Control Bar, right-click<br />
on the vector and choose Edit. See 9.6.2 “Teach Plate Robot Vector Dialog Box”,<br />
9-59 for further information.<br />
To create a new home vector, click Robot Vectors in the Control Bar, right-click on<br />
the Robot Vectors group title and chose New. Name the vector “Home 1” (for<br />
RoMa 1) or “Home 2” (for RoMa 2). The new home vector will be shown in the<br />
Home Vectors group in the Control Bar (Robot Vectors section).<br />
<strong>Freedom</strong><br />
<strong>EVOware</strong><br />
<strong>Standard</strong><br />
If you specify Move to home position with the Move RoMa command, during script<br />
runtime <strong>Freedom</strong> <strong>EVOware</strong> automatically determines the closest waypoint of the<br />
home vector to the current RoMa position. The RoMa then moves to this waypoint<br />
and along the home vector until the home position (the first waypoint) has been<br />
reached.<br />
9.7 Creating and Editing Tube Robot Vectors<br />
The tube robot (PnP; Pick & Place arm) is a robot arm with gripper fingers that can<br />
grip and move tubes within the working area of the pipetting instrument, for<br />
example to transport tubes between tube racks. Current Tecan pipetting<br />
instruments can be fitted with up to two PnP arms.<br />
PnP actions such as getting a tube from a tube rack are stored in the <strong>Freedom</strong><br />
<strong>EVOware</strong> configuration. Each PnP action is called a PnP vector, which is a<br />
predefined sequence of PnP positions (called waypoints). PnP vectors are<br />
associated with labware such as tube racks.<br />
In both <strong>Freedom</strong> <strong>EVOware</strong> <strong>Standard</strong> and <strong>Freedom</strong> <strong>EVOware</strong> Plus, PnP<br />
movements are initiated by script commands (see 15.61 “PnP Vector Command”,<br />
15-146, and 15.62 “Transfer Tube Command”, 15-148). Simple PnP<br />
movements are carried out with the Move PnP command, which does not need a<br />
PnP vector (see 15.60, 15-145).<br />
In <strong>Freedom</strong> <strong>EVOware</strong> Plus, you first must use a special process step to open the<br />
script editor (see 16.25.1 “Tube Robot - ExecuteScript Command”, 16-83).<br />
PnP vectors can have up to 7 waypoints, but must have at least two. The first<br />
waypoint is called the safe position and the last waypoint is called the end<br />
position.<br />
• The safe position is where the PnP starts its movement towards the site to<br />
pick up or to release the tube. It should be chosen such that the PnP can<br />
move to the safe position of another PnP vector or to the PnP home position<br />
without colliding with other objects on the worktable.<br />
• The end position is where the PnP grips or releases the tube.<br />
Each PnP vector is associated with a labware item such as a tube rack. If the<br />
labware is moved on the worktable, the PnP vector moves along with it and does<br />
not need to be redefined. Accordingly, you only have to define a PnP vector once<br />
<strong>Freedom</strong> <strong>EVOware</strong> <strong>Software</strong> <strong>Manual</strong>, 393172, en, V<strong>2.3</strong> 9 - 63
9 - Specifying Your Instrument Setup<br />
Creating and Editing Tube Robot Vectors<br />
for each labware type, and you can then use it for any worktable position of this<br />
labware type.<br />
In addition, <strong>Freedom</strong> <strong>EVOware</strong> automatically recalculates the PnP vector for each<br />
well of the labware (it gets information on the spacing between the wells from the<br />
labware definition). So you only need to define a PnP vector for one of the wells<br />
(typically the first well). In your pipetting script, the position of a tube in the tube<br />
rack can be specified as a variable. This allows you to access all of the tubes in<br />
the tube rack using the same script command.<br />
end position<br />
(site 1)<br />
end position<br />
(site 2)<br />
2<br />
3<br />
2<br />
3<br />
site 1<br />
site 2<br />
1<br />
safe position<br />
(site 1)<br />
1<br />
safe position<br />
(site 2)<br />
y<br />
Fig. 9-23 Two site carrier showing two PnP movements with three waypoints each<br />
The above figure shows two PnP vectors for a two site carrier. In the example,<br />
each PnP vector has three waypoints (1, 2 and 3). <strong>Freedom</strong> <strong>EVOware</strong><br />
automatically calculates the PnP vector for site 2 from the PnP vector for site 1.<br />
PnP vectors are associated with labware (typically tube racks) and are stored in<br />
the labware definition (see 9.7.2 “Teach Tube Robot Vector Dialog Box”, 9-65).<br />
You also need to create a PnP vector which moves the PnP back to the home<br />
(parking) position, out of the way of other objects on the worktable (you need to<br />
create two home vectors if your instrument is fitted with two PnPs). See<br />
9.7.4 “Defining the Home Position for a PnP”, 9-69.<br />
When <strong>Freedom</strong> <strong>EVOware</strong> moves a tube from one tube rack to another, it typically<br />
needs to carry out two PnP vectors. The first one moves the PnP from its current<br />
position to the safe position of site 1 and then to the end position of site 1, grips<br />
the tube and moves back to the safe position again using the same vector in<br />
reverse. It then moves directly to the safe position of site 2. Using the second PnP<br />
vector it moves to the end position of site 2, releases the tube and moves back to<br />
the safe position again. Depending on the configuration, in <strong>Freedom</strong> <strong>EVOware</strong><br />
Plus the PnP then either waits at this position or moves back to its home (parking)<br />
position out of the way of other objects on the worktable. In <strong>Freedom</strong> <strong>EVOware</strong><br />
<strong>Standard</strong>, you should use the Move PnP command to move the PnP back to its<br />
home position after carrying out a sequence of PnP movements.<br />
9 - 64 <strong>Freedom</strong> <strong>EVOware</strong> <strong>Software</strong> <strong>Manual</strong>, 393172, en, V<strong>2.3</strong>
9 - Specifying Your Instrument Setup<br />
Creating and Editing Tube Robot Vectors<br />
end position A1<br />
PnP home position<br />
end position A2<br />
safe position A<br />
end position A3<br />
safe position B<br />
end position B<br />
Fig. 9-24 Moving labware from carrier A to carrier B<br />
The above figure shows how the PnP moves tubes between three sites of carrier<br />
A and one site of carrier B.<br />
When the PnP transfers a tube from carrier A to carrier B, it first moves from its<br />
current position (not shown in the figure) to the safe position of carrier A, then it<br />
moves to the end position of the required site, grips the tube and moves back to<br />
the safe position of carrier A again. From this position it moves directly to the safe<br />
position of carrier B, moves to its end position, releases the tube and moves back<br />
to the safe position of carrier B. Depending on the configuration of the PnP, the<br />
PnP either waits at this position or moves back to its home (parking) position. See<br />
9.7.4 “Defining the Home Position for a PnP”, 9-69.<br />
Note: The safe positions of the PnP vectors and the PnP home position should all<br />
be chosen such that the PnP can move between them without colliding with other<br />
objects on the worktable. Also keep in mind that the PnP needs to rotate if the two<br />
sites have a different orientation (landscape or portrait) and that it needs to move<br />
without obstruction both with and without a microplate.<br />
9.7.1 Using PnP Vectors<br />
Movement commands for the tube robot (PnP vectors) are associated with<br />
labware such as tube racks. They are specified in the labware definition.<br />
In both <strong>Freedom</strong> <strong>EVOware</strong> <strong>Standard</strong> and <strong>Freedom</strong> <strong>EVOware</strong> Plus, PnP vectors<br />
are executed using the script commands PnP Vector and Transfer Tube. Simple<br />
PnP movements are executed with the Move PnP command, which does not<br />
need a vector.<br />
9.7.2 Teach Tube Robot Vector Dialog Box<br />
The following dialog box is used to create and edit tube robot (PnP) vectors. See<br />
9.7 “Creating and Editing Tube Robot Vectors”, 9-63 for more information on<br />
tube robot vectors.<br />
<strong>Freedom</strong> <strong>EVOware</strong> <strong>Software</strong> <strong>Manual</strong>, 393172, en, V<strong>2.3</strong> 9 - 65
9 - Specifying Your Instrument Setup<br />
Creating and Editing Tube Robot Vectors<br />
Fig. 9-25 Teach Tube Robot Vector dialog box<br />
To get to this dialog box, open the Edit Labware dialog box for the tube rack you<br />
want to use and click the Create button (it is just above the Cancel button). The<br />
button changes to Edit if the robot vector has already been created.<br />
You are then prompted to click on the carrier site which you want to use for<br />
teaching. Since you will need to carefully observe the tube robot movements, you<br />
should choose a site which has good visibility.<br />
The parameters in the Teach Tube Robot Vector dialog box are as follows:<br />
Carrier name<br />
Name of the labware item for which the PnP vector is being defined.<br />
Grid, Site<br />
These fields show the grid position and the site which you chose for teaching<br />
the vector.<br />
The adjustment buttons of the Site field are protected (gray) if the labware’s<br />
carrier only has one site.<br />
Position<br />
Choose the position in the tube rack which you want to use for teaching (tube<br />
positions are counted from rear to front).<br />
ATTENTION<br />
Risk of the PnP moving to the wrong position on the worktable.<br />
• Please choose the correct grid position and site before specifying any<br />
coordinates or using any of the movement buttons. Otherwise the PnP might<br />
move to the wrong position on the worktable.<br />
9 - 66 <strong>Freedom</strong> <strong>EVOware</strong> <strong>Software</strong> <strong>Manual</strong>, 393172, en, V<strong>2.3</strong>
9 - Specifying Your Instrument Setup<br />
Creating and Editing Tube Robot Vectors<br />
Define Coordinates panel<br />
This shows the PnP positions (waypoints) which will be used for the PnP vector.<br />
Each waypoint is specified by its X, Y and Z coordinates in instrument steps (0.1<br />
mm) and a value for the rotation of the gripper fingers (R, measured in 0.1° steps).<br />
Absolute<br />
Check this checkbox to use absolute positions for the selected waypoint. In<br />
this case, when <strong>Freedom</strong> <strong>EVOware</strong> automatically recalculates the PnP vector<br />
for each site of the carrier it only changes the X coordinates. This may be<br />
necessary if the PnP could otherwise collide with other objects on the<br />
worktable. See 9.7.3 “Absolute Positions in PnP Vectors”, 9-68. The<br />
Absolute checkbox should not be checked for the End position.<br />
The following buttons can be used to edit, insert and delete waypoints and to<br />
move the PnP along the specified waypoints:<br />
add pos.<br />
This button inserts a new entry in the waypoint list above the currently<br />
selected entry.<br />
delete<br />
This button deletes the currently selected entry in the waypoint list.<br />
transfer<br />
This button copies the current PnP position (as shown in the Tube Robot tab<br />
of the Move dialog box) to the selected entry in the waypoint list. Do this when<br />
you want to teach the current position of the PnP.<br />
Note: You can move the PnP using the keys on the numeric keypad (see the<br />
Move dialog box and 9.3.3 “Moving the PnP (Tube Robot)”, 9-6).<br />
move to...<br />
This button moves the PnP to the coordinates of the selected entry in the<br />
waypoint list. The Tube Robot tab of the Move dialog box will be updated<br />
accordingly.<br />
move to Safe Position<br />
This button moves the PnP along the defined waypoints from the selected<br />
waypoint to the safe position of the PnP vector (the first waypoint).<br />
move to End Position<br />
This button moves the PnP along the defined waypoints from the selected<br />
waypoint to the end position of the PnP vector (the last waypoint).<br />
Movements panel<br />
XYZ Speed<br />
Specify the required speed for x, y and z movements.<br />
Grip Parameters panel<br />
Grip Distance<br />
This is the distance in mm that the PnP gripper closes to when gripping an<br />
object with this vector (range: 7 to 28 mm). It should be about 1 to 2 mm less<br />
than the width of the object.<br />
Release Distance<br />
This is the distance in mm that the PnP gripper opens to when releasing an<br />
object with this vector (range: 7 to 28 mm). It should be about 3 to 4 mm more<br />
than the width of the object.<br />
<strong>Freedom</strong> <strong>EVOware</strong> <strong>Software</strong> <strong>Manual</strong>, 393172, en, V<strong>2.3</strong> 9 - 67
9 - Specifying Your Instrument Setup<br />
Creating and Editing Tube Robot Vectors<br />
grip<br />
Click this button to close the gripper to the specified gripping distance for<br />
testing purposes. The gripper remains at the specified gripping distance until<br />
the Release button is clicked.<br />
release<br />
Click this button to open the gripper to the specified release distance for<br />
testing purposes.<br />
9.7.3 Absolute Positions in PnP Vectors<br />
One or more waypoints in a PnP vector can be configured as absolute positions.<br />
For such waypoints, when <strong>Freedom</strong> <strong>EVOware</strong> automatically calculates the PnP<br />
vector for each site of the carrier it only changes the X coordinates. You can test<br />
this by checking the Absolute checkbox in the Edit Tube Robot Vector dialog box<br />
and changing the specified site.<br />
You may need to specify one or more absolute waypoints in your PnP vector if the<br />
PnP could otherwise collide with other objects on the worktable. The Abs.<br />
checkbox should not be checked for the End position.<br />
In the following figure, waypoint 1 is an absolute waypoint (compare this figure<br />
with Fig. 9-23, 9-64).<br />
end position<br />
(site 2)<br />
end position<br />
(site 1)<br />
2<br />
2<br />
3<br />
site 1<br />
1<br />
safe position<br />
(site 1 and 2)<br />
3<br />
site 2<br />
y<br />
Fig. 9-26 Two PnP vectors with three waypoints each. Waypoint 1 is an absolute waypoint<br />
- it is used by both PnP vectors<br />
The above figure shows two PnP Vectors for a two site a carrier; the Absolute<br />
checkbox has been checked for waypoint 1 (the safe position in this case).<br />
Accordingly, <strong>EVOware</strong> uses the same safe position for both sites. This may be<br />
necessary if the PnP could otherwise collide with other objects on the worktable<br />
(not shown in the figure). When <strong>Freedom</strong> <strong>EVOware</strong> automatically calculates the<br />
PnP vector for site 2 from the PnP vector for site 1, it does not change the<br />
coordinates for waypoint 1.<br />
9 - 68 <strong>Freedom</strong> <strong>EVOware</strong> <strong>Software</strong> <strong>Manual</strong>, 393172, en, V<strong>2.3</strong>
9 - Specifying Your Instrument Setup<br />
Creating and Editing MCA Vectors<br />
9.7.4 Defining the Home Position for a PnP<br />
After completing a sequence of movements with the PnP, it should be moved back<br />
to its home (i.e. parking) position, out of the way of other objects on the worktable.<br />
Otherwise it might obstruct the movement of other arms such as the LiHa.<br />
The PnP moves to the home position when you exit <strong>Freedom</strong> <strong>EVOware</strong>. In<br />
<strong>Freedom</strong> <strong>EVOware</strong> <strong>Standard</strong>, the PnP moves to the home position if you specify<br />
Move to home position with the Move PnP command. <strong>Freedom</strong> <strong>EVOware</strong> Plus<br />
moves the PnP back to the home position automatically.<br />
The home position for a PnP is normally at the extreme left or right of the<br />
worktable, and should be chosen to be out of the way of other objects on the<br />
worktable. The home position is specified by creating a special PnP vector with<br />
the name “Home 1”, which moves the PnP to the chosen safe position.<br />
If your instrument is fitted with two PnPs, the home position for PnP 1 is normally<br />
at the extreme left of the worktable and the home position for PnP 2 is normally at<br />
the extreme right of the worktable. The home position for PnP 2 is specified by<br />
creating a special PnP vector with the name “Home 2”.<br />
Proceed as follows to define a home vector for the PnP:<br />
Identify a route across the worktable from right to left (for PnP 1) or left to right (for<br />
PnP 2) along which the PnP can safely move without colliding with other objects.<br />
Then create a PnP vector for this route with at least five waypoints, whereby the<br />
first waypoint of this vector (the safe position) is the required home position.<br />
To edit an existing home vector, click Robot Vectors in the Control Bar, right-click<br />
on the vector and choose Edit. See 9.7.2 “Teach Tube Robot Vector Dialog Box”,<br />
9-65 for further information.<br />
To create a new home vector, click Robot Vectors in the Control Bar, right-click on<br />
the Robot Vectors (Tubes) group title and chose New. Name the vector “Home 1”<br />
(for PnP 1) or “Home 2” (for PnP 2). The new home vector will be shown in the<br />
Home Vectors group in the Control Bar (Robot Vectors section).<br />
<strong>Freedom</strong><br />
<strong>EVOware</strong><br />
<strong>Standard</strong><br />
If you specify Move to home position with the Move PnP command, during script<br />
runtime <strong>Freedom</strong> <strong>EVOware</strong> automatically determines the closest waypoint of the<br />
home vector to the current PnP position. The PnP then moves to this waypoint<br />
and along the home vector until the home position (the first waypoint) has been<br />
reached.<br />
9.8 Creating and Editing MCA Vectors<br />
Movement ectors for the MCA (Multi Channel Arm) are very similar in principle to<br />
RoMa vectors. The special features of MCA96 and MCA384 vectors are<br />
described below.<br />
9.8.1 MCA96 Vectors<br />
The MCA96 can be optionally fitted with gripper fingers to allow it to pick up and<br />
move labware. In contrast to the RoMa, the gripper fingers cannot be rotated (they<br />
are always parallel to the X axis of the pipetting instrument). Accordingly, you<br />
cannot specify the R axis for MCA vectors.<br />
When setting up the hardware, the MCA96 gripper option can be attached to the<br />
MCA96 pipetting head on the left side with the gripper fingers pointing to the right<br />
(under the head) or on the right side with the gripper fingers pointing to the left<br />
<strong>Freedom</strong> <strong>EVOware</strong> <strong>Software</strong> <strong>Manual</strong>, 393172, en, V<strong>2.3</strong> 9 - 69
9 - Specifying Your Instrument Setup<br />
Configuring Device Drivers<br />
(under the head) or to the right (away from the head). On the left side and pointing<br />
to the left is not supported.<br />
You cannot and do not need to define a home position for the MCA96.<br />
Please see 9.6 “Creating and Editing Plate Robot Vectors”, 9-55 for more<br />
information on creating vectors.<br />
9.8.2 MCA384 Vectors<br />
The MCA384 can be optionally fitted with a gripper module (CGM, common<br />
gripper module) which can be used to pick up and move labware. The CGM can<br />
be rotated. The CGM can only be used for gripping and moving labware when it is<br />
undocked. Commands which use the CGM initiate the undocking operation<br />
automatically, if necessary. See also 15.69.13 “MCA384 Dock CGM Command”,<br />
15-204 and 15.69.14 “MCA384 Undock CGM Command”, 15-204.<br />
When you teach a CGM vector, <strong>Freedom</strong> <strong>EVOware</strong> also needs to know the Y<br />
position of the MCA384 pipetting head to ensure that the CGM will not collide with<br />
the MCA384 as it moves.<br />
You cannot and do not need to define a home position for the MCA384.<br />
Please see 9.6 “Creating and Editing Plate Robot Vectors”, 9-55 for general<br />
information on creating vectors.<br />
9.9 Configuring Device Drivers<br />
Device drivers are configured with <strong>Freedom</strong> <strong>EVOware</strong>’s Configuration Tool (see<br />
8.5 “Device Driver Configuration”, 8-39). See 13.2 “Overview of Device<br />
Commands”, 13-12 for information on the device drivers which are provided<br />
with <strong>EVOware</strong> together with the icon which is shown in the Worktable Editor.<br />
9.10 Local Settings for Process Steps (Context Menu)<br />
In <strong>Freedom</strong> <strong>EVOware</strong> Plus, the following settings can be made in the Process<br />
Editor for each of the process steps. You can access the settings by right-clicking<br />
on the process step icon and choosing the required item from the context menu.<br />
Fig. 9-27 Context menu for a process step<br />
9 - 70 <strong>Freedom</strong> <strong>EVOware</strong> <strong>Software</strong> <strong>Manual</strong>, 393172, en, V<strong>2.3</strong>
9 - Specifying Your Instrument Setup<br />
Local Settings for Process Steps (Context Menu)<br />
See 9.11 “Local Settings for Labware Source Icons (Context Menu)”, 9-77 for<br />
the settings you can make for labware source icons.<br />
9.10.1 Execution Parameters<br />
This option is used to edit the execution parameters for the current process step<br />
(i.e. device command). The settings only apply to the selected process step. You<br />
can also open the Edit Parameters dialog box by double-clicking on the process<br />
step. The available settings are described under “Execution Parameters” in the<br />
respective section for the device (see 16 “Device Commands”, 16-1).<br />
In addition, the Edit Parameters dialog box is opened automatically when you add<br />
the command to the Process Editor.<br />
Note: The dialog box will not open if the respective device command does not<br />
have any execution parameters.<br />
9.10.2 Adjust Time/Error handling<br />
This option is used to edit the command execution time and the reaction to errors.<br />
The settings only apply to the selected process step.<br />
9.10.2.1 General Tab<br />
This tab lets you specify the execution time and waiting time which should be<br />
used by the scheduler for this process step.<br />
Fig. 9-28 Configuring the execution time and max. waiting time for a command<br />
The parameters in this dialog box are as follows:<br />
Execution Time<br />
Specify the execution time in seconds that should be assigned to this process<br />
step. An error will be output during process runtime if the command is not<br />
completed within this time. When you insert the command into your process,<br />
this field initially shows the default execution time specified for the command<br />
with the Configuration Tool (see 8.5.35 “Driver Tab of the Configure Device<br />
Driver Properties Dialog Box”, 8-116).<br />
<strong>Freedom</strong> <strong>EVOware</strong> <strong>Software</strong> <strong>Manual</strong>, 393172, en, V<strong>2.3</strong> 9 - 71
9 - Specifying Your Instrument Setup<br />
Local Settings for Process Steps (Context Menu)<br />
Note: With some device commands, the default execution time is automatically<br />
re-calculated when the command is inserted and a more accurate value is put into<br />
this field.<br />
Max. Waiting Time<br />
Specify the maximum additional time in seconds the labware can wait before<br />
the next action has to be performed. This may be important e.g. if you have<br />
heated the samples to a specified temperature and they should not be allowed<br />
to cool down too much before the next process step.<br />
Example - A pipetting command with an execution time of 500 s must be<br />
completed within 500 s or an error message will be generated. If you set Max.<br />
Waiting Time to 300 s, <strong>Freedom</strong> <strong>EVOware</strong> may leave the plate for an<br />
additional 300 s at the pipetting position or on the following device if this is<br />
advantageous for the scheduling.<br />
Note: Max. Waiting Time includes the time required to move the labware to the<br />
next device. Accordingly, it should always be larger than the time required for the<br />
associated RoMa_MoveObject command.<br />
9.10.2.2 Pause On Error Tab<br />
This tab lets you specify which types of errors will trigger a system pause if they<br />
occur during execution of this process step.<br />
Fig. 9-29 Configuring the reaction of the command to errors<br />
Check the corresponding boxes if you want the system to halt on all errors, on<br />
loss of peripheral errors, on errors in pre-actions and/or on errors in post-actions.<br />
Note: The settings made in the Error Handling tab section of the <strong>Freedom</strong><br />
<strong>EVOware</strong> Configuration Tool can be configured to overwrite the local settings you<br />
make here. See 8.4.4.3 “Pause On Error Tab”, 8-38 for details.<br />
9.10.3 Pre-actions / Post-actions (Custom)<br />
In some cases it is necessary to carry out additional actions before and after the<br />
command is executed. This done using pre-actions and/or post-actions –<br />
commands which are always carried out before and after the main command. For<br />
example, if you want to scan labware in a Tecan Ultra reader with the Measure<br />
command, it is necessary to open the reader door (with the Ultra_Open<br />
command) and to move the labware to the reader using the plate robot (with the<br />
9 - 72 <strong>Freedom</strong> <strong>EVOware</strong> <strong>Software</strong> <strong>Manual</strong>, 393172, en, V<strong>2.3</strong>
9 - Specifying Your Instrument Setup<br />
Local Settings for Process Steps (Context Menu)<br />
RoMa_MoveObject command). To make sure that the door is opened in time, the<br />
door must be opened before moving the labware. Another RoMa_MoveObject<br />
command and an Ultra_Close command are needed when the scanning operation<br />
is finished. The door must be closed after moving the labware.<br />
The process diagram is simplified by implementing the additional actions as preactions<br />
and post-actions which are linked to the Measure command. <strong>EVOware</strong><br />
then adds the pre-actions and post-actions to the Measure command<br />
automatically. This avoids having to specify these four additional steps for each<br />
Measure command manually.<br />
The standard pre-actions and post-actions are specified in the command<br />
definition using the Configure Tool (see 8.5.35 “Driver Tab of the Configure Device<br />
Driver Properties Dialog Box”, 8-116).<br />
Choose Pre-actions & Post-actions in the context menu to specify custom preactions<br />
and post-actions, which are used for special applications. The settings<br />
only apply to the currently selected process step.<br />
In the Custom Pre-actions / Post-actions dialog box, the Pre-actions and Postactions<br />
tabs Initially show the standard pre-actions and post-actions (if any):<br />
Fig. 9-30 Configuring custom pre-actions and post-actions for the process step<br />
Uncheck Use default pre-actions and/or Use default post-actions if you want to<br />
specify additional pre-actions and/or post-actions or to modify existing ones.<br />
Note: If you create any custom pre-actions and post-actions, they will be deleted<br />
again if you check Use default pre-actions and/or Use default post-actions.<br />
Click Delete to delete the currently selected pre-action or post-action. Click Copy<br />
to copy the currently selected pre-action or post-action. The new pre-action or<br />
post-action will have the same settings as the one you copied.<br />
Click the Up and Down buttons to change the sort order of the pre-actions and<br />
post-actions. This changes the sequence with which the pre-actions and postactions<br />
are carried out. Taking the above example of the Measure command for<br />
the Ultra reader, the door must be opened before the plate robot brings the<br />
labware.<br />
<strong>Freedom</strong> <strong>EVOware</strong> <strong>Software</strong> <strong>Manual</strong>, 393172, en, V<strong>2.3</strong> 9 - 73
9 - Specifying Your Instrument Setup<br />
Local Settings for Process Steps (Context Menu)<br />
9.10.3.1 Editing Custom Pre-actions and Post-actions<br />
To edit a pre-action or post-action, click the Pre-actions or the Post-actions tab,<br />
select the required entry and click Edit to display the Edit Custom Pre-actions /<br />
Post-actions dialog box.<br />
To add a pre-action or post-action, click the Pre Actions or the Post Actions tab<br />
and click Add to display the Edit Custom Pre-actions / Post-actions dialog box.<br />
Fig. 9-31 Editing custom pre-actions and post-actions<br />
In the Edit Custom Pre-actions / Post-actions dialog box, choose the command to<br />
be executed as a pre-action or post-action from the pull-down list and specify its<br />
default execution time in the Expected Duration field.<br />
The Object Parameters panel lists the parameters which are needed by the<br />
selected command. Select an object parameter and choose the required value<br />
from the list in the Value panel. Click the Parameters radio button to show predefined<br />
constants. Click the Variables radio button to show defined instances of<br />
objects.<br />
The Value panel shows the parameters and variables which can be chosen for the<br />
selected object parameter type, as follows:<br />
Tab. 9-35 Parameters and variables versus object parameter types<br />
Object parameter<br />
type Placeholder Variables<br />
Object or MP Labware site on the<br />
worktable<br />
Location or Device or labware<br />
site<br />
Tool or On-the-fly tool (e.g.<br />
barcode scanner) a)<br />
a) This field is normally set to . On-the-fly tools are normally<br />
specified in the Process Editor using drag and drop.<br />
9 - 74 <strong>Freedom</strong> <strong>EVOware</strong> <strong>Software</strong> <strong>Manual</strong>, 393172, en, V<strong>2.3</strong>
9 - Specifying Your Instrument Setup<br />
Local Settings for Process Steps (Context Menu)<br />
is a placeholder which represents the original location of the object (the<br />
labware source). is a placeholder to indicate that the parameter is<br />
unused.<br />
Usage example<br />
You can use a custom pre-action if you want <strong>Freedom</strong> <strong>EVOware</strong> Plus to use a<br />
specific location for discarding racks with used DITIs. If you don’t specify a<br />
specific waste site, <strong>Freedom</strong> <strong>EVOware</strong> Plus will return racks with used DITIs to<br />
their base (labware source) location, e.g. the carousel. Proceed as follows:<br />
– Configure the pipetting instrument to use DITIs and put a DITI carrier (e.g.<br />
DITI 2Pos + Waste) on the worktable. Then right-click on the carrier and<br />
choose Edit Carrier from the context menu.<br />
– Assign a group label (e.g. “DITI-Waste”) to the DITI waste site (site 3). See<br />
9.5 “Configuring Carriers”, 9-39, “Groups”.<br />
– Put DITI racks in the carousel using the labware generator. Add a LiHa<br />
Pipette process step to your process, put a DITI rack on the DITI carrier<br />
and add DITI commands to the pipetting script. Exit the Script Editor.<br />
– Save the process.<br />
– Right-click the LiHa Pipette process step, choose Pre-actions / Postactions<br />
from the context menu and select the RoMa_ReplaceObject<br />
command. Click Edit, choose MoveLocation2, click Variables and choose<br />
the carrier site you have labeled from the pull-down list. The group name<br />
you have chosen is shown appended to the end of the carrier name, e.g.<br />
DiTi_2Pos_+_Waste_DITI-Waste. Confirm the dialog boxes with OK.<br />
Pre-actions and post-actions are not relevant for <strong>Freedom</strong> <strong>EVOware</strong><br />
<strong>Standard</strong>.<br />
9.10.4 Locations<br />
Process steps can have one or more object parameters, which are shown as<br />
“fields” in the bottom half of the icon. The object parameters show the names of<br />
the labware and/or devices which are involved in the operation.<br />
The first object parameter is the name of the labware which is involved in the<br />
process step.<br />
If the labware needs to be moved in the process step, the second object<br />
parameter specifies the required location of the labware when the process step<br />
has been completed. For example, the RoMa_MoveObject command requires<br />
you to specify where you want to move the labware item to. Right-click on the<br />
second object parameter, choose Locations and choose the required location,<br />
typically another device. Choose the placeholder if you want the labware<br />
to be returned to the position it had at the beginning of the process (the labware<br />
source).<br />
After choosing a location you will see a tick alongside the object parameter field<br />
and the object parameter field shows the specified location.<br />
The third object parameter is used to specify an optional on-the-fly device,<br />
normally a barcode scanner. Right-click on the second object parameter, choose<br />
Locations and choose the required on-the-fly device. Choose the placeholder<br />
if you do not want to use an on-the-fly device in this process step.<br />
The following example shows the RoMa_MoveObject command before you have<br />
specified the labware, the location and the on-the-fly-device:<br />
<strong>Freedom</strong> <strong>EVOware</strong> <strong>Software</strong> <strong>Manual</strong>, 393172, en, V<strong>2.3</strong> 9 - 75
9 - Specifying Your Instrument Setup<br />
Local Settings for Process Steps (Context Menu)<br />
Fig. 9-32 Specifying locations 1<br />
In the following example, the RoMa_MoveObject command has been configured<br />
to move the microplate MyLabware1 to the centrifuge but does not scan the<br />
barcode on the way:<br />
Fig. 9-33 Specifying locations 2<br />
The above figure is shown as an example only. The RoMa_MoveObject command<br />
is normally only used for pre-actions and post-actions and is not normally used<br />
directly in the Process Editor.<br />
9.10.5 Comment<br />
Specify an optional comment (or label) for the process step:<br />
Fig. 9-34 Comment for the process step<br />
When you run the process, the comments are shown in the Gantt chart of the<br />
Runtime Controller as tool tips (yellow labels which appear when you move the<br />
cursor above the horizontal colored bars). If you choose suitable comments, this<br />
can help you to identify different parts of the Gantt chart. See 12.2.4 “Runtime<br />
Controller, Extended View (Running a Process)”, 12-14.<br />
9.10.6 Copy<br />
This option is used to copy the selected process step.<br />
9.10.7 Delete<br />
This option is used to delete the selected process step.<br />
9 - 76 <strong>Freedom</strong> <strong>EVOware</strong> <strong>Software</strong> <strong>Manual</strong>, 393172, en, V<strong>2.3</strong>
9 - Specifying Your Instrument Setup<br />
Local Settings for Labware Source Icons (Context Menu)<br />
9.11 Local Settings for Labware Source Icons (Context<br />
Menu)<br />
In <strong>Freedom</strong> <strong>EVOware</strong> Plus, the following settings can be made in the Process<br />
Editor for each of the labware source icons. You can access these dialog boxes<br />
by right-clicking on the labware source icon and choosing the required item from<br />
the context menu.<br />
Fig. 9-35 Context menu for labware source icons<br />
Rename<br />
This option is used to enter a new name for the labware source. You can also<br />
rename the labware source by double-clicking on the labware source icon.<br />
Use n times<br />
Specify the required number of times if you want to reuse the labware in<br />
another process instance. A typical use of this feature is a serial dilution where<br />
you want to use different process instances to handle different columns of the<br />
same microplate. Another use is a trough or deep well microplate which<br />
contains a sufficient volume of liquid to be used several times. Take care with<br />
this feature if the settings in the Runtime Controller allow the process<br />
instances to run in parallel. You need to make sure that the labware will still be<br />
available for all of the instances when it is needed. See also Tab. 9-<br />
21 “Labware attributes, hidden”, 9-35, Run Parallel attribute.<br />
Copy<br />
Make a copy of the labware source. A typical use of this feature is a carousel<br />
which contains different plate types in different towers. For the first copy of the<br />
labware source, use the labware generator to take a set of plates from a<br />
specific tower. Then use the copy feature if you need the same plate type<br />
somewhere else in your process. This is faster to do than using the labware<br />
generator a second time.<br />
Delete<br />
Press Del or choose Delete to delete the labware source.<br />
See 9.10 “Local Settings for Process Steps (Context Menu)”, 9-70 for the<br />
settings you can make for process steps for devices.<br />
<strong>Freedom</strong> <strong>EVOware</strong> <strong>Software</strong> <strong>Manual</strong>, 393172, en, V<strong>2.3</strong> 9 - 77
9 - Specifying Your Instrument Setup<br />
Local Settings for Labware Source Icons (Context Menu)<br />
9 - 78 <strong>Freedom</strong> <strong>EVOware</strong> <strong>Software</strong> <strong>Manual</strong>, 393172, en, V<strong>2.3</strong>
10 - Configuring Liquid Classes<br />
Liquid Classes Editor<br />
10 Configuring Liquid Classes<br />
This chapter describes how to create and edit liquid classes for the liquids that<br />
you want to aspirate or dispense.<br />
A liquid class is a collection of parameters necessary for pipetting liquids. Each<br />
liquid class is divided into subclasses for a certain hardware configuration and<br />
volume range. The subclasses are automatically selected at runtime depending<br />
on the used hardware and required volume.<br />
The <strong>Freedom</strong> <strong>EVOware</strong> database already contains a large selection of predefined<br />
liquid classes.You only need to create or edit a liquid class if you cannot<br />
find a standard liquid class which is suitable for your needs. See 10.7 “Overview<br />
of Liquid Classes Supplied With <strong>Freedom</strong> <strong>EVOware</strong>”, 10-42.<br />
10.1 Liquid Classes Editor<br />
A liquid class is a set of liquid handling parameters. It specifies aspirating and<br />
dispensing speeds, airgaps, liquid detection modes, etc. The values of the<br />
parameters are dependent on the physical characteristics of the liquid. <strong>Freedom</strong><br />
<strong>EVOware</strong> contains a large number of pre-defined liquid classes which are based<br />
on the extensive experience of the Tecan liquid handling specialists. <strong>Freedom</strong><br />
<strong>EVOware</strong> stores the liquid classes in the \Database directory) and<br />
has a built-in editor for displaying, creating and deleting liquid classes.<br />
To open the liquid classes editor, click Liquid Classes in the Control Bar and<br />
double-click on any of the liquid classes:<br />
<strong>Freedom</strong> <strong>EVOware</strong> <strong>Software</strong> <strong>Manual</strong>, 393172, en, V<strong>2.3</strong> 10 - 1
10 - Configuring Liquid Classes<br />
Liquid Classes Editor<br />
Fig. 10-1 Aspirate tab of the Liquid Classes editor<br />
The left side of the window shows pre-defined liquid classes ( ) and custom<br />
liquid classes ( ). Custom liquid classes are user-defined liquid classes.<br />
Note: You cannot change the properties of the pre-defined (standard) liquid<br />
classes. However, you can create a new custom class with the same properties<br />
and then change them.<br />
Check the Show all liquid classes checkbox to see all available liquid classes.If<br />
this checkbox is unchecked, you will only see liquid classes which are compatible<br />
with the current tip and device configuration of your pipetting instrument.<br />
If you check the Show all liquid classes checkbox and click OK to close the Liquid<br />
Classes Editor, the Liquid Classes tab of the Control Bar will also show all liquid<br />
classes. If you uncheck the Show all liquid classes checkbox and click OK to close<br />
the Liquid Classes Editor, the Liquid Classes tab of the Control Bar will only show<br />
liquid classes which are compatible with the current tip and device configuration.<br />
For information on the current tip configuration, start the Configuration Tool, click<br />
the Devices tab and click Instrument Options in the General group (see Fig. 8-<br />
9 “Configuring the LiHa”, 8-25).<br />
Each liquid class is divided into one or more sub-classes. Click the + symbol in<br />
front of a liquid class or double-click the liquid class name to show its sub-classes.<br />
The + symbol then changes to a - symbol. Click the - symbol to hide the subclasses<br />
again.<br />
A sub-class is characterized by the tip type and volume range for which its<br />
parameters are specified. During script runtime, <strong>Freedom</strong> <strong>EVOware</strong> selects the<br />
liquid class and sub-class that best matches the liquid class name, the currently<br />
used tip type and the pipetting volume.<br />
10 - 2 <strong>Freedom</strong> <strong>EVOware</strong> <strong>Software</strong> <strong>Manual</strong>, 393172, en, V<strong>2.3</strong>
10 - Configuring Liquid Classes<br />
Liquid Classes Editor<br />
If you choose an item in the liquid classes list, <strong>Freedom</strong> <strong>EVOware</strong> displays one or<br />
more parameter pages in the right side of the window. The parameter pages are<br />
described in more detail in the following chapters.<br />
New Class<br />
Click this button to create a new liquid class. A dialog box is shown to allow<br />
you to choose an existing liquid class as a template for the new liquid class.<br />
Choose the entry you want to use as a template and click OK. The template<br />
makes it easier to create a new liquid class since you only need to edit the<br />
parameters which are different.<br />
Liquid classes must have unique names.<br />
New Entry<br />
Click this button to create a new sub-class. A dialog box is shown to allow you<br />
to choose an existing sub-class as a template for the new sub-class. Choose<br />
the entry you want to use as a template and click OK. The template makes it<br />
easier to create a new sub-class since you only need to edit the parameters<br />
which are different.<br />
If you want to create more than one sub-class with the same name, the<br />
pipetting volume ranges must not overlap.<br />
Delete<br />
Click this button to delete the currently selected liquid class or sub-class.<br />
Print<br />
Click this button to print information on the currently selected liquid class<br />
(including every sub-class) or sub-class (single page) as a report. You are first<br />
shown a print preview window. Click the Printer button in the menu bar of the<br />
print preview window to print the report.<br />
<strong>Freedom</strong> <strong>EVOware</strong> <strong>Software</strong> <strong>Manual</strong>, 393172, en, V<strong>2.3</strong> 10 - 3
10 - Configuring Liquid Classes<br />
Liquid Classes Editor<br />
10.1.1 Global Parameters for Liquid Classes<br />
<strong>Freedom</strong> <strong>EVOware</strong> uses these parameters for all sub-classes of the selected<br />
liquid class.<br />
Fig. 10-2 Global parameters for liquid classes<br />
Class Name<br />
Specify a unique name for the liquid class.<br />
Description<br />
Enter additional information about this liquid class. The description is optional<br />
and is currently intended for documentation purposes only.<br />
If you are using the pressure-monitored pipetting (PMP) hardware option, the<br />
description is stored in the pressure curve files which are created.<br />
Liquid Density<br />
Specify the density of the liquid (range: 0.1 to 10 mg/µl). The liquid arrival<br />
check function of the pooling balance option uses this parameter to calculate<br />
the pipetted liquid volume from the measured weight difference. The PMP<br />
option uses this parameter to estimate the volume of liquid which was<br />
dispensed.<br />
Liquid Detection panel<br />
Liquid Level detection can be used e.g. to ensure minimal tip contamination<br />
by limiting the tip immersion depth. Specify the liquid level detection<br />
parameters as follows:<br />
10 - 4 <strong>Freedom</strong> <strong>EVOware</strong> <strong>Software</strong> <strong>Manual</strong>, 393172, en, V<strong>2.3</strong>
10 - Configuring Liquid Classes<br />
Liquid Classes Editor<br />
– Choose the required liquid level detection mode from the pull down list.<br />
Pressure-based liquid level detection requires the PMP hardware option.<br />
Capacitive liquid level detection is always available.<br />
– Choose the liquid conductivity from the pull down list. This setting is not<br />
available if you choose the liquid detection mode pressure only (pLLD).<br />
– Choose the required detection speed (range: 0.1 to 500 mm/s).<br />
– Choose the required double distance (range: 0.1 to 50 mm). The double<br />
distance is the distance by which the tips retract (move upwards) before<br />
carrying out liquid level detection for the second time. It is only used when<br />
a detection mode with double detection is chosen.<br />
To enable liquid level detection, you also need to activate it on the Aspirate<br />
and/or Dispense tabs of the respective sub-class.<br />
If you choose a combination of capacitive and pressure-based liquid level<br />
detection, both methods must indicate the same liquid level within a specified<br />
tolerance. Error messages will be generated if this is not the case.<br />
If you are using LiHa tips (fixed tips or DITIs) and you choose Detect with first<br />
tip, move others to same position, 1 mm will be added to the aspiration offset<br />
you specify on the Aspirate Parameters page. See 10.2.1 “LiHa Aspirate<br />
Parameters (Fixed Tips and DiTis)”, 10-7, Aspiration Position for more<br />
information.<br />
The Te-MO, the MCA96 and the MCA384 do not support liquid level detection.<br />
If you want to use a liquid class which specifies liquid level detection, the liquid<br />
level must be emulated using a special variable (see<br />
14.1.4.14 “RACK_VOLUME_x”, 14-7). The values you specify here are<br />
ignored in this case. The Te-MO and the MCA96 only use the emulated liquid<br />
level detection for aspirating. The MCA384 uses the emulated liquid level<br />
detection for aspirating and dispensing.<br />
Pressure Liquid Detection panel<br />
The settings in this panel are only available if you choose the liquid detection<br />
mode pressure only or pressure and capacity.<br />
Sensitivity<br />
Choose the required sensitivity for pressure-based liquid level detection<br />
(pLLD) from the pull down list.<br />
Liquid Characteristics<br />
Choose the liquid characteristics from the pull down list. You can choose<br />
between hydrophilic (water-based, conductive) and hydrophobic (non-waterbased,<br />
non-conductive).<br />
Pressure Monitored Pipetting panel<br />
The PMP option monitors the pressure in the airgap between the sample and<br />
the system liquid during aspiration and dispensing. The PMP hardware option<br />
is only available for LiHa DiTi tips. The settings you make here will be ignored<br />
if PMP is not activated. See also 17.6 “Configuring and Using PMP (Pressure<br />
Monitored Pipetting)”, 17-16.<br />
Viscosity<br />
Specify the viscosity of the liquid in mPa s.<br />
<strong>Freedom</strong> <strong>EVOware</strong> <strong>Software</strong> <strong>Manual</strong>, 393172, en, V<strong>2.3</strong> 10 - 5
10 - Configuring Liquid Classes<br />
Liquid Classes Editor<br />
Clot Detection panel<br />
Specify the global settings for capacitive clot detection (cLLD). You can<br />
specify the detection speed and the clot limit. The clot limit is a tolerance<br />
factor to compensate for cohesion effects. To enable clot detection, you need<br />
to check the Use exit signal detection checkbox on the Aspirate tab of the<br />
respective sub-class. See the description of this checkbox for more<br />
information.<br />
The Te-MO, the MCA96 and the MCA384 do not support clot detection. The<br />
values you specify here are ignored in this case.<br />
Liquid Arrival Check panel<br />
The Liquid Arrival Check (LAC) feature verifies that the correct liquid volumes<br />
have been dispensed by weighing the labware before and after pipetting. The<br />
labware must be put onto a special balance (pooling balance) for the dispense<br />
operation. <strong>Freedom</strong> <strong>EVOware</strong> automatically calculates the liquid volume from the<br />
weight difference and compares the results with the volume specified in the<br />
pipetting command. An LAC error is output if the two values differ by more than<br />
the maximum volume deviation which is specified in the liquid class.<br />
The LAC feature is only supported by special balance types such as the Mettler<br />
WM pooling balance. This balance has a built-in tube rack for 16 x 13 mm tubes<br />
and is commonly used for liquid pooling operations.<br />
See also 9.5.5.7 “Pooling Balance Carrier Attributes”, 9-53, 15.26.4 “Pooling<br />
balance data in report files”, 15-56, 8.5.31 “Settings for the Pooling Balance”,<br />
8-110 and A.3 “Parameters in the Evoware.opt file”, A-17, [OPTIONS]<br />
section, Poolsafe_Balances.<br />
Use Check<br />
Check the checkbox to activate the LAC feature for this liquid class. The<br />
Liquid Arrival Check will then be carried out automatically during dispensing if<br />
you dispense this liquid type into containers (e.g. tubes) which have been put<br />
onto a pooling balance. You do not need to add a Balance command to your<br />
pipetting script to use the Liquid Arrival Check feature.<br />
Lower deviation<br />
Specify the required accuracy for the liquid arrival check - how close the<br />
calculated volume must be to the volume specified in the pipetting command<br />
(range: 0 to 100 µl or 0 to 10%). If the pipetted volume is too small, <strong>Freedom</strong><br />
<strong>EVOware</strong> will write a warning message to the log file if the specified deviation<br />
is exceeded. In addition, an LAC error code will be contained in the report file<br />
output by the Export Data command.<br />
Upper deviation<br />
Specify the required accuracy for the liquid arrival check - how close the<br />
calculated volume must be to the volume specified in the pipetting command<br />
(range: 0 to 100 µl or 0 to 10%). If the pipetted volume is too large, <strong>Freedom</strong><br />
<strong>EVOware</strong> will write a warning message to the log file if the specified deviation<br />
is exceeded. In addition, an LAC error code will be contained in the report file<br />
output by the Export Data command.<br />
On LAC error<br />
Select the required error handling if an LAC error occurs.<br />
The error handling option User prompt shows the Liquid Arrival Check Error<br />
dialog (see 18.1.5 “Liquid Arrival Check Error”, 18-5) and pauses the script<br />
or process. Alternatively you can choose to ignore the error and continue<br />
without pausing. The logging of the LAC error is not affected by your choice.<br />
10 - 6 <strong>Freedom</strong> <strong>EVOware</strong> <strong>Software</strong> <strong>Manual</strong>, 393172, en, V<strong>2.3</strong>
10 - Configuring Liquid Classes<br />
LiHa Liquid Classes for Fixed Tips and DiTis<br />
10.1.2 Type Parameters for Liquid Classes<br />
<strong>Freedom</strong> <strong>EVOware</strong> uses these parameters to select the best suited sub-class for<br />
a specified tip type and pipetting volume.<br />
Fig. 10-3 Type parameters for liquid classes<br />
Tip Type<br />
Select the tip type. The following tip types are available:<br />
– <strong>Standard</strong> tips<br />
– DITI (disposable tips)<br />
– Std. & Low Vol. (standard tips with the low volume option)<br />
– DITI & Low Vol. (disposable tips with the low volume option)<br />
– Te-MO Fixed tips (96 tips)<br />
– Te-MO DITI tips (96 tips)<br />
– Te-MO 384 (384-tip pipetting head)<br />
– MCA96 Fixed (Multi-Channel Arm with fixed tips)<br />
– MCA96 DITI (Multi-Channel Arm with disposable tips)<br />
– MCA384 Fixed (Multi-Channel Arm with fixed tips)<br />
– MCA384 DITI (Multi-Channel Arm with disposable tips)<br />
The following options are only intended for research applications: Low<br />
Volume, Te-MO tips (all types).<br />
Volume Range<br />
If you check the Use for All Volumes checkbox, the aspirate, dispense and<br />
calibration parameters for this sub-class are valid for all pipetting volumes.<br />
If this box is not checked, you must specify the minimum volume and the<br />
maximum volume. <strong>Freedom</strong> <strong>EVOware</strong> will then use this sub-class during<br />
pipetting if the following expression is true:<br />
Minimum Volume ≤ pipetting volume < Maximum Volume<br />
10.2 LiHa Liquid Classes for Fixed Tips and DiTis<br />
The LiHa (Liquid Handling Arm) is a robot arm on the pipetting instrument which is<br />
mounted on the X-slide and typically holds four or eight pipetting tips.<br />
10.2.1 LiHa Aspirate Parameters (Fixed Tips and DiTis)<br />
<strong>Freedom</strong> <strong>EVOware</strong> uses these parameters when aspirating or mixing with LiHa<br />
fixed tips or DITIs. The illustrations at the top right of the dialog box show<br />
<strong>Freedom</strong> <strong>EVOware</strong> <strong>Software</strong> <strong>Manual</strong>, 393172, en, V<strong>2.3</strong> 10 - 7
10 - Configuring Liquid Classes<br />
LiHa Liquid Classes for Fixed Tips and DiTis<br />
graphically the current settings for single pipetting mode and multi pipetting mode.<br />
Vol. stands for the pipetted volume.<br />
Fig. 10-4 Aspirate parameters for fixed tips and DITIs<br />
The parameters of this dialog box are as follows (some of the parameters must be<br />
specified separately for single pipetting mode and multi pipetting mode):<br />
Aspiration Speed<br />
Specify the aspiration speed in µl/s. A lower aspiration speed can improve the<br />
pipetting accuracy, a higher aspiration speed can improve the speed of<br />
operation. See Tab. 8-2 “Max. dilutor speeds for the LiHa (pipetting or<br />
washing)”, 8-28 for related information.<br />
Delay<br />
Specify the delay after aspiration.<br />
System Trailing Airgap (STAG)<br />
Specify the volume of the system trailing airgap. <strong>Freedom</strong> <strong>EVOware</strong> uses the<br />
aspiration speed specified for the leading airgap for the system trailing airgap,<br />
too. The system trailing airgap is used to prevent contamination by ensuring<br />
that the system liquid cannot come into contact with the liquid being aspirated.<br />
Leading Airgap (LAG)<br />
Specify the volume of the leading airgap. Click the button to specify<br />
aspiration speed and delay after aspiration. The air of the leading airgap is<br />
dispensed together with the net volume which you specify in the Dispense<br />
command. The resulting tip blowout leads to more accurate pipetting.<br />
10 - 8 <strong>Freedom</strong> <strong>EVOware</strong> <strong>Software</strong> <strong>Manual</strong>, 393172, en, V<strong>2.3</strong>
10 - Configuring Liquid Classes<br />
LiHa Liquid Classes for Fixed Tips and DiTis<br />
Trailing Airgap (TAG)<br />
Specify the volume of the trailing airgap. Click the button to specify<br />
aspiration speed and delay after aspiration. The trailing airgap is used to<br />
prevent liquid dripping from the tips when the arm moves. In addition, it<br />
ensures that the liquid meniscus is not dragged away from the end of the tip<br />
during fast arm movements.<br />
The trailing airgap is aspirated at the Z-position specified with Retract tips to.<br />
A Z-position relative to the liquid level requires liquid level detection and must<br />
not be used if you are carrying out septum piercing (the septum interferes with<br />
the capacitance-based detection system). Otherwise the trailing airgap may<br />
be aspirated with the tips still in the liquid.<br />
Excess Volume<br />
Specify the excess volume (in µl or %). Click the button to choose the<br />
position to use for discarding the excess volume (Discard to waste or Back to<br />
vessel). The excess volume is used to reduce contamination of the liquid in<br />
the tips with the system liquid to an absolute minimum. The excess volume is<br />
discarded after the pipetting cycle (aspiration and dispensing) has been<br />
completed.<br />
Specify a digit in the Replace after field to discard the excess volume after reusing<br />
it several times (e.g. to save costs). This only applies if excess volume ><br />
0 and if you are using multi-pipetting.<br />
Conditioning Volume<br />
Specify the conditioning volume. Click the button to choose the position to<br />
use for discarding the conditioning volume (Discard to waste or Back to<br />
vessel). A conditioning volume can be used to maximize pipetting accuracy by<br />
ensuring that the liquid meniscus at the end of the tips is the same shape after<br />
aspirating as it will be after dispensing.The conditioning volume is discarded<br />
directly after aspirating.<br />
Use Pinch Valve<br />
This is used to activate the Low Volume option if it is fitted to your pipetting<br />
instrument.<br />
Use Liquid Detection<br />
Check this box if you want to use capacitative liquid level detection (cLLD)<br />
when aspirating. cLLD detects the liquid surface through a change of the<br />
electrical capacitance of the pipetting tip when the tip enters the liquid. It is<br />
carried out just before aspirating and can be used e.g. to minimize tip<br />
contamination by limiting the tip immersion depth.<br />
cLLD is carried out with the detection mode, liquid conductivity, detection<br />
speed and double distance settings which you specified on the Global dialog<br />
box for the liquid class.<br />
cLLD must not be used if you are carrying out septum piercing (the septum<br />
interferes with the capacitive detection system).<br />
<strong>Freedom</strong> <strong>EVOware</strong> <strong>Software</strong> <strong>Manual</strong>, 393172, en, V<strong>2.3</strong> 10 - 9
10 - Configuring Liquid Classes<br />
LiHa Liquid Classes for Fixed Tips and DiTis<br />
Aspiration Position<br />
Specify the Z-position and the Z-offset of the tips when aspirating. A positive<br />
value for the offset lowers the tips. You can only choose a Z-position relative<br />
to the liquid level if you have activated liquid level detection.<br />
If you choose an aspirate position with tracking, the tips will move downwards<br />
as the liquid level drops in the wells during aspiration. This option can be used<br />
e.g. to ensure minimal tip contamination by limiting the tip immersion depth.<br />
If you choose Detect with first tip, move others to same position, on the Global<br />
Parameters page (10.1.1, 10-4) and you choose the aspiration position z-<br />
max ± offset (with or without tracking), 1 mm will be added to the aspiration<br />
offset you specify. Example: If you specify an offset of 2 mm, the tips will be<br />
submerged by 3 mm. This is done to make sure that all of the tips are<br />
submerged in the liquid in case of small differences in the liquid level between<br />
the wells.<br />
You can also choose the X-position when aspirating as follows:<br />
– Center: as specified for the labware which is used<br />
– Left: left of center; the offset is specified with X or Y offset while pipetting<br />
for the labware which is used<br />
– Right: right of center; the offset is specified with X or Y offset while<br />
pipetting for the labware which is used<br />
– Left / Right: left of center for odd columns, right of center for even<br />
columns; the offset is specified with X or Y offset while pipetting for the<br />
labware which is used<br />
– Right / Left: right of center for odd columns, left of center for even<br />
columns; the offset is specified with X or Y offset while pipetting for the<br />
labware which is used<br />
You can also choose the Y-position when aspirating as follows:<br />
– Center: as specified for the labware which is used<br />
– Rear: rear of center; the offset is specified with X or Y offset while pipetting<br />
for the labware which is used<br />
– Front: front of center; the offset is specified with X or Y offset while<br />
pipetting for the labware which is used<br />
– Rear / Front: rear of center for odd columns, front of center for even<br />
columns; the offset is specified with X or Y offset while pipetting for the<br />
labware which is used<br />
– Front / Rear: front of center for odd columns, rear of center for even<br />
columns; the offset is specified with X or Y offset while pipetting for the<br />
labware which is used<br />
By combining an X offset and a Y offset, there are nine possible pipetting<br />
positions (including the center position with no offsets).<br />
On Detection Error<br />
Select the required error handling if <strong>Freedom</strong> <strong>EVOware</strong> detects no liquid or<br />
not enough liquid.<br />
If a liquid detection error occurs, the error handling option User prompt shows<br />
the Liquid Detection Error dialog (see 18.1.1 “Liquid Detection Error”, 18-1);<br />
the other three options carry out the chosen action directly and do not show<br />
the Liquid Detection Error dialog.<br />
10 - 10 <strong>Freedom</strong> <strong>EVOware</strong> <strong>Software</strong> <strong>Manual</strong>, 393172, en, V<strong>2.3</strong>
10 - Configuring Liquid Classes<br />
LiHa Liquid Classes for Fixed Tips and DiTis<br />
Use Exit Signal Detection<br />
Check this box to activate capacitive exit signal detection (dip out signal<br />
detection). This detects the liquid surface through a change of the electrical<br />
capacitance of the pipetting tip when the tip is retracted and exits the liquid. It<br />
is carried out just after aspirating. The measured liquid level is then compared<br />
with the liquid level which should have resulted from the aspiration.<br />
You can only activate exit signal detection if you have also enabled liquid level<br />
detection.<br />
On Exit Signal Error<br />
Select the required error handling if the exit signal error does not take place as<br />
expected when retracting the tips.<br />
If an exit signal error occurs, the error handling option User prompt shows the<br />
Clot Error dialog (see 18.1.2 “Clot Error”, 18-2); the other two options carry<br />
out the chosen action directly and do not show the Clot Error dialog.<br />
Two error situations are possible:<br />
– The exit signal was detected within the specified “retract tips to” distance<br />
but not within the clot limit which which you specified in the Global dialog<br />
box for the liquid class. This is probably because a clot is attached to one<br />
of the tips and has maintained the electrical contact between the tip and<br />
the liquid. A “clot error” is reported in the log file in this case.<br />
– The exit signal was not detected at all within the specified “retract tips to”<br />
distance. In this case, there is another reason for the tips failing to loose<br />
contact with the liquid. A “no exit signal error” is reported in the log file in<br />
this case.<br />
Note: Both clot error and exit signal error are currently reported in the report file<br />
from the Export Data command as “clot was detected”.<br />
On PMP Clot Error<br />
Select the required error handling if a clot is detected using pressure-based<br />
clot detection. Pressure-based clot detection requires the PMP hardware<br />
option. The PMP hardware option is only available for LiHa DiTi tips.<br />
If a clot error is detected by PMP, the error handling option User prompt shows<br />
the Clot Error (PMP) dialog; the other three options carry out the chosen<br />
action directly and do not show the Clot Error (PMP) dialog.<br />
If you choose User Prompt, the Clot Error (PMP) dialog then allows the<br />
instrument operator to choose between the following options:<br />
– Dispense back into vessel and then pipette nothing<br />
– Ignore clot error and continue<br />
– Discard the DITI and pipette nothing<br />
See 18.1.3 “Clot Error (PMP)”, 18-3 for more information.<br />
See also 17.6.4 “PMP Error and Success Messages”, 17-22 for more<br />
information on PMP.<br />
Mix before Aspiration<br />
Check this box if you want <strong>Freedom</strong> <strong>EVOware</strong> to mix the liquid before<br />
aspirating it. You can specify the number of mix cycles (range: 1 to 99), the<br />
mix volume (range: 1 to 2500 µl), the Z-position and the Z-offset. A positive<br />
value for the offset lowers the tips.<br />
Retract Tips to<br />
Specify the Z-position and the Z-offset to which the tips should retract (move<br />
upwards) after aspirating. A positive value for the offset lowers the tips. You<br />
can only choose a Z-position relative to the liquid level if you have activated<br />
liquid level detection.<br />
<strong>Freedom</strong> <strong>EVOware</strong> <strong>Software</strong> <strong>Manual</strong>, 393172, en, V<strong>2.3</strong> 10 - 11
10 - Configuring Liquid Classes<br />
LiHa Liquid Classes for Fixed Tips and DiTis<br />
Retract Speed<br />
Specify the required retract speed.<br />
10.2.2 LiHa Dispense Parameters (Fixed Tips and DiTis)<br />
<strong>Freedom</strong> <strong>EVOware</strong> uses these parameters when dispensing or mixing with LiHa<br />
fixed tips or DITIs.<br />
Fig. 10-5 Dispense parameters for fixed tips and DITIs<br />
The parameters of this dialog box are as follows (some of the parameters must be<br />
specified separately for single pipetting mode and multi pipetting mode):<br />
Dispense Speed<br />
Specify the dispense speed in µl/s. The maximum dispense speed is about<br />
80% of the dilutor capacity (syringe size) per second. See Tab. 8-2 “Max.<br />
dilutor speeds for the LiHa (pipetting or washing)”, 8-28.<br />
A high dispense speed is needed to achieve a proper free dispense. Contact<br />
dispense requires a lower speed (in the same range as the aspirate speed).<br />
Breakoff Speed<br />
Specify the breakoff speed (final dispense speed) in µl/s. The breakoff speed<br />
should normally be about 70% of the actual dispense speed but should not<br />
exceed 45% of the the dilutor capacity (syringe size) per second. A high<br />
breakoff speed is needed to achieve a proper free dispense.<br />
Delay<br />
Specify the delay after dispensing.<br />
10 - 12 <strong>Freedom</strong> <strong>EVOware</strong> <strong>Software</strong> <strong>Manual</strong>, 393172, en, V<strong>2.3</strong>
10 - Configuring Liquid Classes<br />
LiHa Liquid Classes for Fixed Tips and DiTis<br />
Trailing Airgap after each Dispense<br />
You can automatically aspirate a trailing airgap after each dispense operation<br />
to avoid droplets forming on the tips. The trailing airgap parameters for<br />
dispensing are specified in the Aspirate dialog box.<br />
Use Pinch Valve<br />
This is used to activate the Low Volume option if it is fitted to your pipetting<br />
instrument.<br />
Use Liquid Detection<br />
Check this box if you want to use capacitative liquid level detection (cLLD)<br />
when dispensing. cLLD detects the liquid surface through a change of the<br />
electrical capacitance of the pipetting tip when the tip enters the liquid. Liquid<br />
level detection when dispensing can be used e.g. to ensure that the tips<br />
remain immersed in the liquid during dispensing.<br />
cLLD is carried out with the detection mode, liquid conductivity, detection<br />
speed and double distance settings which you specified on the Global dialog<br />
box for the liquid class.<br />
cLLD must not be used if you are carrying out septum piercing (the septum<br />
interferes with the capacitive detection system).<br />
Dispense Position<br />
Specify the Z-position and the Z-offset of the tips when dispensing. A positive<br />
value for the offset lowers the tips. You can only choose a Z-position relative<br />
to the liquid level if you have activated liquid level detection.<br />
If you choose a dispense position with tracking, the tips will move upwards as<br />
the liquid level rises in the wells during dispensing. This option can be used<br />
e.g. to ensure minimal tip contamination by limiting the tip immersion depth.<br />
You can also choose the X-position when dispensing as follows:<br />
– Center: as specified for the labware which is used<br />
– Left: left of center; the offset is specified with X or Y offset while pipetting<br />
for the labware which is used<br />
– Right: right of center; the offset is specified with X or Y offset while<br />
pipetting for the labware which is used<br />
– Left / Right: left of center for odd columns, right of center for even<br />
columns; the offset is specified with X or Y offset while pipetting for the<br />
labware which is used<br />
– Right / Left: right of center for odd columns, left of center for even<br />
columns; the offset is specified with X or Y offset while pipetting for the<br />
labware which is used<br />
You can also choose the Y-position when dispensing as follows:<br />
– Center: as specified for the labware which is used<br />
– Rear: rear of center; the offset is specified with X or Y offset while pipetting<br />
for the labware which is used<br />
– Front: front of center; the offset is specified with X or Y offset while<br />
pipetting for the labware which is used<br />
– Rear / Front: rear of center for odd columns, front of center for even<br />
columns; the offset is specified with X or Y offset while pipetting for the<br />
labware which is used<br />
– Front / Rear: front of center for odd columns, rear of center for even<br />
columns; the offset is specified with X or Y offset while pipetting for the<br />
labware which is used<br />
By combining an X offset and a Y offset, there are nine possible pipetting<br />
positions (including the center position with no offsets).<br />
<strong>Freedom</strong> <strong>EVOware</strong> <strong>Software</strong> <strong>Manual</strong>, 393172, en, V<strong>2.3</strong> 10 - 13
10 - Configuring Liquid Classes<br />
LiHa Liquid Classes for Fixed Tips and DiTis<br />
Tip Touching<br />
Activate the tip touching function if required and specify the direction of the<br />
movement. The amount of movement is specified with Tip-touching distance<br />
for the labware which is used.<br />
Tip touching is a special movement when dispensing a liquid. When tip<br />
touching is activated, <strong>Freedom</strong> <strong>EVOware</strong> dispenses to the destination<br />
container in the normal way, but then moves the tips to the side of the well and<br />
back before retracting them. This helps to remove any droplets which may be<br />
adhering to the tips.<br />
Speed: Specify the tip touching speed.<br />
Delay after touching: Specify the delay between the tip touching the well and<br />
moving back to the middle of the well.<br />
Mix after Dispense<br />
Check this box if you want to mix the liquid after dispensing it. You can specify<br />
the number of mix cycles (range: 1 to 99), the mix volume (range: 1 to 2500<br />
µl), the Z-position and the Z-offset. A positive value for the offset lowers the<br />
tips.<br />
Retract Tips to<br />
Specify the Z-position and the Z-offset to which the tips should retract (move<br />
upwards) after dispensing. A positive value for the offset lowers the tips. You<br />
can only choose a Z-position relative to the liquid level if you have activated<br />
liquid level detection.<br />
Retract Speed<br />
Specify the required retract speed.<br />
10 - 14 <strong>Freedom</strong> <strong>EVOware</strong> <strong>Software</strong> <strong>Manual</strong>, 393172, en, V<strong>2.3</strong>
10 - Configuring Liquid Classes<br />
LiHa Liquid Classes for Fixed Tips and DiTis<br />
10.<strong>2.3</strong> LiHa Calibration Parameters (Fixed Tips and DiTis)<br />
<strong>Freedom</strong> <strong>EVOware</strong> uses these parameters to ensure that the specified net<br />
volumes are dispensed accurately by the LiHa. The two curves in the dialog box<br />
show graphically the current settings for single pipetting mode and multi pipetting<br />
mode.<br />
Fig. 10-6 Calibration parameters for fixed tips and DITIs<br />
The parameters of this dialog box are as follows:<br />
Offset / Factor<br />
Specify an offset and/or calibration factor to be applied for single pipetting<br />
mode and multi pipetting mode.<br />
<strong>Freedom</strong> <strong>EVOware</strong> uses the following expression to calculate the dilutor<br />
movement from the net volume specified in the pipetting script:<br />
Calibrated dilutor movement = (net volume * factor) + offset<br />
Individual calibration tables<br />
If necessary you can specify a separate offset and calibration factor for each of<br />
the dilutors which overrides the global setting. This can be used to compensate<br />
for very small differences in the characteristics of the dilutors due to<br />
manufacturing tolerances. It is only needed for special applications which require<br />
extreme accuracy and is only available for the LiHa (the Te-MO, the MCA96 and<br />
the MCA384 do not use dilutors). The individual calibration settings can be made<br />
separately for single pipetting and multi pipetting.<br />
<strong>Freedom</strong> <strong>EVOware</strong> <strong>Software</strong> <strong>Manual</strong>, 393172, en, V<strong>2.3</strong> 10 - 15
10 - Configuring Liquid Classes<br />
LiHa Liquid Classes for Fixed Tips and DiTis<br />
Please note the following if you specify an individual dilutor calibration factor or<br />
offset:<br />
– The individual calibration settings are only intended for specialists such as<br />
Tecan Field Service Engineers.<br />
– Before changing the calibration settings, make sure that the pipetting<br />
inaccuracy has been caused by the dilutor and that all other possibilities<br />
such as tubing problems or air bubbles have been ruled out.<br />
– The calibration settings must be determined and verified gravimetrically<br />
for the liquids and volume ranges in question.<br />
– The calibration settings are only valid for the type of liquid used during<br />
testing.<br />
– The calibration settings only apply to <strong>Freedom</strong> <strong>EVOware</strong> and do not affect<br />
the gravimetric tests using the Setup & Service software.<br />
– The values must be reset if you change the dilutor.<br />
10 - 16 <strong>Freedom</strong> <strong>EVOware</strong> <strong>Software</strong> <strong>Manual</strong>, 393172, en, V<strong>2.3</strong>
10 - Configuring Liquid Classes<br />
MCA96 Liquid Classes<br />
10.3 MCA96 Liquid Classes<br />
The MCA96 (Multi Channel Arm 96) has a 96-tip pipetting head. The 96-tip<br />
pipetting head can be fitted with a tipblock (fixed tips) or with disposable tips<br />
(DITIs).<br />
10.3.1 MCA96 Aspirate Parameters<br />
<strong>Freedom</strong> <strong>EVOware</strong> uses these parameters for the MCA96 pipetting head when<br />
aspirating or mixing. The illustrations at the top right of the dialog box show<br />
graphically the current settings for single pipetting mode and multi pipetting mode.<br />
Vol. stands for the pipetted volume.<br />
Fig. 10-7 MCA96 Aspirate parameters<br />
The parameters of this dialog box are as follows (some of the parameters must be<br />
specified separately for single pipetting mode and multi pipetting mode):<br />
Aspiration Speed<br />
Specify the aspiration speed in µl/s. A lower aspiration speed can improve the<br />
pipetting accuracy, a higher aspiration speed can improve the speed of<br />
operation.<br />
Delay<br />
Specify the delay after aspiration.<br />
<strong>Freedom</strong> <strong>EVOware</strong> <strong>Software</strong> <strong>Manual</strong>, 393172, en, V<strong>2.3</strong> 10 - 17
10 - Configuring Liquid Classes<br />
MCA96 Liquid Classes<br />
System Trailing Airgap (STAG)<br />
Specify the volume of air to aspirate directly after getting the tip block or DITIs<br />
(recommended range: 0 to 50 µl). <strong>Freedom</strong> <strong>EVOware</strong> uses the aspiration<br />
speed specified for the leading airgap for the system trailing airgap, too.<br />
When washing the tips, the air is dispensed during the empty step of the Wash<br />
command together with the remaining liquid. The STAG ensures that all of the<br />
liquid in the tips is discarded at the start of the wash procedure. This helps to<br />
reduce the carryover. In contrast to the leading airgap, the STAG is only<br />
relevant for washing the tips and is not dispensed by the Dispense command.<br />
Leading Airgap (LAG)<br />
Specify the volume of the leading airgap. Click the button to specify<br />
aspiration speed and delay after aspiration. The air of the leading airgap is<br />
dispensed together with the net volume which you specify in the Dispense<br />
command. The resulting tip blowout leads to more accurate pipetting.<br />
Trailing Airgap (TAG)<br />
Specify the volume of the trailing airgap. Click the button to specify<br />
aspiration speed and delay after aspiration. The trailing airgap is used to<br />
prevent liquid dripping from the tips when the arm moves. In addition, it<br />
ensures that the liquid meniscus is not dragged away from the end of the tip<br />
during fast arm movements.<br />
Excess Volume<br />
Specify the excess volume (in µl or %). Click the button to choose the<br />
position to use for discarding the excess volume (Discard to waste or Back to<br />
vessel). The excess volume is used to reduce contamination of the liquid in<br />
the tips with previously used liquids to an absolute minimum.<br />
Specify a digit in the Replace after field to discard the excess volume after reusing<br />
it several times (e.g. to save costs). This only applies if excess volume ><br />
0 and if you are using multi-pipetting. The excess volume is discarded after<br />
the pipetting cycle (aspiration and dispensing) has been completed.<br />
Conditioning Volume<br />
Specify the conditioning volume. Click the button to choose the position to<br />
use for discarding the conditioning volume (Discard to waste or Back to<br />
vessel). A conditioning volume can be used to maximize pipetting accuracy by<br />
ensuring that the liquid meniscus at the end of the tips is the is the same<br />
shape after aspirating as it will be after dispensing. The conditioning volume is<br />
discarded directly after aspirating.<br />
Use Pinch Valve<br />
The MCA96 does not have a pinch valve.<br />
Use Liquid Detection<br />
The MCA96 does not support liquid level detection for aspiration directly. If<br />
you want to use a liquid class for the MCA96 which specifies liquid level<br />
detection, the liquid level must be emulated using a special variable (see<br />
14.1.4.14 “RACK_VOLUME_x”, 14-7). Check this checkbox if you want to<br />
activate the emulated liquid level detection. Liquid level detection can be used<br />
e.g. to ensure minimal tip contamination by limiting the tip immersion depth.<br />
For <strong>Freedom</strong> <strong>EVOware</strong> Plus, see 14.1.4 “Pre-Defined Variables”, 14-4 for<br />
information on accessing the current value of this pre-defined variable in<br />
another script.<br />
10 - 18 <strong>Freedom</strong> <strong>EVOware</strong> <strong>Software</strong> <strong>Manual</strong>, 393172, en, V<strong>2.3</strong>
10 - Configuring Liquid Classes<br />
MCA96 Liquid Classes<br />
Aspiration Position<br />
Specify the Z-position and the Z-offset of the tips when aspirating. A positive<br />
value for the offset lowers the tips. You can only choose a Z-position relative<br />
to the liquid level if you have activated liquid level detection emulation.<br />
If you choose an aspirate position with tracking, the tips move downwards as<br />
the liquid level drops in the wells during aspiration. This option can be used<br />
e.g. to ensure minimal tip contamination by limiting the tip immersion depth.<br />
You can also choose the X-position when aspirating as follows:<br />
– Center: as specified for the labware which is used<br />
– Left: left of center; the offset is specified with X or Y offset while pipetting<br />
for the labware which is used<br />
– Right: right of center; the offset is specified with X or Y offset while<br />
pipetting for the labware which is used<br />
– Left / Right: left of center for odd columns, right of center for even<br />
columns; the offset is specified with X or Y offset while pipetting for the<br />
labware which is used<br />
– Right / Left: right of center for odd columns, left of center for even<br />
columns; the offset is specified with X or Y offset while pipetting for the<br />
labware which is used<br />
You can also choose the Y-position when aspirating as follows:<br />
– Center: as specified for the labware which is used<br />
– Rear: rear of center; the offset is specified with X or Y offset while pipetting<br />
for the labware which is used<br />
– Front: front of center; the offset is specified with X or Y offset while<br />
pipetting for the labware which is used<br />
– Rear / Front: rear of center for odd columns, front of center for even<br />
columns; the offset is specified with X or Y offset while pipetting for the<br />
labware which is used<br />
– Front / Rear: front of center for odd columns, rear of center for even<br />
columns; the offset is specified with X or Y offset while pipetting for the<br />
labware which is used<br />
By combining an X offset and a Y offset, there are nine possible pipetting<br />
positions (including the center position with no offsets).<br />
On Detection Error<br />
Select the required error handling if <strong>Freedom</strong> <strong>EVOware</strong> detects no liquid or<br />
not enough liquid.<br />
Use Exit Signal Detection<br />
The MCA96 does not support exit signal detection. The PMP option is not<br />
available for the MCA96.<br />
Mix before Aspiration<br />
Check this box if you want <strong>Freedom</strong> <strong>EVOware</strong> to mix the liquid before<br />
aspirating it. You can specify the number of mix cycles (range: 1 to 99), the<br />
mix volume (max. 2500 µl), the Z-position and the Z-offset. A positive value for<br />
the offset lowers the tips.<br />
Retract Tips to<br />
Specify the Z-position and the Z-offset to which the tips should retract (move<br />
upwards) after aspirating. A positive value for the offset lowers the tips.<br />
Retract Speed<br />
Specify the required retract speed.<br />
<strong>Freedom</strong> <strong>EVOware</strong> <strong>Software</strong> <strong>Manual</strong>, 393172, en, V<strong>2.3</strong> 10 - 19
10 - Configuring Liquid Classes<br />
MCA96 Liquid Classes<br />
10.3.2 MCA96 Dispense Parameters<br />
<strong>Freedom</strong> <strong>EVOware</strong> uses these parameters for the MCA96 pipetting head when<br />
dispensing or mixing.<br />
Fig. 10-8 MCA96 Dispense parameters<br />
The parameters of this dialog box are as follows (some of the parameters must be<br />
specified separately for single pipetting mode and multi pipetting mode):<br />
Dispense Speed<br />
Specify the dispense speed in µl/s. A high speed (400-600 µl/s) is needed to<br />
achieve a proper free dispense. Contact dispense requires a lower speed (in<br />
the same range as the aspirate speed).<br />
Breakoff Speed<br />
You cannot specify a breakoff speed for the MCA96.<br />
Delay<br />
Specify the delay after dispensing.<br />
Trailing Airgap after each Dispense<br />
You can automatically aspirate a trailing airgap after each dispense operation<br />
in order to avoid droplets forming on the tip. The trailing airgap parameters are<br />
specified in the Aspirate dialog box.<br />
Use Pinch Valve<br />
The MCA96 does not have a pinch valve.<br />
Use Liquid Detection<br />
The MCA96 does not support liquid level detection (or emulated liquid level<br />
detection) for dispensing.<br />
10 - 20 <strong>Freedom</strong> <strong>EVOware</strong> <strong>Software</strong> <strong>Manual</strong>, 393172, en, V<strong>2.3</strong>
10 - Configuring Liquid Classes<br />
MCA96 Liquid Classes<br />
Dispense Position<br />
Specify the Z-position and the Z-offset of the tips when dispensing. A positive<br />
value for the offset lowers the tips.<br />
If you choose a dispense position with tracking, the tips move upwards as the<br />
liquid level rises in the wells during dispensing. This option can be used e.g. to<br />
ensure minimal tip contamination by limiting the tip immersion depth.<br />
You can also choose the X-position when dispensing as follows:<br />
– Center: as specified for the labware which is used<br />
– Left: left of center; the offset is specified with X or Y offset while pipetting<br />
for the labware which is used<br />
– Right: right of center; the offset is specified with X or Y offset while<br />
pipetting for the labware which is used<br />
– Left / Right: left of center for odd columns, right of center for even<br />
columns; the offset is specified with X or Y offset while pipetting for the<br />
labware which is used<br />
– Right / Left: right of center for odd columns, left of center for even<br />
columns; the offset is specified with X or Y offset while pipetting for the<br />
labware which is used<br />
You can also choose the Y-position when dispensing as follows:<br />
– Center: as specified for the labware which is used<br />
– Rear: rear of center; the offset is specified with X or Y offset while pipetting<br />
for the labware which is used<br />
– Front: front of center; the offset is specified with X or Y offset while<br />
pipetting for the labware which is used<br />
– Rear / Front: rear of center for odd columns, front of center for even<br />
columns; the offset is specified with X or Y offset while pipetting for the<br />
labware which is used<br />
– Front / Rear: front of center for odd columns, rear of center for even<br />
columns; the offset is specified with X or Y offset while pipetting for the<br />
labware which is used<br />
By combining an X offset and a Y offset, there are nine possible pipetting<br />
positions (including the center position with no offsets).<br />
Tip Touching<br />
Activate the tip touching function if required and specify the direction of the<br />
movement. The amount of movement is specified with Tip-touching distance<br />
for the labware which is used.<br />
Tip touching is a special movement when dispensing a liquid. When tip<br />
touching is activated, <strong>Freedom</strong> <strong>EVOware</strong> dispenses to the destination<br />
container in the normal way, but then moves the tips to the side of the well and<br />
back before retracting them. This helps to remove any droplets which may be<br />
adhering to the tips.<br />
Speed: Specify the tip touching speed.<br />
Delay after touching: Specify the delay between the tip touching the well and<br />
moving back to the middle of the well.<br />
Mix after Dispense<br />
Check this box if you want to mix the liquid after dispensing it. You can specify<br />
the number of mix cycles (range: 1 to 99), the mix volume (max. 2500 µl), the<br />
Z-position and the Z-offset. A positive value for the offset lowers the tips.<br />
Retract Tips to<br />
Specify the Z-position and the Z-offset to which the tips should retract (move<br />
upwards) after dispensing. A positive value for the offset lowers the tips.<br />
<strong>Freedom</strong> <strong>EVOware</strong> <strong>Software</strong> <strong>Manual</strong>, 393172, en, V<strong>2.3</strong> 10 - 21
10 - Configuring Liquid Classes<br />
MCA96 Liquid Classes<br />
Retract Speed<br />
Specify the required retract speed.<br />
10.3.3 MCA96 Calibration Parameters<br />
<strong>Freedom</strong> <strong>EVOware</strong> uses these parameters for the MCA96 pipetting head to<br />
ensure that the specified net volumes are dispensed accurately. The two curves in<br />
the dialog box show graphically the current settings for single pipetting mode and<br />
multi pipetting mode.<br />
Fig. 10-9 MCA96 Calibration parameters<br />
The parameters of this dialog box are as follows (some of the parameters must be<br />
specified separately for single pipetting mode and multi pipetting mode):<br />
Offset / Factor<br />
Specify an offset and/or calibration factor to be applied for single pipetting<br />
mode and multi pipetting mode.<br />
<strong>Freedom</strong> <strong>EVOware</strong> uses the following expression to calculate the MCA96<br />
plunger movement from the net volume specified in the pipetting script:<br />
Calibrated MCA96 plunger movement = (net volume * factor) + offset<br />
10.3.4 MCA96 Plunger Parameters<br />
<strong>Freedom</strong> <strong>EVOware</strong> uses these parameters for the MCA96 pipetting head to<br />
control the plunger during dispensing. The graph illustrates the plunger speed<br />
versus the time for the specified dispense volume.<br />
10 - 22 <strong>Freedom</strong> <strong>EVOware</strong> <strong>Software</strong> <strong>Manual</strong>, 393172, en, V<strong>2.3</strong>
10 - Configuring Liquid Classes<br />
MCA96 Liquid Classes<br />
Fig. 10-10 MCA96 Plunger parameters<br />
The parameters of this dialog box are as follows (some of the parameters must be<br />
specified separately for single pipetting mode and multi pipetting mode):<br />
Accelerate with / Decelerate with<br />
Specify the required acceleration and deceleration of the MCA96 plunger for<br />
single pipetting mode and multi pipetting mode. For mechanical reasons the<br />
MCA96 plunger cannot accelerate or decelerate instantly. The graph then<br />
illustrates the plunger speed versus the time for the specified dispense<br />
volume.<br />
Dispense volume<br />
Specify the dispense volume for which you want to see a graph (the volume<br />
you specify should include the leading and trailing airgaps) and choose the<br />
graph you want to see (single pipetting mode or multi pipetting mode). The<br />
volume you specify is only used to calculate the graph and is not a dispense<br />
command for the MCA96 (the volume which will be dispensed is specified with<br />
the MCA96 Dispense command).<br />
The graph helps you to identify whether you have chosen suitable settings in<br />
this dialog box.<br />
If the graph has a flat top (plateau), the plunger acceleration/deceleration will<br />
allow the plunger to reach the dispense speed specified on the Dispense tab<br />
of the liquid class for the dispense volume you have chosen.<br />
<strong>Freedom</strong> <strong>EVOware</strong> <strong>Software</strong> <strong>Manual</strong>, 393172, en, V<strong>2.3</strong> 10 - 23
10 - Configuring Liquid Classes<br />
MCA384 Liquid Classes<br />
10.4 MCA384 Liquid Classes<br />
The MCA384 (Multi Channel Arm) can be fitted with 96 or 384 fixed tips or with 96<br />
or 384 disposable tips (DITIs). So-called head adapters are used to adapt the<br />
pipetting head to the different tip types.<br />
10.4.1 MCA384 Aspirate Parameters<br />
<strong>Freedom</strong> <strong>EVOware</strong> uses these parameters for the MCA384 pipetting head when<br />
aspirating or mixing. The illustrations at the top right of the dialog box show<br />
graphically the current settings for single pipetting mode and multi pipetting mode.<br />
Vol. stands for the pipetted volume.<br />
Fig. 10-11 MCA384 Aspirate parameters<br />
The parameters of this dialog box are as follows (some of the parameters must be<br />
specified separately for single pipetting mode and multi pipetting mode):<br />
Aspiration Speed<br />
Specify the aspiration speed in µl/s. A lower aspiration speed can improve the<br />
pipetting accuracy, a higher aspiration speed can improve the speed of<br />
operation.<br />
Delay<br />
Specify the delay after aspiration.<br />
10 - 24 <strong>Freedom</strong> <strong>EVOware</strong> <strong>Software</strong> <strong>Manual</strong>, 393172, en, V<strong>2.3</strong>
10 - Configuring Liquid Classes<br />
MCA384 Liquid Classes<br />
System Trailing Airgap (STAG)<br />
Specify the volume of air to aspirate directly after getting the tip block or DITIs<br />
(recommended range: 0 to 50 µl). <strong>Freedom</strong> <strong>EVOware</strong> uses the aspiration<br />
speed specified for the leading airgap for the system trailing airgap, too.<br />
When washing the tips, the air is dispensed during the empty step of the Wash<br />
command together with the remaining liquid. The STAG ensures that all of the<br />
liquid in the tips is discarded at the start of the wash procedure. This helps to<br />
reduce the carryover. In contrast to the leading airgap, the STAG is only<br />
relevant for washing the tips and is not dispensed by the Dispense command.<br />
Leading Airgap (LAG)<br />
Specify the volume of the leading airgap. Click the button to specify<br />
aspiration speed and delay after aspiration. The air of the leading airgap is<br />
dispensed together with the net volume which you specify in the Dispense<br />
command. The resulting tip blowout leads to more accurate pipetting.<br />
Trailing Airgap (TAG)<br />
Specify the volume of the trailing airgap. Click the button to specify<br />
aspiration speed and delay after aspiration. The trailing airgap is used to<br />
prevent liquid dripping from the tips when the arm moves. In addition, it<br />
ensures that the liquid meniscus is not dragged away from the end of the tip<br />
during fast arm movements.<br />
Excess Volume<br />
Specify the excess volume (in µl or %). Click the button to choose the<br />
position to use for discarding the excess volume (Discard to waste or Back to<br />
vessel). The excess volume is used to reduce contamination of the liquid in<br />
the tips with previously used liquids to an absolute minimum.<br />
Specify a digit in the Replace after field to discard the excess volume after reusing<br />
it several times (e.g. to save costs). This only applies if excess volume ><br />
0 and if you are using multi-pipetting. The excess volume is discarded after<br />
the pipetting cycle (aspiration and dispensing) has been completed.<br />
Conditioning Volume<br />
Specify the conditioning volume. Click the button to choose the position to<br />
use for discarding the conditioning volume (Discard to waste or Back to<br />
vessel). A conditioning volume can be used to maximize pipetting accuracy by<br />
ensuring that the liquid meniscus at the end of the tips is the is the same<br />
shape after aspirating as it will be after dispensing. The conditioning volume is<br />
discarded directly after aspirating.<br />
Use Pinch Valve<br />
The MCA384 does not have a pinch valve.<br />
Use Liquid Detection<br />
The MCA384 does not support liquid level detection for aspiration directly. If<br />
you want to use a liquid class for the MCA384 which specifies liquid level<br />
detection, the liquid level must be emulated using a special variable (see<br />
14.1.4.14 “RACK_VOLUME_x”, 14-7). Check this checkbox if you want to<br />
activate the emulated liquid level detection. Liquid level detection can be used<br />
e.g. to ensure minimal tip contamination by limiting the tip immersion depth.<br />
For <strong>Freedom</strong> <strong>EVOware</strong> Plus, see 14.1.4 “Pre-Defined Variables”, 14-4 for<br />
information on accessing the current value of this pre-defined variable in<br />
another script.<br />
<strong>Freedom</strong> <strong>EVOware</strong> <strong>Software</strong> <strong>Manual</strong>, 393172, en, V<strong>2.3</strong> 10 - 25
10 - Configuring Liquid Classes<br />
MCA384 Liquid Classes<br />
Aspiration Position<br />
Specify the Z-position and the Z-offset of the tips when aspirating. A positive<br />
value for the offset lowers the tips. You can only choose a Z-position relative<br />
to the liquid level if you have activated liquid level detection emulation.<br />
If you choose an aspirate position with tracking, the tips move downwards as<br />
the liquid level drops in the wells during aspiration. This option can be used<br />
e.g. to ensure minimal tip contamination by limiting the tip immersion depth.<br />
You can also choose the X-position when aspirating as follows:<br />
– Center: as specified for the labware which is used<br />
– Left: left of center; the offset is specified with X or Y offset while pipetting<br />
for the labware which is used<br />
– Right: right of center; the offset is specified with X or Y offset while<br />
pipetting for the labware which is used<br />
– Left / Right: left of center for odd columns, right of center for even<br />
columns; the offset is specified with X or Y offset while pipetting for the<br />
labware which is used<br />
– Right / Left: right of center for odd columns, left of center for even<br />
columns; the offset is specified with X or Y offset while pipetting for the<br />
labware which is used<br />
You can also choose the Y-position when aspirating as follows:<br />
– Center: as specified for the labware which is used<br />
– Rear: rear of center; the offset is specified with X or Y offset while pipetting<br />
for the labware which is used<br />
– Front: front of center; the offset is specified with X or Y offset while<br />
pipetting for the labware which is used<br />
– Rear / Front: rear of center for odd columns, front of center for even<br />
columns; the offset is specified with X or Y offset while pipetting for the<br />
labware which is used<br />
– Front / Rear: front of center for odd columns, rear of center for even<br />
columns; the offset is specified with X or Y offset while pipetting for the<br />
labware which is used<br />
By combining an X offset and a Y offset, there are nine possible pipetting<br />
positions (including the center position with no offsets).<br />
On Detection Error<br />
Select the required error handling if <strong>Freedom</strong> <strong>EVOware</strong> detects no liquid or<br />
not enough liquid.<br />
Use Exit Signal Detection<br />
The MCA384 does not support exit signal detection. The PMP option is not<br />
available for the MCA384.<br />
Mix before Aspiration<br />
Check this box if you want <strong>Freedom</strong> <strong>EVOware</strong> to mix the liquid before<br />
aspirating it. You can specify the number of mix cycles (range: 1 to 99), the<br />
mix volume (max. 2500 µl), the Z-position and the Z-offset. A positive value for<br />
the offset lowers the tips.<br />
Retract Tips to<br />
Specify the Z-position and the Z-offset to which the tips should retract (move<br />
upwards) after aspirating. A positive value for the offset lowers the tips.<br />
Retract Speed<br />
Specify the required retract speed.<br />
10 - 26 <strong>Freedom</strong> <strong>EVOware</strong> <strong>Software</strong> <strong>Manual</strong>, 393172, en, V<strong>2.3</strong>
10 - Configuring Liquid Classes<br />
MCA384 Liquid Classes<br />
10.4.2 MCA384 Dispense Parameters<br />
<strong>Freedom</strong> <strong>EVOware</strong> uses these parameters for the MCA384 pipetting head when<br />
dispensing or mixing.<br />
Fig. 10-12 MCA384 Dispense parameters<br />
The parameters of this dialog box are as follows (some of the parameters must be<br />
specified separately for single pipetting mode and multi pipetting mode):<br />
Dispense Speed<br />
Specify the dispense speed in µl/s. A high speed (400-600 µl/s) is needed to<br />
achieve a proper free dispense. Contact dispense requires a lower speed (in<br />
the same range as the aspirate speed).<br />
Breakoff Speed<br />
You cannot specify a breakoff speed for the MCA384.<br />
Delay<br />
Specify the delay after dispensing.<br />
Trailing Airgap after each Dispense<br />
You can automatically aspirate a trailing airgap after each dispense operation<br />
in order to avoid droplets forming on the tip. The trailing airgap parameters are<br />
specified in the Aspirate dialog box.<br />
Use Pinch Valve<br />
The MCA384 does not have a pinch valve.<br />
<strong>Freedom</strong> <strong>EVOware</strong> <strong>Software</strong> <strong>Manual</strong>, 393172, en, V<strong>2.3</strong> 10 - 27
10 - Configuring Liquid Classes<br />
MCA384 Liquid Classes<br />
Use Liquid Detection<br />
The MCA384 does not support liquid level detection for dispensing directly. If<br />
you want to use a liquid class for the MCA384 which specifies liquid level<br />
detection, the liquid level must be emulated using a special variable (see<br />
14.1.4.14 “RACK_VOLUME_x”, 14-7). Check this checkbox if you want to<br />
activate the emulated liquid level detection. Liquid level detection can be used<br />
e.g. to ensure minimal tip contamination by limiting the tip immersion depth.<br />
For <strong>Freedom</strong> <strong>EVOware</strong> Plus, see 14.1.4 “Pre-Defined Variables”, 14-4 for<br />
information on accessing the current value of this pre-defined variable in<br />
another script.<br />
Dispense Position<br />
Specify the Z-position and the Z-offset of the tips when dispensing. A positive<br />
value for the offset lowers the tips.<br />
If you choose a dispense position with tracking, the tips move upwards as the<br />
liquid level rises in the wells during dispensing. This option can be used e.g. to<br />
ensure minimal tip contamination by limiting the tip immersion depth.<br />
You can also choose the X-position when dispensing as follows:<br />
– Center: as specified for the labware which is used<br />
– Left: left of center; the offset is specified with X or Y offset while pipetting<br />
for the labware which is used<br />
– Right: right of center; the offset is specified with X or Y offset while<br />
pipetting for the labware which is used<br />
– Left / Right: left of center for odd columns, right of center for even<br />
columns; the offset is specified with X or Y offset while pipetting for the<br />
labware which is used<br />
– Right / Left: right of center for odd columns, left of center for even<br />
columns; the offset is specified with X or Y offset while pipetting for the<br />
labware which is used<br />
You can also choose the Y-position when dispensing as follows:<br />
– Center: as specified for the labware which is used<br />
– Rear: rear of center; the offset is specified with X or Y offset while pipetting<br />
for the labware which is used<br />
– Front: front of center; the offset is specified with X or Y offset while<br />
pipetting for the labware which is used<br />
– Rear / Front: rear of center for odd columns, front of center for even<br />
columns; the offset is specified with X or Y offset while pipetting for the<br />
labware which is used<br />
– Front / Rear: front of center for odd columns, rear of center for even<br />
columns; the offset is specified with X or Y offset while pipetting for the<br />
labware which is used<br />
By combining an X offset and a Y offset, there are nine possible pipetting<br />
positions (including the center position with no offsets).<br />
10 - 28 <strong>Freedom</strong> <strong>EVOware</strong> <strong>Software</strong> <strong>Manual</strong>, 393172, en, V<strong>2.3</strong>
10 - Configuring Liquid Classes<br />
MCA384 Liquid Classes<br />
Tip Touching<br />
Activate the tip touching function if required and specify the direction of the<br />
movement. The amount of movement is specified with Tip-touching distance<br />
for the labware which is used.<br />
Tip touching is a special movement when dispensing a liquid. When tip<br />
touching is activated, <strong>Freedom</strong> <strong>EVOware</strong> dispenses to the destination<br />
container in the normal way, but then moves the tips to the side of the well and<br />
back before retracting them. This helps to remove any droplets which may be<br />
adhering to the tips.<br />
Speed: Specify the tip touching speed.<br />
Delay after touching: Specify the delay between the tip touching the well and<br />
moving back to the middle of the well.<br />
Mix after Dispense<br />
Check this box if you want to mix the liquid after dispensing it. You can specify<br />
the number of mix cycles (range: 1 to 99), the mix volume (max. 2500 µl), the<br />
Z-position and the Z-offset. A positive value for the offset lowers the tips.<br />
Retract Tips to<br />
Specify the Z-position and the Z-offset to which the tips should retract (move<br />
upwards) after dispensing. A positive value for the offset lowers the tips.<br />
Retract Speed<br />
Specify the required retract speed.<br />
10.4.3 MCA384 Calibration Parameters<br />
<strong>Freedom</strong> <strong>EVOware</strong> uses these parameters for the MCA384 pipetting head to<br />
ensure that the specified net volumes are dispensed accurately. The two curves in<br />
the dialog box show graphically the current settings for single pipetting mode and<br />
multi pipetting mode.<br />
Fig. 10-13 MCA384 Calibration parameters<br />
<strong>Freedom</strong> <strong>EVOware</strong> <strong>Software</strong> <strong>Manual</strong>, 393172, en, V<strong>2.3</strong> 10 - 29
10 - Configuring Liquid Classes<br />
MCA384 Liquid Classes<br />
The parameters of this dialog box are as follows (some of the parameters must be<br />
specified separately for single pipetting mode and multi pipetting mode):<br />
Offset / Factor<br />
Specify an offset and/or calibration factor to be applied for single pipetting<br />
mode and multi pipetting mode.<br />
<strong>Freedom</strong> <strong>EVOware</strong> uses the following expression to calculate the MCA384<br />
plunger movement from the net volume specified in the pipetting script:<br />
Calibrated MCA384 plunger movement = (net volume * factor) + offset<br />
10.4.4 MCA384 Plunger Parameters<br />
<strong>Freedom</strong> <strong>EVOware</strong> uses these parameters for the MCA384 pipetting head to<br />
control the plunger during dispensing. The graph illustrates the plunger speed<br />
versus the time for the specified dispense volume.<br />
Fig. 10-14 MCA384 Plunger parameters<br />
The parameters of this dialog box are as follows (some of the parameters must be<br />
specified separately for single pipetting mode and multi pipetting mode):<br />
Accelerate with / Decelerate with<br />
Specify the required acceleration and deceleration of the MCA384 plunger for<br />
single pipetting mode and multi pipetting mode. For mechanical reasons the<br />
MCA384 plunger cannot accelerate or decelerate instantly. The graph then<br />
illustrates the plunger speed versus the time for the specified dispense<br />
volume.<br />
10 - 30 <strong>Freedom</strong> <strong>EVOware</strong> <strong>Software</strong> <strong>Manual</strong>, 393172, en, V<strong>2.3</strong>
10 - Configuring Liquid Classes<br />
MCA384 Liquid Classes<br />
Vol. dependent speed<br />
Check these checkboxes to use a pipetting speed which is dependent on the<br />
volume you want to pipette. The aspiration and/or dispense speed which you<br />
choose on the aspirate and/or dispense tabs will be ignored and the following<br />
pipetting speeds will be used instead:<br />
– ½ Vol. µl/s: The volume you choose in the Aspirate command will be<br />
aspirated in 2 seconds.<br />
– Vol. µl/s: The volume you choose in the Dispense command will be<br />
dispensed in 1 second.<br />
Dispense volume<br />
Specify the dispense volume for which you want to see a graph (the volume<br />
you specify should include the leading and trailing airgaps) and choose the<br />
graph you want to see (single pipetting mode or multi pipetting mode). The<br />
volume you specify is only used to calculate the graph and is not a dispense<br />
command for the MCA384 (the volume which will be dispensed is specified<br />
with the MCA384 Dispense command).<br />
The graph helps you to identify whether you have chosen suitable settings in<br />
this dialog box.<br />
If the graph has a flat top (plateau), the plunger acceleration/deceleration will<br />
allow the plunger to reach the dispense speed specified on the Dispense tab<br />
of the liquid class for the dispense volume you have chosen.<br />
<strong>Freedom</strong> <strong>EVOware</strong> <strong>Software</strong> <strong>Manual</strong>, 393172, en, V<strong>2.3</strong> 10 - 31
10 - Configuring Liquid Classes<br />
Te-MO 96 Liquid Classes<br />
10.5 Te-MO 96 Liquid Classes<br />
The Te-MO is available with a 96-tip or 384-tip pipetting head. The following<br />
settings apply to the 96-tip version. The 96-tip pipetting head can be fitted with a<br />
tipblock (fixed tips) or with disposable tips (DITIs).<br />
10.5.1 Te-MO 96 Aspirate Parameters<br />
<strong>Freedom</strong> <strong>EVOware</strong> uses these parameters when aspirating or mixing with the 96-<br />
tip Te-MO tip block or DITI pipetting head. The illustrations at the top right of the<br />
dialog box show graphically the current settings for single pipetting mode and<br />
multi pipetting mode. Vol. stands for the pipetted volume.<br />
Fig. 10-15 Te-MO 96 Aspirate parameters for the tip block and DITIs<br />
The parameters of this dialog box are as follows (some of the parameters must be<br />
specified separately for single pipetting mode and multi pipetting mode):<br />
Aspiration Speed<br />
Specify the aspiration speed in µl/s. A lower aspiration speed can improve the<br />
pipetting accuracy, a higher aspiration speed can improve the speed of<br />
operation.<br />
Delay<br />
Specify the delay after aspiration.<br />
10 - 32 <strong>Freedom</strong> <strong>EVOware</strong> <strong>Software</strong> <strong>Manual</strong>, 393172, en, V<strong>2.3</strong>
10 - Configuring Liquid Classes<br />
Te-MO 96 Liquid Classes<br />
System Trailing Airgap (STAG)<br />
Specify the volume of air to aspirate directly after getting the tip block or DITIs<br />
(recommended range: 0 to 50 µl). <strong>Freedom</strong> <strong>EVOware</strong> uses the aspiration<br />
speed specified for the leading airgap for the system trailing airgap, too.<br />
When washing the tips, the air is dispensed during the empty step of the Wash<br />
command together with the remaining liquid. The STAG ensures that all of the<br />
liquid in the tips is discarded at the start of the wash procedure. This helps to<br />
reduce the carryover. In contrast to the leading airgap, the STAG is only<br />
relevant for washing the tips and is not dispensed by the Dispense command.<br />
Leading Airgap (LAG)<br />
Specify the volume of the leading airgap. Click the button to specify<br />
aspiration speed and delay after aspiration. The air of the leading airgap is<br />
dispensed together with the net volume which you specify in the Dispense<br />
command. The resulting tip blowout leads to more accurate pipetting.<br />
Trailing Airgap (TAG)<br />
Specify the volume of the trailing airgap. Click the button to specify<br />
aspiration speed and delay after aspiration. The trailing airgap is used to<br />
prevent liquid dripping from the tips when the arm moves. In addition, it<br />
ensures that the liquid meniscus is not dragged away from the end of the tip<br />
during fast arm movements.<br />
Excess Volume<br />
Specify the excess volume (in µl or %). Click the button to choose the<br />
position to use for discarding the excess volume (Discard to waste or Back to<br />
vessel). The excess volume is used to reduce contamination of the liquid in<br />
the tips with previously used liquids to an absolute minimum.<br />
Specify a digit in the Replace after field to discard the excess volume after reusing<br />
it several times (e.g. to save costs). This only applies if excess volume ><br />
0 and if you are using multi-pipetting. The excess volume is discarded after<br />
the pipetting cycle (aspiration and dispensing) has been completed.<br />
Conditioning Volume<br />
Specify the conditioning volume. Click the button to choose the position to<br />
use for discarding the conditioning volume (Discard to waste or Back to<br />
vessel). A conditioning volume can be used to maximize pipetting accuracy by<br />
ensuring that the liquid meniscus at the end of the tips is the is the same<br />
shape after aspirating as it will be after dispensing. The conditioning volume is<br />
discarded directly after aspirating.<br />
Use Pinch Valve<br />
The Te-MO does not have a pinch valve.<br />
Use Liquid Detection<br />
The Te-MO does not support liquid level detection for aspiration directly. If you<br />
want to use a liquid class for the Te-MO which specifies liquid level detection,<br />
the liquid level must be emulated using a special variable (see<br />
14.1.4.14 “RACK_VOLUME_x”, 14-7). Check this checkbox if you want to<br />
activate the emulated liquid level detection. Liquid level detection can be used<br />
e.g. to ensure minimal tip contamination by limiting the tip immersion depth.<br />
For <strong>Freedom</strong> <strong>EVOware</strong> Plus, see 14.1.4 “Pre-Defined Variables”, 14-4 for<br />
information on accessing the current value of this pre-defined variable in<br />
another script.<br />
<strong>Freedom</strong> <strong>EVOware</strong> <strong>Software</strong> <strong>Manual</strong>, 393172, en, V<strong>2.3</strong> 10 - 33
10 - Configuring Liquid Classes<br />
Te-MO 96 Liquid Classes<br />
Aspiration Position<br />
Specify the Z-position and the Z-offset of the tips when aspirating. A positive<br />
value for the offset lowers the tips. You can only choose a Z-position relative<br />
to the liquid level if you have activated liquid level detection emulation.<br />
If you choose an aspirate position with tracking, the tips move downwards as<br />
the liquid level drops in the wells during aspiration. This option can be used<br />
e.g. to ensure minimal tip contamination by limiting the tip immersion depth.<br />
You can also choose the X-position when aspirating as follows:<br />
– Center: as specified for the labware which is used<br />
– Left: left of center; the offset is specified with X or Y offset while pipetting<br />
for the labware which is used<br />
– Right: right of center; the offset is specified with X or Y offset while<br />
pipetting for the labware which is used<br />
– Left / Right: left of center for odd columns, right of center for even<br />
columns; the offset is specified with X or Y offset while pipetting for the<br />
labware which is used<br />
– Right / Left: right of center for odd columns, left of center for even<br />
columns; the offset is specified with X or Y offset while pipetting for the<br />
labware which is used<br />
You can also choose the Y-position when aspirating as follows:<br />
– Center: as specified for the labware which is used<br />
– Rear: rear of center; the offset is specified with X or Y offset while pipetting<br />
for the labware which is used<br />
– Front: front of center; the offset is specified with X or Y offset while<br />
pipetting for the labware which is used<br />
– Rear / Front: rear of center for odd columns, front of center for even<br />
columns; the offset is specified with X or Y offset while pipetting for the<br />
labware which is used<br />
– Front / Rear: front of center for odd columns, rear of center for even<br />
columns; the offset is specified with X or Y offset while pipetting for the<br />
labware which is used<br />
By combining an X offset and a Y offset, there are nine possible pipetting<br />
positions (including the center position with no offsets).<br />
On Detection Error<br />
Select the required error handling if <strong>Freedom</strong> <strong>EVOware</strong> detects no liquid or<br />
not enough liquid.<br />
Use Exit Signal Detection<br />
The Te-MO does not support exit signal detection. The PMP option is not<br />
available for the Te-MO.<br />
Mix before Aspiration<br />
Check this box if you want <strong>Freedom</strong> <strong>EVOware</strong> to mix the liquid before<br />
aspirating it. You can specify the number of mix cycles (range: 1 to 99), the<br />
mix volume (max. 2500 µl), the Z-position and the Z-offset. A positive value for<br />
the offset lowers the tips.<br />
Retract Tips to<br />
Specify the Z-position and the Z-offset to which the tips should retract (move<br />
upwards) after aspirating. A positive value for the offset lowers the tips.<br />
Retract Speed<br />
Specify the required retract speed.<br />
10 - 34 <strong>Freedom</strong> <strong>EVOware</strong> <strong>Software</strong> <strong>Manual</strong>, 393172, en, V<strong>2.3</strong>
10 - Configuring Liquid Classes<br />
Te-MO 96 Liquid Classes<br />
10.5.2 Te-MO 96 Dispense Parameters<br />
<strong>Freedom</strong> <strong>EVOware</strong> uses these parameters when dispensing or mixing with the<br />
96-tip Te-MO tip block or DITI pipetting head.<br />
Fig. 10-16 Te-MO 96 Dispense parameters for the tip block and DITIs<br />
The parameters of this dialog box are as follows (some of the parameters must be<br />
specified separately for single pipetting mode and multi pipetting mode):<br />
Dispense Speed<br />
Specify the dispense speed in µl/s. A high speed (400-600 µl/s) is needed to<br />
achieve a proper free dispense. Contact dispense requires a lower speed (in<br />
the same range as the aspirate speed).<br />
Breakoff Speed<br />
You cannot specify a breakoff speed for the Te-MO.<br />
Delay<br />
Specify the delay after dispensing.<br />
Trailing Airgap after each Dispense<br />
You can automatically aspirate a trailing airgap after each dispense operation<br />
in order to avoid droplets forming on the tip. The trailing airgap parameters are<br />
specified in the Aspirate dialog box.<br />
Use Pinch Valve<br />
The Te-MO does not have a pinch valve.<br />
Use Liquid Detection<br />
The Te-MO does not support liquid level detection (or emulated liquid level<br />
detection) for dispensing.<br />
<strong>Freedom</strong> <strong>EVOware</strong> <strong>Software</strong> <strong>Manual</strong>, 393172, en, V<strong>2.3</strong> 10 - 35
10 - Configuring Liquid Classes<br />
Te-MO 96 Liquid Classes<br />
Dispense Position<br />
Specify the Z-position and the Z-offset of the tips when dispensing. A positive<br />
value for the offset lowers the tips.<br />
If you choose a dispense position with tracking, the tips move upwards as the<br />
liquid level rises in the wells during dispensing. This option can be used e.g. to<br />
ensure minimal tip contamination by limiting the tip immersion depth.<br />
You can also choose the X-position when dispensing as follows:<br />
– Center: as specified for the labware which is used<br />
– Left: left of center; the offset is specified with X or Y offset while pipetting<br />
for the labware which is used<br />
– Right: right of center; the offset is specified with X or Y offset while<br />
pipetting for the labware which is used<br />
– Left / Right: left of center for odd columns, right of center for even<br />
columns; the offset is specified with X or Y offset while pipetting for the<br />
labware which is used<br />
– Right / Left: right of center for odd columns, left of center for even<br />
columns; the offset is specified with X or Y offset while pipetting for the<br />
labware which is used<br />
You can also choose the Y-position when dispensing as follows:<br />
– Center: as specified for the labware which is used<br />
– Rear: rear of center; the offset is specified with X or Y offset while pipetting<br />
for the labware which is used<br />
– Front: front of center; the offset is specified with X or Y offset while<br />
pipetting for the labware which is used<br />
– Rear / Front: rear of center for odd columns, front of center for even<br />
columns; the offset is specified with X or Y offset while pipetting for the<br />
labware which is used<br />
– Front / Rear: front of center for odd columns, rear of center for even<br />
columns; the offset is specified with X or Y offset while pipetting for the<br />
labware which is used<br />
By combining an X offset and a Y offset, there are nine possible pipetting<br />
positions (including the center position with no offsets).<br />
Tip Touching<br />
Activate the tip touching function if required and specify the direction of the<br />
movement. The amount of movement is specified with Tip-touching distance<br />
for the labware which is used.<br />
Tip touching is a special movement when dispensing a liquid. When tip<br />
touching is activated, <strong>Freedom</strong> <strong>EVOware</strong> dispenses to the destination<br />
container in the normal way, but then moves the tips to the side of the well and<br />
back before retracting them. This helps to remove any droplets which may be<br />
adhering to the tips.<br />
Speed: Specify the tip touching speed.<br />
Delay after touching: Specify the delay between the tip touching the well and<br />
moving back to the middle of the well.<br />
Mix after Dispense<br />
Check this box if you want to mix the liquid after dispensing it. You can specify<br />
the number of mix cycles (range: 1 to 99), the mix volume (max. 2500 µl), the<br />
Z-position and the Z-offset. A positive value for the offset lowers the tips.<br />
Retract Tips to<br />
Specify the Z-position and the Z-offset to which the tips should retract (move<br />
upwards) after dispensing. A positive value for the offset lowers the tips.<br />
10 - 36 <strong>Freedom</strong> <strong>EVOware</strong> <strong>Software</strong> <strong>Manual</strong>, 393172, en, V<strong>2.3</strong>
10 - Configuring Liquid Classes<br />
Te-MO 96 Liquid Classes<br />
Retract Speed<br />
Specify the required retract speed.<br />
10.5.3 Te-MO 96 Calibration Parameters<br />
<strong>Freedom</strong> <strong>EVOware</strong> uses these parameters for the 96-tip Te-MO tip block or DITI<br />
pipetting head to ensure that the specified net volumes are dispensed accurately.<br />
The two curves in the dialog box show graphically the current settings for single<br />
pipetting mode and multi pipetting mode.<br />
Fig. 10-17 Te-MO 96 Calibrate parameters for the tip block and DITIs<br />
The parameters of this dialog box are as follows (some of the parameters must be<br />
specified separately for single pipetting mode and multi pipetting mode):<br />
Offset / Factor<br />
Specify an offset and/or calibration factor to be applied for single pipetting<br />
mode and multi pipetting mode.<br />
<strong>Freedom</strong> <strong>EVOware</strong> uses the following expression to calculate the Te-MO<br />
plunger movement from the net volume specified in the pipetting script:<br />
Calibrated Te-MO plunger movement = (net volume * factor) + offset<br />
<strong>Freedom</strong> <strong>EVOware</strong> <strong>Software</strong> <strong>Manual</strong>, 393172, en, V<strong>2.3</strong> 10 - 37
10 - Configuring Liquid Classes<br />
Te-MO 384 Liquid Classes<br />
10.6 Te-MO 384 Liquid Classes<br />
The Te-MO is available with a 96-tip or 384-tip pipetting head. The following<br />
settings apply to the 384-tip version. The 384-tip pipetting head can be fitted with<br />
a tipblock (fixed tips) but not with disposable tips (DITIs).<br />
10.6.1 Te-MO 384 Aspirate Parameters<br />
<strong>Freedom</strong> <strong>EVOware</strong> uses these parameters for the 384-tip Te-MO pipetting head<br />
when aspirating or mixing. The illustrations at the top right of the dialog box show<br />
graphically the current settings for single pipetting mode and multi pipetting mode.<br />
Vol. stands for the pipetted volume.<br />
Fig. 10-18 Te-MO 384 Aspirate parameters<br />
See 10.5.1 “Te-MO 96 Aspirate Parameters”, 10-32 for details of the<br />
parameters.<br />
The Te-MO 384 does not have a pinch valve and does not support exit signal<br />
detection. The PMP option is not available for the Te-MO.<br />
10 - 38 <strong>Freedom</strong> <strong>EVOware</strong> <strong>Software</strong> <strong>Manual</strong>, 393172, en, V<strong>2.3</strong>
10 - Configuring Liquid Classes<br />
Te-MO 384 Liquid Classes<br />
10.6.2 Te-MO 384 Dispense Parameters<br />
<strong>Freedom</strong> <strong>EVOware</strong> uses these parameters for the 384-tip Te-MO pipetting head<br />
when dispensing or mixing.<br />
Fig. 10-19 Te-MO 384 Dispense parameters<br />
The parameters of this dialog box are as follows (some of the parameters must be<br />
specified separately for single pipetting mode and multi pipetting mode):<br />
Delay before<br />
Specify the required settling time for the Te-MO after completing the previous<br />
Te-MO command and before starting to dispense (range: 0 to 5000 ms).<br />
The Te-MO 384 does not support liquid level detection or tip touching for<br />
dispensing.<br />
See 10.5.2 “Te-MO 96 Dispense Parameters”, 10-35 for details of the other<br />
parameters.<br />
10.6.3 Te-MO 384 Calibration Parameters<br />
<strong>Freedom</strong> <strong>EVOware</strong> uses these parameters for the 384-tip Te-MO pipetting head<br />
to ensure that the specified net volumes are dispensed accurately. The two curves<br />
in the dialog box show graphically the current settings for single pipetting mode<br />
and multi pipetting mode.<br />
<strong>Freedom</strong> <strong>EVOware</strong> <strong>Software</strong> <strong>Manual</strong>, 393172, en, V<strong>2.3</strong> 10 - 39
10 - Configuring Liquid Classes<br />
Te-MO 384 Liquid Classes<br />
Fig. 10-20 Te-MO 384 Calibration parameters<br />
The parameters of this dialog box are as follows (some of the parameters must be<br />
specified separately for single pipetting mode and multi pipetting mode):<br />
Offset / Factor<br />
Specify an offset and/or calibration factor to be applied for single pipetting<br />
mode and multi pipetting mode.<br />
<strong>Freedom</strong> <strong>EVOware</strong> uses the following expression to calculate the Te-MO<br />
plunger movement from the net volume specified in the pipetting script:<br />
Calibrated Te-MO plunger movement = (net volume * factor) + offset<br />
10 - 40 <strong>Freedom</strong> <strong>EVOware</strong> <strong>Software</strong> <strong>Manual</strong>, 393172, en, V<strong>2.3</strong>
10 - Configuring Liquid Classes<br />
Te-MO 384 Liquid Classes<br />
10.6.4 Te-MO 384 Plunger Parameters<br />
<strong>Freedom</strong> <strong>EVOware</strong> uses these parameters for the 384-tip Te-MO pipetting head<br />
to control the plunger during dispensing. The graph illustrates the plunger speed<br />
versus the time for the specified dispense volume.<br />
Fig. 10-21 Te-MO 384 Plunger parameters<br />
The parameters of this dialog box are as follows (some of the parameters must be<br />
specified separately for single pipetting mode and multi pipetting mode):<br />
Accelerate with / Decelerate with<br />
Specify the required acceleration and deceleration of the Te-MO plunger for<br />
single pipetting mode and multi pipetting mode. For mechanical reasons the<br />
Te-MO plunger cannot accelerate or decelerate instantly. The graph then<br />
illustrates the plunger speed versus the time for the specified dispense<br />
volume.<br />
Dispense volume<br />
Specify the dispense volume for which you want to see a graph (the volume<br />
you specify should include the leading and trailing airgaps) and choose the<br />
graph you want to see (single pipetting mode or multi pipetting mode). The<br />
volume you specify is only used to calculate the graph and is not a dispense<br />
command for the Te-MO (the volume which will be dispensed is specified with<br />
the Te-MO Dispense command).<br />
The graph helps you to identify whether you have chosen suitable settings in<br />
this dialog box.<br />
If the graph has a flat top (plateau), the plunger acceleration/deceleration will<br />
allow the plunger to reach the dispense speed specified on the Dispense tab<br />
of the liquid class for the dispense volume you have chosen.<br />
<strong>Freedom</strong> <strong>EVOware</strong> <strong>Software</strong> <strong>Manual</strong>, 393172, en, V<strong>2.3</strong> 10 - 41
10 - Configuring Liquid Classes<br />
Overview of Liquid Classes Supplied With <strong>Freedom</strong> <strong>EVOware</strong><br />
10.7 Overview of Liquid Classes Supplied With <strong>Freedom</strong><br />
<strong>EVOware</strong><br />
A liquid class is a collection of parameters necessary for pipetting liquids. Each<br />
liquid class is divided into subclasses for a certain hardware configuration and<br />
volume range. The subclasses are automatically selected at runtime depending<br />
on the used hardware and required volume.<br />
10.7.1 General<br />
Tecan provides a default liquid class database for water, DMSO, serum and<br />
ethanol, installed with <strong>EVOware</strong>. Additional liquid classes for special pipetting<br />
options can be imported from the <strong>EVOware</strong> CD.<br />
Note: If not specified, all liquid classes are for use with 1000 µl syringes.<br />
Using a standard liquid class assumes that the most suitable tip size is used; for<br />
example, when pipetting 150 µl with the Liquid Handling Arm, it is assumed that<br />
the 200 µl tip is used. In this case, the standard liquid class "Water free dispense"<br />
should be used. However, if it is preferred to use the 1000 µl tip for pipetting 150<br />
µl, a specific liquid class should be used, in this case "Water free dispense DiTi<br />
1000" .<br />
The diagram Fig. 10-23, 10-43 and Fig. 10-22, 10-42 show the usage for the<br />
most common liquid classes in combination of the required volume and tip<br />
capacity.<br />
Eg.: Pipetting a volume of 10 µl with a 50 µl tip using the MCA384 would require<br />
the liquid class Water wet contact MCA 384 DiTi 50.<br />
Liquid class usage for DiTi operated with the LiHa:<br />
Pipetted volume<br />
A<br />
B<br />
A<br />
Tip capacity<br />
Fig. 10-22 Liquid class usage for Disposable Tips on the LiHa<br />
A Water free dispense B Water free dispense DiTi 1000<br />
10 - 42 <strong>Freedom</strong> <strong>EVOware</strong> <strong>Software</strong> <strong>Manual</strong>, 393172, en, V<strong>2.3</strong>
10 - Configuring Liquid Classes<br />
Overview of Liquid Classes Supplied With <strong>Freedom</strong> <strong>EVOware</strong><br />
Liquid class usage for DiTi operated with the MCA384:<br />
Pipetted volume<br />
A<br />
B<br />
A<br />
C<br />
A<br />
Tip capacity<br />
Fig. 10-23 Liquid class usage for Disposable Tips on the MCA 384<br />
A Water wet contact<br />
B Water wet contact MCA 384 DiTi 125<br />
C Water wet contact MCA 384 DiTi 50<br />
Approach<br />
The liquid class names have been chosen to be self-explanatory containing the<br />
liquid type, dispense mode and if necessary the hardware configuration.<br />
Many liquid classes may have similar parameter settings when being compared to<br />
each other. The differences are usually found in adaptations of parameter values<br />
for certain volumes.<br />
Refer to the respective section for further information:<br />
10.7.3 “Installed Liquid Classes”, 10-44<br />
10.7.4 “Liquid Classes on the <strong>Freedom</strong> <strong>EVOware</strong> CD”, 10-49<br />
10.7.2 Dispense Modes<br />
The figures below show how liquids are dispensed into a well.<br />
The dispense modes differ from each other to provide certain features to match<br />
the liquid’s attributes and application requirements.<br />
<strong>Freedom</strong> <strong>EVOware</strong> <strong>Software</strong> <strong>Manual</strong>, 393172, en, V<strong>2.3</strong> 10 - 43
10 - Configuring Liquid Classes<br />
Overview of Liquid Classes Supplied With <strong>Freedom</strong> <strong>EVOware</strong><br />
A B C<br />
Fig. 10-24 Dispense modes<br />
A<br />
B<br />
Free Dispense (non contact)<br />
Wet Contact (contact with liquid)<br />
C<br />
Dry Contact (contact with<br />
labware)<br />
Free Dispense (non contact)<br />
The free dispense mode dispenses the liquid from a defined dispense<br />
position, generally at the container top. If liquid is present the dispense<br />
position is above the liquid level.<br />
– Medium precision; maximum throughput<br />
Wet Contact (contact with liquid)<br />
The wet contact dispense mode dispenses the liquid at Z-Max or below the<br />
liquid level of a pre-dispensed liquid (e.g. diluent). Mixing can be added<br />
without additional tip movement.<br />
– High precision; low throughput<br />
Dry Contact (contact with labware)<br />
The dry contact dispense mode dispenses at or close to Z-Max.<br />
High precision; medium throughput<br />
10.7.3 Installed Liquid Classes<br />
The default liquid classes listed below are intended for water, DMSO, serum and<br />
ethanol.<br />
DMSO<br />
Name<br />
Usage<br />
Devices<br />
Comment<br />
DMSO free dispense<br />
General liquid class<br />
LiHa, MCA96 with DiTi<br />
Can be used for most pipetting devices and tip types<br />
Name<br />
Usage<br />
Devices<br />
Comment<br />
DMSO wet contact<br />
General liquid class<br />
MCA96, MCA384, Te-MO96<br />
For multi channel pipetting heads<br />
10 - 44 <strong>Freedom</strong> <strong>EVOware</strong> <strong>Software</strong> <strong>Manual</strong>, 393172, en, V<strong>2.3</strong>
10 - Configuring Liquid Classes<br />
Overview of Liquid Classes Supplied With <strong>Freedom</strong> <strong>EVOware</strong><br />
Name<br />
Usage<br />
Devices<br />
DMSO wet contact MC96 HP block<br />
High Precision fixed tip block on 96-channel pipetting heads<br />
MCA96, Te-MO96<br />
Comment<br />
Name DMSO wet contact MCA 384 DiTi 125<br />
Usage<br />
Devices<br />
MCA384 with 125 µl DiTi<br />
Comment Improved accuracy below 50 µl<br />
Name DMSO wet contact MCA 384 DiTi 50<br />
Usage<br />
Devices<br />
MCA384 with 50 µl DiTi<br />
Comment Improved accuracy below 15 µl<br />
Name<br />
Usage<br />
Devices<br />
DMSO wet contact MCA 384 large capacity tip block<br />
For large capacity fixed tip blocks<br />
MCA384 with 96 or 384 fixed tip block<br />
Comment<br />
Name<br />
Usage<br />
Devices<br />
DMSO wet contact MCA 384 small capacity tip block<br />
For small capacity fixed tip blocks<br />
MCA384 with 96 or 384 fixed tip block<br />
Comment<br />
Ethanol<br />
Name<br />
Usage<br />
Devices<br />
Comment<br />
Ethanol free dispense<br />
General liquid class<br />
LiHa<br />
<strong>Freedom</strong> <strong>EVOware</strong> <strong>Software</strong> <strong>Manual</strong>, 393172, en, V<strong>2.3</strong> 10 - 45
10 - Configuring Liquid Classes<br />
Overview of Liquid Classes Supplied With <strong>Freedom</strong> <strong>EVOware</strong><br />
Serum<br />
Name<br />
Usage<br />
Devices<br />
Comment<br />
Serum free dispense<br />
General liquid class<br />
LiHa<br />
Name Serum free dispense DiTi 1000<br />
Usage<br />
Devices<br />
Comment<br />
LiHa with 1000 µl DiTi<br />
Improved accuracy below 200 µl with 1000 µl DiTi<br />
System Liquid<br />
Name<br />
Usage<br />
Devices<br />
Comment<br />
System Liquid free dispense<br />
Aspirate and dispense system liquid with the LiHa<br />
LiHa<br />
Water<br />
Name<br />
Usage<br />
Devices<br />
Comment<br />
Water dry contact High density plate<br />
For Te-PS tips and 10 µl Disposable Tips in dry 1536 well plate<br />
LiHa with Te-PS tips or 10 µl DiTi<br />
Name<br />
Usage<br />
Devices<br />
Comment<br />
Water free dispense<br />
General liquid class<br />
LiHa, MCA96<br />
For most pipetting devices and tip types<br />
Name Water free dispense DiTi 1000<br />
Usage<br />
Devices<br />
Comment<br />
LiHa with 1000 µl DiTi<br />
Improved accuracy below 200 µl for 1000 µl Disposable Tips<br />
10 - 46 <strong>Freedom</strong> <strong>EVOware</strong> <strong>Software</strong> <strong>Manual</strong>, 393172, en, V<strong>2.3</strong>
10 - Configuring Liquid Classes<br />
Overview of Liquid Classes Supplied With <strong>Freedom</strong> <strong>EVOware</strong><br />
Name<br />
Usage<br />
Water wet contact<br />
General liquid class<br />
Devices LiHa, MCA384, MCA96, Te-MO 96<br />
Comment<br />
For most pipetting devices and tip types<br />
Name<br />
Usage<br />
Water wet contact MC96 HP block<br />
High Precision fixed tip block on 96-channel pipetting heads<br />
Devices MCA96, Te-MO 96<br />
Comment<br />
Name Water wet contact MCA 384 DiTi 125<br />
Usage<br />
Devices<br />
MCA384 with 125 µl DiTi<br />
Comment Improved accuracy below 50 µl<br />
Name Water wet contact MCA 384 DiTi 50<br />
Usage<br />
Devices<br />
MCA384 with 50 µl DiTi<br />
Comment Improved accuracy below 15 µl<br />
Name<br />
Usage<br />
Devices<br />
Water wet contact MCA 384 large capacity tip block<br />
For large capacity fixed tip blocks<br />
MCA384 with 96 or 384 fixed tip block<br />
Comment<br />
Name<br />
Usage<br />
Devices<br />
Water wet contact MCA 384 small capacity tip block<br />
For small capacity fixed tip blocks<br />
MCA384 with 96 or 384 fixed tip blocks<br />
Comment<br />
<strong>Freedom</strong> <strong>EVOware</strong> <strong>Software</strong> <strong>Manual</strong>, 393172, en, V<strong>2.3</strong> 10 - 47
10 - Configuring Liquid Classes<br />
Overview of Liquid Classes Supplied With <strong>Freedom</strong> <strong>EVOware</strong><br />
Wash Refill Center<br />
The WRC wash and refill center has default liquid classes, required for washing<br />
tips. The WRC wash and refill center is used for washing the MCA96, MCA384 as<br />
well as the Te-MO 96.<br />
WRC<br />
Name<br />
Usage<br />
WRC step 1 Empty tips<br />
Step 1 of wash command<br />
Devices MCA384, MCA96, Te-MO 96<br />
Comment<br />
For emptying tips<br />
Name<br />
Usage<br />
WRC step 2 Dip in<br />
Step 2 of wash command<br />
Devices MCA384, MCA96, Te-MO 96<br />
Comment<br />
For dipping into the wash liquid<br />
Name<br />
Usage<br />
WRC step 3 Blow out underwater<br />
Step 3 of wash command<br />
Devices MCA384, MCA96, Te-MO 96<br />
Comment<br />
For blowing out air inside the wash liquid<br />
10 - 48 <strong>Freedom</strong> <strong>EVOware</strong> <strong>Software</strong> <strong>Manual</strong>, 393172, en, V<strong>2.3</strong>
10 - Configuring Liquid Classes<br />
Overview of Liquid Classes Supplied With <strong>Freedom</strong> <strong>EVOware</strong><br />
10.7.4 Liquid Classes on the <strong>Freedom</strong> <strong>EVOware</strong> CD<br />
The liquid classes listed below can be imported from the <strong>Freedom</strong> <strong>EVOware</strong> CD.<br />
LiHa 50 µl DiTi<br />
Name Water free dispense DiTi 50<br />
Usage<br />
Devices<br />
Comment<br />
For 50 µl DiTi without filter<br />
LiHa with 50 µl DiTi<br />
Used with 500 µl syringe<br />
Name<br />
Usage<br />
Devices<br />
Comment<br />
Water free dispense DiTi 50 Filter<br />
For 50 µl DiTi with filter<br />
LiHa with 50 µl DiTi<br />
Used with 500 µl syringe<br />
Te-MO 384<br />
Name<br />
Usage<br />
384 DMSO contact wet<br />
Devices Te-MO 384<br />
Comment<br />
Name<br />
384 DMSO free dispense<br />
Usage<br />
Devices Te-MO 384<br />
Comment<br />
Name<br />
384 Dummy<br />
Usage<br />
Devices Te-MO 384<br />
Comment<br />
Only used for maintenance scripts<br />
Name<br />
384 Water contact wet<br />
Usage<br />
Devices Te-MO 384<br />
<strong>Freedom</strong> <strong>EVOware</strong> <strong>Software</strong> <strong>Manual</strong>, 393172, en, V<strong>2.3</strong> 10 - 49
10 - Configuring Liquid Classes<br />
Overview of Liquid Classes Supplied With <strong>Freedom</strong> <strong>EVOware</strong><br />
Comment<br />
Name<br />
384 Water free dispense<br />
Usage<br />
Devices Te-MO 384<br />
Comment<br />
PMP<br />
Name<br />
Water free dispense PMP DiTi 200 filter<br />
Usage Pressure Monitored Pipetting using Tecan part no. 10 612 553<br />
Devices<br />
PMP LiHa with 200 µl DiTi with filter<br />
Comment<br />
Name<br />
Water free dispense PMP DiTi 1000 filter<br />
Usage Pressure Monitored Pipetting using Tecan part no. 10 612 555<br />
Devices<br />
PMP LiHa with 1000 µl DiTi with filter<br />
Comment<br />
Name<br />
Serum free dispense PMP DiTi 200 filter<br />
Usage Pressure Monitored Pipetting using Tecan part no. 10 612 553<br />
Devices<br />
PMP LiHa with 200 µl DiTi with filter<br />
Comment<br />
Name<br />
Serum free dispense PMP DiTi 1000 filter<br />
Usage Pressure Monitored Pipetting using Tecan part no. 10 612 555<br />
Devices<br />
PMP LiHa with 1000 µl DiTi with filter<br />
Comment<br />
Name DMSO free dispense PMP DiTi 200<br />
Usage Pressure Monitored Pipetting using Tecan part no. 10 612 552<br />
Devices<br />
PMP LiHa with 200 µl DiTi without filter<br />
Comment<br />
10 - 50 <strong>Freedom</strong> <strong>EVOware</strong> <strong>Software</strong> <strong>Manual</strong>, 393172, en, V<strong>2.3</strong>
10 - Configuring Liquid Classes<br />
Overview of Liquid Classes Supplied With <strong>Freedom</strong> <strong>EVOware</strong><br />
Name<br />
DMSO free dispense PMP DiTi 200 filter<br />
Usage Pressure Monitored Pipetting using Tecan part no. 10 612 553<br />
Devices<br />
PMP LiHa with 200 µl DiTi with filter<br />
Comment<br />
Name<br />
DMSO free dispense PMP DiTi 1000 filter<br />
Usage Pressure Monitored Pipetting using Tecan part no. 10 612 555<br />
Devices<br />
PMP LiHa with 1000 µl DiTi with filter<br />
Comment<br />
Name Template free dispense PMP DiTi 200<br />
Usage<br />
Devices<br />
Template for creating a customized PMP liquid class<br />
PMP LiHa with 200 µl DiTi without filter<br />
Comment<br />
Name<br />
Usage<br />
Devices<br />
Template free dispense PMP DiTi 200 filter<br />
Template for creating a customized PMP liquid class<br />
PMP LiHa with 200 µl DiTi with filter<br />
Comment<br />
Name<br />
Usage<br />
Devices<br />
Template free dispense PMP DiTi 1000 filter<br />
Template for creating a customized PMP liquid class<br />
PMP LiHa with 1000 µl DiTi with filter<br />
Comment<br />
<strong>Freedom</strong> <strong>EVOware</strong> <strong>Software</strong> <strong>Manual</strong>, 393172, en, V<strong>2.3</strong> 10 - 51
10 - Configuring Liquid Classes<br />
Overview of Liquid Classes Supplied With <strong>Freedom</strong> <strong>EVOware</strong><br />
10 - 52 <strong>Freedom</strong> <strong>EVOware</strong> <strong>Software</strong> <strong>Manual</strong>, 393172, en, V<strong>2.3</strong>
11 - Getting Started - Setting Up a New Script or Process<br />
First Steps<br />
11 Getting Started - Setting Up a New Script or<br />
Process<br />
This chapter describes the steps which are required to set up a new pipetting<br />
script (<strong>Freedom</strong> <strong>EVOware</strong> <strong>Standard</strong>) or process (<strong>Freedom</strong> <strong>EVOware</strong> Plus).<br />
Processes and scripts can only be created and/or modified by users with <strong>Freedom</strong><br />
<strong>EVOware</strong> Administrator or Application Specialist rights.<br />
11.1 First Steps<br />
<strong>Freedom</strong><br />
<strong>EVOware</strong><br />
<strong>Standard</strong><br />
<strong>Freedom</strong><br />
<strong>EVOware</strong> Plus<br />
Start <strong>Freedom</strong> <strong>EVOware</strong> and choose Create a new script in the Startup Wizard<br />
(see 5.2 “Startup Wizard, <strong>Freedom</strong> <strong>EVOware</strong> <strong>Standard</strong>”, 5-5). This opens the<br />
main window of <strong>Freedom</strong> <strong>EVOware</strong>. Initially, the Worktable Editor at the bottom<br />
right of the screen will be empty (i.e. it does not contain any carriers or labware<br />
etc.). The Script Editor at the top right of the screen will also empty be until you<br />
add some pipetting commands. Until you save the script for the first time and<br />
assign a name of your choice, the title bar of the Script Editor will show a generic<br />
name.<br />
Start <strong>Freedom</strong> <strong>EVOware</strong> and choose Create a new process in the Startup Wizard<br />
(see 5.3 “Startup Wizard, <strong>Freedom</strong> <strong>EVOware</strong> Plus”, 5-7). This opens the main<br />
window of <strong>Freedom</strong> <strong>EVOware</strong>. Initially, the Worktable Editor at the bottom right of<br />
the screen will be empty (i.e. it does not contain any carriers or labware etc.). The<br />
Process Editor at the top right of the screen will also empty be empty until you add<br />
some process steps. Until you save the script for the first time and assign a name<br />
of your choice, the title bar of the Process Editor will show a generic name.<br />
The various elements of the <strong>Freedom</strong> <strong>EVOware</strong> main window are described in<br />
5.4 “Overview of the Main Window in <strong>Freedom</strong> <strong>EVOware</strong>”, 5-9.<br />
11.2 Setting Up a New Pipetting Instrument<br />
Please proceed as follows when setting up a new pipetting instrument:<br />
• Use the Setup & Service software to check and calibrate the reference<br />
coordinates of the hardware. This is normally done for you by the Tecan Field<br />
Service Engineer when installing the pipetting instrument and the optional<br />
devices. See 1.2 “Reference Documents”, 1-3 for information on this<br />
software.<br />
• Edit the settings for the LiHa (see 8.4.2.1 “LiHa (Liquid Handling Arm)”, 8-<br />
22).<br />
• If necessary, edit the settings for the PosID barcode scanner (see<br />
8.4.2.2, 8-28), the MPO/LICOS system (see 8.4.<strong>2.3</strong>, 8-29), the Chemical<br />
System (see 8.4.2.5, 8-30) and the doorlocks (see 8.4.2.7, 8-31).<br />
<strong>Freedom</strong> <strong>EVOware</strong> <strong>Software</strong> <strong>Manual</strong>, 393172, en, V<strong>2.3</strong> 11 - 1
11 - Getting Started - Setting Up a New Script or Process<br />
Pre-requirements<br />
11.3 Pre-requirements<br />
Before you can set up a process or script, you have to configure the infrastructure<br />
of your system as follows:<br />
• Check that the optional devices you want to use (such as barcode scanners)<br />
are installed on your pipetting instrument and that the devices are present in<br />
the Control Bar (Commands section) and/or visible in the Worktable Editor. If<br />
the icons are missing, then you need to run the installation program again and<br />
install the device drivers which are missing (see 13.2 “Overview of Device<br />
Commands”, 13-12 and 4.3 “Modifying, Removing or Repairing Your<br />
Installation”, 4-8). In general, the device drivers are pre-configured during<br />
installation with appropriate global settings. For information on configuring the<br />
global settings see 8.4 “Device Settings”, 8-21.<br />
• Check that the general settings for the <strong>Freedom</strong> <strong>EVOware</strong> software are<br />
configured appropriately (see 8 “Configuration Tool”, 8-1). Among other<br />
things, check that the COM ports have been configured for the optional<br />
devices and that the I/O state is switched ON for the devices that you want to<br />
use (this enables the COM interface for the respective device). See 8.4.3.1 “I/<br />
O State Tab”, 8-36.<br />
• Check that the carriers and labware you want to use for your process are<br />
visible in <strong>Freedom</strong> <strong>EVOware</strong> in the Control Bar (Labware section). If you are<br />
using custom carriers and/or labware items which are not in the list, you need<br />
to create them in <strong>Freedom</strong> <strong>EVOware</strong> before you can set up your process. See<br />
9.5 “Configuring Carriers”, 9-39 and 9.4 “Configuring Labware”, 9-15. In<br />
the case of carriers, this involves e.g. specifying the carrier dimensions and<br />
how many labware items can be put on the carrier. In the case of labware, this<br />
involves e.g. specifying the labware dimensions.<br />
• Check that liquid classes are available for the liquids you want to pipette (see<br />
10.1 “Liquid Classes Editor”, 10-1). A liquid class is a set of liquid handling<br />
parameters. It specifies aspirating and dispensing speeds, airgaps, liquid<br />
detection modes, etc.<br />
• Rectangular labware such as microplates is moved to and from carriers and<br />
other devices such as carousels using a plate robot (RoMa; robot<br />
manipulator). Tubes are moved to and from tube racks using a tube robot<br />
(PnP; Pick & Place arm). Movement commands for the RoMa and PnP are<br />
called robot vectors. The robot vectors for the RoMa are associated with the<br />
carrier definitions. The robot vectors for the PnP are associated with the<br />
labware definitions. Appropriate robot vectors may already be provided with<br />
your <strong>Freedom</strong> <strong>EVOware</strong> installation. Check in the respective carrier and<br />
labware definitions to see whether the robot vectors you want to use are<br />
already present. Otherwise you will need to configure a new vector. See<br />
9.6 “Creating and Editing Plate Robot Vectors”, 9-55 and 9.7 “Creating and<br />
Editing Tube Robot Vectors”, 9-63.<br />
• Additional RoMa and PnP vectors are needed to move the RoMa or PnP back<br />
to a home (or parking) position when not in use. Such vectors can be seen in<br />
the Robot Vectors section of the Control Bar. See 9.6.4 “Defining the Home<br />
Position for a RoMa”, 9-62 and 9.7.4 “Defining the Home Position for a<br />
PnP”, 9-69 for more information.<br />
11.3.1 Setting Up Carriers on the Worktable<br />
The Worktable Editor at the bottom right of the screen is a graphical<br />
representation of the pipetting instrument's worktable (deck). It shows icons for<br />
11 - 2 <strong>Freedom</strong> <strong>EVOware</strong> <strong>Software</strong> <strong>Manual</strong>, 393172, en, V<strong>2.3</strong>
11 - Getting Started - Setting Up a New Script or Process<br />
Pre-requirements<br />
the devices which are installed and the arrangement of the carriers and labware.<br />
See 13.2 “Overview of Device Commands”, 13-12.<br />
Before programming your process or pipetting script, you need to move the<br />
carriers and labware etc. which you want to use on to the Worktable Editor to<br />
match the real arrangement of these objects on the pipetting instrument.<br />
This section describes how to add carriers; putting labware on the carriers is<br />
described in 11.4.1 “Choosing Labware for a Pipetting Script”, 11-4,<br />
11.5.1 “Choosing Labware for a Process”, 11-7 and 11.5.4 “Choosing Labware<br />
for a Pipette Command”, 11-11.<br />
Note: Each script or process has its own worktable layout, and the worktable<br />
layout is automatically saved with the script or process. Click on the worktable and<br />
click Save worktable as template if you want to save the worktable layout as a<br />
template for use in another script or process. The worktable template contains<br />
information on the carriers you have chosen. If you have already put labware onto<br />
the carriers, the template also contains information on the labware you have<br />
chosen.<br />
Carriers can only be placed on the Worktable Editor at specified grid positions<br />
which correspond to the positioning pins on the instrument’s worktable. One grid<br />
unit is 25.0 mm. The choice and the positions of carriers and labware are chosen<br />
according to the requirements of your application or experiment.<br />
You can change the carrier positions later by dragging with the mouse without<br />
needing to change your script or process, for example if it turns out that the<br />
carriers are too close together to position additional objects in between.<br />
You can change the size of the Worktable Editor by moving the mouse over the<br />
one of the edges until the double arrow cursor appears. Then click and drag until<br />
the required size has been reached.<br />
When required by the script or process, <strong>Freedom</strong> <strong>EVOware</strong> uses the RoMa<br />
(Robot Manipulator) to move labware during runtime to new positions (carrier<br />
sites). However, carriers and devices always stay at the same position.<br />
Accordingly, you must set up the initial worktable with all of the carriers you need<br />
in the correct positions.<br />
There are two basic types of carrier - normal carriers on which you can place<br />
labware for pipetting and carriers which are devices. The latter type are used as<br />
placeholders on the worktable for devices such as the orbital shaker or the<br />
incubator. Depending on the type of device, such carriers are often not available<br />
for pipetting, even though you can place labware on (or into) them. When the<br />
carrier is configured, this is specified by unchecking the Accessible for liquid<br />
handling arm checkbox.<br />
To create the worktable layout, select the required carrier type from the Control<br />
Bar (Labware section) and drag it onto the worktable at the required position.<br />
Make sure that there is enough space on the worktable for the carrier. If<br />
necessary, drag already positioned objects to the left or right to make space.<br />
Remember that the final positions you choose must correspond to the actual<br />
position of the objects on the pipetting instrument. Large objects such as the Te-<br />
MO need a lot of space to allow them to be positioned.<br />
Repeat this process to add all of the carriers to the worktable that you need. The<br />
choice and the positions of the carriers is based on the requirements of your<br />
application or experiment.<br />
To move a carrier to a new position, click the edge of the carrier to select it and<br />
drag it to the required position. When dragging the carrier, the current grid position<br />
is shown in the small yellow tab at the bottom left. To delete a carrier, click on it<br />
and drag it off of the worktable.<br />
To make a copy of a carrier which is already on the worktable, press the Ctrl<br />
button, click on the carrier and drag the cursor to the required grid position.<br />
<strong>Freedom</strong> <strong>EVOware</strong> <strong>Software</strong> <strong>Manual</strong>, 393172, en, V<strong>2.3</strong> 11 - 3
11 - Getting Started - Setting Up a New Script or Process<br />
Setting Up a Pipetting Script in <strong>Freedom</strong> <strong>EVOware</strong> <strong>Standard</strong><br />
When adding, deleting or moving carriers, a special cursor is shown to indicate<br />
the action you are performing (“+”, “del” or “move”).<br />
If you click on a carrier (click on the edge, not on the labware on the carrier),<br />
information on the carrier is shown in the lower infopad.<br />
Carrier types can be assigned unique colors in the <strong>Freedom</strong> <strong>EVOware</strong><br />
configuration make it easier for you to identify them in the Worktable Editor<br />
(see “Color”, 9-41).<br />
Carriers which are designed for one type of labware only (such as tube racks and<br />
the wash station) are put on the worktable with a full complement of labware. For<br />
other carrier types, you need to add the labware by hand (see later).<br />
See also 11.7.2 “Example of a Worktable With Several Carriers and Labware<br />
Items”, 11-20.<br />
11.4 Setting Up a Pipetting Script in <strong>Freedom</strong> <strong>EVOware</strong><br />
<strong>Standard</strong><br />
After setting up the worktable with the carriers and devices you want to use,<br />
before you write the pipetting script you must to choose the labware you need.<br />
11.4.1 Choosing Labware for a Pipetting Script<br />
Select the required labware type from the Labware section of the Control Bar and<br />
drag it onto the required carrier site on the worktable. To help you, <strong>Freedom</strong><br />
<strong>EVOware</strong> highlights all carrier sites which are suitable for the chosen labware<br />
item.<br />
Note: If you click on the carrier and scroll down to Allowed Labware, <strong>Freedom</strong><br />
<strong>EVOware</strong> will show you the labware types which are compatible with the selected<br />
carrier.<br />
Repeat this process to add all of the labware to the worktable that you need. The<br />
choice and the positions of the labware is based on the requirements of your<br />
application or experiment.<br />
To move labware to a new position, click on the labware to select it and drag to the<br />
required carrier site.To delete labware, click on it and drag it off of the worktable.<br />
To make a copy of a labware item which is already on the worktable, press the Ctrl<br />
button, click on the labware and drag the cursor to the required carrier site.<br />
When adding, deleting or moving labware, a special cursor is shown to indicate<br />
the action you are performing (“+”, “del” or “move”).<br />
Labware types can be assigned unique colors in the <strong>Freedom</strong> <strong>EVOware</strong><br />
configuration make it easier for you to identify them in the Worktable Editor<br />
(see “Color”, 9-19).<br />
In addition, labware items can be assigned labels (names) to make it easier to<br />
identify them in the Worktable Editor (see 11.7.1 “Assigning a Label (Name) to the<br />
Labware”, 11-19). Labware labels are shown in yellow.<br />
If you click on a labware item, information on the item is shown in the lower<br />
infopad. See Fig. 11-8, 11-20 for an example of a worktable.<br />
11 - 4 <strong>Freedom</strong> <strong>EVOware</strong> <strong>Software</strong> <strong>Manual</strong>, 393172, en, V<strong>2.3</strong>
11 - Getting Started - Setting Up a New Script or Process<br />
Setting Up a Pipetting Script in <strong>Freedom</strong> <strong>EVOware</strong> <strong>Standard</strong><br />
11.4.2 Creating a Pipetting Script<br />
The pipetting program (or script) is created by choosing script commands in the<br />
Control Bar and dragging them to the Script Editor window (see 5.4.4 “The Script<br />
Editor”, 5-19). See 13.1 “Overview of Script Commands”, 13-1.<br />
Because <strong>Freedom</strong> <strong>EVOware</strong> normally executes a script in a linear sequence, you<br />
should add the commands in the order that you want the script to be executed.<br />
Each script is associated with its own worktable layout (carriers, devices and<br />
labware), which must be specified before you write the script.<br />
When you drag a script command to the Script Editor, a blue line helps you to<br />
choose where the new command should be inserted.<br />
When you drop the command onto the Script Editor, a dialog box is opened where<br />
you can specify the command parameters. After making your entries, click OK to<br />
add the command to the script. To change the command parameters later, doubleclick<br />
the script line to open the dialog box again (or click on the script line and<br />
press Enter).<br />
If your script uses device commands, it is also necessary to put labware of the<br />
correct type onto the device icon(s). This is shown by a grey rectangle inside the<br />
icon. This is not necessary in <strong>Freedom</strong> <strong>EVOware</strong> Plus. Tip: If you click on the grey<br />
rectangle, the chosen labware type is shown in the lower Infopad.<br />
The currently selected script line is highlighted in orange. The associated object in<br />
the Worktable Editor is highlighted using the same color. The cursor keys can be<br />
used to move through the script one line at a time.<br />
The Cut, Copy, and Paste functions in the Edit menu (and in the Script Editor’s<br />
context menu) can also be used when creating a script. Select one or more script<br />
lines, choose Cut or Copy, select where you want to insert the command(s) and<br />
then choose Paste.<br />
To select several script lines, click on the first line you want to select and shift-click<br />
on the last line (click while pressing the Shift key). To clear the selection, click on a<br />
line outside of the selected range. To move a line, click on it and drag it to the<br />
required position.<br />
See also 17 “Special Features, Example Scripts and Processes,”, 17-1.<br />
11.4.2.1 Checking the Pipetting Script for Errors<br />
Each time you insert a new command in your script or edit an existing command,<br />
<strong>Freedom</strong> <strong>EVOware</strong> validates the entire script to check for errors and shows all<br />
commands which have errors in red. If you select a faulty command, the infopad<br />
will show information on the error. Double-click on the command in the Script<br />
Editor to open a dialog box where you can change the command parameters.<br />
Choose Auto-Validation in the Edit menu if you want to switch off automatic<br />
validation of pipetting scripts (see 6.2.5 “Auto-Validation”, 6-9). You then need<br />
to validate the script manually (by choosing Validate Script in the Edit menu).<br />
If your script contains conditional jumps or branches, validation only checks those<br />
parts of the script which are executed with the default values of the IF variables in<br />
Condition commands. For this reason, it is not recommended to declare variables<br />
(e.g. with the Set Variable command) within conditional parts of the script (see<br />
14.1.12 “Validating a Script Which Contains Variables”, 14-18).<br />
If your script contains conditional jumps or branches, you should separately<br />
validate those parts of the script which are not executed with the default values of<br />
the IF variables. To do this, temporarily modify the values of the IF variables to<br />
ensure that all of the script branches have been tested.<br />
<strong>Freedom</strong> <strong>EVOware</strong> chooses multi-dispensing mode automatically if the pipetting<br />
script specifies an aspirate command followed by several consecutive dispense<br />
commands. In turn, this influences the liquid class parameters which are used.<br />
<strong>Freedom</strong> <strong>EVOware</strong> <strong>Software</strong> <strong>Manual</strong>, 393172, en, V<strong>2.3</strong> 11 - 5
11 - Getting Started - Setting Up a New Script or Process<br />
Setting Up a Pipetting Script in <strong>Freedom</strong> <strong>EVOware</strong> <strong>Standard</strong><br />
The decision between single dispensing mode and multi-dispensing mode is<br />
made when the script is validated and not when the script is run. Scripts are<br />
validated when they are modified and also when they are opened for running<br />
without being modified. Validation is done using default values for the variables.<br />
If the number of consecutive dispense commands is controlled by a variable<br />
whose value can change during runtime, it is recommended to design the script<br />
with branches or separate groups of commands for single-pipetting mode (one<br />
dispense operation) and multi-pipetting mode (more than one dispense<br />
operation). This ensures that the correct pipetting mode and liquid class<br />
parameters will be chosen at runtime.<br />
See also 14.3.4 “Validating a Script Which Contains Sub-Routines”, 14-22.<br />
See also C “Validation of <strong>Freedom</strong> <strong>EVOware</strong> Applications”, C-1.<br />
11.4.3 Adding Robot Movement Commands to the Script<br />
Plate Robot<br />
Tube Robot<br />
Multi channel<br />
arm (MCA)<br />
Movement commands for the plate robot (RoMa vectors) are associated with<br />
carriers. They are specified in the carrier definition (see 9.6 “Creating and Editing<br />
Plate Robot Vectors”, 9-55).<br />
In <strong>Freedom</strong> <strong>EVOware</strong> <strong>Standard</strong>, RoMa movements are initiated by script<br />
commands (see 15.58 “RoMa Vector Command”, 15-141 and 15.59 “Transfer<br />
Labware Command”, 15-143). Simple RoMa movements are carried out with<br />
the Move RoMa command, which does not need a RoMa vector (see 15.57, 15-<br />
140).<br />
For <strong>Freedom</strong> <strong>EVOware</strong> Plus see 11.5.3 “Adding Robot Movement Commands to<br />
the Process”, 11-10.<br />
Movement commands for the tube robot (PnP vectors) are associated with<br />
labware such as tube racks. They are specified in the labware definition (see<br />
9.7 “Creating and Editing Tube Robot Vectors”, 9-63).<br />
In both <strong>Freedom</strong> <strong>EVOware</strong> <strong>Standard</strong> and <strong>Freedom</strong> <strong>EVOware</strong> Plus, PnP<br />
movements are initiated by script commands (see 15.61 “PnP Vector Command”,<br />
15-146, and 15.62 “Transfer Tube Command”, 15-148). Simple PnP<br />
movements are carried out with the Move PnP command, which does not need a<br />
PnP vector (see 15.60, 15-145).<br />
In <strong>Freedom</strong> <strong>EVOware</strong> Plus, you first must use a special process step to open the<br />
script editor (see 16.25.1 “Tube Robot - ExecuteScript Command”, 16-83).<br />
Movement commands for the MCA96 or the MCA384 (MCA vectors) are<br />
associated with carriers. They are specified in the carrier definition (see<br />
9.8 “Creating and Editing MCA Vectors”, 9-69). MCA vectors are very similar to<br />
RoMa vectors.<br />
In <strong>Freedom</strong> <strong>EVOware</strong> <strong>Standard</strong>, MCA movements are initiated by script<br />
commands (see 15.68.11 “MCA96 Vector Command”, 15-175,<br />
15.68.12 “MCA96 Transfer Labware Command”, 15-177, 15.69.11 “MCA384<br />
Vector Command”, 15-199 and 15.69.12 “MCA384 Transfer Labware<br />
Command”, 15-201). Also see 9.8 “Creating and Editing MCA Vectors”, 9-69.<br />
For <strong>Freedom</strong> <strong>EVOware</strong> Plus see 11.5.3 “Adding Robot Movement Commands to<br />
the Process”, 11-10.<br />
11.4.4 Saving the Script<br />
Save the script you have created by clicking Save in the toolbar or by choosing<br />
Save from the File menu. Then enter a name for the script in the Save File dialog<br />
11 - 6 <strong>Freedom</strong> <strong>EVOware</strong> <strong>Software</strong> <strong>Manual</strong>, 393172, en, V<strong>2.3</strong>
11 - Getting Started - Setting Up a New Script or Process<br />
Setting Up a Process in <strong>Freedom</strong> <strong>EVOware</strong> Plus<br />
box or select an existing script which you want to overwrite and click the green<br />
arrow. You can also save the script as a script template by choosing Save As from<br />
the File menu and clicking the Template button in the Save File dialog box.<br />
11.4.5 Running the Script<br />
See 12.1 “Running a Liquid Handling Script”, 12-1.<br />
11.4.6 Example Scripts and Example Process<br />
<strong>Freedom</strong> <strong>EVOware</strong> is provided with a number of example scripts which illustrate<br />
various aspects of script programming. It is instructive for new users of <strong>Freedom</strong><br />
<strong>EVOware</strong> to load the scripts which are provided and to study each command<br />
while looking at the on-line help. For learning purposes, some of the scripts can<br />
also be run in offline mode. The scripts are stored as script templates. To load<br />
them, click New and select the required template. Script templates have a yellow<br />
icon.<br />
Note that scripts will indicate errors (marked in red in the Script Editor) if the<br />
configuration of the pipetting instrument is unsuitable. For example, if the script<br />
uses DITIs, errors which be shown if the liquid handling arm is not configured with<br />
DITIs. Conversely, if the liquid handling arm is configured with DITIs, Aspirate<br />
commands must be preceeded by Get DITI commands. Errors will also be shown<br />
if the script uses liquid classes or volume ranges which are not currently available.<br />
In many cases, the purpose of each of the scripts is explained in a Comment<br />
command at the start of the script.<br />
The <strong>Freedom</strong> <strong>EVOware</strong> installation contains a number of maintenance scripts<br />
(see 6.4.2 “Run Maintenance”, 6-10). Maintenance scripts can be run by both<br />
<strong>Freedom</strong> <strong>EVOware</strong> versions but can only be created and edited with <strong>Freedom</strong><br />
<strong>EVOware</strong> <strong>Standard</strong>. Script files and maintenance scripts have a green icon.<br />
<strong>Freedom</strong> <strong>EVOware</strong> Plus is also provided with an example process template,<br />
which is for the ELISA test (Enzyme immunoassay). Process templates have a<br />
blue icon.<br />
11.5 Setting Up a Process in <strong>Freedom</strong> <strong>EVOware</strong> Plus<br />
In <strong>Freedom</strong> <strong>EVOware</strong> Plus, the sequence of steps which are required to carry out<br />
a particular application or experiment, for example to extract the substance you<br />
are looking for, is called a process. The process specifies the operations you want<br />
the pipetting instrument to execute. Processes are set up in the Process Editor,<br />
which is shown at the top right of the screen (see 5.4.3 “The Process Editor<br />
(<strong>Freedom</strong> <strong>EVOware</strong> Plus)”, 5-17).<br />
11.5.1 Choosing Labware for a Process<br />
After setting up the worktable with the carriers and devices you want to use, you<br />
then need to choose the labware you need. There are several ways to do this<br />
depending on the situation:<br />
<strong>Freedom</strong> <strong>EVOware</strong> <strong>Software</strong> <strong>Manual</strong>, 393172, en, V<strong>2.3</strong> 11 - 7
11 - Getting Started - Setting Up a New Script or Process<br />
Setting Up a Process in <strong>Freedom</strong> <strong>EVOware</strong> Plus<br />
⌦ The labware will always stay at the same position and does not need to<br />
be moved when you run the process<br />
This option is typically used for reagent troughs.<br />
Select the required labware type in the Control Bar (Labware section) and drag it<br />
onto the required carrier site on the worktable. To help you, <strong>Freedom</strong> <strong>EVOware</strong><br />
highlights all carrier sites which are suitable for the chosen labware item.<br />
Note: If you click on the carrier and scroll down to Allowed Labware, <strong>Freedom</strong><br />
<strong>EVOware</strong> will show you the labware types which are compatible with the selected<br />
carrier.<br />
Repeat this process to add all of the labware to the worktable that you need. The<br />
choice and the positions of the labware is based on the requirements of your<br />
application or experiment.<br />
To move labware to a new position, click on the labware to select it and drag to the<br />
required carrier site.To delete labware, click on it and drag it off of the worktable.<br />
To make a copy of a labware item which is already on the worktable, press the Ctrl<br />
button, click on the labware and drag the cursor to the required carrier site.<br />
When adding, deleting or moving labware, a special cursor is shown to indicate<br />
the action you are performing (“+”, “del” or “move”).<br />
Labware types can be assigned unique colors in the <strong>Freedom</strong> <strong>EVOware</strong><br />
configuration make it easier for you to identify them in the Worktable Editor<br />
(see “Color”, 9-19).<br />
In addition, labware can be assigned labels (names) to make them easier to<br />
identify in the Worktable Editor (see 11.7.1 “Assigning a Label (Name) to the<br />
Labware”, 11-19). The label is shown in yellow.<br />
If you click on a labware item, information on the item is shown in the lower<br />
infopad.<br />
⌦ You want to create a repository of labware in a feeder device such as a<br />
carousel<br />
Before you run a process which contains a pipetting script, you must put all of the<br />
labware on the worktable that the pipetting script will need. You also need to tell<br />
<strong>Freedom</strong> <strong>EVOware</strong> how many labware items you will be using. When you run the<br />
process, <strong>Freedom</strong> <strong>EVOware</strong> will take labware items from the feeder device as<br />
and when needed by the pipetting script and move them using the RoMa to the<br />
empty carriers which you have put aside for the pipetting operations.<br />
Proceed as follows to create a labware repository in a feeder device: Select the<br />
required labware type in the Control Bar (Labware section) and drag it onto the<br />
icon for the carousel (or another feeder device or a hotel) in the Worktable Editor.<br />
This opens the Labware Generator dialog box, which allows you specify how<br />
many labware items you need. See 11.6 “Labware Generator (<strong>Freedom</strong> <strong>EVOware</strong><br />
Plus)”, 11-16.<br />
The Labware Generator will insert a labware source icon in the Process Editor.<br />
Notes:<br />
• The chosen number of labware items is shown in the carousel device icon<br />
(see Fig. 11-8 “Example worktable showing carriers, labware and labware<br />
labels”, 11-20).<br />
• Repeat the above procedure to create additional labware source icons if the<br />
carousel will be filled with different labware types in different towers.<br />
• The number of towers and the storage capacity of the feeder device are<br />
configured in the Edit Carrier dialog box for the feeder (see 9.5, 9-39). See<br />
also 9.5.5.3 “Carousel Carrier Attributes”, 9-50 and 16.33 “Commands for<br />
the Te-Stack Te-MO”, 16-105.<br />
11 - 8 <strong>Freedom</strong> <strong>EVOware</strong> <strong>Software</strong> <strong>Manual</strong>, 393172, en, V<strong>2.3</strong>
11 - Getting Started - Setting Up a New Script or Process<br />
Setting Up a Process in <strong>Freedom</strong> <strong>EVOware</strong> Plus<br />
⌦ You want to create a repository of labware on the worktable<br />
This option is only used for special applications; labware repositories (storage<br />
areas) are normally created in feeder devices.<br />
Before you run a process which contains a pipetting script, you must put all of the<br />
labware on the worktable that the pipetting script will need. You may decide to<br />
use, say, the left side of the worktable as a storage area for all of the labware<br />
which you will need and the right side of the worktable for pipetting. You also need<br />
to tell <strong>Freedom</strong> <strong>EVOware</strong> how many labware items you will be using. When you<br />
run the process, <strong>Freedom</strong> <strong>EVOware</strong> will take the required labware items from the<br />
storage area when needed by the pipetting script and move them using the RoMa<br />
to the carrier sites which you have chosen to use for the pipetting operations.<br />
Proceed as follows to create a labware repository on the worktable: Make sure<br />
that you have already put enough carriers in the Worktable Editor, select the<br />
required labware type in the Control Bar (Labware section), press Ctrl and drag<br />
the labware icon onto one of the carriers in the Worktable Editor.<br />
This opens the Labware Generator dialog box, which allows you specify how<br />
many labware items you need and which carriers to place them on. See<br />
11.6 “Labware Generator (<strong>Freedom</strong> <strong>EVOware</strong> Plus)”, 11-16.<br />
The Labware Generator will insert a labware source icon in the Process Editor.<br />
⌦ The labware will be used dynamically by a pipetting script<br />
When you run a process with a pipetting script, <strong>Freedom</strong> <strong>EVOware</strong> Plus will take<br />
the required labware items from the storage device or storage area when needed<br />
by the pipetting script and move them using the RoMa to the carrier sites which<br />
you have chosen to use for the pipetting operations. Labware which is used<br />
dynamically by the pipetting script should be positioned in the Worktable Editor<br />
when you create the script. See 11.5.4 “Choosing Labware for a Pipette<br />
Command”, 11-11.<br />
Note: Labware which you position when the Script Editor is open is shown in grey<br />
when you return to the Process Editor. This is because it is only moved to the<br />
pipetting position during process runtime and is initially kept elsewhere (typically<br />
in a carousel).<br />
11.5.1.1 Labware in the Worktable Editor of <strong>Freedom</strong> <strong>EVOware</strong> Plus<br />
In the figure below, the labware on sites 1 and 2 of the first carrier (at grid position<br />
2) will always stay at the same position. The labware was dragged from the<br />
Control Bar to the carrier directly.<br />
Sites 1 and 2 of the second carrier (at grid position 10) are used as a labware<br />
repository. The labware was dragged from the Control Bar to the carrier while<br />
pressing the Ctrl button to open the Labware Generator.<br />
Sites 1 and 2 of the third carrier (at grid position 18) show (in grey) labware which<br />
will be used dynamically by a pipetting script and will be moved to this position<br />
during process runtime. The labware was dragged from the Control Bar to the<br />
carrier when the Script Editor was open.<br />
<strong>Freedom</strong> <strong>EVOware</strong> <strong>Software</strong> <strong>Manual</strong>, 393172, en, V<strong>2.3</strong> 11 - 9
11 - Getting Started - Setting Up a New Script or Process<br />
Setting Up a Process in <strong>Freedom</strong> <strong>EVOware</strong> Plus<br />
Fig. 11-1 Labware in the Worktable Editor of <strong>Freedom</strong> <strong>EVOware</strong> Plus<br />
See Fig. 11-8, 11-20 for a worktable example where the labware is taken from a<br />
carousel.<br />
11.5.2 Adding Device Commands to the Process<br />
To add a device command to your process, click the Commands tab in the Control<br />
Bar, look for the device you want to use and drag the command from the Control<br />
Bar onto the Process Editor window. If you need to specify any execution<br />
parameters for the command, the Parameters dialog box will open automatically<br />
when you do this. For example, the MoveToCartridge command for the Carousel<br />
requires you to specify the number of the required tower. The Pipette command of<br />
the Liquid Handling Arm requires you to specify a pipetting script.<br />
The device command is then shown as a process step icon in the Process Editor.<br />
You can change the position of a process step icon by dragging it to the required<br />
location.<br />
To edit the execution parameters of the command (or the pipetting script) later,<br />
double-click on the icon (or right click on the icon and choose Edit Parameters).<br />
The Parameters dialog box will only be shown if the command has parameters.<br />
To edit the runtime parameters for the command, right click on the icon and<br />
choose Adjust Time/Error handling. See 9.10.2 “Adjust Time/Error handling”, 9-<br />
71. These parameters are set automatically to appropriate values and do not<br />
normally need to be changed.<br />
To edit the pre-actions and post-actions for the command, right click on the icon<br />
and choose Pre-actions / Post-actions. See 9.10.3 “Pre-actions / Post-actions<br />
(Custom)”, 9-72. The pre-actions and post-actions are normally configured<br />
through the global settings of the device driver and only need to be changed for<br />
special applications.<br />
To delete a process step, select the icon and press Del (or right click on the icon<br />
and choose Delete in the context menu).<br />
11.5.3 Adding Robot Movement Commands to the Process<br />
Plate Robot<br />
Movement commands for the plate robot (RoMa vectors) are associated with<br />
carriers. They are specified in the carrier definition (see 9.6 “Creating and Editing<br />
Plate Robot Vectors”, 9-55).<br />
11 - 10 <strong>Freedom</strong> <strong>EVOware</strong> <strong>Software</strong> <strong>Manual</strong>, 393172, en, V<strong>2.3</strong>
11 - Getting Started - Setting Up a New Script or Process<br />
Setting Up a Process in <strong>Freedom</strong> <strong>EVOware</strong> Plus<br />
In <strong>Freedom</strong> <strong>EVOware</strong> Plus, RoMa vectors are mainly used by pre-actions and<br />
post-actions of device commands. The pre-actions and post-actions and thus the<br />
RoMa movements are executed automatically when the process step is executed.<br />
If your process involves pipetting to a plate which is initially stored in a carousel,<br />
<strong>Freedom</strong> <strong>EVOware</strong> first uses the robot vector associated with the carousel to take<br />
the plate from the carousel and then uses the robot vector associated with the<br />
carrier to put the plate on the carrier. You do not need to specify the RoMa vectors<br />
- <strong>Freedom</strong> <strong>EVOware</strong> gets them from the carrier and device definitions. You only<br />
need to make sure that the RoMa vectors which you want to use are already set<br />
up in the <strong>Freedom</strong> <strong>EVOware</strong> configuration.<br />
Tube Robot<br />
Multi channel<br />
arm (MCA)<br />
Movement commands for the tube robot (PnP vectors) are associated with<br />
labware such as tube racks. They are specified in the labware definition (see<br />
9.7 “Creating and Editing Tube Robot Vectors”, 9-63).<br />
In both <strong>Freedom</strong> <strong>EVOware</strong> <strong>Standard</strong> and <strong>Freedom</strong> <strong>EVOware</strong> Plus, PnP vectors<br />
are executed using script commands (see 15.61 “PnP Vector Command”, 15-<br />
146, and 15.62 “Transfer Tube Command”, 15-148). Simple PnP movements<br />
are executed with the Move PnP command, which does not need a PnP vector<br />
(see 15.60, 15-145).<br />
In <strong>Freedom</strong> <strong>EVOware</strong> Plus, you first must use a special process step to open the<br />
script editor (see 16.25.1 “Tube Robot - ExecuteScript Command”, 16-83).<br />
Movement commands for the MCA96 or the MCA384 (MCA vectors) are<br />
associated with carriers. They are specified in the carrier definition (see<br />
9.8 “Creating and Editing MCA Vectors”, 9-69).<br />
11.5.4 Choosing Labware for a Pipette Command<br />
Script (e.g. pipetting) commands are carried out by the liquid handling arm and<br />
are defined in the Script Editor. To open the Script Editor, select the Pipette<br />
command in the Control Bar (Liquid Handling Arm group) and drag it to the<br />
Process Editor window.<br />
Before you can specify script commands such as Aspirate or Dispense, you must<br />
put the labware you want to use onto the carriers. When you run the process,<br />
<strong>Freedom</strong> <strong>EVOware</strong> Plus will take the specified labware items from the storage<br />
device or storage area as and when needed and move them using the RoMa to<br />
the carrier sites which you allocated for the pipetting operations.<br />
Select the required labware type from the Labware section of the Control Bar and<br />
drag it onto the required carrier site on the worktable (you cannot choose sites<br />
which are already occupied by labware). To help you, <strong>Freedom</strong> <strong>EVOware</strong><br />
highlights all carrier sites which are suitable for the chosen labware item.<br />
Note: If you click on the carrier and scroll down to Allowed Labware, <strong>Freedom</strong><br />
<strong>EVOware</strong> will show you the labware types which are compatible with the selected<br />
carrier.<br />
Repeat this process to add all of the labware to the worktable that you need. The<br />
choice and the positions of the labware is based on the requirements of your<br />
application or experiment.<br />
To move labware to a new position, click on the labware to select it and drag to the<br />
required carrier site.To delete labware, click on it and drag it off of the worktable.<br />
To make a copy of a labware item which is already on the worktable, press the Ctrl<br />
button, click on the labware and drag the cursor to the required carrier site.<br />
When adding, deleting or moving labware, a special cursor is shown to indicate<br />
the action you are performing (“+”, “del” or “move”).<br />
<strong>Freedom</strong> <strong>EVOware</strong> <strong>Software</strong> <strong>Manual</strong>, 393172, en, V<strong>2.3</strong> 11 - 11
11 - Getting Started - Setting Up a New Script or Process<br />
Setting Up a Process in <strong>Freedom</strong> <strong>EVOware</strong> Plus<br />
Labware can be assigned unique colors in the <strong>Freedom</strong> <strong>EVOware</strong> configuration<br />
make it easier for you to identify them in the Worktable Editor (see “Color”, 9-<br />
19).<br />
In addition, labware can be assigned labels (names) to make them easier to<br />
identify in the Worktable Editor (see 11.7.1 “Assigning a Label (Name) to the<br />
Labware”, 11-19). The label is shown in yellow.<br />
If you click on a labware item, information on the item is shown in the lower<br />
infopad.<br />
Note: Labware which you position when the Script Editor is open is shown in grey<br />
when you return to the Process Editor. This is because it is only moved to the<br />
pipetting position during process runtime and is initially kept elsewhere (typically<br />
in a carousel).<br />
Since the labware is only moved to the pipetting position during process runtime,<br />
if your process has more than one pipetting script you can specify the same<br />
carrier sites for pipetting operations in different scripts. The carrier sites you<br />
choose are used as placeholders. When you run the process, <strong>Freedom</strong> <strong>EVOware</strong><br />
Plus may decide to use different sites to maximize the throughout (efficiency) of<br />
the process.<br />
See Fig. 11-8, 11-20 for an example of a worktable.<br />
11.5.5 Creating a Script for the Pipette Command<br />
Script (e.g. pipetting) commands are carried out by the liquid handling arm and<br />
are defined in the Script Editor (see 5.4.4 “The Script Editor”, 5-19). To open the<br />
Script Editor, select the Pipette command in the Control Bar (Liquid Handling Arm<br />
group) and drag it to the Process Editor window.<br />
The pipetting script is then created by choosing script commands in the Control<br />
Bar and dragging them to the Script Editor window.<br />
Note: In <strong>Freedom</strong> <strong>EVOware</strong> Plus, when the Script Editor is open the Commands<br />
tab of the Control Bar only shows script commands (commands which are used<br />
for writing pipetting scripts). When the Process Editor is open, the Commands tab<br />
of the Control Bar only shows device commands (commands for the optional<br />
devices).<br />
The procedure to follow to create a script is the same for <strong>Freedom</strong> <strong>EVOware</strong> Plus<br />
and <strong>Freedom</strong> <strong>EVOware</strong> <strong>Standard</strong> See 11.4.2 “Creating a Pipetting Script”, 11-5<br />
for more information.<br />
See also 13.1 “Overview of Script Commands”, 13-1.<br />
11.5.6 Closing the Script Editor<br />
When you have finished adding all of the script commands you need, click Accept<br />
at the top right of the Script Editor window to return to the Process Editor. This<br />
stores the script in memory and creates a Pipette process step icon. To<br />
permanently save the script you must save the process as described in<br />
11.5.10 “Saving the Process”, 11-15.<br />
Click Reject if you do not want to keep the changes you have made to the script.<br />
Click Save as template if you want to save the script as a template for use in<br />
another process or process step.<br />
11 - 12 <strong>Freedom</strong> <strong>EVOware</strong> <strong>Software</strong> <strong>Manual</strong>, 393172, en, V<strong>2.3</strong>
11 - Getting Started - Setting Up a New Script or Process<br />
Setting Up a Process in <strong>Freedom</strong> <strong>EVOware</strong> Plus<br />
Labware which you positioned when the Script Editor was open is shown in grey<br />
when you return to the Process Editor. When you run the process, <strong>Freedom</strong><br />
<strong>EVOware</strong> Plus will move the labware to these carrier sites automatically.<br />
If your process uses more than one pipetting script, insert another Pipette<br />
command in your process using the procedure described above.<br />
To edit an existing pipetting script, double-click the Pipette process step to open<br />
the Script Editor again. Alternatively, select the Pipette process step and click Edit<br />
Parameters in the Infopad.<br />
11.5.7 Adding Final Position Icons to your Process<br />
Final position icons are used to specify the final position of the labware after the<br />
process has finished. They are often associated with a storage device such as a<br />
hotel. Final position icons are not necessary if you want <strong>Freedom</strong> <strong>EVOware</strong> to<br />
return the labware to its original position after the process has finished, for<br />
example back to a storage device such as a carousel (the “base” location). Final<br />
position icons are created by right-clicking on the background of the Process<br />
Editor and choosing Choose Final Position from the context menu.<br />
11.5.8 Linking the Process Steps in the Order of Execution<br />
After adding all of the process steps you need in the Process Editor, you must<br />
specify the order in which you want to execute them by linking the icons together.<br />
Start by clicking the pointed end of a labware source icon. Then drag and drop the<br />
arrow cursor which appears onto the labware field (“object parameter”) of the first<br />
process step that will handle this labware. A connecting line will be drawn from the<br />
labware source icon to the process step to visualize the connection and the<br />
default labware name “MP” in the labware field changes to the labware name of<br />
the source labware (e.g. “sample_1”).<br />
If the process step can handle more than one labware item at a time (for example<br />
if the LiHa command needs two microplates), repeat this process to connect more<br />
labware source icons to the labware fields.<br />
Then drag the next process step to be adjacent or close to the first process step<br />
and link them together in the same way. Click the black arrow on the labware field<br />
of the first process step and drag and drop the arrow cursor onto the labware field<br />
of the second process step.<br />
<strong>Freedom</strong> <strong>EVOware</strong> <strong>Software</strong> <strong>Manual</strong>, 393172, en, V<strong>2.3</strong> 11 - 13
11 - Getting Started - Setting Up a New Script or Process<br />
Setting Up a Process in <strong>Freedom</strong> <strong>EVOware</strong> Plus<br />
Fig. 11-2 Process Editor showing process icons<br />
Proceed until you have connected all of your process steps in the order you want.<br />
Note: You cannot save the process until you have connected all of the process<br />
steps (<strong>Freedom</strong> <strong>EVOware</strong> will display an error message).<br />
Note: If you make a mistake when connecting the process steps or change your<br />
mind, right-click on the connecting line and choose Delete.<br />
Note: Make sure that the labware source icons and labware fields which you<br />
connect together use the same physical labware type. For example, do not<br />
connect a labware source icon for a microplate to a labware field for a deep well<br />
plate. <strong>Freedom</strong> <strong>EVOware</strong> does not check the labware types when you make the<br />
connections. However, you are allowed to connect landscape and portrait<br />
versions of the same physical labware together (e.g. 96 Well Microplate and 96<br />
Well Microplate portrait). In this case, <strong>Freedom</strong> <strong>EVOware</strong> will automatically use<br />
the RoMa to rotate the labware by 90° if necessary.<br />
11.5.8.1 Reserving and Linking Devices<br />
Some process steps, typically initialize or prime commands for devices, do not<br />
need labware and do not have labware fields. In such cases, click the right edge<br />
of the process step and drag and drop the arrow cursor onto the icon of the<br />
following process step:<br />
Fig. 11-3 Linking a process step which does not have a labware field<br />
In the above example, the connecting line makes sure that priming takes place<br />
before the plate washer is used to wash the plate.<br />
This type of connection can also be used to reserve a device. In the following<br />
example, a magnetic separation is carried out using the Te-MagS and a pipetting<br />
operation is then carried out. The plate is then returned to the Te-MagS for<br />
another separation step. The line linking the two Te-MagS process steps makes<br />
11 - 14 <strong>Freedom</strong> <strong>EVOware</strong> <strong>Software</strong> <strong>Manual</strong>, 393172, en, V<strong>2.3</strong>
11 - Getting Started - Setting Up a New Script or Process<br />
Setting Up a Process in <strong>Freedom</strong> <strong>EVOware</strong> Plus<br />
sure that the Te-MagS is reserved and thus immediately available for use when<br />
the pipetting operation has finished:<br />
Fig. 11-4 Reserving a device<br />
<strong>Freedom</strong> <strong>EVOware</strong> Plus lets you run several processes in parallel. If you don’t<br />
reserve the Te-MagS, it may be occupied by another process when the first<br />
process wants to use it. The first process will then have to wait until it becomes<br />
free again. Depending on your application or experiment, the waiting may be<br />
inacceptable.<br />
11.5.9 Adding On-the-fly Actions<br />
Some devices require the use of the RoMa (plate robot) to carry out their function.<br />
A typical example of this is the Symbol LS-1220 barcode scanner which is rigidly<br />
fixed to the instrument's deck and cannot move towards the labware to scan it.<br />
Instead, the RoMa is used to move the labware past the barcode scanner “on-thefly”<br />
while carrying out something else, for example when moving the labware from<br />
one carrier to another. The barcode scanner is then instructed to perform a read<br />
operation when the RoMa presents the labware. Such devices are called on-thefly<br />
devices.<br />
Add an on-the-fly device to your process by dragging it from the Control Bar onto<br />
the line which links two process steps. The corresponding actions will then be<br />
executed when the labware moves between the two process steps.<br />
For example, If you want to read the barcodes of your labware items as they move<br />
from the washer to the pipetting station, drag the Barcode Scanner device onto<br />
the line which links these two process steps.<br />
See Fig. 5-11 “Process Editor showing an example process”, 5-17.<br />
11.5.10 Saving the Process<br />
Save the process you have created by clicking Save in the toolbar or by choosing<br />
Save from the File menu. Then enter a name for the process in the Save File<br />
dialog box or select an existing process which you want to overwrite and click the<br />
green arrow. You can also save the process as a process template by choosing<br />
Save As from the File menu and clicking the Template button in the Save File<br />
dialog box.<br />
11.5.11 Running the Process<br />
See 12.2 “Running and Optimizing a Process (<strong>Freedom</strong> <strong>EVOware</strong> Plus)”, 12-5.<br />
<strong>Freedom</strong> <strong>EVOware</strong> <strong>Software</strong> <strong>Manual</strong>, 393172, en, V<strong>2.3</strong> 11 - 15
11 - Getting Started - Setting Up a New Script or Process<br />
Labware Generator (<strong>Freedom</strong> <strong>EVOware</strong> Plus)<br />
11.6 Labware Generator (<strong>Freedom</strong> <strong>EVOware</strong> Plus)<br />
The labware generator is used to specify the type and quantity of labware items<br />
which you will need for the pipetting script commands in your process (LiHa<br />
Pipette process steps).<br />
11.6.1 Creating a labware repository in a feeder device<br />
Select the required labware type in the Control Bar (Labware section) and drag it<br />
onto the icon for the feeder device (e.g. carousel) in the Worktable Editor. If the<br />
chosen labware type is allowed for the feeder device, this opens the labware<br />
generator dialog box:<br />
Fig. 11-5 Labware generator when generating labware for the carousel<br />
The rectangles at the top of the dialog box show all of the labware storage<br />
positions (sites) in the feeder device. For the carousel or Te-Stack stacker, each<br />
column is one tower (cartridge).<br />
The number of towers and the storage capacity of the feeder device are<br />
configured in the Edit Carrier dialog box for the feeder (see 9.5, 9-39). See also<br />
9.5.5.3 “Carousel Carrier Attributes”, 9-50 and 16.33 “Commands for the Te-<br />
Stack Te-MO”, 16-105.<br />
Storage positions which are yellow (occupied) or red (unavailable) cannot be used<br />
for generating labware since they are already in use.<br />
Enter the number of labware items you want to create in the Create field and click<br />
on the first site you want to use. The message area at the bottom of the labware<br />
generator will tell you if sufficient sites are available for the chosen number of<br />
items. Adjust your entries until the labware generator indicates that your selection<br />
is valid and click Create to create the specified labware. The newly created<br />
11 - 16 <strong>Freedom</strong> <strong>EVOware</strong> <strong>Software</strong> <strong>Manual</strong>, 393172, en, V<strong>2.3</strong>
11 - Getting Started - Setting Up a New Script or Process<br />
Labware Generator (<strong>Freedom</strong> <strong>EVOware</strong> Plus)<br />
labware changes colour from green (selected position) to yellow (occupied<br />
position). This creates a labware group (a set of labware associated with a<br />
labware source icon in the Process Editor).<br />
If you move the cursor over the coloured rectangles, the Labware ID field shows<br />
the ID (internal labware name) of the selected labware item. If you click on a<br />
labware item (yellow rectangle), the starting position and the name of the<br />
associated labware group are shown. Click Delete if you want to delete all of the<br />
labware in the group.<br />
Right click a labware item to open the context menu (see 11.6.3 “Context Menu of<br />
the Labware Generator”, 11-19).<br />
Repeat this process if you want to create further labware of a different type or<br />
using a different group name (i.e. an additional labware source icon).<br />
Click Close when you have created all of the labware you need. This closes the<br />
labware generator. The labware you have created is shown as one or more<br />
labware source icons in the Process Editor and the total number of storage<br />
positions containing labware is shown in the icon for the feeder device.<br />
Note: When the Process Editor is open, right-click on the icon for the feeder<br />
device and choose Modify Labware in the context menu if you want to<br />
subsequently edit the settings you have made.<br />
11.6.2 Creating a labware repository on the worktable<br />
This option is only used for special applications; labware repositories are normally<br />
created in feeder devices such as the carousel.<br />
Make sure that you have already put enough carriers in the Worktable Editor,<br />
select the required labware type from the Control Bar (Labware section), press<br />
Ctrl and drag the labware icon onto a suitable carrier type in the Worktable Editor.<br />
This opens the labware generator dialog box:<br />
<strong>Freedom</strong> <strong>EVOware</strong> <strong>Software</strong> <strong>Manual</strong>, 393172, en, V<strong>2.3</strong> 11 - 17
11 - Getting Started - Setting Up a New Script or Process<br />
Labware Generator (<strong>Freedom</strong> <strong>EVOware</strong> Plus)<br />
Fig. 11-6 Labware generator when generating labware for three microplate carriers on the<br />
worktable<br />
The rectangles at the top of the dialog box show the sites of all of the suitable<br />
carriers on the worktable. Sites marked occupied or not available cannot be used<br />
for generating labware since they are already in use. If you have already created a<br />
pipetting script, sites which are used by the pipetting script must not be used<br />
either. <strong>Freedom</strong> <strong>EVOware</strong> will put the labware onto these sites during process<br />
runtime, and they must not be occupied by a labware repository.<br />
Note: Labware which you position when the Script Editor is open is shown in grey<br />
when you return to the Process Editor.<br />
Note: Carrier sites which are used for a labware repository cannot be used in your<br />
script for pipetting. Make sure you have kept enough unused sites for your<br />
pipetting script. Put another carrier on the worktable if necessary.<br />
Enter the number of labware items you want to create in the Create field and click<br />
on the first site you want to use. The message area at the bottom of the labware<br />
generator will tell you if sufficient sites are available for the chosen number of<br />
items. Adjust your entries until the labware generator indicates that your selection<br />
is valid and click Create to create the specified labware. The newly created<br />
labware changes colour from green (selected position) to yellow (occupied<br />
position). This creates a labware group (a set of labware associated with a<br />
labware source icon in the Process Editor).<br />
If you move the cursor over the coloured rectangles, the Labware ID field shows<br />
the ID (internal labware name) of the selected labware item. If you click on a<br />
labware item (yellow rectangle), the starting position and the name of the<br />
associated labware group are shown. Click Delete if you want to delete all of the<br />
labware in the group.<br />
Right click a labware item to open the context menu (see 11.6.3 “Context Menu of<br />
the Labware Generator”, 11-19).<br />
11 - 18 <strong>Freedom</strong> <strong>EVOware</strong> <strong>Software</strong> <strong>Manual</strong>, 393172, en, V<strong>2.3</strong>
11 - Getting Started - Setting Up a New Script or Process<br />
Additional Information on Labware and Carriers<br />
Click Close when you have created all of the labware you need. This closes the<br />
labware generator. The labware you have created is shown as a labware source<br />
icon in the Process Editor and is also visible on the worktable.<br />
Note: When the Process Editor is open, right-click on the generated labware and<br />
choose Modify Labware in the context menu if you want to subsequently edit the<br />
settings you have made.<br />
If you use labware barcodes to specify source and/or destination positions in the<br />
worklist, do not use a labware repository on the worktable if the labware will be<br />
moved during runtime to another worktable position for pipetting. This can lead to<br />
pipetting at the wrong worktable position. Use a labware repository in a feeder<br />
device (e.g. hotel or carousel) instead.<br />
11.6.3 Context Menu of the Labware Generator<br />
Right click a labware item (yellow rectangle) in the labware generator to open the<br />
context menu. The menu item are as follows:<br />
Enter barcode<br />
Choose this option to enter a barcode manually for the selected labware item.<br />
This option is mainly used for testing since it is inflexible in a production<br />
environment to store barcodes within the process. You should normally use a<br />
barcode scanner instead.<br />
Read barcodes from file<br />
Choose this option to import a list of barcodes for the selected labware group.<br />
This feature is mainly intended for testing or training. For information on the<br />
syntax see A.2.4 “Barcode File for the Labware Generator”, A-14.<br />
Rename labware<br />
Choose this option to change the name of the labware group.<br />
Delete labware<br />
Choose this option to delete all of the labware in the group.<br />
11.7 Additional Information on Labware and Carriers<br />
11.7.1 Assigning a Label (Name) to the Labware<br />
You can assign a label (i.e. a user-defined name) to each labware item by double<br />
clicking on the labware in the Worktable Editor and typing the required name in<br />
the Name field of the Edit Labware Name dialog box:<br />
Fig. 11-7 Specifying labels for objects on the worktable<br />
<strong>Freedom</strong> <strong>EVOware</strong> <strong>Software</strong> <strong>Manual</strong>, 393172, en, V<strong>2.3</strong> 11 - 19
11 - Getting Started - Setting Up a New Script or Process<br />
Additional Information on Labware and Carriers<br />
The label is shown in yellow. The label for the currently selected labware item is<br />
also shown in the Infopad together with the other properties.<br />
Labware labels can be used in scripts and worklist files to make them easier to<br />
understand for other persons (see 15.24 “Worklist Command”, 15-36). They are<br />
also used by <strong>Freedom</strong> <strong>EVOware</strong> in log files. If you don’t specify labware labels,<br />
the scripts, worklists and log files contain the generic labware name instead, e.g.<br />
Microplate, landscape.<br />
11.7.2 Example of a Worktable With Several Carriers and Labware Items<br />
The following figure shows an example worktable with carriers, labware and<br />
labware labels:<br />
Fig. 11-8 Example worktable showing carriers, labware and labware labels<br />
In this example, the labware generator was used to assign 84 microplates to the<br />
carousel.<br />
11.7.3 System Liquid Icon<br />
When you specify a script command which involves aspiration, click on the<br />
System icon at the bottom right of the Worktable Editor if you want to aspirate the<br />
system liquid. If you need to aspirate large volumes of the system liquid, this<br />
avoids having to place a trough on the worktable. See 8.4.2.5 “System Liquids”,<br />
8-30 for further information.<br />
11 - 20 <strong>Freedom</strong> <strong>EVOware</strong> <strong>Software</strong> <strong>Manual</strong>, 393172, en, V<strong>2.3</strong>
12 - Running Scripts and Processes<br />
Running a Liquid Handling Script<br />
12 Running Scripts and Processes<br />
This chapter describes how to run, preview and calibrate a process (<strong>Freedom</strong><br />
<strong>EVOware</strong> Plus) and how to run a script (<strong>Freedom</strong> <strong>EVOware</strong> <strong>Standard</strong>).<br />
12.1 Running a Liquid Handling Script<br />
This section describes how to run a liquid handling script.<br />
<strong>Freedom</strong><br />
<strong>EVOware</strong><br />
<strong>Standard</strong><br />
<strong>Freedom</strong><br />
<strong>EVOware</strong> Plus<br />
To run the currently loaded script, click the Run button in the toolbar or choose<br />
Run in the Execute menu. To run another, previously saved script click the Wizard<br />
button in the toolbar or choose Startup Wizard in the File menu. Then choose the<br />
script you want to run.<br />
To run a script which belongs to a process, open the Script Editor by doubleclicking<br />
the Pipette command which is associated with the script and click the Run<br />
button in the toolbar or choose Run in the Execute menu.<br />
After a short delay you are shown the Runtime Controller dialog box:<br />
Fig. 12-1 Script runtime settings<br />
Click the Run button to run the script. Unless you are running <strong>Freedom</strong> <strong>EVOware</strong><br />
in offline mode, commands will be sent to the pipetting instrument and pipetting<br />
will take place according to the instructions in your script.<br />
The Run button will change to Recover if the script did not execute completely<br />
the last time it was run (see 17.2 “ Script and process recovery function”, 17-5).<br />
Run full script?<br />
To start running the script at a specified line, e.g. for testing purposes,<br />
uncheck this checkbox and specify the script lines which you want to run by<br />
entering the first and last script line. Then click the Run button.<br />
This option is not available when running a script in in <strong>Freedom</strong> <strong>EVOware</strong><br />
Plus.<br />
If you start running the script at a specified line and if the part of the script<br />
which you have chosen to run uses variables which have not been defined,<br />
you will be prompted to enter the values manually.<br />
<strong>Freedom</strong> <strong>EVOware</strong> <strong>Software</strong> <strong>Manual</strong>, 393172, en, V<strong>2.3</strong> 12 - 1
12 - Running Scripts and Processes<br />
Running a Liquid Handling Script<br />
Start time<br />
Specify when you want to start the script. Initially, this field shows the current<br />
time (i.e. start the script immediately).<br />
A progress bar shows the progress of the script as it runs:<br />
Fig. 12-2 Script runtime showing progress bar<br />
To pause a running script, click the Pause button (orange parallel bars). The<br />
script is paused and the System paused message is shown.<br />
To resume running a script which has been paused, click the Run button again.<br />
To stop the script from running, click the Stop button (red square).<br />
If the pipetting script contains Comment commands, the comments are shown in<br />
the Comments panel in the center of the dialog box (example: see figure above). If<br />
suitable comments have been chosen, this can help the instrument operator to<br />
monitor the progress of the script as it runs.<br />
The other options in this dialog box are as follows:<br />
Start time<br />
This shows the time when the script was started.<br />
Elapsed<br />
The amount of time which has elapsed since the script was started.<br />
12.1.1 Buttons in <strong>Standard</strong> View<br />
Cancel<br />
Return to the Script Editor.<br />
Extended view<br />
Switch to the extended view of the Runtime Controller where you can get<br />
more information on the currently running script.<br />
12 - 2 <strong>Freedom</strong> <strong>EVOware</strong> <strong>Software</strong> <strong>Manual</strong>, 393172, en, V<strong>2.3</strong>
12 - Running Scripts and Processes<br />
Running a Liquid Handling Script<br />
Lock <strong>Freedom</strong> <strong>EVOware</strong><br />
This button logs out the current <strong>Freedom</strong> <strong>EVOware</strong> user (see 6.1.9 “Lock<br />
<strong>EVOware</strong>”, 6-7). Another use of the Lock button is to switch <strong>Freedom</strong><br />
<strong>EVOware</strong> users when you are handing over to another employee, e.g. due to<br />
a change of shift.<br />
Show Log File<br />
This button displays the <strong>Freedom</strong> <strong>EVOware</strong> log file in a new window. The log<br />
file tracks every command sent by the computer to the instrument, every<br />
response returned from the instrument to the computer and any user input.<br />
The content and format of the log corresponds to a log file of type LOG (see<br />
A.1 “Overview of the Log Files”, A-1).<br />
If the script finished with warnings or errors, click this button to get more<br />
information from the log file.<br />
Stop<br />
This button stops the script.<br />
Run<br />
This button runs the script; it is also used to continue the script if it has been<br />
paused.<br />
Pause<br />
This button pauses the script.<br />
<strong>Freedom</strong> <strong>EVOware</strong> <strong>Software</strong> <strong>Manual</strong>, 393172, en, V<strong>2.3</strong> 12 - 3
12 - Running Scripts and Processes<br />
Running a Liquid Handling Script<br />
12.1.2 Runtime Controller, Extended View (Running a Script)<br />
The Extended View option of the runtime controller gives you more information on<br />
the currently running pipetting script:<br />
Fig. 12-3 Script runtime - Extended view<br />
The extended view has four windows:<br />
• The Comments window - If the pipetting script contains Comment<br />
commands, this window shows the comments. This window is refreshed after<br />
executing each script line.<br />
• The Variables window - This shows the value of all defined variables during<br />
script runtime. This window is refreshed after executing each script line.<br />
• The Script window - This shows part of the script. When the script is running,<br />
the script line which is currently executing is highlighted with a colored line.<br />
The default color is orange.<br />
• The Worktable window - This shows the instrument’s worktable. When the<br />
script is running, the worktable object (e.g. microplate) which is currently being<br />
accessed is highlighted with a colored box. The default color is orange.<br />
If you need more space for the Script window, you can collapse the Worktable<br />
window by clicking in the title bar. You can also resize the windows by dragging<br />
the dividers between the windows.<br />
12 - 4 <strong>Freedom</strong> <strong>EVOware</strong> <strong>Software</strong> <strong>Manual</strong>, 393172, en, V<strong>2.3</strong>
12 - Running Scripts and Processes<br />
Running and Optimizing a Process (<strong>Freedom</strong> <strong>EVOware</strong> Plus)<br />
12.1.3 Buttons in Extended View<br />
Cancel<br />
Return to the Script Editor.<br />
<strong>Standard</strong> view<br />
Return to the standard view of the Runtime Controller.<br />
Lock <strong>Freedom</strong> <strong>EVOware</strong><br />
This button logs out the current <strong>Freedom</strong> <strong>EVOware</strong> user (see 6.1.9 “Lock<br />
<strong>EVOware</strong>”, 6-7). Another use of the Lock button is to switch <strong>Freedom</strong><br />
<strong>EVOware</strong> users when you are handing over to another employee, e.g. due to<br />
a change of shift.<br />
Show Log File<br />
This button displays the <strong>Freedom</strong> <strong>EVOware</strong> log file in a new window. The log<br />
file tracks every command sent by the computer to the instrument, every<br />
response returned from the instrument to the computer and any user input.<br />
The content and format of the log corresponds to a log file of type LOG (see<br />
A.1 “Overview of the Log Files”, A-1).<br />
If the script finished with warnings or errors, click this button to get more<br />
information from the log file.<br />
Stop<br />
This button stops the script.<br />
Run<br />
This button runs the script; it is also used to continue the script if it has been<br />
paused.<br />
Pause<br />
This button pauses the script.<br />
12.2 Running and Optimizing a Process (<strong>Freedom</strong><br />
<strong>EVOware</strong> Plus)<br />
This section describes how to run, preview and calibrate a process.<br />
To run the currently loaded process, click the Run button in the toolbar or choose<br />
Run in the Execute menu. To run another, previously-saved process click the<br />
Wizard button in the toolbar or choose Startup Wizard in the File menu. Then click<br />
Run an existing process and choose the process you want to run.<br />
<strong>Freedom</strong> <strong>EVOware</strong> allows you to run several processes in parallel or sequentially.<br />
You can save all of the runtime settings for one or more processes as a “method”.<br />
For information on creating and running methods see the description of the Save<br />
as method button, below.<br />
After a short delay you are shown the Runtime Controller dialog box:<br />
<strong>Freedom</strong> <strong>EVOware</strong> <strong>Software</strong> <strong>Manual</strong>, 393172, en, V<strong>2.3</strong> 12 - 5
12 - Running Scripts and Processes<br />
Running and Optimizing a Process (<strong>Freedom</strong> <strong>EVOware</strong> Plus)<br />
Fig. 12-4 Process runtime settings<br />
To run the process, click the Run button at the bottom right of the dialog box.<br />
Unless you are running <strong>Freedom</strong> <strong>EVOware</strong> in offline mode, commands will be<br />
sent to the pipetting instrument and pipetting will take place according to the<br />
instructions in your process.<br />
The Run button will change to Recover if the script did not execute completely<br />
the last time it was run (see 17.2 “ Script and process recovery function”, 17-5).<br />
Click the Preview button to run the process for testing without carrying out<br />
pipetting. Firmware commands such as movement commands are not sent to the<br />
pipetting instrument.<br />
Process List<br />
<strong>Freedom</strong> <strong>EVOware</strong> Plus allows you to run several processes in parallel or<br />
sequentially. You can run several copies of the same process and/or several<br />
different processes. You can also add new processes to processes which are<br />
already running. The process list shows the processes you have set up to run.<br />
Batch<br />
Read-only field. If you want to run more than one process type, you can<br />
assign batch numbers if you want them to group the processes into batches<br />
which run sequentially rather than in parallel. See 12.2.2 “Additional Runtime<br />
Settings for Processes”, 12-10 for information on using batches.<br />
Process<br />
The name of the process.<br />
12 - 6 <strong>Freedom</strong> <strong>EVOware</strong> <strong>Software</strong> <strong>Manual</strong>, 393172, en, V<strong>2.3</strong>
12 - Running Scripts and Processes<br />
Running and Optimizing a Process (<strong>Freedom</strong> <strong>EVOware</strong> Plus)<br />
Instances<br />
Specify how many times you want to run the process in parallel. To optimize<br />
the throughput (efficiency) of your pipetting instrument (i.e. to maximize the<br />
number of samples which are processed per hour), <strong>Freedom</strong> <strong>EVOware</strong> Plus<br />
allows you to run several copies of the same process in parallel. This allows<br />
<strong>Freedom</strong> <strong>EVOware</strong> to e.g. to fetch a microplate from the carousel while<br />
pipetting is taking place on another microplate. Each copy of the process is<br />
called an instance.<br />
The maximum value you should set for this parameter depends e.g. on how<br />
much space you have assigned on the worktable for <strong>Freedom</strong> <strong>EVOware</strong> to set<br />
up multiple sites for pipetting. There is no speed advantage to be gained in<br />
fetching a microplate from the carousel if there are currently no unoccupied<br />
carrier sites where it can be put down.<br />
More<br />
Click to specify additional runtime settings. See 12.2.2 “Additional<br />
Runtime Settings for Processes”, 12-10.<br />
Run<br />
<strong>Freedom</strong> <strong>EVOware</strong> allows you to start one or more additional processes when<br />
other processes are already running. For example, if you have forgotten to<br />
start a process which you need. To use this feature, add the process as<br />
described in Add process, below. If other processes are already running, the<br />
Run column in the runtime list will now contain a small Run button for the new<br />
process. Click this button when you are ready to start the new process.<br />
Val.<br />
A green tick (“validated”) shows that enough labware has been assigned to<br />
the process. A red cross shows that process validation was not successful, for<br />
example because not enough labware is available for the specified number of<br />
instances or the same labware has been assigned to two different processes<br />
(invalid assignment).<br />
Buttons<br />
Save method<br />
Save all of the settings you have made in the Runtime Controller as a<br />
“method”. If you have configured to run several processes, the saved method<br />
will contain the runtime settings you have made for all of the processes.<br />
To run a previously-saved method, click the Wizard button in the toolbar or<br />
choose Startup Wizard in the File menu. Then click Run an existing process<br />
and choose the method you want to run (the lists shows both processes and<br />
methods).<br />
Load method<br />
Load a previously saved method file. You can then run the method and/or edit<br />
the method and save it again.<br />
Add process<br />
To add another process to the runtime list, click Add process and select the<br />
process from the dialog box. The dialog box only lists processes which use<br />
the same worktable layout. You cannot add processes which use a different<br />
worktable layout. If the original process was saved in a user defined directory<br />
(see 6.1.3 “Save”, 6-5, User Defined), the dialog box only lists processes<br />
which use the same worktable layout AND have been saved in the same base<br />
directory.<br />
<strong>Freedom</strong> <strong>EVOware</strong> <strong>Software</strong> <strong>Manual</strong>, 393172, en, V<strong>2.3</strong> 12 - 7
12 - Running Scripts and Processes<br />
Running and Optimizing a Process (<strong>Freedom</strong> <strong>EVOware</strong> Plus)<br />
Delete process<br />
Click this button to delete the currently selected process from the runtime list.<br />
You can only delete a process with this button if it is not yet running.<br />
Options<br />
Click Options to show additional options:<br />
Calibration run<br />
Check this checkbox if you want to run the process and carry out pipetting for<br />
the purpose of calibration. You only need to run one process instance for the<br />
calibration run. The following options (buttons) are available in the Runtime<br />
Controller when the calibration run has finished:<br />
Click Update Proc to store information in the process file on the actual times<br />
required by device commands. The next time you run the process, the stored<br />
information allows the scheduler to plan more accurately and thus optimize<br />
the throughput of the process.<br />
Click Optimize to optimize the schedule using the real execution times which<br />
were recorded during the calibration run. You must then click Save to save the<br />
optimized schedule.<br />
Click Save Schedule to save a schedule for this process. Schedules can be<br />
used to ensure that processes always run the same way and use the same<br />
timing.<br />
The calibration run allows <strong>Freedom</strong> <strong>EVOware</strong> to get realistic execution times<br />
for each of the process steps which are more accurate than the estimated<br />
values in the database. This generally results in better optimization<br />
(throughput) of the process. The Calibration run option is not available if you<br />
run several different processes in parallel.<br />
Use pre-scheduled process<br />
Check this checkbox if you want to run the process using a schedule which<br />
you saved previously, for example after carrying out a calibration run. A<br />
separate schedule can be saved for each of the processes you have run.<br />
If you run the process using a saved schedule, it will always run the same way<br />
and use the same timing. If you don’t use a saved schedule and you have<br />
chosen to run more than one instance of the process, the order of the process<br />
steps may change each time you run the process if the time required for<br />
certain operations such as robot movements varies slightly from run to run.<br />
Automated DiTi Handling panel<br />
The options in this panel are only relevant for the automatic DITI handling feature.<br />
See 17.1.2.1 “Process runtime settings for automatic DITI handling”, 17-4.<br />
12 - 8 <strong>Freedom</strong> <strong>EVOware</strong> <strong>Software</strong> <strong>Manual</strong>, 393172, en, V<strong>2.3</strong>
12 - Running Scripts and Processes<br />
Running and Optimizing a Process (<strong>Freedom</strong> <strong>EVOware</strong> Plus)<br />
Start Initial DiTi Load process<br />
If you check this checkbox, there should not be any DITI racks on the<br />
worktable when you start the process.<br />
Reset Counters<br />
If you do not check Start Initial DiTi Load process, click this button if you want<br />
to re-load the worktable with full DITI racks before you start the process, for<br />
example to re-run the process from the beginning for testing. The Reset<br />
Counters button resets all of the DITI-related internal variables to their initial<br />
values. The Reset Counters button is not relevant if you have checked the<br />
Start Initial DiTi Load process checkbox (the counters are reset automatically<br />
in this case each time the process is run).<br />
Information box<br />
For each DITI type which is used in the process, this text box shows the<br />
source position of the full DITI racks which will be used next. In addition, it<br />
shows the position in the DITI Rack source (e.g. carousel or hotel) which will<br />
be used for the empty DITI racks during the next replacement operation. This<br />
position must be empty. Note: The empty DITI racks are returned to the<br />
carousel or hotel before getting the full DITI racks.<br />
12.2.1 Process Controller during process runtime<br />
Additional information is shown during process runtime as follows:<br />
Fig. 12-5 Process runtime showing progress bar<br />
Start<br />
The time when the process was started.<br />
Elapsed<br />
The amount of time which has elapsed since the process was started.<br />
End<br />
The time when the process is expected to finish.<br />
<strong>Freedom</strong> <strong>EVOware</strong> <strong>Software</strong> <strong>Manual</strong>, 393172, en, V<strong>2.3</strong> 12 - 9
12 - Running Scripts and Processes<br />
Running and Optimizing a Process (<strong>Freedom</strong> <strong>EVOware</strong> Plus)<br />
12.2.2 Additional Runtime Settings for Processes<br />
Click in the More field to make the following additional runtime settings for<br />
special applications:<br />
Fig. 12-6 Additional runtime settings<br />
Batch<br />
If you want to run more than one process type, you can assign batch numbers<br />
if you want them to group the processes into batches which run sequentially<br />
rather than in parallel. For example, if the processes “preparation” and “assay”<br />
are assigned the batch number 1 and the process “cleanup” is assigned the<br />
batch number 2, “preparation” and “assay” will run in parallel but “cleanup” will<br />
not be scheduled to start until both “preparation” and “assay” have finished.<br />
Usage example: The creation of a mother plate for subsequent use in assays.<br />
The batch number has a higher priority than the emergency checkbox. See<br />
also Start offset, below.<br />
If you have assigned<br />
Emergency<br />
The Emergency checkbox is used to assign a higher priority to special<br />
processes. You can use emergency processes for samples which you want to<br />
process first or operations (such as barcode scanning) which you need to<br />
carry out first.<br />
The standard (non-emergency) processes will only be started after all of the<br />
emergency processes have been started, even if they have a higher value in<br />
the Priority column. <strong>Freedom</strong> <strong>EVOware</strong> always starts emergency processes in<br />
the order of their priorities.<br />
Priority<br />
Specify the required process priority. <strong>Freedom</strong> <strong>EVOware</strong> tries to start<br />
processes which have a higher priority first. Note: Smaller numbers<br />
correspond to a lower priority (the lowest priority is “1”).<br />
12 - 10 <strong>Freedom</strong> <strong>EVOware</strong> <strong>Software</strong> <strong>Manual</strong>, 393172, en, V<strong>2.3</strong>
12 - Running Scripts and Processes<br />
Running and Optimizing a Process (<strong>Freedom</strong> <strong>EVOware</strong> Plus)<br />
Start offset<br />
Specify a starting offset in days to delay the starting of the process (range: 0 to<br />
99 days).<br />
Start offset and Time are additive. In the above figure, the process will be<br />
started after a delay of 1 day plus 2.5 hours (26.5 hours).<br />
If you have chosen to run more than one instance (copy) of this process, the<br />
offset applies to all instances of the process.<br />
Time<br />
Specify a time in hours, minutes and seconds to delay the starting of the<br />
process. If you have configured more than one instance of this process, it<br />
applies to all instances of the process.<br />
Start offset and Time are additive. In the above figure, the process will be<br />
started after a delay of 1 day plus 2.5 hours (26.5 hours).<br />
If you have chosen to run more than one instance (copy) of this process, the<br />
time delay applies to all instances of the process.<br />
Instance offset<br />
If you have chosen to run more than one instance (copy) of this process,<br />
specify an instance offset if you do not want to start all of the instances<br />
simultaneously. The starting of the instances will then be staggered by the<br />
specified delay. This may be necessary e.g. if the pipetting instrument<br />
transfers processed samples to another piece of equipment which cannot<br />
handle a large number of samples simultaneously.<br />
Specify plates by barcode<br />
Check this checkbox if you want to run the process using specific labware<br />
items which are identified by their barcodes. A dialog box opens to allow you<br />
to choose a .txt or .csv file which contains a list of barcodes. See<br />
A.2.5 “Barcode File for the <strong>Freedom</strong> <strong>EVOware</strong> Plus Runtime Controller”, A-<br />
15 for information on the required syntax of this file.<br />
This feature is only intended for random access storage devices such as the<br />
carousel (the stacker is a first-in last-out storage device, not random access).<br />
For labware in the carousel, you can use the ReadAllBarcodes or<br />
ReadPlatesInCartridge commands to read the barcodes and store them in a<br />
file (see 16.3 “Commands for the Carousel”, 16-2).<br />
Labware source, Group, Labware, Val.<br />
Click the Group field and choose the required labware if you want to run this<br />
process using a specific item of labware. You can choose labware from any of<br />
the labware sources which you have configured on your worktable.<br />
Leave the labware fields empty if you do not want to use a specific labware<br />
item. In this case, the process will use the next labware item which is available<br />
for the configured labware source.<br />
Val.: A green tick (“validated”) shows that enough labware has been assigned<br />
to the process. A red cross shows that process validation was not successful,<br />
for example because not enough labware is available for the specified number<br />
of instances or the same labware has been assigned to two different<br />
processes (invalid assignment).<br />
<strong>Freedom</strong> <strong>EVOware</strong> <strong>Software</strong> <strong>Manual</strong>, 393172, en, V<strong>2.3</strong> 12 - 11
12 - Running Scripts and Processes<br />
Running and Optimizing a Process (<strong>Freedom</strong> <strong>EVOware</strong> Plus)<br />
12.<strong>2.3</strong> Buttons in <strong>Standard</strong> View<br />
Cancel<br />
Return to the Process Editor.<br />
Extended view<br />
Switch to the extended view of the Runtime Controller where you can get<br />
more information on the currently running process.<br />
Lock <strong>Freedom</strong> <strong>EVOware</strong><br />
This button logs out the current <strong>Freedom</strong> <strong>EVOware</strong> user (see 6.1.9 “Lock<br />
<strong>EVOware</strong>”, 6-7). Another use of the Lock button is to switch <strong>Freedom</strong><br />
<strong>EVOware</strong> users when you are handing over to another employee, e.g. due to<br />
a change of shift.<br />
Show Log File<br />
This button displays the <strong>Freedom</strong> <strong>EVOware</strong> log file in a new window. The log<br />
file tracks every command sent by the computer to the instrument, every<br />
response returned from the instrument to the computer and any user input.<br />
The content and format of the log corresponds to a log file of type LOG (see<br />
A.1 “Overview of the Log Files”, A-1).<br />
Stop<br />
This button runs the process; it is also used to continue the process if it has<br />
been paused.<br />
Preview<br />
This button previews the process; it is also used to continue the process if it<br />
has been paused.<br />
Run<br />
This button runs the process; it is also used to continue the process if it has<br />
been paused.<br />
Pause<br />
This button pauses the process.<br />
If you have already run the process<br />
Click Save Schedule to save a schedule for this process. Schedules can be<br />
use to ensure that processes always run the same way and use the same<br />
timing.<br />
Click New Run to return to the standard view of the Runtime Controller, e.g. to<br />
run the process again from the beginning. If you want to save a schedule for<br />
this process, do this before you click New Run.<br />
12 - 12 <strong>Freedom</strong> <strong>EVOware</strong> <strong>Software</strong> <strong>Manual</strong>, 393172, en, V<strong>2.3</strong>
12 - Running Scripts and Processes<br />
Running and Optimizing a Process (<strong>Freedom</strong> <strong>EVOware</strong> Plus)<br />
If the process has stopped before being completed<br />
Click Recover to start the Process Recovery Wizard (see 17.2.2.2 “Process<br />
Recovery Wizard, Recovery Settings”, 17-10).<br />
Click New Run to return to the standard view of the Runtime Controller, e.g. to<br />
run the process again from the beginning.<br />
If you have just made a calibration run<br />
Click Optimize first if you want to optimize the schedule before saving it.<br />
Click New Run to return to the standard view of the Runtime Controller, e.g. to<br />
run the process again. If you want to save a schedule for this process, do this<br />
before you click New.<br />
Click Update Proc to store information in the process file on the actual times<br />
required by device commands. The next time you run the process, the stored<br />
information allows the scheduler to plan more accurately and thus optimize<br />
the throughput of the process.<br />
Click Optimize to optimize the schedule using the real execution times which<br />
were recorded during the calibration run. You must then click Save to save the<br />
optimized schedule.<br />
Click Save Schedule to save a schedule for this process. Schedules can be<br />
used to ensure that processes always run the same way and use the same<br />
timing.<br />
<strong>Freedom</strong> <strong>EVOware</strong> <strong>Software</strong> <strong>Manual</strong>, 393172, en, V<strong>2.3</strong> 12 - 13
12 - Running Scripts and Processes<br />
Running and Optimizing a Process (<strong>Freedom</strong> <strong>EVOware</strong> Plus)<br />
12.2.4 Runtime Controller, Extended View (Running a Process)<br />
The Extended View option of the runtime controller gives you more information on<br />
the currently running <strong>Freedom</strong> <strong>EVOware</strong> processes:<br />
Fig. 12-7 Process runtime - Extended view (showing the Gantt Chart window)<br />
The extended view has four windows:<br />
• The Devices window - This shows the colors which are assigned to each of<br />
the devices in the Gantt chart and the current device utilization in percent<br />
when the process is running. The colors which are assigned to the devices<br />
are configurable (see 8.4.1.2 “Colors Tab”, 8-22).<br />
Click on a device in the Devices window to see all available messages for the<br />
device (the list shows all messages since <strong>Freedom</strong> <strong>EVOware</strong> was last<br />
started). Coloured buttons are shown in the Devices window if device<br />
warnings or errors have occured.<br />
• The Gantt chart / Statistics window<br />
Click the Gantt chart tab to get a graphical representation of the currently<br />
running process(es). For each labware item or resource, the process steps or<br />
actions which will take place (have already taken place) are shown as<br />
horizontal colored bars. When a process is running, the vertical red line<br />
indicates the progess of process execution.<br />
Click on a horizontal colored bar to get more information on the process step<br />
or action. The first line of the Info window shows the process name and the<br />
process instance ID. To zoom in to a particular part of the chart, click with the<br />
mouse and drag open a rectangle which encloses the part of interest. To reset<br />
the zoom, right-click on the chart and choose Fit to page from the context<br />
12 - 14 <strong>Freedom</strong> <strong>EVOware</strong> <strong>Software</strong> <strong>Manual</strong>, 393172, en, V<strong>2.3</strong>
12 - Running Scripts and Processes<br />
Running and Optimizing a Process (<strong>Freedom</strong> <strong>EVOware</strong> Plus)<br />
menu.<br />
Click on a labware item in the Labware column to see all available messages<br />
for the labware (the list shows all messages since <strong>Freedom</strong> <strong>EVOware</strong> was<br />
last started).<br />
If you have added comments to the process steps (in the Process Editor), the<br />
comments are shown in the Gantt chart as tool tips (yellow labels which<br />
appear when you move the cursor above the horizontal colored bars). If you<br />
choose suitable comments, this can help you to identify different parts of the<br />
Gantt chart. See 9.10.5 “Comment”, 9-76.<br />
Click the Statistics tab to get statistics on resource utilization for the process<br />
(see figure below). When you run the process, the information becomes<br />
available as soon as the the process schedule has been calculated. The<br />
information which is provided makes it easier to locate resource bottlenecks<br />
which could reduce the process performance (throughput).<br />
• The Event log window - This shows information on important events for<br />
devices and labware.<br />
• The Warnings/Errors window - This shows process warnings and errors.<br />
If one of the messages is shown truncated because it is too long, lengthen the<br />
field in the dialog box and activate the horizontal scroll bar by double-clicking on<br />
the divider (short vertical line in the header) at the end of the field.<br />
If you need more space for the Gantt chart, you can collapse the Event log and/or<br />
Messages/Error windows by clicking in the title bar. In addition, you can<br />
collapse the Devices windows by clicking in the title bar. You can also resize<br />
the windows by dragging the dividers between the windows.<br />
Fig. 12-8 Process runtime - Extended view (showing the Statistics window)<br />
<strong>Freedom</strong> <strong>EVOware</strong> <strong>Software</strong> <strong>Manual</strong>, 393172, en, V<strong>2.3</strong> 12 - 15
12 - Running Scripts and Processes<br />
Running and Optimizing a Process (<strong>Freedom</strong> <strong>EVOware</strong> Plus)<br />
12.2.5 Buttons in Extended View<br />
Cancel<br />
Return to the Process Editor.<br />
<strong>Standard</strong> view<br />
Return to the standard view of the Runtime Controller.<br />
Lock <strong>Freedom</strong> <strong>EVOware</strong><br />
This button logs out the current <strong>Freedom</strong> <strong>EVOware</strong> user (see 6.1.9 “Lock<br />
<strong>EVOware</strong>”, 6-7). Another use of the Lock button is to switch <strong>Freedom</strong><br />
<strong>EVOware</strong> users when you are handing over to another employee, e.g. due to<br />
a change of shift.<br />
Show Log File<br />
This button displays the <strong>Freedom</strong> <strong>EVOware</strong> log file in a new window.<br />
Stop<br />
This button runs the process; it is also used to continue the process if it has<br />
been paused.<br />
Preview<br />
This button previews the process; it is also used to continue the process if it<br />
has been paused.<br />
Run<br />
This button runs the process; it is also used to continue the process if it has<br />
been paused.<br />
Pause<br />
This button pauses the process.<br />
If you have already run the process<br />
Save schedule<br />
Click Save schedule to save a schedule for this process. Schedules can be<br />
use to ensure that processes always run the same way and use the same<br />
timing.<br />
Click New Run to return to the standard view of the Runtime Controller, e.g. to<br />
run the process again. If you want to save a schedule for this process, do this<br />
before you click New Run.<br />
If the process has stopped before being completed<br />
Click Recover to start the Process Recovery Wizard (see 17.2.2.2 “Process<br />
Recovery Wizard, Recovery Settings”, 17-10).<br />
Click New Run to return to the standard view of the Runtime Controller, e.g. to<br />
run the process again from the beginning.<br />
12 - 16 <strong>Freedom</strong> <strong>EVOware</strong> <strong>Software</strong> <strong>Manual</strong>, 393172, en, V<strong>2.3</strong>
12 - Running Scripts and Processes<br />
Running and Optimizing a Process (<strong>Freedom</strong> <strong>EVOware</strong> Plus)<br />
If you have just made a calibration run<br />
Click Optimize first if you want to optimize the schedule before saving it.<br />
Click New Run to return to the standard view of the Runtime Controller, e.g. to<br />
run the process again. If you want to save a schedule for this process, do this<br />
before you click New.<br />
Click Update Proc to store information in the process file on the actual times<br />
required by device commands. The next time you run the process, the stored<br />
information allows the scheduler to plan more accurately and thus optimize<br />
the throughput of the process.<br />
Click Optimize to optimize the schedule using the real execution times which<br />
were recorded during the calibration run. You must then click Save to save the<br />
optimized schedule.<br />
Click Save Schedule to save a schedule for this process. Schedules can be<br />
used to ensure that processes always run the same way and use the same<br />
timing.<br />
<strong>Freedom</strong> <strong>EVOware</strong> <strong>Software</strong> <strong>Manual</strong>, 393172, en, V<strong>2.3</strong> 12 - 17
12 - Running Scripts and Processes<br />
Running and Optimizing a Process (<strong>Freedom</strong> <strong>EVOware</strong> Plus)<br />
12 - 18 <strong>Freedom</strong> <strong>EVOware</strong> <strong>Software</strong> <strong>Manual</strong>, 393172, en, V<strong>2.3</strong>
13 - Overview of <strong>Freedom</strong> <strong>EVOware</strong> Commands<br />
Overview of Script Commands<br />
13 Overview of <strong>Freedom</strong> <strong>EVOware</strong> Commands<br />
This chapter gives an overview of the commands which are available in <strong>Freedom</strong><br />
<strong>EVOware</strong> <strong>Standard</strong> and <strong>Freedom</strong> <strong>EVOware</strong> Plus.<br />
After creating a worktable and choosing/defining the carriers and labware that you<br />
want to use, the process or pipetting script is created by selecting commands from<br />
the Control Bar (see 11 “Getting Started - Setting Up a New Script or Process”,<br />
11-1).<br />
In this chapter, the commands are divided into two sections - script commands<br />
and device commands - and each section is divided into groups (e.g. Liquid<br />
Handling Arm commands). The same groups are used in the Control Bar. See<br />
Commands in the index for an alphabetic list of the commands.<br />
Some of the commands will only be shown in the Control Bar if your pipetting<br />
instrument is fitted with the appropriate hardware option.<br />
In addition, you can hide commands which you do not normally use (see<br />
5.4.1.13 “Context Menu for Group Titles in the Control Bar”, 5-15).<br />
Tecan and third party software add-ons for <strong>Freedom</strong> <strong>EVOware</strong> may add additional<br />
script and/or device commands to the Control Bar which are not described in this<br />
manual. In this case, refer to the instruction manual for the respective software<br />
add-on for more information.<br />
13.1 Overview of Script Commands<br />
In <strong>Freedom</strong> <strong>EVOware</strong> Plus, when the Script Editor is open the Commands tab of<br />
the Control Bar only shows script commands (commands which are used for<br />
writing pipetting scripts). When the Process Editor is open, the Commands tab of<br />
the Control Bar only shows device commands (commands for the optional<br />
devices, see 13.2 “Overview of Device Commands”, 13-12).<br />
In <strong>Freedom</strong> <strong>EVOware</strong> <strong>Standard</strong>, the Control Bar always shows both command<br />
types (it does not have a Process Editor).<br />
Tecan and third party software add-ons for <strong>Freedom</strong> <strong>EVOware</strong> may add additional<br />
script and/or device commands to the Control Bar which are not described in this<br />
manual. In this case, refer to the instruction manual for the respective software<br />
add-on for more information.<br />
13.1.1 Liquid Handling Arm (LiHa) Commands, Overview<br />
The following table lists the commands for the liquid handling arm. To use these<br />
commands in <strong>Freedom</strong> <strong>EVOware</strong> Plus, add the device command “Liquid Handling<br />
Arm - Pipette” to your process; this opens the Script Editor (see 16.13.2, 16-47).<br />
If your pipetting instrument is fitted with two liquid handling arms (and you have<br />
installed drivers for both of them), there will be two liquid handling arm groups in<br />
the Control Bar (Liquid Handling Arm and Liquid Handling Arm 2). Use the<br />
commands in the group “Liquid Handling Arm” if you want to pipette with the first<br />
LiHa. Use the commands in the group “Liquid Handling Arm 2” if you want to<br />
pipette with the second LiHa. The commands themselves are identical in both<br />
groups. The Script Editor window appends a “2” to the commands which are<br />
destined for the second LiHa (e.g. “Aspirate 2”).<br />
<strong>Freedom</strong> <strong>EVOware</strong> <strong>Software</strong> <strong>Manual</strong>, 393172, en, V<strong>2.3</strong> 13 - 1
13 - Overview of <strong>Freedom</strong> <strong>EVOware</strong> Commands<br />
Overview of Script Commands<br />
Tab. 13-1 Liquid Handling Arm (LiHa) commands<br />
Aspirate - The Aspirate command is used to pick up liquid from specified positions on<br />
the worktable. See 15.1 “Aspirate Command”, 15-1.<br />
Dispense - The Dispense command is used to dispense liquid to specified positions<br />
on the worktable. See 15.2 “Dispense Command”, 15-3.<br />
Mix - The Mix command performs a mix operation by aspirating and then dispensing<br />
at the same position. See 15.3 “Mix Command”, 15-5.<br />
Wash Tips - The Wash Tips command is used to flush and wash fixed tips or to flush<br />
DITI adapters using a wash station. It is not intended for flushing DITI tips. See<br />
15.4 “Wash Tips Command”, 15-8.<br />
Periodic Wash - The Periodic Wash command is used to flush DITI adapters in a<br />
wash station at specified, regular intervals. It is not intended for flushing DITI tips. See<br />
15.5 “Periodic Wash Command”, 15-10.<br />
Activate DITI Handling - The Activate DITI Handling command activates the automatic<br />
DITI handling feature in your pipetting script and specifies the DITI replacement<br />
script to use. See 15.6 “Activate DITI Handling Command”, 15-12.<br />
Get DITIs - The Get DITIs command is used to pick up DiTis (disposable tips) of the<br />
specified capacity from a DITI rack. <strong>Freedom</strong> <strong>EVOware</strong> keeps track of their position<br />
on the worktable and automatically chooses the next available unused DiTi. This command<br />
is only shown in the Control Bar if you are using DiTis on the LiHa. See<br />
15.7 “Get DITIs Command”, 15-13.<br />
Drop DITIs - The Drop DITIs command is used to discard the specified DITIs into the<br />
specified DITI waste. This command is only shown in the Control Bar if you are using<br />
DiTis on the LiHa. See 15.8 “Drop DITIs Command”, 15-14.<br />
Set DiTi Position - The Set DiTi Position command is used to specify the location of<br />
the next DiTi which should be used by the Get DiTis command. This command is only<br />
shown in the Control Bar if you are using DiTis on the LiHa. See 15.9 “Set DITI Position<br />
Command”, 15-15.<br />
Pick Up DITIs - The Pick Up DITIs command is used to pick up DITIs which have<br />
already been used and put back into the DiTi rack with the Set DITIs Back command.<br />
You must specify the DiTis you want to pick up. This command is only shown in the<br />
Control Bar if you are using DiTis on the LiHa. See 15.10 “Pick Up DITIs Command”,<br />
15-16.<br />
Set DITIs Back - The Set DITIs Back command is used to return used DITIs to specified<br />
positions on a DiTi rack for later use. This command requires the Lower DiTi Eject<br />
option. This command is only shown in the Control Bar if you are using DiTis on the<br />
LiHa. See 15.11 “Set DITIs Back Command”, 15-18.<br />
Pickup ZipTip - The Pickup ZipTip command is used to pick up ZipTips. See<br />
15.12 “Pickup ZipTip Command”, 15-19.<br />
Detect Liquid - The Detect Liquid command is used to carry out liquid level detection<br />
without pipetting and reports the liquid volume for each of the chosen wells in the<br />
rack. See 15.13 “Detect Liquid Command”, 15-20.<br />
Te-Fill Aspirate - The Te-Fill Aspirate command is used to pick up liquid from specified<br />
positions on the worktable using the Te-Fill option. See 15.14 “Te-Fill Aspirate<br />
Command”, 15-22<br />
13 - 2 <strong>Freedom</strong> <strong>EVOware</strong> <strong>Software</strong> <strong>Manual</strong>, 393172, en, V<strong>2.3</strong>
13 - Overview of <strong>Freedom</strong> <strong>EVOware</strong> Commands<br />
Overview of Script Commands<br />
Tab. 13-1 Liquid Handling Arm (LiHa) commands (cont.)<br />
Te-Fill Dispense - The Te-Fill Dispense command is used to dispense liquid to specified<br />
positions on the worktable using the Te-Fill option. See 15.15 “Te-Fill Dispense<br />
Command”, 15-24<br />
Te-Fill Prime - The Te-Fill Prime command is used to prime the liquid channel of the<br />
Te-Fill option. See 15.16 “Te-Fill Prime Command”, 15-26<br />
Te-Fill Switch Valve - The Te-Fill Switch Valve command is used for special applications<br />
which require the Te-Fill liquid path to be selected but without aspirating or dispensing.<br />
See 15.17 “Te-Fill Switch Valve Command”, 15-28<br />
Activate PMP - The Activate PMP command is used to activate the PMP (Pressure<br />
Monitored Pipetting) function at the appropriate point in your pipetting script. You must<br />
do this before getting (mounting) the PMP-controlled DiTis. See 15.18 “Activate PMP<br />
Command”, 15-29.<br />
Deactivate PMP - The Deactivate PMP command is used to deactivate the PMP<br />
(Pressure Monitored Pipetting) function at the appropriate point in your pipetting<br />
script. You must do this after finishing the pipetting sequence and dropping the DITIs.<br />
See 15.19 “Deactivate PMP Command”, 15-30.<br />
Tip Alignment Check - The Tip Alignment Check command is used to check and readjust<br />
the alignment of the Liquid Handling Arm (LiHa) during script runtime. This<br />
function is normally only necessary if you are using microplates with 1536 wells or<br />
other high precision labware. See 15.20 “Tip Alignment Check Command”, 15-30.<br />
Move LIHA - The Move LIHA command is used to move the liquid handling arm from<br />
one position to another without performing an Aspirate or Dispense operation. See<br />
15.21 “Move LiHa Command”, 15-33.<br />
Waste - The Waste command is used to control the vacuum-assisted waste (instrument<br />
option for viscous liquids which creates a partial vacuum in the waste bottles).<br />
See 15.22 “Waste Command”, 15-35.<br />
Active WashStation – The Active WashStation command is used to control the pressure<br />
pump of the Active WashStation. It is mainly intended for ZipTips. See<br />
15.23 “Active WashStation Command”, 15-36.<br />
Worklist - The Worklist command is used to load a worklist file or run previously<br />
loaded worklist files. A worklist file is a text file containing instructions for the pipetting<br />
instrument. It contains information on source and destination positions and the volumes<br />
to pipette. See 15.24 “Worklist Command”, 15-36.<br />
Worklist Import - The Worklist Import command is used to create an <strong>Freedom</strong><br />
<strong>EVOware</strong> worklist from an Excel file which is stored in CSV format. See<br />
15.25 “Worklist Import Command”, 15-46.<br />
Export Data - The Export Data command is used to create report files for selected<br />
labware or for all labware on the worktable or the Te-MO deck. The report files contain<br />
information about the pipetting which has been carried out. See 15.26 “Export Data<br />
Command”, 15-48.<br />
<strong>Manual</strong> Tip Alignment - The <strong>Manual</strong> Tip Alignment command is used to check the<br />
alignment of the Liquid Handling Arm (LiHa) before or after running a script. It is also<br />
able to detect bent tips. This function is normally only necessary if you are using<br />
microplates with 1536 wells or other high precision labware. See 15.27 “<strong>Manual</strong> Tip<br />
Alignment Command”, 15-57. This command is mainly intended for use in maintenance<br />
scripts (see 6.4.2 “Run Maintenance”, 6-10).<br />
<strong>Freedom</strong> <strong>EVOware</strong> <strong>Software</strong> <strong>Manual</strong>, 393172, en, V<strong>2.3</strong> 13 - 3
13 - Overview of <strong>Freedom</strong> <strong>EVOware</strong> Commands<br />
Overview of Script Commands<br />
13.1.2 Wizards, Overview<br />
The following table lists advanced commands which are configured using wizards.<br />
To use these commands in <strong>Freedom</strong> <strong>EVOware</strong> Plus, add the device command<br />
“Liquid Handling Arm - Pipette” to your process; this opens the Script Editor (see<br />
16.13.2, 16-47).<br />
Tab. 13-2 Wizards<br />
Copy Plate - The Copy Plate wizard creates a set of script commands which make<br />
identical copies of the source plate on one or more destination plates. You can copy<br />
the whole plate or a rectangular selection of wells. See 15.28 “Copy Plate Wizard”,<br />
15-59.<br />
Replicates - The Replicates wizard creates a set of script commands which make<br />
one or more repetitions (copies) of selected wells on the source plate on one or more<br />
destination plates. All of the destination plates will be identical. You can only create<br />
horizontal replicates. See 15.29 “Replicates Wizard”, 15-63.<br />
Serial Dilution - The Serial Dilution wizard creates a set of script commands which<br />
perform a serial dilution in two or more steps. Each dilution step has the same dilution<br />
factor. See 15.30 “Serial Dilution Wizard”, 15-69.<br />
Merge Plates - The Merge Plates wizard creates a set of script commands which<br />
make a destination plate (e.g. a 384 well plate) by merging together wells from one or<br />
more source plates (e.g. four 96 well plates). See 15.31 “Merge Plates Wizard”, 15-<br />
77.<br />
Transfer - The Transfer wizard creates a set of script commands which aspirate liquid<br />
from specified wells on the source plate and transfer it to destination positions See<br />
15.32 “Transfer Wizard”, 15-85.<br />
MCA Merge Plate - The MCA Merge Plate wizard creates a set of script commands<br />
for the MCA96 which merge four 96-well microplates into one 384-well microplate.<br />
See 15.33 “MCA Merge Plate Wizard”, 15-90.<br />
13.1.3 Programming Commands, Overview<br />
The following table lists the script programming commands. To use these<br />
commands in <strong>Freedom</strong> <strong>EVOware</strong> Plus, add the device command “Liquid Handling<br />
Arm - Pipette” to your process; this opens the Script Editor (see 16.13.2, 16-47).<br />
13 - 4 <strong>Freedom</strong> <strong>EVOware</strong> <strong>Software</strong> <strong>Manual</strong>, 393172, en, V<strong>2.3</strong>
13 - Overview of <strong>Freedom</strong> <strong>EVOware</strong> Commands<br />
Overview of Script Commands<br />
Tab. 13-3 Script programming commands<br />
Start Timer - The Start Timer command re-starts one of the 100 internal timers in<br />
<strong>Freedom</strong> <strong>EVOware</strong>. See 15.34 “Start Timer Command”, 15-95.<br />
Wait for Timer - The Wait for Timer command pauses the execution of the script until<br />
a specified number of seconds have expired since a specified timer was started. See<br />
15.35 “Wait for Timer Command”, 15-95.<br />
Execute Application - The Execute Application command instructs <strong>Freedom</strong><br />
<strong>EVOware</strong> to run an external program from within a pipetting script. You can run DOS<br />
and Windows applications. See 15.36 “Execute Application Command”, 15-96.<br />
Comment - The Comment command is used to insert a comment for a script command<br />
or for some other reason. It is used to annotate the script and is not executable.<br />
See 15.37 “Comment Command”, 15-97. Use the User Prompt command instead if<br />
you want to prompt the instrument operator. Comment commands are also used as<br />
labels by the Condition command.<br />
User Prompt - The User Prompt command is an informational command that displays<br />
a prompt on the screen as a reminder to the operator to execute a function or to<br />
perform a special action. See 15.38 “User Prompt Command”, 15-98.<br />
Begin Loop - The Begin Loop command instructs <strong>Freedom</strong> <strong>EVOware</strong> to repeat a<br />
command or a set of commands (i.e. a loop) a specified number of times until the<br />
matching End Loop command is encountered in the script. See 15.39 “Begin Loop<br />
Command”, 15-100.<br />
End Loop - The End Loop command terminates the loop which is initiated by the<br />
matching Begin Loop command. The End Loop command is inserted in the script<br />
automatically when you add the Begin Loop command. <strong>Freedom</strong> <strong>EVOware</strong> uses the<br />
same loop name for the Begin Loop command and the End Loop command. See<br />
15.40 “End Loop Command”, 15-100.<br />
Set Variable - The Set Variable command is used to declare a numeric or string variable<br />
in a pipetting script and to assign an initial value. You can also prompt the operator<br />
for the value. See 15.41 “Set Variable Command”, 15-101.<br />
Import Variable - The Import Variable command is used to import values for script<br />
variables from a file during script runtime. You can import values for variables which<br />
are already declared (defined) in the script. You can also use this command to declare<br />
new variables for use in the script and assign an initial value which is read from the<br />
import file. See 15.42 “Import Variable Command”, 15-103.<br />
Export Variable - The Export Variable command is used to export the values of script<br />
variables to a file during script runtime. See 15.43 “Export Variable Command”, 15-<br />
107.<br />
Condition - The Condition command is used to jump to a specified line in the script if<br />
a specified condition is met. See 15.44 “Condition Command”, 15-109.<br />
If - Then - The If -Then command is used to execute a set of script commands if a<br />
specified condition is met and execute a different set of commands if the condition is<br />
not met (Else condition. See 15.45 “If - Then Command”, 15-111.<br />
Group - The Group command is used to group together script commands to make<br />
long scripts easier to understand. When you insert a Group command, a Group End<br />
command is also inserted. Click the “-” button in the Group command icon in the<br />
Script Editor if you want to collapse and hide all of the script lines in the group. See<br />
15.48 “Group Command”, 15-112.<br />
<strong>Freedom</strong> <strong>EVOware</strong> <strong>Software</strong> <strong>Manual</strong>, 393172, en, V<strong>2.3</strong> 13 - 5
13 - Overview of <strong>Freedom</strong> <strong>EVOware</strong> Commands<br />
Overview of Script Commands<br />
Tab. 13-3 Script programming commands (cont.)<br />
Sub-Routine - The Sub-Routine command executes another script as part of the current<br />
script. The Sub-Routine command is not available in <strong>Freedom</strong> <strong>EVOware</strong> Plus.<br />
See 15.49 “Sub-Routine Command”, 15-113.<br />
Execute VB Script – The Execute VB Script command is used to execute a Visual<br />
Basic (VB) script from within an <strong>Freedom</strong> <strong>EVOware</strong> script. See 15.50 “Execute VB<br />
Script Command”, 15-114.<br />
Notification - The Notification command is used to send an email from within a script<br />
(e.g. to inform an operator in another room that a certain process has finished). It can<br />
also be used to send an automatic email if an error occurs during script execution.<br />
See 15.51 “Notification Command”, 15-116.<br />
Start Script - The Start Script command starts another script from the currently running<br />
script, which is terminated. In contrast to sub-routines, the new script can use a<br />
different worktable layout to the original script. The Start Script command is not available<br />
in <strong>Freedom</strong> <strong>EVOware</strong> Plus. See 15.52 “Start Script Command”, 15-117.<br />
On Error Goto - The On Error Goto command is used to jump to a specified line in<br />
the script if an error occurs during script runtime. Error recovery commands then allow<br />
the pipetting script to react automatically to the error. See 15.53 “On Error Goto Command”,<br />
15-118.<br />
Resume - The Resume command is used together with the On Error Goto command<br />
and specifies where to resume running the script after executing the error recovery<br />
commands. See 15.54 “Resume Command”, 15-119.<br />
End Script - The End Script command is used to stop the pipetting script prematurely<br />
and to specify a return code (error code) for the script. It is typically used together with<br />
error recovery commands. See 15.55 “End Script Command”, 15-120.<br />
13.1.4 Commands for the Te-MO, Overview<br />
The following table lists the commands for the Te-MO.<br />
To use these commands in <strong>Freedom</strong> <strong>EVOware</strong> Plus, add the device command<br />
“Te-MO - Pipette” to your process; this opens the Script Editor (see 16.36.2, 16-<br />
120).<br />
Tab. 13-4 Te-MO commands<br />
Te-MO Aspirate – The Te-MO Aspirate command is used to pick up liquid from specified<br />
positions on the Te-MO. It is analogous to the Aspirate command for the LiHa.<br />
See 15.56.1 “Te-MO Aspirate Command”, 15-122.<br />
Te-MO Dispense – The Te-MO Dispense command is used to dispense liquid to<br />
specified positions on the Te-MO. It is analogous to the Dispense command for the<br />
LiHa. See 15.56.2 “Te-MO Dispense Command”, 15-124.<br />
Te-MO Mix – The Te-MO Mix command performs a mix operation by aspirating and<br />
then dispensing at the same Te-MO position. It is equivalent to the Mix command for<br />
the LiHa. See 15.56.3 “Te-MO Mix Command”, 15-125.<br />
Te-MO Wash – The Te-MO Wash command is used to wash the Te-MO tips or DITIs<br />
using the specified Te-MO 96 wash block. It is designed for standard Te-MO tip blocks<br />
and DITi pipetting heads with 96 tips. See 15.56.4 “Te-MO Wash Command”, 15-<br />
127.<br />
13 - 6 <strong>Freedom</strong> <strong>EVOware</strong> <strong>Software</strong> <strong>Manual</strong>, 393172, en, V<strong>2.3</strong>
13 - Overview of <strong>Freedom</strong> <strong>EVOware</strong> Commands<br />
Overview of Script Commands<br />
Tab. 13-4 Te-MO commands (cont.)<br />
Te-MO Wash 384 Tip Head - The Te-MO Wash 384 Tip Head command is used to<br />
wash the Te-MO tips using the specified Te-MO 384 wash block. It is designed for<br />
384-tip pipetting heads. See 15.56.5 “Te-MO 384 Wash Tip Head Command”, 15-<br />
130.<br />
Te-MO Get DITIs – The Te-MO Get DITIs command is used to pick up disposable tips<br />
of the specified capacity from a specified position on the Te-MO. See 15.56.6 “Te-MO<br />
Get DITIs Command”, 15-132.<br />
Te-MO Drop DITIs – The Te-MO Drop DITIs command is used to return the disposable<br />
tips to a specified position on the Te-MO. See 15.56.7 “Te-MO Drop DITIs Command”,<br />
15-133.<br />
Te-MO Get Tip Block – The Te-MO Get Tip Block command is used to pick up a tip<br />
block from a specified position on the Te-MO. It is analogous to the Te-MO Get DITIs<br />
command. See 15.56.8 “Te-MO Get Tip Block Command”, 15-134.<br />
Te-MO Drop Tip Block – The Te-MO Drop Tip Block command is used to put down<br />
the tipblock at a specified position on the Te-MO. It is analogous to the Te-MO Drop<br />
DITIs command. See 15.56.9 “Te-MO Drop Tip Block Command”, 15-135.<br />
Te-MO Refill Trough - The trough is a special carrier on the Te-MO which is used as<br />
a container for a reagent liquid. The Te-MO Refill Trough command is used to refill the<br />
trough with reagents. See 15.56.10 “Te-MO Refill Trough Command”, 15-135.<br />
Te-MO Relative Movements - The Te-MO Relative Movements command is used to<br />
perform Te-MO movements with an offset. It can be used e.g. to program a serial dilution.<br />
It is only available for the Te-MO 96. See 15.56.11 “Te-MO Relative Movements<br />
Command”, 15-136.<br />
Export Data - The Export Data command is used to create report files for selected<br />
labware or for all labware on the worktable or the Te-MO deck. The report files contain<br />
information about the pipetting which has been carried out. See 15.26 “Export Data<br />
Command”, 15-48.<br />
Load the Te-MO - The Load the Te-MO command is used to move a specified Te-MO<br />
site to the RoMa exchange position (transfer position) to make it easier to exchange<br />
the labware manually. See 15.56.12 “Load the Te-MO Command”, 15-138. This<br />
command is mainly intended for use in maintenance scripts (see 6.4.2 “Run Maintenance”,<br />
6-10).<br />
Fill System (384 tip head) - The Fill system (Te-MO 384) command is used to fill and<br />
flush the 384-tip Te-MO pipetting system and to prime the wash block of the Te-MO<br />
384 Wash & Refill Center. See 15.56.13 “Fill system (Te-MO 384) Command”, 15-<br />
138. This command is mainly intended for use in maintenance scripts (see 6.4.2 “Run<br />
Maintenance”, 6-10).<br />
13.1.5 Commands for the Plate Robot, Overview<br />
The following table lists the commands for the Robot manipulator (RoMa). These<br />
commands are only available in <strong>Freedom</strong> <strong>EVOware</strong> <strong>Standard</strong>. In <strong>Freedom</strong><br />
<strong>EVOware</strong> Plus, plate robot actions are normally specified as pre-actions and postactions<br />
of device commands (see 8.5.35.3 “Pre-actions and Post-actions Tabs”,<br />
8-119).<br />
<strong>Freedom</strong> <strong>EVOware</strong> <strong>Software</strong> <strong>Manual</strong>, 393172, en, V<strong>2.3</strong> 13 - 7
13 - Overview of <strong>Freedom</strong> <strong>EVOware</strong> Commands<br />
Overview of Script Commands<br />
Tab. 13-5 Commands for the plate robot<br />
Move RoMa - The Move RoMa command is used to carry out simple RoMa movements.<br />
See 15.57 “Move RoMa Command”, 15-140.<br />
RoMa Vector - The RoMa Vector command executes a RoMa vector, which is a predefined<br />
sequence of RoMa movements. You can also specify gripper actions at the<br />
Safe and End positions. See 15.58 “RoMa Vector Command”, 15-141.<br />
Transfer Labware - The Transfer Labware command is used to to transfer labware<br />
(e.g. a microplate) from one position to another with the plate robot (RoMa) . The<br />
same action can be carried out by defining two RoMa Vector commands and using<br />
two RoMa vectors. See 15.59 “Transfer Labware Command”, 15-143.<br />
13.1.6 Commands for the Tube Robot, Overview<br />
The following table lists the commands for the Pick & Place arm (PnP).<br />
To use these commands in <strong>Freedom</strong> <strong>EVOware</strong> Plus, add the device command<br />
“Tube Robot - Execute Script” to your process; this opens the Script Editor (see<br />
16.25.1, 16-83).<br />
Tab. 13-6 Commands for the tube robot<br />
Move PnP - The Move PnP command is used to carry out simple PnP movements.<br />
See 15.60 “Move PnP Command”, 15-145.<br />
PnP Vector - The PnP Vector command executes a PnP vector, which is a predefined<br />
sequence of PnP movements. You can also specify gripper actions at the<br />
Safe and End positions. See 15.61 “PnP Vector Command”, 15-146.<br />
Transfer Tube - The Transfer Tube command is used to transfer a tube from one<br />
position to another with the tube robot (PnP) . The same action can be carried out by<br />
defining two PnP Vector commands and using two PnP vectors. See 15.62 “Transfer<br />
Tube Command”, 15-148.<br />
13.1.7 Commands for Identification Devices, Overview<br />
The following table lists the command for the PosID movable barcode scanner.<br />
The PosID-3 (a new, improved version of the PosID hardware) uses device<br />
commands instead of script commands. If your pipetting instrument is fitted with<br />
the PosID-3 instead of the PosID, the Identification Devices group of the Control<br />
Bar will not contain any commands. The PosID-3 device commands can be found<br />
in the PosID-3 group of the Control Bar.<br />
Tab. 13-7 Commands for identification devices<br />
PosID - The PosID command is used to read the barcode labels on one or more<br />
pieces of labware using the PosID option. The PosID (Positive Identification System)<br />
is a movable barcode scanner which can be used to read the barcode labels on carriers,<br />
labware and tubes. See 15.63 “PosID Command”, 15-150.<br />
13 - 8 <strong>Freedom</strong> <strong>EVOware</strong> <strong>Software</strong> <strong>Manual</strong>, 393172, en, V<strong>2.3</strong>
13 - Overview of <strong>Freedom</strong> <strong>EVOware</strong> Commands<br />
Overview of Script Commands<br />
13.1.8 Miscellaneous Commands, Overview<br />
The following table lists the script commands for miscellaneous devices. To use<br />
these commands in <strong>Freedom</strong> <strong>EVOware</strong> Plus, add the device command “Liquid<br />
Handling Arm - Pipette” to your process; this opens the Script Editor (see<br />
16.13.2, 16-47).<br />
Tab. 13-8 Commands for miscellaneous devices<br />
Waterbath Control – The Waterbath Control command is used to control the waterbaths<br />
for the Te-Flow option. The Te-Flow option provides support for the In Situ<br />
Hybridization method. See 15.64 “Waterbath Control Command”, 15-154.<br />
Balance - The Balance command is used to read a weight from the Mettler balance<br />
and store it in a variable. See 15.65 “Balance Command”, 15-155.<br />
Balance Send Command - The Balance Send Command command allows you to<br />
send a firmware command directly to the Mettler balance. This command is only<br />
intended for specialists. See 15.66 “Balance Send Command Command”, 15-157.<br />
Send Command - The Send Command command allows you to send a firmware<br />
command directly to the pipetting instrument. This command is only intended for specialists.<br />
See 15.67 “Send Command Command”, 15-158.<br />
13.1.9 Commands for the MCA96 (Multi Channel Arm 96), Overview<br />
The following table lists the script commands for the MCA96.<br />
Tab. 13-9 Commands for the MCA96<br />
Aspirate - The MCA96 Aspirate command is used to pick up liquid from specified<br />
positions on the worktable of the pipetting instrument using the multi channel arm.<br />
See 15.68.1 “MCA96 Aspirate Command”, 15-159.<br />
Dispense - The MCA96 Dispense command is used to dispense liquid to specified<br />
positions on the worktable of the pipetting instrument using the multi channel arm.<br />
See 15.68.2 “MCA96 Dispense Command”, 15-161.<br />
Mix - The MCA96 Mix command performs a mix operation by aspirating and then dispensing<br />
at the same position using the multi channel arm. See 15.68.3 “MCA96 Mix<br />
Command”, 15-162.<br />
Wash - The MCA96 Wash command is used to wash MCA96 tips or MCA96 DITIs<br />
using the specified MCA96 wash block. See 15.68.4 “MCA96 Wash Command”,<br />
15-164.<br />
Get DITIs - The MCA96 Get DITIs command is used to pick up disposable tips for the<br />
multi channel arm from a specified position on the worktable of the pipetting instrument.<br />
See 15.68.5 “MCA96 Get DITIs Command”, 15-167.<br />
Drop DITIs - The MCA96 Drop DITIs command is used to return the disposable tips<br />
of the multi channel arm to a specified position on the worktable of the pipetting instrument.<br />
See 15.68.6 “MCA96 Drop DITIs Command”, 15-168.<br />
Get Tipblock - The MCA96 Get Tip Block command is used to pick up a tip block for<br />
the MCA96 from a specified position on the worktable of the pipetting instrument. See<br />
15.68.7 “MCA96 Get Tip Block Command”, 15-170.<br />
<strong>Freedom</strong> <strong>EVOware</strong> <strong>Software</strong> <strong>Manual</strong>, 393172, en, V<strong>2.3</strong> 13 - 9
13 - Overview of <strong>Freedom</strong> <strong>EVOware</strong> Commands<br />
Overview of Script Commands<br />
Tab. 13-9 Commands for the MCA96 (cont.)<br />
Drop Tipblock - The MCA96 Drop Tip Block command is used to put down the tipblock<br />
of the MCA96 at a specified position on the worktable of the pipetting instrument.<br />
See 15.68.8 “MCA96 Drop Tip Block Command”, 15-171.<br />
Relative Movements - The MCA96 Relative Movements command is used to perform<br />
movements of the MCA96 with an offset. It can be used e.g. to program a serial<br />
dilution. See 15.68.9 “MCA96 Relative Movements Command”, 15-171.<br />
Move - The MCA96 Move command is used to move the MCA96 from one position to<br />
another without performing an Aspirate or Dispense operation. See 15.68.10 “MCA96<br />
Move Command”, 15-174.<br />
Vector - The MCA96 Vector command executes an MCA96 vector, which is a predefined<br />
sequence of MCA96 movements. You can also specify gripper actions at the<br />
Safe and End positions. Gripper actions require the MCA96 gripper option. See<br />
15.68.11 “MCA96 Vector Command”, 15-175.<br />
Transfer Labware - The MCA96 Transfer Labware command is used to transfer labware<br />
(e.g. a microplate) from one position to another with the MCA96 gripper. The<br />
same action can be carried out using two MCA96 Vector commands. This command<br />
requires the MCA96 gripper option. See 15.68.12 “MCA96 Transfer Labware Command”,<br />
15-177.<br />
13.1.10 Commands for the MCA384 (Multi Channel Arm 384), Overview<br />
The following table lists the script commands for the MCA384.<br />
Tab. 13-10 Commands for the MCA384<br />
Aspirate - The MCA384 Aspirate command is used to pick up liquid from specified<br />
positions on the worktable of the pipetting instrument using the multi channel arm.<br />
See 15.69.2 “MCA384 Aspirate Command”, 15-181.<br />
Dispense - The MCA384 Dispense command is used to dispense liquid to specified<br />
positions on the worktable of the pipetting instrument using the multi channel arm.<br />
See 15.69.3 “MCA384 Dispense Command”, 15-183.<br />
Mix - The MCA384 Dispense command performs a mix operation by aspirating and<br />
then dispensing at the same position using the multi channel arm. See<br />
15.69.4 “MCA384 Mix Command”, 15-185.<br />
Wash - The MCA384 Wash command is used to wash the MCA384 tips or MCA384<br />
DITIs using the specified MCA384 wash block. See 15.69.5 “MCA384 Wash Command”,<br />
15-187.<br />
Get Head Adapter - The MCA384 Get Head Adapter command is used to pick up an<br />
adapter plate for the multi channel arm from a specified position on the worktable of<br />
the pipetting instrument. See 15.69.6 “MCA384 Get Head Adapter Command”, 15-<br />
189.<br />
Drop Head Adapter - The MCA384 Drop Head Adapter command is used to put<br />
down the adapter plate of the multi channel arm at a specified position on the worktable<br />
of the pipetting instrument. See 15.69.7 “MCA384 Drop Head Adapter Command”,<br />
15-190.<br />
13 - 10 <strong>Freedom</strong> <strong>EVOware</strong> <strong>Software</strong> <strong>Manual</strong>, 393172, en, V<strong>2.3</strong>
13 - Overview of <strong>Freedom</strong> <strong>EVOware</strong> Commands<br />
Overview of Script Commands<br />
Tab. 13-10 Commands for the MCA384 (cont.)<br />
Get DITIs - The MCA384 Get DITIs command is used to pick up disposable tips for<br />
the multi channel arm from a specified position on the worktable of the pipetting<br />
instrument. See 15.69.8 “MCA384 Get DITIs Command”, 15-191.<br />
Drop DITIs - The MCA384 Drop DITIs command is used to return the disposable tips<br />
of the multi channel arm to a specified position on the worktable of the pipetting instrument.<br />
See 15.69.9 “MCA384 Drop DITIs Command”, 15-194.<br />
Move - The MCA384 Move command is used to move the MCA384 from one position<br />
to another without performing an Aspirate or Dispense operation. See<br />
15.69.10 “MCA384 Move Command”, 15-198.<br />
Vector - The MCA384 Vector command executes a CGM vector, which is a predefined<br />
sequence of CGM movements. You can also specify gripper actions at the<br />
Safe and End positions. This command requires the CGM (common gripper module),<br />
which is a hardware option for the MCA384. See 15.69.11 “MCA384 Vector Command”,<br />
15-199.<br />
Transfer Labware - The MCA384 Transfer Labware command is used to transfer<br />
labware (e.g. a microplate) from one position to another with the CGM. The same<br />
action can be carried out using two MCA384 Vector commands. This command<br />
requires the CGM (common gripper module), which is a hardware option for the<br />
MCA384. See 15.69.12 “MCA384 Transfer Labware Command”, 15-201.<br />
Dock CGM - The MCA384 Dock CGM command is used to dock the CGM around the<br />
MCA384 pipetting head. This reduces the amount of space required by the MCA384/<br />
CGM hardware. The CGM (common gripper module) is a hardware option for the<br />
MCA384. See 15.69.13 “MCA384 Dock CGM Command”, 15-204.<br />
Undock CGM - The MCA384 Undock CGM command is used to undock the CGM<br />
from the MCA384 pipetting head. The CGM can only be used for gripping and transferring<br />
labware when it is undocked. The CGM (common gripper module) is a hardware<br />
option for the MCA384. See 15.69.14 “MCA384 Undock CGM Command”, 15-<br />
204.<br />
13.1.11 Commands for the Common Notification Server, Overview<br />
The following table lists the command for the Common Notification Server. The<br />
Common Notification Server (CNS) is a central Tecan software component which<br />
is responsible for sending notification messages to administrators, users or<br />
operators of the pipetting instrument. The CNS complements the features of the<br />
Notification script command.<br />
Tab. 13-11 Commands for the Common Notification Server<br />
SendNotification - The Common Notification Server (CNS) is a central Tecan software<br />
component which is responsible for sending notification messages. The Send-<br />
Notification command is used to send a message to one or more recipients. See<br />
15.70 “CNS SendNotification command”, 15-205.<br />
<strong>Freedom</strong> <strong>EVOware</strong> <strong>Software</strong> <strong>Manual</strong>, 393172, en, V<strong>2.3</strong> 13 - 11
13 - Overview of <strong>Freedom</strong> <strong>EVOware</strong> Commands<br />
Overview of Device Commands<br />
13.2 Overview of Device Commands<br />
In <strong>Freedom</strong> <strong>EVOware</strong> Plus, when the Process Editor is open the Control Bar only<br />
shows device commands (commands which are used for controlling optional<br />
devices).<br />
Conversely, when the Script Editor is open the Control Bar only shows script<br />
commands (commands which are used for writing pipetting scripts). See<br />
11.5.5 “Creating a Script for the Pipette Command”, 11-12).<br />
In <strong>Freedom</strong> <strong>EVOware</strong> <strong>Standard</strong>, both command types are shown in the Control<br />
Bar (it does not have a Process Editor).<br />
Tecan and third party software add-ons for <strong>Freedom</strong> <strong>EVOware</strong> may add additional<br />
script and/or device commands to the Control Bar which are not described in this<br />
manual. In this case, refer to the instruction manual for the respective software<br />
add-on for more information.<br />
Note: Device commands are handled by device drivers.The currently installed<br />
devices are shown in the Control Bar. If you cannot find the device command you<br />
need even though it is listed in this chapter, you must run the <strong>Freedom</strong> <strong>EVOware</strong><br />
installation program again to install it. Also check whether the driver has been<br />
installed but is currently deactivated (see 8.4.1.1 “Device Information Tab”, 8-<br />
21, Start checkbox).<br />
13.2.1 Commands for the Barcode Scanner, Overview<br />
The following table lists the command for the Symbol LS-1220 barcode scanner.<br />
In <strong>Freedom</strong> <strong>EVOware</strong> Plus, the Barcode Scanner command is an on-the-flycommand<br />
– drag the command to the line which connects two process steps (see<br />
5.4.3 “The Process Editor (<strong>Freedom</strong> <strong>EVOware</strong> Plus)”, 5-17).<br />
In <strong>Freedom</strong> <strong>EVOware</strong> <strong>Standard</strong>, proceed as follows to use the Symbol LS-1220<br />
barcode scanner:<br />
• Make sure that the labware type has been “allowed” for scanning with the<br />
barcode scanner (see 9.5 “Configuring Carriers”, 9-39, “Allowed Labware<br />
on this carrier”).<br />
• Drag labware of the type you want to scan from the Control Bar (Labware<br />
section) onto the device icon of the barcode scanner.<br />
• Use the Transfer Labware command to move the labware to the barcode<br />
scanner (the barcode scanner carrier attribute “on-the-fly” instructs <strong>Freedom</strong><br />
<strong>EVOware</strong> not to release the labware at this position); see 15.59 “Transfer<br />
Labware Command”, 15-143;<br />
• Add the Barcode Scanner - ReadBarcode command to your script;<br />
• Use the Transfer Labware command to move the labware from the barcode<br />
scanner to the required destination position.<br />
Tab. 13-12 Commands for the Barcode Scanner<br />
Read Barcode - The Read Barcode command is used to read barcodes from the labware<br />
or tube which is presented to the barcode scanner by the RoMa. See<br />
16.2.1 “Barcode Scanner - Read Barcode Command”, 16-2.<br />
13 - 12 <strong>Freedom</strong> <strong>EVOware</strong> <strong>Software</strong> <strong>Manual</strong>, 393172, en, V<strong>2.3</strong>
13 - Overview of <strong>Freedom</strong> <strong>EVOware</strong> Commands<br />
Overview of Device Commands<br />
13.2.2 Commands for the Carousel, Overview<br />
The following table lists the commands for the Carousel. The commands<br />
PresentPlate, ReturnPlate, MoveToCartridge and EndAccess are only relevant for<br />
<strong>Freedom</strong> <strong>EVOware</strong> <strong>Standard</strong>. These actions are handled automatically in<br />
<strong>Freedom</strong> <strong>EVOware</strong> Plus.<br />
PresentPlateByBarcode, ReturnPlateByBarcode and PreReturnPlateByBC are<br />
also only available in <strong>Freedom</strong> <strong>EVOware</strong> <strong>Standard</strong>. In <strong>Freedom</strong> <strong>EVOware</strong> Plus,<br />
you should use the Use barcode file option in the Runtime Controller instead (see<br />
12.2 “Running and Optimizing a Process (<strong>Freedom</strong> <strong>EVOware</strong> Plus)”, 12-5).<br />
Tab. 13-13 Commands for the Carousel<br />
PresentPlate - The PresentPlate command gets labware from the carousel. The labware<br />
is brought to the carousel transfer position where the plate robot can pick it up<br />
and move it away. See 16.3.1 “Carousel - PresentPlate Command”, 16-2.<br />
PreReturnPlateByBC - The PreReturnPlateByBC command moves the carousel’s<br />
plate handler to the carousel transfer position where it waits for the RoMa to bring the<br />
labware which you want to return to the carousel. It is used together with the Return-<br />
PlateByBarcode command. See 16.3.2 “Carousel - PreReturnPlateByBC Command”,<br />
16-3.<br />
ReturnPlate - The ReturnPlate command returns labware from the carousel transfer<br />
position to the specified tower and position in the carousel. See 16.3.3 “Carousel -<br />
ReturnPlate Command”, 16-3.<br />
ReturnPlateByBarcode - The ReturnPlateByBarcode command returns labware<br />
from the carousel transfer position to its original position in the carousel. See<br />
16.3.4 “Carousel - ReturnPlateByBarcode Command”, 16-4.<br />
ReadAllBarcodes - The ReadAllBarcodes command reads the barcodes of all of labware<br />
in the carousel. See 16.3.5 “Carousel - ReadAllBarcodes command”, 16-5.<br />
InitCarousel - The InitCarousel command initializes the carousel. This needs to be<br />
executed before the carousel is first used in a process or script. See 16.3.6 “Carousel<br />
- InitCarousel Command”, 16-5.<br />
MoveToCartridge - The MoveToCartridge command rotates the carousel to a specified<br />
tower. See 16.3.7 “Carousel - MoveToCartridge Command”, 16-5.<br />
EndAccess - The EndAccess command completes the current carousel movement.<br />
This command is necessary after each PresentPlate, PresentPlateByBarcode and<br />
ReturnPlate command. See 16.3.8 “Carousel - EndAccess Command”, 16-6.<br />
ReadPlatesInCartridge - The ReadPlatesInCartridge command reads the barcodes<br />
of all of the labware in the specified cartridge (tower) of the carousel. See<br />
16.3.9 “Carousel - ReadPlatesInCartridge Command”, 16-6.<br />
PresentPlateByBarcode - The PresentPlateByBarcode command gets the labware<br />
with the specified barcode from the carousel. The labware is brought to the carousel<br />
transfer position where the plate robot can pick it up and move it away. See<br />
16.3.10 “Carousel - PresentPlateByBarcode Command”, 16-7.<br />
LoadBCFromFile - The LoadBCFromFile command reads a list of barcodes from a<br />
text file and assigns them to labware in the carousel. See 16.3.13 “Carousel - LoadB-<br />
CFromFile Command”, 16-8.<br />
<strong>Freedom</strong> <strong>EVOware</strong> <strong>Software</strong> <strong>Manual</strong>, 393172, en, V<strong>2.3</strong> 13 - 13
13 - Overview of <strong>Freedom</strong> <strong>EVOware</strong> Commands<br />
Overview of Device Commands<br />
13.<strong>2.3</strong> Commands for the Carousel NT, Overview<br />
The following table lists the commands for the Carousel NT. The commands<br />
PresentPlate, ReturnPlate and MoveToCartridge are only available in <strong>Freedom</strong><br />
<strong>EVOware</strong> <strong>Standard</strong>. These actions are handled automatically in <strong>Freedom</strong><br />
<strong>EVOware</strong> Plus.<br />
PresentPlateByBC and ReturnPlateByBC are also only available in <strong>Freedom</strong><br />
<strong>EVOware</strong> <strong>Standard</strong>. In <strong>Freedom</strong> <strong>EVOware</strong> Plus, you should use the Use barcode<br />
file option in the Runtime Controller instead (see 12.2 “Running and Optimizing a<br />
Process (<strong>Freedom</strong> <strong>EVOware</strong> Plus)”, 12-5).<br />
PrePesentPlate and UndoPrePesentPlate are not relevant for (and not available<br />
in) <strong>Freedom</strong> <strong>EVOware</strong> <strong>Standard</strong>.<br />
Tab. 13-14 Commands for the Carousel NT<br />
OpenDoorlock - The OpenDoorlock command unlocks the doorlocks of the carousel<br />
safety door. See 16.4.1 “Carousel NT - OpenDoorlock command”, 16-9.<br />
CloseDoorlock- The CloseDoorlock command locks the doorlocks of the carousel<br />
safety door. See 16.4.2 “Carousel NT - CloseDoorlock command”, 16-9.<br />
VerifyCartridges - The VerifyCartridges command is used to check that the correct<br />
cartridge types have been loaded in the carousel. See 16.4.3 “Carousel NT - Verify-<br />
Cartridges command”, 16-9.<br />
ScanAllCartridges - The ScanAllCartridges command reads the barcodes of all of<br />
labware in the carousel. See 16.3.5 “Carousel - ReadAllBarcodes command”, 16-5.<br />
ScanCartridge - The ScanCartridge command reads the barcodes of all labware in<br />
the specified cartridge (tower) of the carousel. See 16.4.5 “Carousel NT - ScanCartridge<br />
Command”, 16-10.<br />
ScanLocation - The ScanLocation command reads the barcodes of all of the labware<br />
in the specified logical carousel. See 16.4.6 “Carousel NT - ScanLocation Command”,<br />
16-10.<br />
PresentPlate - The PresentPlate command gets labware from the carousel. The labware<br />
is brought to the carousel transfer position where the plate robot can pick it up<br />
and move it away. See 16.4.7 “Carousel NT - PresentPlate Command”, 16-11.<br />
ReturnPlate - The ReturnPlate command returns labware from the carousel transfer<br />
position to the specified tower and position in the carousel. See 16.4.8 “Carousel NT -<br />
ReturnPlate Command”, 16-12.<br />
PresentPlateByBC - The PresentPlateByBC command gets the labware with the<br />
specified barcode from the carousel. The labware is brought to the carousel transfer<br />
position where the plate robot can pick it up and move it away. See 16.4.9 “Carousel<br />
NT - PresentPlateByBC Command”, 16-13.<br />
ReturnPlateByBC - The ReturnPlateByBC command returns labware from the carousel<br />
transfer position to its original position in the carousel. See 16.4.10 “Carousel<br />
NT - ReturnPlateByBC Command”, 16-14.<br />
13 - 14 <strong>Freedom</strong> <strong>EVOware</strong> <strong>Software</strong> <strong>Manual</strong>, 393172, en, V<strong>2.3</strong>
13 - Overview of <strong>Freedom</strong> <strong>EVOware</strong> Commands<br />
Overview of Device Commands<br />
Tab. 13-14 Commands for the Carousel NT (cont.)<br />
MoveToCartridge - The MoveToCartridge command rotates the carousel to a specified<br />
tower. See 16.4.11 “Carousel NT - MoveToCartridge Command”, 16-14.<br />
PrePresentPlate - The PrePresentPlate command moves the next labware item to<br />
be processed to the carousel transfer position where it can be picked up by the robot<br />
during idle time. The robot then does not have to wait for the labware to be presented.<br />
This optimizes the movement times for the carousel. See 16.4.14 “Carousel NT -<br />
PrePresentPlate Command”, 16-15.<br />
UndoPrePresent - The UndoPrePresent command cancels the pre-unloading of<br />
plates. See 16.4.15 “Carousel NT - UndoPrePresent Command”, 16-16.<br />
LoadBCFromFile - The LoadBCFromFile command reads a list of barcodes from a<br />
text file and assigns them to labware in the carousel. See 16.4.16 “Carousel NT -<br />
LoadBCFromFile Command”, 16-16.<br />
13.2.4 Commands for the Hettich Centrifuge, Overview<br />
The following table lists the commands for the Hettich Centrifuge. The commands<br />
Execute2, Execute3 and Execute4 are only available in <strong>Freedom</strong> <strong>EVOware</strong> Plus.<br />
In <strong>Freedom</strong> <strong>EVOware</strong> <strong>Standard</strong>, plates are loaded into the carousel using RoMa<br />
movement commands. For example, use two RoMa movement commands to load<br />
two plates.<br />
In <strong>Freedom</strong> <strong>EVOware</strong> Plus, plate loading/unloading is handled automatically by<br />
the Execute command.<br />
Tab. 13-15 Commands for the Hettich Centrifuge<br />
Init - The Init command initializes the centrifuge. This needs to be done before the<br />
device is first used in a script or process. See 16.5.1 “Hettich Centrifuge - Init Command”,<br />
16-16.<br />
Open - The Open command opens the door of the centrifuge. See 16.5.2 “Hettich<br />
Centrifuge - Open Command”, 16-17.<br />
Close - The Close command closes the door of the centrifuge. See 16.5.3 “Hettich<br />
Centrifuge - Close Command”, 16-17.<br />
Execute1 - The Execute1 command performs the rotation procedure with one rotor<br />
position of the device occupied by labware. After the plates have been placed into the<br />
device and the door closed, the centrifuge will start rotating with the specified parameters.<br />
See 16.5.4 “Hettich Centrifuge - ExecuteN Command”, 16-17.<br />
<strong>Freedom</strong> <strong>EVOware</strong> <strong>Software</strong> <strong>Manual</strong>, 393172, en, V<strong>2.3</strong> 13 - 15
13 - Overview of <strong>Freedom</strong> <strong>EVOware</strong> Commands<br />
Overview of Device Commands<br />
Tab. 13-15 Commands for the Hettich Centrifuge (cont.)<br />
Execute2 - The Execute2 command performs the rotation procedure with two rotor<br />
positions of the device occupied by labware. After the plates have been placed into<br />
the device and the door closed, the centrifuge will start rotating with the specified<br />
parameters. See 16.5.4 “Hettich Centrifuge - ExecuteN Command”, 16-17.<br />
Execute3 - The Execute3 command performs the rotation procedure with three rotor<br />
positions of the device occupied by labware. After the plates have been placed into<br />
the device and the door closed, the centrifuge will start rotating with the specified<br />
parameters. See 16.5.4 “Hettich Centrifuge - ExecuteN Command”, 16-17.<br />
Execute4 - The Execute4 command performs the rotation procedure with four rotor<br />
positions of the device occupied by labware. After the plates have been placed into<br />
the device and the door closed, the centrifuge will start rotating with the specified<br />
parameters. See 16.5.4 “Hettich Centrifuge - ExecuteN Command”, 16-17.<br />
MoveToPos - The MoveToPos command slowly turns the centrifuge rotor to align the<br />
specified bucket (rotor position) with the transfer position. After opening the door, the<br />
labware can then be removed or inserted using the RoMa. See 16.5.5 “Hettich Centrifuge<br />
- MoveToPos Command”, 16-18.<br />
13.2.5 Commands for the Columbus Washer, Overview<br />
The following table lists the commands for the Columbus Washer. The Status<br />
command is only available in <strong>Freedom</strong> <strong>EVOware</strong> Plus.<br />
Tab. 13-16 Commands for the Columbus Washer<br />
WashPlate - The WashPlate command performs the washing of a microplate. See<br />
16.6.1 “Columbus Washer - WashPlate command”, 16-19.<br />
Prime - Before the washer is used, all dispensing channels needed for the wash step<br />
must be primed to fill the liquid system with the required liquid. The Prime command<br />
starts the priming procedure. See 16.6.2 “Columbus Washer - Prime Command”,<br />
16-22.<br />
Rinse - The Rinse command starts the rinsing procedure of the washer to flush the<br />
liquid system and prevent needle blockages. Rinsing should be performed when the<br />
device is left in standby or is switched off at the end of use. See 16.6.3 “Columbus<br />
Washer- Rinse Command”, 16-23.<br />
Remote - The Remote command switches the device from local mode to remote<br />
mode. The device can only be controlled remotely by <strong>Freedom</strong> <strong>EVOware</strong> (through the<br />
interface cable) in remote mode. See 16.6.4 “Columbus Washer - Remote Command”,<br />
16-24.<br />
ExitRemote - The ExitRemote command switches the device from remote mode to<br />
local mode. The device can not be controlled remotely by <strong>Freedom</strong> <strong>EVOware</strong><br />
(through the interface cable) in local mode. See 16.6.5 “Columbus Washer - ExitRemote<br />
Command”, 16-24.<br />
Status - The Status command interrogates the status of the Columbus washer. See<br />
16.6.6 “Columbus Washer - Status Command”, 16-24.<br />
Init - The Init command initializes the washer. This must be done before the washer is<br />
first used in a script or process. See 16.6.7 “Columbus Washer - Init Command”,<br />
16-24.<br />
13 - 16 <strong>Freedom</strong> <strong>EVOware</strong> <strong>Software</strong> <strong>Manual</strong>, 393172, en, V<strong>2.3</strong>
13 - Overview of <strong>Freedom</strong> <strong>EVOware</strong> Commands<br />
Overview of Device Commands<br />
Tab. 13-16 Commands for the Columbus Washer (cont.)<br />
StopRinse - The StopRinse command stops the currently running rinsing procedure.<br />
See 16.6.8 “Columbus Washer - StopRinse Command”, 16-25.<br />
StartProg - The StartProg command starts a washing program which is stored in the<br />
Columbus washer. The washer is capable of storing up to 30 user-definable washing<br />
programs. See 16.6.9 “Columbus Washer - StartProg Command”, 16-25.<br />
WashPlateEx - The WashPlateEx command performs the washing of a microplate.<br />
Information on the channels (liquid containers) to use with this command is read from<br />
an external text file. The washer is capable of storing up to 30 user-definable washing<br />
programs. See 16.6.10 “Columbus Washer - WashPlateEx Command”, 16-26.<br />
DisableAutoPrime - The DisableAutoPrime command disables the auto-priming<br />
function for the Columbus washer. Auto-priming is configured in the Columbus driver<br />
settings. See 16.6.11 “Columbus Washer - DisableAutoPrime Command”, 16-29.<br />
AllowAutoPrime - The AllowAutoPrime command activates the auto-priming function<br />
for the Columbus washer. Auto-priming is configured in the Columbus driver settings.<br />
See 16.6.12 “Columbus Washer - AllowAutoPrime Command”, 16-29.<br />
13.2.6 Commands for the FlaskFlipper, Overview<br />
The following table lists the commands for the FlaskFlipper.<br />
Tab. 13-17 Commands for the FlaskFlipper<br />
ExecuteScript - The ExecuteScript command is used to execute commands for the<br />
FlaskFlipper. Most of the functions can also be executed using the other FlaskFlipper<br />
commands. See 16.7.1 “FlaskFlipper - ExecuteScript Command”, 16-30.<br />
LoadUnloadFlask - The LoadUnloadFlask command turns the flask flipper to the<br />
horizontal position and opens the flask holding mechanism. In this position, you can<br />
load (insert) or unload (remove) flasks using the plate robot (RoMa) or AutoLoader.<br />
See 16.7.2 “FlaskFlipper - LoadUnloadFlask Command”, 16-30.<br />
PrepareForPipette - The PrepareForPipette command closes the flask holding<br />
mechanism and turns the flask flipper to the vertical position. In this position, you can<br />
pipette into the flasks through the septum in the screw cap using the liquid handling<br />
arm (LiHa). See 16.7.3 “FlaskFlipper - PrepareForPipette Command”, 16-31.<br />
Shake - The Shake command is used to shake the flasks in the flask flipper for the<br />
purpose of distributing and mixing liquids. This is done by alternately rocking the flask<br />
flipper clockwise and counterclockwise with the specified shaking amplitude and<br />
acceleration. See 16.7.4 “FlaskFlipper - Shake Command”, 16-31.<br />
Knock - The Knock command moves the flask flipper to the horizontal position and<br />
knocks the flasks using a spring-loaded mechanism. This is done to detach the cell<br />
culture from the inner wall of a flask when the culture is fully grown. See<br />
16.7.5 “FlaskFlipper - Knock Command”, 16-32.<br />
13.2.7 Commands for the GENios Reader, Overview<br />
The following table lists the commands for the GENios Reader. The Status<br />
command is only available in <strong>Freedom</strong> <strong>EVOware</strong> Plus.<br />
<strong>Freedom</strong> <strong>EVOware</strong> <strong>Software</strong> <strong>Manual</strong>, 393172, en, V<strong>2.3</strong> 13 - 17
13 - Overview of <strong>Freedom</strong> <strong>EVOware</strong> Commands<br />
Overview of Device Commands<br />
Tab. 13-18 Commands for the GENios Reader<br />
Status - The Status command interrogates the status of the reader. See<br />
16.8.1 “GENios Reader - Status Command”, 16-33.<br />
Excitation Out - The Excitation Out command moves the excitation filter slide out of<br />
the reader to allow the filters to be removed or exchanged. See 16.8.2 “GENios<br />
Reader - Excitation Out Command”, 16-33.<br />
Emission Out - The Emission Out command moves the emission filter slide out of the<br />
reader to allow the filters to be removed or exchanged. See 16.8.3 “GENios Reader -<br />
Emission Out Command”, 16-33.<br />
Open - The Open command opens the door of the reader. See 16.8.4 “GENios<br />
Reader - Open Command”, 16-33.<br />
Close - The Close command closes the door of the reader. See 16.8.5 “GENios<br />
Reader - Close Command”, 16-33.<br />
Measure - The Measure command performs a measurement procedure using external<br />
software which is controlled by external software. See 16.8.6 “GENios Reader -<br />
Measure Command”, 16-34.<br />
Multilabel - The Multilabel command performs up to four consecutive measurement<br />
steps on the same plate using external software. The plate does not have to leave the<br />
reader in between measurements. See 16.8.7 “GENios Reader - Multilabel Command”,<br />
16-34.<br />
13.2.8 Commands for the GENios Pro Reader, Overview<br />
The following table lists the commands for the GENios Pro Reader. The Status<br />
command is only available in <strong>Freedom</strong> <strong>EVOware</strong> Plus.<br />
Tab. 13-19 Commands for the GENios Pro Reader<br />
Status - The Status command interrogates the status of the reader. See<br />
16.9.1 “GENios Pro Reader - Status Command”, 16-36.<br />
Excitation Out - The Excitation Out command moves the excitation filter slide out of<br />
the reader to allow the filters to be removed or exchanged. See 16.9.2 “GENios Pro<br />
Reader - Excitation Out Command”, 16-36.<br />
Emission Out - The Emission Out command moves the emission filter slide out of the<br />
reader to allow the filters to be removed or exchanged. See 16.9.3 “GENios Pro<br />
Reader - Emission Out Command”, 16-36.<br />
Open - The Open command opens the door of the reader. See 16.9.4 “GENios Pro<br />
Reader - Open Command”, 16-37.<br />
Close - The Close command closes the door of the reader. See 16.9.5 “GENios Pro<br />
Reader - Close Command”, 16-37.<br />
13 - 18 <strong>Freedom</strong> <strong>EVOware</strong> <strong>Software</strong> <strong>Manual</strong>, 393172, en, V<strong>2.3</strong>
13 - Overview of <strong>Freedom</strong> <strong>EVOware</strong> Commands<br />
Overview of Device Commands<br />
Tab. 13-19 Commands for the GENios Pro Reader (cont.)<br />
Measure - The Measure command performs a measurement procedure using external<br />
software. See 16.9.6 “GENios Pro Reader - Measure Command”, 16-37.<br />
Multilabel - The Multilabel command performs up to four consecutive measurement<br />
steps on the same plate using external software. The plate does not have to leave the<br />
reader in between measurements. See 16.9.7 “GENios Pro Reader - Multilabel Command”,<br />
16-38.<br />
Prime<strong>Manual</strong> - The Prime<strong>Manual</strong> command executes the priming procedure, which<br />
fills the injectors with fluid, if the reader is equipped with the injector option. See<br />
16.9.8 “GENios Pro Reader - Prime<strong>Manual</strong> Command”, 16-39.<br />
Dispense<strong>Manual</strong> - The Dispense<strong>Manual</strong> command dispenses fluid from the injectors,<br />
if the reader is equipped with the injector option. See 16.9.9 “GENios Pro<br />
Reader - Dispense<strong>Manual</strong> Command”, 16-39.<br />
13.2.9 Commands for the Heated Incubator, Overview<br />
The following table lists the commands for the Heated Incubator. <strong>Freedom</strong><br />
<strong>EVOware</strong> in the standard configuration lets you configure up to three logical<br />
incubators, each of them with a different temperature (see 8.5.8 “Settings for<br />
Heated Incubators 1 to 3”, 8-55).<br />
Use the Duplicate Device tool if you need more than three (see A.9.3 “Duplicate<br />
Device Tool”, A-36).<br />
The commands CloseDoor, StartShaker, StopShaker, InsertPlate and<br />
RemovePlate are only available in <strong>Freedom</strong> <strong>EVOware</strong> <strong>Standard</strong>. Plates are<br />
loaded into the incubator using RoMa movement commands. Use the Wait For<br />
Timer command to control the incubating time.<br />
Use the Incubate command instead in <strong>Freedom</strong> <strong>EVOware</strong> Plus (the Incubate<br />
command handles all of these actions, including incubating time and plate<br />
loading/unloading, automatically).<br />
Tab. 13-20 Commands for the Heated Incubator<br />
Incubate - The Incubate command incubates the labware inside the incubator for the<br />
specified amount of time. See 16.10.1 “Heated Incubator - Incubate Command”,<br />
16-40.<br />
SetTemperature - The SetTemperature command sets the specified slot of the incubator<br />
to the chosen temperature. See 16.10.7 “Heated Incubator - SetTemperature<br />
Command”, 16-43.<br />
CloseDoor- The CloseDoor command closes all of the doors of the incubator. To<br />
maintain a constant temperature within the incubator, it is best to close the doors<br />
again directly after inserting or removing labware. See 16.10.2 “Heated Incubator -<br />
CloseDoor Command”, 16-40.<br />
<strong>Freedom</strong> <strong>EVOware</strong> <strong>Software</strong> <strong>Manual</strong>, 393172, en, V<strong>2.3</strong> 13 - 19
13 - Overview of <strong>Freedom</strong> <strong>EVOware</strong> Commands<br />
Overview of Device Commands<br />
Tab. 13-20 Commands for the Heated Incubator (cont.)<br />
StartShaker - The StartShaker command starts the optional shaker of the incubator.<br />
See 16.10.3 “Heated Incubator - StartShaker Command”, 16-41.<br />
StopShaker - The StopShaker command stops the optional shaker of the incubator.<br />
See 16.10.4 “Heated Incubator - StopShaker Command”, 16-41.<br />
InsertPlate - The InsertPlate command must be used each time the RoMa inserts<br />
labware into the incubator slot. The InsertPlate command itself does not move the<br />
labware. It’s purpose is to regulate the power of the slot’s heater. See 16.10.5 “Heated<br />
Incubator - InsertPlate Command”, 16-41.<br />
RemovePlate - The RemovePlate command must be used each time the RoMa<br />
removes labware from the incubator slot. The RemovePlate command itself does not<br />
move the labware. It’s purpose is to tell <strong>Freedom</strong> <strong>EVOware</strong> to stop recording information<br />
on the slot temperature to the log file. See 16.10.6 “Heated Incubator - Remove-<br />
Plate Command”, 16-42.<br />
13.2.10 Commands for the Base Incubator, Overview<br />
The following table lists the command for the Base Incubator. The Base Incubator<br />
is a software concept and it is not a device which you can fit to your pipetting<br />
instrument. This command is not necessary in <strong>Freedom</strong> <strong>EVOware</strong> <strong>Standard</strong>.<br />
Tab. 13-21 Commands for the Base Incubator<br />
BaseIncubate - The BaseIncubate command moves the labware back to its base<br />
(labware source) position (e.g. the carousel) and leaves it there at room temperature<br />
for the specified amount of time. The base incubator is a software concept and it is not<br />
a device which you can fit to your pipetting instrument. See 16.11.1 “Base Incubator -<br />
BaseIncubate Command”, 16-44.<br />
13.2.11 Commands for the Room Temperature Incubator, Overview<br />
The following table lists the command for the Room Temperature Incubator, which<br />
is only available in <strong>Freedom</strong> <strong>EVOware</strong> Plus. The Incubate command handles<br />
incubating time and plate loading/unloading automatically.<br />
This command is not available in <strong>Freedom</strong> <strong>EVOware</strong> <strong>Standard</strong>. The labware is<br />
loaded into the room temperature incubator using RoMa movement commands.<br />
The incubating time can then be controlled by the Wait For Timer command.<br />
Tab. 13-22 Commands for the Room Temperature Incubator<br />
Incubate - The Incubate command keeps the labware at room temperature for the<br />
specified amount of time. See 16.12.1 “Room Temperature Incubator - Incubate Command”,<br />
16-45.<br />
13.2.12 Commands for the Liquid Handling Arm (LiHa), Overview<br />
The following table lists the device commands for the Liquid Handling Arm (LiHa).<br />
These commands are only available in <strong>Freedom</strong> <strong>EVOware</strong> Plus. They are not<br />
13 - 20 <strong>Freedom</strong> <strong>EVOware</strong> <strong>Software</strong> <strong>Manual</strong>, 393172, en, V<strong>2.3</strong>
13 - Overview of <strong>Freedom</strong> <strong>EVOware</strong> Commands<br />
Overview of Device Commands<br />
necessary in <strong>Freedom</strong> <strong>EVOware</strong> <strong>Standard</strong> - all of the required functions are<br />
provided by the Liquid Handling Arm script commands.<br />
Tab. 13-23 Commands for the Liquid Handling Arm (LiHa)<br />
Flush RSP - The Flush RSP command uses a wash station to flush the dilutors and<br />
the tubing of the pipetting instrument (fill them with system liquid) and to flush and<br />
wash the tips on the LiHa. It is mainly intended as a service function. See<br />
16.13.1 “Liquid Handling Arm - Flush RSP Command”, 16-46.<br />
Pipette - The Pipette command is used to create a pipetting script. When you drag it<br />
to the Process Editor, it opens the Script Editor automatically. See 16.13.2 “Liquid<br />
Handling Arm - Pipette Command”, 16-47. See also 11.4.2 “Creating a Pipetting<br />
Script”, 11-5.<br />
13.2.13 Commands for the Multi Channel Arm (MCA) Overview<br />
The following table lists the device commands for the Multi Channel Arm (MCA).<br />
These commands are only available in <strong>Freedom</strong> <strong>EVOware</strong> Plus. They are not<br />
necessary in <strong>Freedom</strong> <strong>EVOware</strong> <strong>Standard</strong> - all of the required functions are<br />
provided by the Multi Channel Arm script commands.<br />
Tab. 13-24 Commands for the Multi Channel Arm (MCA)<br />
Pipette - The Pipette command is used to create a pipetting script. When you drag it<br />
to the Process Editor, it opens the Script Editor automatically. See 16.14.1 “MCA96 -<br />
Pipette Command”, 16-48. See also 11.4.2 “Creating a Pipetting Script”, 11-5.<br />
13.2.14 Commands for the MCA384 (Multi Channel Arm) Overview<br />
The following table lists the device commands for the Multi Channel Arm (MCA).<br />
These commands are only available in <strong>Freedom</strong> <strong>EVOware</strong> Plus. They are not<br />
necessary in <strong>Freedom</strong> <strong>EVOware</strong> <strong>Standard</strong> - all of the required functions are<br />
provided by the Multi Channel Arm script commands.<br />
Tab. 13-25 Commands for the MCA384 (Multi Channel Arm)<br />
Pipette - The Pipette command is used to create a pipetting script. When you drag it<br />
to the Process Editor, it opens the Script Editor automatically. See 16.14.1 “MCA96 -<br />
Pipette Command”, 16-48. See also 11.4.2 “Creating a Pipetting Script”, 11-5.<br />
13.2.15 Commands for the Magellan option, Overview<br />
The following table lists the <strong>Freedom</strong> <strong>EVOware</strong> commands for the Tecan<br />
Magellan option, which must be installed separately. The Magellan software is<br />
used to control microplate readers (e.g. photometers) and to carry out data<br />
analysis using stored procedures. The Status command is only available in<br />
<strong>Freedom</strong> <strong>EVOware</strong> Plus.<br />
<strong>Freedom</strong> <strong>EVOware</strong> <strong>Software</strong> <strong>Manual</strong>, 393172, en, V<strong>2.3</strong> 13 - 21
13 - Overview of <strong>Freedom</strong> <strong>EVOware</strong> Commands<br />
Overview of Device Commands<br />
Tab. 13-26 Commands for the Magellan option<br />
Status - The Status command interrogates the status of the reader. See<br />
16.16.1 “Magellan - Status Command”, 16-48.<br />
Excitation Out - The Excitation Out command moves the excitation filter slide out of<br />
the reader to allow the filters to be removed or exchanged. See 16.16.2 “Magellan -<br />
Excitation Out Command”, 16-49.<br />
Emission Out - The Emission Out command moves the emission filter slide out of the<br />
reader to allow the filters to be removed or exchanged. See 16.16.3 “Magellan - Emission<br />
Out Command”, 16-49.<br />
Open - The Open command opens the door of the currently active reader. See<br />
16.16.4 “Magellan - Open Command”, 16-49.<br />
Close - The Close command closes the door of the currently active reader. See<br />
16.16.5 “Magellan - Close Command”, 16-49.<br />
Measure - The Measure command performs a measurement procedure using the<br />
Magellan software. See 16.16.6 “Magellan - Measure Command”, 16-49.<br />
13.2.16 Commands for the PW384 Washer, Overview<br />
The following table lists the commands for the PW384 Washer. The Status<br />
command is only available in <strong>Freedom</strong> <strong>EVOware</strong> Plus.<br />
Tab. 13-27 Commands for the PW384 Washer<br />
Status - The Status command interrogates the status of the washer. See<br />
16.17.1 “PW384 Washer - Status Command”, 16-52.<br />
Prime - Before the washer is used, all dispensing channels needed for the wash step<br />
must be primed to fill the liquid system with the required liquid. The Prime command<br />
starts the priming procedure. See 16.17.2 “PW384 Washer - Prime Command”, 16-<br />
52.<br />
Rinse - The Rinse command starts the rinsing procedure of the washer to flush the<br />
liquid system. See 16.17.3 “PW384 Washer - Rinse Command”, 16-52.<br />
Wash - The Wash command performs the washing of a microplate by executing a<br />
wash program which is stored in the washer. See 16.17.4 “PW384 Washer - Wash<br />
Command”, 16-52.<br />
Stop - The Stop command stops the washing procedure. See 16.17.5 “PW384<br />
Washer - Stop Command”, 16-53.<br />
PrepareEmptyWaste - The PrepareEmptyWaste command collapses the vacuum in<br />
the waste bottle to allow it to be emptied. This needs to be done whenever the<br />
washer’s liquid detection indicates that the waste bottle is full. See 16.17.6 “PW384<br />
Washer - PrepareEmptyWaste Command”, 16-53.<br />
13.2.17 Commands for the PW384 GP Washer, Overview<br />
The following table lists the commands for the PW384 GP Washer.<br />
13 - 22 <strong>Freedom</strong> <strong>EVOware</strong> <strong>Software</strong> <strong>Manual</strong>, 393172, en, V<strong>2.3</strong>
13 - Overview of <strong>Freedom</strong> <strong>EVOware</strong> Commands<br />
Overview of Device Commands<br />
Tab. 13-28 Commands for the PW384 GP Washer<br />
Aspirate - The Aspirate command starts the aspiration procedure of the washer. It is<br />
mainly intended for special applications, e.g. to remove sample or reagent liquids<br />
from the wells. See 16.18.1 “PW384GP Washer - Aspirate Command”, 16-54.<br />
Dispense - The Dispense command starts the liquid dispensing procedure of the<br />
washer. It is mainly intended for special applications, e.g. to fill the wells with liquid.<br />
See 16.18.2 “PW384GP Washer - Dispense Command”, 16-55.<br />
Prime - Before the washer is used, all dispensing channels needed for the wash step<br />
must be primed to fill the liquid system with the required liquid. The Prime command<br />
starts the priming procedure. See 16.18.3 “PW384GP Washer - Prime Command”,<br />
16-57.<br />
Rinse - The Rinse command starts the rinsing procedure of the washer to flush the<br />
liquid system. See 16.18.4 “PW384GP Washer - Rinse Command”, 16-57.<br />
Stop - The Stop command stops the washing procedure. See 16.18.5 “PW384GP<br />
Washer - Stop Command”, 16-58.<br />
PrepareEmptyWaste - The PrepareEmptyWaste command collapses the vacuum in<br />
the waste bottle to allow it to be emptied. This needs to be done whenever the<br />
washer’s liquid detection indicates that the waste bottle is full. See<br />
16.18.6 “PW384GP Washer - PrepareEmptyWaste Command”, 16-59.<br />
DownloadWash - The PW384GP washer can store parameter sets for up to 49 different<br />
wash programs. The DownloadWash command is used to configure a wash program<br />
and download it to non-volatile memory in the washer. The stored wash<br />
program can then be executed with the StartWash command. See<br />
16.18.7 “PW384GP Washer - DownloadWash Command”, 16-59.<br />
StartWash - The PW384GP washer can store parameter sets for up to 49 different<br />
wash programs. The StartWash command is used to execute one of the stored wash<br />
programs. See 16.18.8 “PW384GP Washer - StartWash Command”, 16-62.<br />
Wash - The Wash command performs the washing of a microplate with specified<br />
parameters such as wash volume and aspiration time. See 16.18.9 “PW384GP<br />
Washer - Wash Command”, 16-62.<br />
13.2.18 Commands for the 96PW Washer, Overview<br />
The following table lists the commands for the 96PW washer. The Status<br />
command is only available in <strong>Freedom</strong> <strong>EVOware</strong> Plus.<br />
<strong>Freedom</strong> <strong>EVOware</strong> <strong>Software</strong> <strong>Manual</strong>, 393172, en, V<strong>2.3</strong> 13 - 23
13 - Overview of <strong>Freedom</strong> <strong>EVOware</strong> Commands<br />
Overview of Device Commands<br />
Tab. 13-29 Commands for the 96PW washer<br />
WashPlate - The WashPlate command performs the washing of a microplate with<br />
specified parameters such as wash volume and aspiration time. See 16.19.1 “96PW<br />
Washer - WashPlate Command”, 16-66.<br />
Dispense - The Dispense command starts the liquid dispensing procedure of the<br />
washer. It is mainly intended for special applications, e.g. to fill the wells with liquid.<br />
See 16.19.2 “96PW Washer - Dispense Command”, 16-67.<br />
Aspirate - The Aspirate command starts the aspiration procedure of the washer. It is<br />
mainly intended for special applications, e.g. to remove sample or reagent liquids<br />
from the wells. See 16.19.3 “96PW Washer - Aspirate Command”, 16-68.<br />
Prime - Before the washer is used, all dispensing channels needed for the wash step<br />
must be primed to fill the liquid system with the required liquid. The Prime command<br />
starts the priming procedure. See 16.19.4 “96PW Washer - Prime Command”, 16-<br />
68.<br />
Rinse - The Rinse command starts the rinsing procedure of the washer to flush the<br />
liquid system. See 16.19.5 “96PW Washer - Rinse Command”, 16-69.<br />
Remote - The Remote command switches the device from local mode to remote<br />
mode. The device can only be controlled remotely by <strong>Freedom</strong> <strong>EVOware</strong> (through the<br />
interface cable) in remote mode. See 16.19.6 “96PW Washer - Remote Command”,<br />
16-69.<br />
ExitRemote - The ExitRemote command switches the device from remote mode to<br />
local mode. The device can not be controlled remotely by <strong>Freedom</strong> <strong>EVOware</strong><br />
(through the interface cable) in local mode. See 16.19.7 “96PW Washer - ExitRemote<br />
Command”, 16-70.<br />
Status - The Status command interrogates the status of the washer. See<br />
16.19.8 “96PW Washer - Status Command”, 16-70.<br />
13.2.19 Commands for the PosID-3, Overview<br />
The following table lists the command for the PosID-3 movable barcode scanner.<br />
The PosID (the previous version of the PosID-3 hardware) uses script commands<br />
instead of device commands. If your pipetting instrument is fitted with the PosID<br />
instead of the PosID-3, the PosID group of the Control Bar will not contain any<br />
commands. The PosID script commands can be found in the Identification<br />
Devices group.<br />
Tab. 13-30 Commands for the PosID-3<br />
Initialize - The Initialize command initializes the PosID-3. This needs to be done<br />
before the PosID-3 is first used in a script or process. See 16.20.1 “PosID-3 - Initialize<br />
Command”, 16-70.<br />
Scan - The Scan command is used to read the barcode labels on one or more pieces<br />
of labware using the PosID-3 option. The PosID-3 (Positive Identification System) is a<br />
movable barcode scanner which can be used to read the barcode labels on carriers,<br />
labware and tubes. See 16.20.2 “PosID-3 - Scan Command”, 16-70.<br />
13 - 24 <strong>Freedom</strong> <strong>EVOware</strong> <strong>Software</strong> <strong>Manual</strong>, 393172, en, V<strong>2.3</strong>
13 - Overview of <strong>Freedom</strong> <strong>EVOware</strong> Commands<br />
Overview of Device Commands<br />
13.2.20 Commands for the REMP PHS, Overview<br />
The following table lists the command for the REMP PHS (Portrait Heat Sealer).<br />
The REMP PHS is used to heat seal microplates using a special REMP sealing<br />
foil.<br />
Tab. 13-31 Commands for the REMP PHS<br />
SealPlate - The SealPlate command applies the sealing foil to the microplate using<br />
heat and pressure. The plate feeder mechanism removes the microplate from the<br />
device again after sealing. See 16.21.1 “REMP PHS - SealPlate Command”, 16-74.<br />
13.2.21 Commands for the REMP Reatrix, Overview<br />
The following table lists the commands for the REMP Reatrix. The REMP Reatrix<br />
is used to scan the 2D tube barcodes and the tube rack barcode of REMP<br />
STBR96 tube racks.<br />
Tab. 13-32 Commands for the REMP Reatrix<br />
Read - The Read command reads the 2D tube barcodes and the tube rack barcode of<br />
the REMP STBR96 tube rack which has been placed on the Reatrix barcode scanner.<br />
See 16.22.1 “REMP Reatrix - Read Command”, 16-76.<br />
Initialize - The Initialize command initializes the REMP Reatrix. This needs to be<br />
done before the REMP Reatrix is first used in a script or process. See 16.22.2 “REMP<br />
Reatrix - Initialize Command”, 16-77.<br />
13.2.22 Commands for the REMP ACD96, Overview<br />
The following table lists the commands for the REMP ACD96 (Automated Capper<br />
Decapper). The REMP ACD96 is used to fit or remove sealing caps from REMP<br />
tubes in REMP STBR96 tube racks.<br />
Tab. 13-33 Commands for the REMP ACD96<br />
Cap - The Cap command fits caps to 96 REMP tubes in the REMP STBR96 tube<br />
rack. Before fitting the caps, they are held by a mechanism inside the ACD96. See<br />
16.23.1 “REMP ACD96 - Cap Command”, 16-78.<br />
Decap - The Decap command removes the caps from 96 REMP tubes in the REMP<br />
STBR96 tube rack. After removing the caps, they are held by a mechanism inside the<br />
ACD96. See 16.23.2 “REMP ACD96 - Decap Command”, 16-78.<br />
13.2.23 Commands for the Tube Robot, Overview<br />
The following table lists the command for the Tube Robot. This device command<br />
is only available in <strong>Freedom</strong> <strong>EVOware</strong> Plus. It is not necessary in <strong>Freedom</strong><br />
<strong>EVOware</strong> <strong>Standard</strong> - all of the required functions are provided by the Tube Robot<br />
script commands.<br />
<strong>Freedom</strong> <strong>EVOware</strong> <strong>Software</strong> <strong>Manual</strong>, 393172, en, V<strong>2.3</strong> 13 - 25
13 - Overview of <strong>Freedom</strong> <strong>EVOware</strong> Commands<br />
Overview of Device Commands<br />
Tab. 13-34 Commands for the Tube Robot<br />
ExecuteScript - The ExecuteScript command is used to write a script for tube handling.<br />
When you drag it to the Process Editor, it opens the Script Editor automatically.<br />
See 16.25.1 “Tube Robot - ExecuteScript Command”, 16-83. See also<br />
11.4.2 “Creating a Pipetting Script”, 11-5.<br />
13.2.24 Commands for the Process Starter, Overview<br />
The following table lists the commands for the Process Starter device driver.<br />
These commands are only available in <strong>Freedom</strong> <strong>EVOware</strong> Plus.<br />
The Start command is available in five versions (Start and StartP1 to StartP4)<br />
depending on the number of labware items required by the processes you want to<br />
start (0 to 4 labware items).<br />
You can only use StartP1 to StartP4 as process steps. The Start command can be<br />
used as a process step or in scripts for the Process Script - Script command. The<br />
WaitForProcess commands can only be used in scripts for the Process Script -<br />
Script command (see 16.39.1 “Process Script - Script Command”, 16-127).<br />
Tab. 13-35 Commands for the Process Starter<br />
Start - The Start command starts a single instance of a specified process when a set<br />
of user-defined conditions are met. You can specify conditions which are based on<br />
database locations and/or on the values of variables. See 16.24.1 “Process Starter -<br />
Start Command”, 16-78.<br />
WaitForProcess - The WaitForProcess script command waits for a specified process<br />
to finish before allowing the pipetting script to continue. See 16.24.2 “Process Starter<br />
- WaitForProcess Command”, 16-82.<br />
13.2.25 Commands for the Plate Robot, Overview<br />
The following table lists the commands for the Plate Robot. These commands are<br />
only available in <strong>Freedom</strong> <strong>EVOware</strong> Plus and are mainly intended for special<br />
applications. Plate Robot (RoMa movement) commands are normally used as<br />
pre-actions and/or post-actions of other commands and are not normally used as<br />
process steps.<br />
in <strong>Freedom</strong> <strong>EVOware</strong> <strong>Standard</strong>, RoMa movements are specified with the script<br />
commands Move RoMa, RoMa Vector and Transfer Labware.<br />
13 - 26 <strong>Freedom</strong> <strong>EVOware</strong> <strong>Software</strong> <strong>Manual</strong>, 393172, en, V<strong>2.3</strong>
13 - Overview of <strong>Freedom</strong> <strong>EVOware</strong> Commands<br />
Overview of Device Commands<br />
Tab. 13-36 Commands for the Plate Robot<br />
ExecuteSingleVector - The ExecuteSingleVector command executes a predefined<br />
movement from one position on the worktable to another (a RoMa vector). See<br />
16.26.1 “Plate Robot - ExecuteSingleVector Command”, 16-84.<br />
Initialize - The Initialize command initializes the plate robot. This needs to be executed<br />
before the robot is first used in a script or process. See 16.26.2 “Plate Robot -<br />
Initialize Command”, 16-85.<br />
MoveObject- The MoveObject command moves an object (plate) to a specified location.<br />
See 16.26.3 “Plate Robot - MoveObject Command”, 16-85.<br />
ReplaceObject - The ReplaceObject command moves an object to a specified location.<br />
If the destination is occupied, the blocking object will be removed. It is mainly<br />
used for moving reagent carriers. See 16.26.4 “Plate Robot - ReplaceObject Command”,<br />
16-85.<br />
MoveToBase - The MoveToBase command moves an object (plate) to its base (labware<br />
source) position. See 16.26.5 “Plate Robot - MoveToBase Command”, 16-85.<br />
ChangeObject - The ChangeObject command moves an object to a specified location.<br />
If the destination is occupied, the blocking object will be removed. It is only used<br />
for changing DiTi’s. See 16.26.6 “Plate Robot - ChangeObject Command”, 16-86.<br />
MoveInsert - The MoveInsert command moves the insert of an Insert Plate to the<br />
specified location. See 16.26.7 “Plate Robot - MoveInsert Command”, 16-86.<br />
SwapInsert - The SwapInsert command moves the insert of an Insert plate to an<br />
Insert plate which doesn’t have an insert. See 16.26.8 “Plate Robot - SwapInsert<br />
Command”, 16-86.<br />
ClearLocation - The ClearLocation command moves all objects which are currently<br />
at the specified location to a new location. See 16.26.9 “Plate Robot - ClearLocation<br />
Command”, 16-86.<br />
13.2.26 Commands for the Safire Reader, Overview<br />
The following table lists the commands for the Safire Reader. The Status<br />
command is only available in <strong>Freedom</strong> <strong>EVOware</strong> Plus.<br />
Tab. 13-37 Commands for the Safire Reader<br />
Status - The Status command interrogates the status of the reader. See<br />
16.27.1 “Safire Reader - Status Command”, 16-87.<br />
<strong>Freedom</strong> <strong>EVOware</strong> <strong>Software</strong> <strong>Manual</strong>, 393172, en, V<strong>2.3</strong> 13 - 27
13 - Overview of <strong>Freedom</strong> <strong>EVOware</strong> Commands<br />
Overview of Device Commands<br />
Tab. 13-37 Commands for the Safire Reader (cont.)<br />
Open - The Open command opens the door of the reader. See 16.27.2 “Safire<br />
Reader - Open Command”, 16-87.<br />
Close - The Close command closes the door of the reader. See 16.27.3 “Safire<br />
Reader - Close Command”, 16-87.<br />
Measure - The Measure command performs a measurement procedure using external<br />
software. See 16.27.4 “Safire Reader - Measure Command”, 16-87.<br />
Multilabel - The Multilabel command performs up to four consecutive measurement<br />
steps on the same plate using external software. The plate does not have to leave the<br />
reader in between measurements. See 16.27.5 “Safire Reader - Multilabel Command”,<br />
16-88.<br />
13.2.27 Commands for the Te-Shake Shaker, Overview<br />
The following table lists the commands for the Te-Shake Shaker.<br />
The commands Init, Start, Stop, SetTemperature and SetFrequency are only<br />
available in <strong>Freedom</strong> <strong>EVOware</strong> <strong>Standard</strong>. Plates are loaded into the Te-Shake<br />
using RoMa movement commands. The shaking time can be controlled by the<br />
Wait For Timer command.<br />
Use the Shake command instead in <strong>Freedom</strong> <strong>EVOware</strong> Plus (the Shake<br />
command handles all of these actions, including shaking time and plate loading/<br />
unloading, automatically). The Shake command is not available in <strong>Freedom</strong><br />
<strong>EVOware</strong> <strong>Standard</strong>.<br />
<strong>Freedom</strong> <strong>EVOware</strong> is provided with several different types of Te-Shake shaker. If<br />
you want to use more than one shaker in your script or process, you must use the<br />
Duplicate Device tool top create a separate device driver for each of them. For<br />
more information see 16.28 “Commands for the Te-Shake Shaker”, 16-90.<br />
Tab. 13-38 Commands for the Te-Shake Shaker<br />
Init - The Init command initializes the shaker. This needs to be done before the<br />
shaker is first used in a script or process. See 16.28.1 “Te-Shake shaker - Init Command”,<br />
16-90.<br />
Shake - The Shake command performs the shaking procedure with the specified<br />
direction, frequency and temperature. See 16.28.2 “Te-Shake shaker - Shake Command”,<br />
16-90.<br />
Start - The Start command starts the shaking procedure. See 16.28.3 “Te-Shake<br />
shaker - Start Command”, 16-92.<br />
Stop - The Stop command stops the shaking procedure. See 16.28.4 “Te-Shake<br />
shaker - Stop Command”, 16-92.<br />
SetTemperature - The SetTemperature command sets the shaker to the specified<br />
temperature. See 16.28.5 “Te-Shake shaker - SetTemperature Command”, 16-92.<br />
SetFrequency - The SetFrequency command set the shaking frequency of the<br />
shaker. See 16.28.6 “Te-Shake shaker - SetFrequency Command”, 16-93.<br />
13 - 28 <strong>Freedom</strong> <strong>EVOware</strong> <strong>Software</strong> <strong>Manual</strong>, 393172, en, V<strong>2.3</strong>
13 - Overview of <strong>Freedom</strong> <strong>EVOware</strong> Commands<br />
Overview of Device Commands<br />
13.2.28 Commands for the Symbol MS-954 Barcode Scanner, Overview<br />
The following table lists the command for the Symbol MS-954 barcode scanner. In<br />
<strong>Freedom</strong> <strong>EVOware</strong> Plus, the Barcode Scanner command is an on-the-flycommand<br />
– drag the command to the line which connects two process steps (see<br />
5.4.3 “The Process Editor (<strong>Freedom</strong> <strong>EVOware</strong> Plus)”, 5-17).<br />
In <strong>Freedom</strong> <strong>EVOware</strong> <strong>Standard</strong>, proceed as follows to use the Symbol MS-954<br />
barcode scanner:<br />
• Make sure that the labware type has been “allowed” for scanning with the<br />
barcode scanner (see 9.5 “Configuring Carriers”, 9-39, “Allowed Labware<br />
on this carrier”).<br />
• Drag labware of the type you want to scan from the Control Bar (Labware<br />
section) onto the device icon of the Symbol MS-954 barcode scanner.<br />
• Use the Transfer Labware command to move the labware to the barcode<br />
scanner (the barcode scanner carrier attribute “on-the-fly” instructs <strong>Freedom</strong><br />
<strong>EVOware</strong> not to release the labware at this position); see 15.59 “Transfer<br />
Labware Command”, 15-143;<br />
• Add the Barcode Scanner - ReadBarcode command to your script;<br />
• Use the Transfer Labware command to move the labware from the barcode<br />
scanner to the required destination position.<br />
Tab. 13-39 Commands for the Symbol MS-954 Barcode Scanner<br />
Read Barcode - The Read Barcode command is used to read barcodes from the labware<br />
or tube which is presented to the barcode scanner by the RoMa. See<br />
16.29.1 “Symbol MS-954 Barcode Scanner - Read Barcode Command”, 16-94.<br />
13.2.29 Commands for the Spectra Fluor Reader, Overview<br />
The following table lists the commands for the Spectra Fluor Reader. The Status<br />
command is only available in <strong>Freedom</strong> <strong>EVOware</strong> Plus.<br />
Tab. 13-40 Commands for the Spectra Fluor Reader<br />
Status - The Status command interrogates the status of the reader. See<br />
16.30.1 “Spectra Fluor Reader - Status Command”, 16-94.<br />
Excitation Out - The Excitation Out command moves the excitation filter slide out of<br />
the reader to allow the filters to be removed or exchanged. See 16.30.2 “Spectra<br />
Fluor Reader - Excitation Out Command”, 16-95.<br />
Emission Out - The Emission Out command moves the emission filter slide out of the<br />
reader to allow the filters to be removed or exchanged. See 16.30.3 “Spectra Fluor<br />
Reader - Emission Out Command”, 16-95.<br />
<strong>Freedom</strong> <strong>EVOware</strong> <strong>Software</strong> <strong>Manual</strong>, 393172, en, V<strong>2.3</strong> 13 - 29
13 - Overview of <strong>Freedom</strong> <strong>EVOware</strong> Commands<br />
Overview of Device Commands<br />
Tab. 13-40 Commands for the Spectra Fluor Reader (cont.)<br />
Open - The Open command opens the door of the reader. See 16.30.4 “Spectra Fluor<br />
Reader - Open Command”, 16-95.<br />
Close - The Close command closes the door of the reader. See 16.30.5 “Spectra<br />
Fluor Reader - Close Command”, 16-95.<br />
Measure - The Measure command performs a measurement procedure using external<br />
software. See 16.30.6 “Spectra Fluor Reader - Measure Command”, 16-95.<br />
Multilabel - The Multilabel command performs up to four consecutive measurement<br />
steps on the same plate using external software. The plate does not have to leave the<br />
reader in between measurements. See 16.30.7 “Spectra Fluor Reader - Multilabel<br />
Command”, 16-96.<br />
13.<strong>2.3</strong>0 Commands for the Sunrise Reader, Overview<br />
The following table lists the commands for the Sunrise Reader. The Status<br />
command is only available in <strong>Freedom</strong> <strong>EVOware</strong> Plus.<br />
Tab. 13-41 Commands for the Sunrise Reader<br />
Status - The Status command interrogates the status of the reader. See<br />
16.31.1 “Sunrise Reader - Status Command”, 16-98.<br />
Open - The Open command opens the door of the reader. See 16.31.2 “Sunrise<br />
Reader - Open Command”, 16-98.<br />
Close - The Close command closes the door of the reader. See 16.31.3 “Sunrise<br />
Reader - Close Command”, 16-98.<br />
Measure - The Measure command performs a measurement procedure using external<br />
software. See 16.31.4 “Sunrise Reader - Measure Command”, 16-98.<br />
Multilabel - The Multilabel command performs up to four consecutive measurement<br />
steps on the same plate using external software. The plate does not have to leave the<br />
reader in between measurements. See 16.31.5 “Sunrise Reader - Multilabel Command”,<br />
16-99.<br />
13.<strong>2.3</strong>1 Commands for the Magnetic Bead Separator (Te-MagS), Overview<br />
The following table lists the commands for the Magnetic Bead Separator.<br />
13 - 30 <strong>Freedom</strong> <strong>EVOware</strong> <strong>Software</strong> <strong>Manual</strong>, 393172, en, V<strong>2.3</strong>
13 - Overview of <strong>Freedom</strong> <strong>EVOware</strong> Commands<br />
Overview of Device Commands<br />
Tab. 13-42 Commands for the Magnetic Bead Separator<br />
MoveToPosition - The MoveToPosition command moves the carrier to one of four<br />
positions. You must specify the required position. See 16.32.1 “Magnetic Bead Separator<br />
- MoveToPosition Command”, 16-100.<br />
ActivateHeater - The ActivateHeater command is used to switch on the heater. You<br />
must specify the required temperature. See 16.32.2 “Magnetic Bead Separator - ActivateHeater<br />
Command”, 16-101.<br />
DeactivateHeater - The DeactivateHeater command is used to switch off the heater<br />
when you no longer want to use it. See 16.3<strong>2.3</strong> “Magnetic Bead Separator - DeactivateHeater<br />
Command”, 16-102.<br />
Execution - The Execution command lets you specify the sequence of operations to<br />
be carried out by the Magnetic Bead Separator (Te-MagS) during the separation process.<br />
See 16.32.4 “Magnetic Bead Separator - Execution Command”, 16-102.<br />
13.<strong>2.3</strong>2 Commands for the Te-Stack Te-MO, Overview<br />
The following table lists the commands for the Te-Stack Te-MO stacker. The<br />
commands DropPlate and GetPlate are only available in <strong>Freedom</strong> <strong>EVOware</strong><br />
<strong>Standard</strong>. These actions are handled automatically in <strong>Freedom</strong> <strong>EVOware</strong> Plus.<br />
The MoveObject command in <strong>Freedom</strong> <strong>EVOware</strong> Plus is only intended for special<br />
applications.<br />
Tab. 13-43 Commands for the Te-Stack Te-MO stacker<br />
InitStacker - The InitStacker command initializes the Te-Stack Te-MO. This needs to<br />
be done before the stacker is first used in a process or script. See 16.33.1 “Te-Stack<br />
Te-MO - InitStacker Command”, 16-105.<br />
MoveObject - The MoveObject command moves a plate to a site on one of the Te-<br />
MO slides. This command is provided for special applications; it is not normally used<br />
as a process step. See 16.33.2 “Te-Stack Te-MO - MoveObject Command”, 16-105.<br />
DropPlate - The DropPlate command gets a plate from the specified Te-Stack tower<br />
and puts in on the specified Te-MO site. See 16.33.3 “Te-Stack Te-MO - DropPlate<br />
Command”, 16-106.<br />
GetPlate - The GetPlate command gets a plate from the specified Te-MO site and<br />
returns it to the specified Te-Stack tower. See 16.33.4 “Te-Stack Te-MO - GetPlate<br />
Command”, 16-106.<br />
13.<strong>2.3</strong>3 Commands for the Te-Stack, Overview<br />
The following table lists the commands for the Te-Stack stacker. The commands<br />
ReturnPlate, PrepareReturnPlate and PresentPlate are only available in <strong>Freedom</strong><br />
<strong>EVOware</strong> <strong>Standard</strong>. These actions and plate loading/unloading are handled<br />
automatically in <strong>Freedom</strong> <strong>EVOware</strong> Plus.<br />
The MoveObject command in <strong>Freedom</strong> <strong>EVOware</strong> Plus is only intended for special<br />
applications.<br />
<strong>Freedom</strong> <strong>EVOware</strong> <strong>Software</strong> <strong>Manual</strong>, 393172, en, V<strong>2.3</strong> 13 - 31
13 - Overview of <strong>Freedom</strong> <strong>EVOware</strong> Commands<br />
Overview of Device Commands<br />
Tab. 13-44 Commands for the Te-Stack stacker<br />
InitStacker - The InitStacker command initializes the Te-Stack. This needs to be done<br />
before the stacker is first used in a process or script. See 16.34.1 “Te-Stack - Init-<br />
Stacker Command”, 16-108.<br />
MoveObject - The MoveObject command moves a plate to the Te-Stack transfer<br />
position. This command is provided for special applications; it is not normally used as<br />
a process step. See 16.34.2 “Te-Stack - MoveObject Command”, 16-108.<br />
ReturnPlate - The ReturnPlate command returns a plate from the Te-Stack transfer<br />
position to the specified tower. See 16.34.3 “Te-Stack - ReturnPlate Command”, 16-<br />
108.<br />
PrepareReturnPlate - The PrepareReturnPlate command moves the Te-Stack shuttle<br />
to the Te-Stack transfer position, e.g. to wait for the RoMa to bring a plate. After the<br />
RoMa has brought the plate, the ReturnPlate command can then be used to return<br />
the plate to the specified stacker tower. See 16.34.4 “Te-Stack - PrepareReturnPlate<br />
Command”, 16-109.<br />
PresentPlate - The PresentPlate command gets a plate from the specified tower and<br />
brings it to the Te-Stack transfer position, where the robot can pick it up and move it<br />
away. See 16.34.5 “Te-Stack - PresentPlate Command”, 16-109.<br />
13.<strong>2.3</strong>4 Commands for the Vacuum Separator (Te-VacS), Overview<br />
The following table lists the commands for the vacuum separator.<br />
The commands Filtration, CheckWasteLevel and CheckPlateWithBlock are only<br />
available in <strong>Freedom</strong> <strong>EVOware</strong> Plus.<br />
To carry out vacuum separation in <strong>Freedom</strong> <strong>EVOware</strong> <strong>Standard</strong> you must use a<br />
combination of the commands SetPressureDiff, ApplyVacuumRear,<br />
ApplyVacuumFront, VentRear, VentFront, PositionPlateRear, PositionPlateFront<br />
and OpenDesaltingValve. The Filtration command in <strong>Freedom</strong> <strong>EVOware</strong> Plus is a<br />
high-level command which combines all of these functions.<br />
Tab. 13-45 Commands for the Te-VacS<br />
SetPressureDiff- The SetPressureDiff command This option starts the vacuum<br />
pump. You must specify the required vacuum. The vacuum is not applied to either of<br />
the SPE blocks and the script or process does not wait for the vacuum to build up.<br />
See 16.35.1 “Te-VacS - SetPressureDiff Command”, 16-110.<br />
ApplyVacuumRear - The ApplyVacuumRear command applies the vacuum to the<br />
rear SPE block (i.e. the SPE block which is connected to vacuum pipe 2). You must<br />
specify the required vacuum. See 16.35.2 “Te-VacS - ApplyVacuumRear Command”,<br />
16-111.<br />
ApplyVacuumFront - The ApplyVacuumFront command applies the vacuum to the<br />
front SPE block (i.e. the SPE block which is connected to vacuum pipe 1). You must<br />
specify the required vacuum. See 16.35.3 “Te-VacS - ApplyVacuumFront Command”,<br />
16-111.<br />
VentRear - The VentRear command vents the vacuum from the rear SPE block. It is<br />
used to stop the solid phase extraction process. See 16.35.4 “Te-VacS - VentRear<br />
Command”, 16-112.<br />
13 - 32 <strong>Freedom</strong> <strong>EVOware</strong> <strong>Software</strong> <strong>Manual</strong>, 393172, en, V<strong>2.3</strong>
13 - Overview of <strong>Freedom</strong> <strong>EVOware</strong> Commands<br />
Overview of Device Commands<br />
Tab. 13-45 Commands for the Te-VacS (cont.)<br />
VentFront - The VentFront command vents the vacuum from the front SPE block. It is<br />
used to stop the solid phase extraction process. See 16.35.5 “Te-VacS - VentFront<br />
Command”, 16-112.<br />
DeactivateSystem - The DeactivateSystem command is used to shut down the Te-<br />
VacS when you no longer want to use it in your script or process. It switches off the<br />
vacuum pump and vents all blocks and the vacuum tank. See 16.35.6 “Te-VacS -<br />
DeactivateSystem Command”, 16-112.<br />
CheckWasteLevel - The CheckWasteLevel command is used to check the liquid<br />
level in the waste bottle. The waste level is reported during process runtime in the<br />
Messages/Error window of the runtime controller. See 16.35.7 “Te-VacS - Check-<br />
WasteLevel Command”, 16-112.<br />
CheckPlateWithBlock - If a plate has been put on the vacuum block and a RoMa<br />
movement command has moved the vacuum block, the CheckPlateWithBlock command<br />
is used to inform <strong>Freedom</strong> <strong>EVOware</strong> that the plate has moved too. See<br />
16.35.8 “Te-VacS - CheckPlateWithBlock Command”, 16-112.<br />
Filtration - The Filtration command is used to specify the sequence of operations to<br />
be carried out by the Te-VacS during the vacuum separation process. See<br />
16.35.9 “Te-VacS - Filtration Command”, 16-113.<br />
PositionPlateRear - The PositionPlateRear command is only relevant if the Te-VacS<br />
is fitted with the Repositioner option. It moves the collection plate for the rear vacuum<br />
block into one of four positions before you apply the vacuum. See 16.35.9 “Te-VacS -<br />
Filtration Command”, 16-113.<br />
PositionPlateFront - The PositionPlateFront command is only relevant if the Te-<br />
VacS is fitted with the Repositioner option. It moves the collection plate for the front<br />
vacuum block into one of four positions before you apply the vacuum. See<br />
16.35.9 “Te-VacS - Filtration Command”, 16-113.<br />
OpenDesaltingValve - The OpenDesaltingValve command opens the desalter valve<br />
to drain the residues. It is only relevant for Te-VacS versions which are equipped with<br />
a desalter valve. See 16.35.9 “Te-VacS - Filtration Command”, 16-113.<br />
13.<strong>2.3</strong>5 Commands for the Te-MO, Overview<br />
The following table lists the commands for the Multi Pipetting Head. These device<br />
commands are only available in <strong>Freedom</strong> <strong>EVOware</strong> Plus. They are not necessary<br />
in <strong>Freedom</strong> <strong>EVOware</strong> <strong>Standard</strong> - all of the required functions are provided by the<br />
Multi Pipetting Head script commands.<br />
Tab. 13-46 Commands for the Te-MO<br />
Init - The Init command initializes the Te-MO. This needs to be done before the Te-<br />
MO is first used in a process or script. See 16.36.1 “Te-MO - Init Command”, 16-<br />
120.<br />
Pipette - The Pipette command is used to create a pipetting script for the Te-MO.<br />
When you drag it to the Process Editor, it opens the Script Editor automatically. See<br />
16.36.2 “Te-MO - Pipette Command”, 16-120. See also 11.4.2 “Creating a Pipetting<br />
Script”, 11-5.<br />
<strong>Freedom</strong> <strong>EVOware</strong> <strong>Software</strong> <strong>Manual</strong>, 393172, en, V<strong>2.3</strong> 13 - 33
13 - Overview of <strong>Freedom</strong> <strong>EVOware</strong> Commands<br />
Overview of Device Commands<br />
13.<strong>2.3</strong>6 Commands for the Ultra Reader, Overview<br />
The following table lists the commands for the Ultra Reader. The Status command<br />
is only available in <strong>Freedom</strong> <strong>EVOware</strong> Plus.<br />
Tab. 13-47 Commands for the Ultra Reader<br />
Status - The Status command interrogates the status of the reader. See<br />
16.37.1 “Ultra Reader - Status Command”, 16-120.<br />
Excitation Out - The Excitation Out command moves the excitation filter slide out of<br />
the reader to allow the filters to be removed or exchanged. See 16.37.2 “Ultra Reader<br />
- Excitation Out Command”, 16-120.<br />
Emission Out - The Emission Out command moves the emission filter slide out of the<br />
reader to allow the filters to be removed or exchanged. See 16.37.3 “Ultra Reader -<br />
Emission Out Command”, 16-121.<br />
Open - The Open command opens the door of the reader. See 16.37.4 “Ultra Reader<br />
- Open Command”, 16-121.<br />
Close - The Close command closes the door of the reader. See 16.37.5 “Ultra Reader<br />
- Close Command”, 16-121.<br />
Measure - The Measure command performs a measurement procedure using external<br />
software. See 16.37.6 “Ultra Reader - Measure Command”, 16-121.<br />
Multilabel - The Multilabel command performs up to four consecutive measurement<br />
steps on the same plate using external software. The plate does not have to leave the<br />
reader in between measurements. See 16.37.7 “Ultra Reader - Multilabel Command”,<br />
16-122.<br />
13.<strong>2.3</strong>7 Commands for the Ultra Evolution Reader, Overview<br />
The following table lists the commands for the Ultra Evolution Reader. The Status<br />
command is only available in <strong>Freedom</strong> <strong>EVOware</strong> Plus.<br />
Tab. 13-48 Commands for the Ultra Evolution Reader<br />
Status - The Status command interrogates the status of the reader. See<br />
16.38.1 “Ultra Evolution Reader - Status Command”, 16-123.<br />
Excitation Out - The Excitation Out command moves the excitation filter slide out of<br />
the reader to allow the filters to be removed or exchanged. See 16.38.2 “Ultra Evolution<br />
Reader - Excitation Out Command”, 16-124.<br />
Emission Out - The Emission Out command moves the emission filter slide out of the<br />
reader to allow the filters to be removed or exchanged. See 16.38.3 “Ultra Evolution<br />
Reader - Emission Out Command”, 16-124.<br />
13 - 34 <strong>Freedom</strong> <strong>EVOware</strong> <strong>Software</strong> <strong>Manual</strong>, 393172, en, V<strong>2.3</strong>
13 - Overview of <strong>Freedom</strong> <strong>EVOware</strong> Commands<br />
Overview of Device Commands<br />
Tab. 13-48 Commands for the Ultra Evolution Reader (cont.)<br />
Open - The Open command opens the door of the reader. See 16.38.4 “Ultra Evolution<br />
Reader - Open Command”, 16-124.<br />
Close - The Close command closes the door of the reader. See 16.38.5 “Ultra Evolution<br />
Reader - Close Command”, 16-124.<br />
Measure - The Measure command performs a measurement procedure using external<br />
software. See 16.38.6 “Ultra Evolution Reader - Measure Command”, 16-124.<br />
Multilabel - The Multilabel command performs up to four consecutive measurement<br />
steps on the same plate using external software. The plate does not have to leave the<br />
reader in between measurements. See 16.38.7 “Ultra Evolution Reader - Multilabel<br />
Command”, 16-125.<br />
13.<strong>2.3</strong>8 Commands for the Process Script, Overview<br />
The following table lists the command for the Process Script device driver. This<br />
command is only available in <strong>Freedom</strong> <strong>EVOware</strong> Plus.<br />
Tab. 13-49 Commands for the Process Starter<br />
Script - The Script command is used to create a script for the Process Starter script<br />
commands. When you drag it to the Process Editor, it opens the Script Editor automatically.<br />
See 16.39.1 “Process Script - Script Command”, 16-127.<br />
13.<strong>2.3</strong>9 Commands for the Transfer Station, Overview<br />
The following table lists the command for the Transfer Station. The Transfer<br />
Station is an unused location on the worktable of the pipetting instrument. If your<br />
pipetting instrument is fitted with two RoMa arms, this location is used to transfer<br />
labware from one RoMa to another. The Transfer command is only installed if you<br />
have installed <strong>Freedom</strong> <strong>EVOware</strong> with two RoMas.<br />
Tab. 13-50 Commands for the Transfer Station<br />
Transfer - The Transfer Station is an unused location on the worktable of the pipetting<br />
instrument. If your pipetting instrument is fitted with two RoMa arms, the Transfer<br />
command uses the Transfer Station to pass labware from one RoMa to the other if<br />
this becomes necessary. See 16.40.1 “Transfer Station - Transfer Command”, 16-<br />
127.<br />
13.2.40 Commands for the Te-Link, Overview<br />
The following table lists the command for the Te-Link transfer rail.<br />
This command is only available in <strong>Freedom</strong> <strong>EVOware</strong> <strong>Standard</strong>. In <strong>Freedom</strong><br />
<strong>EVOware</strong> Plus, when the labware is put down at either end of the transfer rail the<br />
shuttle carrier starts to move automatically to the other end.<br />
<strong>Freedom</strong> <strong>EVOware</strong> <strong>Software</strong> <strong>Manual</strong>, 393172, en, V<strong>2.3</strong> 13 - 35
13 - Overview of <strong>Freedom</strong> <strong>EVOware</strong> Commands<br />
Overview of Device Commands<br />
Tab. 13-51 Commands for the Te-Link<br />
Move - The Move command moves the shuttle carrier of the Te-Link from one end of<br />
the transfer rail to the other. See 16.41.1 “Te-Link - Move Command”, 16-128.<br />
13 - 36 <strong>Freedom</strong> <strong>EVOware</strong> <strong>Software</strong> <strong>Manual</strong>, 393172, en, V<strong>2.3</strong>
14 - Advanced Programming Features for Scripts<br />
Variables and Expressions in Scripts<br />
14 Advanced Programming Features for Scripts<br />
This chapter describes advanced programming features for liquid handling<br />
scripts.<br />
14.1 Variables and Expressions in Scripts<br />
<strong>Freedom</strong> <strong>EVOware</strong> allows you to use variables in scripts instead of constants.<br />
Variables let you modify the execution of the script during runtime. You can use<br />
variables for pipetting volumes, timers and time durations, strings, names of<br />
external applications and loop counters etc. <strong>Freedom</strong> <strong>EVOware</strong> also supports<br />
expressions, which are a combination of variables and basic mathematical<br />
operators such as add or multiply. The following paragraphs discuss the definition<br />
and the use of variables.<br />
When you run a script, the Extended View of the runtime controller shows the<br />
value of all defined variables during script runtime (see 12.1.2 “Runtime<br />
Controller, Extended View (Running a Script)”, 12-4).<br />
Note: To run an individual script in <strong>Freedom</strong> <strong>EVOware</strong> Plus, open the Script<br />
Editor by double-clicking the Pipette command which is associated with the script<br />
and click the Run button in the toolbar or choose Run in the Execute menu.<br />
14.1.1 Declaring Variables in Scripts<br />
All variables (including pre-defined variables) must be declared (defined) before<br />
use.<br />
Note: The purpose of declaring a pre-defined variable is to assign an initial value<br />
(see 14.1.4 “Pre-Defined Variables”, 14-4). In offline mode, scripts may not run<br />
as expected if you do not set appropriate initial values for the pre-defined<br />
variables.<br />
In <strong>Freedom</strong> <strong>EVOware</strong> Plus, you can also declare variables by choosing Declare<br />
Variables in the Execute menu (see 6.4.6 “Declare Variables”, 6-12).<br />
Variables are declared in pipetting scripts with the following command:<br />
Tab. 14-1 Declaring variables in a pipetting script<br />
Icon Command Description<br />
Set Variable<br />
The Set Variable command is used to declare a numeric or<br />
string variable and assign an initial value to it. You can also<br />
prompt the instrument operator for the value. See 15.41 “Set<br />
Variable Command”, 15-101.<br />
If you declare a variable within a script, the variable only has a meaningful value<br />
within the same script. It is “unknown” to other scripts (i.e. the “scope” of the<br />
variable is “script”). In <strong>Freedom</strong> <strong>EVOware</strong> Plus, you can also declare variables<br />
which are accessible to other scripts and thus allow parameters to be passed from<br />
one script to another (see 6.4.6.4 “Scope of a Variable”, 6-15).<br />
<strong>Freedom</strong> <strong>EVOware</strong> <strong>Software</strong> <strong>Manual</strong>, 393172, en, V<strong>2.3</strong> 14 - 1
14 - Advanced Programming Features for Scripts<br />
Variables and Expressions in Scripts<br />
Variable names can be 1 to 64 characters in length and must not begin with a<br />
digit. Variable names are not case-sensitive and numeric variables are treated as<br />
floating point numbers, except when used in a Send Command command (see<br />
also 14.1.7 “Script Commands That Accept Numeric Variables and Expressions”,<br />
14-12).<br />
The following commands can also declare variables:<br />
Tab. 14-2 Commands that can declare variables<br />
Icon Command Variable and value used during validation<br />
Balance<br />
This command lets you write the measured weight to a variable.<br />
Execute Application Return value = 0<br />
Send Command Answer = ““ (empty string), error code = 0<br />
The variable name which you want to use is specified in the dialog box for the<br />
command. See also 14.1.12 “Validating a Script Which Contains Variables”, 14-<br />
18.<br />
14.1.2 Script Commands That Write to Variables<br />
The following table lists all commands that write to variables (see also<br />
14.1.4 “Pre-Defined Variables”, 14-4):<br />
Tab. 14-3 Commands that write to variables<br />
Icon Command Description<br />
Aspirate<br />
Dispense<br />
Mix<br />
If liquid level detection is used, the LiHa pipetting commands<br />
automatically write the detected volumes to a set of predefined<br />
variables. One variable is provided for each tip. The<br />
variable names are as follows:<br />
DETECTED_VOLUME_1<br />
...<br />
DETECTED_VOLUME_8.<br />
The detected volume is reported in µl for each tip. The value<br />
is updated by each subsequent LiHa pipetting command<br />
which uses liquid level detection. The value -1 is reported if<br />
the tip was used with liquid level detection disabled or was not<br />
part of the pipetting command.<br />
Balance<br />
Begin Loop<br />
This command lets you write the measured weight to a variable.<br />
The variable name to use is specified in the command.<br />
The Begin Loop command automatically writes to the predefined<br />
variable LOOP_x, where x is the name of the loop.<br />
<strong>Freedom</strong> <strong>EVOware</strong> sets this variable to the current cycle<br />
number for the loop, e.g. to 1 to 12 for a loop with 12 cycles.<br />
14 - 2 <strong>Freedom</strong> <strong>EVOware</strong> <strong>Software</strong> <strong>Manual</strong>, 393172, en, V<strong>2.3</strong>
14 - Advanced Programming Features for Scripts<br />
Variables and Expressions in Scripts<br />
Tab. 14-3 Commands that write to variables (cont.)<br />
Icon Command Description<br />
Detect Liquid<br />
Execute Application<br />
Execute VB Script<br />
PosID<br />
Send Command<br />
The Detect Liquid command writes the detected volumes to a<br />
set of pre-defined variables DETECTED_VOLUME_x, where<br />
x is the tip number. The detected volume is reported in µl for<br />
each tip.<br />
This command lets you write the return value of the specified<br />
application to a variable. The variable name to use is specified<br />
in the command.<br />
The Execute VB Script command can assign values to variables<br />
for subsequent use in the <strong>Freedom</strong> <strong>EVOware</strong> script.<br />
However, you must declare the variables in advance in the<br />
<strong>Freedom</strong> <strong>EVOware</strong> script before calling the Execute VB Script<br />
command. See 15.50 “Execute VB Script Command”, 15-<br />
114.<br />
The PosID command automatically writes to the pre-defined<br />
counter variable TUBE_CNT, which is incremented each time<br />
a tube is successfully scanned.<br />
This command lets you write the response of the specified<br />
firmware command to a variable. The returned error code can<br />
also be written to a variable. The variable name to use is<br />
specified in the command.<br />
14.1.3 Querying the Value of a Variable During Script Runtime<br />
The Set Variable command can be used to prompt the operator for the value of a<br />
numeric variable during script runtime (see 15.41 “Set Variable Command”, 15-<br />
101). To do this, check the User Query checkbox when you specify the command<br />
and specify the user prompt which should appear on the screen. You can also<br />
specify a default value and check that the value which is entered by the operator<br />
lies within a specified range.<br />
The following example prompts the operator for a volume and sets the admissible<br />
range to 10 to 100 µl. In addition, a default value of 50 µl is suggested:<br />
Fig. 14-1 Querying the operator for a value during script runtime<br />
<strong>Freedom</strong> <strong>EVOware</strong> <strong>Software</strong> <strong>Manual</strong>, 393172, en, V<strong>2.3</strong> 14 - 3
14 - Advanced Programming Features for Scripts<br />
Variables and Expressions in Scripts<br />
During runtime, the value which is input by the operator is validated and a warning<br />
is output if it does not lie within the specified range.<br />
The Set Variable command can also be used to prompt the operator for the value<br />
of a string variable (text). To do this, choose String in the Define variable type pulldown<br />
list. String variables can be used to generate file names, barcodes etc.<br />
14.1.4 Pre-Defined Variables<br />
<strong>Freedom</strong> <strong>EVOware</strong> has a number of pre-defined variables which e.g. provide<br />
useful information for use in pipetting scripts and/or allow the same script to be<br />
used for different numbers of samples.<br />
Note: Even though the variable names are pre-defined, you must still declare<br />
them in your script with the Set Variable command before you can use them.<br />
The purpose of declaring a pre-defined variable is to assign an initial value. In<br />
offline mode, scripts may not run as expected if you do not set appropriate initial<br />
values for the pre-defined variables.<br />
<strong>Freedom</strong><br />
<strong>EVOware</strong> Plus<br />
<strong>Freedom</strong> <strong>EVOware</strong> Plus processes can contain one or more pipetting scripts. in<br />
addition, <strong>Freedom</strong> <strong>EVOware</strong> Plus allows you to run several copies of the same<br />
process in parallel. Each copy of the process is called an instance. <strong>Freedom</strong><br />
<strong>EVOware</strong> Plus also allows you to run different processes in parallel.<br />
In <strong>Freedom</strong> <strong>EVOware</strong> Plus, the pre-defined variables have the scope “script”. In<br />
other words, the current values of the pre-defined variables are not available in<br />
other pipetting scripts. See 6.4.6.4 “Scope of a Variable”, 6-15.<br />
If you want to access the current value of a pre-defined variable in another script<br />
from the same process or process copy, declare a new variable of scope<br />
“instance” and save the value of the pre-defined variable in the new variable using<br />
the Set Variable command:<br />
Fig. 14-2 Set Variable command<br />
In the example, the variable My_Detected_Volume_1 was previously declared<br />
with scope “instance” using the Declare Variables option in the Execute menu<br />
(see 6.4.6 “Declare Variables”, 6-12).<br />
14 - 4 <strong>Freedom</strong> <strong>EVOware</strong> <strong>Software</strong> <strong>Manual</strong>, 393172, en, V<strong>2.3</strong>
14 - Advanced Programming Features for Scripts<br />
Variables and Expressions in Scripts<br />
If you want to access the current value of a pre-defined variable in a script from<br />
another process or process copy, declare a new variable of scope “run” and save<br />
the value of the pre-defined variable in the new variable using the Set Variable<br />
command.<br />
14.1.4.1 CURRENT_USER<br />
This read-only variable contains the name of the currently logged in user.<br />
14.1.4.2 DETECTED_VOLUME_x<br />
If liquid level detection is used, the LiHa pipetting commands automatically write<br />
the detected volumes to a set of variables. One variable is provided for each tip.<br />
The variable names are as follows:<br />
DETECTED_VOLUME_1<br />
...<br />
DETECTED_VOLUME_8.<br />
The detected volume is reported in µl for each tip. The value is updated by each<br />
subsequent LiHa pipetting command which uses liquid level detection. The value -<br />
1 is reported if the tip was used with liquid level detection disabled or was not part<br />
of the pipetting command.<br />
The Detect Liquid command also writes the detected volumes to these variables.<br />
14.1.4.3 LAST_BARCODE<br />
This read-only variable contains the barcode which was last read by the Symbol<br />
barcode scanner.<br />
14.1.4.4 LAST_ERROR_LINE<br />
This read-only variable contains the line number in the pipetting script of the last<br />
command which reported an error during script runtime.<br />
14.1.4.5 LAST_ERROR_MESSAGE<br />
This read-only variable contains the error message of the last command which<br />
reported an error during script runtime (see 18.3 “List of Error Messages”, 18-<br />
32).<br />
14.1.4.6 LAST_ERROR_MESSAGE_ID<br />
This read-only variable contains the error message ID of the last command which<br />
reported an error during script runtime. The error message ID which is returned by<br />
this variable is a numeric value which is calculated as follows from the error<br />
message ID string (see 18.3 “List of Error Messages”, 18-32):<br />
– Ignore all characters except the last seven<br />
– Ignore underscore character<br />
– Ignore the leading zero (if any)<br />
Example:<br />
– Error message ID string: EVO_EVO_016_024<br />
– Error message ID: 16024<br />
14.1.4.7 LIHA_MOVE_HEIGHT<br />
This variable lets you specify the Z-Travel height for the Move LiHa command (the<br />
tip height which is used during the arm movement). The Z-Travel height you<br />
<strong>Freedom</strong> <strong>EVOware</strong> <strong>Software</strong> <strong>Manual</strong>, 393172, en, V<strong>2.3</strong> 14 - 5
14 - Advanced Programming Features for Scripts<br />
Variables and Expressions in Scripts<br />
specify with this variable only applies to the tips you select in the Move LiHa<br />
command. The Z-Position of the unselected tips remains unchanged.<br />
This variable only takes effect if you choose Positioning with variable Z-Travel in<br />
the Move LiHa command.<br />
A positive value for LIHA_MOVE_HEIGHT means that the tips will be lower during<br />
the arm movement. A value of 0 is the highest position (tips fully retracted during<br />
the arm movement).<br />
An example application of this feature is for pipetting instruments which have<br />
vacuum lines to the tips for the removal of liquids.<br />
14.1.4.8 LOOP_x<br />
The Begin Loop command automatically writes to the variable LOOP_x, where x<br />
is the name of the loop. <strong>Freedom</strong> <strong>EVOware</strong> sets this variable to the current cycle<br />
number for the loop, e.g. to 1 to 12 for a loop with 12 cycles.<br />
14.1.4.9 MCA_MOVE_HEIGHT<br />
This variable lets you specify the Z-Travel height for the MCA96 Move command<br />
(the tip height which is used during the arm movement). The Z-Travel height you<br />
specify with this variable only applies to the tips you select in the MCA96 Move<br />
command. The Z-Position of the unselected tips remains unchanged.<br />
This variable only takes effect if you choose Positioning with variable Z-Travel in<br />
the MCA96 Move command.<br />
A positive value for MCA_MOVE_HEIGHT means that the tips will be lower during<br />
the arm movement. A value of 0 is the highest position (tips fully retracted during<br />
the arm movement).<br />
An example application of this feature is for pipetting instruments which have<br />
vacuum lines to the tips for the removal of liquids.<br />
14.1.4.10 PROCESS_ITERATION<br />
To achieve the maximum throughput (efficiency) of the pipetting instrument, for<br />
example the maximum number of processed microplates per hour, <strong>Freedom</strong><br />
<strong>EVOware</strong> Plus allows you to run several copies (instances) of the same process<br />
in parallel. The number of process copies you want to run is chosen in the<br />
Runtime Controller when you run the process.<br />
This read-only variable contains the number of the process which is running the<br />
current pipetting script. You can use it e.g. to pipette to a different well column<br />
depending on the process copy. Process copies are counted starting with 1. The<br />
process number is also shown in the log files. This variable is not relevant for<br />
<strong>Freedom</strong> <strong>EVOware</strong> <strong>Standard</strong>.<br />
14.1.4.11 PROCESS_NAME<br />
This read-only variable contains the name of the process which is running the<br />
current pipetting script (as shown in the title bar of the Process Editor). You can<br />
use it e.g. in the User Prompt command. This variable is not relevant for <strong>Freedom</strong><br />
<strong>EVOware</strong> <strong>Standard</strong>.<br />
14.1.4.12 PROCESS_NODE<br />
This read-only variable contains the name of the process step which is running<br />
the current pipetting script (as shown in the process icon in the Process Editor).<br />
You can use it e.g. in the User Prompt command. This variable is not relevant for<br />
<strong>Freedom</strong> <strong>EVOware</strong> <strong>Standard</strong>.<br />
14 - 6 <strong>Freedom</strong> <strong>EVOware</strong> <strong>Software</strong> <strong>Manual</strong>, 393172, en, V<strong>2.3</strong>
14 - Advanced Programming Features for Scripts<br />
Variables and Expressions in Scripts<br />
14.1.4.13 RACK_OFFSET<br />
This variable lets you modify the labware selection for the basic commands<br />
Aspirate, Dispense, Mix and Move LIHA. If e.g. RACK_OFFSET equals 1,<br />
<strong>Freedom</strong> <strong>EVOware</strong> searches for the next labware of the same type on the<br />
worktable. The search direction is from rear to front of the worktable and then from<br />
left to right. Negative values in RACK_OFFSET cause <strong>Freedom</strong> <strong>EVOware</strong> to<br />
search in the opposite direction.<br />
Set RACK_OFFSET to 0 to deactivate the offset.<br />
14.1.4.14 RACK_VOLUME_x<br />
The Te-MO, the MCA96 and the MCA384 do not support liquid level detection. If<br />
you want to use a liquid class for these pipetting arms which specifies liquid level<br />
detection, the liquid level must be emulated. To do this, specify the well volume<br />
(well capacity) of the labware you are using by assigning a value to this variable.<br />
Replace the X in the variable name with the labware label (labware name), e.g.<br />
use RACK_VOLUME_SOURCE if you named the labware SOURCE. For<br />
mechanical reasons, the same volume is pipetted by all of the tips.<br />
Instead of setting this parameter to the well volume (well capacity), you can use<br />
the LiHa command Detect Liquid before you aspirate with the Te-MO, MCA96 or<br />
MCA384 to detect the actual liquid level in one of the wells. Then copy the value<br />
reported in the DETECTED_VOLUME_x variable to the RACK_VOLUME_x<br />
variable (see 14.1.4.2 “DETECTED_VOLUME_x”, 14-5).<br />
Liquid level detection can be used e.g. to ensure minimal tip contamination by<br />
limiting the tip immersion depth. The Te-MO and MCA96 only use the emulated<br />
liquid level detection for aspiration. The MCA384 uses it for dispensing, too. The<br />
value of the RACK_VOLUME_x varable is not updated by subsequent pipetting<br />
commands, even if they affect the volume of liquid in the wells.<br />
14.1.4.15 REPLACE_DITI_GRID<br />
If you are using DITIs, <strong>Freedom</strong> <strong>EVOware</strong> provides special facilities to ensure that<br />
sufficient DITIs are present on the worktable for your script or process and to<br />
automatically fetch new DITI racks as and when needed.<br />
For each Get DITI command in your pipetting script, <strong>Freedom</strong> <strong>EVOware</strong><br />
automatically sets the two variables REPLACE_DITI_GRID and<br />
REPLACE_DITI_SITE to the correct grid and site for the selected DITI type before<br />
executing the command.<br />
If your script includes an Activate DITI Handling command and all of the DITIs in<br />
the rack have been used, <strong>Freedom</strong> <strong>EVOware</strong> calls the DITI replacement script<br />
which is specified in the command. The replacement script is normally<br />
implemented using one or more Transfer Labware commands<br />
The worktable location of the DITI rack which needs replacing is specified in the<br />
replacement script with the variables REPLACE_DITI_GRID and<br />
REPLACE_DITI_SITE.<br />
These two variables are only used by the automatic DITI handling feature in<br />
<strong>Freedom</strong> <strong>EVOware</strong> <strong>Standard</strong>. <strong>Freedom</strong> <strong>EVOware</strong> Plus uses a different concept<br />
for automatic DITI handling.<br />
See 17.1 “Using the Automatic DITI Handling feature”, 17-1) for more<br />
information.<br />
<strong>Freedom</strong> <strong>EVOware</strong> <strong>Software</strong> <strong>Manual</strong>, 393172, en, V<strong>2.3</strong> 14 - 7
14 - Advanced Programming Features for Scripts<br />
Variables and Expressions in Scripts<br />
14.1.4.16 REPLACE_DITI_SITE<br />
If you are using DITIs, <strong>Freedom</strong> <strong>EVOware</strong> provides special facilities to ensure that<br />
sufficient DITIs are present on the worktable for your script or process and to<br />
automatically fetch new DITI racks as and when needed.<br />
For each Get DITI command in your pipetting script, <strong>Freedom</strong> <strong>EVOware</strong><br />
automatically sets the two variables REPLACE_DITI_GRID and<br />
REPLACE_DITI_SITE to the correct grid and site for the selected DITI type before<br />
executing the command.<br />
If your script includes an Activate DITI Handling command and all of the DITIs in<br />
the rack have been used, <strong>Freedom</strong> <strong>EVOware</strong> calls the DITI replacement script<br />
which is specified in the command. The replacement script is normally<br />
implemented using one or more Transfer Labware commands<br />
The worktable location of the DITI rack which needs replacing is specified in the<br />
replacement script with the variables REPLACE_DITI_GRID and<br />
REPLACE_DITI_SITE.<br />
These two variables are only used by the automatic DITI handling feature in<br />
<strong>Freedom</strong> <strong>EVOware</strong> <strong>Standard</strong>. <strong>Freedom</strong> <strong>EVOware</strong> Plus uses a different concept<br />
for automatic DITI handling.<br />
See 17.1 “Using the Automatic DITI Handling feature”, 17-1) for more<br />
information.<br />
14.1.4.17 SAMPLE_CNT<br />
If you want to write a script which allows a different number of samples in each<br />
run, you would normally need to modify the script each time you use it. The<br />
SAMPLE_CNT counter variable allows you to write a script for the maximum<br />
number of samples which you expect and to limit the script during runtime<br />
according to the actual number of samples. SAMPLE_CNT is intended for use in<br />
loops in combination with basic pipetting commands such as Aspirate, Dispense,<br />
Mix, Get DITIs and Drop DITIs.<br />
This feature is activated by assigning a positive value to SAMPLE_CNT.<br />
If SAMPLE_CNT is set to a value which is greater than or equal to 0, <strong>Freedom</strong><br />
<strong>EVOware</strong> keeps a count of how many different tips are used in each cycle of the<br />
following loop(s). The loop is then terminated the next time End Loop is executed<br />
when the number of tips used reaches SAMPLE_CNT. If SAMPLE_CNT is not a<br />
multiple of the number of tips used in one cycle of the loop(s), <strong>Freedom</strong> <strong>EVOware</strong><br />
modifies the tip selection in the final cycle of the loop.<br />
The following figure shows an example of using the SAMPLE_CNT variable:<br />
Fig. 14-3 Using the SAMPLE_CNT variable<br />
14 - 8 <strong>Freedom</strong> <strong>EVOware</strong> <strong>Software</strong> <strong>Manual</strong>, 393172, en, V<strong>2.3</strong>
14 - Advanced Programming Features for Scripts<br />
Variables and Expressions in Scripts<br />
The above example script copies 10 µl from the source labware to the destination<br />
labware. The loop is programmed for a maximum of 96 samples or wells. If<br />
SAMPLE_CNT is set to 13, the script is executed as follows:<br />
• Wash tips 1-8,<br />
• Aspirate with tips 1-8 from column 1 of the source labware,<br />
• Dispense with tips 1-8 into column 1 of the destination labware,<br />
• Wash tips 1-8,<br />
• Aspirate with tips 1-5 from column 1 of the source labware,<br />
• Dispense with tips 1-5 into column 1 of the destination labware,<br />
• Wash tips 1-8.<br />
Set SAMPLE_CNT to -1 to deactivate this feature again.<br />
You can prompt the operator for the value of SAMPLE_CNT during script runtime<br />
with the Set Variable command (see 15.41 “Set Variable Command”, 15-101).<br />
14.1.4.18 TIP_MASK<br />
This variable lets you modify the tip selection for the pipetting commands<br />
Aspirate, Dispense, Mix, Wash Tips, Periodic Wash, Get DiTis, Drop DiTis, Pick<br />
Up DiTis, Set DiTis Back, Detect Liquid, Activate/Deactivate PMP, and Move LiHa.<br />
The tip selection is specified as a numeric, bit-coded value (tip1 = 1, tip2 = 2, tip3<br />
= 4, tip4 = 8, tip5 = 16, tip6 = 32, tip7 = 64, tip8 = 128). The tip selection assigned<br />
with this variable masks the tip selection specified in the pipetting command (bitwise<br />
AND of the tip selection in the pipetting command and the current<br />
TIP_MASK value). Thus, only tips selected in both masks will be used for<br />
pipetting.<br />
Set TIP_MASK to -1 to deactivate the mask. <strong>Freedom</strong> <strong>EVOware</strong> then uses the tip<br />
mask which is specified in the pipetting command.<br />
14.1.4.19 TIP_OFFSET<br />
This variable lets you modify the tip selection for the pipetting commands<br />
Aspirate, Dispense, Mix and Move LIHA. A positive value increments the tip<br />
number(s) which are specified in the pipetting command. For example, if the<br />
pipetting command specifies tips 2 and 3 and you set this variable to 1, tips 3 and<br />
4 will be used instead. Negative values of TIP_OFFSET shift the tip selection in<br />
the opposite direction.<br />
Set TIP_OFFSET to 0 to deactivate the offset. <strong>Freedom</strong> <strong>EVOware</strong> then uses the<br />
tip selection which is specified in the pipetting command.<br />
14.1.4.20 TIP_VOLUME_x<br />
Liquid level detection can be used e.g. to ensure minimal tip contamination by<br />
limiting the tip immersion depth. Liquid level detection is activated with the<br />
Aspirate and/or Dispense parameters of the liquid class you are using.<br />
This variable, which only applies to pipetting with the LiHa, can be used to bypass<br />
or override the automatic liquid level detection for special applications. For<br />
example, you can write a script for pipetting with a variable tip immersion depth.<br />
To bypass automatic liquid level detection, specify the volume of liquid in one of<br />
the wells by assigning a non-zero value to this variable. Replace the X in the<br />
variable name with the tip number, e.g. use TIP_VOLUME_2 for tip 2. The setting<br />
you make only applies to the next pipetting operation (aspirate, dispense or mix)<br />
and is reset to zero again after this. If necessary, you can specify a value for this<br />
variable several times in your script. Tip: You can use the Detect Liquid command<br />
before you pipette to detect the actual liquid level in the wells (see<br />
14.1.4.2 “DETECTED_VOLUME_x”, 14-5).<br />
<strong>Freedom</strong> <strong>EVOware</strong> <strong>Software</strong> <strong>Manual</strong>, 393172, en, V<strong>2.3</strong> 14 - 9
14 - Advanced Programming Features for Scripts<br />
Variables and Expressions in Scripts<br />
14.1.4.21 TUBE_CNT<br />
After executing a PosID command, <strong>Freedom</strong> <strong>EVOware</strong> writes the number of<br />
tubes scanned in the script so far to TUBE_CNT.<br />
14.1.4.22 WELL_OFFSET<br />
This variable lets you modify the well selection for the pipetting commands<br />
Aspirate, Dispense, Mix and Move LIHA. <strong>Freedom</strong> <strong>EVOware</strong> shifts the well<br />
selection in the labware by the number of wells defined in WELL_OFFSET. If e.g.<br />
A1 to H1 of a microplate have been selected in the script and WELL_OFFSET is<br />
set to 8, <strong>Freedom</strong> <strong>EVOware</strong> will pipette in A2 to H2. When applying the offset,<br />
<strong>Freedom</strong> <strong>EVOware</strong> shifts from rear to front and then from left to right. Negative<br />
values of WELL_OFFSET shift the well selection in the opposite direction.<br />
Set WELL_OFFSET to 0 to deactivate the offset. <strong>Freedom</strong> <strong>EVOware</strong> then uses<br />
the well selection which is specified in the pipetting command.<br />
14.1.5 Script Commands That Accept String Variables<br />
The following table lists all commands that accept string variables:<br />
Tab. 14-4 Commands that accept string variables<br />
Icon Command Parameter name(s)<br />
Balance<br />
Store weight in variable<br />
Condition<br />
If variable<br />
Execute Application<br />
Path & Name & Command line<br />
Execute VB Script<br />
Path & Name<br />
Notification<br />
Receiver Group, Subject and Message<br />
Send Command<br />
Command<br />
Set Variable<br />
Value<br />
Start Script<br />
Script.gem<br />
14 - 10 <strong>Freedom</strong> <strong>EVOware</strong> <strong>Software</strong> <strong>Manual</strong>, 393172, en, V<strong>2.3</strong>
14 - Advanced Programming Features for Scripts<br />
Variables and Expressions in Scripts<br />
Tab. 14-4 Commands that accept string variables (cont.)<br />
Icon Command Parameter name(s)<br />
Sub-Routine<br />
Path & Name<br />
User Prompt<br />
Text<br />
Worklist<br />
Worklist (Path and Name)<br />
Worklist Import<br />
Import Worklist and Generated <strong>Freedom</strong> <strong>EVOware</strong><br />
Worklist<br />
14.1.6 Mathematical Expressions<br />
In addition to using variables and constants, certain script commands also allow<br />
you to specify a mathematical expression (see 14.1.7 “Script Commands That<br />
Accept Numeric Variables and Expressions”, 14-12).<br />
An expression is constructed from floating point numbers, variables and<br />
operators. The following operators are available:<br />
Tab. 14-5 Expressions that can be used with variables<br />
Operator<br />
Function<br />
+ addition<br />
- subtraction<br />
* multiplication<br />
/ division<br />
% modulo division (division remainder)<br />
( ) parenthesis, used to specify the evaluation<br />
order<br />
Examples of valid expressions:<br />
volume<br />
volume + 10.5<br />
volume * 2<br />
volume + (samples * 2)<br />
3 + 4 * 5<br />
Spaces in expressions are ignored. Multiplication and division have precedence<br />
over addition and subtraction.<br />
Modulo division returns the remainder of a division as an integer.<br />
Examples: 13 % 8 = 5, 49 % 8 = 1<br />
If e.g. the number of samples in a pipetting operation is not an exact multiple of<br />
the number of tips you are using, modulo division can be used to calculate how<br />
many samples you need to pipette in the last cycle of a pipetting loop. Take care<br />
when using modulo division if one or both of the arguments are negative values.<br />
<strong>Freedom</strong> <strong>EVOware</strong> <strong>Software</strong> <strong>Manual</strong>, 393172, en, V<strong>2.3</strong> 14 - 11
14 - Advanced Programming Features for Scripts<br />
Variables and Expressions in Scripts<br />
We recommend you to write a small test script to learn how modulo division works<br />
in this case.<br />
Numeric variables and expressions can also be converted to strings (see<br />
14.1.8 “Converting Numeric Variables and Expressions to Strings”, 14-13).<br />
14.1.7 Script Commands That Accept Numeric Variables and Expressions<br />
Some commands accept numeric variables and expressions instead of integers or<br />
floating point values, for example:<br />
Fig. 14-4 Using an expression in a command<br />
The following table lists all commands that accept numeric variables and<br />
expressions.<br />
Tab. 14-6 Commands that accept numeric variables and expressions<br />
Icon Command Parameter name(s)<br />
Aspirate<br />
Volume or Individual Volumes<br />
Begin Loop<br />
Number of loops<br />
Condition<br />
Both sides of the comparison operator<br />
Dispense<br />
Volume or Individual Volumes<br />
Import Variable<br />
Mix<br />
Line number in Read specified line<br />
Column number in Start in specified column<br />
Volume or Individual Volumes<br />
Periodic Wash<br />
Period<br />
PnP Vector<br />
Grid, Site and Position in labware<br />
RoMa Vector<br />
Grid and Site<br />
Set DITI Position<br />
Grid, Site and Position in labware<br />
14 - 12 <strong>Freedom</strong> <strong>EVOware</strong> <strong>Software</strong> <strong>Manual</strong>, 393172, en, V<strong>2.3</strong>
14 - Advanced Programming Features for Scripts<br />
Variables and Expressions in Scripts<br />
Tab. 14-6 Commands that accept numeric variables and expressions (cont.)<br />
Icon Command Parameter name(s)<br />
Set Variable<br />
Value<br />
Start Timer<br />
Timer<br />
Te-MO Relative<br />
Movements<br />
Te-MO Aspirate<br />
Offset<br />
Volume<br />
Te-MO Dispense<br />
Volume<br />
Te-MO Mix<br />
Volume<br />
Tip Alignment Check<br />
Wait for Timer<br />
Sensorplate position, Script aborts if... and Correct<br />
pipetting position if...<br />
Timer and Time span<br />
Wash Tips<br />
Volume in Waste and Volume in Cleaner<br />
Some of the above parameters (e.g. Timer, Grid and Site) expect integer values.<br />
Floating point values are also accepted and do not cause an error, but they will be<br />
rounded before being used. In such cases, it is recommended to use integer<br />
calculations to avoid unexpected results.<br />
14.1.8 Converting Numeric Variables and Expressions to Strings<br />
Some script commands (e.g. User Prompt) allow you to specify a numeric or<br />
string variable or a mathematical expression instead of a string, e.g. for displaying<br />
the value of the variable during runtime (see 14.1.10 “Script Commands That<br />
Accept Variables and Expressions Converted to a String”, 14-16).<br />
The expression or variable is enclosed within tilde characters “~”. <strong>Freedom</strong><br />
<strong>EVOware</strong> then replaces the expression with the value of the expression during<br />
runtime.<br />
The following shows an example script and the user prompt during script runtime:<br />
Fig. 14-5 <strong>Freedom</strong> <strong>EVOware</strong> script with user prompt<br />
<strong>Freedom</strong> <strong>EVOware</strong> <strong>Software</strong> <strong>Manual</strong>, 393172, en, V<strong>2.3</strong> 14 - 13
14 - Advanced Programming Features for Scripts<br />
Variables and Expressions in Scripts<br />
Fig. 14-6 User Prompt during script runtime<br />
See 15.41 “Set Variable Command”, 15-101.<br />
This example has a mathematical expression in the User Prompt command:<br />
Fig. 14-7 <strong>Freedom</strong> <strong>EVOware</strong> script with user prompt<br />
Fig. 14-8 User prompt during script runtime<br />
The next example passes a variable to an external application as a command line<br />
parameter:<br />
Fig. 14-9 Passing a variable to an external application<br />
The following example shows how to use string variables and numerical variables<br />
to generate a worklist file name:<br />
Fig. 14-10 Using string variables to generate worklist file names<br />
14 - 14 <strong>Freedom</strong> <strong>EVOware</strong> <strong>Software</strong> <strong>Manual</strong>, 393172, en, V<strong>2.3</strong>
14 - Advanced Programming Features for Scripts<br />
Variables and Expressions in Scripts<br />
In line 3, the numeric variable counter is converted to a string by enclosing it<br />
within tilde characters “~”. The string variable name is then assigned the value<br />
“worklist1”.<br />
In line 4, the Worklist command expects a string variable. The string variables<br />
path and name must be enclosed within tilde characters, since otherwise they<br />
would be interpreted literally.<br />
14.1.9 Array Variables<br />
An array of variables can be declared with the Set Variable command by<br />
appending a counter variable to the variable name and enclosing the counter<br />
variable within brackets [] and tilde characters “~”. <strong>Freedom</strong> <strong>EVOware</strong> then<br />
replaces the counter variable name with the value of the counter during runtime.<br />
In the following example script, which creates an array of 8 variables<br />
TipVolume[1], TipVolume[2] etc., tilde characters “~” have been used in the user<br />
prompt, too:<br />
Fig. 14-11 Array of variables<br />
The parameters of the Set Variable command are as follows:<br />
Fig. 14-12 Array of variables - Set Variable command<br />
The user prompt at runtime is as follows:<br />
<strong>Freedom</strong> <strong>EVOware</strong> <strong>Software</strong> <strong>Manual</strong>, 393172, en, V<strong>2.3</strong> 14 - 15
14 - Advanced Programming Features for Scripts<br />
Variables and Expressions in Scripts<br />
Fig. 14-13 Array of variables - User prompt during script runtime<br />
14.1.10 Script Commands That Accept Variables and Expressions Converted<br />
to a String<br />
The following table lists the commands that accept variables and expressions<br />
converted to a string (i.e. plain text):<br />
Tab. 14-7 Commands that accept variables and expressions converted to a string<br />
Icon Command Parameter name(s)<br />
Execute Application<br />
Path & Name & Command line<br />
Send Command<br />
Set Variable<br />
User Prompt<br />
Command (the expression is converted to an integer value<br />
before converting it to a string)<br />
Query (Value and Default are also accepted if you declare a<br />
string variable)<br />
Text<br />
14.1.11 Labware Attributes and String Variables<br />
The Set Variable command allows you to read from and write to the labware<br />
attribute “ID” from within pipetting scripts during script runtime. <strong>Freedom</strong><br />
<strong>EVOware</strong> uses the attribute “ID” to store the labware barcode. You can use this<br />
feature to access scanned barcodes from within pipetting scripts.<br />
You cannot read from or write to carrier attributes or other labware attributes in<br />
this way.<br />
This feature is available for both <strong>Freedom</strong> <strong>EVOware</strong> <strong>Standard</strong> and <strong>Freedom</strong><br />
<strong>EVOware</strong> Plus and is mainly intended for advanced applications. Take care when<br />
modifying labware attributes.<br />
In <strong>Freedom</strong> <strong>EVOware</strong> Plus, labware attributes are automatically assigned to string<br />
variables, so it is not necessary to use the Set Variable command in this case (see<br />
14.1.11.1 “Labware Attributes and String Variables in <strong>Freedom</strong> <strong>EVOware</strong> Plus”,<br />
14-18).<br />
Each of the attributes is associated with a script variable using the following<br />
syntax:<br />
$[index].$<br />
[index] is the well number (for microplates) or tube number (for tube racks).<br />
14 - 16 <strong>Freedom</strong> <strong>EVOware</strong> <strong>Software</strong> <strong>Manual</strong>, 393172, en, V<strong>2.3</strong>
14 - Advanced Programming Features for Scripts<br />
Variables and Expressions in Scripts<br />
If you omit [index], then the string returns the labware or tube rack barcode<br />
instead of the well or tube barcode.<br />
For example:<br />
$MyTubeRack2[5].ID$ - barcode of tube 5 in tube rack “MyTubeRack2”<br />
$MyTubeRack1.ID$ - barcode for the tube rack “MyTubeRack1”<br />
See 11.7.1 “Assigning a Label (Name) to the Labware”, 11-19.<br />
An alternative syntax is as follows:<br />
$[site_global][index].$<br />
[site_global] is the site number counted for all sites for this labware type on the<br />
worktable, counted from rear to front and then from left to right. It is not the same<br />
as the site number on the carrier. For example, if there are two 3-position MP<br />
carriers on the worktable at grid position 10 and 20, [site_global] = 4 for this carrier<br />
type refers to site 1 of the carrier at grid position 20.<br />
[index] is the well number (for microplates) or tube number (for tube racks).<br />
If you omit [index], then the string returns the labware or tube rack barcode<br />
instead of the well or tube barcode. You must not omit [site_global].<br />
For example:<br />
$Tube 16 mm 16 Pos[2][3].ID$ - barcode of tube 3, second tube rack on the<br />
worktable (tube racks only have one site)<br />
$MP 3Pos[4].ID$ - barcode of the labware at site 1 of the second MP carrier on<br />
the worktable<br />
$MP 3Pos[3][18].ID$ - barcode of well 18 on the labware at site 3 of the first MP<br />
carrier on the worktable<br />
Microplate wells do not normally have barcode labels. Nonetheless, the internal<br />
database of <strong>Freedom</strong> <strong>EVOware</strong> provides a barcode attribute field for microplate<br />
wells, too. This can be used for special applications, e.g. sample tracking.<br />
Script example<br />
The following example assumes that there is only one MP carrier on the<br />
worktable.<br />
The label of the labware on site 1 is Labware4.<br />
The label of the labware on site 2 is Labware5.<br />
Fig. 14-14 Example script<br />
Line 1 sets the labware barcode of site 1 to “567”.<br />
Line 2 sets the well barcode of site 2, well 3 to “d123”.<br />
Line 3 copies the labware barcode of site 1 to string variable BC1.<br />
Line 4 displays the string BC1 (= “567”) on the screen.<br />
<strong>Freedom</strong> <strong>EVOware</strong> <strong>Software</strong> <strong>Manual</strong>, 393172, en, V<strong>2.3</strong> 14 - 17
14 - Advanced Programming Features for Scripts<br />
Variables and Expressions in Scripts<br />
Line 5 copies the well barcode of site 2, well 3 to string variable BC2.<br />
Line 6 displays the string BC2 (= “d123”) on the screen.<br />
Note: Normally, the barcode attribute is set by a barcode scanning operation such<br />
as the PosID command, and not by assigning a value as in script line 1. The<br />
above script solely serves to demonstrate the features which are available.<br />
14.1.11.1 Labware Attributes and String Variables in <strong>Freedom</strong> <strong>EVOware</strong> Plus<br />
<strong>Freedom</strong> <strong>EVOware</strong> Plus allows you to read from and write to labware attributes<br />
from within pipetting scripts during script runtime. You cannot read from or write to<br />
carrier attributes in this way.<br />
Each of the attributes is automatically associated with a script variable using the<br />
following syntax:<br />
.<br />
For example:<br />
MyPlate1.Grip_Narrow<br />
MyPlate2.ID<br />
You can use this feature e.g. to access scanned barcodes from within pipetting<br />
scripts. This feature is mainly intended for advanced applications. Take care when<br />
modfying labware attributes. See also 11.7.1 “Assigning a Label (Name) to the<br />
Labware”, 11-19.<br />
The Attributes dialog box for the Edit Labware dialog box normally shows<br />
descriptive names for the attributes. Check the Show internal names checkbox to<br />
see the internal names which are used.<br />
14.1.12 Validating a Script Which Contains Variables<br />
Each time you insert a new command in your script or edit an existing command,<br />
<strong>Freedom</strong> <strong>EVOware</strong> validates the entire script to check for errors and shows all<br />
commands which have errors in red. When validating the script, <strong>Freedom</strong><br />
<strong>EVOware</strong> uses default values for variables which are set during run-time, e.g.<br />
from operator prompts or return codes.<br />
The following table lists the default values which are used during validation for<br />
commands which can declare variables:<br />
Tab. 14-8 Commands with default values for variables for use during script validation<br />
Icon Command Variable and value used during validation<br />
Balance Store weight in variable = 0<br />
Execute Application Return value = 0<br />
Send Command Response = ““ (empty string), Error code = 0<br />
Set Variable<br />
Variable = specified default value or default string<br />
14 - 18 <strong>Freedom</strong> <strong>EVOware</strong> <strong>Software</strong> <strong>Manual</strong>, 393172, en, V<strong>2.3</strong>
14 - Advanced Programming Features for Scripts<br />
Conditions<br />
Choose Auto-Validation in the Edit menu if you want to switch off automatic<br />
validation of pipetting scripts (see 6.2.5 “Auto-Validation”, 6-9). You then need<br />
to validate the script manually (by choosing Validate Script in the Edit menu).<br />
If your script contains conditional jumps or branches, validation only checks those<br />
parts of the script which are executed with the default values of the IF variables in<br />
Condition commands. For this reason, it is not recommended to declare variables<br />
(e.g. with the Set Variable command) within conditional parts of the script.<br />
14.2 Conditions<br />
See 15.44 “Condition Command”, 15-109.<br />
14.3 Sub-routines<br />
Sub-routines are <strong>Freedom</strong> <strong>EVOware</strong> scripts (*.esc files) which can be used as<br />
parts of another script. They allow you to structure and shorten complex scripts<br />
and to build libraries of pipetting procedures (e.g. serial dilutions) which you want<br />
to use repeatedly.<br />
The differences between separate scripts and sub-routines are:<br />
• sub-routines use the same worktable as the main script.<br />
• sub-routines can share variables and timers with the main script.<br />
• sub-routines can execute a worklist which is loaded by the main script.<br />
Loop names and line markers for conditions are not shared between sub-routines<br />
and the main script.<br />
14.3.1 Creating a Sub-Routine<br />
To create a sub-routine, simply write a <strong>Freedom</strong> <strong>EVOware</strong> script and then store it.<br />
You must use the same worktable layout as in the main script.<br />
14.3.2 Sub-Routine Command<br />
The Sub-Routine command executes another script as part of the current script.<br />
<strong>Freedom</strong> <strong>EVOware</strong> <strong>Software</strong> <strong>Manual</strong>, 393172, en, V<strong>2.3</strong> 14 - 19
14 - Advanced Programming Features for Scripts<br />
Sub-routines<br />
Fig. 14-15 Sub-Routine command<br />
The parameters of the Sub-Routine command are as follows:<br />
Path & Name<br />
This edit field shows the filename and location of the <strong>Freedom</strong> <strong>EVOware</strong><br />
script you want to use as a sub-routine.<br />
Edit: Click this button if you want to open the specified sub-routine in a new<br />
window for editing and/or checking.<br />
Browse: Click this button to look for existing <strong>Freedom</strong> <strong>EVOware</strong> scripts and to<br />
choose the one you want to use as a sub-routine.<br />
Execute sub-routine and wait for it to finish<br />
This option causes the main <strong>Freedom</strong> <strong>EVOware</strong> script to wait for the subroutine<br />
to finish before continuing.<br />
Start sub-routine and continue<br />
With this option, the main pipetting script continues without waiting for the<br />
sub-routine to finish (“asynchronous” sub-routine, i.e. asynchronous<br />
processing of the main script and the sub-routine). To allow asynchronous<br />
processing, the sub-routine must only contain the following commands:<br />
• LiHa Commands<br />
– Aspirate<br />
– Dispense<br />
– Mix<br />
– Wash Tips<br />
– Periodic Wash<br />
– Activate DITI Handling<br />
– Get DITIs<br />
– Drop DITIs<br />
– Set DITI Position<br />
– Pick Up DITIs<br />
– Set DITIs Back<br />
– Pickup ZipTip<br />
– Detect Liquid<br />
– Tip Alignment Check<br />
– Move LiHa<br />
– Waste<br />
– Active WashStation<br />
14 - 20 <strong>Freedom</strong> <strong>EVOware</strong> <strong>Software</strong> <strong>Manual</strong>, 393172, en, V<strong>2.3</strong>
14 - Advanced Programming Features for Scripts<br />
Sub-routines<br />
– Worklist<br />
– Export Data<br />
– <strong>Manual</strong> Tip Alignment<br />
• Programming Commands<br />
– Start Timer<br />
– Wait for Timer<br />
– Execute Application<br />
– Comment<br />
– User Prompt<br />
– BeginLoop<br />
– EndLoop<br />
– Set Variable<br />
– ImportVariable<br />
– ExportVariable<br />
– Condition<br />
– If-Then<br />
– Else<br />
– End-If<br />
– Group or Wizard<br />
– GroupEnd or WizardEnd<br />
– Sub-routine<br />
– Execute VB Script<br />
– On Error Go To<br />
– Resume<br />
– End Script<br />
– Send Command<br />
• Commands for the Plate and Tube Robot<br />
– Move ROMA<br />
– ROMA Vector<br />
– Transfer Labware<br />
– Move PnP<br />
– PnP Vector<br />
– Transfer Tube<br />
• MCA96 Commands<br />
– Aspirate<br />
– Dispense<br />
– Mix<br />
– Wash<br />
– Get DITIs<br />
– Drop DITIs<br />
– Get Tip Block<br />
– Drop Tip Block<br />
– Move<br />
– Vector<br />
– Relative Movements<br />
– Transfer Labware<br />
• MCA384 Commands<br />
– Aspirate<br />
– Dispense<br />
<strong>Freedom</strong> <strong>EVOware</strong> <strong>Software</strong> <strong>Manual</strong>, 393172, en, V<strong>2.3</strong> 14 - 21
14 - Advanced Programming Features for Scripts<br />
Sub-routines<br />
– Mix<br />
– Wash<br />
– Get Head Adapter<br />
– Drop Head Adapter<br />
– Get DITIs<br />
– Drop DITIs<br />
– Get Tip Block<br />
– Drop Tip Block<br />
– Move<br />
– Transfer Labware<br />
– Vector<br />
– Dock CGM<br />
– Undock CGM<br />
• Te-MO Commands<br />
– Aspirate<br />
– Dispense<br />
– Mix<br />
– Wash<br />
– Wash 384 Tip Head<br />
– Get DITIs<br />
– Drop DITIs<br />
– Get Tip Block<br />
– Drop Tip Block<br />
– Refill Trough<br />
– Relative Movements<br />
– Load the Te-MO<br />
– Fill System (384 tip head)<br />
• All device commands (see 13.2 “Overview of Device Commands”, 13-12)<br />
Wait for previously started sub-routine to finish<br />
This option causes the main <strong>Freedom</strong> <strong>EVOware</strong> script to wait for the<br />
specified, previously started sub-routine to finish before continuing.<br />
Note: You can also start a sub-routine from within another sub-routine by<br />
including a Sub-Routine command within the sub-routine.<br />
14.3.3 Exchanging Data With Sub-Routines<br />
Variables are shared between the main script and the sub-routine and can be<br />
used to exchange data. To feed in data into the sub-routine, set a variable in the<br />
main script and use the same variable in the sub-routine (e.g. for volumes or<br />
loops). To get data back from a sub-routine (e.g. error codes), write the data to a<br />
variable in the sub-routine and use the same variable in the main script.<br />
14.3.4 Validating a Script Which Contains Sub-Routines<br />
Each time you insert a new command in your script or edit an existing command,<br />
<strong>Freedom</strong> <strong>EVOware</strong> validates the entire script to check for errors and shows all<br />
commands which have errors in red. If a problem is detected in a sub-routine,<br />
14 - 22 <strong>Freedom</strong> <strong>EVOware</strong> <strong>Software</strong> <strong>Manual</strong>, 393172, en, V<strong>2.3</strong>
14 - Advanced Programming Features for Scripts<br />
Loop Options<br />
<strong>Freedom</strong> <strong>EVOware</strong> shows the Sub-Routine command in the main script in red. To<br />
correct the error, you have to open and correct the sub-routine script manually.<br />
14.3.5 Log file for a Script Which Contains Sub-Routines<br />
<strong>Freedom</strong> <strong>EVOware</strong> reports the currently executed script line in the log window<br />
and in the log file. A typical line in the log file is as follows:<br />
E 11:55:42 Line 1 : Aspirate<br />
When <strong>Freedom</strong> <strong>EVOware</strong> executes a sub-routine, it displays the line number in<br />
the main script and the line number in the sub-routine, separated by a slash /. A<br />
typical line then looks like this (line 2 of the main script, line 1 of the sub-routine,<br />
Aspirate command):<br />
E 11:55:42 Line 2/1 : Aspirate<br />
If you are using sub-routines nested inside of other sub-routines, the log file<br />
shows the line numbers of all levels, separated by slashes.<br />
14.4 Loop Options<br />
Many of the standard pipetting commands allow you to specify loop options, which<br />
let you use a different column, row, well and/or labware for each loop cycle if you<br />
are using the command in a script loop.<br />
In the dialog box for the command, click Loop Options to view, define or modify<br />
the loop options:<br />
Fig. 14-16 Loop Options dialog box<br />
The fields of the Loop Options dialog box are as follows:<br />
In every cycle of loop ...<br />
Choose the name of the loop to which the loop options refer. The popup list<br />
only shows the loops which are relevant for the script line where you have<br />
inserted the pipetting command. Note: Loop names are defined in your script<br />
with the Begin Loop command.<br />
<strong>Freedom</strong> <strong>EVOware</strong> <strong>Software</strong> <strong>Manual</strong>, 393172, en, V<strong>2.3</strong> 14 - 23
14 - Advanced Programming Features for Scripts<br />
Loop Options<br />
Vary, for<br />
Specify how to modify the current well selection in each cycle of the loop.<br />
Choose column, row, well or labware from the vary popup list and specify the<br />
increment in the for field. A positive value in the for field increases the chosen<br />
parameter (e.g. use the next column) and a negative value decreases it.<br />
<strong>Freedom</strong> <strong>EVOware</strong> interprets a positive value in the for field as follows:<br />
Column<br />
Row<br />
Well<br />
Labware<br />
Left to right<br />
Rear to front<br />
Rear to front, then left to right<br />
Rear to front on same carrier,<br />
then the next carrier to the right<br />
For standard 96-well microplates with 8 wells per column, “In every cycle of<br />
loop ’loop1’, vary the well for +8” has the same effect as “In every cycle of loop<br />
’loop1’, vary the column for +1”.<br />
Add option<br />
Click this button to add the current loop settings to the list of defined loop<br />
options.<br />
Defined loop options<br />
This shows you all of the currently defined loop options for the pipetting<br />
command.<br />
Delete option<br />
Click this button to delete the currently selected loop option from the list.<br />
14 - 24 <strong>Freedom</strong> <strong>EVOware</strong> <strong>Software</strong> <strong>Manual</strong>, 393172, en, V<strong>2.3</strong>
15 - Script Commands<br />
Aspirate Command<br />
15 Script Commands<br />
This chapter contains detailed descriptions of the <strong>Freedom</strong> <strong>EVOware</strong> script<br />
commands.<br />
In <strong>Freedom</strong> <strong>EVOware</strong> Plus, when the Script Editor is open the Commands tab of<br />
the Control Bar only shows script commands (commands which are used for<br />
writing pipetting scripts, see 13.1 “Overview of Script Commands”, 13-1). When<br />
the Process Editor is open, the Commands tab of the Control Bar only shows<br />
device commands (commands for the optional devices, see 13.2 “Overview of<br />
Device Commands”, 13-12).<br />
In <strong>Freedom</strong> <strong>EVOware</strong> <strong>Standard</strong>, the Control Bar always shows both command<br />
types (it does not have a Process Editor).<br />
15.1 Aspirate Command<br />
The Aspirate command is used to pick up liquid from specified positions on the<br />
worktable.<br />
Fig. 15-1 Aspirate command<br />
The parameters of the Aspirate command are as follows:<br />
<strong>Freedom</strong> <strong>EVOware</strong> <strong>Software</strong> <strong>Manual</strong>, 393172, en, V<strong>2.3</strong> 15 - 1
15 - Script Commands<br />
Aspirate Command<br />
Tip Selection<br />
Select the tips you want to use.<br />
Loop options<br />
If you are using the command in a script loop, click this button if you want to<br />
specify loop options. This allows you to use a different column, row, well and/<br />
or labware item for each cycle of the loop. You can choose different loop<br />
options for the source and the destination. The gray (protected) field shows<br />
the number of loop options you have chosen. See 14.4 “Loop Options”, 14-<br />
23.<br />
Liquid Classes<br />
Choose the required liquid class from the pull down list. The list only shows<br />
liquid classes which are suitable for the current configuration of the pipetting<br />
instrument. For example, you will not see liquid classes for DiTis if the LiHa is<br />
not currently configured with DiTis.<br />
Click the Editor button to start the liquid classes editor if you want to create a<br />
new class or modify an existing class (see 10 “Configuring Liquid Classes”,<br />
10-1). Furthermore you can customize an existing liquid class for use by<br />
this command only (click the Customize button). If you customize an existing<br />
liquid class, the liquid class name is shown in the script command and in the<br />
script editor within double angled brackets “>> name
15 - Script Commands<br />
Dispense Command<br />
Location<br />
Select the labware for the source by clicking on the labware in the Worktable<br />
Editor. Then click on the required source well(s). The gray (protected) field<br />
then shows the label (name) of the labware that you have selected (it shows a<br />
generic name if you have not assigned a label).<br />
Cursor (x,y)<br />
You can also select wells by entering the x coordinate (from left to right) and<br />
the y coordinate (from top to bottom) of the top left well you want to select. Tip:<br />
The x and y coordinates of each well are shown in a tool tip if you move the<br />
cursor over the well area in the Location panel.<br />
Select: Click this button to select the wells you have specified in the Cursor<br />
(x,y) field. This button has no effect if your well selection does not fit within the<br />
well area of the labware. For example, if you have chosen to use 8 tips and<br />
you are pipetting to a 96-well microplate in landcape orientation, you can only<br />
choose the required x coordinate (the y coordinate must be 1).<br />
15.2 Dispense Command<br />
The Dispense command is used to dispense liquid to specified positions on the<br />
worktable.<br />
Fig. 15-2 Dispense command<br />
<strong>Freedom</strong> <strong>EVOware</strong> <strong>Software</strong> <strong>Manual</strong>, 393172, en, V<strong>2.3</strong> 15 - 3
15 - Script Commands<br />
Dispense Command<br />
The parameters of the Dispense command are as follows:<br />
Tip Selection<br />
Select the tips you want to use.<br />
Loop options<br />
If you are using the command in a script loop, click this button if you want to<br />
specify loop options. This allows you to use a different column, row, well and/<br />
or labware item for each cycle of the loop. You can choose different loop<br />
options for the source and the destination. The gray (protected) field shows<br />
the number of loop options you have chosen. See 14.4 “Loop Options”, 14-<br />
23.<br />
Liquid Classes<br />
Choose the required liquid class from the pull down list. The list only shows<br />
liquid classes which are suitable for the current configuration of the pipetting<br />
instrument. For example, you will not see liquid classes for DiTis if the LiHa is<br />
not currently configured with DiTis.<br />
Click the Editor button to start the liquid classes editor if you want to create a<br />
new class or modify an existing class (see 10 “Configuring Liquid Classes”,<br />
10-1). Furthermore you can customize an existing liquid class for use by<br />
this command only (click the Customize button and click the Dispense tab). If<br />
you customize an existing liquid class, the liquid class name is shown in the<br />
script command and in the script editor within double angled brackets “>><br />
name
15 - Script Commands<br />
Mix Command<br />
Location<br />
Select the labware for the destination by clicking on the labware in the<br />
Worktable Editor. Then click on the required destination well(s). The gray<br />
(protected) field then shows the label (name) of the labware that you have<br />
selected (it shows a generic name if you have not assigned a label).<br />
Cursor (x,y)<br />
You can also select wells by entering the x coordinate (from left to right) and<br />
the y coordinate (from top to bottom) of the top left well you want to select. Tip:<br />
The x and y coordinates of each well are shown in a tool tip if you move the<br />
cursor over the well area in the Location panel.<br />
Select: Click this button to select the wells you have specified in the Cursor<br />
(x,y) field. This button has no effect if your well selection does not fit within the<br />
well area of the labware. For example, if you have chosen to use 8 tips and<br />
you are pipetting to a 96-well microplate in landcape orientation, you can only<br />
choose the required x coordinate (the y coordinate must be 1).<br />
15.3 Mix Command<br />
The Mix command performs a mix operation by aspirating and then dispensing at<br />
the same position.<br />
Fig. 15-3 Mix command<br />
<strong>Freedom</strong> <strong>EVOware</strong> <strong>Software</strong> <strong>Manual</strong>, 393172, en, V<strong>2.3</strong> 15 - 5
15 - Script Commands<br />
Mix Command<br />
The parameters of the Mix command are as follows:<br />
Tip Selection<br />
Select the tips you want to use.<br />
Loop options<br />
If you are using the command in a script loop, click this button if you want to<br />
specify loop options. This allows you to use a different column, row, well and/<br />
or labware item for each cycle of the loop. You can choose different loop<br />
options for the source and the destination. The gray (protected) field shows<br />
the number of loop options you have chosen. See 14.4 “Loop Options”, 14-<br />
23.<br />
Liquid Classes<br />
Choose the required liquid class from the pull down list. The list only shows<br />
liquid classes which are suitable for the current configuration of the pipetting<br />
instrument. For example, you will not see liquid classes for DiTis if the LiHa is<br />
not currently configured with DiTis.<br />
Click the Editor button to start the liquid classes editor if you want to create a<br />
new class or modify an existing class (see 10 “Configuring Liquid Classes”,<br />
10-1). Furthermore you can customize an existing liquid class for use by<br />
this command only (click the Customize button and click the Aspirate or<br />
Dispense tab). If you customize an existing liquid class, the liquid class name<br />
is shown in the script command and in the script editor within double angled<br />
brackets “>> name
15 - Script Commands<br />
Mix Command<br />
adjacent and are often smaller in size. Choose the compartment which you<br />
want to use for pipetting (the main compartment is normally compartment 1).<br />
Well compartments are specified in the labware configuration. This field is<br />
inactive (gray) if the well only has one compartment.<br />
Location<br />
Select the labware for the source and destination by clicking on the labware in<br />
the Worktable Editor. Then click on the required well(s). The gray (protected)<br />
field then shows the label (name) of the labware that you have selected (it<br />
shows a generic name if you have not assigned a label).<br />
Cursor (x,y)<br />
You can also select wells by entering the x coordinate (from left to right) and<br />
the y coordinate (from top to bottom) of the top left well you want to select. Tip:<br />
The x and y coordinates of each well are shown in a tool tip if you move the<br />
cursor over the well area in the Location panel.<br />
Select: Click this button to select the wells you have specified in the Cursor<br />
(x,y) field. This button has no effect if your well selection does not fit within the<br />
well area of the labware. For example, if you have chosen to use 8 tips and<br />
you are pipetting to a 96-well microplate in landcape orientation, you can only<br />
choose the required x coordinate (the y coordinate must be 1).<br />
<strong>Freedom</strong> <strong>EVOware</strong> <strong>Software</strong> <strong>Manual</strong>, 393172, en, V<strong>2.3</strong> 15 - 7
15 - Script Commands<br />
Wash Tips Command<br />
15.4 Wash Tips Command<br />
The Wash Tips command is used to flush and wash fixed tips or to flush DITI<br />
adapters using a wash station. It is not intended for flushing DITI tips (DITI tips<br />
should not normally be flushed). If you are using DITIs, make sure in your script<br />
that there are none attached when this command is executed.<br />
Fig. 15-4 Wash Tips command<br />
Tips should be washed as often as necessary, e.g. after a pipetting sequence and<br />
before taking a new sample. DITI adapters should be flushed after replacing the<br />
DITIs several times to renew the system liquid column in the DITI adapters. This<br />
ensures maximum pipetting accuracy.<br />
The parameters of the Wash Tips command are as follows:<br />
Tip Selection<br />
Select the tips you want to wash.<br />
Volume in Waste<br />
Specify the volume of system liquid which should be used to flush the inside of<br />
the tips. Flushing takes place with the tips positioned above the waste of the<br />
specified wash station (tip height for fixed tips = Z-dispense; tip height for DITI<br />
adapters = Z-travel).<br />
Volume in Cleaner<br />
Specify the volume of system liquid which should be used to wash the outside<br />
of the tips. Washing takes place with the tips lowered into the cleaner of the<br />
specified wash station (tip height = Z-max). The wash cycle is skipped if you<br />
are flushing DITI adapters and Volume in Cleaner is ignored in this case.<br />
15 - 8 <strong>Freedom</strong> <strong>EVOware</strong> <strong>Software</strong> <strong>Manual</strong>, 393172, en, V<strong>2.3</strong>
15 - Script Commands<br />
Wash Tips Command<br />
Use Waste<br />
Specify the worktable position for the waste you want to use by clicking on it in<br />
the Worktable Editor. You must first put a wash station with waste unit in the<br />
Worktable Editor at the required position. Alternatively, choose the required<br />
waste position from the pull down list. The list shows all waste units which are<br />
currently positioned in the Worktable Editor.<br />
The gray (protected) fields show the worktable coordinates of the selected<br />
waste.<br />
Use Cleaner<br />
Specify the worktable position for the cleaner you want to use by clicking on it<br />
in the Worktable Editor. You must first put a wash station with cleaner unit in<br />
the Worktable Editor at the required position. Alternatively, choose the<br />
required cleaner position from the pull down list. The list shows all cleaner<br />
units which are currently positioned in the Worktable Editor.<br />
The gray (protected) fields show the worktable coordinates of the selected<br />
cleaner.<br />
Choose a shallow cleaner if you only need to clean the ends of the tips.<br />
Choose a deep cleaner if there is a possibility of contamination along the shaft<br />
of the tip. The deep cleaner requires a larger volume of system liquid and<br />
cleaning takes somewhat longer.<br />
The wash cycle is skipped if you are flushing DITI adapters and Use Cleaner<br />
is ignored in this case.<br />
Use Fast-Wash Module<br />
If your instrument is fitted with FWO (Fast Wash Option) or MPO (Monitored<br />
Pump Option), check this checkbox to use the Fast Wash module instead of<br />
the dilutors to wash the tips. If you use the Fast Wash module, the volumes of<br />
liquid which are dispensed in the flushing and washing steps may differ<br />
significantly from the volumes you specify. This is due to accuracy limitations<br />
of the pump.<br />
Use Pinch Valve<br />
If your instrument is fitted with the Low Volume Option, check this checkbox to<br />
activate the Low Volume Option after washing the tips.<br />
Delay in Waste<br />
To reduce the pressure inside the tubing, you can instruct the instrument to<br />
keep the valves open somewhat longer after flushing before moving the LiHa<br />
away from the waste (range: 0 - 1000 ms).<br />
Delay in Cleaner<br />
To reduce the pressure inside the tubing, you can instruct the instrument to<br />
keep the valves open somewhat longer after washing before moving the LiHa<br />
away from the cleaner (range: 0 - 1000 ms). The wash cycle is skipped if you<br />
are flushing DITI adapters and Delay in Cleaner is ignored in this case.<br />
Retract with<br />
Specify the speed with which you want to retract the tips from the cleaner<br />
(range: 0 - 100 mm/s). If the speed is too high, droplets may be dragged out of<br />
the cleaner and stick to the outside of the tips.<br />
Airgap volume, Airgap speed<br />
These settings are used to specify a system trailing airgap (STAG) which will<br />
be aspirated after washing the tips. Specify the required size of the airgap in µl<br />
and the aspiration speed for the airgap in µl/s. The system trailing airgap is<br />
used to prevent contamination by ensuring that the system liquid cannot come<br />
into contact with the liquid which will be aspirated in a subsequent pipetting<br />
command.<br />
<strong>Freedom</strong> <strong>EVOware</strong> <strong>Software</strong> <strong>Manual</strong>, 393172, en, V<strong>2.3</strong> 15 - 9
15 - Script Commands<br />
Periodic Wash Command<br />
15.5 Periodic Wash Command<br />
The Periodic Wash command is used to flush DITI adapters in a wash station at<br />
specified, regular intervals. It is not intended for flushing DITI tips.<br />
Fig. 15-5 Periodic Wash command<br />
This command is used to flush the DITI adapters at specified, regular intervals<br />
when DITIs are replaced. The flushing takes place after the DITIs are dropped<br />
and before getting new ones. This should be done after replacing the DITIs<br />
several times to renew the system liquid column in the DITI adapters. This<br />
ensures maximum pipetting accuracy.<br />
The Periodic Wash command is not executed at its line in the script, but affects<br />
subsequent Drop DITI and Get DITI commands. It also affects DITI replacement<br />
actions in worklists.<br />
You can deactivate a previous Periodic Wash command by specifying another<br />
Periodic Wash command with the period set to 0 (zero).<br />
The parameters of the Periodic Wash command are as follows:<br />
Tip Selection<br />
Select the DITI adapters you want to flush.<br />
Volume in Waste<br />
Specify the volume of system liquid which should be used to flush the DITI<br />
adapters (range: 0 - 100 ml). Flushing takes place with the tips positioned<br />
above the waste of the specified wash station (tip height for fixed tips = Z-<br />
dispense; tip height for DITI adapters = Z-travel).<br />
15 - 10 <strong>Freedom</strong> <strong>EVOware</strong> <strong>Software</strong> <strong>Manual</strong>, 393172, en, V<strong>2.3</strong>
15 - Script Commands<br />
Periodic Wash Command<br />
Volume in Cleaner<br />
Specify the volume of system liquid which should be used to wash the outside<br />
of the tips (range: 0.1 - 100 ml). Washing takes place with the tips lowered into<br />
the cleaner of the specified wash station (tip height = Z-max). The wash cycle<br />
is skipped if you are flushing DITI adapters and Volume in Cleaner is ignored<br />
in this case.<br />
Use Waste<br />
Specify the worktable position for the waste you want to use by clicking on it in<br />
the Worktable Editor. You must first put a wash station with waste unit in the<br />
Worktable Editor at the required position. Alternatively, choose the required<br />
waste position from the pull down list. The list shows all waste units which are<br />
currently positioned in the Worktable Editor.<br />
The gray (protected) fields show the worktable coordinates of the selected<br />
waste.<br />
Use Cleaner<br />
Specify the worktable position for the cleaner you want to use by clicking on it<br />
in the Worktable Editor. You must first put a wash station with cleaner unit in<br />
the Worktable Editor at the required position. Alternatively, choose the<br />
required cleaner position from the pull down list. The list shows all cleaner<br />
units which are currently positioned in the Worktable Editor.<br />
The gray (protected) fields show the worktable coordinates of the selected<br />
cleaner.<br />
Choose a shallow cleaner if you only need to clean the ends of the tips.<br />
Choose a deep cleaner if there is a possibility of contamination along the shaft<br />
of the tip. The deep cleaner requires a larger volume of system liquid and<br />
cleaning takes somewhat longer.<br />
The wash cycle is skipped if you are flushing DITI adapters and Use Cleaner<br />
is ignored in this case.<br />
Use Fast-Wash Module<br />
If your instrument is fitted with FWO (Fast Wash Option) or MPO (Monitored<br />
Pump Option), check this checkbox to use the Fast Wash module instead of<br />
the dilutors to wash the tips.<br />
Use Pinch Valve<br />
If your instrument is fitted with the Low Volume Option, check this checkbox to<br />
activate the Low Volume Option after washing the tips.<br />
Period<br />
Specify the number of DITI replacement actions after which <strong>Freedom</strong><br />
<strong>EVOware</strong> should flush the DITI adapters.<br />
Delay in Waste<br />
To reduce the pressure inside the tubing, you can instruct the instrument to<br />
keep the valves open somewhat longer after flushing before moving the LiHa<br />
away from the waste (range: 0 - 1000 ms).<br />
Delay in Cleaner<br />
To reduce the pressure inside the tubing, you can instruct the instrument to<br />
keep the valves open somewhat longer after washing before moving the LiHa<br />
away from the cleaner (range: 0 - 1000 ms). The wash cycle is skipped if you<br />
are flushing DITI adapters and Delay in Cleaner is ignored in this case.<br />
Retract with<br />
Specify the speed with which you want to retract the tips from the cleaner. If<br />
the speed is too high, droplets may be dragged out of the cleaner and stick to<br />
the outside of the tips. Retract with is ignored if you are flushing DITI adapters.<br />
<strong>Freedom</strong> <strong>EVOware</strong> <strong>Software</strong> <strong>Manual</strong>, 393172, en, V<strong>2.3</strong> 15 - 11
15 - Script Commands<br />
Activate DITI Handling Command<br />
Airgap volume, Airgap speed<br />
These settings are used to specify a system trailing airgap (STAG) which will<br />
be aspirated after washing the tips. Specify the required size of the airgap in µl<br />
and the aspiration speed for the airgap in µl/s. The system trailing airgap is<br />
used to prevent contamination by ensuring that the system liquid cannot come<br />
into contact with the liquid which will be aspirated in a subsequent pipetting<br />
command.<br />
15.6 Activate DITI Handling Command<br />
<strong>Freedom</strong> <strong>EVOware</strong> provides special facilities to ensure that sufficient DITIs are<br />
present on the worktable for your script or process and to fetch new DITI racks as<br />
and when needed. In <strong>Freedom</strong> <strong>EVOware</strong> <strong>Standard</strong>, automatic DITI replacement is<br />
done using a DITI replacement script (sub-routine).<br />
The Activate DITI Handling command, which is only available in <strong>Freedom</strong><br />
<strong>EVOware</strong> <strong>Standard</strong>, activates the automatic DITI Handling feature in your<br />
pipetting script and specifies the DITI replacement script to use. <strong>Freedom</strong><br />
<strong>EVOware</strong> Plus uses a different concept for automatic DITI handling.<br />
Your script must include an Activate DITI Handling command for each DITI type<br />
you want to replace automatically.<br />
Fig. 15-6 Activate DITI Handling command<br />
The parameters of the Activate DITI Handling command are as follows:<br />
Script Path and Name<br />
Specify the filename and location of the script (sub-routine) you want to use to<br />
replace DITI racks when all of the DITIs have been used. This is normally<br />
done using one or more Transfer Labware commands. The worktable location<br />
(grid, site) of the DITI racks which will need replacing during runtime is<br />
specified in the DITI replacement script using the pre-defined variables<br />
Replace_Diti_Grid and Replace_DiTi_Site. For each Get DITI command in<br />
your pipetting script, <strong>Freedom</strong> <strong>EVOware</strong> automatically sets these variables to<br />
the correct grid and site for the selected DITI type before executing the<br />
command.<br />
Edit: Click this button if you want to open the specified script in a new window<br />
for editing and/or checking.<br />
Browse: Click this button to look for existing scripts and to choose the one<br />
you want to use.<br />
15 - 12 <strong>Freedom</strong> <strong>EVOware</strong> <strong>Software</strong> <strong>Manual</strong>, 393172, en, V<strong>2.3</strong>
15 - Script Commands<br />
Get DITIs Command<br />
For DITI type<br />
Choose the DITI type to which this command should apply. The list shows all<br />
of the LiHa DITI types which are defined in the labware database.<br />
To de-activate the automatic DITI Handling feature again, use the Activate DITI<br />
Handling command and leave the Script Path and Name field blank.<br />
See 17.1 “Using the Automatic DITI Handling feature”, 17-1 for more<br />
information.<br />
15.7 Get DITIs Command<br />
The Get DITIs command is used to pick up DITIs (disposable tips) of the specified<br />
type from a DITI rack. <strong>Freedom</strong> <strong>EVOware</strong> keeps track of their position on the<br />
worktable and automatically picks up the next available unused DITIs of the<br />
chosen type.<br />
Note: DiTi handling is automatic in <strong>Freedom</strong> <strong>EVOware</strong> Plus.<br />
This command is only shown in the Control Bar if you are using DiTis on the LiHa.<br />
<strong>Freedom</strong> <strong>EVOware</strong> does not detect the LiHa tip type automatically. If you are<br />
using DITIs you must configure them manually (see 8.4.2.1 “LiHa (Liquid Handling<br />
Arm)”, 8-22).<br />
Fig. 15-7 Get DITIs command<br />
The parameters of the Get DITIs command are as follows:<br />
Tip Selection<br />
Select the tips you want to pick up. You can only choose tips which are<br />
configured with DITIs.<br />
DITI Type<br />
Choose the required DITI type from the pull-down list. The list shows all of the<br />
LiHa DITI types which are defined in the labware database.<br />
<strong>Freedom</strong> <strong>EVOware</strong> <strong>Software</strong> <strong>Manual</strong>, 393172, en, V<strong>2.3</strong> 15 - 13
15 - Script Commands<br />
Drop DITIs Command<br />
If DITI is not fetched, try 3 times and then proceed to next DITI position<br />
If you do not check this checkbox and the DITIs could not be picked up,<br />
<strong>Freedom</strong> <strong>EVOware</strong> displays an error message and waits for user input.<br />
If you check this checkbox and the DITIs could not be picked up, <strong>Freedom</strong><br />
<strong>EVOware</strong> makes two more attempts before proceeding to the next DITI<br />
position and trying again.<br />
Airgap volume, Airgap speed<br />
These settings are used to specify a system trailing airgap (STAG) which will<br />
be aspirated after mounting the DITIs. Specify the required size of the airgap<br />
in µl and the aspiration speed for the airgap in µl/s. The system trailing airgap<br />
is used to prevent contamination by ensuring that the system liquid cannot<br />
come into contact with the liquid which will be aspirated in a subsequent<br />
pipetting command.<br />
Also see 15.9 “Set DITI Position Command”, 15-15.<br />
15.8 Drop DITIs Command<br />
The Drop DITIs command is used to discard the specified DITIs into the specified<br />
DITI waste.<br />
Note: DiTi handling is automatic in <strong>Freedom</strong> <strong>EVOware</strong> Plus.<br />
This command is only shown in the Control Bar if you are using DiTis on the LiHa.<br />
<strong>Freedom</strong> <strong>EVOware</strong> does not detect the LiHa tip type automatically. If you are<br />
using DITIs you must configure them manually (see 8.4.2.1 “LiHa (Liquid Handling<br />
Arm)”, 8-22).<br />
Fig. 15-8 Drop DITIs command<br />
The parameters of the Drop DITIs command are as follows:<br />
Tip Selection<br />
Select the tips you want to discard. You can only choose tips which are<br />
configured with DITIs.<br />
15 - 14 <strong>Freedom</strong> <strong>EVOware</strong> <strong>Software</strong> <strong>Manual</strong>, 393172, en, V<strong>2.3</strong>
15 - Script Commands<br />
Set DITI Position Command<br />
Use DITI Waste<br />
Specify the worktable position for the DITI waste you want to use by clicking<br />
on the waste in the Worktable Editor. You must first put a DITI waste in the<br />
Worktable Editor at the required position. Alternatively, choose the required<br />
DITI waste from the pull down list. The list shows all of the DITI wastes which<br />
are currently positioned in the Worktable Editor.<br />
The gray (protected) fields show the worktable coordinates of the selected<br />
DITI waste.<br />
15.9 Set DITI Position Command<br />
If you are using DITIs, <strong>Freedom</strong> <strong>EVOware</strong> remembers the position in the DITI<br />
rack of the last DITI which was fetched. When starting a new run, the Get DITIs<br />
command starts picking up DITIs at the next available position. After loading a<br />
new DITI rack onto the worktable during script runtime (e.g. using the RoMa), you<br />
should use the Set DITI Position command in your script to set the DITI Position<br />
counter to 1. This ensures that the next DITI is fetched from position 1 rather than<br />
from the middle of the new rack.<br />
You can specify the next position separately for each of the available DITI types<br />
(i.e. DITI racks on the worktable).<br />
Note: If you want to specify the next DITI position manually before the script or<br />
process is started, use the direct command Set DITI Position (see 5.4.1.3 “Direct<br />
commands”, 5-10) or create a maintenance script which contains the Set DITI<br />
Position command (see 6.4.2 “Run Maintenance”, 6-10).<br />
Note: DiTi handling is automatic in <strong>Freedom</strong> <strong>EVOware</strong> Plus.<br />
This command is only shown in the Control Bar if you are using DiTis on the LiHa.<br />
<strong>Freedom</strong> <strong>EVOware</strong> does not detect the LiHa tip type automatically. If you are<br />
using DITIs you must configure them manually (see 8.4.2.1 “LiHa (Liquid Handling<br />
Arm)”, 8-22).<br />
If your pipetting instrument is fitted with two liquid handling arms, the Set DITI<br />
Position command will be provided in the Control Bar for both arms. However,<br />
please note that the same DITI position counter (and the same pool of unused<br />
DITIs) is used by both arms.<br />
Fig. 15-9 Set DITI Position command<br />
The parameters of the Set DITI Position command are as follows:<br />
<strong>Freedom</strong> <strong>EVOware</strong> <strong>Software</strong> <strong>Manual</strong>, 393172, en, V<strong>2.3</strong> 15 - 15
15 - Script Commands<br />
Pick Up DITIs Command<br />
DITI type<br />
Choose the DITI type whose position you want to set. The list shows all of the<br />
LiHa DITI types which are defined in the labware database. DITI types are<br />
assigned to DITI racks in the labware definition for the rack (see 9.4.1 “Editing<br />
Labware, Well Dimensions Tab”, 9-19).<br />
Next DITI position<br />
Grid, Site: Specify the worktable position of a DITI rack containing unused<br />
DITIs of this type by clicking on the rack in the Worktable Editor. You can also<br />
specify numeric constants or variables. The specified grid and site must<br />
contain a DITI rack.<br />
Position in labware: Specify the labware position in the DITI rack for the next<br />
available unused DITI of this type. You can also specify a numeric constant or<br />
a variable. <strong>Freedom</strong> <strong>EVOware</strong> counts labware positions from rear to front and<br />
then from left to right.<br />
Set last position<br />
If you have activated the feature Optimize positions when fetching DITIs,<br />
<strong>Freedom</strong> <strong>EVOware</strong> fetches new DITIs either starting from the beginning of the<br />
DITI rack or starting from the end of the DITI rack, depending on the situation<br />
(see 8.4.2.1 “LiHa (Liquid Handling Arm)”, 8-22, Optimize positions when<br />
fetching DITIs). In this case, <strong>Freedom</strong> <strong>EVOware</strong> maintains two counters for<br />
the last used DITI position (for DITIs which are taken from the beginning of the<br />
rack and for DITIs which are taken from the end of the rack). Check this<br />
checkbox if you want to set the last used DITI position for the end counter<br />
instead of for the beginning counter.<br />
If you have activated the feature Optimize positions when fetching DITIs, after<br />
loading a new DITI rack onto the worktable during script runtime you should<br />
use the Set DITI Position command twice in your script, to set the beginning<br />
counter to 1 and the end counter to 96.<br />
The Set last position checkbox is inactive (grey) if you have not activated<br />
Optimize positions when fetching DITIs. If you have previously specified the<br />
last used DITI position, it will be ignored during script execution.<br />
15.10 Pick Up DITIs Command<br />
The Pick Up DITIs command is used to pick up DITIs which have already been<br />
used and put back into a DITI rack with the Set DITIs Back command. You must<br />
specify the DITIs you want to pick up.<br />
Note: DiTi handling is automatic in <strong>Freedom</strong> <strong>EVOware</strong> Plus.<br />
This command is only shown in the Control Bar if you are using DiTis on the LiHa.<br />
<strong>Freedom</strong> <strong>EVOware</strong> does not detect the LiHa tip type automatically. If you are<br />
using DITIs you must configure them manually (see 8.4.2.1 “LiHa (Liquid Handling<br />
Arm)”, 8-22).<br />
15 - 16 <strong>Freedom</strong> <strong>EVOware</strong> <strong>Software</strong> <strong>Manual</strong>, 393172, en, V<strong>2.3</strong>
15 - Script Commands<br />
Pick Up DITIs Command<br />
Fig. 15-10 Pick Up DITIs command<br />
The parameters of the Pick Up DITIs command are as follows:<br />
Tip Selection<br />
Select the tips you want to pick up. You can only choose tips which are<br />
configured with DITIs.<br />
Loop options<br />
If you are using the command in a script loop, click this button if you want to<br />
specify loop options. This allows you to use a different column, row, well and/<br />
or labware item for each cycle of the loop. The gray (protected) field shows<br />
the number of loop options you have chosen. See 14.4 “Loop Options”, 14-<br />
23.<br />
DITI Type<br />
Choose the required DITI type from the pull-down list. The list shows all of the<br />
LiHa DITI types which are defined in the labware database.<br />
Location<br />
Select the DITI rack where you want to pick up the DITIs by clicking on the<br />
rack in the Worktable Editor. The gray (protected) field at the top of the<br />
Location panel shows the label (name) of the labware that you have selected<br />
(it shows a generic name if you have not assigned a label). Now click on the<br />
required well(s).<br />
<strong>Freedom</strong> <strong>EVOware</strong> <strong>Software</strong> <strong>Manual</strong>, 393172, en, V<strong>2.3</strong> 15 - 17
15 - Script Commands<br />
Set DITIs Back Command<br />
15.11 Set DITIs Back Command<br />
The Set DITIs Back command is used to return used DITIs to specified positions<br />
on a DITI rack for later use. This command requires the Lower DITI Eject option.<br />
Note: DiTi handling is automatic in <strong>Freedom</strong> <strong>EVOware</strong> Plus.<br />
This command is only shown in the Control Bar if you are using DiTis on the LiHa.<br />
<strong>Freedom</strong> <strong>EVOware</strong> does not detect the LiHa tip type automatically. If you are<br />
using DITIs you must configure them manually (see 8.4.2.1 “LiHa (Liquid Handling<br />
Arm)”, 8-22).<br />
Fig. 15-11 Set DITIs Back command<br />
The parameters of the Set DITIs Back command are as follows:<br />
Tip Selection<br />
Select the tips you want to put down. You can only choose tips which are<br />
configured with DITIs.<br />
Loop options<br />
If you are using the command in a script loop, click this button if you want to<br />
specify loop options. This allows you to use a different column, row, well and/<br />
or labware item for each cycle of the loop. The gray (protected) field shows<br />
the number of loop options you have chosen. See 14.4 “Loop Options”, 14-<br />
23.<br />
Location<br />
Select the DITI rack where you want to put down the DITIs by clicking on the<br />
rack in the Worktable Editor. Then click on the required well(s). The gray<br />
(protected) field at the top of the panel shows the label (name) of the labware<br />
that you have selected (it shows a generic name if you have not assigned a<br />
label).<br />
15 - 18 <strong>Freedom</strong> <strong>EVOware</strong> <strong>Software</strong> <strong>Manual</strong>, 393172, en, V<strong>2.3</strong>
15 - Script Commands<br />
Pickup ZipTip Command<br />
15.12 Pickup ZipTip Command<br />
The Pickup ZipTip command is used to pick up ZipTips. ZipTips are disposable<br />
tips which are pre-filled with liquid and thus do not need an aspirate command.<br />
<strong>Freedom</strong> <strong>EVOware</strong> keeps track of their position on the worktable and<br />
automatically picks up the next available unused ZipTips of the chosen type.<br />
The Pick Up ZipTip command automatically aspirates a specified volume of air<br />
before picking up the tips. The same volume should be chosen in the subsequent<br />
Dispense command, which then ejects the pre-filled liquid into the well.<br />
Fig. 15-12 Pickup ZipTip command<br />
The parameters of the Pickup ZipTip command are as follows:<br />
Tip Selection<br />
Select the tips you want to pick up. You can only choose tips which are<br />
configured with DITIs or ZipTips.<br />
Loop options<br />
If you are using the command in a script loop, click this button if you want to<br />
specify loop options. This allows you to use a different column, row, well and/<br />
or labware item for each cycle of the loop. The gray (protected) field shows<br />
the number of loop options you have chosen. See 14.4 “Loop Options”, 14-<br />
23.<br />
ZipTip Type<br />
Choose the required ZipTip type from the pull-down list. ZipTips are stored in<br />
DITI racks. The list shows all of the LiHa DITI and ZipTip types which are<br />
defined in the labware database.<br />
<strong>Freedom</strong> <strong>EVOware</strong> <strong>Software</strong> <strong>Manual</strong>, 393172, en, V<strong>2.3</strong> 15 - 19
15 - Script Commands<br />
Detect Liquid Command<br />
Airgap<br />
Choose the required size of the airgap in µl and the aspiration speed for the<br />
airgap in µl/s.<br />
Location<br />
Select the DITI rack where you want to pick up the ZipTips by clicking on the<br />
rack in the Worktable Editor. The gray (protected) field at the top of the<br />
Location panel shows the label (name) of the labware that you have selected<br />
(it shows a generic name if you have not assigned a label). Now click on the<br />
required well(s).<br />
ZipTips can be washed after use in the Active WashStation (see 15.23 “Active<br />
WashStation Command”, 15-36).<br />
Also see 15.9 “Set DITI Position Command”, 15-15.<br />
15.13 Detect Liquid Command<br />
Liquid level detection is one of the options available for aspirating and dispensing<br />
and can be individually defined for each liquid class. The Detect Liquid command<br />
is used to carry out liquid level detection without pipetting and reports the liquid<br />
volume for each of the chosen wells in the labware.<br />
The volumes are returned in a set of variables DETECTED_VOLUME_x, where x<br />
is the tip number.<br />
Fig. 15-13 Detect Liquid command<br />
The parameters of the Detect Liquid command are as follows:<br />
15 - 20 <strong>Freedom</strong> <strong>EVOware</strong> <strong>Software</strong> <strong>Manual</strong>, 393172, en, V<strong>2.3</strong>
15 - Script Commands<br />
Detect Liquid Command<br />
Tip Selection<br />
Select the tips you want to use.<br />
Loop options<br />
If you are using the command in a script loop, click this button if you want to<br />
specify loop options. This allows you to use a different column, row, well and/<br />
or labware item for each cycle of the loop. The gray (protected) field shows<br />
the number of loop options you have chosen. See 14.4 “Loop Options”, 14-<br />
23.<br />
Liquid Class<br />
Choose the required liquid class from the pull down list. The list only shows<br />
liquid classes which are suitable for the current configuration of the pipetting<br />
instrument. For example, you will not see liquid classes for DiTis if the LiHa is<br />
not currently configured with DiTis.<br />
Click the Editor button to start the liquid classes editor if you want to create a<br />
new class or modify an existing class (see 10 “Configuring Liquid Classes”,<br />
10-1).<br />
Location<br />
Select the labware which you want to check by clicking on the labware in the<br />
Worktable Editor. The gray (protected) field at the top right of the Location<br />
panel shows the label (name) of the labware that you have selected (it shows<br />
a generic name if you have not assigned a label). Now click on the required<br />
well(s).<br />
Tip Spacing<br />
The Tip Spacing parameter controls the distance between adjacent pipetting<br />
tips for this command. You can choose a different tip spacing for the source<br />
labware and the destination labware. Tip spacing is only relevant if you want<br />
to use more than one tip. A tip spacing of 1 means that the tips will be spread<br />
to match the distance between adjacent wells of the labware. A tip spacing of<br />
2 will select every other well of the labware. You can only choose values for tip<br />
spacing which are meaningful for the labware geometry.<br />
The liquid handling arm achieves the highest mechanical accuracy when the<br />
tips are not spread. For high-density labware such as 1536-well microplates,<br />
you should choose tip spacing such that the tips are adjacent to one another<br />
(physical tip spacing 9 mm). Accordingly, for 1536-well microplates you should<br />
set tip spacing to 4 (every fourth well).<br />
Compartment in well<br />
Some special labware types (e.g. for protein crystallography) have wells with<br />
several compartments (cavities). <strong>Freedom</strong> <strong>EVOware</strong> can pipette a different<br />
liquid into each of the compartments. Each well typically has one main<br />
compartment and one or more satellite compartments which are directly<br />
adjacent and are often smaller in size. Choose the compartment which you<br />
want to use for pipetting (the main compartment is normally compartment 1).<br />
Well compartments are specified in the labware configuration. This field is<br />
inactive (gray) if the well only has one compartment.<br />
<strong>Freedom</strong> <strong>EVOware</strong> <strong>Software</strong> <strong>Manual</strong>, 393172, en, V<strong>2.3</strong> 15 - 21
15 - Script Commands<br />
Te-Fill Aspirate Command<br />
Cursor (x,y)<br />
You can also select wells by entering the x coordinate (from left to right) and<br />
the y coordinate (from top to bottom) of the top left well you want to select. Tip:<br />
The x and y coordinates of each well are shown in a tool tip if you move the<br />
cursor over the well area in the Location panel.<br />
Select: Click this button to select the wells you have specified in the Cursor<br />
(x,y) field. This button has no effect if your well selection does not fit within the<br />
well area of the labware. For example, if you have chosen to use 8 tips and<br />
you are pipetting to a 96-well microplate in landcape orientation, you can only<br />
choose the required x coordinate (the y coordinate must be 1).<br />
15.14 Te-Fill Aspirate Command<br />
The Te-Fill option uses a bi-directional pump instead of the diluter to aspirate and<br />
dispense large volumes of liquid, for example buffer solutions.<br />
The Te-Fill can be optionally equipped with a 6-way valve, which allows you to<br />
switch between six different liquid containers. If fitted, the 6-way valve must be<br />
activated in the Configuration Tool (see 8.4.2.4 “Te-Fill option”, 8-30). Also use<br />
the Configuration Tool to assign the names of the liquids you want to use to the<br />
channels of the 6-way valve (see 8.4.2.6 “6-way valve for Te-Fill”, 8-31). The<br />
assigned names will then be shown in this command in the Channel / Liquid pulldown<br />
list.<br />
The Te-Fill Aspirate command is used to pick up liquid from specified positions on<br />
the worktable using the Te-Fill option.<br />
During runtime, the pipetting instrument will switch from using the diluter to using<br />
the bi-directional pump and switch back again after pipetting - you do not need to<br />
use the Te-Fill Switch Valve command for this purpose.<br />
15 - 22 <strong>Freedom</strong> <strong>EVOware</strong> <strong>Software</strong> <strong>Manual</strong>, 393172, en, V<strong>2.3</strong>
15 - Script Commands<br />
Te-Fill Aspirate Command<br />
Fig. 15-14 Te-Fill Aspirate command<br />
The parameters of the Te-Fill Aspirate command are as follows:<br />
Tip Selection<br />
Select the tips you want to use. You can only select tips which are configured<br />
with the Te-Fill option (see 8.4.2.1 “LiHa (Liquid Handling Arm)”, 8-22, Te-<br />
Fill option).<br />
Loop options<br />
If you are using the command in a script loop, click this button if you want to<br />
specify loop options. This allows you to use a different column, row, well and/<br />
or labware item for each cycle of the loop. You can choose different loop<br />
options for the source and the destination. The gray (protected) field shows<br />
the number of loop options you have chosen. See 14.4 “Loop Options”, 14-<br />
23.<br />
Z-Position<br />
Choose the Z-Position to which the selected tips should be lowered for<br />
pipetting. All other tips remain at the currently applicable Z-Travel height.<br />
Specify a Z offset if required. A positive value for the offset lowers the tips.<br />
<strong>Freedom</strong> <strong>EVOware</strong> <strong>Software</strong> <strong>Manual</strong>, 393172, en, V<strong>2.3</strong> 15 - 23
15 - Script Commands<br />
Te-Fill Dispense Command<br />
Channel / Liquid<br />
If the Te-Fill is fitted with the 6-way valve option, choose the channel (liquid<br />
container) you want to use. The pull-down list is not available if the 6-way<br />
valve is not present and/or not activated.<br />
During runtime, the pipetting instrument will select the correct liquid channel<br />
automatically - you do not need to use the Te-Fill Switch Valve command for<br />
this purpose.<br />
Volume<br />
Specify the volume that you want to aspirate.<br />
Speed<br />
Specify the required pipetting speed for each tip. The available range depends<br />
on how many tips you have selected. The Te-Fill pump has a range of 8 to 80<br />
ml/min. If you have selected e.g. four tips, the range for this field is 2 to 20 ml/<br />
min.<br />
Tip Spacing<br />
The Tip Spacing parameter controls the distance between adjacent pipetting<br />
tips for this command. Tip spacing is only relevant if you want to use more<br />
than one tip. A tip spacing of 1 means that the tips will be spread to match the<br />
distance between adjacent wells of the labware. A tip spacing of 2 will select<br />
every other well of the labware. You can only choose values for tip spacing<br />
which are meaningful for the labware geometry.<br />
The liquid handling arm achieves the highest mechanical accuracy when the<br />
tips are not spread. For high-density labware such as 1536-well microplates,<br />
you should choose tip spacing such that the tips are adjacent to one another<br />
(physical tip spacing 9 mm). Accordingly, for 1536-well microplates you should<br />
set tip spacing to 4 (every fourth well).<br />
Location<br />
Select the labware for the source by clicking on the labware in the Worktable<br />
Editor. Then click on the required source well(s). The gray (protected) field<br />
then shows the label (name) of the labware that you have selected (it shows a<br />
generic name if you have not assigned a label).<br />
Cursor (x,y)<br />
You can also select wells by entering the x coordinate (from left to right) and<br />
the y coordinate (from top to bottom) of the top left well you want to select. Tip:<br />
The x and y coordinates of each well are shown in a tool tip if you move the<br />
cursor over the well area in the Location panel.<br />
Select: Click this button to select the wells you have specified in the Cursor<br />
(x,y) field. This button has no effect if your well selection does not fit within the<br />
well area of the labware. For example, if you have chosen to use 8 tips and<br />
you are pipetting to a 96-well microplate in landcape orientation, you can only<br />
choose the required x coordinate (the y coordinate must be 1).<br />
15.15 Te-Fill Dispense Command<br />
The Te-Fill option uses a bi-directional pump instead of the diluter to aspirate and<br />
dispense large volumes of liquid, for example buffer solutions.<br />
The Te-Fill can be optionally equipped with a 6-way valve, which allows you to<br />
switch between six different liquid containers. If fitted, the 6-way valve must be<br />
activated in the Configuration Tool (see 8.4.2.4 “Te-Fill option”, 8-30). Also use<br />
the Configuration Tool to assign the names of the liquids you want to use to the<br />
15 - 24 <strong>Freedom</strong> <strong>EVOware</strong> <strong>Software</strong> <strong>Manual</strong>, 393172, en, V<strong>2.3</strong>
15 - Script Commands<br />
Te-Fill Dispense Command<br />
channels of the 6-way valve (see 8.4.2.6 “6-way valve for Te-Fill”, 8-31). The<br />
assigned names will then be shown in this command in the Channel / Liquid pulldown<br />
list.<br />
The Te-Fill Dispense command is used to dispense liquid to specified positions on<br />
the worktable using the Te-Fill option.<br />
During runtime, the pipetting instrument will switch from using the diluter to using<br />
the bi-directional pump and switch back again after pipetting - you do not need to<br />
use the Te-Fill Switch Valve command for this purpose.<br />
Fig. 15-15 Te-Fill Dispense command<br />
The parameters of the Te-Fill Dispense command are as follows:<br />
Tip Selection<br />
Select the tips you want to use. You can only select tips which are configured<br />
with the Te-Fill option (see 8.4.2.1 “LiHa (Liquid Handling Arm)”, 8-22, Te-<br />
Fill option).<br />
Loop options<br />
If you are using the command in a script loop, click this button if you want to<br />
specify loop options. This allows you to use a different column, row, well and/<br />
or labware item for each cycle of the loop. You can choose different loop<br />
options for the source and the destination. The gray (protected) field shows<br />
the number of loop options you have chosen. See 14.4 “Loop Options”, 14-<br />
23.<br />
<strong>Freedom</strong> <strong>EVOware</strong> <strong>Software</strong> <strong>Manual</strong>, 393172, en, V<strong>2.3</strong> 15 - 25
15 - Script Commands<br />
Te-Fill Prime Command<br />
Z-Position<br />
Choose the Z-Position to which the selected tips should be lowered for<br />
pipetting. All other tips remain at the currently applicable Z-Travel height.<br />
Specify a Z offset if required. A positive value for the offset lowers the tips.<br />
Channel / Liquid<br />
If the Te-Fill is fitted with the 6-way valve option, choose the channel (liquid<br />
container) you want to use. The pull-down list is not available if the 6-way<br />
valve is not present and/or not activated.<br />
During runtime, the pipetting instrument will select the correct liquid channel<br />
automatically - you do not need to use the Te-Fill Switch Valve command for<br />
this purpose.<br />
Volume<br />
Specify the volume that you want to aspirate.<br />
Speed<br />
Specify the required pipetting speed for each tip. The available range depends<br />
on how many tips you have selected. The Te-Fill pump has a range of 8 to 80<br />
ml/min. If you have selected e.g. four tips, the range for this field is 2 to 20 ml/<br />
min.<br />
Tip Spacing<br />
The Tip Spacing parameter controls the distance between adjacent pipetting<br />
tips for this command. Tip spacing is only relevant if you want to use more<br />
than one tip. A tip spacing of 1 means that the tips will be spread to match the<br />
distance between adjacent wells of the labware. A tip spacing of 2 will select<br />
every other well of the labware. You can only choose values for tip spacing<br />
which are meaningful for the labware geometry.<br />
The liquid handling arm achieves the highest mechanical accuracy when the<br />
tips are not spread. For high-density labware such as 1536-well microplates,<br />
you should choose tip spacing such that the tips are adjacent to one another<br />
(physical tip spacing 9 mm). Accordingly, for 1536-well microplates you should<br />
set tip spacing to 4 (every fourth well).<br />
Location<br />
Select the labware for the source by clicking on the labware in the Worktable<br />
Editor. Then click on the required source well(s). The gray (protected) field<br />
then shows the label (name) of the labware that you have selected (it shows a<br />
generic name if you have not assigned a label).<br />
Cursor (x,y)<br />
You can also select wells by entering the x coordinate (from left to right) and<br />
the y coordinate (from top to bottom) of the top left well you want to select. Tip:<br />
The x and y coordinates of each well are shown in a tool tip if you move the<br />
cursor over the well area in the Location panel.<br />
Select: Click this button to select the wells you have specified in the Cursor<br />
(x,y) field. This button has no effect if your well selection does not fit within the<br />
well area of the labware. For example, if you have chosen to use 8 tips and<br />
you are pipetting to a 96-well microplate in landcape orientation, you can only<br />
choose the required x coordinate (the y coordinate must be 1).<br />
15.16 Te-Fill Prime Command<br />
The Te-Fill option uses a bi-directional pump instead of the diluter to aspirate and<br />
dispense large volumes of liquid, for example buffer solutions.<br />
15 - 26 <strong>Freedom</strong> <strong>EVOware</strong> <strong>Software</strong> <strong>Manual</strong>, 393172, en, V<strong>2.3</strong>
15 - Script Commands<br />
Te-Fill Prime Command<br />
The Te-Fill can be optionally equipped with a 6-way valve, which allows you to<br />
switch between six different liquid containers. If fitted, the 6-way valve must be<br />
activated in the Configuration Tool (see 8.4.2.4 “Te-Fill option”, 8-30). Also use<br />
the Configuration Tool to assign the names of the liquids you want to use to the<br />
channels of the 6-way valve (see 8.4.2.6 “6-way valve for Te-Fill”, 8-31). The<br />
assigned names will then be shown in this command in the Channel / Liquid pulldown<br />
list.<br />
The Te-Fill Prime command is used to prime the liquid channel of the Te-Fill<br />
option.<br />
Fig. 15-16 Te-Fill Prime command<br />
The liquid channel should be primed as often as necessary, e.g. after a pipetting<br />
sequence, before taking a new sample, if you want to use a different liquid<br />
channel in subsequent pipetting steps and if the liquid needs to be replaced due to<br />
aging.<br />
DITI adapters should be flushed after replacing the DITIs several times to renew<br />
the liquid column in the DITI adapters. This ensures maximum pipetting accuracy.<br />
DITIs should not normally be flushed. If you are using DITIs, make sure in your<br />
script that there are none attached when this command is executed.<br />
The parameters of the Te-Fill Prime command are as follows:<br />
Tip Selection<br />
Select the tips you want to prime. You can only select tips which are<br />
configured with the Te-Fill option (see 8.4.2.1 “LiHa (Liquid Handling Arm)”,<br />
8-22, Te-Fill option).<br />
Volume in Waste<br />
Specify the volume of liquid which should be used to prime the liquid channel<br />
and the tips. Priming takes place with the tips positioned above the waste of<br />
the specified wash station (tip height for fixed tips = Z-dispense; tip height for<br />
DITI adapters = Z-travel).<br />
Use Waste<br />
Specify the worktable position for the waste you want to use by clicking on it in<br />
the Worktable Editor. You must first put a wash station with waste unit in the<br />
Worktable Editor at the required position. Alternatively, choose the required<br />
waste position from the pull down list. The list shows all waste units which are<br />
currently positioned in the Worktable Editor.<br />
The gray (protected) fields show the worktable coordinates of the selected<br />
waste.<br />
<strong>Freedom</strong> <strong>EVOware</strong> <strong>Software</strong> <strong>Manual</strong>, 393172, en, V<strong>2.3</strong> 15 - 27
15 - Script Commands<br />
Te-Fill Switch Valve Command<br />
Channel / Liquid<br />
If the Te-Fill is fitted with the 6-way valve option, choose the channel (liquid<br />
container) you want to use. The pull-down list is not available if the 6-way<br />
valve is not present and/or not activated.<br />
During runtime, the pipetting instrument will select the correct liquid channel<br />
automatically - you do not need to use the Te-Fill Switch Valve command for<br />
this purpose.<br />
Speed<br />
Specify the required priming speed for each tip. The available range depends<br />
on how many tips you have selected. The Te-Fill pump has a range of 8 to 80<br />
ml/min. If you have selected e.g. four tips, the range for this field is 2 to 20 ml/<br />
min.<br />
15.17 Te-Fill Switch Valve Command<br />
The Te-Fill option uses a bi-directional pump instead of the diluter to aspirate and<br />
dispense large volumes of liquid, for example buffer solutions.<br />
The Te-Fill can be optionally equipped with a 6-way valve, which allows you to<br />
switch between six different liquid containers. If fitted, the 6-way valve must be<br />
activated in the Configuration Tool (see 8.4.2.4 “Te-Fill option”, 8-30). Also use<br />
the Configuration Tool to assign the names of the liquids you want to use to the<br />
channels of the 6-way valve (see 8.4.2.6 “6-way valve for Te-Fill”, 8-31). The<br />
assigned names will then be shown in this command in the Channel / Liquid pulldown<br />
list.<br />
With the Te-Fill Aspirate, Dispense and Prime commands, the pipetting instrument<br />
will switch during runtime from using the diluter to using the bi-directional pump<br />
and switch back again after pipetting - you do not need to use the Te-Fill Switch<br />
Valve command for this purpose.<br />
The Te-Fill Switch Valve command is used for special applications which require<br />
the Te-Fill liquid path to be selected but without aspirating or dispensing.<br />
Fig. 15-17 Te-Fill Switch Valve command<br />
The parameters of the Te-Fill Switch Valve command are as follows:<br />
15 - 28 <strong>Freedom</strong> <strong>EVOware</strong> <strong>Software</strong> <strong>Manual</strong>, 393172, en, V<strong>2.3</strong>
15 - Script Commands<br />
Activate PMP Command<br />
Tip Selection<br />
Select the tips you want to use. You can only select tips which are configured<br />
with the Te-Fill option (see 8.4.2.1 “LiHa (Liquid Handling Arm)”, 8-22, Te-<br />
Fill option).<br />
Open channel to Large Volume Pump<br />
Position the valves in the pipetting instrument to select the liquid path through<br />
the bi-directional pump instead of through the diluter.<br />
Switch 6-way valve<br />
If the Te-Fill is fitted with the 6-way valve option, choose the channel (liquid<br />
container) you want to use. This option is not available if the 6-way valve is not<br />
present and/or not activated.<br />
Open standard liquid channel<br />
Position the valves in the pipetting instrument to select the liquid path through<br />
the diluter instead of through the bi-directional pump.<br />
Channel / Liquid<br />
If the Te-Fill is fitted with the 6-way valve option, choose the channel (liquid<br />
container) you want to use. The pull-down list is not available if the 6-way<br />
valve is not present and/or not activated.<br />
15.18 Activate PMP Command<br />
The Activate PMP command is used to activate the PMP (Pressure Monitored<br />
Pipetting) function at the appropriate point in your pipetting script. You must do<br />
this before getting (mounting) the PMP-controlled DiTis.<br />
This command is only shown in the Control Bar if you are using DiTis and you<br />
have enabled the PMP option (see 17.6.1 “Activating the PMP Option”, 17-17).<br />
Certain restrictions apply to the pipetting commands which are allowed between<br />
the Activate PMP command and a subsequent Deactivate PMP command (see<br />
17.6.2 “Permissible sequence of script commands for the PMP option”, 17-18).<br />
Fig. 15-18 Activate PMP command<br />
The parameters of the Activate PMP command are as follows:<br />
Tip Selection<br />
Select the tip or tips whose PMP function you want to activate. You can only<br />
choose tips which are configured with DITIs and with the PMP option.<br />
<strong>Freedom</strong> <strong>EVOware</strong> <strong>Software</strong> <strong>Manual</strong>, 393172, en, V<strong>2.3</strong> 15 - 29
15 - Script Commands<br />
Deactivate PMP Command<br />
15.19 Deactivate PMP Command<br />
The Deactivate PMP command is used to deactivate the PMP (Pressure<br />
Monitored Pipetting) function at the appropriate point in your pipetting script. You<br />
must do this after finishing the pipetting sequence and dropping the DITIs. All<br />
PMP-controlled DITIs must be dropped before deactivating PMP.<br />
This command is only shown in the Control Bar if you are using DiTis and you<br />
have enabled the PMP option (see 17.6.1 “Activating the PMP Option”, 17-17).<br />
Certain restrictions apply to the pipetting commands which are allowed between<br />
the Activate PMP command and a subsequent Deactivate PMP command (see<br />
17.6.2 “Permissible sequence of script commands for the PMP option”, 17-18).<br />
Fig. 15-19 Deactivate PMP command<br />
The parameters of the Deactivate PMP command are as follows:<br />
Tip Selection<br />
Select the tip or tips whose PMP function you want to deactivate. You can only<br />
choose tips which are configured with DITIs and with the PMP option. You will<br />
get a script error if you select a tip position whose PMP function was not<br />
previously activated with the Activate PMP command.<br />
15.20 Tip Alignment Check Command<br />
This command is used to check and re-adjust the alignment of the Liquid Handling<br />
Arm (LiHa) during script runtime. It is also able to detect bent tips. It is only<br />
intended for the LiHa of the <strong>Freedom</strong> EVO pipetting instrument and is normally<br />
only necessary if you are using microplates with 1536 wells or other high precision<br />
labware. The Tip Alignment Check command should only be necessary for long<br />
scripts which involve a large number of arm movements. Please note that this<br />
command performs a quick test and delivers less precise results than the Setup &<br />
Service software.<br />
Labware with 1536 wells has a very high packing density and the wells have a<br />
diameter of only 1.7 mm. The high precision requires a special LiHa design. In<br />
addition, 1536-well labware needs to be placed on a specially designed carrier.<br />
The special carrier and the high-precision LiHa are key components of the Tecan<br />
Positioning System (Te-PS).<br />
Arm alignment is done using the Te-PS Sensor plate, which is placed on the Te-<br />
PS Carrier. The tip alignment process moves each of the pipetting tips past the<br />
sensor plate, and lasers are used to accurately measure the position.<br />
The tip alignment can also be tested manually before or after running the script<br />
(see 15.27 “<strong>Manual</strong> Tip Alignment Command”, 15-57).<br />
15 - 30 <strong>Freedom</strong> <strong>EVOware</strong> <strong>Software</strong> <strong>Manual</strong>, 393172, en, V<strong>2.3</strong>
15 - Script Commands<br />
Tip Alignment Check Command<br />
Before starting a script which contains the Tip Alignment Check command, you<br />
must place the Te-PS Sensor plate on one of the sites of the Te-PS Carrier. Check<br />
that the sensor plate is properly connected to the pipetting instrument using the<br />
supplied cable.<br />
In addition, you must put the Te-PS Sensor plate at the same grid and site position<br />
in <strong>Freedom</strong> <strong>EVOware</strong>’s Worktable Editor.<br />
If necessary, the Tip Alignment Check command can also be used to check the tip<br />
alignment with other carrier and labware types. The test should then be carried<br />
out with the Te-PS Sensor plate placed on the same carrier which will be used for<br />
pipetting. However, due to the mechanical design and other factors, the Te-PS<br />
Carrier can achieve a higher alignment accuracy than conventional carrier types.<br />
Fig. 15-20 Tip Alignment Check command<br />
The parameters of the Tip Alignment command are as follows:<br />
Alignment options panel<br />
Te-PS Sensor plate position<br />
Specify the location of the Te-PS Sensor plate by clicking on the sensor plate<br />
in the Worktable Editor.<br />
Script aborts if misalignment is more than ...<br />
Specify a maximum value in mm for tip misalignment above which the script<br />
should be aborted. The maximum allowed misalignment depends on the<br />
radius and shape of the wells in the labware that you are using. It should be<br />
less than well radius - tip radius. For 1536-well labware, an appropriate value<br />
for this parameter is 0.5 mm.<br />
If tip misalignment exceeds the specified value, the instrument must be recalibrated<br />
by authorized personnel using the Setup & Service software. See<br />
1.2 “Reference Documents”, 1-3 for information on this software.<br />
<strong>Freedom</strong> <strong>EVOware</strong> <strong>Software</strong> <strong>Manual</strong>, 393172, en, V<strong>2.3</strong> 15 - 31
15 - Script Commands<br />
Tip Alignment Check Command<br />
If script aborts panel<br />
Send email notification<br />
Check this checkbox if you want to inform an operator or maintenance<br />
personnel by eMail if the script has aborted due to a tip alignment problem.<br />
<strong>Freedom</strong> <strong>EVOware</strong> can be configured to send messages about system<br />
events and error situations to specific groups of users. The groups are<br />
configured with the Configuration Tool. The notification feature requires the<br />
MAPI service to be installed (see 8.3.2 “Notifications Section”, 8-12).<br />
Choose the user group which should be notified from the pull-down list. You<br />
must configure the groups first.<br />
Subject: Specify the required subject of the email.<br />
Message: Specify the message you want to send.<br />
If script continues panel<br />
Correct pipetting position if misalignment is larger than/equal to ...<br />
If the tip misalignment is not too serious and the script can continue, specify<br />
the level of misalignment above which automatic re-adjustment of the LiHa<br />
axes should be undertaken (range: 0.1 - 1.0 mm). For 1536-well labware, an<br />
appropriate value for this parameter is 0.2 mm. The value you choose must be<br />
less than the value in Script aborts if misalignment is more than ....<br />
The misalignment correction is only made for the current script and is not<br />
stored. If subsequent scripts use labware with 1536 wells, they should also<br />
include the Tip Alignment Check command.<br />
and well area of used labware is equal to or less than<br />
You can limit the correction to small wells only by specifying the area of the<br />
wells.<br />
15 - 32 <strong>Freedom</strong> <strong>EVOware</strong> <strong>Software</strong> <strong>Manual</strong>, 393172, en, V<strong>2.3</strong>
15 - Script Commands<br />
Move LiHa Command<br />
15.21 Move LiHa Command<br />
The Move LiHa command is used to move the liquid handling arm (LiHa) from one<br />
position to another without performing an Aspirate or Dispense operation.<br />
Fig. 15-21 Move LiHa command<br />
The parameters of the Move LiHa command are as follows:<br />
Tip Selection<br />
Select the tips you want to use.<br />
Loop options<br />
If you are using the command in a script loop, click this button if you want to<br />
specify loop options. This allows you to use a different column, row, well and/<br />
or labware item for each cycle of the loop. The gray (protected) field shows<br />
the number of loop options you have chosen. See 14.4 “Loop Options”, 14-<br />
23.<br />
<strong>Freedom</strong> <strong>EVOware</strong> <strong>Software</strong> <strong>Manual</strong>, 393172, en, V<strong>2.3</strong> 15 - 33
15 - Script Commands<br />
Move LiHa Command<br />
Type of movement<br />
Choose X-Move, Y-Move or Z-Move to move only one axis of the LiHa. You<br />
can then specify the speed of the movement. Z-Move only moves the selected<br />
tips.<br />
The options Positioning with global Z-travel, Positioning with local Z-travel and<br />
Positioning with variable Z-travel move the LiHa to the labware at maximum<br />
speed. The chosen height for Z-Travel (the tip height which is used during the<br />
arm movement) only applies to the selected tips. The Z position of the<br />
unselected tips remains unchanged.<br />
If you choose Positioning with variable Z-travel, the required Z-Travel height is<br />
specified using the pre-defined variable LIHA_MOVE_HEIGHT (see<br />
14.1.4.7 “LIHA_MOVE_HEIGHT”, 14-5).<br />
Z-Position<br />
Unless you have chosen X-Move or Y-Move in the Type of Movement field,<br />
you can specify the Z-Position to which the selected tips should be lowered at<br />
the end of the LiHa movement. The Z position of the unselected tips remains<br />
unchanged. Choose the required Z-position and then specify a Z offset in mm<br />
if required. A positive value for the offset lowers the tips.<br />
Tip Spacing<br />
The Tip Spacing parameter controls the distance between adjacent pipetting<br />
tips for this command. You can choose a different tip spacing for the source<br />
labware and the destination labware. Tip spacing is only relevant if you want<br />
to use more than one tip. A tip spacing of 1 means that the tips will be spread<br />
to match the distance between adjacent wells in the labware. A tip spacing of<br />
2 will select every other well in the labware. You can only choose values for tip<br />
spacing which are meaningful for the labware geometry.<br />
The liquid handling arm achieves the highest mechanical accuracy when the<br />
tips are not spread. For high-density labware such as 1536-well microplates,<br />
you should choose tip spacing such that the tips are adjacent to one another<br />
(physical tip spacing 9 mm). Accordingly, for 1536-well microplates you should<br />
set tip spacing to 4 (every fourth well).<br />
Compartment in well<br />
Some special labware types (e.g. for protein crystallography) have wells with<br />
several compartments (cavities). <strong>Freedom</strong> <strong>EVOware</strong> can pipette a different<br />
liquid into each of the compartments. Each well typically has one main<br />
compartment and one or more satellite compartments which are directly<br />
adjacent and are often smaller in size. Choose the compartment which you<br />
want to use for pipetting (the main compartment is normally compartment 1).<br />
Well compartments are specified in the labware configuration. This field is<br />
inactive (gray) if the well only has one compartment.<br />
Location<br />
Select the labware which you want to use by clicking on the labware in the<br />
Worktable Editor. Then click on the required well(s). The gray (protected) field<br />
at the top right of the Location panel shows the label (name) of the labware<br />
that you have selected (it shows a generic name if you have not assigned a<br />
label). If you have chosen a movement which changes the Z position of the<br />
tips, this only applies to the selected tips. The Z position of the unselected tips<br />
remains unchanged (see Type of movement and Z-Position, above).<br />
15 - 34 <strong>Freedom</strong> <strong>EVOware</strong> <strong>Software</strong> <strong>Manual</strong>, 393172, en, V<strong>2.3</strong>
15 - Script Commands<br />
Waste Command<br />
Cursor (x,y)<br />
You can also select wells by entering the x coordinate (from left to right) and<br />
the y coordinate (from top to bottom) of the top left well you want to select. Tip:<br />
The x and y coordinates of each well are shown in a tool tip if you move the<br />
cursor over the well area in the Location panel.<br />
Select: Click this button to select the wells you have specified in the Cursor<br />
(x,y) field. This button has no effect if your well selection does not fit within the<br />
well area of the labware. For example, if you have chosen to use 8 tips and<br />
you are pipetting to a 96-well microplate in landcape orientation, you can only<br />
choose the required x coordinate (the y coordinate must be 1).<br />
15.22 Waste Command<br />
The Waste command is used to control the vacuum-assisted waste (instrument<br />
option for viscous liquids which creates a partial vacuum in the waste bottles).<br />
Fig. 15-22 Waste command<br />
In contrast to the standard instrument waste, the vacuum-assisted waste lets you<br />
use up to three waste bottles which are operated with a partial vacuum (suction).<br />
This allows you to discard different waste liquids into different containers if they<br />
should not be allowed to mix. The waste command is typically used before a<br />
Wash tips command.<br />
The parameters of the Waste command are as follows:<br />
Init system<br />
This command starts the vacuum pump. Due to the time needed to build up<br />
the vacuum, you can specify this command at an earlier stage in your script to<br />
ensure that the vacuum is present when you want to apply it with the Activate<br />
waste command.<br />
Activate waste #1<br />
This command applies the vacuum to waste # 1. If no previous Init system<br />
command was specified, Activate waste #1 also starts the vacuum pump.<br />
Activate waste #2<br />
This command applies the vacuum to waste # 2. If no previous Init system<br />
command was specified, Activate waste #2 also starts the vacuum pump.<br />
Activate waste #3<br />
This command applies the vacuum to waste # 3. If no previous Init system<br />
command was specified, Activate waste #3 also starts the vacuum pump.<br />
<strong>Freedom</strong> <strong>EVOware</strong> <strong>Software</strong> <strong>Manual</strong>, 393172, en, V<strong>2.3</strong> 15 - 35
15 - Script Commands<br />
Active WashStation Command<br />
Deactivate all wastes<br />
This command disconnects all wastes from the vacuum supply.<br />
Deactivate system<br />
This command switches off the vacuum pump. If you do not specify a<br />
Deactivate system command in your script, the vacuum pump will be switched<br />
off automatically when you quit <strong>Freedom</strong> <strong>EVOware</strong>.<br />
15.23 Active WashStation Command<br />
The Active WashStation command is used to control the pressure pump of the<br />
Active WashStation. The Active WashStation command is mainly intended for<br />
ZipTips.<br />
<strong>Standard</strong> tips are washed in a wash station using the Wash Tips command, which<br />
moves the LiHa over the wash station and flushes the system liquid through the<br />
tips and into the waste. ZipTips cannot be flushed and are washed after use in the<br />
Active WashStation. The LiHa must be positioned above the Active WashStation<br />
with a Move Liha command before executing the Active WashStation command.<br />
Fig. 15-23 Active WashStation command<br />
The parameters of the Active WashStation command are as follows:<br />
Time of activation in seconds<br />
Specify the time of pump activation in seconds (range: 1 to 999 seconds).<br />
Wait until termination of command<br />
<strong>Freedom</strong> <strong>EVOware</strong> normally continues with subsequent commands in the<br />
pipetting script even if the pressure pump is still busy. This option causes the<br />
script to wait for the pressure pump to finish before continuing.<br />
Continue with script without waiting for termination<br />
This option causes the pipetting script to continue without waiting for the<br />
pressure pump to finish.<br />
15.24 Worklist Command<br />
The Worklist command is used to load a worklist file or run previously loaded<br />
worklist files. A worklist file is a text file containing pipetting instructions. It contains<br />
information on source and destination positions and the volumes to pipette.<br />
Worklists can be created using a plain text editor (see 15.24.2 “Worklist File<br />
Format”, 15-39). They can also be created automatically by the Worklist Import<br />
command (see 15.25 “Worklist Import Command”, 15-46).<br />
15 - 36 <strong>Freedom</strong> <strong>EVOware</strong> <strong>Software</strong> <strong>Manual</strong>, 393172, en, V<strong>2.3</strong>
15 - Script Commands<br />
Worklist Command<br />
If your pipetting instrument is fitted with two liquid handling arms (and you have<br />
installed drivers for both of them), there will be two Worklist commands in the<br />
Control Bar. Use the “Worklist” command if you want the worklist to use the first<br />
LiHa. Use the “Worklist 2” command if you want the worklist to use the second<br />
LiHa. The commands are otherwise identical.<br />
Fig. 15-24 Worklist command<br />
The parameters of the Worklist command are as follows:<br />
Worklist Mode<br />
If you want to execute a worklist in an <strong>Freedom</strong> <strong>EVOware</strong> script, you must first<br />
load it in the script. Insert a Worklist command and click Load Worklist to load<br />
the worklist file and specify additional parameters for the pipetting operations.<br />
Then insert another Worklist command in a later line of your script and click<br />
Execute loaded worklist(s) to run the worklist file. In this mode, all other<br />
parameters in the command are disabled and cannot be modified.<br />
You can load several worklists by inserting several Load Worklist commands<br />
in your script. In this case, a single Execute loaded worklist(s) command runs<br />
all of the worklists which you have loaded. They will be executed in<br />
chronological order of loading. <strong>Freedom</strong> <strong>EVOware</strong> keeps a track of the<br />
worklists which have been run, and a second Execute loaded worklist(s)<br />
command will not run them again unless you have reloaded them.<br />
Worklist (Path and Name)<br />
Specify the file name and location of the worklist file (*.gwl). Enter the path<br />
and file name directly or click Browse and choose an existing file.<br />
Tip Selection<br />
Select the tips you want to use. If the worklist file specifies the tip selection<br />
(with the TipMask parameter) it overrides the settings you make here.<br />
<strong>Freedom</strong> <strong>EVOware</strong> <strong>Software</strong> <strong>Manual</strong>, 393172, en, V<strong>2.3</strong> 15 - 37
15 - Script Commands<br />
Worklist Command<br />
Note: You cannot use a mixture of tip types (fixed tips and DITIs) in the same<br />
worklist. As soon as you choose a fixed tip, you can no longer choose any DITIs<br />
and vice versa. If the LiHa is fitted with a mixture of tip types, uncheck all of the<br />
checkboxes to switch from using fixed tips to DITIs, or vice versa.<br />
Liquid Class<br />
You can choose a different liquid class for each source labware and for the<br />
destination labware. Click the Editor button to start the liquid classes editor if<br />
you want to create a new class or modify an existing class (see<br />
10 “Configuring Liquid Classes”, 10-1). Furthermore you can customize an<br />
existing liquid class for use by this command only (click the Customize button<br />
and click the Aspirate or Dispense tab). If you customize an existing liquid<br />
class, the liquid class name is shown in the script command and in the script<br />
editor within double angled brackets “>> name
15 - Script Commands<br />
Worklist Command<br />
15.24.1 Decontamination Wash Settings<br />
The decontamination wash operation soaks the tips in the specified liquid for a<br />
specified time. It can be used e.g. to remove traces of sticky liquids from the tips<br />
and is carried out before the main wash procedure:<br />
Fig. 15-25 Worklist command - Decontamination Wash parameters<br />
Decontamination Wash is specified in the worklist file with the WD record.<br />
The parameters of the decontamination wash operation are as follows:<br />
Tip Selection<br />
The tip selection is shown for information only and cannot be changed. The<br />
decontamination wash uses the same tip selection as the main wash<br />
procedure.<br />
Volume to aspirate<br />
Specify the volume of wash liquid you want to aspirate (range: 1 to 1000 µl).<br />
Use source<br />
The wash liquid for the decontamination wash is aspirated from a trough<br />
(liquid container). Choose the required trough from the pull down list. The list<br />
shows all troughs which are currently positioned in the Worktable Editor.<br />
Liquid Class<br />
Choose the required liquid class from the pull down list. The list only shows<br />
liquid classes which are suitable for the current configuration of the pipetting<br />
instrument. For example, you will not see liquid classes for DiTis if the LiHa is<br />
not currently configured with DiTis.<br />
Delay after aspirate<br />
Specify how long you want to soak the tips (range: 1 to 1800 s).<br />
15.24.2 Worklist File Format<br />
A worklist file is a text file containing pipetting instructions. The worklist<br />
commands consist of individual lines (or records). Seven different record types<br />
are available: Aspirate, Dispense, Wash Tips / Replace DITIs, Flush, Break, Set<br />
DITI Type and Comment. Each record starts with a single character indicating the<br />
type and is followed by one or more parameters. The parameters are separated<br />
<strong>Freedom</strong> <strong>EVOware</strong> <strong>Software</strong> <strong>Manual</strong>, 393172, en, V<strong>2.3</strong> 15 - 39
15 - Script Commands<br />
Worklist Command<br />
by semicolons. Some of the parameters are optional (see later) and some record<br />
types have no parameters.<br />
The Aspirate record has the following structure:<br />
A;RackLabel;RackID;RackType;Position;TubeID;Volume;LiquidClass;TipType<br />
;TipMask;ForcedRackType<br />
Each Aspirate record specifies the aspiration parameters for a single tip (the next<br />
unused tip from the tip selection you have specified).<br />
The Dispense record has the following structure:<br />
D;RackLabel;RackID;RackType;Position;TubeID;Volume;LiquidClass;TipType<br />
;TipMask;ForcedRackType<br />
Each Dispense record specifies the dispensing parameters for a single tip. It uses<br />
the same tip which was used by the preceeding Aspirate record.<br />
See 15.24.2.1 “Parameters for Aspirate and Dispense records”, 15-41 for<br />
details of the parameters.<br />
The Wash Tip / Replace DITI record has the following structure:<br />
W; (to use the first wash scheme in the worklist command), or<br />
W1; (to use the first wash scheme in the worklist command), or<br />
W2; (to use the second wash scheme in the worklist command), or<br />
W3; (to use the third wash scheme in the worklist command), or<br />
W4; (to use the fourth wash scheme in the worklist command).<br />
The Wash Tip / Replace DITI record washes the tip (or replaces the DITI) which<br />
was used by the preceeding Aspirate record. There are no parameters (the wash<br />
position, wash parameters and/or drop DITIs position are specified in the Worklist<br />
command).<br />
The Decontamination Wash record has the following structure:<br />
WD;<br />
Decontamination wash consists of a decontamination wash operation followed by<br />
the normal wash procedure. There are no parameters (the parameters are<br />
specified in the Worklist command).<br />
The Flush record has the following structure:<br />
F;<br />
It discards the contents of the tips without washing them or dropping DITIs.<br />
The Break record forces the execution of previously specified aspirate, dispense<br />
or wash actions which have not yet been executed. It has the following structure:<br />
B;<br />
If you don’t specify a Break record, <strong>Freedom</strong> <strong>EVOware</strong> normally executes<br />
pipetting commands in groups to optimize the efficiency. For example, if you have<br />
specified four tips in the Worlist command, <strong>Freedom</strong> <strong>EVOware</strong> will queue Aspirate<br />
records until four of them are ready for execution. This allows pipetting to take<br />
place using all four tips at the same time. Specify the Break record if you want to<br />
execute all of the currently queued commands without waiting. You can use the<br />
Break record e.g. to create a worklist which pipettes using only one tip at a time<br />
(even if you chose more than one tip in the tip selection).<br />
The Set DITI Type record has the following structure:<br />
S;DITI_Index<br />
When using DITIs, it is used to switch DITI types from within a worklist. Choose<br />
the required DITI type by specifying the DiTi index. <strong>Freedom</strong> <strong>EVOware</strong><br />
automatically assigns a unique index to each DITI type. The DiTi index is shown in<br />
the Edit Labware dialog box for the DITI labware (Well dimensions tab). See<br />
9.4.1 “Editing Labware, Well Dimensions Tab”, 9-19.<br />
The worklist normally uses the DITI type which you select with the Get DITI button<br />
in the Worklist command.<br />
15 - 40 <strong>Freedom</strong> <strong>EVOware</strong> <strong>Software</strong> <strong>Manual</strong>, 393172, en, V<strong>2.3</strong>
15 - Script Commands<br />
Worklist Command<br />
The Set DITI Type record can only be used at the very beginning of the worklist or<br />
directly after a Break record. A Break record always resets the DITI type to the<br />
type selected in the Worklist command. Accordingy, if your worklist contains a<br />
Break record, you may need to specify the Set DITI Type record again.<br />
The Comment record (ignored by <strong>Freedom</strong> <strong>EVOware</strong>) has the following<br />
structure:<br />
C;Comment<br />
The Reagent Distribution record has the following structure:<br />
R;AspirateParameters;DispenseParameters;Volume;LiquidClass;NoOfDitiRe<br />
uses;NoOfMultiDisp;Direction[;ExcludeDestWell]*<br />
where:<br />
AspirateParameters =<br />
SrcRackLabel;SrcRackID;SrcRackType;SrcPosStart;SrcPosEnd;<br />
and<br />
DispenseParameters =<br />
DestRackLabel;DestRackID;DestRackType;DestPosStart;DestPosEnd;<br />
See 15.24.2.2 “Parameters for Reagent Distribution records”, 15-42 for details<br />
of the parameters.<br />
The Reagent Distribution record specifies the aspiration and dispensing<br />
parameters for all of the tips you have chosen (and dispenses the same volume in<br />
all of the chosen wells in the destination labware).<br />
The Reagent Distribution record has the following advantages when compared to<br />
separate Aspirate and Dispense records:<br />
• Pipetting is automatically optimized during script runtime for the number of tips<br />
which are actually fitted to the LiHa.<br />
• Pipetting is automatically adapted to special LiHa configurations such as the 8<br />
Plus 1 Access option of the <strong>Freedom</strong> EVO 75 pipetting instrument - it is not<br />
necessary to create a custom, LiHa-specific worklist.<br />
• Worklists are shorter and easier to set up manually using an editor - less risk<br />
of programming errors.<br />
For some examples, see 15.24.6 “Worklist Examples for the Reagent Distribution<br />
Record”, 15-45.<br />
15.24.2.1 Parameters for Aspirate and Dispense records<br />
The parameters for Aspirate and Dispense records are as follows:<br />
Tab. 15-1 Parameters for Aspirate and Dispense records in a worklist file<br />
Parameter Range Explanation<br />
RackLabel Max. 32 characters User-defined label (name) which is assigned to the<br />
labware.<br />
RackID Max. 32 characters Labware barcode.<br />
RackType Max. 32 characters Labware type (configuration name), e.g. “384 Well,<br />
landscape”.<br />
Position 1 .. number of wells Well position in the labware. The position starts with<br />
1 and increases from rear to front and left to right.<br />
TubeID Max. 32 characters Tube barcode.<br />
Volume 0 .. +7158278 Pipetting volume in µl.<br />
<strong>Freedom</strong> <strong>EVOware</strong> <strong>Software</strong> <strong>Manual</strong>, 393172, en, V<strong>2.3</strong> 15 - 41
15 - Script Commands<br />
Worklist Command<br />
Tab. 15-1 Parameters for Aspirate and Dispense records in a worklist file (cont.)<br />
Parameter Range Explanation<br />
LiquidClass Max. 32 characters This optional parameter overwrites the liquid class<br />
specified in the Worklist command.<br />
TipType<br />
Reserved, must be omitted.<br />
TipMask 1 .. 128 This optional parameter specifies the tip you want to<br />
use. The tip number is bit-coded, i.e. Tip 1 = 1, Tip 2<br />
= 2, Tip 3 = 4; Tip 4 = 8 and so on. Please note that<br />
you can only use a tip which has been enabled with<br />
Tip Selection in the Worklist command. If you do not<br />
specify TipMask, <strong>Freedom</strong> <strong>EVOware</strong> uses one of the<br />
tips specified with Tip Selection in the Worklist command.<br />
ForcedRack-<br />
Type<br />
Max. 32 characters<br />
This optional parameter is the configuration name of<br />
the labware. If specified, it is used instead of the labware<br />
type which is found on the <strong>Freedom</strong> <strong>EVOware</strong><br />
worktable.<br />
MinDetected-<br />
Volume<br />
0 .. +7158278 Liquid volume in µl. If this optional parameter is<br />
specified and Liquid Level Detection is enabled in<br />
the selected liquid class, it is used by the LiHa to<br />
determine the minimum liquid height which must be<br />
available in the well. Otherwise a liquid detection<br />
error (not enough liquid) will be triggered.<br />
MinDetectedVolume specifies the usable volume of<br />
liquid. If the aspiration position in the liquid class<br />
specifies tip immersion (tip submerging), the actual<br />
liquid height in the well must be higher to allow<br />
immersion (i.e. the volume of liquid in the well must<br />
be more than MinDetectedVolume).<br />
15.24.2.2 Parameters for Reagent Distribution records<br />
The aspirate parameters for Reagent Distribution records are as follows:<br />
Tab. 15-2 Aspirate Parameters for the Reagent Distribution command<br />
Parameter Range Explanation<br />
SrcRackLabel<br />
Max. 32 characters<br />
User-defined label (name) which is assigned to the<br />
source labware.<br />
SrcRackID Max. 32 characters Source labware barcode.<br />
SrcRackType Max. 32 characters Source labware type (configuration name), e.g. “384<br />
Well, landscape”.<br />
SrcPosStart 1 .. number of wells First well to be used in the source labware.<br />
SrcPosEnd 1 .. number of wells Last well to be used in the source labware.<br />
The dispense parameters for Reagent Distribution records are as follows:<br />
15 - 42 <strong>Freedom</strong> <strong>EVOware</strong> <strong>Software</strong> <strong>Manual</strong>, 393172, en, V<strong>2.3</strong>
15 - Script Commands<br />
Worklist Command<br />
Tab. 15-3 Dispense Parameters for the Reagent Distribution command<br />
Parameter Range Explanation<br />
Max. 32 characters<br />
User-defined label (name) which is assigned to the<br />
destination labware.<br />
DestRackID Max. 32 characters Destination labware barcode.<br />
DestRackLabel<br />
DestRack-<br />
Type<br />
Max. 32 characters<br />
Destination labware type (configuration name), e.g.<br />
“384 Well, landscape”.<br />
DestPosStart 1 .. number of wells First well to be used in the destination labware.<br />
DestPosEnd 1 .. number of wells Last well to be used in the destination labware.<br />
The following parameters must also be specified for for Reagent Distribution<br />
records:<br />
Tab. 15-4 Additional Parameters for the Reagent Distribution command<br />
Parameter Range Explanation<br />
Volume 0 .. +7158278 Dispense volume in the destination labware in µl.<br />
LiquidClass Max. 32 characters This optional parameter overwrites the liquid class<br />
specified in the Worklist command.<br />
NoOfDitiReu<br />
ses<br />
NoOfMultiDisp<br />
- Optional maximum number of DiTi reuses allowed<br />
(default 1 = no DiTi reuse).<br />
- Optional maximum number of dispenses in a multidispense<br />
sequence (default 1 = no multi-dispense).<br />
Direction - Optional pipetting direction (0 = left to right, 1 = right<br />
to left; default = 0).<br />
[ExcludeDestWell]*]<br />
Optional list of wells in destination labware to be<br />
excluded from pipetting<br />
The following sections describe how to create files for three different types of<br />
worklist with Aspirate and Dispense records.<br />
15.24.3 Worklist Examples Using Labware Labels<br />
Use this worklist format if you want to use labware labels to specify source and/or<br />
destination positions in the worklist. This is necessary if your instrument does not<br />
have a PosID barcode scanner or your labware does not carry barcodes.<br />
In this case, you only need to define the following parameters in an Aspirate or<br />
Dispense record:<br />
A;RackLabel;;RackType;Position;;Volume<br />
D;RackLabel;;RackType;Position;;Volume<br />
Parameter RackType is optional. If specified, <strong>Freedom</strong> <strong>EVOware</strong> checks whether<br />
the labware specified with RackLabel has the configuration name specified with<br />
RackType. An error message is displayed if an incorrect labware type is found on<br />
the <strong>Freedom</strong> <strong>EVOware</strong> worktable.<br />
<strong>Freedom</strong> <strong>EVOware</strong> <strong>Software</strong> <strong>Manual</strong>, 393172, en, V<strong>2.3</strong> 15 - 43
15 - Script Commands<br />
Worklist Command<br />
Parameter ForcedRackType is optional. If specified, <strong>Freedom</strong> <strong>EVOware</strong> does not<br />
use the labware type of the labware specified with RackLabel, but uses<br />
ForcedRackType instead. The following worklist example illustrates the use of<br />
ForcedRackType in an Aspirate and a Dispense command:<br />
A;S1;;;9;;10;;;;Microplate, landscape<br />
D;D1;;;1;;10;;;;Deepwell, landscape<br />
If you specify the ForcedRackType parameter, you must make sure that labware<br />
of the required types have been placed in the right positions on the instrument’s<br />
worktable before the worklist is executed.<br />
The system liquid is associated with a “virtual” labware item of type System and<br />
labware label Systemliquid. The following worklist command can be used to<br />
aspirate the system liquid:<br />
A;Systemliquid;;System;1;;500:Water<br />
The following worklist example aspirates 10.1 µl from well A2 in labware “S1”,<br />
dispenses 6 µl into well A1 in labware “D1”, dispenses 4 µl into well B1 in labware<br />
“D1” and then washes the tip / changes the DITI:<br />
A;S1;;Microplate, landscape;9;;10.1<br />
D;D1;;Microplate, landscape;1;;6<br />
D;D1;;Microplate, landscape;2;;4<br />
W;<br />
Note that <strong>Freedom</strong> <strong>EVOware</strong> counts wells from rear to front and then from left to<br />
right and a Microplate, landscape labware has eight wells in each column.<br />
Accordingly, well A2 is specified in the above worklist as “9”.<br />
15.24.4 Worklist Examples Using Labware Barcodes<br />
Use this worklist format if you want to use labware barcodes to specify source<br />
and/or destination positions in the worklist. To use this worklist format, your<br />
instrument must be equipped with a PosID option and you must scan the labware<br />
(with a PosID command) in advance of the Execute Worklist command.<br />
In this case, you only need to define the following parameters in an Aspirate or<br />
Dispense record:<br />
A;;RackID;RackType;Position;;Volume<br />
A;;RackID;RackType;Position;;Volume<br />
The following worklist example aspirates 10 µl from well H12 in the labware with<br />
barcode “1234”, dispenses 10 µl into well A12 into the labware with barcode<br />
“5678” and then washes the tip / changes the DITI:<br />
A;;1234;Microplate, landscape;96;;10<br />
D;;5678;Microplate, landscape;89;;10<br />
W;<br />
<strong>Freedom</strong><br />
<strong>EVOware</strong> Plus<br />
If you use labware barcodes to specify source and/or destination positions in the<br />
worklist, do not use a labware repository on the worktable if the labware will be<br />
moved during runtime to another worktable position for pipetting. This will lead to<br />
pipetting at the wrong worktable position. Use a labware repository in a feeder<br />
device (e.g. hotel or carousel) instead. See 11.6 “Labware Generator (<strong>Freedom</strong><br />
<strong>EVOware</strong> Plus)”, 11-16.<br />
15 - 44 <strong>Freedom</strong> <strong>EVOware</strong> <strong>Software</strong> <strong>Manual</strong>, 393172, en, V<strong>2.3</strong>
15 - Script Commands<br />
Worklist Command<br />
15.24.5 Worklist Examples Using Tube Barcodes<br />
Use this worklist format if you want to use tube barcodes to specify source and/or<br />
destination positions in the worklist. To use this worklist format, your instrument<br />
must be equipped with a PosID option and you must scan the labware (with a<br />
PosID command) in advance of the Execute Worklist command.<br />
In this case, you only need to define the following parameters in an Aspirate or<br />
Dispense record:<br />
A;;;RackType;;TubeID;Volume<br />
A;;;RackType;;TubeID;Volume<br />
The following worklist example aspirates 10 µl from the tube with barcode<br />
“S0001”, dispenses 10 µl into the tube with barcode “D0002” and then washes the<br />
tip / changes the DITI:<br />
A;;;Tube 10*100mm, 16 Pos.;;S0001;10<br />
D;;;Tube 16*100mm, 16 Pos.;;D0002;10<br />
W;<br />
<strong>Freedom</strong><br />
<strong>EVOware</strong> Plus<br />
If you use tube barcodes to specify source and/or destination positions in the<br />
worklist, do not use a labware repository on the worktable if the tube rack will be<br />
moved during runtime to another worktable position for pipetting. This will lead to<br />
pipetting at the wrong worktable position. Use a labware repository in a feeder<br />
device (e.g. hotel or carousel) instead. See 11.6 “Labware Generator (<strong>Freedom</strong><br />
<strong>EVOware</strong> Plus)”, 11-16.<br />
15.24.6 Worklist Examples for the Reagent Distribution Record<br />
The worklist example below is configured as follows:<br />
• Source labware: Trough 100ml, labeled 'T3', use wells 1 - 8<br />
• Destination labware: 96 Well Microplate, labeled 'MTP96-3', use wells 1 - 96<br />
• Liquid class 'Water'<br />
• DiTi Reuse = 1 (use only once), Multi-dispense = max. 6<br />
• Pipetting direction 0 = left to right<br />
• Exclude wells 27, 46, 51, 69, 82 => Well positions (column,well) 4,3 / 6,6 / 7,3<br />
/ 9,5 / 11,2<br />
R;T3;;Trough 100ml;1;8;MTP96-3;;96 Well Microplate;1;96;100;Water;<br />
1;6;0;27;46;51;69;82<br />
The worklist example below is configured as follows:<br />
• Source labware: Trough 100ml, labeled 'T2', use wells 1 - 8<br />
• Destination labware: 96 Well Microplate, labeled 'MTP96-2', use wells 1 - 96<br />
• Liquid class 'Water'<br />
• DiTi Reuse = 2 (use 2 times), Multi-dispense = max. 5<br />
• Pipetting direction 0 = left to right<br />
• No wells to be excluded<br />
R;T2;;Trough 100ml;1;8;MTP96-2;;96 Well Microplate;1;96;100;Water;<br />
2;5;0<br />
<strong>Freedom</strong> <strong>EVOware</strong> <strong>Software</strong> <strong>Manual</strong>, 393172, en, V<strong>2.3</strong> 15 - 45
15 - Script Commands<br />
Worklist Import Command<br />
15.24.7 Advanced Worklists<br />
<strong>Freedom</strong> <strong>EVOware</strong> also allows you to use most of the script commands (such as<br />
Wash Tips) and device commands (such as Carousel - ReturnPlate) in a worklist.<br />
This is done using so-called advanced worklist commands. See A.15 “Advanced<br />
Worklist Commands”, A-118 for information on the commands and the<br />
command syntax. Advanced worklist commands are only supported for research<br />
applications.<br />
15.25 Worklist Import Command<br />
The Worklist Import command is used to create a <strong>Freedom</strong> <strong>EVOware</strong> worklist<br />
from an Excel file which is stored in CSV format. See 15.24 “Worklist Command”,<br />
15-36 for more information on worklists.<br />
Fig. 15-26 Worklist Import command<br />
The parameters of the Worklist Import command are as follows:<br />
Import Worklist (Path and Name)<br />
Specify the file name and location of the CSV file to import. Enter the path and<br />
file name directly or click Browse and choose an existing file.<br />
15 - 46 <strong>Freedom</strong> <strong>EVOware</strong> <strong>Software</strong> <strong>Manual</strong>, 393172, en, V<strong>2.3</strong>
15 - Script Commands<br />
Worklist Import Command<br />
Column Separator<br />
Choose the separator which is used between the fields (columns) in each of<br />
the records (i.e. lines) of the import file. The default is Comma.<br />
Start with line<br />
Conversion normally starts with the first line of the import file. Specify a line<br />
number which is higher than 1 to skip one or more lines at the beginning of the<br />
file.<br />
Stop with last line<br />
Stop conversion with the last line of the import file.<br />
Stop with line<br />
Conversion normally stops with the last line of the import file. Specify the line<br />
number where you want the conversion to stop. The remaining lines in the<br />
import file are skipped.<br />
Source Labware<br />
Choose the source labware type for which the generated worklist will be used.<br />
Force: Check this checkbox to create a worklist for the chosen source<br />
labware type instead of the labware type which is found on the <strong>Freedom</strong><br />
<strong>EVOware</strong> worktable. This is done by including the ForcedRackType<br />
parameter in the A and D records of the worklist (see 15.24.2 “Worklist File<br />
Format”, 15-39).<br />
Destination Labware<br />
Choose the destination labware type for which the generated worklist will be<br />
used.<br />
Force: Check this checkbox to create a worklist for the chosen destination<br />
labware type instead of the labware type which is found on the <strong>Freedom</strong><br />
<strong>EVOware</strong> worktable. This is done by including the ForcedRackType<br />
parameter in the A and D records of the worklist (see 15.24.2 “Worklist File<br />
Format”, 15-39).<br />
Content<br />
The Worklist Import command can handle up to 11 different input parameters<br />
in the import file (labware name, labware barcode, tube barcode, worktable<br />
position for both source and destination carrier; volume, liquid class, and tip).<br />
For each column (field) of the import file, specify the assignment to one of the<br />
11 parameters by choosing from the drop-down list. Alternatively, leave the<br />
Content field empty to skip the field because it is empty or contains irrelevant<br />
data. An error message is output if you assign the same parameter to more<br />
than one column of the input file or make a meaningless or contradictory<br />
assignment.<br />
Generated Worklist (Path and Filename)<br />
Specify the file name and location of the worklist file (*.gwl) which should be<br />
created. Enter the path and file name directly or click Browse and choose an<br />
existing worklist file. The Import Worklist command overwrites the previous<br />
contents of the file each time it is executed.<br />
OK<br />
Click OK to insert the Worklist Import command in your script.<br />
Cancel<br />
Click Cancel to close the dialog box without inserting the command.<br />
Each time you insert a new command in your script or edit an existing command,<br />
<strong>Freedom</strong> <strong>EVOware</strong> validates the entire script to check for errors and shows all<br />
commands which have errors in red. The Worklist Import command creates the<br />
worklist file when you run the script or process. However, the worklist file does not<br />
exist yet when validation takes place. Accordingly, <strong>Freedom</strong> <strong>EVOware</strong> will<br />
<strong>Freedom</strong> <strong>EVOware</strong> <strong>Software</strong> <strong>Manual</strong>, 393172, en, V<strong>2.3</strong> 15 - 47
15 - Script Commands<br />
Export Data Command<br />
indicate an error in the Worklist command which is to receive the worklist file<br />
(Error opening worklist file). To avoid the validation error, we recommend you to<br />
create an empty (dummy) worklist file using an editor such as Notepad.<br />
15.26 Export Data Command<br />
The Export Data command is used to create report files for selected labware or for<br />
all labware on the worktable or the Te-MO deck. The report files contain<br />
information about the pipetting which has been carried out. The report files are<br />
written to the Output directory which is specified in <strong>Freedom</strong> <strong>EVOware</strong>’s<br />
Configuration Tool (see 8.3.1.4 “Protocol Options Tab”, 8-8). The default Output<br />
directory is \Output.<br />
Fig. 15-27 Export Data command<br />
The parameters of the Export Data command are as follows:<br />
15 - 48 <strong>Freedom</strong> <strong>EVOware</strong> <strong>Software</strong> <strong>Manual</strong>, 393172, en, V<strong>2.3</strong>
15 - Script Commands<br />
Export Data Command<br />
Labware to be exported<br />
This panel shows the labware for which <strong>Freedom</strong> <strong>EVOware</strong> will create output<br />
files. A separate report file is created for each labware (see 15.26.1 “File<br />
Names for Labware Report Files”, 15-50). Add labware to the list by clicking<br />
on the labware in the Worktable Editor. To remove an entry, select the line in<br />
the list and click Delete labware from list.<br />
Check the Export all labware on worktable checkbox to creates reports for all<br />
labware on the worktable. In this case, the list of labware you have specified is<br />
ignored.<br />
File Formats<br />
This panel is used to select one or more file formats for the report. <strong>Freedom</strong><br />
<strong>EVOware</strong> creates the file(s) in the directory you have specified in Setup ><br />
Settings > Output.<br />
Significant pipetting step for Magellan ...<br />
If you plan to use a Tecan Microplate Reader (photometer) in your script or<br />
process, specify which pipetting step is relevant to the Magellan data<br />
reduction software if the same well will be pipetted several times. For<br />
example, if you pipette the sample and then pipette a reagent, Magellan<br />
needs to know which step pipettes the sample. Information on the significant<br />
pipetting step will be included in the labware report file which the Export Data<br />
command creates for the Magellan software. See 16.16.6 “Magellan -<br />
Measure Command”, 16-49 for further information.<br />
Do not export already exported data later again<br />
If you use the Export Data command more than once in the same script,<br />
check this option if you don’t want to export pipetting data again which has<br />
already been exported. This setting deletes the internal pipetting records for<br />
all prior pipetting operations, not only for the labware specified in the Export<br />
Data command.<br />
Create only one record per well<br />
<strong>Freedom</strong> <strong>EVOware</strong> normally outputs one record for each Aspirate or<br />
Dispense command for each well. If you check this checkbox, <strong>Freedom</strong><br />
<strong>EVOware</strong> only writes one record for each well. The record will then contain<br />
information on the accumulated errors (bitwise addition of all error codes), the<br />
accumulated total pipetting volume (the sum of dispense volumes, i.e. positive<br />
values and aspirate volumes, i.e. negative values) and the maximum detected<br />
volume.<br />
Include balance data for dispense steps<br />
The Liquid Arrival Check (LAC) feature verifies that the correct liquid volumes<br />
have been dispensed by weighing the labware before and after pipetting. The<br />
labware must be put onto a special balance (pooling balance) for the dispense<br />
operation. Check this checkbox if you want to include the weight<br />
measurements in the report file. In this case, the report file will include four<br />
extra columns if a Liquid Arrival Check was carried out when dispensing. See<br />
15.26.4 “Pooling balance data in report files”, 15-56 for more information.<br />
Export Data and Transfer Labware commands<br />
If your script uses the Transfer Labware or Transfer Tube command to move<br />
labware which you have specified in the Export Data command, the Export Data<br />
command must be used before the labware is moved. Otherwise, positional<br />
information in the report file may be misleading or incorrect.<br />
If your script uses the Transfer Labware or Transfer Tube command to move<br />
labware which you have specified in the Export Data command and you want to<br />
use the Export Data command again in the same script, you must check the Do<br />
<strong>Freedom</strong> <strong>EVOware</strong> <strong>Software</strong> <strong>Manual</strong>, 393172, en, V<strong>2.3</strong> 15 - 49
15 - Script Commands<br />
Export Data Command<br />
not export already exported data later again checkboxes in the Export Data<br />
commands. Otherwise, the positional information in the report files may be<br />
misleading or incorrect.<br />
15.26.1 File Names for Labware Report Files<br />
The file names for the labware report files are created automatically and contain<br />
the labware barcodes as follows:<br />
labware barcode + extension for selected file format (e.g. 9900001.xls)<br />
The file name for a tube rack report file (e.g. Tube 13*75mm, 16 Pos.) is:<br />
tube rack barcode + extension for selected file format (e.g. 013_000064.xls)<br />
Slash “/” characters in tube rack barcodes are replaced in file names by<br />
underscore “_”. The barcodes are also reported in the SRCRackID field of each<br />
labware report file.<br />
If a labware or tube rack barcode was not scanned in advance of the Export Data<br />
command, the labware label is used to create the file name instead, for example:<br />
labware label + extension for selected file format (e.g. MyLabware1.xls)<br />
Labware labels are unique within the same worktable layout. See also<br />
15.26.2 “Simulated Barcodes for the Export Data Command”, 15-50.<br />
15.26.2 Simulated Barcodes for the Export Data Command<br />
If a labware or tube rack barcode was not scanned in advance of the Export Data<br />
command, the labware label is used for the barcode instead (“simulated<br />
barcode”). Labware labels are unique within the same worktable layout.<br />
Missing tube barcodes are not simulated; they are left blank in the report file.<br />
15.26.3 Report File Format<br />
The following is an example of an output file in Excel format (example file name<br />
9900001.xls).<br />
Depending on the version and configuration of your instrument, some of the fields<br />
may not be applicable and will be left blank, but – to preserve the file structure –<br />
the fields will not be omitted completely. Fields which are intended for labware<br />
barcodes contain simulated barcodes if the barcode was not scanned (see<br />
15.26.2 “Simulated Barcodes for the Export Data Command”, 15-50). Fields<br />
which are intended for tube barcodes contain three stars (***) if the barcode could<br />
not be read.<br />
If you checked Include balance data for dispense steps in the Export Data<br />
command and a Liquid Arrival Check was carried out when dispensing, the report<br />
file includes four additional columns for the pooling balance data. These four<br />
columns are described in 15.26.4 “Pooling balance data in report files”, 15-56<br />
but are not shown in the following table due to lack of space:<br />
15 - 50 <strong>Freedom</strong> <strong>EVOware</strong> <strong>Software</strong> <strong>Manual</strong>, 393172, en, V<strong>2.3</strong>
15 - Script Commands<br />
Export Data Command<br />
Tab. 15-5 Sample Excel file produced with the Export Data command<br />
Time<br />
Detect Vol<br />
Tip Number<br />
SiteOnGrid<br />
Grid Pos<br />
SRCRackID<br />
Error<br />
Volume<br />
SRC Tube ID<br />
SRC Pos<br />
SRCRack<br />
Scan Error<br />
Tube ID<br />
Pos.<br />
Version<br />
1.20<br />
3091 96 Well<br />
Microplate<br />
12 8 1 0 9900001 18 2 FB28 3.8.2005<br />
1 0 Tube<br />
13*85mm<br />
3 0 Tube<br />
13*85mm<br />
5 0 Tube<br />
13*85mm<br />
7 0 Tube<br />
13*85mm<br />
1 0001 10 0 013_000064 4 1 1 11:55:42<br />
2 0002 20 0 013_000064 4 1 2 11:55:42<br />
3 0003 30 0 013_000064 4 1 3 11:55:42<br />
4 0004 40 0 013_000064 4 1 4 11:55:42<br />
In the example, liquid was pipetted from four tubes into a microplate.<br />
The first line contains the column headers, which are the same for all file formats<br />
(except that some file formats only support upper-case characters for column<br />
headers).<br />
The second line contains information on the labware or tube rack for which the<br />
report was created and the date that the report was created. The second line also<br />
contains information which is relevant to the Magellan (data reduction) option.<br />
The third and subsequent lines contain information on the wells in the labware or<br />
the tubes in the tube rack. Dispense commands are indicated by a positive value<br />
in the volume column and aspirate commands are indicated by a negative value.<br />
The columns contain the following information:<br />
<strong>Freedom</strong> <strong>EVOware</strong> <strong>Software</strong> <strong>Manual</strong>, 393172, en, V<strong>2.3</strong> 15 - 51
15 - Script Commands<br />
Export Data Command<br />
Tab. 15-6 Parameters in the report file output by the Export Data command<br />
Column Range Explanation<br />
Position 1 .. number of wells Destination well number or tube number. The numbering<br />
sequence is rear to front and then left to right.<br />
TubeID Max. 32 characters Barcode of destination tube. This column is only used<br />
if the destination is a tube rack (i.e. you are pipetting<br />
into tubes).<br />
In line 2, this column shows the <strong>Freedom</strong> <strong>EVOware</strong><br />
software version.<br />
ScanError 0 .. 4294967295 This column shows barcode scanning errors (if any)<br />
at the destination. See Tab. 15-7, 15-54, below.<br />
In line 2, this column shows the serial number of<br />
pipetting instrument. If you chose to include pooling<br />
balance data in the report file and a Liquid Arrival<br />
Check was carried out when dispensing, the serial<br />
number of the balance is also included in line 2 (see<br />
15.26.4 “Pooling balance data in report files”, 15-<br />
56). The two serial numbers are separated by “/”.<br />
SRCRack Max. 32 characters For dispense commands, this column shows the configuration<br />
name of the source labware.<br />
In line 2, this column shows the configuration name<br />
of the labware for which the report file was created<br />
(the configuration name of the destination labware).<br />
SRCPos 1 .. number of wells For dispense commands, this column shows the<br />
position in the source labware where the liquid came<br />
from.<br />
In line 2, this column shows the total number of wells<br />
in the labware in the x direction.<br />
SRCTubeID Max. 32 characters If the source for a dispense command was a tube<br />
rack, this column shows the barcode of the source<br />
tube.<br />
In line 2, this column shows the total number of wells<br />
in the labware in the y direction.<br />
Volume -7158278 .. +7158278 This column contains the volume in µl which was dispensed<br />
(positive value) or aspirated (negative value).<br />
dest<br />
In line 2, this column shows which pipetting step is<br />
relevant to the Tecan Magellan software if more than<br />
one has been carried out on the same well; see<br />
“Significant pipetting step for Magellan ...”, 15-49<br />
for further information.<br />
15 - 52 <strong>Freedom</strong> <strong>EVOware</strong> <strong>Software</strong> <strong>Manual</strong>, 393172, en, V<strong>2.3</strong>
15 - Script Commands<br />
Export Data Command<br />
Tab. 15-6 Parameters in the report file output by the Export Data command (cont.)<br />
Column Range Explanation<br />
Error 0 .. 4294967295 This column shows pipetting errors (if any). See<br />
Tab. 15-8, 15-54, below.<br />
In line 2, this column shows scanning errors for the<br />
labware for which the report file was created.<br />
SRCRackID max. 32 characters For dispense commands, this column shows the barcode<br />
of the source labware. If the source for the dispense<br />
command was a tube rack, this column shows<br />
the barcode of the source tube rack.<br />
In line 2, this column shows the barcode of the labware<br />
for which the report file was created. For labware<br />
on the Te-MO, it shows the simulated barcode<br />
(see 15.26.1 “File Names for Labware Report Files”,<br />
15-50).<br />
GridPos 1 .. 67 For dispense commands, this column shows the grid<br />
position of the source labware.<br />
In line 2, this column shows the grid position of the<br />
labware for which the report file was created.<br />
SiteOnGrid 1 .. 128 For dispense commands, this column shows the carrier<br />
site of the source labware. It is always 1 when<br />
dispensing from tube racks (because they only have<br />
one site).<br />
In line 2, this column shows the carrier site of the labware<br />
for which the report file was created. It is always<br />
1 when dispensing into tube racks (because they<br />
only have one site).<br />
TipNumber 1 .. 8 This column shows the tip number which was used<br />
for pipetting into / from this well.<br />
In line 2, this column contains the 4-character checksum<br />
for the file. This is used to check whether the file<br />
is corrupted or has been modified outside of <strong>Freedom</strong><br />
<strong>EVOware</strong> (see A.9.1 “Data Explorer Tool”, A-<br />
35).<br />
DetectVol 0 .. +7158278 If liquid level detection was used, this column shows<br />
the detected volume in the well before the aspirate /<br />
dispense command.<br />
Time<br />
This is the time (hh:mm:ss) when the pipetting was<br />
carried out on the well.<br />
In line 2, this column shows the date that the report<br />
was created.<br />
The following table shows possible codes in the ScanError column. The value is<br />
bit-coded. If several errors occurred, the value shown is the bit-wise addition of<br />
<strong>Freedom</strong> <strong>EVOware</strong> <strong>Software</strong> <strong>Manual</strong>, 393172, en, V<strong>2.3</strong> 15 - 53
15 - Script Commands<br />
Export Data Command<br />
the separate error codes. The Te-MO does not have a barcode scanner and does<br />
not generate barcode scanning errors.<br />
Tab. 15-7 Barcode scanning error codes in the report file output by the Export Data command<br />
Code<br />
(decimal)<br />
Code<br />
(hex) Caused by Explanation<br />
0 0 - No error.<br />
16 10 Instrument A barcode could not be read by the PosID or the<br />
PosID-3 scanner.<br />
32 20 Instrument The same labware was scanned again (at the same<br />
grid position or at a new worktable position of the<br />
same labware) and the scanned barcode did not<br />
match the previously scanned barcode. If this error<br />
occurs, <strong>Freedom</strong> <strong>EVOware</strong> updates the stored information<br />
for the labware with the newer barcode.<br />
64 40 Instrument An identical barcode was scanned at an unexpected<br />
grid position. Either (a) two labware items have identical<br />
barcodes or (b) the labware was moved to a different<br />
grid position manually. If this error occurs,<br />
<strong>Freedom</strong> <strong>EVOware</strong> assumes that (b) has taken<br />
place and updates the stored information for the labware<br />
with the new position.<br />
4096 1000 User The user entered the barcode manually after a scanning<br />
error.<br />
8192 2000 User The user chose Retry after a barcode scanning<br />
error.<br />
16384 4000 User The user chose Ignore after a barcode scanning<br />
error.<br />
The following table shows possible codes in the Error column. The value is bitcoded.<br />
If several errors occurred, the value shown is the bit-wise addition of the<br />
separate error codes.<br />
Tab. 15-8 Pipetting error codes in the report file output by the Export Data command<br />
Code<br />
(decimal)<br />
Code<br />
(hex) Caused by Explanation<br />
0 0 - No error.<br />
1 1 Instrument No liquid was detected.<br />
2 2 Instrument Not enough liquid was detected.<br />
4 4 Instrument Clot was detected.<br />
8 8 Instrument A dilutor error occurred during pipetting.<br />
15 - 54 <strong>Freedom</strong> <strong>EVOware</strong> <strong>Software</strong> <strong>Manual</strong>, 393172, en, V<strong>2.3</strong>
15 - Script Commands<br />
Export Data Command<br />
Tab. 15-8 Pipetting error codes in the report file output by the Export Data command (cont.)<br />
Code<br />
(decimal)<br />
Code<br />
(hex) Caused by Explanation<br />
256 100 Instrument Liquid Arrival Check, liquid error: The dispensed volume<br />
was outside of the tolerance specified in the liquid<br />
class. This error is generated by the LAC<br />
(pooling balance) feature (see 15.26.4 “Pooling balance<br />
data in report files”, 15-56).<br />
512 200 Instrument Liquid Arrival Check, technical error: timeout or<br />
hardware malfunction such as balance overload.<br />
This error is generated by the LAC (pooling balance)<br />
feature.<br />
1,024 400 Instrument The PMP option detected a tip orifice occlusion (e.g.<br />
clot aspirated). This error also results in error code 4<br />
(clot detected).<br />
2,048 800 Instrument The PMP option detected an incorrect pipetting volume.<br />
65,536 10000 User The dilutor was initialized after a dilutor error.<br />
131,072 20000 User The dilutor was deactivated after a dilutor error.<br />
262,144 40000 User The user chose Retry after a clot-detection error.<br />
524,288 80000 User The user chose Ignore after a clot-detection error.<br />
1,048,576 100000 User The user chose Continue after a clot-detection error.<br />
2,097,152 200000 User The user chose Retry after a liquid-detection error.<br />
4,194,304 400000 User The user chose Aspirate air after a liquid-detection<br />
error.<br />
8,388,608 800000 User The user chose Move tips to Z-Max after a liquiddetection<br />
error.<br />
33,554,432 2000000 The PMP option detected an instrument error (e.g. a<br />
leakage from the air gap or a blocked pressure<br />
channel). a)<br />
67,108,864 4000000 The PMP option detected an unspecified error. If this<br />
occurs more than three times in a row for the same<br />
tip, this can also indicate an instrument error. a)<br />
a) In the case of an instrument error, you can use the Setup & Service software (PMP panel) to get more<br />
detailed information on the error. The Setup & Service software is provided by Tecan to service engineers.<br />
See 17.6.4 “PMP Error and Success Messages”, 17-22 for more information on PMP errors and error<br />
handling.<br />
Note: If a liquid from a container or tube which returns a barcode error is pipetted<br />
to another labware item, the error is inherited in the destination well as a pipetting<br />
error (not a barcode error). The value of the error code is unchanged (see<br />
Tab. 15-7, 15-54 for a list of the applicable error codes).<br />
Note: If “Pipette Nothing” was chosen after a liquid level detection error or clot<br />
error, the affected well(s) will not be reported any more in the output files.<br />
<strong>Freedom</strong> <strong>EVOware</strong> <strong>Software</strong> <strong>Manual</strong>, 393172, en, V<strong>2.3</strong> 15 - 55
15 - Script Commands<br />
Export Data Command<br />
15.26.4 Pooling balance data in report files<br />
The Liquid Arrival Check (LAC) feature verifies that the correct liquid volumes<br />
have been dispensed by weighing the labware before and after pipetting. The<br />
labware must be put onto a special balance (pooling balance) for the dispense<br />
operation.<br />
The Liquid Arrival Check is only carried out if the labware is put onto a pooling<br />
balance for the dispense operation and LAC is activated for the liquid class which<br />
is used. See 10.1.1 “Global Parameters for Liquid Classes”, 10-4, Liquid Arrival<br />
Check panel.<br />
If you checked the Include balance data for dispense steps checkbox in the Export<br />
Data command and a Liquid Arrival Check was carried out, the report file will<br />
include the following four additional columns for the pooling balance data:<br />
Tab. 15-9 Additional columns in the report file for pooling balance data<br />
SampleDensity<br />
ActualVolume<br />
ActualWeight<br />
Expected Weight<br />
150.00 149.00 135.45<br />
50.00 52.00 47.27 1.10<br />
25.00 22.00 20.00 1.10<br />
50.00 51.00 46.36 1.10<br />
25.00 24.00 21.81 1.10<br />
The columns contain the following information:<br />
15 - 56 <strong>Freedom</strong> <strong>EVOware</strong> <strong>Software</strong> <strong>Manual</strong>, 393172, en, V<strong>2.3</strong>
15 - Script Commands<br />
<strong>Manual</strong> Tip Alignment Command<br />
Tab. 15-10 Parameters in the report file for pooling balance data<br />
Column<br />
Expected Weight<br />
Explanation<br />
Expected weight difference calculated from the expected volume and<br />
the sample density. a)<br />
Line 2: Total expected weight (sum of all dispense steps).<br />
ActualWeight<br />
Actual weight difference indicated by the pooling balance by measuring<br />
before and after the dispense step.<br />
Line 2: Total actual weight difference (sum of all dispense steps).<br />
ActualVolume<br />
Actual dispensed volume calculated from the actual weight difference<br />
and the sample density. a)<br />
Line 2: Total actual dispensed volume (sum of all dispense steps).<br />
SampleDensity Density of the dispensed liquid. a)<br />
Line 2: Empty.<br />
a) As specified in the liquid liquid class used for the dispense step.<br />
15.27 <strong>Manual</strong> Tip Alignment Command<br />
This command is used to check the alignment of the Liquid Handling Arm (LiHa)<br />
before or after running a pipetting script. It is also able to detect bent tips. It is only<br />
intended for the LiHa of the <strong>Freedom</strong> EVO pipetting instrument and is normally<br />
only necessary if you are using microplates with 1536 wells or other high precision<br />
labware. This command is mainly intended for use in maintenance scripts (see<br />
6.4.2 “Run Maintenance”, 6-10). Please note that this function is a quick test<br />
and delivers less precise results than the Setup & Service software.<br />
Use the Tip Alignment Check command instead if you need to check tip alignment<br />
when a pipetting script is running (see 15.20 “Tip Alignment Check Command”,<br />
15-30).<br />
Racks with 1536 wells have a very high packing density and the wells have a<br />
diameter of only 1.7 mm. The high precision requires a special LiHa design. In<br />
addition, 1536-well racks need to be placed on a specially designed carrier. The<br />
special carrier and the high-precision LiHa are key components of the Tecan<br />
Positioning System (Te-PS).<br />
Arm alignment is done using the Te-PS Sensor plate, which is placed on the Te-<br />
PS Carrier. The tip alignment process moves each of the pipetting tips past the<br />
sensor plate, and lasers are used to accurately measure the position.<br />
Tip alignment can also be tested while running a script (see 15.20 “Tip Alignment<br />
Check Command”, 15-30).<br />
To carry out the test, place the Te-PS Sensor plate on one of the sites of the Te-<br />
PS Carrier. Check that the sensor plate is properly connected to the pipetting<br />
instrument using the supplied cable.<br />
In addition, you must put the Te-PS Sensor plate at the same grid and site position<br />
in the Worktable Editor.<br />
If necessary, the <strong>Manual</strong> Tip Alignment function can also be used to check the tip<br />
alignment with other carrier and rack types. The test should then be carried out<br />
<strong>Freedom</strong> <strong>EVOware</strong> <strong>Software</strong> <strong>Manual</strong>, 393172, en, V<strong>2.3</strong> 15 - 57
15 - Script Commands<br />
<strong>Manual</strong> Tip Alignment Command<br />
with the Te-PS Sensor plate placed on the same carrier which will be used for<br />
pipetting. However, due to the mechanical design and other factors, the Te-PS<br />
Carrier can achieve a higher alignment accuracy than conventional carrier types.<br />
The following dialog box is shown when you insert the <strong>Manual</strong> Tip Alignment<br />
command in your script:<br />
Fig. 15-28 Sensorplate Position dialog box<br />
Click on the Te-PS Sensor plate in the Worktable Editor or specify the grid and site<br />
position manually and click OK to start the tip alignment procedure.<br />
A dialog box (not shown) warns you that the LiHa will now move to the sensor<br />
plate position. If your instrument is fitted with doorlocks, for safety reasons the<br />
doorlocks will be locked before moving the LiHa. Click OK to continue to the Tip<br />
Alignment Results dialog box or click Cancel to cancel tip alignment.<br />
15.27.1 Tip Alignment Results<br />
This dialog box is used by the <strong>Manual</strong> Tip Alignment function to display the<br />
misalignment (if any) of the Liquid Handling Arm (LiHa):<br />
Fig. 15-29 Tip Alignment Results dialog box<br />
Click OK to start the test. After the test is finished, the dialog box shows the<br />
misalignment in mm for each of the tips.<br />
If the misalignment exceeds the maximum allowed value for any of the tips, the<br />
instrument must be re-calibrated by authorized personnel using the Setup &<br />
Service software (see 1.2 “Reference Documents”, 1-3 for information on this<br />
software).<br />
The maximum allowed misalignment depends on the radius and shape of the<br />
wells in the racks that you are using. It should be less than well radius - tip radius.<br />
15 - 58 <strong>Freedom</strong> <strong>EVOware</strong> <strong>Software</strong> <strong>Manual</strong>, 393172, en, V<strong>2.3</strong>
15 - Script Commands<br />
Copy Plate Wizard<br />
For 1536-well racks, an appropriate value for the maximum misalignment is 0.5<br />
mm.<br />
After completing the test, you can remove the sensor plate from the carrier if the<br />
site is required by a subsequent pipetting script. However, you should not unplug<br />
the sensor plate cable from the pipetting instrument.<br />
15.28 Copy Plate Wizard<br />
The Copy Plate wizard creates a set of script commands which make identical<br />
copies of the source plate on one or more destination plates. You can copy the<br />
whole plate or a rectangular selection of wells.<br />
After you have completed all of the steps in the wizard, it creates script commands<br />
which carry out the required actions and inserts them in the Script Editor window<br />
at the currently selected position. If necessary, the script commands can then be<br />
edited if you want to include some special features.<br />
15.28.1 Copy Plate Wizard, Step 1 of 4<br />
Select the source plate parameters:<br />
Fig. 15-30 Copy Plate wizard, step 1 of 4<br />
Click on the source plate you want to use<br />
Select the source plate by clicking on the labware in the Worktable Editor. The<br />
protected field then shows the type or the label (name) of the selected item.<br />
Select the tips you want to use<br />
Check the appropriate checkboxes.<br />
Note: The Copy Plate wizard does not allow you to use a mixture of standard tips<br />
and DITIs. If your pipetting instrument has both standard tips and DITIs, you must<br />
uncheck all standard tips before you can choose any DITIs (and vice versa).<br />
<strong>Freedom</strong> <strong>EVOware</strong> <strong>Software</strong> <strong>Manual</strong>, 393172, en, V<strong>2.3</strong> 15 - 59
15 - Script Commands<br />
Copy Plate Wizard<br />
Click on the DITI rack you want to use<br />
This option only appears if you are using DITIs (disposable tips). Select the<br />
DITI rack by clicking on it in the Worktable Editor. The protected field then<br />
shows the type or the label (name) of the selected item.<br />
Select the liquid class<br />
Choose the required liquid class for the source plate from the pull down list.<br />
The list only shows liquid classes which are suitable for the current<br />
configuration of the pipetting instrument. See also 10 “Configuring Liquid<br />
Classes”, 10-1.<br />
Do you want to mix before aspirating<br />
Click the appropriate radio button. If you choose Yes, you must also specify<br />
how many times to mix and the volume to mix with.<br />
How many plates do you want to copy<br />
Select the number of copies you want to make from the source labware. The<br />
allowed range is from 1 to 16.<br />
Do you want to use multi-pipetting mode<br />
This option only appears if you have chosen to make more than one copy.<br />
With multi-pipetting mode, the liquid which is aspirated is dispensed in<br />
portions into several destination positions. With single pipetting mode, the<br />
liquid which is aspirated is dispensed into a single destination position in one<br />
step.<br />
15.28.2 Copy Plate Wizard, Step 2 of 4<br />
Select the destination plate parameters:<br />
Fig. 15-31 Copy Plate wizard, step 2 of 4<br />
15 - 60 <strong>Freedom</strong> <strong>EVOware</strong> <strong>Software</strong> <strong>Manual</strong>, 393172, en, V<strong>2.3</strong>
15 - Script Commands<br />
Copy Plate Wizard<br />
Click on the first destination plate you want to use<br />
Select the destination plate by clicking on the labware in the Worktable Editor.<br />
The protected field then shows the type or the label (name) of the selected<br />
item.<br />
If you have chosen to make more than one copy, <strong>Freedom</strong> <strong>EVOware</strong> will<br />
choose additional labware of the same type automatically by searching the<br />
worktable from rear to front and then from left to right (you cannot select it<br />
yourself). Make sure there is enough labware on the worktable for all of the<br />
copies and choose the left-most and top-most plate for the first copy.<br />
Otherwise the script which is created will contain errors (faulty script lines are<br />
marked in red).<br />
Select the liquid class<br />
Choose the required liquid class for the destination plate(s) from the pull down<br />
list. The list only shows liquid classes which are suitable for the current<br />
configuration of the pipetting instrument.<br />
Wash tips after x aspiration(s)<br />
This option only appears if you are using fixed tips. Enter a non-zero value if<br />
you want to wash the tips after aspirating. If you specify “1”, washing will be<br />
carried out after each aspiration.<br />
Change DiTis after x aspirations<br />
This option only appears if you are using DITIs (disposable tips). Enter a nonzero<br />
value if you want to replace the DITIs after aspirating. If you specify “1”,<br />
the DITIs will be replaced after each aspiration.<br />
The following settings for the waste and the cleaner do not appear if you have<br />
chosen “0” (i.e. “wash is not necessary” or “DITI change is not necessary”).<br />
Select the waste site<br />
Choose the waste unit you want to use from the pull down list. The list shows<br />
all waste units which are currently positioned in the Worktable Editor. The<br />
worktable grid position is shown in brackets. You must first put a wash station<br />
with waste unit in the Worktable Editor. Alternatively, specify the worktable<br />
position for the waste by clicking on it in the Worktable Editor. If only one<br />
waste unit is present, it is chosen automatically.<br />
When using multi-pipetting mode, <strong>Freedom</strong> <strong>EVOware</strong> uses the chosen waste<br />
for discarding the excess volume before aspirating again from the same<br />
source. See also 15.5 “Periodic Wash Command”, 15-10.<br />
Select the cleaner site<br />
This option only appears if you are using fixed tips. Choose the cleaner unit<br />
you want to use from the pull down list. The list shows all cleaner units which<br />
are currently positioned in the Worktable Editor. You must first put a wash<br />
station with cleaner unit in the Worktable Editor. If only one cleaner unit is<br />
present, it is chosen automatically. Alternatively, specify the worktable position<br />
for the cleaner by clicking on it in the Worktable Editor.<br />
Choose a shallow cleaner if you only need to clean the ends of the tips.<br />
Choose a deep cleaner if there is a possibility of contamination along the shaft<br />
of the tip. The deep cleaner requires a larger volume of system liquid and<br />
cleaning takes somewhat longer.<br />
Volumes in cleaner and in waste<br />
These options only appear if you are using fixed tips. Specify the volume of<br />
system liquid which should be used to wash the outside of the tips (volume in<br />
cleaner) and to flush the inside of the tips (volume in waste). Appropriate<br />
settings are chosen automatically. For more information on washing see<br />
15.4 “Wash Tips Command”, 15-8.<br />
<strong>Freedom</strong> <strong>EVOware</strong> <strong>Software</strong> <strong>Manual</strong>, 393172, en, V<strong>2.3</strong> 15 - 61
15 - Script Commands<br />
Copy Plate Wizard<br />
Use Fast-Wash Module<br />
If your instrument is fitted with FWO (Fast Wash Option) or MPO (Monitored<br />
Pump Option), check this checkbox to use the Fast Wash module instead of<br />
the dilutors to wash the tips.<br />
Use Pinch Valve<br />
If your instrument is fitted with the Low Volume Option, check this checkbox to<br />
activate the Low Volume Option after washing the tips.<br />
Volume in destination wells<br />
Specify the required volume of liquid in the destination wells (the same volume<br />
will be dispensed to all wells of all copies). <strong>Freedom</strong> <strong>EVOware</strong> automatically<br />
calculates the necessary aspiration volume for the source labware. However,<br />
<strong>Freedom</strong> <strong>EVOware</strong> does not automatically handle volumes that exceed the<br />
dilutor or DITI capacity.<br />
Do you want to mix after dispensing<br />
Click the appropriate radio button. If you choose Yes, you must also specify<br />
how many times to mix and the volume to mix with.<br />
15.28.3 Copy Plate Wizard, Step 3 of 4<br />
Select the source wells to be copied:<br />
Fig. 15-32 Copy Plate wizard, step 3 of 4<br />
Select the source wells to be copied<br />
Select one or more rows and columns of wells by clicking with the mouse and<br />
dragging. Tip: the cursor shows the x and y coordinates for each well as it<br />
moves over the labware.<br />
15.28.4 Copy Plate Wizard, Step 4 of 4<br />
Select the start position (top left) of the destination wells:<br />
15 - 62 <strong>Freedom</strong> <strong>EVOware</strong> <strong>Software</strong> <strong>Manual</strong>, 393172, en, V<strong>2.3</strong>
15 - Script Commands<br />
Replicates Wizard<br />
Fig. 15-33 Copy Plate wizard, step 4 of 4<br />
Select the start position (top left) of the destination wells<br />
Select the required position of the destination wells by clicking with the<br />
mouse. The same selection of wells will be used for all destination plates. An<br />
error message will be displayed if the position you choose does not allow all of<br />
the source wells to fit on the destination plate (to avoid this, choose a start<br />
position towards the top left of the plate).<br />
Click Finish Wizard when you have made all of your entries. This creates a set of<br />
script commands which carry out the required actions.<br />
Note: Click the “-” button in the Wizard command icon in the Script Editor if you<br />
want to collapse and hide all of the script lines between Wizard and Wizard End.<br />
The “-” button changes to “+”. Click the “+” button to show the script lines again.<br />
15.29 Replicates Wizard<br />
The Replicates wizard creates a set of script commands which make one or more<br />
repetitions (copies) of selected wells on the source plate on one or more<br />
destination plates. All of the destination plates will be identical. You can only<br />
create horizontal replicates.<br />
After you have completed all of the steps in the wizard, it creates script commands<br />
which carry out the required actions and inserts them in the Script Editor window<br />
at the currently selected position. If necessary, the script commands can then be<br />
edited if you want to include some special features.<br />
<strong>Freedom</strong> <strong>EVOware</strong> <strong>Software</strong> <strong>Manual</strong>, 393172, en, V<strong>2.3</strong> 15 - 63
15 - Script Commands<br />
Replicates Wizard<br />
15.29.1 Replicates Wizard, Step 1 of 5<br />
Select the source plate parameters:<br />
Fig. 15-34 Replicates wizard, step 1 of 5<br />
Click on the source plate you want to use<br />
Select the source plate by clicking on the labware in the Worktable Editor. The<br />
protected field then shows the type or the label (name) of the selected item.<br />
Select the tips you want to use<br />
Check the appropriate checkboxes.<br />
Note: The Replicates wizard does not allow you to use a mixture of standard tips<br />
and DITIs. If your pipetting instrument has both standard tips and DITIs, you must<br />
uncheck all standard tips before you can choose any DITIs (and vice versa).<br />
Click on the DITI rack you want to use<br />
This option only appears if you are using DITIs (disposable tips). Select the<br />
DITI rack by clicking on it in the Worktable Editor. The protected field then<br />
shows the type or the label (name) of the selected item.<br />
Select the liquid class<br />
Choose the required liquid class for the source plate from the pull down list.<br />
The list only shows liquid classes which are suitable for the current<br />
configuration of the pipetting instrument. See also 10 “Configuring Liquid<br />
Classes”, 10-1.<br />
Do you want to mix before aspirating<br />
Click the appropriate radio button. If you choose Yes, you must also specify<br />
how many times to mix and the volume to mix with.<br />
15 - 64 <strong>Freedom</strong> <strong>EVOware</strong> <strong>Software</strong> <strong>Manual</strong>, 393172, en, V<strong>2.3</strong>
15 - Script Commands<br />
Replicates Wizard<br />
15.29.2 Replicates Wizard, Step 2 of 5<br />
Select the destination plate parameters:<br />
Fig. 15-35 Replicates wizard, step 2 of 5<br />
Click on the first destination plate you want to use<br />
Select the destination plate by clicking on the labware in the Worktable Editor.<br />
The protected field then shows the type or the label (name) of the selected<br />
item.<br />
If you have chosen to make more than one replicate, <strong>Freedom</strong> <strong>EVOware</strong> will<br />
choose additional labware of the same type automatically by searching the<br />
worktable from rear to front and then from left to right (you cannot select it<br />
yourself). Make sure there is enough labware on the worktable for all of the<br />
copies and choose the left-most and top-most plate for the first copy.<br />
Otherwise the script which is created will contain errors (faulty script lines are<br />
marked in red).<br />
Select the liquid class<br />
Choose the required liquid class for the destination plate(s) from the pull down<br />
list. The list only shows liquid classes which are suitable for the current<br />
configuration of the pipetting instrument.<br />
How many replicates of each well do you want to create<br />
Select how many replications of the source plate wells you want to make<br />
(range: 1 to 24). The maximum number of replications also depends on how<br />
many wells are available on the destination plate. For example, if you want to<br />
replicate four wells three times, the replications will occupy 12 wells on each<br />
of the destination plates.<br />
How many plate copies do you want to create<br />
Select how many copies of the replications you want (range: 1 to 16). All of<br />
the destination plates will be identical.<br />
Replication sequence mode<br />
This is used to select the placement on the destination wells:<br />
<strong>Freedom</strong> <strong>EVOware</strong> <strong>Software</strong> <strong>Manual</strong>, 393172, en, V<strong>2.3</strong> 15 - 65
15 - Script Commands<br />
Replicates Wizard<br />
– With 12 to 1122, <strong>Freedom</strong> <strong>EVOware</strong> pipettes all replicates of the first<br />
source column onto the destination plate, and then proceeds with the<br />
replicates of the second source column. For example, if you want to<br />
replicate columns B, C and D of the source labware and you choose three<br />
replications per plate, the destination columns will be as follows:<br />
BBBCCCDDD.<br />
– With 12 to 1212, <strong>Freedom</strong> <strong>EVOware</strong> pipettes a single replicate of the first<br />
column and then a single replicate of the second column, and so on. For<br />
example, if you want to replicate columns B, C and D of the source plate<br />
and you choose three replications per plate, the destination columns will<br />
be as follows: BCDBCDBCD.<br />
Volume in destination wells<br />
Specify the required volume of liquid in the destination wells (the same volume<br />
will be dispensed to all wells of all replicates). <strong>Freedom</strong> <strong>EVOware</strong><br />
automatically calculates the necessary aspiration volume for the source<br />
labware. However, <strong>Freedom</strong> <strong>EVOware</strong> does not automatically handle<br />
volumes that exceed the dilutor or DITI capacity.<br />
15.29.3 Replicates Wizard, Step 3 of 5<br />
Select the destination plate parameters:<br />
Fig. 15-36 Replicates wizard, step 3 of 5<br />
Do you want to mix after dispensing<br />
Click the appropriate radio button. If you choose Yes, you must also specify<br />
how many times to mix and the volume to mix with.<br />
Wash tips after x replications<br />
This option only appears if you are using fixed tips. Enter a non-zero value if<br />
you want to wash the tips after replicating. If you specify “1”, washing will be<br />
carried out after each replication.<br />
15 - 66 <strong>Freedom</strong> <strong>EVOware</strong> <strong>Software</strong> <strong>Manual</strong>, 393172, en, V<strong>2.3</strong>
15 - Script Commands<br />
Replicates Wizard<br />
Change DiTis after x replications<br />
This option only appears if you are using DITIs (disposable tips). Enter a nonzero<br />
value if you want to replace the DITIs after replicating. If you specify “1”,<br />
the DITIs will be replaced after each replication.<br />
The following settings for the waste and the cleaner do not appear if you have<br />
chosen “0” (i.e. “wash is not necessary” or “DITI change is not necessary”).<br />
Select the waste site<br />
Choose the waste unit you want to use from the pull down list. The list shows<br />
all waste units which are currently positioned in the Worktable Editor. The<br />
worktable grid position is shown in brackets. You must first put a wash station<br />
with waste unit in the Worktable Editor. Alternatively, specify the worktable<br />
position for the waste by clicking on it in the Worktable Editor. If only one<br />
waste unit is present, it is chosen automatically.<br />
When using multi-pipetting mode, <strong>Freedom</strong> <strong>EVOware</strong> uses the chosen waste<br />
for discarding the excess volume before aspirating again from the same<br />
source. See also 15.5 “Periodic Wash Command”, 15-10.<br />
Select the cleaner site<br />
This option only appears if you are using fixed tips. Choose the cleaner unit<br />
you want to use from the pull down list. The list shows all cleaner units which<br />
are currently positioned in the Worktable Editor. You must first put a wash<br />
station with cleaner unit in the Worktable Editor. Alternatively, specify the<br />
worktable position for the cleaner by clicking on it in the Worktable Editor. If<br />
only one cleaner unit is present, it is chosen automatically.<br />
Choose a shallow cleaner if you only need to clean the ends of the tips.<br />
Choose a deep cleaner if there is a possibility of contamination along the shaft<br />
of the tip. The deep cleaner requires a larger volume of system liquid and<br />
cleaning takes somewhat longer.<br />
Volumes in cleaner and in waste<br />
These options only appear if you are using fixed tips. Specify the volume of<br />
system liquid which should be used to wash the outside of the tips (volume in<br />
cleaner) and to flush the inside of the tips (volume in waste). Appropriate<br />
settings are chosen automatically. For more information on washing see<br />
15.4 “Wash Tips Command”, 15-8.<br />
Use Fast-Wash Module<br />
If your instrument is fitted with FWO (Fast Wash Option) or MPO (Monitored<br />
Pump Option), check this checkbox to use the Fast Wash module instead of<br />
the dilutors to wash the tips.<br />
Use Pinch Valve<br />
If your instrument is fitted with the Low Volume Option, check this checkbox to<br />
activate the Low Volume Option after washing the tips.<br />
How many replicates per aspiration do you want to make<br />
This option only appears if you chose to make more than one replicate of each<br />
well in the previous step. Specify a value greater than one to use multipipetting<br />
mode. With multi-pipetting mode, the liquid which is aspirated is<br />
dispensed in portions into several destination positions. With single pipetting<br />
mode, the liquid which is aspirated is dispensed into a single destination<br />
position in one step.<br />
<strong>Freedom</strong> <strong>EVOware</strong> <strong>Software</strong> <strong>Manual</strong>, 393172, en, V<strong>2.3</strong> 15 - 67
15 - Script Commands<br />
Replicates Wizard<br />
15.29.4 Replicates Wizard, Step 4 of 5<br />
Select the source wells to be replicated:<br />
Fig. 15-37 Replicates wizard, step 4 of 5<br />
Select the source wells to be replicated<br />
Select one or more rows and columns of wells by clicking with the mouse and<br />
dragging. Tip: the cursor shows the x and y coordinates for each well as it<br />
moves over the labware.<br />
15 - 68 <strong>Freedom</strong> <strong>EVOware</strong> <strong>Software</strong> <strong>Manual</strong>, 393172, en, V<strong>2.3</strong>
15 - Script Commands<br />
Serial Dilution Wizard<br />
15.29.5 Replicates Wizard, Step 5 of 5<br />
Select the start position (top left) of the destination wells:<br />
Fig. 15-38 Replicates wizard, step 5 of 5<br />
Select the start position (top left) of the destination wells<br />
Select the required position of the destination wells by clicking with the<br />
mouse. The same selection of wells will be used for all destination plates. An<br />
error message will be displayed if the position you choose does not allow all of<br />
the replicated wells to fit on the destination plate (to avoid this, choose a start<br />
position towards the top left of the plate).<br />
Click Finish Wizard when you have made all of your entries. This creates a set of<br />
script commands which carry out the required actions.<br />
Note: Click the “-” button in the Wizard command icon in the Script Editor if you<br />
want to collapse and hide all of the script lines between Wizard and Wizard End.<br />
The “-” button changes to “+”. Click the “+” button to show the script lines again.<br />
15.30 Serial Dilution Wizard<br />
The Serial Dilution wizard creates a set of script commands which perform a serial<br />
dilution in two or more steps. Each dilution step has the same dilution factor.<br />
After you have completed all of the steps in the wizard, it creates script commands<br />
which carry out the required actions and inserts them in the Script Editor window<br />
at the currently selected position. If necessary, the script commands can then be<br />
edited if you want to include some special features.<br />
<strong>Freedom</strong> <strong>EVOware</strong> <strong>Software</strong> <strong>Manual</strong>, 393172, en, V<strong>2.3</strong> 15 - 69
15 - Script Commands<br />
Serial Dilution Wizard<br />
15.30.1 Serial Dilution Wizard, Step 1 of 6<br />
Select the dilution parameters:<br />
Fig. 15-39 Serial Dilution wizard, step 1 of 6<br />
Click on the labware that contains the diluent<br />
Select the plate which contains the diluent by clicking on the labware in the<br />
Worktable Editor. The protected field then shows the type or the label (name)<br />
of the selected item.<br />
What is the dilution factor<br />
Specify the required dilution factor per step (range: 1.1 to 1000). Each dilution<br />
step has the same dilution factor. The following table lists the dilution in<br />
percent for six different dilution factors:<br />
Tab. 15-11 Dilution in percent for six different dilution factors<br />
Dilution<br />
factor Sample % : Diluent %<br />
1:2 50% : 50%<br />
1:4 25% : 75%<br />
1:8 12.5% : 87.5%<br />
1:16 6.25% : 93.75%<br />
1:32 3.125% : 96.875%<br />
1:64 1.5625% : 98.4375%<br />
15 - 70 <strong>Freedom</strong> <strong>EVOware</strong> <strong>Software</strong> <strong>Manual</strong>, 393172, en, V<strong>2.3</strong>
15 - Script Commands<br />
Serial Dilution Wizard<br />
How many steps should your dilution contain<br />
Specify the required number of steps (range: 2 to 24). Example: if you specify<br />
a dilution of 1:2 per step and a total of 3 steps, the destination plate(s) will all<br />
have three columns of wells with dilution factors of 1:2, 1:4 and 1:8. See also<br />
“Is the source concentration equal to the first step”.<br />
How many dilution series (plates)<br />
Specify how many destination plates you want to make (range: 1 to 16). All of<br />
the destination plates will be identical.<br />
Dilute the first transfer to the destination plate(s)<br />
Click No if you want the first column in the destination plate(s) to contain the<br />
undiluted sample. Example: if you choose No and specify a dilution of 1:2 per<br />
step and a total of 3 steps, the destination plate(s) will all have three columns<br />
of wells with dilution factors of “undiluted”, 1:2 and 1:4.<br />
Is the diluent already distributed<br />
Click Yes if the destination wells in the destination plate(s) already contain<br />
diluent. In this case, you must specify how much diluent is contained in each<br />
well, and the Serial Dilution wizard only needs to aspirate and dispense the<br />
appropriate quantities of the sample liquid. Tip: You can dispense diluent to<br />
the destination wells using the Replicates wizard.<br />
How much diluent is dispensed in each well: Specify how much diluent is<br />
already contained in each destination well.<br />
What final volume do you want to have<br />
Specify the required total volume (sample plus diluent) in each of the<br />
destination wells.<br />
Aspirate sample and diluent together<br />
Click Yes if you want to aspirate the sample directly after aspirating the<br />
diluent. Click No if you want to dispense the diluent into the destination wells<br />
before aspirating and dispensing the sample. Be aware of the risk of<br />
contamination if you choose Yes.<br />
<strong>Freedom</strong> <strong>EVOware</strong> <strong>Software</strong> <strong>Manual</strong>, 393172, en, V<strong>2.3</strong> 15 - 71
15 - Script Commands<br />
Serial Dilution Wizard<br />
15.30.2 Serial Dilution Wizard, Step 2 of 6<br />
Select the source parameters:<br />
Fig. 15-40 Serial Dilution wizard, step 2 of 6<br />
Click on the source plate you want to use<br />
Select the source plate by clicking on the labware in the Worktable Editor. The<br />
protected field then shows the type or the label (name) of the selected item.<br />
Select the tips you want to use<br />
Check the appropriate checkboxes.<br />
Note: The Serial Dilution wizard does not allow you to use a mixture of standard<br />
tips and DITIs. If your pipetting instrument has both standard tips and DITIs, you<br />
must uncheck all standard tips before you can choose any DITIs (and vice versa).<br />
Click on the DITI rack you want to use<br />
This option only appears if you are using DITIs (disposable tips). Select the<br />
DITI rack by clicking on it in the Worktable Editor. The protected field then<br />
shows the type or the label (name) of the selected item.<br />
Select the sample liquid class<br />
Choose the required liquid class for the sample from the pull down list. The list<br />
only shows liquid classes which are suitable for the current configuration of<br />
the pipetting instrument. See also 10 “Configuring Liquid Classes”, 10-1.<br />
Select the diluent liquid class<br />
Choose the required liquid class for the diluent from the pull down list. The list<br />
only shows liquid classes which are suitable for the current configuration of<br />
the pipetting instrument.<br />
Do you want to mix before aspirating<br />
Click the appropriate radio button. If you choose Yes, you must also specify<br />
how many times to mix and the volume to mix with.<br />
15 - 72 <strong>Freedom</strong> <strong>EVOware</strong> <strong>Software</strong> <strong>Manual</strong>, 393172, en, V<strong>2.3</strong>
15 - Script Commands<br />
Serial Dilution Wizard<br />
15.30.3 Serial Dilution Wizard, Step 3 of 6<br />
Select the destination parameters:<br />
Fig. 15-41 Serial Dilution wizard, step 3 of 6<br />
Click on the destination plate you want to use<br />
Select the destination plate by clicking on the labware in the Worktable Editor.<br />
The protected field then shows the type or the label (name) of the selected<br />
item.<br />
If you have chosen to make more than one curve (destination plate), <strong>Freedom</strong><br />
<strong>EVOware</strong> will choose additional labware of the same type automatically by<br />
searching the worktable from rear to front and then from left to right (you<br />
cannot select it yourself). Make sure there is enough labware on the worktable<br />
for all of the copies and choose the left-most and top-most plate for the first<br />
copy. Otherwise the script which is created will contain errors (faulty script<br />
lines are marked in red).<br />
Select the liquid class<br />
Choose the required liquid class for the destination plate(s) from the pull down<br />
list. The list only shows liquid classes which are suitable for the current<br />
configuration of the pipetting instrument.<br />
Wash tips after each dilution step<br />
This option only appears if you are using fixed tips. Click Yes if you want to<br />
wash the tips after each dilution step.<br />
Change DiTis after each dilution step<br />
This option only appears if you are using DITIs (disposable tips). Click Yes if<br />
you want to replace the DITIs after each dilution step.<br />
The following settings for the waste and the cleaner do not appear if you have<br />
chosen No (i.e. “wash is not necessary” or “DITI change is not necessary”):<br />
<strong>Freedom</strong> <strong>EVOware</strong> <strong>Software</strong> <strong>Manual</strong>, 393172, en, V<strong>2.3</strong> 15 - 73
15 - Script Commands<br />
Serial Dilution Wizard<br />
Select the waste site<br />
Choose the waste unit you want to use from the pull down list. The list shows<br />
all waste units which are currently positioned in the Worktable Editor. The<br />
worktable grid position is shown in brackets. You must first put a wash station<br />
with waste unit in the Worktable Editor.Alternatively, specify the worktable<br />
position for the waste by clicking on it in the Worktable Editor. If only one<br />
waste unit is present, it is chosen automatically.<br />
When using multi-pipetting mode, <strong>Freedom</strong> <strong>EVOware</strong> uses the chosen waste<br />
for discarding the excess volume before aspirating again from the same<br />
source. See also 15.5 “Periodic Wash Command”, 15-10.<br />
Select the cleaner site<br />
This option only appears if you have if you are using fixed tips. Choose the<br />
cleaner unit you want to use from the pull down list. The list shows all cleaner<br />
units which are currently positioned in the Worktable Editor. You must first put<br />
a wash station with cleaner unit in the Worktable Editor. If only one cleaner<br />
unit is present, it is chosen automatically. Alternatively, specify the worktable<br />
position for the cleaner by clicking on it in the Worktable Editor.<br />
Choose a shallow cleaner if you only need to clean the ends of the tips.<br />
Choose a deep cleaner if there is a possibility of contamination along the shaft<br />
of the tip. The deep cleaner requires a larger volume of system liquid and<br />
cleaning takes somewhat longer.<br />
Volumes in cleaner and in waste<br />
These options only appear if you are using fixed tips. Specify the volume of<br />
system liquid which should be used to wash the outside of the tips (volume in<br />
cleaner) and to flush the inside of the tips (volume in waste). Appropriate<br />
settings are chosen automatically. For more information on washing see<br />
15.4 “Wash Tips Command”, 15-8.<br />
Use Fast-Wash Module<br />
If your instrument is fitted with FWO (Fast Wash Option) or MPO (Monitored<br />
Pump Option), check this checkbox to use the Fast Wash module instead of<br />
the dilutors to wash the tips.<br />
Use Pinch Valve<br />
If your instrument is fitted with the Low Volume Option, check this checkbox to<br />
activate the Low Volume Option after washing the tips.<br />
Do you want to mix after dispensing<br />
Click the appropriate radio button. If you choose Yes, you must also specify<br />
how many times to mix and the volume to mix with.<br />
15 - 74 <strong>Freedom</strong> <strong>EVOware</strong> <strong>Software</strong> <strong>Manual</strong>, 393172, en, V<strong>2.3</strong>
15 - Script Commands<br />
Serial Dilution Wizard<br />
15.30.4 Serial Dilution Wizard, Step 4 of 6<br />
Select the tip position of the diluent source:<br />
Fig. 15-42 Serial Dilution wizard, step 4 of 6<br />
Select the tip position of the diluent source<br />
Select the tip position of the diluent source by clicking with the mouse. In the<br />
above example, the diluent will be taken from a trough (troughs only have one<br />
column).<br />
<strong>Freedom</strong> <strong>EVOware</strong> <strong>Software</strong> <strong>Manual</strong>, 393172, en, V<strong>2.3</strong> 15 - 75
15 - Script Commands<br />
Serial Dilution Wizard<br />
15.30.5 Serial Dilution Wizard, Step 5 of 6<br />
Select the sample source wells:<br />
Fig. 15-43 Serial Dilution wizard, step 5 of 6<br />
Select the sample source wells<br />
Select the required number of source wells by clicking with the mouse and<br />
dragging. All of the wells are in the same column. Tip: the cursor shows the x<br />
and y coordinates for each well as it moves over the labware.<br />
15 - 76 <strong>Freedom</strong> <strong>EVOware</strong> <strong>Software</strong> <strong>Manual</strong>, 393172, en, V<strong>2.3</strong>
15 - Script Commands<br />
Merge Plates Wizard<br />
15.30.6 Serial Dilution Wizard, Step 6 of 6<br />
Select the start position (top left) of the destination wells:<br />
Fig. 15-44 Serial Dilution wizard, step 6 of 6<br />
Select the start position (top left) of the destination wells<br />
Select the required position of the destination wells by clicking with the<br />
mouse. The same selection of wells will be used for all destination plates. An<br />
error message will be displayed if the position you choose does not allow all of<br />
the destination wells to fit on the destination plate (to avoid this, choose a start<br />
position towards the top left of the plate).<br />
Click Finish Wizard when you have made all of your entries. This creates a set of<br />
script commands which carry out the required actions.<br />
Note: Click the “-” button in the Wizard command icon in the Script Editor if you<br />
want to collapse and hide all of the script lines between Wizard and Wizard End.<br />
The “-” button changes to “+”. Click the “+” button to show the script lines again.<br />
15.31 Merge Plates Wizard<br />
The Merge Plates wizard creates a set of script commands which make a<br />
destination plate (e.g. a 384 well plate) by merging together wells from one or<br />
more source plates (e.g. four 96 well plates). When merging plates, <strong>Freedom</strong><br />
<strong>EVOware</strong> always proceeds from rear to front and then from left to right.<br />
The number of steps which are required for the wizard depends on how many<br />
source plates you want to merge.<br />
<strong>Freedom</strong> <strong>EVOware</strong> <strong>Software</strong> <strong>Manual</strong>, 393172, en, V<strong>2.3</strong> 15 - 77
15 - Script Commands<br />
Merge Plates Wizard<br />
15.31.1 Merge Plates Wizard, Step 1 of 7<br />
Select the common source plate parameters:<br />
Fig. 15-45 Merge Plates wizard, step 1 of 7<br />
Select the tips you want to use<br />
Check the appropriate checkboxes.<br />
Note: The Merge Plates wizard does not allow you to use a mixture of standard<br />
tips and DITIs. If your pipetting instrument has both standard tips and DITIs, you<br />
must uncheck all standard tips before you can choose any DITIs (and vice versa).<br />
Click on the DITI rack you want to use<br />
This option only appears if you are using DITIs (disposable tips). Select the<br />
DITI rack by clicking on it in the Worktable Editor. The protected field then<br />
shows the type or the label (name) of the selected item.<br />
Do you want to mix before aspirating<br />
Click the appropriate radio button. If you choose Yes, you must also specify<br />
how many times to mix and the volume to mix with.<br />
How many source plates do you want to merge<br />
Specify the number of source plates you want to merge (range: 2 to 16).<br />
15 - 78 <strong>Freedom</strong> <strong>EVOware</strong> <strong>Software</strong> <strong>Manual</strong>, 393172, en, V<strong>2.3</strong>
15 - Script Commands<br />
Merge Plates Wizard<br />
15.31.2 Merge Plates Wizard, Step 2 of 7<br />
Select the parameters for the first source plate:<br />
Fig. 15-46 Merge Plates wizard, step 2 of 7<br />
Click on the source plate you want to use<br />
Select the first source plate by clicking on the labware in the Worktable Editor.<br />
The protected field then shows the type or the label (name) of the selected<br />
item. The plate number is shown at the top right.<br />
Select the liquid class<br />
Choose the required liquid class for this source plate from the pull down list.<br />
The list only shows liquid classes which are suitable for the current<br />
configuration of the pipetting instrument. See also 10 “Configuring Liquid<br />
Classes”, 10-1.<br />
Volume in well<br />
Specify the volume of liquid you want to aspirate (the same volume will be<br />
aspirated from all wells).<br />
<strong>Freedom</strong> <strong>EVOware</strong> <strong>Software</strong> <strong>Manual</strong>, 393172, en, V<strong>2.3</strong> 15 - 79
15 - Script Commands<br />
Merge Plates Wizard<br />
15.31.3 Merge Plates Wizard, Step 3 of 7<br />
Select the parameters for the second source plate:<br />
Fig. 15-47 Merge Plates wizard, step 3 of 7<br />
Click on the source plate you want to use<br />
Select the second source plate by clicking on the labware in the Worktable<br />
Editor. The protected field then shows the type or the label (name) of the<br />
selected item. The plate number is shown at the top right. If required, you can<br />
aspirate from the same source plate again (e.g. if you want to create a<br />
destination plate with the same samples but in different well positions).<br />
Select the liquid class<br />
Choose the required liquid class for this source plate from the pull down list.<br />
The list only shows liquid classes which are suitable for the current<br />
configuration of the pipetting instrument.<br />
Volume in well<br />
Specify the volume of liquid you want to aspirate (the same volume will be<br />
aspirated from all wells).<br />
15 - 80 <strong>Freedom</strong> <strong>EVOware</strong> <strong>Software</strong> <strong>Manual</strong>, 393172, en, V<strong>2.3</strong>
15 - Script Commands<br />
Merge Plates Wizard<br />
15.31.4 Merge Plates Wizard, Step 4 of 7<br />
Select the destination plate parameters:<br />
Fig. 15-48 Merge Plates wizard, step 4 of 7<br />
Click on the destination plate you want to use<br />
Select the destination plate by clicking on the labware in the Worktable Editor.<br />
The protected field then shows the type or the label (name) of the selected<br />
item.<br />
Select the liquid class<br />
Choose the required liquid class for the destination plate(s) from the pull down<br />
list. The list only shows liquid classes which are suitable for the current<br />
configuration of the pipetting instrument.<br />
Wash tips<br />
This option only appears if you are using fixed tips. Choose the required<br />
washing method.<br />
Change DiTis<br />
This option only appears if you are using DITIs (disposable tips). Choose the<br />
required method for replacing the DITIs.<br />
Select the waste site<br />
Choose the waste unit you want to use from the pull down list. The list shows<br />
all waste units which are currently positioned in the Worktable Editor. The<br />
worktable grid position is shown in brackets. You must first put a wash station<br />
with waste unit in the Worktable Editor. Alternatively, specify the worktable<br />
position for the waste by clicking on it in the Worktable Editor. If only one<br />
waste unit is present, it is chosen automatically.<br />
When using multi-pipetting mode, <strong>Freedom</strong> <strong>EVOware</strong> uses the chosen waste<br />
for discarding the excess volume before aspirating again from the same<br />
source. See also 15.5 “Periodic Wash Command”, 15-10.<br />
<strong>Freedom</strong> <strong>EVOware</strong> <strong>Software</strong> <strong>Manual</strong>, 393172, en, V<strong>2.3</strong> 15 - 81
15 - Script Commands<br />
Merge Plates Wizard<br />
Select the cleaner site<br />
This option only appears if you are using fixed tips. Choose the cleaner unit<br />
you want to use from the pull down list. The list shows all cleaner units which<br />
are currently positioned in the Worktable Editor. You must first put a wash<br />
station with cleaner unit in the Worktable Editor. If only one cleaner unit is<br />
present, it is chosen automatically. Alternatively, specify the worktable position<br />
for the cleaner by clicking on it in the Worktable Editor.<br />
Choose a shallow cleaner if you only need to clean the ends of the tips.<br />
Choose a deep cleaner if there is a possibility of contamination along the shaft<br />
of the tip. The deep cleaner requires a larger volume of system liquid and<br />
cleaning takes somewhat longer.<br />
Volumes in cleaner and in waste<br />
These options only appear if you are using fixed tips. Specify the volume of<br />
system liquid which should be used to wash the outside of the tips (volume in<br />
cleaner) and to flush the inside of the tips (volume in waste). Appropriate<br />
settings are chosen automatically. For more information on washing see<br />
15.4 “Wash Tips Command”, 15-8.<br />
Use Fast-Wash Module<br />
If your instrument is fitted with FWO (Fast Wash Option) or MPO (Monitored<br />
Pump Option), check this checkbox to use the Fast Wash module instead of<br />
the dilutors to wash the tips.<br />
Use Pinch Valve<br />
If your instrument is fitted with the Low Volume Option, check this checkbox to<br />
activate the Low Volume Option after washing the tips.<br />
Do you want to mix after dispensing<br />
Click the appropriate radio button. If you choose Yes, you must also specify<br />
how many times to mix and the volume to mix with.<br />
15 - 82 <strong>Freedom</strong> <strong>EVOware</strong> <strong>Software</strong> <strong>Manual</strong>, 393172, en, V<strong>2.3</strong>
15 - Script Commands<br />
Merge Plates Wizard<br />
15.31.5 Merge Plates Wizard, Step 5 of 7<br />
Select the wells to be copied from the first source plate:<br />
Fig. 15-49 Merge Plates wizard, step 5 of 7<br />
Select the source wells to be copied<br />
Select one or more rows and columns of wells by clicking with the mouse and<br />
dragging. Tip: the cursor shows the x and y coordinates for each well as it<br />
moves over the labware. The plate number is shown at the top right.<br />
<strong>Freedom</strong> <strong>EVOware</strong> <strong>Software</strong> <strong>Manual</strong>, 393172, en, V<strong>2.3</strong> 15 - 83
15 - Script Commands<br />
Merge Plates Wizard<br />
15.31.6 Merge Plates Wizard, Step 6 of 7<br />
Select the wells to be copied from the second source plate:<br />
Fig. 15-50 Merge Plates wizard, step 6 of 7<br />
Select the source wells to be copied<br />
Select one or more rows and columns of wells by clicking with the mouse and<br />
dragging. Tip: the cursor shows the x and y coordinates for each well as it<br />
moves over the labware. The plate number is shown at the top right.<br />
15 - 84 <strong>Freedom</strong> <strong>EVOware</strong> <strong>Software</strong> <strong>Manual</strong>, 393172, en, V<strong>2.3</strong>
15 - Script Commands<br />
Transfer Wizard<br />
15.31.7 Merge Plates Wizard, Step 7 of 7<br />
Select the destination for each source block:<br />
Fig. 15-51 Merge Plates wizard, step 7 of 7<br />
Select the destination for each source block<br />
Select the required position of the destination wells from the first source plate<br />
by clicking with the mouse. Click the green arrow to confirm and repeat this<br />
step until you have selected the required positions of the destination wells for<br />
all source plates. The plate number is shown at the top right. If required, you<br />
can position the wells so they overlap (e.g. if you want to mix a reagent with<br />
the samples on the destination plate).<br />
Click Finish Wizard when you have made all of your entries. This creates a set of<br />
script commands which carry out the required actions.<br />
Note: Click the “-” button in the Wizard command icon in the Script Editor if you<br />
want to collapse and hide all of the script lines between Wizard and Wizard End.<br />
The “-” button changes to “+”. Click the “+” button to show the script lines again.<br />
15.32 Transfer Wizard<br />
The Transfer wizard creates a set of script commands which aspirate liquid from<br />
specified wells on the source plate and transfer it to destination positions.<br />
After you have completed all of the steps in the wizard, it creates script commands<br />
which carry out the required actions and inserts them in the Script Editor window<br />
at the currently selected position. If necessary, the script commands can then be<br />
edited if you want to include some special features.<br />
<strong>Freedom</strong> <strong>EVOware</strong> <strong>Software</strong> <strong>Manual</strong>, 393172, en, V<strong>2.3</strong> 15 - 85
15 - Script Commands<br />
Transfer Wizard<br />
15.32.1 Transfer Wizard, Step 1 of 4<br />
Select the source plate parameters:<br />
Fig. 15-52 Transfer wizard, step 1 of 4<br />
Click on the source plate you want to use<br />
Select the source plate by clicking on the labware in the Worktable Editor. The<br />
protected field then shows the type or the label (name) of the selected item.<br />
Select the tips you want to use<br />
Check the appropriate checkboxes.<br />
Note: The Transfer wizard does not allow you to use a mixture of standard tips<br />
and DITIs. If your pipetting instrument has both standard tips and DITIs, you must<br />
uncheck all standard tips before you can choose any DITIs (and vice versa).<br />
Click on the DITI rack you want to use<br />
This option only appears if you are using DITIs (disposable tips). Select the<br />
DITI rack by clicking on it in the Worktable Editor. The protected field then<br />
shows the type or the label (name) of the selected item.<br />
Select the liquid class<br />
Choose the required liquid class for the source plate from the pull down list.<br />
The list only shows liquid classes which are suitable for the current<br />
configuration of the pipetting instrument. See also 10 “Configuring Liquid<br />
Classes”, 10-1.<br />
Do you want to mix before aspirating<br />
Click the appropriate radio button. If you choose Yes, you must also specify<br />
how many times to mix and the volume to mix with.<br />
15 - 86 <strong>Freedom</strong> <strong>EVOware</strong> <strong>Software</strong> <strong>Manual</strong>, 393172, en, V<strong>2.3</strong>
15 - Script Commands<br />
Transfer Wizard<br />
15.32.2 Transfer Wizard, Step 2 of 4<br />
Select the destination plate parameters:<br />
Fig. 15-53 Transfer wizard, step 2 of 4<br />
Click on the first destination plate you want to use<br />
Select the destination plate by clicking on the labware in the Worktable Editor.<br />
The protected field then shows the type or the label (name) of the selected<br />
item.<br />
If you have chosen to make more than one copy, <strong>Freedom</strong> <strong>EVOware</strong> will<br />
choose additional labware of the same type automatically by searching the<br />
worktable from rear to front and then from left to right (you cannot select it<br />
yourself). Make sure there is enough labware on the worktable for all of the<br />
copies and choose the left-most and top-most plate for the first copy.<br />
Otherwise the script which is created will contain errors (faulty script lines are<br />
marked in red).<br />
Select the liquid class<br />
Choose the required liquid class for the destination plate(s) from the pull down<br />
list. The list only shows liquid classes which are suitable for the current<br />
configuration of the pipetting instrument.<br />
Wash tips after the transfer<br />
This option only appears if you are using fixed tips. Click Yes if you want to<br />
wash the tips after the transfer.<br />
Drop DiTis after the transfer<br />
This option only appears if you are using DITIs (disposable tips). Click Yes if<br />
you want to drop the DITIs after the transfer.<br />
The following settings for the waste and the cleaner do not appear if you have<br />
chosen No (i.e. “wash is not necessary” or “DITI change is not necessary”):<br />
<strong>Freedom</strong> <strong>EVOware</strong> <strong>Software</strong> <strong>Manual</strong>, 393172, en, V<strong>2.3</strong> 15 - 87
15 - Script Commands<br />
Transfer Wizard<br />
Select the waste site<br />
Choose the waste unit you want to use from the pull down list. The list shows<br />
all waste units which are currently positioned in the Worktable Editor. The<br />
worktable grid position is shown in brackets. You must first put a wash station<br />
with waste unit in the Worktable Editor. Alternatively, specify the worktable<br />
position for the waste by clicking on it in the Worktable Editor. If only one<br />
waste unit is present, it is chosen automatically.<br />
When using multi-pipetting mode, <strong>Freedom</strong> <strong>EVOware</strong> uses the chosen waste<br />
for discarding the excess volume before aspirating again from the same<br />
source. See also 15.5 “Periodic Wash Command”, 15-10.<br />
Select the cleaner site<br />
This option only appears if you are using fixed tips. Choose the cleaner unit<br />
you want to use from the pull down list. The list shows all cleaner units which<br />
are currently positioned in the Worktable Editor. You must first put a wash<br />
station with cleaner unit in the Worktable Editor. Alternatively, specify the<br />
worktable position for the cleaner by clicking on it in the Worktable Editor. If<br />
only one cleaner unit is present, it is chosen automatically.<br />
Choose a shallow cleaner if you only need to clean the ends of the tips.<br />
Choose a deep cleaner if there is a possibility of contamination along the shaft<br />
of the tip. The deep cleaner requires a larger volume of system liquid and<br />
cleaning takes somewhat longer.<br />
Volumes in cleaner and in waste<br />
These options only appear if you are using fixed tips. Specify the volume of<br />
system liquid which should be used to wash the outside of the tips (volume in<br />
cleaner) and to flush the inside of the tips (volume in waste). Appropriate<br />
settings are chosen automatically. For more information on washing see<br />
15.4 “Wash Tips Command”, 15-8.<br />
Use Fast-Wash Module<br />
If your instrument is fitted with FWO (Fast Wash Option) or MPO (Monitored<br />
Pump Option), check this checkbox to use the Fast Wash module instead of<br />
the dilutors to wash the tips.<br />
Use Pinch Valve<br />
If your instrument is fitted with the Low Volume Option, check this checkbox to<br />
activate the Low Volume Option after washing the tips.<br />
Volume in destination wells<br />
Specify the required volume of liquid in the destination wells (the same volume<br />
will be dispensed to all wells).<br />
Do you want to mix after dispensing<br />
Click the appropriate radio button. If you choose Yes, you must also specify<br />
how many times to mix and the volume to mix with.<br />
15 - 88 <strong>Freedom</strong> <strong>EVOware</strong> <strong>Software</strong> <strong>Manual</strong>, 393172, en, V<strong>2.3</strong>
15 - Script Commands<br />
Transfer Wizard<br />
15.3<strong>2.3</strong> Transfer Wizard, Step 3 of 4<br />
Select the source wells to be copied:<br />
Fig. 15-54 Transfer wizard, step 3 of 4<br />
Select the source wells to be copied<br />
Select the position of the source wells by clicking with the mouse. All of the<br />
wells are in the same column.<br />
<strong>Freedom</strong> <strong>EVOware</strong> <strong>Software</strong> <strong>Manual</strong>, 393172, en, V<strong>2.3</strong> 15 - 89
15 - Script Commands<br />
MCA Merge Plate Wizard<br />
15.32.4 Transfer Wizard, Step 4 of 4<br />
Select the position of the destination wells:<br />
Fig. 15-55 Transfer wizard, step 4 of 4<br />
Select the position of the destination wells<br />
Select the position of the destination wells by clicking with the mouse. All of<br />
the wells are in the same column.<br />
Click Finish Wizard when you have made all of your entries. This creates a set of<br />
script commands which carry out the required actions.<br />
Note: Click the “-” button in the Wizard command icon in the Script Editor if you<br />
want to collapse and hide all of the script lines between Wizard and Wizard End.<br />
The “-” button changes to “+”. Click the “+” button to show the script lines again.<br />
15.33 MCA Merge Plate Wizard<br />
The MCA Merge Plate wizard creates a set of script commands for the MCA96<br />
which merge four 96-well microplates into one 384-well microplate.<br />
After you have completed all of the steps in the wizard, it creates script commands<br />
which carry out the required actions and inserts them in the Script Editor window<br />
at the currently selected position. If necessary, the script commands can then be<br />
edited if you want to include some special features.<br />
15.33.1 MCA Merge Plate Wizard, Step 1 of 4<br />
Specify the general settings for the MCA Merge Plate wizard:<br />
15 - 90 <strong>Freedom</strong> <strong>EVOware</strong> <strong>Software</strong> <strong>Manual</strong>, 393172, en, V<strong>2.3</strong>
15 - Script Commands<br />
MCA Merge Plate Wizard<br />
Fig. 15-56 MCA Merge Plate wizard, step 1 of 4<br />
Tips<br />
Choose the required action for getting the tipblock or the DiTis.<br />
DiTi source<br />
Select the location of the MCA tipblock or the first MCA DITI rack by clicking<br />
on it in the Worktable Editor. The green (protected) field then shows the label<br />
(name) of the labware that you have selected. The worktable grid and site<br />
position is shown in brackets.<br />
If more than one MCA DiTi rack is needed, <strong>Freedom</strong> <strong>EVOware</strong> will choose<br />
additional MCA DiTi racks automatically by searching the worktable from rear<br />
to front and then from left to right. Make sure you have put enough MCA DiTi<br />
racks on the worktable and choose the left-most and top-most MCA DiTi rack<br />
in this dialog box.<br />
You can only put MCA DiTi racks and MCA tipblocks on MCA carriers.<br />
The script commands created by the MCA Merge Plate Wizard use the predefined<br />
variable RACK_OFFSET. Care must be taken if you use this predefined<br />
variable in other parts of your script (see 14.1.4.13 “RACK_OFFSET”,<br />
14-7).<br />
Drop tips<br />
Choose the required action for dropping the tipblock or the DiTis. Specify<br />
Keep tips if you do not want to drop them (i.e. you want to re-use them). If you<br />
specify Drop to, select the location for dropping the tipblock or the DITI rack by<br />
clicking on it in the Worktable Editor.<br />
<strong>Freedom</strong> <strong>EVOware</strong> <strong>Software</strong> <strong>Manual</strong>, 393172, en, V<strong>2.3</strong> 15 - 91
15 - Script Commands<br />
MCA Merge Plate Wizard<br />
15.33.2 MCA Merge Plate Wizard, Step 2 of 4<br />
Choose the source plate settings:<br />
Fig. 15-57 MCA Merge Plate wizard, step 2 of 4<br />
Source plate<br />
Select the first source plate by clicking on it in the Worktable Editor. The<br />
protected field then shows the type or the label (name) of the selected item.<br />
The green (protected) field then shows the label (name) of the labware that<br />
you have selected. The worktable grid and site position is shown in brackets.<br />
<strong>Freedom</strong> <strong>EVOware</strong> will choose three more 96-well labware items of the same<br />
type automatically by searching the worktable from rear to front and then from<br />
left to right. Make sure you have put four labware items on the worktable and<br />
choose the left-most and top-most labware item in this dialog box.<br />
The script commands created by the MCA Merge Plate Wizard use the predefined<br />
variable RACK_OFFSET. Care must be taken if you use this predefined<br />
variable in other parts of your script (see 14.1.4.13 “RACK_OFFSET”,<br />
14-7).<br />
Liquid class<br />
Choose the required liquid class for aspirating from the source plates from the<br />
pull down list. The list only shows liquid classes which are suitable for the<br />
current configuration of the pipetting instrument. See also 10 “Configuring<br />
Liquid Classes”, 10-1.<br />
Volume<br />
Specify the required volume to aspirate.<br />
Mix before aspirating<br />
Check this checkbox if you want to mix before aspirating. If you do this, you<br />
must also specify the liquid class to use for mixing, the volume to mix with and<br />
how many times to mix.<br />
15 - 92 <strong>Freedom</strong> <strong>EVOware</strong> <strong>Software</strong> <strong>Manual</strong>, 393172, en, V<strong>2.3</strong>
15 - Script Commands<br />
MCA Merge Plate Wizard<br />
15.33.3 MCA Merge Plate wizard, Step 3 of 4<br />
Choose the destination plate settings:<br />
Fig. 15-58 MCA Merge Plate wizard, step 3 of 4<br />
Destination plate<br />
Select the destination plate by clicking on it in the Worktable Editor. The<br />
protected field then shows the type or the label (name) of the selected item.<br />
The green (protected) field then shows the label (name) of the labware that<br />
you have selected. The worktable grid and site position is shown in brackets.<br />
Liquid class<br />
Choose the required liquid class for dispensing to the destination plate from<br />
the pull down list. The list only shows liquid classes which are suitable for the<br />
current configuration of the pipetting instrument.<br />
Quadrant order<br />
Click the radio buttons to indicate the well areas on the destination plate which<br />
will receive liquid from each of the four source plates.<br />
Mix after dispensing<br />
Check this checkbox if you want to mix after dispensing. If you do this, you<br />
must also specify the liquid class to use for mixing, the volume to mix with and<br />
how many times to mix.<br />
<strong>Freedom</strong> <strong>EVOware</strong> <strong>Software</strong> <strong>Manual</strong>, 393172, en, V<strong>2.3</strong> 15 - 93
15 - Script Commands<br />
MCA Merge Plate Wizard<br />
15.33.4 MCA Merge Plate wizard, Step 4 of 4<br />
Choosing the settings to use for washing the tips:<br />
Fig. 15-59 MCA Merge Plate wizard, step 4 of 4<br />
Wash panel<br />
Click the radio buttons to choose how you want to wash.<br />
Wash option<br />
Different wash parameters are needed for each of the MCA tip types. Choose<br />
the MCA tip type you are using from the pull-down list. This configures the<br />
MCA Wash command which is created by the MCA Merge Plate Wizard<br />
command with the recommended wash parameters for the chosen tip type.<br />
The parameter sets with the recommended wash parameters are stored in the<br />
evoware.opt file (see A.3 “Parameters in the Evoware.opt file”, A-17, MCA<br />
Wash Parameters). The parameters in the evoware.opt file should only be<br />
changed by specialists.<br />
In addition to choosing the tip type in the pull-down list, if you want to wash the<br />
whole outside of the tips (the whole length) you may need to adapt the liquid<br />
class parameter "Aspiration position, Z-offset" for the liquid class which is<br />
used for the first cleaner step to ensure that the tips dip far enough into the<br />
wash liquid. A positive value for Z-offset lowers the tips. Note: You cannot<br />
change the properties of the pre-definded (standard) liquid classes. However<br />
you can create a new custom class with the same properties and then change<br />
them.<br />
Open the MCA Wash command in the script commands which are created by<br />
the MCA Merge Plate wizard if you need to know the name of the liquid class<br />
which has been chosen for the first cleaner step.<br />
15 - 94 <strong>Freedom</strong> <strong>EVOware</strong> <strong>Software</strong> <strong>Manual</strong>, 393172, en, V<strong>2.3</strong>
15 - Script Commands<br />
Start Timer Command<br />
Wash position<br />
Select the MCA wash block you want to use by clicking on the wash block in<br />
the Worktable Editor. The green (protected) field then shows the label (name)<br />
of the MCA wash block that you have selected. The worktable grid and site<br />
position is shown in brackets.<br />
You can only put MCA Wash Blocks on MCA carriers.<br />
Click Finish Wizard when you have made all of your entries. This creates a set of<br />
script commands which carry out the required actions.<br />
Note: Click the “-” button in the Wizard command icon in the Script Editor if you<br />
want to collapse and hide all of the script lines between Wizard and Wizard End.<br />
The “-” button changes to “+”. Click the “+” button to show the script lines again.<br />
15.34 Start Timer Command<br />
The Start Timer command re-starts one of the 100 internal timers in <strong>Freedom</strong><br />
<strong>EVOware</strong>. If required, you can use this command to re-start a specified timer<br />
several times in the same script.<br />
Fig. 15-60 Start Timer command<br />
The parameter of the Start Timer command is as follows:<br />
Timer<br />
Specify the number of the timer you want to re-start or specify a numeric<br />
variable (range: 1 - 100).<br />
Note: <strong>Freedom</strong> <strong>EVOware</strong> automatically starts all timers when the script is started.<br />
15.35 Wait for Timer Command<br />
The Wait for Timer command pauses the execution of the script until a specified<br />
number of seconds have expired since a specified timer was reset.<br />
Fig. 15-61 Wait for Timer command<br />
<strong>Freedom</strong> <strong>EVOware</strong> <strong>Software</strong> <strong>Manual</strong>, 393172, en, V<strong>2.3</strong> 15 - 95
15 - Script Commands<br />
Execute Application Command<br />
The parameters of the Wait for Timer command are as follows:<br />
Timer<br />
Specify the number of the timer you want to use or specify a numeric variable<br />
(range: 1 - 100).<br />
Time Span<br />
Specify the time duration which has to expire since the selected timer was<br />
started or reset or specify a numeric variable (range: 0.02 - 86400 seconds).<br />
The script will be paused until the specified time duration has been reached.<br />
15.35.1 Wait for Timer Message Box<br />
If the <strong>Freedom</strong> <strong>EVOware</strong> script contains a Wait for Timer command, the following<br />
message box is shown on the screen while the script waits for the specified time<br />
span to expire:<br />
Fig. 15-62 Wait for Timer message box, example from <strong>Freedom</strong> <strong>EVOware</strong> Plus<br />
The script continues automatically when the time span has expired.<br />
The operator can click Continue to continue the script immediately without waiting<br />
for the specified time span to expire. This option is only available to users with<br />
<strong>Freedom</strong> <strong>EVOware</strong> Administrator or Application Specialist rights and could have<br />
an adverse effect on pipetting, depending on the purpose of the Wait for Timer<br />
command in the script.<br />
The operator can click Cancel to abort the script.<br />
The title bar shows the name of the pipetting script which displayed the prompt.<br />
In <strong>Freedom</strong> <strong>EVOware</strong> Plus, the title bar shows the process name, script ID<br />
(normally counting from 1) and the number of the process copy which is running<br />
the script (process instance ID, counting from 1).<br />
15.36 Execute Application Command<br />
The Execute Application command instructs <strong>Freedom</strong> <strong>EVOware</strong> to run an<br />
external program from within a pipetting script. You can run DOS and Windows<br />
applications. Use the Execute VBScript command instead if you want to run a VB<br />
script (see 15.50 “Execute VB Script Command”, 15-114).<br />
15 - 96 <strong>Freedom</strong> <strong>EVOware</strong> <strong>Software</strong> <strong>Manual</strong>, 393172, en, V<strong>2.3</strong>
15 - Script Commands<br />
Comment Command<br />
Fig. 15-63 Execute Application command<br />
The parameters of the Execute Application command are as follows:<br />
Path & Name & Command Line<br />
Specify the filename and location of the application you want to execute. You<br />
can also specify command line parameters if required. See Fig. 14-9, 14-14<br />
for an example of passing a variable to an external program as a command<br />
line parameter.<br />
Wait for termination of application<br />
If you check this checkbox, the pipetting script will wait for the external<br />
application to finish before continuing; otherwise, the pipetting script will be<br />
continued immediately.<br />
Store return value in variable<br />
Some external applications return an integer value when terminating (error<br />
level). Check this checkbox if you want to store the return value in a variable.<br />
Variable: Specify the variable name. Variable names in scripts can be 1 - 64<br />
characters in length, are not case-sensitive and must not begin with a digit.<br />
15.37 Comment Command<br />
The Comment command is used to insert a comment for a script command or for<br />
some other reason. It is used to annotate the script and is not executable. Use the<br />
User Prompt command instead (see 15.38 “User Prompt Command”, 15-98) if<br />
you want to prompt the instrument operator.<br />
When you run the script, the comments are shown in the Runtime Controller of<br />
<strong>Freedom</strong> <strong>EVOware</strong> <strong>Standard</strong>. If you choose suitable comments, this can help the<br />
instrument operator to monitor the progress of the script as it runs.<br />
Comment commands are also used as labels (jump destinations) by the Condition<br />
command (see 15.44 “Condition Command”, 15-109). Accordingly, you cannot<br />
have two Comment commands in the same script which have the same comment<br />
text.<br />
<strong>Freedom</strong> <strong>EVOware</strong> <strong>Software</strong> <strong>Manual</strong>, 393172, en, V<strong>2.3</strong> 15 - 97
15 - Script Commands<br />
User Prompt Command<br />
Fig. 15-64 Comment command<br />
The parameter of the Comment command is as follows:<br />
Comment<br />
Specify the text of the comment.<br />
The texts of the Comment commands and the corresponding script line numbers<br />
are listed as hyperlinks in the upper Infopad. Click on one of the entries to jump to<br />
the script line which contains the Comment command (script navigation<br />
feature).<br />
Note: Since the Infopads are based on XML technology, avoid using special<br />
characters which are reserved for XML tags. Above all, do not use the “
15 - Script Commands<br />
User Prompt Command<br />
In addition, in <strong>Freedom</strong> <strong>EVOware</strong> <strong>Standard</strong> the doorlocks are unlocked when the<br />
user prompt is shown. The doorlocks are locked again and the script continues<br />
when the operator clicks OK in the User Prompt Message Box.<br />
Note: If the doorlocks cannot be locked again, the Doorlock Error is displayed and<br />
the script will not continue.<br />
Note: The user prompt does not unlock the doorlocks in <strong>Freedom</strong> <strong>EVOware</strong><br />
<strong>Standard</strong> if the script contains an asynchronous subroutine which is still running.<br />
Note: The user prompt does not unlock the doorlocks in <strong>Freedom</strong> <strong>EVOware</strong> Plus<br />
since other processes may still be running.<br />
Fig. 15-65 User Prompt command<br />
The parameters of the User Prompt command are as follows:<br />
Text<br />
Specify the required text of the prompt. If you press the ENTER key, this will<br />
insert a new line in the prompt and does not close the dialog box.<br />
Sound<br />
Choose one of the four available sound options:<br />
– No sound<br />
– Beep once<br />
– Beep three times<br />
– Beep every 3 seconds<br />
Close window automatically<br />
If you check this checkbox, <strong>Freedom</strong> <strong>EVOware</strong> automatically closes the user<br />
prompt window after the specified time and then continues with the script.<br />
Otherwise, the script will pause until the user acknowledges the prompt by<br />
clicking OK in the User Prompt message box during script runtime.<br />
15.38.1 User Prompt Message Box<br />
The User Prompt command pauses the script and displays the following message<br />
box during script run-time:<br />
<strong>Freedom</strong> <strong>EVOware</strong> <strong>Software</strong> <strong>Manual</strong>, 393172, en, V<strong>2.3</strong> 15 - 99
15 - Script Commands<br />
Begin Loop Command<br />
Fig. 15-66 User Prompt message box, example from <strong>Freedom</strong> <strong>EVOware</strong> Plus<br />
The operator can click OK to acknowledge the prompt and continue the script.<br />
The operator can click Cancel to abort the script.<br />
The title bar shows the name of the pipetting script which displayed the prompt.<br />
In <strong>Freedom</strong> <strong>EVOware</strong> Plus, the title bar shows the process name, script ID<br />
(normally counting from 1) and the number of the process copy which is running<br />
the script (process instance ID, counting from 1).<br />
15.39 Begin Loop Command<br />
The Begin Loop command instructs <strong>Freedom</strong> <strong>EVOware</strong> to repeat a command or a<br />
set of commands (i.e. a loop) a specified number of times until the matching End<br />
Loop command is encountered in the script.<br />
Fig. 15-67 Begin Loop command<br />
The parameters of the Begin Loop command are as follows:<br />
Number of loops<br />
Specify the required number of times the loop should be repeated (range: 1 -<br />
999).<br />
Name of Loop<br />
Specify a unique name for the loop (max. 32 characters).<br />
15.40 End Loop Command<br />
The End Loop command terminates the loop which is initiated by the matching<br />
Begin Loop command. The End Loop command is inserted in the script<br />
automatically when you add the Begin Loop command. <strong>Freedom</strong> <strong>EVOware</strong> uses<br />
the same loop name for the Begin Loop command and the End Loop command.<br />
15 - 100 <strong>Freedom</strong> <strong>EVOware</strong> <strong>Software</strong> <strong>Manual</strong>, 393172, en, V<strong>2.3</strong>
15 - Script Commands<br />
Set Variable Command<br />
You must put the End Loop command after the last command which you want in<br />
the loop. To move the End Loop command, click on it and drag it to the required<br />
position. All of the commands within the loop will then be indented. If necessary,<br />
you can add more script commands later between the Begin Loop and End Loop<br />
commands.<br />
The End Loop command has no parameters to configure.<br />
15.41 Set Variable Command<br />
The Set Variable command is used to declare (define) a numeric or string variable<br />
in a pipetting script and to assign an initial value. You can also prompt the<br />
instrument operator for the value. See 14.1 “Variables and Expressions in<br />
Scripts”, 14-1 for more information. In <strong>Freedom</strong> <strong>EVOware</strong> Plus, you can also<br />
declare variables by choosing Declare Variables in the Execute menu (see<br />
6.4.6 “Declare Variables”, 6-12).<br />
Fig. 15-68 Set Variable command<br />
The parameters of the Set Variable command are as follows:<br />
Variable name<br />
Specify the name of the variable. Variable names in scripts can be 1 - 64<br />
characters in length, are not case-sensitive and must not begin with a digit.<br />
Alternatively, choose the variable from the pull-down list. The pull-down list<br />
shows all of the variables which you have used (declared) so far in your script<br />
and all of the commonly used, writable pre-defined variables which are<br />
available. See 14.1.4 “Pre-Defined Variables”, 14-4 for a complete list of<br />
pre-defined variables.<br />
Variable type<br />
Choose Number or String depending on the variable type you want to declare.<br />
Variable value<br />
Specify the integer, floating point value or string you want to assign as the<br />
initial value. The name of the Enter variable value field changes to Enter<br />
default value if you check the User Query checkbox (see below).<br />
<strong>Freedom</strong> <strong>EVOware</strong> <strong>Software</strong> <strong>Manual</strong>, 393172, en, V<strong>2.3</strong> 15 - 101
15 - Script Commands<br />
Set Variable Command<br />
Variable scope<br />
This setting cannot be changed and is shown for information purposes only.<br />
The scope of a variable describes the extent of validity of the variable. If you<br />
declare a variable in a script, the variable only has a meaningful value within<br />
the same script (the “scope” of the variable is “script”). In <strong>Freedom</strong> <strong>EVOware</strong><br />
Plus, you can also declare variables which are accessible to other scripts and<br />
thus allow parameters to be passed from one script to another (see<br />
6.4.6 “Declare Variables”, 6-12).<br />
User Query<br />
Check this checkbox if you want to prompt the operator for the value during<br />
script runtime instead of assigning a fixed initial value or string to the variable.<br />
The text field allows you to specify the operator prompt which should be<br />
displayed. The operator prompt also displays the default value you specified<br />
in Enter default value. The script will be interrupted until the required value<br />
has been entered by the operator.<br />
See also 15.41.1 “Set Variable, Operator Prompt”, 15-102.<br />
User Query at Script Start<br />
Check this checkbox if you want to prompt the operator for the value of the<br />
variable when the script is first started. If you check User Query but do not<br />
check User Query at Script Start, the operator will be prompted for the value<br />
later, when the Set Variable command is executed.<br />
If your script has several Set Variable commands and you check User Query<br />
at Script Start for all of them, the operator will be prompted for the value of all<br />
of the variables when the script is first started (see 15.41.2 “Set Variable -<br />
User Query At Script Start”, 15-103).<br />
This is equivalent to including several Set Variable commands at the start of<br />
your script, but has the advantage that all of the values can be entered in a<br />
single dialog box. In addition, your script is easier to read if the Set Variable<br />
commands directly precede the script lines which use the variables.<br />
This option is only available in <strong>Freedom</strong> <strong>EVOware</strong> <strong>Standard</strong>. In <strong>Freedom</strong><br />
<strong>EVOware</strong> Plus, a similar functionality is provided by the Declare Variables<br />
feature in User Query mode (see 6.4.6 “Declare Variables”, 6-12)<br />
Limit entry to allowed range<br />
If you are prompting the operator for a numeric value, check this checkbox to<br />
limit the values which are entered to a specified range.<br />
Minimum, Maximum: Specify the minimum and maximum values for the<br />
numeric variable. During runtime, the value which is input by the operator is<br />
validated and a warning is output if it does not lie within the specified range.<br />
See 14.1.8 “Converting Numeric Variables and Expressions to Strings”, 14-13<br />
and 14.1.11 “Labware Attributes and String Variables”, 14-16 for usage<br />
examples of the Set Variable command. See 14.1 “Variables and Expressions in<br />
Scripts”, 14-1 for more information on variables.<br />
15.41.1 Set Variable, Operator Prompt<br />
The Set Variable command displays the following operator prompt during script<br />
run-time if you have checked the User Query checkbox to prompt the operator for<br />
a value:<br />
15 - 102 <strong>Freedom</strong> <strong>EVOware</strong> <strong>Software</strong> <strong>Manual</strong>, 393172, en, V<strong>2.3</strong>
15 - Script Commands<br />
Import Variable Command<br />
Fig. 15-69 Set Variable operator prompt, example from <strong>Freedom</strong> <strong>EVOware</strong> Plus<br />
The operator should enter the requested value and click OK<br />
The operator can click Cancel to abort the script.<br />
The title bar shows the name of the pipetting script which displayed the prompt.<br />
In <strong>Freedom</strong> <strong>EVOware</strong> Plus, the title bar shows the process name, script ID<br />
(normally counting from 1) and the number of the process copy which is running<br />
the script (process instance ID, counting from 1).<br />
15.41.2 Set Variable - User Query At Script Start<br />
The Set Variable command displays the following operator prompt when the script<br />
starts if you have checked the User Query at Script Start checkbox to prompt the<br />
operator for a value:<br />
Fig. 15-70 Set Variable - User Query operator prompt<br />
In the above example, the script contains two Set Variable commands with the<br />
User Query at Script Start feature enabled.<br />
15.42 Import Variable Command<br />
The Import Variable command is used to import values for script variables from a<br />
file during script runtime. You can import values for variables which are already<br />
declared (defined) in the script. You can also use this command to declare new<br />
<strong>Freedom</strong> <strong>EVOware</strong> <strong>Software</strong> <strong>Manual</strong>, 393172, en, V<strong>2.3</strong> 15 - 103
15 - Script Commands<br />
Import Variable Command<br />
variables for use in the script and assign an initial value which is read from the<br />
import file. The import file can be either a comma-separated text file (.txt or .csv)<br />
or an Excel file (.xls).<br />
Fig. 15-71 Import Variable command<br />
The parameters of the Import Variable command are as follows:<br />
Create new variable panel<br />
New variable<br />
To create (declare) a new variable, enter the variable name in the New<br />
variable field, choose the variable type (number or string) and click Add to list.<br />
The new variable will be added to the Import list. The new variable will be<br />
created when the script is run. Variable names in <strong>Freedom</strong> <strong>EVOware</strong> are not<br />
case-sensitive.<br />
Currently defined variables<br />
This list initially shows all of the variables which are already declared in the script.<br />
It also shows the pre-defined variables which the script uses. In the above<br />
example, the pre-defined variable LOOP_loop2 was automatically declared by a<br />
Begin Loop command.<br />
If your script contains conditional jumps or branches, the Import Variable<br />
command only lists variables in those parts of the script which are executed with<br />
the default values of the IF variables in Condition commands. It is not<br />
recommended to declare variables (e.g. with the Set Variable command) within<br />
conditional parts of the script (see 14.1.12 “Validating a Script Which Contains<br />
Variables”, 14-18).<br />
15 - 104 <strong>Freedom</strong> <strong>EVOware</strong> <strong>Software</strong> <strong>Manual</strong>, 393172, en, V<strong>2.3</strong>
15 - Script Commands<br />
Import Variable Command<br />
To read a value for one of these variables from the import file, select the variable<br />
and click Add. This moves the variable to the Import list. Repeat this process to<br />
import more variables.<br />
Import list<br />
This list shows all of the variables whose values you want to import. Make sure<br />
that the import file contains values for all of the variables which you want to<br />
import. Select an entry and click Up or Down to re-arrange the order of the<br />
variables in the list. The order of the variables in the list must match the order of<br />
the fields in the import file (see below).<br />
To remove a variable from the import list, select the variable and click Remove. If<br />
the variable is a pre-defined variable, it is moved back to the Currently defined<br />
variables list. If the variable is a newly created variable, it is deleted.<br />
Select file to import<br />
Specify the name and full path of the import file or click Browse and choose an<br />
existing file. The import file can be either a comma-separated text file (.txt or<br />
.csv) or an Excel file (.xls). The import file type is determined automatically<br />
from the filename extension which you specify.<br />
Read specified line<br />
Check this checkbox and specify a line number to import the values from a<br />
specified line of the import file. By default, the values will be imported from line<br />
1. If the import file has a header, the header is not included in the line count.<br />
Start in specified column<br />
Check this checkbox and specify a column number to import the values<br />
starting at a specified column of the import file. By default, the values will be<br />
imported starting at column 1.<br />
File contains header<br />
Check this checkbox if the file contains a header with the names of the<br />
variables to import.<br />
Import file examples with and without header<br />
Text file without header and values for one string variable and one numeric<br />
variable:<br />
“myprompt”,2<br />
Text file with header and values for one string variable and two numeric variables:<br />
prompt2,counter1,counter_2<br />
“myprompt”,2,50<br />
Text file with header and three sets of values for one string variable and one<br />
numeric variable:<br />
prompt2,counter1<br />
“myprompt”,2<br />
“hello”,25<br />
“goodbye”,42<br />
If the import file has a header, it is used to determine which value should be<br />
imported to which variable. An error message will be output during script runtime if<br />
any of the variable names in the import list cannot be found in the header.<br />
If the import file does not have a header, the values are processed from left to<br />
right. The value in the first field (Excel: column) is written to the first variable in the<br />
import list and the value in the second field is written to the second variable in the<br />
import list, etc.<br />
<strong>Freedom</strong> <strong>EVOware</strong> <strong>Software</strong> <strong>Manual</strong>, 393172, en, V<strong>2.3</strong> 15 - 105
15 - Script Commands<br />
Import Variable Command<br />
If you are importing from a text file, see 15.42.2 “Field Separator for the Import<br />
Variable and Export Variable Commands”, 15-107.<br />
15.42.1 Import Variable Default Values Dialog Box<br />
When you click OK to insert the Import Variable command in your script, you are<br />
prompted to enter default values for the variables which you want to import:<br />
Fig. 15-72 Import Variable Default Values dialog box<br />
This list shows all of the variables whose values you want to import. Variables<br />
which are already declared in the script are shown with their existing default<br />
values. Variables which will be created by the Import Variable command are<br />
shown without a default value. Make sure that a default value has been specified<br />
for all of the variables.<br />
During script runtime, the Import Variable command reads values for the chosen<br />
variables from the specified import file. If the import file does not contain values for<br />
all of the variables which you want to import, <strong>Freedom</strong> <strong>EVOware</strong> will use the<br />
default values in the above dialog box instead if the value is missing.<br />
15 - 106 <strong>Freedom</strong> <strong>EVOware</strong> <strong>Software</strong> <strong>Manual</strong>, 393172, en, V<strong>2.3</strong>
15 - Script Commands<br />
Export Variable Command<br />
15.42.2 Field Separator for the Import Variable and Export Variable<br />
Commands<br />
The field (i.e. column) separator which is used in the import file of the Import<br />
Variable command and the export file of the Export Variable command can be<br />
configured with the parameter Csv_With_Semicolon in the Evoware.opt file (see<br />
A.3 “Parameters in the Evoware.opt file”, A-17):<br />
Tab. 15-12 Field separator for the Import Variable and Output Variable commands<br />
csv_with_semicolon parameter<br />
not present in evoware.opt<br />
field separator<br />
in the input file<br />
semicolon<br />
field separator<br />
in the export file<br />
comma<br />
csv_with_semicolon=0 comma comma<br />
csv_with_semicolon=1 semicolon semicolon<br />
If you set this parameter to 1, this simplifies opening the export file and/or creating<br />
a suitable input file using Microsoft Excel (Excel normally uses a semicolon as the<br />
field separator in csv files - depending on the MS Windows regional settings).<br />
This parameter also affects the field separator which is used by the Export Data<br />
command.<br />
15.43 Export Variable Command<br />
The Export Variable command is used to export the values of script variables to a<br />
file during script runtime. The export file can be either a comma-separated text file<br />
(.txt or .csv) or an Excel file (.xls).<br />
Fig. 15-73 Export Variable command<br />
The parameters of the Export Variable command are as follows:<br />
<strong>Freedom</strong> <strong>EVOware</strong> <strong>Software</strong> <strong>Manual</strong>, 393172, en, V<strong>2.3</strong> 15 - 107
15 - Script Commands<br />
Export Variable Command<br />
Currently defined variables<br />
This list initially shows all of the variables which are declared in the script. It also<br />
shows the pre-defined variables which the script uses. In the above example, the<br />
pre-defined variable LOOP_loop2 was automatically declared by a Begin Loop<br />
command.<br />
If your script contains conditional jumps or branches, the Export Variable<br />
command only lists variables in those parts of the script which are executed with<br />
the default values of the IF variables in Condition commands. It is not<br />
recommended to declare variables (e.g. with the Set Variable command) within<br />
conditional parts of the script (see 14.1.12 “Validating a Script Which Contains<br />
Variables”, 14-18).<br />
To include a variable value in the export file, select the variable and click Add. This<br />
moves it to the Export list. Repeat this process to export more variables.<br />
Export list<br />
This list shows all of the variables whose values you want to export. Select an<br />
entry and click Up or Down to re-arrange the order of the variables in the list. The<br />
order of the variables in the list affects the order of the fields in the export file<br />
which is written (see below).<br />
To remove a variable from the export list, select the variable and click Remove.<br />
This moves it back to the Currently defined variables list.<br />
Select file for export<br />
Specify the name and full path of the export file or click Browse and choose an<br />
existing file. The export file can be either a comma-separated text file (.txt or<br />
.csv) or an Excel file (.xls). The export file type is determined automatically<br />
from the filename extension which you specify.<br />
Write header to file<br />
Check this checkbox if you want the Export Variable command to write a<br />
header to the file with the names of the variables which have been exported.<br />
See also Multiple Export Variable commands, below.<br />
Overwrite existing file<br />
Check this checkbox if you want to overwrite an existing export file of the<br />
same name. If you do not check this checkbox and the export file already<br />
exists, new lines are appended to the existing file. See Multiple Export<br />
Variable commands, below.<br />
Export file examples with and without header<br />
Text file without header and values for one string variable and one numeric<br />
variable:<br />
“myprompt”,2<br />
Text file with header and values for one string variable and two numeric variables:<br />
prompt2,counter1,counter_2<br />
“myprompt”,2,50<br />
Text file with header and three sets of values for one string variable and one<br />
numeric variable:<br />
prompt2,counter1<br />
“myprompt”,2<br />
“hello”,25<br />
“goodbye”,42<br />
15 - 108 <strong>Freedom</strong> <strong>EVOware</strong> <strong>Software</strong> <strong>Manual</strong>, 393172, en, V<strong>2.3</strong>
15 - Script Commands<br />
Condition Command<br />
The Export Variable command processes the variables in the export list from top<br />
to bottom. The value of the first variable in the export list is written to the first field<br />
(Excel: column) and the value of the second variable in the export list is written to<br />
the second field, etc.<br />
If you are exporting to a text file, see 15.42.2 “Field Separator for the Import<br />
Variable and Export Variable Commands”, 15-107.<br />
Multiple Export Variable commands<br />
If your script contains more than one Export Variable command which writes to the<br />
same export file (or the same Export Variable command is called several times),<br />
and you did not check the Overwrite existing file checkbox, each subsequent<br />
Export Variable command appends a new line to the export file.<br />
If your script contains more than one Export Variable command which writes to the<br />
same export file and you have checked the Write header to file checkbox,<br />
subsequent Export Variable commands check whether a valid header is present<br />
in the export file before appending new lines to the export file. Valid means that<br />
the existing header is identical to the header that would be written if the command<br />
was executed on its own. Variable names in <strong>Freedom</strong> <strong>EVOware</strong> are not casesensitive.<br />
The following conditions must be met in this case:<br />
• All of the Export Variable commands must specify the same variable list in the<br />
same order;<br />
• The Write header to file checkbox must be checked for the first Export<br />
Variable command in the script (but does not need to be checked for all of the<br />
subsequent ones).<br />
15.44 Condition Command<br />
The Condition command is used to jump to a specified line in the script if a<br />
specified condition is met. You can specify a value, variable or expression on both<br />
sides of the comparison operator. If the comparison is true, <strong>Freedom</strong> <strong>EVOware</strong><br />
continues the script at the line specified with then goto line.<br />
Fig. 15-74 Condition command<br />
The parameters of the Condition command are as follows:<br />
If Variable<br />
Specify the value, numeric variable, string variable or expression to be used<br />
on the left of the comparison operator. Then specify the value, numeric<br />
variable, string or expression to be used on the right of the comparison<br />
operator in the field below the If Variable field.<br />
<strong>Freedom</strong> <strong>EVOware</strong> <strong>Software</strong> <strong>Manual</strong>, 393172, en, V<strong>2.3</strong> 15 - 109
15 - Script Commands<br />
Condition Command<br />
Comparison operator<br />
Choose one of the four comparison operators from the pull-down list:<br />
– is equal to<br />
– is not equal to<br />
– is bigger than<br />
– is less than<br />
then goto line<br />
<strong>Freedom</strong> <strong>EVOware</strong> uses Comment commands as labels (jump destinations)<br />
for the Condition command. Choose the required jump destination from the<br />
pull-down list. The list shows all comments which are currently defined in the<br />
script. <strong>Freedom</strong> <strong>EVOware</strong> will continue script execution at the specified line if<br />
the condition is met. Otherwise it will continue script execution at the next line<br />
in the script.<br />
In the Comment command, it is recommended to prefix the label (jump<br />
destination) with underscore (“_”), see the above figure for an example. See<br />
15.37 “Comment Command”, 15-97 for an explanation of this<br />
recommendation.<br />
You can also specify a name for the jump destination in advance and add the<br />
corresponding Comment command to the script later.<br />
Note: Each time you insert a new command in your script or edit an existing<br />
command, <strong>Freedom</strong> <strong>EVOware</strong> validates the entire script to check for errors.<br />
During validation, <strong>Freedom</strong> <strong>EVOware</strong> uses default values for the variables (see<br />
14.1.12 “Validating a Script Which Contains Variables”, 14-18). For this reason,<br />
the script might run incorrectly even if no errors are detected during validation.<br />
15 - 110 <strong>Freedom</strong> <strong>EVOware</strong> <strong>Software</strong> <strong>Manual</strong>, 393172, en, V<strong>2.3</strong>
15 - Script Commands<br />
If - Then Command<br />
15.45 If - Then Command<br />
The If -Then command is used to execute a set of script commands if a specified<br />
condition is met and execute a different set of commands if the condition is not<br />
met (Else condition).<br />
The If -Then command is part of an If - Then - Else control structure. A control<br />
structure is a set of related commands which are used to control the sequence<br />
actions in your script. When you add the If - Then command to your script, an Else<br />
command and an End If command are added automatically.<br />
If you want to execute any script commands when If -Then is true, you must put<br />
them between the If -Then command and the Else command. If you want to<br />
execute any script commands when If -Then is not true, you must put them<br />
between the Else command and the End If command.<br />
Fig. 15-75 If - Then command<br />
The parameters of the If - Then command are as follows:<br />
If Variable<br />
Specify the value, numeric variable, string variable or expression to be used<br />
on the left of the comparison operator. Then specify the value, numeric<br />
variable, string or expression to be used on the right of the comparison<br />
operator in the field below the If Variable field.<br />
Comparison operator<br />
Choose one of the four comparison operators from the pull-down list:<br />
– is equal to<br />
– is not equal to<br />
– is bigger than<br />
– is less than<br />
Note: Each time you insert a new command in your script or edit an existing<br />
command, <strong>Freedom</strong> <strong>EVOware</strong> validates the entire script to check for errors.<br />
During validation, <strong>Freedom</strong> <strong>EVOware</strong> uses default values for the variables (see<br />
14.1.12 “Validating a Script Which Contains Variables”, 14-18). For this reason,<br />
the script might run incorrectly even if no errors are detected during validation.<br />
15.46 Else Command<br />
The Else command of an If - Then - Else control structure. A control structure is a<br />
set of related commands which is used to control the sequence actions in your<br />
script. The Else command is inserted in the script automatically when you add the<br />
If - Then command.<br />
<strong>Freedom</strong> <strong>EVOware</strong> <strong>Software</strong> <strong>Manual</strong>, 393172, en, V<strong>2.3</strong> 15 - 111
15 - Script Commands<br />
End If Command<br />
If you want to execute any script commands when Else is true, you must put them<br />
between the Else command and the End If command.<br />
The Else command itself has no parameters to configure.<br />
15.47 End If Command<br />
The End If command is the last command of an If - Then - Else control structure. A<br />
control structure is a set of related commands which is used to control the<br />
sequence actions in your script. The End If command is inserted in the script<br />
automatically when you add the If - Then command.<br />
You must put the End If command after the last command which you want to<br />
execute when Else is true.<br />
The End If command itself has no parameters to configure.<br />
15.48 Group Command<br />
The Group command is used to group together script lines to make long scripts<br />
easier to read. When you insert a Group command, a Group End command is<br />
also inserted.<br />
Fig. 15-76 Group command<br />
After inserting the Group command in your script, put all of the script lines which<br />
belong to the group between the Group command and the Group End command.<br />
Then click the “-” button in the Group command icon in the Script Editor if you<br />
want to hide all of the script lines in the group. The “-” button changes to “+”. Click<br />
the “+” button to show the script lines again.<br />
The parameters of the Group command are as follows<br />
Name<br />
Specify a descriptive name of your choice for the group.<br />
Example of using the group command:<br />
Fig. 15-77 Group command, example<br />
15 - 112 <strong>Freedom</strong> <strong>EVOware</strong> <strong>Software</strong> <strong>Manual</strong>, 393172, en, V<strong>2.3</strong>
15 - Script Commands<br />
Sub-Routine Command<br />
15.49 Sub-Routine Command<br />
The Sub-Routine command executes another script as part of the current script.<br />
See 14.3 “Sub-routines”, 14-19 for more information. The Sub-Routine<br />
command is not available in <strong>Freedom</strong> <strong>EVOware</strong> Plus.<br />
Fig. 15-78 Sub-Routine command<br />
The parameters of the Sub-Routine command are as follows:<br />
Path & Name<br />
Specify the filename and location of the pipetting script you want to use as a<br />
sub-routine.<br />
Edit: Click this button if you want to open the specified sub-routine in a new<br />
window for editing and/or checking.<br />
Browse: Click this button to look for existing pipetting scripts and to choose<br />
the one you want to use as a sub-routine.<br />
Execute sub-routine and wait for it to finish<br />
This option causes the main pipetting script to wait for the sub-routine to finish<br />
before continuing.<br />
Start sub-routine and continue<br />
With this option, the main pipetting script continues without waiting for the<br />
sub-routine to finish (“asynchronous” sub-routine, i.e. asynchronous<br />
processing of the main script and the sub-routine). To allow asynchronous<br />
processing, the sub-routine must only contain the following commands:<br />
– Aspirate<br />
– Dispense<br />
– Mix<br />
– Wash Tips<br />
– Periodic Wash<br />
– Get DITIs<br />
– Drop DITIs<br />
– Set DITI Position<br />
– Pick Up DITIs<br />
– Set DITIs Back<br />
– Pickup ZipTip<br />
– Detect Liquid<br />
– Tip Alignment Check<br />
<strong>Freedom</strong> <strong>EVOware</strong> <strong>Software</strong> <strong>Manual</strong>, 393172, en, V<strong>2.3</strong> 15 - 113
15 - Script Commands<br />
Execute VB Script Command<br />
– Move LiHa<br />
– Waste<br />
– Active WashStation<br />
– Export Data<br />
– <strong>Manual</strong> Tip Alignment<br />
– Start Timer<br />
– Wait for Timer<br />
– Execute Application<br />
– Comment<br />
– User Prompt<br />
– BeginLoop<br />
– EndLoop<br />
– Set Variable<br />
– ImportVariable<br />
– ExportVariable<br />
– Move ROMA<br />
– ROMA Vector<br />
– Transfer Labware<br />
– Move PnP<br />
– PnP Vector<br />
– Transfer Tube<br />
– All device commands (see 13.2 “Overview of Device Commands”, 13-<br />
12)<br />
Wait for previously started sub-routine to finish<br />
This option causes the main pipetting script to wait for the specified,<br />
previously started sub-routine to finish before continuing.<br />
Note: You can also start a sub-routine from within another sub-routine by<br />
including a Sub-Routine command within the sub-routine.<br />
See 14.3 “Sub-routines”, 14-19 for more information.<br />
15.50 Execute VB Script Command<br />
The Execute VB Script command is used to execute a Visual Basic (VB) script<br />
from within a pipetting script.<br />
Refer to the standard Microsoft documentation for more information on VB scripts.<br />
Visit e.g. www.microsoft.com/downloads and search for Visual Basic Scripting<br />
Edition.<br />
Provision is made to allow you to transfer numerical and string variables from the<br />
VB script to the <strong>Freedom</strong> <strong>EVOware</strong> script and vice versa.<br />
Each time you insert a new command in your script or edit an existing command,<br />
<strong>Freedom</strong> <strong>EVOware</strong> validates the entire script to check for errors. When validating,<br />
it is not possible to execute or validate VB scripts which are called by the main<br />
script. In addition, if the main script uses variables from the VB script, you must<br />
declare them (assign values) before the VB script is called to avoid the Variable<br />
not defined error during validation. See 14.1.1 “Declaring Variables in Scripts”,<br />
14-1. In <strong>Freedom</strong> <strong>EVOware</strong> Plus, you can also declare variables by choosing<br />
Declare Variables in the Execute menu (see 6.4.6 “Declare Variables”, 6-12).<br />
15 - 114 <strong>Freedom</strong> <strong>EVOware</strong> <strong>Software</strong> <strong>Manual</strong>, 393172, en, V<strong>2.3</strong>
15 - Script Commands<br />
Execute VB Script Command<br />
If required, you can run several VB scripts simultaneously by using the Execute<br />
VB Script command more than once in your <strong>Freedom</strong> <strong>EVOware</strong> script.<br />
Fig. 15-79 Execute VB Script command<br />
The parameters of the Execute VB Script command are as follows:<br />
Path & Name<br />
This edit field shows the file name and location of the VB script you want to<br />
run.<br />
Edit: Click this button to edit the specified VB script in the Notepad editor.<br />
Browse: Click this button to look for existing VB scripts and to choose the one<br />
you want to use.<br />
<strong>Freedom</strong> <strong>EVOware</strong> script waits for end of VB script<br />
This option causes the pipetting script to wait for the VB script to finish before<br />
continuing.<br />
<strong>Freedom</strong> <strong>EVOware</strong> script continues<br />
With this option, the pipetting script continues without waiting for the VB script<br />
to finish.<br />
<strong>Freedom</strong> <strong>EVOware</strong> script waits for a previously started VB script<br />
This option causes the pipetting script to wait for the specified, previously<br />
started VB script to finish before continuing.<br />
The VB script feature in <strong>Freedom</strong> <strong>EVOware</strong> provides a new VB object "Evoware"<br />
with the following five functions:<br />
• GetDoubleVariable: This function accepts the name of the <strong>Freedom</strong> <strong>EVOware</strong><br />
variable as a string argument and returns a numerical value.<br />
Example: Evoware.GetDoubleVariable(“volume”)<br />
• SetDoubleVariable: This function accepts the name of the <strong>Freedom</strong> <strong>EVOware</strong><br />
variable as a string and its new numerical value as arguments.<br />
Example: Evoware.SetDoubleVariable “volume”,10.5<br />
• GetStringVariable: This function accepts the name of the <strong>Freedom</strong> <strong>EVOware</strong><br />
variable as a string argument and returns a string value.<br />
Example: Evoware.GetStringVariable(“barcode”)<br />
• SetStringVariable: This function accepts the name of the <strong>Freedom</strong> <strong>EVOware</strong><br />
variable as a string and its new string value as arguments.<br />
Example: Evoware.SetStringVariable “barcode”,"012345"<br />
• SendNamedPipeCommand: This function accepts a complete named pipe<br />
command as a string argument.<br />
Example: Evoware.SendNamedPipeCommand(“INIT_RSP;”)<br />
<strong>Freedom</strong> <strong>EVOware</strong> <strong>Software</strong> <strong>Manual</strong>, 393172, en, V<strong>2.3</strong> 15 - 115
15 - Script Commands<br />
Notification Command<br />
See the \database\VBscripts directory for examples of VB scripts.<br />
The scripts are plain text files and contain a description of their intended<br />
application.<br />
15.50.1 Menu Items for VB Scripts<br />
See 6.4.5.1 “Creating Custom Menu Items for VB Scripts”, 6-12. The menu<br />
items are shown in the Execute menu and allow VB scripts to be executed<br />
manually outside of a pipetting script.<br />
15.51 Notification Command<br />
The Notification command is used to send an eMail from within a script (e.g. to<br />
inform an operator in another room that a certain process has finished). It can also<br />
be used to send an automatic eMail if an error occurs during script execution.<br />
The Notification command sends the eMail using the notification feature in<br />
<strong>Freedom</strong> <strong>EVOware</strong>. The notification feature requires either the MAPI service to be<br />
installed or access to an SMTP server (mail server). See 8.3.2 “Notifications<br />
Section”, 8-12.<br />
Fig. 15-80 Notification command<br />
The parameters of the Notification command are as follows:<br />
Recipient group<br />
<strong>Freedom</strong> <strong>EVOware</strong> can be configured to send messages about system<br />
events and error situations to specific groups of users. The groups are<br />
configured with the Configuration Tool (see 8.3.2 “Notifications Section”, 8-<br />
12, Groups tab). Choose the user group which should be notified from the<br />
pull-down list. You must configure the groups first.<br />
Subject<br />
Specify the subject of the email.<br />
Message<br />
Specify the message you want to send.<br />
Send email now<br />
Sends an eMail immediately.<br />
Send email on error<br />
An eMail will be send to the specified address each time <strong>Freedom</strong> <strong>EVOware</strong><br />
displays an error dialog box.<br />
15 - 116 <strong>Freedom</strong> <strong>EVOware</strong> <strong>Software</strong> <strong>Manual</strong>, 393172, en, V<strong>2.3</strong>
15 - Script Commands<br />
Start Script Command<br />
Stop sending email on error<br />
No eMails will be sent any more when errors occur. This option is used to<br />
disable a previous Send email on error command.<br />
Address<br />
Specify the recipient’s eMail address.<br />
Add screenshot as attachment<br />
If you check this checkbox, a screenshot of the current screen will be attached<br />
to the eMail which is sent.<br />
15.52 Start Script Command<br />
The Start Script command starts another script from the currently running script. In<br />
contrast to sub-routines, the new script can use a different worktable layout to the<br />
original script. The Start Script command is not available in <strong>Freedom</strong> <strong>EVOware</strong><br />
Plus.<br />
The Start Script command terminates the currently executing script, closes it,<br />
loads and validates another script and starts it if there were no errors. If errors are<br />
found, the faulty script lines are marked in red and the new script is not executed.<br />
When executing the Start Script command, <strong>Freedom</strong> <strong>EVOware</strong> reacts as if the<br />
first script has terminated normally and the user manually loaded and started the<br />
new script.<br />
This means that the new script is not validated during validation of the first script,<br />
worklists which have been loaded in the first script are not available in the new<br />
script and variables and timers cannot be passed from the first script to the new<br />
script.<br />
Note: <strong>Freedom</strong> <strong>EVOware</strong> Plus allows you to declare variables which can be<br />
shared between different scripts (see 6.4.6 “Declare Variables”, 6-12).<br />
If the new script uses a different worktable layout to the original script, you must<br />
make sure that objects (e.g. labware) of the required types have been placed in<br />
the right positions on the instrument’s worktable before the new script is executed.<br />
The Start Script command is not allowed in sub-routines and advanced worklists.<br />
Fig. 15-81 Start Script command<br />
The parameters of the Start Script command are as follows:<br />
Edit field<br />
Specify the filename and location of the <strong>Freedom</strong> <strong>EVOware</strong> script you want to<br />
start.<br />
Browse: Click this button to look for existing <strong>Freedom</strong> <strong>EVOware</strong> scripts and to<br />
choose the one you want to start.<br />
<strong>Freedom</strong> <strong>EVOware</strong> <strong>Software</strong> <strong>Manual</strong>, 393172, en, V<strong>2.3</strong> 15 - 117
15 - Script Commands<br />
On Error Goto Command<br />
15.53 On Error Goto Command<br />
The On Error Goto command is used to jump to a specified line in the script if an<br />
error occurs during script runtime. Error recovery commands then allow the<br />
pipetting script to react automatically to the error.<br />
For example, to recover from a liquid error due to insufficient liquid, use the predefined<br />
variable RACK_OFFSET in the Aspirate command to specify the labware<br />
location and use the On Error Goto command to jump to error recovery<br />
commands. The error recovery commands then modify the value of<br />
RACK_OFFSET to aspirate from another container which has enough liquid. An<br />
elegant way to program this uses the On Error Goto command together with the<br />
Resume command (see 15.54 “Resume Command”, 15-119).<br />
If you do not use the On Error Goto command, many of the runtime errors would<br />
otherwise pause the pipetting script and display a dialog box for operator<br />
intervention (see 18.1 “Error Dialogs”, 18-1).<br />
The On Error Goto command will only respond to the error if the error would<br />
otherwise result in an error dialog. For example, if you have configured the error<br />
reaction in the Aspirate tab of the liquid class as “pipette air” or “go to z-max”<br />
instead of “user prompt”, a liquid detection error would not otherwise cause an<br />
error dialog to appear and will be ignored by the On Error Goto command.<br />
Specifically, the On Error Goto command responds to the following error dialogs:<br />
• Liquid Detection Error<br />
• Clot Error<br />
• Clot Error (PMP)<br />
• PMP Instrument Error<br />
• Liquid Arrival Check Error<br />
• Volume Monitoring Error<br />
• Diluter Error<br />
• Error Fetching DITIs<br />
• Error Mounting DITIs<br />
• Lost DITI Error<br />
• DITI Already Mounted Error<br />
• Grip Error<br />
• Te-MO DITI Error<br />
• WRC / Te-MO Error<br />
• WRC Errors<br />
In the case of Diluter Error and PMP Instrument Error, the affected dilutors are<br />
automatically switched off and the tip status is set to “broken” to prevent them<br />
from being used for any further pipetting (as if the user had clicked the<br />
“Deactivate” button in the Diluter Error dialog box).<br />
Of course, some types of error cannot be resolved automatically. In this case, the<br />
On Error Goto command could for example call the Notification command to send<br />
an eMail which alerts someone to the problem.<br />
The On Error Goto command must precede the script command which could<br />
generate an error.<br />
15 - 118 <strong>Freedom</strong> <strong>EVOware</strong> <strong>Software</strong> <strong>Manual</strong>, 393172, en, V<strong>2.3</strong>
15 - Script Commands<br />
Resume Command<br />
Fig. 15-82 On Error Goto command<br />
The parameters of the On Error Goto command are as follows:<br />
then goto line<br />
Specify the jump destination for the On Error Goto command as a line number<br />
in the script. <strong>Freedom</strong> <strong>EVOware</strong> will continue script execution at the specified<br />
line if an error is detected. Otherwise it will continue script execution at the<br />
next line in the script. The jump destination can also be specified using a<br />
variable or expression, for example Err_Recovery+1.<br />
The line number you specify in this command is automatically adjusted if you<br />
add or remove lines from the script.<br />
Deactivate error handling<br />
Choose this option if you want to switch off automatic error handling again if it<br />
was enabled earlier on in the pipetting script.<br />
You can use the On Error Goto command several times in the same script. For<br />
example, you could use an On Error Goto command prior to a Get DITis<br />
command to handle a problem with getting DITIs and a second On Error Goto<br />
command prior to a pipetting operation to handle a liquid detection error.<br />
Note: last_error_line is a read-only, pre-defined variable which contains the line<br />
number in the pipetting script of the last command which reported an error during<br />
script runtime. Information on the last script error which was reported is contained<br />
in the pre-defined variables last_error_message and last_error_message_id. See<br />
14.1.4 “Pre-Defined Variables”, 14-4.<br />
15.54 Resume Command<br />
The Resume command is used together with the On Error Goto command and<br />
specifies where to resume running the script after executing the error recovery<br />
commands.<br />
The On Error Goto command is used to jump to a specified line in the script if an<br />
error occurs during script runtime. Error recovery commands then allow the<br />
pipetting script to react automatically to the error (see 15.53 “On Error Goto<br />
Command”, 15-118).<br />
Use a Resume command in the last line of the error recovery section if you want<br />
script execution to return to the main part of the script or to another, specified<br />
place in the script .<br />
<strong>Freedom</strong> <strong>EVOware</strong> <strong>Software</strong> <strong>Manual</strong>, 393172, en, V<strong>2.3</strong> 15 - 119
15 - Script Commands<br />
End Script Command<br />
For example, to recover from a liquid error due to insufficient liquid, use the predefined<br />
variable RACK_OFFSET in the Aspirate command to specify the labware<br />
location and use the On Error Goto command to jump to error recovery<br />
commands. The error recovery commands then modify the value of<br />
RACK_OFFSET to aspirate from another container which has enough liquid and<br />
the Resume command returns program control to the Aspirate command again.<br />
Fig. 15-83 Resume command<br />
The parameters of the On Error Goto command are as follows:<br />
Last_Error_Line ±<br />
Choose this option if you want to return to the script line which caused the<br />
error. You can also specify an offset if required. For example, if you specify -1,<br />
script execution will return to the line which directly preceeded the script line<br />
which caused the error:<br />
Line number<br />
Choose this option and specify a line number in the script if you want to go to<br />
an absolute position in the script after handling the error.<br />
You can use the On Error Goto command several times in the same script. For<br />
example, you could use an On Error Goto command prior to a Get DITis<br />
command to handle a problem with getting DITIs and a second On Error Goto<br />
command prior to a pipetting operation to handle a liquid detection error. The<br />
Resume command always applies to the last script runtime error and the last On<br />
Error Goto command which was executed.<br />
Note: Last_Error_Line is a read-only, pre-defined variable which contains the line<br />
number in the pipetting script of the last command which reported an error during<br />
script runtime. See 14.1.4 “Pre-Defined Variables”, 14-4.<br />
15.55 End Script Command<br />
The End Script command is used to stop the pipetting script prematurely and to<br />
specify a return code (error code) for the script. It is typically used together with<br />
error recovery commands.<br />
15 - 120 <strong>Freedom</strong> <strong>EVOware</strong> <strong>Software</strong> <strong>Manual</strong>, 393172, en, V<strong>2.3</strong>
15 - Script Commands<br />
Te-MO Commands<br />
Fig. 15-84 End Script command<br />
The parameters of the End Script command are as follows:<br />
Execution code<br />
Choose the required return code (error code) for the script. You can choose<br />
between No Error, Loss of Sample and Loss of Peripheral. The return code is<br />
reported in the log files.<br />
Note: Information on the last script error which was reported is contained in the<br />
pre-defined variables last_error_message and last_error_message_id. If you put<br />
several End Script commands in the script, if runtime errors occur you can jump to<br />
an End Script command which has the appropriate return code. See 14.1.4 “Pre-<br />
Defined Variables”, 14-4.<br />
<strong>Freedom</strong><br />
<strong>EVOware</strong> Plus<br />
If the return code for the script is Loss of Sample, the labware will not be used any<br />
more (because the pipetting was not carried out correctly) and it will be returned to<br />
the base position, e.g. the carousel. If more labware is available, the process will<br />
continue with the new labware. The process will be stopped if the return code is<br />
Loss of Peripheral.<br />
15.56 Te-MO Commands<br />
The Te-MO (Tecan Multi-Pipetting Option - not to be confused with multi-pipetting<br />
mode) is a robot pipetting device which can be mounted on the worktable of the<br />
pipetting instrument. It is equipped with a specially designed multi-pipetting head<br />
which can pipette to 96 or 384 wells simultaneously, resulting in an extremely high<br />
throughput and efficiency. For mechanical reasons, the same volume is pipetted<br />
by all of the tips. The Te-MO is available as the Te-MO 3/5 (3 slides, 5 carriers per<br />
slide) and the Te-MO 3/3 (3 slides, 3 carriers per slide).<br />
The Te-MO can be fitted with a 96-tip or 384-tip pipetting head. The 96-tip head<br />
can be fitted with a tipblock (a replaceable block with 96 tips) or with DITIs. The<br />
spacing between the tips is fixed (96-tip head: 9 mm; 384-tip head: 4.5 mm).<br />
In contrast to the Te-MO 96, the Te-MO 384 uses a liquid system in the same way<br />
as the LiHa. This allows the tips and the pipetting head to be flushed from the<br />
inside. To do this, the system liquid is pumped into the pipetting head and flows<br />
through the tips before being discarded into the Te-MO 384 Wash Block, which is<br />
part of the Te-MO 384 Wash & Refill Center (WRC). Due to its special design, the<br />
Te-MO 384 pipetting head cannot be fitted with DITIs.<br />
<strong>Freedom</strong> <strong>EVOware</strong> is provided with special liquid classes which should be used<br />
for pipetting with the Te-MO.<br />
The Te-MO 3/5 can be fitted with the Te-MO stacker option (the stacker cannot be<br />
fitted to the smaller Te-MO 3/3 version). Stackers are used to store a stack of<br />
labware and to present it to the instrument for pipetting operations. The labware<br />
can then be returned to the stacker for subsequent actions.<br />
<strong>Freedom</strong> <strong>EVOware</strong> <strong>Software</strong> <strong>Manual</strong>, 393172, en, V<strong>2.3</strong> 15 - 121
15 - Script Commands<br />
Te-MO Commands<br />
15.56.1 Te-MO Aspirate Command<br />
The Te-MO Aspirate command is used to pick up liquid from specified positions on<br />
the Te-MO. It is analogous to the Aspirate command for the LiHa.<br />
Fig. 15-85 Te-MO Aspirate command<br />
The parameters of the Te-MO Aspirate command are as follows:<br />
Liquid Class<br />
Choose the required liquid class from the pull down list. The list only shows<br />
liquid classes which are suitable for the current configuration of the pipetting<br />
instrument.<br />
Click the Editor button to start the liquid classes editor if you want to create a<br />
new class or modify an existing class (see 10 “Configuring Liquid Classes”,<br />
10-1). Furthermore you can customize an existing liquid class for use by<br />
this command only (click the Customize button). If you customize an existing<br />
liquid class, the liquid class name is shown in the script command and in the<br />
script editor within double angled brackets “>> name
15 - Script Commands<br />
Te-MO Commands<br />
Loop Options<br />
If you are using the command in a script loop, click this button if you want to<br />
specify loop options. This allows you to use a different Te-MO slide and carrier<br />
(i.e. labware) for each cycle of the loop. The gray (protected) field shows the<br />
number of loop options you have chosen. See 14.4 “Loop Options”, 14-23.<br />
Volume<br />
Specify the required pipetting volume. The same volume is aspirated by all of<br />
the tips. The maximum allowed volume is the plunger or DITI capacity<br />
(<strong>Freedom</strong> <strong>EVOware</strong> does not automatically handle volumes that exceed the<br />
plunger or DITI capacity).<br />
Compartment in well<br />
Some special labware types (e.g. for protein crystallography) have wells with<br />
several compartments (cavities). <strong>Freedom</strong> <strong>EVOware</strong> can pipette a different<br />
liquid into each of the compartments. Each well typically has one main<br />
compartment and one or more satellite compartments which are directly<br />
adjacent and are often smaller in size. Choose the compartment which you<br />
want to use for pipetting (the main compartment is normally compartment 1).<br />
Well compartments are specified in the labware configuration. This field is<br />
inactive (gray) if the well only has one compartment.<br />
Location<br />
Specify the required Te-MO slide and carrier position by clicking on the<br />
labware in the Worktable Editor. You must first put an appropriate labware<br />
item in the Worktable Editor at the required position. The gray (protected) field<br />
above the location panel then shows the label (name) of the labware that you<br />
have selected (it shows a generic name if you have not assigned a label).<br />
If the Te-MO pipetting head has less tips than the number of wells in the<br />
labware, you must click in the Location panel to select the set of wells you<br />
want to use. This is not necessary if the pipetting head has the same number<br />
of tips as the number of wells in the labware. Your selection will be shown in<br />
green.<br />
<strong>Freedom</strong> <strong>EVOware</strong> <strong>Software</strong> <strong>Manual</strong>, 393172, en, V<strong>2.3</strong> 15 - 123
15 - Script Commands<br />
Te-MO Commands<br />
15.56.2 Te-MO Dispense Command<br />
The Te-MO Dispense command is used to dispense liquid to specified positions<br />
on the Te-MO. It is analogous to the Dispense command for the LiHa.<br />
Fig. 15-86 Te-MO Dispense command<br />
The parameters of the Te-MO Dispense command are as follows:<br />
Liquid Class<br />
Choose the required liquid class from the pull down list. The list only shows<br />
liquid classes which are suitable for the current configuration of the pipetting<br />
instrument.<br />
Click the Editor button to start the liquid classes editor if you want to create a<br />
new class or modify an existing class (see 10 “Configuring Liquid Classes”,<br />
10-1). Furthermore you can customize an existing liquid class for use by<br />
this command only (click the Customize button and click the Dispense tab). If<br />
you customize an existing liquid class, the liquid class name is shown in the<br />
script command and in the script editor within double angled brackets “>><br />
name
15 - Script Commands<br />
Te-MO Commands<br />
Loop Options<br />
If you are using the command in a script loop, click this button if you want to<br />
specify loop options. This allows you to use a different Te-MO slide and carrier<br />
(i.e. labware) for each cycle of the loop. The gray (protected) field shows the<br />
number of loop options you have chosen. See 14.4 “Loop Options”, 14-23.<br />
Volume<br />
Specify the required pipetting volume. The same volume is dispensed by all of<br />
the tips. The maximum allowed volume is the plunger or DITI capacity<br />
(<strong>Freedom</strong> <strong>EVOware</strong> does not automatically handle volumes that exceed the<br />
plunger or DITI capacity).<br />
Compartment in well<br />
Some special labware types (e.g. for protein crystallography) have wells with<br />
several compartments (cavities). <strong>Freedom</strong> <strong>EVOware</strong> can pipette a different<br />
liquid into each of the compartments. Each well typically has one main<br />
compartment and one or more satellite compartments which are directly<br />
adjacent and are often smaller in size. Choose the compartment which you<br />
want to use for pipetting (the main compartment is normally compartment 1).<br />
Well compartments are specified in the labware configuration. This field is<br />
inactive (gray) if the well only has one compartment.<br />
Location<br />
Specify the required Te-MO slide and carrier position by clicking on the<br />
labware in the Worktable Editor. You must first put an appropriate labware<br />
item in the Worktable Editor at the required position. The gray (protected) field<br />
above the location panel then shows the label (name) of the labware that you<br />
have selected (it shows a generic name if you have not assigned a label).<br />
If the Te-MO pipetting head has less tips than the number of wells in the<br />
labware, you must click in the Location panel to select the set of wells you<br />
want to use. This is not necessary if the pipetting head has the same number<br />
of tips as the number of wells in the labware. Your selection will be shown in<br />
green.<br />
15.56.3 Te-MO Mix Command<br />
The Te-MO Mix command performs a mix operation by aspirating and then<br />
dispensing at the same Te-MO position. It is analogous to the Mix command for<br />
the LiHa.<br />
<strong>Freedom</strong> <strong>EVOware</strong> <strong>Software</strong> <strong>Manual</strong>, 393172, en, V<strong>2.3</strong> 15 - 125
15 - Script Commands<br />
Te-MO Commands<br />
Fig. 15-87 Te-MO Mix command<br />
The parameters of the Te-MO Mix command are as follows:<br />
Liquid Class<br />
Choose the required liquid class from the pull down list. The list only shows<br />
liquid classes which are suitable for the current configuration of the pipetting<br />
instrument.<br />
Click the Editor button to start the liquid classes editor if you want to create a<br />
new class or modify an existing class (see 10 “Configuring Liquid Classes”,<br />
10-1). Furthermore you can customize an existing liquid class for use by<br />
this command only (click the Customize button and click the Aspirate or<br />
Dispense tab). If you customize an existing liquid class, the liquid class name<br />
is shown in the script command and in the script editor within double angled<br />
brackets “>> name
15 - Script Commands<br />
Te-MO Commands<br />
Volume<br />
Specify the volume that you want to aspirate for the mixing process. The same<br />
volume is pipetted by all of the tips. The maximum allowed volume is the<br />
plunger or DITI capacity (<strong>Freedom</strong> <strong>EVOware</strong> does not automatically handle<br />
volumes that exceed the plunger or DITI capacity).<br />
Cycles<br />
Specify how often you want to repeat the mixing process.<br />
Compartment in well<br />
Some special labware types (e.g. for protein crystallography) have wells with<br />
several compartments (cavities). <strong>Freedom</strong> <strong>EVOware</strong> can pipette a different<br />
liquid into each of the compartments. Each well typically has one main<br />
compartment and one or more satellite compartments which are directly<br />
adjacent and are often smaller in size. Choose the compartment which you<br />
want to use for pipetting (the main compartment is normally compartment 1).<br />
Well compartments are specified in the labware configuration. This field is<br />
inactive (gray) if the well only has one compartment.<br />
Location<br />
Specify the required Te-MO slide and carrier position by clicking on the<br />
labware in the Worktable Editor. You must first put an appropriate labware<br />
item in the Worktable Editor at the required position. The gray (protected) field<br />
above the location panel then shows the label (name) of the labware that you<br />
have selected (it shows a generic name if you have not assigned a label).<br />
If the Te-MO pipetting head has less tips than the number of wells in the<br />
labware, you must click in the Location panel to select the set of wells you<br />
want to use. This is not necessary if the pipetting head has the same number<br />
of tips as the number of wells in the labware. Your selection will be shown in<br />
green.<br />
15.56.4 Te-MO Wash Command<br />
The Te-MO Wash command is used to wash the Te-MO tips or DITIs using the<br />
specified Te-MO 96 wash block, which is designed for 96-tip Te-MO tip blocks and<br />
96-tip DITi pipetting heads and is connected to the Te-MO Wash & Refill Center<br />
(WRC) through tubing. The Te-MO hardware supports up to two Te-MO 96 wash<br />
blocks.<br />
Use the Te-MO Wash 384 Tip Head command instead if you are using a 384-tip<br />
pipetting head.<br />
<strong>Freedom</strong> <strong>EVOware</strong> <strong>Software</strong> <strong>Manual</strong>, 393172, en, V<strong>2.3</strong> 15 - 127
15 - Script Commands<br />
Te-MO Commands<br />
Fig. 15-88 Te-MO Wash command<br />
The wash process normally consists of one Empty Tips step and one or more<br />
Cleaner steps. Start by choosing the required number of cleaner steps in the No.<br />
of Cleaner Steps field.<br />
The parameters and steps of the Te-MO Wash command are as follows:<br />
Set values for<br />
Different wash parameters are needed for each of the Te-MO tip types.<br />
Choose the Te-MO tip type you are using from the pull-down list. This<br />
configures the Te-MO Wash command with the recommended wash<br />
parameters for the chosen tip type.<br />
If you modify the recommended settings after choosing the tip type, the pulldown<br />
list will show “Edited values” instead of the tip type you chose.<br />
The parameter sets with the recommended wash parameters are stored in the<br />
evoware.inf file (see A.4 “Parameters in the Evoware.inf file”, A-24, Te-MO<br />
Wash Parameters). The parameters in the evoware.inf file should only be<br />
changed by specialists.<br />
In addition to choosing the tip type in the pull-down list, if you want to wash the<br />
whole outside of the tips (the whole length) you may need to adapt the liquid<br />
class parameter "Aspiration position, Z-offset" for the liquid class which is<br />
used for the first cleaner step (default “Te-MO WRC dip in”) to ensure that the<br />
tips dip far enough into the wash liquid. A positive value for Z-offset lowers the<br />
tips. Note: You cannot change the properties of the pre-defined (standard)<br />
liquid classes. However you can create a new custom class with the same<br />
properties and then change them.<br />
Note: Take care to choose a parameter set to match the tips you are using and to<br />
adjust the Z-offset correctly. Incorrect parameters can lead to incomplete washing<br />
of the tips, which could cause cross-contamination under unfavorable<br />
circumstances.<br />
Empty Tips step<br />
This step will only be executed if the excess volume or the leading airgap is<br />
still in the tips or the Te-MO plunger has not reached the start position.<br />
During this step, the Te-MO head moves to the Z-dispense position above the<br />
wash block and any remaining liquid is expelled from the tips.<br />
15 - 128 <strong>Freedom</strong> <strong>EVOware</strong> <strong>Software</strong> <strong>Manual</strong>, 393172, en, V<strong>2.3</strong>
15 - Script Commands<br />
Te-MO Commands<br />
Cleaner step<br />
During each cleaner step, the Te-MO head moves the tips into the wash block<br />
to the Z-max position and waits for the specified soak time. The Te-MO then<br />
aspirates and dispenses the specified volume of wash liquid. Specify the<br />
Cycles parameter to repeat aspiration and dispensing several times if<br />
necessary. The WRC washing pumps operate during the entire cleaner step.<br />
The Te-MO head moves up and the washing pumps stop at the end of each<br />
step.<br />
You can specify the wash liquid (1 or 2) you want to use in the wash block. In<br />
addition, the wash block can be flushed for a specified time before starting<br />
(Preflush) and after finishing (Postflush) each step.<br />
Wash position<br />
For each of the steps, click on this table field and choose the required wash<br />
block from the pull down list. The list shows all Te-MO 96 wash blocks which<br />
are currently positioned on the Te-MO in the Worktable Editor (the Te-MO grid<br />
position and the wash block site are shown in brackets, see Tab. 8-9 “Te-MO<br />
3x5 site numbers”, 8-104). The Te-MO hardware supports up to two Te-MO<br />
96 wash blocks. You can only put Te-MO 96 wash blocks on the middle slide<br />
of the Te-MO.<br />
Wash liquid<br />
You can connect two different wash liquid containers to the WRC. Specify the<br />
wash liquid you want to use in the wash block.<br />
Flow through [%]<br />
Specify the flow rate of the pressure pump of the WRC (range: 1 - 100%;<br />
100% is the maximum flow rate).<br />
Preflush [s]<br />
Specify how long the wash block should be flushed at the beginning of the<br />
step (range: 0 -1000 s).<br />
Soak time [s]<br />
Specify how long the tips should soak in the wash block before aspirating and<br />
dispensing the wash liquid (range: 0 - 200 s). You must specify at least 1 s for<br />
the last Cleaner step.<br />
Liquid Class<br />
Choose the liquid class of the wash liquid from the pull down list. Click the<br />
Editor button below the table to start the liquid classes editor if you want to<br />
create a new class or modify an existing class (see 10 “Configuring Liquid<br />
Classes”, 10-1).<br />
Volume [µl]<br />
Specify the required volume of wash liquid in the cleaner step. The maximum<br />
allowed volume is the dilutor or DITI capacity (<strong>Freedom</strong> <strong>EVOware</strong> does not<br />
automatically handle volumes that exceed the dilutor or DITI capacity).<br />
Cycles<br />
Specifies how many times aspiration and dispensing of the wash liquid takes<br />
place in the cleaner step. If you specify 0, aspiration and dispensing the wash<br />
liquid will not be carried out.<br />
<strong>Freedom</strong> <strong>EVOware</strong> <strong>Software</strong> <strong>Manual</strong>, 393172, en, V<strong>2.3</strong> 15 - 129
15 - Script Commands<br />
Te-MO Commands<br />
Change [µl]<br />
Specify an optional volume of wash liquid which is added to the specified<br />
aspiration and dispense volume for each subsequent cycle of the cleaner<br />
step. A negative value means that less wash liquid will be used for each<br />
subsequent cycle. This parameter can be used to optimize the effectiveness<br />
of the washing process. The total volume (Volume + Change) should not<br />
exceed the dilutor or DITI capacity (<strong>Freedom</strong> <strong>EVOware</strong> does not automatically<br />
handle volumes that exceed the plunger or DITI capacity).<br />
Postflush [s]<br />
Specify how long the wash block should be flushed at the end of the step<br />
(range: 0 - 1000 s).<br />
Liquid class editor<br />
Click the Editor button to start the liquid classes editor if you want to create a<br />
new class or modify an existing class (see 10 “Configuring Liquid Classes”,<br />
10-1).<br />
Use wash sensor on station 1 / station 2<br />
The Te-MO hardware supports up to two Wash Blocks for the Te-MO 96<br />
pipetting head. Use the checkboxes to switch the wash liquid level detection<br />
on or off for the two wash blocks. The wash block sensors should normally be<br />
switched on for both wash blocks, but can be disabled e.g. if you are using a<br />
wash liquid with a high electrical resistance which cannot be detected reliably.<br />
15.56.5 Te-MO 384 Wash Tip Head Command<br />
The Te-MO can be fitted with a 96-tip or 384-tip pipetting head. In contrast to the<br />
Te-MO 96, the Te-MO 384 operates with a system liquid in a similar way to the<br />
LiHa, which allows the tips and the entire pipetting head to be flushed from the<br />
inside. To do this, the system liquid is pumped into the pipetting head and flows<br />
through the tips before being discarded into the Te-MO 384 wash block, which is<br />
part of the Te-MO 384 Wash & Refill Center (WRC). Due to its unique design, the<br />
Te-MO 384 pipetting head cannot be fitted with DITIs.<br />
The Te-MO Wash 384 Tip Head command is used to wash the Te-MO tips using<br />
the specified Te-MO 384 Wash Block. It is designed for 384-tip pipetting heads.<br />
The Te-MO hardware only supports one Te-MO 384 Wash Block.<br />
Use the Te-MO Wash command instead if you are using a 96-tip Te-MO tip block<br />
or 96-tip DITi pipetting head.<br />
15 - 130 <strong>Freedom</strong> <strong>EVOware</strong> <strong>Software</strong> <strong>Manual</strong>, 393172, en, V<strong>2.3</strong>
15 - Script Commands<br />
Te-MO Commands<br />
Fig. 15-89 Te-MO 384 Wash Tip Head command<br />
The parameters of the Te-MO Wash 384 Tip Head command are as follows:<br />
Flush Time<br />
Specify the required flush time (range: 0.1 - 50 seconds). Flushing takes place<br />
with the tips above the Te-MO 384 wash block (tip height = Z-dispense) and<br />
moved slightly to the side to position them in between the cleaner tubes. This<br />
ensures that the cleaner tubes are not contaminated by the liquid which is<br />
expelled during flushing. The specified flush time is preceded by an<br />
automated preflush phase with pressure pulses which takes about 15<br />
seconds. The total time required by this step is thus Flush Time + 15 s.<br />
Quick head flushing<br />
This option speeds up head flushing by a few seconds. Do not use it for the<br />
first wash in the script because a full flush is necessary if you haven’t used the<br />
Te-MO for some time.<br />
Wash Time<br />
Specify the required wash time (range: 0.1 - 50 seconds). Washing takes<br />
place with the tips lowered into cleaning tubes of the Te-MO 384 wash block<br />
(tip height = Z-max). This field is inactive (gray) if you specify Tip washing with<br />
plunger moves.<br />
Tip washing with plunger moves<br />
This option activates an alternative method of washing the tips. It uses<br />
plunger movements to aspirate and dispense wash liquid from the wash block.<br />
The standard method uses the wash block to pump wash liquid through the<br />
pipetting head and the tips but does not move the plunger.<br />
Cycles: Specify how many aspirate/dispense cycles you want (range: 1 to<br />
10).<br />
Volume: Specify the volume of liquid to use for aspirating and dispensing<br />
(range: 1 to 50 µl).<br />
Speed: Specify the required aspirating and dispensing speed (range: 1 to 100<br />
µl/s).<br />
<strong>Freedom</strong> <strong>EVOware</strong> <strong>Software</strong> <strong>Manual</strong>, 393172, en, V<strong>2.3</strong> 15 - 131
15 - Script Commands<br />
Te-MO Commands<br />
Flush tips after plunger moves<br />
This option removes foam from within the tips. Use it if foam is produced<br />
during the plunger wash.<br />
Total duration<br />
This field displays the estimated total time required by the wash command<br />
based on the settings you have made.<br />
Wash block<br />
Specify the required Te-MO 384 wash block by clicking on the wash block in<br />
the Worktable Editor. The Te-MO grid position and the wash block site are<br />
then shown in the gray (protected) fields, see also Tab. 8-9 “Te-MO 3x5 site<br />
numbers”, 8-104. You must first put an appropriate Te-MO 384 wash block<br />
in the Worktable Editor at the required position. Alternatively, choose the Te-<br />
MO 384 wash block from the pull down list. The list shows all Te-MO 384 wash<br />
blocks which are currently positioned on the Te-MO in the Worktable Editor.<br />
You can only put Te-MO 384 wash blocks on the middle slide of the Te-MO.<br />
The Te-MO hardware only supports one Te-MO 384 Wash Block.<br />
15.56.6 Te-MO Get DITIs Command<br />
The Te-MO Get DITIs command is used to pick up disposable tips of the specified<br />
capacity from a specified position on the Te-MO.<br />
Fig. 15-90 Te-MO Get DITIs command<br />
The parameters of the Te-MO Get DITIs command are as follows:<br />
Position<br />
Specify the position where the Te-MO should get the DITIs by clicking on the<br />
Te-MO DITI rack in the Worktable Editor. The type or label (name), the Te-MO<br />
grid position and the site of the DITI rack are then shown in the gray<br />
(protected) fields, see also Tab. 8-9 “Te-MO 3x5 site numbers”, 8-104. You<br />
must first put a Te-MO DITI rack in the Worktable Editor at the required<br />
position. You can only put Te-MO DITI racks on the middle slide of the Te-MO.<br />
Blowout airgap<br />
Specify the volume of air to aspirate directly before getting the DITIs (range: 0<br />
to 150 µl). When the tips are washed, the air is dispensed at the end of the<br />
wash procedure and serves to make sure that all of the wash liquid remaining<br />
in the tips is discarded. In contrast to the Leading Airgap (which is specified in<br />
the liquid classes), the blowout airgap is only relevant for washing the tips and<br />
is not dispensed by the Dispense command.<br />
15 - 132 <strong>Freedom</strong> <strong>EVOware</strong> <strong>Software</strong> <strong>Manual</strong>, 393172, en, V<strong>2.3</strong>
15 - Script Commands<br />
Te-MO Commands<br />
15.56.7 Te-MO Drop DITIs Command<br />
The Te-MO Drop DITIs command is used to return the disposable tips to a<br />
specified position on the Te-MO.<br />
Fig. 15-91 Te-MO Drop DITIs command<br />
The parameters of the Te-MO Drop DITIs command are as follows:<br />
Back to source<br />
This option returns the DITIs back to the Te-MO carrier and slide position from<br />
where they were fetched with the Te-MO Get DITIs command.<br />
Note: If you switch off the pipetting instrument with the DITIs still attached, it will<br />
forget the Te-MO carrier and slide position from where the DITIs were fetched.<br />
The option Back to source will then display an error message when the script is<br />
validated.<br />
Back to position<br />
Specify the position where the Te-MO should return the DITIs by clicking on<br />
the Te-MO DITI rack in the Worktable Editor. The type or label (name), the Te-<br />
MO grid position and the site of the DITI rack are then shown in the gray<br />
(protected) fields, see also Tab. 8-9 “Te-MO 3x5 site numbers”, 8-104. You<br />
must first put a Te-MO DITI rack in the Worktable Editor at the required<br />
position. You can only put Te-MO DITI racks on the middle slide of the Te-MO.<br />
Discard DITIs into waste<br />
Check this checkbox if you want to discard the DITIs after returning them to<br />
the specified position. After putting down the DITIs in the DITI rack, the rack<br />
will be pushed into the waste chute. This operation requires the DITI rack to<br />
be positioned on the front most site of the centre slide.<br />
15.56.7.1 Side movements when dropping Te-MO DITIs<br />
Under unusual environmental conditions (e.g. very dry ambient air), Te-MO DITIs<br />
may not drop reliably due to electrostatic charging of the plastic tips. In such<br />
cases, you can specify an optional side and/or vertical movement of the Te-MO<br />
pipetting head directly after releasing the tips.<br />
This is done by adding entries to the [TEMO] section of the configuration file<br />
evoware.opt using a text editor. evoware.opt is in the \Database<br />
directory.<br />
Add the following line to move by 10 instrument steps (10 x 0.1 mm) in the X<br />
direction:<br />
DITI_SIDE_STEPS_X=10<br />
<strong>Freedom</strong> <strong>EVOware</strong> <strong>Software</strong> <strong>Manual</strong>, 393172, en, V<strong>2.3</strong> 15 - 133
15 - Script Commands<br />
Te-MO Commands<br />
Add the following line to move by 20 instrument steps in the Y direction:<br />
DITI_SIDE_STEPS_Y=20<br />
Add the following line to move by 15 instrument steps in the Z direction:<br />
DITI_SIDE_STEPS_Z=15<br />
Recommended value for DITI_SIDE_STEPS_X when using this feature: -180<br />
Recommended value for DITI_SIDE_STEPS_Y when using this feature: 0<br />
Recommended value for DITI_SIDE_STEPS_Z when using this feature: 90<br />
To disable this feature, set the values to 0 or remove the entries from the<br />
evoware.opt file.<br />
The above settings only affect the Te-MO Drop DITIs command.<br />
Note: <strong>Freedom</strong> <strong>EVOware</strong> must be re-started for the changes to take effect.<br />
Configuration files are protected with checksums. When you re-start <strong>Freedom</strong><br />
<strong>EVOware</strong> after editing evoware.opt, you will be warned that this file now has an<br />
invalid checksum. Confirm the prompt with Yes and proceed as follows to repair<br />
the checksum:<br />
• Click Configure in the Toolbar to start the Configuration Tool. You will be<br />
warned again that evoware.opt has an invalid checksum and you will be<br />
asked if you want to checksum to be repaired. Click Yes. Then Click Exit to<br />
return to <strong>Freedom</strong> <strong>EVOware</strong>.<br />
15.56.8 Te-MO Get Tip Block Command<br />
The Te-MO Get Tip Block command is used to pick up a tip block from a specified<br />
position on the Te-MO.<br />
Fig. 15-92 Te-MO Get Tip Block command<br />
The parameters of the Te-MO Get Tip Block command are as follows:<br />
Position<br />
Specify the position where the Te-MO should get the tip block by clicking on<br />
the Te-MO tip block in the Worktable Editor. The type or label (name), the Te-<br />
MO grid position and the site of the tip block are then shown in the gray<br />
(protected) fields, see also Tab. 8-9 “Te-MO 3x5 site numbers”, 8-104. You<br />
must first put a Te-MO tip block in the Worktable Editor at the required<br />
position. You can only put Te-MO tip blocks on the middle slide of the Te-MO.<br />
15 - 134 <strong>Freedom</strong> <strong>EVOware</strong> <strong>Software</strong> <strong>Manual</strong>, 393172, en, V<strong>2.3</strong>
15 - Script Commands<br />
Te-MO Commands<br />
Blowout airgap<br />
Specify the volume of air to aspirate directly before getting the tip block<br />
(range: 0 to 150 µl). When the tips are washed, the air is dispensed at the end<br />
of the wash procedure and serves to make sure that all of the wash liquid<br />
remaining in the tips is discarded. In contrast to the Leading Airgap (which is<br />
specified in the liquid classes), the blowout airgap is only relevant for washing<br />
the tips and is not dispensed by the Dispense command.<br />
15.56.9 Te-MO Drop Tip Block Command<br />
The Te-MO Drop Tip Block command is used to put down the tipblock at a<br />
specified position on the Te-MO.<br />
Fig. 15-93 Te-MO Drop Tip Block command<br />
The parameters of the Te-MO Drop Tip Block command are as follows:<br />
Back to source<br />
This option returns the tip block back to the Te-MO carrier and slide position<br />
from where it was fetched with the Te-MO Get Tip Block command. I:<br />
Note: If you switch off the pipetting instrument with the tip block still attached, it<br />
will forget the Te-MO carrier and slide position from where the tip block was<br />
fetched. The option Back to source will then display an error message when the<br />
script is validated.<br />
Back to position<br />
Specify the position where the Te-MO should discard the tip block by clicking<br />
on the Te-MO tip block in the Worktable Editor. The type or label (name), the<br />
Te-MO grid position and the site of the tip block are then shown in the gray<br />
(protected) fields, see also Tab. 8-9 “Te-MO 3x5 site numbers”, 8-104. You<br />
must first put a Te-MO tip block in the Worktable Editor at the required<br />
position. The gray (protected) field then shows the type or the label (name) of<br />
the selected item. You can only put Te-MO tip blocks on the middle slide of the<br />
Te-MO.<br />
15.56.10 Te-MO Refill Trough Command<br />
The Te-MO trough is a special carrier on the Te-MO which is used as a container<br />
for a reagent liquid. The reagent liquid can be aspirated using the Te-MO pipetting<br />
<strong>Freedom</strong> <strong>EVOware</strong> <strong>Software</strong> <strong>Manual</strong>, 393172, en, V<strong>2.3</strong> 15 - 135
15 - Script Commands<br />
Te-MO Commands<br />
commands. The Te-MO Refill Trough command is used to refill the trough with<br />
reagents.<br />
Fig. 15-94 Te-MO Refill Trough command<br />
The parameters of the Te-MO Refill Trough command are as follows:<br />
Channel<br />
You can connect up to four different reagent containers to the trough. Specify<br />
the channel which contains the reagent you want to use.<br />
Min. fill level<br />
Specify the minimum fill level in %. The trough will only be refilled if the liquid<br />
quantity has dropped to this level.<br />
Max fill level<br />
Specify the maximum fill level in %. Refilling of the trough will be stopped<br />
when the liquid quantity reaches this level.<br />
Trough<br />
Specify the position of the trough by clicking on the trough in the Worktable<br />
Editor. The Te-MO grid position and the site of the trough are then shown in<br />
the gray (protected) fields, see also Tab. 8-9 “Te-MO 3x5 site numbers”, 8-<br />
104. You must first put an appropriate Te-MO trough in the Worktable Editor at<br />
the required position. Alternatively, choose the required trough from the pull<br />
down list. The list shows all troughs which are currently positioned on the Te-<br />
MO in the Worktable Editor. You can only put Te-MO troughs on the middle<br />
slide of the Te-MO.<br />
15.56.11 Te-MO Relative Movements Command<br />
The Te-MO Relative Movements command is used to perform Te-MO movements<br />
with an offset. It can be used e.g. to program a serial dilution. It is only available<br />
for the Te-MO 96.<br />
The Te-MO (Tecan Multi-Pipetting Option) is normally used to perform pipetting<br />
operations on all of the wells of the labware simultaneously, whereby the Te-MO<br />
pipetting head is positioned directly above the labware. However, it can also be<br />
used to carry out operations such as serial dilution. In this case, pipetting takes<br />
place to one column or one row of the labware at a time. This is achieved by only<br />
picking up DITIs for a single column or row and positioning the Te-MO head with<br />
an offset to align the DITIs with the required wells. For fixed tips, you can use a<br />
special tip block which only has tips fitted to one row or column.<br />
15 - 136 <strong>Freedom</strong> <strong>EVOware</strong> <strong>Software</strong> <strong>Manual</strong>, 393172, en, V<strong>2.3</strong>
15 - Script Commands<br />
Te-MO Commands<br />
For mechanical reasons, the Te-MO head can only be positioned within the<br />
working area of the Te-MO. Accordingly, fit the tips to the column on the left side of<br />
the head if you want to access all of the columns of the labware on the left slide.<br />
Fit the tips to the column on the right side of the head if you want to access all of<br />
the columns of the labware on the right slide. If you fit the tips to the front row of<br />
the Te-MO head, you can access all rows of the labware on the left or the right<br />
slide. Note: The center slide is not normally used for pipetting with relative<br />
movements.<br />
To fit DITI tips to the required column or row of the Te-MO head, load tips into only<br />
one column or row of the new DITI rack and then use the Te-MO Get DITIs<br />
command in the normal way (with an offset of 0). See also Fetching DITIs, below.<br />
Fig. 15-95 Te-MO Relative Movements command<br />
The parameters of the Te-MO Relative Movements command are as follows:<br />
Row offset (tips are on front side of Te-MO head)<br />
This option is used to pipette to rows of the labware on the left or right slide.<br />
Specify the required row offset. Fit the tips on the front row(s) of the Te-MO<br />
head. The offset for pipetting to the front row of the labware is 0. The offset for<br />
the second row (from front to back) is -1.<br />
Column offset (tips are on left side of Te-MO head)<br />
This option is used to pipette to columns of the labware on the left slide.<br />
Specify the required column offset. Fit the tips on the left column(s) of the Te-<br />
MO head. The offset for pipetting to the left column of the labware is 0. The<br />
offset for the second column (from left to right) is 1.<br />
Column offset (tips are on right side of Te-MO head)<br />
This option is used to pipette to columns of the labware on the right slide.<br />
Specify the required column offset. Fit the tips on the right column(s) of the Te-<br />
MO head. The offset for pipetting to the left column of the labware is 0. The<br />
offset for the second column (from left to right) is 1.<br />
Switch off offset<br />
This cancels a previously specified offset (row or column) and resets the Te-<br />
MO pipetting head to the default position. It has the same effect as specifying<br />
a column offset of 0 with the option Column offset (tips are on left side of Te-<br />
MO head).<br />
You cannot specify a row and a column offset simultaneously. If you specify a row<br />
offset, this cancels a previously specified column offset. If you specify a column<br />
offset, this cancels a previously specified row offset.<br />
Note: You must switch off the offset before fetching a tipblock with the Te-MO Get<br />
Tipblock command. In addition, it is recommended to switch off the offset when<br />
you no longer want to use Te-MO offsets in your script.<br />
<strong>Freedom</strong> <strong>EVOware</strong> <strong>Software</strong> <strong>Manual</strong>, 393172, en, V<strong>2.3</strong> 15 - 137
15 - Script Commands<br />
Te-MO Commands<br />
Fetching DITIs<br />
If required, you can specify an offset before fetching the DITIs with the Te-MO Get<br />
DITIs command. Use this feature if you do not want to pick up DITIs for all of the<br />
rows or columns of the pipetting head. If you use an offset, make sure that the<br />
pipetting head will not collide with other objects, e.g. other DITIs in the DITI rack.<br />
Please contact Tecan for further information.<br />
15.56.12 Load the Te-MO Command<br />
The Te-MO is normally loaded with labware during script or process runtime using<br />
RoMa movement commands. You can also load it manually, before starting the<br />
script or process. However, depending on their position in the Te-MO, some of the<br />
Te-MO sites may be difficult to access due to the position of the Te-MO slides.<br />
This command is used to move a specified Te-MO site to the RoMa transfer<br />
position (also called the exchange position) to make it easier to exchange the<br />
labware manually. It is mainly intended for use in maintenance scripts.<br />
For safety reasons, <strong>Freedom</strong> <strong>EVOware</strong> does not open the doors of the pipetting<br />
instrument when scripts are running. Please use the supplied Loading the Te-MO<br />
maintenance script if you want to load the Te-MO manually (see 6.4.2 “Run<br />
Maintenance”, 6-10).<br />
Fig. 15-96 Loading the Te-MO command<br />
Choose the required slide and site in the Sites panel and click Move in the Plate<br />
Robot exchange position panel to move the site to the exchange position.<br />
When the Te-MO reaches the plate robot exchange position and you are using an<br />
APC (Active Positioning Carrier), click Open in the APC panel to release the<br />
labware. Click Close in the APC panel to lock the labware in position again. You<br />
can only release or lock the labware at the exchange position.<br />
The Loading the Te-MO dialog box is not available if <strong>Freedom</strong> <strong>EVOware</strong> is<br />
running in offline mode.<br />
15.56.13 Fill system (Te-MO 384) Command<br />
The Fill system (Te-MO 384) command is used to fill and flush the 384-tip Te-MO<br />
pipetting system and to prime the wash block of the Te-MO 384 Wash & Refill<br />
Center. It is not applicable to the 96-tip Te-MO tip block or the 96-tip Te-MO DITi<br />
15 - 138 <strong>Freedom</strong> <strong>EVOware</strong> <strong>Software</strong> <strong>Manual</strong>, 393172, en, V<strong>2.3</strong>
15 - Script Commands<br />
Te-MO Commands<br />
pipetting head. It is mainly intended for use in maintenance scripts (see<br />
6.4.2 “Run Maintenance”, 6-10).<br />
Fig. 15-97 Fill System (Te-MO 384) dialog box<br />
The parameters of the Fill System (Te-MO 384) command are as follows:<br />
Fill system continuously<br />
This is used to fill the Te-MO 384 pipetting system with system liquid. This<br />
operation is normally only necessary if you fit a new pipetting head.<br />
Fill Time: Specify the required fill time in seconds.<br />
Flush head<br />
This is used to flush the Te-MO 384 pipetting head with system liquid to clean<br />
the system and remove trapped air. Flushing should be carried out daily<br />
before using the Te-MO 384 for the first time or if several hours have elapsed<br />
since the Te-MO 384 was last used. This automated procedure takes about 25<br />
seconds and cannot be interrupted.<br />
Prime wash block<br />
This is used to prime the Te-MO 384 wash block with system liquid (fill the<br />
cleaner tubes). Priming should be carried out daily before using the Te-MO<br />
384 wash block for the first time or if several hours have elapsed since the Te-<br />
MO 384 wash block was last used.<br />
Wash Block<br />
Specify the position of the Te-MO 384 wash block by clicking on the wash<br />
block in the Worktable Editor. The Te-MO grid position and the site of the wash<br />
block are then shown in the gray (protected) fields, see also Tab. 8-9 “Te-MO<br />
3x5 site numbers”, 8-104. You must first put an appropriate Te-MO 384<br />
wash block in the Worktable Editor at this position. Alternatively, choose the<br />
required Te-MO 384 wash block from the pull down list. The list shows all Te-<br />
MO 384 wash blocks which are currently positioned on the Te-MO in the<br />
Worktable Editor. You can only put Te-MO 384 wash blocks on the middle<br />
slide of the Te-MO.<br />
<strong>Freedom</strong> <strong>EVOware</strong> <strong>Software</strong> <strong>Manual</strong>, 393172, en, V<strong>2.3</strong> 15 - 139
15 - Script Commands<br />
Move RoMa Command<br />
15.57 Move RoMa Command<br />
This command is used to carry out simple RoMa movements without using a<br />
RoMa vector:<br />
Fig. 15-98 Move RoMa command<br />
The parameters of the Move RoMa command are as follows:<br />
ROMA-No.<br />
Choose the RoMa you want to use (1 or 2) if your instrument is fitted with<br />
more than one.<br />
Open Gripper<br />
This opens the gripper to the specified width (range: 55 to 140 mm).<br />
Close Gripper<br />
This closes the gripper to the specified width (range: 55 to 140 mm) using the<br />
specified force (range: 0 to 249). A Grip Error message will be output if no<br />
resistance is detected when gripping.<br />
Move to home position<br />
This moves the RoMa to the specified home position.<br />
After completing a sequence of movements with the RoMa, you should move<br />
it back to its home (parking) position, out of the way of other objects on the<br />
worktable (see 9.6.4 “Defining the Home Position for a RoMa”, 9-62).<br />
15 - 140 <strong>Freedom</strong> <strong>EVOware</strong> <strong>Software</strong> <strong>Manual</strong>, 393172, en, V<strong>2.3</strong>
15 - Script Commands<br />
RoMa Vector Command<br />
Move relative to current position<br />
This moves the RoMa relative to its current position. You must then specify<br />
the relative distances (range: -400 to 400 mm) and whether the RoMa should<br />
move at a particular speed (range: 0.1 to 400 mm/s) or at maximum speed.<br />
The movements in A and B are not aligned with the instrument axes, but with<br />
the current rotator position (angle).<br />
The movement in A is perpendicular to the gripper. Example #1: If the gripper<br />
points to the front (angle = 0°) and the A value is positive, then the RoMA will<br />
move to the left. Example #2: If the gripper points to the left (angle = 90°) and<br />
the A value is positive, then the RoMA will move to the back.<br />
The movement in B is in line with the gripper. Example #1: If the gripper points<br />
to the front (angle = 0°) and the B value is positive, then the RoMA will move<br />
to the front. Example #2: If the gripper points to the left (angle = 90°) and the B<br />
value is positive, then the RoMA will move to the left.<br />
See also 9.4.8.2 “RoMa Coordinate System”, 9-39.<br />
15.58 RoMa Vector Command<br />
This command executes a RoMa vector, which is a predefined sequence of RoMa<br />
movements. You can also specify gripper actions at the Safe and End positions.<br />
See 9.6.1 “Using RoMa Vectors”, 9-58 for more information.<br />
The RoMa Vector command is intended for special RoMa movements and not for<br />
moving labware from one position to another - you should use the Transfer<br />
Labware command instead for this purpose. See also 15.58.1 “Moving labware<br />
with the RoMa Vector command”, 15-142.<br />
Fig. 15-99 RoMa Vector command<br />
<strong>Freedom</strong> <strong>EVOware</strong> <strong>Software</strong> <strong>Manual</strong>, 393172, en, V<strong>2.3</strong> 15 - 141
15 - Script Commands<br />
RoMa Vector Command<br />
The parameters of the RoMa Vector command are as follows:<br />
RoMa-No.<br />
Choose the RoMa you want to use (1 or 2) if your instrument is fitted with<br />
more than one.<br />
Use RoMa Vector<br />
Choose the RoMa vector you want to use for the RoMa movement. The<br />
popup list shows the RoMa vectors which are currently defined in the<br />
<strong>Freedom</strong> <strong>EVOware</strong> database.<br />
The digit at the end of the vector name (e.g. Carousel_Narrow_1) indicates<br />
the RoMa for which the vector was defined (1 or 2). See also 9.6.1 “Using<br />
RoMa Vectors”, 9-58.<br />
You can also choose a user-defined vector. User-defined vectors are created<br />
in the Control Bar (Robot Vectors section).<br />
Then specify the grid position and carrier site for which the vector is intended.<br />
The Grid field is protected (gray) if you have chosen a vector for a device<br />
which is not positioned on the worktable (see Carrier is Device checkbox in<br />
the carrier definition).<br />
Tip: If you click on a carrier, the current grid position is shown in the small<br />
yellow tab at the bottom left.<br />
Move along RoMa Vector<br />
Choose the required direction of the RoMa movement. Click And back if you<br />
want the RoMa to return to the Safe position after reaching the End position.<br />
Gripper action<br />
Choose the gripper action which should be executed at the Safe position and<br />
at the End position. The required gripper spacing to pick up and release the<br />
labware is taken from the Grip Width and Release Width parameters in the<br />
chosen RoMa vector.<br />
Speed<br />
Choose Maximum if you want the RoMa to move at maximum speed. Choose<br />
Slow if you want the RoMa to move at the speed specified in the RoMa vector.<br />
15.58.1 Moving labware with the RoMa Vector command<br />
If you have scanned the labware barcode and you move the labware with the<br />
Transfer Labware command, the barcode remains assigned to the labware (i.e.<br />
the labware data record) at the new location. In addition, pipetting information, if<br />
any, remains assigned to the labware (see 15.26 “Export Data Command”, 15-<br />
48).<br />
This is not the case with the RoMa Vector command. The barcode and the<br />
pipetting information are no longer available at the new location.<br />
This also applies analogously to the MCA96 Vector command and the MCA384<br />
Vector command.<br />
Proceed as follows if you want to use a Vector command to move barcoded<br />
labware in special situations:<br />
• After scanning the barcode, assign it to a temporary variable (see<br />
14.1.11 “Labware Attributes and String Variables”, 14-16).<br />
• Move the labware.<br />
• Re-assign the barcode from the temporary variable to the labware.<br />
This workaround transfers the barcode but not the pipetting information.<br />
15 - 142 <strong>Freedom</strong> <strong>EVOware</strong> <strong>Software</strong> <strong>Manual</strong>, 393172, en, V<strong>2.3</strong>
15 - Script Commands<br />
Transfer Labware Command<br />
15.59 Transfer Labware Command<br />
This command is used to transfer labware (e.g. a microplate) from one position to<br />
another with the plate robot (RoMa).<br />
If you have scanned the labware barcode and you move the labware with the<br />
Transfer Labware command, the barcode remains assigned to the labware (i.e.<br />
the labware data record) at the new location. In addition, pipetting information, if<br />
any, remains assigned to the labware (see 15.26 “Export Data Command”, 15-<br />
48).<br />
Grip and release commands for the RoMa (used to pick up and put down the<br />
labware) are handled automatically. The required gripper spacing is taken from<br />
the advanced properties for the respective labware type (see 9.4.2 “Editing<br />
Labware, Advanced Tab”, 9-22):<br />
Fig. 15-100 Transfer Labware command<br />
The parameters of the Transfer Labware command are as follows:<br />
Move with<br />
Choose the RoMa you want to use (1 or 2) if your instrument is fitted with<br />
more than one.<br />
<strong>Freedom</strong> <strong>EVOware</strong> <strong>Software</strong> <strong>Manual</strong>, 393172, en, V<strong>2.3</strong> 15 - 143
15 - Script Commands<br />
Transfer Labware Command<br />
Vector<br />
Choose the RoMa vector that you want to use to pick up the labware.<br />
Choose Narrow to pick up the labware on the narrow side; choose Wide to<br />
pick up the labware on the wide side.<br />
Choose User defined (Narrow) or (Wide) to pick up the labware on the narrow<br />
or wide side with a user-defined vector. In this case, you must choose the<br />
user-defined vector to use for picking up the labware at the source position<br />
and putting down it at the destination position in the two User Vector pull-down<br />
lists. User-defined vectors are created in the Control Bar (Robot Vectors<br />
section). See 5.4.1.6 “Robot Vectors”, 5-12.<br />
Above all if you did not create the user-defined vector yourself, we<br />
recommend you to check carefully that the vector moves the RoMa to the<br />
correct (i.e. intended) source and destination carrier positions before using it<br />
for pipetting. Tip: Test the RoMa vector in a script using the 3D simulation<br />
program EVOSim.<br />
<strong>Freedom</strong> <strong>EVOware</strong> will report an error when you complete the Transfer<br />
Labware command if the narrow or wide RoMa vector has not yet been<br />
created for the chosen labware type. It is best to create the required RoMa<br />
vectors in advance (see 9.6.2 “Teach Plate Robot Vector Dialog Box”, 9-59).<br />
⌦ Transfer Labware command, Step 1<br />
Specify the parameters for the source position:<br />
Source position<br />
Select the current position of the labware by clicking on it in the Worktable<br />
Editor.<br />
Grid and Site then show the position you have chosen. The gray (protected)<br />
field Defined Carrier then shows the type of carrier at the chosen site and the<br />
gray (protected) field Defined Labware shows the type of labware at the<br />
chosen site.<br />
If you want to fetch the labware from a device such as a hotel or barcode<br />
scanner, click on the device icon. You then need to choose the site and the<br />
labware type. The list shows labware types which are allowed for the device<br />
(see 9.5 “Configuring Carriers”, 9-39, “Allowed Labware on this carrier”).<br />
⌦ Transfer Labware command, Step 2<br />
Specify the parameters for the labware lid. These parameters are only available<br />
for labware types which can be fitted with a lid:<br />
Lid handling<br />
Check this checkbox if the labware has a lid. Choose Cover at source if you<br />
want to put on the lid before moving the labware. Choose Uncover at<br />
destination if you want to remove the lid after moving the labware to the<br />
destination position (i.e. the lid was already present). In either case, select the<br />
position for fetching or putting aside the lid by clicking on the site in the<br />
Worktable Editor. Grid and Site then show the position you have chosen. The<br />
gray (protected) field Defined Carrier shows the type of carrier on which the lid<br />
is placed/will be placed. You can only put aside lids on unused carrier sites.<br />
⌦ Transfer Labware command, Step 3<br />
Specify the parameters for the destination position:<br />
15 - 144 <strong>Freedom</strong> <strong>EVOware</strong> <strong>Software</strong> <strong>Manual</strong>, 393172, en, V<strong>2.3</strong>
15 - Script Commands<br />
Move PnP Command<br />
Destination Position<br />
Select the required destination position of the labware by clicking on the site in<br />
the Worktable Editor.<br />
The destination site must be suitable for the labware type you are moving (see<br />
9.5 “Configuring Carriers”, 9-39, “Allowed labware on this carrier”).<br />
Grid and Site then show the position you have chosen. The gray (protected)<br />
field Defined Carrier then shows the type of carrier at the chosen site.<br />
If you want to move the labware to a device such as a hotel or barcode<br />
scanner, click on the device icon. You then need to choose the site and the<br />
labware type. The list shows labware types which are allowed for the device<br />
(see 9.5 “Configuring Carriers”, 9-39, “Allowed Labware on this carrier”).<br />
Speed<br />
Choose Maximum if you want the RoMa to move at maximum speed. Choose<br />
Taught in vector dialog if you want the RoMa to move at the speed specified in<br />
the RoMa vector.<br />
Move back to Home Position<br />
Check this checkbox if you want the RoMa to move back to its home (parking)<br />
position after transferring the labware. See 9.6.4 “Defining the Home Position<br />
for a RoMa”, 9-62.<br />
15.60 Move PnP Command<br />
This command is used to carry out simple PnP movements without using a PnP<br />
vector:<br />
Fig. 15-101 Move PnP command<br />
The parameters of the Move PnP command are as follows:<br />
<strong>Freedom</strong> <strong>EVOware</strong> <strong>Software</strong> <strong>Manual</strong>, 393172, en, V<strong>2.3</strong> 15 - 145
15 - Script Commands<br />
PnP Vector Command<br />
PnP-No.<br />
Choose the PnP you want to use (1 or 2) if your instrument is fitted with more<br />
than one.<br />
Open Gripper<br />
This opens the gripper to the specified width (range: 7 to 28 mm).<br />
Close Gripper<br />
This closes the gripper to the specified width (range: 7 to 28 mm) using the<br />
specified force (range: 0 to 249). A Grip Error message is output if no<br />
resistance is detected when gripping.<br />
Move to home position<br />
This moves the PnP to the specified home position.<br />
After completing a sequence of movements with the PnP, you should move it<br />
back to its home (parking) position, out of the way of other objects on the<br />
worktable (see 9.7.4 “Defining the Home Position for a PnP”, 9-69).<br />
Move relative to current position<br />
This moves the PnP relative to its current position. You must then specify the<br />
relative distances (range: -400 to 400 mm) and whether the PnP should move<br />
at a particular speed (range: 0.1 to 400 mm/s) or at maximum speed.<br />
15.61 PnP Vector Command<br />
This command executes a PnP vector, which is a predefined sequence of PnP<br />
movements. You can also specify gripper actions at the Safe and End positions.<br />
See 9.7.1 “Using PnP Vectors”, 9-65 for more information.<br />
The PnP Vector command is intended for special PnP movements and not for<br />
moving tubes from one position to another - you should use the Transfer Tube<br />
command instead for this purpose. See also 15.61.1 “Moving tubes with the PnP<br />
Vector command”, 15-148.<br />
15 - 146 <strong>Freedom</strong> <strong>EVOware</strong> <strong>Software</strong> <strong>Manual</strong>, 393172, en, V<strong>2.3</strong>
15 - Script Commands<br />
PnP Vector Command<br />
Fig. 15-102 PnP Vector command<br />
The parameters of the PnP Vector command are as follows:<br />
PnP-No.<br />
Choose the PnP you want to use (1 or 2) if your instrument is fitted with more<br />
than one.<br />
Use PnP Vector<br />
Choose the PnP vector you want to use for the PnP movement. The popup list<br />
shows the PnP vectors which are currently defined in the <strong>Freedom</strong> <strong>EVOware</strong><br />
database.<br />
The digit at the end of the vector name (e.g. Tube 16*100mm 16 Pos_1)<br />
indicates the PnP for which the vector was defined (1 or 2). See also<br />
9.7.1 “Using PnP Vectors”, 9-65.<br />
Then specify the grid position, the carrier site and the tube position for which<br />
the vector is intended.<br />
Tip: If you click on carrier, the current grid position is shown in the small yellow<br />
tab at the bottom left.<br />
Move along PnP Vector<br />
Choose the required direction of the PnP movement. Click And back if you<br />
want the PnP to return to the Safe position after reaching the End position.<br />
Gripper action<br />
Choose the gripper action which should be executed at the Safe position and<br />
at the End position. The required gripper spacing to pick up and release the<br />
tube is taken from the Grip Distance and Release Distance parameters in the<br />
chosen PnP vector.<br />
<strong>Freedom</strong> <strong>EVOware</strong> <strong>Software</strong> <strong>Manual</strong>, 393172, en, V<strong>2.3</strong> 15 - 147
15 - Script Commands<br />
Transfer Tube Command<br />
Speed<br />
Choose Maximum if you want the PnP to move at maximum speed. Choose<br />
Slow if you want the PnP to move at the speed specified in the PnP vector.<br />
15.61.1 Moving tubes with the PnP Vector command<br />
If you have scanned the tube barcode and you move the tube with the Transfer<br />
Tube command, the barcode remains assigned to the tube (i.e. the tube data<br />
record) at the new location. In addition, pipetting information, if any, remains<br />
assigned to the tube (see 15.26 “Export Data Command”, 15-48).<br />
This is not the case with the PnP Vector command. The barcode and the pipetting<br />
information are no longer available at the new location.<br />
Proceed as follows if you want to use the PnP Vector command to move barcoded<br />
tubes in special situations:<br />
• After scanning the barcode, assign it to a temporary variable (see<br />
14.1.11 “Labware Attributes and String Variables”, 14-16).<br />
• Move the tube.<br />
• Re-assign the barcode from the temporary variable to the tube.<br />
This workaround transfers the barcode but not the pipetting information.<br />
15.62 Transfer Tube Command<br />
This command is used to transfer a tube from one position to another with the<br />
tube robot (PnP).<br />
If you have scanned the tube barcode and you move the tube with the Transfer<br />
Tube command, the barcode remains assigned to the tube (i.e. the tube data<br />
record) at the new location. In addition, pipetting information, if any, remains<br />
assigned to the tube (see 15.26 “Export Data Command”, 15-48).<br />
You do not need to specify a PnP vector with this command because each<br />
labware type (e.g. tube rack) is associated with only one PnP vector for each PnP<br />
arm, so there is no choice to make.<br />
Grip and release commands for the PnP (to pick up and put down the tube) are<br />
handled automatically. The required gripper spacing is taken from the Grip<br />
Distance and Release Distance parameters in the PnP vector for the selected<br />
labware type.<br />
15 - 148 <strong>Freedom</strong> <strong>EVOware</strong> <strong>Software</strong> <strong>Manual</strong>, 393172, en, V<strong>2.3</strong>
15 - Script Commands<br />
Transfer Tube Command<br />
Fig. 15-103 Transfer Tube command<br />
The parameters of the Transfer Tube command are as follows:<br />
Move with<br />
Choose the PnP you want to use (1 or 2) if your instrument is fitted with more<br />
than one.<br />
The Transfer Tube command will use the PnP vector (PnP movement<br />
command) which is associated with the chosen tube type. <strong>Freedom</strong> <strong>EVOware</strong><br />
will report an error when you complete the Transfer Tube command if a PnP<br />
vector has not yet been created for this tube type. It is best to create the<br />
required PnP vector in advance (see 9.7.2 “Teach Tube Robot Vector Dialog<br />
Box”, 9-65).<br />
⌦ Transfer Tube command, Step 1<br />
Specify the parameters for the source position:<br />
Source position<br />
Select the position of the source tube rack by clicking on it in the Worktable<br />
Editor. Grid and Site then show the position you have chosen. The gray<br />
(protected) field Defined Carrier shows the type of carrier at the chosen site.<br />
The gray (protected) field Defined Labware then shows the type of labware at<br />
the chosen site.<br />
Position in tube rack<br />
Specify the current position of the tube in the source tube rack. <strong>Freedom</strong><br />
<strong>EVOware</strong> counts tubes from rear to front and then from left to right.<br />
⌦ Transfer Tube command, Step 2<br />
Specify the parameters for the destination position:<br />
<strong>Freedom</strong> <strong>EVOware</strong> <strong>Software</strong> <strong>Manual</strong>, 393172, en, V<strong>2.3</strong> 15 - 149
15 - Script Commands<br />
PosID Command<br />
Destination Position<br />
Select the position of the destination tube rack by clicking on the site in the<br />
Worktable Editor. Grid and Site then show the position you have chosen. The<br />
gray (protected) field Defined Carrier then shows the type of carrier at the<br />
chosen site.<br />
Position in tube rack<br />
Specify the required position of the tube in the destination tube rack. <strong>Freedom</strong><br />
<strong>EVOware</strong> counts tubes from rear to front and then from left to right.<br />
Wipe off movement<br />
If the tubes you use carry adhesive labels, in unusual cases they may stick to<br />
the PnP fingers due to incorrectly applied labels or adhesive residues. In such<br />
cases, you can activate an optional downwards movement of the PnP directly<br />
after releasing the tube. Specify the required downwards movement in mm<br />
(range: 0 to 10 mm).<br />
Speed<br />
Choose Maximum if you want the PnP to move at maximum speed. Choose<br />
Taught in vector dialog if you want the PnP to move at the speed specified in<br />
the PnP vector.<br />
Move back to Home Position<br />
Check this checkbox if you want the PnP to move back to its home (parking)<br />
position after transferring the tube. See 9.7.4 “Defining the Home Position for<br />
a PnP”, 9-69.<br />
15.63 PosID Command<br />
The PosID command is used to read the barcode labels on one or more pieces of<br />
labware using the PosID option. The corresponding carrier or tube rack barcodes<br />
will also be scanned.<br />
The PosID (Positive Identification System) is a movable barcode scanner which<br />
can be used to read the barcode labels on carriers, labware and tubes. Unlike<br />
fixed barcode scanners, it does not need a robot to bring the labware to it. The<br />
PosID is installed at the rear of the pipetting instrument and is provided with a<br />
gripper which pulls the carrier towards the rear for barcode identification and then<br />
slides the carrier back into the pipetting position. The scanning head hinges to<br />
read barcodes which are attached to horizontal or vertical surfaces. Barcodes can<br />
be read on both the primary side (e.g. sample tube) and the secondary side (e.g.<br />
microplates).<br />
<strong>Freedom</strong> <strong>EVOware</strong> stores each scanned barcode in the internal database in the<br />
ID field of the labware record. The barcode information can also be included in<br />
report files (see 15.26 “Export Data Command”, 15-48).<br />
The Scan tab lets you choose the labware you want to scan and the Barcode<br />
types tab is used to configure the barcode types which the PosID scanner will<br />
accept for the chosen labware:<br />
15 - 150 <strong>Freedom</strong> <strong>EVOware</strong> <strong>Software</strong> <strong>Manual</strong>, 393172, en, V<strong>2.3</strong>
15 - Script Commands<br />
PosID Command<br />
Fig. 15-104 PosID command (Scan tab)<br />
The parameters of the PosID command are as follows (Scan tab):<br />
Labware to be scanned<br />
This shows the labware which <strong>Freedom</strong> <strong>EVOware</strong> will scan with this<br />
command. Click on a labware item in the Worktable Editor to add it to the list.<br />
If necessary, adjust the speed with which the labware barcode should be<br />
scanned (range 30 to 400 mm/s). The corresponding carrier or tube rack<br />
barcodes will also be scanned and do not need to be specified.<br />
Delete labware from list<br />
To remove labware from the list, select the corresponding line and click this<br />
button.<br />
Scan worktable with<br />
Specify the speed with which the carrier or tube rack barcodes should be<br />
scanned (range: 30 to 300 mm/s). Choose slower speeds if the barcodes are<br />
difficult to read or very small and to prevent spilling of the liquid in the wells as<br />
the scanner carrier is positioned.<br />
<strong>Freedom</strong> <strong>EVOware</strong> <strong>Software</strong> <strong>Manual</strong>, 393172, en, V<strong>2.3</strong> 15 - 151
15 - Script Commands<br />
PosID Command<br />
No prompt for scan errors<br />
If this option is enabled, <strong>Freedom</strong> <strong>EVOware</strong> does not display an error<br />
message if a barcode could not be read.<br />
If the carrier barcode cannot be read, the tubes or labware on this carrier won't<br />
be scanned either and are assigned default barcodes. The default barcode for<br />
labware is the grid position followed by an underscore (_) and the site number.<br />
The default barcode for tubes is the grid position followed by an underscore<br />
(_) and the tube number.<br />
The default barcode for carriers or tube racks is the carrier code followed by<br />
an underscore (_) and the grid position. The grid position is padded to 6 digits<br />
with leading zeros. The carrier code is a 3-digit code which indicates the<br />
carrier type. Example: 013_000015.<br />
If the carrier barcode can be read but a tube barcode cannot be read,<br />
<strong>Freedom</strong> <strong>EVOware</strong> assigns a default barcode which consists of three stars<br />
(***). If the tube is missing, <strong>Freedom</strong> <strong>EVOware</strong> assigns a default barcode<br />
which consists of $$$.<br />
Ignore duplicate barcodes<br />
<strong>Freedom</strong> <strong>EVOware</strong> will display an error message if the barcode scanner finds<br />
the same barcode on two different carriers or labware items.<br />
Check the Ignore duplicate barcodes checkbox to switch off this security<br />
feature and disable the error message.<br />
Write file with scan results<br />
If this option is enabled, a report file is created with the scanned barcodes.<br />
The filename is scan.csv and it is written to the configured Output directory<br />
(default path \Output). Existing files with the same name are<br />
overwritten. The file contains one line per scanned labware or tube barcode.<br />
For information on the sytax of this file see A.2.2 “Barcode file written by the<br />
PosID and PosID-3 commands”, A-13.<br />
15 - 152 <strong>Freedom</strong> <strong>EVOware</strong> <strong>Software</strong> <strong>Manual</strong>, 393172, en, V<strong>2.3</strong>
15 - Script Commands<br />
PosID Command<br />
15.63.1 PosID Command (Barcode Types Tab)<br />
The Barcode Types tab of the PosID command is used to configure the barcode<br />
types which the PosID scanner will accept for the chosen labware:<br />
Fig. 15-105 PosID command (Barcode types tab)<br />
The parameters of the PosID command are as follows (Barcode Types tab):<br />
Type<br />
Choose the barcodes types which will be accepted by the PosID scanner from<br />
the popup lists. You should only choose the barcode types which are being<br />
used on the barcode labels. This makes it easier for the scanner to identify<br />
incorrect barcodes. The PosID will report an error if it finds a barcode type<br />
which you have not chosen.<br />
<strong>Freedom</strong> <strong>EVOware</strong> <strong>Software</strong> <strong>Manual</strong>, 393172, en, V<strong>2.3</strong> 15 - 153
15 - Script Commands<br />
Waterbath Control Command<br />
Some of the barcode types have additional settings as follows:<br />
Length<br />
0 Do not check the length of the barcode.<br />
1..30 The length of the barcode must match this value (the<br />
checksum and start/stop code are also counted).<br />
Barcodes with different lengths will be ignored.<br />
Check Mode<br />
empty<br />
evaluate / transmit<br />
evaluate / don't transmit<br />
Do not check the checksum.<br />
The checksum is checked and is reported to <strong>Freedom</strong><br />
<strong>EVOware</strong> as part of the barcode.<br />
The checksum is checked but not reported.<br />
Start/Stop<br />
empty<br />
transmit<br />
don't transmit<br />
A start/stop code is not required.<br />
A start/stop code is required and is reported to <strong>Freedom</strong><br />
<strong>EVOware</strong> as part of the barcode.<br />
A start/stop code is required but not reported.<br />
15.64 Waterbath Control Command<br />
The Waterbath Control command is used to control the Lauda waterbath for the<br />
Te-Flow option. The Te-Flow option provides support for the In Situ Hybridization<br />
method.<br />
Fig. 15-106 Waterbath Control command<br />
The Te-Flow option uses a water circulation system to maintain a constant<br />
temperature in the flow through chambers that contain the labware. The water<br />
temperature is controlled using a waterbath.<br />
The parameters of the Waterbath Control command are as follows:<br />
Bath<br />
If the instrument is fitted with more than one waterbath, choose the required<br />
waterbath from the pull-down list.<br />
15 - 154 <strong>Freedom</strong> <strong>EVOware</strong> <strong>Software</strong> <strong>Manual</strong>, 393172, en, V<strong>2.3</strong>
15 - Script Commands<br />
Balance Command<br />
Set Temperature<br />
This option switches on the heater and/or cooling system. You must also<br />
specify the required temperature (range: -100 to 100 C°).<br />
Switch bath to standby<br />
This option switches the waterbath from normal mode to standby mode. In<br />
standby mode, the energy consumption is reduced and the equipment noise<br />
level is lower.<br />
Restart bath<br />
This option switches the waterbath from standby mode to normal mode. After<br />
reaching normal mode, several minutes may be required before the water<br />
circulation system can achieve the specified constant temperature again. In<br />
addition, you should also consider the thermal inertia of your equipment.<br />
15.65 Balance Command<br />
The Balance command is used to read a weight from a Mettler balance and store<br />
it in a variable.<br />
See 10.1.1 “Global Parameters for Liquid Classes”, 10-4, Liquid Arrival Check<br />
panel, for information on pooling balances such as the Mettler WM. You do not<br />
need to add a Balance command to your pipetting script to use the Liquid Arrival<br />
Check feature.<br />
Fig. 15-107 Balance command<br />
The parameters of the Balance command are as follows:<br />
Tare Balance<br />
Choose this option to tare the balance. This can be used to make a differential<br />
weight measurement, e.g.:<br />
– Put the labware on the balance.<br />
– Tare the balance; if required, you can copy the intermediate weight value<br />
to a script variable.<br />
– Dispense the sample onto the labware.<br />
<strong>Freedom</strong> <strong>EVOware</strong> <strong>Software</strong> <strong>Manual</strong>, 393172, en, V<strong>2.3</strong> 15 - 155
15 - Script Commands<br />
Balance Command<br />
– Read the weight using a second balance command. The measured value<br />
does not include the weight of the labware.<br />
The Tare Balance option must not be used if the second weight measurement<br />
is less than the first weight measurement (resulting in a negative weight<br />
difference). This is the case if you are aspirating. In this case, use the Zero<br />
Balance option instead.<br />
When using the Tare Balance option, be careful not to overload the balance.<br />
For example, if the balance is rated for 500 g and you tare the balance with an<br />
object which weighs 300 g, you can only load the balance with an additional<br />
200 g.<br />
Measure weight<br />
Choose this option to read a weight from the balance.<br />
Zero balance<br />
Choose this option to reset the balance to 0. This can be used to make a<br />
differential weight measurement, as described in Tare Balance, above. The<br />
Zero Balance option does not let you copy the intermediate weight value to a<br />
script variable. In addition, you cannot select “Wait for stabilization”.<br />
When using the Zero Balance option, be careful not to overload the balance.<br />
For example, if the balance is rated for 500 g and you tare the balance with an<br />
object which weighs 300 g, you can only load the balance with an additional<br />
200 g.<br />
Store weight in variable<br />
Specify the name of the variable you want to use to store the weight value.<br />
Wait for stabilization<br />
This activates the built-in stabilization algorithms in the balance firmware. The<br />
balance waits until the measured weight is stable. This can result in a more<br />
accurate weight measurement. However, the time required to get a<br />
measurement is slightly increased.<br />
Delay before execution<br />
Specify how long to wait before measuring the weight (default: 1000 ms). The<br />
delay you specify is in addition to the built-in stabilization delay of the balance<br />
and allows more time for mechanical stabilization if necessary.<br />
15 - 156 <strong>Freedom</strong> <strong>EVOware</strong> <strong>Software</strong> <strong>Manual</strong>, 393172, en, V<strong>2.3</strong>
15 - Script Commands<br />
Balance Send Command Command<br />
15.66 Balance Send Command Command<br />
The Balance Send Command allows you to send a firmware command directly to<br />
the Mettler balance. For example, you can use it to activate special hardware<br />
features and/or options. This command is only intended for specialists.<br />
Fig. 15-108 Balance Send Command command<br />
The parameters of the Balance Send Command command are as follows:<br />
Command<br />
Specify the firmware command you want to send to the balance. See the<br />
respective hardware manual for a list of firmware commands. Firmware<br />
commands are nearly always written uppercase.<br />
Wait for termination of command<br />
If you check this checkbox, the pipetting script will wait for the firmware<br />
command to finish before continuing; otherwise the pipetting script will be<br />
continued immediately.<br />
Store response in variable<br />
Some firmware commands terminate with a return parameter (string or<br />
numeric value). Check this checkbox if you want to store the return parameter<br />
in a variable. See the respective hardware manual for information on return<br />
parameters from firmware commands.<br />
Variable: Specify the name of the variable you want to use.<br />
Store error code in variable<br />
All firmware commands terminate with an error code.The error code is 0 if the<br />
command was executed with no errors. Check this checkbox if you want to<br />
store the error code in a variable.<br />
Variable: Specify the name of the variable you want to use.<br />
WARNING<br />
Risk of injury to operating personnel or damage to the equipment<br />
• Take care when sending firmware commands. Sending the wrong commands<br />
can result in a malfunction of the balance or cause damage to the hardware.<br />
<strong>Freedom</strong> <strong>EVOware</strong> <strong>Software</strong> <strong>Manual</strong>, 393172, en, V<strong>2.3</strong> 15 - 157
15 - Script Commands<br />
Send Command Command<br />
15.67 Send Command Command<br />
The Send Command command allows you to send a firmware command directly<br />
to the pipetting instrument. This command is only intended for specialists.<br />
Fig. 15-109 Send Command command<br />
The parameters of the Send Command command are as follows:<br />
Command<br />
Specify the firmware command you want to send to the instrument. For<br />
example, “A1RPZ0” returns the current Z position of each of the LiHa tips. See<br />
the respective instrument manual for a list of firmware commands. Firmware<br />
commands are nearly always written uppercase.<br />
Wait for termination of command<br />
If you check this checkbox, the pipetting script will wait for the firmware<br />
command to finish before continuing; otherwise the pipetting script will be<br />
continued immediately.<br />
Store response in variable<br />
Some firmware commands terminate with one or more return parameters<br />
(numeric values) separated by commas. Check this checkbox if you want to<br />
store one of the return codes in a variable. See the respective instrument<br />
manual for information on return parameters from firmware commands.<br />
Parameter: Specify which one of the return parameters you want to store.<br />
Variable: Specify the name of the variable you want to use.<br />
Store error code in variable<br />
All firmware commands terminate with an error code.The error code is 0 if the<br />
command was executed with no errors. Check this checkbox if you want to<br />
store the error code in a variable.<br />
Variable: Specify the name of the variable you want to use.<br />
WARNING<br />
Risk of injury to operating personnel or damage to the equipment<br />
• Take care when sending firmware commands. Sending the wrong commands<br />
can damage the instrument or objects in its workspace, hurt yourself or other<br />
people.<br />
15 - 158 <strong>Freedom</strong> <strong>EVOware</strong> <strong>Software</strong> <strong>Manual</strong>, 393172, en, V<strong>2.3</strong>
15 - Script Commands<br />
MCA96 Commands<br />
15.68 MCA96 Commands<br />
The MCA96 (Multi Channel Arm 96) is a special liquid handling arm which is fitted<br />
with a 96-tip pipetting head. The pipetting head can be fitted with a tipblock (a<br />
replaceable block with 96 tips) or with DITIs. The spacing between the tips is fixed<br />
(9 mm).<br />
The MCA96 can be optionally fitted with gripper fingers to allow it to pick up and<br />
move labware. In contrast to the RoMa, the gripper fingers cannot be rotated (they<br />
are always parallel to the X axis of the pipetting instrument).<br />
The MCA96 has important performance advantages when pipetting to a large<br />
number of wells simultaneously. For mechanical reasons, the same volume is<br />
pipetted by all of the tips.<br />
For mechanical reasons, the MCA96 tipblock, DiTi rack, trough and wash block<br />
can only be used on the carrier type “MCA96 Carrier”. These four labware types<br />
cannot be used on other carrier types.<br />
<strong>Freedom</strong> <strong>EVOware</strong> is provided with special liquid classes which should be used<br />
for pipetting with the MCA96.<br />
15.68.1 MCA96 Aspirate Command<br />
The MCA96 Aspirate command is used to pick up liquid from specified positions<br />
on the worktable of the pipetting instrument using the multi channel arm.<br />
Fig. 15-110 MCA96 Aspirate command<br />
The parameters of the MCA96 Aspirate command are as follows:<br />
<strong>Freedom</strong> <strong>EVOware</strong> <strong>Software</strong> <strong>Manual</strong>, 393172, en, V<strong>2.3</strong> 15 - 159
15 - Script Commands<br />
MCA96 Commands<br />
Liquid Class<br />
Choose the required liquid class from the pull down list. The list only shows<br />
liquid classes which are suitable for the current configuration of the pipetting<br />
instrument.<br />
Click the Editor button to start the liquid classes editor if you want to create a<br />
new class or modify an existing class (see 10 “Configuring Liquid Classes”,<br />
10-1). Furthermore you can customize an existing liquid class for use by<br />
this command only (click the Customize button). If you customize an existing<br />
liquid class, the liquid class name is shown in the script command and in the<br />
script editor within double angled brackets “>> name
15 - Script Commands<br />
MCA96 Commands<br />
15.68.2 MCA96 Dispense Command<br />
The MCA96 Dispense command is used to dispense liquid to specified positions<br />
on the worktable of the pipetting instrument using the multi channel arm.<br />
Fig. 15-111 MCA96 Dispense command<br />
The parameters of the MCA96 Dispense command are as follows:<br />
Liquid Class<br />
Choose the required liquid class from the pull down list. The list only shows<br />
liquid classes which are suitable for the current configuration of the pipetting<br />
instrument.<br />
Click the Editor button to start the liquid classes editor if you want to create a<br />
new class or modify an existing class (see 10 “Configuring Liquid Classes”,<br />
10-1). Furthermore you can customize an existing liquid class for use by<br />
this command only (click the Customize button and click the Dispense tab). If<br />
you customize an existing liquid class, the liquid class name is shown in the<br />
script command and in the script editor within double angled brackets “>><br />
name
15 - Script Commands<br />
MCA96 Commands<br />
Loop Options<br />
If you are using the command in a script loop, click this button if you want to<br />
specify loop options. This allows you to use a different column, row, well and/<br />
or labware item for each cycle of the loop. The gray (protected) field shows<br />
the number of loop options you have chosen. See 14.4 “Loop Options”, 14-<br />
23.<br />
Volume<br />
Specify the required pipetting volume. The same volume is dispensed by all of<br />
the tips. The maximum allowed volume is the plunger or DITI capacity<br />
(<strong>Freedom</strong> <strong>EVOware</strong> does not automatically handle volumes that exceed the<br />
plunger or DITI capacity).<br />
Compartment in well<br />
Some special labware types (e.g. for protein crystallography) have wells with<br />
several compartments (cavities). <strong>Freedom</strong> <strong>EVOware</strong> can pipette a different<br />
liquid into each of the compartments. Each well typically has one main<br />
compartment and one or more satellite compartments which are directly<br />
adjacent and are often smaller in size. Choose the compartment which you<br />
want to use for pipetting (the main compartment is normally compartment 1).<br />
Well compartments are specified in the labware configuration. This field is<br />
inactive (gray) if the well only has one compartment.<br />
Location<br />
Specify the required labware by clicking on the labware in the Worktable<br />
Editor. You must first put an appropriate labware item in the Worktable Editor<br />
at the required position. The gray (protected) field above the location panel<br />
then shows the label (name) of the labware that you have selected (it shows a<br />
generic name if you have not assigned a label).<br />
If the MCA96 pipetting head has less tips than the number of wells in the<br />
labware, you must click in the Location panel to select the set of wells you<br />
want to use. This is not necessary if the pipetting head has the same number<br />
of tips as the number of wells in the labware. Your selection will be shown in<br />
green.<br />
15.68.3 MCA96 Mix Command<br />
The MCA96 Mix command performs a mix operation by aspirating and then<br />
dispensing at the same position using the multi channel arm.<br />
15 - 162 <strong>Freedom</strong> <strong>EVOware</strong> <strong>Software</strong> <strong>Manual</strong>, 393172, en, V<strong>2.3</strong>
15 - Script Commands<br />
MCA96 Commands<br />
Fig. 15-112 MCA96 Mix command<br />
The parameters of the MCA96 Mix command are as follows:<br />
Liquid Class<br />
Choose the required liquid class from the pull down list. The list only shows<br />
liquid classes which are suitable for the current configuration of the pipetting<br />
instrument.<br />
Click the Editor button to start the liquid classes editor if you want to create a<br />
new class or modify an existing class (see 10 “Configuring Liquid Classes”,<br />
10-1). Furthermore you can customize an existing liquid class for use by<br />
this command only (click the Customize button and click the Aspirate or<br />
Dispense tab). If you customize an existing liquid class, the liquid class name<br />
is shown in the script command and in the script editor within double angled<br />
brackets “>> name
15 - Script Commands<br />
MCA96 Commands<br />
Volume<br />
Specify the volume that you want to aspirate for the mixing process. The same<br />
volume is pipetted by all of the tips. The maximum allowed volume is the<br />
plunger or DITI capacity (<strong>Freedom</strong> <strong>EVOware</strong> does not automatically handle<br />
volumes that exceed the plunger or DITI capacity).<br />
Cycles<br />
Specify how often you want to repeat the mixing process.<br />
Compartment in well<br />
Some special labware types (e.g. for protein crystallography) have wells with<br />
several compartments (cavities). <strong>Freedom</strong> <strong>EVOware</strong> can pipette a different<br />
liquid into each of the compartments. Each well typically has one main<br />
compartment and one or more satellite compartments which are directly<br />
adjacent and are often smaller in size. Choose the compartment which you<br />
want to use for pipetting (the main compartment is normally compartment 1).<br />
Well compartments are specified in the labware configuration. This field is<br />
inactive (gray) if the well only has one compartment.<br />
Location<br />
Specify the required labware by clicking on the labware in the Worktable<br />
Editor. You must first put an appropriate labware item in the Worktable Editor<br />
at the required position. The gray (protected) field above the location panel<br />
then shows the label (name) of the labware that you have selected (it shows a<br />
generic name if you have not assigned a label).<br />
If the MCA96 pipetting head has less tips than the number of wells in the<br />
labware, you must click in the Location panel to select the set of wells you<br />
want to use. This is not necessary if the pipetting head has the same number<br />
of tips as the number of wells in the labware. Your selection will be shown in<br />
green.<br />
15.68.4 MCA96 Wash Command<br />
The MCA96 Wash command is used to wash MCA96 tips or MCA96 DITIs using<br />
the specified MCA96 wash block. The MCA96 wash block is intended for 96-tip<br />
MCA96 tip blocks and 96-tip DITi pipetting heads and is connected to the MCA96<br />
Wash & Refill Center (WRC) through tubing. The MCA96 hardware supports up to<br />
two MCA96 wash blocks (each one with its own control unit). You can only put<br />
MCA96 wash blocks on the carrier type “MCA96 Carrier”.<br />
15 - 164 <strong>Freedom</strong> <strong>EVOware</strong> <strong>Software</strong> <strong>Manual</strong>, 393172, en, V<strong>2.3</strong>
15 - Script Commands<br />
MCA96 Commands<br />
Fig. 15-113 MCA96 Wash command<br />
The wash process normally consists of one Empty Tips step and one or more<br />
Cleaner steps. Start by choosing the required number of cleaner steps in the No.<br />
of Cleaner Steps field.<br />
The parameters and steps of the MCA96 Wash command are as follows:<br />
Set values for<br />
Different wash parameters are needed for each of the MCA96 tip types.<br />
Choose the MCA96 tip type you are using from the pull-down list. This<br />
configures the MCA96 Wash command with the recommended wash<br />
parameters for the chosen tip type.<br />
If you modify the recommended settings after choosing the tip type, the pulldown<br />
list will show “Edited values” instead of the tip type you chose.<br />
The parameter sets with the recommended wash parameters are stored in the<br />
evoware.inf file (see A.4 “Parameters in the Evoware.inf file”, A-24, MCA96<br />
Wash Parameters). The parameters in the evoware.inf file should only be<br />
changed by specialists.<br />
In addition to choosing the tip type in the pull-down list, if you want to wash the<br />
whole outside of the tips (the whole length) you may need to adapt the liquid<br />
class parameter “Aspiration position, Z-offset” for the liquid class which is<br />
used for the first cleaner step (default “WRC step 2 dip in”) to ensure that the<br />
tips dip far enough into the wash liquid. A positive value for Z-offset lowers the<br />
tips. Note: You cannot change the properties of the pre-defined (standard)<br />
liquid classes. However you can create a new custom class with the same<br />
properties and then change them.<br />
Note: Take care to choose a parameter set to match the tips you are using and to<br />
adjust the Z-offset correctly. Incorrect parameters can lead to incomplete washing<br />
of the tips, which could cause cross-contamination under unfavorable<br />
circumstances.<br />
Empty Tips step<br />
This step will only be executed if the excess volume or the leading airgap is<br />
still in the tips or the MCA96 plunger has not reached the start position.<br />
During this step, the MCA96 head moves to the Z-dispense position above the<br />
wash block and any remaining liquid is expelled from the tips.<br />
<strong>Freedom</strong> <strong>EVOware</strong> <strong>Software</strong> <strong>Manual</strong>, 393172, en, V<strong>2.3</strong> 15 - 165
15 - Script Commands<br />
MCA96 Commands<br />
Cleaner step<br />
During each cleaner step, the MCA96 moves the tips into the wash block to<br />
the Z-max position and waits for the specified soak time. The MCA96 then<br />
aspirates and dispenses the specified volume of wash liquid. Specify the<br />
Cycles parameter to repeat aspiration and dispensing several times if<br />
necessary. The WRC washing pumps operate during the entire cleaner step.<br />
The MCA96 head moves up and the washing pumps stop at the end of each<br />
step.<br />
You can specify the wash liquid (1 or 2) you want to use in the wash block. In<br />
addition, the wash block can be flushed for a specified time before starting<br />
(Preflush) and after finishing (Postflush) each step.<br />
Wash position<br />
For each of the steps, click on this table field and choose the required wash<br />
block from the pull down list. The list shows all MCA96 wash blocks which are<br />
currently positioned on the MCA96 in the Worktable Editor (the grid position<br />
and the site of the wash block site are shown in brackets). The MCA96<br />
hardware supports up to two MCA96 wash blocks. You can only put MCA96<br />
wash blocks on the carrier type “MCA96 Carrier”.<br />
Wash liquid<br />
You can connect two different wash liquid containers to the WRC. Specify the<br />
wash liquid you want to use in the wash block.<br />
Flow through [%]<br />
Specify the flow rate of the pressure pump of the WRC (range: 1 - 100%;<br />
100% is the maximum flow rate).<br />
Preflush [s]<br />
Specify how long the wash block should be flushed at the beginning of the<br />
step (range: 0 -1000 s).<br />
Soak time [s]<br />
Specify how long the tips should soak in the wash block before aspirating and<br />
dispensing the wash liquid (range: 0 - 200 s). You must specify at least 1 s for<br />
the last Cleaner step.<br />
Liquid Class<br />
Choose the liquid class of the wash liquid from the pull down list. Click the<br />
Editor button below the table to start the liquid classes editor if you want to<br />
create a new class or modify an existing class (see 10 “Configuring Liquid<br />
Classes”, 10-1).<br />
Volume [µl]<br />
Specify the required volume of wash liquid in the cleaner step. The maximum<br />
allowed volume is the dilutor or DITI capacity (<strong>Freedom</strong> <strong>EVOware</strong> does not<br />
automatically handle volumes that exceed the dilutor or DITI capacity).<br />
Cycles<br />
Specifies how many times aspiration and dispensing of the wash liquid takes<br />
place in the cleaner step. If you specify 0, aspiration and dispensing the wash<br />
liquid will not be carried out.<br />
Change [µl]<br />
Specify an optional volume of wash liquid which is added to the specified<br />
aspiration and dispense volume for each subsequent cycle of the cleaner<br />
step. A negative value means that less wash liquid will be used for each<br />
subsequent cycle. This parameter can be used to optimize the effectiveness<br />
of the washing process. The total volume (Volume + Change) should not<br />
exceed the dilutor or DITI capacity (<strong>Freedom</strong> <strong>EVOware</strong> does not automatically<br />
handle volumes that exceed the plunger or DITI capacity).<br />
15 - 166 <strong>Freedom</strong> <strong>EVOware</strong> <strong>Software</strong> <strong>Manual</strong>, 393172, en, V<strong>2.3</strong>
15 - Script Commands<br />
MCA96 Commands<br />
Postflush [s]<br />
Specify how long the wash block should be flushed at the end of the step<br />
(range: 0 - 1000 s).<br />
Liquid class editor<br />
Click the Editor button to start the liquid classes editor if you want to create a<br />
new class or modify an existing class (see 10 “Configuring Liquid Classes”,<br />
10-1).<br />
Use wash sensor on station 1 / station 2<br />
The MCA96 hardware supports up to two MCA96 Wash Blocks. Use the<br />
checkboxes to switch the wash liquid level detection on or off for the two wash<br />
blocks. The wash block sensors should normally be switched on for both wash<br />
blocks, but can be disabled e.g. if you are using a wash liquid with a high<br />
electrical resistance which cannot be detected reliably.<br />
15.68.5 MCA96 Get DITIs Command<br />
The MCA96 Get DITIs command is used to pick up disposable tips for the multi<br />
channel arm from a specified position on the worktable of the pipetting instrument.<br />
For mechanical reasons, you can only put MCA96 DITI racks on the carrier type<br />
“MCA96 Carrier”.<br />
Fig. 15-114 MCA96 Get DITIs command<br />
The parameters of the MCA96 Get DITIs command are as follows:<br />
Position<br />
Specify the position where the MCA96 should get the DITIs by clicking on the<br />
MCA96 DITI rack in the Worktable Editor. The type or label (name), the grid<br />
position and the site of the DITI rack are then shown in the gray (protected)<br />
fields. You must first put an MCA96 DITI rack in the Worktable Editor at the<br />
required position. You can only put MCA96 DITI racks on the carrier type<br />
“MCA96 Carrier”.<br />
Blowout airgap<br />
Specify the volume of air to aspirate directly before getting the DITIs (range: 0<br />
to 150 µl). When the tips are washed, the air is dispensed at the end of the<br />
wash procedure and serves to make sure that all of the wash liquid remaining<br />
in the tips is discarded. In contrast to the Leading Airgap (which is specified in<br />
the liquid classes), the blowout airgap is only relevant for washing the tips and<br />
is not dispensed by the Dispense command.<br />
<strong>Freedom</strong> <strong>EVOware</strong> <strong>Software</strong> <strong>Manual</strong>, 393172, en, V<strong>2.3</strong> 15 - 167
15 - Script Commands<br />
MCA96 Commands<br />
Pickup Rows, Columns<br />
Specify how many rows and columns of DITIs you want to pick up. Specify 8<br />
rows and 12 columns if you want to pick up DITIs for all tip positions. Your<br />
settings are used internally by <strong>Freedom</strong> <strong>EVOware</strong> to adjust the mechanical<br />
force which is needed to pick up the DITIs. The force is proportional to the<br />
total number of DITIs (see A.3 “Parameters in the Evoware.opt file”, A-17,<br />
[MCA] section). Your settings are also used to assign pipetting information to<br />
the correct tip positions in report files created with the Export Data command.<br />
Your settings do not affect how many tips are picked up. If you want to pick up<br />
less than 96 tips you must either:<br />
– Use a DITI rack which does not have DITIs at all tip positions and pick up<br />
the DITIs without using an offset, or<br />
– Offset the MCA96 pipetting head using the MCA96 Relative Movements<br />
command before picking up the DITIs (see 15.68.9 “MCA96 Relative<br />
Movements Command”, 15-171).<br />
Remove rack<br />
This checkbox is only available in <strong>Freedom</strong> <strong>EVOware</strong> Plus and is intended<br />
for nested DITIs labware. This labware type uses a special DITI rack design<br />
with 96 DITIs which can be stacked to form a pile of racks. Check this<br />
checkbox if you want the Get DITIs command to remove and discard the<br />
empty rack after all the DITIs in the layer have been used. This reveals the<br />
next layer of unused DITIs below. The rack is removed and discarded using<br />
the RoMa. This is handled by a special process which is provided for this<br />
purpose.<br />
If you check this checkbox, you must specify a special DITI waste location for<br />
discarding the empty DITI racks. To do this, right click on a DITI waste on the<br />
worktable and choose Waste for DITI racks from the context menu. A tick<br />
alongside this context menu item shows that this location will then be used for<br />
the empty DITI racks. This option is only available for the DITI waste site of a<br />
DITI carrier with waste and is only intended for discarding empty DITI racks.<br />
<strong>Freedom</strong> <strong>EVOware</strong> <strong>Standard</strong>: You must use a RoMa command to discard<br />
the empty rack after all the DITIs in the layer have been used.<br />
15.68.6 MCA96 Drop DITIs Command<br />
The MCA96 Drop DITIs command is used to return the disposable tips of the multi<br />
channel arm to a specified position on the worktable of the pipetting instrument.<br />
For mechanical reasons, you can only put MCA96 DITI racks on the carrier type<br />
“MCA96 Carrier”.<br />
Fig. 15-115 MCA96 Drop DITIs command<br />
15 - 168 <strong>Freedom</strong> <strong>EVOware</strong> <strong>Software</strong> <strong>Manual</strong>, 393172, en, V<strong>2.3</strong>
15 - Script Commands<br />
MCA96 Commands<br />
The parameters of the MCA96 Drop DITIs command are as follows:<br />
Back to source<br />
This option returns the DITIs back to the grid and site position from where they<br />
were fetched with the MCA96 Get DITIs command.<br />
Note: If you switch off the pipetting instrument with the DITIs still attached, it will<br />
forget the grid and site position from where the DITIs were fetched. The option<br />
Back to source will then display an error message when the script is validated.<br />
Back to position<br />
Specify the position where the MCA96 should return the DITIs by clicking on<br />
the MCA96 DITI rack in the Worktable Editor. The type or label (name), the<br />
grid position and the site of the DITI rack are then shown in the gray<br />
(protected) fields. You must first put a MCA96 DITI rack in the Worktable<br />
Editor at the required position. You can only put MCA96 DITI racks on the<br />
carrier type “MCA96 Carrier”.<br />
Remove rack<br />
This checkbox is only available in <strong>Freedom</strong> <strong>EVOware</strong> Plus and is intended<br />
for nested DITIs labware. This labware type uses a special DITI rack design<br />
with 96 DITIs which can be stacked to form a pile of racks. Check this<br />
checkbox if you want the Drop DITIs command to remove and discard the<br />
rack after putting down the DITIs. A special process is then started which<br />
carries out the following movements:<br />
– The DITIs are put down on the pile of nested tips.<br />
– The RoMa picks up the rack on the top of the pile together with the DITIs<br />
and discards them.<br />
If you check this checkbox, you must choose a special DITI waste location for<br />
discarding the DITI racks and the DITIs. To do this, right click on a DITI waste<br />
on the worktable and choose Waste for DITI racks from the context menu. A<br />
tick alongside this context menu item shows that this location will then be<br />
used for the empty DITI racks. This option is only available for the DITI waste<br />
site of a DITI carrier with waste and is only intended for discarding empty DITI<br />
racks.<br />
<strong>Freedom</strong> <strong>EVOware</strong> <strong>Standard</strong>: You must use a RoMa command if you want<br />
to discard the rack.<br />
15.68.6.1 Side movements when dropping MCA96 DITIs<br />
Under unusual environmental conditions (e.g. very dry ambient air), MCA96 DITIs<br />
may not drop reliably due to electrostatic charging of the plastic tips. In such<br />
cases, you can specify an optional side and/or vertical movement of the MCA96<br />
pipetting head directly after releasing the tips.<br />
This is done by adding entries to the [MCA] section of the configuration file<br />
evoware.opt using a text editor. evoware.opt is in the \Database<br />
directory.<br />
Add the following line to move by 10 instrument steps (10 x 0.1 mm) in the X<br />
direction:<br />
DITI_SIDE_STEPS_X=10<br />
Add the following line to move by 20 instrument steps in the Y direction:<br />
DITI_SIDE_STEPS_Y=20<br />
Add the following line to move by 15 instrument steps in the Z direction:<br />
DITI_SIDE_STEPS_Z=15<br />
Recommended value for DITI_SIDE_STEPS_X when using this feature: -180<br />
<strong>Freedom</strong> <strong>EVOware</strong> <strong>Software</strong> <strong>Manual</strong>, 393172, en, V<strong>2.3</strong> 15 - 169
15 - Script Commands<br />
MCA96 Commands<br />
Recommended value for DITI_SIDE_STEPS_Y when using this feature: 0<br />
Recommended value for DITI_SIDE_STEPS_Z when using this feature: 90<br />
To disable this feature, set the values to 0 or remove the entries from the<br />
evoware.opt file.<br />
The above settings only affect the MCA96 Drop DITIs command.<br />
Note: <strong>Freedom</strong> <strong>EVOware</strong> must be re-started for the changes to take effect.<br />
Configuration files are protected with checksums. When you re-start <strong>Freedom</strong><br />
<strong>EVOware</strong> after editing evoware.opt, you will be warned that this file now has an<br />
invalid checksum. Confirm the prompt with Yes and proceed as follows to repair<br />
the checksum:<br />
• Click Configure in the Toolbar to start the Configuration Tool. You will be<br />
warned again that evoware.opt has an invalid checksum and you will be<br />
asked if you want to checksum to be repaired. Click Yes. Then Click Exit to<br />
return to <strong>Freedom</strong> <strong>EVOware</strong>.<br />
15.68.7 MCA96 Get Tip Block Command<br />
The MCA96 Get Tip Block command is used to pick up a tip block for the MCA96<br />
from a specified position on the worktable of the pipetting instruments. For<br />
mechanical reasons, you can only put MCA96 tip blocks on the carrier type<br />
“MCA96 Carrier”.<br />
Fig. 15-116 MCA96 Get Tip Block command<br />
The parameters of the MCA96 Get Tip Block command are as follows:<br />
Position<br />
Specify the position where the MCA96 should get the tip block by clicking on<br />
the MCA96 tip block in the Worktable Editor. The type or label (name), the grid<br />
position and the site of the tip block are then shown in the gray (protected)<br />
fields. You must first put a MCA96 tip block in the Worktable Editor at the<br />
required position. You can only put MCA96 tip blocks on the carrier type<br />
“MCA96 Carrier”.<br />
15 - 170 <strong>Freedom</strong> <strong>EVOware</strong> <strong>Software</strong> <strong>Manual</strong>, 393172, en, V<strong>2.3</strong>
15 - Script Commands<br />
MCA96 Commands<br />
Blowout airgap<br />
Specify the volume of air to aspirate directly before getting the tip block<br />
(range: 0 to 150 µl). When the tips are washed, the air is dispensed at the end<br />
of the wash procedure and serves to make sure that all of the wash liquid<br />
remaining in the tips is discarded. In contrast to the Leading Airgap (which is<br />
specified in the liquid classes), the blowout airgap is only relevant for washing<br />
the tips and is not dispensed by the Dispense command.<br />
15.68.8 MCA96 Drop Tip Block Command<br />
The MCA96 Drop Tip Block command is used to put down the tipblock of the<br />
MCA96 at a specified position on the worktable of the pipetting instrument. For<br />
mechanical reasons, you can only put MCA96 DITI tip blocks on the carrier type<br />
“MCA96 Carrier”.<br />
Fig. 15-117 MCA96 Drop Tip Block command<br />
The parameters of the MCA96 Drop Tip Block command are as follows:<br />
Back to source<br />
This option returns the tip block back to the grid and site position from where it<br />
was fetched with the MCA96 Get Tip Block command.<br />
Note: If you switch off the pipetting instrument with the tip block still attached, it<br />
will forget the grid and site position from where the tip block was fetched. The<br />
option Back to source will then display an error message when the script is<br />
validated.<br />
Back to position<br />
Specify the position where the MCA96 should discard the tip block by clicking<br />
on the MCA96 tip block in the Worktable Editor. The type or label (name), the<br />
grid position and the site of the tip block are then shown in the gray<br />
(protected) fields. You must first put a MCA96 tip block in the Worktable Editor<br />
at the required position. The gray (protected) field then shows the type or the<br />
label (name) of the selected item. You can only put MCA96 tip blocks on the<br />
carrier type “MCA96 Carrier”.<br />
15.68.9 MCA96 Relative Movements Command<br />
The MCA96 Relative Movements command is used to perform movements of the<br />
MCA96 with an offset. It can be used e.g. to program a serial dilution.<br />
<strong>Freedom</strong> <strong>EVOware</strong> <strong>Software</strong> <strong>Manual</strong>, 393172, en, V<strong>2.3</strong> 15 - 171
15 - Script Commands<br />
MCA96 Commands<br />
The MCA96 (multi channel arm) is normally used to perform pipetting operations<br />
on all of the wells of the labware simultaneously, whereby the MCA96 pipetting<br />
head is positioned directly above the labware. However, it can also be used to<br />
carry out operations such as serial dilution. In this case, pipetting takes place to<br />
one column or one row of the labware at a time. This is achieved by only picking<br />
up DITIs for a single column or row and positioning the MCA96 head with an<br />
offset to align the DITIs with the required wells.<br />
To pick up DITIs for the required column or row of the MCA96 head, load the DITIs<br />
into only one column or row of the new DITI rack and then use the MCA96 Get<br />
DITIs command in the normal way (with an offset of 0). See also Fetching DITIs,<br />
below.<br />
For fixed tips, you can use a special tip block which only has tips fitted to one row<br />
or column.<br />
Fig. 15-118 MCA96 Relative Movements command<br />
The graphical illustration in the dialog box for this command shows the wells of the<br />
labware (or tip positions of the DITI rack) and not the tips on the MCA96 pipetting<br />
head.<br />
For example, if you pick up DITIs after moving the MCA96 pipetting head to the<br />
rear right side of the DITI rack (the positions at the rear right side of the illustration<br />
are marked green, see figure), the DITIs will be picked up on the front left side of<br />
the pipetting head.<br />
The parameters of the MCA96 Relative Movements command are as follows:<br />
Row offset (fit tips on front side of MCA96 head)<br />
Specify the required row offset. Fit the tips on the front row(s) of the MCA96<br />
head.<br />
Row offset (fit tips on rear side of MCA96 head)<br />
Specify the required row offset. Fit the tips on the rear row(s) of the MCA96<br />
head.<br />
15 - 172 <strong>Freedom</strong> <strong>EVOware</strong> <strong>Software</strong> <strong>Manual</strong>, 393172, en, V<strong>2.3</strong>
15 - Script Commands<br />
MCA96 Commands<br />
Column offset (fit tips on left side of MCA96 head)<br />
Specify the required column offset. Fit the tips on the left column(s) of the<br />
MCA96 head.<br />
Column offset (fit tips on right side of MCA96 head)<br />
Specify the required column offset. Fit the tips to the right column(s) of the<br />
MCA96 head.<br />
Switch off offset<br />
This cancels a previously specified offset (row and column) and resets the<br />
MCA96 pipetting head to the default position. It has the same effect as<br />
specifying a row offset of 0 and a column offset of 0.<br />
Note: You must switch off the offset before fetching a tipblock with the MCA96<br />
Get Tipblock command. In addition, it is recommended to switch off the offset<br />
when you no longer want to use MCA96 offsets in your script.<br />
Fetching DITIs<br />
If required, you can specify a row or column offset before fetching the DITIs with<br />
the MCA96 Get DITIs command. Use this feature if you do not want to pick up<br />
DITIs for all of the rows or columns of the pipetting head. If you use an offset,<br />
make sure that the pipetting head will not collide with other objects, e.g. other<br />
DITIs in the DITI rack. Please contact Tecan for further information.<br />
Note: You can also specify variables in the row offset and column offset fields.<br />
This can be used to offset the MCA96 pipetting head incrementally within a loop of<br />
your pipetting script.<br />
<strong>Freedom</strong> <strong>EVOware</strong> <strong>Software</strong> <strong>Manual</strong>, 393172, en, V<strong>2.3</strong> 15 - 173
15 - Script Commands<br />
MCA96 Commands<br />
15.68.10 MCA96 Move Command<br />
The MCA96 Move command is used to move the MCA96 from one position to<br />
another without performing an Aspirate or Dispense operation:<br />
Fig. 15-119 MCA96 Move command<br />
The parameters of the MCA96 Move command are as follows:<br />
Loop options<br />
If you are using the command in a script loop, click this button if you want to<br />
specify loop options. This allows you to use a different column, row, well and/<br />
or labware item for each cycle of the loop. The gray (protected) field shows<br />
the number of loop options you have chosen. See 14.4 “Loop Options”, 14-<br />
23.<br />
Type of movement<br />
Choose X-Move, Y-Move or Z-Move to move only one axis of the MCA96. You<br />
can then specify the speed of the movement.<br />
The options Positioning with global Z-travel and Positioning with local Z-travel<br />
move the MCA96 to the labware at maximum speed. Z-travel is the tip height<br />
which is used during the arm movement.<br />
Z-Position<br />
Unless you have chosen X-Move or Y-Move in the Type of Movement field,<br />
you can specify the Z-Position to which the tips should be lowered at the end<br />
of the MCA96 movement. Choose the required Z-position and then specify a Z<br />
offset in mm if required. A positive value for the offset lowers the tips.<br />
15 - 174 <strong>Freedom</strong> <strong>EVOware</strong> <strong>Software</strong> <strong>Manual</strong>, 393172, en, V<strong>2.3</strong>
15 - Script Commands<br />
MCA96 Commands<br />
Compartment in well<br />
Some special labware types (e.g. for protein crystallography) have wells with<br />
several compartments (cavities). <strong>Freedom</strong> <strong>EVOware</strong> can pipette a different<br />
liquid into each of the compartments. Each well typically has one main<br />
compartment and one or more satellite compartments which are directly<br />
adjacent and are often smaller in size. Choose the compartment which you<br />
want to use for pipetting (the main compartment is normally compartment 1).<br />
Well compartments are specified in the labware configuration. This field is<br />
inactive (gray) if the well only has one compartment.<br />
Location<br />
Select the labware which you want to use by clicking on the labware in the<br />
Worktable Editor. The gray (protected) field at the top right of the Location<br />
panel shows the label (name) of the labware that you have selected (it shows<br />
a generic name if you have not assigned a label).<br />
If the MCA96 pipetting head has less tips than the number of wells in the<br />
labware, you must then click in the Location panel to select the set of wells<br />
you want to use. This is not necessary if the pipetting head has the same<br />
number of tips as the number of wells in the labware. Your well selection is<br />
shown in green.<br />
Cursor (x,y)<br />
You can also select wells by entering the x coordinate (from left to right) and<br />
the y coordinate (from top to bottom) of the top left well you want to select. Tip:<br />
The x and y coordinates of each well are shown in a tool tip if you move the<br />
cursor over the well area in the Location panel.<br />
Select: Click this button to select the wells you have specified in the Cursor<br />
(x,y) field. This button has no effect if your well selection does not fit within the<br />
well area of the labware. In addition, it has no effect if the pipetting head has<br />
the same number of tips as the number of wells in the labware.<br />
15.68.11 MCA96 Vector Command<br />
The MCA96 Vector command executes an MCA96 vector, which is a predefined<br />
sequence of MCA96 movements. You can also specify gripper actions at the Safe<br />
and End positions. Gripper actions require the MCA96 gripper option.<br />
MCA96 vectors are very similar to RoMa vectors. See 9.6.1 “Using RoMa<br />
Vectors”, 9-58. The main difference is that the MCA96 gripper fingers cannot be<br />
rotated (they are always parallel to the X axis of the pipetting instrument).<br />
Accordingly, you cannot specify the R axis for MCA96 vectors.<br />
When setting up the hardware, the MCA96 gripper option can be attached to the<br />
MCA96 pipetting head on the left side with the gripper fingers pointing to the right<br />
(under the head) or on the right side with the gripper fingers pointing to the left<br />
(under the head) or to the right (away from the head). On the left side and pointing<br />
to the left is not supported.<br />
The MCA96 Vector command is intended for special MCA96 movements and not<br />
for moving labware from one position to another - you should use the MCA96<br />
Transfer Labware command instead for this purpose. See 15.58.1 “Moving<br />
labware with the RoMa Vector command”, 15-142 for additional information<br />
which is also applicable to the MCA96.<br />
<strong>Freedom</strong> <strong>EVOware</strong> <strong>Software</strong> <strong>Manual</strong>, 393172, en, V<strong>2.3</strong> 15 - 175
15 - Script Commands<br />
MCA96 Commands<br />
Fig. 15-120 MCA96 Vector command<br />
The parameters of the MCA96 Vector command are as follows:<br />
MCA96-No.<br />
The pull-down list is gray (inactive) and preset to MCA 1 because current<br />
<strong>Freedom</strong> EVO pipetting instruments can only be fitted with one MCA96.<br />
Use MCA96 Vector<br />
Choose the MCA96 vector you want to use for the MCA96 movement. The<br />
popup list shows the MCA96 vectors which are currently defined in the<br />
<strong>Freedom</strong> <strong>EVOware</strong> database.<br />
The digit at the end of the vector name (e.g. MP 3Pos_Narrow_MCA_1)<br />
indicates the MCA96 for which the vector was defined (1 or 2).<br />
Then specify the grid position and carrier site for which the vector is intended.<br />
The Grid field is protected (gray) if you have chosen a vector for a device<br />
which is not positioned on the worktable (see Carrier is Device checkbox in<br />
the carrier definition).<br />
Tip: If you click on a carrier, the current grid position is shown in the small<br />
yellow tab at the bottom left.<br />
Move along MCA96 Vector<br />
Choose the required direction of the MCA96 movement. Click And back if you<br />
want the MCA96 to return to the Safe position after reaching the End position.<br />
Gripper action<br />
Choose the gripper action which should be executed at the Safe position and<br />
at the End position. The required gripper spacing to pick up and release the<br />
labware is taken from the Grip Width and Release Width parameters in the<br />
chosen MCA96 vector.<br />
15 - 176 <strong>Freedom</strong> <strong>EVOware</strong> <strong>Software</strong> <strong>Manual</strong>, 393172, en, V<strong>2.3</strong>
15 - Script Commands<br />
MCA96 Commands<br />
Speed<br />
Choose Maximum if you want the MCA96 to move at maximum speed.<br />
Choose Slow if you want the MCA96 to move at the speed specified in the<br />
MCA96 vector.<br />
15.68.12 MCA96 Transfer Labware Command<br />
The MCA96 Transfer Labware command is used to transfer labware (e.g. a<br />
microplate) from one position to another with the MCA96 gripper. This command<br />
requires the MCA96 gripper option.<br />
If you have scanned the labware barcode and you move the labware with the<br />
MCA96 Transfer Labware command, the barcode remains assigned to the<br />
labware (i.e. the labware data record) at the new location. In addition, pipetting<br />
information, if any, remains assigned to the labware (see 15.26 “Export Data<br />
Command”, 15-48).<br />
MCA96 vectors are very similar to RoMa vectors. See 9.6.1 “Using RoMa<br />
Vectors”, 9-58. The main difference is that the MCA96 gripper fingers cannot be<br />
rotated (they are always parallel to the X axis of the pipetting instrument).<br />
Accordingly, you cannot specify the R axis for MCA96 vectors.<br />
When setting up the hardware, the MCA96 gripper option can be attached to the<br />
MCA96 pipetting head on the left side with the gripper fingers pointing to the right<br />
(under the head) or on the right side with the gripper fingers pointing to the left<br />
(under the head) or to the right (away from the head). On the left side and pointing<br />
to the left is not supported.<br />
Grip and release commands for the MCA96 (used to pick up and put down the<br />
labware) are handled automatically. The required gripper spacing is taken from<br />
the advanced properties for the respective labware type (see 9.4.2 “Editing<br />
Labware, Advanced Tab”, 9-22).<br />
Fig. 15-121 MCA96 Transfer Labware command<br />
<strong>Freedom</strong> <strong>EVOware</strong> <strong>Software</strong> <strong>Manual</strong>, 393172, en, V<strong>2.3</strong> 15 - 177
15 - Script Commands<br />
MCA96 Commands<br />
The parameters of the MCA96 Transfer Labware command are as follows:<br />
Move with<br />
The pull-down list is gray (inactive) and preset to MCA96 1 because current<br />
<strong>Freedom</strong> EVO pipetting instruments can only be fitted with one MCA pipetting<br />
arm.<br />
Vector<br />
Choose the MCA96 vector that you want to use to pick up the labware.<br />
The MCA96 only supports the vector type Narrow, which picks up the labware<br />
on the narrow side.<br />
Choose User defined (Narrow) to pick up the labware on the narrow side with<br />
a user-defined vector. In this case, you must choose the user-defined vector<br />
to use for picking up the labware at the source position and putting down it at<br />
the destination position in the two User Vector pull-down lists. User-defined<br />
vectors are created in the Control Bar (Robot Vectors section). See<br />
5.4.1.6 “Robot Vectors”, 5-12.<br />
Above all if you did not create the user-defined vector yourself, we<br />
recommend you to check carefully that the vector moves the MCA96 to the<br />
correct (i.e. intended) source and destination carrier positions before using it<br />
for pipetting. Tip: Test the MCA96 vector in a script using the 3D simulation<br />
program EVOSim.<br />
<strong>Freedom</strong> <strong>EVOware</strong> will report an error when you complete the Transfer<br />
Labware command if the MCA96 vector has not yet been created for the<br />
chosen labware type. It is best to create the required MCA96 vector in<br />
advance. MCA96 vectors are very similar to RoMa vectors (see 9.6.2 “Teach<br />
Plate Robot Vector Dialog Box”, 9-59).<br />
⌦ Transfer Labware command, Step 1<br />
Specify the parameters for the source position:<br />
Source position<br />
Select the current position of the labware by clicking on it in the Worktable<br />
Editor.<br />
Grid and Site then show the position you have chosen. The gray (protected)<br />
field Defined Carrier then shows the type of carrier at the chosen site and the<br />
gray (protected) field Defined Labware shows the type of labware at the<br />
chosen site.<br />
If you want to fetch the labware from a device such as a hotel or barcode<br />
scanner, click on the device icon. You then need to choose the site and the<br />
labware type. The list shows labware types which are allowed for the device<br />
(see 9.5 “Configuring Carriers”, 9-39, “Allowed Labware on this carrier”).<br />
⌦ Transfer Labware command, Step 2<br />
Specify the parameters for the labware lid. These parameters are only available<br />
for labware types which can be fitted with a lid:<br />
Lid handling<br />
Check this checkbox if the labware has a lid. Choose Cover at source if you<br />
want to put on the lid before moving the labware. Choose Uncover at<br />
destination if you want to remove the lid after moving the labware to the<br />
destination position (i.e. the lid was already present). In either case, select the<br />
position for fetching or putting aside the lid by clicking on the site in the<br />
Worktable Editor. Grid and Site then show the position you have chosen. The<br />
gray (protected) field Defined Carrier shows the type of carrier on which the lid<br />
is placed/will be placed. You can only put aside lids on unused carrier sites.<br />
15 - 178 <strong>Freedom</strong> <strong>EVOware</strong> <strong>Software</strong> <strong>Manual</strong>, 393172, en, V<strong>2.3</strong>
15 - Script Commands<br />
MCA384 Commands<br />
⌦ Transfer Labware command, Step 3<br />
Specify the parameters for the destination position:<br />
Destination Position<br />
Select the required destination position of the labware by clicking on the site in<br />
the Worktable Editor.<br />
The destination site must be suitable for the labware type you are moving (see<br />
9.5 “Configuring Carriers”, 9-39, “Allowed labware on this carrier”).<br />
Grid and Site then show the position you have chosen. The gray (protected)<br />
field Defined Carrier then shows the type of carrier at the chosen site.<br />
If you want to move the labware to a device such as a hotel or barcode<br />
scanner, click on the device icon. You then need to choose the site and the<br />
labware type. The list shows labware types which are allowed for the device<br />
(see 9.5 “Configuring Carriers”, 9-39, “Allowed Labware on this carrier”).<br />
Speed<br />
Choose Maximum if you want the MCA96 to move at maximum speed.<br />
Choose Taught in vector dialog if you want the MCA96 to move at the speed<br />
specified in the MCA96 vector.<br />
Move back to Home Position<br />
Check this checkbox if you want the MCA96 to move back to its home<br />
(parking) position after transferring the labware. See 9.6.4 “Defining the Home<br />
Position for a RoMa”, 9-62.<br />
15.69 MCA384 Commands<br />
The MCA384 (Multi Channel Arm 384) is a special liquid handling arm which can<br />
be fitted with 96 or 384 fixed tips or with 96 or 384 disposable tips (DITIs). The<br />
spacing between the tips is fixed (9 mm and/or 4.5 mm). So-called head adapters<br />
are used to adapt the pipetting head to the different tip types.<br />
The MCA384 has important performance advantages when pipetting to a large<br />
number of wells simultaneously. For mechanical reasons, the same volume is<br />
pipetted by all of the tips.<br />
The MCA384 can be optionally fitted with a gripper system (CGM, common<br />
gripper module) which can be used to pick up and move labware. The gripper<br />
module can be rotated.<br />
<strong>Freedom</strong> <strong>EVOware</strong> is provided with special liquid classes which should be used<br />
for pipetting with the MCA384.<br />
For mechanical reasons, the MCA384 head adapters and the MCA384 wash<br />
block can only be put on the carrier type “MCA384 System Carrier”. In addition, for<br />
mechanical reasons the head adapters for 384 DITIs can only pick up all 384<br />
DITIs if the DITI rack is on the MCA384 DITI carrier. See 15.69.1 “Overview of<br />
MCA384 head adapters”, 15-180.<br />
Special features are provided in the Get and Drop DITIs commands to get and/or<br />
drop a single row or column of tips. In addition, the Aspirate, Dispense, Mix and<br />
Move commands can be performed on a single row or column of tips. Accordingly,<br />
in contrast to the MCA96 with 96 tips, the MCA384 does not need and does not<br />
have a Relative Movements command.<br />
The MCA384 is compatible with nested DITIs, which have a special DITI rack<br />
design with 96 DITIs which can be stacked to form a pile of racks. The pile can be<br />
put on the worktable or stored in the Te-Stack. When the racks are stacked, the<br />
DITI tips slide inside the DITIs on the layer below to save space. Each layer of<br />
<strong>Freedom</strong> <strong>EVOware</strong> <strong>Software</strong> <strong>Manual</strong>, 393172, en, V<strong>2.3</strong> 15 - 179
15 - Script Commands<br />
MCA384 Commands<br />
DITIs has its own rack. In <strong>Freedom</strong> <strong>EVOware</strong> Plus, a feature is provided in the<br />
Get DITIs command to automatically discard the DITI racks to a waste location<br />
using the RoMa.<br />
15.69.1 Overview of MCA384 head adapters<br />
With the MCA384, so-called head adapters are used to adapt the pipetting head<br />
to the different tip types which are supported. The following head adapters are<br />
available:<br />
Tab. 15-13 Overview of MCA384 head adapters<br />
Head adapter<br />
Adapter DiTi Combo MCA384<br />
Adapter DiTi MCA384<br />
Adapter 96 DiTi MCA384<br />
Adapter 96 DiTi 4to1 MCA384<br />
Adapter Fixed 125µl MCA384<br />
Adapter Fixed 15µl MCA384<br />
Adapter 96 Fixed 125µl MCA384<br />
Adapter 96 Fixed 15µl MCA384<br />
Adapter QC MCA384<br />
Description<br />
Can pick up 384 DITIs from the MCA384 DITI Carrier.<br />
Can pick up a row of 24 DITIs or a column of 16 DITIs<br />
from the MCA384 System Carrier.<br />
Compatible with 15 µl, 50 µl and 125 µl disposable tips.<br />
Tip spacing 4.5 mm.<br />
Can pick up 384 DITIs from the MCA384 DITI Carrier.<br />
Compatible with 15 µl, 50 µl and 125 µl disposable tips.<br />
Tip spacing 4.5 mm.<br />
Can pick up 96 DITIs from a box of 384 DITIs on the<br />
MCA384 DITI Carrier.<br />
Can pick up a row of 12 DITIs or a column of 8 DITIs from<br />
the MCA384 System Carrier.<br />
Compatible with 15 µl, 50 µl and 125 µl disposable tips.<br />
Tip spacing 9 mm.<br />
Can pick up 96 DITIs from a box of 384 DITIs on the<br />
MCA384 DITI Carrier.<br />
Can pick up a row of 12 DITIs or a column of 8 DITIs from<br />
the MCA384 System Carrier.<br />
Compatible with 15 µl, 50 µl and 125 µl disposable tips.<br />
Tip spacing 9 mm.<br />
Compared to “MCA384 Adapter for 96 DITIs”, this special<br />
head adapter uses four plungers per tip instead of one.<br />
This allows a larger max. pipetted volume. a)<br />
Tipblock with 384 fixed tips. Each tip has a capacity of<br />
125 µl. Tip spacing 4.5 mm.<br />
Tipblock with 384 fixed tips. Each tip has a capacity of<br />
15 µl. Tip spacing 4.5 mm.<br />
Tipblock with 96 fixed tips. Each tip has a capacity of<br />
125 µl. Tip spacing 9 mm.<br />
Tipblock with 96 fixed tips. Each tip has a capacity of<br />
15 µl. Tip spacing 9 mm.<br />
This special head adapter is used to protect the pipetting<br />
head during transport and storage and is not intended for<br />
pipetting.<br />
a) This head adapter type is currently not available in all countries.<br />
15 - 180 <strong>Freedom</strong> <strong>EVOware</strong> <strong>Software</strong> <strong>Manual</strong>, 393172, en, V<strong>2.3</strong>
15 - Script Commands<br />
MCA384 Commands<br />
All head adapter types have an ID (magnetic bit pattern from 1 to 15) to allows<br />
automatic identification by the pipetting head. It is used to check that the correct<br />
head adapter has been mounted.<br />
15.69.2 MCA384 Aspirate Command<br />
The MCA384 Aspirate command is used to pick up liquid from specified positions<br />
on the worktable of the pipetting instrument using the multi channel arm.<br />
Fig. 15-122 MCA384 Aspirate command<br />
The parameters of the MCA384 Aspirate command are as follows:<br />
Head adapter<br />
You must pick up a suitable head adapter and/or tips before you pipette.<br />
Choose the number of tips which are fitted to the pipetting head. In addition,<br />
you can choose to pipette using all tips, one column of tips or one row of tips.<br />
The Aspirate command moves the plungers for all tip positions<br />
simultaneously. Accordingly, to pipette to one column of tips or one row of tips<br />
the pipetting head should be fitted in advance with one column of DITIs or one<br />
row of DITIs using the Get DITIs command. The one column or one row option<br />
is only supported by the head adapters “Adapter DiTi Combo MCA384”,<br />
“Adapter 96 DiTi MCA384” and “Adapter 96 DiTi 4to1 MCA384” and only for<br />
DITI racks positioned on the MCA384 System Carrier. It is not supported for<br />
fixed tips.<br />
<strong>Freedom</strong> <strong>EVOware</strong> <strong>Software</strong> <strong>Manual</strong>, 393172, en, V<strong>2.3</strong> 15 - 181
15 - Script Commands<br />
MCA384 Commands<br />
Liquid Class<br />
Choose the required liquid class from the pull down list. The list only shows<br />
liquid classes which are suitable for the current configuration of the pipetting<br />
instrument.<br />
Click the Editor button to start the liquid classes editor if you want to create a<br />
new class or modify an existing class (see 10 “Configuring Liquid Classes”,<br />
10-1). Furthermore you can customize an existing liquid class for use by<br />
this command only (click the Customize button). If you customize an existing<br />
liquid class, the liquid class name is shown in the script command and in the<br />
script editor within double angled brackets “>> name
15 - Script Commands<br />
MCA384 Commands<br />
15.69.3 MCA384 Dispense Command<br />
The MCA384 Dispense command is used to dispense liquid to specified positions<br />
on the worktable of the pipetting instrument using the multi channel arm.<br />
Fig. 15-123 MCA384 Dispense command<br />
The parameters of the MCA384 Dispense command are as follows:<br />
Head adapter<br />
You must pick up a suitable head adapter and/or tips before you pipette.<br />
Choose the number of tips which are fitted to the pipetting head. In addition,<br />
you can choose to pipette using all tips, one column of tips or one row of tips.<br />
The Dispense command moves the plungers for all tip positions<br />
simultaneously. Accordingly, to pipette to one column of tips or one row of tips<br />
the pipetting head should be fitted in advance with one column of DITIs or one<br />
row of DITIs using the Get DITIs command. The one column or one row option<br />
is only supported by the head adapters “Adapter DiTi Combo MCA384”,<br />
“Adapter 96 DiTi MCA384” and “Adapter 96 DiTi 4to1 MCA384” and only for<br />
DITI racks positioned on the MCA384 System Carrier. It is not supported for<br />
fixed tips.<br />
<strong>Freedom</strong> <strong>EVOware</strong> <strong>Software</strong> <strong>Manual</strong>, 393172, en, V<strong>2.3</strong> 15 - 183
15 - Script Commands<br />
MCA384 Commands<br />
Liquid Class<br />
Choose the required liquid class from the pull down list. The list only shows<br />
liquid classes which are suitable for the current configuration of the pipetting<br />
instrument.<br />
Click the Editor button to start the liquid classes editor if you want to create a<br />
new class or modify an existing class (see 10 “Configuring Liquid Classes”,<br />
10-1). Furthermore you can customize an existing liquid class for use by<br />
this command only (click the Customize button and click the Dispense tab). If<br />
you customize an existing liquid class, the liquid class name is shown in the<br />
script command and in the script editor within double angled brackets “>><br />
name
15 - Script Commands<br />
MCA384 Commands<br />
15.69.4 MCA384 Mix Command<br />
The MCA384 Mix command performs a mix operation by aspirating and then<br />
dispensing at the same position using the multi channel arm.<br />
Fig. 15-124 MCA384 Mix command<br />
The parameters of the MCA384 Mix command are as follows:<br />
Head adapter<br />
You must pick up a suitable head adapter and/or tips before you pipette.<br />
Choose the number of tips which are fitted to the pipetting head. In addition,<br />
you can choose to pipette using all tips, one column of tips or one row of tips.<br />
The Mix command moves the plungers for all tip positions simultaneously.<br />
Accordingly, to pipette to one column of tips or one row of tips the pipetting<br />
head should be fitted in advance with one column of DITIs or one row of DITIs<br />
using the Get DITIs command. The one column or one row option is only<br />
supported by the head adapters “Adapter DiTi Combo MCA384”, “Adapter 96<br />
DiTi MCA384” and “Adapter 96 DiTi 4to1 MCA384” and only for DITI racks<br />
positioned on the MCA384 System Carrier. It is not supported for fixed tips.<br />
<strong>Freedom</strong> <strong>EVOware</strong> <strong>Software</strong> <strong>Manual</strong>, 393172, en, V<strong>2.3</strong> 15 - 185
15 - Script Commands<br />
MCA384 Commands<br />
Liquid Class<br />
Choose the required liquid class from the pull down list. The list only shows<br />
liquid classes which are suitable for the current configuration of the pipetting<br />
instrument.<br />
Click the Editor button to start the liquid classes editor if you want to create a<br />
new class or modify an existing class (see 10 “Configuring Liquid Classes”,<br />
10-1). Furthermore you can customize an existing liquid class for use by<br />
this command only (click the Customize button and click the Aspirate or<br />
Dispense tab). If you customize an existing liquid class, the liquid class name<br />
is shown in the script command and in the script editor within double angled<br />
brackets “>> name
15 - Script Commands<br />
MCA384 Commands<br />
15.69.5 MCA384 Wash Command<br />
The MCA384 Wash command is used to wash the MCA384 tips or MCA384 DITIs<br />
using the specified MCA384 wash block. The MCA384 wash block is connected to<br />
the MCA384 Wash & Refill Center (WRC) through tubing. The MCA384 hardware<br />
supports up to two MCA384 wash blocks (each one with its own control unit). You<br />
can only put MCA384 wash blocks on the carrier type “MCA384 System Carrier”.<br />
Fig. 15-125 MCA384 Wash command<br />
The wash process normally consists of one Empty Tips step and one or more<br />
Cleaner steps. Start by choosing the required number of cleaner steps in the No.<br />
of Cleaner Steps field.<br />
The parameters and steps of the MCA384 Wash command are as follows:<br />
Set values for<br />
Different wash parameters are needed for each of the MCA384 tip types.<br />
Choose the MCA384 tip type you are using from the pull-down list. This<br />
configures the MCA384 Wash command with the recommended wash<br />
parameters for the chosen tip type.<br />
If you modify the recommended settings after choosing the tip type, the pulldown<br />
list will show “Edited values” instead of the tip type you chose.<br />
The parameter sets with the recommended wash parameters are stored in the<br />
evoware.xml file. For information on the location of this file see A.5 “<strong>Freedom</strong><br />
<strong>EVOware</strong> Directory Structure and Files”, A-25. The parameters in the<br />
evoware.xml file should only be changed by specialists.<br />
In addition to choosing the tip type in the pull-down list, if you want to wash the<br />
whole outside of the tips (the whole length) you may need to adapt the liquid<br />
class parameter “Aspiration position, Z-offset” for the liquid class which is<br />
used for the first cleaner step (default “MCA384 WRC Step 2 Dip in”) to<br />
ensure that the tips dip far enough into the wash liquid. A positive value for Z-<br />
offset lowers the tips. Note: You cannot change the properties of the predefined<br />
(standard) liquid classes. However you can create a new custom<br />
class with the same properties and then change them.<br />
Note: Take care to choose a parameter set to match the tips you are using and to<br />
adjust the Z-offset correctly. Incorrect parameters can lead to incomplete washing<br />
of the tips, which could cause cross-contamination under unfavorable<br />
circumstances.<br />
<strong>Freedom</strong> <strong>EVOware</strong> <strong>Software</strong> <strong>Manual</strong>, 393172, en, V<strong>2.3</strong> 15 - 187
15 - Script Commands<br />
MCA384 Commands<br />
Empty Tips step<br />
This step will only be executed if the excess volume or the leading airgap is<br />
still in the tips or the MCA384 plunger has not reached the start position.<br />
During this step, the MCA384 head moves to the Z-dispense position above<br />
the wash block and any remaining liquid is expelled from the tips.<br />
Cleaner step<br />
During each cleaner step, the MCA384 moves the tips into the wash block to<br />
the Z-max position and waits for the specified soak time. The MCA384 then<br />
aspirates and dispenses the specified volume of wash liquid. Specify the<br />
Cycles parameter to repeat aspiration and dispensing several times if<br />
necessary. The WRC washing pumps operate during the entire cleaner step.<br />
The MCA384 head moves up and the washing pumps stop at the end of each<br />
step.<br />
You can specify the wash liquid (1 or 2) you want to use in the wash block. In<br />
addition, the wash block can be flushed for a specified time before starting<br />
(Preflush) and after finishing (Postflush) each step.<br />
Wash position<br />
For each of the steps, click on this table field and choose the required wash<br />
block from the pull down list. The list shows all MCA384 wash blocks which<br />
are currently positioned on the MCA384 in the Worktable Editor (the grid<br />
position and the site of the wash block are shown in brackets). The MCA384<br />
hardware supports up to two MCA384 wash blocks. You can only put MCA384<br />
wash blocks on the carrier type “MCA384 System Carrier”.<br />
Wash liquid<br />
You can connect two different wash liquid containers to the WRC. Specify the<br />
wash liquid you want to use in the wash block.<br />
Flow through [%]<br />
Specify the flow rate of the pressure pump of the WRC (range: 1 - 100%;<br />
100% is the maximum flow rate).<br />
Preflush [s]<br />
Specify how long the wash block should be flushed at the beginning of the<br />
step (range: 0 -1000 s).<br />
Soak time [s]<br />
Specify how long the tips should soak in the wash block before aspirating and<br />
dispensing the wash liquid (range: 0 - 200 s). You must specify at least 1 s for<br />
the last Cleaner step.<br />
Liquid Class<br />
Choose the liquid class of the wash liquid from the pull down list. Click the<br />
Editor button below the table to start the liquid classes editor if you want to<br />
create a new class or modify an existing class (see 10 “Configuring Liquid<br />
Classes”, 10-1).<br />
Volume [µl]<br />
Specify the required volume of wash liquid in the cleaner step. The maximum<br />
allowed volume is the dilutor or DITI capacity (<strong>Freedom</strong> <strong>EVOware</strong> does not<br />
automatically handle volumes that exceed the dilutor or DITI capacity).<br />
Cycles<br />
Specifies how many times aspiration and dispensing of the wash liquid takes<br />
place in the cleaner step. If you specify 0, aspiration and dispensing the wash<br />
liquid will not be carried out.<br />
15 - 188 <strong>Freedom</strong> <strong>EVOware</strong> <strong>Software</strong> <strong>Manual</strong>, 393172, en, V<strong>2.3</strong>
15 - Script Commands<br />
MCA384 Commands<br />
Change [µl]<br />
Specify an optional volume of wash liquid which is added to the specified<br />
aspiration and dispense volume for each subsequent cycle of the cleaner<br />
step. A negative value means that less wash liquid will be used for each<br />
subsequent cycle. This parameter can be used to optimize the effectiveness<br />
of the washing process. The total volume (Volume + Change) should not<br />
exceed the dilutor or DITI capacity (<strong>Freedom</strong> <strong>EVOware</strong> does not automatically<br />
handle volumes that exceed the plunger or DITI capacity).<br />
Postflush [s]<br />
Specify how long the wash block should be flushed at the end of the step<br />
(range: 0 - 1000 s).<br />
Liquid class editor<br />
Click the Editor button to start the liquid classes editor if you want to create a<br />
new class or modify an existing class (see 10 “Configuring Liquid Classes”,<br />
10-1).<br />
Use wash sensor on station 1 / station 2<br />
The MCA384 hardware supports up to two MCA384 Wash Blocks. Use the<br />
checkboxes to switch the wash liquid level detection on or off for the two wash<br />
blocks. The wash block sensors should normally be switched on for both wash<br />
blocks, but can be disabled e.g. if you are using a wash liquid with a high<br />
electrical resistance which cannot be detected reliably.<br />
15.69.6 MCA384 Get Head Adapter Command<br />
The MCA384 Get Head Adapter command is used to pick up a head adapter for<br />
the MCA384 from a specified position on the worktable of the pipetting instrument.<br />
For mechanical reasons, you can only put MCA384 head adapters on the carrier<br />
type “MCA384 System Carrier”. See 15.69.1 “Overview of MCA384 head<br />
adapters”, 15-180.<br />
Fig. 15-126 MCA384 Get Head Adapter command<br />
The parameters of the MCA384 Get Head Adapter command are as follows:<br />
Position<br />
Specify the position where the MCA384 should get the head adapter by<br />
clicking on the head adapter in the Worktable Editor. The type or label (name),<br />
the grid position and the site of the head adapter are then shown in the gray<br />
(protected) fields. You must first put an MCA384 head adapter in the<br />
Worktable Editor at the required position. You can only put MCA384 head<br />
adapters on the carrier type “MCA384 System Carrier”.<br />
<strong>Freedom</strong> <strong>EVOware</strong> <strong>Software</strong> <strong>Manual</strong>, 393172, en, V<strong>2.3</strong> 15 - 189
15 - Script Commands<br />
MCA384 Commands<br />
Blowout airgap<br />
Specify the volume of air to aspirate directly after getting the head adapter<br />
(range: 0 to 50 µl). When the tips are washed, the air is dispensed at the end<br />
of the wash procedure and serves to make sure that all of the wash liquid<br />
remaining in the tips is discarded. In contrast to the Leading Airgap (which is<br />
specified in the liquid classes), the blowout airgap is only relevant for washing<br />
the tips and is not dispensed by the Dispense command.<br />
15.69.7 MCA384 Drop Head Adapter Command<br />
The MCA384 Drop Head Adapter command is used to put down the head adapter<br />
of the multi channel arm at a specified position on the worktable of the pipetting<br />
instrument. For mechanical reasons, you can only put MCA384 head adapters on<br />
the carrier type “MCA384 System Carrier”. See 15.69.1 “Overview of MCA384<br />
head adapters”, 15-180.<br />
Fig. 15-127 MCA384 Drop Head Adapter command<br />
The parameters of the MCA384 Drop Head Adapter command are as follows:<br />
Back to source<br />
This option returns the DITIs back to the grid and site position from where they<br />
were fetched with the MCA384 Get Head Adapter command.<br />
Note: If you switch off the pipetting instrument with the head adapter still<br />
attached, it will forget the grid and site position from where the head adapter was<br />
fetched. The option Back to source will then display an error message when the<br />
script is validated.<br />
Back to position<br />
Specify the position where the MCA384 should return the head adapter by<br />
clicking on the head adapter in the Worktable Editor. The type or label (name),<br />
the grid position and the site of the head adapter are then shown in the gray<br />
(protected) fields. You must first put an MCA384 head adapter in the<br />
Worktable Editor at the required position. You can only put MCA384 head<br />
adapters on the carrier type “MCA384 System Carrier”.<br />
15 - 190 <strong>Freedom</strong> <strong>EVOware</strong> <strong>Software</strong> <strong>Manual</strong>, 393172, en, V<strong>2.3</strong>
15 - Script Commands<br />
MCA384 Commands<br />
Get adapter after drop<br />
Check this checkbox if you want to get another head adapter after dropping<br />
the one which is currently fitted. This option is only available if you chose Back<br />
to position for dropping the head adapter.<br />
Select adapter for drop or get: If you have already chosen labware positions<br />
for dropping the currently fitted head adapter and getting the new one and you<br />
change your mind, you can click on another head adapter in the Worktable<br />
Editor to chose a new position. Before doing this, click one of the radio buttons<br />
to choose whether you want to re-specify the dropping position or the getting<br />
position.<br />
Get adapter<br />
Specify the position where the MCA384 should get the new head adapter by<br />
clicking on the head adapter in the Worktable Editor. The type or label (name),<br />
the grid position and the site of the head adapter are then shown in the gray<br />
(protected) fields. You must first put an MCA384 head adapter in the<br />
Worktable Editor at the required position. You can only put MCA384 head<br />
adapters on the carrier type “MCA384 System Carrier”.<br />
The new head adapter must be on the same MCA384 System Carrier as the<br />
one you have dropped. If this is not the case, you must drop the currently<br />
fitted head adapter with this command and use a separate Get Head Adapter<br />
command to get the new one. Dropping and getting the head adapter using<br />
the same command is faster.<br />
Blowout airgap<br />
Specify the volume of air to aspirate directly after getting the new head<br />
adapter (range: 0 to 50 µl). When the tips are washed, the air is dispensed at<br />
the end of the wash procedure and serves to make sure that all of the wash<br />
liquid remaining in the tips is discarded. In contrast to the Leading Airgap<br />
(which is specified in the liquid classes), the blowout airgap is only relevant for<br />
washing the tips and is not dispensed by the Dispense command.<br />
15.69.8 MCA384 Get DITIs Command<br />
The MCA384 Get DITIs command is used to pick up disposable tips for the multi<br />
channel arm from a specified position on the worktable of the pipetting instrument.<br />
If the DITI rack is on the MCA384 System Carrier, you can pick up one row or one<br />
column of DITIs out of a box of 384 DITIs. See 15.69.8.1 “Limitations for different<br />
head adapter types (getting DITIs)”, 15-193 for more information.<br />
<strong>Freedom</strong> <strong>EVOware</strong> <strong>Software</strong> <strong>Manual</strong>, 393172, en, V<strong>2.3</strong> 15 - 191
15 - Script Commands<br />
MCA384 Commands<br />
Fig. 15-128 MCA384 Get DITIs command<br />
The parameters of the MCA384 Get DITIs command are as follows:<br />
Position<br />
Specify the position where the MCA384 should get the DITIs by clicking on the<br />
MCA384 DITI carrier in the Worktable Editor. The type or label (name), the<br />
grid position and the site of the DITI rack are then shown in the two fields. You<br />
must first put a MCA384 DITI rack in the Worktable Editor at the required<br />
position. See also 15.69.8.1 “Limitations for different head adapter types<br />
(getting DITIs)”, 15-193.<br />
Head adapter<br />
You must pick up a suitable head adapter with the Get Head Adapter<br />
command before you get the DITIs. Choose the head adapter type which is<br />
currently fitted to the MCA384 pipetting head.<br />
Pick up<br />
Specify whether you want to pick up all DITIs, one column of DITIs or one row<br />
of DITIs. The available options in the pull-down list depend on the chosen<br />
head adapter and DITI carrier type. With the one column or one row option,<br />
you can only pick up DITIs on the first or last column (left or right side) or the<br />
first or last row (rear or front side) of the pipetting head. See also<br />
15.69.8.1 “Limitations for different head adapter types (getting DITIs)”, 15-<br />
193.<br />
15 - 192 <strong>Freedom</strong> <strong>EVOware</strong> <strong>Software</strong> <strong>Manual</strong>, 393172, en, V<strong>2.3</strong>
15 - Script Commands<br />
MCA384 Commands<br />
Blowout airgap<br />
Specify the volume of air to aspirate directly after getting the DITIs (range: 0 to<br />
50 µl). When the tips are washed, the air is dispensed at the end of the wash<br />
procedure and serves to make sure that all of the wash liquid remaining in the<br />
tips is discarded. In contrast to the Leading Airgap (which is specified in the<br />
liquid classes), the blowout airgap is only relevant for washing the tips and is<br />
not dispensed by the Dispense command.<br />
Loop Options<br />
If you are using the command in a script loop, click this button if you want to<br />
specify loop options. This allows you to use a different column, row and/or<br />
labware item for each cycle of the loop. The gray (protected) field shows the<br />
number of loop options you have chosen. See 14.4 “Loop Options”, 14-23.<br />
Location<br />
If the DITI Rack has more DITIs than the number of DITIs you want to pick up,<br />
you must click in the Location panel to select the DITIs that you want to pick<br />
up. This is not necessary if you want to pick up all of the DITIs in the DITI rack.<br />
See also 15.69.8.1 “Limitations for different head adapter types (getting<br />
DITIs)”, 15-193.<br />
Your settings are also used to assign pipetting information to the correct tip<br />
positions in report files created with the Export Data command.<br />
Remove rack<br />
This checkbox is only available in <strong>Freedom</strong> <strong>EVOware</strong> Plus and is intended<br />
for nested DITIs labware. This labware type uses a special DITI rack design<br />
with 96 DITIs which can be stacked to form a pile of racks. Check this<br />
checkbox if you want the Get DITIs command to remove and discard the<br />
empty rack after all the DITIs in the layer have been used. This reveals the<br />
next layer of unused DITIs below. The rack is removed and discarded using<br />
the RoMa. This is handled by a special process which is provided for this<br />
purpose.<br />
If you check this checkbox, you must specify a special DITI waste location for<br />
discarding the empty DITI racks. To do this, right click on a DITI waste on the<br />
worktable and choose Waste for DITI racks from the context menu. A tick<br />
alongside this context menu item shows that this location will then be used for<br />
the empty DITI racks. This option is only available for the DITI waste site of a<br />
DITI carrier with waste and is only intended for discarding empty DITI racks.<br />
<strong>Freedom</strong> <strong>EVOware</strong> <strong>Standard</strong>: You must use a RoMa command to discard<br />
the empty rack after all the DITIs in the layer have been used.<br />
15.69.8.1 Limitations for different head adapter types (getting DITIs)<br />
The MCA384 has the following limitations when getting DITIs:<br />
Adapter DiTi Combo MCA384<br />
You can pick up all 384 DITIs if the DITI rack is on the MCA384 DITI Carrier<br />
but you cannot pick up one row or one column. The latter option requires a<br />
relative movement of the pipetting head which is not possible for mechanical<br />
reasons on the MCA384 DITI Carrier.<br />
<strong>Freedom</strong> <strong>EVOware</strong> <strong>Software</strong> <strong>Manual</strong>, 393172, en, V<strong>2.3</strong> 15 - 193
15 - Script Commands<br />
MCA384 Commands<br />
You can pick up one row or one column of DITIs if the DITI rack is on the<br />
MCA384 System Carrier but you cannot pick up all 384 DITIs. The latter<br />
option requires a locking mechanism for mechanical reasons which is not<br />
provided on the MCA384 System Carrier.<br />
If you pick up one row or one column of DITIs, the Pick up parameter in the<br />
Get DITIs command lets you choose whether to mount them on the first or last<br />
column (left or right side) or the first or last row (rear or front side) of the<br />
pipetting head. The Position parameter then lets you specify the row or<br />
column in the DITI rack from where to get the DITIs. This requires a relative<br />
movement of the pipetting head.<br />
Please note the following mechanical limitations: If you want to pick up e.g.<br />
DITIs on the first column (left side) of the pipetting head, you must pick them<br />
up starting with the last column (right side) of the DITI rack. If you pick up<br />
DITIs from column 23 and column 24 still contains DITIs, you will pick up two<br />
columns of DITIs instead of one column. Analogous limitations apply to<br />
picking up DITIs on the right side of the pipetting head and picking up single<br />
rows of DITIs on the front and rear of the pipetting head.<br />
Adapter DiTi MCA384<br />
You can only pick up DITIs if the DITI rack is on the MCA384 DITI Carrier. You<br />
can only pick up all 384 DITIs. The MCA384 DITI Carrier does not allow<br />
relative movements of the pipetting head.<br />
Adapter 96 DiTi MCA384<br />
You can pick up all 96 DITIs out of a box of 384 DITIs on any of the carrier<br />
types that allow the MCA384 DITI rack.<br />
You can pick up one row or one column of DITIs out of a box of 384 DITIs if<br />
the DITI rack is on the MCA384 System Carrier. This requires a relative<br />
movement of the pipetting head which is not possible for mechanical reasons<br />
on the MCA384 DITI Carrier.<br />
Adapter 96 DiTi 4to1 MCA384<br />
The limitations for this head adapter are the same as “Adapter 96 DiTi<br />
MCA384”.<br />
Adapter QC MCA384<br />
This special head adapter is used to protect the pipetting head during<br />
transport and storage and is not intended for pipetting.<br />
15.69.9 MCA384 Drop DITIs Command<br />
The MCA384 Drop DITIs command is used to return the disposable tips of the<br />
multi channel arm to a specified position on the worktable of the pipetting<br />
instrument.<br />
The MCA384 Drop DITIs command also allows you to drop one row or one<br />
column of DITIs in to a box of 384 DITIs. See 15.69.9.1 “Limitations for different<br />
head adapter types (dropping DITIs)”, 15-197 for more information.<br />
15 - 194 <strong>Freedom</strong> <strong>EVOware</strong> <strong>Software</strong> <strong>Manual</strong>, 393172, en, V<strong>2.3</strong>
15 - Script Commands<br />
MCA384 Commands<br />
Fig. 15-129 MCA384 Drop DITIs command<br />
The parameters of the MCA384 Drop DITIs command are as follows:<br />
Back to source<br />
This option returns the DITIs back to the grid and site position from where it<br />
was fetched with the MCA384 Get DITIs command.<br />
Note: If you switch off the pipetting instrument with the DITIs still attached, it will<br />
forget the grid and site position from where the DITIs were fetched. The option<br />
Back to source will then display an error message when the script is validated.<br />
Back to position<br />
Specify the position where the MCA384 should return the DITIs by clicking on<br />
the MCA384 DITI rack in the Worktable Editor. The type or label (name), the<br />
grid position and the site of the DITI rack are then shown in the two fields. You<br />
must first put an MCA384 DITI rack in the Worktable Editor at the required<br />
position. The gray (protected) field then shows the type or the label (name) of<br />
the selected item.<br />
MCA384 DITIs should not be discarded into the DITI waste. This can cause<br />
mechanical damage. They should be discarded into an MCA384 DITI rack.<br />
Head adapter<br />
DITIs are fitted to the MCA384 using a head adapter between the DITIs and<br />
the pipetting head. Choose the head adapter type which is currently fitted to<br />
the MCA384 pipetting head.<br />
<strong>Freedom</strong> <strong>EVOware</strong> <strong>Software</strong> <strong>Manual</strong>, 393172, en, V<strong>2.3</strong> 15 - 195
15 - Script Commands<br />
MCA384 Commands<br />
Drop<br />
Specify whether you want to drop all DITIs, one column of DITIs or one row of<br />
DITIs. The available options in the pull-down list depend on the chosen head<br />
adapter and the type of the carrier where the DITIs are dropped. The one<br />
column or one row option allows you to specify where to drop the DITIs in the<br />
DITI rack. The DITI dropping mechanism is activated for all DITI positions<br />
simultaneously. Accordingly, you can only drop one row or one column of<br />
DITIs if the pipetting head is only fitted with one row or one column of DITIs.<br />
See also 15.69.8.1 “Limitations for different head adapter types (getting<br />
DITIs)”, 15-193.<br />
Loop Options<br />
If you are using the command in a script loop, click this button if you want to<br />
specify loop options. This allows you to use a different column, row and/or<br />
labware item for each cycle of the loop. The gray (protected) field shows the<br />
number of loop options you have chosen. See 14.4 “Loop Options”, 14-23.<br />
Location<br />
If the DITI Rack has more DITI positions than the number of DITIs you want to<br />
drop, you must click in the Location panel to select where to put down the<br />
DITIs. See also 15.69.8.1 “Limitations for different head adapter types (getting<br />
DITIs)”, 15-193.<br />
Your settings are also used to assign pipetting information to the correct tip<br />
positions in report files created with the Export Data command.<br />
Remove rack<br />
This checkbox is only available in <strong>Freedom</strong> <strong>EVOware</strong> Plus and is intended<br />
for nested DITIs labware. This labware type uses a special DITI rack design<br />
with 96 DITIs which can be stacked to form a pile of racks. Check this<br />
checkbox if you want the Drop DITIs command to remove and discard the<br />
rack after putting down the DITIs. A special process is then started which<br />
carries out the following movements:<br />
– The DITIs are put down on the pile of nested tips.<br />
– The RoMa picks up the rack on the top of the pile together with the DITIs<br />
and discards them.<br />
If you check this checkbox, you must choose a special DITI waste location for<br />
discarding the DITI racks and the DITIs. To do this, right click on a DITI waste<br />
on the worktable and choose Waste for DITI racks from the context menu. A<br />
tick alongside this context menu item shows that this location will then be<br />
used for the empty DITI racks. This option is only available for the DITI waste<br />
site of a DITI carrier with waste and is only intended for discarding empty DITI<br />
racks.<br />
<strong>Freedom</strong> <strong>EVOware</strong> <strong>Standard</strong>: You must use a RoMa command if you want<br />
to discard the rack.<br />
15 - 196 <strong>Freedom</strong> <strong>EVOware</strong> <strong>Software</strong> <strong>Manual</strong>, 393172, en, V<strong>2.3</strong>
15 - Script Commands<br />
MCA384 Commands<br />
15.69.9.1 Limitations for different head adapter types (dropping DITIs)<br />
The MCA384 has the following limitations when dropping DITIs:<br />
Adapter DiTi Combo MCA384<br />
You can drop all 384 DITIs if the DITI rack is on the MCA384 DITI Carrier but<br />
you cannot drop one row or one column. The latter option requires a relative<br />
movement of the pipetting head which is not possible for mechanical reasons<br />
on the MCA384 DITI Carrier.<br />
You can drop all 384 DITIs or one row or one column of DITIS if the DITI rack<br />
is positioned on any of the other carrier types that allow the MCA384 DITI<br />
rack.<br />
If you drop one row or one column of DITIs, you must use the Drop parameter<br />
in the Drop DITIs command to specify whether the DITIs are currently fitted to<br />
the first or last column (left or right side) or the first or last row (rear or front<br />
side) of the pipetting head. The Position parameter then lets you specify the<br />
row or column in the DITI rack where you want to put down the DITIs. This<br />
requires a relative movement of the pipetting head.<br />
The DITI dropping mechanism is activated for all DITI positions<br />
simultaneously. Accordingly, you can only drop one row or one column of<br />
DITIs if the pipetting head is only fitted with one row or one column of DITIs.<br />
Adapter DiTi MCA384<br />
You can only drop all 384 DITIs. This can be done on any of the carrier types<br />
that allow the MCA384 DITI rack.<br />
Adapter 96 DiTi MCA384<br />
You can drop all 384 DITIs if the DITI rack is on the MCA384 DITI Carrier but<br />
you cannot drop one row or one column. The latter option requires a relative<br />
movement of the pipetting head which is not possible for mechanical reasons<br />
on the MCA384 DITI Carrier.<br />
You can drop all 96 DITIs or one row or one column of DITIS into a box of 384<br />
DITIs if the DITI rack is positioned on any of the other carrier types that allow<br />
the MCA384 DITI rack.<br />
If you drop one row or one column of DITIs, you must use the Drop parameter<br />
in the Drop DITIs command to specify whether the DITIs are currently fitted to<br />
the first or last column (left or right side) or the first or last row (rear or front<br />
side) of the pipetting head. The Position parameter then lets you specify the<br />
row or column in the DITI rack where you want to put down the DITIs. This<br />
requires a relative movement of the pipetting head.<br />
The DITI dropping mechanism is activated for all DITI positions<br />
simultaneously. Accordingly, you can only drop one row or one column of<br />
DITIs if the pipetting head is only fitted with one row or one column of DITIs.<br />
Adapter 96 DiTi 4to1 MCA384<br />
The limitations for this head adapter are the same as “Adapter 96 DiTi<br />
MCA384”.<br />
Adapter QC MCA384<br />
This special head adapter is used to protect the pipetting head during<br />
transport and storage and is not intended for pipetting.<br />
<strong>Freedom</strong> <strong>EVOware</strong> also permits you to drop up to 384 DITIs from the 96-DITI or<br />
384-DITI head adapters on to MCA384 DITI racks located on carrier types which<br />
are not specifically intended for the MCA384. Due to the high density of the<br />
MCA384 DITI rack, care should be taken to teach the positions accurately in this<br />
case. Carrier types which are specifically intended for the MCA384 include<br />
features to ensure a very high accuracy of the mechanical fit and position.<br />
<strong>Freedom</strong> <strong>EVOware</strong> <strong>Software</strong> <strong>Manual</strong>, 393172, en, V<strong>2.3</strong> 15 - 197
15 - Script Commands<br />
MCA384 Commands<br />
15.69.10 MCA384 Move Command<br />
The MCA384 Move command is used to move the MCA384 from one position to<br />
another without performing an Aspirate or Dispense operation:<br />
Fig. 15-130 MCA384 Move command<br />
The parameters of the MCA384 Move command are as follows:<br />
Head adapter<br />
Choose the number of tips on the head adapter which was picked up by the<br />
previous MCA384 Get Head Adapter command. In addition, you can choose<br />
to move all tips, one column of tips or one row of tips.<br />
Loop options<br />
If you are using the command in a script loop, click this button if you want to<br />
specify loop options. This allows you to use a different column, row and/or<br />
labware item for each cycle of the loop. The gray (protected) field shows the<br />
number of loop options you have chosen. See 14.4 “Loop Options”, 14-23.<br />
15 - 198 <strong>Freedom</strong> <strong>EVOware</strong> <strong>Software</strong> <strong>Manual</strong>, 393172, en, V<strong>2.3</strong>
15 - Script Commands<br />
MCA384 Commands<br />
Type of movement<br />
Choose X-Move, Y-Move or Z-Move to move only one axis of the MCA384.<br />
You can then specify the speed of the movement.<br />
The options Positioning with global Z-travel, Positioning with local Z-travel and<br />
Positioning with advanced Z-travel move the MCA384 to the labware at<br />
maximum speed. Note: Z-travel is the tip height which is used during the arm<br />
movement.<br />
To use the option Positioning with advanced Z-travel, you must activate this<br />
feature in the Configuration Tool (see 8.4.2.11 “MCA384”, 8-34). If you do<br />
not activate this feature, Positioning with advanced Z-travel has the same<br />
effect as Positioning with global Z-travel.<br />
Z-Position<br />
Unless you have chosen X-Move or Y-Move in the Type of Movement field,<br />
you can specify the Z-Position to which the tips should be lowered at the end<br />
of the MCA384 movement. Choose the required Z-position and then specify a<br />
Z offset in mm if required. A positive value for the offset lowers the tips.<br />
Compartment in well<br />
Some special labware types (e.g. for protein crystallography) have wells with<br />
several compartments (cavities). <strong>Freedom</strong> <strong>EVOware</strong> can pipette a different<br />
liquid into each of the compartments. Each well typically has one main<br />
compartment and one or more satellite compartments which are directly<br />
adjacent and are often smaller in size. Choose the compartment which you<br />
want to use for pipetting (the main compartment is normally compartment 1).<br />
Well compartments are specified in the labware configuration. This field is<br />
inactive (gray) if the well only has one compartment.<br />
Location<br />
Select the labware which you want to use by clicking on the labware in the<br />
Worktable Editor. The gray (protected) field at the top right of the Location<br />
panel shows the label (name) of the labware that you have selected (it shows<br />
a generic name if you have not assigned a label).<br />
If the MCA384 pipetting head has less tips fitted than the number of wells in<br />
the labware (or you have clicked the radio button 1 column or 1 row), you<br />
must then click in the Location panel to select the set of wells you want to use.<br />
This is not necessary if the pipetting head has the same number of tips as the<br />
number of wells in the labware. Your well selection is shown in green.<br />
Cursor (x,y)<br />
You can also select wells by entering the x coordinate (from left to right) and<br />
the y coordinate (from top to bottom) of the top left well you want to select. Tip:<br />
The x and y coordinates of each well are shown in a tool tip if you move the<br />
cursor over the well area in the Location panel.<br />
Select: Click this button to select the wells you have specified in the Cursor<br />
(x,y) field. This button has no effect if your well selection does not fit within the<br />
well area of the labware. In addition, it has no effect if the pipetting head has<br />
the same number of tips as the number of wells in the labware.<br />
15.69.11 MCA384 Vector Command<br />
The MCA384 Vector command executes a CGM vector, which is a predefined<br />
sequence of CGM movements. You can also specify gripper actions at the Safe<br />
and End positions. This command requires the CGM (common gripper module),<br />
which is a hardware option for the MCA384.<br />
<strong>Freedom</strong> <strong>EVOware</strong> <strong>Software</strong> <strong>Manual</strong>, 393172, en, V<strong>2.3</strong> 15 - 199
15 - Script Commands<br />
MCA384 Commands<br />
CGM vectors are very similar to RoMa vectors. See 9.6.1 “Using RoMa Vectors”,<br />
9-58. The main difference is that when you teach CGM vectors you must also<br />
specify the Y position of the MCA384 pipetting head. <strong>Freedom</strong> <strong>EVOware</strong> needs<br />
this information to ensure that the CGM will not collide with the MCA384 as it<br />
moves.<br />
The MCA384 Vector command can only be carried out when the CGM Is<br />
undocked from the MCA384 pipetting head (see 15.69.13 “MCA384 Dock CGM<br />
Command”, 15-204). If the CGM is currently docked, it is undocked<br />
automatically (and left undocked when the Vector command is completed). Use<br />
the Dock CGM command if you want to dock it again.<br />
The MCA384 Vector command is intended for special MCA384 movements and<br />
not for moving labware from one position to another - you should use the MCA384<br />
Transfer Labware command instead for this purpose. See 15.58.1 “Moving<br />
labware with the RoMa Vector command”, 15-142 for additional information<br />
which is also applicable to the MCA384.<br />
Fig. 15-131 MCA384 Vector command<br />
The parameters of the MCA384 Vector command are as follows:<br />
CGM-No.<br />
The pull-down list is gray (inactive) and preset to 1 because current <strong>Freedom</strong><br />
EVO pipetting instruments can only be fitted with one MCA384 and CGM.<br />
15 - 200 <strong>Freedom</strong> <strong>EVOware</strong> <strong>Software</strong> <strong>Manual</strong>, 393172, en, V<strong>2.3</strong>
15 - Script Commands<br />
MCA384 Commands<br />
Use CGM Vector<br />
Choose the CGM vector you want to use for the movement. The popup list<br />
shows the CGM vectors which are currently defined in the <strong>Freedom</strong> <strong>EVOware</strong><br />
database.<br />
Then specify the grid position and carrier site for which the vector is intended.<br />
The Grid field is protected (gray) if you have chosen a vector for a device<br />
which is not positioned on the worktable (see Carrier is Device checkbox in<br />
the carrier definition).<br />
Tip: If you click on a carrier, the current grid position is shown in the small<br />
yellow tab at the bottom left.<br />
Move along CGM Vector<br />
Choose the required direction of the CGM movement. Click And back if you<br />
want the CGM to return to the Safe position after reaching the End position.<br />
Gripper action<br />
Choose the gripper action which should be executed at the Safe position and<br />
at the End position. The required gripper spacing to pick up and release the<br />
labware is taken from the Grip Width and Release Width parameters in the<br />
chosen CGM vector.<br />
Speed<br />
Choose Maximum if you want the CGM to move at maximum speed. Choose<br />
Slow if you want the CGM to move at the speed specified in the CGM vector.<br />
15.69.12 MCA384 Transfer Labware Command<br />
The MCA384 Transfer Labware command is used to transfer labware (e.g. a<br />
microplate) from one position to another with the CGM. This command requires<br />
the CGM (common gripper module), which is a hardware option for the MCA384.<br />
If you have scanned the labware barcode and you move the labware with the<br />
MCA384 Transfer Labware command, the barcode remains assigned to the<br />
labware (i.e. the labware data record) at the new location. In addition, pipetting<br />
information, if any, remains assigned to the labware (see 15.26 “Export Data<br />
Command”, 15-48).<br />
CGM vectors are very similar to RoMa vectors. See 9.6.1 “Using RoMa Vectors”,<br />
9-58. The main difference is that when you teach CGM vectors you must also<br />
specify the Y position of the MCA384 pipetting head. <strong>Freedom</strong> <strong>EVOware</strong> needs<br />
this information to ensure that the CGM will not collide with the MCA384 as it<br />
moves.<br />
The MCA384 Transfer Labware command can only be carried out when the CGM<br />
is undocked from the MCA384 pipetting head (see 15.69.13 “MCA384 Dock CGM<br />
Command”, 15-204). If the CGM is currently docked, it is undocked<br />
automatically (and left undocked when the Transfer Labware command is<br />
completed). Use the Dock CGM command if you want to dock it again.<br />
Grip and release commands for the CGM (used to pick up and put down the<br />
labware) are handled automatically. The required gripper spacing is taken from<br />
the advanced properties for the respective labware type (see 9.4.2 “Editing<br />
Labware, Advanced Tab”, 9-22).<br />
<strong>Freedom</strong> <strong>EVOware</strong> <strong>Software</strong> <strong>Manual</strong>, 393172, en, V<strong>2.3</strong> 15 - 201
15 - Script Commands<br />
MCA384 Commands<br />
Fig. 15-132 MCA384 Transfer Labware command<br />
The parameters of the MCA384 Transfer Labware command are as follows:<br />
Move with<br />
The pull-down list is gray (inactive) and preset to MCA384 1 because current<br />
<strong>Freedom</strong> EVO pipetting instruments can only be fitted with one MCA384 and<br />
CGM.<br />
Vector<br />
Choose the CGM vector that you want to use to transfer the labware.<br />
Choose Narrow to pick up the labware on the narrow side; choose Wide to<br />
pick up the labware on the wide side.<br />
Choose User defined (Narrow) or (Wide) to pick up the labware on the narrow<br />
or wide side with a user-defined vector. In this case, you must choose the<br />
user-defined vector to use for picking up the labware at the source position<br />
and putting down it at the destination position in the two User Vector pull-down<br />
lists. User-defined vectors are created in the Control Bar (Robot Vectors<br />
section). See 5.4.1.6 “Robot Vectors”, 5-12.<br />
Above all if you did not create the user-defined vector yourself, we<br />
recommend you to check carefully that the vector moves the MCA384 to the<br />
correct (i.e. intended) source and destination carrier positions before using it<br />
for pipetting. Tip: Test the CGM vector in a script using the 3D simulation<br />
program EVOSim.<br />
<strong>Freedom</strong> <strong>EVOware</strong> will report an error when you complete the Transfer<br />
Labware command if the narrow or wide CGM vector has not yet been<br />
created for the chosen labware type. It is best to create the required CGM<br />
vector in advance. CGM vectors are very similar to RoMa vectors (see<br />
9.6.2 “Teach Plate Robot Vector Dialog Box”, 9-59).<br />
15 - 202 <strong>Freedom</strong> <strong>EVOware</strong> <strong>Software</strong> <strong>Manual</strong>, 393172, en, V<strong>2.3</strong>
15 - Script Commands<br />
MCA384 Commands<br />
⌦ Transfer Labware command, Step 1<br />
Specify the parameters for the source position:<br />
Source position<br />
Select the current position of the labware by clicking on it in the Worktable<br />
Editor.<br />
Grid and Site then show the position you have chosen. The gray (protected)<br />
field Defined Carrier then shows the type of carrier at the chosen site and the<br />
gray (protected) field Defined Labware shows the type of labware at the<br />
chosen site.<br />
If you want to fetch the labware from a device such as a hotel or barcode<br />
scanner, click on the device icon. You then need to choose the site and the<br />
labware type. The list shows labware types which are allowed for the device<br />
(see 9.5 “Configuring Carriers”, 9-39, “Allowed Labware on this carrier”).<br />
⌦ Transfer Labware command, Step 2<br />
Specify the parameters for the labware lid. These parameters are only available<br />
for labware types which can be fitted with a lid:<br />
Lid handling<br />
Check this checkbox if the labware has a lid. Choose Cover at source if you<br />
want to put on the lid before moving the labware. Choose Uncover at<br />
destination if you want to remove the lid after moving the labware to the<br />
destination position (i.e. the lid was already present). In either case, select the<br />
position for fetching or putting aside the lid by clicking on the site in the<br />
Worktable Editor. Grid and Site then show the position you have chosen. The<br />
gray (protected) field Defined Carrier shows the type of carrier on which the lid<br />
is placed/will be placed. You can only put aside lids on unused carrier sites.<br />
⌦ Transfer Labware command, Step 3<br />
Specify the parameters for the destination position:<br />
Destination Position<br />
Select the required destination position of the labware by clicking on the site in<br />
the Worktable Editor.<br />
The destination site must be suitable for the labware type you are moving (see<br />
9.5 “Configuring Carriers”, 9-39, “Allowed labware on this carrier”).<br />
Grid and Site then show the position you have chosen. The gray (protected)<br />
field Defined Carrier then shows the type of carrier at the chosen site.<br />
If you want to move the labware to a device such as a hotel or barcode<br />
scanner, click on the device icon. You then need to choose the site and the<br />
labware type. The list shows labware types which are allowed for the device<br />
(see 9.5 “Configuring Carriers”, 9-39, “Allowed Labware on this carrier”).<br />
Speed<br />
Choose Maximum if you want the CGM to move at maximum speed. Choose<br />
Taught in vector dialog if you want the CGM to move at the speed specified in<br />
the CGM vector.<br />
Move back to Home Position<br />
Check this checkbox if you want the CGM to move back to its home (parking)<br />
position after transferring the labware. See 9.6.4 “Defining the Home Position<br />
for a RoMa”, 9-62.<br />
<strong>Freedom</strong> <strong>EVOware</strong> <strong>Software</strong> <strong>Manual</strong>, 393172, en, V<strong>2.3</strong> 15 - 203
15 - Script Commands<br />
MCA384 Commands<br />
15.69.13 MCA384 Dock CGM Command<br />
The MCA384 Dock CGM command is used to dock the CGM around the MCA384<br />
pipetting head. This reduces the amount of space required by the MCA384/CGM<br />
hardware in the X direction. The CGM (common gripper module) is a hardware<br />
option for the MCA384 which can be used to pick up and move labware. The<br />
CGM can only be used for gripping and moving labware when it is undocked.<br />
Commands which use the CGM initiate the undocking operation automatically, if<br />
necessary.<br />
If sufficient space is available on the worktable, the CGM can be kept permanently<br />
undocked to avoid the time needed for undocking when the CGM is used. This<br />
speeds up commands which use the CGM.<br />
To dock the CGM, the gripper fingers are lowered below the MCA384 pipetting<br />
head, opened completely and rotated until they point to the left. The grippers are<br />
then raised again until the pipetting head is positioned centrally between the<br />
fingers. When docked, the CGM always moves together with the pipetting head,<br />
and the pipetting head can be moved as if the CGM is not mounted. Tip: You can<br />
test and view docking and undocking using the 3D simulator EVOSim.<br />
<strong>Freedom</strong> <strong>EVOware</strong> Plus: The CGM is docked and undocked automatically, if<br />
necessary (see 8.5.13.2 “MCA384 Configuration - Settings Tab”, 8-66, Dock<br />
CGM after move).<br />
15.69.14 MCA384 Undock CGM Command<br />
The MCA384 Undock CGM command is used to undock the CGM from the<br />
MCA384 pipetting head. The CGM (common gripper module) is a hardware<br />
option for the MCA384 which can be used to pick up and move labware. The<br />
CGM can only be used for gripping and moving labware when it is undocked.<br />
Commands which use the CGM initiate the undocking operation automatically, if<br />
necessary.<br />
Fig. 15-133 MCA384 Undock CGM command<br />
The parameters are as follows:<br />
15 - 204 <strong>Freedom</strong> <strong>EVOware</strong> <strong>Software</strong> <strong>Manual</strong>, 393172, en, V<strong>2.3</strong>
15 - Script Commands<br />
CNS SendNotification command<br />
Position after undocking panel<br />
Rotator position<br />
Specify the required angle of the grippers after undocking (in 0.1 degrees<br />
steps).<br />
Safe position of<br />
Specify the required safe position manually (specify grid and site) or click on a<br />
“safe” carrier in the Worktable Editor. The gray (protected) field then shows<br />
the name of the carrier you have chosen.<br />
If sufficient space is available on the worktable, the CGM can be kept permanently<br />
undocked to avoid the time needed for undocking when the CGM is used. This<br />
speeds up commands which use the CGM.<br />
To dock the CGM, the gripper fingers are lowered below the MCA384 pipetting<br />
head, opened completely and rotated until they point to the left. The grippers are<br />
then raised again until the pipetting head is positioned centrally between the<br />
fingers. When docked, the CGM always moves together with the pipetting head,<br />
and the pipetting head can be moved as if the CGM is not mounted. Tip: You can<br />
test and view docking and undocking using the 3D simulator EVOSim.<br />
<strong>Freedom</strong> <strong>EVOware</strong> Plus: The CGM is docked and undocked automatically, if<br />
necessary (see 8.5.13.2 “MCA384 Configuration - Settings Tab”, 8-66, Dock<br />
CGM after move).<br />
15.70 CNS SendNotification command<br />
The Common Notification Server (CNS) is a central Tecan software component<br />
which is responsible for sending notification messages. The SendNotification<br />
command is used to send a message to one or more recipients:<br />
Fig. 15-134 CNS SendNotification command<br />
The Recipients panel only shows <strong>Freedom</strong> <strong>EVOware</strong> users whose eMail address<br />
has already been configured with the CNS Configuration Tool (see A.12.2 “CNS<br />
Configuration Tool”, A-84). The messages which are sent are also shown in the<br />
CNS web server (see A.12.1 “CNS Web Server”, A-83).<br />
The parameters of the SendNotification command are as follows:<br />
<strong>Freedom</strong> <strong>EVOware</strong> <strong>Software</strong> <strong>Manual</strong>, 393172, en, V<strong>2.3</strong> 15 - 205
15 - Script Commands<br />
CNS SendNotification command<br />
Severity<br />
Choose the required severity of the message (comment, information, warning<br />
or error). Depending on the recipient’s eMail software, the chosen severity is<br />
shown in the “message priority” or “message severity” column or field in the<br />
eMail software. In the CNS web server, the messages are shown accordingly<br />
on the Warnings, Errors and Infos tabs.<br />
Channel names<br />
Choose one or more communication channels, as required. Currently, the<br />
CNS SendNotification command only supports the communication channel<br />
“Email”.<br />
Recipients<br />
Check one or more checkboxes to choose the required recipients of the<br />
message. The Recipients panel only shows <strong>Freedom</strong> <strong>EVOware</strong> users whose<br />
eMail address has already been configured with the CNS Configuration Tool<br />
(see A.12.2 “CNS Configuration Tool”, A-84).<br />
Content<br />
Enter the required text of the message.<br />
15 - 206 <strong>Freedom</strong> <strong>EVOware</strong> <strong>Software</strong> <strong>Manual</strong>, 393172, en, V<strong>2.3</strong>
16 - Device Commands<br />
Service Functions<br />
16 Device Commands<br />
This chapter contains detailed descriptions of the <strong>Freedom</strong> <strong>EVOware</strong> device<br />
commands.<br />
<strong>Freedom</strong><br />
<strong>EVOware</strong> Plus<br />
<strong>Freedom</strong><br />
<strong>EVOware</strong><br />
<strong>Standard</strong><br />
In <strong>Freedom</strong> <strong>EVOware</strong> Plus, when the Script Editor is open the Commands tab<br />
only shows script commands (commands which are used for writing pipetting<br />
scripts, see 13.1 “Overview of Script Commands”, 13-1). When the Process<br />
Editor is open, the Commands tab of the Control Bar only shows device<br />
commands (commands for the optional devices, see 13.2 “Overview of Device<br />
Commands”, 13-12).<br />
In <strong>Freedom</strong> <strong>EVOware</strong> <strong>Standard</strong>, the Control Bar always shows both command<br />
types (it does not have a Process Editor).<br />
If you cannot find the device that you want to use in the Control Bar, you must run<br />
the installation program again and install the respective device driver (see<br />
4.3 “Modifying, Removing or Repairing Your Installation”, 4-8). Also check<br />
whether the driver has been installed but is currently deactivated (see<br />
8.4.1.1 “Device Information Tab”, 8-21, Start checkbox).<br />
Note: Some of the device commands which are described in this chapter are not<br />
shown at all in the Control Bar. Such commands are used internally, e.g. for<br />
configuring pre-actions and post-actions.<br />
16.1 Service Functions<br />
Some or all of the commands for each device can be executed manually from the<br />
Control Bar (without running a process) for service purposes, e.g. to initialize the<br />
device manually or to test correct functioning. To run a device command manually,<br />
right-click on the command name in the Commands section of the Control Bar and<br />
choose Run Command from the context menu.<br />
Before executing a command for service purposes, make sure that the pipetting<br />
instrument and/or the device is set up appropriately. For example, some of the<br />
commands require you to put a microplate onto one or more carriers and/or into<br />
the device.<br />
See 6.4.2 “Run Maintenance”, 6-10 for information on instrument maintenance<br />
functions. Maintenance functions are scripts which are created using the Script<br />
Editor.<br />
16.2 Commands for the Symbol LS-1220 Barcode Scanner<br />
The Symbol LS-1220 barcode scanner option allows you to read barcodes on<br />
plates or tubes which are presented to the scanner by a plate or tube robot. It can<br />
perform several reading attempts and tell the robot to increase its range of motion<br />
in front of the laser beam each time to detect barcodes even if they are not<br />
precisely positioned in front of the laser beam at the first try.<br />
<strong>Freedom</strong> <strong>EVOware</strong> <strong>Software</strong> <strong>Manual</strong>, 393172, en, V<strong>2.3</strong> 16 - 1
16 - Device Commands<br />
Commands for the Carousel<br />
In <strong>Freedom</strong> <strong>EVOware</strong> Plus, the Barcode Scanner - Read Barcode command is an<br />
on-the-fly-command – drag the command to the line which connects two process<br />
steps (see 5.4.3 “The Process Editor (<strong>Freedom</strong> <strong>EVOware</strong> Plus)”, 5-17).<br />
16.2.1 Barcode Scanner - Read Barcode Command<br />
The Read Barcode command is used to read barcodes from the labware or tube<br />
which is presented to the barcode scanner by the RoMa. The RoMa moves the<br />
labware or tube in front of the scanner in x, y and z direction according to the<br />
driver settings you have made. The scanner driver can be configured to re-scan<br />
several times if the labware or tube barcode cannot be read on the first attempt. It<br />
increases the distance of movement of the labware or tube along the three axes<br />
each time to increase the likelihood of finding the barcode. If a timeout occurs, the<br />
user will either be prompted to specify a barcode manually or a default barcode<br />
will be constructed, again depending on the driver configuration. See<br />
8.5.1 “Settings for the Barcode Scanner”, 8-39 for details.<br />
See 13.2.1 “Commands for the Barcode Scanner, Overview”, 13-12 for general<br />
information on using the Read Barcode command.<br />
<strong>Freedom</strong> <strong>EVOware</strong> stores each scanned barcode in the internal database in the<br />
ID field of the labware record. The barcode information can also be included in<br />
report files (see 15.26 “Export Data Command”, 15-48).<br />
This command has no execution parameters or objects, pre-actions or postactions.<br />
16.3 Commands for the Carousel<br />
The carousel is a motor-driven magazine system which is used to store<br />
microplates, tube racks or DITI racks and to present them to the instrument for<br />
pipetting operations. Each carousel can have 1 to 9 towers. The labware is<br />
removed from the carousel and re-inserted using the plate robot. The carousel<br />
can be fitted with a barcode scanner which can read barcode labels on plates<br />
when they are inserted and removed. The carousel can be used like any other<br />
microplate hotel on your pipetting instrument.<br />
The carousel must be subdivided into several logical carousels if you want to use<br />
it to store a mixture of labware types with different dimensions. See<br />
9.5.5.3 “Carousel Carrier Attributes”, 9-50 for more information.<br />
16.3.1 Carousel - PresentPlate Command<br />
The PresentPlate command gets labware from the carousel. The labware is<br />
brought to the carousel transfer position where the plate robot can pick it up and<br />
move it away.<br />
Execution parameters<br />
You are prompted to specify the following execution parameters when you add<br />
this command to your script or process:<br />
16 - 2 <strong>Freedom</strong> <strong>EVOware</strong> <strong>Software</strong> <strong>Manual</strong>, 393172, en, V<strong>2.3</strong>
16 - Device Commands<br />
Commands for the Carousel<br />
Fig. 16-1 Carousel - PresentPlate command<br />
Carousel Selection panel<br />
Plate type<br />
Choose the labware type that you want to use with this command. This tells<br />
the carousel the labware dimensions and how to handle the labware correctly.<br />
Cartridge<br />
Specify the carousel cartridge (tower) containing the labware that you want.<br />
Plate position<br />
Specify the current labware position in the tower or the name of a numeric<br />
variable. Plates are counted from top to bottom.<br />
To view or edit the execution parameters again later, right-click on the script<br />
command in the Script Editor and choose Edit in the context menu.<br />
16.3.2 Carousel - PreReturnPlateByBC Command<br />
The PreReturnPlateByBC command moves the carousel’s plate handler to the<br />
carousel transfer position where it waits for the RoMa to bring the labware which<br />
you want to return to the carousel. It is used together with the<br />
ReturnPlateByBarcode command.<br />
The following sequence of commands must be used to return labware to its<br />
orginal position in the carousel:<br />
• Carousel - PreReturnPlateByBC<br />
• RoMa - Transfer Labware<br />
• Carousel - ReturnPlateByBarcode<br />
The Carousel - EndAccess command is not required in this case.<br />
See 16.3.4 “Carousel - ReturnPlateByBarcode Command”, 16-4 for more<br />
information.<br />
16.3.3 Carousel - ReturnPlate Command<br />
The ReturnPlate command returns labware from the carousel transfer position to<br />
the specified tower and position in the carousel.<br />
<strong>Freedom</strong> <strong>EVOware</strong> <strong>Software</strong> <strong>Manual</strong>, 393172, en, V<strong>2.3</strong> 16 - 3
16 - Device Commands<br />
Commands for the Carousel<br />
Execution parameters<br />
You are prompted to specify the following execution parameters when you add<br />
this command to your script or process:<br />
Fig. 16-2 Carousel ReturnPlate command<br />
Carousel Selection panel<br />
Cartridge<br />
Specify the carousel cartridge (tower) where the labware should be put.<br />
Plate position<br />
Specify the required labware position in the tower or the name of a numeric<br />
variable. Plates are counted from top to bottom.<br />
To view or edit the execution parameters again later, right-click on the script<br />
command in the Script Editor and choose Edit in the context menu.<br />
16.3.4 Carousel - ReturnPlateByBarcode Command<br />
The ReturnPlateByBarcode command returns labware from the carousel transfer<br />
position to its original position in the carousel.<br />
To use this command, before getting labware from the carousel you must scan the<br />
barcodes of all of the labware in the carousel with the ReadAllBarcodes or<br />
ReadPlatesInCartridge command. The carousel driver then creates an internal<br />
table with information on which labware is stored in which position This allows the<br />
carousel to keep track of the orginal position of barcoded labware which has been<br />
removed.<br />
The ReturnPlateByBarcode command must be preceded by the<br />
PreReturnPlateByBC command. The following sequence of commands must be<br />
used to return labware to its orginal position in the carousel:<br />
• Carousel - PreReturnPlateByBC<br />
• RoMa - Transfer Labware<br />
• Carousel - ReturnPlateByBarcode<br />
The Carousel - EndAccess command is not required in this case.<br />
When the ReturnPlateByBarcode command is executed, the carousel handler<br />
moves the labware into the carousel, moves back to the transfer position and<br />
moves in again. The double movement is necessary for mechanical reasons.<br />
16 - 4 <strong>Freedom</strong> <strong>EVOware</strong> <strong>Software</strong> <strong>Manual</strong>, 393172, en, V<strong>2.3</strong>
16 - Device Commands<br />
Commands for the Carousel<br />
16.3.5 Carousel - ReadAllBarcodes command<br />
The ReadAllBarcodes command reads the barcodes of all of labware in the<br />
carousel. <strong>Freedom</strong> <strong>EVOware</strong> stores each scanned barcode in the internal<br />
database in the ID field of the labware record. The barcode information can also<br />
be included in report files (see 15.26 “Export Data Command”, 15-48).<br />
In addition, the carousel driver writes the scanned barcodes to a text file (see<br />
A.2.1 “Barcode files written by the Carousel commands”, A-11).<br />
Note: If the carousel cartridge is configured for the maximum number of slots<br />
(labware positions) which are physically possible, for mechanical reasons the<br />
barcode scanner may not be able to scan the barcode of the labware in the<br />
topmost slot.<br />
This command has no execution parameters or objects, pre-actions or postactions.<br />
16.3.6 Carousel - InitCarousel Command<br />
The InitCarousel command initializes the carousel. You must initialize the<br />
hardware with this command before you use the other commands for this device.<br />
This command has no execution parameters or objects, pre-actions or postactions.<br />
16.3.7 Carousel - MoveToCartridge Command<br />
The MoveToCartridge command rotates the carousel to a specified tower.<br />
Execution parameters<br />
You are prompted to specify the following execution parameters when you add<br />
this command to your script or process:<br />
Fig. 16-3 Carousel MoveToCartridge command<br />
<strong>Freedom</strong> <strong>EVOware</strong> <strong>Software</strong> <strong>Manual</strong>, 393172, en, V<strong>2.3</strong> 16 - 5
16 - Device Commands<br />
Commands for the Carousel<br />
Carousel Selection panel<br />
Cartridge<br />
Specify the cartridge (tower) to which the carousel should be rotated.<br />
To view or edit the execution parameters again later, right-click on the process<br />
step in the Process Editor and choose Edit Parameters in the context menu.<br />
16.3.8 Carousel - EndAccess Command<br />
The EndAccess command completes the current carousel movement. This<br />
command is necessary after each PresentPlate, PresentPlateByBarcode and<br />
ReturnPlate command.<br />
This command has no execution parameters or objects, pre-actions or postactions.<br />
16.3.9 Carousel - ReadPlatesInCartridge Command<br />
The ReadPlatesInCartridge command reads the barcodes of all of the labware in<br />
the specified cartridge (tower) of the carousel. <strong>Freedom</strong> <strong>EVOware</strong> stores each<br />
scanned barcode in the internal database in the ID field of the labware record. The<br />
barcode information can also be included in report files (see 15.26 “Export Data<br />
Command”, 15-48).<br />
In addition, the carousel driver writes the scanned barcodes to a text file (see<br />
A.2.1 “Barcode files written by the Carousel commands”, A-11).<br />
Execution parameters<br />
You are prompted to specify the following execution parameters when you add<br />
this command to your script or process:<br />
Fig. 16-4 Carousel ReadPlatesInCartridge command<br />
Carousel Selection panel<br />
Cartridge<br />
Specify the carousel cartridge (tower) where the barcodes should be read.<br />
To view or edit the execution parameters again later, right-click on the process<br />
step in the Process Editor and choose Edit Parameters in the context menu.<br />
16 - 6 <strong>Freedom</strong> <strong>EVOware</strong> <strong>Software</strong> <strong>Manual</strong>, 393172, en, V<strong>2.3</strong>
16 - Device Commands<br />
Commands for the Carousel<br />
Note: If the carousel cartridge is configured for the maximum number of slots<br />
(labware positions) which are physically possible, for mechanical reasons the<br />
barcode scanner may not be able to scan the barcode of the labware in the<br />
topmost slot.<br />
16.3.10 Carousel - PresentPlateByBarcode Command<br />
The PresentPlateByBarcode command gets the labware with the specified<br />
barcode from the carousel. The labware is brought to the carousel transfer<br />
position where the plate robot can pick it up and move it away.<br />
Before this command is executed, you must scan the barcodes of all of the<br />
labware in the carousel with the ReadAllBarcodes or ReadPlatesInCartridge<br />
command. The carousel driver then creates an internal table with information on<br />
which labware is stored in which position.<br />
Execution parameters<br />
You are prompted to specify the following execution parameters when you add<br />
this command to your script or process:<br />
Fig. 16-5 Carousel PresentPlateByBarcode command<br />
Plate type<br />
Choose the labware type that you want to use with this command. This tells<br />
the carousel the labware dimensions and how to handle the labware correctly.<br />
Barcode<br />
Enter the name of a text file containing the barcode of the labware you want or<br />
click Browse and choose an existing file. The text file can contain more than<br />
one barcode (see Barcode line number). Each barcode must be on a new line.<br />
Barcode line number<br />
If the text file contains more than one barcode, specify the line number which<br />
contains the barcode.<br />
To view or edit the execution parameters again later, right-click on the script<br />
command in the Script Editor and choose Edit in the context menu.<br />
16.3.11 Carousel - PrePresentPlate Command<br />
The PrePresentPlate command brings the next labware item to be processed<br />
from the carousel tower to the transfer position where it can be picked up by the<br />
<strong>Freedom</strong> <strong>EVOware</strong> <strong>Software</strong> <strong>Manual</strong>, 393172, en, V<strong>2.3</strong> 16 - 7
16 - Device Commands<br />
Commands for the Carousel NT<br />
RoMa during idle time. The RoMa then does not have to wait for the labware to be<br />
brought from the tower. This optimizes the movement times for the carousel. This<br />
command is mainly intended for internal use by <strong>Freedom</strong> <strong>EVOware</strong>.<br />
Objects<br />
The PrePresentPlate command operates on a labware item of type Object or a<br />
derived type with default name MP.<br />
16.3.12 Carousel - UndoPrePresent Command<br />
The UndoPrePresent command cancels the pre-unloading of plates. This<br />
command is only used by <strong>Freedom</strong> <strong>EVOware</strong> internally.<br />
This command has no execution parameters or objects, pre-actions or postactions.<br />
16.3.13 Carousel - LoadBCFromFile Command<br />
The LoadBCFromFile command reads a list of barcodes from a text file and<br />
assigns them to the labware in the carousel.<br />
Fig. 16-6 Carousel LoadBCFromFile command<br />
Filename<br />
Enter the name of a text file containing the barcodes you want to assign to the<br />
labware or click Browse and choose an existing file. See A.2.1.1 “Barcode<br />
files read by the Carousel commands”, A-12 for information on the required<br />
structure of the barcode file.<br />
16.4 Commands for the Carousel NT<br />
The carousel is a motor-driven magazine system which is used to store<br />
microplates, tube racks or DITI racks and to present them to the instrument for<br />
pipetting operations. Each carousel can have 1 to 9 towers. The labware is<br />
removed from the carousel and re-inserted using the plate robot. The carousel<br />
can be fitted with a barcode scanner which can read barcode labels on plates<br />
when they are inserted and removed. The carousel can be used like any other<br />
microplate hotel on your pipetting instrument.<br />
The Carousel NT supersedes the standard carousel and features a number of<br />
electrical and mechanical improvements, including faster operation and safety<br />
doors which can be fitted with doorlocks.<br />
16 - 8 <strong>Freedom</strong> <strong>EVOware</strong> <strong>Software</strong> <strong>Manual</strong>, 393172, en, V<strong>2.3</strong>
16 - Device Commands<br />
Commands for the Carousel NT<br />
The carousel must be subdivided into several logical carousels if you want to use<br />
it to store a mixture of labware types with different dimensions. See<br />
9.5.5.4 “Carousel NT Carrier Attributes”, 9-52 for more information.<br />
16.4.1 Carousel NT - OpenDoorlock command<br />
The OpenDoorlock command unlocks the doorlocks of the carousel safety door.<br />
This command can be used e.g. if you want to open the door when a script or<br />
process is running to allow the operator to insert a cartridge with new labware. For<br />
safety reasons, you must pause the script or process with the User Prompt<br />
command directly after you unlock the doorlocks. Furthermore, you must lock the<br />
doorlocks again with the CloseDoorlocks command when the operator has<br />
replaced the cartridge (see 16.4.2 “Carousel NT - CloseDoorlock command”,<br />
16-9).<br />
This command has no execution parameters or objects, pre-actions or postactions.<br />
16.4.2 Carousel NT - CloseDoorlock command<br />
The CloseDoorlock command locks the doorlocks of the carousel safety door. The<br />
door must be locked again after a preceeding OpenDoorlocks command (see<br />
16.4.1 “Carousel NT - OpenDoorlock command”, 16-9). It is is not necessary to<br />
use this command at the beginning of your script - for safety reasons, all<br />
doorlocks are locked automatically when a pipetting script or process is started.<br />
This command has no execution parameters or objects, pre-actions or postactions.<br />
16.4.3 Carousel NT - VerifyCartridges command<br />
The VerifyCartridges command is used to check that the correct cartridge types<br />
have been loaded in the carousel. The cartridge types are specified in the<br />
carousel configuration (8.5.3.2 “Carousel NT Configuration - Hotel - Cartridge<br />
Configuration Tab”, 8-46). The carousel identifies the cartridges which have<br />
been loaded by scanning the cartridge barcode (this is not the same as the<br />
labware barcode). An error message will be output if the wrong cartridge type has<br />
been loaded or the cartridge barcode is missing or unreadable.<br />
This command can be used at the start of your script or process or in a<br />
maintenance script. Alternatively, right-click the VerifyCartridges command in the<br />
Control Bar and choose Run Command in the context menu.<br />
This command has no execution parameters or objects, pre-actions or postactions.<br />
16.4.4 Carousel NT - ScanAllCartridges command<br />
The ScanAllCartridges command reads the barcodes of all of labware in the<br />
carousel. <strong>Freedom</strong> <strong>EVOware</strong> stores each scanned barcode in the internal<br />
database in the ID field of the labware record. The barcode information can also<br />
be included in report files (see 15.26 “Export Data Command”, 15-48).<br />
In addition, the carousel driver writes the scanned barcodes to a text file (see<br />
A.2.1 “Barcode files written by the Carousel commands”, A-11).<br />
<strong>Freedom</strong> <strong>EVOware</strong> <strong>Software</strong> <strong>Manual</strong>, 393172, en, V<strong>2.3</strong> 16 - 9
16 - Device Commands<br />
Commands for the Carousel NT<br />
This command has no execution parameters or objects, pre-actions or postactions.<br />
16.4.5 Carousel NT - ScanCartridge Command<br />
The ScanCartridge command reads the barcodes of all of the labware in the<br />
specified cartridge (tower) of the carousel. <strong>Freedom</strong> <strong>EVOware</strong> stores each<br />
scanned barcode in the internal database in the ID field of the labware record. The<br />
barcode information can also be included in report files (see 15.26 “Export Data<br />
Command”, 15-48).<br />
In addition, the carousel driver writes the scanned barcodes to a text file (see<br />
A.2.1 “Barcode files written by the Carousel commands”, A-11).<br />
Execution parameters<br />
You are prompted to specify the following execution parameters when you add<br />
this command to your script or process:<br />
Fig. 16-7 Carousel NT ScanCartridge command<br />
Carousel Selection panel<br />
Cartridge<br />
Specify the carousel cartridge (tower) where the barcodes should be read.<br />
To view or edit the execution parameters again later, right-click on the process<br />
step in the Process Editor and choose Edit Parameters in the context menu.<br />
16.4.6 Carousel NT - ScanLocation Command<br />
The carousel must be subdivided into several logical carousels (separate sets of<br />
towers) if you want to use it to store a mixture of labware types with different<br />
dimensions. Each of the logical carousels must have a unique name. See<br />
9.5.5.4 “Carousel NT Carrier Attributes”, 9-52 for more information.<br />
The ScanLocation command reads the barcodes of all of the labware in the<br />
specified logical carousel. For example, if you have only exchanged the labware<br />
in towers 1 to 4, this command allows you to scan these towers only. The<br />
ScanLocation command is only meaningful if the carousel has been subdivided.<br />
16 - 10 <strong>Freedom</strong> <strong>EVOware</strong> <strong>Software</strong> <strong>Manual</strong>, 393172, en, V<strong>2.3</strong>
16 - Device Commands<br />
Commands for the Carousel NT<br />
<strong>Freedom</strong> <strong>EVOware</strong> stores each scanned barcode in the internal database in the<br />
ID field of the labware record. The barcode information can also be included in<br />
report files (see 15.26 “Export Data Command”, 15-48).<br />
In addition, the carousel driver writes the scanned barcodes to a text file (see<br />
A.2.1 “Barcode files written by the Carousel commands”, A-11).<br />
Execution parameters<br />
You are prompted to specify the following execution parameters when you add<br />
this command to your script or process:<br />
Fig. 16-8 Carousel NT ScanLocation command<br />
In the above example, a logical carousel has been created with the name<br />
CarouselNT_MTP96. In this example, towers 1 to 4 will be used to store<br />
microplates. The other towers will be used to store DITI racks. The above<br />
ScanLocation command will only scan towers 1 to 4.<br />
Carousel Selection panel<br />
Location<br />
Choose the logical carousel (set of towers) where the barcodes should be<br />
read. If you have not subdivided the carousel into logical carousels, the pulldown<br />
list will only have one entry; the ScanLocation command will scan all of<br />
the cartridges (towers) in this case.<br />
To view or edit the execution parameters again later, right-click on the process<br />
step in the Process Editor and choose Edit Parameters in the context menu.<br />
16.4.7 Carousel NT - PresentPlate Command<br />
The PresentPlate command gets labware from the carousel. The labware is<br />
brought to the carousel transfer position where the plate robot can pick it up and<br />
move it away.<br />
Execution parameters<br />
You are prompted to specify the following execution parameters when you add<br />
this command to your script or process:<br />
<strong>Freedom</strong> <strong>EVOware</strong> <strong>Software</strong> <strong>Manual</strong>, 393172, en, V<strong>2.3</strong> 16 - 11
16 - Device Commands<br />
Commands for the Carousel NT<br />
Fig. 16-9 Carousel NT PresentPlate command<br />
Carousel Selection panel<br />
Plate type<br />
Choose the labware type that you want to use with this command. This tells<br />
the carousel the labware dimensions and how to handle the labware correctly.<br />
Cartridge<br />
Specify the carousel cartridge (tower) containing the labware that you want.<br />
Plate position<br />
Specify the current labware position in the tower or the name of a numeric<br />
variable. Plates are counted from top to bottom.<br />
To view or edit the execution parameters again later, right-click on the script<br />
command in the Script Editor and choose Edit in the context menu.<br />
16.4.8 Carousel NT - ReturnPlate Command<br />
The ReturnPlate command returns labware from the carousel transfer position to<br />
the specified tower and position in the carousel.<br />
Execution parameters<br />
You are prompted to specify the following execution parameters when you add<br />
this command to your script or process:<br />
16 - 12 <strong>Freedom</strong> <strong>EVOware</strong> <strong>Software</strong> <strong>Manual</strong>, 393172, en, V<strong>2.3</strong>
16 - Device Commands<br />
Commands for the Carousel NT<br />
Fig. 16-10 Carousel NT ReturnPlate command<br />
Carousel Selection panel<br />
Cartridge<br />
Specify the carousel cartridge (tower) where the labware should be put.<br />
Plate position<br />
Specify the required labware position in the tower or the name of a numeric<br />
variable. Plates are counted from top to bottom.<br />
To view or edit the execution parameters again later, right-click on the script<br />
command in the Script Editor and choose Edit in the context menu.<br />
16.4.9 Carousel NT - PresentPlateByBC Command<br />
The PresentPlateByBC command gets the labware with the specified barcode<br />
from the carousel. The labware is brought to the carousel transfer position where<br />
the plate robot can pick it up and move it away.<br />
Before this command is executed, you must scan the barcodes of all of the<br />
labware in the carousel with the ScanAllCartridges or ScanCartridge command.<br />
The carousel driver then creates an internal table with information on which<br />
labware is stored in which position.<br />
Execution parameters<br />
You are prompted to specify the following execution parameters when you add<br />
this command to your script or process:<br />
<strong>Freedom</strong> <strong>EVOware</strong> <strong>Software</strong> <strong>Manual</strong>, 393172, en, V<strong>2.3</strong> 16 - 13
16 - Device Commands<br />
Commands for the Carousel NT<br />
Fig. 16-11 Carousel NT PresentPlateByBarcode command<br />
Plate type<br />
Choose the labware type that you want to use with this command. This tells<br />
the carousel the labware dimensions and how to handle the labware correctly.<br />
Barcode file name<br />
Enter the name of a text file containing the barcode of the labware you want or<br />
click Browse and choose an existing file. The text file can contain more than<br />
one barcode (see Barcode line number). Each barcode must be on a new line.<br />
Barcode line number<br />
If the text file contains more than one barcode, specify the line number which<br />
contains the barcode.<br />
To view or edit the execution parameters again later, right-click on the script<br />
command in the Script Editor and choose Edit in the context menu.<br />
16.4.10 Carousel NT - ReturnPlateByBC Command<br />
The ReturnPlateByBC command returns labware from the carousel transfer<br />
position to its original position in the carousel.<br />
To use this command, before getting labware from the carousel you must scan the<br />
barcodes of all of the labware in the carousel with the ScanAllCartridges or<br />
ScanCartridge command. The carousel driver then creates an internal table with<br />
information on which labware is stored in which position This allows the carousel<br />
to keep track of the orginal position of barcoded labware which has been<br />
removed.<br />
When the ReturnPlateByBarcode command is executed, the carousel handler<br />
moves the labware into the carousel, moves back to the transfer position and<br />
moves in again. The double movement is necessary for mechanical reasons.<br />
16.4.11 Carousel NT - MoveToCartridge Command<br />
The MoveToCartridge command rotates the carousel to a specified tower.<br />
Execution parameters<br />
You are prompted to specify the following execution parameters when you add<br />
this command to your script or process:<br />
16 - 14 <strong>Freedom</strong> <strong>EVOware</strong> <strong>Software</strong> <strong>Manual</strong>, 393172, en, V<strong>2.3</strong>
16 - Device Commands<br />
Commands for the Carousel NT<br />
Fig. 16-12 Carousel NT MoveToCartridge command<br />
Carousel Selection panel<br />
Cartridge<br />
Specify the cartridge (tower) to which the carousel should be rotated.<br />
To view or edit the execution parameters again later, right-click on the process<br />
step in the Process Editor and choose Edit Parameters in the context menu.<br />
16.4.12 Carousel NT - Initialize Command<br />
The Initialize command initializes the carousel and locks the doorlocks of the<br />
safety door. <strong>Freedom</strong> <strong>EVOware</strong> normally initializes the carousel automatically at<br />
the appropriate time. This command is intended for special applications.<br />
This command has no execution parameters or objects, pre-actions or postactions.<br />
16.4.13 Carousel NT - Shutdown Command<br />
The Shutdown command shuts down the carousel and locks the doorlocks of the<br />
safety door. <strong>Freedom</strong> <strong>EVOware</strong> normally shuts down the carousel automatically<br />
at the appropriate time. This command is intended for special applications.<br />
This command has no execution parameters or objects, pre-actions or postactions.<br />
16.4.14 Carousel NT - PrePresentPlate Command<br />
The PrePresentPlate command moves the next labware item to be processed to<br />
the carousel transfer position where it can be picked up by the robot during idle<br />
time. The robot then does not have to wait for the labware to be presented. This<br />
optimizes the movement times for the carousel. This command is mainly intended<br />
for internal use by <strong>Freedom</strong> <strong>EVOware</strong>.<br />
<strong>Freedom</strong> <strong>EVOware</strong> <strong>Software</strong> <strong>Manual</strong>, 393172, en, V<strong>2.3</strong> 16 - 15
16 - Device Commands<br />
Commands for the Hettich Centrifuge<br />
Objects<br />
The PrePresentPlate command operates on a labware item of type Object or a<br />
derived type with default name MP.<br />
16.4.15 Carousel NT - UndoPrePresent Command<br />
The UndoPrePresent command cancels the pre-unloading of plates.<br />
This command has no execution parameters or objects, pre-actions or postactions.<br />
16.4.16 Carousel NT - LoadBCFromFile Command<br />
The LoadBCFromFile command reads a list of barcodes from a text file and<br />
assigns them to the labware in the carousel.<br />
Fig. 16-13 Carousel NT LoadBCFromFile command<br />
Filename<br />
Enter the name of a text file containing the barcodes you want to assign to the<br />
labware or click Browse and choose an existing file. See A.2.1.1 “Barcode<br />
files read by the Carousel commands”, A-12 for information on the required<br />
structure of the barcode file.<br />
16.5 Commands for the Hettich Centrifuge<br />
The Hettich Centrifuge is a centrifuging device from the Hettich company which is<br />
fitted below the worktable and secured to the floor. It can be loaded and unloaded<br />
by reaching through a hole in the worktable with a robot. It can perform<br />
centrifuging of samples at configurable speeds and temperatures.<br />
16.5.1 Hettich Centrifuge - Init Command<br />
The Init command initializes the centrifuge. You must initialize the hardware with<br />
this command before you use the other commands for this device.<br />
This command has no execution parameters or objects, pre-actions or postactions.<br />
16 - 16 <strong>Freedom</strong> <strong>EVOware</strong> <strong>Software</strong> <strong>Manual</strong>, 393172, en, V<strong>2.3</strong>
16 - Device Commands<br />
Commands for the Hettich Centrifuge<br />
16.5.2 Hettich Centrifuge - Open Command<br />
The Open command opens the door of the centrifuge.<br />
This command has no execution parameters or objects, pre-actions or postactions.<br />
16.5.3 Hettich Centrifuge - Close Command<br />
The Close command closes the door of the centrifuge.<br />
This command has no execution parameters or objects, pre-actions or postactions.<br />
16.5.4 Hettich Centrifuge - ExecuteN Command<br />
The ExecuteN command carries out centrifuging with N rotor positions of the<br />
device occupied by labware (N = 1, 2, 3 or 4). After the microplates have been<br />
placed into the device and the door closed, the centrifuge will start rotating with<br />
the specified parameters.<br />
To avoid mechanical imbalance, microplates must be put into the centrifuge in<br />
pairs. For example, if you only want to centrifuge one microplate (Execute1<br />
command), you must put a second microplate in the opposite rotor position of the<br />
centrifuge. You can do this by specifying appropriate RoMa MoveObject<br />
commands in the custom pre-actions and post-actions. However, if you always<br />
want to centrifuge just one microplate, it is easier and more efficient to put a<br />
second microplate into the centrifuge by hand.<br />
The Execute1 command puts the microplate in rotor position 1 – to avoid<br />
imbalance you must put another microplate in rotor position 3. The Execute2<br />
command puts microplates in rotor positions 1 and 3 (a balancing microplate is<br />
not necessary). The Execute3 command puts microplates in rotor positions 1, 2<br />
and 3 – to avoid imbalance you must put another microplate in rotor position 4.<br />
The Execute4 command puts microplates in rotor positions 1, 2, 3 and 4 (a<br />
balancing microplate is not necessary).<br />
Execution parameters<br />
You are prompted to specify the following execution parameters when you add<br />
this command to your script or process:<br />
Fig. 16-14 Hettich Centrifuge ExecuteN command<br />
<strong>Freedom</strong> <strong>EVOware</strong> <strong>Software</strong> <strong>Manual</strong>, 393172, en, V<strong>2.3</strong> 16 - 17
16 - Device Commands<br />
Commands for the Hettich Centrifuge<br />
Rotation<br />
Specify the speed of the rotation in rounds per minute.<br />
Duration<br />
Specify the duration of the rotation in seconds.<br />
Start Ramp<br />
Choose the required ramp for accelerating the centrifuge to the working speed<br />
(range: 1 - 9).<br />
Stop Ramp<br />
Choose the required ramp for decelerating and stopping the centrifuge when<br />
centrifuging is finished (range: 1 - 9).<br />
Temperature<br />
Specify the required temperature during rotation in degrees Celsius. The<br />
rotation of the centrifuge heats up the air within due to air friction. For this<br />
reason, the centrifuge is provided with a cooling system.<br />
The heating effect depends e.g. on the speed of rotation, the number of<br />
buckets which are loaded with labware and the duration of centrifuging.<br />
Whereas the theoretical minimum temperature is ca. 5 ºC, the achievable<br />
minimum temperature may be significantly higher than this and must be<br />
determined by measurement if it is important for your application. Please refer<br />
to the hardware manual of your Hettich centrifuge for more information.<br />
To view or edit the execution parameters again later, right-click on the process<br />
step in the Process Editor and choose Edit Parameters in the context menu.<br />
Objects<br />
The Execute N commands operate on N objects of type Sample or a derived type<br />
with default names MP, MP2, MP3 and MP4.<br />
Pre-actions and Post-actions<br />
The labware is brought to the Centrifuge location with a RoMa MoveObject<br />
command for each of the N microplates and brought back to its Base location with<br />
another RoMa MoveObject command for each microplate.<br />
16.5.5 Hettich Centrifuge - MoveToPos Command<br />
The MoveToPos command slowly turns the centrifuge rotor to align the specified<br />
bucket (rotor position) with the transfer position. After opening the door, the<br />
labware can then be removed or inserted using the RoMa. Please note that the<br />
centrifuge normally requires you to use a long arm RoMa. The MoveToPos<br />
command is mainly intended for <strong>Freedom</strong> <strong>EVOware</strong> <strong>Standard</strong>. It is not normally<br />
needed for <strong>Freedom</strong> <strong>EVOware</strong> Plus.<br />
Execution parameters<br />
You are prompted to specify the following execution parameters when you add<br />
this command to your script or process:<br />
16 - 18 <strong>Freedom</strong> <strong>EVOware</strong> <strong>Software</strong> <strong>Manual</strong>, 393172, en, V<strong>2.3</strong>
16 - Device Commands<br />
Commands for the Columbus Washer<br />
Fig. 16-15 Hettich Centrifuge MoveToPos command<br />
Position<br />
Specify the number of the bucket (rotor position) which you want to align with<br />
the transfer position.<br />
16.6 Commands for the Columbus Washer<br />
The Columbus Washer is used for stripwise washing of 96-well microplates<br />
(optional: 384-well microplates). It can be equipped with either a 8, 12 or 16 way<br />
manifold or a 384 way manifold, each of which are provided with one aspirating<br />
and one dispensing needle per well. It can store up to 9 user-defined labware<br />
types that define the dispensing and aspirating positions for round or flat bottomed<br />
plates. The dispensing and aspirating speeds can be selected from 5 pre-defined<br />
speed settings. For dispensing, an additional drip mode setting is available which<br />
allows a wash liquid to be added drop by drop. In the soaking phase, you can also<br />
activate a microplate shaking mechanism. These features allow the device to be<br />
used for all ELISA microplate washing applications including cell washing.<br />
16.6.1 Columbus Washer - WashPlate command<br />
The WashPlate command performs the washing of a microplate.<br />
The washing parameters you specify with this command are used to create a<br />
washing program which is copied to the first program position in the Columbus<br />
washer and then executed. If the first program position in the washer already<br />
contains a user-defined washing program, it is overwritten.<br />
Execution parameters<br />
You are prompted to specify the execution parameters when you add this<br />
command to your script or process. The dialog box has three tabs.<br />
<strong>Freedom</strong> <strong>EVOware</strong> <strong>Software</strong> <strong>Manual</strong>, 393172, en, V<strong>2.3</strong> 16 - 19
16 - Device Commands<br />
Commands for the Columbus Washer<br />
16.6.1.1 General Tab of the Columbus Washer - WashPlate Command<br />
The General tab is used to set the general washing parameters.<br />
Fig. 16-16 Columbus WashPlate command - General tab<br />
Plate type<br />
The Columbus washer can store parameter sets for up to nine different<br />
labware types. The parameter sets are created using the menus on the<br />
washer’s LCD panel. Choose the parameter set you want to use for washing.<br />
For information on parameter sets please refer to the corresponding section in<br />
the operating manual of your washer.<br />
Dispense Rate, Aspiration Rate<br />
Choose the required speed of the dispensing and aspirating pump.<br />
Aspiration Mode<br />
Choose the required aspiration mode. The available options are normal/<br />
normal, crosswise/crosswise, normal/crosswise and crosswise/normal.<br />
Crosswise aspiration should only be used for 96-well plates with flat bottomed<br />
wells. In this case, aspiration is carried out with the needles at two positions in<br />
each well (front edge and back edge). This minimizes the volume of residual<br />
liquids. For more information, please refer to the corresponding section in the<br />
operating manual of your washer.<br />
Wash mode<br />
Choose whether you want to use plate mode or strip mode. In plate mode,<br />
each process step is performed on all of the strips sequentially before<br />
proceeding to the next process step. The entire microplate is processed for<br />
the defined soaking time. In strip mode, the entire wash program is performed<br />
on a single strip (i.e. one column or row of the microplate, depending on wash<br />
orientation) before proceeding to the next strip. Each strip is processed for the<br />
defined soaking time before proceeding to the next strip. See also<br />
17.5 “Columbus Washer - Washing a Variable Number of Strips in the Plate”,<br />
17-15.<br />
Repetitions<br />
Specify the required number of repetitions of the washing procedure.<br />
16 - 20 <strong>Freedom</strong> <strong>EVOware</strong> <strong>Software</strong> <strong>Manual</strong>, 393172, en, V<strong>2.3</strong>
16 - Device Commands<br />
Commands for the Columbus Washer<br />
Final Asp. Time<br />
Specify the required final aspiration time (range: 1 to 20 seconds). Final<br />
aspiration is used to remove remaining liquid from the wells after the washing<br />
procedure.<br />
Final Asp. Speed<br />
Specify the required final aspiration speed (range: 1 to 20 mm/s). This is the<br />
speed at which the needles are lowered into the wells as the liquid level drops.<br />
16.6.1.2 Wash Tab of the Columbus Washer - WashPlate Command<br />
The Wash tab is used to set additional washing parameters.<br />
Fig. 16-17 Columbus WashPlate command - Wash tab<br />
Aspiration Speed<br />
Specify the required aspiration speed (range: 1 to 20 mm/s). This is the speed<br />
at which the needles are lowered into the wells as the liquid level drops.<br />
Dispense Position<br />
Choose the required washing mode (overflow or bottom washing). Overflow<br />
washing consists of a simultaneous aspiration and dispensing step. It creates<br />
a circular flow of the washing liquid in the well.<br />
Channel<br />
Choose the channel (liquid container) which contains the required washing<br />
liquid.<br />
Dispense Volume<br />
Specify the required dispense volume (in µl).<br />
16.6.1.3 Soak Tab of the Columbus Washer - WashPlate Command<br />
If you want to soak the microplate, the corresponding parameters are set in the<br />
Soak tab.<br />
<strong>Freedom</strong> <strong>EVOware</strong> <strong>Software</strong> <strong>Manual</strong>, 393172, en, V<strong>2.3</strong> 16 - 21
16 - Device Commands<br />
Commands for the Columbus Washer<br />
Fig. 16-18 Columbus WashPlate command - Soak tab<br />
Soak Time, Shake Speed, Shake Mode<br />
If you want to soak the microplate, set the soaking time to a value greater than<br />
0 seconds. To shake the microplate while soaking, choose one of the shaking<br />
modes (low, normal or high) and set soak time and shake speed to values<br />
greater than 0.<br />
To view or edit the execution parameters again later, right-click on the process<br />
step in the Process Editor and choose Edit Parameters in the context menu.<br />
Objects<br />
The WashPlate command operates on an object of type Sample or a derived type<br />
with default name MP.<br />
Pre-actions and Post-actions<br />
The labware is brought to the Columbus location with a RoMa MoveObject<br />
command and brought back to its Base location with another RoMa MoveObject<br />
command.<br />
16.6.2 Columbus Washer - Prime Command<br />
Before the washer is used, all dispensing channels needed for the wash step<br />
must be primed to fill the liquid system with the required liquid. The Prime<br />
command starts the priming procedure.<br />
Priming can take several minutes, so you should start priming with this command<br />
at an early stage in your script or process to make sure that the washer is ready<br />
when you want to use it.<br />
Execution parameters<br />
You are prompted to specify the following execution parameters when you add<br />
this command to your script or process:<br />
16 - 22 <strong>Freedom</strong> <strong>EVOware</strong> <strong>Software</strong> <strong>Manual</strong>, 393172, en, V<strong>2.3</strong>
16 - Device Commands<br />
Commands for the Columbus Washer<br />
Fig. 16-19 Columbus Washer Prime command<br />
Priming time<br />
Specify the required priming time.<br />
Channel<br />
Choose the channel which contains the required priming liquid.<br />
To view or edit the execution parameters again later, right-click on the process<br />
step in the Process Editor and choose Edit Parameters in the context menu.<br />
16.6.3 Columbus Washer- Rinse Command<br />
The Rinse command starts the rinsing procedure of the washer to flush the liquid<br />
system and prevent needle blockages. Rinsing should be performed when the<br />
device is left in standby or is switched off at the end of use. Four different rinse<br />
modes are available.<br />
Execution parameters<br />
You are prompted to specify the following execution parameters when you add<br />
this command to your script or process:<br />
Fig. 16-20 Columbus Washer Rinse command<br />
Rinse Time<br />
Specify the required rinsing time.<br />
Channel<br />
Choose the channel which contains the required rinsing liquid.<br />
<strong>Freedom</strong> <strong>EVOware</strong> <strong>Software</strong> <strong>Manual</strong>, 393172, en, V<strong>2.3</strong> 16 - 23
16 - Device Commands<br />
Commands for the Columbus Washer<br />
Rinse Mode<br />
Specify the mode to be used for rinsing. Four modes are available:<br />
Soak mode should be used if the washer will be left standing for a short time<br />
only (less than one hour). You can rinse the system with either distilled water<br />
or wash solution.<br />
Day mode should be used if the washer will be or has been left standing for a<br />
least one hour. Day mode rinsing is normally carried out with wash liquid. Use<br />
distilled water instead if the washer has been unused for longer than two<br />
hours.<br />
Night mode should be used at the end of the day to thoroughly rinse the liquid<br />
system and leave the manifold (wash head) soaking in the waste sink. Night<br />
mode rinsing is normally carried out with distilled water.<br />
Auto mode is the same as day mode except that rinsing is automatically<br />
repeated after a specified amount of time (1 to 24 hours). The auto-rinse<br />
repeat time is configured using the washer’s LCD panel.<br />
To view or edit the execution parameters again later, right-click on the process<br />
step in the Process Editor and choose Edit Parameters in the context menu.<br />
16.6.4 Columbus Washer - Remote Command<br />
The Remote command switches the device from local mode to remote mode. The<br />
device can only be controlled remotely by <strong>Freedom</strong> <strong>EVOware</strong> (through the<br />
interface cable) in remote mode.<br />
This command has no execution parameters or objects, pre-actions or postactions.<br />
16.6.5 Columbus Washer - ExitRemote Command<br />
The ExitRemote command switches the device from remote mode to local mode.<br />
The device can not be controlled remotely by <strong>Freedom</strong> <strong>EVOware</strong> (through the<br />
interface cable) in local mode. Using this command will disconnect the device<br />
from the <strong>Freedom</strong> <strong>EVOware</strong> software.<br />
This command has no execution parameters or objects, pre-actions or postactions.<br />
16.6.6 Columbus Washer - Status Command<br />
The Status command interrogates the status of the Columbus washer. The device<br />
status is reported during process runtime in the Messages/Error window of the<br />
runtime controller (see 12.2.4 “Runtime Controller, Extended View (Running a<br />
Process)”, 12-14).<br />
This command has no execution parameters or objects, pre-actions or postactions.<br />
16.6.7 Columbus Washer - Init Command<br />
The Init command initializes the washer. You must initialize the hardware with this<br />
command before you use the other commands for this device.<br />
16 - 24 <strong>Freedom</strong> <strong>EVOware</strong> <strong>Software</strong> <strong>Manual</strong>, 393172, en, V<strong>2.3</strong>
16 - Device Commands<br />
Commands for the Columbus Washer<br />
This command has no execution parameters or objects, pre-actions or postactions.<br />
16.6.8 Columbus Washer - StopRinse Command<br />
The StopRinse command stops the currently running rinsing procedure.<br />
This command has no execution parameters or objects, pre-actions or postactions.<br />
16.6.9 Columbus Washer - StartProg Command<br />
The StartProg command starts a washing program which is stored in the<br />
Columbus washer. The washer is capable of storing up to 30 user-definable<br />
washing programs which are identified by a number. For information on creating<br />
and storing washing programs please refer to the corresponding section in the<br />
operating manual of your washer.<br />
Execution parameters<br />
You are prompted to specify the following execution parameters when you add<br />
this command to your script or process:<br />
Fig. 16-21 Columbus StartProg command<br />
Program Number, Number of Strips<br />
Specify the number of the wash program you want to run.<br />
Number of Strips<br />
Specify the number of strips (i.e. rows or columns of the microplate) to be<br />
washed (range: 1 to 32).<br />
To view or edit the execution parameters again later, right-click on the process<br />
step in the Process Editor and choose Edit Parameters in the context menu.<br />
Objects<br />
The StartProg command operates on an object of type Sample or a derived type<br />
with default name MP.<br />
Pre-actions and Post-actions<br />
The labware is brought to the Columbus location with a RoMa MoveObject<br />
command and brought back to its Base location with another RoMa MoveObject<br />
command.<br />
<strong>Freedom</strong> <strong>EVOware</strong> <strong>Software</strong> <strong>Manual</strong>, 393172, en, V<strong>2.3</strong> 16 - 25
16 - Device Commands<br />
Commands for the Columbus Washer<br />
16.6.10 Columbus Washer - WashPlateEx Command<br />
The WashPlateEx command performs the washing of a microplate. Information on<br />
the channels (liquid containers) to use with this command is read from an external<br />
text file.<br />
The washing parameters you specify with this command are used to create a<br />
washing program which is copied to the first program position in the Columbus<br />
washer and then executed. If the first program position in the washer already<br />
contains a user-defined washing program, it is overwritten.<br />
Execution parameters<br />
You are prompted to specify the execution parameters when you add this<br />
command to your script or process. The dialog box has three tabs.<br />
16.6.10.1 General Tab of the Columbus Washer - WashPlateEx Command<br />
The General tab is used to set the general washing parameters.<br />
Fig. 16-22 Columbus WashPlateEx command - General tab<br />
Plate type<br />
The Columbus washer can store parameter sets for up to nine different<br />
labware types. The parameter sets are created using the menus on the<br />
washer’s LCD panel. Choose the parameter set you want to use for washing.<br />
For information on parameter sets please refer to the corresponding section in<br />
the operating manual of your washer.<br />
Dispense Rate, Aspiration Rate<br />
Choose the required speed of the dispensing and aspirating pump.<br />
16 - 26 <strong>Freedom</strong> <strong>EVOware</strong> <strong>Software</strong> <strong>Manual</strong>, 393172, en, V<strong>2.3</strong>
16 - Device Commands<br />
Commands for the Columbus Washer<br />
Aspiration Mode<br />
Choose the required aspiration mode. The available options are normal/<br />
normal, crosswise/crosswise, normal/crosswise and crosswise/normal.<br />
Crosswise aspiration should only be used for 96-well plates with flat bottomed<br />
wells. In this case, aspiration is carried out with the needles at two positions in<br />
each well (front edge and back edge). This minimizes the volume of residual<br />
liquids. For more information, please refer to the corresponding section in the<br />
operating manual of your washer.<br />
Wash mode<br />
Choose whether you want to use plate mode or strip mode. In plate mode,<br />
each process step is performed on all of the strips sequentially before<br />
proceeding to the next process step. The entire microplate is processed for<br />
the defined soaking time. In strip mode, the entire wash program is performed<br />
on a single strip (i.e. one column or row of the microplate, depending on wash<br />
orientation) before proceeding to the next strip. Each strip is processed for the<br />
defined soaking time before proceeding to the next strip. See also<br />
17.5 “Columbus Washer - Washing a Variable Number of Strips in the Plate”,<br />
17-15.<br />
Repetitions<br />
Specify the required number of repetitions of the washing procedure.<br />
Final Asp. Time<br />
Specify the required final aspiration time (range: 1 to 20 seconds). Final<br />
aspiration is used to remove remaining liquid from the wells after the washing<br />
procedure.<br />
Final Asp. Speed<br />
Specify the required final aspiration speed (range: 1 to 20 mm/s). This is the<br />
speed at which the needles are lowered into the wells as the liquid level drops.<br />
16.6.10.2 Wash Tab of the Columbus Washer - WashPlateEx Command<br />
The Wash tab is used to set additional washing parameters.<br />
Fig. 16-23 Columbus WashPlateEx command - Wash tab<br />
<strong>Freedom</strong> <strong>EVOware</strong> <strong>Software</strong> <strong>Manual</strong>, 393172, en, V<strong>2.3</strong> 16 - 27
16 - Device Commands<br />
Commands for the Columbus Washer<br />
Aspiration Speed<br />
Specify the required aspiration speed (range: 1 to 20 mm/s). This is the speed<br />
at which the needles are lowered into the wells as the liquid level drops.<br />
Dispense Position<br />
Choose the required washing mode (overflow or bottom washing). Overflow<br />
washing consists of a simultaneous aspiration and dispensing step. It creates<br />
a circular flow of the washing liquid in the well.<br />
Channel File<br />
Specify the required channel file. Enter the file name directly or click Browse<br />
and choose an existing file. The channel file specifies the channel (liquid<br />
container) which contains the required washing liquid. The syntax of the file is<br />
as follows:<br />
[Wash]<br />
Channel=<br />
For example:<br />
[Wash]<br />
Channel=1<br />
The folder (directory) which contains the channel files is configured in the<br />
Columbus driver settings (see 8.5.6.2 “Columbus Washer Configuration -<br />
Settings Tab”, 8-51).<br />
Dispense Volume<br />
Specify the required dispense volume (in µl).<br />
16.6.10.3 Soak Tab of the Columbus Washer - WashPlateEx Command<br />
If you want to soak the microplate, the corresponding parameters are set in the<br />
Soak tab.<br />
Fig. 16-24 Columbus WashPlateEx command - Soak tab<br />
16 - 28 <strong>Freedom</strong> <strong>EVOware</strong> <strong>Software</strong> <strong>Manual</strong>, 393172, en, V<strong>2.3</strong>
16 - Device Commands<br />
Commands for the FlaskFlipper<br />
Soak Time, Shake Speed, Shake Mode<br />
If you want to soak the microplate, set the soaking time to a value greater than<br />
0 seconds. To shake the microplate while soaking, choose one of the shaking<br />
modes (low, normal or high) and set soak time and shake speed to values<br />
greater than 0.<br />
To view or edit the execution parameters again later, right-click on the process<br />
step in the Process Editor and choose Edit Parameters in the context menu.<br />
Objects<br />
The WashPlate command operates on an object of type Sample or a derived type<br />
with default name MP.<br />
Pre-actions and Post-actions<br />
The labware is brought to the Columbus location with a RoMa MoveObject<br />
command and brought back to its Base location with another RoMa MoveObject<br />
command.<br />
16.6.11 Columbus Washer - DisableAutoPrime Command<br />
The DisableAutoPrime command disables the auto-priming function for the<br />
Columbus washer. Auto-priming is configured in the Columbus driver settings<br />
(see 8.5.6.3 “Columbus Washer Configuration - Autopriming Tab”, 8-52).<br />
This command has no execution parameters or objects, pre-actions or postactions.<br />
16.6.12 Columbus Washer - AllowAutoPrime Command<br />
The AllowAutoPrime command activates the auto-priming function for the<br />
Columbus washer. Auto-priming is configured in the Columbus driver settings<br />
(see 8.5.6.3 “Columbus Washer Configuration - Autopriming Tab”, 8-52).<br />
This command has no execution parameters or objects, pre-actions or postactions.<br />
16.7 Commands for the FlaskFlipper<br />
The FlaskFlipper hardware option is one of the components of the Tecan Cellerity<br />
system. Cellerity is a modular system based on the <strong>Freedom</strong> EVO series of<br />
pipetting instruments which allows you to automate typical cell biology processes<br />
for adherent cell lines such as cell feeding, harvesting and passaging. It uses<br />
microplate-sized automation-friendly cell culturing flasks such as the Corning<br />
Roboflask ® .<br />
The FlaskFlipper is mounted on the worktable of the pipetting instrument and is<br />
used to load, unload, hold, shake and knock the cell culture flasks.<br />
<strong>Freedom</strong> <strong>EVOware</strong> <strong>Software</strong> <strong>Manual</strong>, 393172, en, V<strong>2.3</strong> 16 - 29
16 - Device Commands<br />
Commands for the FlaskFlipper<br />
16.7.1 FlaskFlipper - ExecuteScript Command<br />
The ExecuteScript command is used to execute commands for the FlaskFlipper.<br />
Most of the functions can also be executed using the other FlaskFlipper<br />
commands.<br />
Choose the required operation from the pull-down list:<br />
Fig. 16-25 FlaskFlipper ExecuteScript command<br />
Script panel<br />
The available commands are:<br />
• Initialize: This command initializes the FlaskFlipper; it is is intended for special<br />
applications. <strong>Freedom</strong> <strong>EVOware</strong> normally initializes the FlaskFlipper<br />
automatically at the appropriate time.<br />
• Shutdown: This command shuts down the FlaskFlipper; it is is intended for<br />
special applications. <strong>Freedom</strong> <strong>EVOware</strong> normally shuts down the<br />
FlaskFlipper automatically at the appropriate time.<br />
• FlaskFlipper_LoadUnloadFlask: For more information see<br />
16.7.2 “FlaskFlipper - LoadUnloadFlask Command”, 16-30.<br />
• FlaskFlipper_PrepareForPipet. For more information see 16.7.3 “FlaskFlipper<br />
- PrepareForPipette Command”, 16-31<br />
• FlaskFlipper_Shake. For information on the execution parameters see<br />
16.7.4 “FlaskFlipper - Shake Command”, 16-31.<br />
• FlaskFlipper_Knock. For information on the execution parameters see<br />
16.7.5 “FlaskFlipper - Knock Command”, 16-32.<br />
This command has no objects, pre-actions or post-actions.<br />
16.7.2 FlaskFlipper - LoadUnloadFlask Command<br />
The LoadUnloadFlask command turns the flask flipper to the horizontal position<br />
and opens the flask holding mechanism. In this position, you can load (insert) or<br />
unload (remove) flasks using the plate robot (RoMa) or the Cellerity AutoLoader.<br />
This command has no execution parameters or objects, pre-actions or postactions.<br />
16 - 30 <strong>Freedom</strong> <strong>EVOware</strong> <strong>Software</strong> <strong>Manual</strong>, 393172, en, V<strong>2.3</strong>
16 - Device Commands<br />
Commands for the FlaskFlipper<br />
16.7.3 FlaskFlipper - PrepareForPipette Command<br />
The PrepareForPipette command closes the flask holding mechanism and turns<br />
the flask flipper to the vertical position. In this position, you can pipette into the<br />
flasks through the septum in the screw cap using the liquid handling arm (LiHa).<br />
This command has no execution parameters or objects, pre-actions or postactions.<br />
16.7.4 FlaskFlipper - Shake Command<br />
The Shake command is used to shake the flasks in the flask flipper for the<br />
purpose of distributing and mixing liquids. This is done by alternately rocking the<br />
flask flipper clockwise and counterclockwise with the specified shaking amplitude<br />
and acceleration. The shaking starts and ends in the horizontal position.<br />
Execution parameters<br />
You are prompted to specify the following execution parameters when you add<br />
this command to your script or process:<br />
Fig. 16-26 FlaskFlipper Shake command<br />
Variables panel<br />
Name<br />
Parameter name. This field cannot be edited.<br />
Value<br />
Amplitude: required amplitude of the shaking in 0.1° (default: 200)<br />
NofCycles: required number of shaking cycles (default: 5)<br />
Speed: required speed of shaking in 0.1°/s (default: 500)<br />
Acceleration: required acceleration at the endpoints of shaking in 0.1°/s 2<br />
(default: 250)<br />
Min. and Max. Value<br />
Minimum and maximum value (i.e.range). This field cannot be edited.<br />
Description<br />
Parameter description. These fields cannot be edited.<br />
This command has no objects, pre-actions or post-actions.<br />
<strong>Freedom</strong> <strong>EVOware</strong> <strong>Software</strong> <strong>Manual</strong>, 393172, en, V<strong>2.3</strong> 16 - 31
16 - Device Commands<br />
Commands for the GENios Reader<br />
16.7.5 FlaskFlipper - Knock Command<br />
The Knock command moves the flask flipper to the horizontal position and knocks<br />
the flasks using a spring-loaded mechanism. This is done to detach the cell<br />
culture from the inner wall of a flask when the culture is fully grown. The force of<br />
the impact is sufficient to detach the cell culture from the growth surface.<br />
Execution parameters<br />
You are prompted to specify the following execution parameters when you add<br />
this command to your script or process:<br />
Fig. 16-27 FlaskFlipper Knock command<br />
Variables panel<br />
Name<br />
Parameter name. This field cannot be edited.<br />
Value<br />
Num: Required number of knocks (range: 1 to 20, default: 5).<br />
Min. and Max. Value<br />
Minimum and maximum value (i.e.range). These fields cannot be edited.<br />
Description<br />
Parameter description. This field cannot be edited.<br />
This command has no objects, pre-actions or post-actions.<br />
16.8 Commands for the GENios Reader<br />
The Tecan GENios is a fully automatic computer-controlled microplate reader for<br />
measuring samples in microplates. It fulfills the requirements for numerous<br />
fluorescence, absorbance and glow type luminescence applications in research<br />
and routine investigations. It can be used with 384, 96, 24, 12 or 6 well<br />
microplates. The filters are arranged in filter slides which allow up to four<br />
excitation filters and four emission filters.<br />
16 - 32 <strong>Freedom</strong> <strong>EVOware</strong> <strong>Software</strong> <strong>Manual</strong>, 393172, en, V<strong>2.3</strong>
16 - Device Commands<br />
Commands for the GENios Reader<br />
The commands for this reader require the RdrOLE and XFluor4 software, which<br />
must be installed separately. <strong>Freedom</strong> <strong>EVOware</strong> can also control this reader<br />
using the Magellan software (see 16.16 “Commands for the Magellan option”,<br />
16-48).<br />
16.8.1 GENios Reader - Status Command<br />
The Status command interrogates the status of the reader. The device status is<br />
reported during process runtime in the Messages/Error window of the runtime<br />
controller (see 12.2.4 “Runtime Controller, Extended View (Running a Process)”,<br />
12-14).<br />
This command has no execution parameters or objects, pre-actions or postactions.<br />
16.8.2 GENios Reader - Excitation Out Command<br />
On some readers, the excitation light source can be filtered with an interference<br />
filter. The Excitation Out command moves the excitation filter slide out of the<br />
reader to allow the filters to be removed or exchanged.<br />
After removing, inserting or exchanging the filter, the slide should be pushed back<br />
in to the reader manually.<br />
This command has no execution parameters or objects, pre-actions or postactions.<br />
16.8.3 GENios Reader - Emission Out Command<br />
On some readers, the light emission detector of the reader can be filtered with an<br />
interference filter. The Emission Out command moves the emission filter slide out<br />
of the reader to allow the filters to be removed or exchanged.<br />
After removing, inserting or exchanging the filter, the slide should be pushed back<br />
in to the reader manually.<br />
This command has no execution parameters or objects, pre-actions or postactions.<br />
16.8.4 GENios Reader - Open Command<br />
The Open command opens the door of the reader.<br />
This command has no execution parameters or objects, pre-actions or postactions.<br />
16.8.5 GENios Reader - Close Command<br />
The Close command closes the door of the reader.<br />
This command has no execution parameters or objects, pre-actions or postactions.<br />
<strong>Freedom</strong> <strong>EVOware</strong> <strong>Software</strong> <strong>Manual</strong>, 393172, en, V<strong>2.3</strong> 16 - 33
16 - Device Commands<br />
Commands for the GENios Reader<br />
16.8.6 GENios Reader - Measure Command<br />
The Measure command performs a measurement procedure using external<br />
software. For a detailed description of the parameters of this command please<br />
consult the documentation for RdrOLE and XFluor4.<br />
Execution parameters<br />
The RdrOLE reader interface software prompts you to specify the measurement<br />
parameters when you add this command to your script or process. Refer to the<br />
RdrOLE online help and manual for more information.<br />
Note: RdrOLE must be configured to connect to the chosen reader. In <strong>Freedom</strong><br />
<strong>EVOware</strong>’s offline mode, you must start RdrOLE and choose the reader manually.<br />
After making your entries in the Measurement Parameters dialog box and clicking<br />
Ok, the Output dialog box is shown where you must specify the name of the<br />
output file for the measurements. Alternatively, click Browse and choose an<br />
existing file. A default file name will be suggested automatically:<br />
Fig. 16-28 Specifying the output file of the GENios Reader Measure command<br />
See 16.42 “Specifying Output Filenames for Reader Data”, 16-128 for a<br />
description of the placeholders which can be used to generate reader data file<br />
names.<br />
To view or edit the execution parameters again later, right-click on the process<br />
step in the Process Editor and choose Edit Parameters in the context menu.<br />
Objects<br />
The Measure command operates on an object of type Sample or a derived type<br />
with default name MP.<br />
Pre-actions and post-actions<br />
The labware is brought to the GENios location with a RoMa MoveObject<br />
command and the door of the reader is opened with the Open command. After the<br />
measurement, the labware is brought back to its Base location with another RoMa<br />
MoveObject command and the door is closed with the Close command.<br />
16.8.7 GENios Reader - Multilabel Command<br />
The Multilabel command performs up to four consecutive measurement steps on<br />
the same labware using external software. The labware does not have to leave<br />
the reader in between measurements. Multi labeling allows different components<br />
(labelled with different fluorophores) to be detected in one operation.<br />
16 - 34 <strong>Freedom</strong> <strong>EVOware</strong> <strong>Software</strong> <strong>Manual</strong>, 393172, en, V<strong>2.3</strong>
16 - Device Commands<br />
Commands for the GENios Reader<br />
Execution parameters<br />
You are prompted to specify the following execution parameters when you add<br />
this command to your script or process:<br />
Fig. 16-29 GENios Reader Multilabel command<br />
Measurement parameters<br />
For each measurement step you want to perform, check the corresponding<br />
checkbox and click Edit. The RdrOLE reader interface software then prompts<br />
you to specify the measurement parameters. Refer to the RdrOLE online help<br />
and manual for more information.<br />
Note: RdrOLE must be configured to connect to the chosen reader. In <strong>Freedom</strong><br />
<strong>EVOware</strong>’s offline mode, you must start RdrOLE and choose the reader manually.<br />
Write raw data to file<br />
Enter the path and name of the raw data file or click Browse and choose an<br />
existing file. A default file name will be suggested automatically. See<br />
16.42 “Specifying Output Filenames for Reader Data”, 16-128 for a<br />
description of the placeholders which can be used to generate reader data file<br />
names.<br />
To view or edit the execution parameters again later, right-click on the process<br />
step in the Process Editor and choose Edit Parameters in the context menu.<br />
Objects<br />
The Multilabel command operates on an object of type Sample or a derived type<br />
with default name MP.<br />
Pre-actions and Post-actions<br />
The labware is brought to the GENios location with a RoMa MoveObject<br />
command and the door of the reader is opened with the Open command. After the<br />
measurement, the labware is brought back to its Base location with another RoMa<br />
MoveObject command and the door is closed with the Close command.<br />
<strong>Freedom</strong> <strong>EVOware</strong> <strong>Software</strong> <strong>Manual</strong>, 393172, en, V<strong>2.3</strong> 16 - 35
16 - Device Commands<br />
Commands for the GENios Pro Reader<br />
16.9 Commands for the GENios Pro Reader<br />
The Tecan GENios Pro is a multifunctional microplate reader with injector option.<br />
The GENios Pro provides high performance for the vast majority of today’s<br />
microplate applications and research and is robotic compatible. It supports<br />
several measurement techniques such as Fluorescence Intensity (FI),<br />
Fluorescence Time Resolved (FTR), Fluorescence Polarization (FP), Flash<br />
Fluorescence, Absorbance, Absorbance with Injectors, Glow Type Chemi- or<br />
Bioluminescence, Bioluminescence Resonance Energy Transger (BRET) and<br />
Flash Luminescence.<br />
Any common microplate ranging from 6 to 384 well format maybe measured with<br />
any of the above measurement techniques. Switching between measurement<br />
techniques or labware formats is fully automated via software. It is designed for<br />
optimum sensitivity and speed of measurement.<br />
The commands for this reader require the RdrOLE and XFluor4 software, which<br />
must be installed separately. <strong>Freedom</strong> <strong>EVOware</strong> can also control this reader<br />
using the Magellan software (see 16.16 “Commands for the Magellan option”,<br />
16-48).<br />
16.9.1 GENios Pro Reader - Status Command<br />
The Status command interrogates the status of the reader. The device status is<br />
reported during process runtime in the Messages/Error window of the runtime<br />
controller (see 12.2.4 “Runtime Controller, Extended View (Running a Process)”,<br />
12-14).<br />
This command has no execution parameters or objects, pre-actions or postactions.<br />
16.9.2 GENios Pro Reader - Excitation Out Command<br />
On some readers, the excitation light source can be filtered with an interference<br />
filter. The Excitation Out command moves the excitation filter slide out of the<br />
reader to allow the filters to be removed or exchanged.<br />
After removing, inserting or exchanging the filter, the slide should be pushed back<br />
in to the reader manually.<br />
This command has no execution parameters or objects, pre-actions or postactions.<br />
16.9.3 GENios Pro Reader - Emission Out Command<br />
On some readers, the light emission detector of the reader can be filtered with an<br />
interference filter. The Emission Out command moves the emission filter slide out<br />
of the reader to allow the filters to be removed or exchanged.<br />
After removing, inserting or exchanging the filter, the slide should be pushed back<br />
in to the reader manually.<br />
This command has no execution parameters or objects, pre-actions or postactions.<br />
16 - 36 <strong>Freedom</strong> <strong>EVOware</strong> <strong>Software</strong> <strong>Manual</strong>, 393172, en, V<strong>2.3</strong>
16 - Device Commands<br />
Commands for the GENios Pro Reader<br />
16.9.4 GENios Pro Reader - Open Command<br />
The Open command opens the door of the reader.<br />
This command has no execution parameters or objects, pre-actions or postactions.<br />
16.9.5 GENios Pro Reader - Close Command<br />
The Close command closes the door of the reader.<br />
This command has no execution parameters or objects, pre-actions or postactions.<br />
16.9.6 GENios Pro Reader - Measure Command<br />
The Measure command performs a measurement procedure using external<br />
software. For a detailed description of the parameters of this command please<br />
consult the documentation for RdrOLE and XFluor4.<br />
Execution parameters<br />
The RdrOLE reader interface software prompts you to specify the measurement<br />
parameters when you add this command to your script or process. Refer to the<br />
RdrOLE online help and manual for more information.<br />
Note: RdrOLE must be configured to connect to the chosen reader. In <strong>Freedom</strong><br />
<strong>EVOware</strong>’s offline mode, you must start RdrOLE and choose the reader manually.<br />
After making your entries in the Measurement Parameters dialog box and clicking<br />
Ok, the Output dialog box is shown where you must specify the name of the<br />
output file for the measurements. Alternatively, click Browse and choose an<br />
existing file. A default file name will be suggested automatically:<br />
Fig. 16-30 Specifying the output file of the GENios Pro Reader Measure command<br />
See 16.42 “Specifying Output Filenames for Reader Data”, 16-128 for a<br />
description of the placeholders which can be used to generate reader data file<br />
names.<br />
To view or edit the execution parameters again later, right-click on the process<br />
step in the Process Editor and choose Edit Parameters in the context menu.<br />
Objects<br />
The Measure command operates on an object of type Sample or a derived type<br />
with default name MP.<br />
<strong>Freedom</strong> <strong>EVOware</strong> <strong>Software</strong> <strong>Manual</strong>, 393172, en, V<strong>2.3</strong> 16 - 37
16 - Device Commands<br />
Commands for the GENios Pro Reader<br />
Pre-actions and post-actions<br />
The labware is brought to the GENios Pro location with a RoMa MoveObject<br />
command and the door of the reader is opened with the Open command. After the<br />
measurement, the labware is brought back to its Base location with another RoMa<br />
MoveObject command and the door is closed with the Close command.<br />
16.9.7 GENios Pro Reader - Multilabel Command<br />
The Multilabel command performs up to four consecutive measurement steps on<br />
the same labware using external software. The labware does not have to leave<br />
the reader in between measurements. Multi labeling allows different components<br />
(labelled with different fluorophores) to be detected in one operation.<br />
Execution parameters<br />
You are prompted to specify the following execution parameters when you add<br />
this command to your script or process:<br />
Fig. 16-31 GENios Pro Reader Multilabel command<br />
Measurement parameters<br />
For each measurement step you want to perform, check the corresponding<br />
checkbox and click Edit. The RdrOLE reader interface software then prompts<br />
you to specify the measurement parameters. Refer to the RdrOLE online help<br />
and manual for more information.<br />
Note: RdrOLE must be configured to connect to the chosen reader. In <strong>Freedom</strong><br />
<strong>EVOware</strong>’s offline mode, you must start RdrOLE and choose the reader manually.<br />
Write raw data to file<br />
Enter the path and name of the raw data file or click Browse and choose an<br />
existing file. A default file name will be suggested automatically. See<br />
16.42 “Specifying Output Filenames for Reader Data”, 16-128 for a<br />
description of the placeholders which can be used to generate reader data file<br />
names.<br />
To view or edit the execution parameters again later, right-click on the process<br />
step in the Process Editor and choose Edit Parameters in the context menu.<br />
16 - 38 <strong>Freedom</strong> <strong>EVOware</strong> <strong>Software</strong> <strong>Manual</strong>, 393172, en, V<strong>2.3</strong>
16 - Device Commands<br />
Commands for the Heated Incubator<br />
Objects<br />
The Multilabel command operates on an object of type Sample or a derived type<br />
with default name MP.<br />
Pre-actions and Post-actions<br />
The labware is brought to the GENios Pro location with a RoMa MoveObject<br />
command and the door of the reader is opened with the Open command. After the<br />
measurement, the labware is brought back to its Base location with another RoMa<br />
MoveObject command and the door is closed with the Close command.<br />
16.9.8 GENios Pro Reader - Prime<strong>Manual</strong> Command<br />
if the reader is equipped with the injector option, the Prime<strong>Manual</strong> command is<br />
used to prime the reader injectors manually. The injectors must be primed before<br />
they are first used in a process or script. For this procedure the injector carrier is<br />
removed from the carrier slot and rotated 180 degrees so that the injector needles<br />
face away from the instrument and then partially reinserted into the slot for<br />
support. Please refer to the manual of your GENios Pro reader for details on how<br />
to properly perform the priming procedure. The priming process can take several<br />
minutes so you should start priming with this command at an early stage in your<br />
script or process to make sure that the reader is ready when you want to use it.<br />
This command has no execution parameters or objects, pre-actions or postactions.<br />
16.9.9 GENios Pro Reader - Dispense<strong>Manual</strong> Command<br />
if the reader is equipped with the injector option, the Dispense<strong>Manual</strong> command is<br />
used to dispense fluid from the injectors manually.<br />
This command has no execution parameters or objects, pre-actions or postactions.<br />
16.10 Commands for the Heated Incubator<br />
An incubator is a device which is used to keep labware containing samples or<br />
reagents at a defined temperature for a specified length of time, for example until<br />
the desired biological or biochemical reaction has taken place. The heated<br />
incubator can be fitted with a shaker option.<br />
<strong>Freedom</strong> <strong>EVOware</strong> distinguishes between physical and logical incubators. A<br />
physical incubator is the device you place on the worktable of your instrument. A<br />
logical incubator is a group of incubator slots which are configured for the same<br />
incubating temperature. The group of slots can all lie within one physical incubator<br />
or can extend over more than one physical incubator. In the latter case, all of the<br />
physical incubators must have the same number of slots (4 or 6). <strong>Freedom</strong><br />
<strong>EVOware</strong> installs three logical incubators (Heated Incubator 1 to 3). The<br />
temperature of the slots in the logical incubator is set in the Configuration Tool<br />
(see 8.5.8.2 “Heated Incubator Configuration - Settings Tab”, 8-56).<br />
<strong>Freedom</strong> <strong>EVOware</strong> <strong>Software</strong> <strong>Manual</strong>, 393172, en, V<strong>2.3</strong> 16 - 39
16 - Device Commands<br />
Commands for the Heated Incubator<br />
16.10.1 Heated Incubator - Incubate Command<br />
The Incubate command incubates the labware inside the incubator for the<br />
specified amount of time. The temperature of the incubator slots is set in the<br />
Configuration Tool (8.5.8.2 “Heated Incubator Configuration - Settings Tab”, 8-<br />
56). All of the slots of the logical incubator are set to the same temperature.<br />
<strong>Freedom</strong> <strong>EVOware</strong> Plus automatically chooses the next free slot to use for<br />
incubating.<br />
To ensure that the incubator reaches and maintains a stable temperature, make<br />
sure that the incubator doors are not left open for extended periods.<br />
Execution parameters<br />
You are prompted to specify the following execution parameters when you add<br />
this command to your script or process:<br />
Fig. 16-32 Heated Incubator Incubate command<br />
Hours, Minutes, Seconds<br />
Specify the amount of time the labware should be kept at the chosen<br />
temperature. Click on the sliders to move them or enter the required time in<br />
the numeric fields.<br />
To view or edit the execution parameters again later, right-click on the process<br />
step in the Process Editor and choose Edit Parameters in the context menu.<br />
Objects<br />
The Incubate command operates on an object of type Sample or a derived type<br />
with default name MP.<br />
Pre-actions and Post-actions<br />
The labware is brought to the Incubator location with a RoMa MoveObject<br />
command and brought back to its Base location with another RoMa MoveObject<br />
command.<br />
16.10.2 Heated Incubator - CloseDoor Command<br />
The slot doors of the incubator open automatically when the RoMa inserts or<br />
removes the labware. The doors then stay in the open position. This command<br />
releases the latches to close all of the doors. To maintain a constant temperature<br />
within the incubator, it is best to close the doors again directly after inserting or<br />
removing labware.<br />
This command has no execution parameters or objects, pre-actions or postactions.<br />
16 - 40 <strong>Freedom</strong> <strong>EVOware</strong> <strong>Software</strong> <strong>Manual</strong>, 393172, en, V<strong>2.3</strong>
16 - Device Commands<br />
Commands for the Heated Incubator<br />
16.10.3 Heated Incubator - StartShaker Command<br />
The StartShaker command starts the optional shaker of the incubator.<br />
Execution parameters<br />
You are prompted to specify the following execution parameters when you add<br />
this command to your script or process:<br />
Fig. 16-33 Heated Incubator StartShaker command<br />
Speed<br />
Specify the shaking speed (range: 1 to 10.5 Hz).<br />
To view or edit the execution parameters again later, right-click on the script<br />
command in the Script Editor and choose Edit in the context menu.<br />
16.10.4 Heated Incubator - StopShaker Command<br />
The StopShaker command stops the optional shaker of the incubator.<br />
This command has no execution parameters or objects, pre-actions or postactions.<br />
16.10.5 Heated Incubator - InsertPlate Command<br />
The InsertPlate command must be used each time the RoMa inserts labware into<br />
the incubator slot. The InsertPlate command itself does not move the labware. It’s<br />
purpose is to regulate the power of the slot’s heater. In addition, it tells <strong>Freedom</strong><br />
<strong>EVOware</strong> to start recording information on the slot temperature to the log file.<br />
Your script must also include a plate robot command to move the labware into the<br />
incubator slot; the plate robot command should precede the InsertPlate<br />
command. Typical sequence of commands: plate robot command, CloseDoor<br />
command, Insert Plate command (the slot door opens automatically when the<br />
RoMa inserts the labware).<br />
Execution parameters<br />
You are prompted to specify the following execution parameters when you add<br />
this command to your script or process:<br />
<strong>Freedom</strong> <strong>EVOware</strong> <strong>Software</strong> <strong>Manual</strong>, 393172, en, V<strong>2.3</strong> 16 - 41
16 - Device Commands<br />
Commands for the Heated Incubator<br />
Fig. 16-34 Heated Incubator InsertPlate command<br />
Slot<br />
Choose the incubator slot into which the labware will be inserted. Incubator<br />
slots are counted from top to bottom.<br />
To view or edit the execution parameters again later, right-click on the script<br />
command in the Script Editor and choose Edit in the context menu.<br />
16.10.6 Heated Incubator - RemovePlate Command<br />
The RemovePlate command must be used each time the RoMa removes labware<br />
from the incubator slot. The RemovePlate command itself does not move the<br />
labware. It’s purpose is to tell <strong>Freedom</strong> <strong>EVOware</strong> to stop recording information on<br />
the slot temperature to the log file.<br />
Your script must also include a plate robot command to move the labware out of<br />
the incubator slot; the plate robot command should follow the RemovePlate<br />
command. Typical sequence of commands: RemovePlate command, plate robot<br />
command, CloseDoor command (the slot door opens automatically when the<br />
RoMa removes the labware).<br />
Execution parameters<br />
You are prompted to specify the following execution parameters when you add<br />
this command to your script or process:<br />
Fig. 16-35 Heated Incubator RemovePlate command<br />
Slot<br />
Choose the incubator slot from which the labware will be removed. Incubator<br />
slots are counted from top to bottom.<br />
16 - 42 <strong>Freedom</strong> <strong>EVOware</strong> <strong>Software</strong> <strong>Manual</strong>, 393172, en, V<strong>2.3</strong>
16 - Device Commands<br />
Commands for the Heated Incubator<br />
To view or edit the execution parameters again later, right-click on the script<br />
command in the Script Editor and choose Edit in the context menu.<br />
16.10.7 Heated Incubator - SetTemperature Command<br />
The SetTemperature command sets the specified slot of the incubator to the<br />
chosen temperature.<br />
Changes in temperature are not instantaneous. Make sure you specify the<br />
SetTemperature command early enough in your script to ensure that the slot has<br />
sufficient time to heat up or cool down before you want to incubate.<br />
To ensure that the slot reaches and maintains a stable temperature, make sure<br />
that the slot door is not left open (see CloseDoor command).<br />
Note: The default slot temperature is set in the Configuration Tool (see<br />
8.5.8.2 “Heated Incubator Configuration - Settings Tab”, 8-56). Unless you use<br />
the SetTemperature command, all slots of the logical incubator are set to the<br />
same temperature.<br />
Execution parameters<br />
You are prompted to specify the following execution parameters when you add<br />
this command to your script or process:<br />
Fig. 16-36 Heated Incubator SetTemperature command<br />
Tecan Incubator Selection panel<br />
Slot<br />
Choose the incubator slot whose temperature you want to set. You can also<br />
choose all slots. Incubator slots are counted from top to bottom.<br />
Temperature Settings panel<br />
Temperature<br />
Specify the working temperature of the specified slot (range: 25 to 47°C).<br />
To view or edit the execution parameters again later, right-click on the process<br />
step in the Process Editor and choose Edit Parameters in the context menu.<br />
<strong>Freedom</strong> <strong>EVOware</strong> <strong>Software</strong> <strong>Manual</strong>, 393172, en, V<strong>2.3</strong> 16 - 43
16 - Device Commands<br />
Commands for the Base Incubator<br />
16.11 Commands for the Base Incubator<br />
An incubator is a device which is used to keep labware containing samples or<br />
reagents at a defined temperature for a specified length of time, for example until<br />
the desired biological or biochemical reaction has taken place.<br />
The Base Incubator treats the base (labware source) location of a piece of<br />
labware as a room temperature incubator. The labware is taken back to its base<br />
position and left there for a specified length of time. In <strong>Freedom</strong> <strong>EVOware</strong>, the<br />
base incubator is a software concept. It is not a device which you can fit to your<br />
pipetting instrument.<br />
16.11.1 Base Incubator - BaseIncubate Command<br />
The BaseIncubate command moves the labware back to its base (labware<br />
source) position (e.g. the carousel) and leaves it there at room temperature for the<br />
specified amount of time.<br />
Execution parameters<br />
You are prompted to specify the following execution parameters when you add<br />
this command to your script or process:<br />
Fig. 16-37 Base Incubator BaseIncubate command<br />
Specify the amount of time the labware should be kept at room temperature at its<br />
base position.<br />
To view or edit the execution parameters again later, right-click on the process<br />
step in the Process Editor and choose Edit Parameters in the context menu.<br />
Objects<br />
The BaseIncubate command operates on an object of type Sample or a derived<br />
type with default name MP.<br />
Pre-actions and Post-actions<br />
The labware is brought to its Base location with a RoMa MoveObject command if<br />
necessary.<br />
16 - 44 <strong>Freedom</strong> <strong>EVOware</strong> <strong>Software</strong> <strong>Manual</strong>, 393172, en, V<strong>2.3</strong>
16 - Device Commands<br />
Commands for the Room Temperature Incubator<br />
16.12 Commands for the Room Temperature Incubator<br />
An incubator is a device which is used to keep labware containing samples or<br />
reagents at a defined temperature for a specified length of time, for example until<br />
the desired biological or biochemical reaction has taken place.<br />
The Room Temperature Incubator is a storage location such as a hotel where<br />
labware can be kept at room temperature for a specified length of time.<br />
Note: The same driver is used for the Base Incubator (see 16.11 “Commands for<br />
the Base Incubator”, 16-44).<br />
16.12.1 Room Temperature Incubator - Incubate Command<br />
The Incubate command keeps the labware at room temperature for the specified<br />
amount of time.<br />
Execution parameters<br />
You are prompted to specify the following execution parameters when you add<br />
this command to your script or process:<br />
Fig. 16-38 Room Temperature Incubator Incubate command<br />
Specify the amount of time the labware should be kept at room temperature.<br />
To view or edit the execution parameters again later, right-click on the process<br />
step in the Process Editor and choose Edit Parameters in the context menu.<br />
Objects<br />
The Incubate command operates on an object of type Sample or a derived type<br />
with default name MP.<br />
Pre-actions and Post-actions<br />
The labware is brought to the IncubatorRT location with a RoMa MoveObject<br />
command and brought back to its Base location with another RoMa MoveObject<br />
command.<br />
<strong>Freedom</strong> <strong>EVOware</strong> <strong>Software</strong> <strong>Manual</strong>, 393172, en, V<strong>2.3</strong> 16 - 45
16 - Device Commands<br />
Commands for the Liquid Handling Arm<br />
16.13 Commands for the Liquid Handling Arm<br />
The Liquid Handling Arm (also called the LiHa) is a robot arm on the pipetting<br />
instrument which is mounted on the X-slide and typically holds four or eight<br />
pipetting tips. It is used for pipetting samples in different volume ranges,<br />
depending on the tip types used and the features of the liquid system.<br />
16.13.1 Liquid Handling Arm - Flush RSP Command<br />
The Flush RSP command uses a wash station to flush the dilutors and the tubing<br />
of the pipetting instrument (fill them with system liquid) and to flush and wash the<br />
tips on the LiHa. It is mainly intended as a service function (see 5.4.1.12 “Context<br />
Menu for Objects in the Control Bar”, 5-14). It does not flush the Te-MO. See<br />
15.56.13 “Fill system (Te-MO 384) Command”, 15-138 if your instrument is<br />
fitted with a Te-MO.<br />
Fig. 16-39 Flush RSP command<br />
Flushing is carried out to clean the system and remove trapped air. Flushing<br />
should be carried out daily before using the LiHa for the first time or if several<br />
hours have elapsed since the LiHa was last used. The parameters of this dialog<br />
box are as follows:<br />
Volume in Waste<br />
Specify the volume of system liquid which should be used to flush the inside of<br />
the tips (range: 0.01 - 100 ml). Flushing takes place with the tips positioned<br />
above the waste of the specified wash station (tip height = Z-dispense).<br />
Wait time in Waste<br />
To reduce the pressure inside the tubing, you can instruct the instrument to<br />
keep the valves open somewhat longer after flushing before moving the LiHa<br />
away from the waste (range: 0 - 1000 ms).<br />
16 - 46 <strong>Freedom</strong> <strong>EVOware</strong> <strong>Software</strong> <strong>Manual</strong>, 393172, en, V<strong>2.3</strong>
16 - Device Commands<br />
Commands for the MCA96<br />
Volume in Cleaner<br />
Specify the volume of system liquid which should be used to wash the outside<br />
of the tips (range: 0.01 - 100 ml). Washing takes place with the tips lowered<br />
into the cleaner of the specified wash station (tip height = Z-max).<br />
Wait time in Cleaner<br />
To reduce the pressure inside the tubing, you can instruct the instrument to<br />
keep the valves open somewhat longer after cleaning before moving the LiHa<br />
away from the cleaner (range: 0 - 1000 ms).<br />
Waste Grid, Waste Site<br />
Specify the worktable position for the waste you want to use (grid and site).<br />
You must put a wash station with waste unit in the Worktable Editor at the<br />
required position.<br />
Cleaner Grid, Cleaner Site<br />
Specify the worktable position for the cleaner you want to use (grid and site).<br />
You must put a wash station with waste unit in the Worktable Editor at the<br />
required position.<br />
Choose a shallow cleaner if you only need to clean the ends of the tips.<br />
Choose a deep cleaner if there is a possibility of contamination along the shaft<br />
of the tip. The deep cleaner requires a larger volume of system liquid and<br />
cleaning takes somewhat longer.<br />
Airgap after Washing<br />
To avoid droplets of liquid on the worktable, you can instruct the instrument to<br />
aspirate an airgap after washing the tips. Specify the required airgap or<br />
specify 0 to deactivate this feature.<br />
Airgap Speed<br />
Specify the required speed for aspirating the airgap after washing the tips.<br />
Retract Speed<br />
Specify the speed with which you want to retract the tips from the cleaner. If<br />
the speed is too high, droplets may be dragged out of the cleaner and stick to<br />
the outside of the tips.<br />
Use Fast Wash<br />
If your instrument is fitted with the FWO (Fast Wash Option) or the MPO<br />
(Monitored Pump Option), check this checkbox to use the Fast Wash module<br />
instead of the dilutors to wash the tips.<br />
16.13.2 Liquid Handling Arm - Pipette Command<br />
The Pipette command is used to create a pipetting script for the LiHa. When you<br />
drag it to the Process Editor, it opens the Script Editor. See 11.4.2 “Creating a<br />
Pipetting Script”, 11-5.<br />
If you want to use this command, make sure that you have set the I/O Status for<br />
the Liquid Handling Arm to ON in the Configuration Tool.<br />
16.14 Commands for the MCA96<br />
The MCA96 (Multi-Channel Arm 96) is a special liquid handling arm which is fitted<br />
with a 96-tip pipetting head. The pipetting head can be fitted with a tipblock (a<br />
<strong>Freedom</strong> <strong>EVOware</strong> <strong>Software</strong> <strong>Manual</strong>, 393172, en, V<strong>2.3</strong> 16 - 47
16 - Device Commands<br />
Commands for the MCA384<br />
replaceable block with 96 tips) or with DITIs. The spacing between the tips is fixed<br />
(9 mm).<br />
16.14.1 MCA96 - Pipette Command<br />
The Pipette command is used to create a pipetting script for the MCA96. When<br />
you drag it to the Process Editor, it opens the Script Editor. See 11.4.2 “Creating a<br />
Pipetting Script”, 11-5.<br />
If you want to use this command, make sure that you have set the I/O Status for<br />
the MCA96 to ON in the Configuration Tool.<br />
16.15 Commands for the MCA384<br />
The multi-channel arm is a special liquid handling arm which is fitted with a 96-tip<br />
pipetting head. The pipetting head can be fitted with a tipblock (a replaceable<br />
block with 96 tips) or with DITIs. The spacing between the tips is fixed (9 mm).<br />
16.15.1 MCA384 - Pipette Command<br />
The Pipette command is used to create a pipetting script for the MCA384. When<br />
you drag it to the Process Editor, it opens the Script Editor. See 11.4.2 “Creating a<br />
Pipetting Script”, 11-5.<br />
If you want to use this command, make sure that you have set the I/O Status for<br />
the MCA384 to ON in the Configuration Tool.<br />
16.16 Commands for the Magellan option<br />
The Magellan commands are used to initiate actions to be performed by the<br />
Tecan Magellan software, which must be installed separately. The Magellan<br />
software is used to control microplate readers (e.g. photometers) and to carry out<br />
data analysis using stored procedures. Please refer to the documentation of the<br />
Magellan software for more information.<br />
The Magellan software has built-in drivers for Tecan microplate readers. If you<br />
intend to use the Magellan software, it is not necessary to install the driver for your<br />
reader when you install <strong>Freedom</strong> <strong>EVOware</strong>.<br />
If you use the Magellan commands to control your reader, the Magellan software<br />
pre-processes and analyzes the reader data according to a specified, stored<br />
procedure (“Magellan method”). If you use the <strong>Freedom</strong> <strong>EVOware</strong> commands for<br />
your reader directly without using the Magellan software, the reader data in the<br />
output file will be unprocessed (raw data).<br />
16.16.1 Magellan - Status Command<br />
The Status command interrogates the status of the reader. The device status is<br />
reported during process runtime in the Messages/Error window of the runtime<br />
16 - 48 <strong>Freedom</strong> <strong>EVOware</strong> <strong>Software</strong> <strong>Manual</strong>, 393172, en, V<strong>2.3</strong>
16 - Device Commands<br />
Commands for the Magellan option<br />
controller (see 12.2.4 “Runtime Controller, Extended View (Running a Process)”,<br />
12-14).<br />
This command has no execution parameters or objects, pre-actions or postactions.<br />
16.16.2 Magellan - Excitation Out Command<br />
On some readers, the excitation light source can be filtered with an interference<br />
filter. The Excitation Out command is used to move the excitation filter slide out of<br />
the reader to allow the filters to be removed or exchanged.<br />
After removing, inserting or exchanging the filter, the slide should be pushed back<br />
in to the reader manually.<br />
This command has no execution parameters or objects, pre or post actions<br />
16.16.3 Magellan - Emission Out Command<br />
On some readers, the light emission detector of the reader can be filtered with an<br />
interference filter. The Emission Out command is used to move the emission filter<br />
slide out of the reader to allow the filters to be removed or exchanged.<br />
After removing, inserting or exchanging the filter, the slide should be pushed back<br />
in to the reader manually.<br />
This command has no execution parameters or objects, pre-actions or postactions.<br />
16.16.4 Magellan - Open Command<br />
The Open command opens the door of the respective reader.<br />
This command has no execution parameters or objects, pre-actions or postactions.<br />
16.16.5 Magellan - Close Command<br />
The Close command closes the door of the respective reader.<br />
This command has no execution parameters or objects, pre-actions or postactions.<br />
16.16.6 Magellan - Measure Command<br />
The Measure command initiates a measurement procedure to be performed by<br />
the Magellan software, which must be installed separately. The Magellan software<br />
is used to control microplate readers (e.g. photometers) and to carry out data<br />
analysis using stored procedures. The procedures to be used are specified in the<br />
Magellan software as so-called “methods”. Please refer to the documentation of<br />
the Magellan software for more information.<br />
See 17.9 “Using <strong>Freedom</strong> <strong>EVOware</strong> with the Tecan Magellan <strong>Software</strong>”, 17-29<br />
for more information on using the Magellan Measure command.<br />
<strong>Freedom</strong> <strong>EVOware</strong> <strong>Software</strong> <strong>Manual</strong>, 393172, en, V<strong>2.3</strong> 16 - 49
16 - Device Commands<br />
Commands for the Magellan option<br />
Execution parameters<br />
You are prompted to specify the following execution parameters when you add<br />
this command to your script or process:<br />
Fig. 16-40 Magellan Measure command<br />
Output file name<br />
Specify the required filename and path of the output file (workspace file). The<br />
default filename and path which is shown is the one you specified in <strong>Freedom</strong><br />
<strong>EVOware</strong>’s Configuration Tool (see 17.9.3.1 “Magellan Output File<br />
(Workspace File)”, 17-30).<br />
If you are using a barcode scanner, you should specify the filename as the<br />
placeholder , which will instruct <strong>Freedom</strong> <strong>EVOware</strong> and thus Magellan to<br />
generate the filename from the labware barcode. The labware must be<br />
scanned in advance of the Magellan Measure command.<br />
Note: In both Magellan <strong>Standard</strong> and Magellan Tracker, if you leave the Output<br />
File Name field blank in <strong>Freedom</strong> <strong>EVOware</strong>, the filename and path of the<br />
workspace file will be taken from the settings which were made in the Magellan<br />
method.<br />
Import Sample ID list<br />
Check the Import sample ID list checkbox if you have scanned the tube<br />
barcodes in advance of the Magellan Measure command. This instructs the<br />
Magellan software to extract the tube barcodes from a labware report file and<br />
assign them to the samples. The barcode information will then be contained in<br />
16 - 50 <strong>Freedom</strong> <strong>EVOware</strong> <strong>Software</strong> <strong>Manual</strong>, 393172, en, V<strong>2.3</strong>
16 - Device Commands<br />
Commands for the PW384 Washer<br />
the Magellan output file (workspace file) which is produced. The workspace<br />
file will also contain information from <strong>Freedom</strong> <strong>EVOware</strong> on pipetting errors (if<br />
any). The barcodes and pipetting errors can then be viewed by loading the<br />
generated workspace file in Magellan.<br />
To create a labware report file, you must use the script command Export Data<br />
before using the Measure command for the Magellan software. See<br />
17.9 “Using <strong>Freedom</strong> <strong>EVOware</strong> with the Tecan Magellan <strong>Software</strong>”, 17-29<br />
for more information.<br />
<strong>Freedom</strong> <strong>EVOware</strong> <strong>Standard</strong>: The labware must be brought to the reader<br />
using the Transfer Labware command and not using another RoMa<br />
command. Otherwise, the barcodes and the pipetting information will not be<br />
transferred with the labware.<br />
<strong>Freedom</strong> <strong>EVOware</strong> Plus: The PosID and Export Data commands must be in<br />
the same pipetting script since the tube barcodes are not normally available<br />
globally (see the description of Scope in the <strong>Freedom</strong> <strong>EVOware</strong> software<br />
manual).<br />
Append data to existing file<br />
Check this checkbox if you want to append the measurement data to an<br />
existing output file (workspace file). This option is mainly intended for kinetic<br />
measurements (frequent or repeated measurement of the reaction to<br />
determine the rate or progress). This option must be activated in all Magellan<br />
Measure commands in the kinetic series except for the first one. This option<br />
requires labware with barcodes (you must also check the checkbox Import<br />
sample ID list).<br />
Edit method<br />
Click this button to edit the selected method using the Edit Method wizard of<br />
the Magellan software.<br />
Method file panel<br />
The Method File panel only shows methods which are compatible with the<br />
currently configured reader type and Magellan version (<strong>Standard</strong> or Tracker).<br />
See 17.9.3.3 “Specifying the Reader Type in <strong>Freedom</strong> <strong>EVOware</strong>”, 17-31.<br />
You can only edit the method if you have Application Specialist rights in<br />
Magellan.<br />
Objects<br />
The Measure command operates on an object of type Sample or a derived type<br />
with default name MP.<br />
Pre-actions and Post-actions<br />
The labware is brought to the Magellan location with a RoMa MoveObject<br />
command and the door of the reader is opened with the reader’s Open command.<br />
After the measurement the labware is brought back to its Base location with<br />
another RoMa MoveObject command the door is closed with the reader’s Close<br />
command.<br />
16.17 Commands for the PW384 Washer<br />
The PW384 is a microplate washer which performs ultra-fast washing of both 384-<br />
well and 96-well microplates. The PW384 not only processes all 384 wells<br />
<strong>Freedom</strong> <strong>EVOware</strong> <strong>Software</strong> <strong>Manual</strong>, 393172, en, V<strong>2.3</strong> 16 - 51
16 - Device Commands<br />
Commands for the PW384 Washer<br />
simultaneously, but uses “Overflow” washing to further boost wash performance.<br />
This wash procedure combines high wash efficiency with short wash times, since<br />
no transport steps are required to index the wash head.<br />
The <strong>Freedom</strong> <strong>EVOware</strong> driver is based on Tecan’s WinWash Plus <strong>Software</strong>.<br />
WinWash Plus is an MS Windows-based program which is supplied with Tecan<br />
Plate Washers. It lets you create wash programs and download and upload them<br />
to/from the plate washer via the RS232 interface. It also functions as the software<br />
interface between <strong>Freedom</strong> <strong>EVOware</strong> and the plate washer hardware. Since the<br />
WinWash Plus <strong>Software</strong> uses an OLE Interface, the implementation is transparent<br />
to the user.<br />
See 18.1.27 “Liquid Error (PW384)”, 18-27 for information on liquid error<br />
handling when the script or process is run.<br />
Note: The WinWash Plus <strong>Software</strong> must be installed if you want to use the<br />
PW 384 Plate Washer with the PW384 driver. See also 16.18 “Commands for the<br />
PW384GP Washer”, 16-54.<br />
16.17.1 PW384 Washer - Status Command<br />
The Status command interrogates the status of the washer. The device status is<br />
reported during process runtime in the Messages/Error window of the runtime<br />
controller (see 12.2.4 “Runtime Controller, Extended View (Running a Process)”,<br />
12-14).<br />
This command has no execution parameters or objects, pre-actions or postactions.<br />
16.17.2 PW384 Washer - Prime Command<br />
Before the washer is used, all dispensing channels needed for the wash step<br />
must be primed to fill the liquid system with the required liquid. The Prime<br />
command starts the priming procedure.<br />
Priming can take several minutes so you should start priming with this command<br />
at an early stage in your script or process to make sure that the washer is ready<br />
when you want to use it.<br />
This command has no execution parameters or objects, pre-actions or postactions.<br />
16.17.3 PW384 Washer - Rinse Command<br />
The Rinse command starts the rinsing procedure of the washer to flush the liquid<br />
system.<br />
This command has no execution parameters or objects, pre-actions or postactions.<br />
16.17.4 PW384 Washer - Wash Command<br />
The Wash command performs the washing of a microplate by executing a wash<br />
program which is stored in the washer. For information on creating and storing<br />
washing programs please refer to the operating manual of the WinWash Plus<br />
software.<br />
16 - 52 <strong>Freedom</strong> <strong>EVOware</strong> <strong>Software</strong> <strong>Manual</strong>, 393172, en, V<strong>2.3</strong>
16 - Device Commands<br />
Commands for the PW384 Washer<br />
Execution parameters<br />
The WinWash Plus software prompts you to specify the following execution<br />
parameters when you add this command to your script or process:<br />
Fig. 16-41 PW384 - Wash command<br />
Programs<br />
Choose the Wash program that you want to run. The WinWash Plus software<br />
gets this list by interrogating the washer. WinWash Plus can also be used to<br />
create the wash programs.<br />
To view or edit the execution parameters again later, right-click on the process<br />
step in the Process Editor and choose Edit Parameters in the context menu.<br />
Objects<br />
The Wash command operates on an object of type Sample or a derived type with<br />
default name MP.<br />
Pre-actions and Post-actions<br />
The labware is brought to the PW384 location with a RoMa MoveObject command<br />
and brought back to its Base location with another RoMa MoveObject command.<br />
16.17.5 PW384 Washer - Stop Command<br />
The Stop command stops the washing procedure.<br />
This command has no execution parameters or objects, pre-actions or postactions.<br />
16.17.6 PW384 Washer - PrepareEmptyWaste Command<br />
The PrepareEmptyWaste command collapses the vacuum in the waste bottle to<br />
allow it to be emptied. This needs to be done whenever the washer’s liquid<br />
detection indicates that the waste bottle is full.<br />
This command has no execution parameters or objects, pre-actions or postactions.<br />
<strong>Freedom</strong> <strong>EVOware</strong> <strong>Software</strong> <strong>Manual</strong>, 393172, en, V<strong>2.3</strong> 16 - 53
16 - Device Commands<br />
Commands for the PW384GP Washer<br />
16.18 Commands for the PW384GP Washer<br />
The Tecan PW384 Washer is a fully automated microplate washer for all types of<br />
96-well microplates. The device is fitted with a 96-well wash head, which has one<br />
aspirating and one dispensing needle per well. The plate carrier is adjustable to<br />
enable the use types of round and flat bottom microplates. The device is also<br />
equipped with a mirror so that visual quality control can be performed during the<br />
washing procedure. By treating all 96 wells of the microplate simultaneously, the<br />
washer is able to achieve very short wash times.<br />
The PW384GP driver communicates with the PW 384 washer using native<br />
firmware commands. When compared to the PW384 driver, which communicates<br />
with the PW 384 through the Tecan WinWash Plus software, this leads to more<br />
effficient control of the hardware. WinWash Plus is not necessary for the<br />
PW384GP driver. The PW384GP driver can be used for both research<br />
applications and general purpose applications.<br />
See 18.1.28 “Liquid Error (PW384GP)”, 18-28 for information on liquid error<br />
handling when the script or process is run.<br />
16.18.1 PW384GP Washer - Aspirate Command<br />
The Aspirate command starts the aspiration procedure of the washer. This<br />
command is mainly intended for special applications, e.g. to remove sample or<br />
reagent liquids from the wells.<br />
Execution parameters<br />
You are prompted to specify the following execution parameters when you add<br />
this command to your script or process:<br />
Fig. 16-42 PW384GP Washer Aspirate command<br />
Aspiration time<br />
Specify how long the vacuum valve remains open once the aspiration bottom<br />
position has been reached.<br />
Head speed<br />
Specify the required head speed (range: 1 to 20 mm/s). This is the speed at<br />
which the needles are lowered into the wells as the liquid level drops.<br />
16 - 54 <strong>Freedom</strong> <strong>EVOware</strong> <strong>Software</strong> <strong>Manual</strong>, 393172, en, V<strong>2.3</strong>
16 - Device Commands<br />
Commands for the PW384GP Washer<br />
Vacuum level<br />
Specify the required vacuum level. The vacuum level determines the<br />
aspiration speed.<br />
Plate Type<br />
The PW384GP washer can store parameter sets for up to 15 different type of<br />
labware. The parameter sets are created using the menus on the washer’s<br />
LCD panel. Select the parameter set you want to use for aspirating. For<br />
information on parameter sets please refer to the corresponding section in the<br />
operating manual of your washer.<br />
Head position<br />
Choose the required head position when aspirating.:<br />
Bottom: The aspiration step is performed down to the bottom of the wells to<br />
ensure the minimum volume of residual liquid.<br />
Cell: The aspiration step is only performed down to a predefined height to<br />
leave a small amount of liquid in the wells. This setting is useful for cell<br />
washing. Note: The needle positions “Bottom” and “Cell” are configured in the<br />
washer with the plate parameters.<br />
Aspiration mode<br />
Select the required aspiration mode (standard or crosswise). Crosswise<br />
aspiration should only be used for 96-well plates with flat bottomed wells. In<br />
this case, aspiration is carried out with the needles at two positions in each<br />
well (front edge and back edge). This ensures the minimum volume of<br />
residual liquid. For more information, please refer to the corresponding<br />
section in the operating manual of your washer.<br />
To view or edit the execution parameters again later, right-click on the process<br />
step in the Process Editor and choose Edit Parameters in the context menu.<br />
Objects<br />
The Aspirate command operates on an object of type Sample or a derived type<br />
with default name MP.<br />
Pre-actions and Post-actions<br />
The labware is brought to the PW384GP location with a RoMa MoveObject<br />
command and brought back to its Base location with another RoMa MoveObject<br />
command.<br />
16.18.2 PW384GP Washer - Dispense Command<br />
The Dispense command starts the liquid dispensing procedure of the washer. This<br />
command is mainly intended for special applications, e.g. to fill the wells with<br />
liquid.<br />
Execution parameters<br />
You are prompted to specify the following execution parameters when you add<br />
this command to your script or process:<br />
<strong>Freedom</strong> <strong>EVOware</strong> <strong>Software</strong> <strong>Manual</strong>, 393172, en, V<strong>2.3</strong> 16 - 55
16 - Device Commands<br />
Commands for the PW384GP Washer<br />
Fig. 16-43 PW384GP Washer Dispense command<br />
Liquid channel<br />
Choose the channel (liquid container) which contains the required washing<br />
liquid. Choose Rinse if you want to use the rinsing liquid (normally distilled<br />
water).<br />
Volume<br />
Specify the volume (in µl) to be dispensed. The volume depends on the<br />
labware type.<br />
Speed<br />
Specify the required dispense speed (range: 1 to 5). Choose “1” for drip mode.<br />
Head position<br />
Choose the required head position when dispensing:<br />
Overflow: The aspiration needles are slightly below the shoulder (top edge)<br />
of the wells.<br />
Cell: The aspiration needles are slightly above the bottom of the wells. Note:<br />
The needle positions “Overflow” and “Cell” are configured in the washer with<br />
the plate parameters.<br />
Plate Type<br />
The PW384GP washer can store parameter sets for up to 15 different type of<br />
labware. The parameter sets are created using the menus on the washer’s<br />
LCD panel. Select the parameter set you want to use for washing. For<br />
information on parameter sets please refer to the corresponding section in the<br />
operating manual of your washer.<br />
To view or edit the execution parameters again later, right-click on the process<br />
step in the Process Editor and choose Edit Parameters in the context menu.<br />
Objects<br />
The Dispense command operates on an object of type Sample or a derived type<br />
with default name MP.<br />
Pre-actions and Post-actions<br />
The labware is brought to the PW384GP location with a RoMa MoveObject<br />
command and brought back to its Base location with another RoMa MoveObject<br />
command.<br />
16 - 56 <strong>Freedom</strong> <strong>EVOware</strong> <strong>Software</strong> <strong>Manual</strong>, 393172, en, V<strong>2.3</strong>
16 - Device Commands<br />
Commands for the PW384GP Washer<br />
16.18.3 PW384GP Washer - Prime Command<br />
Before the washer is used, all dispensing channels needed for the wash step<br />
must be primed to fill the liquid system with the required liquid. The Prime<br />
command starts the priming procedure.<br />
Priming can take several minutes so you should start priming with this command<br />
at an early stage in your script or process to make sure that the washer is ready<br />
when you want to use it.<br />
Execution parameters<br />
You are prompted to specify the following execution parameters when you add<br />
this command to your script or process:<br />
Fig. 16-44 PW384GP Washer Prime command<br />
Prime method<br />
Choose the required prime method:<br />
Full: In this mode, first the dispense needles are flushed. Then the waste tub<br />
is filled with liquid. After that the head is lowered into the liquid and the<br />
aspirate needles are flushed.<br />
Short: In this mode, only the dispense needles are flushed. Short priming is<br />
normally carried out using the same liquid which will be used in the wash or<br />
dispense command which follows the prime command.<br />
Time<br />
Specify how long to prime in seconds.<br />
Prime channel<br />
Choose the channel (liquid container) which contains the required priming<br />
liquid. Choose Rinse if you want to use the rinsing liquid (normally distilled<br />
water).<br />
Waste channel<br />
Choose the channel (liquid container) you want to use for the waste liquids.<br />
This command has no objects, pre-actions or post-actions.<br />
16.18.4 PW384GP Washer - Rinse Command<br />
The Rinse command starts the rinsing procedure of the washer to flush the liquid<br />
system.<br />
<strong>Freedom</strong> <strong>EVOware</strong> <strong>Software</strong> <strong>Manual</strong>, 393172, en, V<strong>2.3</strong> 16 - 57
16 - Device Commands<br />
Commands for the PW384GP Washer<br />
Execution parameters<br />
You are prompted to specify the following execution parameters when you add<br />
this command to your script or process:<br />
Fig. 16-45 PW384GP Washer Rinse command<br />
Rinse mode<br />
Choose the required rinsing mode:<br />
Day mode should be used if the washer will be or has been left standing for a<br />
least one hour. Day mode rinsing is normally carried out with wash liquid. Use<br />
distilled water instead if the washer has been unused for longer than two<br />
hours.<br />
Night mode should be used at the end of the day to thoroughly rinse the liquid<br />
system and leave the manifold (wash head) soaking in the waste sink. Rinsing<br />
is then repeated automatically after one hour. Thereafter, the liquid level is<br />
topped up every 6 hours to compensate for evaporation. Night mode rinsing is<br />
normally carried out with distilled water.<br />
Time<br />
Specify how long to rinse in seconds (day mode rinsing only). This setting is<br />
ignored for night mode rinsing. Night mode rinsing is carried out indefinitely<br />
until you re-start <strong>Freedom</strong> <strong>EVOware</strong> (which initializes the washer) or use a<br />
Stop command (see 16.18.5 “PW384GP Washer - Stop Command”, 16-58).<br />
If you plan to leave <strong>Freedom</strong> <strong>EVOware</strong> and the washer running overnight, the<br />
first washer command in your script or process on the following day should be<br />
a Stop command. Note: Night mode rinsing is not interrupted if you exit<br />
<strong>Freedom</strong> <strong>EVOware</strong> and/or switch off the PC.<br />
Liquid channel<br />
Choose the channel (liquid container) which contains the required washing<br />
liquid. Choose Rinse if you want to use the rinsing liquid (normally distilled<br />
water).<br />
Waste channel<br />
Choose the channel (liquid container) you want to use for the waste liquids.<br />
To view or edit the execution parameters again later, right-click on the process<br />
step in the Process Editor and choose Edit Parameters in the context menu.<br />
This command has no objects, pre-actions or post-actions.<br />
16.18.5 PW384GP Washer - Stop Command<br />
The Stop command stops the washing or rinsing procedure.<br />
16 - 58 <strong>Freedom</strong> <strong>EVOware</strong> <strong>Software</strong> <strong>Manual</strong>, 393172, en, V<strong>2.3</strong>
16 - Device Commands<br />
Commands for the PW384GP Washer<br />
This command has no execution parameters or objects, pre-actions or postactions.<br />
16.18.6 PW384GP Washer - PrepareEmptyWaste Command<br />
The PrepareEmptyWaste command collapses the vacuum in the waste bottle to<br />
allow it to be emptied. This needs to be done whenever the washer’s liquid<br />
detection indicates that the waste bottle is full.<br />
This command has no execution parameters or objects, pre-actions or postactions.<br />
16.18.7 PW384GP Washer - DownloadWash Command<br />
The PW384GP washer can store parameter sets for up to 49 different wash<br />
programs. The DownloadWash command is used to configure a wash program<br />
and download it to non-volatile memory in the washer. The stored wash program<br />
can then be executed with the StartWash command. All of the wash programs<br />
downloaded with this command have the name “generic” (the name can be<br />
displayed on the LCD panel of the washer).<br />
Fig. 16-46 PW384GP Washer DownloadWash command<br />
General panel<br />
Storage address<br />
Specify the required address of the wash program (range: 1 to 49). If you<br />
specify the address of a wash program which already exists in the washer, it<br />
will be overwritten by the new wash program.<br />
<strong>Freedom</strong> <strong>EVOware</strong> <strong>Software</strong> <strong>Manual</strong>, 393172, en, V<strong>2.3</strong> 16 - 59
16 - Device Commands<br />
Commands for the PW384GP Washer<br />
Plate Type<br />
The PW384GP washer can store parameter sets for up to 15 different type of<br />
labware. The parameter sets are created using the menus on the washer’s<br />
LCD panel. Select the parameter set you want to use for washing. For<br />
information on parameter sets please refer to the corresponding section in the<br />
operating manual of your washer.<br />
Vacuum level<br />
Specify the required vacuum level. The vacuum level determines the<br />
aspiration speed.<br />
Waste channel<br />
Choose the channel (liquid container) you want to use for the waste liquids<br />
from the aspiration steps.<br />
Cycle A/B/C<br />
The following parameters can be set separately for each of three washing cycles<br />
A, B and C. Click the corresponding tab to configure the settings for each cycle.<br />
Each cycle consists of a wash operation and optional pre-aspirate, soak and postaspirate<br />
steps.<br />
Repetitions<br />
Specify the number of repetitions for the selected cycle. Cycle A must<br />
executed at least once. Set Repetitions to zero in cycle B and C if you only<br />
want Cycle A to be executed.<br />
Pre-aspirate panel<br />
Check the pre-aspiratecheckbox if you want to aspirate before washing. This can<br />
be done to remove sample or reagent liquids from the wells before starting the<br />
wash procedure.<br />
Aspiration time<br />
Specify how long to aspirate before the wash cycle starts.<br />
Head speed<br />
Specify the required head speed (range: 1 to 20 mm/s). This is the speed at<br />
which the needles are lowered into the wells as the liquid level drops.<br />
Aspiration mode<br />
Select the required aspiration mode (standard or crosswise). Crosswise<br />
aspiration should only be used for 96-well plates with flat bottomed wells. In<br />
this case, aspiration is carried out with the needles at two positions in each<br />
well (front edge and back edge). This ensures the minimum volume of<br />
residual liquid. For more information, please refer to the corresponding<br />
section in the operating manual of your washer.<br />
Head position<br />
Choose the required head position when aspirating:<br />
Bottom: The aspiration step is performed down to the bottom of the wells to<br />
ensure the minimum volume of residual liquid.<br />
Cell: The aspiration step is only performed down to a predefined height to<br />
leave a small amount of liquid in the wells. This setting is useful for cell<br />
washing. Note: The needle positions “Bottom” and “Cell” are configured in the<br />
washer with the plate parameters.<br />
16 - 60 <strong>Freedom</strong> <strong>EVOware</strong> <strong>Software</strong> <strong>Manual</strong>, 393172, en, V<strong>2.3</strong>
16 - Device Commands<br />
Commands for the PW384GP Washer<br />
Wash panel<br />
During the wash step, the aspiration needles are slightly below the shoulder (top<br />
edge) of the wells (overflow position). The needle position “Overflow” is<br />
configured in the washer with the plate parameters.<br />
Wash channel<br />
Choose the channel (liquid container) which contains the required washing<br />
liquid. Choose Rinse if you want to use the rinsing liquid (normally distilled<br />
water).<br />
Wash volume<br />
Specify the volume (in µl) of liquid to be used for the wash process.<br />
Dispense rate<br />
Specify the required speed of the dispensing pump.<br />
Soak panel<br />
Check the Soak checkbox if you want to soak the microplate after dispensing the<br />
wash liquid. You can also shake the microplate while soaking.<br />
Soak time<br />
Specify the required soak time in seconds.<br />
Plate position<br />
Choose the required plate position while soaking:<br />
Load: The transport sledge is in the home position during soaking.<br />
Wash: The transport sledge is under the wash head during soaking.<br />
Shake intensity<br />
Choose the required intensity of shaking while soaking. Choose Off to disable<br />
shaking.<br />
Post-aspirate panel<br />
Check the Post-aspirate checkbox if you want to aspirate after washing. This can<br />
be done to remove remaining liquid from the wells after the washing procedure.<br />
Time<br />
Specify how long to aspirate after the wash cycle has finished.<br />
Head speed<br />
Specify the required head speed (range: 1 to 20 mm/s). This is the speed at<br />
which the needles are lowered into the wells as the liquid level drops.<br />
Aspiration mode<br />
Select the required aspiration mode (standard or crosswise). Crosswise<br />
aspiration should only be used for 96-well plates with flat bottomed wells. In<br />
this case, aspiration is carried out with the needles at two positions in each<br />
well (front edge and back edge). This ensures the minimum volume of<br />
residual liquid. For more information, please refer to the corresponding<br />
section in the operating manual of your washer.<br />
Head position<br />
Choose the required head position when aspirating:<br />
Bottom: The aspiration step is performed down to the bottom of the wells to<br />
ensure the minimum volume of residual liquid.<br />
Cell: The aspiration step is only performed down to a predefined height to<br />
leave a small amount of liquid in the wells. This setting is useful for cell<br />
washing. Note: The needle positions “Bottom” and “Cell” are configured in the<br />
washer with the plate parameters.<br />
<strong>Freedom</strong> <strong>EVOware</strong> <strong>Software</strong> <strong>Manual</strong>, 393172, en, V<strong>2.3</strong> 16 - 61
16 - Device Commands<br />
Commands for the PW384GP Washer<br />
To view or edit the execution parameters again later, right-click on the process<br />
step in the Process Editor and choose Edit Parameters in the context menu.<br />
This command has no objects, pre-actions or post-actions.<br />
16.18.8 PW384GP Washer - StartWash Command<br />
The PW384GP washer can store parameter sets for up to 49 different wash<br />
programs. The StartWash command is used to execute one of the stored wash<br />
programs.<br />
Execution parameters<br />
You are prompted to specify the following execution parameters when you add<br />
this command to your script or process:<br />
Fig. 16-47 PW384GP Washer StartWash command<br />
Download address<br />
Specify the address of the wash program (range: 1 to 49). You must store the<br />
wash program in the washer (e.g. with the DownloadWash command) before<br />
using the StartWash command. Wash programs are stored in the washer in<br />
non-volatile memory.<br />
Objects<br />
The StartWash command operates on an object of type Sample or a derived type<br />
with default name MP.<br />
Pre-actions and Post-actions<br />
The labware is brought to the PW384GP location with a RoMa MoveObject<br />
command and brought back to its Base location with another RoMa MoveObject<br />
command.<br />
16.18.9 PW384GP Washer - Wash Command<br />
The WashPlate command performs the washing of a microplate with specified<br />
parameters such as wash volume and aspiration time.<br />
Execution parameters<br />
You are prompted to specify the following execution parameters when you add<br />
this command to your script or process:<br />
16 - 62 <strong>Freedom</strong> <strong>EVOware</strong> <strong>Software</strong> <strong>Manual</strong>, 393172, en, V<strong>2.3</strong>
16 - Device Commands<br />
Commands for the PW384GP Washer<br />
Fig. 16-48 PW384GP Washer Wash command<br />
General panel<br />
Plate Type<br />
The PW384GP washer can store parameter sets for up to 15 different type of<br />
labware. The parameter sets are created using the menus on the washer’s<br />
LCD panel. Select the parameter set you want to use for washing. For<br />
information on parameter sets please refer to the corresponding section in the<br />
operating manual of your washer.<br />
Vacuum level<br />
Specify the required vacuum level. The vacuum level determines the<br />
aspiration speed.<br />
Waste channel<br />
Choose the channel (liquid container) you want to use for the waste liquids.<br />
Cycle A/B/C<br />
The following parameters can be set separately for each of three washing cycles<br />
A, B and C. Click the corresponding tab to configure the settings for each cycle.<br />
Each cycle consists of a wash operation and optional pre-aspirate, soak and postaspirate<br />
steps.<br />
Repetitions<br />
Specify the number of repetitions for the selected cycle. Cycle A must<br />
executed at least once. Set Repetitions to zero in cycle B and C if you only<br />
want Cycle A to be executed.<br />
<strong>Freedom</strong> <strong>EVOware</strong> <strong>Software</strong> <strong>Manual</strong>, 393172, en, V<strong>2.3</strong> 16 - 63
16 - Device Commands<br />
Commands for the PW384GP Washer<br />
Pre-aspirate panel<br />
Check the pre-aspiratecheckbox if you want to aspirate before washing. This can<br />
be done to remove sample or reagent liquids from the wells before starting the<br />
wash procedure.<br />
Aspiration time<br />
Specify how long to aspirate before the wash cycle starts.<br />
Head speed<br />
Specify the required head speed (range: 1 to 20 mm/s). This is the speed at<br />
which the needles are lowered into the wells as the liquid level drops.<br />
Aspiration mode<br />
Select the required aspiration mode (standard or crosswise). Crosswise<br />
aspiration should only be used for 96-well plates with flat bottomed wells. In<br />
this case, aspiration is carried out with the needles at two positions in each<br />
well (front edge and back edge). This ensures the minimum volume of<br />
residual liquid. For more information, please refer to the corresponding<br />
section in the operating manual of your washer.<br />
Head position<br />
Choose the required head position when aspirating:<br />
Bottom: The aspiration step is performed down to the bottom of the wells to<br />
ensure the minimum volume of residual liquid.<br />
Cell: The aspiration step is only performed down to a predefined height to<br />
leave a small amount of liquid in the wells. This setting is useful for cell<br />
washing. Note: The needle positions “Bottom” and “Cell” are configured in the<br />
washer with the plate parameters.<br />
Wash panel<br />
During the wash step, the aspiration needles are slightly below the shoulder (top<br />
edge) of the wells (overflow position). The needle position “Overflow” is<br />
configured in the washer with the plate parameters.<br />
Wash channel<br />
Choose the channel (liquid container) which contains the required washing<br />
liquid. Choose Rinse if you want to use the rinsing liquid (normally distilled<br />
water).<br />
Wash volume<br />
Specify the volume (in µl) of liquid to be used for the wash process.<br />
Dispense rate<br />
Specify the required speed of the dispensing pump.<br />
Soak panel<br />
Check the Soak checkbox if you want to soak the microplate after dispensing the<br />
wash liquid. You can also shake the microplate while soaking.<br />
Soak time<br />
Specify the required soak time in seconds.<br />
Plate position<br />
Choose the required plate position while soaking:<br />
Load: The transport sledge is in the home position during soaking.<br />
Wash: The transport sledge is under the wash head during soaking.<br />
Shake intensity<br />
Choose the required intensity of shaking while soaking. Choose Off to disable<br />
shaking.<br />
16 - 64 <strong>Freedom</strong> <strong>EVOware</strong> <strong>Software</strong> <strong>Manual</strong>, 393172, en, V<strong>2.3</strong>
16 - Device Commands<br />
Commands for the 96PW Washer<br />
Post-aspirate panel<br />
Check the Post-aspirate checkbox if you want to aspirate after washing. This can<br />
be done to remove remaining liquid from the wells after the washing procedure.<br />
Time<br />
Specify how long to aspirate after the wash cycle has finished.<br />
Head speed<br />
Specify the required head speed (range: 1 to 20 mm/s). This is the speed at<br />
which the needles are lowered into the wells as the liquid level drops.<br />
Aspiration mode<br />
Select the required aspiration mode (standard or crosswise). Crosswise<br />
aspiration should only be used for 96-well plates with flat bottomed wells. In<br />
this case, aspiration is carried out with the needles at two positions in each<br />
well (front edge and back edge). This ensures the minimum volume of<br />
residual liquid. For more information, please refer to the corresponding<br />
section in the operating manual of your washer.<br />
Head position<br />
Choose the required head position when aspirating:<br />
Bottom: The aspiration step is performed down to the bottom of the wells to<br />
ensure the minimum volume of residual liquid.<br />
Cell: The aspiration step is only performed down to a predefined height to<br />
leave a small amount of liquid in the wells. This setting is useful for cell<br />
washing. Note: The needle positions “Bottom” and “Cell” are configured in the<br />
washer with the plate parameters.<br />
To view or edit the execution parameters again later, right-click on the process<br />
step in the Process Editor and choose Edit Parameters in the context menu.<br />
Objects<br />
The WashPlate command operates on an object of type Sample or a derived type<br />
with default name MP.<br />
Pre-actions and Post-actions<br />
The labware is brought to the PW384GP location with a RoMa MoveObject<br />
command and brought back to its Base location with another RoMa MoveObject<br />
command.<br />
16.19 Commands for the 96PW Washer<br />
The Tecan 96PW Washer is a fully automated microplate washer for all types of<br />
96-well microplates. The device is fitted with a 96-well wash head, which has one<br />
aspirating and one dispensing needle per well. The plate carrier is adjustable to<br />
enable the use types of round and flat bottom microplates. The device is also<br />
equipped with a mirror so that visual quality control can be performed during the<br />
washing procedure. By treating all 96 wells of the microplate simultaneously, the<br />
washer is able to achieve very short wash times.<br />
<strong>Freedom</strong> <strong>EVOware</strong> <strong>Software</strong> <strong>Manual</strong>, 393172, en, V<strong>2.3</strong> 16 - 65
16 - Device Commands<br />
Commands for the 96PW Washer<br />
16.19.1 96PW Washer - WashPlate Command<br />
The WashPlate command performs the washing of a microplate with specified<br />
parameters such as wash volume and aspiration time.<br />
Execution parameters<br />
You are prompted to specify the following execution parameters when you add<br />
this command to your script or process:<br />
Fig. 16-49 96PW Washer WashPlate command<br />
Wash panel<br />
Plate Type<br />
The 96PW washer can store parameter sets for up to eight different type of<br />
labware. The parameter sets are created using the menus on the washer’s<br />
LCD panel. Select the parameter set you want to use for washing. For<br />
information on parameter sets please refer to the corresponding section in the<br />
operating manual of your washer.<br />
Aspiration Speed<br />
Specify the required aspiration speed (range: 1 to 20 mm/s). This is the speed<br />
at which the needles are lowered into the wells as the liquid level drops.<br />
Aspirate Before<br />
Specify how long to aspirate before the first wash cycle starts. This can be<br />
done to remove sample or reagent liquids from the wells before starting the<br />
wash procedure. Specify 0 to disable this feature.<br />
Cycle A/B/C<br />
The following parameters can be set separately for each of three washing cycles.<br />
Click the corresponding tab to switch to the settings for each cycle.<br />
Wash Volume<br />
Specify the volume (in µl) of liquid to be used for the wash process.<br />
Soak Time<br />
Specify the required soak time in seconds.<br />
Aspiration Time<br />
Specify the required aspiration time in seconds.<br />
16 - 66 <strong>Freedom</strong> <strong>EVOware</strong> <strong>Software</strong> <strong>Manual</strong>, 393172, en, V<strong>2.3</strong>
16 - Device Commands<br />
Commands for the 96PW Washer<br />
Repetitions<br />
Specify the number of repetitions for this cycle. Cycle A must executed at<br />
least once. Set Repetitions to zero in cycle B and C if you only want Cycle A to<br />
be executed.<br />
To view or edit the execution parameters again later, right-click on the process<br />
step in the Process Editor and choose Edit Parameters in the context menu.<br />
Objects<br />
The WashPlate command operates on an object of type Sample or a derived type<br />
with default name MP.<br />
Pre-actions and Post-actions<br />
The labware is brought to the 96PW location with a RoMa MoveObject command<br />
and brought back to its Base location with another RoMa MoveObject command.<br />
16.19.2 96PW Washer - Dispense Command<br />
The Dispense command starts the liquid dispensing procedure of the washer. This<br />
command is mainly intended for special applications, e.g. to fill the wells with<br />
liquid.<br />
Execution parameters<br />
You are prompted to specify the following execution parameters when you add<br />
this command to your script or process:<br />
Fig. 16-50 96PW Washer Dispense command<br />
Volume<br />
Specify the volume (in µl) to be dispensed.<br />
To view or edit the execution parameters again later, right-click on the process<br />
step in the Process Editor and choose Edit Parameters in the context menu.<br />
Objects<br />
The Dispense command operates on an object of type Sample or a derived type<br />
with default name MP.<br />
Pre-actions and Post-actions<br />
The labware is brought to the 96PW location with a RoMa MoveObject command<br />
and brought back to its Base location with another RoMa MoveObject command.<br />
<strong>Freedom</strong> <strong>EVOware</strong> <strong>Software</strong> <strong>Manual</strong>, 393172, en, V<strong>2.3</strong> 16 - 67
16 - Device Commands<br />
Commands for the 96PW Washer<br />
16.19.3 96PW Washer - Aspirate Command<br />
The Aspirate command starts the aspiration procedure of the washer. This<br />
command is mainly intended for special applications, e.g. to remove sample or<br />
reagent liquids from the wells.<br />
Execution parameters<br />
You are prompted to specify the following execution parameters when you add<br />
this command to your script or process:<br />
Fig. 16-51 96PW Washer Aspirate command<br />
Plate Type<br />
The 96PW washer can store parameter sets for up to nine different types of<br />
plates. The parameter sets can be created using the menus on the washer’s<br />
LCD panel. Select the parameter set you want to use for washing. For<br />
information on parameter sets please refer to the corresponding section in the<br />
operating manual of your washer.<br />
Time<br />
Specify the required aspiration time in seconds.<br />
To view or edit the execution parameters again later, right-click on the process<br />
step in the Process Editor and choose Edit Parameters in the context menu.<br />
Objects<br />
The Aspirate command operates on an object of type Sample or a derived type<br />
with default name MP.<br />
Pre-actions and Post-actions<br />
The labware is brought to the 96PW location with a RoMa MoveObject command<br />
and brought back to its Base location with another RoMa MoveObject command.<br />
16.19.4 96PW Washer - Prime Command<br />
Before the washer is used, all dispensing channels needed for the wash step<br />
must be primed to fill the liquid system with the required liquid. The Prime<br />
command starts the priming procedure.<br />
Priming can take several minutes so you should start priming with this command<br />
at an early stage in your script or process to make sure that the washer is ready<br />
when you want to use it.<br />
This command has no execution parameters or objects, pre-actions or postactions.<br />
16 - 68 <strong>Freedom</strong> <strong>EVOware</strong> <strong>Software</strong> <strong>Manual</strong>, 393172, en, V<strong>2.3</strong>
16 - Device Commands<br />
Commands for the 96PW Washer<br />
16.19.5 96PW Washer - Rinse Command<br />
The Rinse command starts the rinsing procedure of the washer to flush the liquid<br />
system.<br />
Execution parameters<br />
You are prompted to specify the following execution parameters when you add<br />
this command to your script or process:<br />
Fig. 16-52 96PW Washer Rinse command<br />
Mode<br />
Specify the mode to be used for rinsing. Four modes are available:<br />
Soak mode should be used if the washer will be left standing for a short time<br />
only (less than one hour). You can rinse the system with either distilled water<br />
or wash solution.<br />
Day mode should be used if the washer will be or has been left standing for a<br />
least one hour. Day mode rinsing is normally carried out with wash liquid. Use<br />
distilled water instead if the washer has been unused for longer than two<br />
hours.<br />
Night mode should be used at the end of the day to thoroughly rinse the liquid<br />
system and leave the manifold (wash head) soaking in the waste sink. Night<br />
mode rinsing is normally carried out with distilled water.<br />
Auto mode is the same as day mode except that rinsing is automatically<br />
repeated after a specified amount of time (1 to 24 hours). The auto-rinse<br />
repeat time is configured using the washer’s LCD panel.<br />
To view or edit the execution parameters again later, right-click on the process<br />
step in the Process Editor and choose Edit Parameters in the context menu.<br />
16.19.6 96PW Washer - Remote Command<br />
The Remote command switches the device from local mode to remote mode. The<br />
device can only be controlled remotely by <strong>Freedom</strong> <strong>EVOware</strong> (through the<br />
interface cable) in remote mode.<br />
This command has no execution parameters or objects, pre-actions or postactions.<br />
<strong>Freedom</strong> <strong>EVOware</strong> <strong>Software</strong> <strong>Manual</strong>, 393172, en, V<strong>2.3</strong> 16 - 69
16 - Device Commands<br />
Commands for the PosID-3<br />
16.19.7 96PW Washer - ExitRemote Command<br />
The ExitRemote command switches the device from remote mode to local mode.<br />
The device can not be controlled remotely by <strong>Freedom</strong> <strong>EVOware</strong> (through the<br />
interface cable) in local mode. Using this command will disconnect the device<br />
from the <strong>Freedom</strong> <strong>EVOware</strong> software.<br />
This command has no execution parameters or objects, pre-actions or postactions.<br />
16.19.8 96PW Washer - Status Command<br />
The Status command interrogates the status of the washer. The device status is<br />
reported during process runtime in the Messages/Error window of the runtime<br />
controller (see 12.2.4 “Runtime Controller, Extended View (Running a Process)”,<br />
12-14).<br />
This command has no execution parameters or objects, pre-actions or postactions.<br />
16.20 Commands for the PosID-3<br />
The PosID-3 (Positive Identification System) is a movable barcode scanner which<br />
can be used to read the barcode labels on carriers, labware and tubes. The<br />
PosID-3 supersedes the PosID and has configurable features which allow it to<br />
scan a wider range of custom carrier and labware types. Unlike fixed barcode<br />
scanners, it does not need a robot to bring the labware to it. The PosID-3 is<br />
installed at the rear of the pipetting instrument and is provided with a gripper<br />
which pulls the carrier towards the rear for barcode identification and then slides<br />
the carrier back into the pipetting position. The scanning head hinges to read<br />
barcodes which are attached to horizontal or vertical surfaces. Barcodes can be<br />
read on both the primary side (e.g. sample tube) and the secondary side (e.g.<br />
microplates).<br />
<strong>Freedom</strong> <strong>EVOware</strong> stores each scanned barcode in the internal database in the<br />
ID field of the labware record. The barcode information can also be included in<br />
report files (see 15.26 “Export Data Command”, 15-48).<br />
16.20.1 PosID-3 - Initialize Command<br />
The Initialize command initializes the PosID-3. You must initialize the hardware<br />
with this command before you use the other commands for this device.<br />
This command has no execution parameters or objects, pre-actions or postactions.<br />
16.20.2 PosID-3 - Scan Command<br />
The Scan command is used to read the barcode labels on one or more pieces of<br />
labware using the PosID-3 option. The corresponding carrier or tube rack<br />
barcodes will also be scanned.<br />
16 - 70 <strong>Freedom</strong> <strong>EVOware</strong> <strong>Software</strong> <strong>Manual</strong>, 393172, en, V<strong>2.3</strong>
16 - Device Commands<br />
Commands for the PosID-3<br />
If you are using the PosID-3 for general purpose applications in a regulated<br />
environment, you must activate the Double Blind Entry feature in the PosID-3<br />
configuration (see 8.5.19.2 “PosID-3 Configuration - Settings Tab”, 8-80).<br />
Execution parameters<br />
The Scan tab lets you choose the labware you want to scan and the Barcode<br />
types tab is used to configure the barcode types which the PosID-3 scanner will<br />
accept for the chosen labware:<br />
Fig. 16-53 PosID-3 command (Scan tab)<br />
The parameters of the PosID-3 command are as follows (Scan tab):<br />
Labware to be scanned<br />
This shows the labware which <strong>Freedom</strong> <strong>EVOware</strong> will scan with this<br />
command. Click on a labware item in the Worktable Editor to add it to the list.<br />
The corresponding carrier or tube rack barcodes will also be scanned and do<br />
not need to be specified.<br />
Delete labware from list<br />
To remove labware from the list, select the corresponding line and click this<br />
button.<br />
<strong>Freedom</strong> <strong>EVOware</strong> <strong>Software</strong> <strong>Manual</strong>, 393172, en, V<strong>2.3</strong> 16 - 71
16 - Device Commands<br />
Commands for the PosID-3<br />
No prompt for scan errors<br />
If this option is enabled, <strong>Freedom</strong> <strong>EVOware</strong> does not display an error<br />
message if a barcode could not be read.<br />
If the carrier barcode cannot be read, the tubes or labware on this carrier won't<br />
be scanned either and are assigned default barcodes. The default barcode for<br />
labware is the grid position followed by an underscore (_) and the site number.<br />
The default barcode for tubes is the grid position followed by an underscore<br />
(_) and the tube number.<br />
The default barcode for carriers or tube racks is the carrier code followed by<br />
an underscore (_) and the grid position. The grid position is padded to 6 digits<br />
with leading zeros. The carrier code is a 3-digit code which indicates the<br />
carrier type. Example: 013_000015.<br />
If the carrier barcode can be read but a tube barcode cannot be read,<br />
<strong>Freedom</strong> <strong>EVOware</strong> assigns a default barcode which consists of three stars<br />
(***). If the tube is missing, <strong>Freedom</strong> <strong>EVOware</strong> assigns a default barcode<br />
which consists of $$$.<br />
No prompt for not existing carrier<br />
If this option is enabled, <strong>Freedom</strong> <strong>EVOware</strong> does not display an error<br />
message if the carrier specified in the PosID-3 command was not found on<br />
the worktable at the specified grid position.<br />
Overwrite barcodes<br />
If the same labware item is scanned twice, <strong>Freedom</strong> <strong>EVOware</strong> will display an<br />
error message if the two scanned barcodes differ. It is not normally necessary<br />
to scan same labware item twice, but you may want to do this as a security<br />
check (by specifying the PosID-3 command twice) to make sure that the same<br />
labware item or tube is still present on the worktable. Depending on the<br />
settings you have made, <strong>Freedom</strong> <strong>EVOware</strong> also scans the same labware<br />
twice If a barcode could not be read.<br />
Check the Overwrite barcodes checkbox to switch off this security feature. In<br />
this case, if the two barcodes differ, the first barcode will be overwritten by the<br />
second barcode without displaying an error.<br />
Write file with scan results<br />
If this option is enabled, a report file is created with the scanned barcodes.<br />
The filename is scan.csv and it is written to the configured Output directory<br />
(default path \Output). Existing files with the same name are<br />
overwritten. The file contains one line per scanned labware or tube barcode.<br />
For information on the sytax of this file see A.2.2 “Barcode file written by the<br />
PosID and PosID-3 commands”, A-13.<br />
16.20.2.1 PosID-3 Command (Barcode Types Tab)<br />
The Barcode Types tab of the PosID-3 command is used to configure the barcode<br />
types which the PosID-3 scanner will accept for the chosen labware:<br />
16 - 72 <strong>Freedom</strong> <strong>EVOware</strong> <strong>Software</strong> <strong>Manual</strong>, 393172, en, V<strong>2.3</strong>
16 - Device Commands<br />
Commands for the PosID-3<br />
Fig. 16-54 PosID-3 command (Barcode types tab)<br />
The parameters of the PosID-3 command are as follows (Barcode Types tab):<br />
Type<br />
Choose the barcodes types which will be accepted by the PosID-3 scanner<br />
from the popup lists. You should only choose the barcode types which are<br />
being used on the barcode labels. This makes it easier for the scanner to<br />
identify incorrect barcodes. The PosID-3 will report an error if it finds a<br />
barcode type which you have not chosen.<br />
Some of the barcode types have additional settings as follows:<br />
Length<br />
0 Do not check the length of the barcode.<br />
1..30 The length of the barcode must match this value (the<br />
checksum and start/stop code are also counted).<br />
Barcodes with different lengths will be ignored.<br />
Check Mode<br />
empty<br />
evaluate / transmit<br />
evaluate / don't transmit<br />
Do not check the checksum.<br />
The checksum is checked and is reported to <strong>Freedom</strong><br />
<strong>EVOware</strong> as part of the barcode.<br />
The checksum is checked but not reported.<br />
Start/Stop<br />
empty<br />
transmit<br />
don't transmit<br />
A start/stop code is not required.<br />
A start/stop code is required and is reported to <strong>Freedom</strong><br />
<strong>EVOware</strong> as part of the barcode.<br />
A start/stop code is required but not reported.<br />
<strong>Freedom</strong> <strong>EVOware</strong> <strong>Software</strong> <strong>Manual</strong>, 393172, en, V<strong>2.3</strong> 16 - 73
16 - Device Commands<br />
Commands for the REMP PHS<br />
16.21 Commands for the REMP PHS<br />
The REMP PHS (Portrait Heat Sealer) is used to heat seal microplates using a<br />
special REMP sealing foil. Refer to the REMP user manual for a list of microplate<br />
types which are supported and the plate adapters which must be used for different<br />
microplate types.<br />
The REMP ADI software, which must be installed separately, communicates with<br />
the PHS through an RS232 port. The <strong>Freedom</strong> <strong>EVOware</strong> driver for the PHS<br />
communicates with the ADI software using ActiveX.<br />
To allow <strong>Freedom</strong> <strong>EVOware</strong> to control the PHS device, the ADI software must be<br />
running. In addition, the PHS must be switched to remote mode using the function<br />
keys and menus on the device. Refer to the REMP User <strong>Manual</strong> for more<br />
information.<br />
To start the ADI software, choose Start > All Programs > Remp > Remp ADI<br />
Stand-Alone.<br />
The <strong>Freedom</strong> <strong>EVOware</strong> installation program installs <strong>Freedom</strong> <strong>EVOware</strong> drivers<br />
and a device carrier for the PHS. The REMP ADI software installation CD is<br />
packaged with the device. The recommended program installation directory for<br />
the ADI software is C:\Program Files\Tecan\Remp.<br />
REMP ADI <strong>Software</strong><br />
A single installation of the ADI software can be used to control several different<br />
REMP devices such as the ACD96 Automated Capper Decapper and the PHS<br />
Portrait Heat Sealer. After installing the ADI software, you must install driver(s) for<br />
the REMP devices you want to use.<br />
To do this, start the ADI software and choose Install New Device in the File menu.<br />
Select the required device from the list, and click Next. Then specify the device<br />
name “RempPHS” (specify the device name exactly like this). Then click Next and<br />
click Finished in the following dialog box.<br />
Then configure the RS232 port to which the PHS is connected. To do this, connect<br />
the PHS to the PC and switch it on, switch it to remote mode using the function<br />
keys and menus on the device and choose Settings in the Device menu of the ADI<br />
software. Refer to the REMP documentation for more information.<br />
The Available Device pull-down list shows all of the device drivers which have<br />
been installed in the ADI software.<br />
16.21.1 REMP PHS - SealPlate Command<br />
The SealPlate command applies the sealing foil to the microplate using heat and<br />
pressure. The plate feeder mechanism removes the microplate from the device<br />
again after sealing.<br />
Before using this command, the microplate must be put on the plate adapter of the<br />
PHS using the RoMa.<br />
16.22 Commands for the REMP Reatrix<br />
The REMP Reatrix 2D Barcode Scanner is used to scan the 2D tube barcodes<br />
and the tube rack barcode of REMP STBR96 tube racks. Each tube rack holds 96<br />
REMP tubes. The REMP Reatrix software, which must be installed separately,<br />
16 - 74 <strong>Freedom</strong> <strong>EVOware</strong> <strong>Software</strong> <strong>Manual</strong>, 393172, en, V<strong>2.3</strong>
16 - Device Commands<br />
Commands for the REMP Reatrix<br />
communicates with the Reatrix Barcode Scanner through two RS232 ports. The<br />
<strong>Freedom</strong> <strong>EVOware</strong> driver for the Reatrix communicates with the REMP Reatrix<br />
software using TCP/IP (default port 6054).<br />
The <strong>Freedom</strong> <strong>EVOware</strong> installation program installs <strong>Freedom</strong> <strong>EVOware</strong> drivers<br />
and a device carrier for the Reatrix. The REMP Reatrix software installation CD is<br />
packaged with the device.<br />
To allow <strong>Freedom</strong> <strong>EVOware</strong> to control the Reatrix Barcode Scanner, the REMP<br />
Reatrix software must be running. In addition, you must switch the Reatrix<br />
software to remote mode by choosing Remote Mode in the Edit menu.<br />
To start the REMP Reatrix software, choose Start > All Programs > Reatrix ><br />
Reatrix.<br />
Note: If you restart the PC or the Reatrix software, you must choose remote mode<br />
again (the setting is not saved).<br />
The recommended installation directory for the Reatrix software is C:\Program<br />
Files\Tecan\Remp\Reatrix.<br />
Configuring the REMP Reatrix software<br />
After installing the Reatrix software, it needs to be suitably configured for data<br />
exchange with <strong>Freedom</strong> <strong>EVOware</strong>. To do this, start the Reatrix software and<br />
choose System Settings in the Settings menu:<br />
Fig. 16-55 REMP Reatrix software - Settings<br />
Serial Connection 1 and 2<br />
Choose the serial ports to which the REMP Reatrix is connected.<br />
Data File Extension<br />
Choose txt.<br />
Data File Delimiter<br />
Choose COLON.<br />
<strong>Freedom</strong> <strong>EVOware</strong> <strong>Software</strong> <strong>Manual</strong>, 393172, en, V<strong>2.3</strong> 16 - 75
16 - Device Commands<br />
Commands for the REMP Reatrix<br />
Logfile Naming Conventions<br />
Choose Barcode Date and Time.<br />
Data File Path<br />
Specific the path where the REMP log files should be saved. The log files<br />
which are written by the REMP software are not read by <strong>Freedom</strong> <strong>EVOware</strong><br />
(<strong>Freedom</strong> <strong>EVOware</strong> receives the scanned data directly through the TCP/IP<br />
connection). Accordingly, you can specify any existing path.<br />
Additional configuration settings can be made by editing the configuration file<br />
Reatrix.ini. Refer to the REMP User <strong>Manual</strong> for more information.<br />
16.22.1 REMP Reatrix - Read Command<br />
The Read command reads the 2D tube barcodes and the tube rack barcode of the<br />
REMP STBR96 tube rack which has been placed on the Reatrix barcode scanner:<br />
Fig. 16-56 REMP Reatrix - Read command<br />
The parameters are as follows:<br />
Code type<br />
Choose the quality of the 2D barcodes on the tubes: Mode1 = High barcode<br />
quality; Mode2 = Medium barcode quality; Mode3 = Low barcode quality.<br />
Scanning generally takes longer if you choose Mode3.<br />
Read Time<br />
Choose the reading speed of the 2D barcode scanner (short, medium or<br />
long). Choose long if the barcode quality is poor.<br />
Plate position<br />
The tube rack barcode of REMP STBR96 tube racks is normally fitted on the<br />
side of the tube rack adjacent to tube position H12 (choose H12 in the pulldown<br />
list). Choose A1 if the carrier barcode is adjacent to tube position A1.<br />
Note: The REMP tube rack should always be placed on the Reatrix barcode<br />
scanner with the tube rack barcode towards the barcode scanner at one end of<br />
the device (the 2D tube barcodes are scanned from below using an additional<br />
barcode scanner).<br />
Read tube codes<br />
Check this checkbox if you want to read the 2D tube barcodes.<br />
Read barcode<br />
Check this checkbox if you want to read the tube rack barcode.<br />
16 - 76 <strong>Freedom</strong> <strong>EVOware</strong> <strong>Software</strong> <strong>Manual</strong>, 393172, en, V<strong>2.3</strong>
16 - Device Commands<br />
Commands for the REMP ACD96<br />
Verify barcode<br />
Check this checkbox if you want to read the 2D tube barcodes and compare<br />
them with existing barcode information in <strong>Freedom</strong> <strong>EVOware</strong>. The script or<br />
process is stopped with an error message if the barcodes do not match.<br />
16.22.2 REMP Reatrix - Initialize Command<br />
The Initialize command initializes the Reatrix. You must initialize the hardware<br />
with this command before you use other commands for this device.<br />
16.23 Commands for the REMP ACD96<br />
The REMP ACD96 Automated Capper Decapper is used to fit or remove sealing<br />
caps from REMP tubes in REMP STBR96 tube racks. Each tube rack holds 96<br />
REMP tubes. Refer to the REMP user manual for information on the rack<br />
adapters which must be used for different REMP tube rack versions.<br />
The REMP ADI software, which must be installed separately, communicates with<br />
the ACD96 through an RS232 port. The <strong>Freedom</strong> <strong>EVOware</strong> driver for the ACD96<br />
communicates with the ADI software using ActiveX.<br />
To allow <strong>Freedom</strong> <strong>EVOware</strong> to control the ACD96 device, the ADI software must<br />
be running. In addition, the ACD96 must be switched to remote mode using the<br />
function keys and menus on the device. Refer to the REMP User <strong>Manual</strong> for more<br />
information.<br />
To start the ADI software, choose Start > All Programs > Remp > Remp ADI<br />
Stand-Alone.<br />
The <strong>Freedom</strong> <strong>EVOware</strong> installation program installs <strong>Freedom</strong> <strong>EVOware</strong> drivers<br />
and a device carrier for the ACD96. The REMP ADI software installation CD is<br />
packaged with the device. The recommended program installation directory for<br />
the ADI software is C:\Program Files\Tecan\Remp<br />
REMP ADI <strong>Software</strong><br />
A single installation of the ADI software can be used to control several different<br />
REMP devices such as the ACD96 Automated Capper Decapper and the PHS<br />
Portrait Heat Sealer. After installing the ADI software, you must install driver(s) for<br />
the REMP devices you want to use.<br />
To do this, start the ADI software and choose Install New Device in the File menu.<br />
Select the required device from the list, and click Next. Then specify the device<br />
name “REMP ACD” (specify the device name exactly like this). Then click Next<br />
and click Finished in the following dialog box.<br />
Then configure the RS232 port to which the ACD96 is connected. To do this,<br />
connect the ACD96 to the PC and switch it on, switch it to remote mode using the<br />
function keys and menus on the device and choose Settings in the Device menu<br />
of the ADI software. Refer to the REMP documentation for more information.<br />
The Available Device pull-down list shows all of the device drivers which have<br />
been installed in the ADI software.<br />
<strong>Freedom</strong> <strong>EVOware</strong> <strong>Software</strong> <strong>Manual</strong>, 393172, en, V<strong>2.3</strong> 16 - 77
16 - Device Commands<br />
Commands for the Process Starter<br />
16.23.1 REMP ACD96 - Cap Command<br />
The Cap command fits caps to 96 REMP tubes in the REMP STBR96 tube rack.<br />
Before fitting the caps, they are held by a mechanism inside the ACD96. Before<br />
using this command, the STBR96 tube rack must be put on the rack adapter of<br />
the ACD96 using the RoMa.<br />
The Cap command can also be used to put caps into the optional REMP cap<br />
holder. The cap holder, which can be put down on the worktable of the pipetting<br />
instrument or in the Tecan carousel, can be used as a temporary storage for caps<br />
which have been removed.<br />
16.23.2 REMP ACD96 - Decap Command<br />
The Decap command removes the caps from 96 REMP tubes in the REMP<br />
STBR96 tube rack. After removing the caps, they are held by a mechanism inside<br />
the ACD96. Before using this command, the STBR96 tube rack must be put on<br />
the rack adapter of the ACD96 using the RoMa.<br />
The Decap command can also be used to pick up caps from the optional REMP<br />
cap holder. The cap holder, which can be put down on the worktable of the<br />
pipetting instrument or in the Tecan carousel, can be used as a temporary storage<br />
for caps which have been removed.<br />
16.24 Commands for the Process Starter<br />
The Process Starter device driver starts a specified process when a set of userdefined<br />
conditions are met. You can specify conditions which are based on<br />
database locations and/or on the values of variables. Alternatively, you can start a<br />
specified process unconditionally.<br />
The Process Starter is only available for <strong>Freedom</strong> <strong>EVOware</strong> Plus. It can also start<br />
<strong>Freedom</strong> <strong>EVOware</strong> processes on remote computers.<br />
16.24.1 Process Starter - Start Command<br />
The Start command starts a single instance of a specified process when a set of<br />
user-defined conditions are met. You can specify conditions which are based on<br />
database locations (labware attributes) and/or on the values of variables.<br />
Alternatively, you can start a specified process unconditionally.<br />
The Start command can be used as a process step or as a script command in a<br />
Process Script process step. It is only available for <strong>Freedom</strong> <strong>EVOware</strong> Plus. It can<br />
also be used to start <strong>Freedom</strong> <strong>EVOware</strong> processes on a remote computer.<br />
The Start command is available in five versions (Start and StartP1 to StartP4),<br />
depending on the number of labware items required by the processes you want to<br />
start (0 to 4 labware items). The Start command has no labware parameters and<br />
the StartP1 to StartP4 commands have from one to four labware parameters. If<br />
you assign labware sources to the StartP1 to StartP4 commands in the Process<br />
Editor, you can configure the command to pass the labware parameters to the<br />
processes you want to start. See Plate Mapping panel, below.<br />
You can only use StartP1 to StartP4 as process steps. The Start command can be<br />
used as a process step or in scripts for the Process Script - Script command.<br />
16 - 78 <strong>Freedom</strong> <strong>EVOware</strong> <strong>Software</strong> <strong>Manual</strong>, 393172, en, V<strong>2.3</strong>
16 - Device Commands<br />
Commands for the Process Starter<br />
The five Start commands do not wait for the started processes to finish. If<br />
necessary, you can use the script command WaitForProcess to pause the<br />
execution of a pipetting script until a specified process has finished (see<br />
16.24.2 “Process Starter - WaitForProcess Command”, 16-82). The<br />
WaitForProcess commands can only be used in scripts for the Process Script -<br />
Script command.<br />
The dialog box of the Start commands is as follows (the example shows StartP2):<br />
Fig. 16-57 Process Starter - StartP2 command<br />
The parameters of the Start command are as follows:<br />
Conditions panel<br />
Specify the conditions which must be met to start the process or processes.<br />
You can specify a single condition to start a single specified process or several<br />
different conditions, each of which starts a different process. If you do not specify<br />
any conditions, the process specified in the Starting Process panel will be started<br />
unconditionally.<br />
When you run the process which contains the Start command, the conditions in<br />
the list are tested from the top downwards. The first true condition which is found<br />
is executed and the remaining conditions in the list are skipped.<br />
Select a condition in the list to view and/or edit the settings for the condition in the<br />
pull-down lists and text fields.<br />
The buttons and pull-down lists in the Conditions panel are as follows:<br />
Add<br />
Add a condition.<br />
<strong>Freedom</strong> <strong>EVOware</strong> <strong>Software</strong> <strong>Manual</strong>, 393172, en, V<strong>2.3</strong> 16 - 79
16 - Device Commands<br />
Commands for the Process Starter<br />
Set<br />
If you have edited a condition, click Set to apply the changes.<br />
Delete<br />
Delete the selected condition.<br />
Up, Down<br />
Move the selected condition up or down in the list.<br />
The available options for Plate 1/2 and Value 1/2 are as follows:<br />
Tab. 16-1 Options for Plate 1/2 and Value 1/2<br />
Plate1 / Plate 2 Value 1 / Value 2 Description<br />
Labware name<br />
<br />
<br />
<br />
Name of a labware<br />
attribute<br />
Name of an existing variable<br />
of scope “script” a)<br />
Name of an existing variable<br />
of scope “run” a)<br />
Name of an existing variable<br />
of scope “instance” a)<br />
Choose the required attribute from the pulldown<br />
list (the list shows valid attributes for<br />
labware items). You can also enter the<br />
attribute name manually in the Value 1 or<br />
Value 2 field.<br />
Value of the specified variable. Specify the<br />
variable name in the Value 1 or Value 2 field.<br />
Value of the specified variable. Specify the<br />
variable name in the Value 1 or Value 2 field.<br />
Value of the specified variable. Specify the<br />
variable name in the Value 1 or Value 2 field.<br />
Constant The value is used directly. Specify the value<br />
in the Value 2 field.<br />
a) See 6.4.6 “Declare Variables”, 6-12.<br />
The available options for Operator are as follows:<br />
Tab. 16-2 Expressions that can be used in the Start command<br />
Operator<br />
Description<br />
== String is the same<br />
!= String is not the same<br />
< Numeric value is less than<br />
> Numeric value is greater than<br />
DEFAULT<br />
Always true<br />
16 - 80 <strong>Freedom</strong> <strong>EVOware</strong> <strong>Software</strong> <strong>Manual</strong>, 393172, en, V<strong>2.3</strong>
16 - Device Commands<br />
Commands for the Process Starter<br />
Starting Process panel<br />
Script PID<br />
This field is only required if you want to use the Process Starter -<br />
WaitForProcess command. Specify the name of a string variable of scope<br />
script, instance or run (as required).<br />
When the Start command (or StartP1 to StartP4) starts a process, it will write<br />
the unique process ID of the process into this variable. If you have started a<br />
process on a remote PC, the process ID will be followed by the name of the<br />
remote host (e.g. 42:RemoteHost_2).<br />
You must specify the same variable name in the Process ID field of the<br />
WaitForProcess command. The WaitForProcess command will then pause<br />
the execution of the pipetting script until the specified process has finished.<br />
Priority<br />
Required priority of the process to be started.<br />
Emergency<br />
Required emergency level of the process to be started.<br />
Host<br />
If you want to start a process on a remote PC, specify the name of the remote<br />
host.<br />
Process<br />
The name of the process to be started.<br />
The pull-down list only shows processes from the local computer. If you<br />
choose a local process, the labware parameters of the process are shown in<br />
the right hand list of the Plate Mapping panel.<br />
If you want to start a process on a remote computer, you must enter the<br />
process name and the plate mapping manually. The process must exist on the<br />
remote computer.<br />
Plate Mapping panel<br />
The list on the left side shows the labware parameters of the Start command. It will<br />
not contain any entries if you have chosen the Start command with no labware<br />
parameters; it will show 1 to 4 labware items if you have chosen StartP1 to<br />
StartP4.<br />
The list on the right side shows the labware parameters of the process to be<br />
started.<br />
Click a labware item in the right-hand list to connect it to the currently selected<br />
labware item in the left-hand list. Click a labware item in the right-hand list again to<br />
disconnect it.<br />
If you connect a labware parameter in the right-hand list to a labware parameter in<br />
the left-hand list, the Start command will pass information on the labware to the<br />
called process (the process you want to start). The called process will then use<br />
the labware you assign to the Start command in the Process Editor instead of its<br />
own labware source.<br />
For labware parameters in the called process which are not connected in this way,<br />
the called process will use the labware from its own labware source (the labware<br />
you assign to the called process in the Process Editor).<br />
Different icons are used in the dialog box for the Start command to show how the<br />
labware is connected. In the above figure (Fig. 16-57, 16-79), the labware MP2<br />
in the left-hand list is connected to the first entry in the right-hand list. The other<br />
two entries are not connected (blue tick). The labware MP in the left-hand list is<br />
also not connected.<br />
<strong>Freedom</strong> <strong>EVOware</strong> <strong>Software</strong> <strong>Manual</strong>, 393172, en, V<strong>2.3</strong> 16 - 81
16 - Device Commands<br />
Commands for the Process Starter<br />
Click the <strong>Manual</strong> parameters radio button to enter a labware assigment string<br />
instead of using the graphical interface in the Plate Mapping panel. The string you<br />
enter is passed to the called process without change. So the string must be in the<br />
correct format. A typically example is:<br />
MyLabware001 MyLabware001{001}, MoreLabware_1 MyLabware001{002}<br />
This string assigns the labware item MyLabware001{001} in the main process to<br />
labware source MyLabware001 in the called process and MyLabware001{002} in<br />
the main process to labware source MoreLabware_1 in the called process.<br />
You need to do this if the called process is on a remote computer. The Process<br />
Starter cannot determine the labware requirements of a <strong>Freedom</strong> <strong>EVOware</strong><br />
process on a remote computer automatically.<br />
The Start command starts a single instance of the called process. If you want to<br />
start more than one instance you can use variables in the labware assigment<br />
string.<br />
Using the Start command as a script command<br />
The Start command can also be used in the pipetting script of a Process Script<br />
process step (see 16.39 “Commands for the Process Script Driver”, 16-126). In<br />
this case, the Plate 1 and Plate 2 pull-down lists only allow you to choose<br />
variables and constants for use in the conditions and not labware parameters.<br />
Remote Processes<br />
Please note the following limitations and conventions if the called process is on a<br />
remote computer:<br />
• To start processes remotely, the correct permissions must be set for the<br />
DCOM component EvoApi. This is done in Control Panel > Administrative<br />
Tools > Component Services. Please contact Tecan support for additional<br />
information.<br />
• The same user name and password combination which you are using on the<br />
local <strong>Freedom</strong> <strong>EVOware</strong> installation must be available on the remote<br />
<strong>Freedom</strong> <strong>EVOware</strong> installation.<br />
• The locations which you use to transfer labware between the two <strong>Freedom</strong><br />
<strong>EVOware</strong> systems must have the same type or name (e.g. Hotel 4Pos) and<br />
dimension (e.g. four sites).<br />
• The labware you want to transfer to the remote computer must have the same<br />
name on both the local and the remote system (the names shown in the<br />
labware generator, see 11.6, 11-16 must be identical).<br />
• The location of the labware is passed to the remote process without change (it<br />
is set to the same value as on the local system). Accordingly, the labware<br />
location on the remote system must be empty and the labware must not be in<br />
use. This must be ensured by the operator before starting the process. The<br />
Process Starter cannot check the availability of the labware and labware<br />
location on the remote computer automatically.<br />
• To start and intialize the remote system correctly, It is recommended to create<br />
and run a simple dummy remote process such as an incubation.<br />
16.24.2 Process Starter - WaitForProcess Command<br />
The WaitForProcess script command waits for a specified process to finish before<br />
allowing the pipetting script to continue.<br />
The WaitForProcess command is only available for <strong>Freedom</strong> <strong>EVOware</strong> Plus. You<br />
can only use it in a Process Script -Script process step.<br />
16 - 82 <strong>Freedom</strong> <strong>EVOware</strong> <strong>Software</strong> <strong>Manual</strong>, 393172, en, V<strong>2.3</strong>
16 - Device Commands<br />
Commands for the Tube Robot<br />
Fig. 16-58 Process Starter - WaitForProcess command<br />
Process ID<br />
Specify the name of an existing string variable which contains the process ID<br />
of a process to be started by the Process Starter - Start command. The<br />
WaitForProcess command will then pause the execution of the pipetting script<br />
until the specified process has finished.<br />
The variable name must be identical to the variable name you specified in the<br />
Script PID field of the Process Starter - Start command.<br />
16.25 Commands for the Tube Robot<br />
The tube robot (also called PnP) is a robot arm equipped with special grippers that<br />
can pick up, transport and place small objects within the working area of the<br />
pipetting instrument. It is typically used to transport tubes with samples. Current<br />
Tecan pipetting instruments can be fitted with up to two PnP arms. Movements of<br />
the robot arms between different positions are called vectors.<br />
16.25.1 Tube Robot - ExecuteScript Command<br />
The ExecuteScript command is used to create a script for tube handling. When<br />
you drag it to the Process Editor, it opens the Script Editor. It does not allow you to<br />
use pipetting commands. The pipetting commands are specified in another script<br />
in the same process. You can exchange variables such as the tube counter or<br />
tube position with other scripts by declaring them with the scope instance or run.<br />
See 6.4.6 “Declare Variables”, 6-12 and 11.4.2 “Creating a Pipetting Script”,<br />
11-5.<br />
If you want to use this command, make sure that you have set the I/O Status for<br />
the Tube Robot to ON in the Configuration Tool.<br />
16.26 Commands for the Plate Robot<br />
The Plate Robot (also called the RoMa) is a robot arm equipped with special<br />
grippers that can pick up, transport and place objects within the working area of<br />
the pipetting instrument. It is typically used to transport microplates, reagent<br />
blocks, deep well plates, etc. between carriers, incubators and storage positions<br />
(e.g. a RoMa shelf or Carousel).<br />
Current Tecan pipetting instruments can be fitted with up to two RoMas. <strong>Standard</strong><br />
arm versions can handle objects on or above the worktable. Long arm (long z)<br />
<strong>Freedom</strong> <strong>EVOware</strong> <strong>Software</strong> <strong>Manual</strong>, 393172, en, V<strong>2.3</strong> 16 - 83
16 - Device Commands<br />
Commands for the Plate Robot<br />
versions can also access objects which are positioned lower than the worktable,<br />
for example the Hettich Centrifuge. Movements of the robot arms between<br />
different positions are called vectors.<br />
RoMa versions are available with offset gripper fingers (RoMa eccentric) and<br />
symmetrical gripper fingers (RoMa centric). The type to use is chosen according<br />
to the accessibility of the object to be gripped.<br />
You do not need to (and cannot) specify the RoMa type in the <strong>Freedom</strong> <strong>EVOware</strong><br />
configuration. However, you must re-teach the robot movement commands<br />
(RoMa vectors) if you exchange the robot arm for a different type. The RoMa<br />
vectors supplied with <strong>Freedom</strong> <strong>EVOware</strong> have been designed for RoMa<br />
eccentric.<br />
16.26.1 Plate Robot - ExecuteSingleVector Command<br />
The ExecuteSingleVector command executes a predefined movement from one<br />
position on the worktable to another (a RoMa vector). The vector can also be<br />
executed in reverse and the grippers can be opened or closed before and/or after<br />
the move.<br />
This command is intended for RoMa vectors which are not used to move labware.<br />
In <strong>Freedom</strong> <strong>EVOware</strong> Plus, RoMa vectors which are used to move labware are<br />
normally carried out automatically. In <strong>Freedom</strong> <strong>EVOware</strong> <strong>Standard</strong>, use the RoMa<br />
Vector script command if you want to execute a robot vector (see 15.58 “RoMa<br />
Vector Command”, 15-141).<br />
Execution parameters<br />
You are prompted to specify the following execution parameters when you add<br />
this command to your script or process:<br />
Fig. 16-59 Plate Robot ExecuteSingleVector command<br />
Pre-action / Post-action<br />
Check the Pre-action checkbox if you want to close or open the gripper before<br />
execution of the movement vector. Check the Post-action checkbox if you<br />
want to close or open the gripper after execution of the movement vector.<br />
Then click Close gripper or Open gripper as required.<br />
16 - 84 <strong>Freedom</strong> <strong>EVOware</strong> <strong>Software</strong> <strong>Manual</strong>, 393172, en, V<strong>2.3</strong>
16 - Device Commands<br />
Commands for the Plate Robot<br />
Set gripper width to<br />
Specify the width to which the gripper should be closed or opened (range: 60<br />
to 140 mm).<br />
Set site<br />
Specify the site to execute the vector on. Specify this as “carrier site - 1”. For<br />
example, specify “0” to execute the vector on carrier site 1.<br />
Set speed<br />
Specify the plate robot movement speed with which to execute the vector<br />
(range 1 to 400 mm/s).<br />
Execute vector in reverse<br />
Check this checkbox if you want to execute the vector in reverse (from its end<br />
point to its start point).<br />
Vector Name<br />
Specify the name of the vector to execute. The vector must already be<br />
defined. Click the Robot Vectors tab in the Control Bar to see a list of the robot<br />
vectors which are not associated with carriers or labware items. If your<br />
pipetting instrument is fitted with two plate robots, specify a vector which has<br />
been created for the plate robot (1 or 2) that you want to use with this<br />
command.<br />
To view or edit the execution parameters again later, right-click on the process<br />
step in the Process Editor and choose Edit Parameters in the context menu.<br />
16.26.2 Plate Robot - Initialize Command<br />
The Initialize command initializes the plate robot. You must initialize the hardware<br />
with this command before you use the other commands for this device.<br />
This command is normally used as a pre-action and/or post-action of another<br />
command. It is not normally used as a process step.<br />
16.26.3 Plate Robot - MoveObject Command<br />
The MoveObject command moves an object (e.g. labware) to a specified location.<br />
This command is normally used as a pre-action and/or post-action of another<br />
command. It is not normally used as a process step.<br />
16.26.4 Plate Robot - ReplaceObject Command<br />
The ReplaceObject command moves an object (e.g. labware) to a specified<br />
location. If the destination is occupied, the blocking object will be removed. It is<br />
mainly used for moving reagent carriers. The ReplaceObject command must not<br />
have a corresponding post-action.<br />
This command is normally used as a pre-action and/or post-action of another<br />
command. It is not normally used as a process step.<br />
16.26.5 Plate Robot - MoveToBase Command<br />
The MoveToBase command moves an object (plate) to its base (labware source)<br />
position.<br />
<strong>Freedom</strong> <strong>EVOware</strong> <strong>Software</strong> <strong>Manual</strong>, 393172, en, V<strong>2.3</strong> 16 - 85
16 - Device Commands<br />
Commands for the Safire Reader<br />
This command is normally used as a pre-action and/or post-action of another<br />
command. It is not normally used as a process step.<br />
16.26.6 Plate Robot - ChangeObject Command<br />
The ChangeObject command moves an object to a specified location. If the<br />
destination is occupied, the blocking object will be removed. The ChangeObject<br />
command must not have a corresponding post-action. It is only used for changing<br />
DiTi’s and is normally used as a pre-action and/or post-action of another<br />
command. It is not normally used as a process step.<br />
16.26.7 Plate Robot - MoveInsert Command<br />
The MoveInsert command moves the insert of an Insert Plate to the specified<br />
location.<br />
This command is normally used as a pre-action and/or post-action of another<br />
command. It is not normally used as a process step.<br />
16.26.8 Plate Robot - SwapInsert Command<br />
The SwapInsert command moves the insert of an Insert plate to another Insert<br />
plate which doesn’t currently have an insert. After performing the operation, the<br />
Insert attribute of the source plate is set to 0 (= insert not fitted), and the Insert<br />
attribute of the destination plate is set to 1 (= insert is fitted).<br />
This command is normally used as a pre-action and/or post-action of another<br />
command. It is not normally used as a process step.<br />
16.26.9 Plate Robot - ClearLocation Command<br />
The ClearLocation command moves all objects which are currently at the<br />
specified location to a new location.<br />
This command is normally used as a pre-action and/or post-action of another<br />
command. It is not normally used as a process step.<br />
16.27 Commands for the Safire Reader<br />
The Tecan Safire is a multi-functional monochromator-based microplate reader. It<br />
provides high performance for the vast majority of today’s microplate applications<br />
and research.<br />
Safire provides you with the following measurement techniques:<br />
• Fluorescence Intensity (FI) top/bottom<br />
• Fluorescence Time Resolved (TRF) top/bottom<br />
• Absorbance<br />
• Quick Absorbance Scanning (optional)<br />
Any standard microplates from 6-well to 384-well format can be measured with<br />
any of the above measurement techniques. Fluorescence measurement can be<br />
16 - 86 <strong>Freedom</strong> <strong>EVOware</strong> <strong>Software</strong> <strong>Manual</strong>, 393172, en, V<strong>2.3</strong>
16 - Device Commands<br />
Commands for the Safire Reader<br />
made with up to 1536-well microplates (max. labware height 24.5 mm). Switching<br />
between measurement techniques and labware formats is fully automated.<br />
The commands for this reader require the RdrOLE and XFluor4 software, which<br />
must be installed separately. <strong>Freedom</strong> <strong>EVOware</strong> can also control this reader<br />
using the Magellan software (see 16.16 “Commands for the Magellan option”,<br />
16-48).<br />
16.27.1 Safire Reader - Status Command<br />
The Status command interrogates the status of the reader. The device status is<br />
reported during process runtime in the Messages/Error window of the runtime<br />
controller (see 12.2.4 “Runtime Controller, Extended View (Running a Process)”,<br />
12-14).<br />
This command has no execution parameters or objects, pre-actions or postactions.<br />
16.27.2 Safire Reader - Open Command<br />
The Open command opens the door of the reader.<br />
This command has no execution parameters or objects, pre-actions or postactions.<br />
16.27.3 Safire Reader - Close Command<br />
The Close command closes the door of the reader.<br />
This command has no execution parameters or objects, pre-actions or postactions.<br />
16.27.4 Safire Reader - Measure Command<br />
The Measure command performs a measurement procedure using external<br />
software. For a detailed description of the parameters of this command please<br />
consult the documentation for RdrOLE and XFluor4.<br />
Execution parameters<br />
The RdrOLE reader interface software prompts you to specify the measurement<br />
parameters when you add this command to your script or process. Refer to the<br />
RdrOLE online help and manual for more information.<br />
Note: RdrOLE must be configured to connect to the chosen reader. In <strong>Freedom</strong><br />
<strong>EVOware</strong>’s offline mode, you must start RdrOLE and choose the reader manually.<br />
After making your entries in the Measurement Parameters dialog box and clicking<br />
Ok, the Output dialog box is shown where you must specify the name of the<br />
output file for the measurements. Alternatively, click Browse and choose an<br />
existing file. A default file name will be suggested automatically:<br />
<strong>Freedom</strong> <strong>EVOware</strong> <strong>Software</strong> <strong>Manual</strong>, 393172, en, V<strong>2.3</strong> 16 - 87
16 - Device Commands<br />
Commands for the Safire Reader<br />
Fig. 16-60 Specifying the output file of the Safire Reader Measure command<br />
See 16.42 “Specifying Output Filenames for Reader Data”, 16-128 for a<br />
description of the placeholders which can be used to generate reader data file<br />
names.<br />
To view or edit the execution parameters again later, right-click on the process<br />
step in the Process Editor and choose Edit Parameters in the context menu.<br />
Objects<br />
The Measure command operates on an object of type Sample or a derived type<br />
with default name MP.<br />
Pre-actions and post-actions<br />
The labware is brought to the Safire location with a RoMa MoveObject command<br />
and the door of the reader is opened with the Open command. After the<br />
measurement, the labware is brought back to its Base location with another RoMa<br />
MoveObject command and the door is closed with the Close command.<br />
16.27.5 Safire Reader - Multilabel Command<br />
The Multilabel command performs up to four consecutive measurement steps on<br />
the same labware using external software. The labware does not have to leave<br />
the reader in between measurements. Multi labeling allows different components<br />
(labelled with different fluorophores) to be detected in one operation.<br />
Execution parameters<br />
You are prompted to specify the following execution parameters when you add<br />
this command to your script or process:<br />
16 - 88 <strong>Freedom</strong> <strong>EVOware</strong> <strong>Software</strong> <strong>Manual</strong>, 393172, en, V<strong>2.3</strong>
16 - Device Commands<br />
Commands for the Safire Reader<br />
Fig. 16-61 Safire Reader Multilabel command<br />
Measurement parameters<br />
For each measurement step you want to perform, check the corresponding<br />
checkbox and click Edit. The RdrOLE reader interface software then prompts<br />
you to specify the measurement parameters. Refer to the RdrOLE online help<br />
and manual for more information.<br />
Note: RdrOLE must be configured to connect to the chosen reader. In <strong>Freedom</strong><br />
<strong>EVOware</strong>’s offline mode, you must start RdrOLE and choose the reader manually.<br />
Write raw data to file<br />
Enter the path and name of the raw data file or click Browse and choose an<br />
existing file. A default file name will be suggested automatically. See<br />
16.42 “Specifying Output Filenames for Reader Data”, 16-128 for a<br />
description of the placeholders which can be used to generate reader data file<br />
names.<br />
To view or edit the execution parameters again later, right-click on the process<br />
step in the Process Editor and choose Edit Parameters in the context menu.<br />
Objects<br />
The Multilabel command operates on an object of type Sample or a derived type<br />
with default name MP.<br />
Pre-actions and Post-actions<br />
The labware is brought to the Safire location with a RoMa MoveObject command<br />
and the door of the reader is opened with the Open command. After the<br />
measurement, the labware is brought back to its Base location with another RoMa<br />
MoveObject command and the door is closed with the Close command.<br />
<strong>Freedom</strong> <strong>EVOware</strong> <strong>Software</strong> <strong>Manual</strong>, 393172, en, V<strong>2.3</strong> 16 - 89
16 - Device Commands<br />
Commands for the Te-Shake Shaker<br />
16.28 Commands for the Te-Shake Shaker<br />
The Te-Shake Shaker commands are used to control the Tecan orbital shaker for<br />
microplates or microplate-like racks. The shaker is used for mixing functions and<br />
can be equipped with an optional heating plate. The shaker plate is placed on an<br />
eccentric. Rotation of the rotor causes an orbital movement of the shaker plate.<br />
The orbit of the movement can be varied by changing the eccentric.<br />
<strong>Freedom</strong> <strong>EVOware</strong> is provided with carrier definitions for several different types of<br />
Te-Shake shaker. Initially, only one of them is configured for use on the worktable<br />
(normally Te-Shake 2Pos).<br />
If you want to use more than one shaker in your script or process or a shaker with<br />
more than one rotor, first use the Duplicate Device tool to create additional shaker<br />
drivers (see A.9.3 “Duplicate Device Tool”, A-36). A separate driver is needed<br />
for each shaker. Then assign the drivers to the shakers you want to use (see<br />
9.5 “Configuring Carriers”, 9-39, “Carrier is device”). The shaker carriers will<br />
then appear as icons on the worktable.<br />
Finally, check that the carrier location is correctly assigned for each of the drivers.<br />
To do this, start the Configuration Tool, click Device Information, select the<br />
respective shaker driver in the Devices list and click Settings. Then click the<br />
Driver tab, select the Shaker_Shake command, click Pre-actions and edit the preaction.<br />
Location MoveLocation must specify the carrier location for the shaker<br />
which you are configuring. See 8.5.24.1 “Te-Shake Configuration - Driver Tab”,<br />
8-89.<br />
It is also necessary to check the assignment of the carrier location if you are only<br />
using one shaker but you have changed the shaker type by unchecking “Carrier is<br />
device” for Te-Shake 2Pos and checking it for another shaker type.<br />
You can configure the execution parameters (shaking time etc.) for each of the<br />
shakers separately when you add the shaker commands to your script or process.<br />
Note: <strong>Freedom</strong> <strong>EVOware</strong> treats a double shaker (with two rotors) as two separate<br />
shakers (labeled Te-Shake Front and Rear in the Control Bar, Labware section).<br />
You need two shaker drivers for the double shaker.<br />
Note: A multiple site shaker (one rotor but two microplate sites which shake in<br />
parallel) is called “Te-Shake 2Pos” in the Control Bar. It only needs one shaker<br />
driver.<br />
16.28.1 Te-Shake shaker - Init Command<br />
The Init command initializes the shaker. You must initialize the hardware with this<br />
command before you use the other commands for this device.<br />
This command has no execution parameters or objects, pre-actions or postactions.<br />
16.28.2 Te-Shake shaker - Shake Command<br />
The Shake command performs the shaking procedure with the specified direction,<br />
frequency and temperature.<br />
16 - 90 <strong>Freedom</strong> <strong>EVOware</strong> <strong>Software</strong> <strong>Manual</strong>, 393172, en, V<strong>2.3</strong>
16 - Device Commands<br />
Commands for the Te-Shake Shaker<br />
Execution parameters<br />
You are prompted to specify the following execution parameters when you add<br />
this command to your script or process:<br />
Fig. 16-62 Te-Shake Shaker Shake command<br />
Time panel<br />
Hours, minutes, seconds<br />
Specify the required duration of the shaking process.<br />
Settings panel<br />
Frequency<br />
Specify the required shaking frequency (range: 2 to 1800 rpm).<br />
Temperature<br />
Specify the working temperature of the heating plate option (range: 15 to<br />
90 °C). The heating plate cannot cool, so the minimum temperature of the<br />
labware is room temperature. Specify 0 to switch off the heating plate (or<br />
uncheck the Heater checkbox in the device configuration).<br />
Direction of rotation<br />
Select the required direction of shaking. If you choose Alternate, you must<br />
also specify the time period after which the rotation switches from clockwise to<br />
counter clockwise and vice versa.<br />
Note: Changes in the temperature of the heating plate are not instantaneous. If<br />
the shaker is used twice in rapid succession with different temperature settings,<br />
the required temperature of the heating plate might not be reached in time and the<br />
shaking process will be performed at the wrong temperature. To avoid this, install<br />
two shakers which are configured for different temperatures.<br />
To view or edit the execution parameters again later, right-click on the process<br />
step in the Process Editor and choose Edit Parameters in the context menu.<br />
<strong>Freedom</strong> <strong>EVOware</strong> <strong>Software</strong> <strong>Manual</strong>, 393172, en, V<strong>2.3</strong> 16 - 91
16 - Device Commands<br />
Commands for the Te-Shake Shaker<br />
Objects<br />
The Shake command operates on an object of type Sample or a derived type with<br />
default name MP.<br />
Pre-actions and Post-actions<br />
The labware is brought to the Shaker location with a RoMa MoveObject command<br />
and brought back to its Base location with another RoMa MoveObject command.<br />
16.28.3 Te-Shake shaker - Start Command<br />
The Start command starts the shaking procedure.<br />
Execution parameters<br />
You are prompted to specify the following execution parameters when you add<br />
this command to your script or process:<br />
Fig. 16-63 Te-Shake Shaker Start command<br />
Direction<br />
Specify whether you want the shaker to shake clockwise or counter clockwise.<br />
To view or edit the execution parameters again later, right-click on the script<br />
command in the Script Editor and choose Edit in the context menu.<br />
16.28.4 Te-Shake shaker - Stop Command<br />
The Stop command stops the shaking procedure.<br />
This command has no execution parameters or objects, pre-actions or postactions.<br />
16.28.5 Te-Shake shaker - SetTemperature Command<br />
The SetTemperature command sets the shaker to the specified temperature.<br />
Changes in temperature are not instantaneous. Make sure you specify the<br />
SetTemperature command early enough in your process or script to ensure that<br />
the shaker has sufficient time to heat up or cool down before using the Shake<br />
command.<br />
Execution parameters<br />
You are prompted to specify the following execution parameters when you add<br />
this command to your script or process:<br />
16 - 92 <strong>Freedom</strong> <strong>EVOware</strong> <strong>Software</strong> <strong>Manual</strong>, 393172, en, V<strong>2.3</strong>
16 - Device Commands<br />
Commands for the Symbol MS-954 Barcode Scanner<br />
Fig. 16-64 Te-Shake Shaker SetTemperature command<br />
Temperature<br />
Specify the working temperature of the heating plate option (15 to 90 °C). The<br />
heating plate cannot cool, so the minimum temperature of the labware is room<br />
temperature. Specify 0 to switch off the heating plate (or uncheck the Heater<br />
checkbox in the device configuration).<br />
To view or edit the execution parameters again later, right-click on the script<br />
command in the Script Editor and choose Edit in the context menu.<br />
16.28.6 Te-Shake shaker - SetFrequency Command<br />
The SetFrequency command sets the shaking frequency of the shaker.<br />
Execution parameters<br />
You are prompted to specify the following execution parameters when you add<br />
this command to your script or process:<br />
Fig. 16-65 Te-Shake Shaker SetFrequency command<br />
Frequency<br />
Specify the required shaking frequency (range: 2 to 1800 rpm).<br />
To view or edit the execution parameters again later, right-click on the script<br />
command in the Script Editor and choose Edit in the context menu.<br />
16.29 Commands for the Symbol MS-954 Barcode Scanner<br />
The Symbol LS-954 barcode scanner option allows you to read barcodes on<br />
plates or tubes which are presented to the scanner by a plate or tube robot. It can<br />
perform several reading attempts and tell the robot to increase its range of motion<br />
in front of the laser beam each time to detect barcodes even if they are not<br />
precisely positioned in front of the laser beam at the first try.<br />
<strong>Freedom</strong> <strong>EVOware</strong> <strong>Software</strong> <strong>Manual</strong>, 393172, en, V<strong>2.3</strong> 16 - 93
16 - Device Commands<br />
Commands for the Spectra Fluor Reader<br />
In <strong>Freedom</strong> <strong>EVOware</strong> Plus, the Barcode Scanner - Read Barcode command is an<br />
on-the-fly-command – drag the command to the line which connects two process<br />
steps (see 5.4.3 “The Process Editor (<strong>Freedom</strong> <strong>EVOware</strong> Plus)”, 5-17).<br />
16.29.1 Symbol MS-954 Barcode Scanner - Read Barcode Command<br />
The Read Barcode command is used to read barcodes from the labware or tube<br />
which is presented to the barcode scanner by the RoMa. The RoMa moves the<br />
labware or tube in front of the scanner in x, y and z direction according to the<br />
driver settings you have made. The scanner driver can be configured to re-scan<br />
several times if the labware or tube barcode cannot be read on the first attempt. It<br />
increases the distance of movement of the labware or tube along the three axes<br />
each time to increase the likelihood of finding the barcode. If a timeout occurs, the<br />
user will either be prompted to specify a barcode manually or a default barcode<br />
will be constructed, again depending on the driver configuration. See<br />
8.5.25 “Settings for the Symbol MS-954 Barcode Scanner”, 8-90 for details.<br />
See 13.2.28 “Commands for the Symbol MS-954 Barcode Scanner, Overview”,<br />
13-29 for general information on using the Read Barcode command.<br />
<strong>Freedom</strong> <strong>EVOware</strong> stores each scanned barcode in the internal database in the<br />
ID field of the labware record. The barcode information can also be included in<br />
report files (see 15.26 “Export Data Command”, 15-48).<br />
This command has no execution parameters or objects, pre-actions or postactions.<br />
16.30 Commands for the Spectra Fluor Reader<br />
The Spectra Fluor reader is a fully automatic, computer controlled fluorometer for<br />
measuring samples in a microplate. It fulfills the requirements for numerous<br />
fluorescence and absorbance applications in research and routine investigations.<br />
The filters are arranged in filter slides which allow up to four excitation filters and<br />
four emission filters.<br />
The commands for this reader require the RdrOLE and XFluor4 software, which<br />
must be installed separately. <strong>Freedom</strong> <strong>EVOware</strong> can also control this reader<br />
using the Magellan software (see 16.16 “Commands for the Magellan option”,<br />
16-48).<br />
Note: The Spectra Fluor commands and the Spectra Fluor driver are also<br />
compatible with the Spectra Fluor+ reader.<br />
16.30.1 Spectra Fluor Reader - Status Command<br />
The Status command interrogates the status of the reader. The device status is<br />
reported during process runtime in the Messages/Error window of the runtime<br />
controller (see 12.2.4 “Runtime Controller, Extended View (Running a Process)”,<br />
12-14).<br />
This command has no execution parameters or objects, pre-actions or postactions.<br />
16 - 94 <strong>Freedom</strong> <strong>EVOware</strong> <strong>Software</strong> <strong>Manual</strong>, 393172, en, V<strong>2.3</strong>
16 - Device Commands<br />
Commands for the Spectra Fluor Reader<br />
16.30.2 Spectra Fluor Reader - Excitation Out Command<br />
On some readers, the excitation light source can be filtered with an interference<br />
filter. The Excitation Out command moves the excitation filter slide out of the<br />
reader to allow the filters to be removed or exchanged.<br />
After removing, inserting or exchanging the filter, the slide should be pushed back<br />
in to the reader manually.<br />
This command has no execution parameters or objects, pre-actions or postactions.<br />
16.30.3 Spectra Fluor Reader - Emission Out Command<br />
On some readers, the light emission detector of the reader can be filtered with an<br />
interference filter. The Emission Out command moves the emission filter slide out<br />
of the reader to allow the filters to be removed or exchanged.<br />
After removing, inserting or exchanging the filter, the slide should be pushed back<br />
in to the reader manually.<br />
This command has no execution parameters or objects, pre-actions or postactions.<br />
16.30.4 Spectra Fluor Reader - Open Command<br />
The Open command opens the door of the reader.<br />
This command has no execution parameters or objects, pre-actions or postactions.<br />
16.30.5 Spectra Fluor Reader - Close Command<br />
The Close command closes the door of the reader.<br />
This command has no execution parameters or objects, pre-actions or postactions.<br />
16.30.6 Spectra Fluor Reader - Measure Command<br />
The Measure command performs a measurement procedure using external<br />
software. For a detailed description of the parameters of this command please<br />
consult the documentation for RdrOLE and XFluor4.<br />
Execution parameters<br />
The RdrOLE reader interface software prompts you to specify the measurement<br />
parameters when you add this command to your script or process. Refer to the<br />
RdrOLE online help and manual for more information.<br />
Note: RdrOLE must be configured to connect to the chosen reader. In <strong>Freedom</strong><br />
<strong>EVOware</strong>’s offline mode, you must start RdrOLE and choose the reader manually.<br />
After making your entries in the Measurement Parameters dialog box and clicking<br />
Ok, the Output dialog box is shown where you must specify the name of the<br />
<strong>Freedom</strong> <strong>EVOware</strong> <strong>Software</strong> <strong>Manual</strong>, 393172, en, V<strong>2.3</strong> 16 - 95
16 - Device Commands<br />
Commands for the Spectra Fluor Reader<br />
output file for the measurements. Alternatively, click Browse and choose an<br />
existing file. A default file name will be suggested automatically:<br />
Fig. 16-66 Specifying the output file of the Spectra Fluor Reader Measure command<br />
See 16.42 “Specifying Output Filenames for Reader Data”, 16-128 for a<br />
description of the placeholders which can be used to generate reader data file<br />
names.<br />
To view or edit the execution parameters again later, right-click on the process<br />
step in the Process Editor and choose Edit Parameters in the context menu.<br />
Objects<br />
The Measure command operates on an object of type Sample or a derived type<br />
with default name MP.<br />
Pre-actions and post-actions<br />
The labware is brought to the Spectra Fluor location with a RoMa MoveObject<br />
command and the door of the reader is opened with the Open command. After the<br />
measurement, the labware is brought back to its Base location with another RoMa<br />
MoveObject command and the door is closed with the Close command.<br />
16.30.7 Spectra Fluor Reader - Multilabel Command<br />
The Multilabel command performs up to four consecutive measurement steps on<br />
the same labware using external software. The labware does not have to leave<br />
the reader in between measurements. Multi labeling allows different components<br />
(labelled with different fluorophores) to be detected in one operation.<br />
Execution parameters<br />
You are prompted to specify the following execution parameters when you add<br />
this command to your script or process:<br />
16 - 96 <strong>Freedom</strong> <strong>EVOware</strong> <strong>Software</strong> <strong>Manual</strong>, 393172, en, V<strong>2.3</strong>
16 - Device Commands<br />
Commands for the Sunrise Reader<br />
Fig. 16-67 Spectra Fluor Reader Multilabel command<br />
Measurement parameters<br />
For each measurement step you want to perform, check the corresponding<br />
checkbox and click Edit. The RdrOLE reader interface software then prompts<br />
you to specify the measurement parameters. Refer to the RdrOLE online help<br />
and manual for more information.<br />
Note: RdrOLE must be configured to connect to the chosen reader. In <strong>Freedom</strong><br />
<strong>EVOware</strong>’s offline mode, you must start RdrOLE and choose the reader manually.<br />
Write raw data to file<br />
Enter the path and name of the raw data file or click Browse and choose an<br />
existing file. A default file name will be suggested automatically. See<br />
16.42 “Specifying Output Filenames for Reader Data”, 16-128 for a<br />
description of the placeholders which can be used to generate reader data file<br />
names.<br />
To view or edit the execution parameters again later, right-click on the process<br />
step in the Process Editor and choose Edit Parameters in the context menu.<br />
Objects<br />
The Multilabel command operates on an object of type Sample or a derived type<br />
with default name MP.<br />
Pre-actions and Post-actions<br />
The labware is brought to the Spectra Fluor location with a RoMa MoveObject<br />
command and the door of the reader is opened with the Open command. After the<br />
measurement, the labware is brought back to its Base location with another RoMa<br />
MoveObject command and the door is closed with the Close command.<br />
16.31 Commands for the Sunrise Reader<br />
The Sunrise reader is a fully automatic, microplate absorbance reader designed<br />
for professional use, enabling the user to measure the light absorbency (optical<br />
density) of samples in 96-well microplates. By reading twelve wells<br />
simultaneously, the instrument is able to measure a microplate in approximately<br />
<strong>Freedom</strong> <strong>EVOware</strong> <strong>Software</strong> <strong>Manual</strong>, 393172, en, V<strong>2.3</strong> 16 - 97
16 - Device Commands<br />
Commands for the Sunrise Reader<br />
six seconds. With an innovative range of options, this versatile MTP reader<br />
provides a wide range of features for numerous applications.<br />
The commands for this reader require the RdrOLE and XFluor4 software, which<br />
must be installed separately. <strong>Freedom</strong> <strong>EVOware</strong> can also control this reader<br />
using the Magellan software (see 16.16 “Commands for the Magellan option”,<br />
16-48).<br />
16.31.1 Sunrise Reader - Status Command<br />
The Status command interrogates the status of the reader. The device status is<br />
reported during process runtime in the Messages/Error window of the runtime<br />
controller (see 12.2.4 “Runtime Controller, Extended View (Running a Process)”,<br />
12-14).<br />
This command has no execution parameters or objects, pre-actions or postactions.<br />
16.31.2 Sunrise Reader - Open Command<br />
The Open command opens the door of the reader.<br />
This command has no execution parameters or objects, pre-actions or postactions.<br />
16.31.3 Sunrise Reader - Close Command<br />
The Close command closes the door of the reader.<br />
This command has no execution parameters or objects, pre-actions or postactions.<br />
16.31.4 Sunrise Reader - Measure Command<br />
The Measure command performs a measurement procedure using external<br />
software. For a detailed description of the parameters of this command please<br />
consult the documentation for RdrOLE and XFluor4.<br />
Execution parameters<br />
The RdrOLE reader interface software prompts you to specify the measurement<br />
parameters when you add this command to your script or process. Refer to the<br />
RdrOLE online help and manual for more information.<br />
Note: RdrOLE must be configured to connect to the chosen reader. In <strong>Freedom</strong><br />
<strong>EVOware</strong>’s offline mode, you must start RdrOLE and choose the reader manually.<br />
After making your entries in the Measurement Parameters dialog box and clicking<br />
Ok, the Output dialog box is shown where you must specify the name of the<br />
output file for the measurements. Alternatively, click Browse and choose an<br />
existing file. A default file name will be suggested automatically:<br />
16 - 98 <strong>Freedom</strong> <strong>EVOware</strong> <strong>Software</strong> <strong>Manual</strong>, 393172, en, V<strong>2.3</strong>
16 - Device Commands<br />
Commands for the Sunrise Reader<br />
Fig. 16-68 Specifying the output file of the Sunrise Reader Measure command<br />
See 16.42 “Specifying Output Filenames for Reader Data”, 16-128 for a<br />
description of the placeholders which can be used to generate reader data file<br />
names.<br />
To view or edit the execution parameters again later, right-click on the process<br />
step in the Process Editor and choose Edit Parameters in the context menu.<br />
Objects<br />
The Measure command operates on an object of type Sample or a derived type<br />
with default name MP.<br />
Pre-actions and post-actions<br />
The labware is brought to the Sunrise location with a RoMa MoveObject<br />
command and the door of the reader is opened with the Open command. After the<br />
measurement, the labware is brought back to its Base location with another RoMa<br />
MoveObject command and the door is closed with the Close command.<br />
16.31.5 Sunrise Reader - Multilabel Command<br />
The Multilabel command performs up to four consecutive measurement steps on<br />
the same labware using external software. The labware does not have to leave<br />
the reader in between measurements. Multi labeling allows different components<br />
(labelled with different fluorophores) to be detected in one operation.<br />
Execution parameters<br />
You are prompted to specify the following execution parameters when you add<br />
this command to your script or process:<br />
Fig. 16-69 Sunrise Reader Multilabel command<br />
<strong>Freedom</strong> <strong>EVOware</strong> <strong>Software</strong> <strong>Manual</strong>, 393172, en, V<strong>2.3</strong> 16 - 99
16 - Device Commands<br />
Commands for the Magnetic Bead Separator<br />
Measurement parameters<br />
For each measurement step you want to perform, check the corresponding<br />
checkbox and click Edit. The RdrOLE reader interface software then prompts<br />
you to specify the measurement parameters. Refer to the RdrOLE online help<br />
and manual for more information.<br />
Note: RdrOLE must be configured to connect to the chosen reader. In <strong>Freedom</strong><br />
<strong>EVOware</strong>’s offline mode, you must start RdrOLE and choose the reader manually.<br />
Write raw data to file<br />
Enter the path and name of the raw data file or click Browse and choose an<br />
existing file. A default file name will be suggested automatically. See<br />
16.42 “Specifying Output Filenames for Reader Data”, 16-128 for a<br />
description of the placeholders which can be used to generate reader data file<br />
names.<br />
To view or edit the execution parameters again later, right-click on the process<br />
step in the Process Editor and choose Edit Parameters in the context menu.<br />
Objects<br />
The Multilabel command operates on an object of type Sample or a derived type<br />
with default name MP.<br />
Pre-actions and Post-actions<br />
The labware is brought to the Sunrise location with a RoMa MoveObject<br />
command and the door of the reader is opened with the Open command. After the<br />
measurement, the labware is brought back to its Base location with another RoMa<br />
MoveObject command and the door is closed with the Close command.<br />
16.32 Commands for the Magnetic Bead Separator<br />
The Magnetic Bead Separator option (also called Te-MagS) is a magnetic bead<br />
separator with an optional heating function. It uses a commercially-available liquid<br />
containing microscopic magnetic beads to rapidly isolate bio-molecules (e.g.<br />
DNA, RNA, proteins etc.) or whole cells from various crude mixtures by means of<br />
magnetic forces. The magnetic beads are pulled through the liquid in the tubes<br />
using magnets and collect the required substance as they move.<br />
16.32.1 Magnetic Bead Separator - MoveToPosition Command<br />
The MoveToPosition command moves the carrier to one of four positions. You<br />
must specify the required position.<br />
Execution parameters<br />
You are prompted to specify the following execution parameters when you add<br />
this command to your script or process:<br />
16 - 100 <strong>Freedom</strong> <strong>EVOware</strong> <strong>Software</strong> <strong>Manual</strong>, 393172, en, V<strong>2.3</strong>
16 - Device Commands<br />
Commands for the Magnetic Bead Separator<br />
Fig. 16-70 Magnetic Bead Separation MoveToPosition command<br />
Specify the position the carrier should be moved to. The four positions are:<br />
Aspirate Position<br />
Carrier above the magnet block, magnet block raised.<br />
Dispense Position<br />
Carrier above the magnet block, magnet block lowered.<br />
Incubation Position<br />
Carrier above the heating block, heating block raised.<br />
Re-suspension Position<br />
Carrier above the heating block, heating block lowered. Use this position to<br />
carry out re-suspension by mixing the liquid with the pipetting tips (e.g. with<br />
the LiHa - Mix script command).<br />
Z-Position<br />
Specify the required Z-position (height) of the magnet block for the Aspirate<br />
position (range: 1 to 31 movement steps).<br />
z = 31 is the highest possible position. z = 1 is the lowest possible position and<br />
corresponds to the Dispense position. For more information on this feature<br />
see Z-position in 16.32.4 “Magnetic Bead Separator - Execution Command”,<br />
16-102.<br />
This field is only shown if you have checked Support Z-positioning in the<br />
configuration of the Te-MagS driver. This feature requires special Te-MagS<br />
hardware. This parameter can only be specified for the Aspirate position.<br />
To view or edit the execution parameters again later, right-click on the process<br />
step in the Process Editor and choose Edit Parameters in the context menu.<br />
16.32.2 Magnetic Bead Separator - ActivateHeater Command<br />
The ActivateHeater command is used to switch on the heater. You must specify<br />
the required temperature. Due to the time required to heat up the heating block,<br />
you should specify this command at an early stage in your script or process to<br />
ensure that the instrument does not have to wait if you want to heat the samples<br />
during the separation process.<br />
Execution parameters<br />
You are prompted to specify the following execution parameters when you add<br />
this command to your script or process:<br />
<strong>Freedom</strong> <strong>EVOware</strong> <strong>Software</strong> <strong>Manual</strong>, 393172, en, V<strong>2.3</strong> 16 - 101
16 - Device Commands<br />
Commands for the Magnetic Bead Separator<br />
Fig. 16-71 Magnetic Bead Separation ActivateHeater command<br />
Specify the working temperature of the heating block (range: 15 to 80 °C). The<br />
heating block cannot cool, so the minimum temperature of the labware is room<br />
temperature. Specify 0 to switch off the heating block, use the DeactivateHeater<br />
command or uncheck the Heater checkbox in the device configuration.<br />
Note: Changes in the temperature of the heating block are not instantaneous.<br />
To view or edit the execution parameters again later, right-click on the process<br />
step in the Process Editor and choose Edit Parameters in the context menu.<br />
16.3<strong>2.3</strong> Magnetic Bead Separator - DeactivateHeater Command<br />
The DeactivateHeater command is used to switch off the heater when you no<br />
longer want to use it. If you do not specify a Deactivate heater command in your<br />
script or process, the heater will be switched off automatically when you quit<br />
<strong>Freedom</strong> <strong>EVOware</strong>. The heater can also be switched off by unchecking the<br />
Heater checkbox in the device configuration.<br />
This command has no execution parameters or objects, pre-actions or postactions.<br />
16.32.4 Magnetic Bead Separator - Execution Command<br />
The Execution command is used to specify the sequence of operations to be<br />
carried out by the Magnetic Bead Separator (Te-MagS) during the magnetic<br />
separation process. The sequence of operations is called a “separation script”.<br />
Execution parameters<br />
You are prompted to specify the following execution parameters when you add<br />
this command to your script or process:<br />
16 - 102 <strong>Freedom</strong> <strong>EVOware</strong> <strong>Software</strong> <strong>Manual</strong>, 393172, en, V<strong>2.3</strong>
16 - Device Commands<br />
Commands for the Magnetic Bead Separator<br />
Fig. 16-72 Magnetic Bead Separation Execution command<br />
To add a command to the separation script, click one of the Commands buttons<br />
after specifying the command parameters to the right of the button. To change the<br />
order of execution of the commands, select a command from the list and click the<br />
Up or Down buttons. To delete a command from the list, select the command and<br />
click Delete.<br />
The following commands are available:<br />
Magnetic Mix<br />
This command mixes the magnetic beads with the sample liquid by applying<br />
the magnet block to alternate sides of the carrier the specified number of<br />
times (Cycles) with the specified waiting time at each of the two positions. In<br />
addition to moving from left to right and back, the magnet block also moves up<br />
and down to follow an approximately rectangular path.<br />
Z-Position<br />
Specify the required Z-position (highest position) of the magnet block for the<br />
Magnetic Mix command (range: 1 to 31 movement steps).<br />
z = 31 is the highest possible position and results in the maximum up and<br />
down movement of the magnet block during the Magnetic Mix command. z = 1<br />
is the lowest possible position and corresponds to the Dispense position. In<br />
this case, the Magnetic Mix command will only move the magnet block from<br />
left to right and back and not up and down.<br />
Specify a smaller value for Z-position if you only have a small volume of liquid<br />
in the labware. This ensures that the upwards movement of the magnet block<br />
will not drag the magnetic beads above the liquid surface. This makes it easier<br />
to aspirate the supernatant or wash liquid with the LiHa in a following step.<br />
This field is only shown if you have checked Support Z-positioning in the<br />
configuration of the Te-MagS driver. This feature requires special Te-MagS<br />
hardware.<br />
Incubation<br />
This command incubates the labware on the heater for the specified time.<br />
<strong>Freedom</strong> <strong>EVOware</strong> <strong>Software</strong> <strong>Manual</strong>, 393172, en, V<strong>2.3</strong> 16 - 103
16 - Device Commands<br />
Commands for the Magnetic Bead Separator<br />
Wait<br />
This command causes the device to wait for the specified time without<br />
performing any actions.<br />
Move to Pos.<br />
This command moves the carrier to one of four positions. The four positions are:<br />
Aspirate Position: Carrier above the magnet block, magnet block raised.<br />
Dispense Position: Carrier above the magnet block, magnet block lowered.<br />
Incubation Position: Carrier above the heating block, heating block raised.<br />
Re-suspension Position: Carrier above the heating block, heating block<br />
lowered. Use this position to carry out re-suspension by mixing the liquid with<br />
the pipetting tips (e.g. with the LiHa - Mix script command).<br />
Z-Position<br />
Specify the required Z-position (height) of the magnet block for the Aspirate<br />
position (range: 1 to 31 movement steps).<br />
z = 31 is the highest possible position. z = 1 is the lowest possible position and<br />
corresponds to the Dispense position.<br />
This field is only shown if you have checked Support Z-positioning in the<br />
configuration of the Te-MagS driver. This feature requires special Te-MagS<br />
hardware. This parameter can only be specified for the Aspirate position.<br />
Command<br />
Sends a firmware command to the Te-MagS. Refer to the firmware<br />
documentation for the device for a complete list of firmware commands (see<br />
also 1.2.1 “Related Documentation and <strong>Software</strong>”, 1-3).<br />
WARNING<br />
Risk of injury to operating personnel or damage to the equipment<br />
• Take care when sending firmware commands. Sending the wrong commands<br />
can damage the instrument or objects in its workspace, hurt yourself or other<br />
people.<br />
To view or edit the execution parameters again later, right-click on the process<br />
step in the Process Editor and choose Edit Parameters in the context menu.<br />
Objects<br />
The Execution command operates on an object of type Sample or a derived type<br />
with default name MP.<br />
Pre-actions and Post-actions<br />
The labware is brought to the Te-MagS location with a RoMa MoveObject<br />
command and brought back to its Base location with another RoMa MoveObject<br />
command.<br />
16 - 104 <strong>Freedom</strong> <strong>EVOware</strong> <strong>Software</strong> <strong>Manual</strong>, 393172, en, V<strong>2.3</strong>
16 - Device Commands<br />
Commands for the Te-Stack Te-MO<br />
16.33 Commands for the Te-Stack Te-MO<br />
The Te-Stack is used to store a stack of microplates, tube racks or DITI racks and<br />
to present them to the instrument for pipetting operations. It fetches the labware<br />
from the stacker tower (or “cartridge”) and moves them to a special position where<br />
they can be accessed by the liquid handling arm or robot manipulator (RoMa).<br />
The Te-Stack can be fitted with a barcode scanner which can read barcode labels<br />
on plates when they are inserted or removed. The Te-Stack is fitted to the side of<br />
the pipetting instrument alongside the worktable. It can also be fitted above the<br />
Te-MO. The barcode scanner option is not available in this case.<br />
The Te-Stack normally has two towers, each of which can hold up to 50<br />
microplates (depending on microplate height). When you fetch the labware, the<br />
Te-Stack brings it from the specified tower to the Te-Stack transfer position, where<br />
it can be picked up by the RoMa. To return the labware, the RoMa places it on the<br />
Te-Stack transfer position and the Te-Stack moves it back into the specified tower.<br />
Both towers share the same transfer position. A moveable carrier (the “shuttle” or<br />
“slide”) is used to move the labware between the transfer position and the two<br />
towers.<br />
To increase the available storage capacity, <strong>Freedom</strong> <strong>EVOware</strong> can group several<br />
physical Te-Stack devices into one logical Te-Stack device (see 8.5.28.3 “Te-Stack<br />
and Te-Stack Te-MO Configuration - Towers Tab”, 8-98).<br />
The Te-Stack can also be fitted above the Te-MO. The Te-Stack Te-MO can only<br />
put plates on the front two sites of each of the three Te-MO slides (it does not<br />
need a plate robot or slide to do this). For mechanical reasons, the rear three Te-<br />
MO sites are not accessible to the stacker. The barcode scanner option is not<br />
available for the Te-Stack Te-MO. The Te-Stack Te-MO cannot pick up Te-MO<br />
troughs or Te-MO Wash & Refill centers.<br />
16.33.1 Te-Stack Te-MO - InitStacker Command<br />
The InitStacker command initializes the Te-Stack Te-MO. You must initialize the<br />
hardware with this command before you use the other commands for this device.<br />
This command has no execution parameters or objects, pre-actions or postactions.<br />
16.33.2 Te-Stack Te-MO - MoveObject Command<br />
The MoveObject command moves the labware to a site on one of the Te-MO<br />
slides.<br />
This command is mainly intended for special applications; it is not normally used<br />
as a process step.<br />
Objects<br />
The Te-Stack MoveObject command operates on an object of type Object or a<br />
derived type with default name MP. It moves the object to a Location with default<br />
name MoveLocation.<br />
<strong>Freedom</strong> <strong>EVOware</strong> <strong>Software</strong> <strong>Manual</strong>, 393172, en, V<strong>2.3</strong> 16 - 105
16 - Device Commands<br />
Commands for the Te-Stack Te-MO<br />
16.33.3 Te-Stack Te-MO - DropPlate Command<br />
The DropPlate command gets the labware from the specified Te-Stack tower and<br />
puts in on the specified Te-MO site.<br />
Execution parameters<br />
You are prompted to specify the following execution parameters when you add<br />
this command to your script or process:<br />
Fig. 16-73 Te-Stack Te-MO - DropPlate command<br />
Plate type<br />
Choose the labware type that you want to use with this command. This tells<br />
the stacker the labware dimensions and how to handle the labware correctly.<br />
Tower<br />
Choose the stacker tower which contains the labware you want.<br />
Site<br />
Specify the Te-MO site where you want to put the labware. You should only<br />
select the front two rows of each slide. The Te-Stack Te-MO is only designed<br />
to handle plates and DITI racks - do not specify sites with other types of<br />
labware.<br />
To view or edit the execution parameters again later, right-click on the script<br />
command in the Script Editor and choose Edit in the context menu.<br />
16.33.4 Te-Stack Te-MO - GetPlate Command<br />
The GetPlate command gets the labware from the specified Te-MO site and<br />
returns it to the specified Te-Stack tower.<br />
Execution parameters<br />
You are prompted to specify the following execution parameters when you add<br />
this command to your script or process:<br />
16 - 106 <strong>Freedom</strong> <strong>EVOware</strong> <strong>Software</strong> <strong>Manual</strong>, 393172, en, V<strong>2.3</strong>
16 - Device Commands<br />
Commands for the Te-Stack<br />
Fig. 16-74 Te-Stack Te-MO - GetPlate command<br />
Plate type<br />
Choose the labware type that you want to use with this command. This tells<br />
the stacker the labware dimensions and how to handle the labware correctly.<br />
Tower<br />
Choose the stacker tower where you want to return the labware.<br />
Site<br />
Specify the Te-MO site which contains the labware you want. You should only<br />
select the front two rows of each slide. The Te-Stack Te-MO is only designed<br />
to handle plates and DITI racks - do not specify sites with other types of<br />
labware.<br />
To view or edit the execution parameters again later, right-click on the script<br />
command in the Script Editor and choose Edit in the context menu.<br />
16.34 Commands for the Te-Stack<br />
The Te-Stack is used to store a stack of microplates, tube racks or DITI racks and<br />
to present them to the instrument for pipetting operations. It fetches the labware<br />
from the stacker tower (or “cartridge”) and moves them to a special position where<br />
they can be accessed by the liquid handling arm or robot manipulator (RoMa).<br />
The Te-Stack can be fitted with a barcode scanner which can read barcode labels<br />
on plates when they are inserted or removed. The Te-Stack is fitted to the side of<br />
the pipetting instrument alongside the worktable. It can also be fitted above the<br />
Te-MO. The barcode scanner option is not available in this case.<br />
The Te-Stack normally has two towers, each of which can hold up to 50<br />
microplates (depending on microplate height). When you fetch the labware, the<br />
Te-Stack brings it from the specified tower to the Te-Stack transfer position, where<br />
it can be picked up by the RoMa. To return the labware, the RoMa places it on the<br />
Te-Stack transfer position and the Te-Stack moves it back into the specified tower.<br />
Both towers share the same transfer position. A moveable carrier (the “shuttle” or<br />
“slide”) is used to move the labware between the transfer position and the two<br />
towers.<br />
To increase the available storage capacity, <strong>Freedom</strong> <strong>EVOware</strong> can group several<br />
physical Te-Stack devices into one logical Te-Stack device (see 8.5.28.3 “Te-Stack<br />
and Te-Stack Te-MO Configuration - Towers Tab”, 8-98).<br />
The Te-Stack can also be fitted above the Te-MO. The Te-Stack Te-MO can only<br />
put plates on the front two sites of each of the three Te-MO slides (it does not<br />
need a plate robot or slide to do this). For mechanical reasons, the rear three Te-<br />
MO sites are not accessible to the stacker. The barcode scanner option is not<br />
<strong>Freedom</strong> <strong>EVOware</strong> <strong>Software</strong> <strong>Manual</strong>, 393172, en, V<strong>2.3</strong> 16 - 107
16 - Device Commands<br />
Commands for the Te-Stack<br />
available for the Te-Stack Te-MO. The Te-Stack Te-MO cannot pick up Te-MO<br />
troughs or Te-MO Wash & Refill centers.<br />
Note: The same driver is used for the Te-Stack Te-MO (see 16.33 “Commands for<br />
the Te-Stack Te-MO”, 16-105).<br />
16.34.1 Te-Stack - InitStacker Command<br />
The InitStacker command initializes the Te-Stack. You must initialize the hardware<br />
with this command before you use the other commands for this device.<br />
This command has no execution parameters or objects, pre-actions or postactions.<br />
16.34.2 Te-Stack - MoveObject Command<br />
The MoveObject command moves the labware to the Te-Stack transfer position.<br />
This command is mainly intended for special applications; it is not normally used<br />
as a process step.<br />
Objects<br />
The Te-Stack MoveObject command operates on an object of type Object or a<br />
derived type with default name MP. It moves the object to a Location with default<br />
name MoveLocation.<br />
16.34.3 Te-Stack - ReturnPlate Command<br />
The ReturnPlate command returns the labware from the Te-Stack transfer position<br />
to the specified tower.<br />
Execution parameters<br />
You are prompted to specify the following execution parameters when you add<br />
this command to your script or process:<br />
Fig. 16-75 Te-Stack ReturnPlate command<br />
Plate type<br />
Choose the labware type that you want to use with this command. This tells<br />
the stacker the labware dimensions and how to handle the labware correctly.<br />
Tower<br />
Choose the stacker tower where you want to return the labware.<br />
16 - 108 <strong>Freedom</strong> <strong>EVOware</strong> <strong>Software</strong> <strong>Manual</strong>, 393172, en, V<strong>2.3</strong>
16 - Device Commands<br />
Commands for the Te-Stack<br />
Site<br />
This field is not relevant for the Te-Stack. It is only used by the Te-Stack Te-<br />
MO.<br />
Move to waste<br />
Check this checkbox if you want the Te-Stack to discard the labware which<br />
you return to the Te-Stack to the waste instead of putting it back in the tower.<br />
This checkbox is only available if the Te-Stack is fitted with the Waste option.<br />
The Waste option for the Te-Stack is mainly intended for discarding empty<br />
DITI racks. <strong>Freedom</strong> <strong>EVOware</strong> detects this hardware option automatically by<br />
interrogating the device.<br />
To view or edit the execution parameters again later, right-click on the script<br />
command in the Script Editor and choose Edit in the context menu.<br />
16.34.4 Te-Stack - PrepareReturnPlate Command<br />
The PrepareReturnPlate command moves the Te-Stack shuttle to the Te-Stack<br />
transfer position, e.g. to wait for the RoMa to bring the labware. After the RoMa<br />
has brought the labware, the ReturnPlate command can then be used to return<br />
the labware to the specified stacker tower.<br />
Execution parameters<br />
You are prompted to specify the following execution parameters when you add<br />
this command to your script or process:<br />
Fig. 16-76 Te-Stack PrepareReturnPlate command<br />
Tower<br />
Choose the stacker tower. If you have configured a logical Te-Stack with more<br />
than one slide, the Tower parameter indicates which transfer position you<br />
want to use (see 8.5.28.3 “Te-Stack and Te-Stack Te-MO Configuration -<br />
Towers Tab”, 8-98).<br />
To view or edit the execution parameters again later, right-click on the script<br />
command in the Script Editor and choose Edit in the context menu.<br />
16.34.5 Te-Stack - PresentPlate Command<br />
The PresentPlate command gets labware from the specified tower and brings it to<br />
the Te-Stack transfer position, where the robot can pick it up and move it away.<br />
<strong>Freedom</strong> <strong>EVOware</strong> <strong>Software</strong> <strong>Manual</strong>, 393172, en, V<strong>2.3</strong> 16 - 109
16 - Device Commands<br />
Commands for the Te-VacS<br />
Execution parameters<br />
You are prompted to specify the following execution parameters when you add<br />
this command to your script or process:<br />
Fig. 16-77 Te-Stack PresentPlate command<br />
Plate type<br />
Choose the labware type that you want to use with this command. This tells<br />
the stacker the labware dimensions and how to handle the labware correctly.<br />
Tower<br />
Choose the stacker tower which contains the labware you want.<br />
To view or edit the execution parameters again later, right-click on the script<br />
command in the Script Editor and choose Edit in the context menu.<br />
16.35 Commands for the Te-VacS<br />
The Te-VacS is an SPE (Solid Phase Extraction) vacuum filtration system which is<br />
used for vacuum separation of biological molecules and chemical compounds.<br />
For more information on the Te-VacS see 8.5.29.2 “Te-VacS Configuration -<br />
Settings Tab”, 8-106.<br />
16.35.1 Te-VacS - SetPressureDiff Command<br />
The SetPressureDiff command starts the vacuum pump. You must specify the<br />
required vacuum. The vacuum is not applied to either of the SPE blocks and the<br />
script or process does not wait for the vacuum to build up. Due to the time needed<br />
to build up the vacuum, you should specify this command at an earlier stage in<br />
your script to ensure that the instrument does not have to wait when you want to<br />
apply the vacuum with the ApplyVacuumRear or ApplyVacuumFront commands.<br />
Execution parameters<br />
You are prompted to specify the following execution parameters when you add<br />
this command to your script or process:<br />
16 - 110 <strong>Freedom</strong> <strong>EVOware</strong> <strong>Software</strong> <strong>Manual</strong>, 393172, en, V<strong>2.3</strong>
16 - Device Commands<br />
Commands for the Te-VacS<br />
Fig. 16-78 Te-VacS - SetPressureDiff command<br />
Vacuum<br />
Specify the required vacuum (range: 30 – 700 mBar).<br />
To view or edit the execution parameters again later, right-click on the script<br />
command in the Script Editor and choose Edit in the context menu.<br />
16.35.2 Te-VacS - ApplyVacuumRear Command<br />
The ApplyVacuumRear command opens a valve which applies the vacuum to the<br />
rear SPE block (i.e. the SPE block which is connected to vacuum pipe 2). You<br />
must specify the required vacuum. If you did not specify a previous<br />
SetPressureDiff command, the vacuum pump is then started and pumps the<br />
entire vacuum path (“soft pumping”, see Te-VacS operating manual). The vacuum<br />
will be applied until a subsequent VentRear command is executed.<br />
Execution parameters<br />
You are prompted to specify the following execution parameters when you add<br />
this command to your script or process:<br />
Fig. 16-79 Te-VacS - ApplyVacuumRear command<br />
Vacuum<br />
Specify the required vacuum (range: 30 – 700 mBar).<br />
To view or edit the execution parameters again later, right-click on the script<br />
command in the Script Editor and choose Edit in the context menu.<br />
16.35.3 Te-VacS - ApplyVacuumFront Command<br />
The ApplyVacuumFront command opens a valve which applies the vacuum to the<br />
front SPE block (i.e. the SPE block which is connected to vacuum pipe 1). You<br />
must specify the required vacuum. If you did not specify a previous<br />
SetPressureDiff command, the vacuum pump is then started and pumps the<br />
entire vacuum path (“soft pumping”, see Te-VacS operating manual). The vacuum<br />
will be applied until a subsequent VentFront command is executed.<br />
<strong>Freedom</strong> <strong>EVOware</strong> <strong>Software</strong> <strong>Manual</strong>, 393172, en, V<strong>2.3</strong> 16 - 111
16 - Device Commands<br />
Commands for the Te-VacS<br />
Execution parameters<br />
You are prompted to specify the following execution parameters when you add<br />
this command to your script or process:<br />
Fig. 16-80 Te-VacS - ApplyVacuumFront command<br />
Vacuum<br />
Specify the required vacuum (range: 30 – 700 mBar).<br />
To view or edit the execution parameters again later, right-click on the script<br />
command in the Script Editor and choose Edit in the context menu.<br />
16.35.4 Te-VacS - VentRear Command<br />
The VentRear command vents the vacuum from the rear SPE block. It is used to<br />
stop the vacuum separation process.<br />
16.35.5 Te-VacS - VentFront Command<br />
The VentFront command vents the vacuum from the front SPE block. It is used to<br />
stop the vacuum separation process.<br />
16.35.6 Te-VacS - DeactivateSystem Command<br />
The DeactivateSystem command is used to shut down the Te-VacS when you no<br />
longer want to use it in your script or process. It switches off the vacuum pump<br />
and vents all blocks and the vacuum tank. If you do not specify a<br />
DeactivateSystem command, the Te-VacS will be deactivated automatically when<br />
you quit <strong>Freedom</strong> <strong>EVOware</strong>.<br />
16.35.7 Te-VacS - CheckWasteLevel Command<br />
The CheckWasteLevel command is used to check the liquid level in the waste<br />
bottle. The waste level is reported during process runtime in the Messages/Error<br />
window of the runtime controller (see 12.2.4 “Runtime Controller, Extended View<br />
(Running a Process)”, 12-14).<br />
16.35.8 Te-VacS - CheckPlateWithBlock Command<br />
If labware is positioned on the vacuum block and the vacuum block is moved with<br />
the RoMa, the CheckPlateWithBlock command is used to inform <strong>Freedom</strong><br />
<strong>EVOware</strong> that the labware has moved too.<br />
16 - 112 <strong>Freedom</strong> <strong>EVOware</strong> <strong>Software</strong> <strong>Manual</strong>, 393172, en, V<strong>2.3</strong>
16 - Device Commands<br />
Commands for the Te-VacS<br />
This command is normally used as a pre-action and/or post-action of another<br />
command. It is not normally used as a process step.<br />
16.35.9 Te-VacS - Filtration Command<br />
The Filtration command, which is only available in <strong>Freedom</strong> <strong>EVOware</strong> Plus, is<br />
used to specify the sequence of operations to be carried out by the Te-VacS<br />
during the vacuum separation process. Three of the tabs are used to make<br />
general settings. The fourth tab is used to specify the filtration parameters.<br />
To carry out vacuum separation in <strong>Freedom</strong> <strong>EVOware</strong> <strong>Standard</strong> you must use a<br />
combination of the commands SetPressureDiff, ApplyVacuumRear,<br />
ApplyVacuumFront, VentRear, VentFront, PositionPlateRear, PositionPlateFront<br />
and OpenDesaltingValve. The Filtration command in <strong>Freedom</strong> <strong>EVOware</strong> Plus is a<br />
high-level command which combines all of these functions.<br />
When setting up your worktable for the Filtration command, you must assign the<br />
labware labels FiltrationPlate and CollectionPlate to the filtration plate and the<br />
collection plate (see 11.7.1 “Assigning a Label (Name) to the Labware”, 11-19).<br />
Execution parameters<br />
You are prompted to specify the following execution parameters when you add<br />
this command to your script or process:<br />
16.35.9.1 General Tab<br />
This tab is used to make general settings.<br />
Fig. 16-81 Te-VacS Filtration command - General tab<br />
Execute on panel<br />
Specify whether you want to use the front SPE block or the rear SPE block.<br />
<strong>Freedom</strong> <strong>EVOware</strong> <strong>Software</strong> <strong>Manual</strong>, 393172, en, V<strong>2.3</strong> 16 - 113
16 - Device Commands<br />
Commands for the Te-VacS<br />
Collection plate panel<br />
Use collection plate<br />
Check this checkbox if you want to use a collection plate. A collection plate is<br />
used to collect the liquid which is extracted from the filtration plate.<br />
Absorbent station panel<br />
The absorbent station uses a blotting pad to remove drops of liquid from the<br />
bottom of the filtration and/or collection plate after each filtration step. It usually<br />
consists of a stand or carrier that contains a piece of fabric or absorbent material.<br />
It can also be programmed to be a replaceable item. The filtration or collection<br />
plate is put on to the absorbent station using the RoMa.<br />
The settings in this panel are only available if you have specified a location for the<br />
absorbent station in the device configuration (see 8.5.29.3 “Te-VacS Configuration<br />
- Command Generation Tab”, 8-107).<br />
Use for filtration plate<br />
Check this checkbox if you want to blot the filtration plate on the absorbent<br />
station.<br />
Use for collection plate<br />
Check this checkbox if you want to blot the collection plate on the absorbent<br />
station. This option is only available if you are using a collection plate.<br />
Replace absorbent after each use<br />
Check this checkbox if you want to replace the absorbent station each time it<br />
is used. The necessary replacement intervals depend on your application or<br />
experiment.<br />
Sequence panel<br />
The sequence panel is used to configure the sequence of plate robot (RoMa)<br />
movements if the Te-VacS process step follows and/or precedes another Te-VacS<br />
process step. In this case, some of the RoMa movements can be omitted because<br />
the labware item(s) have been left at the required position by the preceding step<br />
and/or can be left at the required position for the following step.<br />
<strong>Freedom</strong><br />
<strong>EVOware</strong> Plus<br />
If your <strong>Freedom</strong> <strong>EVOware</strong> Plus process has several Te-VacS process steps which<br />
are not directly connected, you must reserve the Te-VacS in the Process Editor<br />
(see 11.5.8.1 “Reserving and Linking Devices”, 11-14). If you don’t make a<br />
reservation and the Te-VacS is used by several processes, the Te-VacS vacuum<br />
block and the plates may not be positioned as expected.<br />
Follows a previous Te-VacS step<br />
Check this checkbox if the Te-VacS process step follows a previous Te-VacS<br />
process step.<br />
Execute all moves<br />
Carry out all of the RoMa movements which are normally required by this<br />
step.<br />
Filtration plate is already on block<br />
The filtration plate is already on the vacuum block. The associated RoMa<br />
movement is not necessary.<br />
Collection plate is already on position<br />
The collection plate is already at the correct position. The associated RoMa<br />
movement is not necessary.<br />
16 - 114 <strong>Freedom</strong> <strong>EVOware</strong> <strong>Software</strong> <strong>Manual</strong>, 393172, en, V<strong>2.3</strong>
16 - Device Commands<br />
Commands for the Te-VacS<br />
Collection plate and filtration plate are already on position<br />
The collection and filtration plates are already at the correct positions. The<br />
associated RoMa movements are not necessary.<br />
Another Te-VacS step will follow<br />
Check this checkbox if the Te-VacS process step will be followed by another<br />
Te-VacS process step.<br />
Execute all moves<br />
Carry out all of the RoMa movements which are normally required by this<br />
step.<br />
Filtration plate stays on block<br />
The filtration plate can be left on the vacuum block at the end of the step. The<br />
associated RoMa movement is not necessary.<br />
Collection plate becomes filtration plate<br />
The collection plate will be used as the filtration plate in the following Te-VacS<br />
step.<br />
Collection plate stays on position<br />
The collection plate can be left at the same position for the following Te-VacS<br />
step. The associated RoMa movement is not necessary.<br />
Collection plate and filtration plate stay on position<br />
The collection and filtration plates can be left at the same positions for the<br />
following Te-VacS step. The associated RoMa movements are not necessary.<br />
16.35.9.2 Prewetting Tab<br />
This tab is used to specify optional prewetting of the collection plate.<br />
Fig. 16-82 Te-VacS Filtration command - Pre-wetting tab<br />
Pre-wetting of collection plate panel<br />
Pre-wetting step required<br />
Check this checkbox if you want to pre-wet the collection plate before the<br />
filtration plate is put on top of it. This opens the Script Editor to allow you to<br />
create a script for pre-wetting.<br />
Pipetting time<br />
Specify the expected execution time of the pipetting operation.<br />
Edit button<br />
If you have already specified a pre-wetting script for the Filtration command,<br />
click this button to edit the script.<br />
16.35.9.3 Pipetting Tab<br />
This tab is used to specify optional pipetting to the filtration plate.<br />
<strong>Freedom</strong> <strong>EVOware</strong> <strong>Software</strong> <strong>Manual</strong>, 393172, en, V<strong>2.3</strong> 16 - 115
16 - Device Commands<br />
Commands for the Te-VacS<br />
Fig. 16-83 Te-VacS Filtration command - Pipetting tab<br />
Pipetting of filtration plate panel<br />
Pipetting step required<br />
Check this checkbox if you want to pipette to the filtration plate before filtration<br />
starts. This opens the Script Editor to allow you to create a script for pipetting.<br />
Pipetting time<br />
Specify the expected execution time of the pipetting operation.<br />
Edit button<br />
If you have already specified a pipetting script for the Filtration command, click<br />
this button to edit the script.<br />
16.35.9.4 Filtration Tab<br />
This tab is used to specify the separation script for the vacuum separation<br />
process.<br />
Fig. 16-84 Te-VacS Filtration command - Filtration tab<br />
To add a command to the separation script, click one of the Commands buttons<br />
after specifying the command parameters to the right of the button. To change the<br />
order of execution of the commands, select a command from the list and click the<br />
Up or Down buttons. To delete a command from the list, select the command and<br />
click Delete.<br />
The following commands are available<br />
16 - 116 <strong>Freedom</strong> <strong>EVOware</strong> <strong>Software</strong> <strong>Manual</strong>, 393172, en, V<strong>2.3</strong>
16 - Device Commands<br />
Commands for the Te-VacS<br />
Set Pressure Difference<br />
This command starts the vacuum pump. You must specify the required<br />
vacuum (range: 30 – 700 mBar). This does not apply vacuum to either of the<br />
SPE blocks. If you want to use the fast pumping procedure (see Operating<br />
<strong>Manual</strong>, Te-VacS), you should use this command in advance of the Apply<br />
Vacuum command. Due to the time needed to build up the vacuum, you<br />
should follow this command with a Wait command.<br />
Apply Vacuum<br />
This command applies the vacuum to the SPE block specified on the General<br />
tab. You must specify the required vacuum (range: 30 – 700 mBar). The<br />
vacuum will be applied until a subsequent Vent Block command is executed.<br />
The vacuum builds up slowly unless you precede this command with a Set<br />
Pressure Difference command. This is equivalent to the soft pumping<br />
procedure (see Operating <strong>Manual</strong>, Te-VacS - see 1.2.1 “Related<br />
Documentation and <strong>Software</strong>”, 1-3).<br />
Vent Block<br />
This command vents the vacuum from the SPE block specified on the General<br />
tab. It is used to stop the vacuum separation process.<br />
Deactivate<br />
This command is used to shut down the Te-VacS when you no longer want to<br />
use it in your script or process. It switches off the vacuum pump and vents all<br />
blocks and the internal vacuum container. If you do not specify a Deactivate<br />
command, the Te-VacS will be deactivated automatically when you quit<br />
<strong>Freedom</strong> <strong>EVOware</strong>.<br />
Position plate<br />
This command is only relevant if the Te-VacS is fitted with the Repositioner<br />
option. It moves the collection plate for the rear vacuum block into one of four<br />
positions before you apply the vacuum. For more information on this feature,<br />
see 16.35.10 “Te-VacS - PositionPlateRear Command”, 16-118.<br />
Desalting<br />
This command opens the desalter valve to drain the residues. It is only<br />
relevant for Te-VacS versions which are equipped with a desalter valve.<br />
Specify how long you want to open the desalting valve (range: 1 - 60<br />
seconds).<br />
Wait<br />
This causes the separation script to wait for the specified duration.<br />
Command<br />
Sends a firmware command to the Te-VacS. Refer to the firmware<br />
documentation for the device for a complete list of firmware commands (see<br />
also 1.2.1 “Related Documentation and <strong>Software</strong>”, 1-3).<br />
WARNING<br />
Risk of injury to operating personnel or damage to the equipment<br />
• Take care when sending firmware commands. Sending the wrong commands<br />
can damage the instrument or objects in its workspace, hurt yourself or other<br />
people.<br />
To view or edit the execution parameters again later, right-click on the process<br />
step in the Process Editor and choose Edit Parameters in the context menu.<br />
<strong>Freedom</strong> <strong>EVOware</strong> <strong>Software</strong> <strong>Manual</strong>, 393172, en, V<strong>2.3</strong> 16 - 117
16 - Device Commands<br />
Commands for the Te-VacS<br />
16.35.10 Te-VacS - PositionPlateRear Command<br />
The PositionPlateRear command is only relevant if the Te-VacS is fitted with the<br />
Repositioner option. This option allows the contents of four subsequent 96-well<br />
SPE plates (e.g. TecPrep 96 microplates) to be extracted to one 384-well<br />
collection plate (e.g. a MALDI target). The collection plate is placed on a movable<br />
carrier.<br />
The PositionPlateRear command moves the collection plate for the rear vacuum<br />
block into one of four positions before you apply the vacuum. After extracting<br />
liquid from one of the 96-well microplates, it is replaced by another microplate and<br />
the collection plate is moved by 4.5 mm in the X and/or Y direction to the new<br />
position.<br />
The collection plate can be moved to the following positions:<br />
• left/rear<br />
• left/front<br />
• right/rear<br />
• right/front.<br />
Execution parameters<br />
You are prompted to specify the following execution parameters when you add<br />
this command to your script or process:<br />
Fig. 16-85 Te-VacS - PositionPlateRear command<br />
Position<br />
Choose the required position of the collection plate.<br />
To view or edit the execution parameters again later, right-click on the script<br />
command in the Script Editor and choose Edit in the context menu.<br />
16.35.11 Te-VacS - PositionPlateFront Command<br />
The PositionPlateFront command is only relevant if the Te-VacS is fitted with the<br />
Repositioner option. This option allows the contents of four subsequent 96-well<br />
SPE plates (e.g. TecPrep 96 microplates) to be extracted to one 384-well<br />
collection plate (e.g. a MALDI target). The collection plate is placed on a movable<br />
carrier.<br />
The PositionPlateFront command moves the collection plate for the front vacuum<br />
block into one of four positions before you apply the vacuum. After extracting<br />
liquid from one of the 96-well microplates, it is replaced by another plate and the<br />
collection plate is moved by 4.5 mm in the X and/or Y direction to the new<br />
position.<br />
The collection plate can be moved to the following positions:<br />
• left/rear<br />
• left/front<br />
• right/rear<br />
16 - 118 <strong>Freedom</strong> <strong>EVOware</strong> <strong>Software</strong> <strong>Manual</strong>, 393172, en, V<strong>2.3</strong>
16 - Device Commands<br />
Commands for the Te-MO<br />
• right/front.<br />
Execution parameters<br />
You are prompted to specify the following execution parameters when you add<br />
this command to your script or process:<br />
Fig. 16-86 Te-VacS - PositionPlateFront command<br />
Position<br />
Choose the required position of the collection plate.<br />
To view or edit the execution parameters again later, right-click on the script<br />
command in the Script Editor and choose Edit in the context menu.<br />
16.35.12 Te-VacS - OpenDesaltingValve Command<br />
The OpenDesaltingValve command opens the desalter valve to drain the<br />
residues. It is only relevant for Te-VacS versions which are equipped with a<br />
desalter valve.<br />
Execution parameters<br />
You are prompted to specify the following execution parameters when you add<br />
this command to your script or process:<br />
Fig. 16-87 Te-VacS - OpenDesaltingValve command<br />
Open time<br />
Specify how long you want to open the desalting valve (range: 1 - 60<br />
seconds).<br />
To view or edit the execution parameters again later, right-click on the script<br />
command in the Script Editor and choose Edit in the context menu.<br />
16.36 Commands for the Te-MO<br />
The Te-MO is a robot pipetting device which can be attached to the worktable of<br />
the pipetting instrument. It is equipped with a specially designed pipetting system<br />
<strong>Freedom</strong> <strong>EVOware</strong> <strong>Software</strong> <strong>Manual</strong>, 393172, en, V<strong>2.3</strong> 16 - 119
16 - Device Commands<br />
Commands for the Ultra Reader<br />
which can pipette to up to 384 wells simultaneously, resulting in an extremely high<br />
throughput and efficiency. See 15.56 “Te-MO Commands”, 15-121 for more<br />
information.<br />
16.36.1 Te-MO - Init Command<br />
The Init command initializes the Te-MO. You must initialize the hardware with this<br />
command before you use the other commands for this device.<br />
This command has no execution parameters or objects, pre-actions or postactions.<br />
16.36.2 Te-MO - Pipette Command<br />
The Pipette command is used to create a pipetting script for the Te-MO. When you<br />
drag it to the Process Editor, it opens the Script Editor. See 11.4.2 “Creating a<br />
Pipetting Script”, 11-5.<br />
If you want to use this command, make sure that you have set the I/O Status for<br />
the Te-MO to ON in the Configuration Tool.<br />
16.37 Commands for the Ultra Reader<br />
The Tecan Ultra reader is a fully automated software-controlled fluorometer for<br />
both normal and polarized fluorescence as well as absorbance measurements. It<br />
provides unrivaled performance in luminescence mode.<br />
The commands for this reader require the RdrOLE and XFluor4 software, which<br />
must be installed separately. <strong>Freedom</strong> <strong>EVOware</strong> can also control this reader<br />
using the Magellan software (see 16.16 “Commands for the Magellan option”,<br />
16-48).<br />
16.37.1 Ultra Reader - Status Command<br />
The Status command interrogates the status of the reader. The device status is<br />
reported during process runtime in the Messages/Error window of the runtime<br />
controller (see 12.2.4 “Runtime Controller, Extended View (Running a Process)”,<br />
12-14).<br />
This command has no execution parameters or objects, pre-actions or postactions.<br />
16.37.2 Ultra Reader - Excitation Out Command<br />
On some readers, the excitation light source can be filtered with an interference<br />
filter. The Excitation Out command moves the excitation filter slide out of the<br />
reader to allow the filters to be removed or exchanged.<br />
After removing, inserting or exchanging the filter, the slide should be pushed back<br />
in to the reader manually.<br />
This command has no execution parameters or objects, pre-actions or postactions.<br />
16 - 120 <strong>Freedom</strong> <strong>EVOware</strong> <strong>Software</strong> <strong>Manual</strong>, 393172, en, V<strong>2.3</strong>
16 - Device Commands<br />
Commands for the Ultra Reader<br />
16.37.3 Ultra Reader - Emission Out Command<br />
On some readers, the light emission detector of the reader can be filtered with an<br />
interference filter. The Emission Out command moves the emission filter slide out<br />
of the reader to allow the filters to be removed or exchanged.<br />
After removing, inserting or exchanging the filter, the slide should be pushed back<br />
in to the reader manually.<br />
This command has no execution parameters or objects, pre-actions or postactions.<br />
16.37.4 Ultra Reader - Open Command<br />
The Open command opens the door of the reader.<br />
This command has no execution parameters or objects, pre-actions or postactions.<br />
16.37.5 Ultra Reader - Close Command<br />
The Close command closes the door of the reader.<br />
This command has no execution parameters or objects, pre-actions or postactions.<br />
16.37.6 Ultra Reader - Measure Command<br />
The Measure command performs a measurement procedure using external<br />
software. For a detailed description of the parameters of this command please<br />
consult the documentation for RdrOLE and XFluor4.<br />
Execution parameters<br />
The RdrOLE reader interface software prompts you to specify the measurement<br />
parameters when you add this command to your script or process. Refer to the<br />
RdrOLE online help and manual for more information.<br />
Note: RdrOLE must be configured to connect to the chosen reader. In <strong>Freedom</strong><br />
<strong>EVOware</strong>’s offline mode, you must start RdrOLE and choose the reader manually.<br />
After making your entries in the Measurement Parameters dialog box and clicking<br />
Ok, the Output dialog box is shown where you must specify the name of the<br />
output file for the measurements. Alternatively, click Browse and choose an<br />
existing file. A default file name will be suggested automatically:<br />
Fig. 16-88 Specifying the output file of the Ultra Reader Measure command<br />
<strong>Freedom</strong> <strong>EVOware</strong> <strong>Software</strong> <strong>Manual</strong>, 393172, en, V<strong>2.3</strong> 16 - 121
16 - Device Commands<br />
Commands for the Ultra Reader<br />
See 16.42 “Specifying Output Filenames for Reader Data”, 16-128 for a<br />
description of the placeholders which can be used to generate reader data file<br />
names.<br />
To view or edit the execution parameters again later, right-click on the process<br />
step in the Process Editor and choose Edit Parameters in the context menu.<br />
Objects<br />
The Measure command operates on an object of type Sample or a derived type<br />
with default name MP.<br />
Pre-actions and post-actions<br />
The labware is brought to the Ultra location with a RoMa MoveObject command<br />
and the door of the reader is opened with the Open command. After the<br />
measurement, the labware is brought back to its Base location with another RoMa<br />
MoveObject command and the door is closed with the Close command.<br />
16.37.7 Ultra Reader - Multilabel Command<br />
The Multilabel command performs up to four consecutive measurement steps on<br />
the same labware using external software. The labware does not have to leave<br />
the reader in between measurements. Multi labeling allows different components<br />
(labelled with different fluorophores) to be detected in one operation.<br />
Execution parameters<br />
You are prompted to specify the following execution parameters when you add<br />
this command to your script or process:<br />
Fig. 16-89 Ultra Reader Multilabel command<br />
Measurement parameters<br />
For each measurement step you want to perform, check the corresponding<br />
checkbox and click Edit. The RdrOLE reader interface software then prompts<br />
you to specify the measurement parameters. Refer to the RdrOLE online help<br />
and manual for more information.<br />
Note: RdrOLE must be configured to connect to the chosen reader. In <strong>Freedom</strong><br />
<strong>EVOware</strong>’s offline mode, you must start RdrOLE and choose the reader manually.<br />
16 - 122 <strong>Freedom</strong> <strong>EVOware</strong> <strong>Software</strong> <strong>Manual</strong>, 393172, en, V<strong>2.3</strong>
16 - Device Commands<br />
Commands for the Ultra Evolution Reader<br />
Write raw data to file<br />
Enter the path and name of the raw data file or click Browse and choose an<br />
existing file. A default file name will be suggested automatically. See<br />
16.42 “Specifying Output Filenames for Reader Data”, 16-128 for a<br />
description of the placeholders which can be used to generate reader data file<br />
names.<br />
To view or edit the execution parameters again later, right-click on the process<br />
step in the Process Editor and choose Edit Parameters in the context menu.<br />
Objects<br />
The Multilabel command operates on an object of type Sample or a derived type<br />
with default name MP.<br />
Pre-actions and Post-actions<br />
The labware is brought to the Ultra location with a RoMa MoveObject command<br />
and the door of the reader is opened with the Open command. After the<br />
measurement, the labware is brought back to its Base location with another RoMa<br />
MoveObject command and the door is closed with the Close command.<br />
16.38 Commands for the Ultra Evolution Reader<br />
The Tecan Ultra Evolution is a multi-functional microplate reader which provides<br />
high performance for the vast majority of today’s microplate applications and<br />
research. Being sensitive while fast, the Ultra Evolution fulfills the special<br />
demands of Ultra High Throughput Screening (UHTS). It provides the following<br />
measurement techniques: Fluorescence Intensity (FI), Fluorescence Time<br />
Resolved (FTR), Fluorescence Polarization (FP), Fluorescence Lifetime (FL),<br />
Absorbance, Luminescence and Dual Color Luminescence (Bioluminescence<br />
Resonance Energy Transfer). Measurement results can be optimized for different<br />
assay types (cell based or homogeneous), for different microplate types and for<br />
different dispensed volumes per well.<br />
The commands for this reader require the RdrOLE and XFluor4 software, which<br />
must be installed separately. <strong>Freedom</strong> <strong>EVOware</strong> can also control this reader<br />
using the Magellan software (see 16.16 “Commands for the Magellan option”,<br />
16-48).<br />
16.38.1 Ultra Evolution Reader - Status Command<br />
The Status command interrogates the status of the reader. The device status is<br />
reported during process runtime in the Messages/Error window of the runtime<br />
controller (see 12.2.4 “Runtime Controller, Extended View (Running a Process)”,<br />
12-14).<br />
This command has no execution parameters or objects, pre-actions or postactions.<br />
<strong>Freedom</strong> <strong>EVOware</strong> <strong>Software</strong> <strong>Manual</strong>, 393172, en, V<strong>2.3</strong> 16 - 123
16 - Device Commands<br />
Commands for the Ultra Evolution Reader<br />
16.38.2 Ultra Evolution Reader - Excitation Out Command<br />
On some readers, the excitation light source can be filtered with an interference<br />
filter. The Excitation Out command moves the excitation filter slide out of the<br />
reader to allow the filters to be removed or exchanged.<br />
After removing, inserting or exchanging the filter, the slide should be pushed back<br />
in to the reader manually.<br />
This command has no execution parameters or objects, pre-actions or postactions.<br />
16.38.3 Ultra Evolution Reader - Emission Out Command<br />
On some readers, the light emission detector of the reader can be filtered with an<br />
interference filter. The Emission Out command moves the emission filter slide out<br />
of the reader to allow the filters to be removed or exchanged.<br />
After removing, inserting or exchanging the filter, the slide should be pushed back<br />
in to the reader manually.<br />
This command has no execution parameters or objects, pre-actions or postactions.<br />
16.38.4 Ultra Evolution Reader - Open Command<br />
The Open command opens the door of the reader.<br />
This command has no execution parameters or objects, pre-actions or postactions.<br />
16.38.5 Ultra Evolution Reader - Close Command<br />
The Close command closes the door of the reader.<br />
This command has no execution parameters or objects, pre-actions or postactions.<br />
16.38.6 Ultra Evolution Reader - Measure Command<br />
The Measure command performs a measurement procedure using external<br />
software. For a detailed description of the parameters of this command please<br />
consult the documentation for RdrOLE and XFluor4.<br />
Execution parameters<br />
The RdrOLE reader interface software prompts you to specify the measurement<br />
parameters when you add this command to your script or process. Refer to the<br />
RdrOLE online help and manual for more information.<br />
Note: RdrOLE must be configured to connect to the chosen reader. In <strong>Freedom</strong><br />
<strong>EVOware</strong>’s offline mode, you must start RdrOLE and choose the reader manually.<br />
After making your entries in the Measurement Parameters dialog box and clicking<br />
Ok, the Output dialog box is shown where you must specify the name of the<br />
16 - 124 <strong>Freedom</strong> <strong>EVOware</strong> <strong>Software</strong> <strong>Manual</strong>, 393172, en, V<strong>2.3</strong>
16 - Device Commands<br />
Commands for the Ultra Evolution Reader<br />
output file for the measurements. Alternatively, click Browse and choose an<br />
existing file. A default file name will be suggested automatically:<br />
Fig. 16-90 Specifying the output file of the Ultra Revolution Reader Measure command<br />
See 16.42 “Specifying Output Filenames for Reader Data”, 16-128 for a<br />
description of the placeholders which can be used to generate reader data file<br />
names.<br />
To view or edit the execution parameters again later, right-click on the process<br />
step in the Process Editor and choose Edit Parameters in the context menu.<br />
Objects<br />
The Measure command operates on an object of type Sample or a derived type<br />
with default name MP.<br />
Pre-actions and post-actions<br />
The labware is brought to the Ultra Evolution location with a RoMa MoveObject<br />
command and the door of the reader is opened with the Open command. After the<br />
measurement, the labware is brought back to its Base location with another RoMa<br />
MoveObject command and the door is closed with the Close command.<br />
16.38.7 Ultra Evolution Reader - Multilabel Command<br />
The Multilabel command performs up to four consecutive measurement steps on<br />
the same labware using external software. The labware does not have to leave<br />
the reader in between measurements. Multi labeling allows different components<br />
(labelled with different fluorophores) to be detected in one operation.<br />
Execution parameters<br />
You are prompted to specify the following execution parameters when you add<br />
this command to your script or process:<br />
<strong>Freedom</strong> <strong>EVOware</strong> <strong>Software</strong> <strong>Manual</strong>, 393172, en, V<strong>2.3</strong> 16 - 125
16 - Device Commands<br />
Commands for the Process Script Driver<br />
Fig. 16-91 Ultra Evolution Reader Multilabel command<br />
Measurement parameters<br />
For each measurement step you want to perform, check the corresponding<br />
checkbox and click Edit. The RdrOLE reader interface software then prompts<br />
you to specify the measurement parameters. Refer to the RdrOLE online help<br />
and manual for more information.<br />
Note: RdrOLE must be configured to connect to the chosen reader. In <strong>Freedom</strong><br />
<strong>EVOware</strong>’s offline mode, you must start RdrOLE and choose the reader manually.<br />
Write raw data to file<br />
Enter the path and name of the raw data file or click Browse and choose an<br />
existing file. A default file name will be suggested automatically. See<br />
16.42 “Specifying Output Filenames for Reader Data”, 16-128 for a<br />
description of the placeholders which can be used to generate reader data file<br />
names.<br />
To view or edit the execution parameters again later, right-click on the process<br />
step in the Process Editor and choose Edit Parameters in the context menu.<br />
Objects<br />
The Multilabel command operates on an object of type Sample or a derived type<br />
with default name MP.<br />
Pre-actions and Post-actions<br />
The labware is brought to the Ultra Evolution location with a RoMa MoveObject<br />
command and the door of the reader is opened with the Open command. After the<br />
measurement, the labware is brought back to its Base location with another RoMa<br />
MoveObject command and the door is closed with the Close command.<br />
16.39 Commands for the Process Script Driver<br />
The Process Starter device driver starts a specified process when a set of userdefined<br />
conditions are met. You can specify conditions which are based on<br />
database locations and/or on the values of variables. Alternatively, you can start a<br />
specified process unconditionally.<br />
16 - 126 <strong>Freedom</strong> <strong>EVOware</strong> <strong>Software</strong> <strong>Manual</strong>, 393172, en, V<strong>2.3</strong>
16 - Device Commands<br />
Commands for the Transfer Station<br />
The Process Starter - Start command can be used as a process step or as a script<br />
command in a Process Script process step (see 16.24.1 “Process Starter - Start<br />
Command”, 16-78).<br />
The Process Starter and Process Script device drivers are only relevant for<br />
<strong>Freedom</strong> <strong>EVOware</strong> Plus.<br />
16.39.1 Process Script - Script Command<br />
The Process Starter device driver starts a specified process when a set of userdefined<br />
conditions are met. You can specify conditions which are based on<br />
database locations and/or on the values of variables. Alternatively, you can start a<br />
specified process unconditionally.<br />
The ProcStart - Start command can be used as a process step or as a script<br />
command in a Process Script process step (see 16.24.1 “Process Starter - Start<br />
Command”, 16-78).<br />
The Process Script - Script command is used to create a script for the Process<br />
Starter script commands. When you drag it to the Process Editor, it opens the<br />
Script Editor automatically. See 11.4.2 “Creating a Pipetting Script”, 11-5.<br />
16.40 Commands for the Transfer Station<br />
The Transfer Station is an unused location on the worktable of the pipetting<br />
instrument. If your pipetting instrument is fitted with two RoMa arms, it is used to<br />
transfer labware from one RoMa to another. The Transfer command is only<br />
available if you have installed <strong>Freedom</strong> <strong>EVOware</strong> with two RoMas.<br />
16.40.1 Transfer Station - Transfer Command<br />
The Transfer Station is an unused location on the worktable of the pipetting<br />
instrument. If your pipetting instrument is fitted with two RoMa arms, the Transfer<br />
command uses the Transfer Station to pass labware from one RoMa to the other if<br />
this becomes necessary. <strong>Freedom</strong> <strong>EVOware</strong> instructs the first RoMa to put down<br />
the labware on the Transfer Station, where the second RoMa can pick it up again.<br />
In most cases, both RoMas can access all locations on the the pipetting<br />
instrument. This command is only needed if - for mechanical reasons - labware<br />
which has been picked up by one of the RoMas must be moved to a location<br />
which is only accessible to the other one. This situation is detected automatically<br />
when you preview your process. If the Runtime Controller reports a RoMa access<br />
problem, insert the Transfer command between the two relevant process steps.<br />
<strong>Freedom</strong> <strong>EVOware</strong> then uses the Transfer Station automatically when it is<br />
needed.<br />
16.41 Commands for the Te-Link<br />
The Te-Link is a transfer rail (conveyor) option that allows the transport of labware<br />
such as microplates from one pipetting instrument to another or to another<br />
external device. Labware to be moved is placed by the RoMa on a shuttle carrier<br />
<strong>Freedom</strong> <strong>EVOware</strong> <strong>Software</strong> <strong>Manual</strong>, 393172, en, V<strong>2.3</strong> 16 - 127
16 - Device Commands<br />
Specifying Output Filenames for Reader Data<br />
at one end of the Te-Link. It is then moved to the other end of the Te-Link where it<br />
can be picked up by another RoMa for further processing.<br />
16.41.1 Te-Link - Move Command<br />
The Te-Link is a transfer rail (conveyor) option that allows the transport of labware<br />
such as microplates from one pipetting instrument to another or to another device.<br />
The Move command moves the shuttle of the Te-Link from one position on the<br />
transfer rail to another:<br />
Fig. 16-92 Te-Link - Move command<br />
Location<br />
Choose which position you want to move the shuttle to.<br />
Location1 and Location2 are assigned to two physical positions of the Te-Link<br />
shuttle (normally the two ends of the Te-Link rail) when setting up the<br />
hardware. This is done by sending firmware commands to the device using<br />
the Setup & Service software.<br />
16.42 Specifying Output Filenames for Reader Data<br />
The Measure commands of microplate readers such as the GENios or Ultra family<br />
allow you to specify an output file for the results of the measurement steps. The<br />
file name of this file can either be specified explicitly or it can be generated during<br />
script or process runtime. The following placeholders are available for generating<br />
the file name:<br />
Tab. 16-3 Filename placeholders for reader data output files<br />
Placeholder Example Description<br />
000912 The current date<br />
20000912 The current date<br />
120900 The current date<br />
12092000 The current date<br />
000912.003 The current date and a sequence<br />
number (counter)<br />
20000912.003 The current date and a sequence<br />
number (counter)<br />
120900.003 The current date and a sequence<br />
number (counter)<br />
16 - 128 <strong>Freedom</strong> <strong>EVOware</strong> <strong>Software</strong> <strong>Manual</strong>, 393172, en, V<strong>2.3</strong>
16 - Device Commands<br />
Specifying Output Filenames for Reader Data<br />
Tab. 16-3 Filename placeholders for reader data output files<br />
Placeholder Example Description<br />
120900-003 The current date and a sequence<br />
number (counter)<br />
12092000.003 The current date and a sequence<br />
number (counter)<br />
003 A sequence number (counter)<br />
12345 The contents of a variable in the<br />
<strong>Freedom</strong> <strong>EVOware</strong> database<br />
12345 The labware barcode. After scanning<br />
the labware with the barcode<br />
reader or the PosID, the barcode is<br />
stored in this database variable<br />
The placeholders are replaced dynamically with their current values during script<br />
or process runtime. You can combine the placeholders with plain text, e.g. to<br />
specify the filename extension.<br />
Examples<br />
• Use the following string to generate filenames containing the date and a<br />
sequence number (counter):<br />
.rdr<br />
(e.g. 0411301234.rdr)<br />
• Use the following string to generate the file name from the labware barcode:<br />
.rdr<br />
(e.g. 783898936.rdr)<br />
<strong>Freedom</strong> <strong>EVOware</strong> <strong>Software</strong> <strong>Manual</strong>, 393172, en, V<strong>2.3</strong> 16 - 129
16 - Device Commands<br />
Specifying Output Filenames for Reader Data<br />
16 - 130 <strong>Freedom</strong> <strong>EVOware</strong> <strong>Software</strong> <strong>Manual</strong>, 393172, en, V<strong>2.3</strong>
17 - Special Features, Example Scripts and Processes,<br />
Using the Automatic DITI Handling feature<br />
17 Special Features, Example Scripts and Processes,<br />
This chapter introduces the example scripts and processes and describes the<br />
usage and configuration of special features in <strong>Freedom</strong> <strong>EVOware</strong>.<br />
17.1 Using the Automatic DITI Handling feature<br />
If you are using DITIs on the liquid handling arm (LiHa), <strong>Freedom</strong> <strong>EVOware</strong><br />
provides special facilities to ensure that sufficient DITIs are present on the<br />
worktable for your script or process and to automatically fetch new DITI racks as<br />
and when needed.<br />
The automatic DITI handling feature is also compatible with stackable DITI racks.<br />
However, this feature is not available for and is not meaningful for the Te-MO and<br />
the MCA.<br />
A stackable DITI rack is a special DITI rack design which can be stacked using<br />
plastic spacers to form a pile of racks. The pile can be put on the workable. This<br />
avoids the need for a carousel if the number of DITIs required by your script or<br />
process is not too high. The Get DITIs command picks up DITIs from the DITI rack<br />
which is on the top of the pile. When the DITI rack is empty, it is removed from the<br />
pile together with the spacer to reveal the next DITI rack in the pile. Stackable DITI<br />
racks can only be used with the LiHa.<br />
<strong>Freedom</strong> <strong>EVOware</strong> is provided with a sample carrier definition for a stackable<br />
DITI rack. Since the dimensions of stackable DITI racks are not currently<br />
standardized and can vary between models and manufacturers, you must reteach<br />
the coordinates using the actual DITI carrier and labware type which you<br />
plan to use.<br />
The automatic DITI handling feature is only intended for automatic replacement of<br />
DITIs on the LiHa. It cannot be used to replace DITIs on the MCA, MCA384 or Te-<br />
MO.<br />
Proceed as follows to use automatic DITI handling feature:<br />
17.1.1 Automatic DITI handling in <strong>Freedom</strong> <strong>EVOware</strong> <strong>Standard</strong><br />
In <strong>Freedom</strong> <strong>EVOware</strong> <strong>Standard</strong>, automatic LiHa DITI replacement is done using a<br />
DITI replacement script (sub-routine).<br />
Set up the worktable to include DiTi carriers and DiTi labware to meet the<br />
requirements of your script. Unless you are using stackable DITI racks, you also<br />
need to configure a labware source for the DITI racks (typically a carousel or<br />
hotel). Stackable DITI racks are normally put on the worktable.<br />
Add an Activate DITI Handling command to your script for each DITI type which is<br />
used. The Activate DITI Handling command specifies the DITI type and also a<br />
DITI replacement script (sub-routine) which replaces the DITI racks when all of<br />
the DITIs have been used (see 15.6 “Activate DITI Handling Command”, 15-<br />
12).<br />
For standard DITI racks, the replacement script is normally programmed using<br />
two Transfer Labware commands (one to remove the empty DITI racks and one to<br />
get fresh DITI racks). Depending on the application, it can also contain a Set DITI<br />
Position command. For stackable DiTi racks, the replacement script only needs<br />
<strong>Freedom</strong> <strong>EVOware</strong> <strong>Software</strong> <strong>Manual</strong>, 393172, en, V<strong>2.3</strong> 17 - 1
17 - Special Features, Example Scripts and Processes,<br />
Using the Automatic DITI Handling feature<br />
to remove the empty DITI racks and the spacers (and thus only needs one<br />
Transfer Labware command). Don’t remove the last rack of the stack.<br />
The worktable locations (grid, site) of the DITI racks which will need replacing or<br />
removing during runtime is specified in the Transfer Labware command(s) of the<br />
DITI replacement script using the pre-defined variables Replace_Diti_Grid and<br />
Replace_Diti_Site. For each Get DITI command in your pipetting script, <strong>Freedom</strong><br />
<strong>EVOware</strong> automatically sets these variables to the correct grid and site for the<br />
selected DITI type before executing the command.<br />
Script Runtime<br />
During script runtime, the DITI replacement script is called whenever DITIs need<br />
to be replaced. When using stackable DITI racks, the replacement script only<br />
needs to remove the empty DiTi racks along with the spacers to reveal the next<br />
DITI rack in the pile. Note: stackable DITI racks and spacers cannot be stacked<br />
when they are empty, you must discard them to a suitable location.<br />
Note: The used DITIs are discarded to the DITI waste which is specified in the<br />
Drop DITIs command(s).<br />
Before running the script<br />
For standard DITI racks: Make sure that the source of DITI racks (e.g. carousel<br />
or hotel) contains full DITI racks.<br />
For stackable DITI racks: Make sure the stack contains enough DITI racks for<br />
your script. Provided that you set the DITI position correctly using the Set DITI<br />
Position command, the topmost DITI rack in the stack does not need to be full.<br />
For standard DITI racks and stackable DITI racks: <strong>Freedom</strong> <strong>EVOware</strong><br />
remembers the position in the DITI rack where the last DITI was fetched. When<br />
starting a new run, the Get DITIs command starts picking up DITIs at the next<br />
available position.<br />
17.1.1.1 Example of Automatic DITI handling in <strong>Freedom</strong> <strong>EVOware</strong> <strong>Standard</strong><br />
The first three lines of the main script are as follows:<br />
Fig. 17-1 Automatic DITI handling - Main script<br />
The variable NewDitiSite, which is declared in line 2, specifies a hotel site which<br />
contains the next full DITI rack to be used. The rest of the main script contains<br />
pipetting commands, Get DITI and Drop DITI commands etc.<br />
The initial worktable setup in this example is as follows:<br />
A carrier “DITI 2Pos + Waste” is positioned at worktable grid 35:<br />
• Site 1 of this carrier contains a full DITI Rack.<br />
• The first DITI will be taken from position 89 of this DITI rack.<br />
A hotel is positioned at worktable grid 43:<br />
17 - 2 <strong>Freedom</strong> <strong>EVOware</strong> <strong>Software</strong> <strong>Manual</strong>, 393172, en, V<strong>2.3</strong>
17 - Special Features, Example Scripts and Processes,<br />
Using the Automatic DITI Handling feature<br />
• Hotel site 1 is empty. The DITI rack at grid 35, site 1 will be put here when all<br />
of the DITIs have been used for pipetting.<br />
• All other hotel sites contain full DITI racks.<br />
• Hotel site 2 contains a full DITI rack which will be used for the first replace<br />
operation.<br />
First replace operation<br />
When all of the DITIs have been used from the DITI rack at grid 35, it will be<br />
moved to site 1 of the hotel. A fresh DITI rack will be taken from site 2 of the hotel.<br />
The replace script in this example is as follows:<br />
Fig. 17-2 Automatic DITI handling - Replace script<br />
The replace script is specified in the Activate DITI Handling command in line 3 of<br />
the main script.<br />
Second replace operation<br />
When all of the DITIs have been used from the DITI rack at grid 35, it will be<br />
moved to site 2 of the hotel. A fresh DITI rack will be taken from site 3 of the hotel.<br />
The replace operations will be repeated until all of the DITIs in the hotel have<br />
been used.<br />
17.1.2 Automatic DITI handling in <strong>Freedom</strong> <strong>EVOware</strong> Plus<br />
With the process editor open, set up the worktable to include DiTi carriers and DiTi<br />
labware to meet the requirements of your process. Unless you are using<br />
stackable DITI racks, you also need to configure a labware source for the DITI<br />
racks (typically a carousel or hotel). Stackable DITI racks are normally put on the<br />
worktable.<br />
Specify the worktable location(s) of the DITI racks which will need replacing during<br />
runtime. To do this, right click on the DiTi rack on the worktable and choose<br />
Automatic replace from the context menu. A tick alongside this context menu item<br />
shows that automatic DITI Handling is enabled for this site. Repeat this operation<br />
for each DiTi type (DITI rack) which you want to replace automatically.<br />
<strong>Freedom</strong> <strong>EVOware</strong> <strong>Software</strong> <strong>Manual</strong>, 393172, en, V<strong>2.3</strong> 17 - 3
17 - Special Features, Example Scripts and Processes,<br />
Using the Automatic DITI Handling feature<br />
When using stackable DiTi racks, you must choose a special DITI waste location<br />
for discarding the empty DITI racks and the spacers. This is because stackable<br />
DITI racks and spacers cannot be stacked when they are empty.<br />
To enable the automatic DITI rack waste feature, right click on a DITI waste on the<br />
worktable and choose Waste for DITI racks from the context menu. A tick<br />
alongside this context menu item shows that this location will then be used for the<br />
empty DITI racks and spacers. This option is only available for the DITI waste site<br />
of a DITI carrier with waste and is only intended for discarding empty DITI racks<br />
and spacers.<br />
Note: The used DITIs are discarded to the DITI waste which is specified in the<br />
Drop DITIs command(s).<br />
There are two approaches to automatic DITI handling in <strong>Freedom</strong> <strong>EVOware</strong> Plus:<br />
• Method A: The labware source for the DITI racks (e.g. carousel or hotel) is full<br />
and there are no DITI racks on the worktable.<br />
• Method B: DITI racks are present on the worktable, some of them are only<br />
partly full. For this approach, <strong>Freedom</strong> <strong>EVOware</strong> needs to have up to date<br />
information on the DITI positions of all DITI types used in the process.<br />
17.1.2.1 Process runtime settings for automatic DITI handling<br />
There are two basic approaches to automatic DITI handling in <strong>Freedom</strong> <strong>EVOware</strong><br />
Plus:<br />
• Method A: The labware source for the DITI racks (e.g. carousel or hotel) is full<br />
and there are no DITI racks on the worktable.<br />
• Method B: DITI racks are present on the worktable, some of them are only<br />
partly full. For this approach, <strong>Freedom</strong> <strong>EVOware</strong> needs to have up to date<br />
information on the DITI positions of all DITI types used in the process.<br />
Depending on the chosen approach, the following settings should be made in the<br />
Runtime Controller of <strong>Freedom</strong> <strong>EVOware</strong> Plus:<br />
Method A:<br />
Check the Start initial load process checkbox in the Runtime Controller to load<br />
the worktable automatically with DITI racks before you start the main process.<br />
In addition:<br />
– Make sure that the source of the DITIs (e.g. carousel) contains full DITI<br />
racks at all positions.<br />
– Make sure that there are no DITI racks already on the worktable.<br />
– <strong>Freedom</strong> <strong>EVOware</strong> will clear away all used and partly used DITI racks<br />
when the process is finished.<br />
Before starting the main process, one Initial Load process will be started for<br />
each DiTi type which is configured for automatic handling. When the main<br />
process is finished, one clear-away process will be started for all DiTi types<br />
which are configured for automatic handling.<br />
Method B:<br />
Do not check the Start initial load process checkbox in the Runtime Controller<br />
if you want to load the worktable manually with full DITI racks before you start<br />
the main process or if you are carrying on from a previous process which used<br />
DITIs.<br />
In addition:<br />
– For each DITI type on the worktable, <strong>Freedom</strong> <strong>EVOware</strong> remembers the<br />
position in the DITI Rack of the last DITI which was fetched. This<br />
information is still available even if you restart <strong>Freedom</strong> <strong>EVOware</strong> or your<br />
17 - 4 <strong>Freedom</strong> <strong>EVOware</strong> <strong>Software</strong> <strong>Manual</strong>, 393172, en, V<strong>2.3</strong>
17 - Special Features, Example Scripts and Processes,<br />
Script and process recovery function<br />
PC. If you have made manual changes to the DITI racks in the meantime,<br />
for example by replacing empty racks on the worktable with full ones, you<br />
must use the direct command Set DITI Position to inform <strong>Freedom</strong><br />
<strong>EVOware</strong> of the current situation.<br />
– For each DITI type used in the process, make sure there is at least one<br />
empty position in the DITI rack source (e.g. carousel or hotel). This<br />
position will be used for empty DITI racks during the replacement<br />
operation. Note: The empty DITI racks are returned to the carousel or<br />
hotel before getting the full DITI racks.<br />
– Partly used DITI labware will be left on the worktable when the process is<br />
finished. If you then want to run another process, do not check the Start<br />
Initial DiTi Load Processes checkbox in the follow-up process.<br />
17.2 Script and process recovery function<br />
<strong>Freedom</strong> <strong>EVOware</strong> provides functions for script and process error recovery. This<br />
allows aborted pipetting scripts and processes to be restarted where they were<br />
stopped.<br />
<strong>Freedom</strong> <strong>EVOware</strong> <strong>Standard</strong>: When the script is open in the Script Editor (or you<br />
open the same script again) the Run button in the <strong>Freedom</strong> <strong>EVOware</strong> toolbar<br />
changes to Recover. In addition, the last script line which was successfully<br />
executed is highlighted in orange.<br />
<strong>Freedom</strong> <strong>EVOware</strong> Plus: The Process Recovery Wizard takes you directly to the<br />
Runtime Controller; the Run button in the Runtime Controller changes to Recover.<br />
Script or process recovery is still available if you have restarted your PC and/or<br />
<strong>Freedom</strong> <strong>EVOware</strong> in the meantime.<br />
When you recover a script, information on barcodes which were previously<br />
scanned is no longer available. If barcodes were scanned, make sure that<br />
recovery starts at or prior to the barcode scanning operation. When you recover a<br />
process, information on barcodes which were scanned is stored in the internal<br />
database and does not get lost.<br />
17.2.1 Script Recovery Function<br />
When running a pipetting script, <strong>Freedom</strong> <strong>EVOware</strong> monitors the progress and<br />
stores information on the current line number, the current values of the variables<br />
which are used, etc. If the script was stopped while it was running and did not<br />
execute completely, for example due to a runtime error or because you clicked<br />
Stop, you are given the option of running the script at the point where it was<br />
interrupted.<br />
If the script is open in the Script Editor (or you open the same script again), the<br />
Run button in the <strong>Freedom</strong> <strong>EVOware</strong> toolbar changes to Recover. In addition, the<br />
last script line which was successfully executed is highlighted in orange.<br />
Click the Recover button to start the Recovery Wizard if you want to continue the<br />
interrupted script. Choose Run instead from the pull-down list in the toolbar if you<br />
want to run the entire script again.<br />
Note: If required, you can edit the script to make some changes or corrections<br />
before you click Recover.<br />
The following dialog box is shown if you click the Recover button:<br />
<strong>Freedom</strong> <strong>EVOware</strong> <strong>Software</strong> <strong>Manual</strong>, 393172, en, V<strong>2.3</strong> 17 - 5
17 - Special Features, Example Scripts and Processes,<br />
Script and process recovery function<br />
Fig. 17-3 Recovery Wizard for Scripts - Loop counters tab<br />
The three tabs of the above dialog box lists the loop counters, variables queried<br />
during runtime with an operator prompt (via the Set Variable command with the<br />
option User Query at Script Start) and other script variables and shows the values<br />
which were current when the script was interrupted.<br />
The following figure shows an example of the Variables tab:<br />
Fig. 17-4 Recovery Wizard for scripts - Variables tab<br />
17 - 6 <strong>Freedom</strong> <strong>EVOware</strong> <strong>Software</strong> <strong>Manual</strong>, 393172, en, V<strong>2.3</strong>
17 - Special Features, Example Scripts and Processes,<br />
Script and process recovery function<br />
Restart script in line<br />
Specify the line number of the script command where you want to resume<br />
running. Alternatively, In the Script Editor, click the line where you want to<br />
resume running the script before you click the Recover button.<br />
If the script uses a worklist and you specify the line number of the Execute<br />
Worklist command, a new dialog box is shown where you can make settings<br />
for recovering the execution of the worklist. See 17.2.1.1 “Recovery Wizard<br />
for Worklists”, 17-7.<br />
Then adjust the values of the loop counters and variables in the above dialog box<br />
to appropriate values (if necessary) and click Recover to continue executing the<br />
script. For example, if you want to completely repeat a program loop which was<br />
interrupted, you should adjust the loop counters correspondingly.<br />
Note: Clicking the required line in the Script Editor or choosing a line number in<br />
the above dialog box does not roll back the values of the variables and loop<br />
counters automatically. You must specify the required values of the loop counters<br />
and variables manually in the dialog box.<br />
Click Recover after you have made the required settings. <strong>Freedom</strong> <strong>EVOware</strong> will<br />
then re-initialize the pipetting instrument, run the script in offline mode until the<br />
specified line has been reached and then switch to real mode before continuing.<br />
Note: If the script was stopped while incubation was taking place, the incubation<br />
times will be lengthened by the time that the script was stopped.<br />
In order to choose appropriate values for the variables and loop counters, you<br />
need to know how the script functions.<br />
The script recovery function can recover scripts which use synchronous subroutines<br />
but cannot recover scripts which use asynchronous sub-routines (see<br />
15.49 “Sub-Routine Command”, 15-113). The script recovery feature is only<br />
available for <strong>Freedom</strong> <strong>EVOware</strong> <strong>Standard</strong>.<br />
17.2.1.1 Recovery Wizard for Worklists<br />
When running a pipetting script, <strong>Freedom</strong> <strong>EVOware</strong> monitors the progress and<br />
stores information on the current line number, the current values of the variables<br />
which are used, etc. If the script was stopped while it was running and did not<br />
execute completely, for example due to a runtime error or because you clicked<br />
Stop, you are given the option of running the script at the point where it was<br />
interrupted.<br />
If the script is open in the Script Editor (or you open the same script again), the<br />
Run button in the <strong>Freedom</strong> <strong>EVOware</strong> toolbar changes to Recover. In addition, the<br />
last script line which was successfully executed is highlighted in orange.<br />
Click the Recover button to start the Recovery Wizard if you want to continue the<br />
interrupted script (see 17.2.1 “Script Recovery Function”, 17-5). Choose Run<br />
instead from the pull-down list in the toolbar if you want to run the entire script<br />
again.<br />
If the script uses a worklist and you specify the line number of the Execute<br />
Worklist command in the Recovery Wizard, when you click Recover <strong>Freedom</strong><br />
<strong>EVOware</strong> will then show the Worklist Recovery Wizard:<br />
<strong>Freedom</strong> <strong>EVOware</strong> <strong>Software</strong> <strong>Manual</strong>, 393172, en, V<strong>2.3</strong> 17 - 7
17 - Special Features, Example Scripts and Processes,<br />
Script and process recovery function<br />
Fig. 17-5 Worklist Recovery Wizard<br />
The Worklist Recovery Wizard visualizes the currently loaded worklist in two<br />
different views:<br />
• The tree view at the top lists all of the operations in the worklist in their order of<br />
execution. Click “+” to expand the view to get more details of the operation.<br />
• The view at the bottom lists the lines (records) of the worklist file (GWL file).<br />
Both views use colors to indicate the progress of execution (green = already<br />
executed, orange = operation was interrupted, grey = not yet executed).<br />
The two views are synchronized - if you select an entry in the tree view, this scrolls<br />
the worklist file view to the corresponding line, and vice versa.<br />
How to proceed<br />
Choose the worklist operation/line where you want to resume running. In the top<br />
view, the selected line is shown as a small square button containing a green<br />
arrow.<br />
Click Recover when you have made your choice. <strong>Freedom</strong> <strong>EVOware</strong> will then reinitialize<br />
the pipetting instrument, run the script in offline mode until the choosen<br />
worklist line has been reached and then switch to real mode before continuing.<br />
17 - 8 <strong>Freedom</strong> <strong>EVOware</strong> <strong>Software</strong> <strong>Manual</strong>, 393172, en, V<strong>2.3</strong>
17 - Special Features, Example Scripts and Processes,<br />
Script and process recovery function<br />
Note: The worklist recovery feature is only available for <strong>Freedom</strong> <strong>EVOware</strong><br />
<strong>Standard</strong>.<br />
17.2.2 Process Recovery Function<br />
When running processes or methods, <strong>Freedom</strong> <strong>EVOware</strong> monitors the<br />
progresses and stores information on the process instances, the current values of<br />
the variables which are used, etc. If a process (or set of processes) was stopped<br />
while it was running and did not execute completely, for example due to a runtime<br />
error or because you clicked Stop, you are given the option of running the process<br />
(or processes) at the point where it was (they were) interrupted.<br />
To recover the process, click the Recover button which is now shown in the<br />
Runtime Controller to start the Process Recovery Wizard (see 17.2.2.2 “Process<br />
Recovery Wizard, Recovery Settings”, 17-10).<br />
Alternatively, click Cancel if you want to restart <strong>Freedom</strong> <strong>EVOware</strong> before<br />
recovering the process. This may be necessary e.g. if a mechanical or labware<br />
problem has occurred which you need to rectify before continuing the process.<br />
The following dialog box is shown if you click Cancel:<br />
Fig. 17-6 Error recovery warning<br />
Shutdown<br />
Close <strong>Freedom</strong> <strong>EVOware</strong>. You can then carry out recovery when you restart<br />
<strong>Freedom</strong> <strong>EVOware</strong>.<br />
Cancel<br />
Return to the Runtime Controller. Use this option if the process was paused<br />
and you clicked Cancel in the Runtime Controller by mistake.<br />
Delete<br />
Ignore the incomplete process, delete the recovery information and return to<br />
the Runtime Controller.<br />
17.2.2.1 Process Recovery Wizard<br />
The following dialog box is shown if the last process (or set of processes) that you<br />
run was stopped while it was running and did not execute completely and you<br />
<strong>Freedom</strong> <strong>EVOware</strong> was restarted:<br />
<strong>Freedom</strong> <strong>EVOware</strong> <strong>Software</strong> <strong>Manual</strong>, 393172, en, V<strong>2.3</strong> 17 - 9
17 - Special Features, Example Scripts and Processes,<br />
Script and process recovery function<br />
Fig. 17-7 Process recovery wizard<br />
Recover last executed method / process<br />
Go to the Runtime Controller to recover (continue) the incomplete process or<br />
processes. In the Runtime Controller, click Recover to adjust the recovery<br />
settings or click Continue to restart and continue the process at the last<br />
executed timeslice using the default recovery settings.<br />
Note: If the process was stopped while incubation was taking place, the<br />
incubation times will be lengthened by the time that the process was stopped.<br />
Proceed to startup screen<br />
Ignore the incomplete process, delete the recovery information and go to the<br />
Startup Wizard.<br />
17.2.2.2 Process Recovery Wizard, Recovery Settings<br />
The following dialog box is shown if the last process that you run was interrupted<br />
while it was running and did not execute completely and you clicked Recover in<br />
the Runtime Controller or you chose Recover last executed method / process in<br />
the Process Recovery Wizard dialog box:<br />
Concerning the positions of the labware following an interruption to the process:<br />
Before continuing the process it is important to ensure that the physical position of<br />
the labware on the worktable of the pipetting instrument matches the position<br />
information in the <strong>Freedom</strong> <strong>EVOware</strong> database (the “database location”). The<br />
procedure to follow is described below.<br />
Modify Labware tab<br />
This tab is used to edit labware attributes and/or to move labware to a new<br />
database location before continuing with recovery:<br />
17 - 10 <strong>Freedom</strong> <strong>EVOware</strong> <strong>Software</strong> <strong>Manual</strong>, 393172, en, V<strong>2.3</strong>
17 - Special Features, Example Scripts and Processes,<br />
Script and process recovery function<br />
Fig. 17-8 Process recovery wizard - Modify Labware tab<br />
Click Edit to edit the attributes of the selected labware item. Click Move to change<br />
the position information for the labware in the database (the “database location”).<br />
This is necessary if the current physical position of the labware does not match<br />
the database location, e.g. due to a mechanical malfunction or because you<br />
moved the labware manually to a new position while the process was stopped.<br />
See 9.4.8 “Labware Attributes”, 9-34 for information on labware attributes.<br />
Clear Locations tab<br />
This tab is used to clear database locations which refer to faulty labware. Remove<br />
the faulty labware from the worktable of the pipetting instrument manually and<br />
click Clear Selected Location to tell <strong>Freedom</strong> <strong>EVOware</strong> that the database location<br />
is no longer occupied. The position information in the database for the labware is<br />
then updated to . This is important above all for locations which<br />
are needed for other labware when you continue the process.<br />
Fig. 17-9 Process recovery wizard - Clear Locations tab<br />
<strong>Freedom</strong> <strong>EVOware</strong> <strong>Software</strong> <strong>Manual</strong>, 393172, en, V<strong>2.3</strong> 17 - 11
17 - Special Features, Example Scripts and Processes,<br />
Script and process recovery function<br />
Execute Commands tab<br />
This tab is used to execute device commands manually before continuing with<br />
recovery. For example, click Direct Command, choose Drop DITIs and click<br />
Execute to drop the DITIs.<br />
Fig. 17-10 Process recovery wizard - Execute Commands tab<br />
Stopped Commands tab<br />
This tab shows the last commands which were executed before the process<br />
stopped. The scheduler assumes that the commands in the list were completely<br />
correctly before the process stopped. If an inspection of the pipetting instrument<br />
shows that a command did not execute properly, choose the incomplete<br />
command and click Execute:<br />
Fig. 17-11 Process recovery wizard - Stopped Commands tab<br />
Concerning incomplete movement commands (RoMa commands): if labware was<br />
not moved to the correct position when the process stopped, you can either<br />
choose the RoMa command in the list and click Execute to move the labware with<br />
the RoMa or ignore the incomplete RoMa command and put the labware manually<br />
17 - 12 <strong>Freedom</strong> <strong>EVOware</strong> <strong>Software</strong> <strong>Manual</strong>, 393172, en, V<strong>2.3</strong>
17 - Special Features, Example Scripts and Processes,<br />
Site-specific RoMa vectors<br />
at the correct position before you continue with recovery. In the latter case, you<br />
must update the database location accordingly with the Modify Labware tab.<br />
Click Continue to recover (finish running) the process when you have made all of<br />
the required settings.<br />
17.3 Site-specific RoMa vectors<br />
Site-specific RoMa vectors are needed e.g. for special carrier types with different<br />
physical characteristics for different sites (e.g. site 1 is lower than site 2). Sitespecific<br />
RoMa vectors are also needed for the MP 2Pos carrier if you want to grip<br />
the labware on the narrow side. Due to the limited space, labware on the rear site<br />
must be gripped from the front (RoMa fingers to the rear) and labware on the front<br />
site must be gripped from the rear (RoMa fingers to the front).<br />
Proceed as follows to create a site-specific RoMa vector:<br />
1 In the Robot Vectors section of the Control Bar, right-click Robot Vectors and<br />
choose New in the context menu.<br />
2 To assign the RoMa vector to a specific carrier type and site, use the following<br />
naming conventions for the new vector:<br />
For gripping the labware on the narrow side:<br />
Narrow POS for the Move Narrow vector<br />
DriveIN Narrow POS for the Approach Narrow vector<br />
For gripping the labware on the wide side:<br />
Wide POS for the Move Wide vector<br />
DriveIN Wide POS for the Approach Wide vector<br />
SiteNo is 0-based (specify 0 for site 1).<br />
For example: Hotel 9pos Microplate Narrow POS0.<br />
3 Teach the new vector in the Teach Plate Robot Vector dialog box. If you have<br />
specified the carrier name correctly, the Teach Plate Robot Vector dialog box<br />
will already show the correct carrier type in the Carrier Name field.<br />
In <strong>Freedom</strong> <strong>EVOware</strong> Plus, the new RoMa vector will be used automatically when<br />
moving labware to the specified site of this carrier type.<br />
In <strong>Freedom</strong> <strong>EVOware</strong> <strong>Standard</strong>, the name of the RoMa vector is not important (it<br />
has no influence on the Transfer Labware and RoMa Vector commands). Despite<br />
this, it is a good idea (good practice) to follow the same naming conventions for<br />
site-specific vectors in <strong>Freedom</strong> <strong>EVOware</strong> <strong>Standard</strong>, too.<br />
See 9.6.1 “Using RoMa Vectors”, 9-58 for information on the RoMa vector types<br />
Move and Approach.<br />
See 15.59 “Transfer Labware Command”, 15-143 for information on using userdefined<br />
vectors in <strong>Freedom</strong> <strong>EVOware</strong> <strong>Standard</strong> in the Transfer Labware<br />
command. User-defined vectors can also be used in RoMa Vector commands.<br />
<strong>Freedom</strong> <strong>EVOware</strong> <strong>Software</strong> <strong>Manual</strong>, 393172, en, V<strong>2.3</strong> 17 - 13
17 - Special Features, Example Scripts and Processes,<br />
Safe Pathways Feature<br />
17.4 Safe Pathways Feature<br />
With appropriate design of the pipetting script and the correct choice of the liquid<br />
classes and airgaps for the pipetting, the risk of contamination due to aerosols or<br />
drops of liquid falling when the LiHa moves across labware on the worktable is<br />
extremely low.<br />
The safe pathways feature is intended for extremely critical applications such as<br />
those which are very sensitive to cross contamination. It allows you to specify safe<br />
movement paths for the LiHa to prevent it from moving above certain areas of the<br />
labware unless they are directly involved in the pipetting operation.<br />
The safe pathways feature is enabled by specifying values for two carrier<br />
attributes for the labware which is involved in the pipetting (see 9.5.5.1 “Labware<br />
Carrier Attributes”, 9-49):<br />
• The carrier attribute SafeMoveOffset specifies an X-offset in mm for safe LiHa<br />
movement to and from the pipetting position.<br />
• The carrier attribute SafeMoveSpeed specifies the speed to use for<br />
movements along the safe paths in mm/s.<br />
Safe pathways are enabled by setting the carrier attribute SafeMoveOffset to a<br />
non-zero value. Negative values specify an offset to the left of the pipetting<br />
position; positive values specify an offset to the right of the pipetting position.<br />
Safe pathways can be disabled again by setting the carrier attribute<br />
SafeMoveOffset to zero.<br />
Note: To allow you to enable safe pathways for specific scripts and processes<br />
only, it is recommended to create copies of the carrier configurations you intend to<br />
modify and to specify the two carrier attributes for the copies but not for the<br />
original versions.<br />
Suggested offset for tube racks: If there is enough space on the worktable, allow<br />
one unused grid position between adjacent tube racks and set SafeMoveOffset to<br />
25 mm or -25 mm.<br />
Suggested offset for microplates: Set SafeMoveOffset to half the distance<br />
between adjacent columns of wells (e.g. 4.5 mm).<br />
The SafeMoveSpeed attribute is optional; if it is not set, the LiHa uses the default<br />
speeds when moving along the safe paths.<br />
The following rules are applied to safe pathways:<br />
• If SafeMoveOffset is non-zero for the source carrier (Aspirate step), safe<br />
pathways are activated for the pipetting sequence.<br />
• If SafeMoveOffset is zero for the source carrier, normal movements are used,<br />
even if SafeMoveOffset is non-zero for the destination carrier.<br />
• For multi-dispense sequences within the same labware, the safe movement is<br />
only performed for the first dispense position; there are no safe moves within<br />
the labware for the remaining dispense operations.<br />
• When executing multiple Aspirate steps or an Aspirate-Dispense sequence<br />
within the same labware, the LiHa moves out along the safe path after the first<br />
step and uses the same path to move in again for the next step.<br />
• If safe pathways are used for the pipetting sequence and you are using DITIs,<br />
the subsequent DiTi discard operation also uses a safe movement as follows:<br />
– The LiHa moves in the Y direction to behind the worktable and then in the<br />
X direction along the back of the worktable to the grid position of the DITI<br />
waste. It then moves forward to the DITI waste and discards the DITIs. It<br />
then moves back to the original pipetting position by retracing the same<br />
path.<br />
17 - 14 <strong>Freedom</strong> <strong>EVOware</strong> <strong>Software</strong> <strong>Manual</strong>, 393172, en, V<strong>2.3</strong>
17 - Special Features, Example Scripts and Processes,<br />
Columbus Washer - Washing a Variable Number of Strips in the Plate<br />
The safe movements are carried out as follows:<br />
After an Aspirate command:<br />
1 If the tips are currently lower than the specified z-Travel height for the<br />
labware, they are raised to that height.<br />
2 The LiHa moves with the safe movement speed along the X-axis by the offset<br />
defined for the carrier.<br />
3 The LiHa moves with the safe movement speed along the Y-axis to the rear of<br />
the worktable and raises the tips to maximum height (to avoid a collision with<br />
the PosID-3, if fitted).<br />
Before a Dispense command:<br />
1 The LiHa moves at normal speed along the rear of the worktable to the<br />
position “dispense position + SafeMoveOffset” for the destination carrier.<br />
2 The tips are lowered to the lowest z-Travel height which clears all obstacles<br />
within the destination carrier.<br />
3 The LiHa moves with the safe movement speed along the Y-axis to the<br />
pipetting position.<br />
4 The LiHa moves with the safe movement speed along the X-axis by the<br />
negative SafeMoveOffset distance to reach the actual pipetting position.<br />
In the following example:<br />
• The red line shows the default movement of the LiHa.<br />
• The green dotted line shows the LiHa movement with the safe pathways<br />
feature enabled.<br />
Fig. 17-12 Safe pathways feature<br />
17.5 Columbus Washer - Washing a Variable Number of<br />
Strips in the Plate<br />
In <strong>Freedom</strong> <strong>EVOware</strong> Plus, the Columbus - WashPlate command can be<br />
configured to wash a variable number of strips (columns or rows) of the labware.<br />
<strong>Freedom</strong> <strong>EVOware</strong> <strong>Software</strong> <strong>Manual</strong>, 393172, en, V<strong>2.3</strong> 17 - 15
17 - Special Features, Example Scripts and Processes,<br />
Configuring and Using PMP (Pressure Monitored Pipetting)<br />
This is done by assigning a non-zero value to one of the two following special<br />
attributes of the labware you want to wash:<br />
• The labware attribute StripCount is used to wash a specified number of strips,<br />
starting at strip 1. Specify 0 to wash all of the strips.<br />
With the default wash head configuration of the Columbus Washer,<br />
microplates are washed in portrait orientation (there are 12 strips with 8 wells<br />
per strip; strip 1 is towards the rear of the washer).<br />
• The labware attribute StripMask is used to wash a specified mixture of strips.<br />
The required strips are specified as a bit-mapped value:<br />
1 = Strip 1<br />
2 = Strip 2<br />
4 = Strip 3<br />
...<br />
5 = Strip 1 and Strip 3<br />
0 = Wash all of the strips<br />
Proceed as follows:<br />
• Activate either or both of the above special attributes for the labware (Edit<br />
Labware > Advanced tab > Click Attributes > Click Add). See 9.4.8 “Labware<br />
Attributes”, 9-34.<br />
• Assign a value to either StripCount or StripMask as required using the Set<br />
Variable command. The Set Variable command is needed twice, the first Set<br />
Variable command initializes the special attribute:<br />
Fig. 17-13 Assigning a value to StripCount<br />
• Specify the variable name as .<br />
(see 14.1.11.1 “Labware Attributes and String Variables in <strong>Freedom</strong> <strong>EVOware</strong><br />
Plus”, 14-18).<br />
• In the Columbus - Wash Plate command, choose Wash Mode = strip on the<br />
General tab (see 16.6.1.1 “General Tab of the Columbus Washer - WashPlate<br />
Command”, 16-20).<br />
Note: If you specify values for both parameters, StripCount has priority over<br />
StripMask.<br />
17.6 Configuring and Using PMP (Pressure Monitored<br />
Pipetting)<br />
Pressure Monitored Pipetting is a hardware option for the liquid handling arm that<br />
monitors the pressure in the airgap between the sample and the system liquid<br />
during aspiration and dispensing. The pressure curves are used to detect<br />
pipetting errors.<br />
PMP is only available for 200 µl and 1000 µl LiHa DITI tips. It requires a special tip<br />
adapter and control electronics. Either four or eight tip positions can be fitted with<br />
the PMP option.<br />
The PMP settings can be configured for each liquid class (liquid type).<br />
17 - 16 <strong>Freedom</strong> <strong>EVOware</strong> <strong>Software</strong> <strong>Manual</strong>, 393172, en, V<strong>2.3</strong>
17 - Special Features, Example Scripts and Processes,<br />
Configuring and Using PMP (Pressure Monitored Pipetting)<br />
In addition, the PMP hardware allows pressure-based pipetting error detection,<br />
clot detection and liquid level detection (pLLD).<br />
Note: PMP uses small diameter tubing. For this reason, if your pipetting<br />
instrument is fitted with the MPO option, do not use a Fast Wash flow rate in<br />
excess of 80% (see 8.4.<strong>2.3</strong> “MPO/SPO and LICOS”, 8-29).<br />
17.6.1 Activating the PMP Option<br />
The PMP features are only available if the PMP option has been activated with the<br />
Start checkbox in the Configuration Tool (see 8.4.1.1 “Device Information Tab”,<br />
8-21).<br />
If <strong>Freedom</strong> <strong>EVOware</strong> is running in normal mode and connected to a pipetting<br />
instrument, the PMP option is detected automatically. However, you still need to<br />
configure the LiHa settings in the Configuration Tool to indicate which of the tip<br />
positions are fitted with DITIs.<br />
The PMP option is used for two separate functions:<br />
• Pressure-based liquid level detection (pLLD),<br />
• Pressure-monitored pipetting (PMP) = detection of pipetting errors during<br />
aspiration and dispensing.<br />
Enabling pLLD<br />
Pressure-based liquid level detection (pLLD) is selected with the Detection Mode<br />
pull-down list on the Global tab of the respective liquid class. You can configure to<br />
use pLLD, cLLD or both systems in parallel. pLLD requires the PMP hardware<br />
option but can also be used for conventional (non-pressure monitored) pipetting<br />
(you do not need to specify the Activate PMP script command if you only want to<br />
use pLLD).<br />
Enabling PMP<br />
PMP must be activated in your pipetting script with the Activate PMP script<br />
command before getting (mounting) the PMP-controlled DiTis.<br />
PMP requires special liquid class settings. Default PMP liquid classes are<br />
provided on the <strong>Freedom</strong> <strong>EVOware</strong> installation CD as an .exd file for the Export/<br />
Import tool (see A.9.4 “Export/Import Tool”, A-38). See the PMP Option<br />
Application <strong>Manual</strong> (DocID 395390) for more details. See also 10.7.4 “Liquid<br />
Classes on the <strong>Freedom</strong> <strong>EVOware</strong> CD”, 10-49, PMP section.<br />
Error handling for PMP clot detection is configured on the Aspirate tab of the liquid<br />
sub-class. Liquid level detection should always be enabled for aspiration when<br />
using PMP.<br />
Working offline with pLLD and PMP<br />
If you want to test a script or process with <strong>Freedom</strong> <strong>EVOware</strong> running in offline<br />
mode, you must check the PMP checkbox in the Configuration Tool for each of the<br />
tip positions which are fitted with a PMP tip adapter (see 8.4.2.1 “LiHa (Liquid<br />
Handling Arm)”, 8-22). PMP is only available for LiHa DiTi tips (the checkboxes<br />
are only shown in the Configuration Tool if Tip Type is set to DiTi).<br />
Offline mode does not simulate the PMP functions, so PMP is ignored in this case.<br />
In addition, PMP is not supported by the 3D simulation tool EVOSim. If you are<br />
using EVOSim, <strong>Freedom</strong> <strong>EVOware</strong> will display an error message when it starts<br />
and PMP will be ignored.<br />
<strong>Freedom</strong> <strong>EVOware</strong> <strong>Software</strong> <strong>Manual</strong>, 393172, en, V<strong>2.3</strong> 17 - 17
17 - Special Features, Example Scripts and Processes,<br />
Configuring and Using PMP (Pressure Monitored Pipetting)<br />
17.6.2 Permissible sequence of script commands for the PMP option<br />
PMP must be activated in your pipetting script with the Activate PMP script<br />
command before getting (mounting) the PMP-controlled DiTis.<br />
PMP must be deactivated again with the Deactivate PMP script command after<br />
finishing the pipetting sequence and dropping the DiTis. All PMP-controlled DITIs<br />
must be dropped before deactivating PMP.<br />
Monitoring of the airgap pressure is started when the Activate PMP command is<br />
executed in the pipetting script and stops again when the Deactivate PMP<br />
command is executed.<br />
The default directory which PMP uses to store evaluation configuration data and<br />
pressure curves (the PMP data directory) is as follows:<br />
C:\Program Files\Tecan\<strong>EVOware</strong>\PMP\Curves (Windows XP) or<br />
C:\ProgramData\Tecan\<strong>EVOware</strong>\PMP\Curves (Windows Vista).<br />
The file names are XXXX_C_YYMMDD_HHMMSS.pmd.zip, where XXXX is a<br />
sequence number, C is the channel (tip) number, YYMMDD is the creation date<br />
(year, month day) and HHMMSS is the creation time (hours, minutes and<br />
seconds), for example:<br />
0106_4_080924_170619.pmd.zip.<br />
The following restrictions apply to each PMP-controlled pipetting sequence (the<br />
pipetting commands between an Activate PMP command and a Deactivate PMP<br />
command):<br />
• The PMP-controlled pipetting sequence must consist of one Aspirate<br />
command followed by one or more Dispense commands (i.e. single or multi<br />
dispensing).<br />
• With the default configuration settings, the aspirate and (multi-)dispense<br />
sequence must not be followed by any more pipetting steps which use the<br />
same tips. This will result in a script validation error.<br />
• Use the special configuration parameter Allow_Reuse_PMP if you need to<br />
carry out additional pipetting steps with the same tips after finishing the PMPcontrolled<br />
aspirate and dispense sequence. The additional pipetting steps will<br />
be carried out using standard pipetting and not using PMP. See<br />
A.3 “Parameters in the Evoware.opt file”, A-17, [DITI] section.<br />
– Although a pressure curve is generated from the Activate PMP command<br />
(before DiTi pick-up) to the Deactivate PMP command (after multiple<br />
aspirate/dispense cycles and after finally dropping the DiTis), only the first<br />
aspirate/dispense cycle is evaluated for PMP errors.<br />
• pLLD is only allowed for the first command in a pipetting sequence (the<br />
Aspirate command).<br />
• The Liquid Class option Mix before Aspiration is not allowed within the PMPcontrolled<br />
pipetting sequence.<br />
17.6.3 PMP Pressure Viewer Tool<br />
Pressure<br />
Viewer<br />
Purpose of This<br />
Chapter<br />
The PMP Pressure Viewer is a software tool to view the gradient of the pressure<br />
measurement performed by the PMP (Pressure Monitored Pipetting) option of<br />
Tecan pipetting instruments.<br />
This chapter instructs the user how to use the pressure viewer and how to view<br />
the curve graphs produced by the PMP option.<br />
17 - 18 <strong>Freedom</strong> <strong>EVOware</strong> <strong>Software</strong> <strong>Manual</strong>, 393172, en, V<strong>2.3</strong>
17 - Special Features, Example Scripts and Processes,<br />
Configuring and Using PMP (Pressure Monitored Pipetting)<br />
Starting the<br />
Pressure<br />
Viewer<br />
To start the pressure viewer, double-click the icon or run the program<br />
PressureViewerLight.exe in the directory C:\Program Files\Common<br />
Files\Tecan\Common Driver\PMP Driver\2.2.2 (or a later version).<br />
Main Window<br />
The main window represents a p/t (pressure/time) diagram.<br />
A<br />
B<br />
C<br />
D<br />
E<br />
F<br />
Fig. 17-14 Pressure viewer main window<br />
A<br />
Menu bar<br />
D<br />
Y-axis<br />
B<br />
Task bar: Open icon<br />
E<br />
X-axis<br />
C<br />
Task bar: Close icon<br />
F<br />
Status bar<br />
Menu Bar<br />
Menu File<br />
The menu File contains the following commands:<br />
• Open<br />
– The Open command opens a file browser which allows you to select one<br />
or several pressure curve files.<br />
– Click on Open in the file browser to display the curve graphs.<br />
– Click on Cancel to close the browser, the display in the main window<br />
remains unchanged.<br />
<strong>Freedom</strong> <strong>EVOware</strong> <strong>Software</strong> <strong>Manual</strong>, 393172, en, V<strong>2.3</strong> 17 - 19
17 - Special Features, Example Scripts and Processes,<br />
Configuring and Using PMP (Pressure Monitored Pipetting)<br />
• Open Folder<br />
– The Open Folder command opens a file browser which allows you to<br />
select a folder.<br />
– Click on OK in the file browser to display the curve graphs of all pressure<br />
curve files in the folder.<br />
– Click on Cancel to close the browser, the display in the main window<br />
remains unchanged.<br />
• Close All<br />
– The Close All command clears the display of the main window, i.e. no<br />
curve graphs are loaded any more.<br />
• Quit<br />
– The Quit command quits the pressure viewer.<br />
Menu View<br />
The menu View contains the following commands:<br />
• Zoom Selection<br />
– The Zoom Selection command zooms on the section of the curve graph<br />
selected with the mouse to be displayed in the main window.<br />
• Fit Plot<br />
– The Fit Plot command adapts the size of the curve graph to fit in the<br />
actual size of the main window.<br />
• Show Axis<br />
– The Show Axis command switches between axes shown or not shown.<br />
Menu About<br />
The menu About opens the Information window.<br />
Fig. 17-15 Information window<br />
The Information window displays the name and the version of the application.<br />
Click on OK to close the window.<br />
Task Bar<br />
The task bar offers the following functions:<br />
Tab. 17-1 Icons in task bar<br />
Icon<br />
Open (B, see Fig. 17-14, 17-<br />
19)<br />
Close (C, see Fig. 17-<br />
14, 17-19)<br />
Function<br />
Same as menu File > Open<br />
Same as menu File > Close All<br />
17 - 20 <strong>Freedom</strong> <strong>EVOware</strong> <strong>Software</strong> <strong>Manual</strong>, 393172, en, V<strong>2.3</strong>
17 - Special Features, Example Scripts and Processes,<br />
Configuring and Using PMP (Pressure Monitored Pipetting)<br />
Status Bar<br />
The status bar displays the coordinates of the mouse cursor if positioned on the<br />
curve graph.<br />
If a selection was made, the X-coordinates of the selection (begin, end and width)<br />
is displayed.<br />
Hot Keys (Shortcuts)<br />
The following hot keys are available:<br />
Tab. 17-2 Icons in task bar<br />
Hot key<br />
Ctrl + O<br />
Ctrl + Z<br />
Ctrl + F<br />
Ctrl + A<br />
Function<br />
Same as menu File > Open<br />
Same as menu View > Zoom Selection<br />
Same as menu View > Fit plot<br />
Same as menu View > Show axis<br />
Function<br />
The pressure viewer draws the curves graphs that are stored in the files<br />
*.pmd.zip, which are produced by the PMP option.<br />
Each file is associated with the pipetting cycle of a specific pipetting tip.<br />
If several files are opened each curve graph is drawn in a different color.<br />
How to View<br />
Curve Graphs<br />
Use one of the above mentioned methods to open one or several of these files to<br />
evaluate the pressure gradient of the corresponding pipetting cycle.<br />
Note: The pressure curve files can also be opened or added by dragging and<br />
dropping the file from the Windows explorer to the main window of the pressure<br />
viewer.<br />
While loading one or several pressure curve files a Progress dialog appears<br />
showing a progress bar. The dialog also gives information on the file name being<br />
loaded and the actual number of files as well as the total number of files to be<br />
loaded.<br />
To cancel the process, click on Cancel in this dialog.<br />
Select a part of the curve with the left mouse button to define the zoom section.<br />
If only a part of the curve graph is displayed due to a zoomed selection, horizontal<br />
and vertical sliders appear and enable you to scroll along the curve graph.<br />
Evaluation of Curve Graph<br />
One or several curve graphs show the pressure gradient of the corresponding file.<br />
If the axes are shown, they represent the following absolute values.<br />
• X-Axis<br />
– The X-axis represents the time in ADC (Analog to Digital Converter) steps.<br />
• One ADC step equals 2 ms.<br />
• Y-Axis<br />
Before each measurement the y-axis value is set to zero, i.e. 0 pADC equals<br />
ambient pressure.<br />
<strong>Freedom</strong> <strong>EVOware</strong> <strong>Software</strong> <strong>Manual</strong>, 393172, en, V<strong>2.3</strong> 17 - 21
17 - Special Features, Example Scripts and Processes,<br />
Configuring and Using PMP (Pressure Monitored Pipetting)<br />
– The Y-axis represents the pressure in pADC (pressure value of Analog to<br />
Digital Converter).<br />
• To calculate the (relative) pressure in Pa use the formula:<br />
p[Pa] = pADC * 3.469.<br />
17.6.4 PMP Error and Success Messages<br />
The PMP option can output the following error and success messages:<br />
Aspiration messages:<br />
• Correct (success message)<br />
• Clot<br />
• Clogged<br />
• Nullcurve<br />
• ShortBubblesCorrect (success message)<br />
• MediumLeakageShort<br />
• LeakageCorrect (success message)<br />
• AspirationError<br />
• PlausibilityCheckFailed<br />
• Default (used if the error message did not contain any of the above strings)<br />
Dispense messages:<br />
• Correct (success message)<br />
• UnderDispense<br />
• AspirateRejection<br />
The messages are shown as strings in the <strong>Freedom</strong> <strong>EVOware</strong> log file. See also<br />
A.10 “LogViewer Tool”, A-72. Refer to the PMP Option Application <strong>Manual</strong><br />
(Doc ID 395390) for descriptions of these messages and for information on when<br />
they can occur.<br />
The PMP software maps the above error messages to (a) actions to be taken by<br />
<strong>Freedom</strong> <strong>EVOware</strong> if the errors occur and (b) internal PMP error flags. The PMP<br />
error flags are associated with pipetting error codes in the report file which is<br />
created by the Export Data command (see 15.26 “Export Data Command”, 15-<br />
48).<br />
Note: The error mapping is specified in the configuration file for the PMP driver<br />
and should only be changed by a trained Tecan application specialist.<br />
The Clot error is normally configured to display the Clot Error (PMP) dialog. See<br />
18.1.3 “Clot Error (PMP)”, 18-3 for more information.<br />
The following table shows the default error handling which takes place if a PMP<br />
error is detected during aspiration:<br />
Tab. 17-3 Default actions for PMP aspiration errors<br />
Error message a)<br />
Clot<br />
Clogged<br />
NullCurve<br />
Action taken with the default PMP configuration<br />
• Use PMP clot error handling defined in liquid class<br />
• Continue, dispense back and pipette nothing<br />
• Continue, dispense back and pipette nothing<br />
17 - 22 <strong>Freedom</strong> <strong>EVOware</strong> <strong>Software</strong> <strong>Manual</strong>, 393172, en, V<strong>2.3</strong>
17 - Special Features, Example Scripts and Processes,<br />
Configuring and Using PMP (Pressure Monitored Pipetting)<br />
Tab. 17-3 Default actions for PMP aspiration errors (cont.)<br />
Error message a)<br />
MediumLeakageShort<br />
Default b)<br />
AspirationError<br />
PlausibilityCheckFailed<br />
Action taken with the default PMP configuration<br />
• Continue, dispense back and pipette nothing<br />
• Ignore, continue pipetting<br />
• Continue, dispense back and pipette nothing<br />
• Ignore, continue pipetting<br />
a) These strings are also shown in the <strong>Freedom</strong> <strong>EVOware</strong> log file<br />
b) This error is output if the PMP result is not available or none of the other errors are applicable<br />
Clot error is the only PMP error which allows operator intervention (see<br />
18.1.3 “Clot Error (PMP)”, 18-3). See also 10.2.1 “LiHa Aspirate Parameters<br />
(Fixed Tips and DiTis)”, 10-7, ON PMP Clot Error).<br />
The following table shows the default error mapping to internal PMP error flags if a<br />
PMP error is detected during aspiration:<br />
Tab. 17-4 Default error mapping for PMP aspiration errors<br />
PMP Error Message<br />
Clot<br />
Clogged<br />
NullCurve<br />
MediumLeakageShort<br />
Default<br />
AspirationError<br />
PlausibilityCheckFailed<br />
Default mapping to internal PMP error flags<br />
• E_PMPDetectedTipOcclusion<br />
• E_PMPInstrumentError<br />
• E_PMPInstrumentError<br />
• E_PMPUnspecifiedError<br />
• E_PMPUnspecifiedError<br />
• E_PMPDeficientVolume<br />
• E_PMPUnspecifiedError<br />
The following table shows the resulting pipetting error codes in the report file of<br />
the Export Data command for the four internal PMP error flags:<br />
Tab. 17-5 Mapping between PMP error flags and pipetting error codes<br />
PMP Error Flag<br />
• E_PMPDetectedTipOcclusion<br />
• E_PMPDeficientVolume<br />
• E_PMPInstrumentError<br />
• E_PMPUnspecifiedError<br />
Pipetting error code<br />
400 (hex)<br />
800 (hex)<br />
2000000 (hex)<br />
4000000 (hex)<br />
See Tab. 15-8 “Pipetting error codes in the report file output by the Export Data<br />
command”, 15-54 for more information.<br />
<strong>Freedom</strong> <strong>EVOware</strong> <strong>Software</strong> <strong>Manual</strong>, 393172, en, V<strong>2.3</strong> 17 - 23
17 - Special Features, Example Scripts and Processes,<br />
Configuring the Waste Option of the Te-Stack in <strong>Freedom</strong> <strong>EVOware</strong> Plus<br />
17.7 Configuring the Waste Option of the Te-Stack in<br />
<strong>Freedom</strong> <strong>EVOware</strong> Plus<br />
The following describes how to configure the double Te-Stack with the Waste<br />
option (waste chute) in <strong>Freedom</strong> <strong>EVOware</strong> Plus in order to achieve the following:<br />
• Fetch labware from tower 2 (front Te-Stack)<br />
• Return labware to tower 4 (front Te-Stack)<br />
• Fetch DITI racks with fresh DITIs from towers 1 and 3 (rear Te-Stack)<br />
• Return empty DITI racks to the rear Te-Stack, whereupon they will be<br />
discarded using the waste chute.<br />
See Fig. 9-16, 9-43 for information on the default tower configuration (tower<br />
numbers) for a double Te-Stack. The Waste option for the Te-Stack is mainly<br />
intended for discarding empty DITI racks.<br />
In this example, before the process starts, tower 2 should contain labware, tower<br />
4 should be empty and towers 1 and 3 should both be filled with fresh DITI racks.<br />
Note: The following description applies to the double Te-Stack right (i.e. the Te-<br />
Stack is fitted on the right side of the worktable). The Te-Stack Left is a mirror<br />
image of the Te-Stack right. The following description is only relevant for <strong>Freedom</strong><br />
<strong>EVOware</strong> Plus.<br />
A double Te-Stack has four towers and two RoMa transfer positions. The default<br />
position layout of the Te-Stack (2,2,50) configures the Te-Stack device carrier as a<br />
two site carrier and the double Te-Stack is configured as as a single <strong>Freedom</strong><br />
<strong>EVOware</strong> device. For this example, it is necessary to subdivide the double Te-<br />
Stack into two separate devices. This is because we want to configure the rear<br />
towers to function differently to the front towers.<br />
Proceed as follows:<br />
Te-Stack Rear<br />
Duplicate the device carrier “Te-Stack Right” and assign a meaningful name, e.g.<br />
“Te-Stack Rear”.<br />
Set the position layout to 2,1,25 (each tower normally holds 25 DITI racks; adjust<br />
this value if necessary to suit the height of your DITI racks).<br />
Click Attributes, add the attribute WasteLocation and set the value to “1”. This<br />
activates the Waste option for the Te-Stack.<br />
Check that Allowed labware includes your DITI racks.<br />
Create carrier for the worktable<br />
Duplicate the device carrier “Te-Stack Right” and assign a meaningful name, e.g.<br />
“Te-Stack Worktable”.<br />
Uncheck Carrier is device. This allows you to put the carrier on the worktable.<br />
Set the position layout to 1,2,1 (two site worktable carrier)<br />
Click Attributes, and set Allowed Robots to “Te-Stacker” (the call name of the Te-<br />
Stack driver).<br />
Check that Allowed labware includes your DITI racks and microplates.<br />
Put the new carrier on the worktable.<br />
17 - 24 <strong>Freedom</strong> <strong>EVOware</strong> <strong>Software</strong> <strong>Manual</strong>, 393172, en, V<strong>2.3</strong>
17 - Special Features, Example Scripts and Processes,<br />
Handling inserts in <strong>Freedom</strong> <strong>EVOware</strong> Plus<br />
Te-Stack Front<br />
Rename the device carrier “Te-Stack Right” to “Te-Stack Front” or something<br />
similar.<br />
Set the position layout to 2,1,50 (each tower normally holds 50 microplates; adjust<br />
this value if necessary to suit the height of your labware)<br />
Check that Allowed labware includes your microplates.<br />
Driver settings<br />
Start the Configuration Tool and adjust the Te-Stack driver settings as follows:<br />
On the Towers tab:<br />
• Choose the location “Te-Stack Front” for towers 2 and 4.<br />
• Choose the location “Te-Stack Rear” for towers 1 and 3.<br />
On the Locations tab:<br />
• Set Number of locations to “2”.<br />
• For location 1: Choose Te-Stack(1,1,1) and the master ID from Te-Stack Front.<br />
• For location 2: Choose Te-Stack(1,2,1) and the master ID from Te-Stack Rear.<br />
Put the carrier “Te-Stack Worktable” on the extreme right of the worktable. The<br />
LiHa/MCA script should be programmed to use DITIs from site 1 of this carrier<br />
(rear site) and to use labware from site 2 of this carrier (front site).<br />
For increased performance (speed) of the process, you should pick up the DITIs<br />
with the LiHa or MCA directly from the RoMa transfer position of the Te-Stack (site<br />
1 of the “Te-Stack Worktable” carrier) instead of using the RoMa to bring the DITI<br />
rack to another position on the worktable first. In this case, after creating the LiHa<br />
Pipette process step, change the pre-actions and post-actions for site 1 of this<br />
step from RoMa_ReplaceObject to RoMa_Moveobject (see 9.10.3 “Pre-actions /<br />
Post-actions (Custom)”, 9-72).<br />
17.8 Handling inserts in <strong>Freedom</strong> <strong>EVOware</strong> Plus<br />
The following information about insert handling is only relevant to <strong>Freedom</strong><br />
<strong>EVOware</strong> Plus.<br />
An insert is not an independent labware item, but is part of a special labware type<br />
(“insert plate”) and is similar to a lid. The insert can be removed from the insert<br />
plate using the RoMa or another robot arm. The part that remains after removing<br />
the insert is sometimes called a base plate.<br />
To specify that labware can have an insert, check the “Labware can have insert”<br />
checkbox in the Edit Labware dialog box (Advanced tab). In the example below,<br />
this checkbox must be checked for both source and destination labware items.<br />
When you put an insert plate on the worktable, <strong>Freedom</strong> <strong>EVOware</strong> automatically<br />
assumes that it already contains an insert (the insert attribute of the labware is set<br />
to “1”). The RoMa command SwapInsert moves the insert of an Insert plate to<br />
another Insert plate. However, you can only do this if the destination plate does<br />
not currently contain an insert.<br />
The following lines must be added to the Te-LiHa.ini file to specify that the<br />
destination plate does not contain an insert:<br />
[Class2]<br />
Name=labware_type_LT<br />
Parent=LabwareInsertType<br />
<strong>Freedom</strong> <strong>EVOware</strong> <strong>Software</strong> <strong>Manual</strong>, 393172, en, V<strong>2.3</strong> 17 - 25
17 - Special Features, Example Scripts and Processes,<br />
Handling inserts in <strong>Freedom</strong> <strong>EVOware</strong> Plus<br />
Slot1=Insert:Integer:0<br />
Replace “labware_type” by the labware type of the destination plate (replace<br />
space characters by underscores “_”) and append the string “_LT”.<br />
For example Name=caco_baseplate_LT<br />
Save the file after making your changes. Configuration files are protected with<br />
checksums. Accordingly, you must now repair the checksum as follows:<br />
• Quit <strong>Freedom</strong> <strong>EVOware</strong> and start the Configuration Tool with Start > All<br />
Programs > Tecan > <strong>EVOware</strong> > Configure. You will be warned that the<br />
checksum is invalid and you will be asked if you want to repair the checksum.<br />
Click Yes. Then Click Exit and re-start <strong>Freedom</strong> <strong>EVOware</strong>. Alternatively, repair<br />
the checksum using the Validate Configuration tool (see A.9.2 “Validate<br />
Configuration Tool”, A-36).<br />
• You must then quit <strong>Freedom</strong> <strong>EVOware</strong>, un-load the drivers and restart<br />
<strong>Freedom</strong> <strong>EVOware</strong>. To do this, choose Exit, unload drivers in the File menu.<br />
This ensures that the driver configuration files (ini files) will be read again<br />
when <strong>Freedom</strong> <strong>EVOware</strong> is re-started.<br />
Note: You must also restart <strong>Freedom</strong> <strong>EVOware</strong> and the drivers each time you edit<br />
the insert plate labware, since the process of editing sets the insert attribute of the<br />
labware to “1” again.<br />
Moving the insert with the RoMa_SwapInsert command<br />
The following example shows how to use the RoMa_SwapInsert command to<br />
move an insert from the insert plate caco-1 (labware type caco) to the insert plate<br />
base-2 (labware type caco_baseplate) before pipetting. This is done by adding<br />
the RoMa_SwapInsert command as a custom pre-action to the LiHa process step.<br />
For this example, the type of the source and destination labware must be<br />
different.<br />
The following figure shows the worktable and the lower Infopad with the<br />
destination plate selected:<br />
Fig. 17-16 Example process - Worktable and infopad<br />
The following figure shows the example process and the default pre-actions for<br />
the LiHa process step:<br />
17 - 26 <strong>Freedom</strong> <strong>EVOware</strong> <strong>Software</strong> <strong>Manual</strong>, 393172, en, V<strong>2.3</strong>
17 - Special Features, Example Scripts and Processes,<br />
Handling inserts in <strong>Freedom</strong> <strong>EVOware</strong> Plus<br />
Fig. 17-17 Example process and default pre-actions<br />
Proceed as follows to add the RoMa_SwapInsert command as an additional preaction:<br />
Right click the LiHa process step and choose Pre-Actions / Post actions. This<br />
opens the Custom Pre-Actions / Post actions dialog box.<br />
Click Add and choose the RoMa_SwapInsert command from the drop-down list.<br />
Choose caco-1 as the value of the Object MPI parameter, base-2 as the value of<br />
the Object MPI2 parameter and NONE as the value of the ToolOnTheFly<br />
parameter.<br />
Fig. 17-18 Example process - Adding the RoMa_SwapInsert command<br />
Click OK when you have done this. The following figure shows the pre-actions<br />
with the RoMa_SwapInsert command you have just added:<br />
<strong>Freedom</strong> <strong>EVOware</strong> <strong>Software</strong> <strong>Manual</strong>, 393172, en, V<strong>2.3</strong> 17 - 27
17 - Special Features, Example Scripts and Processes,<br />
Handling inserts in <strong>Freedom</strong> <strong>EVOware</strong> Plus<br />
Fig. 17-19 Example process - Custom pre-actions<br />
Click OK again when you are finished.<br />
17 - 28 <strong>Freedom</strong> <strong>EVOware</strong> <strong>Software</strong> <strong>Manual</strong>, 393172, en, V<strong>2.3</strong>
17 - Special Features, Example Scripts and Processes,<br />
Using <strong>Freedom</strong> <strong>EVOware</strong> with the Tecan Magellan <strong>Software</strong><br />
17.9 Using <strong>Freedom</strong> <strong>EVOware</strong> with the Tecan Magellan<br />
<strong>Software</strong><br />
This chapter describes how to set up <strong>Freedom</strong> <strong>EVOware</strong> (either <strong>Freedom</strong><br />
<strong>EVOware</strong> <strong>Standard</strong> or <strong>Freedom</strong> <strong>EVOware</strong> Plus) for use with the Tecan Magellan<br />
data reduction software.<br />
The Tecan Magellan software is used to control microplate readers (e.g.<br />
photometers) and to carry out data analysis using stored procedures. The<br />
Magellan software must be installed separately.<br />
17.9.1 Compatibility<br />
This chapter describes the configuration steps which are necessary for Magellan<br />
<strong>Standard</strong> 6.5 and Magellan Tracker 6.5. To check your Magellan version, check<br />
the splash screen when Magellan starts or refer to the Magellan help file.<br />
The Tracker version of Magellan contains special tracking features which are<br />
required for compliance with the FDA regulations.<br />
Note: The splash screen which is shown when Magellan starts tells you if you<br />
have installed Magellan <strong>Standard</strong> or Magellan Tracker. Magellan Tracker uses the<br />
Tecan User Management system and requires you to enter a user name and<br />
password.<br />
17.9.2 Preparing the Magellan <strong>Software</strong><br />
Make sure that Magellan is correctly installed and is configured for the microplate<br />
reader and the COM port that you want to use. To check this, start the Magellan<br />
Wizard, click Instrument Control and Click Change Instrument.<br />
If you don’t have a reader connected to the PC and want Magellan to simulate a<br />
reader, choose the reader you want to simulate, choose Demo mode in the Port<br />
panel and None in the Stacker Port panel. Refer to the Magellan manual for more<br />
information.<br />
Magellan is also provided with a tool (MagellanIQ) to check that the software has<br />
been correctly installed and configured. MagellanIQ can be started with the<br />
shortcut in Start > All Programs > Tecan.<br />
17.9.2.1 Methods and Workspace Files in Magellan<br />
Method files contain all of the necessary parameters for the measurement,<br />
evaluation and data handling of an assay. Workspace files are created when a<br />
method is run and contain measured and calculated data as well as all of the<br />
method settings.<br />
Methods and workspace files are reader-specific. For example, a method file for<br />
the Sunrise reader can only be used with this reader type. Accordingly, when you<br />
want to open a method or workspace file in the Magellan wizard, the Select a file<br />
dialog box will initially only show methods and workspace files which are<br />
compatible with the currently configured reader type.<br />
Choose All files instead of Files from this instrument in the Select a file dialog box<br />
to see files which were created for other reader types, too. If the reader has<br />
equivalent measurement modes to the currently configured reader type, Magellan<br />
will ask you whether you want to convert the file.<br />
<strong>Freedom</strong> <strong>EVOware</strong> <strong>Software</strong> <strong>Manual</strong>, 393172, en, V<strong>2.3</strong> 17 - 29
17 - Special Features, Example Scripts and Processes,<br />
Using <strong>Freedom</strong> <strong>EVOware</strong> with the Tecan Magellan <strong>Software</strong><br />
Furthermore, methods and workspace files which were created with Magellan<br />
<strong>Standard</strong> cannot be used in Magellan Tracker, and will not be shown in the Select<br />
a file dialog box. This is because Magellan Tracker methods and workspace files<br />
contain additional tracking information which is needed for regulated<br />
environments.<br />
Note: The sample methods and workspace files which are provided with Magellan<br />
Tracker were created using Magellan <strong>Standard</strong> and are not shown in the Select a<br />
file dialog box of Magellan Tracker. Magellan includes a conversion tool which lets<br />
you convert Magellan <strong>Standard</strong> files to Magellan Tracker files.<br />
In <strong>Freedom</strong> <strong>EVOware</strong> too, the Method Selection dialog box of the Magellan<br />
Measure device command only shows methods which are compatible with the<br />
currently configured reader type and Magellan version (<strong>Standard</strong> or Tracker). See<br />
17.9.3.3 “Specifying the Reader Type in <strong>Freedom</strong> <strong>EVOware</strong>”, 17-31.<br />
17.9.3 Configuring <strong>Freedom</strong> <strong>EVOware</strong> for the Magellan software<br />
Start <strong>Freedom</strong> <strong>EVOware</strong>’s Configuration Tool, click the Devices tab, click Device<br />
Information and look for the Magellan device driver in the list.<br />
If the Magellan driver is missing, then it is not installed. Refer to the Installation<br />
chapter in the <strong>Freedom</strong> <strong>EVOware</strong> manual for information on installing software<br />
components which are missing.<br />
Select the Magellan driver and check that the version is correct (see<br />
17.9.1 “Compatibility”, 17-29).<br />
Check the Start checkbox for the Magellan driver to make sure that it will be<br />
loaded when <strong>Freedom</strong> <strong>EVOware</strong> starts.<br />
Note: If you change configuration settings in <strong>Freedom</strong> <strong>EVOware</strong>’s Configuration<br />
Tool, in most cases <strong>Freedom</strong> <strong>EVOware</strong> must be restarted for the changes to take<br />
effect.<br />
17.9.3.1 Magellan Output File (Workspace File)<br />
In <strong>Freedom</strong> <strong>EVOware</strong>’s Configuration Tool, select the Magellan driver, click<br />
Settings and choose the Settings tab in the Configure Device Driver Properties<br />
dialog box.<br />
In the Output File Default field, specify the required default filename and path for<br />
the calculated results (workspace file) from the Magellan software. The default<br />
filename and path which you specify here will then be shown in the dialog box of<br />
the Magellan Measure command (see Fig. 17-23, 17-36).<br />
Magellan<br />
<strong>Standard</strong><br />
Path: Specify the path which is configured in Magellan for workspace files. This<br />
makes it easier to load the generated workspace files if you run Magellan on its<br />
own later on.<br />
Filename: If you are using a barcode scanner, you should specify the placeholder<br />
, which will instruct <strong>Freedom</strong> <strong>EVOware</strong> and thus Magellan to generate the<br />
filename from the labware barcode. It is not necessary to specify the file extension<br />
(which is .wsp). Note: The labware must be scanned in advance of the Magellan<br />
Measure command.<br />
Examples:<br />
c:\Documents and Settings\All Users\Documents\Tecan\Magellan\<br />
or<br />
c:\Program Files\Tecan\<strong>EVOware</strong>\Output\<br />
17 - 30 <strong>Freedom</strong> <strong>EVOware</strong> <strong>Software</strong> <strong>Manual</strong>, 393172, en, V<strong>2.3</strong>
17 - Special Features, Example Scripts and Processes,<br />
Using <strong>Freedom</strong> <strong>EVOware</strong> with the Tecan Magellan <strong>Software</strong><br />
Note: To check the paths which are configured in Magellan, start the Magellan<br />
Wizard, click More and click Options. Then choose the Paths tab.<br />
Magellan<br />
Tracker<br />
Path: Magellan Tracker stores the workspace files in the path which is configured<br />
in Magellan and ignores the path that you specify here. Accordingly, it is<br />
recomended to leave the Output File Default field blank for Magellan Tracker. The<br />
filename and path of the workspace file will then be taken from the settings which<br />
were made in the Magellan method.<br />
Filename: If you are using a barcode scanner, you should specify the placeholder<br />
, which will instruct <strong>Freedom</strong> <strong>EVOware</strong> and thus Magellan to generate the<br />
filename from the labware barcode. It is not necessary to specify the file extension<br />
(which is .wsp). Note: The labware must be scanned in advance of the Magellan<br />
Measure command.<br />
Example:<br />
c:\Documents and Settings\All Users\Documents\Tecan\Magellan\wsp\<br />
Note: In both Magellan <strong>Standard</strong> and Magellan Tracker, if you leave the Output<br />
File Default field blank in <strong>Freedom</strong> <strong>EVOware</strong>, the filename and path of the<br />
workspace file will be taken from the settings which were made in the Magellan<br />
method.<br />
Note: In Windows Explorer, the directory c:\Documents and Settings\All<br />
Users\Documents is shown as “Shared Documents” and not “Documents”.<br />
17.9.3.2 Specifying the Reader COM port in <strong>Freedom</strong> <strong>EVOware</strong><br />
Start <strong>Freedom</strong> <strong>EVOware</strong>’s Configuration Tool, click the Devices tab, click Com<br />
Ports and select the COM port for the Magellan driver (the COM port to which the<br />
reader is attached). The same COM port should be configured in the Magellan<br />
software (see 17.9.2 “Preparing the Magellan <strong>Software</strong>”, 17-29).<br />
Then click the I/O State tab and make sure that the COM port for the Magellan<br />
driver is enabled (active).<br />
If you do not have a reader connected to your PC, disable the COM port by<br />
unchecking the checkbox. Nonetheless, you should still specify a valid COM port<br />
as described above.<br />
Note: Unlike using the Magellan software on its own, <strong>Freedom</strong> <strong>EVOware</strong> cannot<br />
currently simulate a missing reader. If you do not have a reader connected to your<br />
PC, the Magellan Measure command in the <strong>Freedom</strong> <strong>EVOware</strong> pipetting script<br />
should execute without errors but will not create an output file (workspace file).<br />
17.9.3.3 Specifying the Reader Type in <strong>Freedom</strong> <strong>EVOware</strong><br />
If there is a reader connected to your PC, the Magellan Measure command in the<br />
<strong>Freedom</strong> <strong>EVOware</strong> pipetting script will use the reader type which is attached to<br />
the COM port which you have specified.<br />
Note: <strong>Freedom</strong> <strong>EVOware</strong> gets the reader type by asking the reader driver to<br />
interrogate the reader. Accordingly, the reader must be connected up and<br />
switched on when you create the pipetting script.<br />
If you do not have a reader connected to your PC, the Magellan Measure<br />
command in the <strong>Freedom</strong> <strong>EVOware</strong> pipetting script will use the reader type which<br />
is configured in the Te-Magellan.ini file in <strong>Freedom</strong> <strong>EVOware</strong>’s installation<br />
directory (default path c:\Program Files\Tecan\<strong>EVOware</strong>. The reader type is<br />
<strong>Freedom</strong> <strong>EVOware</strong> <strong>Software</strong> <strong>Manual</strong>, 393172, en, V<strong>2.3</strong> 17 - 31
17 - Special Features, Example Scripts and Processes,<br />
Using <strong>Freedom</strong> <strong>EVOware</strong> with the Tecan Magellan <strong>Software</strong><br />
configured in the [Settings] section with the switch Simulation=. The available<br />
reader types are listed in the [DemoInstruments] section.<br />
If you do not have a reader connected to your PC, you must disable the COM port<br />
as described in 17.9.3.2 “Specifying the Reader COM port in <strong>Freedom</strong> <strong>EVOware</strong>”,<br />
17-31.<br />
Note: Method files are reader-specific. In <strong>Freedom</strong> <strong>EVOware</strong>, the Method<br />
Selection dialog box of the Magellan Measure command only shows methods<br />
which are compatible with the currently configured reader type.<br />
17.9.4 <strong>Freedom</strong> <strong>EVOware</strong> <strong>Standard</strong> Script for the Magellan software<br />
The following figure shows a simple example script for <strong>Freedom</strong> <strong>EVOware</strong><br />
<strong>Standard</strong> which uses the Magellan Measure script command:<br />
Fig. 17-20 Example pipetting script and worktable for <strong>Freedom</strong> <strong>EVOware</strong> <strong>Standard</strong><br />
In the example, the worktable has been configured with a wash station at grid<br />
position 5, a tube rack at grid position 10 (labware name: Labware1) and a<br />
microplate carrier at grid position 15 (labware name: Labware2). A microplate has<br />
been put on site 1 of the carrier.<br />
17 - 32 <strong>Freedom</strong> <strong>EVOware</strong> <strong>Software</strong> <strong>Manual</strong>, 393172, en, V<strong>2.3</strong>
17 - Special Features, Example Scripts and Processes,<br />
Using <strong>Freedom</strong> <strong>EVOware</strong> with the Tecan Magellan <strong>Software</strong><br />
In <strong>Freedom</strong> <strong>EVOware</strong> <strong>Standard</strong>, it is also necessary to put a microplate of the<br />
correct type onto the Magellan device icon. This is shown by the grey rectangle<br />
inside the icon. This is not necessary in <strong>Freedom</strong> <strong>EVOware</strong> Plus.<br />
Note: Make sure you have chosen the same microplate type which you want to<br />
use in the script. Refer to the hardware manual for your reader for information on<br />
the microplate types which are supported (96-well, 384-well etc.).<br />
Please refer to the <strong>Freedom</strong> <strong>EVOware</strong> software manual or the context-sensitive<br />
help for detailed information on each of the script commands. The following only<br />
describes special points to note when setting up scripts for the Magellan software.<br />
In the example, the labware and tube (sample) barcodes are scanned in script line<br />
1 using the PosID barcode scanner. The following figure shows the Scan tab of<br />
the PosID command:<br />
Fig. 17-21 PosID command<br />
The Barcode Types tab is used to configure the barcode types which the PosID<br />
scanner will accept for the chosen labware.<br />
The labware and tube barcodes must be scanned in advance of the Export Data<br />
and Magellan Measure commands. In <strong>Freedom</strong> <strong>EVOware</strong> Plus, the PosID and<br />
Export Data commands must be in the same pipetting script since the tube<br />
barcodes are not normally available globally (see the description of Scope in the<br />
<strong>Freedom</strong> <strong>EVOware</strong> software manual). See also 17.9.6 “<strong>Freedom</strong> <strong>EVOware</strong> Plus<br />
Process for the Magellan software”, 17-38.<br />
With the above settings, the barcodes will be scanned for Labware1 (the tube<br />
rack) and Labware2 (the microplate).<br />
In script lines 2 to 6, the sample liquids are transferred from the tube rack to the<br />
microplate using the Copy Plate wizard.<br />
<strong>Freedom</strong> <strong>EVOware</strong> <strong>Software</strong> <strong>Manual</strong>, 393172, en, V<strong>2.3</strong> 17 - 33
17 - Special Features, Example Scripts and Processes,<br />
Using <strong>Freedom</strong> <strong>EVOware</strong> with the Tecan Magellan <strong>Software</strong><br />
The Magellan Measure command in script line 9 gets important information it<br />
needs from a labware report file in CSV format which is output by the Export Data<br />
command in line 7. The following figure shows the dialog box for the Export Data<br />
command:<br />
Fig. 17-22 Export Data command<br />
The labware report file will contain pipetting information for Labware2 (the<br />
microplate). It will also contain the microplate and tube (sample) barcodes which<br />
were scanned by the PosID command. The labware report file is written to the<br />
Output directory which is specified in <strong>Freedom</strong> <strong>EVOware</strong>’s Configuration Tool.<br />
<strong>Freedom</strong> <strong>EVOware</strong> sends the name and location of this file to the Magellan driver<br />
automatically (you do not need to configure the <strong>Freedom</strong> <strong>EVOware</strong> Output<br />
directory in the Magellan software).<br />
Significant pipetting step for Magellan is set to “1” since only one pipetting step<br />
was carried out on Labware2 (the Dispense command in script line 4). See the<br />
<strong>Freedom</strong> <strong>EVOware</strong> manual for more information on this option.<br />
The Transfer Labware command in script line 8 moves the microplate from the<br />
worktable to the microplate reader. If you want to use the Magellan software to<br />
control the reader, when you configure the Transfer Labware command you must<br />
choose the Magellan device icon in the worktable editor as the destination<br />
position of the microplate, not the device icon for the reader itself.<br />
17 - 34 <strong>Freedom</strong> <strong>EVOware</strong> <strong>Software</strong> <strong>Manual</strong>, 393172, en, V<strong>2.3</strong>
17 - Special Features, Example Scripts and Processes,<br />
Using <strong>Freedom</strong> <strong>EVOware</strong> with the Tecan Magellan <strong>Software</strong><br />
Note: The labware must be brought to the reader using the Transfer Labware<br />
command and not using another RoMa command. Otherwise the barcodes and<br />
the pipetting information will not be transferred with the labware.<br />
The Transfer Labware command is not available in <strong>Freedom</strong> <strong>EVOware</strong> Plus. See<br />
17.9.6 “<strong>Freedom</strong> <strong>EVOware</strong> Plus Process for the Magellan software”, 17-38 for<br />
more information.<br />
<strong>Freedom</strong> <strong>EVOware</strong> <strong>Software</strong> <strong>Manual</strong>, 393172, en, V<strong>2.3</strong> 17 - 35
17 - Special Features, Example Scripts and Processes,<br />
Using <strong>Freedom</strong> <strong>EVOware</strong> with the Tecan Magellan <strong>Software</strong><br />
The following figure shows the dialog box for the Magellan Measure command in<br />
script line 9:<br />
Fig. 17-23 Magellan Measure command<br />
Output file name<br />
Specify the required filename and path of the output file (workspace file). The<br />
default filename and path which is shown is the one you specified in <strong>Freedom</strong><br />
<strong>EVOware</strong>’s Configuration Tool (see 17.9.3.1 “Magellan Output File<br />
(Workspace File)”, 17-30).<br />
If you are using a barcode scanner, you should specify the filename as the<br />
placeholder , which will instruct <strong>Freedom</strong> <strong>EVOware</strong> and thus Magellan to<br />
generate the filename from the labware barcode. The labware must be<br />
scanned in advance of the Magellan Measure command.<br />
Note: In both Magellan <strong>Standard</strong> and Magellan Tracker, if you leave the Output<br />
File Name field blank in <strong>Freedom</strong> <strong>EVOware</strong>, the filename and path of the<br />
workspace file will be taken from the settings which were made in the Magellan<br />
method.<br />
Import Sample ID list<br />
Check the Import sample ID list checkbox if you have scanned the tube<br />
barcodes in advance of the Magellan Measure command. This instructs the<br />
Magellan software to extract the tube barcodes from a labware report file and<br />
assign them to the samples. The barcode information will then be contained in<br />
17 - 36 <strong>Freedom</strong> <strong>EVOware</strong> <strong>Software</strong> <strong>Manual</strong>, 393172, en, V<strong>2.3</strong>
17 - Special Features, Example Scripts and Processes,<br />
Using <strong>Freedom</strong> <strong>EVOware</strong> with the Tecan Magellan <strong>Software</strong><br />
the Magellan output file (workspace file) which is produced. The workspace<br />
file will also contain information from <strong>Freedom</strong> <strong>EVOware</strong> on pipetting errors (if<br />
any). The barcodes and pipetting errors can then be viewed by loading the<br />
generated workspace file in Magellan.<br />
To create a labware report file, you must use the script command Export Data<br />
before using the Measure command for the Magellan software.<br />
<strong>Freedom</strong> <strong>EVOware</strong> <strong>Standard</strong>: The labware must be brought to the reader<br />
using the Transfer Labware command and not using another RoMa<br />
command. Otherwise, the barcodes and the pipetting information will not be<br />
transferred with the labware.<br />
<strong>Freedom</strong> <strong>EVOware</strong> Plus: The PosID and Export Data commands must be in<br />
the same pipetting script since the tube barcodes are not normally available<br />
globally (see the description of Scope in the <strong>Freedom</strong> <strong>EVOware</strong> software<br />
manual).<br />
Append data to existing file<br />
Check this checkbox if you want to append the measurement data to an<br />
existing output file (workspace file). This option is mainly intended for kinetic<br />
measurements (frequent measurement of the reaction to determine the rate or<br />
progress). This option must be activated in all Magellan Measure commands<br />
in the kinetic series except for the first one. This option requires labware with<br />
barcodes (you must also check the checkbox Import sample ID list).<br />
Edit method<br />
Click this button to edit the selected method using the Edit Method wizard of<br />
the Magellan software. See 17.9.5 “Additional Settings for the Magellan<br />
Method”, 17-37 for more information.<br />
Method file panel<br />
The Method File panel only shows methods which are compatible with the<br />
currently configured reader type and Magellan version (<strong>Standard</strong> or Tracker).<br />
See 17.9.3.3 “Specifying the Reader Type in <strong>Freedom</strong> <strong>EVOware</strong>”, 17-31.<br />
You can only edit the method if you have Application Specialist rights in<br />
Magellan.<br />
17.9.5 Additional Settings for the Magellan Method<br />
If you are using a barcode scanner and a labware report file, additional settings<br />
are needed for the Magellan method. To make these settings, select the required<br />
method file in the Magellan Measure command and click Edit Method. This opens<br />
the Magellan wizard. Select and open the method, choose the required<br />
measurement type and click the large green arrow. Then click Automated data<br />
handling in the Data Handling group of the Magellan Control Bar and make the<br />
following settings:<br />
<strong>Freedom</strong> <strong>EVOware</strong> <strong>Software</strong> <strong>Manual</strong>, 393172, en, V<strong>2.3</strong> 17 - 37
17 - Special Features, Example Scripts and Processes,<br />
Using <strong>Freedom</strong> <strong>EVOware</strong> with the Tecan Magellan <strong>Software</strong><br />
Fig. 17-24 Magellan settings - Automated data handling<br />
Note: The checkbox Save workspace is not available in Magellan Tracker. The<br />
checkboxes for data export may not be available either depending on other<br />
settings you make in Magellan.<br />
Now click the More button next to Load sample ID List and make the following<br />
settings:<br />
Fig. 17-25 Magellan settings - Load Sample ID List<br />
Click OK twice when you are finished.<br />
17.9.6 <strong>Freedom</strong> <strong>EVOware</strong> Plus Process for the Magellan software<br />
The following figure shows a simple example process for <strong>Freedom</strong> <strong>EVOware</strong> Plus<br />
which uses the Magellan Measure device command:<br />
17 - 38 <strong>Freedom</strong> <strong>EVOware</strong> <strong>Software</strong> <strong>Manual</strong>, 393172, en, V<strong>2.3</strong>
17 - Special Features, Example Scripts and Processes,<br />
Using <strong>Freedom</strong> <strong>EVOware</strong> with the Tecan Magellan <strong>Software</strong><br />
Fig. 17-26 Example process and worktable for <strong>Freedom</strong> <strong>EVOware</strong> Plus<br />
In the example, the worktable has been configured with a wash station at grid<br />
position 5, a tube rack at grid position 10 (labware name: Labware1) and a<br />
microplate carrier at grid position 15. The carousel has been set up with 10<br />
microplates.<br />
In the Script Editor, a microplate was put on site 1 of the carrier and given the<br />
name Labware2. Since the microplate will be taken to this site dynamically during<br />
process run time, it is shown in grey in the Process Editor.<br />
After pipetting, the microplate is transferred automatically to the microplate reader<br />
and scanned using a Magellan Measure command in the Magellan process step.<br />
The Transfer Labware command from the <strong>Freedom</strong> <strong>EVOware</strong> <strong>Standard</strong> example<br />
is not necessary (and not available in <strong>Freedom</strong> <strong>EVOware</strong> Plus). After scanning,<br />
the microplate will be returned to the carousel automatically.<br />
The pipetting script in the LiHa Pipette process step is identical to lines 1 to 7 of<br />
the example script for <strong>Freedom</strong> <strong>EVOware</strong> <strong>Standard</strong>:<br />
<strong>Freedom</strong> <strong>EVOware</strong> <strong>Software</strong> <strong>Manual</strong>, 393172, en, V<strong>2.3</strong> 17 - 39
17 - Special Features, Example Scripts and Processes,<br />
Example Scripts and Processes<br />
Fig. 17-27 Example pipetting script for <strong>Freedom</strong> <strong>EVOware</strong> Plus<br />
See the example for <strong>Freedom</strong> <strong>EVOware</strong> <strong>Standard</strong> for more details on setting up<br />
the Magellan Measure, PosID and Export Data commands.<br />
Configuration of the Magellan driver and the exchange of information between<br />
<strong>Freedom</strong> <strong>EVOware</strong> and the Magellan software takes place in the same way as in<br />
<strong>Freedom</strong> <strong>EVOware</strong> <strong>Standard</strong>.<br />
Note: The PosID and Export Data must be in the same pipetting script, as in the<br />
example, since the tube barcodes are not normally available globally (see the<br />
description of Scope in the <strong>Freedom</strong> <strong>EVOware</strong> software manual).<br />
17.10 Example Scripts and Processes<br />
<strong>Freedom</strong> <strong>EVOware</strong> is provided with a number of example scripts which illustrate<br />
various aspects of script programming. It is instructive for new users of <strong>Freedom</strong><br />
<strong>EVOware</strong> to load the scripts which are provided and to study each command<br />
while looking at the on-line help. For learning purposes, some of the scripts can<br />
also be run in offline mode. The scripts are stored as script templates. To load<br />
them, click New and select the required template.Script templates have a yellow<br />
icon.<br />
Note that scripts will indicate errors (marked in red in the Script Editor) if the<br />
configuration of the pipetting instrument is unsuitable. For example, if the script<br />
uses DITIs, errors will be shown if the liquid handling arm is not configured with<br />
DITIs. Conversely, if the liquid handling arm is configured with DITIs, Aspirate<br />
commands must be preceded by Get DITI commands. Errors will also be shown if<br />
the script uses liquid classes or volume ranges which are not currently available.<br />
In many cases, the purpose of each of the scripts is explained in a Comment<br />
command at the start of the script.<br />
The <strong>Freedom</strong> <strong>EVOware</strong> installation contains a number of maintenance scripts<br />
(see 6.4.2 “Run Maintenance”, 6-10). Maintenance scripts can be run by both<br />
<strong>Freedom</strong> <strong>EVOware</strong> versions but can only be created and edited with <strong>Freedom</strong><br />
<strong>EVOware</strong> <strong>Standard</strong>. Script files and maintenance scripts have a green icon.<br />
<strong>Freedom</strong> <strong>EVOware</strong> Plus is also provided with an example process template,<br />
which is for the ELISA test (Enzyme immunoassay). Process templates have a<br />
blue icon.<br />
17 - 40 <strong>Freedom</strong> <strong>EVOware</strong> <strong>Software</strong> <strong>Manual</strong>, 393172, en, V<strong>2.3</strong>
17 - Special Features, Example Scripts and Processes,<br />
Example Scripts and Processes<br />
<strong>Freedom</strong> <strong>EVOware</strong> <strong>Software</strong> <strong>Manual</strong>, 393172, en, V<strong>2.3</strong> 17 - 41
17 - Special Features, Example Scripts and Processes,<br />
Example Scripts and Processes<br />
17 - 42 <strong>Freedom</strong> <strong>EVOware</strong> <strong>Software</strong> <strong>Manual</strong>, 393172, en, V<strong>2.3</strong>
18 - Error Handling<br />
Error Dialogs<br />
18 Error Handling<br />
Purpose of This<br />
Chapter<br />
This chapter describes runtime error messages and the associated dialog boxes<br />
that can be issued by the software. It gives information on the cause of the error<br />
and instructs how to correct the error, where applicable.<br />
18.1 Error Dialogs<br />
Errors<br />
Requiring User<br />
Interaction<br />
This section describes pipetting and hardware device error messages which<br />
require user interaction. Please see the description of the output file format from<br />
the Export Data command for information on the pipetting error codes which are<br />
reported. Errors are also reported in the <strong>Freedom</strong> <strong>EVOware</strong> log files.<br />
18.1.1 Liquid Detection Error<br />
The following dialog box is shown when the pipetting instrument reports a liquid<br />
detection error.<br />
The dialog box shows the respective tip or tips with errors and the tip status. The<br />
last column display the detected volume:<br />
Fig. 18-1 Liquid Detection Error dialog box<br />
The buttons in the dialog box are as follows. The actions described only apply to<br />
the affected tip positions - if the pipetting script is allowed to continue, the other<br />
tips will be handled in the normal way.<br />
Retry detection<br />
Click this button to retry the liquid level detection.<br />
<strong>Freedom</strong> <strong>EVOware</strong> <strong>Software</strong> <strong>Manual</strong>, 393172, en, V<strong>2.3</strong> 18 - 1
18 - Error Handling<br />
Error Dialogs<br />
Move tips to Z (Max)<br />
If you click this button, <strong>Freedom</strong> <strong>EVOware</strong> will move the tips to Z-Max and will<br />
try to aspirate the specified volume again.<br />
Pipette nothing<br />
If you click this button, <strong>Freedom</strong> <strong>EVOware</strong> will not use the affected tip(s) until<br />
the next Wash Tips or Get DITIs operation.<br />
The affected wells won't be reported any more in the output files.<br />
Aspirate air instead of the liquid<br />
If you click this button, <strong>Freedom</strong> <strong>EVOware</strong> will pipette air instead of the liquid<br />
and will continue with the pipetting script.<br />
Abort<br />
Click Abort if you want to stop the pipetting script.<br />
See also 10.2.1 “LiHa Aspirate Parameters (Fixed Tips and DiTis)”, 10-7, On<br />
Detection Error.<br />
Note: Liquid Level detection is not supported by the Te-MO. However, it can be<br />
emulated using the pre-defined variable RACK_VOLUME_x. Accordingly, if this<br />
error is reported by the Te-MO, this indicates that an unsuitable or incorrect value<br />
has been assigned to the RACK_VOLUME_x variable.<br />
18.1.2 Clot Error<br />
The following dialog box is shown if the pipetting instrument reports a clot error or<br />
an exit signal error during pipetting. The dialog box shows the respective tip or tips<br />
and the tip status:<br />
Fig. 18-2 Clot Error dialog box<br />
The buttons in the dialog box are as follows. The actions described only apply to<br />
the affected tip positions - if the pipetting script is allowed to continue, the other<br />
tips will be handled in the normal way.<br />
18 - 2 <strong>Freedom</strong> <strong>EVOware</strong> <strong>Software</strong> <strong>Manual</strong>, 393172, en, V<strong>2.3</strong>
18 - Error Handling<br />
Error Dialogs<br />
Dispense back into vessel, then retry<br />
If you click this button, <strong>Freedom</strong> <strong>EVOware</strong> will dispense the aspirated volume<br />
back into the vessel and will retry the liquid level detection, aspiration, and clot<br />
detection.<br />
Dispense back into vessel, then pipette nothing<br />
If you click this button, <strong>Freedom</strong> <strong>EVOware</strong> will dispense the aspirated volume<br />
back into the vessel and will not use the affected tip(s) until the next Wash<br />
Tips or Get DITIs operation.<br />
The affected wells won't be reported any more in the output files.<br />
Go on with clot<br />
If you click this button, <strong>Freedom</strong> <strong>EVOware</strong> will continue with the pipetting<br />
script and report the clot error in the output file(s).<br />
Continue, ignore clot error<br />
If you click this button, <strong>Freedom</strong> <strong>EVOware</strong> will continue with the pipetting<br />
script and report “clot error ignored” in the output file(s).<br />
See also 10.2.1 “LiHa Aspirate Parameters (Fixed Tips and DiTis)”, 10-7, On<br />
Exit Signal Error.<br />
18.1.3 Clot Error (PMP)<br />
The following dialog box is shown if the PMP (Pressure Monitored Pipetting)<br />
hardware option detects a clot during pipetting.<br />
PMP is only available for LiHa DITI tips. The dialog box shows the respective tip<br />
or tips and the tip status:<br />
Fig. 18-3 Clot Error (PMP) dialog box<br />
The buttons in the dialog box are as follows. The actions described only apply to<br />
the affected tip positions - if the pipetting script is allowed to continue, the other<br />
tips will be handled in the normal way.<br />
<strong>Freedom</strong> <strong>EVOware</strong> <strong>Software</strong> <strong>Manual</strong>, 393172, en, V<strong>2.3</strong> 18 - 3
18 - Error Handling<br />
Error Dialogs<br />
Retry with new DITI<br />
This option is currently not available for PMP.<br />
Dispense back into vessel, then pipette nothing<br />
If you click this button, <strong>Freedom</strong> <strong>EVOware</strong> will dispense the aspirated volume<br />
back into the vessel and will not use the affected tip(s) until the next Get DITIs<br />
operation.<br />
The affected wells won’t be reported any more in the output files.<br />
Ignore clot error and continue<br />
If you click this button, <strong>Freedom</strong> <strong>EVOware</strong> will continue with the pipetting<br />
script and report “clot error ignored” in the output file(s).<br />
Discard DITI and pipette nothing<br />
If you click this button, <strong>Freedom</strong> <strong>EVOware</strong> will discard the affected DITI(s) and<br />
will not use these tip positions until the next Get DITIs operation.<br />
The following LiHa movements are made in this case when discarding the<br />
DITIs: The LiHa moves in the Y direction to behind the worktable and then in<br />
the X direction along the back of the worktable to the grid position of the DITI<br />
waste. It then moves forward to the DITI waste and discards the DITI. It then<br />
moves back to the original pipetting position by retracing the same path.<br />
The affected wells won’t be reported any more in the output files.<br />
PMP errors are shown in the report file of the Export Data command (see Tab. 15-<br />
8, 15-54). See also 17.6.4 “PMP Error and Success Messages”, 17-22 and<br />
10.2.1 “LiHa Aspirate Parameters (Fixed Tips and DiTis)”, 10-7, On PMP Clot<br />
Error.<br />
18.1.4 PMP Instrument Error<br />
The following dialog box is shown if the PMP (Pressure Monitored Pipetting)<br />
firmware reports “pressure out of range” during pipetting. The dilutor is then<br />
stopped to avoid damage to the PMP pressure sensor.<br />
The under-pressure threshold is set so that Clot Error (PMP) will normally trigger<br />
before “pressure out of range”, hence avoiding the need for re-initialization and<br />
allowing error handling options instead (see 18.1.3 “Clot Error (PMP)”, 18-3).<br />
PMP is only available for LiHa DITI tips. The dialog box shows the respective tip<br />
or tips and the tip status:<br />
18 - 4 <strong>Freedom</strong> <strong>EVOware</strong> <strong>Software</strong> <strong>Manual</strong>, 393172, en, V<strong>2.3</strong>
18 - Error Handling<br />
Error Dialogs<br />
Fig. 18-4 PMP Instrument Error dialog box<br />
The buttons in the dialog box are as follows. The actions described only apply to<br />
the affected tip positions.<br />
Initialize plungers<br />
If you click this button, <strong>Freedom</strong> <strong>EVOware</strong> will discard the affected DITI(s) and<br />
will not use these tip positions until the next Get DITIs operation. In addition,<br />
the respective plungers of the PMP option will be initialized.<br />
The following LiHa movements are made in this case when discarding the<br />
DITIs: The LiHa moves in the Y direction to behind the worktable and then in<br />
the X direction along the back of the worktable to the grid position of the DITI<br />
waste. It then moves forward to the DITI waste and discards the DITI. It then<br />
moves back to the original pipetting position by retracing the same path.<br />
The affected wells will be flagged with “Diluter Error” in the output files.<br />
Abort<br />
Click Abort if you want to stop the pipetting script.<br />
PMP errors are shown in the report file of the Export Data command (see Tab. 15-<br />
8, 15-54). See also 17.6.4 “PMP Error and Success Messages”, 17-22.<br />
18.1.5 Liquid Arrival Check Error<br />
The Liquid Arrival Check (LAC) feature verifies that the correct liquid volumes<br />
have been dispensed by weighing the labware before and after pipetting. The<br />
labware must be put onto a special balance (pooling balance) for the dispense<br />
operation. <strong>Freedom</strong> <strong>EVOware</strong> automatically calculates the liquid volume from the<br />
weight difference and compares the results with the volume specified in the<br />
pipetting command. The following dialog box is shown if the two values differ by<br />
more than the maximum volume deviation which is specified in the liquid class<br />
which was used for pipetting:<br />
<strong>Freedom</strong> <strong>EVOware</strong> <strong>Software</strong> <strong>Manual</strong>, 393172, en, V<strong>2.3</strong> 18 - 5
18 - Error Handling<br />
Error Dialogs<br />
Fig. 18-5 Liquid Arrival Check error<br />
The same dialog box is also used to display technical errors from the LAC<br />
hardware.<br />
The buttons in the dialog box are as follows:<br />
Ignore and continue<br />
If you click this button, <strong>Freedom</strong> <strong>EVOware</strong> will ignore the error and continue<br />
with the pipetting script. Please be careful with this option. Ignoring errors can<br />
lead to further errors.<br />
Abort<br />
Click Abort if you want to stop the pipetting script.<br />
18.1.6 Volume Monitoring Error (Diluter Overflow)<br />
The following dialog box is shown when the liquid amount you want to aspirate<br />
exceeds the diluter capacity:<br />
Fig. 18-6 Volume Monitoring dialog box<br />
The buttons in the dialog box are as follows:<br />
Cancel<br />
Click Cancel if you want to stop the pipetting script.<br />
Ignore<br />
If you click this button, <strong>Freedom</strong> <strong>EVOware</strong> will ignore the error and continue<br />
with the pipetting script. Please be careful with this option. Ignoring errors can<br />
lead to further errors.<br />
Note: Check the pipetting script or adapt the liquid class with regard to air gaps<br />
and excess/conditioning volume.<br />
18 - 6 <strong>Freedom</strong> <strong>EVOware</strong> <strong>Software</strong> <strong>Manual</strong>, 393172, en, V<strong>2.3</strong>
18 - Error Handling<br />
Error Dialogs<br />
18.1.7 Diluter Error<br />
The following dialog box is shown when the pipetting instrument reports a diluter<br />
error. The dialog box shows the respective diluter or diluters and the error(s):<br />
Fig. 18-7 Diluter Error dialog box<br />
The buttons in the dialog box are as follows:<br />
Initialise<br />
If you click this button, <strong>Freedom</strong> <strong>EVOware</strong> will move the LiHa above the leftmost<br />
waste position and will try to initialize the diluter(s). If an error occurs<br />
again, this dialog box will be displayed again.<br />
With <strong>Standard</strong> Tips: If the initialization is successful, the pipetting script will<br />
continue, but <strong>Freedom</strong> <strong>EVOware</strong> will not use the affected tips until the next<br />
Wash Tips operation.<br />
With DITIs: If you click this button, <strong>Freedom</strong> <strong>EVOware</strong> will discard the<br />
affected DITI(s) and will not use these tip positions until the next Get DITIs<br />
operation.<br />
In both cases, the affected wells will be flagged with “Diluter Error” in the<br />
output files.<br />
Deactivate<br />
Click this button to switch off the affected diluter. It will not used any more for<br />
pipetting and the tip position will be marked as “broken” in the configuration of<br />
the LiHa.<br />
Notes on specific error messages<br />
Plunger Overload<br />
Too much force is needed to move the plunger.<br />
Possible causes are:<br />
– The tip is blocked.<br />
– The pipes are blocked.<br />
– The 3-way valve is faulty.<br />
– The plunger or plunger cap has jammed.<br />
Invalid Operand<br />
Possible causes are:<br />
– Aspirate or dispense speed has been configured too high.<br />
<strong>Freedom</strong> <strong>EVOware</strong> <strong>Software</strong> <strong>Manual</strong>, 393172, en, V<strong>2.3</strong> 18 - 7
18 - Error Handling<br />
Error Dialogs<br />
– Check the log file to see which liquid class has been used. Make sure that<br />
the single pipetting and multi-pipetting is configured appropriately.<br />
– The script has tried to aspirate a liquid volume which exceeds the diluter<br />
capacity. The total aspirated volume also includes the airgaps.<br />
18 - 8 <strong>Freedom</strong> <strong>EVOware</strong> <strong>Software</strong> <strong>Manual</strong>, 393172, en, V<strong>2.3</strong>
18 - Error Handling<br />
Error Dialogs<br />
18.1.8 Error Fetching DITIs<br />
The following dialog box is shown if a DITI was not fetched correctly (as reported<br />
by the electrical DITI sensors in the pipetting head). A common cause of this error<br />
is a missing DITI in the DITI rack. The dialog box shows the respective tip or tips<br />
and the tip status:<br />
Fig. 18-8 Error Fetching DITIs dialog box<br />
The buttons in the dialog box are as follows:<br />
Retry at same position<br />
If you click this button, <strong>Freedom</strong> <strong>EVOware</strong> will try to fetch the affected DITI(s)<br />
again.<br />
Try at next position<br />
If you click this button, <strong>Freedom</strong> <strong>EVOware</strong> will try to fetch DITIs for the<br />
affected position(s) at the next available location(s) in the DITI rack.<br />
Abort<br />
Click Abort if you want to stop the pipetting script.<br />
<strong>Freedom</strong> <strong>EVOware</strong> <strong>Software</strong> <strong>Manual</strong>, 393172, en, V<strong>2.3</strong> 18 - 9
18 - Error Handling<br />
Error Dialogs<br />
18.1.9 Error Mounting DITIs<br />
The following dialog box is shown if a DITI was fetched (as reported by the<br />
electrical DITI sensors in the pipetting head) but was not mounted correctly (as<br />
reported by the force feedback sensors). A common cause of this error is<br />
inaccurate or incorrect teaching of the DITI labware.<br />
The dialog box shows the respective tip or tips and the tip status:<br />
Fig. 18-9 Error Mounting DITIs dialog box<br />
The buttons in the dialog box are as follows:<br />
Retry at same position<br />
If you click this button, <strong>Freedom</strong> <strong>EVOware</strong> will try to fetch the affected DITI(s)<br />
again. Before you do this, make sure that DITIs are available at all of the<br />
required well positions.<br />
Continue and pipette anyway<br />
If you click this button, <strong>Freedom</strong> <strong>EVOware</strong> will ignore the error and continue<br />
with the pipetting script.<br />
Choose this option if visual inspection shows that the DITIs are correctly<br />
mounted and you decide that it is safe to continue with the script.<br />
Continue, but pipette nothing with DITIs concerned<br />
If you click this button, <strong>Freedom</strong> <strong>EVOware</strong> will continue with the pipetting<br />
script, but will not use the affected tip(s) until the next Get DITIs operation.<br />
The affected tip(s) will move upwards as far as possible to be out of the way of<br />
other objects.<br />
Choose this option to avoid the risk of loosing the DITIs during pipetting if they<br />
are not tightly or correctly attached to the DITI adapters.<br />
The affected wells won’t be reported any more in the output files.<br />
18 - 10 <strong>Freedom</strong> <strong>EVOware</strong> <strong>Software</strong> <strong>Manual</strong>, 393172, en, V<strong>2.3</strong>
18 - Error Handling<br />
Error Dialogs<br />
Abort<br />
Click Abort if you want to stop the pipetting script.<br />
18.1.10 Lost DITI Error<br />
The following dialog box is shown if a DITI has been lost directly before or after a<br />
pipetting command (as reported by the electrical DITI sensors in the pipetting<br />
head). The dialog box shows the respective tip or tips and the tip status:<br />
Fig. 18-10 Lost DITI Error dialog box<br />
The buttons in the dialog box are as follows:<br />
Continue, but pipette nothing with lost DITI<br />
If you click this button, <strong>Freedom</strong> <strong>EVOware</strong> will continue with the pipetting<br />
script, but will not use the affected tip(s) until the next Get DITIs operation.<br />
The affected tip(s) will move upwards as far as possible to be out of the way of<br />
other objects.<br />
The affected wells won’t be reported any more in the output files.<br />
Abort<br />
Click Abort if you want to stop the pipetting script.<br />
<strong>Freedom</strong> <strong>EVOware</strong> <strong>Software</strong> <strong>Manual</strong>, 393172, en, V<strong>2.3</strong> 18 - 11
18 - Error Handling<br />
Error Dialogs<br />
18.1.11 DITI Already Mounted Error<br />
The following dialog box is shown if a DITI is detected on the DITI adapter directly<br />
before a Get DITI or Pickup DITI command is executed. The dialog box shows the<br />
respective tip or tips and the tip status:<br />
Fig. 18-11 DITI Already Mounted error dialog box<br />
The buttons in the dialog box are as follows:<br />
Continue, but pipette nothing with mounted DITI<br />
If you click this button, <strong>Freedom</strong> <strong>EVOware</strong> will continue with the pipetting<br />
script, but will not use the affected tip(s) until the next Get DITIs operation.<br />
The affected tip(s) will move upwards as far as possible to be out of the way of<br />
other objects.<br />
The affected wells won’t be reported any more in the output files.<br />
Retry at same position<br />
If you click this button, <strong>Freedom</strong> <strong>EVOware</strong> will try again to get or pick up a<br />
DITI after checking again whether a DITI is already mounted.<br />
Abort<br />
Click Abort if you want to stop the pipetting script.<br />
Eject mounted DITI and mount new<br />
If you click this button, <strong>Freedom</strong> <strong>EVOware</strong> will eject the DITI which is mounted<br />
and get another DITI for this tip position.<br />
18 - 12 <strong>Freedom</strong> <strong>EVOware</strong> <strong>Software</strong> <strong>Manual</strong>, 393172, en, V<strong>2.3</strong>
18 - Error Handling<br />
Error Dialogs<br />
18.1.12 Error Reading Barcodes<br />
The following dialog box is shown if the pipetting instrument reports an error when<br />
scanning a carrier, labware or tube barcode with the PosID barcode scanner (the<br />
example below shows a labware barcode error). The dialog box shows the error<br />
which was returned:<br />
Fig. 18-12 Error Reading Barcodes dialog box<br />
The buttons in the dialog box are as follows:<br />
Retry<br />
Click this button to scan the barcode again.<br />
Enter<br />
If you click this button, the Enter Barcode dialog box is displayed to let you<br />
enter the barcode manually.<br />
Cancel<br />
Click Cancel if you want to stop the pipetting script.<br />
Notes on specific error messages<br />
Unexpected carrier barcode on grid {}<br />
The carrier code of the scanned barcode does not match the carrier code of<br />
the carrier in the Worktable Editor (i.e. the incorrect carrier type is specified in<br />
<strong>Freedom</strong> <strong>EVOware</strong> or has been loaded on the worktable). All standard Tecan<br />
carriers have a unique carrier code (the carrier code is shown in the first three<br />
digits of the barcode; it is configured in the carrier definition).<br />
18.1.13 Carrier Barcode Error<br />
The following dialog box is shown if the pipetting instrument reports an error when<br />
scanning a carrier barcode with the PosID-3 barcode scanner. The dialog box<br />
shows the error which was returned:<br />
Fig. 18-13 Carrier Barcode Error dialog box<br />
<strong>Freedom</strong> <strong>EVOware</strong> <strong>Software</strong> <strong>Manual</strong>, 393172, en, V<strong>2.3</strong> 18 - 13
18 - Error Handling<br />
Error Dialogs<br />
The buttons in the dialog box are as follows:<br />
Retry<br />
Click this button to scan the barcode again.<br />
Ignore<br />
Click this button to ignore the error and continue with the pipetting script.<br />
Please be careful with this option. Ignoring errors can lead to further errors.<br />
Cancel<br />
Click Cancel if you want to stop the pipetting script.<br />
Notes on specific error messages<br />
Carrier Barcode Error: Unexpected carrier barcode on grid {}<br />
The carrier code of the scanned barcode does not match the carrier code of<br />
the carrier in the Worktable Editor (i.e. the incorrect carrier type is specified in<br />
<strong>Freedom</strong> <strong>EVOware</strong> or has been loaded on the worktable). All standard Tecan<br />
carriers have a unique carrier code (the carrier code is shown in the first three<br />
digits of the barcode; it is configured in the carrier definition).<br />
Error reading carrier barcode on grid {}<br />
Each carrier or tube rack is fitted with two barcodes. This is done to enhance<br />
scanning accuracy. The two barcodes only differ in the separator character<br />
between the carrier code and the barcode (“\” or “/”). This error occurs if the<br />
the separator characters are incorrect.<br />
18.1.14 Barcode Error<br />
The following dialog box is shown if the pipetting instrument reports an error when<br />
scanning a labware or tube barcode with the PosID-3 barcode scanner (the<br />
example below shows a labware barcode error). The dialog box shows the error<br />
which was returned:<br />
Fig. 18-14 Barcode Error dialog box<br />
The buttons in the dialog box are as follows:<br />
Retry<br />
Click this button to scan the barcode again.<br />
Enter<br />
If you click this button, the Enter Barcode dialog box is displayed to let you<br />
enter the barcode manually.<br />
Cancel<br />
Click Cancel if you want to stop the pipetting script.<br />
18 - 14 <strong>Freedom</strong> <strong>EVOware</strong> <strong>Software</strong> <strong>Manual</strong>, 393172, en, V<strong>2.3</strong>
18 - Error Handling<br />
Error Dialogs<br />
Notes on specific error messages<br />
Barcode Error: Mismatching barcode for position grid ... site ...<br />
The barcodes of all of the labware on the worktable must be unique. This error<br />
occurs if the same barcode has been scanned on more than one tube or<br />
labware item.<br />
18.1.15 Labware or Tube Barcode Error<br />
The barcodes of all of the labware on the worktable must be unique. This error<br />
occurs if the same barcode has been scanned on more than one tube or labware<br />
item.<br />
The duplicate barcode has either been read by a barcode scanner (e.g. PosID,<br />
PosID-3 or Symbol barcode scanner) or has resulted from an incorrect or<br />
inappropriate assigment of a barcode variable in a pipetting script (e.g. using the<br />
Set Variable command).<br />
Fig. 18-15 Barcode Error dialog box<br />
The buttons in the dialog box are as follows:<br />
OK<br />
Click this button to continue with the script.<br />
<strong>Freedom</strong> <strong>EVOware</strong> <strong>Software</strong> <strong>Manual</strong>, 393172, en, V<strong>2.3</strong> 18 - 15
18 - Error Handling<br />
Error Dialogs<br />
18.1.16 Enter Barcode<br />
The following dialog box is shown if an error is detected when scanning a labware<br />
barcode with the PosID or PosID-3 barcode scanner and the operator clicks Enter<br />
in the Barcode Error dialog box:<br />
Fig. 18-16 Enter Barcode dialog box<br />
The buttons in the dialog box are as follows:<br />
OK<br />
Click OK after you have entered the correct barcode in the field provided.<br />
Cancel<br />
Click Cancel if you want to stop the pipetting script.<br />
This dialog box is also shown if your script contains a PosID command and you<br />
are running <strong>Freedom</strong> <strong>EVOware</strong> in offline mode. In this case, the dialog box will be<br />
shown with a default barcode.<br />
For the PosID, the default barcode for labware is the grid position followed by an<br />
underscore (_) and the site number. The default barcode for tubes is the grid<br />
position followed by an underscore (_) and the tube number.<br />
18 - 16 <strong>Freedom</strong> <strong>EVOware</strong> <strong>Software</strong> <strong>Manual</strong>, 393172, en, V<strong>2.3</strong>
18 - Error Handling<br />
Error Dialogs<br />
18.1.17 Enter Barcode (Double Blind Entry)<br />
The following dialog box is shown if an error is detected when scanning a labware<br />
barcode with the PosID-3 barcode scanner and the operator clicks Enter in the<br />
Barcode Error dialog box. The Double Blind Entry feature has been activated in<br />
the configuration of the PosID-3. With Double Blind Entry, you are prompted to<br />
enter the missing barcode twice.<br />
Fig. 18-17 Enter Barcode dialog box<br />
The buttons in the dialog box are as follows:<br />
OK<br />
Click OK after you have entered the correct barcode in both of the fields which<br />
are provided.<br />
Cancel<br />
Click Cancel if you want to stop the pipetting script.<br />
<strong>Freedom</strong> <strong>EVOware</strong> <strong>Software</strong> <strong>Manual</strong>, 393172, en, V<strong>2.3</strong> 18 - 17
18 - Error Handling<br />
Error Dialogs<br />
18.1.18 Instrument Error<br />
The following dialog box is shown if the pipetting instrument reports an error that<br />
is not handled automatically by <strong>Freedom</strong> <strong>EVOware</strong>. The dialog box shows the<br />
error number, a brief description of the error, and the device (hardware component<br />
or option) and firmware command that caused the error.<br />
Fig. 18-18 Instrument Error dialog box<br />
The buttons in the dialog box are as follows (not all buttons available at all times,<br />
refer to the note below):<br />
Retry<br />
Click this button to re-send the firmware command to the pipetting instrument.<br />
This option is not allowed for users with the user level Operator. If you click<br />
the Retry button, you will be prompted to log in again as an Application<br />
Specialist or <strong>Freedom</strong> <strong>EVOware</strong> Administrator 1) . You will not be able to<br />
proceed with Retry if you do not have the appropriate user name and<br />
password.<br />
Ignore<br />
Click this button to ignore the error and continue with the pipetting script.<br />
Please be careful with this option. Ignoring errors can lead to further errors.<br />
This option is not allowed for users with the user level Operator. If you click<br />
the Retry button, you will be prompted to log in again as an Application<br />
Specialist or <strong>Freedom</strong> <strong>EVOware</strong> Administrator 1) . You will not be able to<br />
proceed with Ignore if you do not have the appropriate user name and<br />
password.<br />
Abort<br />
If you click this button, the current command is completed without sending any<br />
more firmware commands (e.g. movement commands) to the pipetting<br />
instrument and the script is stopped. <strong>Freedom</strong> <strong>EVOware</strong> then switches to<br />
offline mode. To cancel offline mode and resume normal pipetting, choose<br />
Switch to real mode in the Execute menu or restart <strong>Freedom</strong> <strong>EVOware</strong>.<br />
1) Or a Power User with the rights “Start running pipetting scripts at a specified line number”. See<br />
8.3.3.3 “Groups Tab”, 8-20.<br />
18 - 18 <strong>Freedom</strong> <strong>EVOware</strong> <strong>Software</strong> <strong>Manual</strong>, 393172, en, V<strong>2.3</strong>
18 - Error Handling<br />
Error Dialogs<br />
Send<br />
This button is used to send a firmware command directly to the pipetting<br />
instrument and is only intended for specialists. Specify the required command<br />
in the Command field and click Send. For example, “A1RPZ0” returns the<br />
current Z position of each of the LiHa tips. Refer to the firmware<br />
documentation for the device for a complete list of firmware commands.<br />
Firmware commands are nearly always written uppercase.<br />
Error: All firmware commands terminate with an error code. After clicking the<br />
Send button, the error code is shown in this (protected) field. The error code is<br />
0 if the command was executed with no errors.<br />
Response: Some firmware commands terminate with one or more return<br />
parameters (numeric values) separated by commas. After clicking the Send<br />
button, the return parameters are shown in this (protected) field.<br />
WARNING<br />
Risk of injury to operating personnel or damage to the equipment<br />
• Take care when sending firmware commands. Sending the wrong commands<br />
can damage the instrument or objects in its workspace, hurt yourself or other<br />
people.<br />
Note: The buttons Retry, Ignore and Send are not available (inactive) if you are<br />
logged in to <strong>Freedom</strong> <strong>EVOware</strong> as an operator. In this case, only the Abort button<br />
is available.<br />
18.1.19 Doorlock Error<br />
The following dialog box is shown if an error is reported by the doorlock hardware<br />
when locking or unlocking the doorlocks. When locking the doorlocks, a doorlock<br />
error normally indicates that the respective safety door has not been closed<br />
properly, but it can also be caused by a mechanical or electrical malfunction of the<br />
doorlock mechanism. The dialog box shows which doorlock has reported the<br />
error.<br />
Fig. 18-19 Doorlock Error dialog box<br />
The buttons in the dialog box are as follows:<br />
Switch Lock again<br />
Click this button to try to lock or unlock the doorlocks in the doorlock group<br />
again. The Doorlock Error dialog box will displayed again if the operation is<br />
not successful.<br />
Cancel<br />
Click this button to cancel the pipetting script.<br />
<strong>Freedom</strong> <strong>EVOware</strong> <strong>Software</strong> <strong>Manual</strong>, 393172, en, V<strong>2.3</strong> 18 - 19
18 - Error Handling<br />
Error Dialogs<br />
WARNING<br />
Risk of injury to operating personnel<br />
• Be aware of the safety risk if the doors are not properly locked. If in doubt,<br />
cancel the script and contact the maintenance personnel before using the<br />
pipetting instrument again.<br />
18.1.20 Grip Error<br />
The following dialog box is shown if the RoMa could not grip a labware item or if<br />
the PnP could not grip a tube:<br />
Fig. 18-20 Grip Error dialog box<br />
The buttons in the dialog box are as follows:<br />
Retry<br />
If you click this button, <strong>Freedom</strong> <strong>EVOware</strong> will try to grip the labware item or<br />
tube again.<br />
Ignore<br />
If you click this button, <strong>Freedom</strong> <strong>EVOware</strong> will ignore the error and continue<br />
with the pipetting script. Please be careful with this option. Ignoring errors can<br />
lead to further errors.<br />
Abort<br />
Click Abort if you want to stop the pipetting script.<br />
18.1.21 Te-Stack Errors<br />
The following dialog box is shown if the Te-Stack (stand-alone stacker) or the Te-<br />
Stack Te-MO reports an error.<br />
Fig. 18-21 -Te-Stack Errors message box<br />
The following errors can be displayed in this dialog box:<br />
Stack not in position<br />
You must insert a stack into the stacker (error from Te-Stack or Te-Stack Te-<br />
MO).<br />
18 - 20 <strong>Freedom</strong> <strong>EVOware</strong> <strong>Software</strong> <strong>Manual</strong>, 393172, en, V<strong>2.3</strong>
18 - Error Handling<br />
Error Dialogs<br />
Stack empty<br />
The stack is empty, you must put labware into the stack (error from Te-Stack<br />
or Te-Stack Te-MO).<br />
Carrier position not empty<br />
The transfer position is already occupied, you must remove the labware from<br />
the transfer position (error from Te-Stack only).<br />
Carrier position empty<br />
The transfer position is empty, you must place labware onto the carrier at the<br />
transfer position position (error from Te-Stack only).<br />
No barcode detected<br />
The labware barcode could not be scanned, e.g. damaged barcode, or wrong<br />
barcode format (error from Te-Stack only). You should check the barcode and/<br />
or the scanner.<br />
18.1.21.1 Other Te-Stack Errors<br />
The following dialog box is shown if the Te-Stack reports an error which is not<br />
listed in 18.1.21 “Te-Stack Errors”, 18-20. The dialog box shows the pipetting<br />
instrument error number and a brief description of the error, such as “Te-Stack<br />
collided with an obstacle” or “time-out error”.<br />
Fig. 18-22 Te-Stack Error dialog box<br />
Note: The pipetting instrument error number is not the same as the <strong>Freedom</strong><br />
<strong>EVOware</strong> error message ID.<br />
The buttons in the dialog box are as follows:<br />
Retry<br />
If you click this button, <strong>Freedom</strong> <strong>EVOware</strong> will resend the command to the<br />
pipetting instrument.<br />
Ignore<br />
If you click this button, <strong>Freedom</strong> <strong>EVOware</strong> will ignore the error and continue<br />
with the pipetting script. Please be careful with this option. Ignoring errors can<br />
lead to further errors.<br />
Abort<br />
Click Abort if you want to stop the pipetting script.<br />
<strong>Freedom</strong> <strong>EVOware</strong> <strong>Software</strong> <strong>Manual</strong>, 393172, en, V<strong>2.3</strong> 18 - 21
18 - Error Handling<br />
Error Dialogs<br />
Send<br />
This button lets you send a firmware command directly to the instrument and<br />
is only intended for specialists. Specify the required command in the<br />
Command field and click Send. For example, “A1RPZ0” returns the current Z<br />
position of each of the LiHa tips. See the respective instrument manual for a<br />
list of firmware commands. Firmware commands are nearly always written<br />
uppercase.<br />
Error: All firmware commands terminate with an error code. After clicking the<br />
Send button, the error code is shown in this (protected) field. The error code is<br />
0 if the command was executed with no errors.<br />
Answer: Some firmware commands terminate with one or more return<br />
parameters (numeric values) separated by commas. After clicking the Send<br />
button, the return parameters are shown in this (protected) field.<br />
WARNING<br />
Risk of injury to operating personnel or damage to the equipment<br />
• Take care when sending firmware commands. Sending the wrong commands<br />
can damage the instrument or objects in its workspace, hurt yourself or other<br />
people.<br />
18.1.22 Te-MO DITI Error<br />
The following dialog box is shown if a Te-MO DITI could not be fetched:<br />
Fig. 18-23 Te-MO DITI error dialog box<br />
A similar dialog box is shown if the Te-MO tipblock could not be fetched.<br />
The buttons in the dialog box are as follows:<br />
Retry<br />
If you click this button, <strong>Freedom</strong> <strong>EVOware</strong> will try to fetch the Te-MO DITI or<br />
Te-MO tipblock again.<br />
Ignore and continue<br />
If you click this button, <strong>Freedom</strong> <strong>EVOware</strong> will ignore the error and continue<br />
with the pipetting script. Please be careful with this option. Ignoring errors can<br />
lead to further errors.<br />
Abort<br />
Click Abort if you want to stop the pipetting script.<br />
18 - 22 <strong>Freedom</strong> <strong>EVOware</strong> <strong>Software</strong> <strong>Manual</strong>, 393172, en, V<strong>2.3</strong>
18 - Error Handling<br />
Error Dialogs<br />
18.1.23 WRC/Te-MO Error<br />
The Wash & Refill Center is a supporting device for the Te-MO which is connected<br />
to the Te-MO wash block through tubing. The following dialog box is shown if the<br />
Te-MO or the WRC reports an error, with the exception of the errors WRC empty<br />
and WRC overflow, which are described in 18.1.24 “WRC Errors”, 18-24.<br />
The dialog box shows the pipetting instrument error number and a brief<br />
description of the error, such as “Waste bottle 1 empty’:<br />
Fig. 18-24 WRC/Te-MO Error dialog box<br />
Note: The pipetting instrument error number is not the same as the <strong>Freedom</strong><br />
<strong>EVOware</strong> error message ID.<br />
The buttons in the dialog box are as follows:<br />
Retry<br />
If you click this button, <strong>Freedom</strong> <strong>EVOware</strong> will resend the command to the<br />
pipetting instrument.<br />
Ignore<br />
If you click this button, <strong>Freedom</strong> <strong>EVOware</strong> will ignore the error and continue<br />
with the pipetting script. Please be careful with this option. Ignoring errors can<br />
lead to further errors.<br />
Abort<br />
If you click this button, the current command is completed without sending any<br />
more firmware commands (e.g. movement commands) to the pipetting<br />
instrument and the script is stopped. <strong>Freedom</strong> <strong>EVOware</strong> then switches to<br />
offline mode. To cancel offline mode and resume normal pipetting, choose<br />
Switch to real mode in the Execute menu or restart <strong>Freedom</strong> <strong>EVOware</strong>.<br />
<strong>Freedom</strong> <strong>EVOware</strong> <strong>Software</strong> <strong>Manual</strong>, 393172, en, V<strong>2.3</strong> 18 - 23
18 - Error Handling<br />
Error Dialogs<br />
Send<br />
This button lets you send a firmware command directly to the instrument and<br />
is only intended for specialists. Specify the required command in the<br />
Command field and click Send. For example, “A1RPZ0” returns the current Z<br />
position of each of the LiHa tips. See the respective instrument manual for a<br />
list of firmware commands. Firmware commands are nearly always written<br />
uppercase.<br />
Error: All firmware commands terminate with an error code. After clicking the<br />
Send button, the error code is shown in this (protected) field. The error code is<br />
0 if the command was executed with no errors.<br />
Answer: Some firmware commands terminate with one or more return<br />
parameters (numeric values) separated by commas. After clicking the Send<br />
button, the return parameters are shown in this (protected) field.<br />
WARNING<br />
Risk of injury to operating personnel or damage to the equipment<br />
• Take care when sending firmware commands. Sending the wrong commands<br />
can damage the instrument or objects in its workspace, hurt yourself or other<br />
people.<br />
18.1.24 WRC Errors<br />
The Wash & Refill Center is a supporting device for the Te-MO which is connected<br />
to the Te-MO wash block through tubing. The following two errors can be output<br />
by the Wash and Refill Center. See 18.1.23 “WRC/Te-MO Error”, 18-23 for<br />
information on additional Te-MO WRC errors.<br />
18.1.24.1 WRC Empty Error<br />
The following dialog box is shown during a Te-MO wash cycle if the wash block of<br />
the Wash & Refill Center (WRC) is empty. You will be prompted to refill the wash<br />
block:<br />
Fig. 18-25 Wash & Refill Center error dialog box<br />
The buttons in the dialog box are as follows:<br />
OK<br />
The pumps will be started and will continue to run until the liquid reaches the<br />
specified upper level or the user stops the pumps.<br />
18 - 24 <strong>Freedom</strong> <strong>EVOware</strong> <strong>Software</strong> <strong>Manual</strong>, 393172, en, V<strong>2.3</strong>
18 - Error Handling<br />
Error Dialogs<br />
Ignore<br />
If you click this button, <strong>Freedom</strong> <strong>EVOware</strong> will ignore the error and continue<br />
with the pipetting script. Please be careful with this option. Ignoring errors can<br />
lead to further errors.<br />
Abort<br />
Click Abort if you want to stop the pipetting script.<br />
18.1.24.2 WRC Overflow Error<br />
The following dialog box is shown during a Te-MO wash cycle if the wash block of<br />
the Wash & Refill Center (WRC) is full. You will be prompted to empty the wash<br />
block:<br />
Fig. 18-26 Wash & Refill Center error dialog box<br />
The buttons in the dialog box are as follows:<br />
OK<br />
The vacuum pump will be started and will continue to run until the liquid<br />
reaches the specified lower level or the user stops the pump.<br />
Ignore<br />
If you click this button, <strong>Freedom</strong> <strong>EVOware</strong> will ignore the error and continue<br />
with the pipetting script. Please be careful with this option. Ignoring errors can<br />
lead to further errors.<br />
Abort<br />
Click Abort if you want to stop the pipetting script.<br />
<strong>Freedom</strong> <strong>EVOware</strong> <strong>Software</strong> <strong>Manual</strong>, 393172, en, V<strong>2.3</strong> 18 - 25
18 - Error Handling<br />
Error Dialogs<br />
18.1.25 WinWash Liquid Error<br />
WinWash Plus is an MS Windows-based program which is supplied with Tecan<br />
Plate Washers. It functions as the software interface between the PW384 driver in<br />
<strong>Freedom</strong> <strong>EVOware</strong> and the hardware of the PW384 Plate Washer. WinWash Plus<br />
is not used by the PW384GP driver.<br />
<strong>Freedom</strong> <strong>EVOware</strong> displays the following dialog box when executing a script<br />
containing WinWash commands if one or more of the bottles is empty:<br />
Fig. 18-27 WinWash Liquid Error dialog box<br />
The buttons in the dialog box are as follows:<br />
OK<br />
If you click this button, <strong>Freedom</strong> <strong>EVOware</strong> will resend the command to the<br />
pipetting instrument.<br />
Ignore<br />
If you click this button, <strong>Freedom</strong> <strong>EVOware</strong> will ignore the error and continue<br />
with the pipetting script. Please be careful with this option. Ignoring errors can<br />
lead to further errors.<br />
Cancel<br />
The pipetting script is stopped.<br />
18.1.25.1 Other WinWash Errors<br />
The following general errors can also occur:<br />
COM-Library could not be initialized!<br />
Possible reason: WinWash Plus is not installed.<br />
WinWash server could not be created!<br />
Possible reason: WinWash Plus is not installed.<br />
The washer could not be connected!<br />
Possible reason: Washer not switched on or washer not connected to the PC.<br />
The following error can occur when defining the WinWash command in your<br />
script:<br />
Error during wash program selection!<br />
Internal WinWash error. A problem occurred when choosing the WinWash<br />
program.<br />
18 - 26 <strong>Freedom</strong> <strong>EVOware</strong> <strong>Software</strong> <strong>Manual</strong>, 393172, en, V<strong>2.3</strong>
18 - Error Handling<br />
Error Dialogs<br />
18.1.26 Vacuum Waste Container Error<br />
The following dialog box is shown by the Te-VacS option if the waste container is<br />
full:<br />
Fig. 18-28 Vacuum Waste Container error dialog box<br />
The buttons in the dialog box are as follows:<br />
Ignore<br />
To continue with the pipetting script, empty the waste container and click the<br />
Ignore button.<br />
Abort<br />
Click Abort if you want to stop the pipetting script.<br />
18.1.27 Liquid Error (PW384)<br />
The liquid error dialog box is shown if the waste bottle is not emptied after the<br />
configured number of warnings. The liquid error dialog box is also shown if the<br />
wash liquid bottle is not re-filled after the configured number of warnings.<br />
Fig. 18-29 Liquid error dialog box of the PW384 Plate Washer driver<br />
The liquid levels of the wash liquid channel and the waste bottle are checked<br />
before each wash step. Warning levels and liquid detection are configured in the<br />
settings for the PW384 driver.<br />
In the above example dialog box, all three liquid bottles are empty. The error<br />
dialog has been shown because the channel 1 liquid bottle is empty (the other two<br />
channels are not used by the wash command so their empty status is ignored).<br />
The waste bottle is not full.<br />
The buttons in the dialog box are as follows:<br />
<strong>Freedom</strong> <strong>EVOware</strong> <strong>Software</strong> <strong>Manual</strong>, 393172, en, V<strong>2.3</strong> 18 - 27
18 - Error Handling<br />
Error Dialogs<br />
Prime<br />
If one of the liquid bottles is empty, the “Channel” icon will be red. In this case,<br />
refill the bottle and click the Prime button to execute the washer’s priming<br />
procedure. The Prime button is not available until the bottle has been refilled.<br />
Note: The Prime button is not available if you have clicked the Prepare Waste<br />
button.<br />
Prepare Waste<br />
If the waste bottle is full, the “Waste” icon will be red. In this case, click the<br />
Prepare Waste button to collapse the vacuum in the waste bottle to allow it to<br />
be emptied. When you have emptied the waste bottle, the “Waste” icon will<br />
turn to green and the Prepare Waste button will be replaced by a Stop button.<br />
Click the Stop button to activate the vacuum pump again.<br />
18.1.28 Liquid Error (PW384GP)<br />
The liquid error dialog box is shown if the waste bottle is not emptied after the<br />
configured number of warnings. The liquid error dialog box is also shown if the<br />
wash liquid bottle is not re-filled after the configured number of warnings.<br />
Fig. 18-30 Liquid error dialog box of the PW384GP Plate Washer driver<br />
The liquid levels of the wash liquid channel and the waste bottle are checked<br />
before each wash step. Warning levels and liquid detection are configured in the<br />
settings for the PW384GP driver.<br />
In the above example dialog box, all three liquid bottles are empty. The error<br />
dialog has been shown because the channel 1 liquid bottle is empty (the other two<br />
channels are not used by the wash command so their empty status is ignored).<br />
The waste bottle is not full.<br />
The buttons in the dialog box are as follows:<br />
Prime<br />
If one of the liquid bottles is empty, the “Channel” icon will be red. In this case,<br />
refill the bottle and click the Prime button to execute the washer’s priming<br />
procedure. The Prime button is not available until the bottle has been refilled.<br />
Note: The Prime button is not available if you have clicked the Prepare Waste<br />
button.<br />
18 - 28 <strong>Freedom</strong> <strong>EVOware</strong> <strong>Software</strong> <strong>Manual</strong>, 393172, en, V<strong>2.3</strong>
18 - Error Handling<br />
Editing Messages in Message Boxes<br />
Prepare Waste<br />
If the waste bottle is full, the “Waste” icon will be red. In this case, click the<br />
Prepare Waste button to collapse the vacuum in the waste bottle to allow it to<br />
be emptied. When you have emptied the waste bottle, the “Waste” icon will<br />
turn to green and the Prepare Waste button will be replaced by a Stop button.<br />
Click the Stop button to activate the vacuum pump again.<br />
Close<br />
Click this button to close the dialog box. The Close button is only active if the<br />
error condition has been resolved by following the procedure described<br />
above.<br />
18.2 Editing Messages in Message Boxes<br />
Messages in <strong>Freedom</strong> <strong>EVOware</strong> which are displayed in a message box use a<br />
standard layout as follows:<br />
Fig. 18-31 <strong>Freedom</strong> <strong>EVOware</strong> message box - Normal view<br />
In the case of error messages, the Error ID is shown at the top of the message<br />
box. For a list of Error IDs see 18.3 “List of Error Messages”, 18-32.<br />
If required, you can add more information to each message, such as a reason for<br />
the message and a possible solution. The user-defined texts are saved in<br />
<strong>Freedom</strong> <strong>EVOware</strong> and appear each time the message is displayed. For<br />
example, the additional information can refer to procedures which are specific to<br />
the laboratory’s standard workflow.<br />
Note: Choose Error History in the Help menu to see a list of the last 20<br />
information or error messages which were displayed while using <strong>Freedom</strong><br />
<strong>EVOware</strong>. Double-click on an entry in the list to see the details of the message.<br />
• If you open the message from the Error History menu item, the buttons are<br />
the bottom of the message are inctivate (grey) because the script or process<br />
is no longer running (see Yes and No buttons in above screen shot).<br />
To edit the message texts, click in the message box to switch to edit view:<br />
<strong>Freedom</strong> <strong>EVOware</strong> <strong>Software</strong> <strong>Manual</strong>, 393172, en, V<strong>2.3</strong> 18 - 29
18 - Error Handling<br />
Editing Messages in Message Boxes<br />
Fig. 18-32 <strong>Freedom</strong> <strong>EVOware</strong> message box - Edit view<br />
Click in the Reason or Possible solution fields to add your own texts. Use the<br />
keyboard shortcut Ctrl+V to paste in text which you have copied to the clipboard.<br />
You can also paste in bitmap graphics such as screenshots. The paste-fromclipboard<br />
function also supports text which has been formatted using Microsoft<br />
RTF (Rich Text Format) formatting codes. An easy way to include RTF formatting<br />
in the message such as bold, coloured or underlined text, is to pre-format the text<br />
in Microsoft Word and to transfer the text from Word to the message box using cut<br />
and paste.<br />
Click Save to save your changes. Click Restore to restore the message text to the<br />
standard text which was shown when <strong>Freedom</strong> <strong>EVOware</strong> was first installed. Click<br />
Cancel to discard your changes. Click Close to return to the normal view of the<br />
message box.<br />
18 - 30 <strong>Freedom</strong> <strong>EVOware</strong> <strong>Software</strong> <strong>Manual</strong>, 393172, en, V<strong>2.3</strong>
18 - Error Handling<br />
Editing Messages in Message Boxes<br />
After editing, the error message shown in Fig. 18-31, 18-29 will appear in future<br />
as follows:<br />
Fig. 18-33 <strong>Freedom</strong> <strong>EVOware</strong> message box - <strong>Standard</strong> view with user-defined texts<br />
The user-defined texts are shared between all of the <strong>Freedom</strong> <strong>EVOware</strong> scripts<br />
and/or processes which could display this message. Accordingly, you should<br />
choose texts which are generally applicable to the message - they should not<br />
refer to a specific situation in a specific script or process.<br />
Other buttons in the message box<br />
Click in the message box to copy the message text to the clipboard.<br />
Click in the message box to send a copy of the message via eMail. The<br />
message will be sent via MAPI or SMTP using the settings configured in <strong>Freedom</strong><br />
<strong>EVOware</strong> for the notifications feature (Configuration Tool > General tab ><br />
Notifications section). If an email account has not (yet) been configured in<br />
<strong>Freedom</strong> <strong>EVOware</strong>, the eMail will be sent instead using the default eMail client<br />
which is installed on the PC (if available).<br />
<strong>Freedom</strong> <strong>EVOware</strong> <strong>Software</strong> <strong>Manual</strong>, 393172, en, V<strong>2.3</strong> 18 - 31
18 - Error Handling<br />
List of Error Messages<br />
18.3 List of Error Messages<br />
The table below lists all messages from <strong>Freedom</strong> <strong>EVOware</strong> which are visible to<br />
the user.<br />
Runtime error messages from <strong>Freedom</strong> <strong>EVOware</strong> are recorded in log files and<br />
can also be viewed in the LogViewer tool (see A.1 “Overview of the Log Files”,<br />
A-1 and A.10 “LogViewer Tool”, A-72).<br />
Error Messages<br />
Variables<br />
In case of error messages, this gives instructions on how to handle the error, if<br />
applicable.<br />
If there is no cause or corrective measure associated with the message (e.g. if the<br />
message is for information purposes only), the table cell is marked with n.a. for<br />
“not applicable”.<br />
If the message text shown in the table contains variables, such as numbers or<br />
names, the variable is shown below in angle brackets, e.g. .<br />
The text in the <strong>Freedom</strong> <strong>EVOware</strong> message or error message will show the<br />
corresponding value of the variable.<br />
Tab. 18-1 List of error messages<br />
Error ID Message Text Reason Corrective Measure<br />
Carousel<br />
EVO_BCC_000_000<br />
Module successfully executed its<br />
COM registration.<br />
n.a.<br />
n.a.<br />
EVO_BCC_000_001<br />
Module is unable to prepare its COM<br />
registration.<br />
• Call name is missing<br />
• No right to write to registry<br />
• Check driver INI file<br />
• Check user rights<br />
EVO_BCC_000_002<br />
An unhandled exception has<br />
occurred.<br />
Exception occurred during<br />
registration<br />
• Check INI file<br />
• Check user rights<br />
EVO_BCC_001_000<br />
No communication to device available.<br />
Device will be simulated.<br />
COM port could not be<br />
opened<br />
Check device configuration<br />
EVO_BCC_002_000<br />
Error while initializing<br />
Communication!<br />
Windows responded with<br />
an error while opening<br />
COM<br />
Check configuration<br />
EVO_BCC_003_000<br />
Could not connect to Message<br />
Server.<br />
Could not connect to<br />
MCS<br />
Check registration of<br />
MCS<br />
EVO_BCC_003_001<br />
Message thread could not be<br />
stopped.<br />
(in debug mode only)<br />
n.a.<br />
EVO_BCC_004_000<br />
General error during database registration!<br />
Problem during connection<br />
to database<br />
• Restart <strong>EVOware</strong><br />
• Restore backup<br />
• Reinstall <strong>EVOware</strong><br />
EVO_BCC_004_001 Scheduler could not be reached! Could not connect the<br />
scheduler<br />
• Restart <strong>EVOware</strong><br />
• Reinstall <strong>EVOware</strong><br />
18 - 32 <strong>Freedom</strong> <strong>EVOware</strong> <strong>Software</strong> <strong>Manual</strong>, 393172, en, V<strong>2.3</strong>
18 - Error Handling<br />
List of Error Messages<br />
Tab. 18-1 List of error messages (cont.)<br />
Error ID Message Text Reason Corrective Measure<br />
EVO_BCC_005_000<br />
Cannot read variables from database.<br />
Error when reading variables<br />
from the database<br />
• Restart <strong>EVOware</strong><br />
• Restore backup<br />
• Reinstall <strong>EVOware</strong><br />
EVO_BCC_005_001<br />
Cannot read instances from database.<br />
Error when reading<br />
instances from the database<br />
• Restart <strong>EVOware</strong><br />
• Restore backup<br />
• Reinstall <strong>EVOware</strong><br />
EVO_BCC_006_000 Initialisation was successful n.a. n.a.<br />
EVO_BCC_006_001 Initialisation was NOT successful An error was reported<br />
from the carousel<br />
• Re-initialize<br />
• Restart <strong>EVOware</strong><br />
• Restart instrument and<br />
<strong>EVOware</strong><br />
EVO_BCC_006_002<br />
ERROR: EndAccess command<br />
expected!<br />
EndAccess command<br />
missing<br />
Add EndAccess command<br />
EVO_BCC_006_003<br />
ERROR: ReturnPlateByBarcode<br />
command expected!<br />
ReturnPlate command<br />
missing<br />
Add ReturnPlate command<br />
EVO_BCC_006_004<br />
Timeout occured while synchronizing<br />
with tool thread<br />
Timeout<br />
Check log files for more<br />
information<br />
EVO_BCC_006_005 Execution was successful n.a. n.a.<br />
EVO_BCC_006_006 Error occured during execution See error message Check log files<br />
EVO_BCC_006_007 Carousel timed out. An action took too long • Restart process<br />
• Restart <strong>EVOware</strong><br />
EVO_BCC_006_008 Emergency Stop n.a. n.a.<br />
EVO_BCC_007_000 Generated ID n.a. n.a.<br />
EVO_BCC_007_001 Barcode n.a. n.a.<br />
Carousel NT<br />
EVO_CNT_000_000 Error initializing device. • Device initialization<br />
failed<br />
• Instrument or device<br />
switched off<br />
• Incorrect address settings<br />
• Bad connections to<br />
device<br />
• Check if device is powered<br />
• Check address settings<br />
• Check connections<br />
EVO_CNT_000_001 Execution was successful n.a. n.a.<br />
EVO_CNT_000_002 Error occurred during execution See error message Check log files<br />
EVO_CNT_000_003<br />
ERROR: Barcode File Index is<br />
greater than number of lines in barcode<br />
file!<br />
n.a.<br />
Check number of lines in<br />
barcode file, check the<br />
barcode index<br />
<strong>Freedom</strong> <strong>EVOware</strong> <strong>Software</strong> <strong>Manual</strong>, 393172, en, V<strong>2.3</strong> 18 - 33
18 - Error Handling<br />
List of Error Messages<br />
Tab. 18-1 List of error messages (cont.)<br />
Error ID Message Text Reason Corrective Measure<br />
EVO_CNT_000_004<br />
Cannot find position for specified<br />
barcode: <br />
Plate with specified barcode<br />
not known to the<br />
carousel.<br />
• Check barcode<br />
• Refer to the description<br />
of the commands PresentPlateByBC<br />
and<br />
ReturnPlateByBC<br />
EVO_CNT_000_005<br />
Makro_ReadPlatesInCartridge: A<br />
database error was reported by<br />
function GetAllPlatesInHotel():<br />
Internal error<br />
Contact your local service<br />
organization<br />
EVO_CNT_000_006<br />
Makro_ReadPlatesInCartridge: No<br />
logical hotel found for cartridge {}<br />
Configuration error<br />
• Check the configuration<br />
of the logical carousel<br />
• Restart <strong>Freedom</strong><br />
<strong>EVOware</strong><br />
EVO_CNT_000_007<br />
Cannot find position for specified<br />
barcode: <br />
Plate with specified barcode<br />
not known to the<br />
carousel.<br />
• Check barcode<br />
• Refer to the description<br />
of the commands PresentPlateByBC<br />
and<br />
ReturnPlateByBC<br />
EVO_CNT_000_008 Could not read the Slot 'ID' of: {} Configuration error Check the configuration<br />
EVO_CNT_000_009<br />
Error: Exception thrown while communicating<br />
with robot driver. Unable<br />
to update labware: {}<br />
Internal error<br />
Contact your local service<br />
organization<br />
EVO_CNT_000_010<br />
Cartridge position :<br />
Barcode unreadable<br />
Damaged barcode<br />
Check barcode label on<br />
cartridge<br />
EVO_CNT_000_011<br />
ERROR: Timeout occurred while<br />
synchronizing with tool thread<br />
Timeout<br />
Check log files for more<br />
information<br />
EVO_CNT_000_012 Error: Doorlock is open. Doors not closed • Check correct operation<br />
of doorlock<br />
• Make sure safety doors<br />
are closed<br />
EVO_CNT_000_013<br />
Unable to update barcode for labware<br />
Barcode-ID: {}, cartridge:<br />
{}, slot: {} Reason: {}<br />
Internal error<br />
Contact your local service<br />
organization<br />
EVO_CNT_000_014<br />
Error: Firmware version is too old!<br />
Required version: {}<br />
Incorrect firmware version.<br />
Contact your local service<br />
organization<br />
EVO_CNT_000_015<br />
Hotel Error: Door or door lock is<br />
open!<br />
Doors not closed<br />
• Check correct operation<br />
of doorlock<br />
• Make sure safety doors<br />
are closed<br />
EVO_CNT_000_016<br />
Cannot read variables from database.<br />
Internal error or incorrect<br />
device configuration.<br />
Check configuration.<br />
EVO_CNT_000_017<br />
Cannot read instances from database.<br />
Internal error or incorrect<br />
device configuration.<br />
Check configuration.<br />
EVO_CNT_000_018<br />
Cartridge position :<br />
No cartridge detected<br />
Cartridge is missing<br />
Check cartridge<br />
18 - 34 <strong>Freedom</strong> <strong>EVOware</strong> <strong>Software</strong> <strong>Manual</strong>, 393172, en, V<strong>2.3</strong>
18 - Error Handling<br />
List of Error Messages<br />
Tab. 18-1 List of error messages (cont.)<br />
Error ID Message Text Reason Corrective Measure<br />
EVO_CNT_001_000<br />
ERROR: No Plate detected on the<br />
transfer station!<br />
Plate was expected but<br />
not found on the transfer<br />
station<br />
• Check configuration<br />
• Check for mechanical<br />
malfunction<br />
EVO_CNT_001_001<br />
ERROR: Plate detected on the<br />
transfer station!<br />
Plate not expected but<br />
was found on the transfer<br />
station<br />
• Check configuration<br />
• Check for mechanical<br />
malfunction<br />
EVO_CNT_002_001 Temperature: {}°C / {}°F Message with information<br />
on the temperature<br />
inside the carousel<br />
EVO_CNT_002_002 Humidity: {}%rH Message with information<br />
on the humidity inside<br />
the carousel<br />
n.a.<br />
n.a.<br />
EVO_CNT_003_000<br />
ERROR: Barcodes doesn't match<br />
for: {} scanned BC: ' {} ' expected<br />
BC: ' {}'<br />
The carousel has rescanned<br />
the barcode for<br />
confirmation but the new<br />
ID does not match the old<br />
one<br />
Check the barcode<br />
EVO_CNT_003_001<br />
ERROR: Instance {} locked, unable<br />
to update ID slot.<br />
Failed to read barcode<br />
because the plate is currently<br />
being accessed by<br />
another device; internal<br />
error<br />
Contact your local service<br />
organization<br />
EVO_CNT_003_002<br />
ERROR: Unable to update Instance<br />
, DCOM error: {}<br />
Internal error<br />
Contact your local service<br />
organization<br />
EVO_CNT_003_003<br />
ERROR: Unable to update Instance<br />
, unknown exception catched<br />
Internal error<br />
Contact your local service<br />
organization<br />
EVO_CNT_004_000 Hotel Error: {} Unknown Error Carousel NT firmware<br />
command error<br />
Contact your local service<br />
organization<br />
EVO_CNT_004_001<br />
Hotel Error: {} General Handling<br />
Error<br />
Carousel NT firmware<br />
command error<br />
Contact your local service<br />
organization<br />
EVO_CNT_004_007 Hotel Error: {} Gate Open Error Carousel NT firmware<br />
command error<br />
EVO_CNT_004_008 Hotel Error: {} Gate Close Error Carousel NT firmware<br />
command error<br />
Contact your local service<br />
organization<br />
Contact your local service<br />
organization<br />
EVO_CNT_004_009<br />
Hotel Error: {} General Lift Positioning<br />
Error<br />
Carousel NT firmware<br />
command error<br />
Contact your local service<br />
organization<br />
EVO_CNT_004_010 Hotel Error: {} User Access Error Carousel NT firmware<br />
command error<br />
EVO_CNT_004_011 Hotel Error: {} Stacker Slot Error Carousel NT firmware<br />
command error<br />
Contact your local service<br />
organization<br />
Contact your local service<br />
organization<br />
EVO_CNT_004_012<br />
Hotel Error: {} Undefined stacker<br />
level has been requested<br />
Carousel NT firmware<br />
command error<br />
Contact your local service<br />
organization<br />
<strong>Freedom</strong> <strong>EVOware</strong> <strong>Software</strong> <strong>Manual</strong>, 393172, en, V<strong>2.3</strong> 18 - 35
18 - Error Handling<br />
List of Error Messages<br />
Tab. 18-1 List of error messages (cont.)<br />
Error ID Message Text Reason Corrective Measure<br />
EVO_CNT_004_013<br />
Hotel Error: {} Plate Transfer Detection<br />
Error<br />
Carousel NT firmware<br />
command error<br />
Contact your local service<br />
organization<br />
EVO_CNT_004_014 Hotel Error: {} Lift Initialization Error Carousel NT firmware<br />
command error<br />
Contact your local service<br />
organization<br />
EVO_CNT_004_015<br />
Hotel Error: {} Plate on Shovel<br />
Detection<br />
Carousel NT firmware<br />
command error<br />
Contact your local service<br />
organization<br />
EVO_CNT_004_016<br />
Hotel Error: {} No Plate on Shovel<br />
Detection<br />
Carousel NT firmware<br />
command error<br />
Contact your local service<br />
organization<br />
EVO_CNT_004_017 Hotel Error: {} No recovery Carousel NT firmware<br />
command error<br />
EVO_CNT_004_019 Hotel Error: {} Shovel timeout Carousel NT firmware<br />
command error<br />
Contact your local service<br />
organization<br />
Contact your local service<br />
organization<br />
EVO_CNT_004_100<br />
Hotel Error: {} Import Plate Stacker<br />
Positioning Error<br />
Carousel NT firmware<br />
command error<br />
Contact your local service<br />
organization<br />
EVO_CNT_004_101<br />
Hotel Error: {} Import Plate Handler<br />
Transfer Turn out Error<br />
Carousel NT firmware<br />
command error<br />
Contact your local service<br />
organization<br />
EVO_CNT_004_102<br />
Hotel Error: {} Import Plate shovel<br />
Transfer Outer Error<br />
Carousel NT firmware<br />
command error<br />
Contact your local service<br />
organization<br />
EVO_CNT_004_103<br />
Hotel Error: {} Import Plate Lift<br />
Transfer Error<br />
Carousel NT firmware<br />
command error<br />
Contact your local service<br />
organization<br />
EVO_CNT_004_104<br />
Hotel Error: {} Import Plate Shovel<br />
Transfer Inner Error<br />
Carousel NT firmware<br />
command error<br />
Contact your local service<br />
organization<br />
EVO_CNT_004_105<br />
Hotel Error: {} Import Plate Handler<br />
Transfer Turn in Error<br />
Carousel NT firmware<br />
command error<br />
Contact your local service<br />
organization<br />
EVO_CNT_004_106<br />
Hotel Error: {} Import Plate Lift<br />
Stacker Travel Error<br />
Carousel NT firmware<br />
command error<br />
Contact your local service<br />
organization<br />
EVO_CNT_004_107<br />
Hotel Error: {} Import Plate Shovel<br />
Stacker Front Error<br />
Carousel NT firmware<br />
command error<br />
Contact your local service<br />
organization<br />
EVO_CNT_004_108<br />
Hotel Error: {} Import Plate Lift<br />
Stacker Place Error<br />
Carousel NT firmware<br />
command error<br />
Contact your local service<br />
organization<br />
EVO_CNT_004_109<br />
Hotel Error: {} Import Plate shovel<br />
Stacker Inner Error<br />
Carousel NT firmware<br />
command error<br />
Contact your local service<br />
organization<br />
EVO_CNT_004_110<br />
Hotel Error: {} Import Plate Lift Travel<br />
Back Error<br />
Carousel NT firmware<br />
command error<br />
Contact your local service<br />
organization<br />
EVO_CNT_004_111<br />
Hotel Error: {} Import Plate Lift Init<br />
Error<br />
Carousel NT firmware<br />
command error<br />
Contact your local service<br />
organization<br />
EVO_CNT_004_200<br />
Hotel Error: {} Export Plate Lift<br />
Stacker Travel Error<br />
Carousel NT firmware<br />
command error<br />
Contact your local service<br />
organization<br />
EVO_CNT_004_201<br />
Hotel Error: {} Export Plate Shovel<br />
Stacker Front Error<br />
Carousel NT firmware<br />
command error<br />
Contact your local service<br />
organization<br />
18 - 36 <strong>Freedom</strong> <strong>EVOware</strong> <strong>Software</strong> <strong>Manual</strong>, 393172, en, V<strong>2.3</strong>
18 - Error Handling<br />
List of Error Messages<br />
Tab. 18-1 List of error messages (cont.)<br />
Error ID Message Text Reason Corrective Measure<br />
EVO_CNT_004_202<br />
Hotel Error: {} Export Plate Lift<br />
Stacker Import Error<br />
Carousel NT firmware<br />
command error<br />
Contact your local service<br />
organization<br />
EVO_CNT_004_203<br />
Hotel Error: {} Export Plate Shovel<br />
Stacker Inner Error<br />
Carousel NT firmware<br />
command error<br />
Contact your local service<br />
organization<br />
EVO_CNT_004_204<br />
Hotel Error: {} Export Plate Lift<br />
Transfer Positioning Error<br />
Carousel NT firmware<br />
command error<br />
Contact your local service<br />
organization<br />
EVO_CNT_004_205<br />
Hotel Error: {} Export Plate Handler<br />
Transfer Turn out Error<br />
Carousel NT firmware<br />
command error<br />
Contact your local service<br />
organization<br />
EVO_CNT_004_206<br />
Hotel Error: {} Export Plate Shovel<br />
Transfer Outer Error<br />
Carousel NT firmware<br />
command error<br />
Contact your local service<br />
organization<br />
EVO_CNT_004_207<br />
Hotel Error: {} Export Plate Lift<br />
Transfer Place Error<br />
Carousel NT firmware<br />
command error<br />
Contact your local service<br />
organization<br />
EVO_CNT_004_208<br />
Hotel Error: {} Export Plate Shovel<br />
Transfer Inner Error<br />
Carousel NT firmware<br />
command error<br />
Contact your local service<br />
organization<br />
EVO_CNT_004_209<br />
Hotel Error: {} Export Plate Handler<br />
Transfer Turn in Error<br />
Carousel NT firmware<br />
command error<br />
Contact your local service<br />
organization<br />
EVO_CNT_004_210<br />
Hotel Error: {} Export Plate Lift Travel<br />
Back Error<br />
Carousel NT firmware<br />
command error<br />
Contact your local service<br />
organization<br />
EVO_CNT_004_211<br />
Hotel Error: {} Export Plate Lift Initializing<br />
Error<br />
Carousel NT firmware<br />
command error<br />
Contact your local service<br />
organization<br />
EVO_CNT_005_000<br />
Cartridge position {}: SAP-ID: {} S/N:<br />
{} Type: {} --- OK<br />
Internal command has<br />
reported that the correct<br />
cartridge is present<br />
n.a.<br />
EVO_CNT_005_001<br />
Cartridge position {}: SAP-ID: {} S/N:<br />
{} Type: {} --- Wrong cartridge<br />
detected<br />
Internal command has<br />
reported that the wrong<br />
cartridge is present<br />
Check if correct cartridge<br />
is present<br />
Columbus Washer<br />
EVO_COL_000_000 Max. time for Auto Rinse is 24h n.a. n.a.<br />
EVO_COL_000_001<br />
Module successfully executed its<br />
COM registration.<br />
n.a.<br />
n.a.<br />
EVO_COL_000_002<br />
Module is unable to prepare its COM<br />
registration.<br />
• Call name is missing<br />
• No right to write to registry<br />
• Check driver INI file<br />
• Check user rights<br />
EVO_COL_000_003<br />
An unhandled exception has<br />
occurred.<br />
Exception occurred during<br />
registration<br />
• Check INI file<br />
• Check user rights<br />
EVO_COL_000_004<br />
No communication to device available.<br />
Device will be simulated.<br />
Could not open COM port<br />
Check configuration<br />
EVO_COL_000_005<br />
Error while initializing<br />
Communication!<br />
Could not initialize COM<br />
port<br />
Check configuration<br />
<strong>Freedom</strong> <strong>EVOware</strong> <strong>Software</strong> <strong>Manual</strong>, 393172, en, V<strong>2.3</strong> 18 - 37
18 - Error Handling<br />
List of Error Messages<br />
Tab. 18-1 List of error messages (cont.)<br />
Error ID Message Text Reason Corrective Measure<br />
EVO_COL_000_006 Init Error Washer firmware command<br />
error<br />
EVO_COL_000_007 Invalid Command Washer firmware command<br />
error<br />
EVO_COL_000_008 Invalid Operand Washer firmware command<br />
error<br />
EVO_COL_000_009 Invalid Command Sequence Washer firmware command<br />
error<br />
EVO_COL_000_010 System Error Washer firmware command<br />
error<br />
EVO_COL_000_011 Time-out Error Washer firmware command<br />
error<br />
EVO_COL_000_012 Plate Mismatch Washer firmware command<br />
error<br />
EVO_COL_000_013 Plate Transport Error Washer firmware command<br />
error<br />
EVO_COL_000_014 Manifold Transport Error Washer firmware command<br />
error<br />
EVO_COL_000_015 Dispense Pump Error Washer firmware command<br />
error<br />
EVO_COL_000_016 Fill Verification Dispense Error Washer firmware command<br />
error<br />
EVO_COL_000_017 Manifold Error Washer firmware command<br />
error<br />
EVO_COL_000_018 Waste Full Error Washer firmware command<br />
error<br />
EVO_COL_000_019 No Test defined Washer firmware command<br />
error<br />
EVO_COL_000_020 Command Overflow Washer firmware command<br />
error<br />
EVO_COL_000_021 Fill Verification Function Error Washer firmware command<br />
error<br />
EVO_COL_000_022 Fill Verification Aspiration Error Washer firmware command<br />
error<br />
EVO_COL_000_023 Unknown error reported by device Washer firmware command<br />
error<br />
EVO_COL_000_025 Timeout Washer firmware command<br />
error<br />
Contact your local service<br />
organization<br />
Contact your local service<br />
organization<br />
Contact your local service<br />
organization<br />
Contact your local service<br />
organization<br />
Contact your local service<br />
organization<br />
Contact your local service<br />
organization<br />
Contact your local service<br />
organization<br />
Contact your local service<br />
organization<br />
Contact your local service<br />
organization<br />
Contact your local service<br />
organization<br />
Contact your local service<br />
organization<br />
Contact your local service<br />
organization<br />
Contact your local service<br />
organization<br />
Contact your local service<br />
organization<br />
Contact your local service<br />
organization<br />
Contact your local service<br />
organization<br />
Contact your local service<br />
organization<br />
Contact your local service<br />
organization<br />
Contact your local service<br />
organization<br />
Feeedom EVO<br />
18 - 38 <strong>Freedom</strong> <strong>EVOware</strong> <strong>Software</strong> <strong>Manual</strong>, 393172, en, V<strong>2.3</strong>
18 - Error Handling<br />
List of Error Messages<br />
Tab. 18-1 List of error messages (cont.)<br />
Error ID Message Text Reason Corrective Measure<br />
EVO_EVO_000_000 Evoware is already running Multisession is not permissible<br />
for <strong>EVOware</strong><br />
Start <strong>EVOware</strong> only once<br />
EVO_EVO_000_001<br />
Error reading settings file .<br />
Evoware uses defaults!<br />
One of the configuration<br />
files is not accessible for<br />
reading<br />
• Reinstall <strong>EVOware</strong><br />
• Restore backup<br />
EVO_EVO_000_002<br />
Error writing settings file .<br />
One of the configuration<br />
files is not accessible for<br />
writing<br />
• Reinstall <strong>EVOware</strong><br />
• Restore backup<br />
EVO_EVO_000_003<br />
Wrong version of settings file .<br />
Evoware uses defaults!<br />
Inconsistent configuration<br />
• Reinstall <strong>EVOware</strong><br />
• Restore backup<br />
EVO_EVO_000_004 Error creating log-file Harddisk full • Check harddisk<br />
• Reinstall <strong>EVOware</strong><br />
EVO_EVO_000_005<br />
The instrument does not respond.<br />
Retry?<br />
Instrument switched off<br />
Instrument not connected<br />
properly<br />
Switch instrument on<br />
Check connections<br />
EVO_EVO_000_006 Error writing One of the configuration<br />
files is not accessible for<br />
writing<br />
• Reinstall <strong>EVOware</strong><br />
• Restore backup<br />
EVO_EVO_000_007<br />
Error reading liquid classes file <br />
One of the configuration<br />
files is not accessible for<br />
reading<br />
• Reinstall <strong>EVOware</strong><br />
• Restore backup<br />
EVO_EVO_000_008<br />
Error writing liquid classes file <br />
One of the configuration<br />
files is not accessible for<br />
writing<br />
• Reinstall <strong>EVOware</strong><br />
• Restore backup<br />
EVO_EVO_000_009 Are you sure? n.a. n.a.<br />
EVO_EVO_000_010 Error reading One of the configuration<br />
files is not accessible<br />
• Reinstall <strong>EVOware</strong><br />
• Restore backup<br />
EVO_EVO_000_011<br />
No connection to the instrument.<br />
Retry?<br />
Pipetting instrument not<br />
connected properly<br />
Check connections.<br />
EVO_EVO_000_012<br />
Error loading device drivers: <br />
Installation corrupt<br />
• Reinstall <strong>EVOware</strong><br />
EVO_EVO_000_013<br />
PMP - Connection Error: <br />
PMP will not continue.<br />
• PMP driver loaded, but<br />
there is no PMP option<br />
installed<br />
• PMP option defective<br />
• Disable driver in configuration<br />
• Field Service Engineer:<br />
Replace defective parts<br />
EVO_EVO_000_014<br />
PMP - Initialize Error: <br />
PMP will not continue.<br />
PMP-related error<br />
Contact your local service<br />
organization<br />
EVO_EVO_000_015<br />
PMP - Stop Error: <br />
PMP will not continue.<br />
PMP-related error<br />
Contact your local service<br />
organization<br />
EVO_EVO_000_016<br />
PMP - Drop Tips Error: <br />
PMP will not continue.<br />
PMP-related error<br />
Contact your local service<br />
organization<br />
<strong>Freedom</strong> <strong>EVOware</strong> <strong>Software</strong> <strong>Manual</strong>, 393172, en, V<strong>2.3</strong> 18 - 39
18 - Error Handling<br />
List of Error Messages<br />
Tab. 18-1 List of error messages (cont.)<br />
Error ID Message Text Reason Corrective Measure<br />
EVO_EVO_000_017<br />
PMP - Drop Tips Error: <br />
PMP continues.<br />
PMP-related error<br />
Contact your local service<br />
organization<br />
EVO_EVO_000_018<br />
PMP - Pickup Tips Error: <br />
PMP will not continue.<br />
PMP-related error<br />
Contact your local service<br />
organization<br />
EVO_EVO_000_019<br />
PMP - Pickup Tips Error: <br />
PMP continues.<br />
PMP-related error<br />
Contact your local service<br />
organization<br />
EVO_EVO_000_020<br />
PMP - Set DITIs Back Error: <br />
PMP will not continue.<br />
PMP-related error<br />
Contact your local service<br />
organization<br />
EVO_EVO_000_021<br />
PMP - Set DITIs Back Error: <br />
PMP continues.<br />
PMP-related error<br />
Contact your local service<br />
organization<br />
EVO_EVO_000_022<br />
PMP - Aspirate Error: <br />
PMP will not continue.<br />
PMP-related error<br />
Contact your local service<br />
organization<br />
EVO_EVO_000_023<br />
PMP - Dispense Error: <br />
PMP will not continue.<br />
PMP-related error<br />
Contact your local service<br />
organization<br />
EVO_EVO_000_024<br />
PMP - Mix Error: <br />
PMP will not continue.<br />
PMP-related error<br />
Contact your local service<br />
organization<br />
EVO_EVO_000_025<br />
PMP - LClass Mix Error: <br />
PMP will not continue.<br />
PMP-related error<br />
Contact your local service<br />
organization<br />
EVO_EVO_000_026<br />
PMP - Detect Liquid Error: <br />
PMP will not continue.<br />
PMP-related error<br />
Contact your local service<br />
organization<br />
EVO_EVO_000_027 PMP Result for tip :<br />
<br />
n.a.<br />
n.a.<br />
EVO_EVO_000_028<br />
Cannot create temporary file to initialize<br />
OPT file<br />
One of the configuration<br />
files is not accessible for<br />
writing<br />
• Reinstall <strong>EVOware</strong><br />
• Restore backup<br />
EVO_EVO_000_029<br />
PMP driver shutdown error: <br />
PMP-related error<br />
Contact your local service<br />
organization<br />
EVO_EVO_000_030<br />
Checksum of is missing or<br />
incorrect.<br />
Do you want to use it? Evoware will<br />
terminate if you answer with no.<br />
File has been edited individually<br />
(not by means of<br />
<strong>EVOware</strong>)<br />
• Do not edit file<br />
• Restore backup<br />
• Accept change (if you<br />
are aware of the consequences<br />
of the change)<br />
EVO_EVO_000_031<br />
Checksum of is missing or<br />
incorrect.<br />
Do you want to use it?<br />
File has been edited individually<br />
(not by means of<br />
<strong>EVOware</strong>)<br />
• Do not edit file<br />
• Restore backup<br />
• Accept change (if you<br />
are aware of the consequences<br />
of the change)<br />
EVO_EVO_001_000 Error reading configurations file One of the configuration<br />
files is not accessible for<br />
reading<br />
• Reinstall <strong>EVOware</strong><br />
• Restore backup<br />
18 - 40 <strong>Freedom</strong> <strong>EVOware</strong> <strong>Software</strong> <strong>Manual</strong>, 393172, en, V<strong>2.3</strong>
18 - Error Handling<br />
List of Error Messages<br />
Tab. 18-1 List of error messages (cont.)<br />
Error ID Message Text Reason Corrective Measure<br />
EVO_EVO_001_001<br />
Error in configuration file in line<br />
<br />
One of the configuration<br />
files is not accessible for<br />
reading<br />
• Reinstall <strong>EVOware</strong><br />
• Restore backup<br />
EVO_EVO_001_002 Error writing configuration file One of the configuration<br />
files is not accessible for<br />
writing<br />
EVO_EVO_001_003 Incompatible CFG File A configuration file is currupt<br />
• Reinstall <strong>EVOware</strong><br />
• Restore backup<br />
• Reinstall <strong>EVOware</strong><br />
EVO_EVO_001_004<br />
Old version of configuration file!<br />
Please define all elements new.<br />
A configuration file stems<br />
from an older version of<br />
<strong>EVOware</strong><br />
• Reinstall <strong>EVOware</strong><br />
• Use current version of<br />
file<br />
EVO_EVO_001_005 LIHA not defined A configuration file is currupt<br />
• Configure LiHa in Configuration<br />
• Reinstall <strong>EVOware</strong><br />
EVO_EVO_002_000<br />
Diluter broken!<br />
Switching Diluter off!<br />
Diluter error/defective<br />
Check/replace diluter<br />
EVO_EVO_002_001<br />
DITI not dropped for tip.<br />
Retry?<br />
Problem with DiTi<br />
DiTi drop mechanism<br />
defective<br />
User new DiTi<br />
Check DiTi drop mechanism<br />
EVO_EVO_002_002<br />
Internal error.<br />
Different pressure sensitivities used<br />
in one liquid detection action<br />
<strong>Software</strong> error<br />
Contact your local service<br />
organization<br />
EVO_EVO_002_003<br />
Internal error.<br />
Different liquid characteristics used<br />
in one liquid detection action<br />
<strong>Software</strong> error<br />
Contact your local service<br />
organization<br />
EVO_EVO_002_004<br />
No MPO found<br />
LICOS not installed<br />
No MPO installed<br />
MPO defective<br />
Check/replace MPO<br />
Install LICOS<br />
EVO_EVO_002_005<br />
No way to LiHa target<br />
found!\\Evoware switches into offline<br />
mode.<br />
Inconsistent process definition<br />
Check process definition<br />
EVO_EVO_002_006 Internal Error: Illegal Move <strong>Software</strong> error Contact your local service<br />
organization<br />
EVO_EVO_003_001<br />
Error unloading device drivers: <br />
Inconsistent installation<br />
Reinstall <strong>EVOware</strong><br />
EVO_EVO_003_002<br />
Error shutting down devices:<br />
<br />
Inconsistent installation<br />
Reinstall <strong>EVOware</strong><br />
EVO_EVO_004_000<br />
Maximum tip-misalignment<br />
exceeded !<br />
Script execution will be aborted.<br />
Tips misaligned/bent<br />
Align/replace tips<br />
EVO_EVO_005_000 Error starting processes: Process not executable Modify process<br />
EVO_EVO_005_001<br />
Your process completed successfully<br />
!<br />
n.a.<br />
n.a.<br />
<strong>Freedom</strong> <strong>EVOware</strong> <strong>Software</strong> <strong>Manual</strong>, 393172, en, V<strong>2.3</strong> 18 - 41
18 - Error Handling<br />
List of Error Messages<br />
Tab. 18-1 List of error messages (cont.)<br />
Error ID Message Text Reason Corrective Measure<br />
EVO_EVO_005_002 Your process completed with errors ! n.a. n.a.<br />
EVO_EVO_005_003<br />
Your process completed with warnings<br />
!<br />
n.a.<br />
n.a.<br />
EVO_EVO_005_004<br />
Error reading barcode file.<br />
File: <br />
Barcode file corrupted<br />
Check barcode file<br />
EVO_EVO_005_005<br />
Too many barcodes in line .<br />
Wrong file format<br />
Check barcode file<br />
EVO_EVO_005_006<br />
Barcode '' not found in<br />
database.<br />
Inconsistent barcode<br />
information<br />
Check barcode file<br />
EVO_EVO_005_007<br />
The following barcodes could not be<br />
found in the database<br />
Inconsistent barcode<br />
information<br />
Check barcode file<br />
EVO_EVO_005_008<br />
The process does not contain labware<br />
''.<br />
Inconsistent process<br />
defintion<br />
Check process definition<br />
EVO_EVO_005_009<br />
The selected script is empty! It cannot<br />
be executed!<br />
Inconsistent script defintion<br />
Check script definition<br />
EVO_EVO_005_010<br />
This command is not allowed in<br />
<strong>EVOware</strong> plus!<br />
Command not permissible<br />
Modify process definition<br />
EVO_EVO_005_011<br />
This run was not done as calibration<br />
run. Using the timing data for future<br />
runs will most likely result in timeouts.<br />
Do you still want to save?<br />
n.a.<br />
n.a.<br />
EVO_EVO_005_012 Preparation of database failed! Inconsistent database<br />
contents<br />
Modify labware and carriers<br />
EVO_EVO_005_013<br />
Preparation of database failed!<br />
Details:<br />
Inconsistent database<br />
contents<br />
Modify labware and carriers<br />
EVO_EVO_005_014<br />
Number of iterations is too high for<br />
the available schedule files.<br />
Please create a fitting schedule file<br />
first or reduce the number of iterations.<br />
Valid range is 1 to .<br />
n.a.<br />
n.a.<br />
EVO_EVO_005_011<br />
This run was not done as calibration<br />
run. Using the timing data for future<br />
runs will most likely result in timeouts.<br />
Do you still want to save?<br />
n.a.<br />
n.a.<br />
18 - 42 <strong>Freedom</strong> <strong>EVOware</strong> <strong>Software</strong> <strong>Manual</strong>, 393172, en, V<strong>2.3</strong>
18 - Error Handling<br />
List of Error Messages<br />
Tab. 18-1 List of error messages (cont.)<br />
Error ID Message Text Reason Corrective Measure<br />
EVO_EVO_006_000 Error initializing devices: • Device initialization<br />
failed<br />
• Instrument or device<br />
switched off<br />
• Incorrect address settings<br />
• Bad connections to<br />
device<br />
• Check if device is powered<br />
• Check address settings<br />
• Check connections<br />
EVO_EVO_007_000<br />
Error while connecting to scheduler<br />
server: <br />
Scheduler not present,<br />
not registered or files<br />
missing<br />
• Register Scheduler.exe/<br />
Schedulerps.dll<br />
• Reinstall <strong>EVOware</strong><br />
EVO_EVO_007_001 Error opening One of the configuration<br />
files is not accessible for<br />
reading<br />
• Reinstall <strong>EVOware</strong><br />
• Restore backup<br />
EVO_EVO_007_002 Command not allowed in worklist n.a. Modify worklist<br />
EVO_EVO_007_003<br />
The variable '' in process<br />
'' already exists with a different<br />
scope.<br />
n.a.<br />
Rename variable<br />
EVO_EVO_007_004<br />
The variable '' in process<br />
'' already exists with a different<br />
type.<br />
n.a.<br />
Rename variable<br />
EVO_EVO_007_005<br />
The variable '' in process<br />
'' already exists with a different<br />
value. The value will not be<br />
changed.<br />
n.a.<br />
n.a.<br />
EVO_EVO_007_006<br />
File import for process variables<br />
failed! Possible causes: File does<br />
not exist or file access was denied.<br />
n.a.<br />
• Make sure file is available<br />
• Check access rights to<br />
file and folder<br />
EVO_EVO_007_007<br />
Operator query for process variables<br />
failed! The operator cancelled the<br />
query dialog.<br />
n.a.<br />
n.a.<br />
EVO_EVO_008_000 Your script completed successfully! n.a. n.a.<br />
EVO_EVO_008_001 Your script completed with errors! n.a. n.a.<br />
EVO_EVO_008_002<br />
Please define the script lines to execute.<br />
n.a.<br />
n.a.<br />
EVO_EVO_008_003<br />
Selected last line is larger than the<br />
line number of the actual script!<br />
n.a.<br />
n.a.<br />
EVO_EVO_008_004 Running script n.a. n.a.<br />
EVO_EVO_008_005 Run script! n.a. n.a.<br />
EVO_EVO_008_006<br />
Script contains errors! For more<br />
information see the log file.<br />
Various<br />
Check script definition<br />
<strong>Freedom</strong> <strong>EVOware</strong> <strong>Software</strong> <strong>Manual</strong>, 393172, en, V<strong>2.3</strong> 18 - 43
18 - Error Handling<br />
List of Error Messages<br />
Tab. 18-1 List of error messages (cont.)<br />
Error ID Message Text Reason Corrective Measure<br />
EVO_EVO_008_007 Script has been stopped! n.a. n.a.<br />
EVO_EVO_009_000<br />
This command is not allowed in<br />
<strong>EVOware</strong> plus!<br />
Command not permissible<br />
Modify process definition<br />
EVO_EVO_009_001<br />
Invalid command for asynchronous<br />
sub-routine<br />
n.a.<br />
Modify process definition<br />
EVO_EVO_009_002<br />
Could not start asynchronous subroutine<br />
Subroutine already running<br />
Wait for completion of<br />
subroutine<br />
EVO_EVO_009_003<br />
Unknown operation mode for subroutine<br />
Undefined subroutine<br />
operation mode used<br />
Use one of the defined<br />
operation modes in the<br />
subroutine command<br />
EVO_EVO_009_004 Invalid command for sub-routine. Command not permissible<br />
Modify process definition<br />
EVO_EVO_010_000 Pipetting was aborted n.a. n.a.<br />
EVO_EVO_011_000<br />
The value for Grid has to be<br />
between and .<br />
Inconsistent grid position<br />
number<br />
Correct grid position number<br />
EVO_EVO_011_001<br />
The value for Site has to be between<br />
and .<br />
Inconsistent site position<br />
number<br />
Correct grid position number<br />
EVO_EVO_011_002<br />
The value for Position in labware has<br />
to be between and .<br />
Inconsistent position<br />
number on labware<br />
Correct position number<br />
on labware<br />
EVO_EVO_012_000 Initialization error RoMa firmware command<br />
error<br />
EVO_EVO_012_001 Invalid command RoMa firmware command<br />
error<br />
EVO_EVO_012_002 Invalid operand RoMa firmware command<br />
error<br />
EVO_EVO_012_003 Invalid command sequence RoMa firmware command<br />
error<br />
EVO_EVO_012_004 Device not implemented RoMa firmware command<br />
error<br />
EVO_EVO_012_005 Time-Out RoMa firmware command<br />
error<br />
EVO_EVO_012_006 Device not initialised RoMa firmware command<br />
error<br />
EVO_EVO_012_007 Command Overflow RoMa firmware command<br />
error<br />
EVO_EVO_013_000 No access to EEPROM Te-CU firmware command<br />
error<br />
EVO_EVO_013_001 Error in power control circuit Te-CU firmware command<br />
error<br />
Contact your local service<br />
organization<br />
Contact your local service<br />
organization<br />
Contact your local service<br />
organization<br />
Contact your local service<br />
organization<br />
Contact your local service<br />
organization<br />
Contact your local service<br />
organization<br />
Contact your local service<br />
organization<br />
Contact your local service<br />
organization<br />
Contact your local service<br />
organization<br />
Contact your local service<br />
organization<br />
18 - 44 <strong>Freedom</strong> <strong>EVOware</strong> <strong>Software</strong> <strong>Manual</strong>, 393172, en, V<strong>2.3</strong>
18 - Error Handling<br />
List of Error Messages<br />
Tab. 18-1 List of error messages (cont.)<br />
Error ID Message Text Reason Corrective Measure<br />
EVO_EVO_013_002 Error in door lock #1 Door lock cannot lock/<br />
unlock<br />
EVO_EVO_013_003 Error in door lock #2 Door lock cannot lock/<br />
unlock<br />
Check door lock/latch<br />
Check door lock/latch<br />
EVO_EVO_013_004 Arm is collided Crash has occurred Check worktable layout<br />
Check process definition<br />
EVO_EVO_013_005 No FLASH / EEPROM access LiHa firmware command<br />
error<br />
EVO_EVO_013_006 Error in power control circuit LiHa firmware command<br />
error<br />
EVO_EVO_013_007 Measurement failed LiHa firmware command<br />
error<br />
EVO_EVO_013_008 No liquid exit detected LiHa firmware command<br />
error<br />
EVO_EVO_013_009 Error in liquid sensor LiHa firmware command<br />
error<br />
Contact your local service<br />
organization<br />
Contact your local service<br />
organization<br />
Contact your local service<br />
organization<br />
Contact your local service<br />
organization<br />
Contact your local service<br />
organization<br />
EVO_EVO_013_010<br />
Application switch and axes mismatch<br />
Incorrect replacement of<br />
instrument/parts<br />
Field Service Engineer:<br />
Set application switch on<br />
PCB correctly<br />
EVO_EVO_013_011 Wrong DC_Servo Type Incorrect replacement of<br />
parts<br />
EVO_EVO_013_012 Labware not gripped Labware not present<br />
Bad gripper alignment.<br />
Gripper defective.<br />
EVO_EVO_013_013 Arm is collided Crash has occurred<br />
See 18.1.18, 18-18.<br />
EVO_EVO_013_014 Error in power control circuit RoMa firmware command<br />
error<br />
Field Service Engineer:<br />
Use correct DC servo<br />
type<br />
Check worktable/process<br />
definition<br />
Align/repair gripper<br />
Check worktable layout<br />
Check process definition<br />
Contact your local service<br />
organization<br />
EVO_EVO_013_015 ROMA collision with LIHA avoided n.a. n.a.<br />
EVO_EVO_013_016 Error in EEPROM PosID firmware command<br />
error<br />
EVO_EVO_013_017 No access to EEPROM PosID firmware command<br />
error<br />
EVO_EVO_013_018 Invalid data in EEPROM PosID firmware command<br />
error<br />
EVO_EVO_013_019 Special error in EEPROM PosID firmware command<br />
error<br />
EVO_EVO_013_020 Invalid command PosID firmware command<br />
error<br />
Contact your local service<br />
organization<br />
Contact your local service<br />
organization<br />
Contact your local service<br />
organization<br />
Contact your local service<br />
organization<br />
Contact your local service<br />
organization<br />
<strong>Freedom</strong> <strong>EVOware</strong> <strong>Software</strong> <strong>Manual</strong>, 393172, en, V<strong>2.3</strong> 18 - 45
18 - Error Handling<br />
List of Error Messages<br />
Tab. 18-1 List of error messages (cont.)<br />
Error ID Message Text Reason Corrective Measure<br />
EVO_EVO_013_021 Invalid operand PosID firmware command<br />
error<br />
EVO_EVO_013_022 Invalid number of operands PosID firmware command<br />
error<br />
EVO_EVO_013_023 Invalid device address PosID firmware command<br />
error<br />
Contact your local service<br />
organization<br />
Contact your local service<br />
organization<br />
Contact your local service<br />
organization<br />
EVO_EVO_013_024 Door already open n.a. n.a.<br />
EVO_EVO_013_025 Hall sensors not calibrated n.a. Field Service Engineer:<br />
Calibrate hall sensors<br />
EVO_EVO_013_026 Pump not defined MPO/SPO firmware command<br />
error<br />
Contact your local service<br />
organization<br />
EVO_EVO_013_027 LICOS not calibrated n.a. Field Service Engineer:<br />
Calibrate LICOS<br />
EVO_EVO_013_028 No access to EEPROM MPO/SPO firmware command<br />
error<br />
Contact your local service<br />
organization<br />
EVO_EVO_013_029 Pressure sensor not calibrated n.a. Field Service Engineer:<br />
Calibrate pressure sensor<br />
EVO_EVO_013_030 Command overflow of sub device MPO/SPO firmware command<br />
error<br />
EVO_EVO_013_031 Pump stalled MPO/SPO firmware command<br />
error<br />
EVO_EVO_013_037 Initialization error Diluter firmware command<br />
error<br />
EVO_EVO_013_038 Invalid command Diluter firmware command<br />
error<br />
EVO_EVO_013_039 Invalid operand Diluter firmware command<br />
error See<br />
18.1.7, 18-7<br />
EVO_EVO_013_040 Invalid command sequence Diluter firmware command<br />
error<br />
EVO_EVO_013_041 Dilutor not connected. Diluter firmware command<br />
error<br />
EVO_EVO_013_042 Error in EEPROM Diluter firmware command<br />
error<br />
EVO_EVO_013_043 Device not initialized Diluter firmware command<br />
error<br />
EVO_EVO_013_044 Plunger overload Defective valve<br />
Clogged liquid system<br />
See 18.1.7, 18-7<br />
Contact your local service<br />
organization<br />
Contact your local service<br />
organization<br />
Contact your local service<br />
organization<br />
Contact your local service<br />
organization<br />
Contact your local service<br />
organization<br />
Contact your local service<br />
organization<br />
Contact your local service<br />
organization<br />
Contact your local service<br />
organization<br />
Contact your local service<br />
organization<br />
Check diluter<br />
Check liquid system<br />
EVO_EVO_013_045 Valve blocked Defective valve Replace valve<br />
18 - 46 <strong>Freedom</strong> <strong>EVOware</strong> <strong>Software</strong> <strong>Manual</strong>, 393172, en, V<strong>2.3</strong>
18 - Error Handling<br />
List of Error Messages<br />
Tab. 18-1 List of error messages (cont.)<br />
Error ID Message Text Reason Corrective Measure<br />
EVO_EVO_013_046 Movement not possible Diluter firmware command<br />
error<br />
EVO_EVO_013_047 No access to EEPROM Diluter firmware command<br />
error<br />
EVO_EVO_013_048 Command Overflow Diluter firmware command<br />
error<br />
EVO_EVO_013_049 Piezo communication error Diluter firmware command<br />
error<br />
EVO_EVO_013_050 Piezo module busy Diluter firmware command<br />
error<br />
EVO_EVO_013_051 Piezo parameter out of range Diluter firmware command<br />
error<br />
EVO_EVO_013_052 ADV param out of range Diluter firmware command<br />
error<br />
EVO_EVO_013_053 No Low Volume installed Low Volume firmware<br />
command error<br />
EVO_EVO_013_054 Pinch valve not installed Low Volume firmware<br />
command error<br />
EVO_EVO_013_055 Endless mode not possible Low Volume firmware<br />
command error<br />
EVO_EVO_013_056 Wrong node address Low Volume firmware<br />
command error<br />
Contact your local service<br />
organization<br />
Contact your local service<br />
organization<br />
Contact your local service<br />
organization<br />
Contact your local service<br />
organization<br />
Contact your local service<br />
organization<br />
Contact your local service<br />
organization<br />
Contact your local service<br />
organization<br />
Contact your local service<br />
organization<br />
Contact your local service<br />
organization<br />
Contact your local service<br />
organization<br />
Contact your local service<br />
organization<br />
EVO_EVO_013_057 Picture not usable n.a. n.a.<br />
EVO_EVO_013_058 Invalid operand n.a. n.a.<br />
EVO_EVO_013_059 Picture is still processed n.a. n.a.<br />
EVO_EVO_013_060 Error writing file n.a. n.a.<br />
EVO_EVO_013_061 Error accessing file n.a. n.a.<br />
EVO_EVO_013_062 Error reading file n.a. n.a.<br />
EVO_EVO_013_063 Number is already used n.a. n.a.<br />
EVO_EVO_013_064 Harddisk full Storage capacity of harddisk<br />
exceeded<br />
Perform data management<br />
on harddisk<br />
EVO_EVO_013_065 Picture memory full n.a. n.a.<br />
EVO_EVO_013_066 Error grabbing picture n.a. n.a.<br />
EVO_EVO_013_067 X drive overload Axis blocked Check mechanics<br />
EVO_EVO_013_068 Y drive overload Axis blocked Check mechanics<br />
EVO_EVO_013_069 Z drive overload Axis blocked Check mechanics<br />
<strong>Freedom</strong> <strong>EVOware</strong> <strong>Software</strong> <strong>Manual</strong>, 393172, en, V<strong>2.3</strong> 18 - 47
18 - Error Handling<br />
List of Error Messages<br />
Tab. 18-1 List of error messages (cont.)<br />
Error ID Message Text Reason Corrective Measure<br />
EVO_EVO_013_070 No access to flash eeprom Te-MagS firmware command<br />
error<br />
EVO_EVO_013_071 Command overflow Te-MagS firmware command<br />
error<br />
EVO_EVO_013_072 Temperature overrun Te-MagS firmware command<br />
error<br />
Contact your local service<br />
organization<br />
Contact your local service<br />
organization<br />
Contact your local service<br />
organization<br />
EVO_EVO_013_073<br />
Temperature sensor short or open<br />
circuit<br />
Te-MagS firmware command<br />
error<br />
Contact your local service<br />
organization<br />
EVO_EVO_013_074 Drive overload Te-Shake firmware command<br />
error<br />
EVO_EVO_013_075 Drive already running Te-Shake firmware command<br />
error<br />
EVO_EVO_013_076 No access to EEPROM Te-Shake firmware command<br />
error<br />
EVO_EVO_013_077 Command overflow Te-Shake firmware command<br />
error<br />
Contact your local service<br />
organization<br />
Contact your local service<br />
organization<br />
Contact your local service<br />
organization<br />
Contact your local service<br />
organization<br />
EVO_EVO_013_078 LICOS not calibrated n.a. Field Service Engineer:<br />
Calibrate LICOS<br />
EVO_EVO_013_079 No access to EEPROM Supervisor firmware command<br />
error<br />
EVO_EVO_013_080 Command overflow Supervisor firmware command<br />
error<br />
EVO_EVO_013_081 Option not installed MIO firmware command<br />
error<br />
EVO_EVO_013_082 Shaker position initialization error MIO firmware command<br />
error<br />
Contact your local service<br />
organization<br />
Contact your local service<br />
organization<br />
Contact your local service<br />
organization<br />
Contact your local service<br />
organization<br />
EVO_EVO_013_083<br />
Close door solenoid short or open<br />
circuit<br />
MIO firmware command<br />
error<br />
Contact your local service<br />
organization<br />
EVO_EVO_013_084 EEPROM checksum error MIO firmware command<br />
error<br />
EVO_EVO_013_085 EEPROM access error MIO firmware command<br />
error<br />
EVO_EVO_013_086 Command overflow MIO firmware command<br />
error<br />
EVO_EVO_013_087 Slot temperature overrun MIO firmware command<br />
error<br />
Contact your local service<br />
organization<br />
Contact your local service<br />
organization<br />
Contact your local service<br />
organization<br />
Contact your local service<br />
organization<br />
EVO_EVO_013_088<br />
Temperature sensor short or open<br />
circuit<br />
MIO firmware command<br />
error<br />
Contact your local service<br />
organization<br />
EVO_EVO_013_089 Shaker Fail (motor not turning) MIO firmware command<br />
error<br />
Contact your local service<br />
organization<br />
18 - 48 <strong>Freedom</strong> <strong>EVOware</strong> <strong>Software</strong> <strong>Manual</strong>, 393172, en, V<strong>2.3</strong>
18 - Error Handling<br />
List of Error Messages<br />
Tab. 18-1 List of error messages (cont.)<br />
Error ID Message Text Reason Corrective Measure<br />
EVO_EVO_013_090 Temperature overrun Te-Shake firmware command<br />
error<br />
Contact your local service<br />
organization<br />
EVO_EVO_013_091<br />
Temperature sensor short or open<br />
circuit<br />
Te-Shake firmware command<br />
error<br />
Contact your local service<br />
organization<br />
EVO_EVO_013_093 Initialization Error Te-MO firmware command<br />
error<br />
EVO_EVO_013_094 Invalid Command Te-MO firmware command<br />
error<br />
EVO_EVO_013_095 Invalid Operand Te-MO firmware command<br />
error<br />
EVO_EVO_013_096 Invalid Command Sequence Te-MO firmware command<br />
error<br />
EVO_EVO_013_097 Device not implemented Te-MO firmware command<br />
error<br />
EVO_EVO_013_098 Timeout error Te-MO firmware command<br />
error<br />
EVO_EVO_013_099 Device not initialized Te-MO firmware command<br />
error<br />
EVO_EVO_013_100 No liquid detected. Te-MO firmware command<br />
error<br />
EVO_EVO_013_101 Collision detected Te-MO firmware command<br />
error<br />
EVO_EVO_013_102 No access to parameter pages Te-MO firmware command<br />
error<br />
EVO_EVO_013_103 Command overflow Te-MO firmware command<br />
error<br />
EVO_EVO_013_104 Power fail Te-MO firmware command<br />
error<br />
EVO_EVO_013_105 No Communication to Sub-Device. Te-MO firmware command<br />
error<br />
EVO_EVO_013_106 Tips not fetched. DiTis not picked up properly<br />
EVO_EVO_013_107 Invalid Command WRC firmware command<br />
error<br />
EVO_EVO_013_108 Invalid Operand WRC firmware command<br />
error<br />
EVO_EVO_013_109 Device not implemented WRC firmware command<br />
error<br />
EVO_EVO_013_110 Timeout Error WRC firmware command<br />
error<br />
Contact your local service<br />
organization<br />
Contact your local service<br />
organization<br />
Contact your local service<br />
organization<br />
Contact your local service<br />
organization<br />
Contact your local service<br />
organization<br />
Contact your local service<br />
organization<br />
Contact your local service<br />
organization<br />
Contact your local service<br />
organization<br />
Contact your local service<br />
organization<br />
Contact your local service<br />
organization<br />
Contact your local service<br />
organization<br />
Contact your local service<br />
organization<br />
Contact your local service<br />
organization<br />
Check DiTi pick up mechanism<br />
Contact your local service<br />
organization<br />
Contact your local service<br />
organization<br />
Contact your local service<br />
organization<br />
Contact your local service<br />
organization<br />
<strong>Freedom</strong> <strong>EVOware</strong> <strong>Software</strong> <strong>Manual</strong>, 393172, en, V<strong>2.3</strong> 18 - 49
18 - Error Handling<br />
List of Error Messages<br />
Tab. 18-1 List of error messages (cont.)<br />
Error ID Message Text Reason Corrective Measure<br />
EVO_EVO_013_111 Reagent sensor not calibrated n.a. Field Service Engineer:<br />
Calibrate reagent sensor<br />
EVO_EVO_013_112 EEPROM access error WRC firmware command<br />
error<br />
EVO_EVO_013_113 Command overflow WRC firmware command<br />
error<br />
Contact your local service<br />
organization<br />
Contact your local service<br />
organization<br />
EVO_EVO_013_114 Wash bottle 1 empty n.a. n.a.<br />
EVO_EVO_013_115 Waste bottle full n.a. n.a.<br />
EVO_EVO_013_116 Pump 1 low level n.a. n.a.<br />
EVO_EVO_013_117 Pump 2 low level n.a. n.a.<br />
EVO_EVO_013_118 Pump 3 low level n.a. n.a.<br />
EVO_EVO_013_119 Pump 4 low level n.a. n.a.<br />
EVO_EVO_013_120 Wash station empty n.a. n.a.<br />
EVO_EVO_013_121 Wash station overflow Clogged waste tubing Check waste tubing<br />
EVO_EVO_013_122 Sub-device not implemented WRC firmware command<br />
error<br />
Contact your local service<br />
organization<br />
EVO_EVO_013_123 Wash bottle 2 empty n.a. n.a.<br />
EVO_EVO_013_124 Sensor out of range WRC firmware command<br />
error<br />
EVO_EVO_013_125 Initialization Error LAC Option firmware<br />
command error<br />
EVO_EVO_013_126 Invalid Command LAC Option firmware<br />
command error<br />
EVO_EVO_013_127 Invalid Operand LAC Option firmware<br />
command error<br />
EVO_EVO_013_128 Invalid Command Sequence LAC Option firmware<br />
command error<br />
EVO_EVO_013_129 Device not implemented LAC Option firmware<br />
command error<br />
EVO_EVO_013_130 Timeout Error LAC Option firmware<br />
command error<br />
EVO_EVO_013_131 Device not initialized LAC Option firmware<br />
command error<br />
EVO_EVO_013_132 Command overflow by CU LAC Option firmware<br />
command error<br />
EVO_EVO_013_133 No liquid level measured LAC Option firmware<br />
command error<br />
Contact your local service<br />
organization<br />
Contact your local service<br />
organization<br />
Contact your local service<br />
organization<br />
Contact your local service<br />
organization<br />
Contact your local service<br />
organization<br />
Contact your local service<br />
organization<br />
Contact your local service<br />
organization<br />
Contact your local service<br />
organization<br />
Contact your local service<br />
organization<br />
Contact your local service<br />
organization<br />
18 - 50 <strong>Freedom</strong> <strong>EVOware</strong> <strong>Software</strong> <strong>Manual</strong>, 393172, en, V<strong>2.3</strong>
18 - Error Handling<br />
List of Error Messages<br />
Tab. 18-1 List of error messages (cont.)<br />
Error ID Message Text Reason Corrective Measure<br />
EVO_EVO_013_134 Device collided with an obstacle Obstruction on worktable Check worktable layout<br />
Check process definition<br />
EVO_EVO_013_135<br />
Wrong checksum in flash parameter<br />
block<br />
LAC Option firmware<br />
command error<br />
Contact your local service<br />
organization<br />
EVO_EVO_013_136 No access to flash parameter block LAC Option firmware<br />
command error<br />
Contact your local service<br />
organization<br />
EVO_EVO_013_137 Collision avoided n.a. n.a.<br />
EVO_EVO_013_138 No carrier detected LAC Option firmware<br />
command error<br />
EVO_EVO_013_139 Command overflow in device LAC Option firmware<br />
command error<br />
EVO_EVO_013_140 Power fail LAC Option firmware<br />
command error<br />
EVO_EVO_013_141 Tube not detected LAC Option firmware<br />
command error<br />
EVO_EVO_013_142 Invalid axis combination LAC Option firmware<br />
command error<br />
EVO_EVO_013_143 Ultrasonic Transducer error LAC Option firmware<br />
command error<br />
EVO_EVO_013_144 Temperature sensor error LAC Option firmware<br />
command error<br />
Contact your local service<br />
organization<br />
Contact your local service<br />
organization<br />
Contact your local service<br />
organization<br />
Contact your local service<br />
organization<br />
Contact your local service<br />
organization<br />
Contact your local service<br />
organization<br />
Contact your local service<br />
organization<br />
EVO_EVO_013_145<br />
Requested memory block size was<br />
not allocable<br />
LAC Option firmware<br />
command error<br />
Contact your local service<br />
organization<br />
EVO_EVO_013_146 CreateTask() called too late LAC Option firmware<br />
command error<br />
Contact your local service<br />
organization<br />
EVO_EVO_013_147<br />
CkStackOV() didn't find NIL at end of<br />
RTX.DefTcbs<br />
LAC Option firmware<br />
command error<br />
Contact your local service<br />
organization<br />
EVO_EVO_013_148 CkStackOV() found min task stack LAC Option firmware<br />
command error<br />
Contact your local service<br />
organization<br />
EVO_EVO_013_149<br />
CkStackOV() found task stack overflow<br />
LAC Option firmware<br />
command error<br />
Contact your local service<br />
organization<br />
EVO_EVO_013_150 No error n.a. n.a.<br />
EVO_EVO_013_151 Invalid command n.a. n.a.<br />
EVO_EVO_013_152 Unexpected error n.a. n.a.<br />
EVO_EVO_013_153 Invalid number of operands n.a. n.a.<br />
EVO_EVO_013_154 Invalid operand n.a. n.a.<br />
EVO_EVO_013_155 RSP error reported in answer string n.a. n.a.<br />
EVO_EVO_013_156 RSP not initialized n.a. n.a.<br />
<strong>Freedom</strong> <strong>EVOware</strong> <strong>Software</strong> <strong>Manual</strong>, 393172, en, V<strong>2.3</strong> 18 - 51
18 - Error Handling<br />
List of Error Messages<br />
Tab. 18-1 List of error messages (cont.)<br />
Error ID Message Text Reason Corrective Measure<br />
EVO_EVO_013_157 ROMA-vector not defined n.a. n.a.<br />
EVO_EVO_013_158<br />
ROMA-vector for this site is not<br />
defined<br />
n.a.<br />
n.a.<br />
EVO_EVO_013_159 RSP still active n.a. n.a.<br />
EVO_EVO_013_160 RSP not active n.a. n.a.<br />
EVO_EVO_013_161 RSP not active n.a. n.a.<br />
EVO_EVO_013_162 Cancel was pressed n.a. n.a.<br />
EVO_EVO_013_163 Script could not be loaded / saved n.a. n.a.<br />
EVO_EVO_013_164 Variable not defined n.a. n.a.<br />
EVO_EVO_013_165<br />
Advanced version of Evoware<br />
required<br />
n.a.<br />
n.a.<br />
EVO_EVO_013_166 No labware gripped by ROMA Labware not present<br />
Bad gripper alignment.<br />
Gripper defective.<br />
Check worktable/process<br />
definition<br />
Align/repair gripper<br />
EVO_EVO_013_167 Device not found n.a. n.a.<br />
EVO_EVO_013_168 Timeout n.a. n.a.<br />
EVO_EVO_013_169 Worklist already loaded n.a. n.a.<br />
EVO_EVO_013_170 Initialization failed PnP firmware command<br />
error<br />
EVO_EVO_013_171 Invalid command PnP firmware command<br />
error<br />
EVO_EVO_013_172 Invalid operand PnP firmware command<br />
error<br />
EVO_EVO_013_173 CAN acknowledge problems PnP firmware command<br />
error<br />
EVO_EVO_013_174 Device not implemented PnP firmware command<br />
error<br />
EVO_EVO_013_175 CAN answer timeout PnP firmware command<br />
error<br />
EVO_EVO_013_176 Device not initialized PnP firmware command<br />
error<br />
Contact your local service<br />
organization<br />
Contact your local service<br />
organization<br />
Contact your local service<br />
organization<br />
Contact your local service<br />
organization<br />
Contact your local service<br />
organization<br />
Contact your local service<br />
organization<br />
Contact your local service<br />
organization<br />
EVO_EVO_013_177<br />
Command overflow of <strong>Freedom</strong><br />
EVO control unit<br />
PnP firmware command<br />
error<br />
Contact your local service<br />
organization<br />
EVO_EVO_013_178 Plate not fetched PnP firmware command<br />
error<br />
EVO_EVO_013_179 Collision detected PnP firmware command<br />
error<br />
Contact your local service<br />
organization<br />
Contact your local service<br />
organization<br />
18 - 52 <strong>Freedom</strong> <strong>EVOware</strong> <strong>Software</strong> <strong>Manual</strong>, 393172, en, V<strong>2.3</strong>
18 - Error Handling<br />
List of Error Messages<br />
Tab. 18-1 List of error messages (cont.)<br />
Error ID Message Text Reason Corrective Measure<br />
EVO_EVO_013_180 No access to Flash-EEPROM PnP firmware command<br />
error<br />
EVO_EVO_013_181 Command overflow of this device PnP firmware command<br />
error<br />
Contact your local service<br />
organization<br />
Contact your local service<br />
organization<br />
EVO_EVO_013_182 Tube left in gripper Tube sticks to gripper Clean gripper<br />
EVO_EVO_013_183 Tube not fetched Tube not present<br />
Bad gripper alignment.<br />
Gripper defective.<br />
EVO_EVO_013_184 Invalid axes combination PnP firmware command<br />
error<br />
EVO_EVO_013_185 Initialization error Te-Stack firmware command<br />
error<br />
EVO_EVO_013_186 Invalid command Te-Stack firmware command<br />
error<br />
EVO_EVO_013_187 Invalid operand Te-Stack firmware command<br />
error<br />
EVO_EVO_013_188 Invalid command sequence Te-Stack firmware command<br />
error<br />
EVO_EVO_013_189 Device not implemented Te-Stack firmware command<br />
error<br />
EVO_EVO_013_190 Timeout error Te-Stack firmware command<br />
error<br />
EVO_EVO_013_191 Device not initialized Te-Stack firmware command<br />
error<br />
Check worktable/process<br />
definition<br />
Align/repair gripper<br />
Contact your local service<br />
organization<br />
Contact your local service<br />
organization<br />
Contact your local service<br />
organization<br />
Contact your local service<br />
organization<br />
Contact your local service<br />
organization<br />
Contact your local service<br />
organization<br />
Contact your local service<br />
organization<br />
Contact your local service<br />
organization<br />
EVO_EVO_013_192<br />
Command overflow of <strong>Freedom</strong><br />
EVO control unit<br />
Te-Stack firmware command<br />
error<br />
Contact your local service<br />
organization<br />
EVO_EVO_013_193 Te-Stack collided with an obstacle Obstruction on worktable<br />
See 18.1.21, 18-20<br />
EVO_EVO_013_194 No access to Flash-EPROM Te-Stack firmware command<br />
error<br />
EVO_EVO_013_195 Command overflow of the Te-Stack Te-Stack firmware command<br />
error<br />
EVO_EVO_013_196 Slide not in position! Te-Stack firmware command<br />
error<br />
Check worktable layout<br />
Check process definition<br />
Contact your local service<br />
organization<br />
Contact your local service<br />
organization<br />
Contact your local service<br />
organization<br />
EVO_EVO_013_197<br />
Stack not in position! Please install<br />
stack!<br />
n.a.<br />
Install stack<br />
EVO_EVO_013_198 Carrier position empty! There is no plate on<br />
stacker carrier for picking<br />
up<br />
Put plate on stacker carrier<br />
<strong>Freedom</strong> <strong>EVOware</strong> <strong>Software</strong> <strong>Manual</strong>, 393172, en, V<strong>2.3</strong> 18 - 53
18 - Error Handling<br />
List of Error Messages<br />
Tab. 18-1 List of error messages (cont.)<br />
Error ID Message Text Reason Corrective Measure<br />
EVO_EVO_013_199<br />
Carrier position not empty! Please<br />
remove labware!<br />
n.a.<br />
Remove labware<br />
EVO_EVO_013_200 Stack empty! Please insert labware! n.a. Insert labware<br />
EVO_EVO_013_201 Gripper not in zero position Te-Stack command error Contact your local service<br />
organization<br />
EVO_EVO_013_202<br />
Move does not cross BCR or<br />
CarSens window.<br />
Te-Stack command error<br />
Contact your local service<br />
organization<br />
EVO_EVO_013_203<br />
Cmd not possible now (ADP/ASP<br />
sequence error)<br />
Te-Stack command error<br />
Contact your local service<br />
organization<br />
EVO_EVO_013_204 Barcode-Reader general error Stacker barcode scanner<br />
defective<br />
EVO_EVO_013_205 Digital output(s) overloaded Te-MO servo control firmware<br />
error (error 21)<br />
EVO_EVO_013_206 Home position not found Te-MO servo control firmware<br />
error (error 23)<br />
EVO_EVO_013_207 Current limit exceeded Te-MO servo control firmware<br />
error (error 41)<br />
EVO_EVO_013_208 Current limit exceeded Te-MO servo control firmware<br />
error (error 44)<br />
EVO_EVO_013_209 Initialization error Te-Servo firmware command<br />
error<br />
EVO_EVO_013_210 Invalid command Te-Servo firmware command<br />
error<br />
EVO_EVO_013_211 Invalid operand Te-Servo firmware command<br />
error<br />
EVO_EVO_013_212 Invalid command sequence Te-Servo firmware command<br />
error<br />
EVO_EVO_013_213 Device not implemented Te-Servo firmware command<br />
error<br />
EVO_EVO_013_214 Timeout error Te-Servo firmware command<br />
error<br />
EVO_EVO_013_215 Device not initialized Te-Servo firmware command<br />
error<br />
Check barcode scanner<br />
• Reset servo control and<br />
retry<br />
• Contact your local service<br />
organization<br />
• Reset servo control and<br />
retry<br />
• Contact your local service<br />
organization<br />
• Reset servo control and<br />
retry<br />
• Contact your local service<br />
organization<br />
• Reset servo control and<br />
retry<br />
• Contact your local service<br />
organization<br />
Contact your local service<br />
organization<br />
Contact your local service<br />
organization<br />
Contact your local service<br />
organization<br />
Contact your local service<br />
organization<br />
Contact your local service<br />
organization<br />
Contact your local service<br />
organization<br />
Contact your local service<br />
organization<br />
18 - 54 <strong>Freedom</strong> <strong>EVOware</strong> <strong>Software</strong> <strong>Manual</strong>, 393172, en, V<strong>2.3</strong>
18 - Error Handling<br />
List of Error Messages<br />
Tab. 18-1 List of error messages (cont.)<br />
Error ID Message Text Reason Corrective Measure<br />
EVO_EVO_013_216<br />
Command overflow of <strong>Freedom</strong><br />
EVO control unit<br />
Te-Servo firmware command<br />
error<br />
Contact your local service<br />
organization<br />
EVO_EVO_013_217 Plunger collided Te-Servo firmware command<br />
error<br />
EVO_EVO_013_218 No access to Flash-EPROM Te-Servo firmware command<br />
error<br />
EVO_EVO_013_219 Missing configuration Te-Servo firmware command<br />
error<br />
EVO_EVO_013_220 Command overflow of the Te-Servo Te-Servo firmware command<br />
error<br />
EVO_EVO_013_221 Out of physical range Te-Servo firmware command<br />
error<br />
EVO_EVO_013_222 Multiple run curve error Te-Servo firmware command<br />
error<br />
EVO_EVO_013_223 Command not possible Te-Servo firmware command<br />
error<br />
EVO_EVO_013_224 End position not reached Te-Servo firmware command<br />
error<br />
EVO_EVO_013_225 Drive overheated Te-Servo firmware command<br />
error<br />
EVO_EVO_013_226 No move detected Te-Servo firmware command<br />
error<br />
EVO_EVO_013_227 Move was interupted Te-Servo firmware command<br />
error<br />
EVO_EVO_013_228 Internal calculation error Te-Servo firmware command<br />
error<br />
Contact your local service<br />
organization<br />
Contact your local service<br />
organization<br />
Contact your local service<br />
organization<br />
Contact your local service<br />
organization<br />
Contact your local service<br />
organization<br />
Contact your local service<br />
organization<br />
Contact your local service<br />
organization<br />
Contact your local service<br />
organization<br />
Contact your local service<br />
organization<br />
Contact your local service<br />
organization<br />
Contact your local service<br />
organization<br />
Contact your local service<br />
organization<br />
EVO_EVO_014_000<br />
Instrument has been switched off or<br />
disconnected!<br />
Evoware switches to offline mode<br />
and aborts script!<br />
Instrument not connected<br />
properly<br />
Switch instrument on<br />
Check connections<br />
EVO_EVO_014_001<br />
The process is not executable.<br />
Action aborted.<br />
Process not executable,<br />
e.g. labware nodes not<br />
connected<br />
Modify process<br />
EVO_EVO_014_002<br />
The script contains errors and is not<br />
executable. Action aborted.<br />
Script validation failed<br />
Load script into editor and<br />
correct errors<br />
EVO_EVO_014_003<br />
Auto-validation of scripts has been<br />
switched on!<br />
n.a.<br />
n.a.<br />
EVO_EVO_014_004<br />
Auto-validation of scripts has been<br />
switched off!<br />
n.a.<br />
n.a.<br />
EVO_EVO_014_005<br />
On-demand validation of current<br />
script has been started.<br />
n.a.<br />
n.a.<br />
<strong>Freedom</strong> <strong>EVOware</strong> <strong>Software</strong> <strong>Manual</strong>, 393172, en, V<strong>2.3</strong> 18 - 55
18 - Error Handling<br />
List of Error Messages<br />
Tab. 18-1 List of error messages (cont.)<br />
Error ID Message Text Reason Corrective Measure<br />
EVO_EVO_014_006<br />
There are schedules stored for this<br />
process. If the process is changed<br />
these schedules will be lost.<br />
To keep the original version with it's<br />
schedules please use 'Save As' to<br />
store the changed process under a<br />
new name.<br />
Save process under same name and<br />
loose schedules?<br />
n.a.<br />
n.a.<br />
EVO_EVO_015_000 Error opening Named Pipe Named Pipe could not be<br />
opend in “Command”<br />
command<br />
• Check pipe name provided<br />
in command<br />
• Wait until pipe is available<br />
EVO_EVO_016_002 Enter Barcode (PosID-2) Refer to 18.1.16, 18-16<br />
EVO_EVO_016_003 Barcode Error (PosID-2) Refer to 18.1.12, 18-13<br />
EVO_EVO_016_004 Clot Error Refer to 18.1.2, 18-2<br />
EVO_EVO_016_005 Dilutor Overflow Refer to 18.1.6, 18-6<br />
EVO_EVO_016_006 Dilutor Error Refer to 18.1.7, 18-7<br />
EVO_EVO_016_007 DITI Already Mounted Refer to 18.1.11, 18-12<br />
EVO_EVO_016_008 Error Fetching DITIs Refer to 18.1.8, 18-9<br />
EVO_EVO_016_009 Te-MO DITI Error Refer to 18.1.22, 18-22<br />
EVO_EVO_016_010 Lost DITI Refer to 18.1.10, 18-11<br />
EVO_EVO_016_011 Doorlock Error Refer to 18.1.19, 18-19<br />
EVO_EVO_016_023 Liquid Arrival Check Error Refer to 18.1.5, 18-5<br />
EVO_EVO_016_024 Liquid Detection Error Refer to 18.1.1, 18-1<br />
EVO_EVO_016_036 Grip Error Refer to 18.1.20, 18-20<br />
EVO_EVO_016_040 Instrument Error dialog box Refer to 18.1.18, 18-18<br />
EVO_EVO_016_042 Te-Stack Error Refer to 18.1.21.1, 18-21<br />
EVO_EVO_016_043 Vacuum Waste Container Refer to 18.1.26, 18-27<br />
EVO_EVO_016_048 WinWash Liquid Error Refer to 18.1.25, 18-26<br />
EVO_EVO_016_049 WRC/Te-MO Error Refer to 18.1.23, 18-23<br />
EVO_EVO_016_052 Clot Error (PMP) Refer to 18.1.3, 18-3<br />
EVO_EVO_016_053 PMP Instrument Error Refer to 18.1.4, 18-4<br />
EVO_EVO_017_000<br />
A Te-MO has been detected but is<br />
not on the worktable.<br />
Evoware now prohibits LiHa access<br />
to the rear of the instrument.<br />
n.a.<br />
n.a.<br />
18 - 56 <strong>Freedom</strong> <strong>EVOware</strong> <strong>Software</strong> <strong>Manual</strong>, 393172, en, V<strong>2.3</strong>
18 - Error Handling<br />
List of Error Messages<br />
Tab. 18-1 List of error messages (cont.)<br />
Error ID Message Text Reason Corrective Measure<br />
EVO_EVO_017_001<br />
"To the front" initialization is only<br />
available on <strong>Freedom</strong> instruments.<br />
Evoware will perform standard initialization.<br />
n.a.<br />
n.a.<br />
EVO_EVO_017_002 Roma not found! RoMa command in script,<br />
but there is no RoMa<br />
EVO_EVO_017_003 PnP not found! PnP command in script,<br />
but there is no PnP<br />
EVO_EVO_018_000 Barcode could not be detected! Stacker barcode scanner<br />
could not read barcode<br />
Modify script<br />
Modify script<br />
Check barcode label on<br />
labware<br />
EVO_EVO_019_000 TeMO x-coordinate too low! n.a. n.a.<br />
EVO_EVO_020_000<br />
Carrier not found on grid<br />
<br />
• Barcode not readable<br />
• Carrier not present<br />
• Check barcode<br />
• Check worktable<br />
EVO_EVO_020_001<br />
Carrier ID not found in<br />
configuration<br />
There is no carrier definition<br />
for this item<br />
Check worktable<br />
EVO_EVO_020_002<br />
-coordinate of ROMA vector<br />
point <br />
is outside of allowed range<br />
(Home) vector coordinate<br />
out of range<br />
Teach RoMa (home) vector<br />
properly<br />
EVO_EVO_021_000 PnP vector not defined Vector not found in Carrier.cfg<br />
EVO_EVO_022_000 Instrument has no LiHA LiHa command in script,<br />
but there is no LiHa<br />
Teach vector with given<br />
name<br />
Modify script<br />
EVO_EVO_023_000<br />
Instrument error <br />
(), device , command<br />
<br />
n.a.<br />
n.a.<br />
EVO_EVO_024_000<br />
The resulting script contains invalid<br />
groups or loops.<br />
The action is canceled.<br />
n.a.<br />
Check script definition<br />
EVO_EVO_025_000<br />
Balance: Reset could not be performed.<br />
Device was busy! Retry?<br />
n.a.<br />
n.a.<br />
EVO_EVO_025_001<br />
Balance: Zeroing currently not executable;<br />
Device is busy! Retry?<br />
n.a.<br />
n.a.<br />
EVO_EVO_025_002<br />
Balance: Balance data inquiry could<br />
not be performed.<br />
Device was busy! Retry?<br />
n.a.<br />
n.a.<br />
EVO_EVO_025_003<br />
Balance is not responding!<br />
Retry?<br />
Balance switched off<br />
Bad connection<br />
Switch balance on<br />
Check connections<br />
EVO_EVO_026_000<br />
-coordinate of PnP vector<br />
"" outside of allowed range<br />
(Home) vector coordinate<br />
out of range<br />
Teach PnP (home) vector<br />
properly<br />
<strong>Freedom</strong> <strong>EVOware</strong> <strong>Software</strong> <strong>Manual</strong>, 393172, en, V<strong>2.3</strong> 18 - 57
18 - Error Handling<br />
List of Error Messages<br />
Tab. 18-1 List of error messages (cont.)<br />
Error ID Message Text Reason Corrective Measure<br />
EVO_EVO_027_000 Waterbath not connected! n.a. Check waterbath connections<br />
EVO_EVO_028_000 No column offset (relative move in x)<br />
possible on right TeMO slide.<br />
EVO_EVO_028_001 No column offset (relative move in x)<br />
possible on left TeMO slide.<br />
Te-MO relative move of<br />
tips on left side of Te-MO<br />
head, pipetting on the<br />
right slide<br />
Te-MO relative move of<br />
tips on right side of Te-<br />
MO head, pipetting on the<br />
left slide<br />
Mount tips on the right<br />
side of the Te-MO head to<br />
pipette on the right slide<br />
Mount tips on the left side<br />
of the Te-MO head to<br />
pipette on the left slide<br />
EVO_EVO_029_000 Error opening barcode output file. • Barcode file of obsolete<br />
PosID<br />
• File not accessible<br />
• Check output path in<br />
configuration<br />
• Check access rights to<br />
file and folder<br />
EVO_EVO_030_000<br />
Unable to write header to file:<br />
Header must be written by first<br />
export command acessing the file.<br />
Previous “Export Variable”<br />
command did not<br />
write header<br />
First “Export Variable”<br />
command must write<br />
header, correct script<br />
EVO_EVO_030_001<br />
Unable to write variables to file: Conflicts<br />
in header strings - variable<br />
order or variable count do not match.<br />
Variable not found in<br />
header of export file<br />
Choose correct file or<br />
change variable selection<br />
EVO_EVO_031_000<br />
Illegal line number specified<br />
for Import Variable command:<br />
Legal range is 1 to !<br />
Line number exceeded<br />
range, using “Read specified<br />
line” option<br />
Check script definition<br />
Global messages<br />
EVO_GLO_000_000<br />
The response for message {} timed<br />
out.<br />
Internal communication<br />
error. E.g. a hardware<br />
option failed or did not<br />
respond while a pipetting<br />
script was running.<br />
IVD Incubator<br />
EVO_IVD_000_000<br />
Error getting configuration from database:<br />
No carrier definition in<br />
database<br />
Create carrier definition<br />
EVO_IVD_000_001<br />
Error getting number of sites from<br />
database:<br />
n.a.<br />
n.a.<br />
EVO_IVD_000_002<br />
Device carrier configuration read<br />
from database: Position layout<br />
[//] =<br />
available sites.<br />
n.a.<br />
n.a.<br />
EVO_IVD_000_003 Configuration error Error in carrier definition Check carrier definition<br />
EVO_IVD_000_004<br />
Number of carrier sites does not<br />
match number of modules in configuration.<br />
Carrier definition does not<br />
correspond with driver INI<br />
file<br />
Modify carrier definition or<br />
driver configuration<br />
18 - 58 <strong>Freedom</strong> <strong>EVOware</strong> <strong>Software</strong> <strong>Manual</strong>, 393172, en, V<strong>2.3</strong>
18 - Error Handling<br />
List of Error Messages<br />
Tab. 18-1 List of error messages (cont.)<br />
Error ID Message Text Reason Corrective Measure<br />
EVO_IVD_000_005<br />
CloseDrawer for slot <br />
failed: Return value = .<br />
Drawer malfunction<br />
Check drawer<br />
EVO_IVD_000_006 Slot number is out of range! Selected slot does not<br />
exist<br />
Check script definition<br />
EVO_IVD_000_007<br />
Current temperature of slot <br />
is °C.<br />
n.a.<br />
n.a.<br />
EVO_IVD_000_008<br />
Current temperature of slot <br />
could not be determined.<br />
Device reported Error .<br />
Washer firmware command<br />
error<br />
Contact your local service<br />
organization<br />
EVO_IVD_000_009 Successfully initialized. n.a. n.a.<br />
EVO_IVD_000_010 Initialization failed. Error during initiatlization Restart <strong>EVOware</strong><br />
Restart <strong>EVOware</strong> and<br />
instrument<br />
Check configuration<br />
Contact your local service<br />
organization<br />
LiHa<br />
EVO_LIH_000_000<br />
Module successfully executed its<br />
COM registration.<br />
n.a.<br />
n.a.<br />
EVO_LIH_000_001<br />
Module is unable to prepare its COM<br />
registration.<br />
• Call name is missing<br />
• No right to write to registry<br />
• Check driver INI file<br />
• Check user rights<br />
EVO_LIH_000_002<br />
An unhandled exception has<br />
occurred.<br />
Exception occurred during<br />
registration<br />
• Check INI file<br />
• Check user rights<br />
EVO_LIH_000_003<br />
No communication to device available.<br />
Device will be simulated.<br />
COM port could not be<br />
opened<br />
Check device configuration<br />
EVO_LIH_000_004<br />
Error while initializing<br />
Communication!<br />
Windows responded with<br />
an error while opening<br />
COM<br />
Check configuration<br />
EVO_LIH_003_000<br />
Could not connect to Message<br />
Server.<br />
Could not connect to<br />
MCS<br />
Check registration of<br />
MCS<br />
EVO_LIH_003_001<br />
Message thread could not be<br />
stopped.<br />
(in debug mode only)<br />
n.a.<br />
EVO_LIH_004_000<br />
General error during database registration!<br />
Problem during connection<br />
to database<br />
• Restart <strong>EVOware</strong><br />
• Restore backup<br />
• Reinstall <strong>EVOware</strong><br />
EVO_LIH_004_001 Scheduler could not be reached! Could not connect the<br />
scheduler<br />
• Restart <strong>EVOware</strong><br />
• Reinstall <strong>EVOware</strong><br />
<strong>Freedom</strong> <strong>EVOware</strong> <strong>Software</strong> <strong>Manual</strong>, 393172, en, V<strong>2.3</strong> 18 - 59
18 - Error Handling<br />
List of Error Messages<br />
Tab. 18-1 List of error messages (cont.)<br />
Error ID Message Text Reason Corrective Measure<br />
EVO_LIH_005_000<br />
Cannot read variables from database.<br />
Error when reading variables<br />
from the database<br />
• Restart <strong>EVOware</strong><br />
• Restore backup<br />
• Reinstall <strong>EVOware</strong><br />
EVO_LIH_005_001<br />
Cannot read instances from database.<br />
Error when reading<br />
instances from the database<br />
• Restart <strong>EVOware</strong><br />
• Restore backup<br />
• Reinstall <strong>EVOware</strong><br />
PosID-3<br />
EVO_PID_001_001<br />
Error while initializing PosID device:<br />
Collision avoidance request has<br />
timed out.<br />
Internal error<br />
Restart <strong>Freedom</strong><br />
<strong>EVOware</strong>. If this does not<br />
help, contact your local<br />
service organization.<br />
EVO_PID_001_002<br />
Error while getting initialization status<br />
from PosID device. PosID3 error:<br />
{} - {} Severity: {}<br />
Internal error<br />
Contact your local service<br />
organization<br />
EVO_PID_001_003<br />
Error reading carrier barcode on grid<br />
{0}<br />
Refer to 18.1.13, 18-13<br />
EVO_PID_001_005<br />
Error while getting initialization status<br />
from PosID device: {}<br />
Internal error<br />
Contact your local service<br />
organization<br />
EVO_PID_001_006<br />
Error reading labware {} (grid {}) barcode<br />
Refer to 18.1.14, 18-14<br />
EVO_PID_001_007<br />
Unexpected carrier barcode on grid<br />
{} . Expected{} . Scanned{}<br />
Refer to 18.1.13, 18-13<br />
EVO_PID_001_008 Carrier or tube rack re-scan required Carrier or tube rack rescan<br />
required for doubleblind<br />
check<br />
Make sure the carrier /<br />
tube rack is inserted correctly<br />
and click OK<br />
EVO_PID_001_009<br />
Error while initializing PosID device:<br />
{}<br />
Internal error<br />
Contact your local service<br />
organization<br />
EVO_PID_001_010 Aborted by user. User aborted the operation<br />
(e.g. by clicking Cancel<br />
in a barcode error<br />
prompt).<br />
n.a.<br />
EVO_PID_001_011<br />
Error getting carrier definition for carrier<br />
type '{0}'.<br />
Internal error or carrier<br />
code unknown to <strong>Freedom</strong><br />
<strong>EVOware</strong><br />
• Check barcode on carrier<br />
• Check the carrier code<br />
(barcode prefix) in the<br />
carrier editor<br />
EVO_PID_001_013<br />
Error while setting the barcode definitions.<br />
PosID3 error: {} - {}<br />
Internal error<br />
Contact your local service<br />
organization<br />
EVO_PID_001_014<br />
Error while setting the barcode definitions:<br />
{}<br />
Internal error<br />
Contact your local service<br />
organization<br />
EVO_PID_001_015<br />
An error occured while storing<br />
scanned barcodes.<br />
Internal error<br />
Contact your local service<br />
organization<br />
18 - 60 <strong>Freedom</strong> <strong>EVOware</strong> <strong>Software</strong> <strong>Manual</strong>, 393172, en, V<strong>2.3</strong>
18 - Error Handling<br />
List of Error Messages<br />
Tab. 18-1 List of error messages (cont.)<br />
Error ID Message Text Reason Corrective Measure<br />
EVO_PID_001_016 Error writing barcode file File not accessible • Check output path in<br />
configuration<br />
• Check access rights to<br />
file and folder<br />
EVO_PID_001_017<br />
IOState will be set to off because<br />
connection to instrument could not<br />
be established<br />
• Device initialization<br />
failed<br />
• Instrument or device<br />
switched off<br />
• Incorrect communication<br />
settings<br />
• Bad connections to<br />
device<br />
• Restart <strong>Freedom</strong><br />
<strong>EVOware</strong><br />
• Check if device is powered<br />
• Check communication<br />
settings<br />
• Check connections<br />
EVO_PID_001_018<br />
Cannot connect to PosID-3 communication<br />
driver<br />
Internal error<br />
Contact your local service<br />
organization<br />
EVO_PID_001_019<br />
Cannot connect to PosID-3 communication<br />
driver<br />
Internal error<br />
Contact your local service<br />
organization<br />
EVO_PID_001_020<br />
Cannot connect to collision avoidance<br />
system<br />
Internal error<br />
Restart <strong>Freedom</strong><br />
<strong>EVOware</strong>. If this does not<br />
help, contact your local<br />
service organization<br />
EVO_PID_001_021<br />
Error retrieving communication<br />
channel name.<br />
Internal error<br />
Restart <strong>Freedom</strong><br />
<strong>EVOware</strong>. If this does not<br />
help, contact your local<br />
service organization<br />
EVO_PID_001_022<br />
Collision avoidance request has<br />
timed out.<br />
Internal error<br />
Restart <strong>Freedom</strong><br />
<strong>EVOware</strong>. If this does not<br />
help, contact your local<br />
service organization<br />
EVO_PID_001_023 Collision avoidance error. Internal error Restart <strong>Freedom</strong><br />
<strong>EVOware</strong>. If this does not<br />
help, contact your local<br />
service organization<br />
EVO_PID_001_024 Error while scanning carrier {}: {} Internal error Contact your local service<br />
organization<br />
EVO_PID_001_025 Error while scanning carrier {}: {} Internal error Contact your local service<br />
organization<br />
<strong>Freedom</strong> <strong>EVOware</strong> <strong>Software</strong> <strong>Manual</strong>, 393172, en, V<strong>2.3</strong> 18 - 61
18 - Error Handling<br />
List of Error Messages<br />
Tab. 18-1 List of error messages (cont.)<br />
Error ID Message Text Reason Corrective Measure<br />
EVO_PID_001_026 Error while scanning carrier {}.<br />
PosID3 error: {} - {}<br />
Each carrier or tube rack<br />
is fitted with two barcodes.<br />
This is done to<br />
enhance scanning accuracy.<br />
The two barcodes<br />
only differ in the separator<br />
character between the<br />
carrier code and the barcode<br />
(“\” or “/”). This error<br />
occurs if the barcode<br />
characters which follow<br />
the separator do not<br />
match.<br />
Check the barcode.<br />
EVO_PID_001_027 Error closing doorlocks! The doors could not be<br />
closed and the user<br />
clicked Cancel<br />
EVO_PID_001_028 Driver is not initialized! The PosID-3 driver must<br />
be initialized before running<br />
the script<br />
EVO_PID_001_029 Aborted by system User aborted the operation<br />
n.a.<br />
<strong>Freedom</strong> <strong>EVOware</strong> Plus:<br />
Go to the process editor<br />
and click Initialize before<br />
you open the script editor<br />
and run the script<br />
n.a.<br />
EVO_PID_001_030 Tube Barcode Error (PosID-3) Refer to 18.1.14, 18-14<br />
EVO_PID_001_031 Enter Barcode (PosID-3) Refer to 18.1.16, 18-16<br />
EVO_PID_001_032<br />
Enter Barcode (PosID-3, Double<br />
Blind Entry)<br />
Refer to 18.1.17, 18-17<br />
EVO_PID_001_033<br />
No carrier detected on grid <br />
The carrier barcode has<br />
been scanned (carrier is<br />
present) but the PosID-3<br />
cannot grip it<br />
• Make sure the carrier /<br />
tube rack is inserted correctly<br />
• Check for mechanical<br />
malfunction<br />
EVO_PID_001_034 n.a. A scanning error was<br />
reported and the user<br />
clicked ignore in the Carrier<br />
Barcode Error dialog<br />
box.<br />
EVO_PID_003_001 Barcodes are not identical Double Blind Entry is<br />
enabled and the two barcodes<br />
you entered are<br />
not the same.<br />
n.a.<br />
Enter the same barcode<br />
in both fields.<br />
Symbol BC Scanner<br />
EVO_SBC_000_000 Generated ID n.a. n.a.<br />
EVO_SBC_000_001 Barcode n.a. n.a.<br />
18 - 62 <strong>Freedom</strong> <strong>EVOware</strong> <strong>Software</strong> <strong>Manual</strong>, 393172, en, V<strong>2.3</strong>
18 - Error Handling<br />
List of Error Messages<br />
Tab. 18-1 List of error messages (cont.)<br />
Error ID Message Text Reason Corrective Measure<br />
EVO_SBC_000_002<br />
Generated ID could not be<br />
saved in DB<br />
Labware not found in the<br />
database or labware<br />
locked<br />
• Restart <strong>EVOware</strong><br />
• Restore backup<br />
• Reinstall <strong>EVOware</strong><br />
EVO_SBC_000_003<br />
Error accessing labware '' in<br />
the database.<br />
Labware not found in the<br />
database<br />
• Restart <strong>EVOware</strong><br />
• Restore backup<br />
• Reinstall <strong>EVOware</strong><br />
EVO_SBC_000_004 Execution was successful n.a. n.a.<br />
EVO_SBC_000_005 Error occured during execution n.a. (protocol message) n.a.<br />
Scheduler<br />
EVO_SCH_000_000 Halt pressed, system Interrupted! n.a. n.a.<br />
EVO_SCH_000_001 Module registered. n.a. n.a.<br />
EVO_SCH_000_002 Instrument is ready. n.a. n.a.<br />
EVO_SCH_000_003 Loading module n.a. n.a.<br />
EVO_SCH_000_004 GetInstrument: Index out of range. GetInstrument requested<br />
with wrong index<br />
EVO_SCH_000_005 GetInstrument: Bad index. GetInstrument requested<br />
with wrong index<br />
Contact your local service<br />
organization<br />
Contact your local service<br />
organization<br />
EVO_SCH_000_006<br />
LoadInstruments is currently not<br />
allowed.<br />
Inernal error<br />
Contact your local service<br />
organization<br />
EVO_SCH_000_007<br />
LoadAllInstruments is currently not<br />
allowed.<br />
Inernal error<br />
Contact your local service<br />
organization<br />
EVO_SCH_000_008<br />
UnloadInstruments is already running.<br />
Inernal error<br />
Contact your local service<br />
organization<br />
EVO_SCH_000_009<br />
UnloadInstruments can not be run at<br />
this time.<br />
Inernal error<br />
Contact your local service<br />
organization<br />
EVO_SCH_000_010 Initialization currently not allowed. Inernal error Contact your local service<br />
organization<br />
EVO_SCH_000_011<br />
Configuration file has been changed.<br />
Initialization aborted.<br />
Trac.ini has been modified<br />
Restore originial file or<br />
open configuration and<br />
accept changes<br />
EVO_SCH_000_012<br />
Error initializing instrument drivers.<br />
Instrument driver '' unreachable!:<br />
<br />
Communication to driver<br />
failed<br />
• Restart <strong>EVOware</strong><br />
• Reboot computer<br />
• Reinstall <strong>EVOware</strong><br />
EVO_SCH_000_013 Could not start scheduler Scheduler could not be<br />
connected or shut down<br />
Restart <strong>EVOware</strong><br />
EVO_SCH_000_014<br />
Error shutting down instruments.<br />
Instrument driver '' unreachable!:<br />
<br />
Communication to driver<br />
failed<br />
If error recurs contact<br />
your local service organization<br />
<strong>Freedom</strong> <strong>EVOware</strong> <strong>Software</strong> <strong>Manual</strong>, 393172, en, V<strong>2.3</strong> 18 - 63
18 - Error Handling<br />
List of Error Messages<br />
Tab. 18-1 List of error messages (cont.)<br />
Error ID Message Text Reason Corrective Measure<br />
EVO_SCH_000_015<br />
Instrument driver '' unreachable!:<br />
<br />
Communication to driver<br />
failed<br />
If error recurs contact<br />
your local service organization<br />
EVO_SCH_000_016<br />
Instrument driver '' unreachable!:<br />
unknown error<br />
Communication to driver<br />
failed<br />
If error recurs contact<br />
your local service organization<br />
EVO_SCH_000_017 Resource Missing! Process contains<br />
resource but driver is not<br />
installed<br />
Add/activate driver or<br />
change process<br />
EVO_SCH_000_018 Unknown n.a. n.a.<br />
EVO_SCH_000_019 Cannot initialize Module n.a. Check hardware connections<br />
and driver configuration<br />
EVO_SCH_000_020 Cannot shut down Module n.a. Check hardware connections<br />
and driver configuration<br />
EVO_SCH_001_000<br />
Scheduler Error: cannot allocate<br />
memory!<br />
Insufficient memory<br />
• Increase page file size<br />
• Increase RAM<br />
resources<br />
EVO_SCH_002_000<br />
Revision of process<br />
'' was requested but<br />
the current revision is .<br />
A schedule will be started<br />
but a contained process<br />
was changed<br />
Update saved schedule<br />
or restore original process<br />
file<br />
EVO_SCH_002_001 Create not called. Inernal error Contact your local service<br />
organization<br />
EVO_SCH_002_002<br />
No software license found or evaluation<br />
period expired.<br />
Program will unload.<br />
n.a.<br />
Check your licence<br />
agreement<br />
EVO_SCH_002_003<br />
There is no valid schedule available<br />
for saving.<br />
n.a.<br />
n.a.<br />
EVO_SCH_002_004<br />
Failure while loading schedule information<br />
from disk<br />
Schedule file not accessible<br />
Check access rights to<br />
schedule file/process<br />
folder<br />
EVO_SCH_002_005 The schedule file is not valid. File is corrupt Check schedule file<br />
EVO_SCH_002_006 Scheduler is running. n.a. n.a.<br />
EVO_SCH_002_007 Process is not executable. Process saved is invalid Check process definition<br />
EVO_SCH_002_008 Error: Configuration file is invalid /<br />
has been changed. Protocols cannot<br />
be executed.<br />
Trac.ini has been modified<br />
Restore originial file or<br />
open configuration and<br />
accept changes<br />
EVO_SCH_002_009<br />
Cannot open File for Simulation Output!<br />
File not accessible<br />
Check access rights to file<br />
and folder<br />
18 - 64 <strong>Freedom</strong> <strong>EVOware</strong> <strong>Software</strong> <strong>Manual</strong>, 393172, en, V<strong>2.3</strong>
18 - Error Handling<br />
List of Error Messages<br />
Tab. 18-1 List of error messages (cont.)<br />
Error ID Message Text Reason Corrective Measure<br />
EVO_SCH_002_010 Could not connect to MCS server. Connection to MCS<br />
server failed<br />
Call up “MCS -regserver”<br />
in command prompt<br />
EVO_SCH_002_011<br />
System successfully recovered!<br />
Please check Labware and finish all<br />
canceled steps manually!<br />
n.a.<br />
n.a.<br />
EVO_SCH_002_012 System Recovery n.a. n.a.<br />
EVO_SCH_002_013<br />
System pause requested by user.<br />
Waiting for pending requests to finish...<br />
n.a.<br />
n.a.<br />
EVO_SCH_002_014 Recover Method n.a. n.a.<br />
EVO_SCH_002_015 System successfully recovered! n.a. n.a.<br />
EVO_SCH_002_016 Can not open Recoveryfile File not accessible Check access rights to file<br />
and folder<br />
EVO_SCH_002_017<br />
Impossible to schedule due to insufficient<br />
resource capacity. Add<br />
resources or increase allowed waiting<br />
times to allow sequential use of<br />
resource.<br />
n.a.<br />
n.a.<br />
EVO_SCH_002_018<br />
System pause requested by module<br />
''. Waiting for pending<br />
requests to finish...<br />
n.a.<br />
n.a.<br />
EVO_SCH_002_019 The macro ''is still active. n.a. n.a.<br />
EVO_SCH_002_020<br />
Module timeout caused by .<br />
Timeout buffer started...<br />
n.a.<br />
n.a.<br />
EVO_SCH_002_021 System resumes... n.a. n.a.<br />
EVO_SCH_002_022<br />
Error opening schedule file ''.<br />
Save schedule failed<br />
Check access rights to file<br />
and folder<br />
EVO_SCH_002_023<br />
Error writing schedule file ''-<br />
• Save schedule failed<br />
• Storage capacity of<br />
harddisk exceeded<br />
• Perform data management<br />
on harddisk<br />
• Contact your local service<br />
organization<br />
EVO_SCH_003_000<br />
SetReservation <br />
() Start <br />
()<br />
Internal error<br />
Contact your local service<br />
organization<br />
EVO_SCH_003_001<br />
CheckRessources failed () Start ()<br />
Internal error<br />
Contact your local service<br />
organization<br />
EVO_SCH_003_002 SetReservation n.a. (window title) n.a.<br />
<strong>Freedom</strong> <strong>EVOware</strong> <strong>Software</strong> <strong>Manual</strong>, 393172, en, V<strong>2.3</strong> 18 - 65
18 - Error Handling<br />
List of Error Messages<br />
Tab. 18-1 List of error messages (cont.)<br />
Error ID Message Text Reason Corrective Measure<br />
EVO_SCH_003_003<br />
Macro could<br />
not be restored! (Start=<br />
Duration= Module=)!<br />
Internal error<br />
Contact your local service<br />
organization<br />
EVO_SCH_003_004<br />
Macro could<br />
not be restored! (Start=<br />
Duration= Module=?)!<br />
Internal error<br />
Contact your local service<br />
organization<br />
EVO_SCH_003_005<br />
Action (ID) is not reserved!<br />
(Start= - Modul=)<br />
Internal error<br />
Contact your local service<br />
organization<br />
EVO_SCH_004_000 Process impossible to schedule! Inconsistent process Check process definition/<br />
time settings<br />
EVO_SCH_004_001<br />
Robot access for Source and Destination<br />
location in Process is incompatible!<br />
No robot is allowed for<br />
both carriers/locations<br />
Reconfigure carriers or<br />
change process<br />
EVO_SCH_004_002 Process Restored! Time n.a. n.a.<br />
EVO_SCH_004_003<br />
Error backup reservation !<br />
Time=<br />
Internal error<br />
Contact your local service<br />
organization<br />
EVO_SCH_004_004 Process stopped! n.a. n.a.<br />
EVO_SCH_004_005 Process cancelled! n.a. n.a.<br />
EVO_SCH_004_006<br />
Check Ressources failed!<br />
Time=<br />
Internal error<br />
Contact your local service<br />
organization<br />
EVO_SCH_004_007<br />
Process can not be<br />
restored! Time=<br />
Internal error<br />
Contact your local service<br />
organization<br />
EVO_SCH_004_008<br />
CheckRessources failed after<br />
restore Process! <br />
Time=<br />
Internal error<br />
Contact your local service<br />
organization<br />
EVO_SCH_004_009<br />
Macro ()<br />
could not be restored Start= Duration=<br />
Modul= !<br />
Internal error<br />
Contact your local service<br />
organization<br />
EVO_SCH_004_010<br />
Macro ()<br />
could not be restored Start= Duration= <br />
Modul=?!<br />
Internal error<br />
Contact your local service<br />
organization<br />
EVO_SCH_004_011<br />
Start Recovery Process for Process<br />
(ID)!<br />
n.a.<br />
n.a.<br />
EVO_SCH_005_000<br />
Allowed waiting time of macro<br />
() must<br />
be increased to for<br />
macro ()!<br />
Scheduling of process<br />
impossible due to timing<br />
problems<br />
Increase permissible waiting<br />
time as suggested<br />
18 - 66 <strong>Freedom</strong> <strong>EVOware</strong> <strong>Software</strong> <strong>Manual</strong>, 393172, en, V<strong>2.3</strong>
18 - Error Handling<br />
List of Error Messages<br />
Tab. 18-1 List of error messages (cont.)<br />
Error ID Message Text Reason Corrective Measure<br />
EVO_SCH_005_001<br />
CheckOccupation failed ()<br />
Internal error<br />
Contact your local service<br />
organization<br />
EVO_SCH_006_000<br />
Ressource of Mainaction<br />
() for ()<br />
not available! Time=<br />
Internal error<br />
Contact your local service<br />
organization<br />
EVO_SCH_007_000 No instruments. n.a. n.a.<br />
EVO_SCH_007_001<br />
Loading device drivers timed out<br />
while waiting for feedback from<br />
driver '<br />
Driver did not register with<br />
scheduler<br />
• Restart device and system<br />
• Contact your local service<br />
organization<br />
EVO_SCH_008_000<br />
Can not allocate memory for Time<br />
file. Time fit will not work properly.<br />
Insufficient memory<br />
• Increase page file size<br />
• Increase RAM<br />
resources<br />
Startup wizard<br />
EVO_TIN_001_000 No error n.a. n.a.<br />
EVO_TIN_001_001 Administrator rights necessary n.a. n.a.<br />
EVO_TIN_001_002 Read only property n.a. n.a.<br />
EVO_TIN_001_003 Write only property n.a. n.a.<br />
EVO_TIN_001_004 Language not supported n.a. n.a.<br />
EVO_TIN_001_005 Wrong parameter n.a. n.a.<br />
EVO_TIN_001_006 Not logged in n.a. n.a.<br />
EVO_TIN_001_007 Login n.a. n.a.<br />
EVO_TIN_001_008 Wrong password n.a. n.a.<br />
EVO_TIN_001_009 Password not compliant n.a. n.a.<br />
EVO_TIN_001_010 Passwords identical n.a. n.a.<br />
EVO_TIN_001_011 Passwords already used n.a. n.a.<br />
EVO_TIN_001_012 Could not access user database n.a. n.a.<br />
EVO_TIN_001_013 User does not exist User not defined Call administrator to have<br />
user properly defined<br />
EVO_TIN_001_014 User is disabled n.a. n.a.<br />
EVO_TIN_001_015 Login failed n.a. n.a.<br />
EVO_TIN_001_016 Initial password expired n.a. n.a.<br />
EVO_TIN_001_017 Password expired n.a. n.a.<br />
EVO_TIN_001_018 Wrong login n.a. n.a.<br />
EVO_TIN_001_019 Administrator right needed n.a. n.a.<br />
<strong>Freedom</strong> <strong>EVOware</strong> <strong>Software</strong> <strong>Manual</strong>, 393172, en, V<strong>2.3</strong> 18 - 67
18 - Error Handling<br />
List of Error Messages<br />
Tab. 18-1 List of error messages (cont.)<br />
Error ID Message Text Reason Corrective Measure<br />
EVO_TIN_001_020<br />
<strong>EVOware</strong> Application Specialist<br />
needed<br />
n.a.<br />
n.a.<br />
EVO_TIN_001_021 This user has no rights in <strong>EVOware</strong> User not properly defined Call administrator to have<br />
user properly defined<br />
EVO_TIN_001_022<br />
First time initialization needed!<br />
Please login as administrator<br />
n.a.<br />
n.a.<br />
EVO_TIN_001_023 Unspecified user management error n.a. n.a.<br />
18 - 68 <strong>Freedom</strong> <strong>EVOware</strong> <strong>Software</strong> <strong>Manual</strong>, 393172, en, V<strong>2.3</strong>
19 - Customer Support<br />
19 Customer Support<br />
Purpose of This<br />
Chapter<br />
How to get Help<br />
Feedback on<br />
This <strong>Manual</strong><br />
Addresses<br />
This chapter informs you how to contact us in case help is needed. It lists<br />
addresses and telephone numbers of the manufacturer’s representatives.<br />
Tecan and its representatives maintain a fully trained staff of technical specialists<br />
around the world. For any technical question, contact the nearest Tecan<br />
representative.<br />
If you have any comments on this <strong>Software</strong> <strong>Manual</strong> or suggestions for<br />
improvement, please send them by e-mail to docfeedback@tecan.com.<br />
In your e-mail, please specify the manual name, the document ID and the manual<br />
version. This information is shown at the bottom of each printed page and on the<br />
first page of the help file (context-sensitive help of software products).<br />
Contact your local distributor or one of the addresses below.<br />
Also see our homepage on the web: www.tecan.com<br />
Country/Region Address Telephone/Telefax/E-mail<br />
Asia<br />
Tecan Asia Pte Ltd.<br />
18 Boon Lay Way,<br />
#09-140 TradeHub 21<br />
Singapore 609966<br />
Singapore<br />
Telephone<br />
Telefax<br />
E-mail<br />
+65 6444 1886<br />
+65 6444 1836<br />
tecan@tecan.com.sg<br />
Austria<br />
Tecan Austria GmbH<br />
Untersbergstrasse 1a<br />
A-5082 Grödig<br />
Austria<br />
Telephone<br />
Telefax<br />
E-mail<br />
+43 6246 8933 256<br />
+43 6246 72 770<br />
helpdesk-at@tecan.com<br />
Belgium<br />
Tecan Benelux B.V.B.A.<br />
Vaartdijk 55<br />
B-2800 Mechelen<br />
Belgium<br />
Telephone<br />
Telefax<br />
E-mail<br />
+32 15 42 13 19<br />
+32 15 42 16 12<br />
tecan-be@tecan.com<br />
China<br />
Tecan Group Ltd., Beijing<br />
Representative Office<br />
Room 2502, Building A,<br />
Jianwai SOHO<br />
No. 39, Dongshanhuan Zhong Road<br />
100022 Beijing<br />
China<br />
Telephone<br />
Telefax<br />
E-mail<br />
+86-10 5869 5936<br />
+86-10-5869 5935<br />
helpdesk-cn@tecan.com<br />
France<br />
Tecan France S.A.<br />
26 avenue Tony Garnier<br />
F-69007 Lyon<br />
France<br />
Telephone<br />
Telefax<br />
E-mail<br />
+33 820 88 77 36<br />
+33 472 76 04 99<br />
helpdesk-fr@tecan.com<br />
Germany<br />
Tecan Deutschland GmbH<br />
Theodor-Storm-Strasse 17<br />
D-74564 Crailsheim<br />
Germany<br />
Telephone<br />
Telefax<br />
E-mail<br />
+49 1805 8322 633 or<br />
+49 1805 TECAN DE<br />
+49 7951 9417 92<br />
helpdesk-de@tecan.com<br />
<strong>Freedom</strong> <strong>EVOware</strong> <strong>Software</strong> <strong>Manual</strong>, 393172, en, V<strong>2.3</strong> 19 - 1
19 - Customer Support<br />
Italy<br />
Tecan Italia, S.r.l.<br />
Via Brescia, 39<br />
I-20063 Cernusco Sul Naviglio (MI)<br />
Italy<br />
Telephone<br />
Telefax<br />
E-mail<br />
+39 (02) 92 44 790<br />
+39 (02) 92 72 90 47<br />
helpdesk-it@tecan.com<br />
Japan<br />
Tecan Japan Co., Ltd.<br />
Kawasaki Tech Center<br />
580-16, Horikawa-cho, Saiwai-ku<br />
Kawasaki, Kanagawa 212-0013<br />
Japan<br />
Telephone<br />
Telefax<br />
Telephone<br />
E-mail<br />
+81 44 556 7311 (Kawasaki)<br />
+81 44 556 7312 (Kawasaki)<br />
+81 (0) 6305 8511 (Osaka)<br />
helpdesk-jp@tecan.com<br />
Netherlands<br />
Tecan Benelux B.V.B.A.<br />
Industrieweg 30<br />
NL-4283 GZ Giessen<br />
Netherlands<br />
Telephone<br />
Telefax<br />
E-mail<br />
+31 183 44 81 74<br />
+31 183 44 80 67<br />
tecan-nl@tecan.com<br />
Portugal<br />
Tecan Ibérica (Portugal)<br />
Quinta da Fonte Edificio Pedro I<br />
P-2780-730 Paço D’Arcos<br />
Portugal<br />
Telephone +35 21 000 8216<br />
Scandinavia<br />
Tecan Nordic AB<br />
Taljegårdsgatan 11B<br />
SE-431 53 Mölndal<br />
Sweden<br />
Telephone<br />
Telefax<br />
E-mail<br />
+46 317 54 40 00<br />
+46 317 54 40 10<br />
helpdesk@tecan.se<br />
Spain<br />
Tecan Ibérica (Spain)<br />
Sabino de Arana 32<br />
E-08028 Barcelona<br />
Spain<br />
Telephone<br />
Telefax<br />
E-mail<br />
+34 93 409 1237<br />
+34 93 411 2407<br />
helpdesk-sp@tecan.com<br />
N VI - km 23,300<br />
c/ Pollensa, 4 - Oficina 8<br />
E-28230 Las Rozas de Madrid<br />
Spain<br />
Telephone<br />
Telefax<br />
E-mail<br />
+34 91 151 71 07<br />
+34 91 151 71 20<br />
helpdesk-sp@tecan.com<br />
Switzerland<br />
Tecan Schweiz AG<br />
Seestrasse 103<br />
CH-8708 Männedorf<br />
Switzerland<br />
Telephone<br />
Telefax<br />
E-mail<br />
+41 44 922 82 82<br />
+41 44 922 84 84<br />
helpdesk-ch@tecan.com<br />
United Kingdom<br />
Tecan UK<br />
Theale Court<br />
11-13 High Street<br />
Theale<br />
UK-Reading RG7 5AH<br />
United Kingdom<br />
Telephone<br />
Telefax<br />
E-mail<br />
+44 118 930 0300<br />
+44 118 930 5671<br />
helpdesk-uk@tecan.com<br />
USA<br />
(Tecan instruments)<br />
Tecan US<br />
4022 Stirrup Creek Road, Suite 310<br />
Durham, NC 27703<br />
USA<br />
Telephone<br />
Telefax<br />
Telephone<br />
Telephone<br />
E-mail<br />
+1 919 361 5200<br />
+1 919 361 5201<br />
Toll free in the US:<br />
+1 800 TECAN US or<br />
+1 800 832 2687<br />
helpdesk-us@tecan.com<br />
19 - 2 <strong>Freedom</strong> <strong>EVOware</strong> <strong>Software</strong> <strong>Manual</strong>, 393172, en, V<strong>2.3</strong>
19 - Customer Support<br />
USA<br />
(Components)<br />
Tecan Systems Inc.<br />
2450 Zanker Road<br />
San Jose, CA 95131<br />
USA<br />
Telephone<br />
Telefax<br />
Telephone<br />
E-mail<br />
+1 408 953 3100<br />
+1 408 953 3101<br />
Toll free in the US:<br />
+1 866 798 3226<br />
tecan-sy@tecan.com<br />
<strong>Freedom</strong> <strong>EVOware</strong> <strong>Software</strong> <strong>Manual</strong>, 393172, en, V<strong>2.3</strong> 19 - 3
19 - Customer Support<br />
19 - 4 <strong>Freedom</strong> <strong>EVOware</strong> <strong>Software</strong> <strong>Manual</strong>, 393172, en, V<strong>2.3</strong>
A - Appendix A<br />
Overview of the Log Files<br />
A<br />
Appendix A<br />
This chapter contains background information on file and directory structures,<br />
system tools for <strong>Freedom</strong> <strong>EVOware</strong> and advanced worklist commands.<br />
A.1 Overview of the Log Files<br />
<strong>Freedom</strong> <strong>EVOware</strong> writes log files to document the pipetting, to record user<br />
actions and changes to parameter values, to help you to check scripts in offline<br />
mode and to find errors. The log files are written to a specified directory (default<br />
\AuditTrail\Log).<br />
• A new log file of type EVO is created each time <strong>Freedom</strong> <strong>EVOware</strong> is started.<br />
It contains initialization information from the <strong>Freedom</strong> <strong>EVOware</strong> software, the<br />
<strong>Freedom</strong> <strong>EVOware</strong> version number and the serial number of the pipetting<br />
instrument. It also contains information on the hardware options and external<br />
devices which are currently connected to the pipetting instrument, including<br />
their firmware versions.<br />
• A new log file of type EVO is also created each time a pipetting script or<br />
process is started. It contains information about the script, the position of the<br />
instrument arms and the instrument settings.<br />
• Each time the pipetting instrument is initialized, <strong>Freedom</strong> <strong>EVOware</strong> writes<br />
information on the positions of arms, the connected external devices and the<br />
COM ports into a new log file of type EVO.<br />
• <strong>Freedom</strong> <strong>EVOware</strong> always creates log files of type EVO. Using the<br />
Configuration Tool, users with Administrator or Application Specialist rights<br />
can activate additional log files of type USR and type ERR with different<br />
levels of logging detail. See A.1.2 “Structure of Log Files of Type USR”, A-9<br />
and A.1.3 “Structure of Log Files of Type ERR”, A-9 for more information.<br />
• Log files of type MACRO (file name MACRO*.log) contain messages from<br />
internal <strong>Freedom</strong> <strong>EVOware</strong> commands (macros). The information which is<br />
logged can also be viewed in the <strong>EVOware</strong>/Macro channel of the LogViewer<br />
tool. See also A.1.4 “Log Files of Type MACRO”, A-10.<br />
• Log files of type DB (file name DB*.log) contain messages from <strong>Freedom</strong><br />
<strong>EVOware</strong>’s internal database. See also A.1.5 “Log Files of Type DB”, A-10.<br />
• Log files of type MCS (file name MCS*.log) contain messages from the<br />
Message Control Server. The MCS does not normally create log files. To<br />
activate logging for the MCS, see A.1.6 “Log Files of Type MCS”, A-10.<br />
• In addition, the Export Data command can be included in pipetting scripts to<br />
create report files on pipetting operations (see 15.26 “Export Data Command”,<br />
15-48).<br />
You can also view recent log entries by choosing Log Window in the View menu.<br />
The Log Window has the same contents as the log file of type EVO and initially<br />
shows the last 1000 log entries.<br />
Note: <strong>Freedom</strong> <strong>EVOware</strong> can output a large amount of logging information. It is<br />
recommended to back up and then delete the old log files on a regular basis. They<br />
are not backed up by the Backup function - you should use the Audit Trail<br />
Archiving function instead. See A.9.6 “Audit Trail Archiving tool”, A-47.<br />
<strong>Freedom</strong> <strong>EVOware</strong> <strong>Software</strong> <strong>Manual</strong>, 393172, en, V<strong>2.3</strong> A - 1
A - Appendix A<br />
Overview of the Log Files<br />
A.1.1 Structure of Log Files of Type EVO<br />
A log file of type EVO has the highest level of logging detail. The file names are<br />
EVO_YYYYMMDD_HHMMSS.log, where YYYYMMDD is the creation date and<br />
HHMMSS is the creation time. Each log file of type EVO is protected with a<br />
checksum which is stored in the first line of the file.<br />
<strong>Freedom</strong> <strong>EVOware</strong> always creates log files of type EVO. The information which is<br />
logged can also be viewed in the Tecan/<strong>EVOware</strong>/Log channel of the LogViewer<br />
tool (see A.10 “LogViewer Tool”, A-72).<br />
Each time <strong>Freedom</strong> <strong>EVOware</strong> is started, a new log file of type EVO is created in<br />
the specified log files directory (default \AuditTrail\Log). It contains<br />
initialization information from the <strong>Freedom</strong> <strong>EVOware</strong> software, the <strong>Freedom</strong><br />
<strong>EVOware</strong> version number and the serial number of the pipetting instrument. It<br />
also contains information on the hardware options and external devices which are<br />
currently connected to the pipetting instrument, including their firmware versions.<br />
A new log file of type EVO is also created each time you run a script or process. It<br />
contains the record types A to E and G from Tab. A-1, A-8 and includes<br />
information on pipetting commands, user inputs and errors/warnings. If a device<br />
error is reported in a log file of type EVO, the log file of type MACRO may contain<br />
additional information on the error. This depends on the type of error.<br />
Check the Log serial data checkbox in the Configuration Tool if you want to<br />
include the record type F (instrument firmware commands) too. See<br />
8.3.1.4 “Protocol Options Tab”, 8-8. This will significantly increase the size of<br />
the log files.<br />
The serial data can be useful when investigating communication errors. The log<br />
file also includes firmware commands for devices which are connected to the<br />
instrument’s CAN bus (e.g. LiHa, RoMa, PnP, incubator(s), Te-Shake, Te-MagS,<br />
Te-VacS and Te-Stack). It does not include firmware commands from devices<br />
which have their own RS232 interface.<br />
See 8.4.3.2 “Logging Option”, 8-36 for information on log files for devices which<br />
have their own RS232 interface.<br />
The following example shows part of a log file of type EVO*.log (the record types<br />
are described in Tab. A-1, A-8):<br />
7BEFBDC6<br />
20040721_103529 admin<br />
<strong>Freedom</strong> <strong>EVOware</strong>, Version 1.2.28.301<br />
D 10:35:29 Starting program "Aspirate.esc" (lines 1 to 2)<br />
F 10:35:29 > P1,SGO0<br />
- P1,0<br />
> P1,LAA0,0,4<br />
- P1,0<br />
> P1,PIG<br />
- P1,0<br />
E 10:35:29 0 Line 1 : Aspirate<br />
F 10:35:29 > W2,RPX0<br />
- W2,0,-100<br />
> C2,RPX0<br />
- C2,0,9680<br />
> C2,RPR0<br />
- C2,0,0<br />
E 10:35:29 0<br />
tip 1 : aspirate 52.06µl 1, 1 Tube 13*75mm 16 Pos [9,1]<br />
50.00µl "Water" <strong>Standard</strong> Single<br />
tip 2 : aspirate 52.06µl 1, 2 Tube 13*75mm 16 Pos [9,1]<br />
A - 2 <strong>Freedom</strong> <strong>EVOware</strong> <strong>Software</strong> <strong>Manual</strong>, 393172, en, V<strong>2.3</strong>
A - Appendix A<br />
Overview of the Log Files<br />
50.00µl "Water" <strong>Standard</strong> Single<br />
F 10:35:29 > C5,SHZ2080,2080,2080,2080,2080,2080,2080,2080<br />
- C5,0<br />
> C5,RPX0<br />
- C5,0,1295<br />
> C5,RPY0<br />
- C5,0,1031,90<br />
> W2,RPX0<br />
- W2,0,-100<br />
> C2,RPX0<br />
- C2,0,9680<br />
> C2,RPR0<br />
- C2,0,0<br />
> C5,PAA2000,-32,188,1225,1225,2080,2080,2080,2080,2080,2080<br />
F 10:35:31 - C5,0<br />
> C5,RTS<br />
- C5,0,227<br />
> C5,SDM7,1<br />
- C5,0<br />
> C5,SSL600,600,,,,,,<br />
- C5,0<br />
> C5,SDL40,40,,,,,,<br />
- C5,0<br />
> C5,STL1225,1225,,,,,,<br />
- C5,0<br />
> C5,SML490,490,2100,2100,2100,2100,2100,2100<br />
- C5,0<br />
> C5,SBL20,20,,,,,,<br />
- C5,0<br />
> C5,MDT3,,,,19,19,0,0,0,0,0,0<br />
F 10:35:37 * C5,11<br />
> C5,REE<br />
- C5,0,@@@@K@@@@@@<br />
> C5,RVZ1<br />
- C5,0,544,502,0,0,0,0,0,0<br />
C 10:35:37 0 tip 1 : OK / automatic handling<br />
tip 2 : not enough liquid<br />
F 10:35:37 > O1,ALO1,0<br />
- O1,0<br />
> O1,RSL1<br />
- O1,0,1<br />
> O1,ALO2,0<br />
- O1,0<br />
> O1,SSL1,0<br />
- O1,0<br />
> O1,SSL2,2<br />
- O1,0<br />
D 10:36:42 0 button "pipette air" has been pressed<br />
F 10:36:42 > O1,ALO1,1<br />
F 10:36:43 - O1,0<br />
> O1,ALO2,1<br />
- O1,0<br />
> C5,RPZ0<br />
> O1,RSL2<br />
- O1,0,2<br />
> O1,SSL2,0<br />
- C5,0,513,2080,2080,2080,2080,2080,2080,2080<br />
- O1,0<br />
<strong>Freedom</strong> <strong>EVOware</strong> <strong>Software</strong> <strong>Manual</strong>, 393172, en, V<strong>2.3</strong> A - 3
A - Appendix A<br />
Overview of the Log Files<br />
> C5,SSZ21,,,,,,,<br />
> O1,SSL1,1<br />
- C5,0<br />
> C5,SEP900,900,,,,,,<br />
- O1,0<br />
- C5,0<br />
> C5,STZ-7,0,,,,,,<br />
- C5,0<br />
> C5,MTR156,156,,,,,,<br />
F 10:36:44 - C5,0<br />
> C5,RPZ0<br />
- C5,0,506,2080,2080,2080,2080,2080,2080,2080<br />
> C5,SSZ200,,,,,,,<br />
- C5,0<br />
> C5,MAZ583,,,,,,,<br />
F 10:36:45 - C5,0<br />
> C5,PVL0,0,,,,,,<br />
- C5,0<br />
> C5,SEP420,420,,,,,,<br />
- C5,0<br />
> C5,PPR30,30,,,,,,<br />
- C5,0<br />
> C5,RTS<br />
- C5,0,227<br />
E 10:36:45 0 detected_volume_1 = 207<br />
detected_volume_2 = 20<br />
detected_volume_3 = -1<br />
detected_volume_4 = -1<br />
detected_volume_5 = -1<br />
detected_volume_6 = -1<br />
detected_volume_7 = -1<br />
detected_volume_8 = -1<br />
F 10:36:45<br />
Line<br />
> W2,RPX0<br />
- W2,0,-100<br />
> C2,RPX0<br />
- C2,0,9680<br />
> C2,RPR0<br />
- C2,0,0<br />
2 : Dispense<br />
E 10:36:45 0<br />
tip 1 : dispense 62.06µl 1, 1 Wash Station Waste [6,2]<br />
50.00µl "Water" <strong>Standard</strong> Single<br />
tip 2 : dispense 62.06µl 1, 2 Wash Station Waste [6,2]<br />
50.00µl "Water" <strong>Standard</strong> Single<br />
F 10:36:45<br />
> C5,SHZ2080,2080,2080,2080,2080,2080,2080,2080<br />
- C5,0<br />
> C5,RPX0<br />
- C5,0,2000<br />
> C5,RPY0<br />
- C5,0,-32,188<br />
> W2,RPX0<br />
- W2,0,-100<br />
> C2,RPX0<br />
- C2,0,9680<br />
> C2,RPR0<br />
- C2,0,0<br />
> C5,PAA1295,1031,90,1200,1200,2080,2080,2080,2080,2080,2080<br />
A - 4 <strong>Freedom</strong> <strong>EVOware</strong> <strong>Software</strong> <strong>Manual</strong>, 393172, en, V<strong>2.3</strong>
A - Appendix A<br />
Overview of the Log Files<br />
F 10:36:47 - C5,0<br />
> C5,RTS<br />
F 10:36:48 - C5,0,227<br />
> C5,RPP0<br />
- C5,0,246,246,120,120,120,120,120,0<br />
> C5,RPZ0<br />
- C5,0,1200,1200,2080,2080,2080,2080,2080,2080<br />
> C5,SEP3600,3600,,,,,,<br />
- C5,0<br />
> C5,SPP900,900,,,,,,<br />
- C5,0<br />
> C5,STZ0,0,,,,,,<br />
- C5,0<br />
> C5,MTR-186,-186,,,,,,<br />
- C5,0<br />
> C5,RPZ0<br />
- C5,0,1200,1200,2080,2080,2080,2080,2080,2080<br />
> C5,RTS<br />
- C5,0,227<br />
E 10:36:48 0 detected_volume_1 = -1<br />
detected_volume_2 = -1<br />
detected_volume_3 = -1<br />
detected_volume_4 = -1<br />
detected_volume_5 = -1<br />
detected_volume_6 = -1<br />
detected_volume_7 = -1<br />
detected_volume_8 = -1<br />
F 10:36:48 > P1,SGO0<br />
- P1,0<br />
> P1,LAA0,0,4<br />
- P1,0<br />
> O1,ALO1,0<br />
- O1,0<br />
> O1,ALO2,0<br />
- O1,0<br />
> O1,RSL1<br />
- O1,0,1<br />
> O1,SSL1,0<br />
- O1,0<br />
> O1,RSL2<br />
- O1,0,0<br />
> O1,SPS0<br />
- O1,0<br />
F 10:37:02 > O1,RSL1<br />
- O1,0,0<br />
> O1,RSL2<br />
- O1,0,0<br />
C 10:37:24 Should Evoware move all arms to their home position?<br />
D 10:37:31 button Yes has been pressed<br />
A 10:37:31<br />
A 10:37:32<br />
F 10:37:32<br />
SHUTTING DOWN DEVICES<br />
UNLOADING DEVICE DRIVERS<br />
Named Pipe 3 closed<br />
Named Pipe 2 closed<br />
Named Pipe 1 closed<br />
SHUTTING DOWN INSTRUMENTS<br />
> O1,ALO1,1<br />
- O1,0<br />
<strong>Freedom</strong> <strong>EVOware</strong> <strong>Software</strong> <strong>Manual</strong>, 393172, en, V<strong>2.3</strong> A - 5
A - Appendix A<br />
Overview of the Log Files<br />
> O1,ALO2,1<br />
F 10:37:33 - O1,0<br />
> C1,SRA<br />
- C1,0<br />
> C1,REE<br />
- C1,0,@@@@@<br />
> C1,RPR0<br />
- C1,0,0<br />
> C1,RPG0<br />
- C1,0,900<br />
> C1,PAG900<br />
- C1,0<br />
> C2,RPX0<br />
- C2,0,9680<br />
> C2,RPY0<br />
- C2,0,1059<br />
> C2,RPZ0<br />
- C2,0,2548<br />
> C2,RPR0<br />
- C2,0,0<br />
> C2,RPG0<br />
- C2,0,900<br />
> C2,RPR0<br />
- C2,0,0<br />
> C1,SAA1,9680,1059,2548,0,,1<br />
- C1,0<br />
> C1,RPR0<br />
- C1,0,0<br />
> C1,RPG0<br />
- C1,0,900<br />
> C6,RPX0<br />
- C6,0,1295<br />
> C1,AAA<br />
- C1,0<br />
> C2,RPX0<br />
- C2,0,9680<br />
> C2,RPY0<br />
- C2,0,1059<br />
> C2,RPZ0<br />
- C2,0,2548<br />
> C2,RPR0<br />
- C2,0,0<br />
> C2,RPG0<br />
- C2,0,900<br />
> W2,RPX0<br />
- W2,0,-100<br />
> C2,RPX0<br />
- C2,0,9680<br />
> C2,RPR0<br />
- C2,0,0<br />
> C5,RPX0<br />
- C5,0,1295<br />
> C5,RPY0<br />
- C5,0,1031,90<br />
> W2,RPX0<br />
- W2,0,-100<br />
> C2,RPX0<br />
- C2,0,9680<br />
A - 6 <strong>Freedom</strong> <strong>EVOware</strong> <strong>Software</strong> <strong>Manual</strong>, 393172, en, V<strong>2.3</strong>
A - Appendix A<br />
Overview of the Log Files<br />
> C2,RPR0<br />
- C2,0,0<br />
> C5,SHZ2080,2080,2080,2080,2080,2080,2080,2080<br />
- C5,0<br />
> C5,PAA1295,1031,90,1200,1200,450,450,450,540,540,860<br />
F 10:37:34 - C5,0<br />
> W1,PAG280<br />
- W1,0<br />
> W2,RPX0<br />
- W2,0,-100<br />
> W2,RPY0<br />
- W2,0,-700<br />
> W2,RPZ0<br />
- W2,0,2600<br />
> W2,RPR0<br />
- W2,0,0<br />
> W2,RPG0<br />
- W2,0,280<br />
> C6,RPX0<br />
- C6,0,1295<br />
> W1,PAA-100,-700,2600,0<br />
F 10:37:35 - W1,0<br />
> W2,RPX0<br />
- W2,0,-100<br />
> W2,RPY0<br />
- W2,0,-700<br />
> W2,RPZ0<br />
- W2,0,2600<br />
> W2,RPR0<br />
- W2,0,0<br />
> W2,RPG0<br />
- W2,0,280<br />
> O6,STT0<br />
- O6,0<br />
> O6,RLC<br />
- O6,0,1<br />
> O1,ALO1,0<br />
- O1,0<br />
> O1,ALO2,0<br />
- O1,0<br />
> C5,SDZ390,390,-500,-500,-500,-270,-270,50<br />
- C5,0<br />
A 10:37:35 setting baudrate 38400<br />
F 10:37:35 > M1,SHB5<br />
- M1,0<br />
A 10:37:38 quitting Genesis driver<br />
quitting Evoware<br />
closing log-file<br />
<strong>Freedom</strong> <strong>EVOware</strong> <strong>Software</strong> <strong>Manual</strong>, 393172, en, V<strong>2.3</strong> A - 7
A - Appendix A<br />
Overview of the Log Files<br />
Each line has the following structure:<br />
Tab. A-1 Structure of the log files<br />
Column<br />
Explanation<br />
1 Alpha character which indicates the type of logged information:<br />
A = internal event<br />
B = dialog was opened<br />
C = message appeared on the screen<br />
D = user action<br />
E = pipetting command<br />
F = serial data (instrument firmware command):<br />
command prefix ">" = command sent to the instrument<br />
command prefix "-" = response from the instrument<br />
command prefix "*" = response from the instrument reports an error<br />
G = named pipe command or response<br />
2 Space character<br />
3 .. 10 The time in the format hh:mm:ss<br />
11 - 12 Space characters<br />
13 <strong>Freedom</strong> <strong>EVOware</strong> Plus: Process copy ID (process instance ID) minus 1.<br />
<strong>Freedom</strong> <strong>EVOware</strong> <strong>Standard</strong>: always 0.<br />
14 Space character<br />
15 .. End of Line Additional information depending on the type of record<br />
Note: Some of the columns 1 to 10 are filled with space characters if the type of<br />
information or the time has not changed since the previous line.<br />
Line 1 of each log file contains the file checksum. Line 2 contains the creation date<br />
and time of the log file and the name of the currently logged in user. Line 3<br />
contains the <strong>Freedom</strong> <strong>EVOware</strong> software build code (this is not the same as the<br />
<strong>Freedom</strong> <strong>EVOware</strong> version).<br />
The log file entries for a pipetting command, taken from the above log file<br />
example, are as follows:<br />
D 10:35:29 Starting program "Aspirate.esc" (lines 1 to 2)<br />
F 10:35:29 > P1,SGO0<br />
- P1,0<br />
> P1,LAA0,0,4<br />
- P1,0<br />
> P1,PIG<br />
- P1,0<br />
E 10:35:29 0 Line 1 : Aspirate<br />
F 10:35:29 > W2,RPX0<br />
- W2,0,-100<br />
> C2,RPX0<br />
- C2,0,9680<br />
> C2,RPR0<br />
- C2,0,0<br />
E 10:35:29 0<br />
tip 1 : aspirate 52.06µl 1, 1 Tube 13*75mm 16 Pos [9,1]<br />
50.00µl "Water" <strong>Standard</strong> Single<br />
tip 2 : aspirate 52.06µl 1, 2 Tube 13*75mm 16 Pos [9,1]<br />
A - 8 <strong>Freedom</strong> <strong>EVOware</strong> <strong>Software</strong> <strong>Manual</strong>, 393172, en, V<strong>2.3</strong>
A - Appendix A<br />
Overview of the Log Files<br />
50.00µl "Water" <strong>Standard</strong> Single<br />
"Starting program “Aspirate.esc" ...<br />
<strong>Freedom</strong> <strong>EVOware</strong> started to process the pipetting script “Aspirate.esc” at<br />
10:35:29. The following six lines show firmware commands which were sent to<br />
and received from the pipetting instrument.<br />
"Line 1 : Aspirate" ...<br />
Line 1 of the <strong>Freedom</strong> <strong>EVOware</strong> script was executed by process copy “0”. It<br />
contains an Aspirate command. The following six lines show firmware commands<br />
which were sent to and received from the pipetting instrument.<br />
"tip 1 : aspirate 52.06µl 1, 1 Tube 13*75mm 16 Pos [9,1]"<br />
Tip 1 executes an Aspirate command which aspirated 52.06 µl (the net volume of<br />
liquid after applying the calibration factor and offset from the liquid class) from well<br />
1,1 (X and Y position) of the labware Tube 13*75mm, 16 Pos. (the configuration<br />
name of the labware). The labware was positioned at [9,1] (grid 9, carrier site 1).<br />
"50.00µl "Water" <strong>Standard</strong> Single"<br />
The net volume (without calibration) was 50.00 µl. The liquid class Water and subclass<br />
<strong>Standard</strong> was used. The command is a single pipetting<br />
command.<br />
"tip 2 : aspirate 52.06µl 1, 1 Tube 13*75mm 16 Pos [9,1]"<br />
Tip 2 executes an Aspirate command which aspirated 52.06 µl (the net volume of<br />
liquid after applying the calibration factor and offset from the liquid class) from well<br />
1,2 (X and Y position) of the labware Tube 13*75mm, 16 Pos. (the configuration<br />
name of the labware). The labware was positioned at [9,1] (grid 9, carrier site 1).<br />
"50.00µl "Water" <strong>Standard</strong> Single"<br />
The net volume (without calibration) was 50.00 µl. The liquid class Water and subclass<br />
<strong>Standard</strong> was used. The command is a single pipetting<br />
command.<br />
A.1.2 Structure of Log Files of Type USR<br />
A log file of type USR contains information on pipetting commands and user<br />
inputs. The file names are USR_YYYYMMDD_HHMMSS.log, where YYYYMMDD<br />
is the creation date and HHMMSS is the creation time. Each log file of type USR is<br />
protected with a checksum which is stored in the first line of the file.<br />
If you activate this log file type (see 8.3.1.4 “Protocol Options Tab”, 8-8), a new<br />
log file of type USR is created in the specified log files directory (default<br />
\AuditTrail\Log) each time you start <strong>Freedom</strong> <strong>EVOware</strong> or run a<br />
script.<br />
It contains the record types D and E from Tab. A-1, A-8.<br />
The information which is logged can also be viewed in the Tecan/<strong>EVOware</strong>/Usr<br />
channel of the LogViewer tool (see A.10 “LogViewer Tool”, A-72).<br />
A.1.3 Structure of Log Files of Type ERR<br />
A log file of type ERR contains information on pipetting commands, user inputs<br />
and errors/warnings. The file names are ERR_YYYYMMDD_HHMMSS.log,<br />
where YYYYMMDD is the creation date and HHMMSS is the creation time. Each<br />
<strong>Freedom</strong> <strong>EVOware</strong> <strong>Software</strong> <strong>Manual</strong>, 393172, en, V<strong>2.3</strong> A - 9
A - Appendix A<br />
Overview of the Log Files<br />
log file of type ERR is protected with a checksum which is stored in the first line of<br />
the file.<br />
If you activate this log file type (see 8.3.1.4 “Protocol Options Tab”, 8-8), a new<br />
log file of type ERR is created in the specified log files directory (default<br />
\AuditTrail\Log) each time you start <strong>Freedom</strong> <strong>EVOware</strong> or run a<br />
script. The error file is empty (except for the checksum at the beginning) if no<br />
errors took place.<br />
It contains the record types C, D and E from Tab. A-1, A-8.<br />
The information which is logged can also be viewed in the Tecan/<strong>EVOware</strong>/Error<br />
channel of the LogViewer tool (see A.10 “LogViewer Tool”, A-72).<br />
A.1.4 Log Files of Type MACRO<br />
Log files of type MACRO contain messages from internal <strong>Freedom</strong> <strong>EVOware</strong><br />
commands (macros). The file names are MACRO_YYYYMMDD_HHMMSS.log,<br />
where YYYYMMDD is the creation date and HHMMSS is the creation time. If a<br />
device error is reported in a log file of type EVO, the log file of type MACRO may<br />
contain additional information on the error. This depends on the type of error.<br />
The information which is logged can also be viewed in the Tecan/<strong>EVOware</strong>/Macro<br />
channel of the LogViewer tool (see A.10 “LogViewer Tool”, A-72).<br />
A.1.5 Log Files of Type DB<br />
Log files of type DB contain messages from <strong>Freedom</strong> <strong>EVOware</strong>’s internal<br />
database. The log files are created in c:\program files\Tecan\AuditTrail\log. The<br />
file names are DB_YYYYMMDD_HHMMSS.log, where YYYYMMDD is the<br />
creation date and HHMMSS is the creation time.<br />
The information which is logged can also be viewed in the Tecan/Database<br />
channel of the LogViewer tool (see A.10 “LogViewer Tool”, A-72).<br />
A.1.6 Log Files of Type MCS<br />
Log Files of type MCS contain messages from the Message Control Server (MCS)<br />
in <strong>Freedom</strong> <strong>EVOware</strong>. The log files are created in the same directory as the<br />
mcs.exe executable file (default c:\program files\common files\Tecan\_MCS). The<br />
file names are MCS_YYYYMMDD_HHMMSS.log, where YYYYMMDD is the<br />
creation date and HHMMSS is the creation time.<br />
The MCS does not normally output logging information. Proceed as follows to<br />
activate the logging function for the MCS:<br />
• Edit mcs.ini in the same directory as the mcs.exe executable file and set the<br />
required logging level.<br />
• The mcs.exe process must be re-started after editing the mcs.ini file. To do<br />
this, exit <strong>Freedom</strong> <strong>EVOware</strong>, stop the mcs.exe process in the Windows Task<br />
Manager and re-start <strong>Freedom</strong> <strong>EVOware</strong>. This re-starts mcs.exe.<br />
• Alternatively, use the Zip & Send tool to set the logging level (see A.9.5 “Zip &<br />
Send Tool”, A-42).<br />
To avoid logging an excessive amount of data, this logging feature should be<br />
disabled when it is not needed.<br />
The information which is logged can also be viewed in the Tecan/MCS channel of<br />
the LogViewer tool (see A.10 “LogViewer Tool”, A-72).<br />
A - 10 <strong>Freedom</strong> <strong>EVOware</strong> <strong>Software</strong> <strong>Manual</strong>, 393172, en, V<strong>2.3</strong>
A - Appendix A<br />
Structure of the Barcode Files<br />
A.1.7 Structure of the Trace File (Audit Trail)<br />
The trace file contains information on configuration, data and log files which have<br />
been created, edited or saved. The default location for the trace file is<br />
\AuditTrail\Log.<br />
Each time a configuration, data or log file is created or modified, a CRC checksum<br />
is stored in the file and an entry is made in the trace file.<br />
Each entry in the trace file specifies the date and time, the name of the currently<br />
logged in user and the file name. Log files are created by <strong>Freedom</strong> <strong>EVOware</strong><br />
automatically and a user name is not included in the trace file entry in this case.<br />
The trace file can be viewed with a plain text editor.<br />
Each time a configuration or data file is modified and saved, the previous version<br />
is archived in the \AuditTrail\Configuration sub-directory. The date<br />
and time is appended to the original filename. The archive copy includes the userspecified<br />
reason for the change if “Electronic Signatures” is enabled in the<br />
<strong>Freedom</strong> <strong>EVOware</strong> Configuration Tool (see B.5.5 “Electronic Signatures”, B-9).<br />
All changes relating to user management are recorded in the user management<br />
audit trail (see B.5.3.1 “User Management Audit Trail”, B-8).<br />
A.2 Structure of the Barcode Files<br />
The following sections describe the syntax of the barcode files which <strong>Freedom</strong><br />
<strong>EVOware</strong> creates. It also describes the syntax of the barcode files which are<br />
required by the Carousel and Carousel NT commands LoadBCFromFile and by<br />
the Specify plates by barcodes option in the <strong>Freedom</strong> <strong>EVOware</strong> Plus Runtime<br />
Controller.<br />
A.2.1 Barcode files written by the Carousel commands<br />
The Carousel commands ReadAllBarcodes and ReadPlatesInCartridge and the<br />
Carousel NT commands ScanAllCartridges, ScanCartridge and ScanLocation<br />
read the barcodes of the labware in the carousel and create a text file which<br />
contains the barcodes .<br />
Carousel<br />
Carousel NT<br />
The name and path of the barcode file is specified in the carousel configuration<br />
(see 8.5.<strong>2.3</strong> “Carousel Configuration - Barcode File Settings Tab”, 8-43).<br />
The default file name is _PosList.txt, e.g.<br />
Carousel_PosList.txt.<br />
The default location is \Output.<br />
The name of the barcode file is _PosList.txt, e.g.<br />
CarouselNT_PosList.txt.<br />
The default location is \Output.<br />
When the barcodes are scanned, the barcode file will be overwritten if it already<br />
exists.<br />
The structure is as follows:<br />
[Carousel]<br />
1,1=20038451<br />
1,2=20061299<br />
1,3=20273850<br />
<strong>Freedom</strong> <strong>EVOware</strong> <strong>Software</strong> <strong>Manual</strong>, 393172, en, V<strong>2.3</strong> A - 11
A - Appendix A<br />
Structure of the Barcode Files<br />
1,4=<br />
1,5=20078804<br />
...<br />
2,1=20273853<br />
2,2=20265063<br />
...<br />
[Carousel_DITIs]<br />
4,1=20265140<br />
4,2=20078802<br />
4,3=<br />
4,4=20265141<br />
...<br />
The carousel can be subdivided into two or more logical carousels, and the<br />
barcode file has a separate section for each of them (see 9.5.5.3 “Carousel<br />
Carrier Attributes”, 9-50). The section headers show the names of the logical<br />
carousels (i.e. the names of the carousel carriers) in square brackets. The<br />
subsequent lines list the labware items. Each labware item is on a separate line<br />
with the following syntax:<br />
=<br />
is missing if there is no labware at this position or the<br />
labware has no barcode. The order of the entries in the list depends on the order<br />
in which the carousel scans the labware.<br />
Carousel slots are counted from the top downwards.<br />
If the carousel barcode scanner cannot read the barcode of one of the labware<br />
items, a default (simulated) barcodes is used instead (see 8.5.2.2 “Carousel<br />
Configuration - Scanner Settings Tab”, 8-42 and/or 8.5.3.4 “Carousel NT<br />
Configuration - Barcode Settings Tab”, 8-47).<br />
A.2.1.1 Barcode files read by the Carousel commands<br />
The Carousel and Carousel NT command LoadBCFromFile reads a list of<br />
barcodes from a text file and assigns them to labware in the carousel. The<br />
required barcode file has the same format (syntax) as the barcode files written by<br />
the Carousel commands ReadAllBarcodes and ReadPlatesInCartridge and the<br />
Carousel NT commands ScanAllCartridges, ScanCartridge and ScanLocation<br />
(see A.2.1 “Barcode files written by the Carousel commands”, A-11).<br />
The following additional points should be noted:<br />
• To allow the barcodes to be correctly assigned to the labware, the section<br />
headers in the input file (e.g. [Carousel_DITIs]) must be identical to the<br />
section headers in the barcode files which are written by the other carousel<br />
commands listed above. Tip: Write a test script which creates a barcode file to<br />
get the correct spelling of the section headers for the input file.<br />
• If a tower/slot entry is missing in the input file, the existing barcode (if any) will<br />
not be changed.<br />
• If a tower/slot entry is present in the input file but does not have a value, an<br />
empty barcode will be written.<br />
Example input file for the carousel (for the carrier name “Hotel”):<br />
[Hotel]<br />
1,1=ABC<br />
1,3=<br />
When the LoadBCFromFile command reads the input file:<br />
A - 12 <strong>Freedom</strong> <strong>EVOware</strong> <strong>Software</strong> <strong>Manual</strong>, 393172, en, V<strong>2.3</strong>
A - Appendix A<br />
Structure of the Barcode Files<br />
• Barcode „ABC“ will be assigned to the labware in Tower 1, Slot 1.<br />
• An empty barcode will be assigned to the labware in Tower 1, Slot 3.<br />
• The barcode already assigned to the labware in Tower 1, Slot 2 (if any) will not<br />
be changed.<br />
A.2.2 Barcode file written by the PosID and PosID-3 commands<br />
The PosID and PosID-3 commands can be configured to write a report file with<br />
the scanned barcodes. The filename is scan.csv and it is written to the configured<br />
Output directory (default path \Output). Existing files with the same<br />
name are overwritten.<br />
.<br />
Each line in the file contains the following parameters, separated by semicolons:<br />
Grid;site on carrier (always 1 for tube racks);tube position in tube rack (missing or<br />
0 for other labware types);configuration name of labware or tube;labware or tube<br />
rack name (yellow label on the worktable);carrier or tube rack barcode;labware or<br />
tube barcode.<br />
The file contains one line per scanned labware or tube barcode. The first line of<br />
the file contains a CRC checksum. Starting with line 2, the structure of the file is as<br />
follows:<br />
GridPos,SiteOnGrid,TipNumber,ConfigName,RackLabel,CarrierBarcode,SRCRackID<br />
The parameters are as follows:<br />
GridPos<br />
Worktable grid position of the labware.<br />
SiteOnGrid<br />
Carrier site (always 1 for tube racks).<br />
TipNumber<br />
Tube position in tube rack (missing or 0 for other labware types).<br />
ConfigName<br />
Configuration name of labware or tube rack.<br />
RackLabel<br />
Name (label) of labware or tube rack (yellow label on the worktable).<br />
CarrierBarcode<br />
Carrier or tube rack barcode.<br />
SRCRackID<br />
Labware or tube barcode.<br />
The labware or tube barcode field contains three stars (***) if the barcode cannot<br />
be read. For tubes, it contains $$$ if the tube is missing.<br />
The file does not include column headers.<br />
A.<strong>2.3</strong> Barcode File for the PosID-3 Driver<br />
For the purpose of testing or training, the PosID-3 driver can be configured to read<br />
simulated barcodes from a text fiie and return them to <strong>Freedom</strong> <strong>EVOware</strong> through<br />
<strong>Freedom</strong> <strong>EVOware</strong> <strong>Software</strong> <strong>Manual</strong>, 393172, en, V<strong>2.3</strong> A - 13
A - Appendix A<br />
Structure of the Barcode Files<br />
the PosID-3 - Scan command as if the PosID-3 has actually scanned some<br />
labware.<br />
Proceed as follows to use this feature:<br />
• Create a text file with barcodes using the syntax described below.<br />
• Set the I/O State of the PosID-3 driver to OFF.<br />
• In the configuration of the PosID-3 driver, check the Enable barcode file usage<br />
checkbox and specify the path and name of the barcode file (see<br />
8.5.19.2 “PosID-3 Configuration - Settings Tab”, 8-80). The suggested file<br />
name is PosID3_<strong>Manual</strong>Barcodes.txt.<br />
The .txt file should have the following structure:<br />
Create a section "[Grid]" for each grid position to be scanned,<br />
where is the number of the grid where the carrier is located.<br />
Create a new line = for each tube or labware item at<br />
the specified grid position, where is the tube number or site<br />
number.<br />
Use "***" to simulate positions with scan errors and "$$$" to simulate positions<br />
with missing tubes.<br />
Example file:<br />
[Grid12]<br />
1=10001<br />
2=***<br />
3=10003<br />
4=10004<br />
[Grid14]<br />
1=20001<br />
2=$$$<br />
3=20003<br />
4=20004<br />
A.2.4 Barcode File for the Labware Generator<br />
For the purpose of testing or training, the context menu of the labware generator<br />
lets you import a list of labware barcodes from a file and assign them to labware<br />
on the worktable or in a labware feeder such as the carousel (see 11.6.3 “Context<br />
Menu of the Labware Generator”, 11-19). Tube barcodes cannot be imported in<br />
this way.<br />
File syntax<br />
Line 1 of the file contains the column headers (field names) as follows:<br />
GridPos<br />
Column number in the labware generator.<br />
SiteOnGrid<br />
Row number in the labware generator.<br />
SRCRackID<br />
Labware barcode.<br />
Line 2 of the file contains a dummy string consisting of at least one alphanumeric<br />
character. The dummy string is ignored but line 2 must not be empty or omitted.<br />
The data lines start at line 3. The last data line must end with (press<br />
Return in the text editor when you create the file).<br />
A - 14 <strong>Freedom</strong> <strong>EVOware</strong> <strong>Software</strong> <strong>Manual</strong>, 393172, en, V<strong>2.3</strong>
A - Appendix A<br />
Structure of the Barcode Files<br />
The barcodes are assigned to the currently selected labware group in the labware<br />
generator. To select a group, click on one of the labware items in the group. The<br />
selected labware items are shown with a shaded yellow colour.<br />
When you create the labware group in the labware generator, you must do this in<br />
a single step. If you create the labware group using several steps and choose<br />
non-adjacent wells, you will not be able to select the entire group to assign the<br />
barcodes.<br />
Data lines in the barcode file for column number(s) which are not included in the<br />
currently selected labware group will be ignored. For example, if the first labware<br />
group extends over columns 1 and 2 in the labware generator and you select this<br />
labware group when you import the barcode list, data lines for column 3<br />
(GridPos=3) will be ignored.<br />
Example file:<br />
GridPos,SiteOnGrid,SRCRackID<br />
dummy_string<br />
1,1,ABB123<br />
1,2,BAB321<br />
1,3,DCC123<br />
A.2.5 Barcode File for the <strong>Freedom</strong> <strong>EVOware</strong> Plus Runtime Controller<br />
The Specify plates by barcodes option in the <strong>Freedom</strong> <strong>EVOware</strong> Plus Runtime<br />
Controller allows you to run processes using specific labware items which are<br />
identified by their barcodes.<br />
If you check the Specify plates by barcodes checkbox, you will prompted to<br />
choose a .txt or .csv file which contains a list of barcodes.<br />
The .txt file should have the following structure:<br />
MyLabware001,MyLabware002,Sample1,Reagent1<br />
ABB123,BAB321,DCC123,AAA123,BBA321<br />
DED123,BAB321,BCD123,BBB123,CDA321<br />
...<br />
The first line of the file is a comma-separated list of the labware source icon<br />
names (as shown in the Process Editor). You do not need to include all of the<br />
source icon names which are used in your process. You only need to include the<br />
source icon names whose barcodes are relevant.<br />
Subsequent lines list the barcodes of the labware which should be used. <strong>Freedom</strong><br />
<strong>EVOware</strong> Plus lets you run several processes in parallel, and each line lists the<br />
barcodes for one process copy. Make sure that there are enough lines for the<br />
number of process copies you want to run. Each line should include the same<br />
number of barcodes as the number of labware source icon names in the first line.<br />
Empty lines in the file are ignored. You can use semicolons “;” or pipe characters<br />
“|” as the separator character instead of commas. The barcodes must not include<br />
any of these three separator characters.<br />
The structure of the .csv file is as follows:<br />
Put the labware source icon names in the first row of the table, each of them in a<br />
separate table cell. Subsequent rows of the table contain the barcodes of the<br />
labware which should be used.<br />
<strong>Freedom</strong> <strong>EVOware</strong> <strong>Software</strong> <strong>Manual</strong>, 393172, en, V<strong>2.3</strong> A - 15
A - Appendix A<br />
Structure of the Barcode Files<br />
Note: This feature is only intended for random access storage devices such as<br />
the carousel (the stacker is a first-in last-out storage device, not random access).<br />
For labware in the carousel, you can use the ReadAllBarcodes or<br />
ReadPlatesInCartridge commands to read the barcodes and store them in a text<br />
file (see 16.3 “Commands for the Carousel”, 16-2).<br />
A - 16 <strong>Freedom</strong> <strong>EVOware</strong> <strong>Software</strong> <strong>Manual</strong>, 393172, en, V<strong>2.3</strong>
A - Appendix A<br />
Parameters in the Evoware.opt file<br />
A.3 Parameters in the Evoware.opt file<br />
The following tables list user-configurable parameters in six different sections of<br />
the evoware.opt file. evoware.opt is in the /Database directory.<br />
These settings should only be changed by specialists.<br />
Note: The parameters in evoware.opt are already configured with suitable values.<br />
The values should only be changed for special applications. Do not change the<br />
values of parameters which are not listed in the following tables.<br />
Add a new line to the respective section of the evoware.opt file if the parameter is<br />
missing.<br />
Default values: Each parameter string is shown below with the default value of<br />
the parameter (some parameters do not have a default value). The parameter<br />
string is not case sensitive.<br />
Note: <strong>Freedom</strong> <strong>EVOware</strong> must be re-started for the changes to take effect.<br />
Configuration files are protected with checksums. When you re-start <strong>Freedom</strong><br />
<strong>EVOware</strong> after editing this file, you will be warned that the checksum is invalid.<br />
Proceed as follows to repair the checksum:<br />
• Quit <strong>Freedom</strong> <strong>EVOware</strong> and start the Configuration Tool with Start > All<br />
Programs > Tecan > <strong>EVOware</strong> > Configure. You will be warned again that the<br />
checksum is invalid and you will be asked if you want to repair the checksum.<br />
Click Yes. Then Click Exit and re-start <strong>Freedom</strong> <strong>EVOware</strong>. Alternatively, repair<br />
the checksum using the Validate Configuration tool (see A.9.2 “Validate<br />
Configuration Tool”, A-36).<br />
Tab. A-2 Evoware.opt parameters, [OPTIONS] section<br />
Parameter string Description Range, units<br />
Lauda_Pump_Speed=3<br />
Csv_With_Semicolon=0<br />
Speed of pump for Lauda waterbath.<br />
1= Use “;” instead of “,” as the field<br />
separator in the CSV file created<br />
by the Export Data command. This<br />
parameter also controls the field<br />
separator for the Import Variable<br />
and Export Variable commands<br />
(see 15.42.2, 15-107).<br />
It has no influence on the scan.csv<br />
file exported by the PosID command,<br />
which always uses “;” as<br />
the field separator.<br />
1 to 5<br />
0 or 1<br />
Posid_Allocation_Timeout=60000 Time-out for collision avoidance. 0 to ∞, in ms<br />
LiHa_Allocation_Timeout=60000 Time-out for collision avoidance. 0 to ∞, in ms<br />
RoMa_Allocation_Timeout=60000 Time-out for collision avoidance. 0 to ∞, in ms<br />
PnP_Allocation_Timeout=60000 Time-out for collision avoidance. 0 to ∞, in ms<br />
Diluter_OFF=tipMask<br />
Turns the diluter off for the specified<br />
tip(s).<br />
0 to 255,<br />
bit-mapped<br />
<strong>Freedom</strong> <strong>EVOware</strong> <strong>Software</strong> <strong>Manual</strong>, 393172, en, V<strong>2.3</strong> A - 17
A - Appendix A<br />
Parameters in the Evoware.opt file<br />
Tab. A-2 Evoware.opt parameters, [OPTIONS] section (cont.)<br />
Parameter string Description Range, units<br />
Optimize_Ztravel=0<br />
Outrigger_Distance=0<br />
Reduce_CPU_Usage=0<br />
Disable_CA=0<br />
Poolsafe_Balances<br />
LIHA_CheckForDeadlocks<br />
MCA_CheckForDeadlocks<br />
MCA384_CheckForDeadlocks<br />
1=When moving above a carrier,<br />
retract to Z-travel for the highest<br />
labware on the carrier instead of to<br />
global Z-travel. This can reduce<br />
the time required for the move.<br />
Length of the RoMa grippers<br />
(overrides value in the firmware).<br />
1=Allocate less cpu priority to<br />
<strong>EVOware</strong> tasks. Allows other software<br />
to run faster.<br />
1=Disable collision avoidance globally.<br />
This setting is only needed<br />
for special applications and is only<br />
intended for specialists. Use with<br />
care!!<br />
Specify how many pooling balances<br />
are fitted to your system.<br />
Omit this parameter or specify 0 if<br />
none are fitted.<br />
If the pipetting instrument is fitted<br />
with two liquid handling, MCA96 or<br />
MCA384 arms, rare situations can<br />
lead to a deadlock situation, e.g. if<br />
both arms are pipetting simultaneously<br />
on opposite ends of the<br />
same labware and both of them<br />
move towards the middle of the<br />
labware.<br />
0 = Do not check for arm deadlocks;<br />
use the normal collision<br />
avoidance routines.<br />
1 = Check for arm deadlocks and<br />
resolve them if necessary.<br />
0 or 1<br />
in 0.1 mm<br />
0 or 1<br />
0 or 1<br />
-<br />
0 or 1<br />
A - 18 <strong>Freedom</strong> <strong>EVOware</strong> <strong>Software</strong> <strong>Manual</strong>, 393172, en, V<strong>2.3</strong>
A - Appendix A<br />
Parameters in the Evoware.opt file<br />
Tab. A-3 Evoware.opt parameters, [OBSTACLES] section<br />
Parameter string Description Range, units<br />
No_Temo_Obstacle=0<br />
Obstacle1=xLeft,yRear,xRight,yFront<br />
Specify 1 if the Te-MO is not on<br />
the worktable (i.e. it is not an<br />
obstacle for LiHa, RoMa or PnP<br />
movements).<br />
You can specify up to 10 worktable<br />
obstacles for LiHa, RoMa or PnP<br />
movements which are not otherwise<br />
known to <strong>EVOware</strong>. Specify<br />
the obstacle position with the coordinates<br />
of its left/rear and front/<br />
right edges.<br />
0 or 1<br />
in 0.1 mm<br />
Tab. A-4 Evoware.opt parameters, [DITI] section<br />
Parameter string Description Range, units<br />
Lower_Eject_OFF=0 1=Disable Lower DITI Eject. 0 or 1<br />
Lower_Eject_200=700<br />
Lower_Eject_1000=1075<br />
Subroutine=pathname<br />
Allow_Reuse_PMP=0<br />
Specifies Lower DITI Eject height<br />
for DITI 200 tips; this parameter is<br />
normally configured with the Setup<br />
& Service software.<br />
Specifies Lower DITI Eject height<br />
for DITI 1000 tips; this parameter<br />
is normally configured with the<br />
Setup & Service software.<br />
Specify the path and name of subroutine<br />
(script file) to be executed<br />
after getting the last DITI from the<br />
rack. Use it e.g. to fetch new DITI<br />
racks. This parameter is only<br />
intended for <strong>Freedom</strong> <strong>EVOware</strong><br />
<strong>Standard</strong>.<br />
The following internal variables<br />
can be used in the script:<br />
__diti_grid, __diti_site and<br />
__diti_index (see 9.4.5 “Labware<br />
Types and DITI Types”, 9-32,<br />
DITI Index).<br />
The PMP option does not normally<br />
allow you re-use DITIs after an<br />
aspirate-dispense sequence.<br />
Specify 1 if you want to allow the<br />
DITIs to be reused. PMP will only<br />
be used for the first aspirate-dispense<br />
sequence and subsequent<br />
aspirate-dispense sequences will<br />
use normal pipetting.<br />
0 to 2100 steps<br />
0 to 2100 steps<br />
-<br />
<strong>Freedom</strong> <strong>EVOware</strong> <strong>Software</strong> <strong>Manual</strong>, 393172, en, V<strong>2.3</strong> A - 19
A - Appendix A<br />
Parameters in the Evoware.opt file<br />
Tab. A-5 Evoware.opt parameters, [NANO] section<br />
Parameter string Description Range, units<br />
Accel_X=500<br />
Accel_Y=500<br />
Accel_Z=500<br />
Specify the acceleration of LiHa<br />
movements for nano-pipetting.<br />
Reduced acceleration can<br />
improve pipetting accuracy due to<br />
reduced vibration.<br />
in 0.1 mm/s 2<br />
Tab. A-6 Evoware.opt parameters, [PRINT] section<br />
Parameter string Description Range, units<br />
Left=50<br />
Right=50<br />
Top=50<br />
Bottom=50<br />
Specify the required print border<br />
for printed reports.<br />
printer dots<br />
Tab. A-7 Evoware.opt parameters, [TEMO] section<br />
Parameter string Description Range, units<br />
Skip_Tipblock_Commands=0<br />
Second_Diti_Drop=1<br />
Delay_Diti_Drop=200<br />
Relative_Move_Diti_Drop=100<br />
Retract_Speed_Diti_Drop=200<br />
OptimizeZtravel=1<br />
Y2_Maxspeed=2000<br />
1=Ignore Get/Drop Tipblock commands.<br />
Enable this feature if you don’t<br />
want to exchange the tipblock during<br />
the script. In this case, the tipblock<br />
must be fitted before the<br />
script is run.<br />
1=Enable second DITI drop movement<br />
to solve problems with DITI<br />
dropping due to electrostatic<br />
charges (see 15.56.7.1, 15-<br />
133); if necessary, you can also<br />
specify the DITI_SIDE_STEPS<br />
parameters (see below).<br />
Delay between first and second<br />
DITI drop movement.<br />
Z-distance between first and second<br />
DITI drop movement.<br />
Retract speed between first and<br />
second DITI drop movement.<br />
Minimizes Z movements when<br />
carrying out the Te-MO 96 Wash<br />
command.<br />
Maximum movement speed of<br />
slide 2 (center slide).<br />
0 or 1<br />
0 or 1<br />
in ms<br />
in 0.1 mm<br />
in 0.1 mm<br />
0 or 1<br />
(min to max<br />
speed as<br />
defined in the<br />
firmware)<br />
A - 20 <strong>Freedom</strong> <strong>EVOware</strong> <strong>Software</strong> <strong>Manual</strong>, 393172, en, V<strong>2.3</strong>
A - Appendix A<br />
Parameters in the Evoware.opt file<br />
Tab. A-7 Evoware.opt parameters, [TEMO] section (cont.)<br />
Parameter string Description Range, units<br />
Plunger_Drop_Diti=68000<br />
Plunger_Drop_Speed=50<br />
Diti_Side_Steps_X=0<br />
Diti_Side_Steps_Y=0<br />
Diti_Side_Steps_Z=0<br />
Low_Init=0<br />
Plunger movement (Z-direction)<br />
for DITI eject (Te-MO 96). It is not<br />
recommended to change this<br />
parameter.<br />
Plunger drop speed for DITI eject<br />
(Te-MO 96).<br />
Used to solve problems with DITI<br />
dropping due to electrostatic<br />
charges (see 15.56.7.1, 15-<br />
133).<br />
Recommended value if you want<br />
to use this feature: -180<br />
Used to solve problems with DITI<br />
dropping due to electrostatic<br />
charges (see 15.56.7.1, 15-<br />
133).<br />
Recommended value if you want<br />
to use this feature: 0<br />
Used to solve problems with DITI<br />
dropping due to electrostatic<br />
charges (see 15.56.7.1, 15-<br />
133).<br />
Recommended value if you want<br />
to use this feature: 90<br />
1=The Te-MO pipetting head is<br />
lowered to local z-travel above the<br />
wash block before initializing the<br />
plunger and moved up again afterwards.<br />
This avoids the risk of spilling<br />
liquid during initialization.<br />
0=The Te-MO pipetting head<br />
moves above the wash block during<br />
initialization but it is not lowered.<br />
plunger steps<br />
plunger steps/s<br />
in 0.1 mm<br />
in 0.1 mm<br />
in 0.1 mm<br />
0 or 1<br />
<strong>Freedom</strong> <strong>EVOware</strong> <strong>Software</strong> <strong>Manual</strong>, 393172, en, V<strong>2.3</strong> A - 21
A - Appendix A<br />
Parameters in the Evoware.opt file<br />
Tab. A-8 Evoware.opt parameters, [MCA] section<br />
Parameter string Description Range, units<br />
Skip_Tipblock_Commands=0<br />
Second_Diti_Drop=1<br />
Delay_Diti_Drop=200<br />
Relative_Move_Diti_Drop=100<br />
Retract_Speed_Diti_Drop=200<br />
OptimizeZtravel=1<br />
Diti_Pwm_Limit<br />
Diti_Pwm_Limit1<br />
1=Ignore Get/Drop Tipblock commands.<br />
Enable this feature if you don’t<br />
want to exchange the tipblock during<br />
the script. In this case, the tipblock<br />
must be fitted before the<br />
script is run.<br />
1=Enable second DITI drop movement<br />
to solve problems with DITI<br />
dropping due to electrostatic<br />
charges (see 15.56.7.1, 15-<br />
133); if necessary, you can also<br />
specify the DITI_SIDE_STEPS<br />
parameters (see below).<br />
Delay between first and second<br />
DITI drop movement.<br />
Z-distance between first and second<br />
DITI drop movement.<br />
Retract speed between first and<br />
second DITI drop movement.<br />
Minimizes Z movements when<br />
carrying out the MCA96 Wash<br />
command.<br />
Vertical force to use when mounting<br />
96 tips. a)<br />
Vertical force to use when mounting<br />
1 tip. a)<br />
0 or 1<br />
0 or 1<br />
in ms<br />
in 0.1 mm<br />
in 0.1 mm<br />
0 or 1<br />
force units<br />
force units<br />
A - 22 <strong>Freedom</strong> <strong>EVOware</strong> <strong>Software</strong> <strong>Manual</strong>, 393172, en, V<strong>2.3</strong>
A - Appendix A<br />
Parameters in the Evoware.opt file<br />
Tab. A-8 Evoware.opt parameters, [MCA] section (cont.)<br />
Parameter string Description Range, units<br />
Tipblock_Pwm<br />
Diti_Side_Steps_X=0<br />
Diti_Side_Steps_Y=0<br />
Diti_Side_Steps_Z=0<br />
Vertical force to use when mounting<br />
a tipblock.<br />
Used to solve problems with DITI<br />
dropping due to electrostatic<br />
charges (see 15.56.7.1, 15-<br />
133).<br />
Recommended value if you want<br />
to use this feature: -180<br />
Used to solve problems with DITI<br />
dropping due to electrostatic<br />
charges (see 15.56.7.1, 15-<br />
133).<br />
Recommended value if you want<br />
to use this feature: 0<br />
Used to solve problems with DITI<br />
dropping due to electrostatic<br />
charges (see 15.56.7.1, 15-<br />
133).<br />
Recommended value if you want<br />
to use this feature: 90<br />
force units<br />
in 0.1 mm<br />
in 0.1 mm<br />
in 0.1 mm<br />
a) The vertical force to use for mounting 2 to 95 tips is interpolated from Diti_Pwm_Limit and Diti_Pwm_Limit1.<br />
<strong>Freedom</strong> <strong>EVOware</strong> <strong>Software</strong> <strong>Manual</strong>, 393172, en, V<strong>2.3</strong> A - 23
A - Appendix A<br />
Parameters in the Evoware.inf file<br />
A.4 Parameters in the Evoware.inf file<br />
The following tables list user-configurable parameters in the evoware.inf file.<br />
evoware.inf is in the /Database directory. These settings should<br />
only be changed by specialists.<br />
Note: The parameters in evoware.inf are already configured with suitable values.<br />
The values should only be changed for special applications. Do not change the<br />
values of parameters which are not listed in the following tables.<br />
Add a new line to the respective section of the evoware.inf file if the parameter is<br />
missing.<br />
Default values: Each parameter string is shown below with the default value of<br />
the parameter (some parameters do not have a default value). The parameter<br />
string is not case sensitive.<br />
Note: <strong>Freedom</strong> <strong>EVOware</strong> must be re-started for the changes to take effect.<br />
Configuration files are protected with checksums. When you re-start <strong>Freedom</strong><br />
<strong>EVOware</strong> after editing this file, you will be warned that the checksum is invalid.<br />
Proceed as follows to repair the checksum:<br />
• Quit <strong>Freedom</strong> <strong>EVOware</strong> and start the Configuration Tool with Start > All<br />
Programs > Tecan > <strong>EVOware</strong> > Configure. You will be warned again that the<br />
checksum is invalid and you will be asked if you want to repair the checksum.<br />
Click Yes. Then Click Exit and re-start <strong>Freedom</strong> <strong>EVOware</strong>. Alternatively, repair<br />
the checksum using the Validate Configuration tool (see A.9.2 “Validate<br />
Configuration Tool”, A-36).<br />
MCA96 Wash Parameters<br />
The sections whose name starts with “[MCA_” specify the recommended wash<br />
parameters for the MCA96 Wash command and the MCA96 Merge Plate Wizard<br />
for a variety of different MCA96 tip types.<br />
Each tip type requires at least three sections (including the “header” section), and<br />
the sections are arranged in groups. For each tip type, the “header” section (e.g.<br />
[MCA_STD]) specifies the tip type (TipType=) and the number of wash steps<br />
which are recommended for this tip type (WashSteps=). This is followed by<br />
additional sections which contain the wash parameters for each of the wash steps<br />
(e.g. [MCA_STD_WASH1], [MCA_STD_WASH2] and [MCA_STD_WASH3]. In<br />
this example, WASH1 is the empty tips step, WASH2 is the first cleaner step and<br />
WASH3 applies to all subsequent cleaner steps, starting with the second one.<br />
Te-MO Wash Parameters<br />
The sections whose name starts with “[TEMO_” specify the recommended wash<br />
parameters for the Te-MO Wash command for a variety of different Te-MO tip<br />
types.<br />
Each tip type requires at least three sections (including the “header” section), and<br />
the sections are arranged in groups. For each tip type, the “header” section (e.g.<br />
[TEMO_STD]) specifies the tip type (TipType=) and the number of wash steps<br />
which are recommended for this tip type (WashSteps=). This is followed by<br />
additional sections which contain the wash parameters for each of the wash steps<br />
(e.g. [TEMO_STD_WASH1], [TEMO_STD_WASH2] and [TEMO_STD_WASH3].<br />
In this example, WASH1 is the empty tips step, WASH2 is the first cleaner step<br />
and WASH3 applies to all subsequent cleaner steps, starting with the second one.<br />
A - 24 <strong>Freedom</strong> <strong>EVOware</strong> <strong>Software</strong> <strong>Manual</strong>, 393172, en, V<strong>2.3</strong>
A - Appendix A<br />
<strong>Freedom</strong> <strong>EVOware</strong> Directory Structure and Files<br />
A.5 <strong>Freedom</strong> <strong>EVOware</strong> Directory Structure and Files<br />
This section describes the <strong>Freedom</strong> <strong>EVOware</strong> directory structure and its files. The<br />
following structure is used under Windows XP if you choose the installation<br />
defaults (with the English version of Microsoft Windows, the ..\<strong>EVOware</strong> directory<br />
is normally located in C:\Program Files\Tecan):<br />
Fig. A-1<br />
Directory structure of c:\Program Files, Windows XP<br />
Under Windows Vista, <strong>Freedom</strong> <strong>EVOware</strong> stores all files whose contents can<br />
change during program runtime in the c:\ProgramData directory using the<br />
directory structure shown in the following figure. Examples of files whose contents<br />
can change includes configuration files (.ini and .xml), database files, scripts and<br />
processes.<br />
<strong>Freedom</strong> <strong>EVOware</strong> <strong>Software</strong> <strong>Manual</strong>, 393172, en, V<strong>2.3</strong> A - 25
A - Appendix A<br />
<strong>Freedom</strong> <strong>EVOware</strong> Directory Structure and Files<br />
Fig. A-2<br />
Directory structure of c:\ProgramData, Windows Vista<br />
<strong>Software</strong> components such as .exe and .dll files are stored in the same directory<br />
under both Windows XP and Windows Vista.<br />
The C:\Program Files\Tecan\<strong>EVOware</strong> directory contains executable files,<br />
device drivers, help files and configuration files (.ini and .xml). Evoware_gp.chm is<br />
the help file for the general purpose configuration. Evoware_ro.chm is the help file<br />
for the research only configuration.<br />
Under Windows Vista, the configuration files (.ini and .xml) are stored in<br />
C:\ProgramData\Tecan\<strong>EVOware</strong> instead.<br />
The C:\Program Files\Tecan\<strong>EVOware</strong>\API directory contains executable files<br />
for the Application Programming Interface.<br />
AuditTrail<br />
directory<br />
The ..\<strong>EVOware</strong>\AuditTrail\Configuration directory contains earlier versions of<br />
configuration and data files. It also contains copies of the user management audit<br />
trail (see 7.1.1 “User Management Audit Trail”, 7-2).<br />
Each time a configuration or data file is modified and saved, the previous version<br />
is stored in this directory. The date and time is appended to the original filename<br />
as follows:<br />
A - 26 <strong>Freedom</strong> <strong>EVOware</strong> <strong>Software</strong> <strong>Manual</strong>, 393172, en, V<strong>2.3</strong>
A - Appendix A<br />
<strong>Freedom</strong> <strong>EVOware</strong> Directory Structure and Files<br />
name.extension.YYMMDD.HHMMSS, where YYMMDD is the date and HHMMSS<br />
is the time of the backup, e.g.: Carrier.cfg.020531.084612<br />
If you have used the Export/Import tool to import <strong>Freedom</strong> <strong>EVOware</strong> configuration<br />
and data files, the ..\<strong>EVOware</strong>\AuditTrail directory contains backup copies of the<br />
files which have been replaced. <strong>Freedom</strong> <strong>EVOware</strong> creates a new sub-directory<br />
for each backup. The name of the new sub-directory is<br />
ExpImpBU_YYYYMMDD_HHMMSS, where YYYYMMDD is the date and<br />
HHMMSS is the time of the backup. See A.9.4 “Export/Import Tool”, A-38.<br />
The ..\<strong>EVOware</strong>\AuditTrail\Log directory contains log files (see A.1 “Overview of<br />
the Log Files”, A-1). It also contains the trace file (see A.1.7 “Structure of the<br />
Trace File (Audit Trail)”, A-11). For each file except the trace file, the date and<br />
the time is included the file name. If required, you can configure an alternative<br />
location for this directory (see 8.3.1.4 “Protocol Options Tab”, 8-8).<br />
Note: <strong>Freedom</strong> <strong>EVOware</strong> can output a large amount of logging information. It is<br />
recommended to back up and then delete the old log files on a regular basis. They<br />
are not backed up by the Backup function - you should use the Audit Trail<br />
Archiving function instead. See A.9.6 “Audit Trail Archiving tool”, A-47.<br />
Note: If you are required to comply with the FDA regulations, make sure you keep<br />
archive copies of all audit trail, trace and log files.<br />
The ..\<strong>EVOware</strong>\AuditTrail\Processes directory contains backup copies of all<br />
<strong>Freedom</strong> <strong>EVOware</strong> Plus process files which have been changed. For each file,<br />
the date and the time is included in the file name.<br />
Under Windows Vista, the AuditTrail directory is stored in<br />
C:\ProgramData\Tecan\<strong>EVOware</strong> instead.<br />
The ..\<strong>EVOware</strong>\Backup directory contains backup copies of the <strong>Freedom</strong><br />
<strong>EVOware</strong> configuration and data files (see 8.2 “Backing Up and Restoring Your<br />
Configuration”, 8-3). <strong>Freedom</strong> <strong>EVOware</strong> creates a new sub-directory for each<br />
backup. The name of the new sub-directory is BACKUP_YYYYMMDD_HHMMSS,<br />
where YYYYMMDD is the date and HHMMSS is the time of the backup. If<br />
required, you can configure an alternative location for this directory (see<br />
8.3.1.4 “Protocol Options Tab”, 8-8).<br />
Under Windows Vista, the default location for the Backup directory is<br />
C:\ProgramData\Tecan\<strong>EVOware</strong>\Backup.<br />
Database<br />
directory<br />
The ..\<strong>EVOware</strong>\Database directory contains files which are used by <strong>Freedom</strong><br />
<strong>EVOware</strong> internally.<br />
The ..\<strong>EVOware</strong>\Database\factsbase directory contains files which are used by<br />
<strong>Freedom</strong> <strong>EVOware</strong> internally.<br />
The ..\<strong>EVOware</strong>\Database\factsdict directory contains files which are used by<br />
<strong>Freedom</strong> <strong>EVOware</strong> internally.<br />
The ..\<strong>EVOware</strong>\Database\Maintenance directory contains maintenance scripts<br />
(see 6.4.2 “Run Maintenance”, 6-10).<br />
The ..\<strong>EVOware</strong>\Database\PD_Templates directory contains <strong>Freedom</strong> <strong>EVOware</strong><br />
Plus process templates. Each template is contained in a separate sub-directory.<br />
<strong>Freedom</strong> <strong>EVOware</strong> <strong>Software</strong> <strong>Manual</strong>, 393172, en, V<strong>2.3</strong> A - 27
A - Appendix A<br />
<strong>Freedom</strong> <strong>EVOware</strong> Directory Structure and Files<br />
The ..\<strong>EVOware</strong>\Database\Processes directory contains <strong>Freedom</strong> <strong>EVOware</strong><br />
Plus processes. Each process is contained in a separate sub-directory.<br />
The ..\<strong>EVOware</strong>\Database\SC_Templates directory contains script templates.<br />
The ..\<strong>EVOware</strong>\Database\Schedules directory contains <strong>Freedom</strong> <strong>EVOware</strong><br />
Plus schedules which you have saved.<br />
The ..\<strong>EVOware</strong>\Database\Scripts directory contains pipetting scripts.<br />
The ..\<strong>EVOware</strong>\Database\Tools directory is used to store user-created tools<br />
(executable files). The tools are assigned automatically to the Tools menu in<br />
<strong>Freedom</strong> <strong>EVOware</strong>. See 6.4.4 “Tools”, 6-11.<br />
The ..\<strong>EVOware</strong>\Database\VBScripts directory is used to store user-created<br />
Visual Basic scripts. The Visual Basic scripts are assigned automatically to the VB<br />
Scripts menu in <strong>Freedom</strong> <strong>EVOware</strong>. See 6.4.5 “VB Scripts”, 6-12.<br />
The ..\<strong>EVOware</strong>\Database\wt_Templates directory contains worktable<br />
templates.<br />
Under Windows Vista, the Database directory is stored in<br />
C:\ProgramData\Tecan\<strong>EVOware</strong>\Database instead.<br />
The ..\<strong>EVOware</strong>\Drivers directory contains components for drivers such as the<br />
PosID-3 driver and for software add-ons such as the hit-picking wizard (see<br />
3.1.3 “Tecan <strong>Software</strong> Add-ons for <strong>Freedom</strong> <strong>EVOware</strong>”, 3-3).<br />
Under Windows Vista, configuration files from this directory are stored in<br />
C:\ProgramData\Tecan\<strong>EVOware</strong>\Drivers instead.<br />
The ..\<strong>EVOware</strong>\Infopad directory contains components for the Infopads (see<br />
5.4.2 “Infopads”, 5-15).<br />
Under Windows Vista, configuration files from this directory are stored in<br />
C:\ProgramData\Tecan\<strong>EVOware</strong>\Infopad instead.<br />
The ..\<strong>EVOware</strong>\Icons directory contains icons (graphic symbols).<br />
The ..\<strong>EVOware</strong>\Output directory is used for storing the files which are generated<br />
by the Export Data command. See 15.26 “Export Data Command”, 15-48 for<br />
information on the files which are created by this command. If required, you can<br />
specify an alternative location for this directory (see 8.3.1.4 “Protocol Options<br />
Tab”, 8-8).<br />
Under Windows Vista, the default location for the Output directory is<br />
C:\ProgramData\Tecan\<strong>EVOware</strong>\Output.<br />
The ..\<strong>EVOware</strong>\Plugins directory contains components for software pluginms<br />
such as wizards.<br />
Under Windows Vista, configuration files from this directory are stored in<br />
C:\ProgramData\Tecan\<strong>EVOware</strong>\Plugins instead.<br />
The ..\<strong>EVOware</strong>\PMP directory contains configuration files for the Pressure<br />
Monitored Pipetting hardware option (see 17.6 “Configuring and Using PMP<br />
(Pressure Monitored Pipetting)”, 17-16).<br />
Under Windows Vista, the PMP directory is stored in<br />
C:\ProgramData\Tecan\<strong>EVOware</strong>\PMP instead.<br />
A - 28 <strong>Freedom</strong> <strong>EVOware</strong> <strong>Software</strong> <strong>Manual</strong>, 393172, en, V<strong>2.3</strong>
A - Appendix A<br />
Command Line Parameters (<strong>Freedom</strong> <strong>EVOware</strong>)<br />
The ..\<strong>EVOware</strong>\Simulation directory contains the 3D Simulation Tool EVOSim (if<br />
you chose to install this feature when you installed <strong>Freedom</strong> <strong>EVOware</strong>). See<br />
3.1.4 “3D Simulation Tool for the Pipetting Instrument”, 3-3.<br />
Under Windows Vista, configuration files from this directory are stored in<br />
C:\ProgramData\Tecan\<strong>EVOware</strong>\Simulation instead.<br />
The ..\<strong>EVOware</strong>\Tmp directory is used by <strong>Freedom</strong> <strong>EVOware</strong> internally.<br />
Under Windows Vista, the Tmp directory is stored in<br />
C:\ProgramData\Tecan\<strong>EVOware</strong>\Tmp instead.<br />
The ..\<strong>EVOware</strong>\Tools directory contains components for system tools (see<br />
A.9 “System Tools for <strong>Freedom</strong> <strong>EVOware</strong>”, A-32).<br />
Under Windows Vista, configuration files from this directory are stored in<br />
C:\ProgramData\Tecan\<strong>EVOware</strong>\Tools instead.<br />
A.6 Command Line Parameters (<strong>Freedom</strong> <strong>EVOware</strong>)<br />
<strong>Freedom</strong> <strong>EVOware</strong> supports the following command line parameters:<br />
Tab. A-9 Command Line Parameters (<strong>Freedom</strong> <strong>EVOware</strong>)<br />
Switch<br />
-u <br />
-w <br />
-sim<br />
Explanation<br />
Specify -u -w to start <strong>Freedom</strong> <strong>EVOware</strong> without<br />
requiring the user name and password to be entered manually in the Login<br />
dialog box.<br />
Start <strong>Freedom</strong> <strong>EVOware</strong> in offline mode. In offline mode, firmware commands<br />
such as movement commands are not sent to the pipetting instrument<br />
(i.e. pipetting does not take place). a)<br />
-b Start <strong>Freedom</strong> <strong>EVOware</strong> <strong>Standard</strong> instead of <strong>Freedom</strong> <strong>EVOware</strong> Plus.<br />
-e Start <strong>Freedom</strong> <strong>EVOware</strong> and open an existing script (e.g. script.esc) for editing.<br />
-r Start <strong>Freedom</strong> <strong>EVOware</strong> and run an existing script (e.g. script1.esc).<br />
-e Start <strong>Freedom</strong> <strong>EVOware</strong> and open an existing process for editing.<br />
-r Start <strong>Freedom</strong> <strong>EVOware</strong> and run an existing process.<br />
-m Start <strong>Freedom</strong> <strong>EVOware</strong> and run an existing maintenance script (e.g.<br />
maint1.esc).<br />
-b -n Start <strong>Freedom</strong> <strong>EVOware</strong> <strong>Standard</strong> and open the Script Editor with an empty<br />
script using the specified worktable template file (e.g. templ2.ewt).<br />
-n Start <strong>Freedom</strong> <strong>EVOware</strong> Plus and open the Script Editor with an empty<br />
script using the specified worktable template file (e.g. templ2.ewt)..<br />
-c Start the Configuration Tool instead of starting <strong>Freedom</strong> <strong>EVOware</strong>.<br />
a) <strong>Freedom</strong> <strong>EVOware</strong> will switch to offline mode automatically if it cannot detect a hardlock (dongle) when it<br />
starts (see 5.1.4 “Instrument and Hardlock Detection”, 5-3).<br />
<strong>Freedom</strong> <strong>EVOware</strong> <strong>Software</strong> <strong>Manual</strong>, 393172, en, V<strong>2.3</strong> A - 29
A - Appendix A<br />
<strong>Freedom</strong> EVO 75 Pipetting Instrument - LiHa Configuration<br />
Example<br />
The following command line starts <strong>Freedom</strong> <strong>EVOware</strong> with the user name David<br />
and password Long and runs the maintenance script maintscript.esc:<br />
evoware.exe -m maintscript.esc -u David -w Long<br />
Tip: In Windows, right-click on a shortcut and choose Properties > Shortcut to<br />
assign command line parameters to the shortcut.<br />
A.7 <strong>Freedom</strong> EVO 75 Pipetting Instrument - LiHa<br />
Configuration<br />
The <strong>Freedom</strong> EVO 75 pipetting instrument now supports the following LiHa<br />
configurations:<br />
• One tip.<br />
• Two tips.<br />
• 8 Plus 1 Access option.<br />
Please note the following:<br />
Two-tip LiHa<br />
You can select either or both tips in the pipetting commands. The two tips can<br />
be used for pipetting (raised or lowered) independently. The tip spacing is<br />
fixed at 18 mm (every second well of a 96-well microplate).<br />
8 Plus 1 Access option<br />
You can select either tip 1 or all 8 tips in the pipetting commands. Tip 1 can be<br />
used for pipetting (raised or lowered) independently of the other 7 tips. If you<br />
select all 8 tips, they are all used (raised or lowered) together. The tip spacing<br />
is fixed at 9 mm (adjacent wells of a 96-well microplate).<br />
In addition, liquid detection hardware is only provided for tip 1. If you want to<br />
use liquid detection, you must choose the detection mode Detect liquid with<br />
first, tip, move others to same position in the Global settings of the liquid class.<br />
The 8 Plus 1 Access option is currently only intended for disposable tips (not<br />
fixed tips). In addition, you must fit the same DITI type (DITI size) to all 8<br />
positions on the LiHa.<br />
Tip spacing<br />
Tip spreading is not available for the <strong>Freedom</strong> EVO 75 pipetting instrument (the<br />
tips have a fixed spacing of 9 or 18 mm depending on LiHa type). Accordingly, in<br />
the pipetting commands, you can only change the tip spacing setting for the 2-tip<br />
LiHa configuration. If the spacing between the wells you want to pipette is not<br />
18 mm, pipetting is carried out twice using one tip at a time.<br />
This is not possible with the 8 Plus 1 Access option. If you select all 8 tips, they<br />
are all used (raised or lowered) together. Accordingly, you cannot change the<br />
setting for tip spacing because you cannot use one tip at a time.<br />
Tip spacing is not relevant for the 1-tip LiHa configuration.<br />
Enhanced DITI logistics for the Get DITI command<br />
The following method is used to minimize LiHa movements when getting DITIs (to<br />
speed up the Get DITI commands).<br />
A - 30 <strong>Freedom</strong> <strong>EVOware</strong> <strong>Software</strong> <strong>Manual</strong>, 393172, en, V<strong>2.3</strong>
A - Appendix A<br />
Frequently Asked Questions (FAQ)<br />
2-tip LiHa<br />
If you choose both tips in the Get DITI command, they are picked up in a<br />
single movement from non-adjacent DITI rack positions. If the DITI rack is full,<br />
the first pair of tips is picked up at positions 1 and 3. The second Get DITI<br />
command picks up the tips from positions 2 and 4.<br />
If you choose only one tip in the Get DITI command, it is picked up starting at<br />
the last position in the DITI rack (position 96) and the next single tip from<br />
position 95.<br />
8 Plus 1 Access option<br />
If you choose all 8 tips in the Get DITI command, they are picked up starting at<br />
the beginning of the DITI rack (positions 1 to 8). The next eight tips are then<br />
picked up at positions 9 to 16.<br />
If you choose only one tip in the Get DITI command, it is picked up starting at<br />
the last position in the DITI rack (position 96) and the next single tip from<br />
position 95.<br />
This method ensures that the beginning of the DITI rack always has full rows<br />
of fresh DITIs which can be picked up in a single movement.<br />
See also 15.9 “Set DITI Position Command”, 15-15, Set Rear Counter<br />
checkbox.<br />
A.8 Frequently Asked Questions (FAQ)<br />
The <strong>Freedom</strong> <strong>EVOware</strong> Administrator password has been lost. Can the<br />
password be recovered or reset?<br />
No. <strong>Freedom</strong> <strong>EVOware</strong> must be re-installed. You must backup your data<br />
before you do this.<br />
The pipetting instrument does not react any more after an error or a robot<br />
arm crash.<br />
<strong>Freedom</strong> <strong>EVOware</strong> has switched to offline mode (the <strong>Freedom</strong> <strong>EVOware</strong><br />
mode is shown in the status bar). In offline mode, firmware commands such<br />
as movement commands are not sent to the instrument (i.e. pipetting does not<br />
take place). You must switch off the instrument, move the arms and devices<br />
manually to an appropriate position, switch on the instrument again, restart<br />
<strong>Freedom</strong> <strong>EVOware</strong> and initialize the instrument with the Initialize button in the<br />
toolbar.<br />
<strong>Freedom</strong> <strong>EVOware</strong> will only start in offline mode.<br />
The hardlock (dongle) must be attached to a USB port. The pipetting<br />
instrument must be connected to a USB or COM port on the PC. In the latter<br />
case, make sure you have correctly configured the same COM port in<br />
<strong>Freedom</strong> <strong>EVOware</strong> (see 8.4.3.3 “Com Ports Tab”, 8-36). The pipetting<br />
instrument must be switched on when you start <strong>Freedom</strong> <strong>EVOware</strong>. Note: The<br />
<strong>Freedom</strong> <strong>EVOware</strong> mode is shown in the status bar.<br />
The script or process runs fine in offline mode and <strong>Freedom</strong> <strong>EVOware</strong> has<br />
not indicated any errors. However, the Invalid Operand error is displayed for<br />
an arm or device when the script runs in real mode.<br />
The respective arm or device cannot carry out the required movement of one<br />
or more axes because it exceeds the mechanical limits. Check the definition<br />
of the respective carrier or labware in the <strong>Freedom</strong> <strong>EVOware</strong> configuration.<br />
Check your worktable layout to see if arm movement is obstructed by another<br />
device.<br />
<strong>Freedom</strong> <strong>EVOware</strong> <strong>Software</strong> <strong>Manual</strong>, 393172, en, V<strong>2.3</strong> A - 31
A - Appendix A<br />
System Tools for <strong>Freedom</strong> <strong>EVOware</strong><br />
The script or process runs in offline mode and <strong>Freedom</strong> <strong>EVOware</strong> reports<br />
errors but errors are not listed in the log window or the log file.<br />
If your script uses a barcode scanner, in offline mode you will be prompted to<br />
enter the barcode manually. <strong>Manual</strong> barcode entry is reported in the log file<br />
and is considered to be an error in this case because the barcode scanner is<br />
missing.<br />
A Get DITIs or Te-MO Get DITIs command causes a DITIs already mounted<br />
error even though you haven’t yet mounted any DITIs in the script.<br />
<strong>Freedom</strong> <strong>EVOware</strong> remembers whether you still have DITIs mounted from a<br />
previous pipetting script, even if the PC has been re-started in the meantime.<br />
The <strong>Freedom</strong> <strong>EVOware</strong> worklist specifies all eight tips but <strong>Freedom</strong><br />
<strong>EVOware</strong> only uses the first tip.<br />
<strong>Freedom</strong> <strong>EVOware</strong> automatically optimizes script execution by grouping<br />
together aspirate and dispense commands etc. where possible. The worklist<br />
should be written as follows if you want to use multiple tips:<br />
A; ... (for tip 1)<br />
D; ... (for tip 1)<br />
W; ... (for tip 1)<br />
A; ... (for tip 2)<br />
D; ... (for tip 2)<br />
W; ... (for tip 2)<br />
etc.<br />
It is possible to write a <strong>Freedom</strong> <strong>EVOware</strong> worklist for four standard tips and<br />
four Ditis?<br />
No, you can only write a worklist for the same tip type. Load several worklists<br />
in your script and execute them using the Worklist - Execute loaded worklists<br />
command. They will be executed in chronological order of loading.<br />
The pipetted volumes are completely wrong (too much or not enough<br />
liquid).<br />
Check the LiHa configuration. The configured dilutor capacity must be<br />
appropriate for the tips which are mounted.<br />
The LiHa moves to the required position but ignores aspirate and dispense<br />
commands.<br />
In the LiHa configuration, check whether Tip is broken is activated (the<br />
checkbox is activated if you click the Deactivate button in the Diluter Error<br />
dialog box). Check the checkbox(es) to enable the pipetting channel(s) again.<br />
The trailing airgap (TAG) is aspirated with the tips still in the liquid.<br />
The trailing airgap is aspirated at the Z-position specified in the liquid class<br />
with Retract tips to. A Z-position relative to the liquid level requires liquid level<br />
detection and can not be used if you are carrying out septum piercing (the<br />
septum interferes with the capacitance-based detection system).<br />
A.9 System Tools for <strong>Freedom</strong> <strong>EVOware</strong><br />
The <strong>Freedom</strong> <strong>EVOware</strong> installation program also installs the following system<br />
tools:<br />
A - 32 <strong>Freedom</strong> <strong>EVOware</strong> <strong>Software</strong> <strong>Manual</strong>, 393172, en, V<strong>2.3</strong>
A - Appendix A<br />
System Tools for <strong>Freedom</strong> <strong>EVOware</strong><br />
Tab. A-10 Tools for system configuration and export/import<br />
Tool<br />
Configure<br />
Data Explorer<br />
Validate Configuration<br />
Duplicate Device<br />
EVOSim<br />
Export/Import<br />
Zip & Send tool<br />
Audit Trail Archiving<br />
tool<br />
EVOTransfer tool<br />
Gemini Migration<br />
Shutdown <strong>EVOware</strong><br />
drivers<br />
Purpose<br />
<strong>Freedom</strong> <strong>EVOware</strong> Configuration Tool (see 8 “Configuration<br />
Tool”, 8-1). This tool can also be accessed from the <strong>Freedom</strong><br />
<strong>EVOware</strong> toolbar.<br />
This tool is used to check whether <strong>Freedom</strong> <strong>EVOware</strong> configuration<br />
and data files have valid checksums, to display user comments<br />
(electronic signatures feature) and to show information on<br />
modifications to these files (see A.9.1 “Data Explorer Tool”, A-<br />
35).<br />
This tool is used to check whether the <strong>Freedom</strong> <strong>EVOware</strong> configuration<br />
files have valid checksums and to repair the checksums if<br />
necessary (see A.9.2 “Validate Configuration Tool”, A-36).<br />
This tool is used to create additional copies of the <strong>Freedom</strong><br />
<strong>EVOware</strong> device drivers if you want to connect more than one<br />
device of the same type to your pipetting instrument. See<br />
A.9.3 “Duplicate Device Tool”, A-36.<br />
3D simulation tool for visualizing the movements which are carried<br />
out by the arms of the <strong>Freedom</strong> EVO pipetting instrument<br />
(see A.14 “Configuring and Using the 3D Simulation Tool EVO-<br />
Sim”, A-103).<br />
This tool is used to exchange processes and scripts, robot vectors<br />
and liquid class, carrier and labware definitions with other<br />
<strong>Freedom</strong> <strong>EVOware</strong> installations (see A.9.4 “Export/Import Tool”,<br />
A-38).<br />
This tool allows you to select one or more <strong>Freedom</strong> <strong>EVOware</strong> log<br />
files and/or INI files containing configuration settings and to send<br />
them by eMail to a specified recipient (see A.9.5 “Zip & Send<br />
Tool”, A-42).<br />
This tool is used to archive <strong>Freedom</strong> <strong>EVOware</strong> log files and audit<br />
trail data either manually or automatically (see A.9.6 “Audit Trail<br />
Archiving tool”, A-47).<br />
This tool allows you to package up and compress an entire<br />
<strong>EVOware</strong> installation into a single, special transfer file (image<br />
file). You can then send it by email or ftp and install it on another<br />
PC (see A.9.7 “EVOTransfer”, A-50).<br />
This tool is used to import carrier, labware and liquid class definitions<br />
from the Gemini software. It also imports the Gemini worktable,<br />
Gemini pipetting scripts and VBScripts (see A.9.8 “Gemini<br />
Migration Tool”, A-54). The imported configuration data<br />
replaces all existing <strong>Freedom</strong> <strong>EVOware</strong> configuration data,<br />
which is no longer available.<br />
This tool is used to unload the Tecan drivers when <strong>Freedom</strong><br />
<strong>EVOware</strong> is no longer running (see A.9.9 “Shutdown <strong>EVOware</strong><br />
drivers”, A-55).<br />
<strong>Freedom</strong> <strong>EVOware</strong> <strong>Software</strong> <strong>Manual</strong>, 393172, en, V<strong>2.3</strong> A - 33
A - Appendix A<br />
System Tools for <strong>Freedom</strong> <strong>EVOware</strong><br />
Tab. A-10 Tools for system configuration and export/import (cont.)<br />
Tool<br />
IQ Wizard<br />
Registration Wizard<br />
Import vCards<br />
Version Checker<br />
LogViewer<br />
ASTM Interface<br />
Module<br />
Purpose<br />
This tool checks that the Tecan software components are correctly<br />
installed and guides you through the initial setup of your<br />
pipetting instrument in <strong>Freedom</strong> <strong>EVOware</strong> (see A.9.10 “IQ Wizard”,<br />
A-55).<br />
This tool collects information on all of the Tecan software components<br />
which are installed on your PC and sends it to Tecan using<br />
one of three methods (direct online, email or file (see<br />
A.9.11 “Registration Wizard”, A-63).<br />
This tool is used to import user information into the Tecan User<br />
Management System (user database) from vCard files (see<br />
A.9.12 “Import vCards Tool”, A-68).<br />
This tool is used to check the versions of the installed device drivers<br />
(see A.9.13 “Version Checker Tool”, A-70).<br />
This tool is used to view, filter and search for messages which<br />
have been received by the Tecan Logging Server (see<br />
A.10 “LogViewer Tool”, A-72).<br />
This tool is to transfer data from <strong>Freedom</strong> <strong>EVOware</strong> to a LIMS<br />
system (see A.13 “ASTM Interface Module”, A-90). The<br />
installer for this tool is provided on the <strong>Freedom</strong> <strong>EVOware</strong> installation<br />
CD.<br />
Most of the above tools are provided with shortcuts in Start > All Programs ><br />
Tecan > <strong>EVOware</strong> > Tools. Refer to the description of each tool for further<br />
information. The Audit Trail Archiving tool can also be started from the<br />
Configuration Tool.<br />
When you start these tools, you will be prompted to enter your <strong>Freedom</strong> <strong>EVOware</strong><br />
user name and password.<br />
Note: You can only use these tools if you have been given <strong>Freedom</strong> <strong>EVOware</strong><br />
Administrator or Application Specialist access rights.<br />
Optional Tools Not Listed Above<br />
The following tools are provided on the <strong>Freedom</strong> <strong>EVOware</strong> installation CD and<br />
must be installed separately:<br />
The ASTM Interface Module provides a standardized software interface to<br />
laboratory information management systems (LIMS) from third-party suppliers<br />
(see A.13 “ASTM Interface Module”, A-90).<br />
The Tecan Driver Installer is used to create an installation program (setup<br />
package) for installing custom device drivers (drivers which are not included in the<br />
<strong>Freedom</strong> <strong>EVOware</strong> installation program (see A.11 “Tecan Driver Installer”, A-<br />
80).<br />
A - 34 <strong>Freedom</strong> <strong>EVOware</strong> <strong>Software</strong> <strong>Manual</strong>, 393172, en, V<strong>2.3</strong>
A - Appendix A<br />
System Tools for <strong>Freedom</strong> <strong>EVOware</strong><br />
A.9.1 Data Explorer Tool<br />
This tool is used to check whether <strong>Freedom</strong> <strong>EVOware</strong> configuration and data files<br />
have valid checksums, to display user comments (electronic signatures feature)<br />
and to show information on modifications to these files.<br />
An incorrect checksum indicates that the file may be corrupted or has been<br />
modified outside of <strong>Freedom</strong> <strong>EVOware</strong> by another program or process. Invalid<br />
checksums of <strong>Freedom</strong> <strong>EVOware</strong> configuration files can be repaired with the<br />
Validate Configuration tool (see A.9.2 “Validate Configuration Tool”, A-36).<br />
Start this tool with the shortcut in Start > All Programs > Tecan > <strong>EVOware</strong> ><br />
Tools:<br />
Fig. A-3<br />
Data Explorer tool<br />
In <strong>Freedom</strong> <strong>EVOware</strong>, a warning is shown if an attempt is made to load a file with<br />
an incorrect or missing checksum. The user can then choose to load the file or<br />
cancel. In the latter case, <strong>Freedom</strong> <strong>EVOware</strong> aborts with the exception of script<br />
files. In this case, the file is not loaded but <strong>Freedom</strong> <strong>EVOware</strong> remains running.<br />
The incorrect checksum warning can be disabled in the Settings dialog box by a<br />
<strong>Freedom</strong> <strong>EVOware</strong> <strong>Software</strong> <strong>Manual</strong>, 393172, en, V<strong>2.3</strong> A - 35
A - Appendix A<br />
System Tools for <strong>Freedom</strong> <strong>EVOware</strong><br />
user with Administrator rights (see 8.3.1.4 “Protocol Options Tab”, 8-8). An entry<br />
is written to the log file each time an incorrect or missing checksum is found.<br />
If you select a configuration or data file in the Data Explorer, the date and time of<br />
the last modification to the file will be shown alongside the name of the user who<br />
modified it.<br />
The Data Explorer also shows a user-specified reason for the change (if the<br />
Electronic Signatures feature is enabled in the <strong>Freedom</strong> <strong>EVOware</strong> Configuration<br />
Tool). See B.5.5 “Electronic Signatures”, B-9 for additional information on this<br />
feature.<br />
If one of the above changes has been made automatically by <strong>Freedom</strong> <strong>EVOware</strong>,<br />
a comment is inserted which starts with “<strong>EVOware</strong>:”<br />
A.9.2 Validate Configuration Tool<br />
This tool is used to check whether the <strong>Freedom</strong> <strong>EVOware</strong> configuration files have<br />
valid checksums and to repair the checksums if necessary.<br />
Some of the advanced configuration settings for <strong>Freedom</strong> <strong>EVOware</strong> can only be<br />
made by editing the evoware.opt or evoware.inf files. If you edit these files<br />
manually, it will be necessary to repair the checksums afterwards.<br />
Start this tool with the shortcut in Start > All Programs > Tecan > <strong>EVOware</strong> ><br />
Tools.<br />
You will be shown a list of configuration files. A green icon indicates that the<br />
checksum is correct. A red icon indicates that the checksum is not correct and<br />
needs to be repaired.<br />
To repair the checksum or checksums click the large green arow at the bottom<br />
right. You will be presented with the Login dialog box. Enter your user name and<br />
password and click OK. You can only repair the checksum(s) if you have been<br />
given <strong>Freedom</strong> <strong>EVOware</strong> Administrator or Application Specialist access rights. If<br />
you repair checksums, this is logged to the trace.txt file.<br />
A.9.3 Duplicate Device Tool<br />
if you want to use more than one physical device of the same type on your<br />
pipetting instrument, you must use the Duplicate Device tool to create one or<br />
more copies of the <strong>Freedom</strong> <strong>EVOware</strong> device driver and device configuration<br />
settings. Please exit <strong>Freedom</strong> <strong>EVOware</strong> before using this tool.<br />
The additional device should then appear in the Control Bar (Commands section)<br />
when you re-start <strong>Freedom</strong> <strong>EVOware</strong>. If it doesn’t, make sure that the Start<br />
checkbox is checked for the device in the Configuration Tool (see 8.4.1.1 “Device<br />
Information Tab”, 8-21).<br />
After duplicating the device driver, you must create a carrier for the new device. To<br />
do this, right-click on the carrier for the original device in the Labware section of<br />
the Control Bar and choose Duplicate from the context menu.<br />
The new device must then be assigned to the new carrier. To do this, choose the<br />
new device (e.g. Shaker2) from the Device pull-down list in the Edit Carrier dialog<br />
box (see 9.5 “Configuring Carriers”, 9-39). Each device must only be assigned<br />
to one carrier.<br />
Note: <strong>Freedom</strong> <strong>EVOware</strong> allows you to sub-divide the carousel, incubator and<br />
Te-Stack into several logical devices. You do not need to use the Duplicate Device<br />
tool to do this (see Logical Devices in the Index for more information).<br />
A - 36 <strong>Freedom</strong> <strong>EVOware</strong> <strong>Software</strong> <strong>Manual</strong>, 393172, en, V<strong>2.3</strong>
A - Appendix A<br />
System Tools for <strong>Freedom</strong> <strong>EVOware</strong><br />
Start this tool with the shortcut in Start > All Programs > Tecan > <strong>EVOware</strong> ><br />
Tools. You are prompted to choose the device you want to duplicate:<br />
Fig. A-4<br />
Duplicate Device tool<br />
Click the Clone button in the toolbar. You will be prompted to confirm your choice:<br />
Fig. A-5<br />
Confirmation dialog box<br />
If you click Yes, you must then make the following settings for the new device<br />
driver:<br />
Fig. A-6<br />
Enter Duplicate Details dialog box<br />
Call name<br />
This field specifies the device name which used by <strong>Freedom</strong> <strong>EVOware</strong><br />
internally. The call name is also used for labeling the process step in the<br />
Process Editor. A suitable name will be suggested. You can specify a different<br />
name if required. Call names must be unique.<br />
<strong>Freedom</strong> <strong>EVOware</strong> <strong>Software</strong> <strong>Manual</strong>, 393172, en, V<strong>2.3</strong> A - 37
A - Appendix A<br />
System Tools for <strong>Freedom</strong> <strong>EVOware</strong><br />
Driver Name<br />
This field specifies the name of the device driver. A suitable name will be<br />
suggested. You can specify a different name if required.<br />
If you specify the same driver name as the one you copied, <strong>Freedom</strong><br />
<strong>EVOware</strong> Plus treats them as a parallel resource, and the scheduler will<br />
automatically choose one of the physical devices during process runtime,<br />
depending on which one is free. The parallel resources should normally be<br />
configured to function identically (e.g. same washing liquid or same incubation<br />
temperature).<br />
Parallel resources are not relevant in <strong>Freedom</strong> <strong>EVOware</strong> <strong>Standard</strong>.<br />
Display Name<br />
Specify the required name for the device in the Control Bar. It is<br />
recommended to choose a unique, descriptive display name (e.g. Te-Shake 2<br />
or Te-Shake 90 degrees).<br />
If you want to delete a device driver, select the driver in the list and click the<br />
Delete button in the toolbar . You will be prompted to confirm the deletion.<br />
Note: If you delete all copies of the device driver, you must re-install the device<br />
with the installation program if you want to use the device again later.<br />
A.9.4 Export/Import Tool<br />
This tool is used to exchange processes and scripts, robot vectors and liquid<br />
class, carrier and labware definitions with other <strong>Freedom</strong> <strong>EVOware</strong> installations.<br />
In contrast to earlier Tecan pipetting software products such as Gemini, you must<br />
not simply copy the carrier database file carrier.cfg from one <strong>Freedom</strong> <strong>EVOware</strong><br />
installation to another. You must use the Export/Import tool instead.<br />
Start this tool with the shortcut in Start > All Programs > Tecan > <strong>EVOware</strong> > Tools<br />
(please exit <strong>Freedom</strong> <strong>EVOware</strong> first):<br />
A - 38 <strong>Freedom</strong> <strong>EVOware</strong> <strong>Software</strong> <strong>Manual</strong>, 393172, en, V<strong>2.3</strong>
A - Appendix A<br />
System Tools for <strong>Freedom</strong> <strong>EVOware</strong><br />
Fig. A-7<br />
Export/Import tool<br />
When you start it, the Export/Import tool is initially in export mode, as shown by<br />
the Export button at the bottom.<br />
A.9.4.1 Exporting<br />
Choose individual items you want to export using the Add and Remove buttons<br />
and the four coloured tabs. Click Add Tab to export all of the items on the currently<br />
selected tab. Click Add All to export all of the items on all of the tabs.<br />
Thie chosen items will be shown in the right hand panel.<br />
If you choose to export a script or process, the Export/Import tool will<br />
automatically add all of the labware, carriers and liquid classes which are used to<br />
the right hand panel. Use the Remove button to remove un-needed items from the<br />
right hand panel if required.<br />
The icons in the left hand panel of the Liquid Classes tab indicate whether the<br />
liquid classes are pre-defined ( ) or custom ( ).<br />
When you have made your choices, click the Export button to create an export file<br />
(*.exd) which contains the chosen items. The export file will also contain the xml<br />
data which is needed by the PMP (Pressure Monitored Pipetting) hardware<br />
option.<br />
To switch to import mode, choose Load import file in the File menu and choose a<br />
previously created export file (*.exd). The Export button at the bottom changes to<br />
Import. A dialog box will be shown if script and process files with the same names<br />
already exist. You can then choose to skip the file(s) or overwrite the existing<br />
file(s). Click the Import button when you are ready to import.<br />
<strong>Freedom</strong> <strong>EVOware</strong> <strong>Software</strong> <strong>Manual</strong>, 393172, en, V<strong>2.3</strong> A - 39
A - Appendix A<br />
System Tools for <strong>Freedom</strong> <strong>EVOware</strong><br />
Please exit <strong>Freedom</strong> <strong>EVOware</strong> before using this tool.<br />
A.9.4.2 Importing<br />
Choose Load import file in the File menu to load a previously created export file<br />
(*.exd) which contains the processes and scripts, robot vectors and liquid class,<br />
carrier and labware definitions you want to import.<br />
Alternatively, if the Export/Import tool is not already running, double-click on the<br />
required *.exd file to start the tool and switch to import mode. You will be prompted<br />
to enter your user name and password.<br />
A dialog box will appear if one or more items already exist in your <strong>Freedom</strong><br />
<strong>EVOware</strong> installation with the same name. The dialog box shows the name of the<br />
offending item and lets you choose how to treat existing items:<br />
• Skip this item: Do not import this item.<br />
• Skip all items: Do not import any of the items in the export file.<br />
• Include this item: Add the item to the list in the right hand panel even though it<br />
already exists.<br />
• Include all items: Add all items in the export file to the list in the right hand<br />
panel even though some of them already exist.<br />
After processing the export file, the right hand panel shows all of the items you<br />
have chosen to import. Click Import all to import all of the items in the list. Items<br />
which already exist in your <strong>Freedom</strong> <strong>EVOware</strong> installation (if any) will be<br />
overwritten. Alternatively, select an item and click Import to import the selected<br />
item only.<br />
A.9.4.3 File menu<br />
Load import file<br />
Choose a previously created export file which contains the processes and<br />
scripts, robot vectors and liquid class, carrier and labware definitions you want<br />
to import. See A.9.4.2 “Importing”, A-40.<br />
Undo previous import...<br />
If you have used the Export/Import tool to import <strong>Freedom</strong> <strong>EVOware</strong><br />
configuration and data files, backup copies of the files which have been<br />
replaced are made in the /AuditTrail/Configuration directory.<br />
Choose Undo previous import if you decide to restore the earlier versions of<br />
the configuration and data files. A dialog box is shown to allow you to choose<br />
the backup copy to restore. This function only restores backups made by the<br />
Export/Import tool, not those made by the Backup feature. See also<br />
8.2 “Backing Up and Restoring Your Configuration”, 8-3.<br />
A.9.4.4 Edit menu<br />
Switch to export<br />
Unload a previously loaded import file, cancel import mode and switch to<br />
export mode. Use this option if you have started to import but change your<br />
mind and want to export instead. This menu item is only available in import<br />
mode.<br />
A - 40 <strong>Freedom</strong> <strong>EVOware</strong> <strong>Software</strong> <strong>Manual</strong>, 393172, en, V<strong>2.3</strong>
A - Appendix A<br />
System Tools for <strong>Freedom</strong> <strong>EVOware</strong><br />
Add files to export list<br />
Choose a file of any required type which you want to include in the export file.<br />
For example, you can include a worklist file, a VB script or a text document<br />
with instructions on using the export file. This menu item is only available in<br />
export mode.<br />
During the subsequent import operation, the file will be put in a directory of the<br />
same name from where it was exported. The user will be prompted if the file<br />
already exists on the destination PC or if the directory does not exist.<br />
A.9.4.5 Command Line Parameters (Export/Import Tool)<br />
The Export/Import Tool supports the following command line parameters:<br />
Tab. A-11 Command Line Parameters (Export/Import Tool)<br />
Switch<br />
-u <br />
-w <br />
Explanation<br />
Specify -u -w to start <strong>Freedom</strong> <strong>EVOware</strong> without<br />
requiring the user name and password to be entered manually in the Login<br />
dialog box. a)<br />
-a Automated mode (no user interaction, no GUI)<br />
-e Export mode<br />
-s Skip existing items on import (in automated mode only)<br />
-o Overwrite existing items on import (in automated mode only)<br />
-k Secret key allowing login without user name and password (e.g. for Installer)<br />
-v Verbose mode (extended logging)<br />
<br />
*<br />
Full path and filename of export/import file (EXD file). In import mode, this<br />
file is loaded; in export mode, it is generated.<br />
List of items to be exported, separated by spaces (in export mode only).<br />
a) The login dialog box is also skipped if the User Management has been disabled in the <strong>EVOware</strong><br />
Configuration Tool.<br />
The command line parameters are evaluated and handled as follows:<br />
• If both user name and password are specified, the login is performed<br />
automatically.<br />
• If the correct secret key is specified, the login dialog is skipped.<br />
• If the automated mode option is specified, the options -s and -o are accepted.<br />
If none of the latter two is specified, existing items are skipped on import (i.e. -<br />
s is default behaviour).<br />
• If the automated mode option is specified, an import file has to be specified as<br />
well; otherwise the tool starts in normal mode.<br />
• If the export mode switch has been specified, a list of items to be exported has<br />
to be provided as well as the export file name.<br />
• In import mode, the list of items - if provided - is ignored.<br />
<strong>Freedom</strong> <strong>EVOware</strong> <strong>Software</strong> <strong>Manual</strong>, 393172, en, V<strong>2.3</strong> A - 41
A - Appendix A<br />
System Tools for <strong>Freedom</strong> <strong>EVOware</strong><br />
A.9.5 Zip & Send Tool<br />
To help with diagnosing problems with your <strong>Freedom</strong> <strong>EVOware</strong> installation, the<br />
Tecan pipetting instrument and optional hardware such as the Carousel, the<br />
Customer Support hotline at Tecan may ask you to send them a set of log files<br />
from the core software, the Message Control Server and/or the device drivers.<br />
The Zip & Send tool allows you to configure <strong>Freedom</strong> <strong>EVOware</strong> to create the<br />
required log files and to send them by eMail to a specified recipient.<br />
Some of the log file types are always created by <strong>Freedom</strong> <strong>EVOware</strong>, other log file<br />
types (such as log files from device drivers) need to be explicitly activated. In<br />
addition, the Zip & Send can configure the Message Control Server (MCS) to<br />
output log files with five different levels of logging detail, according to<br />
requirements.<br />
Proceed as follows to use Zip & Send:<br />
• Start this tool with the shortcut in Start > All Programs > Tecan > <strong>EVOware</strong> ><br />
Tools.<br />
• Choose the log files which are needed and the required level of detail for the<br />
MCS log.<br />
• Click the large green arrow in the “Activate Logging window”. This configures<br />
<strong>Freedom</strong> <strong>EVOware</strong> to start recording the chosen log files. In addition, Zip &<br />
Send is minimized to an icon the system tray area at the bottom right edge of<br />
the screen.<br />
• Use <strong>Freedom</strong> <strong>EVOware</strong> in the normal way, at least until the event or error<br />
which you want to record has occurred. Zip & Send must remain running (in<br />
the background or foreground) during this time.<br />
• Maximize the Zip & Send window (right-click the Zip & Send icon in the<br />
system tray and choose Show application).<br />
• Click Send to proceed to the “Send Log Files window”.<br />
The buttons in the Send Log Files window allow you to reach the “Mail Setup<br />
window”, the “Choose Data To Send window” and the “Edit Recipients<br />
window”.<br />
• In the Send Log Files window, choose the required recipient(s) and click the<br />
large green arrow on the right to send the log files via eMail. The selected<br />
logging information is compressed to a zip file and sent as an eMail<br />
attachment.<br />
– The name of the zip file which is created is ZipAndSend.zip. It is created in<br />
the ..\<strong>EVOware</strong>\DetailedLog directory. It is overwritten each time you use<br />
Zip & Send.<br />
– If you do not specify any eMail recipients, ZipAndSend.zip will be created<br />
but not sent. If the <strong>Freedom</strong> <strong>EVOware</strong> PC does not have an internet<br />
connection, transfer the zip file to another PC with an internet connection<br />
(e.g. using a USB stick) and send the zip file using an eMail package such<br />
as MS Outlook.<br />
– The zip file will be large if you have chosen to send lots of data (e.g. if you<br />
include <strong>Freedom</strong> <strong>EVOware</strong> database directory). In this case, sending the<br />
eMail may take several minutes. Zip & Send does not react to user input<br />
while the eMail is being sent.<br />
– Zip & Send writes a log file of its actions to the ..\<strong>EVOware</strong>\AuditTrail<br />
directory. The last line of this file indicates whether the eMail was sent<br />
sucessfully.<br />
– All settings for Zip & Send (e.g. eMail recipients) are stored in the<br />
ZipAndSend.ini file in the ..\<strong>EVOware</strong> directory.<br />
• In the Send Log Files window, click Close to return to the Activate Logging<br />
window.<br />
A - 42 <strong>Freedom</strong> <strong>EVOware</strong> <strong>Software</strong> <strong>Manual</strong>, 393172, en, V<strong>2.3</strong>
A - Appendix A<br />
System Tools for <strong>Freedom</strong> <strong>EVOware</strong><br />
• In the Activate Logging window, click Close to exit Zip & Send. This restores<br />
all of the log file settings to the settings which were present before you ran Zip<br />
& Send. Alternatively, click Restore to restore the log file settings without<br />
exiting Zip & Send.<br />
Note: If <strong>Freedom</strong> <strong>EVOware</strong> did not shut down properly the last time it was used,<br />
you will be asked if you want to run Zip & Send when you restart <strong>Freedom</strong><br />
<strong>EVOware</strong> again. The log files which are sent in this case can be useful to the<br />
Customer Support hotline when diagnosing problems, for example if the incorrect<br />
shutdown was caused by an internal error in <strong>Freedom</strong> <strong>EVOware</strong> and not by an<br />
external event such as loss of mains power to the PC.<br />
A.9.5.1 Activate Logging window<br />
This window is used to choose the log files which are needed and the level of<br />
detail for the MCS log:<br />
Fig. A-8<br />
Zip & Send - Activate Logging window<br />
When you first start Zip & Send, all available driver log files and <strong>EVOware</strong> log files<br />
are selected. Uncheck the checkboxes for the files which you don’t want or need<br />
to send.<br />
<strong>Freedom</strong> <strong>EVOware</strong> always creates log files of type EVO. See A.1.2 “Structure of<br />
Log Files of Type USR”, A-9 and A.1.3 “Structure of Log Files of Type ERR”,<br />
A-9 for information on activating the other two log file types.<br />
Check the Serial log checkbox to include serial data (instrument firmware<br />
commands) in the EVO log file type.<br />
Choose the required logging level for the Message Control Server (MCS) from the<br />
pull-down list. A logging level of “3” is normally sufficient. Levels higher than “3”<br />
can result in very large MCS log files in a short period of time.<br />
If you activate log files for devices, you must also check the Driver log files<br />
checkbox in the Choose Data To Send window. Otherwise, the log files will be<br />
recorded but not included in the zip file and not sent. This applies analogously to<br />
the other log file types.<br />
Click the large green arrow to start recording the chosen log files. This minimizes<br />
Zip & Send to an icon the system tray area at the bottom right edge of the screen.<br />
Alternatively, click Send to proceed to the “Send Log Files window”.<br />
<strong>Freedom</strong> <strong>EVOware</strong> <strong>Software</strong> <strong>Manual</strong>, 393172, en, V<strong>2.3</strong> A - 43
A - Appendix A<br />
System Tools for <strong>Freedom</strong> <strong>EVOware</strong><br />
Click Restore to restore all of the log file settings to the settings which were<br />
present before you started Zip & Send.<br />
Context menu in the system tray<br />
When Zip & Send is minimized, right-click the Zip & Send icon in the system tray<br />
area at the bottom right edge of the screen to open the context menu. The<br />
available options are as follows:<br />
Restore settings: Restore all of the log file settings to the settings which were<br />
present before you started Zip & Send.<br />
Activate logging: Activate the log file settings which you configured in the<br />
Activate Logging window. This option only appears if you previously chose<br />
Restore Settings. Activate logging and Restore Settings can be used to switch<br />
logging on and off and thus record and send only the log file information which is<br />
relevant. This reduces the size of the data which is sent.<br />
Send all: This opens the Send Log Files window and selects all available items in<br />
the Choose Data To Send window (ignoring a previous selection which you<br />
made).<br />
Close application: Exit Zip & Send.<br />
Show application: This opens the Activate Logging window again.<br />
A.9.5.2 Send Log Files window<br />
The Send Log Files window is used to send the log files via eMail:<br />
Fig. A-9<br />
Zip & Send - Send Log Files window<br />
Click To... to open the “Edit Recipients window”, which allows you to choose<br />
recipients from the Zip & Send eMail Address Book. Alternatively, you can enter<br />
an eMail address in the field provided. Use semicolons “;” to separate multiple<br />
recipients.<br />
Click CC... (carbon copy) to open the “Edit Recipients window”, which allows you<br />
to choose recipients from the Zip & Send eMail Address Book. Alternatively, you<br />
can enter an eMail address in the field provided. Use semicolons “;” to separate<br />
multiple recipients.<br />
If you do not specify any eMail recipients, ZipAndSend.zip will be created in the<br />
..\<strong>EVOware</strong>\DetailedLog directory but not sent. If the <strong>Freedom</strong> <strong>EVOware</strong> PC does<br />
not have an internet connection, transfer the zip file to another PC with an internet<br />
A - 44 <strong>Freedom</strong> <strong>EVOware</strong> <strong>Software</strong> <strong>Manual</strong>, 393172, en, V<strong>2.3</strong>
A - Appendix A<br />
System Tools for <strong>Freedom</strong> <strong>EVOware</strong><br />
connection (e.g. using a USB stick) and send the zip file using an eMail package<br />
such as MS Outlook.<br />
Click<br />
Click<br />
to open the “Mail Setup window”.<br />
to open the “Choose Data To Send window”.<br />
A.9.5.3 Mail Setup window<br />
The eMail Setup window is used to configure the settings for your eMail account:<br />
Fig. A-10 Zip & Send - eMail Setup window<br />
The settings you make are stored in the Zip & Send configuration. This dialog box<br />
is only need when you use Zip & Send for the first time, or if your eMail settings<br />
have changed.<br />
Send By panel<br />
Specify your name and eMail address, your company name, department name<br />
and phone number. Provide information on your <strong>Freedom</strong> <strong>EVOware</strong> system in the<br />
System field.<br />
MAPI<br />
Click this radio button to send the eMail via MAPI. When you send the mail,<br />
you will be prompted to enter the MAPI profile you want to use and the MAPI<br />
password. You can get a list of available MAPI profiles by double-clicking the<br />
Mail button in the Windows Control Panel. The Mail button will only be present<br />
in the Control Panel if you have installed the MAPI service. MAPI is included<br />
with many eMail programs, e.g. Microsoft Outlook.<br />
<strong>Freedom</strong> <strong>EVOware</strong> <strong>Software</strong> <strong>Manual</strong>, 393172, en, V<strong>2.3</strong> A - 45
A - Appendix A<br />
System Tools for <strong>Freedom</strong> <strong>EVOware</strong><br />
SMTP<br />
Click this radio button to send the eMail via SMTP. The following fields are<br />
also required in this case.<br />
Server name: Specify the address of the SMTP server you want to use for<br />
sending the eMails.<br />
User name: Specify the user name for SMTP authentication.<br />
Password: Specify the password for SMTP authentication<br />
The user name and password for SMTP authentication depends on the SMTP<br />
server. In many cases, it is the same user name and password which is used<br />
to collect eMails using the POP3 protocol.<br />
None<br />
Click this radio button if you want to collect the data but do not want to send it<br />
by eMail. You can then transfer the zip file to another PC manually, e.g. using<br />
a USB stick or through a network connection.<br />
A.9.5.4 Choose Data To Send window<br />
The Choose Data To Send window is used to choose the files and other data<br />
which you want to send:<br />
Fig. A-11 Zip & Send - Choose Data To Send window<br />
When you first use Zip & Send, all available driver log files, <strong>EVOware</strong> log files and<br />
other data items are selected (the checkboxes for USR and ERR log will be<br />
unchecked if you did not select them in the Activate Logging window).<br />
Uncheck the checkboxes for the data which you don’t want or need to send.<br />
Use the Files newer than pull-down list to only send files which are newer than a<br />
specified date.<br />
See A.1 “Overview of the Log Files”, A-1 for information on the log file types<br />
USR, ERR and EVO.<br />
A - 46 <strong>Freedom</strong> <strong>EVOware</strong> <strong>Software</strong> <strong>Manual</strong>, 393172, en, V<strong>2.3</strong>
A - Appendix A<br />
System Tools for <strong>Freedom</strong> <strong>EVOware</strong><br />
Check the Binary version info checkbox to send version info on <strong>EVOware</strong><br />
software components and drivers.<br />
Check the DB checkbox to send the <strong>EVOware</strong> database directory. This directory<br />
can be quite large. If you select this item, sending the eMail may take longer than<br />
expected.<br />
Check the INI checkbox to send INI files. INI files contain configuration settings for<br />
<strong>EVOware</strong> software components and drivers.<br />
Check the Registry checkbox to send that part of the Windows registry which is<br />
used by <strong>EVOware</strong>. The registry contains configuration settings for <strong>EVOware</strong><br />
software components and drivers.<br />
Check the Other files checkbox and choose the file(s) using the buttons to send<br />
other files such as descriptions of the problem which you made using a text editor<br />
program.<br />
The settings you make are stored in the Zip & Send configuration.<br />
A.9.5.5 Edit Recipients window<br />
The Edit Recipients window is used to configure recipients for the Zip & Send<br />
eMail Address Book:<br />
Fig. A-12 Zip & Send - Edit Recipients window<br />
Click New to add a new recipient to the Zip & Send address book. Then fill in the<br />
fields and click Apply. Phone is the recipient’s phone number; this field is for<br />
information purposes only.<br />
Double-click on an entry in the Recipient list to add it to the To... or CC... field in<br />
the Send Log Files window.<br />
A.9.6 Audit Trail Archiving tool<br />
<strong>Freedom</strong> <strong>EVOware</strong> can output a large amount of logging information. It is<br />
recommended to back up and then delete the old log files on a regular basis. The<br />
Audit Trail Archiving tool (AuditArch) allows you to archive <strong>Freedom</strong> <strong>EVOware</strong> log<br />
files and audit trail data either manually or automatically.<br />
Start this tool with the shortcut in Start > All Programs > Tecan > <strong>EVOware</strong> ><br />
Tools. The Audit Trail Archiving tool can also be started from the Configuration<br />
Tool.<br />
If you checked the Start AuditArch at <strong>EVOware</strong> startup checkbox in the<br />
Configuration Tool, AuditArch will start in the background each time you start<br />
<strong>Freedom</strong> <strong>EVOware</strong> <strong>Software</strong> <strong>Manual</strong>, 393172, en, V<strong>2.3</strong> A - 47
A - Appendix A<br />
System Tools for <strong>Freedom</strong> <strong>EVOware</strong><br />
<strong>Freedom</strong> <strong>EVOware</strong> and archive the log files if this is required by the currently<br />
configured archiving actions (see 8.3.1.4 “Protocol Options Tab”, 8-8, Audit Trail<br />
Archiving panel).<br />
Note: If you are required to comply with the FDA regulations, make sure you keep<br />
archive copies of all audit trail, trace and log files.<br />
The log files and audit trail data are located in the \AuditTrail<br />
directory and its sub-directories. These directories are protected against<br />
unauthorized access. AuditArch allows you to copy or move the log files and audit<br />
trail data files to another directory of your choice.<br />
The AuditArch dialog box is as follows:<br />
Fig. A-13 Audit Trail Archiving tool<br />
Click New to create a new archiving action. Click Delete to delete an existing<br />
archiving action.<br />
Click the yellow buttons on the right to:<br />
• Save the current set of archiving actions in a .aal file, and<br />
• Open a previously stored set of archiving actions.<br />
Click the large green arrow on the right to start the archiving procedure manually<br />
using the currently configured archiving actions.<br />
Click Edit to configure the selected archiving action. This opens the Edit Archiving<br />
Action dialog box:<br />
A - 48 <strong>Freedom</strong> <strong>EVOware</strong> <strong>Software</strong> <strong>Manual</strong>, 393172, en, V<strong>2.3</strong>
A - Appendix A<br />
System Tools for <strong>Freedom</strong> <strong>EVOware</strong><br />
Fig. A-14 Editing an archiving action<br />
Choose the files you want to archive with this archiving action by choosing a file<br />
filter from the FileFilter pull-down list. Choose All files to archive all log files and<br />
audit trail data. Click Filter to create or edit a file name filter in the Edit Filter dialog<br />
box (see below).<br />
Check the Include sub-directories checkbox if you want the file name filter to apply<br />
to log files in sub-directories of the ../AuditTrail directory as well.<br />
You can also choose when you want to archive the files (e.g. when they have<br />
reached a specified age) and the action to take (move or copy them to the<br />
specified destination directory or delete them).<br />
Note: If you are required to comply with the FDA regulations, make sure you keep<br />
archive copies of all audit trail, trace and log files. Do not delete them from the<br />
../AuditTrail directory without making an archive copy, which should be kept as a<br />
permanent record.<br />
Edit Filter dialog box<br />
The Edit Filter dialog box lets you specify the files to archive using wildcards:<br />
Fig. A-15 Edit Filter dialog box<br />
<strong>Freedom</strong> <strong>EVOware</strong> <strong>Software</strong> <strong>Manual</strong>, 393172, en, V<strong>2.3</strong> A - 49
A - Appendix A<br />
System Tools for <strong>Freedom</strong> <strong>EVOware</strong><br />
To create a new filter, enter a name for the filter in the Name field, click New,<br />
specify the filter settings and click Apply. Click Close when you are finished.<br />
The new filter can then be chosen from the FileFilter pull-down list in the Edit<br />
archiving action dialog box.<br />
A.9.7 EVOTransfer<br />
This tool allows you to package up and compress an entire <strong>EVOware</strong> installation<br />
into a single, special transfer file (image file). You can then send it by email or ftp<br />
and install it on another PC. You can also use EVOTransfer to make an image of<br />
several different <strong>EVOware</strong> installations. If you copy several image files to the<br />
same PC, you can then use EVOTransfer to switch between different<br />
configuration scenarios or even different <strong>EVOware</strong> versions for the purpose of<br />
demonstration, testing or technical support.<br />
Note: You cannot use EVOTransfer to transfer an <strong>EVOware</strong> installation from a PC<br />
running Windows XP to a PC running Windows Vista or vice versa.<br />
Note: To use the <strong>EVOware</strong> installation for pipetting, the recipient also needs to<br />
have a suitable <strong>Freedom</strong> <strong>EVOware</strong> dongle.<br />
To install EVOTransfer on a PC which is running an older <strong>Freedom</strong> <strong>EVOware</strong><br />
version (e.g. v 1.4), copy the following files from the <strong>EVOware</strong>\Tools\EVOTransfer<br />
directory in the <strong>Freedom</strong> <strong>EVOware</strong> <strong>2.3</strong> installation to a local directory of your<br />
choice on the other PC: EVOtransfer.exe, EVOtransfer.ini,<br />
ICSharpCode.SharpZipLib.dll and Win32Security.dll (or copy the whole directory).<br />
It is not necessary to run a setup program.<br />
Start this tool with the shortcut in Start > All Programs > Tecan > <strong>EVOware</strong> ><br />
Tools:<br />
Fig. A-16 EVOTransfer - Main window<br />
The options in this dialog box are as follows:<br />
Send <strong>EVOware</strong> System<br />
This option collects the files to send from your <strong>Freedom</strong> <strong>EVOware</strong> installation<br />
and packs them into a single compressed transfer file (.etz) in the <strong>EVOware</strong><br />
installation directory:<br />
Recommended: Only collect and compress the files which are normally<br />
required to recreate your <strong>Freedom</strong> <strong>EVOware</strong> installation on the remote<br />
A - 50 <strong>Freedom</strong> <strong>EVOware</strong> <strong>Software</strong> <strong>Manual</strong>, 393172, en, V<strong>2.3</strong>
A - Appendix A<br />
System Tools for <strong>Freedom</strong> <strong>EVOware</strong><br />
system.<br />
Complete: collect and compress all of the files from your <strong>Freedom</strong> <strong>EVOware</strong><br />
installation<br />
<strong>Manual</strong> selection: Choose the files manually which you want to send.<br />
Receive <strong>EVOware</strong> System<br />
Prepare to install a <strong>Freedom</strong> <strong>EVOware</strong> installation from a transfer file which is<br />
on your hard disk. You also have the option of getting a transfer file from an ftp<br />
server.<br />
Switch <strong>EVOware</strong><br />
Replace the currently installed <strong>Freedom</strong> <strong>EVOware</strong> installation on your PC with<br />
another <strong>Freedom</strong> <strong>EVOware</strong> installation which is contained in a transfer file.<br />
Click the green arrow when you have made your choice.<br />
A.9.7.1 Send <strong>EVOware</strong> System<br />
If you choose Send <strong>EVOware</strong> System, a progress bar is shown while collecting<br />
and compressing the files.<br />
You are then shown the following dialog box:<br />
Fig. A-17 EVOTransfer - Send <strong>EVOware</strong> Zip File window<br />
Specify the message you want to send with the transfer file and specify the eMail<br />
address of the recipient. Click To... to open the Edit Recipients window. This<br />
window is your eMail Address Book and works just like the Edit Recipients<br />
window in the Zip & Send tool (see A.9.5.5, A-47).<br />
Note: The To... field is gray (inactive) and shows if you have configured<br />
an ftp server instead of an eMail address in the Mail Setup window.<br />
Click<br />
to open the Mail Setup window.<br />
This window is used to set up your eMail account and works just like the Mail<br />
Setup window in the Zip & Send tool (see A.9.5.3, A-45).<br />
The only differences are:<br />
• You can send the file to an ftp server instead of an eMail address.<br />
<strong>Freedom</strong> <strong>EVOware</strong> <strong>Software</strong> <strong>Manual</strong>, 393172, en, V<strong>2.3</strong> A - 51
A - Appendix A<br />
System Tools for <strong>Freedom</strong> <strong>EVOware</strong><br />
• You can encrypt the file before sending it. EVOTransfer on the remote<br />
computer will then un-encrypt the file again when the file is received.<br />
• Choose None in the Mail Setup window if you want to create the the transfer<br />
file (image file) but do not want to send it by eMail or ftp. You can then transfer<br />
the zip file to another PC manually, e.g. using a USB stick or through a<br />
network connection. The transfer file is created in the <strong>Freedom</strong> <strong>EVOware</strong><br />
installation directory.<br />
The settings you make are stored in the EVOTransfer configuration. You only<br />
need the Mail Setup window when you use EVOTransfer for the first time, or if<br />
your eMail settings have changed.<br />
The following dialog box is shown if you chose <strong>Manual</strong> Selection in Send<br />
<strong>EVOware</strong> System:<br />
Fig. A-18 EVOTransfer - Collect <strong>EVOware</strong> window<br />
Choose the files you want to send and click the green arrow to continue.<br />
A.9.7.2 Receive <strong>EVOware</strong> System<br />
The following dialog box is shown if you choose Receive <strong>EVOware</strong> System in the<br />
main window of EVOTransfer:<br />
A - 52 <strong>Freedom</strong> <strong>EVOware</strong> <strong>Software</strong> <strong>Manual</strong>, 393172, en, V<strong>2.3</strong>
A - Appendix A<br />
System Tools for <strong>Freedom</strong> <strong>EVOware</strong><br />
Fig. A-19 EVOTransfer - Receive <strong>EVOware</strong> Transfer File window<br />
The options in this dialog box are as follows:<br />
Click Browse to look for a transfer file from EVOTransfer which is already on your<br />
hard disk or a network drive. Alternatively, click Get from ftp server to download<br />
the transfer file from an ftp server.<br />
The account information for the ftp server is specified in the Mail Setup window<br />
(the blue buttton in the Send Detailed Information window, see A.9.7.1, A-51).<br />
In the Receive <strong>EVOware</strong> transfer file window, the yellow fields at the top right<br />
show information on the <strong>Freedom</strong> <strong>EVOware</strong> version which is currently installed on<br />
your PC and the yellow fields at the top left show information on the <strong>Freedom</strong><br />
<strong>EVOware</strong> version contained in the transfer file.<br />
Choose the <strong>Freedom</strong> <strong>EVOware</strong> files you want to install and click the green arrow<br />
to contuue with the installation.<br />
Note: If you want to keep a copy of your current <strong>EVOware</strong> installation, back it up<br />
by making a transfer file with EVOTransfer before switching to another <strong>EVOware</strong><br />
installation. Otherwise, you will not be able to switch back to your current system.<br />
Above all, take care to back up your the configuration and data files and your audit<br />
trail. You can either do this with EVOTransfer or with the Backup function (see<br />
8.2 “Backing Up and Restoring Your Configuration”, 8-3).<br />
A.9.7.3 Switch <strong>EVOware</strong><br />
You can use EVOTransfer to make an image of several different <strong>EVOware</strong><br />
installations. This allows you to switch between different configuration scenarios<br />
or even different <strong>EVOware</strong> versions for the purpose of demonstration, testing or<br />
technical support.<br />
<strong>Freedom</strong> <strong>EVOware</strong> <strong>Software</strong> <strong>Manual</strong>, 393172, en, V<strong>2.3</strong> A - 53
A - Appendix A<br />
System Tools for <strong>Freedom</strong> <strong>EVOware</strong><br />
Note: If you want to keep a copy of your current <strong>EVOware</strong> installation, back it up<br />
by making a transfer file with EVOTransfer before switching to another <strong>EVOware</strong><br />
installation. Otherwise, you will not be able to switch back to your current system.<br />
Above all, take care to back up your the configuration and data files and your audit<br />
trail. You can either do this with EVOTransfer or with the Backup function (see<br />
8.2 “Backing Up and Restoring Your Configuration”, 8-3).<br />
A.9.8 Gemini Migration Tool<br />
This tool is used to import carrier, labware and liquid class definitions from the<br />
Gemini software. It also imports the Gemini worktable, Gemini pipetting scripts<br />
and VBScripts.<br />
The imported configuration data replaces all existing <strong>Freedom</strong> <strong>EVOware</strong><br />
configuration data, which is no longer available.<br />
To start this tool, navigate to the directory C:\Program Files\Tecan\<strong>EVOware</strong> using<br />
Windows Explorer and double-click on GeminiMigration.exe. Please exit <strong>Freedom</strong><br />
<strong>EVOware</strong> first.<br />
Fig. A-20 Gemini Migration tool<br />
Source<br />
Enter the directory containing the Gemini installation or click Browse and<br />
choose the directory.<br />
Destination<br />
The Gemini Migration tool determines the directory containing the <strong>Freedom</strong><br />
<strong>EVOware</strong> installation automatically.<br />
Log view<br />
This panel reports the Gemini files which were imported into <strong>Freedom</strong><br />
<strong>EVOware</strong> and the <strong>Freedom</strong> <strong>EVOware</strong> files which were created or replaced.<br />
A - 54 <strong>Freedom</strong> <strong>EVOware</strong> <strong>Software</strong> <strong>Manual</strong>, 393172, en, V<strong>2.3</strong>
A - Appendix A<br />
System Tools for <strong>Freedom</strong> <strong>EVOware</strong><br />
Note: Each time changes are made to the configuration files, <strong>Freedom</strong> <strong>EVOware</strong><br />
creates backup copies of the original files in the /AuditTrail/<br />
Configuration directory.<br />
A.9.8.1 Importing Liquid Classes From Gemini<br />
The Gemini Migration Tool also imports all of the Gemini liquid classes.<br />
In <strong>Freedom</strong> <strong>EVOware</strong>, pipetting commands only let you choose liquid classes<br />
which are suitable for the current configuration of the pipetting instrument. For<br />
example, you will not see liquid classes for DiTis if the LiHa is not currently<br />
configured with DiTis.<br />
If you import Gemini scripts which uses DiTis and the LiHa in <strong>Freedom</strong> <strong>EVOware</strong><br />
is not configured with DiTis, you will not be able to find the DITI liquid class which<br />
was originally intended if you edit the pipetting commands in <strong>Freedom</strong> <strong>EVOware</strong>.<br />
This also applies to liquid classes for Active Tips and for the Te-MO. Note: Active<br />
Tips are no longer supported by <strong>Freedom</strong> <strong>EVOware</strong>.<br />
After importing Gemini scripts with the Gemini Migration Tool, make sure that the<br />
pipetting instrument in <strong>Freedom</strong> <strong>EVOware</strong> is configured with all of the options that<br />
are needed by the scripts. Also see the description of the Show all liquid classes<br />
checkbox in 10.1 “Liquid Classes Editor”, 10-1.<br />
A.9.9 Shutdown <strong>EVOware</strong> drivers<br />
To ensure that <strong>Freedom</strong> <strong>EVOware</strong> starts quickly, all of the Tecan drivers you have<br />
chosen to use are loaded each time the PC is started and remain loaded while the<br />
PC is running (see 6.1.11 “Exit, Unload Drivers”, 6-8). This tool is used to<br />
unload the Tecan drivers when <strong>Freedom</strong> <strong>EVOware</strong> is no longer running. The<br />
drivers should be unloaded e.g. if <strong>Freedom</strong> <strong>EVOware</strong> reports an internal error.<br />
The drivers will be loaded again when you re-start <strong>Freedom</strong> <strong>EVOware</strong>.<br />
Start this tool with the shortcut in Start > All Programs > Tecan > <strong>EVOware</strong> ><br />
Tools. This tool has no effect if <strong>Freedom</strong> <strong>EVOware</strong> is currently running.<br />
A.9.10 IQ Wizard<br />
The IQ (Installation Qualification) Wizard helps you to check that the Tecan<br />
software components are correctly installed and guides you through the initial<br />
setup of your pipetting instrument in <strong>Freedom</strong> <strong>EVOware</strong>.<br />
Start this tool with the shortcut in Start > All Programs > Tecan > <strong>EVOware</strong> ><br />
Tools:<br />
<strong>Freedom</strong> <strong>EVOware</strong> <strong>Software</strong> <strong>Manual</strong>, 393172, en, V<strong>2.3</strong> A - 55
A - Appendix A<br />
System Tools for <strong>Freedom</strong> <strong>EVOware</strong><br />
Fig. A-21 IQ Wizard - Main screen<br />
The IQ Wizard is sub-divided into 10 steps. Move the mouse over one of the steps<br />
to get a short description of the step. Click on a step and click Go if you want to<br />
carry out the operation associated with the step.<br />
Some of the steps are provided with a hyperlink to a page in the <strong>Freedom</strong><br />
<strong>EVOware</strong> help file. It is normally recommended to proceed through all of the steps<br />
in chronological order.<br />
The steps User Administration, COM Port Setup, I/O State, Worktable Setup and<br />
Labware Setup can also be carried out directly using <strong>Freedom</strong> <strong>EVOware</strong> and/or<br />
the Configuration Tool (you do not need to use the IQ wizard for this purpose if<br />
you do not want to). However, the IQ Wizard makes it easier and faster to carry<br />
out these tasks and is recommended above all to users who are new to <strong>Freedom</strong><br />
<strong>EVOware</strong>.<br />
The other steps (Customer Information, Verify Dongle, Verify Driver Setup, IQ<br />
Script and Print Report) can only be carried out with the IQ Wizard.<br />
Many of the steps need a <strong>Freedom</strong> <strong>EVOware</strong> hardlock (USB dongle) and must be<br />
carried out with the pipetting instrument and optional hardware devices connected<br />
up and switched on.<br />
A.9.10.1 Customer information<br />
To carry out this step, click on the step and then click Go.<br />
If you have already used the IQ Wizard or the Registration Wizard, you will be<br />
prompted to enter your existing user name and password:<br />
A - 56 <strong>Freedom</strong> <strong>EVOware</strong> <strong>Software</strong> <strong>Manual</strong>, 393172, en, V<strong>2.3</strong>
A - Appendix A<br />
System Tools for <strong>Freedom</strong> <strong>EVOware</strong><br />
Fig. A-22 IQ Wizard - Wizard user login<br />
The user name and password is used to identify the contact information record in<br />
the IQ Wizard and the Registration Wizard and is not related to the user name and<br />
password which is used to log in to <strong>Freedom</strong> <strong>EVOware</strong>.<br />
Click “Change User Info” if you want to edit your user information. Click the green<br />
arrow on the right to log in and to proceed to the next step without changing your<br />
user information.<br />
If you are using the IQ Wizard for the first time, the wizard will proceed directly to<br />
the Contact Information dialog box. You must then enter a new user name and<br />
password and some information about your company:<br />
<strong>Freedom</strong> <strong>EVOware</strong> <strong>Software</strong> <strong>Manual</strong>, 393172, en, V<strong>2.3</strong> A - 57
A - Appendix A<br />
System Tools for <strong>Freedom</strong> <strong>EVOware</strong><br />
Fig. A-23 IQ Wizard - Contact information<br />
The user name and password is used to identify the contact information record in<br />
the IQ Wizard and the Registration Wizard and is not related to the user name and<br />
password which is used to log in to <strong>Freedom</strong> <strong>EVOware</strong>.<br />
The Dongle ID field will be filled in automatically after carrying out the Verify<br />
Dongle step if the Tecan hardlock (USB dongle) is fitted to your PC.<br />
The System Name field makes it easier to identify the <strong>Freedom</strong> <strong>EVOware</strong><br />
installation if you have more than one. For example, you can specify the host<br />
name of your PC.<br />
The Service Representative field and the next two fields are intended for<br />
information on the service engineer who is responsible for supporting your Tecan<br />
hardware and software components. The information you enter can be viewed in<br />
<strong>Freedom</strong> <strong>EVOware</strong> by choosing Service Contact in the Help menu.<br />
Note: The customer information you enter is also used by the Registration Wizard<br />
(see A.9.11, A-63). If you have already entered this information in the<br />
Registration Wizard, you do not need to enter it again.<br />
A.9.10.2 Verify Dongle<br />
This step is used to verify the hardlock (USB dongle) which is fitted to your PC:<br />
A - 58 <strong>Freedom</strong> <strong>EVOware</strong> <strong>Software</strong> <strong>Manual</strong>, 393172, en, V<strong>2.3</strong>
A - Appendix A<br />
System Tools for <strong>Freedom</strong> <strong>EVOware</strong><br />
Fig. A-24 IQ Wizard - Hardlock check<br />
The following screen shows information on the hardlock type which is fitted:<br />
Fig. A-25 IQ Wizard - Hardlock check finished<br />
See 3.1.2 “Hardlocks for <strong>Freedom</strong> <strong>EVOware</strong> <strong>Standard</strong> and <strong>Freedom</strong> <strong>EVOware</strong><br />
Plus”, 3-2 for more information.<br />
A.9.10.3 User Administration<br />
This step takes you to the Tecan User Management system where you can create<br />
additional users for your <strong>Freedom</strong> <strong>EVOware</strong> software.<br />
You will be prompted to set up a new account for the <strong>Freedom</strong> <strong>EVOware</strong><br />
Administrator or to enter an existing user name and password if the Administrator<br />
account has already been created:<br />
Fig. A-26 IQ Wizard - Login to the user management system<br />
The user name and password is not related to the name and password which is<br />
used to identify the support information record in the IQ Wizard. See 7 “Tecan<br />
User Management System”, 7-1 for more information.<br />
Some of the following steps also require you to enter the user name and<br />
password of the <strong>Freedom</strong> <strong>EVOware</strong> Administrator.<br />
<strong>Freedom</strong> <strong>EVOware</strong> <strong>Software</strong> <strong>Manual</strong>, 393172, en, V<strong>2.3</strong> A - 59
A - Appendix A<br />
System Tools for <strong>Freedom</strong> <strong>EVOware</strong><br />
A.9.10.4 COM Port Setup<br />
This step is used to configure the COM ports for hardware devices which are<br />
connected to the PC through an RS232 interface. It starts the <strong>Freedom</strong> <strong>EVOware</strong><br />
Configuration Tool. See 8.4.3.3 “Com Ports Tab”, 8-36 for more information.<br />
A.9.10.5 I/O State<br />
This step is used to configure the I/O state for communication with the hardware<br />
devices. It starts the <strong>Freedom</strong> <strong>EVOware</strong> Configuration Tool. See 8.4.3.1 “I/O State<br />
Tab”, 8-36 for more information.<br />
A.9.10.6 Verify Driver Setup<br />
This step is used to check the communication with the device drivers and devices<br />
and to interrogate driver versions and device firmware versions. The dialog box<br />
lists all of the <strong>Freedom</strong> <strong>EVOware</strong> drivers which have been installed and have<br />
been configured to load. Initially, a question mark “?” is shown alongside all<br />
entries.<br />
Click Ping to interrogate the driver versions and the device firmware versions:<br />
Fig. A-27 IQ Wizard - Checking the drivers<br />
A green tick indicates that a response was received from the device, indicating<br />
that the drivers are correctly installed and the hardware is correctly connected.<br />
A red cross indicates that a response was not received. Make sure that the<br />
devices are correctly connected and switched on. Make sure, too that the I/O<br />
state has been switched on. Communication with the device will not be possible if<br />
the I/O state is switched off. Click Ping again after resolving the communication<br />
problem.<br />
A - 60 <strong>Freedom</strong> <strong>EVOware</strong> <strong>Software</strong> <strong>Manual</strong>, 393172, en, V<strong>2.3</strong>
A - Appendix A<br />
System Tools for <strong>Freedom</strong> <strong>EVOware</strong><br />
A question mark “?” indicates that the device cannot be checked, for example<br />
because a test routine is not currently available for this device.<br />
After carrying out the Ping test, click Details to view a report of the test:<br />
Fig. A-28 IQ Wizard - Driver report file<br />
The report includes information on driver versions and device firmware versions.<br />
A.9.10.7 Worktable Setup<br />
This step is used to configure the worktable with the carriers which are needed by<br />
your application. It starts <strong>Freedom</strong> <strong>EVOware</strong> to allow you to use the Worktable<br />
Editor. See 11.3.1 “Setting Up Carriers on the Worktable”, 11-2 for more<br />
information.<br />
After setting up the worktable, to return to the IQ Wizard you must save the<br />
worktable layout as the worktable template Empty (template file Empty.ewt). To do<br />
this, click in the Worktable Editor and click Save worktable as template. After<br />
returning to the IQ Wizard, it will list all of the carriers you have chosen to use:<br />
<strong>Freedom</strong> <strong>EVOware</strong> <strong>Software</strong> <strong>Manual</strong>, 393172, en, V<strong>2.3</strong> A - 61
A - Appendix A<br />
System Tools for <strong>Freedom</strong> <strong>EVOware</strong><br />
Fig. A-29 Registration Wizard - Collecting information<br />
The next step is to configure all of the carriers you have chosen.<br />
In the list, carriers which can be accessed by the LiHa are labelled Check ...<br />
Carriers which can only be accessed by the RoMa are labelled Teach ...<br />
For each of the carriers in turn, click on the entry and click Go. This opens the Edit<br />
Carrier dialog box in <strong>Freedom</strong> <strong>EVOware</strong> (see 9.5 “Configuring Carriers”, 9-39).<br />
Check that the dimensions in the dialog box match the dimensions of your carriers<br />
and check and/or teach the RoMa vectors that you need (see 9.6 “Creating and<br />
Editing Plate Robot Vectors”, 9-55).<br />
A.9.10.8 Labware Setup<br />
This step is used to configure the worktable with the labware which is needed by<br />
your application. It starts <strong>Freedom</strong> <strong>EVOware</strong> to allow you to use the Worktable<br />
Editor. See 11.4.1 “Choosing Labware for a Pipetting Script”, 11-4 for more<br />
information.<br />
After setting up the worktable, to return to the IQ Wizard you must save the results<br />
as a pipetting script (which does not yet contain any script commands). To do this,<br />
chose Save in the File menu. After returning to the IQ Wizard, it will list all of the<br />
labware items you have chosen to use:<br />
Fig. A-30 Registration Wizard - Collecting information<br />
The next step is to configure all of the labware you have chosen.<br />
A - 62 <strong>Freedom</strong> <strong>EVOware</strong> <strong>Software</strong> <strong>Manual</strong>, 393172, en, V<strong>2.3</strong>
A - Appendix A<br />
System Tools for <strong>Freedom</strong> <strong>EVOware</strong><br />
For each of the labware items in turn, click on the entry and click Go. This opens<br />
the Edit Labware dialog box in <strong>Freedom</strong> <strong>EVOware</strong> (see 9.4 “Configuring<br />
Labware”, 9-15). Check that the dimensions in the dialog box match the<br />
dimensions of your labware and check and/or teach the labware coordinates<br />
using the LiHa (see 9.4.4 “Teaching the Labware Coordinates”, 9-26). If you<br />
want to use the tube robot (PnP), check and/or teach the PnP vectors that you<br />
need (see 9.7 “Creating and Editing Tube Robot Vectors”, 9-63).<br />
A.9.10.9 IQ Script<br />
This step creates a simple pipetting script for <strong>Freedom</strong> <strong>EVOware</strong> which includes<br />
commands for all of the devices which you have set up. The script allows you to<br />
check that all of the devices are functioning correctly. Please refer to the comment<br />
lines in the script for additional information on how to use the script.<br />
A.9.10.10 Print IQ Report<br />
This step prints a report of all of the configuration steps which have been<br />
completed. You can use the report for documenting the work you have carried out.<br />
A.9.11 Registration Wizard<br />
The Registration Wizard is intended to simplify the update of hardware and<br />
software and the support of your Tecan products.<br />
It collects information on the computer where the Tecan product is installed and<br />
the versions and/or serial numbers of the installed Tecan software and hardware<br />
components. This information, which is useful to Tecan support technicians, is<br />
sent to Tecan using one of three methods (directly online, eMail or file).<br />
The personal and company data which is entered in the Registration Wizard is<br />
used by Tecan to identify the appropriate contact person at your company if a<br />
support issue requires clarification.<br />
The data is encrypted before sending and stored securely on a server operated by<br />
Tecan in Switzerland. All data will be deleted automatically after a duration of at<br />
most 20 years. You can request the correction or premature deletion of this data<br />
by contacting Tecan at registration@tecan.com. The data is not used for<br />
marketing purposes and will not be handed over to third parties.<br />
Click on the link What information will be transferred? in the Select Registration<br />
Method dialog box (Fig. A-37, A-67) to view details of the information which will<br />
be sent.<br />
The registration process is not a substitute for the Tecan hardlock (dongle).<br />
A blinking message will be shown in the <strong>Freedom</strong> <strong>EVOware</strong> status bar if your<br />
software is not yet registered or if you have made some changes to the installed<br />
software components:<br />
Fig. A-31 Message in the <strong>Freedom</strong> <strong>EVOware</strong> status bar<br />
Double-click on the message to start the Registration Wizard.<br />
You should use the Registration Wizard in the following situations:<br />
• <strong>Freedom</strong> <strong>EVOware</strong> has just been installed and Tecan has not yet received<br />
any details of your installation, or<br />
<strong>Freedom</strong> <strong>EVOware</strong> <strong>Software</strong> <strong>Manual</strong>, 393172, en, V<strong>2.3</strong> A - 63
A - Appendix A<br />
System Tools for <strong>Freedom</strong> <strong>EVOware</strong><br />
• You have made some changes to your <strong>Freedom</strong> <strong>EVOware</strong> installation, such<br />
as installing new drivers or updating existing drivers.<br />
Note: You can only complete the registration process if the Tecan hardlock (USB<br />
dongle) is fitted to your PC.<br />
Note: Provided that the hardlock is fitted, all of the purchased functions of<br />
<strong>Freedom</strong> <strong>EVOware</strong> can be used, even if the software is not registered.<br />
The following dialog box is shown at the start of the registration process:<br />
Fig. A-32 Registration Wizard - Collecting information<br />
Click Cancel if you want to start using <strong>Freedom</strong> <strong>EVOware</strong> without delay and you<br />
do not want to register at this stage.<br />
Unless you click Cancel, the Registration Wizard will then check the type and<br />
serial number of your hardlock:<br />
Fig. A-33 Registration Wizard - Checking the hardlock<br />
The following dialog box is shown when checking is finished:<br />
A - 64 <strong>Freedom</strong> <strong>EVOware</strong> <strong>Software</strong> <strong>Manual</strong>, 393172, en, V<strong>2.3</strong>
A - Appendix A<br />
System Tools for <strong>Freedom</strong> <strong>EVOware</strong><br />
Fig. A-34 Registration Wizard - Register<br />
Click Register to proceed with the registration (see later for information on how to<br />
obtain and enter the registration code).<br />
If you have already used the IQ Wizard or the Registration Wizard, you will be<br />
prompted to enter your existing user name and password:<br />
Fig. A-35 Registration Wizard - Wizard user login<br />
The user name and password is used to identify the contact information record in<br />
the Registration Wizard and the IQ Wizard and is not related to the user name and<br />
password which is used to log in to <strong>Freedom</strong> <strong>EVOware</strong>.<br />
Click “Change User Info” if you want to edit your user information. Click the green<br />
arrow on the right to log in and to proceed to the next step without changing your<br />
user information.<br />
If you are using the Registration Wizard for the first time, the wizard will proceed<br />
directly to the Contact Information dialog box. You must then enter a new user<br />
name and password and some information about your company:<br />
<strong>Freedom</strong> <strong>EVOware</strong> <strong>Software</strong> <strong>Manual</strong>, 393172, en, V<strong>2.3</strong> A - 65
A - Appendix A<br />
System Tools for <strong>Freedom</strong> <strong>EVOware</strong><br />
Fig. A-36 Registration Wizard - Customer information<br />
The user name and password is used to identify the contact information record in<br />
the Registration Wizard and the IQ Wizard and is not related to the user name and<br />
password which is used to log in to <strong>Freedom</strong> <strong>EVOware</strong>.<br />
The Dongle ID field will be filled in automatically if the Tecan hardlock (USB<br />
dongle) is fitted to your PC.<br />
The System Name field makes it easier to identify the <strong>Freedom</strong> <strong>EVOware</strong><br />
installation if you have more than one. For example, you can specify the host<br />
name of your PC.<br />
The Service Representative field and the next two fields are intended for<br />
information on the service engineer who is responsible for supporting your Tecan<br />
hardware and software components. The information you enter can be viewed in<br />
<strong>Freedom</strong> <strong>EVOware</strong> by choosing Service Contact in the Help menu.<br />
Note: The customer information you enter is also used by the IQ Wizard (see<br />
A.9.10, A-55). If you have already entered this information in the IQ Wizard<br />
before you use the Registration Wizard, you do not need to enter it again.<br />
You will then be asked about the method you want to use to send the support<br />
information to Tecan:<br />
A - 66 <strong>Freedom</strong> <strong>EVOware</strong> <strong>Software</strong> <strong>Manual</strong>, 393172, en, V<strong>2.3</strong>
A - Appendix A<br />
System Tools for <strong>Freedom</strong> <strong>EVOware</strong><br />
Fig. A-37 Registration Wizard - Registration Method<br />
The available methods are as follows:<br />
• Choose Online registration if your PC has a direct connection to the Internet.<br />
• Choose Save file if you want to save the information in a file and send it to<br />
Tecan manually using a standard eMail client such as Microsoft Outlook which<br />
is installed on this PC or on another PC.<br />
• Choose eMail if your PC is conected to the Internet and a standard eMail<br />
client such as Microsoft Outlook is installed.<br />
• You must send the registration file to registration@tecan.com.<br />
The following information will be sent to Tecan:<br />
• Information on the computer where the Tecan product is installed and the<br />
versions and/or serial numbers of the installed Tecan software and hardware<br />
components.<br />
• Your name, company name, address and telephone number.<br />
The information is encrypted before sending. Click on the link What information<br />
will be transferred? to view details of the information which will be sent.<br />
The following dialog box is shown if you choose eMail under Registration Method:<br />
Fig. A-38 Registration Wizard - eMail setup<br />
SMTP, Use Windows Settings<br />
Click the radio buttons to choose whether to send the registration information<br />
via SMTP or using the Windows settings for an existing eMail client such as<br />
Microsoft Outlook.<br />
SMTP<br />
Email address<br />
Specify your eMail address. The registration information from Tecan will be<br />
sent to this address.<br />
<strong>Freedom</strong> <strong>EVOware</strong> <strong>Software</strong> <strong>Manual</strong>, 393172, en, V<strong>2.3</strong> A - 67
A - Appendix A<br />
System Tools for <strong>Freedom</strong> <strong>EVOware</strong><br />
Server<br />
Specify the address of the SMTP server you want to use for sending the<br />
registration information. You should normally specify the SMTP server<br />
address which is recommended by your eMail provider or eMail administrator.<br />
User<br />
Specify the user name for SMTP authentication.<br />
Password<br />
Specify the password for SMTP authentication.<br />
The user name and password for SMTP authentication depends on the SMTP<br />
server. In most cases, it is the same user name and password which is used to<br />
collect eMails using the POP3 protocol. With some eMail providers, the user<br />
name is the same as the eMail address.<br />
Use Windows Settings<br />
If you choose this option, the Registration Wizard will use the default eMail<br />
sending method and/or local eMail client which is configured with Internet Options<br />
in the Windows Control Panel.<br />
A.9.11.1 Finishing the registration<br />
If you send the registration information online (you chose Online registration in the<br />
Registration method dialog box - see Fig. A-37, A-67), the registration code is<br />
normally sent to your PC within a few minutes. The registration process will then<br />
be completed automatically - no further user actions are required.<br />
If you send the registration information by eMail (you chose Save file or eMail in<br />
the Registration method dialog box), after processing the details Tecan will send a<br />
software registration code to your eMail address.<br />
After you have received the registration code by eMail, start the Registration<br />
Wizard again by clicking on the registration message in the status bar of <strong>Freedom</strong><br />
<strong>EVOware</strong>. Then step through the wizard until you reach the Register dialog box.<br />
Then click Enter code and enter the code. The software is now registered.<br />
In either case (online registration or eMail), creating the registration code takes<br />
place at Tecan using an automatic process.<br />
A.9.12 Import vCards Tool<br />
This tool is used to import user information into the Tecan User Management<br />
System (user database) from vCard files. This saves you having to type the data<br />
in manually.<br />
vCard files (file extension .vcf) can be created with the Windows Address Book<br />
function or with popular eMail programs such as Microsoft Access and can be<br />
automatically attached to eMails which you receive and send.<br />
This tool lets you import additional information into an existing Tecan user account<br />
entry or create a new user account based on the information in the vCard file.<br />
See 7 “Tecan User Management System”, 7-1 for more information on the user<br />
management system. Users, groups and password rules are configured in<br />
<strong>Freedom</strong> <strong>EVOware</strong>’s Configuration Tool (see 8.3.3 “User Management Section”,<br />
8-16).<br />
Start this tool with the shortcut in Start > All Programs > Tecan > Tecan User<br />
Management > Import vCards.<br />
A - 68 <strong>Freedom</strong> <strong>EVOware</strong> <strong>Software</strong> <strong>Manual</strong>, 393172, en, V<strong>2.3</strong>
A - Appendix A<br />
System Tools for <strong>Freedom</strong> <strong>EVOware</strong><br />
Enter your user name and password and click OK. You can only use the Import<br />
vCards Tool if you have been given <strong>Freedom</strong> <strong>EVOware</strong> Application Specialist or<br />
Administrator access rights.<br />
When it is first started, the tool lists all of the existing users in the Tecan User<br />
Management System:<br />
Fig. A-39 Import vCards Tool<br />
The red colour shows that an entry has been modified and not yet saved or a new<br />
entry has been added and not yet saved. Unchanged entries are shown in blue.<br />
The buttons in this dialog box are as follows:<br />
Load<br />
Click this button to open a vCard file and append the information it contains to<br />
the currently selected entry. This button is only active if you have selected an<br />
existing account entry. You can also append information by dragging the<br />
VCard onto the user account entry using Windows Explorer.<br />
New<br />
Click this button to open a vCard file and create a new user account based on<br />
the information it contains. When you save the entry (by clicking Save) you will<br />
be prompted to enter a user name and password. User names must not<br />
contain spaces - the Import vCards tool replaces each space by an<br />
underscore character automatically. This button is not active if you have<br />
selected an existing account entry.<br />
Save<br />
Click this button to save the changes you have made to the currently selected<br />
entry. This updates the user database.<br />
Remove<br />
Click this button to undo the changes you have made to the currently selected<br />
entry. If you have created a new user account from the vCard file and the entry<br />
has already been saved, it will not remove the user account completely. This<br />
must be done in the user management system.<br />
Export<br />
Click this button to export the information in the currently selected entry as a<br />
vCard file.<br />
Close<br />
Click this button to close the tool.<br />
<strong>Freedom</strong> <strong>EVOware</strong> <strong>Software</strong> <strong>Manual</strong>, 393172, en, V<strong>2.3</strong> A - 69
A - Appendix A<br />
System Tools for <strong>Freedom</strong> <strong>EVOware</strong><br />
A.9.13 Version Checker Tool<br />
This tool is used to check the versions of the installed device drivers, other<br />
software components such as DLL files and device firmware. It is mainly intended<br />
for Tecan Field Service Engineers.<br />
The version information which is collected from the files and/or retrieved from the<br />
devices (by sending firmware commands) is compared against a list of expected<br />
versions which is stored in several text files in csv format. These files also specify<br />
which of the software components and/or devices should be checked.<br />
To check device firmware versions, the devices and the pipetting instrument must<br />
be connected to the PC and switched on.<br />
Start this tool with the shortcut in Start > All Programs > Tecan > Version Checker<br />
> Version Checker.<br />
The results of the version checking is shown as a collapsible tree structure.<br />
Entries with non-expected versions are shown in red. Entries with the correct<br />
version are shown in green:<br />
Fig. A-40 Version Checker tool<br />
The menus in this tool are as follows:<br />
File menu<br />
Save result: Saves a list of non-expected versions in a text file.<br />
Print result: Prints a list of non-expected versions.<br />
A - 70 <strong>Freedom</strong> <strong>EVOware</strong> <strong>Software</strong> <strong>Manual</strong>, 393172, en, V<strong>2.3</strong>
A - Appendix A<br />
System Tools for <strong>Freedom</strong> <strong>EVOware</strong><br />
View menu<br />
Collapse all/Expand all: Collapse or expand the tree structure.<br />
Show Errors / Warnings only: Only show entries with errors or warnings.<br />
You can also toggle this function by clicking the green button below the View<br />
menu.<br />
Next error / Previous error: Skip to the next or previous error. You can also<br />
skip to the next or previous error by clicking the green arrows below the File<br />
menu.<br />
The Version Checker tool does not report on software components which are<br />
missing, even if they are non-optional and thus necessary for the correct<br />
functioning of <strong>Freedom</strong> <strong>EVOware</strong> or one of its features.<br />
<strong>Freedom</strong> <strong>EVOware</strong> <strong>Software</strong> <strong>Manual</strong>, 393172, en, V<strong>2.3</strong> A - 71
A - Appendix A<br />
LogViewer Tool<br />
A.10 LogViewer Tool<br />
The Tecan Logging Server is a central software module which handles the logging<br />
of system and error messages for all Tecan software components. The LogViewer<br />
tool is used to view, filter and search for messages which have been received by<br />
the Tecan Logging Server.<br />
To start LogViewer choose Start > All Programs > Tecan > Logging > V2.1 ><br />
LogViewer. The Tecan Logging Server is normally configured to start<br />
automatically when the PC is started.<br />
The LogViewer has three main windows:<br />
• The Channels window (normally on the left side).<br />
• The Message List window (normally on the right side).<br />
• The Message Detail window (normally below the other windows). The<br />
Message Detail window shows full details of the message which is currently<br />
selected in the Message List window.<br />
The windows can be docked and undocked and their positions can be configured<br />
by the user (see A.10.4 “Configuring the user interface”, A-74). Use the View<br />
menu to show or hide the Message Detail and Channels windows as required<br />
(see A.10.5.2 “View Menu”, A-75).<br />
The Tecan Logging Server stores log files in xml format in the directory<br />
Documents and Settings > All Users > Application Data > Tecan ><br />
LoggingServer> LogFiles. A new log file is automatically created when the log file<br />
size exceeds 10 MB.<br />
The log file currently in use is named Current .xml, where <br />
and are the creation date and time of the file. Files no longer in use are<br />
named Logfile .xml. The log files are protected against<br />
unauthorized manipulation and contain a checksum.<br />
A.10.1 Using the Channels window<br />
The Channels window is used to pre-select or filter messages of a particular type.<br />
For example, the Drivers channel refers to messages from hardware device<br />
drivers such as the RoMa driver.<br />
If you check the Drivers checkbox in the Channels window and uncheck all other<br />
checkboxes, the Message List window will only show messages which have come<br />
from device drivers.<br />
The channels have a hierarchical (tree) structure and some of the channels<br />
contain sub-channels. For example, in log files from <strong>Freedom</strong> <strong>EVOware</strong>, the<br />
Drivers channel normally has a RoMa sub-channel:<br />
A - 72 <strong>Freedom</strong> <strong>EVOware</strong> <strong>Software</strong> <strong>Manual</strong>, 393172, en, V<strong>2.3</strong>
A - Appendix A<br />
LogViewer Tool<br />
Fig. A-41 LogViewer, showing the Find window and a bookmark (Message Details window not shown)<br />
The tree structure of the Channels window is automatically adjusted to match the<br />
contents of the currently open log file. Some of the sub-channels may be missing<br />
if the log file does not contain any messages for these sub-channels.<br />
You can expand the Drivers channel to view the sub-channels it contains by<br />
clicking on the ’+’ box on the left side. Click the ’-’ box if you want to collapse the<br />
Drivers channel again.<br />
If you expand the Drivers channel, check the RoMa checkbox and uncheck all<br />
other checkboxes in the Channels window, the Message List window will only<br />
show messages which have come from the RoMa device driver (if there are any to<br />
show) and not from the other device drivers.<br />
When investigating a particular event or problem, it can be helpful to select only<br />
those channels (message types) which are directly relevant and to uncheck the<br />
checkboxes of all other channels.<br />
You can also select channels as follows:<br />
Left click on a check box<br />
Selects / deselects only this channel.<br />
Right click on the label (name) of a check box<br />
Opens a drop down list which allows you to choose between select all and<br />
deselect all.<br />
Right click on a check box<br />
Selects / deselects this channel and all of its subchannels.<br />
When the LogViewer has just been installed, the channel selections of the five<br />
tabs in the Message List window (EVOlution, <strong>EVOware</strong>, General, RspCommands<br />
and Setup & Service) are pre-configured to filter and display only those messages<br />
which are relevant for that tab. The channel selection can be adjusted by the user<br />
and is automatically saved in a user profile which is associated with the MS<br />
Windows user name. When you start the LogViewer again later, the last used<br />
channel selection is automatically re-activated. A separate channel selection is<br />
saved for each user for each of the five tabs. See also A.10.2 “Using the Message<br />
List window”, A-74.<br />
<strong>Freedom</strong> <strong>EVOware</strong> <strong>Software</strong> <strong>Manual</strong>, 393172, en, V<strong>2.3</strong> A - 73
A - Appendix A<br />
LogViewer Tool<br />
A.10.2 Using the Message List window<br />
The Message List window shows messages which are contained in the currently<br />
open log file(s). Warning messages are shown in blue and error messages are<br />
shown in red. Other messages are shown in black (default text colour). Note that<br />
the red colour appears slightly darker if the message line has a blue background.<br />
Messages from Tecan software components and hardware devices have several<br />
different structures which depend on the type of message. For example,<br />
messages sent by the Tecan Communication Server can be acknowledged using<br />
a response code. Other types of message do not have response codes and do<br />
not need a Response column.<br />
The tabs at the top of the Message List window are used to adjust the view (e.g.<br />
column headings) of the message list to be suitable for a particular message<br />
structure, message type or message source. For example, the RspCommands<br />
tab is the appropriate tab to choose if you want to view messages from the Tecan<br />
Communication Server.<br />
See A.10.5.3 “Tab Menu”, A-76 for information on the intended usage of the<br />
other tabs.<br />
When you choose a particular tab, you are also choosing a configurable selection<br />
of channels in the Channels window. See also A.10.1 “Using the Channels<br />
window”, A-72.<br />
The message ID shown in the MsgID column is unique across all tabs. Depending<br />
on your channel selection, the same message may appear in several tabs but with<br />
a different view and different column headings.<br />
A.10.3 Using the Message Detail window<br />
The Message Detail window shows full details of the message which is currently<br />
selected in the Message List window.<br />
Messages from Tecan software components and hardware devices have several<br />
different structures which depend on the type of message. The tabs at the bottom<br />
of the Message Detail window are used to adjust the formatting (layout) of the<br />
detailed view of the message. It is generally appropriate (but not obligatory) to<br />
choose the same tab that you choose in the Message List window. The same tab<br />
is chosen by default, but you can choose another tab if required.<br />
A.10.4 Configuring the user interface<br />
Most of the windows in the LogViewer tool have the following two icons on the<br />
right side of the title bar:<br />
Close<br />
Click the “X” icon to close the window.<br />
Autohide<br />
Click this icon to switch the window to autohide mode. In autohide mode, the<br />
window will automatically collapse to a tab at the edge of the main window<br />
when you click in another window (after a short delay).<br />
Move the mouse over the tab to expand the window again. Click on the<br />
Autohide icon again to switch back to normal mode.<br />
When working with several windows, Autohide mode hides currently unused<br />
windows to make more space on the screen.<br />
A - 74 <strong>Freedom</strong> <strong>EVOware</strong> <strong>Software</strong> <strong>Manual</strong>, 393172, en, V<strong>2.3</strong>
A - Appendix A<br />
LogViewer Tool<br />
Docking and undocking the windows<br />
To change the position of one of the windows, click on the title bar of the<br />
window and drag it to another part of the screen. Docking anchors are shown<br />
as soon as you start to drag. Drag and drop the window onto a docking anchor<br />
to dock the window at the chosen position. If you do not drop the window onto<br />
a docking anchor, the new window position will be undocked (floating). Double<br />
click on the window title to switch between docked and undocked mode.<br />
A.10.5 LogViewer Menus<br />
A.10.5.1 File menu<br />
Open<br />
This menu item is used to open a log file in xml format. When the LogViewer is<br />
first started, it automatically opens the most recent log file (the log file which is<br />
currently being used to record messages). New messages which arrive from<br />
Tecan software components and drivers are appended to the end of the log<br />
file and the Message List window is continuously updated (Online mode).<br />
Choose File > Open to open an older (historical) log file. The LogViewer then<br />
switches to Offline mode, and recently received messages are no longer<br />
shown.<br />
In Offline mode, you can sort the messages in the Message List window by<br />
clicking on the column headers. In Online mode, the messages are always<br />
sorted chronologically.<br />
When you choose File > Open, use the Shift and Ctrl buttons on the keyboard<br />
if you want to select several log files in the file browser window and open them<br />
simultaneously. Alternatively, select the files you want to open in Windows<br />
Explorer and drag them onto the LogViewer window.<br />
Note: Alternatively, clear the Message List window with Shift+Del, select one or<br />
more log files in Windows Explorer and drag them onto the Message List window.<br />
The total number of messages and the filtered number of messages in the<br />
currently open log file(s) is shown at the bottom of the main window (see also<br />
A.10.5 “LogViewer Menus”, A-75, Filter).<br />
To switch back to online mode, choose Online in the View menu or click the<br />
light green Offline tab at the bottom right of the main window. Then press F5 to<br />
refresh the view.<br />
Exit<br />
This menu item is used to exit the Log Viewer.<br />
Note: The Logging Server continues to log Tecan messages independently of the<br />
chosen mode in the LogViewer tool (Online mode, Offline mode or currently not<br />
running).<br />
A.10.5.2 View Menu<br />
Channels<br />
This menu item is used to show or hide the Channels window.<br />
Message Detail<br />
This menu item is used to show or hide the Message Details window.<br />
Note: Press F5 if you need to refresh the view of the Message List window.<br />
<strong>Freedom</strong> <strong>EVOware</strong> <strong>Software</strong> <strong>Manual</strong>, 393172, en, V<strong>2.3</strong> A - 75
A - Appendix A<br />
LogViewer Tool<br />
Clear (Shift + Del)<br />
This menu item is used to clear all of the messages in the Message List<br />
window.<br />
A.10.5.3 Tab Menu<br />
Online / Offline<br />
These menu items are used to switch between Online and Offline mode.<br />
Follow Tail<br />
Activate this option if you want the Message List window to scroll<br />
automatically in Online mode so that the latest messages are always visible at<br />
the bottom of the screen. If you want to study a specific message while the<br />
Tecan software is still running (i.e. messages are still arriving), you can switch<br />
off Follow Trail mode to prevent the message from scrolling off the top of the<br />
screen.<br />
EVOlution<br />
This menu item switches to the EVOlution tab of the Message List window.<br />
This tab is intended for viewing messages from the <strong>Freedom</strong> EVOlution<br />
software package.The initial default channel selection for this tab is Tecan/<br />
Runtime, Tecan/MCS and Tecan/Drivers.<br />
<strong>EVOware</strong><br />
This menu item switches to the <strong>EVOware</strong> tab of the Message List window.<br />
This tab is intended for viewing messages from the <strong>Freedom</strong> <strong>EVOware</strong><br />
software package. The initial default channel selection for this tab is Tecan/<br />
<strong>EVOware</strong>. See also A.10.6 “LogViewer Channel assignments for <strong>Freedom</strong><br />
<strong>EVOware</strong>”, A-79.<br />
General<br />
This menu item switches to the General tab of the Message List window. This<br />
tab shows all mandatory fields (the fields which are mandatory for all message<br />
types).<br />
RspCommands<br />
This menu item switches to the RspCommands tab of the Message List<br />
window. This tab is intended for viewing messages from the Tecan<br />
Communication Server. The initial default channel selection for this tab is<br />
Tecan/Communication.<br />
Setup and Service<br />
This menu item switches to the RspCommands tab of the Message List<br />
window. This tab is intended for messages from the Instrument <strong>Software</strong><br />
package, which contains the Setup & Service software. The initial default<br />
channel selection for this tab is Tecan/Setup and Service.<br />
A.10.5.4 Tools Menu<br />
Find<br />
This option is used to search for a particular string in the messages. Click<br />
Next or Previous to jump to the next or previous message which contains the<br />
string. If the string is found, it is shown highlighted in yellow in the Message<br />
Detail window.<br />
A - 76 <strong>Freedom</strong> <strong>EVOware</strong> <strong>Software</strong> <strong>Manual</strong>, 393172, en, V<strong>2.3</strong>
A - Appendix A<br />
LogViewer Tool<br />
Filter<br />
This option is used to filter the messages which are shown in the Message<br />
List window according to several different criteria. For example, you can<br />
choose to show only those messages which have a specified string in the<br />
channel name or the message text or have a specified range of message IDs.<br />
Filtering by channel name has a similar effect to de-selecting channels in the<br />
Channels window.<br />
After specifying a new filter, check the checkbox to activate it and click Apply<br />
to apply the filter to the Message List window. Click Clear to clear the filter<br />
again.<br />
You can specify several filters and activate the one you want to use. If you<br />
activate more than one filter simultaneously, the filter settings are combined<br />
using the AND function. The filter settings are automatically saved in a user<br />
profile which is associated with your MS Windows user name.<br />
Bookmarks<br />
To use the Bookmarks option, right click on a message in the Message List<br />
window and choose Add from the context menu. Alternatively, click in the<br />
margin column, to the left of the MsgID column. The margin column is then<br />
marked red, so you can easily find the message again later. In addition, the<br />
message is added to the Bookmarks window. To go to the same message<br />
again later, select the bookmark in the Bookmarks window and click Jump To.<br />
If the same message (the same message ID) is also present in another tab of<br />
the Message List window, it will be bookmarked there too (the margin column<br />
will be marked in red). To go to a bookmarked message in another tab, switch<br />
to the other tab, select the bookmark in the Bookmarks window and click<br />
Jump To. If the bookmarked message is not present in the other tab, the next<br />
closest message (closest message ID) will be highlighted instead.<br />
To remove the bookmark again, select the message in the Bookmarks window<br />
and click Remove. Alternatively, right click on the bookmarked message in the<br />
Message List window and choose Remove from the context menu.<br />
Highlighting<br />
To use the Highlighting option, click Add, check the checkbox and enter the<br />
string you want to highlight in the coloured field. Use the pull-down list to<br />
choose the colour you want to use for this string. When you scroll through the<br />
messages in the Message List window, if the specified string is found it will be<br />
highlighted in color in the Message Detail window.<br />
Click Add again to specify another string that you want to highlight. It is<br />
normally helpful but not obligatory to choose a different highlighting colour for<br />
each string you want to highlight.<br />
A.10.5.5 Server Menu<br />
Options<br />
This menu item shows the directory which the Logging Server uses to store<br />
the log files. Click the right arrow button to jump to the configured log files<br />
directory in Windows Explorer. This menu item also shows whether the Tecan<br />
Logging Server is installed on your PC and is currently running.<br />
Create Bookmark File<br />
This menu item creates an empty text file in the log files directory which acts<br />
as a bookmark (visible separator) when viewing the contents of the directory<br />
in Windows Explorer. This helps you to identify the right files if you want to<br />
drag a group of log files to another directory for archiving or to the Message<br />
List window of the LogViewer tool for analysis:<br />
<strong>Freedom</strong> <strong>EVOware</strong> <strong>Software</strong> <strong>Manual</strong>, 393172, en, V<strong>2.3</strong> A - 77
A - Appendix A<br />
LogViewer Tool<br />
Fig. A-42 Log files and a bookmark file in Windows Explorer<br />
If you plan to analyse the log files it can be helpful to create a bookmark file<br />
before you start a new pipetting run.<br />
To create a bookmark file, select Create Bookmark File in the Server menu.<br />
Specify a label for the bookmark file in the Create Bookmark dialog box and<br />
click Create:<br />
Fig. A-43 Create Bookmark dialog box<br />
A.10.5.6 Help Menu<br />
This closes the currently open log file, creates the bookmark file and starts a<br />
new log file.<br />
The filename of the bookmark file which is created is Logfile <br />
Label - .txt, where is the label you specify in the above<br />
dialog box.<br />
About Tecan LogViewer<br />
This menu item shows information on the LogViewer version which is installed<br />
and Tecan copyright information.<br />
A - 78 <strong>Freedom</strong> <strong>EVOware</strong> <strong>Software</strong> <strong>Manual</strong>, 393172, en, V<strong>2.3</strong>
A - Appendix A<br />
LogViewer Tool<br />
A.10.6 LogViewer Channel assignments for <strong>Freedom</strong> <strong>EVOware</strong><br />
When you are investigating a pipetting script or process which you have run under<br />
<strong>Freedom</strong> <strong>EVOware</strong>, the following logging channels in the LogViewer tool are of<br />
particular interest:<br />
Tecan/<strong>EVOware</strong>/Log<br />
This channel contains all message types in Tab. A-1 “Structure of the log<br />
files”, A-8 (including firmware commands sent to the pipetting instrument)<br />
and information on user logins.<br />
Tecan/<strong>EVOware</strong>/Usr<br />
This channel contains message types D and E in Tab. A-1 “Structure of the log<br />
files”, A-8 and information on user logins. To activate logging information for<br />
this channel, see 8.3.1.4 “Protocol Options Tab”, 8-8, Log Options panel.<br />
Tecan/<strong>EVOware</strong>/Error<br />
This channel contains message types C to E in Tab. A-1 “Structure of the log<br />
files”, A-8 and information on user logins. To activate logging information for<br />
this channel, see 8.3.1.4 “Protocol Options Tab”, 8-8, Log Options panel.<br />
Tecan/<strong>EVOware</strong>/Macro<br />
This channel contains messages from internal <strong>Freedom</strong> <strong>EVOware</strong> commands<br />
(macros). This includes messages from the scheduler, the kernel and device<br />
drivers.<br />
Tecan/Drivers (including sub-channels)<br />
The sub-channels of the Drivers channel contain messages which are related<br />
to hardware devices. The sub-channels are named according to the device<br />
call name in <strong>Freedom</strong> <strong>EVOware</strong>. If required, e.g. for testing purposes, you can<br />
configure <strong>Freedom</strong> <strong>EVOware</strong> to output more detailed logging information<br />
which includes device firmware commands (see 8.4.3.2 “Logging Option”,<br />
8-36). Messages to and from device drivers are also contained in the Tecan/<br />
<strong>EVOware</strong>/Macro channel.<br />
Tecan/MCS<br />
This channel contains messages from the Message Control Server (MCS) in<br />
<strong>Freedom</strong> <strong>EVOware</strong>. The MCS does not normally output logging information.<br />
To activate logging for the MCS, see A.1.6 “Log Files of Type MCS”, A-10.<br />
Tecan/Database<br />
This channel contains messages from <strong>Freedom</strong> <strong>EVOware</strong>’s internal database.<br />
Tecan/<strong>EVOware</strong>/Addons<br />
The sub-channels of this channel are used for messages from software addons<br />
for <strong>Freedom</strong> <strong>EVOware</strong> such as Sample Oriented <strong>EVOware</strong>.<br />
<strong>Freedom</strong> <strong>EVOware</strong> <strong>Software</strong> <strong>Manual</strong>, 393172, en, V<strong>2.3</strong> A - 79
A - Appendix A<br />
Tecan Driver Installer<br />
A.11 Tecan Driver Installer<br />
The Tecan Driver Installer is used to create a setup package for installing custom<br />
device drivers (drivers which are not normally included in the <strong>Freedom</strong> <strong>EVOware</strong><br />
installation program).<br />
The modular driver concept and the device driver API allows external software<br />
specialists to develop and integrate custom device drivers for third party<br />
hardware. Contact Tecan for information on additional drivers which are available<br />
for special applications. Please contact the Tecan software specialists for<br />
information on the device driver API.<br />
The Tecan Driver Installer is provided on the <strong>Freedom</strong> <strong>EVOware</strong> installation CD<br />
and must be installed separately.<br />
After installing this tool, you can start it with Start > All Programs > Tecan > Driver<br />
Installer > Driver Installer Editor:<br />
Fig. A-44 Driver Installer Editor - Main screen<br />
The Driver Installer Editor is used to specify the software components which are<br />
required by the driver and to make some general settings.<br />
The software components for drivers are typically stored in a directory structure.<br />
Click the browse button at the right of the Base path field and choose the base<br />
directory of the software components. Refer to the device driver API<br />
documentation for information on developing <strong>Freedom</strong> <strong>EVOware</strong> drivers and on<br />
the components which are required.<br />
If necessary, change the setting in the Template pull-down list to match the<br />
framework (development environment) of the driver (none, .NET 1.1, .Net 2.0 or<br />
Visual Basic). The none setting is appropriate for drivers which have been<br />
developed using the Borland development environment.<br />
Then specify a name for the driver in the Driver name field. This name will be<br />
shown in the InstallShield Wizard and in Add or Remove Programs in the<br />
A - 80 <strong>Freedom</strong> <strong>EVOware</strong> <strong>Software</strong> <strong>Manual</strong>, 393172, en, V<strong>2.3</strong>
A - Appendix A<br />
Tecan Driver Installer<br />
Windows Control Panel. The driver name which is shown in <strong>Freedom</strong> <strong>EVOware</strong> is<br />
specified in the ini file for the driver.<br />
Click the Info button and specify the required project information.<br />
The checkbox Abort when newer version exists should normally be checked. This<br />
prevents users from installing an older driver version than the one which is already<br />
installed. “Version” refers to the version of the main driver file (as shown in<br />
Windows Explorer in the Properties of the file).<br />
Fig. A-45 Driver Installer Editor - Project information<br />
After installing the driver, some of this information in this dialog box can be seen in<br />
Windows at Start > Control Panel > Add or Remove Programs ><br />
NameOfYourDriver > Support Information.<br />
Buttons at the bottom of the main window<br />
Load<br />
Click this button to load an existing configuration file which specifies the<br />
settings and components which are required to install the driver.<br />
Save<br />
Click this button to save a configuration file which specifies the settings and<br />
components which are required to install the driver.<br />
Create<br />
Click this button to create the installation program (setup package) in the<br />
specified destination directory.<br />
Exit<br />
Click this button to exit the Driver Installer.<br />
Settings<br />
Click this button to specify paths and settings for the Driver Installer:<br />
<strong>Freedom</strong> <strong>EVOware</strong> <strong>Software</strong> <strong>Manual</strong>, 393172, en, V<strong>2.3</strong> A - 81
A - Appendix A<br />
Common Notification Server (CNS)<br />
Fig. A-46 Driver Installer Editor - Settings<br />
Destination Path specifies the path of the installation program (setup package)<br />
which is created.<br />
To allow unique identification by Windows, all setup packages (including different<br />
builds or versions of the same setup package) should normally have a unique,<br />
random package code (guid). Accordingly, the Change package code<br />
automatically on every build checkbox should normally be checked. You can<br />
uncheck this checkbox if you want to re-create the same setup package for test<br />
purposes.<br />
Running the setup package which is created<br />
The Driver Installer Editor creates a standard Windows setup package which uses<br />
the InstallShield Wizard. For the above example package, the following dialog box<br />
is shown when you double-click the setup.exe file:<br />
Fig. A-47 Driver Installer - Running the setup package<br />
A.12 Common Notification Server (CNS)<br />
The Common Notification Server (CNS) is a central Tecan software component<br />
which is responsible for sending notification messages to administrators, users or<br />
operators of the pipetting instrument. The CNS complements the features of the<br />
Notification script command.<br />
A - 82 <strong>Freedom</strong> <strong>EVOware</strong> <strong>Software</strong> <strong>Manual</strong>, 393172, en, V<strong>2.3</strong>
A - Appendix A<br />
Common Notification Server (CNS)<br />
Messages can be sent by eMail when particular events occur when running a<br />
script or process (e.g. to inform an operator in another room that a process has<br />
finished).<br />
In addition:<br />
• Status messages are sent automatically to the currently logged in <strong>Freedom</strong><br />
<strong>EVOware</strong> user when the system status changes from idle to running or vice<br />
versa and when a job (script or process) starts to run and/or has completed.<br />
• Messages can be sent to specified <strong>Freedom</strong> <strong>EVOware</strong> users with the CNS<br />
SendNotification command (see 15.70 “CNS SendNotification command”,<br />
15-205).<br />
• The comment text of Comment commands is sent to the currently logged in<br />
<strong>Freedom</strong> <strong>EVOware</strong> user if the comment text starts with “CNS:”, for example:<br />
Fig. A-48 Sending a CNS message using the Comment command<br />
See 15.37 “Comment Command”, 15-97 for more information.<br />
Furthermore, the CNS setup installs a web server on the <strong>Freedom</strong> <strong>EVOware</strong> PC<br />
which allows a variety of information to be accessed by users on other PCs which<br />
are connected to the local network (LAN). See A.12.1 “CNS Web Server”, A-83.<br />
For users of Windows Vista: The CNS web server provides a download link<br />
which allows you to install a Vista gadget (desktop tool or mini-window). The<br />
gadget provides information on the following parameters:<br />
• The host name of the PC on which the CNS web server is running.<br />
• Name of the Tecan application which is running (<strong>Freedom</strong> <strong>EVOware</strong>).<br />
• Name of the currently logged in user.<br />
• Warning signal (if at least 1 warning was received).<br />
• Error signal (if at least 1 error was received).<br />
• Running State (idle, running).<br />
• Expected end time of the current job.<br />
The Vista gadget gets this information from the CNS web server.<br />
Note: The icon of the Vista gadget blinks if the script or process has been<br />
interrupted, e.g. due to a user prompt or error.<br />
Disabling messages from the CNS<br />
If you do not want to use the CNS, you can prevent the messages from being sent<br />
by deleting the eMail addresses which you have configured in the CNS<br />
Configuration Tool.<br />
A.12.1 CNS Web Server<br />
The CNS setup installs a web server on the <strong>Freedom</strong> <strong>EVOware</strong> PC which allows<br />
a variety of information to be accessed by users on other PCs which are<br />
connected to the local network (LAN).<br />
<strong>Freedom</strong> <strong>EVOware</strong> <strong>Software</strong> <strong>Manual</strong>, 393172, en, V<strong>2.3</strong> A - 83
A - Appendix A<br />
Common Notification Server (CNS)<br />
The web server is disabled by default and can be enabled with the CNS<br />
Configuration Tool (see A.12.2 “CNS Configuration Tool”, A-84).<br />
The web server provides information on the following parameters:<br />
• The host name of the PC on which the CNS web server is running.<br />
• Name of the Tecan application which is running (e.g. <strong>Freedom</strong> <strong>EVOware</strong>).<br />
• Name of the currently logged in user.<br />
• Warnings tab: Warning messages, including warning messages from the<br />
CNS SendNotification command (see 15.70 “CNS SendNotification<br />
command”, 15-205).<br />
• Errors tab: Error messages, including error messages from the CNS<br />
SendNotification command.<br />
• Infos tab: General information, including information and comment messages<br />
from the CNS SendNotification command and the texts of Comment<br />
commands in the pipetting script. Comment texts which start with underscore<br />
(“_”) or “-end” are not shown (see 15.37 “Comment Command”, 15-97 for<br />
more information).<br />
• Jobs tab: Information on pipetting jobs (scripts or processes) which have<br />
been (are being) run.<br />
• If the script or process has has been interrupted, e.g. due to a user prompt or<br />
error, a message is shown on the warnings, errors or infos tab. The tab which<br />
is used depends on the severity or cause of the interruption.<br />
The information which is shown is cleared each time you start a new pipetting job<br />
(script or process).<br />
If your PC is attached to the same network (LAN) as the <strong>Freedom</strong> <strong>EVOware</strong> PC,<br />
type in the following address in the internet browser to access the CNS web<br />
server:<br />
:<br />
hostname is the host name or IP address of the PC on which <strong>Freedom</strong> <strong>EVOware</strong><br />
is running.<br />
port is the configured port number of the web server. You do not need to specify<br />
the port if the CNS web server has been configured to use the default port number<br />
(80) for http requests.<br />
Example: http://<strong>EVOware</strong>_1:8080 or <strong>EVOware</strong>_1:8080 (http:// is optional)<br />
You can specify “localhost” instead of the host name you want to access the CNS<br />
web server from the PC on which <strong>Freedom</strong> <strong>EVOware</strong> is running. Example: http://<br />
localhost:8080 or localhost:8080.<br />
Tip: The host name of the PC is shown in the CNS web server on the right of the<br />
screen. Use this host name if you want to access the web server from another PC<br />
on your local network.<br />
A.12.1.1 Security<br />
Unless your company’s internet connection (router or firewall) has been<br />
specifically configured to allow this, the CNS web server can only be accessed<br />
within your local network and cannot be accessed from the public internet.<br />
Contact your network administrator if you need to do this.<br />
A.12.2 CNS Configuration Tool<br />
The Common Notification Server (CNS) is a central Tecan software component<br />
which is responsible for sending notification messages to administrators, users or<br />
A - 84 <strong>Freedom</strong> <strong>EVOware</strong> <strong>Software</strong> <strong>Manual</strong>, 393172, en, V<strong>2.3</strong>
A - Appendix A<br />
Common Notification Server (CNS)<br />
operators of the pipetting instrument. The CNS Configuration Tool is used to<br />
configure the CNS.<br />
Start the configuration tool with the shortcut in Start > All Programs > Tecan ><br />
Common Notification Server > Configure.<br />
Enter your user name and password and click the large green arrow. You can only<br />
use the CNS Configuration Tool if you have been given <strong>Freedom</strong> <strong>EVOware</strong><br />
Administrator access rights. If you want to activate the CNS web server option,<br />
you also need Administrator access rights for Microsoft Windows or Windows<br />
Vista.<br />
A.12.2.1 User Settings tab<br />
This tab is used to configure the eMail addresses for the CNS notification feature:<br />
Fig. A-49 CNS - User Settings tab<br />
Name<br />
This column shows the names of all of the <strong>Freedom</strong> <strong>EVOware</strong> users which<br />
are configured in the Tecan User Management System.<br />
Full name<br />
This column shows the full names of all of the <strong>Freedom</strong> <strong>EVOware</strong> users which<br />
are configured in the User Management System<br />
Email<br />
Specify the eMail address for all of the users to which the CNS should be able<br />
to send notification eMails. Status eMails are automatically sent to the<br />
currently logged in <strong>Freedom</strong> <strong>EVOware</strong> user. In addition, the CNS Send<br />
Notification command can be configured to send eMail messages to any other<br />
user with a configured eMail address.<br />
When you are finished, click Accept to save your changes and close the CNS<br />
Configuration Tool. Saving the changes can take several seconds.<br />
<strong>Freedom</strong> <strong>EVOware</strong> <strong>Software</strong> <strong>Manual</strong>, 393172, en, V<strong>2.3</strong> A - 85
A - Appendix A<br />
Common Notification Server (CNS)<br />
A.12.2.2 Email tab<br />
This tab is used to configure the eMail server settings for sending CNS notification<br />
messages:<br />
Fig. A-50 CNS - Email tab<br />
MAPI panel<br />
Click the MAPI radio button if you want to send the CNS notification messages<br />
using MAPI.<br />
MAPI Profile<br />
Specify the MAPI profile you want to use for sending the notification eMails.<br />
You can get a list of available profiles by double-clicking the Mail button in the<br />
Windows Control Panel. The Mail button will only be present in the Control<br />
Panel if you have installed the MAPI service. MAPI is included with many<br />
eMail programs such as Microsoft Outlook.<br />
Password<br />
Specify the password for the MAPI profile.<br />
SMTP panel<br />
Click the SMTP radio button if you want to send the CNS notification messages<br />
using SMTP<br />
Server<br />
Specify the address of the SMTP server you want to use for sending the<br />
eMails. You should normally specify the SMTP server address which is<br />
recommended by your eMail provider or eMail administrator.<br />
Port<br />
Specify the SMTP port number (default 25).<br />
A - 86 <strong>Freedom</strong> <strong>EVOware</strong> <strong>Software</strong> <strong>Manual</strong>, 393172, en, V<strong>2.3</strong>
A - Appendix A<br />
Common Notification Server (CNS)<br />
Security protocol<br />
SSL (Secure Sockets Layer) and TLS (Transport Layer Security) are protocols<br />
which are used for sending secure eMails. You should only choose SSL or<br />
TLS if your eMail provider supports them. Ask your eMail provider or eMail<br />
administrator for further information.<br />
Return address<br />
Specify the eMail address of a person to whom replies should be sent. The<br />
recipient of the notification messages would normally have no reason to reply.<br />
But you may receive an automatic error message to the specified return<br />
address (delivery failure, “mailer daemon”) if a message is sent but the<br />
recipient eMail address you configured on the User Settings tab is incorrect or<br />
out of service. If you do not configure a return address, you will not be able to<br />
receive the error messages and you may not be aware of the delivery<br />
problem.<br />
With some eMail providers, the return address must belong to the same eMail<br />
account which is specified with the SMTP (or POP3) user name and<br />
password. For example, if the SMTP user name and password are associated<br />
with the address david.long@laboratory.com, the CNS may not be able to<br />
send eMails if you specify a different return address.<br />
Authentication<br />
Check this checkbox if the SMTP server (mail server) requires authentication<br />
to allow eMails to be sent. This is normally the case.<br />
User<br />
Specify the user name for SMTP authentication.<br />
Password<br />
Specify the password for SMTP authentication.<br />
The user name and password for SMTP authentication depends on the SMTP<br />
server. In most cases, it is the same user name and password which is used to<br />
collect eMails using the POP3 protocol. With some eMail providers, the user<br />
name is the same as the eMail address.<br />
Filter panel<br />
This panel is used to configure message filtering settings.<br />
Minimum severity<br />
Choose the minimum message severity for sending automatic notification<br />
eMails to the currently logged on user (comment, information, warning or<br />
error).<br />
Notify when system status changed<br />
Check this checkbox if you want the CNS to send an automatic notification<br />
eMail to the currently logged on user if the system status has changed (e..g<br />
from idle to running).<br />
Notify when job status changed<br />
Check this checkbox if you want the CNS to send an automatic notification<br />
eMail to the currently logged on user if the job status has changed (e.g. the<br />
script or process has started to run or has just finished).<br />
When you are finished, click Accept to save your changes and close the CNS<br />
Configuration Tool. Saving the changes can take several seconds.<br />
<strong>Freedom</strong> <strong>EVOware</strong> <strong>Software</strong> <strong>Manual</strong>, 393172, en, V<strong>2.3</strong> A - 87
A - Appendix A<br />
Common Notification Server (CNS)<br />
A.12.<strong>2.3</strong> Web Server tab<br />
This tab is used to configure the CNS web server:<br />
Fig. A-51 CNS - Web Server tab<br />
Port number<br />
Specify the IP port number which the web server should use for http requests<br />
(default: 80). Use another port number such as 8080 if another application<br />
(e.g. a local web server) which is installed and running on the same PC is<br />
already using port 80.<br />
Start WebServer<br />
Check this checkbox if you want to start the web server automatically when<br />
the PC is started. This checkbox should be checked if you want to use the<br />
CNS Web Server feature.<br />
When you are finished, click Accept to save your changes and close the CNS<br />
Configuration Tool. Saving the changes can take several seconds.<br />
If you activate the web server and you have also activated the Microsoft Firewall<br />
on your PC, when you click Accept the CNS Configuration Tool will change the<br />
firewall settings to allow other PCs on your local network to access the web<br />
server. The changes which are made do not allow the CNS web server to be<br />
accessed from the public internet (see A.12.1.1 “Security”, A-84).<br />
Changing the firewall settings requires Administrator access rights for Microsoft<br />
Windows or Windows Vista. You will get an error message or another message<br />
from Microsoft Windows if the CNS Configuration Tool is not able to change the<br />
firewall settings.<br />
Proceed as follows if you get an error or information message when you click<br />
Accept or if you are not able to access the CNS web server from another PC:<br />
• Click Start > Control Panel, open the firewall configuration and make sure that<br />
incoming and outgoing connections are permitted for the service Tecan<br />
Common Notification Server 1.0.exe for the IP port number you have<br />
A - 88 <strong>Freedom</strong> <strong>EVOware</strong> <strong>Software</strong> <strong>Manual</strong>, 393172, en, V<strong>2.3</strong>
A - Appendix A<br />
Common Notification Server (CNS)<br />
specified in this dialog box. Contact your network administrator for further<br />
information.<br />
• If you are using a non-Microsoft firewall on your PC, refer to the<br />
manufacturer’s user manual for information on making the required settings<br />
manually. Contact your network administrator for further information.<br />
• Make sure that the IP port number you have specified is not being used by<br />
another application which is installed and running on the same PC - try<br />
another port number instead if you suspect that this could be the case.<br />
<strong>Freedom</strong> <strong>EVOware</strong> <strong>Software</strong> <strong>Manual</strong>, 393172, en, V<strong>2.3</strong> A - 89
A - Appendix A<br />
ASTM Interface Module<br />
A.13 ASTM Interface Module<br />
ASTM (American Society for Testing and Materials) is a leading US standards<br />
institute. In the context of this manual, ASTM interface refers to a standard for<br />
transferring information between medicalx instruments and computer systems<br />
through a serial (RS232) connection. The ASTM interface protocol is specified in<br />
the two ASTM documents E1381 and E1394. Although this standard has now<br />
been superseded by other standards from ANSI/NCCLS, it is still widely used in<br />
laboratories for transferring data to and from laboratory information systems.<br />
A laboratory information management system (LIMS) is an overlying software<br />
which is used to control the operations to be carried out in a laboratory and to<br />
store the results of the tests or assays, normally in a database.<br />
The ASTM interface currently provided with this <strong>Freedom</strong> <strong>EVOware</strong> software<br />
version only supports data transfer in one direction (from <strong>Freedom</strong> <strong>EVOware</strong> to<br />
the LIMS). It accepts text files in CSV format, converts the data to the hierarchical<br />
data model described in the ASTM specification and sends it to the LIMS through<br />
a serial (RS232) connection. The ASTM interface must be configured to match the<br />
structure of the input file (number and sequence of fields etc.). A typical<br />
application is to convert and transmit data which is output by the Tecan Magellan<br />
software for microplate readers. The Magellan software can be controlled by<br />
<strong>Freedom</strong> <strong>EVOware</strong>.<br />
The ASTM interface module is provided on the <strong>Freedom</strong> <strong>EVOware</strong> installation CD<br />
and must be installed separately.<br />
A.13.1 Access rights<br />
You can only use the ASTM File Parser if you have been given <strong>Freedom</strong><br />
<strong>EVOware</strong> Operator or Application Specialist access rights. You can only use the<br />
ASTM Configurator if you have been given <strong>Freedom</strong> <strong>EVOware</strong> Application<br />
Specialist access rights.<br />
Note: Currently, you are not authorized to use either of these tools if you are the<br />
<strong>Freedom</strong> <strong>EVOware</strong> Administrator.<br />
The <strong>Freedom</strong> <strong>EVOware</strong> Administrator provides a temporary password when<br />
setting up a new user. When the new user logs in to <strong>Freedom</strong> <strong>EVOware</strong> or one of<br />
the ASTM tools for the first time, he or she is forced to enter a new, final<br />
password.<br />
A.13.2 ASTM File Parser<br />
The main component of the ASTM interface module which is visible to all users is<br />
the ASTM File Parser application. Each time the PC is started, the ASTM File<br />
Parser starts automatically with the Login dialog box. You can also start this tool<br />
with the shortcut in Start > All Programs > Tecan > <strong>EVOware</strong> > ASTM Extensions.<br />
Enter your user name and password and click OK. You can only use the ASTM<br />
File Parser if you have been given <strong>Freedom</strong> <strong>EVOware</strong> Operator or Application<br />
Specialist access rights.<br />
Note: Currently, you are not authorized to use this tool if you are the <strong>Freedom</strong><br />
<strong>EVOware</strong> Administrator.<br />
A - 90 <strong>Freedom</strong> <strong>EVOware</strong> <strong>Software</strong> <strong>Manual</strong>, 393172, en, V<strong>2.3</strong>
A - Appendix A<br />
ASTM Interface Module<br />
The File Parser can be minimized to a system tray icon (button) at the bottom right<br />
of the screen. Double-click on the icon or choose Restore if you want to maximize<br />
the ASTM File Parser dialog box.<br />
Right click on the system tray icon to open the context menu. The available<br />
choices are Restore, About and Exit.<br />
The File Parser has two modes: Run and Pause. Switch between the two modes<br />
by clicking the large buttons at the top of the dialog box:<br />
Fig. A-52 ASTM Extensions File Parser - Info tab<br />
The current mode is shown at the bottom left of the dialog box and also by the<br />
appearance of the system tray icon.<br />
The File Parser runs as a separate process in the background. It continuously<br />
polls the configured input directory for CSV files. When it detects a file, it is<br />
automatically parsed, converted to the ASTM data model and sent to the LIMS<br />
through the configured serial connection.<br />
A success message is displayed in the Info tab of the dialog box when the file has<br />
been transferred. The file is then moved to the configured “processed” directory.<br />
The processing date and the processing time are appended to the original file<br />
name.<br />
If errors are detected during parsing (e.g. the file structure does not match the<br />
parser configuration), an error message is displayed in the Error tab of the dialog<br />
box and the file is moved to the configured “errors” directory. The processing date<br />
and the processing time are appended to the original file name.<br />
Success or failure is also indicated by a notification balloon in the system tray<br />
area of the screen.<br />
Remove the shortcut “ASTM Extensions File Parser” from the MS Windows<br />
Autostart folder if you want to prevent the File Parser from starting each time the<br />
PC is started. You can start this tool manually with the shortcut in Start > All<br />
Programs > Tecan > <strong>EVOware</strong> > ASTM Extensions.<br />
<strong>Freedom</strong> <strong>EVOware</strong> <strong>Software</strong> <strong>Manual</strong>, 393172, en, V<strong>2.3</strong> A - 91
A - Appendix A<br />
ASTM Interface Module<br />
All activities of the ASTM filer parser (start up, shut down and file parsing<br />
messages) are written to log files in the same directory as the executable program<br />
(default path: \ASTM). Each log file is protected with a checksum<br />
which is stored in the first line of the file.<br />
A.13.3 Configuration file<br />
The ASTM File Parser is configured with the configuration file<br />
MagellanFileWatcherConfig.xml. In addition to general settings for the File Parser<br />
and for data communication, the parser configuration file specifies how to map the<br />
columns (fields) of the input files to ASTM entities and properties.<br />
The configuration file is protected by a checksum against unauthorized or<br />
unintentional modification.<br />
If you edit the ASTM configuration settings, the ASTM File Parser must be restarted<br />
in order for the changes to take effect. If you edit the ASTM configuration<br />
settings manually instead of using the ASTM Configurator, after making your<br />
changes you must repair the checksum of the configuration file by starting the<br />
ASTM Configurator and saving the configuration settings again.<br />
A.13.3.1 General settings<br />
Configuration Name=”My Test Config”: The Name parameter specifies the name<br />
of this configuration set. By duplicating all of the entries between <br />
and using a text editor, you can create a parser configuration file<br />
which contains more than one set of parser parameters (see A.13.2 “ASTM File<br />
Parser”, A-90). The File Parser operates on all of the parameter sets<br />
simultaneously. Accordingly, you must configure each of the parameter sets to<br />
use a different input directory (SourcePath parameter).<br />
This feature is useful if you want to parse input files (typically from different<br />
sources) which have different record structures.<br />
SourcePath: This specifies the directory which will be polled for input files. You<br />
can also choose a network directory.<br />
ProcessedPath: Input files which have been successfully parsed and sent to the<br />
remote computer are moved to this directory.<br />
ErrorPath: If errors occur when parsing or sending input files, they are moved to<br />
this directory.<br />
WatchFilter: This specifies the required file type (file extension) of the input files<br />
in the SourcePath directory (default: *.asc). Files with other extensions will be<br />
ignored.<br />
Delimiter: This specifies the field separator which is used in the input files<br />
(normally “,”).<br />
ChecksumCheck: If you are using the ASTM interface module in a regulated<br />
laboratory environment, the input files must be protected by a checksum against<br />
unauthorized or unintentional modification. Specify “True” if the input files are<br />
protected by a checksum. Specify “False” if the input files are not protected by a<br />
checksum.<br />
The Tecan Magellan Tracker software creates output files which are protected by<br />
a checksum (currently, the standard Magellan versions do not add a checksum to<br />
the output files).<br />
StartProcessingAtLine: File parsing normally starts with the first line of the input<br />
file. Specify a line number which is higher than 1 to skip one or more lines at the<br />
beginning of the file (e.g. a comment or header).<br />
AmountOfExpectedDataColumns: This specifies the expected number of fields<br />
in the input files (i.e. number of field separators +1).<br />
A - 92 <strong>Freedom</strong> <strong>EVOware</strong> <strong>Software</strong> <strong>Manual</strong>, 393172, en, V<strong>2.3</strong>
A - Appendix A<br />
ASTM Interface Module<br />
AmountOfExpectedDataLines Check=”True”: This specifies the expected<br />
number of records (lines) in the input files. Change “True” to “False” if you do not<br />
want the File Parser to check the number of lines in the input file. This setting may<br />
be needed for special applications; you should normally specify the number of<br />
lines you expect.<br />
DecimalSeparator: This specifies the decimal separator which is used in the<br />
input file (“.” or “,”).<br />
The section - is used to configure the<br />
parameters of the serial (RS232) interface which is used to send the ASTM data<br />
stream to the LIMS:<br />
HostName: This parameter is currently not used; the string you specify will be<br />
ignored.<br />
ComPort: Specify the port number of the serial interface.<br />
BaudRate: Specify the data transmission rate (max. 57600 baud).<br />
ByteSize: Specify the number of data bits (7 or 8).<br />
StopBitCode: Specify the number of stop bits (0 = 1 stop bit, 1 = 1.5 stop bits, 2 =<br />
2 stop bits).<br />
ParityCode: Specify the parity (even=e, odd=o, none=n, mark=m, space=s).<br />
DelayAfterEachMessage: Specify an optional delay after sending each message<br />
(range: 0 to 5000 ms).<br />
RetryCount: If transmission errors occur, specify how many times to retry<br />
(default:” 3”).<br />
ResendMode: If transmission errors occur, specify whether to re-send the<br />
entire message (“Complete”) or the last part of the message (“Partial”).<br />
The section - is used to configure<br />
settings for the ASTM data stream which is produced. The parameter values in<br />
this section are specified as ASCII codes. Please refer to the ASTM standards<br />
specification for more information.<br />
A.13.3.2 Field mapping<br />
The following table shows the hierarchical structure of an ASTM message and<br />
illustrates the more common ASTM record types:<br />
Tab. A-12 ASTM message example showing the hierarchical data model<br />
Header<br />
Patient 1<br />
Patient 2<br />
Patient 3<br />
Order<br />
Order<br />
Order<br />
Order<br />
Order<br />
Result<br />
Comment<br />
Result<br />
Result<br />
<strong>Freedom</strong> <strong>EVOware</strong> <strong>Software</strong> <strong>Manual</strong>, 393172, en, V<strong>2.3</strong> A - 93
A - Appendix A<br />
ASTM Interface Module<br />
Tab. A-12 ASTM message example showing the hierarchical data model<br />
Order<br />
Result<br />
Terminator<br />
Each record type is associated with one or more parameter values or “properties”<br />
(the properties are not shown in the above table). For example, the record type<br />
“Result” can have the properties UniversalTestID and Measurement.<br />
Note: An order is a request to carry out a specific laboratory test.<br />
The ASTM message in the above example contains data for three patients.<br />
Output files from the Tecan Magellan software normally only contain data for one<br />
patient per record. A typical record structure for a Magellan output file is as<br />
follows:<br />
HIV_Labcorp,A9,SM1_5,0.09,Negative,<br />
The ASTM configuration file example which is described below converts a<br />
Magellan output file with the above record structure to an ASTM message with the<br />
following structure:<br />
Tab. A-13 ASTM message example showing records and properties<br />
Level 0 Level 1 Level 2 Level 3<br />
Header<br />
Patient:<br />
· LaboratoryAssignedPatientID<br />
· PatientIDNo3<br />
Order:<br />
· UniversalTestIDID<br />
Terminator<br />
Result:<br />
· UniversalTestIDID<br />
· Measurement<br />
In the configuration file MagellanFileWatcherConfig.xml, the mapping of input<br />
fields (columns) in the csv file to ASTM entities is specified in the section<br />
- , for example:<br />
<br />
<br />
<br />
UniversalTestIDIdentifier<br />
<br />
<br />
<br />
A - Appendix A<br />
ASTM Interface Module<br />
ParentClassName="Order"><br />
UniversalTestIDIdentifier<br />
<br />
<br />
<br />
<br />
LaboratoryAssignedPatientID<br />
<br />
<br />
<br />
<br />
PatientIDNo3<br />
<br />
<br />
<br />
<br />
Measurement<br />
<br />
<br />
<br />
<br />
Measurement<br />
<br />
<br />
<br />
<br />
Measurement<br />
<br />
<br />
<br />
The significance of each of the above sections in this example is as follows:<br />
Input field 1 is assigned to the “UniversalTestIDIdentifier” property of the “Order”<br />
entity with the instance ID “0”. The order entity is a child of the “Patient” entity with<br />
the instance ID “0”.<br />
Input field 1 is also assigned to the “UniversalTestIDIdentifier” property of the<br />
“Result” entity with the instance ID “0”. The result entity is a child of the “Order”<br />
entity with the instance ID “0”.<br />
Input field 3 is assigned to the “LaboratoryAssignedPatientID” property of the<br />
“Patient” entity with the instance ID “0”. The patient entity is a child of the “Header”<br />
entity with the instance ID “0”.<br />
Input field 3 is also assigned to the “PatientIDNo3” property of the “Patient” entity<br />
with the instance ID “0”. The patient entity is a child of the “Header” entity with the<br />
instance ID “0”.<br />
Input field 4 is assigned to the “Measurement” property of the “Result” entity with<br />
the instance ID “0”. The result entity is a child of the “Order” entity with the<br />
instance ID “0”.<br />
<strong>Freedom</strong> <strong>EVOware</strong> <strong>Software</strong> <strong>Manual</strong>, 393172, en, V<strong>2.3</strong> A - 95
A - Appendix A<br />
ASTM Interface Module<br />
Input field 5 is assigned to the “Measurement” property of the “Result” entity with<br />
the instance ID “0”. The result entity is a child of the “Order” entity with the<br />
instance ID “0”.<br />
Input field 6 is assigned to the “Measurement” property of the “Result” entity with<br />
the instance ID “0”. The result entity is a child of the “Order” entity with the<br />
instance ID “0”.<br />
Notes:<br />
• Input field 2 is not used.<br />
• The (same) value in input field 1 is assigned to a property of two different<br />
ASTM entities. The property name is the same in both cases.<br />
• The (same) value in input field 3 is assigned to a property of two different<br />
ASTM entities. The property name is not the same.<br />
• The “Measurement” property of the “Result” entity is assigned three values<br />
(ASTM terminology: “components”). The values will be separated in the ASTM<br />
data stream by the specified ASTM component delimiter A.13.4.4 “ASTM<br />
Configuration tab”, A-101).<br />
• In the example data, there is only one header entity. It’s instance ID is “0”.<br />
• In the example data, there is only one patient entity. It’s instance ID is “0”.<br />
• In the example data, there is only one order entity. It’s instance ID is “0”.<br />
• In the example data, there is only one result entity. It’s instance ID is “0”.<br />
To see the above example configuration in the ASTM Configurator see<br />
A.13.4.2 “Column Mapping tab”, A-99.<br />
A.13.4 ASTM Configurator<br />
The ASTM Configurator is used to edit the configuration file for the ASTM File<br />
Parser (MagellanFileWatcherConfig.xml). You can edit existing configuration sets<br />
and create new configuration sets.<br />
Start this tool with the shortcut in Start > All Programs > Tecan > <strong>EVOware</strong> ><br />
ASTM Extensions. You will be presented with the Login dialog box. Enter your<br />
user name and password and click OK. You can only use the ASTM Configurator<br />
if you have been given <strong>Freedom</strong> <strong>EVOware</strong> Application Specialist access rights.<br />
Note: Currently, you are not authorized to use this tool if you are the <strong>Freedom</strong><br />
<strong>EVOware</strong> Administrator.<br />
If you edit the ASTM configuration settings, the ASTM File Parser must be restarted<br />
in order for the changes to take effect.<br />
A.13.4.1 General tab<br />
This tab is used to make general settings for the ASTM File Parser:<br />
A - 96 <strong>Freedom</strong> <strong>EVOware</strong> <strong>Software</strong> <strong>Manual</strong>, 393172, en, V<strong>2.3</strong>
A - Appendix A<br />
ASTM Interface Module<br />
Fig. A-53 ASTM Extensions Configurator - General tab<br />
Source path<br />
Specify the directory which will be polled for input files or click the Browse<br />
button and browse for the directory. You can also choose a network directory.<br />
Processed path<br />
Input files which have been successfully parsed and sent to the remote<br />
computer are moved to this directory. Specify the directory or click the Browse<br />
button and browse for the directory.<br />
Error path<br />
If errors occur when parsing or sending input files, they are moved to this<br />
directory. Specify the directory or click the Browse button and browse for the<br />
directory.<br />
Watch filter<br />
This specifies the required file type (file extension) of the input files in the<br />
SourcePath directory (default: *.asc). Files with other extensions will be<br />
ignored.<br />
Delimiter<br />
This specifies the field separator which is used in the input files (normally “,”).<br />
Check the Tab checkbox if you are using the tab character as a delimiter.<br />
Start processing at line<br />
File parsing normally starts with the first line of the input file. Specify a line<br />
number which is higher than 1 to skip one or more lines at the beginning of the<br />
file (e.g. a comment or header).<br />
<strong>Freedom</strong> <strong>EVOware</strong> <strong>Software</strong> <strong>Manual</strong>, 393172, en, V<strong>2.3</strong> A - 97
A - Appendix A<br />
ASTM Interface Module<br />
Expected columns<br />
This specifies the expected number of fields in the input files (i.e. number of<br />
field separators +1).<br />
Expected rows<br />
This specifies the expected number of records (lines) in the input files.<br />
Uncheck the Check row count checkbox if you do not want the File Parser to<br />
check the number of lines in the input file. This setting may be needed for<br />
special applications; the checkbox should normally be checked.<br />
Decimal separator<br />
This specifies the decimal separator which is used in the input file (“.” or “,”).<br />
Check Magellan checksum<br />
If you are using the ASTM interface module in a regulated laboratory<br />
environment, the input files must be protected by a checksum against<br />
unauthorized or unintentional modification. Check this checkbox if the input<br />
files are protected by a checksum.<br />
The Tecan Magellan Tracker software creates output files which are protected<br />
by a checksum (currently, the standard Magellan versions do not add a<br />
checksum to the output files).<br />
Add Configuration<br />
The parser configuration file can contain more than one set of parser<br />
parameters. This feature is useful if you want to parse input files (typically<br />
from different sources) which have different record structures. To create an<br />
additional configuration set, click the Add Configuration button and choose a<br />
new, unique name. The name is shown as a tab in the dialog box of the ASTM<br />
Configurator.<br />
The File Parser operates on all of the parameter sets simultaneously.<br />
Accordingly, you must configure each of the parameter sets to use a different<br />
source path.<br />
Delete Configuration<br />
Click this button to delete the currently selected configuration set if you no<br />
longer want to use it.<br />
Save Configurations<br />
Click this button to save all of your changes. The configuration file is protected<br />
by a checksum against unauthorized or unintentional modification. The<br />
checksum is also updated when you click this button.<br />
A - 98 <strong>Freedom</strong> <strong>EVOware</strong> <strong>Software</strong> <strong>Manual</strong>, 393172, en, V<strong>2.3</strong>
A - Appendix A<br />
ASTM Interface Module<br />
A.13.4.2 Column Mapping tab<br />
This tab is used to specify the mapping of input fields (columns) in the csv file to<br />
ASTM entities:<br />
Fig. A-54 ASTM Extensions Configurator - Mapping tab<br />
Proceed as follows to create the mapping table:<br />
• Choose the column index (field number of the input file) for the first level 1<br />
entry in the mapping table and choose the required ASTM Destination Entity<br />
for this field from the pull-down list. The first level 1 entry is normally the<br />
Patient entity. The example shown in Tab. A-13, A-94 only has one level 1<br />
entry (Patient).<br />
• Choose the instance ID of the destination entity.<br />
• Choose the required ASTM Destination Property from the pull-down list. The<br />
list only shows properties which are allowed for the chosen destination entity.<br />
• Choose the ASTM entity which is the parent of the destination entity. The list<br />
only shows the parent entities which are allowed for the chosen destination<br />
entity. The list also shows the instance IDs of the available parent entities. In<br />
this example, the parent of the Patient entity is the Header entity. There is<br />
always only one Header instance (instance ID = 0).<br />
• Click Add new column and specify the next entry in the mapping table. If you<br />
finished with all of the level 1 entries, proceed to the level 2 entries (e.g.<br />
Order).<br />
• Repeat this process until you have specified all of the required fields in the<br />
input file.<br />
Remember to start with the level 1 entry or entries and then proceed to the lowerlevel<br />
entries.<br />
<strong>Freedom</strong> <strong>EVOware</strong> <strong>Software</strong> <strong>Manual</strong>, 393172, en, V<strong>2.3</strong> A - 99
A - Appendix A<br />
ASTM Interface Module<br />
As described in the ASTM Interface Specification, some of the ASTM destination<br />
properties can contain more than one component (value). On the Column<br />
Mapping tab, ASTM destination properties which allow more than one component<br />
are indicated by [] in the pull-down list (e.g. "Measurement[]").<br />
If you assign multiple components (more than one input field) to the same<br />
destination property with the same ASTM destination entity and instance ID<br />
combination, the values in the transmitted ASTM data stream will be separated by<br />
the component delimiter which is specified on the ASTM Configuration tab.<br />
For ASTM destination properties which do not allow multiple components, the<br />
mapping table can only contain the destination property once for the same ASTM<br />
destination entity and instance ID combination.<br />
Click or to sort the entries in the mapping table by column index (field<br />
number of the input file). Sorting the entries does not affect the mapping or the<br />
sort order in the configuration file, but makes it easier for you to check that all of<br />
the fields are correctly assigned.<br />
A.13.4.3 COM Configuration tab<br />
This tab is used to configure the parameters of the serial (RS232) interface which<br />
is used to send the ASTM data stream to the LIMS:<br />
Fig. A-55 ASTM Extensions Configurator - COM Configuration tab<br />
Com Port<br />
Specify the port number of the serial interface.<br />
Baud Rate<br />
Specify the data transmission rate (max. 57600 baud).<br />
A - 100 <strong>Freedom</strong> <strong>EVOware</strong> <strong>Software</strong> <strong>Manual</strong>, 393172, en, V<strong>2.3</strong>
A - Appendix A<br />
ASTM Interface Module<br />
Byte Size<br />
Specify the number of data bits (7 or 8).<br />
Stop Bit Code<br />
Specify the required number of stop bits (0 = 1 stop bit, 1 = 1.5 stop bits, 2 = 2<br />
stop bits).<br />
Parity Code<br />
Specify the parity (even=e, odd=o, none=n, mark=m, space=s).<br />
Retry Count<br />
If transmission errors occur, specify how many times to retry (default:” 3”).<br />
Resend Mode<br />
If transmission errors occur, specify whether to re-send the entire message<br />
(“Complete”) or the last part of the message (“Partial”).<br />
Delay After Each Message<br />
Specify an optional delay after sending each message (range: 0 to 5000 ms).<br />
A.13.4.4 ASTM Configuration tab<br />
This tab is used to configure settings for the ASTM data stream which is<br />
produced:<br />
Fig. A-56 ASTM Extensions Configurator - ASTM Configuration tab<br />
<strong>Freedom</strong> <strong>EVOware</strong> <strong>Software</strong> <strong>Manual</strong>, 393172, en, V<strong>2.3</strong> A - 101
A - Appendix A<br />
ASTM Interface Module<br />
Sending Host panel<br />
Host Name<br />
The Host Name field is used to indicate to the remote system (e.g. the LIMS)<br />
the source of the ASTM data stream. Specify a descriptive name for your PC.<br />
For example, you can specify the Windows host name of your PC. The value<br />
in the Name field is transmitted in the ASTM data stream in the header field<br />
"Sending Name" (see the ASTM specification document E1394, section 7.1.5<br />
for more information).<br />
Delimiters panel<br />
To change the values of the ASTM data stream delimmeters, choose the ASCII<br />
code from the pull-down list in the right hand column. The default values for these<br />
parameters should not normally be changed except for special applications.<br />
Please refer to the ASTM standards specification for more information.<br />
A - 102 <strong>Freedom</strong> <strong>EVOware</strong> <strong>Software</strong> <strong>Manual</strong>, 393172, en, V<strong>2.3</strong>
A - Appendix A<br />
Configuring and Using the 3D Simulation Tool EVOSim<br />
A.14 Configuring and Using the 3D Simulation Tool<br />
EVOSim<br />
The <strong>Freedom</strong> <strong>EVOware</strong> setup program lets you install a 3D simulation tool<br />
(EVOSim) which can be used to visualize the movements which are carried out by<br />
the arms of the <strong>Freedom</strong> EVO pipetting instrument (LiHa, RoMa, PnP and MCA)<br />
when running <strong>Freedom</strong> <strong>EVOware</strong> scripts and processes. It can also be used to<br />
visualize several other devices such as the Te-MO and the PosID-3.<br />
Start EVOSim with the shortcut in Start > All Programs > Tecan > <strong>EVOware</strong>:<br />
Fig. A-57 EVOSim - Main window<br />
EVOSim interprets the firmware (hardware) commands which are sent to the<br />
pipetting instrument and sends the appropriate responses to <strong>Freedom</strong> <strong>EVOware</strong>.<br />
To do this, the RS232 connection to the pipetting instrument is configured to<br />
communicate with EVOSim instead. This is called “3D simulation mode”.<br />
Using an additional tool (EVOSim Splitter, see below), EVOSim can also be used<br />
to monitor the communication between <strong>Freedom</strong> <strong>EVOware</strong> and the pipetting<br />
instrument. This is called “monitoring mode”.<br />
When the script or process is running, EVOSim displays the texts from Comment<br />
commands in a bar across the top of the screen (see example in the above figure,<br />
“Reset DITI position”). The comment texts remain on the screen until the next<br />
Comment command is executed. A special syntax of the Comment command can<br />
be used to clear the last message which is shown (see 15.37 “Comment<br />
Command”, 15-97 for more information).<br />
You can configure EVOSim to run on the same PC which normally controls the<br />
pipetting instrument or on another PC.<br />
To install EVOSim, activate the corresponding item in the <strong>Software</strong> Options group<br />
when you install <strong>Freedom</strong> <strong>EVOware</strong>. This adds a shortcut for EVOSim and<br />
EVOSim Splitter to the <strong>EVOware</strong> program group of the PC’s Start menu.<br />
<strong>Freedom</strong> <strong>EVOware</strong> <strong>Software</strong> <strong>Manual</strong>, 393172, en, V<strong>2.3</strong> A - 103
A - Appendix A<br />
Configuring and Using the 3D Simulation Tool EVOSim<br />
To install it on another PC, copy the directory c:\Program<br />
Files\Tecan\<strong>EVOware</strong>\Simulation with all of the files and sub-directories to the<br />
other PC. In this case, EVOSim and EVOSim Splitter are started by doubleclicking<br />
on the respective .exe files in the chosen target directory.<br />
Please note the following points:<br />
• EVOsim can be used to simulate a <strong>Freedom</strong> EVO pipetting instrument.<br />
• <strong>Freedom</strong> <strong>EVOware</strong> does not require a hardlock (dongle) when EVOsim is<br />
simulating the pipetting instrument.<br />
• You must start <strong>Freedom</strong> <strong>EVOware</strong> in real mode to use EVOSim (firmware<br />
commands such as movement commands are not sent to the RS232 port in<br />
<strong>Freedom</strong> <strong>EVOware</strong>’s offline mode).<br />
• <strong>Freedom</strong> <strong>EVOware</strong> will run in offline mode if it can not detect either a pipetting<br />
instrument or EVOSim, which simulates the data communication with a<br />
pipetting instrument. If you are using <strong>Freedom</strong> <strong>EVOware</strong> with EVOSim, this<br />
normally indicates that there is a problem with the EVOSim configuration or<br />
the data connection(s). Note: the <strong>Freedom</strong> <strong>EVOware</strong> operation mode is<br />
shown in the Status Bar (see 6.7.3 “Status Bar”, 6-20).<br />
• EVOSim does not currently simulate the following optional devices: Te-Shake,<br />
Te-MagS, Te-Stack, Te-Stack Te-MO and Te-VacS. If you want to use<br />
EVOSim, you must first deactivate these devices in the <strong>Freedom</strong> <strong>EVOware</strong><br />
Configuration Tool (see 8.4.1.1 “Device Information Tab”, 8-21). If you don’t<br />
do this, <strong>Freedom</strong> <strong>EVOware</strong> will report errors when it tries to communicate with<br />
these devices.<br />
• EVOSim does not support the Pressure Monitored Pipetting (PMP) hardware<br />
option. If PMP is activated in your <strong>Freedom</strong> <strong>EVOware</strong> configuration, <strong>Freedom</strong><br />
<strong>EVOware</strong> will display an error message when it starts and PMP will be<br />
disabled for the current <strong>Freedom</strong> <strong>EVOware</strong> session.<br />
• When using EVOSim, you must always start it before you start <strong>Freedom</strong><br />
<strong>EVOware</strong>. If you also use EVOSim Splitter, start EVOSim Splitter first, then<br />
EVOSim and finally <strong>Freedom</strong> <strong>EVOware</strong>.<br />
• If you have been using EVOSim, you must always exit <strong>Freedom</strong> <strong>EVOware</strong><br />
before you exit EVOSim (<strong>Freedom</strong> <strong>EVOware</strong> sends firmware commands<br />
during the shut-down procedure and expects RS232 communications to<br />
remain functional during this time).<br />
• EVOSim does not report pipetting errors to <strong>Freedom</strong> <strong>EVOware</strong> (such as DITI<br />
already mounted). The only errors it reports are incorrect positioning<br />
commands (“movement out of range”). Out of range movements are also<br />
indicated by displaying the respective arm (LiHa, RoMa, PnP) in red. Note:<br />
For mechanical reasons, <strong>Freedom</strong> <strong>EVOware</strong> purposely sends movement<br />
commands which are out of range during pipetting instrument initialization.<br />
• If you want to run two copies of EVOSim on the same PC (not normally<br />
meaningful), first make a duplicate copy of the directory c:\Program<br />
Files\Tecan\<strong>EVOware</strong>\Simulation with all of the files and sub-directories. Do<br />
not start two copies of EVOSim from the same directory (conflicts are caused<br />
by the shared configuration file).<br />
A.14.1 Communication Between EVOSim and <strong>Freedom</strong> <strong>EVOware</strong><br />
Depending on requirements, the simulation tool can communicate with <strong>Freedom</strong><br />
<strong>EVOware</strong> in several different ways:<br />
A): EVOSim runs on the same PC as <strong>Freedom</strong> <strong>EVOware</strong>. The PC must have two<br />
unused RS232 ports. Connect the two ports using a null-modem cable. Configure<br />
<strong>Freedom</strong> <strong>EVOware</strong> to use one of the ports and configure EVOsim to use the other<br />
port.<br />
A - 104 <strong>Freedom</strong> <strong>EVOware</strong> <strong>Software</strong> <strong>Manual</strong>, 393172, en, V<strong>2.3</strong>
A - Appendix A<br />
Configuring and Using the 3D Simulation Tool EVOSim<br />
B): EVOSim runs on the same PC as <strong>Freedom</strong> <strong>EVOware</strong>. Configure EVOsim to<br />
provide a virtual RS232 port. EVOsim then temporarily re-configures <strong>Freedom</strong><br />
<strong>EVOware</strong> to use the same port.<br />
C): EVOSim runs on a different PC to <strong>Freedom</strong> <strong>EVOware</strong>. Each of the PCs must<br />
have one unused RS232 port. Connect the two PCs using a null-modem cable.<br />
Configure the ports appropriately. You must also provide a network connection<br />
between the two PCs.<br />
D): EVOSim is used in monitoring mode (see A.14.2 “Data Splitter Tool EVOSim<br />
Splitter”, A-105).<br />
See A.14.4.1 “Communication Between EVOSim and <strong>Freedom</strong> <strong>EVOware</strong>”, A-<br />
108 for more information.<br />
A.14.2 Data Splitter Tool EVOSim Splitter<br />
EVOsim is also provided with a data splitter tool (EVOSim Splitter) which<br />
duplicates the RS232 data stream over a network connection:<br />
TCP/IP to EVOSim<br />
(monitoring mode)<br />
<strong>EVOware</strong><br />
(RS232)<br />
RS232 to pipetting instrument<br />
or EVOSim (simulation mode)<br />
Fig. A-58 Principle of the data splitter tool EVOSim Splitter<br />
The RS/232 connection is bi-directional. The splitter tool only provides a unidirectional<br />
TCP/IP connection. The EVOSim which is connected to the splitter<br />
connection cannot be used to simulate a pipetting instrument - it can only be used<br />
for monitoring (<strong>Freedom</strong> <strong>EVOware</strong> requires a bi-directional data connection). So<br />
EVOSim Splitter can only be used in addition to a physical pipetting instrument<br />
or another copy of EVOSim running in 3D simulation mode.<br />
EVOSim Splitter can be used in several different scenarios. The two most<br />
common are as follows:<br />
E): <strong>Freedom</strong> <strong>EVOware</strong> is connected to a pipetting instrument using an RS232<br />
cable. EVOSim is used to monitor the progress of the pipetting on another PC<br />
(which may be in a different room).<br />
F): One copy of EVOsim runs on the same PC as <strong>Freedom</strong> <strong>EVOware</strong>, configured<br />
as in case A) or B), above. A second copy of EVOSim running on another PC is<br />
connected to the first PC through EVOSim Splitter. Both copies of EVOSim show<br />
the same simulation. The EVOSim copy on the first PC can be minimized to allow<br />
the whole screen to be used for <strong>Freedom</strong> <strong>EVOware</strong>. This arrangement can be<br />
useful for demonstration purposes in cases where an RS232 cable connection<br />
between the two PCs is not possible or should be avoided.<br />
Note: If you use EVOSim Splitter, you must always provide a network connection<br />
between the two PCs.<br />
See A.14.4.1 “Communication Between EVOSim and <strong>Freedom</strong> <strong>EVOware</strong>”, A-<br />
108 for more information.<br />
<strong>Freedom</strong> <strong>EVOware</strong> <strong>Software</strong> <strong>Manual</strong>, 393172, en, V<strong>2.3</strong> A - 105
A - Appendix A<br />
Configuring and Using the 3D Simulation Tool EVOSim<br />
A.14.3 Using EVOSim Splitter<br />
EVOSim Splitter is only needed if you plan to use EVOSim in monitoring mode<br />
and should only be run on the PC where <strong>Freedom</strong> <strong>EVOware</strong> is installed. Start<br />
EVOSim Splitter before you start EVOSim. This displays the SplitterCtrl dialog box<br />
which shows you the host name of the PC where EVOSim Splitter is running.<br />
Specify the same host name in the Communication dialog box in EVOSim.<br />
EVOSim Splitter does not have any configuration settings.<br />
Click Accept in the SplitterCtrl dialog box to minimize EVOSim Splitter to the<br />
system tray. It will then be shown as a small round icon at the bottom right of the<br />
screen.<br />
Right click the EVOSim Splitter icon to show a context menu with the following<br />
items:<br />
Exit<br />
Quit EVOSim Splitter.<br />
Info<br />
Show the info screen for EVOSim Splitter.<br />
About<br />
Show the About box for EVOSim Splitter.<br />
A.14.4 EVOSim Configuration Wizard<br />
The EVOSim Configuration Wizard is used to specify the required configuration of<br />
the simulated pipetting instrument. The configuration must be chosen to match<br />
the requirements of the scripts and/or processes which you want to run in<br />
<strong>Freedom</strong> <strong>EVOware</strong>. For example, if your script uses a PnP, you must also<br />
configure a PnP in EVOSim.<br />
You must specify the instrument configuration before you connect to <strong>Freedom</strong><br />
<strong>EVOware</strong> for the first time during the current EVOSim session. You cannot<br />
change the instrument configuration after the connection to <strong>Freedom</strong> <strong>EVOware</strong><br />
has been established.<br />
The starting screen of the EVOSim Configuration Wizard is as follows:<br />
Fig. A-59 Starting screen of the Configuration Wizard<br />
The options in the starting screen are as follows:<br />
A - 106 <strong>Freedom</strong> <strong>EVOware</strong> <strong>Software</strong> <strong>Manual</strong>, 393172, en, V<strong>2.3</strong>
A - Appendix A<br />
Configuring and Using the 3D Simulation Tool EVOSim<br />
Run last configuration<br />
This option runs EVOSim with the configuration settings you chose last time<br />
EVOSim was run. This option is only shown if EVOSim has already been run.<br />
Run existing configuration<br />
When you click Next you will be prompted to chose a previously saved<br />
configuration file. Choose the configuration file you want to use and click Next.<br />
You are then prompted to choose the communication mode you want to use.<br />
Note: EVOSim configuration files are stored in the Config sub-directory of the<br />
EVOSim installation path (normally ..\simulation\Config).<br />
Create a new configuration<br />
This starts a wizard which helps you to specify the required configuration<br />
settings for EVOSim. You will be prompted to choose the <strong>Freedom</strong> EVO<br />
(pipetting instrument) version, specify the cutouts in the worktable of the<br />
pipetting instrument, make settings for simulation of the loading interface<br />
hardware option (see A.14.5 “Simulating the Loading Interface”, A-109),<br />
specify the instrument arms which you want to simulate (LiHa RoMa PnP<br />
MCA) and specify additional devices (Te-MO and PosID-3).<br />
Uncheck the corresponding checkboxes if you want to skip the configuration<br />
steps for the worktable cutouts and the loading interface.<br />
If you configure a LiHa, you must specify the tips which are fitted.<br />
The LiHa configuration 8 Plus 1 Access for the <strong>Freedom</strong> EVO 75 pipetting<br />
instrument is currently only intended for disposable tips (not fixed tips). In<br />
addition, the same DITI type (DITI size) must be fitted to all 8 positions of the<br />
LiHa (see A.7 “<strong>Freedom</strong> EVO 75 Pipetting Instrument - LiHa Configuration”,<br />
A-30).<br />
If you configure a RoMa, you will be prompted to specify the arm length, the<br />
home (parking) position and the type of gripper you want to use.<br />
If you configure the Te-MO, you will be prompted to specify the Te-MO sites<br />
that you want to reserve for the Wash Block, the DiTi rack and for putting<br />
down the Tipblock (these objects can only be put on the middle slide of the Te-<br />
MO).<br />
If you configure the MCA, you must specify whether it is fitted with the gripper<br />
option or not.<br />
You will be prompted to save a configuration file when you have made your<br />
settings. EVOSim configuration files are saved in the Config sub-directory of<br />
the EVOSim installation path (normally ..\simulation\Config). After saving the<br />
file, you will prompted to choose the communication mode you want to use<br />
(see A.14.4.1 “Communication Between EVOSim and <strong>Freedom</strong> <strong>EVOware</strong>”,<br />
A-108).<br />
Edit an existing configuration<br />
When you click Next you will be prompted to chose a previously saved<br />
configuration file. You can then edit and run the existing configuration settings.<br />
Begin with configuration wizard at program start<br />
Check this checkbox if you want EVOSim to start with the wizard when you<br />
run it next time. If this checkbox is not checked, you can start the wizard again<br />
later by choosing Configuration in the Machine menu.<br />
Note: You cannot change the configuration settings after the connection to<br />
<strong>Freedom</strong> <strong>EVOware</strong> has been established.<br />
<strong>Freedom</strong> <strong>EVOware</strong> <strong>Software</strong> <strong>Manual</strong>, 393172, en, V<strong>2.3</strong> A - 107
A - Appendix A<br />
Configuring and Using the 3D Simulation Tool EVOSim<br />
A.14.4.1 Communication Between EVOSim and <strong>Freedom</strong> <strong>EVOware</strong><br />
The last step of the configuration wizard - regardless of the options you choose on<br />
the starting screen - is to configure the communication mode you want to use:<br />
Fig. A-60 EVOSim - Communication settings<br />
The available options are as follows:<br />
Maintain current mode<br />
This starts EVOSim with the communication mode which was last used.<br />
Alter your communication settings<br />
Choose this option if you want to choose a different communication mode.<br />
Click Next when you have made your choices.<br />
Monitoring mode (TCP/IP connection to EVOSim Splitter)<br />
Choose this option if you are using EVOSim Splitter (see A.14.2 “Data Splitter<br />
Tool EVOSim Splitter”, A-105). In the next wizard screen, you are prompted<br />
to choose the computer which is running <strong>Freedom</strong> <strong>EVOware</strong> and EVOSim<br />
Splitter, as follows:<br />
Location: Choose the PC where <strong>Freedom</strong> <strong>EVOware</strong> is installed from the pulldown<br />
list. The Host name or TCP/IP address field then shows the host name<br />
or the TCP/IP address of the chosen PC. The list shows the entries which you<br />
previously stored in the EVOSim configuration.<br />
Add Location: Click this button to add a new entry to the Choose location<br />
pull-down list. Specify a descriptive name for the PC (e.g. <strong>EVOware</strong> PC) and<br />
specify the PC’s host name or TCP/IP address. Tip: If you are also using<br />
EVOSim Splitter, EVOSim Splitter’s dialog box tells you the host name of the<br />
PC.<br />
If you want to use EVOSim together with EVOSim Splitter, start EVOSim<br />
Splitter before you start EVOSim (see A.14.3 “Using EVOSim Splitter”, A-<br />
106).<br />
Simulation mode (serial connection to <strong>Freedom</strong> <strong>EVOware</strong>)<br />
Choose this option if EVOSim communicates with <strong>Freedom</strong> <strong>EVOware</strong> through<br />
an RS232 cable or a virtual RS232 port.<br />
Simulator connects to a physical port: Specify the RS232 port to use. The<br />
list shows the addresses of all physical RS232 interfaces which are installed<br />
in your PC.<br />
A - 108 <strong>Freedom</strong> <strong>EVOware</strong> <strong>Software</strong> <strong>Manual</strong>, 393172, en, V<strong>2.3</strong>
A - Appendix A<br />
Configuring and Using the 3D Simulation Tool EVOSim<br />
This option also requires a network connection between the two PCs (the<br />
network connection is used to exchange information on the current worktable<br />
layout). In the next wizard screen, you are prompted to choose the computer<br />
which is running <strong>Freedom</strong> <strong>EVOware</strong>, as follows:<br />
Location: Choose the PC where <strong>Freedom</strong> <strong>EVOware</strong> is installed from the pulldown<br />
list. The Host name or TCP/IP address field then shows the host name<br />
or the TCP/IP address of the chosen PC. The list shows the entries which you<br />
previously stored in the EVOSim configuration.<br />
Add Location: Click this button to add a new entry to the Choose location<br />
pull-down list. Specify a descriptive name for the PC (e.g. <strong>EVOware</strong> PC) and<br />
specify the PC’s host name or TCP/IP address. Tip: If you are also using<br />
EVOSim Splitter, EVOSim Splitter’s dialog box tells you the host name of the<br />
PC.<br />
Simulator connects to a virtual port: Specify the virtual RS232 port which<br />
you want to use. The list only shows ports which are not assigned to physical<br />
RS232 interfaces. EVOsim then temporarily re-configures <strong>Freedom</strong> <strong>EVOware</strong><br />
to use the same port.<br />
Log File mode<br />
In this mode, EVOSim, parses and then simulates the pipetting operations<br />
and robot arm movements which are contained in a <strong>Freedom</strong> <strong>EVOware</strong> log<br />
file (see A.1.1 “Structure of Log Files of Type EVO”, A-2). Log File mode can<br />
be used e.g. for demonstration or diagnostic purposes.<br />
In log file mode, the EVOSim main window has an additional area on the left<br />
(the “Log File Bar”) which is divided into two panels, Files and Commands.<br />
Choose Log file bar in the View menu to show or hide the Log File Bar.<br />
To use this feature, proceed as follows:<br />
• Create a log file of type EVO by running a pipetting script. You can also use a<br />
log file from a colleague which has been sent to you e.g. by eMail.<br />
• Drag the log file from Windows Explorer onto the Files panel of the Log FIle<br />
Bar. The file will be parsed and the Commands panel will list the instrument<br />
firmware commands in the log file which are relevant to EVOSim.<br />
• If required, you can drag and drop several log files onto the Files panel of the<br />
Log FIle Bar. In the Files panel, the files will be sorted in alphabetical order of<br />
the file names (this is normally equivalent to the chronological order of the log<br />
files).<br />
• Click Run to run the simulation. Click Stop to pause the simulation. You can<br />
then click Step to run the simulation one firmware command at a time.<br />
• Click Restart to move all of the arms (LiHa, RoMa, PnP, Te-MO and/or MCA)<br />
and the PosID-3 back to the starting position at the left side of the EVOSim<br />
worktable.<br />
Note: For meaningful results in Log File mode, make sure that EVOSim is<br />
configured with the same worktable layout, optional devices and pipetting<br />
instrument configuration which were used by the script or process which was<br />
logged.<br />
Replay mode<br />
See A.14.9 “Replay Package feature”, A-112.<br />
A.14.5 Simulating the Loading Interface<br />
The Loading Interface is a hardware option for the pipetting instrument which<br />
detects when labware items (typically tube racks) are put onto the worktable (or<br />
<strong>Freedom</strong> <strong>EVOware</strong> <strong>Software</strong> <strong>Manual</strong>, 393172, en, V<strong>2.3</strong> A - 109
A - Appendix A<br />
Configuring and Using the 3D Simulation Tool EVOSim<br />
removed again). It requires special labware which is fitted with a small magnet<br />
which activates a proximity switch.<br />
The presence or absence of the labware is reported to <strong>Freedom</strong> <strong>EVOware</strong>. In<br />
addition, <strong>Freedom</strong> <strong>EVOware</strong> can control LEDs fitted to the front edge of each grid<br />
position to indicate to the operator that labware should be exchanged and/or<br />
should not be exchanged. The Loading Interface is normally controlled by the<br />
Sample Oriented <strong>EVOware</strong> software add-on. Sample Oriented <strong>EVOware</strong> provides<br />
special script commands which allow you to specify which grid positions are<br />
significant and should be monitored by the Loading Interface hardware.<br />
Activate the Loading Interface simulation with the checkbox and click Configure to<br />
choose the grid positions which will be monitored by <strong>Freedom</strong> <strong>EVOware</strong>. The<br />
selected grid positions are marked with a short black bar (only visible if you zoom<br />
in and tilt your view of the pipetting instrument). During (simulated) script or<br />
process run time, choose Loading Ports in EVOSim’s Settings menu and click a<br />
grid position checkbox to indicate that labware has been put on the worktable (or<br />
removed).<br />
A.14.6 EVOSim Views<br />
Click and drag the simulation with the left mouse to change the perceived viewing<br />
angle of the user (above or below the simulation, to the left or the right of the<br />
simulation). Alternatively, use the Left, Right, Up and Down cursor keys on the<br />
numeric keypad.<br />
Click and drag the simulation with the right mouse to tilt and rotate the simulation.<br />
Alternatively, press on the keyboard and use the Left, Right, Up and Down<br />
cursor keys on the numeric keypad.<br />
Use the scrolling wheel of the mouse to change the perceived distance of the user<br />
from the simulation (zoom effect). Alternatively, press on the keyboard and<br />
use the Up and Down cursor keys on the numeric keypad.<br />
A.14.7 EVOSim Toolbar<br />
Click Normal to switch to normal view of the simulation.<br />
Click View 1, 2, 3 or 4 to switch to one of four stored views of the simulation.<br />
Click Save View and then View 1, 2, 3 or 4 to store the current view as view 1, 2,<br />
3 or 4.<br />
Click Pause to pause the running simulation. Click this button again to resume the<br />
simulation.<br />
Speed: This slider lets you choose the required speed of the simulation. You can<br />
also use it to change the speed when the script or process is already running.<br />
A.14.8 EVOSim Menus<br />
A.14.8.1 File Menu<br />
Export configuration<br />
This menu item saves the current EVOSim configuration as an EVOSim<br />
configuration file. EVOSim configuration files should be saved in the Config<br />
sub-directory of the EVOSim installation path (normally ..\simulation\Config).<br />
You can then run or edit the saved configuration using the EVOSim<br />
A - 110 <strong>Freedom</strong> <strong>EVOware</strong> <strong>Software</strong> <strong>Manual</strong>, 393172, en, V<strong>2.3</strong>
A - Appendix A<br />
Configuring and Using the 3D Simulation Tool EVOSim<br />
configuration wizard (see A.14.4 “EVOSim Configuration Wizard”, A-106). If<br />
EVOSim is currently displaying a worktable from the last simulation run, this<br />
menu item also saves the EVOSim worktable (the wizard option Create a new<br />
configuration does not save an EVOSim worktable).<br />
This feature is above all useful for log file mode. The simulation in log file<br />
mode is more instructive if you can also see the worktable which was used<br />
when creating the log files. If you plan to send the log files to someone else for<br />
discussion or analysis, it is helpful to send the saved EVOSim configuration<br />
file, too.<br />
Create Replay Package<br />
See A.14.9 “Replay Package feature”, A-112.<br />
Exit<br />
This menu item is used to exit EVOSim. Always exit <strong>Freedom</strong> <strong>EVOware</strong><br />
before you exit EVOSim (<strong>Freedom</strong> <strong>EVOware</strong> sends firmware commands<br />
during the shut-down procedure and expects RS232 communications to<br />
remain functional during this time).<br />
A.14.8.2 View Menu<br />
Communication Bar<br />
This menu item is used to show or hide the Communication Bar.<br />
Speed Bar<br />
This menu item is used to show or hide the Speed Bar.<br />
View Bar<br />
This menu item is used to show or hide the View Bar.<br />
Log File Bar<br />
This menu item is used to show or hide the Log File Bar (two panels Files and<br />
Commands at the left edge of the EVOSim main window). You can only<br />
choose this menu item if you have chosen Log File Mode (see Log File Mode<br />
in A.14.4.1 “Communication Between EVOSim and <strong>Freedom</strong> <strong>EVOware</strong>”, A-<br />
108).<br />
Window always on top<br />
Select this menu item if you want the EVOSim window to always be on top of<br />
the other windows.<br />
Perspective<br />
This menu item is used to configure advanced features for the 3D<br />
visualization. Appropriate settings are dependent on your graphics card and<br />
graphics driver. If you change the settings to extremely large or small values,<br />
this can slow down simulation considerably due to the increased time required<br />
for graphics rendering.<br />
A.14.8.3 Instrument Menu<br />
Restart<br />
Move all of the arms (LiHa, RoMa, PnP, Te-MO and/or MCA) and the PosID-3<br />
back to the starting position at the left side of the EVOSim worktable. This<br />
option is mainly intended for log file mode (see A.14.4.1 “Communication<br />
Between EVOSim and <strong>Freedom</strong> <strong>EVOware</strong>”, A-108, Log File Mode). You<br />
should not choose Restart when the simulation is running - this can lead to<br />
unexpected results.<br />
<strong>Freedom</strong> <strong>EVOware</strong> <strong>Software</strong> <strong>Manual</strong>, 393172, en, V<strong>2.3</strong> A - 111
A - Appendix A<br />
Configuring and Using the 3D Simulation Tool EVOSim<br />
Configuration<br />
This menu item is used to specify the required configuration of the simulated<br />
pipetting instrument. See A.14.4 “EVOSim Configuration Wizard”, A-106 for<br />
more information.<br />
Loading ports<br />
During (simulated) script or process run time, choose this menu item and click<br />
a grid position checkbox in the Loading Ports dialog box which is shown to<br />
indicate that labware has been put on the worktable (or removed). <strong>Freedom</strong><br />
<strong>EVOware</strong> only monitors the grid positions (ports) which you have selected in<br />
Instrument Config in EVOSim’s <strong>EVOware</strong> menu.<br />
Link Labware to Graphics<br />
The database in EVOSim includes graphics templates for most common types<br />
of labware, carriers and device carriers. EVOSim’s list of labware, carriers and<br />
device carriers is updated automatically if a new, unknown object is used on<br />
the worktable in <strong>Freedom</strong> <strong>EVOware</strong>. If the object you want to use is not<br />
already assigned to a graphics template, it is initially shown as an empty box.<br />
Use this menu item to assign it to the template of another object which has a<br />
similar appearance.<br />
Hide element: Do not show the chosen object.<br />
Show box: Show the chosen object as an empty box. Use this option if you<br />
cannot find a graphics template with a similar appearance.<br />
Link to template: Assign the chosen object to the graphics template which is<br />
selected in the right hand panel.<br />
See also Fig. A-61, A-117 and A.14.11 “Adding custom labware to<br />
EVOSim”, A-115.<br />
Show safety shield / Hide safety shield<br />
This menu item shows and hides the safety shield of the <strong>Freedom</strong> EVO<br />
pipetting instrument in the simulation window.<br />
Open Door / Close Door<br />
This menu item opens and closes the safety door of the <strong>Freedom</strong> EVO<br />
pipetting instrument in the simulation window.<br />
A.14.8.4 Help Menu<br />
Error Logging<br />
This menu item opens the Error Messages dialog box which shows internal<br />
messages from EVOSim. The Error Messages dialog box is only intended for<br />
internal use.<br />
Show Help<br />
This menu item opens the online help for EVOSim. You can also get the online<br />
help for EVOSim by pressing F1.<br />
About EVOSim<br />
This menu item shows information on the <strong>Freedom</strong> <strong>EVOware</strong> version which is<br />
installed and Tecan copyright information.<br />
A.14.9 Replay Package feature<br />
The Replay Package feature is used to create a pre-configured installation<br />
package for EVOSim which can be sent to customers or Tecan sales personnel<br />
for the purpose of demonstration. The package includes a special configuration<br />
file (replay file) which allows EVOSim to simulate pre-recorded pipetting<br />
operations and robot arm movements without needing to install <strong>Freedom</strong><br />
A - 112 <strong>Freedom</strong> <strong>EVOware</strong> <strong>Software</strong> <strong>Manual</strong>, 393172, en, V<strong>2.3</strong>
A - Appendix A<br />
Configuring and Using the 3D Simulation Tool EVOSim<br />
<strong>EVOware</strong> on the destination PC. The replay file also contains information on the<br />
worktable layout, optional devices and pipetting instrument configuration. The<br />
installation package is a small self-extracting, self-installing ZIP file (size ca. 1.5<br />
MB) which you can send e.g. by eMail.<br />
Compatibility:<br />
• The replay package feature has been tested on the destination PC with the<br />
same Windows versions which are supported by <strong>Freedom</strong> <strong>EVOware</strong>.<br />
• The replay package may also run correctly on the destination PC with other<br />
Windows versions.<br />
To use the replay package feature, proceed as follows:<br />
• Start EVOSim, start <strong>Freedom</strong> <strong>EVOware</strong> and run the pipetting script or process<br />
which you want to record.<br />
• In EVOSim, choose Create Replay Package in the File menu, browse to a<br />
suitable directory and specify the required name of the replay package.<br />
• It is recommended to choose a name which gives some indication of the script<br />
or process which has been recorded, e.g. “EVO150WithLiHa”.<br />
• You can save the replay package in any directory except the EVOSim<br />
installation directory.<br />
• EVOSim then creates a self-extracting ZIP file containing the pre-configured<br />
EVOSim installation package, the replay file and all of the settings which are<br />
needed.<br />
• If required, you can create the replay package while the script or process is<br />
still running, or create several replay packages which illustrate different stages<br />
of the same script or process. All of the replay packages will start running from<br />
the beginning of the script or process.<br />
• Send the replay package file to the customer, e.g. via eMail.<br />
On the destination PC<br />
• Double-click the replay package file on the destination PC to extract the files,<br />
install EVOSim and start the replay automatically.<br />
– The customer will be prompted for the required installation directory.<br />
– The customer will be asked whether a desktop shortcut to the replay<br />
package should be created.<br />
When the replay has finished running, double-click the desktop shortcut to run it<br />
again (or click Run in EVOSim). If required, you can install more than one replay<br />
package on the same destination PC (in different directories) and run them<br />
simultaneously.<br />
Note: Installing the replay package does not make any changes to the registry of<br />
the destination PC and is not shown in the Start menu of the PC.<br />
Note: The replay package does not include a help file. The replay package<br />
feature of EVOSim is described in the <strong>Freedom</strong> <strong>EVOware</strong> help file and manual.<br />
Proceed as follows to entirely remove the EVOSim replay installation from the<br />
destination PC:<br />
• Delete the chosen installation directory and all of the files inside.<br />
• Delete the desktop shortcut.<br />
Note: When installing the replay package, the customer’s anti-virus package may<br />
report a potentially unsafe program “hidden install”.This program is part of the<br />
replay package and the message can be ignored.<br />
<strong>Freedom</strong> <strong>EVOware</strong> <strong>Software</strong> <strong>Manual</strong>, 393172, en, V<strong>2.3</strong> A - 113
A - Appendix A<br />
Configuring and Using the 3D Simulation Tool EVOSim<br />
Testing the replay package<br />
Proceed as follows if you want to test the replay package before sending it to the<br />
customer:<br />
• Create the replay package file in a temporary directory on the source PC as<br />
described above and install and run it from the temporary directory. This will<br />
not interfere with any other EVOSim installations on the same PC.<br />
Alternatively:<br />
• Create the replay package as described above<br />
• Switch the communication mode of EVOSim to Replay Mode (see<br />
A.14.4.1 “Communication Between EVOSim and <strong>Freedom</strong> <strong>EVOware</strong>”, A-<br />
108).<br />
In replay mode, the EVOSim main window has an additional area on the left<br />
(the “Replay Bar”) which contains a Commands panel.<br />
• Using Windows Explorer, drag the replay file onto the Commands panel of the<br />
Replay Bar. Replay files are created in the Replay sub-directory of the<br />
EVOSim installation path (normally ..\simulation\Replay). The replay file has<br />
the same (chosen) name as the replay package, but has the extension .erp<br />
instead of .exe.<br />
• The file will be parsed and the Commands panel will list the instrument<br />
firmware commands in the log file which are relevant to EVOSim. The replay<br />
will start automatically.<br />
• Click Run to run the replay again. Click Stop to pause the replay. You can then<br />
click Step to run the replay one firmware command at a time.<br />
• Click Restart to move all of the arms (LiHa, RoMa, PnP, Te-MO and/or MCA)<br />
and the PosID-3 back to the starting position at the left side of the EVOSim<br />
worktable.<br />
Note: For meaningful results when testing the replay file, make sure that EVOSim<br />
is configured with the same worktable layout, optional devices and pipetting<br />
instrument configuration which were used by the script or process which was<br />
recorded. See also A.14.10 “Command Line Parameters (EVOSim)”, A-115.<br />
Note: In replay mode, some of the EVOSim menu items (such as Configuration in<br />
the Instrument menu) are not available. If <strong>Freedom</strong> <strong>EVOware</strong> is installed on the<br />
same PC, restart EVOSim if you want to switch to another mode.If <strong>Freedom</strong><br />
<strong>EVOware</strong> is not installed on the same PC, after switching to replay mode you<br />
cannot switch back to another mode.<br />
Tips when creating the replay package<br />
Proceed as follows if you want to ensure that the replay package you create will<br />
start with the intended worktable layout (instead of starting with an empty<br />
worktable which is replaced by the intended worktable after a short initialization<br />
delay):<br />
• Start EVOSim, start <strong>Freedom</strong> <strong>EVOware</strong> and load the pipetting script or<br />
process which you want to record. EVOSim should now show the worktable<br />
layout which is intended for the script or process.<br />
• In EVOSim, choose Export Configuration in the File menu to create a<br />
configuration file which contains the worktable layout (see A.14.8.1 “File<br />
Menu”, A-110, Export Configuration).<br />
• Quit <strong>Freedom</strong> <strong>EVOware</strong> and quit EVOSim.<br />
• Restart EVOSim, choose Configuration in the Instrument menu, choose Run<br />
existing configuration and choose the configuration file which you saved<br />
A - 114 <strong>Freedom</strong> <strong>EVOware</strong> <strong>Software</strong> <strong>Manual</strong>, 393172, en, V<strong>2.3</strong>
A - Appendix A<br />
Configuring and Using the 3D Simulation Tool EVOSim<br />
previously. EVOSim should now show the worktable layout which is intended<br />
for the script or process.<br />
• Restart <strong>Freedom</strong> <strong>EVOware</strong> and run the pipetting script or process which you<br />
want to record.<br />
• In EVOSim, choose Create Replay Package in the File menu, browse to a<br />
temporary directory and specify the required name of the replay package.<br />
A.14.10 Command Line Parameters (EVOSim)<br />
EVOSim supports the following command line parameters:<br />
Tab. A-14 Command Line Parameters (EVOSim)<br />
Switch<br />
Explanation<br />
-c Start EVOSim with the specified configuration file using the communication<br />
mode which was last used (see A.14.4 “EVOSim Configuration Wizard”,<br />
A-106). By creating several desktop shortcuts to EVOSim.exe with different<br />
parameters, this feature makes it easy to switch between different worktable<br />
layouts, simulated hardware devices and <strong>Freedom</strong> EVO versions. a)<br />
-c Start EVOSim with the specified replay file using the EVOSim configuration<br />
settings which were last used. b)<br />
a) EVOSim configuration files are stored in the Config sub-directory of the EVOSim installation path (normally<br />
..\simulation\Config).<br />
b) By default, EVOSim creates replay files in the Replay sub-directory of the EVOSim installation path (normally<br />
..\simulation\Replay). See A.14.9 “Replay Package feature”, A-112 for more information.<br />
For meaningful results, it is recommended to run the replay using the same<br />
EVOSim configuration settings (worktable layout, simulated hardware devices<br />
and <strong>Freedom</strong> EVO version) with which the replay file was recorded. You can<br />
specify the -c parameter as well to make sure that the correct settings are used,<br />
e.g.<br />
EVOSim -c ConfigFile -r ReplayFile.<br />
You do not need to specify the file extension for the configuration file or the replay<br />
file. You should not specify the path to the file(s) - only specify the file name(s).<br />
The above command line parameters can be included in desktop shortcuts to<br />
EVOSim.exe. Use Windows Explorer to create a desktop shortcut and edit the<br />
properties of the shortcut to specify the parameters.<br />
A.14.11 Adding custom labware to EVOSim<br />
If required, you can extend the EVOSim labware library with CAD drawings of<br />
custom labware, carriers and devices (device carriers) which have been saved in<br />
VRML 2.0 (Virtual Reality Modelling Language) format. This format can be<br />
created using popular CAD programs such as TurboCAD Version 9 or 10,<br />
AutoCAD and ProE.<br />
Installing a dynamically linked device<br />
Dynamically linked devices are devices whose position in EVOSim is updated<br />
according to the worktable layout (grid position) in <strong>Freedom</strong> <strong>EVOware</strong>.<br />
<strong>Freedom</strong> <strong>EVOware</strong> <strong>Software</strong> <strong>Manual</strong>, 393172, en, V<strong>2.3</strong> A - 115
A - Appendix A<br />
Configuring and Using the 3D Simulation Tool EVOSim<br />
1 Export the drawing from your CAD program in VRML 2.0 format.<br />
2 Copy the VMRL file to the \layout\vrml sub-directory of your EVOSim<br />
installation (e.g. ..\<strong>EVOware</strong>\simulation\layout\vrml). The file extension must<br />
be wrl.<br />
3 Edit the file VRMLDevice.tab in the \layout sub-directory of your EVOSim<br />
installation to add a new section for the new device as follows (the example<br />
shows the PW384 Device Carrier):<br />
Design {<br />
Header {<br />
Name<br />
Type<br />
}<br />
SubDesign {<br />
Design<br />
}<br />
}<br />
Design {<br />
Header {<br />
Name<br />
}<br />
VRML {<br />
Name<br />
}<br />
}<br />
; PW384DeviceCarrier //display name<br />
; DeviceCarrier // parameter no longer used<br />
; PW384Design<br />
; PW384Design<br />
; PW384 //device carrier name<br />
; PowerWasher384.wrl<br />
File<br />
Scale ; 1<br />
Position ; 4475,-4500,0<br />
Rotation ; 0,0,2700<br />
VRMLOrigin ; Corner<br />
whereby Scale is a scaling factor for the size of the object in EVOSim, Position is<br />
an offset for the x, y and z axis (in 0.1 mm) and Rotation specifies a rotation of the<br />
x, y and z axis (in 0.1° steps). You should normally only specify rotation for the z<br />
axis. On each line, everything following “//” is an optional comment.<br />
4 Edit the file VRMLDevice.ini in the \layout sub-directory of your EVOSim<br />
installation to add a new section for the new device as follows:<br />
[PW384DeviceCarrier]<br />
Type=DeviceCarrier<br />
Element0Design=VRMLDevice.tab;PW384DeviceCarrier<br />
Note:<br />
For VRML carriers, specify Type=Carrier<br />
For VRML labware, specify Type=Labware<br />
5 In EVOSim, choose Link Labware to Graphics… in the Instrument menu to<br />
link the newly added CAD drawing to a device carrier as follows:<br />
A - 116 <strong>Freedom</strong> <strong>EVOware</strong> <strong>Software</strong> <strong>Manual</strong>, 393172, en, V<strong>2.3</strong>
A - Appendix A<br />
Configuring and Using the 3D Simulation Tool EVOSim<br />
Fig. A-61 Assigning labware to graphics objects<br />
6 Proceed as follows if the required device carrier is not shown in the Device<br />
Carriers list on the left hand side of the dialog box:<br />
a) Return to the EVOSim main window and start <strong>Freedom</strong> <strong>EVOware</strong>.<br />
b) Create a worktable which includes the required device carrier.<br />
c) EVOSim will be notified about the new device carrier, and will add a new<br />
entry to the [DeviceCarrierLinks] section of the EVOSim.ini file automatically.<br />
The new device carrier should now be visible on the EVOSim worktable and<br />
also in the Device Carriers list in the above figure. To avoid the risk of typing<br />
mistakes, we do not recommend adding the new entry to EVOSim.ini<br />
manually.<br />
d) Return to step 5.<br />
Use the same procedure for new labware and carriers.<br />
7 Restart EVOSim.<br />
<strong>Freedom</strong> <strong>EVOware</strong> <strong>Software</strong> <strong>Manual</strong>, 393172, en, V<strong>2.3</strong> A - 117
A - Appendix A<br />
Advanced Worklist Commands<br />
Installing a fixed device<br />
Fixed devices are devices which are always displayed in EVOSim at the same<br />
worktable position. The position is not dependent on the worktable layout in<br />
<strong>Freedom</strong> <strong>EVOware</strong>.<br />
1 Export the drawing from your CAD program in VRML format.<br />
2 Copy the VMRL file to the \layout\vrml sub-directory of your EVOSim<br />
installation (e.g. ..\<strong>EVOware</strong>\simulation\layout\vrml). The file extension must<br />
be wrl.<br />
3 Edit the file ExternalDevices.tab in the \layout sub-directory of your EVOSim<br />
installation to add a new section for the new device with the following syntax:<br />
Design {<br />
Header {<br />
Name<br />
}<br />
VRML {<br />
Name<br />
}<br />
}<br />
; Devices<br />
; PW384<br />
File<br />
; PowerWasher384.wrl<br />
Scale ; 0.5<br />
Position ; 8000,-5000,3000<br />
Rotation ; 0,0,2700<br />
VRMLOrigin ; Corner<br />
whereby Scale is a scaling factor for the size of the object in EVOSim, Position is<br />
an offset for the x, y and z axis (in 0.1 mm) and Rotation specifies a rotation of the<br />
x, y and z axis (in 0.1° steps). You should normally only specify rotation for the z<br />
axis. On each line, everything following “//” is an optional comment.<br />
4 Restart EVOSim.<br />
Note: Your changes will be lost if you update or re-install EVOSim - keep a<br />
backup of your work. Be aware that the structure and syntax of the .tab and .ini<br />
files may change in future EVOSim versions.<br />
A.15 Advanced Worklist Commands<br />
This section describes the advanced worklist commands. Advanced worklist<br />
commands are specified in <strong>Freedom</strong> <strong>EVOware</strong> worklists, normally in combination<br />
with the standard worklist commands. See 15.24.2 “Worklist File Format”, 15-<br />
39.<br />
Compared to standard worklist commands, which allow six basic pipetting<br />
operations to be carried out on samples, the advanced worklist commands give<br />
you full control of pipetting actions, including control over arm movements.<br />
In some cases, the name of the advanced worklist command differs from the<br />
corresponding script command. This is indicated in the text alongside the<br />
command.<br />
For an alphabetical list of advanced worklist commands refer to Advanced worklist<br />
commands in the index. In some cases, the names of the commands differ from<br />
the command names in advanced worklists for the Tecan Gemini software. This<br />
A - 118 <strong>Freedom</strong> <strong>EVOware</strong> <strong>Software</strong> <strong>Manual</strong>, 393172, en, V<strong>2.3</strong>
A - Appendix A<br />
Advanced Worklist Commands<br />
applies above all to commands which are implemented in <strong>Freedom</strong> <strong>EVOware</strong> as<br />
device commands.<br />
Each of the advanced script commands is provided with a syntax example. The<br />
examples are also useful when developing software add-ons for the automatic<br />
generation of pipetting scripts.<br />
<strong>Freedom</strong> <strong>EVOware</strong> has extensive facilities for validating pipetting scripts.<br />
However, it is not possible to validate advanced worklists - it is the user’s<br />
responsibility to check for errors. For example, if you specify a loop option in an<br />
advanced worklist command, you must make sure that the loop you specify is also<br />
contained in the advanced worklist. If you specify a liquid class, you must make<br />
sure that the liquid class is available in your <strong>Freedom</strong> <strong>EVOware</strong> installation.<br />
Note: The advanced worklist commands are only intended for research<br />
applications. You must not use them in worklists for general purpose applications.<br />
Note: Some of the commands are not available in <strong>Freedom</strong> <strong>EVOware</strong> Plus. This<br />
is indicated in the text alongside the command.<br />
Note: Advanced Worklist commands are always executed in single pipetting<br />
mode.<br />
A.15.1 Command Syntax and Parameter Types<br />
A worklist file is a text (ASCII) file. Worklist files can contain a mixture of standard<br />
worklist commands and advanced worklist commands. Each of the commands is<br />
specified on a separate line. For information on the syntax of the six standard<br />
worklist commands see 15.24.2 “Worklist File Format”, 15-39.<br />
Advanced worklist commands for script commands have one or more parameters<br />
which are enclosed in round brackets and separated by commas. Each command<br />
is prefixed by “B;” (break command) and terminated with a semicolon.<br />
Advanced worklist commands for device commands have five parameters which<br />
are enclosed in round brackets and separated by commas. Each command is<br />
prefixed by “B;FACTS” and terminated with a semicolon. The first two parameters<br />
are the device name and the command name.<br />
Each sequence of one or more advanced worklist commands must be preceded<br />
by a Wash command (“W;”). The wash operation uses the first wash scheme<br />
which you configured in the Worklist command.<br />
See A.15.2 “Example Worklist with Three Advanced Worklist Commands”, A-<br />
119.<br />
There are four different parameter types:<br />
• Integer - number without a decimal point;<br />
• Floating point number - number with a decimal point;<br />
• Expression - constructed from variables, operators and/or floating point<br />
numbers, enclosed in double quotation marks<br />
• String1, enclosed in double quotation marks.<br />
• String2, not enclosed in quotation marks.<br />
A.15.2 Example Worklist with Three Advanced Worklist Commands<br />
The following example worklist contains three advanced worklist commands. One<br />
of them is a script command (Execute) and two of them are device commands<br />
(Carousel_InitCarousel and Carousel_PresentPlate).<br />
<strong>Freedom</strong> <strong>EVOware</strong> <strong>Software</strong> <strong>Manual</strong>, 393172, en, V<strong>2.3</strong> A - 119
A - Appendix A<br />
Advanced Worklist Commands<br />
The following example pipettes, initializes the carousel, gets a plate, executes an<br />
external application and pipettes again:<br />
A;S1;;Microplate, landscape;1;;10<br />
D;D1;;Microplate, landscape;1;;10<br />
W;<br />
B;FACTS("Carousel","Carousel_InitCarousel","","0","");<br />
B;FACTS("Carousel","Carousel_PresentPlate","2,5","1","96_Well_Plate");<br />
B;Execute("c:\notepad.exe",2,"");<br />
A;S1;;Microplate, landscape;2;;10<br />
D;D1;;Microplate, landscape;2;;10<br />
W;<br />
A.15.3 Well Selection<br />
Many of the advanced worklist commands have a parameter called wellSelection.<br />
wellSelection is a string which specifies the wells (tips) which should be used for<br />
the command.<br />
Characters 1 and 2 of the string specify the number of wells in the x-direction in<br />
hexadecimal. Characters 3 and 4 of the the string specify the number of wells in<br />
the y-direction in hexadecimal. For example, 12 x 8 (96 wells) = 0C08.<br />
All following characters are used for the well selection, whereby each character<br />
specifies the well selection for a group of 7 adjacent wells using a specially<br />
adapted bitmap system. Only 7 bits are used per byte instead of 8 to avoid screen<br />
and printer font compatibility problems. Using the 7-bit system, 14 characters are<br />
needed to represent the well selection for 96 wells (plus characters 1 to 4, total of<br />
18 characters) and 55 characters are needed to represent the well selection for<br />
384 wells (total of 59 characters).<br />
In addition, since most ASCII characters below ASCII 32 are non-printable (nonhuman-readable),<br />
decimal 48 (ASCII value for “0”) is added to the value of the<br />
bitmap to make it easier to read, send by eMail etc. The following shows some<br />
examples for character 5 of the well selection string for a 96-well microplate in<br />
landcape orientation.<br />
Character 5 is responsible for the first group of 7 wells, A1 to G1 (wells are<br />
counted from rear to front and then from left to right):<br />
A1 = bin. 0000001 = dec. 1. Add 48, result = 49 (ASCII value for “1”)<br />
B1 = bin. 0000010 = dec. 2. Add 48, result = 50 (ASCII value for “2”)<br />
C1 = bin. 0000100 = dec. 4. Add 48, result = 52 (ASCII value for “4”)<br />
D1 = bin. 0001000 = dec. 8. Add 48, result = 56 (ASCII value for “8”)<br />
E1 = bin. 0010000 = dec. 16. Add 48, result = 64 (ASCII value for “@”)<br />
F1 = bin. 0100000 = dec. 32. Add 48, result = 80 (ASCII value for “P”)<br />
G1 = bin. 1000000 = dec. 64. Add 48, result = 112 (ASCII value for “p”)<br />
A1 + E1 = bin. 0010001 = dec. 17. Add 48, result = 65 (ASCII value for “A”)<br />
etc.<br />
No wells selected = bin. 0000000 = dec. 0. Add 48, result = 48 (ASCII for “0”)<br />
Note: H1 (and A2 to F2) are coded in character 6 of the well selection string, not<br />
character 5.<br />
The above examples result in following well selection strings:<br />
A1 = “0C0810000000000000<br />
B1 = “0C0820000000000000”<br />
A - 120 <strong>Freedom</strong> <strong>EVOware</strong> <strong>Software</strong> <strong>Manual</strong>, 393172, en, V<strong>2.3</strong>
A - Appendix A<br />
Advanced Worklist Commands<br />
C1 = “0C0840000000000000”<br />
D1 = “0C0880000000000000”<br />
E1 = “0C08@0000000000000”<br />
F1 = “0C08P0000000000000”<br />
G1 = “0C08p0000000000000”<br />
A1 + E1 = “0C08A0000000000000”<br />
no wells selected = “0C0800000000000000”<br />
Note: H1 = “0C0801000000000000”<br />
<strong>Freedom</strong> <strong>EVOware</strong> can be used to calculate a well selection string for you<br />
automatically as follows:<br />
Create a simple script which only contains an Aspirate command. Select the wells<br />
you want to use and save the script. Script files are saved with the extension .esc<br />
in the ..\<strong>EVOware</strong>\Database\Scripts directory. Open the resulting .esc file with a<br />
plain text editor and copy the well string from the parameters of the Aspirate<br />
command (see A.15.4.1 “Aspirate command (Worklist: Aspirate)”, A-123).<br />
<strong>Freedom</strong> <strong>EVOware</strong> <strong>Software</strong> <strong>Manual</strong>, 393172, en, V<strong>2.3</strong> A - 121
A - Appendix A<br />
Advanced Worklist Commands<br />
The following example C++ function can be used to generate the well selection<br />
string automatically (the example assumes that the wells only have one<br />
compartment, see Well compartments in the index):<br />
CString RPG_RackZoom_Button::getSelection()<br />
{<br />
if (m_rack == NULL)<br />
// no rack selected<br />
return "";<br />
// this function stores 7 bit per character in the selection<br />
string<br />
// the first 2 characters are the number of wells in x-<br />
direction<br />
// the characters 3 and 4 are the number of wells in y-<br />
direction<br />
// well are computed in the order back to front, left to right<br />
CString selString;<br />
// troughs<br />
int yWells = m_rack->yWells;<br />
if (m_rack->tipAccess > 1)<br />
yWells = m_rack->tipAccess;<br />
// system liquids<br />
if (m_rack->systemType == ST_System)<br />
yWells = theApp.m_roboInfo.tips[0];<br />
if (m_rack == NULL)<br />
return "0000";<br />
selString.Format("%02X%02X",m_rack->xWells,yWells);<br />
unsigned int bitCounter = 0;<br />
unsigned int bitMask = 0;<br />
for (int x=0;xxWells;++x)<br />
for (int y=0;y 0)<br />
selString += (char)('0' + bitMask);<br />
}<br />
return selString;<br />
A - 122 <strong>Freedom</strong> <strong>EVOware</strong> <strong>Software</strong> <strong>Manual</strong>, 393172, en, V<strong>2.3</strong>
A - Appendix A<br />
Advanced Worklist Commands<br />
A.15.4 Advanced Worklist Commands for Script Commands<br />
The following describes the advanced worklist commands which correspond to<br />
<strong>Freedom</strong> <strong>EVOware</strong> script commands.<br />
All advanced worklist commands which are equivalent to <strong>Freedom</strong> <strong>EVOware</strong><br />
script commands are described (if the script command is not listed in this section,<br />
a corresponding advanced worklist command is not available).<br />
A.15.4.1 Aspirate command (Worklist: Aspirate)<br />
The advanced worklist command which corresponds to the Aspirate script<br />
command is “Aspirate”.<br />
The parameters of the advanced worklist command are shown in the following<br />
table. For more information on this command see 15.1 “Aspirate Command”,<br />
15-1.<br />
Tab. A-15 Advanced worklist command Aspirate, parameters<br />
Par. Name Type Range Explanation<br />
1 tipMask integer 0 - 255 selected tips, bit-coded<br />
(tip1 = 1, tip8 = 128)<br />
2 liquidClass string1 liquid class name<br />
3 -<br />
14<br />
volume expr[12] 12 expressions which specify the volume<br />
for each tip. Specify 0 for tips which<br />
are not used or not fitted.<br />
15 grid integer 1 - 67 labware location - carrier grid position<br />
16 site integer 0 - 127 labware location - (site on carrier - 1)<br />
17 spacing integer 1 - ... tip spacing<br />
18 wellSelection string1 bit-coded well selection (see<br />
A.15.3 “Well Selection”, A-120)<br />
19 noOfLoopOptions integer 0 - 7 number of loop options required. If nonzero,<br />
parameters 20 - 22 are included n<br />
times, where n = noOfLoopOptions. a)<br />
20 loopName string1 loop name<br />
21 action integer 0 - 3 loop action:<br />
0 = vary the column<br />
1 = vary the row<br />
2 = vary the well<br />
3 = vary the rack<br />
22 difference integer number (“vary by”) which is used for the<br />
loop action (parameter 10)<br />
23 arm integer 0 - 1 number of the LiHa performing the<br />
action:<br />
0 = LiHa 1<br />
1 = LiHa 2<br />
a) See A.15.4.11, A-131 for an example which uses loop options.<br />
<strong>Freedom</strong> <strong>EVOware</strong> <strong>Software</strong> <strong>Manual</strong>, 393172, en, V<strong>2.3</strong> A - 123
A - Appendix A<br />
Advanced Worklist Commands<br />
Example:<br />
Aspirate(15,"Water","5.5","5.5","4.5","4.5",”0”,”0”,”0”,”0”,”0”,”0”,”0”,”0”,15,2,1,"0C0<br />
80N000000000000",0,0);<br />
A.15.4.2 Dispense (Worklist: Dispense)<br />
The advanced worklist command which corresponds to the Dispense script<br />
command is “Dispense”.<br />
The parameters of the advanced worklist command are shown in the following<br />
table. For more information on this command see 15.2 “Dispense Command”,<br />
15-3.<br />
Tab. A-16 Advanced worklist command Dispense, parameters<br />
Par. Name Type Range Explanation<br />
1 tipMask integer 0 - 255 selected tips, bit-coded<br />
(tip1 = 1, tip8 = 128)<br />
2 liquidClass string1 liquid class name<br />
3 -<br />
14<br />
volume expr[12] 12 expressions which specify the volume<br />
for each tip. Specify 0 for tips which<br />
are not used or not fitted.<br />
15 grid integer 1 - 67 labware location - carrier grid position<br />
16 site integer 0 - 127 labware location - (site on carrier - 1)<br />
17 spacing integer 1 - ... tip spacing<br />
18 wellSelection string1 bit-coded well selection (see<br />
A.15.3 “Well Selection”, A-120)<br />
19 noOfLoopOptions integer 0 - 7 number of loop options required. If nonzero,<br />
parameters 20 - 22 are included n<br />
times, where n = noOfLoopOptions. a)<br />
20 loopName string1 loop name<br />
21 action integer 0 - 3 loop action:<br />
0 = vary the column<br />
1 = vary the row<br />
2 = vary the well<br />
3 = vary the rack<br />
22 difference integer number (“vary by”) which is used for the<br />
loop action (parameter 10)<br />
23 arm integer 0 - 1 number of the LiHa performing the<br />
action:<br />
0 = LiHa 1<br />
1 = LiHa 2<br />
a) See A.15.4.11, A-131 for an example which uses loop options.<br />
Example:<br />
Dispense(255,"Water","5.5","5.5","4.5","4.5",”0”,”0”,”0”,”0”,”0”,”0”,”0”,”0”,15,2,1,"0<br />
C08000000p¯000000",0,0);<br />
A - 124 <strong>Freedom</strong> <strong>EVOware</strong> <strong>Software</strong> <strong>Manual</strong>, 393172, en, V<strong>2.3</strong>
A - Appendix A<br />
Advanced Worklist Commands<br />
A.15.4.3 Mix (Worklist: Mix)<br />
The advanced worklist command which corresponds to the Mix script command is<br />
“Mix”.<br />
The parameters of the advanced worklist command are shown in the following<br />
table. For more information on this command see 15.3 “Mix Command”, 15-5.<br />
Tab. A-17 Advanced worklist command Mix, parameters<br />
Par. Name Type Range Explanation<br />
1 tipMask integer 0 - 255 selected tips, bit-coded<br />
(tip1 = 1, tip8 = 128)<br />
2 liquidClass string1 liquid class name<br />
3 -<br />
14<br />
volume expr[12] 12 expressions which specify the volume<br />
for each tip. Specify 0 for tips which<br />
are not used or not fitted.<br />
15 grid integer 1 - 67 labware location - carrier grid position<br />
16 site integer 0 - 127 labware location - (site on carrier - 1)<br />
17 spacing integer 1 - ... tip spacing<br />
18 wellSelection string1 bit-coded well selection (see<br />
A.15.3 “Well Selection”, A-120)<br />
19 cycles integer 0 .. 100 number of mixing cycles<br />
20 noOfLoopOptions integer 0 - 7 number of loop options required. If nonzero,<br />
parameters 21 - 23 are included n<br />
times, where n = noOfLoopOptions. a)<br />
21 loopName string1 loop name<br />
22 action integer 0 - 3 loop action:<br />
0 = vary the column<br />
1 = vary the row<br />
2 = vary the well<br />
3 = vary the rack<br />
23 difference integer number (“vary by”) which is used for the<br />
loop action (parameter 11)<br />
24 arm integer 0 - 1 number of the LiHa performing the<br />
action:<br />
0 = LiHa 1<br />
1 = LiHa 2<br />
a) See A.15.4.11, A-131 for an example which uses loop options.<br />
Example:<br />
Mix(15,"Water","5.5","5.5","4.5","4.5",”0”,”0”,”0”,”0”,”0”,”0”,”0”,”0”,15,2,1,"0C08000<br />
0030000000",1,0,0);<br />
<strong>Freedom</strong> <strong>EVOware</strong> <strong>Software</strong> <strong>Manual</strong>, 393172, en, V<strong>2.3</strong> A - 125
A - Appendix A<br />
Advanced Worklist Commands<br />
A.15.4.4 Wash Tips (Worklist: Wash)<br />
The advanced worklist command which corresponds to the Wash Tips script<br />
command is “Wash”.<br />
The parameters of the advanced worklist command are shown in the following<br />
table. For more information on this command see 15.4 “Wash Tips Command”,<br />
15-8.<br />
Tab. A-18 Advanced worklist command Wash, parameters<br />
Par. Name Type Range Explanation<br />
1 tipMask integer 0 - 255 selected tips, bit-coded<br />
(tip1 = 1, tip8 = 128)<br />
2 wasteGrid integer 1 - 67 waste location - grid position<br />
3 wasteSite integer 0 - 127 waste location - site number<br />
4 cleanerGrid integer 1 - 67 cleaner location - grid position<br />
5 cleanerSite integer 0 - 127 cleaner location - site number<br />
6 wasteVol expression 0 - 100 volume in waste in ml<br />
7 wasteDelay integer 0 - 1000 delay before closing valves in waste in<br />
ms<br />
8 cleanerVol expression 0 - 100 volume in cleaner in ml<br />
9 cleanerDelay integer 0 - 1000 delay before closing valves in cleaner in<br />
ms<br />
10 Airgap floating point 0 - 100 volume of airgap in µl which is aspirated<br />
after washing the tips (system trailing<br />
airgap)<br />
11 airgapSpeed integer 1 - 1000 speed of airgap aspiration in µl/s<br />
12 retractSpeed integer 1 - 100 retract speed in mm/s<br />
13 FastWash integer 0 - 1 1 = use fast-wash-module<br />
14 lowVolume integer 0 - 1 1 = use pinch valves<br />
15 atFrequency integer 50 - 1500 frequency for Active Tips in Hz. Note<br />
Active Tips are no longer supported by<br />
<strong>Freedom</strong> <strong>EVOware</strong>; specify 0 in this<br />
field.<br />
16 arm integer 0 - 1 number of the LiHa performing the<br />
action:<br />
0 = LiHa 1<br />
1 = LiHa 2<br />
Example:<br />
Wash(255,2,1,2,2,"2.0",500,"1.0",500,10,70,30,0,0,1000,0);<br />
A - 126 <strong>Freedom</strong> <strong>EVOware</strong> <strong>Software</strong> <strong>Manual</strong>, 393172, en, V<strong>2.3</strong>
A - Appendix A<br />
Advanced Worklist Commands<br />
A.15.4.5 Get DITIs (Worklist: GetDITI)<br />
The advanced worklist command which corresponds to the Get DITIs script<br />
command is “GetDITI”.<br />
The parameters of the advanced worklist command are shown in the following<br />
table. For more information on this command see 15.7 “Get DITIs Command”,<br />
15-13.<br />
Tab. A-19 Advanced worklist command GetDITI, parameters<br />
Par. Name Type Range Explanation<br />
1 tipMask integer 1 - 255 selected tips, bit-coded<br />
(tip1 = 1, tip8 = 128)<br />
2 type integer 0 - 3 DITI index (see 9.4.5 “Labware Types<br />
and DITI Types”, 9-32, DITI Index).<br />
3 options integer 0 - 1 bit-coded options:<br />
1 = if diti not fetched try 3 times then go<br />
to next position<br />
4 arm integer 0 - 1 number of the LiHa performing the<br />
action:<br />
0 = LiHa 1<br />
1 = LiHa 2<br />
Example:<br />
GetDITI(240,0,0,0);<br />
A.15.4.6 Drop DITIs command (Worklist: DropDITI)<br />
The advanced worklist command which corresponds to the Drop DITIs script<br />
command is “DropDITI”.<br />
The parameters of the advanced worklist command are shown in the following<br />
table. For more information on this command see 15.8 “Drop DITIs Command”,<br />
15-14.<br />
Tab. A-20 Advanced worklist command DropDITI, parameters<br />
Par. Name Type Range Explanation<br />
1 tipMask integer 0 - 255 selected tips, bit-coded<br />
(tip1 = 1, tip8 = 128)<br />
2 grid integer 1 - 67 DITI waste location - grid position<br />
3 site integer 0 - 127 DITI waste location - (site on carrier - 1)<br />
4 airgap floating point 0 - 100 volume of airgap in µl which is aspirated<br />
after dropping the DITIs<br />
5 airgap speed integer 1 - 1000 speed of airgap aspiration in µl/s<br />
6 arm integer 0 - 1 number of the LiHa performing the<br />
action:<br />
0 = LiHa 1<br />
1 = LiHa 2<br />
<strong>Freedom</strong> <strong>EVOware</strong> <strong>Software</strong> <strong>Manual</strong>, 393172, en, V<strong>2.3</strong> A - 127
A - Appendix A<br />
Advanced Worklist Commands<br />
Example:<br />
DropDITI(240,4,2,10,70,0);<br />
A.15.4.7 Set Diti Position (Worklist: Set_DITI_Counter)<br />
The advanced worklist command which corresponds to the Set Diti Position script<br />
command is “Set_DITI_Counter”.<br />
The parameters of the advanced worklist command are shown in the following<br />
table. For more information on this command see 15.9 “Set DITI Position<br />
Command”, 15-15.<br />
Tab. A-21 Advanced worklist command Set_DITI_Counter, parameters<br />
Par. Name Type Range Explanation<br />
1 type integer 0 - 3 DITI index (see 9.4.5 “Labware Types<br />
and DITI Types”, 9-32, DITI Index)<br />
2 grid string1 DITI rack location - grid position<br />
3 site string1 DITI rack location - (site on carrier - 1)<br />
4 posInRack string1 position of next unused DITI in labware<br />
Example:<br />
Set_DITI_Counter(0,"4","1","12");<br />
A.15.4.8 Pick Up DITIs (Worklist: Pick Up_DITI)<br />
The advanced worklist command which corresponds to the Pick Up DITIs script<br />
command is “Pick Up_DITIs”.<br />
The parameters of the advanced worklist command are shown in the following<br />
table. For more information on this command see 15.10 “Pick Up DITIs<br />
Command”, 15-16.<br />
Tab. A-22 Advanced worklist command Pick Up_DITI, parameters<br />
Par. Name Type Range Explanation<br />
1 tipMask integer 0 - 255 selected tips, bit-coded<br />
(tip1 = 1, tip8 = 128)<br />
2 grid integer 1 - 67 DITI rack location - grid position<br />
3 site integer 0 - 127 DITI rack location - (site on carrier - 1)<br />
4 wellSelection string1 bit-coded well selection (see<br />
A.15.3 “Well Selection”, A-120)<br />
5 noOfLoopOptions integer 0 - 7 number of loop options required. If nonzero,<br />
parameters 6 - 8 are included n<br />
times, where n = noOfLoopOptions. a)<br />
6 loopName string1 loop name<br />
A - 128 <strong>Freedom</strong> <strong>EVOware</strong> <strong>Software</strong> <strong>Manual</strong>, 393172, en, V<strong>2.3</strong>
A - Appendix A<br />
Advanced Worklist Commands<br />
Tab. A-22 Advanced worklist command Pick Up_DITI, parameters (cont.)<br />
Par. Name Type Range Explanation<br />
7 action integer 0 - 3 loop action:<br />
0 = vary the column<br />
1 = vary the row<br />
2 = vary the well<br />
3 = vary the rack<br />
8 difference integer number (“vary by”) which is used for the<br />
loop action (parameter 7)<br />
9 type integer 0 - 3 DITI index (see 9.4.5 “Labware Types<br />
and DITI Types”, 9-32, DITI Index)<br />
10 arm integer 0 - 1 number of the LiHa performing the<br />
action:<br />
0 = LiHa 1<br />
1 = LiHa 2<br />
a) See A.15.4.11, A-131 for an example which uses loop options.<br />
Example:<br />
PickUp_DITIs(240,4,0,"0C08 1000000000000",0,0,0);<br />
A.15.4.9 Set DITIs Back (Worklist: Set_DITIs_Back)<br />
The advanced worklist command which corresponds to the Set DITIs Back script<br />
command is “Set_DITIs_Back”.<br />
The parameters of the advanced worklist command are shown in the following<br />
table. For more information on this command see 15.11 “Set DITIs Back<br />
Command”, 15-18.<br />
Tab. A-23 Advanced worklist command Set_DITIs_Back, parameters<br />
Par. Name Type Range Explanation<br />
1 tipMask integer 0 - 255 selected tips, bit-coded<br />
(tip1 = 1, tip8 = 128)<br />
2 grid integer 1 - 67 DITI rack location - grid position<br />
3 site integer 0 - 127 DITI rack location - (site on carrier - 1)<br />
4 wellSelection string1 bit-coded well selection (see<br />
A.15.3 “Well Selection”, A-120)<br />
5 noOfLoopOptions integer 0 - 7 number of loop options required. If nonzero,<br />
parameters 6 - 8 are included n<br />
times, where n = noOfLoopOptions. a)<br />
<strong>Freedom</strong> <strong>EVOware</strong> <strong>Software</strong> <strong>Manual</strong>, 393172, en, V<strong>2.3</strong> A - 129
A - Appendix A<br />
Advanced Worklist Commands<br />
Tab. A-23 Advanced worklist command Set_DITIs_Back, parameters (cont.)<br />
Par. Name Type Range Explanation<br />
6 loopName string1 loop name<br />
7 action integer 0 - 3 loop action:<br />
0 = vary the column<br />
1 = vary the row<br />
2 = vary the well<br />
3 = vary the rack<br />
8 difference integer number (“vary by”) which is used for the<br />
loop action (parameter 7)<br />
9 arm integer 0 - 1 number of the LiHa performing the<br />
action:<br />
0 = LiHa 1<br />
1 = LiHa 2<br />
a) See A.15.4.11, A-131 for an example which uses loop options.<br />
Example:<br />
Set_DITIs_Back(240,4,0,"0C0800l00000000000",0,0);<br />
A.15.4.10 Pickup ZipTip (Worklist: PickUp_ZipTip)<br />
The advanced worklist command which corresponds to the PickUp ZipTip script<br />
command is “PickUp_ZipTip”.<br />
The parameters of the advanced worklist command are shown in the following<br />
table. For more information on this command see 15.12 “Pickup ZipTip<br />
Command”, 15-19.<br />
Tab. A-24 Advanced worklist command PickUp_ZipTip, parameters<br />
Par. Name Type Range Explanation<br />
1 tipMask integer 0 - 255 selected tips, bit-coded<br />
(tip1 = 1, tip8 = 128)<br />
2 grid integer 1 - 67 DITI rack location - grid position<br />
3 site integer 0 - 127 DITI rack location - (site on carrier - 1)<br />
4 wellSelection string1 bit-coded well selection (see<br />
A.15.3 “Well Selection”, A-120)<br />
5 noOfLoopOptions integer 0 - 7 number of loop options required. If nonzero,<br />
parameters 6 - 8 are included n<br />
times, where n = noOfLoopOptions. a)<br />
6 loopName string1 loop name<br />
7 action integer 0 - 3 loop action:<br />
0 = vary the column<br />
1 = vary the row<br />
2 = vary the well<br />
3 = vary the rack<br />
A - 130 <strong>Freedom</strong> <strong>EVOware</strong> <strong>Software</strong> <strong>Manual</strong>, 393172, en, V<strong>2.3</strong>
A - Appendix A<br />
Advanced Worklist Commands<br />
Tab. A-24 Advanced worklist command PickUp_ZipTip, parameters (cont.)<br />
Par. Name Type Range Explanation<br />
8 difference integer number (“vary by”) which is used for the<br />
loop action (parameter 7)<br />
9 type integer 0 - 3 DITI index (see 9.4.5 “Labware Types<br />
and DITI Types”, 9-32, DITI Index).<br />
10 airgap floating point 0 - 100 volume of airgap in µl which is aspirated<br />
after dropping the DITI<br />
11 speed floating point 10 - 100 Specifies the speed of airgap aspiration<br />
in µl/s<br />
12 arm integer 0 - 1 number of the LiHa performing the<br />
action:<br />
0 = LiHa 1<br />
1 = LiHa 2<br />
a) See A.15.4.11, A-131 for an example which uses loop options.<br />
Example:<br />
PickUp_ZipTip(240,4,0,"0C080030000000000",0,4,0.000000,70.000000,0);<br />
A.15.4.11 Detect Liquid (Worklist: Detect_Liquid)<br />
The advanced worklist command which corresponds to the Detect Liquid script<br />
command is “Detect_Liquid”.<br />
The parameters of the advanced worklist command are shown in the following<br />
table. For more information on this command see 15.13 “Detect Liquid<br />
Command”, 15-20.<br />
Tab. A-25 Advanced worklist command Detect_Liquid, parameters<br />
Par. Name Type Range Explanation<br />
1 tipMask integer 0 - 255 selected tips, bit-coded<br />
(tip1 = 1, tip8 = 128)<br />
2 liquidClass string1 liquid class name<br />
3 grid integer 1 - 67 labware location - carrier grid position<br />
4 site integer 0 - 127 labware location - (site on carrier - 1)<br />
5 spacing integer 1 - ... tip spacing<br />
6 wellSelection string1 bit-coded well selection (see<br />
A.15.3 “Well Selection”, A-120)<br />
7 noOfLoopOptions integer 0 - 7 number of loop options required. If nonzero,<br />
parameters 8 - 10 are included n<br />
times, where n = noOfLoopOptions.<br />
<strong>Freedom</strong> <strong>EVOware</strong> <strong>Software</strong> <strong>Manual</strong>, 393172, en, V<strong>2.3</strong> A - 131
A - Appendix A<br />
Advanced Worklist Commands<br />
Tab. A-25 Advanced worklist command Detect_Liquid, parameters (cont.)<br />
Par. Name Type Range Explanation<br />
8 loopName string1 loop name<br />
9 action integer 0 - 3 loop action:<br />
0 = vary the column<br />
1 = vary the row<br />
2 = vary the well<br />
3 = vary the rack<br />
10 difference integer number (“vary by”) which is used for the<br />
loop action (parameter 9)<br />
11 arm integer 0 - 1 number of the LiHa performing the<br />
action:<br />
0 = LiHa 1<br />
1 = LiHa 2<br />
Example with no loop options:<br />
Detect_Liquid(15,"Water",15,2,1,"0C08000¨0000000000",0,0);<br />
Example with two loop options:<br />
Detect_Liquid(1,"Water",15,0,1,"0C0810000000000000",2,"columns",0,1,"oddrows",1,2,0);<br />
A.15.4.12 Activate PMP (Worklist: Activate_PMP)<br />
The advanced worklist command which corresponds to the Activate PMP script<br />
command is “Activate_PMP”.<br />
The parameters of the advanced worklist command are shown in the following<br />
table. For more information on this command see 15.18 “Activate PMP<br />
Command”, 15-29.<br />
Tab. A-26 Advanced worklist command Detect_Liquid, parameters<br />
Par. Name Type Range Explanation<br />
1 tipMask integer 0 - 255 selected tips, bit-coded<br />
(tip1 = 1, tip8 = 128)<br />
Example:<br />
Activate_PMP(192);<br />
A.15.4.13 Deactivate PMP (Worklist: Deactivate_PMP)<br />
The advanced worklist command which corresponds to the Deactivate PMP script<br />
command is “Deactivate_PMP”.<br />
The parameters of the advanced worklist command are shown in the following<br />
table. For more information on this command see 15.19 “Deactivate PMP<br />
Command”, 15-30.<br />
A - 132 <strong>Freedom</strong> <strong>EVOware</strong> <strong>Software</strong> <strong>Manual</strong>, 393172, en, V<strong>2.3</strong>
A - Appendix A<br />
Advanced Worklist Commands<br />
Tab. A-27 Advanced worklist command Detect_Liquid, parameters<br />
Par. Name Type Range Explanation<br />
1 tipMask integer 0 - 255 selected tips, bit-coded<br />
(tip1 = 1, tip8 = 128)<br />
Example:<br />
Deactivate_PMP(192);<br />
A.15.4.14 Move LiHa (Worklist: MoveLiha)<br />
The advanced worklist command which corresponds to the Move Liha script<br />
command is “MoveLiha”.<br />
The parameters of the advanced worklist command are shown in the following<br />
table. For more information on this command see 15.21 “Move LiHa Command”,<br />
15-33.<br />
Tab. A-28 Advanced worklist command MoveLiha, parameters<br />
Par. Name Type Range Explanation<br />
1 tipMask integer 0 - 255 selected tips, bit-coded<br />
(tip1 = 1, tip8 = 128)<br />
2 grid integer 1 - 67 labware location - carrier grid position<br />
3 site integer 0 - 127 labware location - (site on carrier - 1)<br />
4 spacing integer 1 - ... tip spacing<br />
5 wellSelection string1 bit-coded well selection (see<br />
A.15.3 “Well Selection”, A-120)<br />
6 zMove integer 0 - 4 type of movement:<br />
0 = positioning with global z-travel<br />
1 = positioning with local z-travel<br />
2 = x-move<br />
3 = y-move<br />
4 = z-move<br />
7 zTarget integer 0 - 4 z-position after move:<br />
0 = z-travel<br />
1 = z-dispense<br />
2 = z-start<br />
3 = z-max<br />
4 = global z-travel<br />
8 offset floating point -1000 -<br />
1000<br />
offset in mm added to z-position (parameter<br />
7)<br />
9 speed floating point 0.1 - 400 move speed in mm/s if zMove is 2, 3 or 4<br />
10 noOfLoopOptions integer 0 - 7 number of loop options required. If nonzero,<br />
parameters 11 - 13 are included n<br />
times, where n = noOfLoopOptions. a)<br />
<strong>Freedom</strong> <strong>EVOware</strong> <strong>Software</strong> <strong>Manual</strong>, 393172, en, V<strong>2.3</strong> A - 133
A - Appendix A<br />
Advanced Worklist Commands<br />
Tab. A-28 Advanced worklist command MoveLiha, parameters (cont.)<br />
Par. Name Type Range Explanation<br />
11 loopName string1 loop name<br />
12 action integer 0 - 3 loop action:<br />
0 = vary the column<br />
1 = vary the row<br />
2 = vary the well<br />
3 = vary the rack<br />
13 difference integer number (“vary by”) which is used for the<br />
loop action (parameter 12)<br />
14 arm integer 0 - 1 number of the LiHa performing the<br />
action:<br />
0 = LiHa 1<br />
1 = LiHa 2<br />
a) See A.15.4.11, A-131 for an example which uses loop options.<br />
Example:<br />
MoveLiha(1,15,2,1,"0C08@0000000000000",0,0,0,10,0,0);<br />
A.15.4.15 Waste (Worklist: Waste)<br />
The advanced worklist command which corresponds to the Waste script<br />
command is “Waste”. This advanced worklist command can only be used in<br />
<strong>Freedom</strong> <strong>EVOware</strong> <strong>Standard</strong>.<br />
The parameters of the advanced worklist command are shown in the following<br />
table. For more information on this command see 15.22 “Waste Command”, 15-<br />
35.<br />
Tab. A-29 Advanced worklist command Waste, parameters<br />
Par. Name Type Range Explanation<br />
1 action integer 0 - 5 action:<br />
0 = init system<br />
1 = activate waste #1<br />
2 = activate waste #2<br />
3 = activate waste #3<br />
4 = deactivate all wastes<br />
5 = deactivate system<br />
Example:<br />
Waste(1);<br />
A.15.4.16 Active WashStation (Worklist: Active_Wash)<br />
The advanced worklist command which corresponds to the Active Washstation<br />
script command is “Active_Wash”.<br />
The parameters of the advanced worklist command are shown in the following<br />
table. For more information on this command see 15.23 “Active WashStation<br />
Command”, 15-36.<br />
A - 134 <strong>Freedom</strong> <strong>EVOware</strong> <strong>Software</strong> <strong>Manual</strong>, 393172, en, V<strong>2.3</strong>
A - Appendix A<br />
Advanced Worklist Commands<br />
Tab. A-30 Advanced worklist command Active_Wash, parameters<br />
Par. Name Type Range Explanation<br />
1 selection integer 0 - 1 selection:<br />
0 = Wait until termination of command<br />
1 = Continue with script without waiting<br />
for termination<br />
2 time integer 1 - 999 Time of pump activation in seconds<br />
3 arm integer 0 - 1 number of the LiHa performing the<br />
action:<br />
0 = LiHa 1<br />
1 = LiHa 2<br />
Example:<br />
Active_Wash(0,5,0);<br />
A.15.4.17 Export Data (Worklist: Export)<br />
The advanced worklist command which corresponds to the Export Data script<br />
command is “Export”.<br />
The parameters of the advanced worklist command are shown in the following<br />
table. For more information on this command see 15.26 “Export Data Command”,<br />
15-48.<br />
Tab. A-31 Advanced worklist command Export, parameters<br />
Par. Name Type Range Explanation<br />
1 exportAll integer 0 - 1 1 = export all labware items on worktable<br />
2 formats integer 0 - 63 bit-coded output file format:<br />
1 = lotus<br />
2 = dbase<br />
4 = excel<br />
8 = paradox<br />
16 = quattro<br />
32 = text with delimiters<br />
3 delete integer 0 - 1 1 = don't export already exported data<br />
again later<br />
4 compress integer 0 - 1 1 = create only one record per well<br />
<strong>Freedom</strong> <strong>EVOware</strong> <strong>Software</strong> <strong>Manual</strong>, 393172, en, V<strong>2.3</strong> A - 135
A - Appendix A<br />
Advanced Worklist Commands<br />
Tab. A-31 Advanced worklist command Export, parameters (cont.)<br />
Par. Name Type Range Explanation<br />
5 noRacks integer Number of labware items for which data<br />
should be exported. If non-zero, parameters<br />
6 - 7 are included n times, where n<br />
= noRacks.<br />
6 grid integer 1 - 67 Labware location - carrier grid position<br />
7 site integer 0 - 127 Labware location - (site on carrier - 1)<br />
8 significantStep integer 1-99 Significant pipetting step for the Magellan<br />
software if a well is pipetted several<br />
times.<br />
Example:<br />
Export(0,32,0,0,2,10,0,22,3,1);<br />
A.15.4.18 Start Timer (Worklist: StartTimer)<br />
The advanced worklist command which corresponds to the Start Timer script<br />
command is “StartTimer”.<br />
The parameters of the advanced worklist command are shown in the following<br />
table. For more information on this command see 15.34 “Start Timer Command”,<br />
15-95.<br />
Tab. A-32 Advanced worklist command StartTimer, parameters<br />
Par. Name Type Range Explanation<br />
1 timer expression 1 - 100 number of timer to re-start<br />
Example:<br />
StartTimer("2");<br />
A.15.4.19 Wait for Timer (Worklist: WaitTimer)<br />
The advanced worklist command which corresponds to the Wait for Timer script<br />
command is “WaitTimer”.<br />
The parameters of the advanced worklist command are shown in the following<br />
table. For more information on this command see 15.35 “Wait for Timer<br />
Command”, 15-95.<br />
Tab. A-33 Advanced worklist command WaitTimer, parameters<br />
Par. Name Type Range Explanation<br />
1 timer expression 1 - 100 timer number<br />
2 timeSpan expression 0.02 -<br />
86400<br />
duration<br />
Example:<br />
WaitTimer("2","60");<br />
A - 136 <strong>Freedom</strong> <strong>EVOware</strong> <strong>Software</strong> <strong>Manual</strong>, 393172, en, V<strong>2.3</strong>
A - Appendix A<br />
Advanced Worklist Commands<br />
A.15.4.20 Execute Application (Worklist: Execute)<br />
The advanced worklist command which corresponds to the Execute Application<br />
script command is “Execute”.<br />
The parameters of the advanced worklist command are shown in the following<br />
table. For more information on this command see 15.36 “Execute Application<br />
Command”, 15-96.<br />
Tab. A-34 Advanced worklist command Execute, parameters<br />
Par. Name Type Range Explanation<br />
1 application string1 path and name of application to execute<br />
2 options integer 0 - 7 bit-coded options:<br />
1 = release COM port<br />
2 = wait for termination of application<br />
4 = store return value in variable<br />
3 responseVariable string1 name of variable to receive the return<br />
value<br />
4 scope integer 0 - 2 scope of responseVariable (see<br />
6.4.6 “Declare Variables”, 6-12):<br />
0 = Run<br />
1 = Instance<br />
2 = Script<br />
Example:<br />
Execute("c:\tools\notepad.exe",2,"response2",2);<br />
A.15.4.21 Comment (Worklist: Comment)<br />
The advanced worklist command which corresponds to the Comment script<br />
command is “Comment”.<br />
The parameters of the advanced worklist command are shown in the following<br />
table. For more information on this command see 15.37 “Comment Command”,<br />
15-97.<br />
Tab. A-35 Advanced worklist command Comment, parameters<br />
Par. Name Type Range Explanation<br />
1 comment string1 comment string<br />
Example:<br />
Comment("The pipetting starts in the following line");<br />
A.15.4.22 User Prompt (Worklist: UserPrompt)<br />
The advanced worklist command which corresponds to the User Prompt script<br />
command is “UserPrompt”.<br />
The parameters of the advanced worklist command are shown in the following<br />
table. For more information on this command see 15.38 “User Prompt Command”,<br />
15-98.<br />
<strong>Freedom</strong> <strong>EVOware</strong> <strong>Software</strong> <strong>Manual</strong>, 393172, en, V<strong>2.3</strong> A - 137
A - Appendix A<br />
Advanced Worklist Commands<br />
Tab. A-36 Advanced worklist command UserPrompt, parameters<br />
Par. Name Type Range Explanation<br />
1 text string1 message text<br />
2 sound integer 0 - 3 sound options:<br />
0 = no sound<br />
1 = beep once<br />
2 = beep three times<br />
3 = beep every 3 seconds<br />
3 closeTime integer 1 - 9999,<br />
-1<br />
time after which the prompt window is<br />
automatically closed; -1 = never<br />
Example:<br />
UserPrompt("Please refill the trough",3,60);<br />
A.15.4.23 Set Variable (Worklist: Variable)<br />
The advanced worklist command which corresponds to the Set Variable script<br />
command is “Variable”.<br />
The parameters of the advanced worklist command are shown in the following<br />
table. For more information on this command see 15.41 “Set Variable Command”,<br />
15-101.<br />
Tab. A-37 Advanced worklist command Variable, parameters<br />
Par. Name Type Range Explanation<br />
1 name string2 name of variable<br />
2 default expression value assigned to variable or default<br />
value if user query<br />
3 queryFlag integer 0 - 1 0 = no user query<br />
1 = user query<br />
4 queryString string1 text shown in user query<br />
5 checkLimits integer 0 - 1 1 = validate user entry<br />
6 lowerLimit floating point smallest allowed value<br />
7 upperLimit floating point largest allowed value<br />
A - 138 <strong>Freedom</strong> <strong>EVOware</strong> <strong>Software</strong> <strong>Manual</strong>, 393172, en, V<strong>2.3</strong>
A - Appendix A<br />
Advanced Worklist Commands<br />
Tab. A-37 Advanced worklist command Variable, parameters (cont.)<br />
Par. Name Type Range Explanation<br />
8 type integer 0 - 1 type of variable<br />
0 = Numeric<br />
1 = String<br />
9 scope integer 0 - 2 scope of variable (see 6.4.6 “Declare<br />
Variables”, 6-12):<br />
0 = Run<br />
1 = Instance<br />
2 = Script<br />
10 InitMode integer 0 - 2 0 = Fixed value<br />
1 = User query<br />
2 = File import<br />
11 QueryAtStart integer 0 - 1 1 = Prompt for value at start of script<br />
Example:<br />
Variable(volume1,"55",1,"Please specify volume",1,1.000000,80.000000,0,2,1,0);<br />
A.15.4.24 Execute VB Script (Worklist: Execute_VBscript)<br />
The advanced worklist command which corresponds to the Execute VBscript<br />
script command is “Execute_VBscript”.<br />
The parameters of the advanced worklist command are shown in the following<br />
table. For more information on this command see 15.50 “Execute VB Script<br />
Command”, 15-114.<br />
Tab. A-38 Advanced worklist command Execute_VBscript, parameters<br />
Par. Name Type Range Explanation<br />
1 filename string1 Path and filename of the defined VB<br />
script.<br />
2 action integer 0 - 2 0 = script waits for end of the VB script<br />
1 = script continues<br />
2 = script waits for a previously started<br />
VB script<br />
Example:<br />
Execute_VBscript("c:\tools\Example1.vbs",0);<br />
A.15.4.25 Notification (Worklist: Notification)<br />
The advanced worklist command which corresponds to the Notification script<br />
command is “Notification”.<br />
The parameters of the advanced worklist command are shown in the following<br />
table. For more information on this command see 15.51 “Notification Command”,<br />
15-116.<br />
<strong>Freedom</strong> <strong>EVOware</strong> <strong>Software</strong> <strong>Manual</strong>, 393172, en, V<strong>2.3</strong> A - 139
A - Appendix A<br />
Advanced Worklist Commands<br />
Tab. A-39 Advanced worklist command Notification, parameters<br />
Par. Name Type Range Explanation<br />
1 AttachScreen-<br />
ShotFlag<br />
integer 0 - 1 1 = attach screen shot to eMail<br />
2 receiverGroup string1 name of recipient group. Recipient<br />
groups are specified in the Configuration<br />
Tool, see 8.3.<strong>2.3</strong> “Groups Tab”, 8-15.<br />
3 emailSubject string1 email subject<br />
4 emailMessage string1 email message<br />
5 Action integer 0 - 2 action:<br />
0 = send email now<br />
1 = send email on error<br />
2 = stop sending email on error<br />
Example:<br />
Notification(0,"Operators","System liquid","Please refill container",0);<br />
A.15.4.26 Te-MO Aspirate (Worklist: Aspirate-Multipip)<br />
The advanced worklist command which corresponds to the Te-MO Aspirate script<br />
command is “Aspirate-Multipip”. This advanced worklist command can only be<br />
used in <strong>Freedom</strong> <strong>EVOware</strong> <strong>Standard</strong>.<br />
The parameters of the advanced worklist command are shown in the following<br />
table. For more information on this command see 15.56.1 “Te-MO Aspirate<br />
Command”, 15-122.<br />
Tab. A-40 Advanced worklist command Aspirate-Multipip, parameters<br />
Par. Name Type Range Explanation<br />
1 tipMask integer 1 Number of tips on the Te-MO pipetting<br />
head. Only two values are allowed:<br />
255 = 96 tip head<br />
65535 = 384 tip head<br />
2 liquidClass string1 liquid class name<br />
3 volume string1 defines the volume for the tips<br />
4 grid integer 1 - 67 Te-MO location - grid position<br />
5 site integer 0 - 14 labware location - (Te-MO site - 1) (see<br />
Tab. 8-9, 8-104)<br />
6 cycles integer 1 - ... number of mixing cycles (only relevant<br />
for Te-MO Mix command - pad with 1 for<br />
Te-MO Aspirate and Te-MO Dispense)<br />
7 wellSelection string1 bit-coded well selection (see<br />
A.15.3 “Well Selection”, A-120)<br />
A - 140 <strong>Freedom</strong> <strong>EVOware</strong> <strong>Software</strong> <strong>Manual</strong>, 393172, en, V<strong>2.3</strong>
A - Appendix A<br />
Advanced Worklist Commands<br />
Tab. A-40 Advanced worklist command Aspirate-Multipip, parameters (cont.)<br />
Par. Name Type Range Explanation<br />
8 noOfLoopOptions integer 0 - 7 number of loop options required. If nonzero,<br />
parameters 9 - 11 are included n<br />
times, where n = noOfLoopOptions. a)<br />
9 loopName string1 loop name<br />
10 action integer 0 - 3 loop action:<br />
0 = vary the column<br />
1 = vary the row<br />
2 = vary the well<br />
3 = vary the rack<br />
11 difference integer number (“vary by”) which is used for the<br />
loop action (parameter 10)<br />
a) See A.15.4.11, A-131 for an example which uses loop options.<br />
Example:<br />
Aspirate-Multipip(255,"384<br />
DMSO","5",22,3,1,"1810¯¯¯¯¯¯¯¯¯¯¯¯¯¯¯¯¯¯¯¯¯¯¯¯¯¯¯¯¯¯¯¯¯¯¯¯¯¯¯¯¯¯¯¯¯<br />
¯¯¯¯¯¯¯¯¯o",0);<br />
A.15.4.27 Te-MO Dispense (Worklist: Dispense-Multipip)<br />
The advanced worklist command which corresponds to the Te-MO Dispense<br />
script command is “Dispense-Multipip”. This advanced worklist command can<br />
only be used in <strong>Freedom</strong> <strong>EVOware</strong> <strong>Standard</strong>.<br />
The parameters of the advanced worklist command are shown in the following<br />
table. For more information on this command see 15.56.2 “Te-MO Dispense<br />
Command”, 15-124.<br />
Tab. A-41 Advanced worklist command Dispense-Multipip, parameters<br />
Par. Name Type Range Explanation<br />
1 tipMask integer 1 Number of tips on the Te-MO pipetting<br />
head. Only two values are allowed:<br />
255 = 96 tip head<br />
65535 = 384 tip head<br />
2 liquidClass string1 liquid class name<br />
3 volume string1 defines the volume for the tips<br />
4 grid integer 1 - 67 Te-MO location - grid position<br />
5 site integer 0 - 14 labware location - (Te-MO site - 1) (see<br />
Tab. 8-9, 8-104)<br />
6 cycles integer 1 - ... number of mixing cycles (only relevant<br />
for Te-MO Mix command - pad with 1 for<br />
Te-MO Aspirate and Te-MO Dispense)<br />
7 wellSelection string1 bit-coded well selection (see<br />
A.15.3 “Well Selection”, A-120)<br />
<strong>Freedom</strong> <strong>EVOware</strong> <strong>Software</strong> <strong>Manual</strong>, 393172, en, V<strong>2.3</strong> A - 141
A - Appendix A<br />
Advanced Worklist Commands<br />
Tab. A-41 Advanced worklist command Dispense-Multipip, parameters (cont.)<br />
Par. Name Type Range Explanation<br />
8 noOfLoopOptions integer 0 - 7 number of loop options required. If nonzero,<br />
parameters 9 - 11 are included n<br />
times, where n = noOfLoopOptions. a)<br />
9 loopName string1 loop name<br />
10 action integer 0 - 3 loop action:<br />
0 = vary the column<br />
1 = vary the row<br />
2 = vary the well<br />
3 = vary the rack<br />
11 difference integer number (“vary by”) which is used for the<br />
loop action (parameter 10)<br />
a) See A.15.4.11, A-131 for an example which uses loop options.<br />
Example:<br />
Dispense-Multipip(255,"384<br />
DMSO","5",22,3,1,"1810¯¯¯¯¯¯¯¯¯¯¯¯¯¯¯¯¯¯¯¯¯¯¯¯¯¯¯¯¯¯¯¯¯¯¯¯¯¯¯¯¯¯¯¯¯<br />
¯¯¯¯¯¯¯¯¯o",0);<br />
A.15.4.28 Te-MO Mix (Worklist: Mix-Multipip)<br />
The advanced worklist command which corresponds to the Te-MO Mix script<br />
command is “Mix-Multipip”. This advanced worklist command can only be used in<br />
<strong>Freedom</strong> <strong>EVOware</strong> <strong>Standard</strong>.<br />
The parameters of the advanced worklist command are shown in the following<br />
table. For more information on this command see 15.56.3 “Te-MO Mix<br />
Command”, 15-125.<br />
Tab. A-42 Advanced worklist command Mix-Multipip, parameters<br />
Par. Name Type Range Explanation<br />
1 tipMask integer 1 Number of tips on the Te-MO pipetting<br />
head. Only two values are allowed:<br />
255 = 96 tip head<br />
65535 = 384 tip head<br />
2 liquidClass string1 liquid class name<br />
3 volume string1 defines the volume for the tips<br />
4 grid integer 1 - 67 Te-MO location - grid position<br />
5 site integer 0 - 14 labware location - (Te-MO site - 1) (see<br />
Tab. 8-9, 8-104)<br />
6 cycles integer 1 - ... number of mixing cycles<br />
7 wellSelection string1 bit-coded well selection (see<br />
A.15.3 “Well Selection”, A-120)<br />
A - 142 <strong>Freedom</strong> <strong>EVOware</strong> <strong>Software</strong> <strong>Manual</strong>, 393172, en, V<strong>2.3</strong>
A - Appendix A<br />
Advanced Worklist Commands<br />
Tab. A-42 Advanced worklist command Mix-Multipip, parameters (cont.)<br />
Par. Name Type Range Explanation<br />
8 noOfLoopOptions integer 0 - 7 number of loop options required. If nonzero,<br />
parameters 9 - 11 are included n<br />
times, where n = noOfLoopOptions. a)<br />
9 loopName string1 loop name<br />
10 action integer 0 - 3 loop action:<br />
0 = vary the column<br />
1 = vary the row<br />
2 = vary the well<br />
3 = vary the rack<br />
11 difference integer number (“vary by”) which is used for the<br />
loop action (parameter 10)<br />
a) See A.15.4.11, A-131 for an example which uses loop options.<br />
Example:<br />
Mix-Multipip(255,"384<br />
DMSO","5",22,3,4,"1810¯¯¯¯¯¯¯¯¯¯¯¯¯¯¯¯¯¯¯¯¯¯¯¯¯¯¯¯¯¯¯¯¯¯¯¯¯¯¯¯¯¯¯¯¯<br />
¯¯¯¯¯¯¯¯¯o",0);<br />
A.15.4.29 Te-MO Wash (Worklist: Wash-Multipip)<br />
The advanced worklist command which corresponds to the Te-MO Wash script<br />
command is “Wash-Multipip”. This advanced worklist command can only be used<br />
in <strong>Freedom</strong> <strong>EVOware</strong> <strong>Standard</strong>.<br />
The parameters of the advanced worklist command are shown in the following<br />
table. For more information on this command see 15.56.4 “Te-MO Wash<br />
Command”, 15-127.<br />
Tab. A-43 Advanced worklist command Wash-Multipip, parameters<br />
Par. Name Type Range Explanation<br />
1 cleanerSteps integer 1 - 5 number of cleaner steps required.<br />
Parameters 2 - 12 are repeated n times,<br />
where n = (cleanerSteps + 1) a)<br />
2 washGrid integer 1 - 67 Te-MO location - grid position<br />
3 washSite integer 0 - 14 WRC location - (Te-MO site - 1) (see<br />
Tab. 8-9, 8-104)<br />
4 liquidClass string1 Liquid class to use for step<br />
5 Volume string1 Wash liquid volume for cleaner step<br />
(ignored for empty tips step: pad with 0)<br />
6 Soaktime string1 0 - 200 Soak time defined for step<br />
7 Cycles string1 How many aspirate/dispense cycles for<br />
this cleaner step (ignored for empty tips<br />
step: pad with 0)<br />
<strong>Freedom</strong> <strong>EVOware</strong> <strong>Software</strong> <strong>Manual</strong>, 393172, en, V<strong>2.3</strong> A - 143
A - Appendix A<br />
Advanced Worklist Commands<br />
Tab. A-43 Advanced worklist command Wash-Multipip, parameters (cont.)<br />
Par. Name Type Range Explanation<br />
8 Washliquid string1 Wash liquid to use in step (container 1 or<br />
container 2)<br />
9 Flowthrough string1 1 - 100 WRC flow rate for step (%)<br />
10 Change string1 Wash liquid change for cleaner step<br />
(ignored for empty tips step: pad with 0)<br />
11 Preflush string1 0 - 1000 Preflush time for step, seconds<br />
12 Postflush string1 0 - 1000 Postflush time for step, seconds<br />
a) The minimum (cleanerSteps=1) is one Empty Tips step followed by one Cleaner step. This requires two<br />
sets of the parameters 2 - 12.<br />
Example with one Empty Tips step and two Cleaner steps:<br />
Wash-Multipip(2,22,9,"384 DMSO",5,1,1,1,40,0,0,0,22,9,"384<br />
DMSO",5,5,1,1,50,0,5,0,22,9,"384 DMSO",5,1,1,1,50,0,0,0);<br />
A.15.4.30 Te-MO 384 Wash Tip Head (Worklist: Wash-TeMO-384)<br />
The advanced worklist command which corresponds to the Te-MO 384 Wash Tip<br />
Head script command is “Wash_Multipip_384”. This advanced worklist command<br />
can only be used in <strong>Freedom</strong> <strong>EVOware</strong> <strong>Standard</strong>.<br />
The parameters of the advanced worklist command are shown in the following<br />
table. For more information on this command see 15.56.5 “Te-MO 384 Wash Tip<br />
Head Command”, 15-130.<br />
Tab. A-44 Advanced worklist command Wash_Multipip_384, parameters<br />
Par. Name Type Range Explanation<br />
1 flushTime floating point 0.1 - 50 Flush time in wash block<br />
2 flushTimeout floating point 0.1 Always specify 0.1<br />
3 washTime floating point 0.1 - 50 Wash time in wash block<br />
4 washTimeout floating point 30 Always specify 30<br />
5 washStationID integer 0 - grid position and site of the wash bloc,<br />
coded as follows: washStationID = grid *<br />
256 + site<br />
6 quickFlush integer 0 - 1 1 = Use quick flush<br />
7 plungerWash integer 1 = Tip washing with plunger moves<br />
8 washCyles string1 Wash cycles<br />
9 washVolume string1 1 - 100 Wash volume<br />
10 washSpeed string1 Wash speed<br />
12 postflush integer 0 - 1 1 = Flush tips after plunger moves<br />
Example:<br />
A - 144 <strong>Freedom</strong> <strong>EVOware</strong> <strong>Software</strong> <strong>Manual</strong>, 393172, en, V<strong>2.3</strong>
A - Appendix A<br />
Advanced Worklist Commands<br />
Wash-TeMO-384(8,0.1,5,30,5640,0,1,3,20,10,1);<br />
A.15.4.31 Te-MO Get DITIs (Worklist: Multipip_GetDITI)<br />
The advanced worklist command which corresponds to the Te-MO Get DITIs<br />
script command is “Multipip_GetDITI”. This advanced worklist command can only<br />
be used in <strong>Freedom</strong> <strong>EVOware</strong> <strong>Standard</strong>.<br />
The parameters of the advanced worklist command are shown in the following<br />
table. For more information on this command see 15.56.6 “Te-MO Get DITIs<br />
Command”, 15-132.<br />
Tab. A-45 Advanced worklist command Multipip_GetDITI, parameters<br />
Par. Name Type Range Explanation<br />
1 grid integer 1 - 67 Te-MO location - grid position<br />
2 site integer 0 - 14 DITI rack location - (Te-MO site - 1) (see<br />
Tab. 8-9, 8-104)<br />
3 airgap floating point Blowout airgap<br />
Example:<br />
Multipip_GetDITI(22,7,2.000000);<br />
A.15.4.32 Te-MO Drop DITIs (Worklist: Multipip_DropDITI)<br />
The advanced worklist command which corresponds to the Te-MO Drop DITIs<br />
script command is “Multipip_DropDITI”. This advanced worklist command can<br />
only be used in <strong>Freedom</strong> <strong>EVOware</strong> <strong>Standard</strong>.<br />
The parameters of the advanced worklist command are shown in the following<br />
table. For more information on this command see 15.56.7 “Te-MO Drop DITIs<br />
Command”, 15-133.<br />
Tab. A-46 Advanced worklist command Multipip_DropDITI, parameters<br />
Par. Name Type Range Explanation<br />
1 grid integer 1 - 67 Te-MO location - grid position<br />
2 site integer 0 - 14 DITI rack final location - (Te-MO site - 1)<br />
(see Tab. 8-9, 8-104)<br />
3 action integer 0 - 1 action:<br />
0 = back to source<br />
1 = back to a different position<br />
4 discard integer 0 - 1 discard:<br />
0 = Do not discard DITI rack<br />
1 = Discard DITI rack into waste<br />
Example:<br />
Multipip_DropDITI(22,7,1,0);<br />
<strong>Freedom</strong> <strong>EVOware</strong> <strong>Software</strong> <strong>Manual</strong>, 393172, en, V<strong>2.3</strong> A - 145
A - Appendix A<br />
Advanced Worklist Commands<br />
A.15.4.33 Te-MO Get Tipblock (Worklist: Multipip_GetBlock)<br />
The advanced worklist command which corresponds to the Te-MO Get Tipblock<br />
script command is “Multipip_GetBlock”. This advanced worklist command can<br />
only be used in <strong>Freedom</strong> <strong>EVOware</strong> <strong>Standard</strong>.<br />
The parameters of the advanced worklist command are shown in the following<br />
table. For more information on this command see 15.56.8 “Te-MO Get Tip Block<br />
Command”, 15-134.<br />
Tab. A-47 Advanced worklist command Multipip_GetBlock, parameters<br />
Par. Name Type Range Explanation<br />
1 grid integer 1 - 67 Te-MO location - grid position<br />
2 site integer 0 -14 tip block location - (Te-MO site - 1) (see<br />
Tab. 8-9, 8-104)<br />
3 airgap floating point Blowout airgap<br />
Example:<br />
Multipip_GetBlock(22,0,2.000000);<br />
A.15.4.34 Te-MO Drop Tip Block (Worklist: Multipip_DropBlock)<br />
The advanced worklist command which corresponds to the Te-MO Drop Tip Block<br />
script command is “Multipip_DropBlock”. This advanced worklist command can<br />
only be used in <strong>Freedom</strong> <strong>EVOware</strong> <strong>Standard</strong>.<br />
The parameters of the advanced worklist command are shown in the following<br />
table. For more information on this command see 15.56.9 “Te-MO Drop Tip Block<br />
Command”, 15-135.<br />
Tab. A-48 Advanced worklist command Multipip_DropBlock, parameters<br />
Par. Name Type Range Explanation<br />
1 grid integer 1 - 67 Te-MO location - grid position<br />
2 site integer 0 - 14 tip block final location - (Te-MO site - 1)<br />
(see Tab. 8-9, 8-104)<br />
3 action integer 0 - 1 action:<br />
0 = back to source<br />
1 = back to a different position<br />
Example:<br />
Multipip_DropBlock(22,0,1);<br />
A.15.4.35 Te-MO Refill Trough (Worklist: TeMO_Refill)<br />
The advanced worklist command which corresponds to the Te-MO Refill Trough<br />
script command is “TeMO_Refill”. This advanced worklist command can only be<br />
used in <strong>Freedom</strong> <strong>EVOware</strong> <strong>Standard</strong>.<br />
The parameters of the advanced worklist command are shown in the following<br />
table. For more information on this command see 15.56.10 “Te-MO Refill Trough<br />
Command”, 15-135.<br />
A - 146 <strong>Freedom</strong> <strong>EVOware</strong> <strong>Software</strong> <strong>Manual</strong>, 393172, en, V<strong>2.3</strong>
A - Appendix A<br />
Advanced Worklist Commands<br />
Tab. A-49 Advanced worklist command TeMO_Refill, parameters<br />
Par. Name Type Range Explanation<br />
1 channel integer 0 - 3 required refill channel (required liquid<br />
container)<br />
2 lowLevel integer 0 - 100 min. liquid level in trough (%)<br />
3 highLevel integer 0 - 100 max. liquid level in trough (%)<br />
4 grid integer 1 - 14 Te-MO location - grid position<br />
5 site integer 0 - 14 trough location - (Te-MO site - 1) (see<br />
Tab. 8-9, 8-104)<br />
Example:<br />
TeMO_Refill(0,5,95,22,5);<br />
A.15.4.36 Te-MO Relative Movements (Worklist: TeMO_Relative)<br />
The advanced worklist command which corresponds to the Te-MO Relative<br />
Movements script command is “TeMO_Relative”. This advanced worklist<br />
command can only be used in <strong>Freedom</strong> <strong>EVOware</strong> <strong>Standard</strong>.<br />
The parameters of the advanced worklist command are shown in the following<br />
table. For more information on this command see 15.56.11 “Te-MO Relative<br />
Movements Command”, 15-136.<br />
Tab. A-50 Advanced worklist command TeMO_Relative, parameters<br />
Par. Name Type Range Explanation<br />
1 action integer 0 - 2 action:<br />
0 = set row offset<br />
1 = set column offset<br />
2 = switch off offset<br />
2 columnOffset expression 0 - 47 required column offset<br />
3 rowOffset expression 0 - 31 required row offset<br />
Example:<br />
TeMO_Relative(0,"","2");<br />
A.15.4.37 Move RoMa (Worklist: RoMa)<br />
The advanced worklist command which corresponds to the Move RoMa script<br />
command is “RoMa”. This advanced worklist command can only be used in<br />
<strong>Freedom</strong> <strong>EVOware</strong> <strong>Standard</strong>.<br />
The parameters of the advanced worklist command are shown in the following<br />
table. For more information on this command see 15.57 “Move RoMa Command”,<br />
15-140.<br />
<strong>Freedom</strong> <strong>EVOware</strong> <strong>Software</strong> <strong>Manual</strong>, 393172, en, V<strong>2.3</strong> A - 147
A - Appendix A<br />
Advanced Worklist Commands<br />
Tab. A-51 Advanced worklist command RoMa, parameters<br />
Par. Name Type Range Explanation<br />
1 action integer 0 - 3 action:<br />
0 = open gripper<br />
1 = close gripper<br />
2 = move to home position<br />
3 = move relative to current position<br />
2 distance floating point 55 - 140 gripper distance in mm for opening or<br />
closing<br />
3 force integer 0 - 249 force when closing gripper<br />
4 xOffset floating point -400 -<br />
400<br />
5 yOffset floating point -400 -<br />
400<br />
6 zOffset floating point -400 -<br />
400<br />
x-distance for relative move in mm<br />
y-distance for relative move in mm<br />
z-distance for relative move in mm<br />
7 xyzSpeed floating point 0.1 - 400 speed in mm/s<br />
8 xyzMax integer 0 - 1 0 = use xyzSpeed<br />
1 = use maximum speed<br />
9 romaNo integer 0 - 1 number of the RoMa performing the<br />
action:<br />
0 = RoMa 1<br />
1 = RoMa 2<br />
Example:<br />
RoMa(3,80,75,50,20,20,150,0,0);<br />
A.15.4.38 RoMa Vector (Worklist: Vector)<br />
The advanced worklist command which corresponds to the RoMa Vector script<br />
command is “Vector”. This advanced worklist command can only be used in<br />
<strong>Freedom</strong> <strong>EVOware</strong> <strong>Standard</strong>.<br />
The parameters of the advanced worklist command are shown in the following<br />
table. For more information on this command see 15.58 “RoMa Vector<br />
Command”, 15-141.<br />
Tab. A-52 Advanced worklist command Vector, parameters<br />
Par. Name Type Range Explanation<br />
1 vector string1 name of RoMa Vector (as in Configuration)<br />
2 grid expression 1 - 67 labware location - carrier grid position<br />
3 site expression 0 - 127 labware location - (site on carrier - 1)<br />
4 direction integer 0 - 1 0 = from safe to end position<br />
1 = from end to safe position<br />
A - 148 <strong>Freedom</strong> <strong>EVOware</strong> <strong>Software</strong> <strong>Manual</strong>, 393172, en, V<strong>2.3</strong>
A - Appendix A<br />
Advanced Worklist Commands<br />
Tab. A-52 Advanced worklist command Vector, parameters (cont.)<br />
Par. Name Type Range Explanation<br />
5 back integer 0 - 1 1 = and back<br />
6 beginAction integer 0 - 2 gripper action at safe position:<br />
0 = open<br />
1 = close<br />
2 = do not move<br />
7 endAction integer 0 - 2 gripper action at end position:<br />
0 = open<br />
1 = close<br />
2 = do not move<br />
8 speed integer 0 - 1 speed:<br />
0 = maximum speed<br />
1 = slow speed (as defined in RoMa vector)<br />
9 romaNo integer 0 - 1 number of the RoMa performing the<br />
action:<br />
0 = RoMa 1<br />
1 = RoMa 2<br />
Example:<br />
Vector("MP 3Pos_Narrow_1","15","1",0,0,2,2,0,0);<br />
A.15.4.39 Transfer Labware (Worklist: Transfer_Rack)<br />
The advanced worklist command which corresponds to the Transfer Labware<br />
script command is “Transfer_Rack”. This advanced worklist command can only be<br />
used in <strong>Freedom</strong> <strong>EVOware</strong> <strong>Standard</strong>.<br />
The parameters of the advanced worklist command are shown in the following<br />
table. For more information on this command see 15.59 “Transfer Labware<br />
Command”, 15-143.<br />
Tab. A-53 Advanced worklist command Transfer_Rack, parameters<br />
Par. Name Type Range Explanation<br />
1 gridSource expression 1 - 67 labware location - carrier grid position,<br />
source<br />
2 gridDestination expression 0 - 67 labware location - carrier grid position,<br />
destination<br />
3 backHome integer 0 - 1 1 = move back to home when finished<br />
4 lidHandling integer 0 - 1 0 = no lid handling<br />
1= lid handling<br />
5 speed integer 0 - 1 speed:<br />
0 = maximum speed<br />
1 = slow speed (as defined in RoMa vector)<br />
<strong>Freedom</strong> <strong>EVOware</strong> <strong>Software</strong> <strong>Manual</strong>, 393172, en, V<strong>2.3</strong> A - 149
A - Appendix A<br />
Advanced Worklist Commands<br />
Tab. A-53 Advanced worklist command Transfer_Rack, parameters (cont.)<br />
Par. Name Type Range Explanation<br />
6 romaNo integer 0 - 1 number of the RoMa performing the<br />
action:<br />
0 = RoMa 1<br />
1 = RoMa 2<br />
7 cover 0 = cover at source<br />
1 = uncover at destination<br />
8 GridLid expression 1 - 67 lid location - carrier grid position<br />
9 rackType labware type (as in the <strong>Freedom</strong><br />
<strong>EVOware</strong> configuration)<br />
10 vectorName string1 name of RoMa vector to use (as in the<br />
<strong>Freedom</strong> <strong>EVOware</strong> configuration),<br />
choose from one of the following:<br />
Narrow a)<br />
DriveIN_Narrow<br />
Wide<br />
DriveIN_Wide<br />
11 unused string1 pad with 0<br />
12 unused string1 pad with 0<br />
13 carrierName-<br />
Source<br />
carrier name, source<br />
14 carrierNameLid carrier name, lid<br />
15 carrierNameDestination<br />
carrier name, destination<br />
16 siteSource expression 0 - 127 labware location - (site on carrier - 1),<br />
source<br />
17 siteLid expression 0 - 127 lid location - (site on carrier - 1)<br />
18 siteDestination expression 0 - 127 labware location - (site on carrier - 1),<br />
destination<br />
a) In the <strong>Freedom</strong> <strong>EVOware</strong> GUI, Narrow = Move Narrow, DriveIN_Narrow = Approach Narrow etc. See<br />
9.6.1 “Using RoMa Vectors”, 9-58.<br />
Example:<br />
Transfer_Rack("15","15",0,1,0,0,0,"15","96 Well Microplate","Narrow","","","MP<br />
3Pos","MP 3Pos","MP 3Pos","3","2","1");<br />
A.15.4.40 Move PnP (Worklist: PnP)<br />
The advanced worklist command which corresponds to the Move PnP script<br />
command is “PnP”. This advanced worklist command can only be used in<br />
<strong>Freedom</strong> <strong>EVOware</strong> <strong>Standard</strong>.<br />
The parameters of the advanced worklist command are shown in the following<br />
table. For more information on this command see 15.60 “Move PnP Command”,<br />
15-145.<br />
A - 150 <strong>Freedom</strong> <strong>EVOware</strong> <strong>Software</strong> <strong>Manual</strong>, 393172, en, V<strong>2.3</strong>
A - Appendix A<br />
Advanced Worklist Commands<br />
Tab. A-54 Advanced worklist command PnP, parameters<br />
Par. Name Type Range Explanation<br />
1 action integer 0 - 3 action:<br />
0 = open gripper<br />
1 = close gripper<br />
2 = move to home position<br />
3 = move relative to current position<br />
2 distance floating point 70 - 140 gripper distance in mm for opening or<br />
closing<br />
3 force integer 0 - 249 force when closing gripper<br />
4 xOffset floating point -400 -<br />
400<br />
5 yOffset floating point -400 -<br />
400<br />
6 zOffset floating point -400 -<br />
400<br />
x-distance for relative move in mm<br />
y-distance for relative move in mm<br />
z-distance for relative move in mm<br />
7 xyzSpeed floating point 0.1 - 400 speed in mm/s<br />
8 xyzMax integer 0 - 1 0 = use xyzSpeed<br />
1 = use maximum speed<br />
9 pnpNo integer 0 - 1 number of the PnP performing the<br />
action:<br />
0 = PnP 1<br />
1 = PnP 2<br />
Example:<br />
PnP(3,13,75,50,20,20,150,1,0);<br />
A.15.4.41 PnP Vector (Worklist: PnP_Vector)<br />
The advanced worklist command which corresponds to the PnP Vector script<br />
command is “PnP_Vector”. This advanced worklist command can only be used in<br />
<strong>Freedom</strong> <strong>EVOware</strong> <strong>Standard</strong>.<br />
The parameters of the advanced worklist command are shown in the following<br />
table. For more information on this command see 15.61 “PnP Vector Command”,<br />
15-146.<br />
Tab. A-55 Advanced worklist command PnP_Vector, parameters<br />
Par. Name Type Range Explanation<br />
1 vector string1 name of PnP Vector (as in Configuration)<br />
2 grid expression 1 - 67 labware location - carrier grid position<br />
3 site expression 0 - 127 labware location - (site on carrier - 1)<br />
4 position integer 1-96 tube position in tube rack<br />
<strong>Freedom</strong> <strong>EVOware</strong> <strong>Software</strong> <strong>Manual</strong>, 393172, en, V<strong>2.3</strong> A - 151
A - Appendix A<br />
Advanced Worklist Commands<br />
Tab. A-55 Advanced worklist command PnP_Vector, parameters (cont.)<br />
Par. Name Type Range Explanation<br />
5 direction integer 0 - 1 0 = from safe to end position<br />
1 = from end to safe position<br />
6 back integer 0 - 1 1 = and back<br />
7 beginAction integer 0 - 2 gripper action at safe position:<br />
0 = open<br />
1 = close<br />
2 = do not move<br />
8 endAction integer 0 - 2 gripper action at end position:<br />
0 = open<br />
1 = close<br />
2 = do not move<br />
9 speed integer 0 - 1 speed:<br />
0 = maximum speed<br />
1 = slow speed (as defined for RoMa<br />
vector)<br />
10 pnpNo integer 0 - 1 number of the PnP performing the<br />
action:<br />
0 = PnP 1<br />
1 = PnP 2<br />
Example:<br />
PnP_Vector("Tube 16*100mm 16 Pos_1","10","1","5",0,0,2,1,0,0);<br />
A.15.4.42 Transfer Tube (Worklist: Transfer_Tube)<br />
The advanced worklist command which corresponds to the Transfer Tube script<br />
command is “Transfer_Tube”. This advanced worklist command can only be used<br />
in <strong>Freedom</strong> <strong>EVOware</strong> <strong>Standard</strong>.<br />
The parameters of the advanced worklist command are shown in the following<br />
table. For more information on this command see 15.62 “Transfer Tube<br />
Command”, 15-148.<br />
Tab. A-56 Advanced worklist command Transfer_Tube, parameters<br />
Par. Name Type Range Explanation<br />
1 gridSource expression 1 - 67 labware location - carrier grid position,<br />
source<br />
2 gridDestination expression 0 - 67 labware location - carrier grid position,<br />
destination<br />
3 backHome integer 0 - 1 1 = move back to home when finished<br />
4 speed integer 0 - 1 speed:<br />
0 = maximum speed<br />
1 = slow speed (as defined in PnP vector)<br />
A - 152 <strong>Freedom</strong> <strong>EVOware</strong> <strong>Software</strong> <strong>Manual</strong>, 393172, en, V<strong>2.3</strong>
A - Appendix A<br />
Advanced Worklist Commands<br />
Tab. A-56 Advanced worklist command Transfer_Tube, parameters (cont.)<br />
Par. Name Type Range Explanation<br />
5 pnpNo integer 0 - 1 number of the PnP performing the<br />
action:<br />
0 = PnP 1<br />
1 = PnP 2<br />
6 positionSource integer 1 - max.<br />
number<br />
of tubes<br />
tube position in tube rack, source<br />
7 positionDestination<br />
integer<br />
1 - max.<br />
number<br />
of tubes<br />
tube position in tube rack, destination<br />
8 rackType string1 labware type (as in the <strong>Freedom</strong><br />
<strong>EVOware</strong> configuration)<br />
9 vectorSource string1 unused, pad with 0.<br />
10 vectorDestination string1 unused, pad with 0.<br />
11 siteSource expression 0 - 127 labware location - (site on carrier - 1),<br />
source<br />
12 siteDestination expression 0 - 127 labware location - (site on carrier - 1),<br />
destination<br />
13 WipeOffMovement<br />
integer 0 - 10 steps max 10 mm<br />
Example:<br />
Transfer_Tube("10","13",0,0,0,"1","1","","","","1","1",0);<br />
A.15.4.43 PosID (Worklist: PosID)<br />
The advanced worklist command which corresponds to the PosID script<br />
command is “PosID”.<br />
The parameters of the advanced worklist command are shown in the following<br />
table. For more information on this command see 15.63 “PosID Command”, 15-<br />
150.<br />
Tab. A-57 Advanced worklist command PosID, parameters<br />
Par. Name Type Range Explanation<br />
1 worktableSpeed integer 30 - 300 speed with which the carrier or tube rack<br />
barcodes should be scanned<br />
2 numberLabware integer total number of labware items to scan.<br />
Parameters 3 - 5 are included n times,<br />
where n = numberLabware<br />
3 grid integer 1 - 67 labware location - carrier grid position<br />
4 site integer 0 - 127 labware location - (site on carrier - 1)<br />
<strong>Freedom</strong> <strong>EVOware</strong> <strong>Software</strong> <strong>Manual</strong>, 393172, en, V<strong>2.3</strong> A - 153
A - Appendix A<br />
Advanced Worklist Commands<br />
Tab. A-57 Advanced worklist command PosID, parameters (cont.)<br />
Par. Name Type Range Explanation<br />
5 scanSpeed integer 30 - 400 speed with which the labware barcode<br />
should be scanned<br />
6 noBarcodeTypes integer 1 - 23 the number of different barcode types to<br />
be accepted. Parameters 7 - 10 are<br />
included n times, where n = noBarcode-<br />
Types<br />
7 barcodeType integer 1 - 23 barcode type:<br />
1 = 2 of 5 Interleaved<br />
2 = Codabar<br />
3 = Code128<br />
4 = Code39<br />
5 = EAN-13<br />
6 = EAN-13 with 2 Supplement<br />
7 = EAN-13 with 5 Supplement<br />
8 = EAN-8<br />
9 = EAN-8 with 2 Supplement<br />
10 = EAN-8 with 5 Supplement<br />
11 = UPC-A<br />
12 = UPC-A with 2 Supplement<br />
13 = UPC-A with 5 Supplement<br />
14 = UPC-E<br />
15 = UPC-E with 2 Supplement<br />
16 = UPC-E with 5 Supplement<br />
17 = C.I.P.<br />
18 = Code32<br />
19 = Code39 Full ASCII<br />
20 = Code93<br />
21 = Code93 Full ASCII<br />
22 = MSI<br />
23 = EAN-128<br />
8 barcodeLength integer 0 - 30 0 = do not check the barcode length<br />
1 to 30 = required barcode length<br />
Refer to the published barcode specifications<br />
for information on the allowed<br />
length for each barcode type. Also see<br />
C.3 “Recommendations when using barcodes”,<br />
C-4.<br />
9 checkDigitMode integer checksum checking mode: a)<br />
0 = do not evaluate the checksum<br />
1 = evaluate and transmit<br />
2 = evaluate but don’t transmit<br />
10 startStopMode integer handling of start/stop codes: a)<br />
0 = start/stop code is not required<br />
1 = required and transmit<br />
2 = required but don’t transmit<br />
11 options integer 0 - 127 bit-coded options as follows:<br />
1 = No prompt for scan errors<br />
2 = Write file with scan results<br />
4 = Ignore duplicate barcodes<br />
A - 154 <strong>Freedom</strong> <strong>EVOware</strong> <strong>Software</strong> <strong>Manual</strong>, 393172, en, V<strong>2.3</strong>
A - Appendix A<br />
Advanced Worklist Commands<br />
a) See 15.63.1 “PosID Command (Barcode Types Tab)”, 15-153 for more details.<br />
Example with two labware items and two barcode types:<br />
PosID(200,2,10,0,250,15,1,400,2,3,18,0,0,1,12,1,0,1);<br />
A.15.4.44 Waterbath Control Command (Worklist: Waterbath)<br />
The advanced worklist command which corresponds to the Waterbath Control<br />
Command script command is “Waterbath”.<br />
The parameters of the advanced worklist command are shown in the following<br />
table. For more information on this command see 15.64 “Waterbath Control<br />
Command”, 15-154.<br />
Tab. A-58 Advanced worklist command Waterbath, parameters<br />
Par. Name Type Range Explanation<br />
1 action integer 0 - 2 action:<br />
0 = set temperature<br />
1 = switch bath to standby<br />
2 = restart bath<br />
2 bathNumber integer 0 - 3 waterbath number<br />
3 temperature floating point - 100 -<br />
100<br />
bath temperature<br />
Example:<br />
Waterbath(0,0,32);<br />
A.15.4.45 Balance Command (Worklist: Balance)<br />
The advanced worklist command which corresponds to the Balance script<br />
command is “Balance”.<br />
The parameters of the advanced worklist command are shown in the following<br />
table. For more information on this command see 15.65 “Balance Command”,<br />
15-155.<br />
Tab. A-59 Advanced worklist command Balance, parameters<br />
Par. Name Type Range Explanation<br />
1 action integer 0 - 1 action:<br />
0 = tare balance<br />
1 = measure weight<br />
2 variable string2 variable to use for measured weight<br />
3 scope integer 0 - 2 scope of variable (see 6.4.6 “Declare<br />
Variables”, 6-12):<br />
0 = Run<br />
1 = Instance<br />
2 = Script<br />
4 stabilization integer 0 - 1 0 = do not wait for stabilization<br />
1 = wait for stabilization<br />
<strong>Freedom</strong> <strong>EVOware</strong> <strong>Software</strong> <strong>Manual</strong>, 393172, en, V<strong>2.3</strong> A - 155
A - Appendix A<br />
Advanced Worklist Commands<br />
Example:<br />
Balance(1,weight1,2,1);<br />
A.15.4.46 Balance Send Command Command (Worklist: Balance_Send)<br />
The advanced worklist command which corresponds to the Balance Send<br />
Command script command is “Balance_Send”.<br />
The parameters of the advanced worklist command are shown in the following<br />
table. For more information on this command see 15.66 “Balance Send Command<br />
Command”, 15-157.<br />
Tab. A-60 Advanced worklist command Balance_Send, parameters<br />
Par. Name Type Range Explanation<br />
1 commandstring string2 firmware command<br />
2 termination integer 0 - 1 action:<br />
0 = do not wait for termination<br />
1 = wait for termination of command<br />
3 response integer 0 - 1 response:<br />
0 = do not store response in variable<br />
1 = store response in variable<br />
4 response_var string2 variable to use for response<br />
5 error integer 0 - 1 error:<br />
0 = do not store error code in variable<br />
1 = store error code in variable<br />
6 error_var string2 variable to use for error code<br />
9 scope_resp integer 0 - 2 scope of response variable (see<br />
6.4.6 “Declare Variables”, 6-12):<br />
0 = Run<br />
1 = Instance<br />
2 = Script<br />
9 scope_error integer 0 - 2 scope of error variable (see<br />
6.4.6 “Declare Variables”, 6-12):<br />
0 = Run<br />
1 = Instance<br />
2 = Script<br />
Example:<br />
Balance_Send(RP2,1,1,response1,1,error1,2,2);<br />
A.15.4.47 Send Command (Worklist: Command)<br />
The advanced worklist command which corresponds to the Send Command script<br />
command is “Command”.<br />
The parameters of the advanced worklist command are shown in the following<br />
table. For more information on this command see 15.67 “Send Command<br />
Command”, 15-158.<br />
A - 156 <strong>Freedom</strong> <strong>EVOware</strong> <strong>Software</strong> <strong>Manual</strong>, 393172, en, V<strong>2.3</strong>
A - Appendix A<br />
Advanced Worklist Commands<br />
Tab. A-61 Advanced worklist command Command, parameters<br />
Par. Name Type Range Explanation<br />
1 command expression firmware command<br />
2 options integer 0 - 7 bit-coded options:<br />
1 = wait for termination of command<br />
2 = store error code in variable<br />
4 = store answer in variable<br />
3 parameter integer 1 - 16 number of the parameter in the<br />
response which is stored in the variable<br />
“response”<br />
4 response string2 variable for the response<br />
5 error string2 variable for the error code<br />
6 errorVarScope integer 0 - 2 scope of error variable (see<br />
6.4.6 “Declare Variables”, 6-12):<br />
0 = Run<br />
1 = Instance<br />
2 = Script<br />
7 responseVar-<br />
Scope<br />
integer 0 - 2 scope of response variable (see<br />
6.4.6 “Declare Variables”, 6-12):<br />
0 = Run<br />
1 = Instance<br />
2 = Script<br />
8 type integer 0 - 1 type of response variable:<br />
0 = Numeric<br />
1 = String<br />
Example:<br />
Command("A1RPZ0",7,1,response2,error2,2,2,0);<br />
A.15.5 Advanced Worklist Commands for the Carousel<br />
The following describes the most important advanced worklist commands for the<br />
Carousel.<br />
A.15.5.1 ReadAllBarcodes (Worklist: Carousel_ReadAllBarcodes)<br />
The advanced worklist command which corresponds to the Carousel-<br />
ReadAllBarcodes device command is “Carousel_ReadAllBarcodes”.<br />
The parameters of the advanced worklist command are shown in the following<br />
table. For more information on this command see 16.3.5 “Carousel -<br />
ReadAllBarcodes command”, 16-5<br />
<strong>Freedom</strong> <strong>EVOware</strong> <strong>Software</strong> <strong>Manual</strong>, 393172, en, V<strong>2.3</strong> A - 157
A - Appendix A<br />
Advanced Worklist Commands<br />
Tab. A-62 Advanced worklist command Carousel_ReadAllBarcodes, parameters<br />
Par. Name Type Range Explanation<br />
1 devicename string1 name of device<br />
2 commandname string1 name of command<br />
3 exec_parameters expression no execution parameters (specify an<br />
empty string)<br />
4 needs_allwd_lw expression specify 0 (does not need a specific labware<br />
type)<br />
5 allowed_labware expression not relevant (specify an empty string)<br />
Example:<br />
FACTS("Carousel","Carousel_ReadAllBarcodes","","0","");<br />
A.15.5.2 InitCarousel (Worklist: Carousel_InitCarousel)<br />
The advanced worklist command which corresponds to the Carousel-InitCarousel<br />
device command is “Carousel_InitCarousel”.<br />
The parameters of the advanced worklist command are shown in the following<br />
table. For more information on this command see 16.3.6 “Carousel - InitCarousel<br />
Command”, 16-5.<br />
Tab. A-63 Advanced worklist command Carousel_InitCarousel, parameters<br />
Par. Name Type Range Explanation<br />
1 devicename string1 name of device<br />
2 commandname string1 name of command<br />
3 exec_parameters expression no execution parameters (specify an<br />
empty string)<br />
4 needs_allwd_lw expression specify 0 (does not need a specific labware<br />
type)<br />
5 allowed_labware expression not relevant (specify an empty string)<br />
Example:<br />
FACTS("Carousel","Carousel_InitCarousel","","0","");<br />
A.15.5.3 ReturnPlate (Worklist: Carousel_ReturnPlate)<br />
The advanced worklist command which corresponds to the Carousel-ReturnPlate<br />
device command is “Carousel_ReturnPlate”.<br />
The parameters of the advanced worklist command are shown in the following<br />
table. For more information on this command see 16.3.3 “Carousel - ReturnPlate<br />
Command”, 16-3.<br />
A - 158 <strong>Freedom</strong> <strong>EVOware</strong> <strong>Software</strong> <strong>Manual</strong>, 393172, en, V<strong>2.3</strong>
A - Appendix A<br />
Advanced Worklist Commands<br />
Tab. A-64 Advanced worklist command Carousel_ReturnPlate, parameters<br />
Par. Name Type Range Explanation<br />
1 devicename string1 name of device<br />
2 commandname string1 name of command<br />
3 exec_parameters expression cartridge (tower) number, labware position<br />
in tower<br />
4 needs_allwd_lw expression specify 0 (does not need a specific labware<br />
type)<br />
5 allowed_labware expression not relevant (specify an empty string)<br />
Example:<br />
FACTS("Carousel","Carousel_ReturnPlate","2,25","0","");<br />
A.15.5.4 PresentPlate (Worklist: Carousel_PresentPlate)<br />
The advanced worklist command which corresponds to the Carousel-<br />
PresentPlate device command is “Carousel_PresentPlate”.<br />
The parameters of the advanced worklist command are shown in the following<br />
table. For more information on this command see 16.3.1 “Carousel - PresentPlate<br />
Command”, 16-2.<br />
Tab. A-65 Advanced worklist command Carousel_PresentPlate, parameters<br />
Par. Name Type Range Explanation<br />
1 devicename string1 name of device<br />
2 commandname string1 name of command<br />
3 exec_parameters expression cartridge (tower) number, labware position<br />
in tower<br />
4 needs_allwd_lw expression specify 1 (needs a specific labware type)<br />
5 allowed_labware expression required labware type<br />
Example:<br />
FACTS("Carousel","Carousel_PresentPlate","2,5","1","96_Well_Microplate");<br />
A.15.5.5 MoveToCartridge (Worklist: Carousel_MoveToCartridge)<br />
The advanced worklist command which corresponds to the Carousel-<br />
MoveToCartridge device command is “Carousel_ReadAllBarcodes”.<br />
The parameters of the advanced worklist command are shown in the following<br />
table. For more information on this command see 16.3.7 “Carousel -<br />
MoveToCartridge Command”, 16-5.<br />
<strong>Freedom</strong> <strong>EVOware</strong> <strong>Software</strong> <strong>Manual</strong>, 393172, en, V<strong>2.3</strong> A - 159
A - Appendix A<br />
Advanced Worklist Commands<br />
Tab. A-66 Advanced worklist command Carousel_MoveToCartridge, parameters<br />
Par. Name Type Range Explanation<br />
1 devicename string1 name of device<br />
2 commandname string1 name of command<br />
3 exec_parameters expression cartridge (tower) number<br />
4 needs_allwd_lw expression specify 0 (does not need a specific labware<br />
type)<br />
5 allowed_labware expression not relevant (specify an empty string)<br />
Example:<br />
FACTS("Carousel","Carousel_MoveToCartridge","2","0","");<br />
A.15.5.6 EndAccess (Worklist: Carousel_EndAccess)<br />
The advanced worklist command which corresponds to the Carousel-EndAccess<br />
device command is “Carousel_EndAccess”.<br />
The parameters of the advanced worklist command are shown in the following<br />
table. For more information on this command see 16.3.9 “Carousel -<br />
ReadPlatesInCartridge Command”, 16-6.<br />
Tab. A-67 Advanced worklist command Carousel_EndAccess, parameters<br />
Par. Name Type Range Explanation<br />
1 devicename string1 name of device<br />
2 commandname string1 name of command<br />
3 exec_parameters expression no execution parameters (specify an<br />
empty string)<br />
4 needs_allwd_lw expression specify 0 (does not need a specific labware<br />
type)<br />
5 allowed_labware expression not relevant (specify an empty string)<br />
Example:<br />
FACTS("Carousel","Carousel_EndAccess","","0","");<br />
A.15.5.7 ReadPlatesInCartridge (Worklist: Carousel_ReadPlatesInCartridge)<br />
The advanced worklist command which corresponds to the Carousel-<br />
ReadAllBarcodes device command is “Carousel_ReadAllBarcodes”.<br />
The parameters of the advanced worklist command are shown in the following<br />
table. For more information on this command see 16.3.9 “Carousel -<br />
ReadPlatesInCartridge Command”, 16-6.<br />
A - 160 <strong>Freedom</strong> <strong>EVOware</strong> <strong>Software</strong> <strong>Manual</strong>, 393172, en, V<strong>2.3</strong>
A - Appendix A<br />
Advanced Worklist Commands<br />
Tab. A-68 Advanced worklist command Carousel_ReadPlatesInCartridge, parameters<br />
Par. Name Type Range Explanation<br />
1 devicename string1 name of device<br />
2 commandname string1 name of command<br />
3 exec_parameters expression cartridge (tower) number<br />
4 needs_allwd_lw expression specify 0 (does not need a specific labware<br />
type)<br />
5 allowed_labware expression not relevant (specify an empty string)<br />
Example:<br />
FACTS("Carousel","Carousel_ReadPlatesInCartridge","2","0","");<br />
A.15.5.8 PresentPlateByBarcode (Worklist: Carousel_PresentPlateByBarcode)<br />
The advanced worklist command which corresponds to the Carousel-<br />
PresentPlateByBarcode device command is “Carousel_ReadAllBarcodes”.<br />
The parameters of the advanced worklist command are shown in the following<br />
table. For more information on this command see 16.3.10 “Carousel -<br />
PresentPlateByBarcode Command”, 16-7.<br />
Tab. A-69 Advanced worklist command Carousel_PresentPlateByBarcode, parameters<br />
Par. Name Type Range Explanation<br />
1 devicename string1 name<br />
of device<br />
2 commandname string1 name of command<br />
3 exec_parameters expression barcode line number, name of barcode<br />
file<br />
4 needs_allwd_lw expression specify 1 (needs a specific labware type)<br />
5 allowed_labware expression required labware type<br />
Example:<br />
FACTS("Carousel","Carousel_PresentPlateByBarcode","2,C:\TEMP\BARCODES<br />
.TXT","1","96_Well_Microplate");<br />
A.15.5.9 ReturnPlateByBarcode (Worklist: Carousel_ReturnPlateByBarcode)<br />
The advanced worklist command which corresponds to the Carousel-<br />
ReturnPlateByBarcode device command is “Carousel_ReturnPlateByBarcode”.<br />
The parameters of the advanced worklist command are shown in the following<br />
table. For more information on this command see 16.3.4 “Carousel -<br />
ReturnPlateByBarcode Command”, 16-4.<br />
<strong>Freedom</strong> <strong>EVOware</strong> <strong>Software</strong> <strong>Manual</strong>, 393172, en, V<strong>2.3</strong> A - 161
A - Appendix A<br />
Advanced Worklist Commands<br />
Tab. A-70 Advanced worklist command Carousel_ReturnPlateByBarcode, parameters<br />
Par. Name Type Range Explanation<br />
1 devicename string1 name of device<br />
2 commandname string1 name of command<br />
3 exec_parameters expression no execution parameters (specify an<br />
empty string)<br />
4 needs_allwd_lw expression specify 0 (does not need a specific labware<br />
type)<br />
5 allowed_labware expression not relevant (specify an empty string)<br />
Example:<br />
FACTS("Carousel","Carousel_ReturnPlateByBarcode","","0","");<br />
A.15.6 Advanced Worklist Commands for the Hettich Centrifuge<br />
The following describes the most important advanced worklist commands for the<br />
Hettich Centrifuge.<br />
A.15.6.1 Init (Worklist: Centrifuge_Init)<br />
The advanced worklist command which corresponds to the Centrifuge-Init device<br />
command is “Centrifuge_Init”.<br />
The parameters of the advanced worklist command are shown in the following<br />
table. For more information on this command see 16.5.1 “Hettich Centrifuge - Init<br />
Command”, 16-16.<br />
Tab. A-71 Advanced worklist command Centrifuge_Init, parameters<br />
Par. Name Type Range Explanation<br />
1 devicename string1 name of device<br />
2 commandname string1 name of command<br />
3 exec_parameters expression no execution parameters (specify an<br />
empty string)<br />
4 needs_allwd_lw expression specify 0 (does not need a specific labware<br />
type)<br />
5 allowed_labware expression not relevant (specify an empty string)<br />
Example:<br />
FACTS("Centrifuge","Centrifuge_Init","","0","");<br />
A.15.6.2 Open (Worklist: Centrifuge_Open)<br />
The advanced worklist command which corresponds to the Centrifuge-Open<br />
device command is “Centrifuge_Open”.<br />
A - 162 <strong>Freedom</strong> <strong>EVOware</strong> <strong>Software</strong> <strong>Manual</strong>, 393172, en, V<strong>2.3</strong>
A - Appendix A<br />
Advanced Worklist Commands<br />
The parameters of the advanced worklist command are shown in the following<br />
table. For more information on this command see 16.5.2 “Hettich Centrifuge -<br />
Open Command”, 16-17.<br />
Tab. A-72 Advanced worklist command Centrifuge_Open, parameters<br />
Par. Name Type Range Explanation<br />
1 devicename string1 name of device<br />
2 commandname string1 name of command<br />
3 exec_parameters expression no execution parameters (specify an<br />
empty string)<br />
4 needs_allwd_lw expression specify 0 (does not need a specific labware<br />
type)<br />
5 allowed_labware expression not relevant (specify an empty string)<br />
Example:<br />
FACTS("Centrifuge","Centrifuge_Open","","0","");<br />
A.15.6.3 Close (Worklist: Centrifuge_Close)<br />
The advanced worklist command which corresponds to the Centrifuge-Close<br />
device command is “Centrifuge_Close”.<br />
The parameters of the advanced worklist command are shown in the following<br />
table. For more information on this command see 16.5.3 “Hettich Centrifuge -<br />
Close Command”, 16-17.<br />
Tab. A-73 Advanced worklist command Centrifuge_Close, parameters<br />
Par. Name Type Range Explanation<br />
1 devicename string1 name of device<br />
2 commandname string1 name of command<br />
3 exec_parameters expression no execution parameters (specify an<br />
empty string)<br />
4 needs_allwd_lw expression specify 0 (does not need a specific labware<br />
type)<br />
5 allowed_labware expression not relevant (specify an empty string)<br />
Example:<br />
FACTS("Centrifuge","Centrifuge_Close","","0","");<br />
A.15.6.4 Execute1 (Worklist: Centrifuge_Execute1)<br />
The advanced worklist command which corresponds to the Centrifuge-Execute1<br />
device command is “Centrifuge_Execute1”.<br />
The parameters of the advanced worklist command are shown in the following<br />
table. For more information on this command see 16.5.4 “Hettich Centrifuge -<br />
ExecuteN Command”, 16-17.<br />
<strong>Freedom</strong> <strong>EVOware</strong> <strong>Software</strong> <strong>Manual</strong>, 393172, en, V<strong>2.3</strong> A - 163
A - Appendix A<br />
Advanced Worklist Commands<br />
Tab. A-74 Advanced worklist command Centrifuge_Execute1, parameters<br />
Par. Name Type Range Explanation<br />
1 devicename string1 name of device<br />
2 commandname string1 name of command<br />
3 exec_parameters expression rpm,duration,start ramp, stop ramp, temperature<br />
4 needs_allwd_lw expression specify 0 (does not need a specific labware<br />
type)<br />
5 allowed_labware expression not relevant (specify an empty string)<br />
Example:<br />
FACTS("Centrifuge","Centrifuge_Execute1","2000,600,9,8,20","0","");<br />
A.15.6.5 MoveToPos (Worklist: Centrifuge_MoveToPos)<br />
The advanced worklist command which corresponds to the Centrifuge-<br />
MoveToPos device command is “Centrifuge_MoveToPos”.<br />
The parameters of the advanced worklist command are shown in the following<br />
table. For more information on this command see 16.5.5 “Hettich Centrifuge -<br />
MoveToPos Command”, 16-18.<br />
Tab. A-75 Advanced worklist command Centrifuge_MoveToPos, parameters<br />
Par. Name Type Range Explanation<br />
1 devicename string1 name of device<br />
2 commandname string1 name of command<br />
3 position expression rotor position to move to<br />
4 needs_allwd_lw expression specify 0 (does not need a specific labware<br />
type)<br />
5 allowed_labware expression not relevant (specify an empty string)<br />
Example:<br />
FACTS("Centrifuge","Centrifuge_MoveToPos","2","0","");<br />
A.15.7 Advanced Worklist Commands for the Magellan Option<br />
The following describes the most important advanced worklist commands for the<br />
Tecan Magellan software option.<br />
A.15.7.1 ExcitationOut (Worklist: Magellan_Excitation_Out)<br />
The advanced worklist command which corresponds to the Magellan-<br />
ExcitationOut device command is “Magellan_Excitation_Out”.<br />
A - 164 <strong>Freedom</strong> <strong>EVOware</strong> <strong>Software</strong> <strong>Manual</strong>, 393172, en, V<strong>2.3</strong>
A - Appendix A<br />
Advanced Worklist Commands<br />
The parameters of the advanced worklist command are shown in the following<br />
table. For more information on this command see 16.5.1 “Hettich Centrifuge - Init<br />
Command”, 16-16.<br />
Tab. A-76 Advanced worklist command Magellan_Excitation_Out, parameters<br />
Par. Name Type Range Explanation<br />
1 devicename string1 name of device<br />
2 commandname string1 name of command<br />
3 exec_parameters expression no execution parameters (specify an<br />
empty string)<br />
4 needs_allwd_lw expression specify 0 (does not need a specific labware<br />
type)<br />
5 allowed_labware expression not relevant (specify an empty string)<br />
Example:<br />
FACTS("Magellan","Magellan_Excitation_Out","","0","");<br />
A.15.7.2 EmissionOut (Worklist: Magellan_Emission_Out)<br />
The advanced worklist command which corresponds to the Magellan-<br />
EmissionOut device command is “Magellan_Emission_Out”.<br />
The parameters of the advanced worklist command are shown in the following<br />
table. For more information on this command see 16.5.2 “Hettich Centrifuge -<br />
Open Command”, 16-17.<br />
Tab. A-77 Advanced worklist command Magellan_Emission_Out, parameters<br />
Par. Name Type Range Explanation<br />
1 devicename string1 name of device<br />
2 commandname string1 name of command<br />
3 exec_parameters expression no execution parameters (specify an<br />
empty string)<br />
4 needs_allwd_lw expression specify 0 (does not need a specific labware<br />
type)<br />
5 allowed_labware expression not relevant (specify an empty string)<br />
Example:<br />
FACTS("Magellan","Magellan_Emission_Out","","0","");<br />
A.15.7.3 Open (Worklist: Magellan_Open")<br />
The advanced worklist command which corresponds to the Magellan-Open<br />
device command is “Magellan_Open”.<br />
The parameters of the advanced worklist command are shown in the following<br />
table. For more information on this command see 16.5.3 “Hettich Centrifuge -<br />
Close Command”, 16-17.<br />
<strong>Freedom</strong> <strong>EVOware</strong> <strong>Software</strong> <strong>Manual</strong>, 393172, en, V<strong>2.3</strong> A - 165
A - Appendix A<br />
Advanced Worklist Commands<br />
Tab. A-78 Advanced worklist command Magellan_Open, parameters<br />
Par. Name Type Range Explanation<br />
1 devicename string1 name of device<br />
2 commandname string1 name of command<br />
3 exec_parameters expression no execution parameters (specify an<br />
empty string)<br />
4 needs_allwd_lw expression specify 0 (does not need a specific labware<br />
type)<br />
5 allowed_labware expression not relevant (specify an empty string)<br />
Example:<br />
FACTS("Magellan","Magellan_Open","","0","");<br />
A.15.7.4 Execute1 (Worklist: Magellan_Close)<br />
The advanced worklist command which corresponds to the Magellan-Close<br />
device command is “Magellan_Close”.<br />
The parameters of the advanced worklist command are shown in the following<br />
table. For more information on this command see 16.5.4 “Hettich Centrifuge -<br />
ExecuteN Command”, 16-17.<br />
Tab. A-79 Advanced worklist command Magellan_Close, parameters<br />
Par. Name Type Range Explanation<br />
1 devicename string1 name of device<br />
2 commandname string1 name of command<br />
3 exec_parameters expression rpm,duration,start ramp, stop ramp, temperature<br />
4 needs_allwd_lw expression specify 0 (does not need a specific labware<br />
type)<br />
5 allowed_labware expression not relevant (specify an empty string)<br />
Example:<br />
FACTS("Magellan","Magellan_Close","","0","");<br />
A.15.7.5 Measure (Worklist: Magellan_Measure)<br />
The advanced worklist command which corresponds to the Magellan-Measure<br />
device command is “Magellan_Measure”.<br />
The parameters of the advanced worklist command are shown in the following<br />
table. For more information on this command see 16.5.5 “Hettich Centrifuge -<br />
MoveToPos Command”, 16-18.<br />
A - 166 <strong>Freedom</strong> <strong>EVOware</strong> <strong>Software</strong> <strong>Manual</strong>, 393172, en, V<strong>2.3</strong>
A - Appendix A<br />
Advanced Worklist Commands<br />
Tab. A-80 Advanced worklist command Magellan_Measure, parameters<br />
Par. Name Type Range Explanation<br />
1 devicename string1 name of device<br />
2 commandname string1 name of command<br />
3 exec_parameters expression path and name of output file, name of<br />
method file, import_flag<br />
import_flag:<br />
0 = do not import sample ID list<br />
1 = import sample ID list<br />
4 needs_allwd_lw expression specify 0 (does not need a specific labware<br />
type)<br />
5 allowed_labware expression not relevant (specify an empty string)<br />
Example:<br />
FACTS("Magellan","Magellan_Measure","C:\Documents and Settings\All<br />
Users\Documents\Tecan\Magellan\wsp\.wsp,HIV-ELISA.mth,0","0","");<br />
A.15.8 Advanced Worklist Commands for the PosID-3 Barcode Scanner<br />
The following describes the advanced worklist commands for the PosID-3<br />
barcode scanner.<br />
A.15.8.1 Initialize (Worklist: PosID3_Init)<br />
The advanced worklist command which corresponds to the PosID3-Initialize<br />
device command is “PosID3_Init”.<br />
The parameters of the advanced worklist command are shown in the following<br />
table. For more information on this command see 16.20.1 “PosID-3 - Initialize<br />
Command”, 16-70.<br />
Tab. A-81 Advanced worklist command PosID3_Init, parameters<br />
Par. Name Type Range Explanation<br />
1 devicename string1 name of device<br />
2 commandname string1 name of command<br />
3 exec_parameters expression no execution parameters (specify an<br />
empty string)<br />
4 needs_allwd_lw expression specify 0 (does not need a specific labware<br />
type)<br />
5 allowed_labware expression not relevant (specify an empty string)<br />
Example:<br />
FACTS("PosID3","PosID3_Init","","0","");<br />
<strong>Freedom</strong> <strong>EVOware</strong> <strong>Software</strong> <strong>Manual</strong>, 393172, en, V<strong>2.3</strong> A - 167
A - Appendix A<br />
Advanced Worklist Commands<br />
A.15.8.2 Scan (Worklist: PosID3_Scan)<br />
The advanced worklist command which corresponds to thePosID3-Scan device<br />
command is “PosID3_Scan”.<br />
The parameters of the advanced worklist command are shown in the following<br />
table. For more information on this command see 16.20.2 “PosID-3 - Scan<br />
Command”, 16-70.<br />
Tab. A-82 Advanced worklist command PosID3_Scan, parameters<br />
Par. Name Type Range Explanation<br />
1 devicename string1 name of device<br />
2 commandname string1 name of command<br />
3 exec_parameters expression see Tab. A-83, A-168.<br />
4 needs_allwd_lw expression specify 0 (does not need a specific labware<br />
type)<br />
5 allowed_labware expression not relevant (specify an empty string)<br />
The execution parameters of this command are as follows:<br />
Tab. A-83 Advanced worklist command PosID3_Scan, execution parameters<br />
Par. Name Type Range Explanation<br />
1 USER_<br />
ERRORPROMPT<br />
2 promptForScan-<br />
Errors<br />
3 promptForNon-<br />
ExistingCarrier<br />
4 SCANRESULT_<br />
FILE<br />
5 writeScanResult-<br />
File<br />
6 OVERWRITE_<br />
BC<br />
string1<br />
string1<br />
string1<br />
string1<br />
string1<br />
string1<br />
This label indicates the start of the<br />
user_errorprompt section.<br />
True = Prompt if there are scan errors<br />
False = Do not prompt if there are scan<br />
errors<br />
True = Prompt if carrier is missing<br />
False = Do not prompt if carrier is missing<br />
This label indicates the start of the<br />
scanresult_file section<br />
True = Write scan.csv file<br />
False = Do not write scan.csv file<br />
This label indicates the start of the<br />
overwrite_bc section.<br />
7 overwriteOldBCs string1 True = Overwrite old barcodes<br />
False = Do not overwrite old barcodes<br />
8 CARRIER_DEF string1 This label indicates the start of the carrier<br />
definition section. This section<br />
(parameters 8 - 23) is repeated n times,<br />
where n is the number of carriers to be<br />
scanned. Each carrier definition section<br />
also contains one or more labware definition<br />
sections.<br />
A - 168 <strong>Freedom</strong> <strong>EVOware</strong> <strong>Software</strong> <strong>Manual</strong>, 393172, en, V<strong>2.3</strong>
A - Appendix A<br />
Advanced Worklist Commands<br />
Tab. A-83 Advanced worklist command PosID3_Scan, execution parameters (cont.)<br />
Par. Name Type Range Explanation<br />
9 carrierID string1 carrier code (first three digits of the carrier<br />
barcode, as defined in the Edit Carrier<br />
dialog box)<br />
10 carrierSerialNumber<br />
string1<br />
not relevant (specify an empty string)<br />
11 scannedBarcod string1 not relevant (specify an empty string)<br />
12 carrierType string1 configuration name of the carrier<br />
13 carrierGrid string1 carrier grid position<br />
14 carrierNoOfSites string1 total number of labware sites on carrier<br />
(specify 1 for strip racks)<br />
15 LABWARE_DEF string1 This label indicates the start of the labware<br />
definition section. This section<br />
(parameters 15 - 23) is repeated n times,<br />
where n is the number of labware sites<br />
to be scanned on the carrier.<br />
16 labwareLabel string1 labware label, as shown on the <strong>Freedom</strong><br />
<strong>EVOware</strong> worktable<br />
17 labwareAlias string1 labware alias (only for labware generated<br />
by Labware Generator), e.g. "GeneratedLabware{001}<br />
18 labwareType string1 configuration name of the labware<br />
19 labwareSite string1 labware location - (site on carrier - 1)<br />
20 labwareNumber-<br />
OfTubes<br />
string1<br />
placeholder for number of tubes which<br />
were scanned (specify 0 in the<br />
advanced worklist command)<br />
21 labwareBarcode string1 not relevant (specify an empty string)<br />
22 labwareScan_err string1 not relevant (specify an empty string)<br />
23 LabwarePipe_err string1 not relevant (specify “None” or an empty<br />
string)<br />
24 BARCODETYPE<br />
_DEF<br />
string1<br />
This label indicates the start of the barcode<br />
types section. This section (parameters<br />
24 - 28) is repeated n times, where<br />
n is the number of barcode types to be<br />
allowed.<br />
<strong>Freedom</strong> <strong>EVOware</strong> <strong>Software</strong> <strong>Manual</strong>, 393172, en, V<strong>2.3</strong> A - 169
A - Appendix A<br />
Advanced Worklist Commands<br />
Tab. A-83 Advanced worklist command PosID3_Scan, execution parameters (cont.)<br />
Par. Name Type Range Explanation<br />
25 barcodeType string1 Barcode type.<br />
Supported types (allowed strings):<br />
CODABAR<br />
Code128<br />
Code2of5Interleaved<br />
Code39FullASCII<br />
Code39<strong>Standard</strong><br />
EAN128<br />
26 barcodeLength string1 required barcode length<br />
27 checkDigitMode string1 checksum checking mode: a)<br />
Off = do not evaluate the checksum<br />
OnWithTransmission =<br />
evaluate and transmit<br />
OnWithoutTransmission =<br />
evaluate but don’t transmit<br />
28 startStopMode string1 handling of start/stop codes: a)<br />
Off = start/stop code is not required<br />
OnWithTransmission =<br />
required and transmit<br />
OnWithoutTransmission =<br />
required but don’t transmit<br />
a) See 16.20.2.1 “PosID-3 Command (Barcode Types Tab)”, 16-72 for more details.<br />
The execution parameters are separated by commas.<br />
Example:<br />
FACTS("PosID3","PosID3_Scan","USER_ERRORPROMPT;False;True;SCANRE<br />
SULT_FILE;True;OVERWRITE_BC;True;CARRIER_DEF;13;;;Tube 13 mm 16<br />
Pos;5;1;LABWARE_DEF;Tubes Grid5;;Tube 13*100mm 16<br />
Pos;0;0;;0;None;CARRIER_DEF;22;;;MP 3Pos;10;3;LABWARE_DEF;Grid10<br />
Site1;;96 Well Microplate;0;0;;0;None;LABWARE_DEF;Grid10 Site2;;96 Well<br />
Microplate;1;0;;0;None;LABWARE_DEF;Grid10 Site3;;96 Well<br />
Microplate;2;0;;0;None;CARRIER_DEF;22;;;MP<br />
3Pos;20;3;LABWARE_DEF;Grid20 Site1;;96 Well<br />
Microplate;0;0;;0;None;LABWARE_DEF;Grid20 Site3;;96 Well<br />
Microplate;2;0;;0;NotSet;BARCODETYPE_DEF;Code128;8;Off;Off;","0","");<br />
A.15.9 Advanced Worklist Commands for the Te-Shake Shaker<br />
The following describes the advanced worklist commands for the Te-Shake<br />
Shaker.<br />
A.15.9.1 Init (Worklist: Shaker_Init)<br />
The advanced worklist command which corresponds to the Te-Shake-Init device<br />
command is “Shaker_Init”.<br />
The parameters of the advanced worklist command are shown in the following<br />
table. For more information on this command see 16.28.1 “Te-Shake shaker - Init<br />
Command”, 16-90.<br />
A - 170 <strong>Freedom</strong> <strong>EVOware</strong> <strong>Software</strong> <strong>Manual</strong>, 393172, en, V<strong>2.3</strong>
A - Appendix A<br />
Advanced Worklist Commands<br />
Tab. A-84 Advanced worklist command Shaker_Init, parameters<br />
Par. Name Type Range Explanation<br />
1 devicename string1 name of device<br />
2 commandname string1 name of command<br />
3 exec_parameters expression no execution parameters (specify an<br />
empty string)<br />
4 needs_allwd_lw expression specify 0 (does not need a specific labware<br />
type)<br />
5 allowed_labware expression not relevant (specify an empty string)<br />
Example:<br />
FACTS("Shaker","Shaker_Init","","0","");<br />
A.15.9.2 Start (Worklist: Shaker_Start)<br />
The advanced worklist command which corresponds to the Te-Shake-Init device<br />
command is “Shaker_Init”.<br />
The parameters of the advanced worklist command are shown in the following<br />
table. For more information on this command see 16.28.3 “Te-Shake shaker -<br />
Start Command”, 16-92.<br />
Tab. A-85 Advanced worklist command Shaker_Start, parameters<br />
Par. Name Type Range Explanation<br />
1 devicename string1 name of device<br />
2 commandname string1 name of command<br />
3 direction expression direction of shaking:<br />
1 = clockwise<br />
2 = counter-clockwise<br />
4 needs_allwd_lw expression specify 0 (does not need a specific labware<br />
type)<br />
5 allowed_labware expression not relevant (specify an empty string)<br />
Example:<br />
FACTS("Shaker","Shaker_Start","2","0","");<br />
A.15.9.3 Stop (Worklist: Shaker_Stop)<br />
The advanced worklist command which corresponds to the Te-Shake-Stop device<br />
command is “Shaker_Stop”.<br />
The parameters of the advanced worklist command are shown in the following<br />
table. For more information on this command see 16.28.4 “Te-Shake shaker -<br />
Stop Command”, 16-92.<br />
<strong>Freedom</strong> <strong>EVOware</strong> <strong>Software</strong> <strong>Manual</strong>, 393172, en, V<strong>2.3</strong> A - 171
A - Appendix A<br />
Advanced Worklist Commands<br />
Tab. A-86 Advanced worklist command Shaker_Stop, parameters<br />
Par. Name Type Range Explanation<br />
1 devicename string1 name of device<br />
2 commandname string1 name of command<br />
3 exec_parameters expression no execution parameters (specify an<br />
empty string)<br />
4 needs_allwd_lw expression specify 0 (does not need a specific labware<br />
type)<br />
5 allowed_labware expression not relevant (specify an empty string)<br />
Example:<br />
FACTS("Shaker","Shaker_Stop","","0","");<br />
A.15.9.4 SetTemperature (Worklist: Shaker_SetTemperature)<br />
The advanced worklist command which corresponds to the Te-Shake-Init device<br />
command is “Shaker_SetTemperature”.<br />
The parameters of the advanced worklist command are shown in the following<br />
table. For more information on this command see 16.28.5 “Te-Shake shaker -<br />
SetTemperature Command”, 16-92.<br />
Tab. A-87 Advanced worklist command Shaker_SetTemperature, parameters<br />
Par. Name Type Range Explanation<br />
1 devicename string1 name of device<br />
2 commandname string1 name of command<br />
3 temperature expression required temperature in ºC * 10 (320 =<br />
32ºC)<br />
4 needs_allwd_lw expression specify 0 (does not need a specific labware<br />
type)<br />
5 allowed_labware expression not relevant (specify an empty string)<br />
Example:<br />
FACTS("Shaker","Shaker_SetTemperature","320","0","");<br />
A.15.9.5 SetFrequency (Worklist: Shaker_SetFrequency)<br />
The advanced worklist command which corresponds to the Te-Shake-<br />
SetFrequency device command is “Shaker_SetFrequency”.<br />
The parameters of the advanced worklist command are shown in the following<br />
table. For more information on this command see 16.28.6 “Te-Shake shaker -<br />
SetFrequency Command”, 16-93.<br />
A - 172 <strong>Freedom</strong> <strong>EVOware</strong> <strong>Software</strong> <strong>Manual</strong>, 393172, en, V<strong>2.3</strong>
A - Appendix A<br />
Advanced Worklist Commands<br />
Tab. A-88 Advanced worklist command Shaker_SetFrequency, parameters<br />
Par. Name Type Range Explanation<br />
1 devicename string1 name of device<br />
2 cmd_name string1 name of command<br />
3 frequency expression required frequency in rpm<br />
4 needs_allwd_lw expression specify 0 (does not need a specific labware<br />
type)<br />
5 allowed_labware expression not relevant (specify an empty string)<br />
Example:<br />
FACTS("Shaker","Shaker_SetFrequency","500","0","");<br />
A.15.10 Advanced Worklist Commands for the Te-MagS<br />
The following describes the advanced worklist commands for the Te-MagS<br />
Magnetic Bead Separator.<br />
A.15.10.1 MoveToPosition (Worklist: Te-MagS_MoveToPosition)<br />
The advanced worklist command which corresponds to the Te-Mags-<br />
MoveToPosition device command is “Te-MagS_MoveToPosition”.<br />
The parameters of the advanced worklist command are shown in the following<br />
table. For more information on this command see 16.32.1 “Magnetic Bead<br />
Separator - MoveToPosition Command”, 16-100.<br />
Tab. A-89 Advanced worklist command Te-MagS_MoveToPosition, parameters<br />
Par. Name Type Range Explanation<br />
1 devicename string1 name of device<br />
2 commandname string1 name of command<br />
3 position expression required position:<br />
0 = Dispense position<br />
1 = Aspirate position<br />
2 = Re-suspension position<br />
3 = Incubation position<br />
Second field for this parameter: z-pos a)<br />
4 needs_allwd_lw expression specify 0 (does not need a specific labware<br />
type)<br />
5 allowed_labware expression not relevant (specify an empty string)<br />
a) Z-position (height) of the magnet block (range: 1 to 31 steps). The z-pos field is only specified for the<br />
Aspirate position and only if the z-position feature is activated (it is always omitted for Dispense, Resuspension<br />
and Incubation). The Z-position feature requires special Te-MagS hardware. See<br />
16.32.4 “Magnetic Bead Separator - Execution Command”, 16-102 for more information.<br />
Example (z-position feature activated, z-pos set to 22):<br />
<strong>Freedom</strong> <strong>EVOware</strong> <strong>Software</strong> <strong>Manual</strong>, 393172, en, V<strong>2.3</strong> A - 173
A - Appendix A<br />
Advanced Worklist Commands<br />
FACTS("Te-MagS","Te-MagS_MoveToPosition","1 22","0","");<br />
A.15.10.2 ActivateHeater (Worklist: Te-MagS_ActivateHeater)<br />
The advanced worklist command which corresponds to the Te-Mags-<br />
ActivateHeater device command is “Te-MagS_ActivateHeater”.<br />
The parameters of the advanced worklist command are shown in the following<br />
table. For more information on this command see 16.32.2 “Magnetic Bead<br />
Separator - ActivateHeater Command”, 16-101.<br />
Tab. A-90 Advanced worklist command Te-MagS_ActivateHeater, parameters<br />
Par. Name Type Range Explanation<br />
1 devicename string1 name of device<br />
2 commandname string1 name of command<br />
3 temperature expression required temperature<br />
4 needs_allwd_lw expression specify 0 (does not need a specific labware<br />
type)<br />
5 allowed_labware expression not relevant (specify an empty string)<br />
Example:<br />
FACTS("Te-MagS","Te-MagS_ActivateHeater","65","0","");<br />
A.15.10.3 DeactivateHeater (Worklist: Te-MagS_DeactivateHeater)<br />
The advanced worklist command which corresponds to the Te-Mags-<br />
DeactivateHeater device command is “Te-MagS_DeactivateHeater”.<br />
The parameters of the advanced worklist command are shown in the following<br />
table. For more information on this command see 16.3<strong>2.3</strong> “Magnetic Bead<br />
Separator - DeactivateHeater Command”, 16-102.<br />
Tab. A-91 Advanced worklist command Te-MagS_DeactivateHeater, parameters<br />
Par. Name Type Range Explanation<br />
1 devicename string1 name of device<br />
2 commandname string1 name of command<br />
3 exec_parameters expression no execution parameters (specify an<br />
empty string)<br />
4 needs_allwd_lw expression specify 0 (does not need a specific labware<br />
type)<br />
5 allowed_labware expression not relevant (specify an empty string)<br />
Example:<br />
FACTS("Te-MagS","Te-MagS_DeactivateHeater","","0","");<br />
A - 174 <strong>Freedom</strong> <strong>EVOware</strong> <strong>Software</strong> <strong>Manual</strong>, 393172, en, V<strong>2.3</strong>
A - Appendix A<br />
Advanced Worklist Commands<br />
A.15.10.4 Execution (Worklist: Te-MagS_Execution)<br />
The advanced worklist command which corresponds to the Te-Mags-Execution<br />
device command is “Te-MagS_Execution”.<br />
The parameters of the advanced worklist command are shown in the following<br />
table. For more information on this command see 16.32.4 “Magnetic Bead<br />
Separator - Execution Command”, 16-102.<br />
Tab. A-92 Advanced worklist command Te-MagS_Execution, parameters<br />
Par. Name Type Range Explanation<br />
1 devicename string1 name of device<br />
2 commandname string1 name of command<br />
3 exec_parameters expression one or more sets of parameters, one set<br />
for each line of the separation script.<br />
See following table.<br />
4 needs_allwd_lw expression specify 0 (does not need a specific labware<br />
type)<br />
5 allowed_labware expression not relevant (specify an empty string)<br />
Tab. A-93 Advanced worklist command Te-MagS_Execution, separation script parameters<br />
Separation script<br />
command Par. 1 Par. 2 Par. 3 Par. 4 Par. 5 Par. 6<br />
Magnetic mix 1: cyles hours minutes seconds z-pos a)<br />
Incubation 2: hours minutes seconds<br />
Wait 3: hours minutes seconds<br />
Move to position 4: required position:<br />
1 = Dispense<br />
2 = Aspirate<br />
3 = Re-suspension<br />
4 = Incubation<br />
z-pos b)<br />
Command 5: firmware command<br />
a) Z-position (height) of the magnet block (range: 1 to 31 steps). The Z-position feature requires special Te-<br />
MagS hardware. See 16.32.4 “Magnetic Bead Separator - Execution Command”, 16-102 for more<br />
information<br />
b) Z-position (height) of the magnet block (range: 1 to 31 steps). The z-pos field is only specified for the<br />
Aspirate position (this field is omitted for Dispense, Re-suspension and Incubation). Specify 31 if the Z-<br />
position feature is deactivated.<br />
Magnetic mix has six parameters. Incubation and Wait have four parameters.<br />
Move to position has two or three parameters. Command has two parameters.<br />
Parameter 1 (command type) and parameter 2 are separated by “:”. The other<br />
parameters are separated by spaces. Parameter sets are separated by commas.<br />
Example (z-position feature activated, z-pos set to 22 in two of the commands):<br />
FACTS("Te-MagS","Te-MagS_Execution","1:3 0 0 15 22,3:0 0 25,2:0 0 40,4:2<br />
22,5:RPZ1","0","");<br />
<strong>Freedom</strong> <strong>EVOware</strong> <strong>Software</strong> <strong>Manual</strong>, 393172, en, V<strong>2.3</strong> A - 175
A - Appendix A<br />
Advanced Worklist Commands<br />
A.15.11 Advanced Worklist Commands for the Te-Stack Stacker<br />
The following describes the most important advanced worklist commands for the<br />
Te-Stack Stacker.<br />
A.15.11.1 InitStacker (Worklist: Te-Stacker_InitStacker)<br />
The advanced worklist command which corresponds to the Te-Stack-InitStacker<br />
device command is “Te-Stacker_InitStacker”.<br />
The parameters of the advanced worklist command are shown in the following<br />
table. For more information on this command see 16.34.1 “Te-Stack - InitStacker<br />
Command”, 16-108.<br />
Tab. A-94 Advanced worklist command Te-Stacker_InitStacker, parameters<br />
Par. Name Type Range Explanation<br />
1 devicename string1 name of device<br />
2 commandname string1 name of command<br />
3 exec_parameters expression no execution parameters (specify an<br />
empty string)<br />
4 needs_allwd_lw expression specify 0 (does not need a specific labware<br />
type)<br />
5 allowed_labware expression not relevant (specify an empty string)<br />
Example:<br />
FACTS("Te-Stacker","Te-Stacker_InitStacker","","0","");<br />
A.15.11.2 ReturnPlate (Worklist: Te-Stacker_ReturnPlate)<br />
The advanced worklist command which corresponds to the Te-Stack-ReturnPlate<br />
device command is “Te-Stacker_ReturnPlate”.<br />
The parameters of the advanced worklist command are shown in the following<br />
table. For more information on this command see 16.34.3 “Te-Stack - ReturnPlate<br />
Command”, 16-108.<br />
Tab. A-95 Advanced worklist command Te-Stacker_ReturnPlate, parameters<br />
Par. Name Type Range Explanation<br />
1 devicename string1 name of device<br />
2 commandname string1 name of command<br />
3 tower expression stacker tower<br />
4 needs_allwd_lw expression specify 1 (needs a specific labware type)<br />
5 allowed_labware expression required labware type<br />
Example:<br />
FACTS("Te-Stacker","Te-Stacker_ReturnPlate","2","1","96_Well_Microplate");<br />
A - 176 <strong>Freedom</strong> <strong>EVOware</strong> <strong>Software</strong> <strong>Manual</strong>, 393172, en, V<strong>2.3</strong>
A - Appendix A<br />
Advanced Worklist Commands<br />
A.15.11.3 PrepareReturnPlate (Worklist: Te-Stacker_PrepareReturnPlate)<br />
The advanced worklist command which corresponds to the Te-Stack-<br />
PrepareReturnPlate device command is “Te-Stacker_PrepareReturnPlate”.<br />
The parameters of the advanced worklist command are shown in the following<br />
table. For more information on this command see 16.34.4 “Te-Stack -<br />
PrepareReturnPlate Command”, 16-109.<br />
Tab. A-96 Advanced worklist command Te-Stacker_PrepareReturnPlate, parameters<br />
Par. Name Type Range Explanation<br />
1 devicename string1 name of device<br />
2 commandname string1 name of command<br />
3 tower expression stacker tower<br />
4 needs_allwd_lw expression specify 0 (does not need a specific labware<br />
type)<br />
5 allowed_labware expression not relevant (specify an empty string)<br />
Example:<br />
FACTS("Te-Stacker","Te-Stacker_PrepareReturnPlate","2","0","");<br />
A.15.11.4 PresentPlate (Worklist: Te-Stacker_PresentPlate)<br />
The advanced worklist command which corresponds to the Te-Stack-PresentPlate<br />
device command is “Te-Stacker_PresentPlate”.<br />
The parameters of the advanced worklist command are shown in the following<br />
table. For more information on this command see 16.34.5 “Te-Stack -<br />
PresentPlate Command”, 16-109.<br />
Tab. A-97 Advanced worklist command Te-Stacker_PresentPlate, parameters<br />
Par. Name Type Range Explanation<br />
1 devicename string1 name of device<br />
2 commandname string1 name of command<br />
3 tower expression stacker tower<br />
4 needs_allwd_lw expression specify 1 (needs a specific labware type)<br />
5 allowed_labware expression required labware type<br />
Example:<br />
FACTS("Te-Stacker","Te-Stacker_PresentPlate","2","1","96_Well_Microplate");<br />
<strong>Freedom</strong> <strong>EVOware</strong> <strong>Software</strong> <strong>Manual</strong>, 393172, en, V<strong>2.3</strong> A - 177
A - Appendix A<br />
Advanced Worklist Commands<br />
A - 178 <strong>Freedom</strong> <strong>EVOware</strong> <strong>Software</strong> <strong>Manual</strong>, 393172, en, V<strong>2.3</strong>
B - Appendix B - FDA 21 CFR Part 11 Compliance<br />
Related Documentation<br />
B<br />
Appendix B - FDA 21 CFR Part 11 Compliance<br />
The United States Food and Drug Administration (FDA) issued a set of regulations<br />
in 1997 that outlines its criteria for acceptance of electronic records, electronic<br />
signatures and handwritten signatures (referred to as 21 CFR Part 11). The<br />
regulations state the conditions under which the FDA considers electronic<br />
signatures and electronic records to be trustworthy, reliable and equivalent to<br />
traditional handwritten signatures on paper. The criteria were provided in<br />
response to industry requests. In this manner, it defines the conditions under<br />
which an organization must operate to meet its record keeping and record<br />
submission requirements when it uses electronic records and signatures rather<br />
than paper records and handwritten signatures.<br />
The preamble to the 21 CFR Part 11 rule states that “the use of electronic records<br />
as well as their submission to the FDA is voluntary”. However, where an<br />
organization does decide to use electronic records and electronic signatures, the<br />
requirements must be met in full for all relevant electronic records. Organizations<br />
that wish to operate under 21 CFR Part 11 must take the steps described in this<br />
appendix to ensure complete compliance.<br />
B.1 Related Documentation<br />
The following publications from the FDA contain useful information on the 21 CFR<br />
Part 11 regulations:<br />
21 CFR Part 11, Electronic Records; Electronic Signatures; Final Rule;<br />
Department of Health and Human Services, Food and Drug Administration, March<br />
20, 1997;<br />
Guidance for Industry – 21 CFR Part 11 – Electronic Records & Electronic<br />
Signatures – Maintenance of Electronic Records;<br />
Guidance for Industry – 21 CFR Part 11 – Electronic Records & Electronic<br />
Signatures – Glossary of Terms.<br />
B.2 Purpose of this Appendix<br />
This appendix discusses the major requirements of the 21 CFR Part 11<br />
regulations and details the technical features which have been implemented in the<br />
Tecan <strong>Freedom</strong> <strong>EVOware</strong> software to help Tecan customers to reach compliance.<br />
It also indicates which steps the Tecan customers must carry out to achieve<br />
compliance.<br />
The main part of this appendix discusses the relevant issues in the 21 CFR Part<br />
11 regulations rule by rule and identifies how <strong>Freedom</strong> <strong>EVOware</strong> helps to ensure<br />
compliance with the regulations and what Tecan customers must do to achieve<br />
compliance. Refer to the FDA website and FDA publications for the full text of the<br />
regulations.<br />
The regulations primarily require analytical laboratories to consider the following<br />
points:<br />
• The use of validated equipment and computer systems,<br />
• Secure retention of electronic records to instantly reconstruct analyses,<br />
• Computer-generated, time-stamped audit trails,<br />
<strong>Freedom</strong> <strong>EVOware</strong> <strong>Software</strong> <strong>Manual</strong>, 393172, en, V<strong>2.3</strong> B - 1
B - Appendix B - FDA 21 CFR Part 11 Compliance<br />
Definitions and Acronyms<br />
• System and data security, data integrity and confidentiality through limited<br />
authorized system access,<br />
• Secure electronic signatures for closed and open systems,<br />
• Digital signatures for open systems.<br />
Implementing the new regulations will significantly affect the instrumentation, work<br />
processes and people in laboratories that set out to be compliant. The current<br />
process of generating signatures must be evaluated (Who has to sign what, why<br />
and when?). New procedures must be developed within companies and<br />
laboratories to limit the access to systems and data (Who can do what?).<br />
Computer systems used for implementation may need to be updated or replaced<br />
to ensure correct functionality. Finally, the manner of using and handling user<br />
names and passwords for legally binding signatures may have to change.<br />
Key topics covered by the regulations are:<br />
Validation: Validation of the system that creates and maintains electronic records<br />
to ensure accuracy, reliability, consistent intended performance and the ability to<br />
discern invalid or altered records.<br />
Controlled system access: Limiting system access to authorized individuals<br />
only.<br />
Audit trails: The usage of secure, computer-generated, time-stamped trails<br />
(older process data and log files must be archived and must not be deleted).<br />
System controls: Operational system procedures (to enforce the correct<br />
sequencing of steps and events).<br />
Accurate and complete copies: Procedures to ensure that only authorized<br />
individuals can use the system, electronically sign a record, access the operation<br />
or computer system, input or output device, alter a record or perform the operation<br />
at hand.<br />
Protected systems and records:<br />
• The ability to create accurate and complete copies of records – the system<br />
must allow the creation of accurate and complete copies of the electronic<br />
records in human-readable as well as in electronic form for inspection and<br />
review by the FDA.<br />
• The protection of records, for example by an appropriately applied system of<br />
access privileges or rights in the Microsoft Windows file system and/or<br />
network directories to enable accurate and ready<br />
• The ability to retrieve process data, log files and audit trails data throughout<br />
the required retention period of the records.<br />
Adequate training: Sufficient education, training and experience for persons who<br />
develop, maintain and use the electronic systems.<br />
B.3 Definitions and Acronyms<br />
The following explains key terms which are used in this section of the manual and/<br />
or are used in the FDA documentation on the CFR Part 11 regulations.<br />
ASCII<br />
American <strong>Standard</strong> Code for Information Interchange. A standard for<br />
assigning numerical values to the set of letters in the Roman alphabet and<br />
typographic characters.<br />
Audit trail<br />
A computer-generated and time stamped record of who did what and when. In<br />
the context of <strong>Freedom</strong> <strong>EVOware</strong>, audit trails are the sets of process data and<br />
log files which are automatically generated by the software<br />
B - 2 <strong>Freedom</strong> <strong>EVOware</strong> <strong>Software</strong> <strong>Manual</strong>, 393172, en, V<strong>2.3</strong>
B - Appendix B - FDA 21 CFR Part 11 Compliance<br />
Definitions and Acronyms<br />
Authenticated access, authority checks<br />
Systems used to establish and verify as conclusively as possible that a person<br />
logging in to the network is who he or she claims to be. According to the FDA,<br />
“authority checks” should be designed to “ensure that only authorized<br />
individuals can use the system, electronically sign a record, access the<br />
operation or computer system input or output device, alter a record or perform<br />
operations”.<br />
Biometrics<br />
In the context of computer security, this refers to authentication techniques<br />
that rely on measurable physical characteristics that can be automatically<br />
checked, such as fingerprints, speech or retinal patterns. <strong>Freedom</strong> <strong>EVOware</strong><br />
does not support biometric methods to verify an individual’s identity.<br />
Checksum<br />
A checksum is a computed value which depends on the contents of a block of<br />
data. The checksum is re-computed for the received data and compared with<br />
the checksum sent with the data. If the two values are the same, the recipient<br />
of the data can be confident that the data was received correctly. <strong>Freedom</strong><br />
<strong>EVOware</strong> uses a checksum system which is based on the CRC algorithm to<br />
protect important files. The checksum is used to detect corrupted or otherwise<br />
altered data. It is also able to detect whether files have been modified outside<br />
of <strong>Freedom</strong> <strong>EVOware</strong> by another program or process.<br />
Closed system<br />
An environment in which system access is controlled by persons who are<br />
responsible for the content of electronic records that are on the system.<br />
<strong>Freedom</strong> <strong>EVOware</strong> is a closed system.<br />
CRC<br />
A Cyclic Redundancy Check is a computed value which is used to detect<br />
corrupted or otherwise altered data.<br />
Data integrity<br />
Validity of data and its relationships. In order for electronic records to be<br />
trustworthy and reliable, the links between raw data, meta-data and results<br />
must not be compromised or broken. Without data integrity, it is not possible to<br />
reliably regenerate a previous result.<br />
Digital signature<br />
An electronic signature based upon cryptographic methods of originator<br />
authentication, computed by using a set of rules and a set of parameters such<br />
that the identity of the signer and the integrity of the data can be verified.<br />
Disabled account<br />
A user account that has its access turned off so that it is not usable until such<br />
time as access is granted again.<br />
Electronic record<br />
Any combination of text, graphics, data, audio, pictorial or other information<br />
representation in digital form that is created, modified, maintained, archived,<br />
retrieved or distributed by a computer system.<br />
Electronic signature<br />
A computer data compilation of any symbol or series of symbols executed,<br />
adopted or authorized by an individual to be the legally binding equivalent of<br />
the individual’s handwritten signature.<br />
Encryption<br />
Translation of data into a secret code in order to make the data secure.<br />
<strong>Freedom</strong> <strong>EVOware</strong> <strong>Software</strong> <strong>Manual</strong>, 393172, en, V<strong>2.3</strong> B - 3
B - Appendix B - FDA 21 CFR Part 11 Compliance<br />
Definitions and Acronyms<br />
FDA<br />
Food and Drug Administration (US regulatory authority).<br />
File<br />
A collection of data records stored as a unit with a single name.<br />
Handwritten signature<br />
The scripted name or legal mark of an individual handwritten by that individual<br />
and executed or adopted with the present intention to authenticate writing in a<br />
permanent form. The act of signing with a writing or marking instrument such<br />
as a pen or stylus is preserved. The scripted name or legal mark, while<br />
conventionally applied to paper, may also be applied to other devices that<br />
capture the name or mark.<br />
Inactivity disconnect or locked session<br />
This is a computer session that freezes or logs off automatically when no data<br />
has been input for a period of time.<br />
Integrated data organization system, logical security or internal logic<br />
Data management planning and configuring that combines the diverse<br />
applications used by a company with the operating system in such a way that<br />
authentication and authorization are achieved most efficiently and effectively.<br />
Login or login credentials (user name or user ID)<br />
Identification methods that make a computer system recognize users so they<br />
can begin computer sessions, usually based on user names and passwords.<br />
Meta Data<br />
Important for reconstructing a final report from raw data. Meta data includes<br />
integration parameters and calibration tables.<br />
Open system<br />
An environment in which system access is not controlled by persons who are<br />
responsible for the content of electronic records that are on the system. This<br />
is not applicable to <strong>Freedom</strong> <strong>EVOware</strong>. <strong>Freedom</strong> <strong>EVOware</strong> is a closed<br />
system and is not designed for an open system.<br />
Operating system<br />
The operating system is the most important program that runs on a computer.<br />
It performs basic tasks such as recognizing input from the keyboard, sending<br />
output to display screens, keeping track of files and directories, controlling<br />
access to files and directories and controlling peripherals such as printers.<br />
Passwords<br />
Ideally, a password is something nobody can guess.<br />
Permissions or privileges<br />
These are security codes that define or restrict which users can read, write<br />
and execute the associated files, directories or programs. Some departments<br />
only need to look at data, some need to input data or run programs and others<br />
may not need to look at the data at all.<br />
Private data<br />
Personal directories on a file server which are only accessible by the owner of<br />
the data.<br />
Programs<br />
An organized list of instructions that causes a computer to behave in certain<br />
predetermined ways.<br />
Raw Data<br />
Data which has not yet been analyzed.<br />
B - 4 <strong>Freedom</strong> <strong>EVOware</strong> <strong>Software</strong> <strong>Manual</strong>, 393172, en, V<strong>2.3</strong>
B - Appendix B - FDA 21 CFR Part 11 Compliance<br />
Recommendations<br />
Security mechanisms<br />
This refers to techniques for ensuring that data stored in a computer cannot<br />
be read or compromised. Most security measures involve encryption or<br />
passwords.<br />
Server<br />
A computer or device on a network that manages network resources. A file<br />
server stores files, a print server manages printers, a network server manages<br />
network traffic and a database server processes database inquiries.<br />
Service release or service pack<br />
Defect-fix releases of an operating system that address serious issues or<br />
defects reported against a previous release. Service releases need to be<br />
installed on top of the original software. Service releases often address<br />
security issues which have arisen during the use of the software. Generally<br />
speaking, you should install the operating system service release specified for<br />
the <strong>Freedom</strong> <strong>EVOware</strong> software to ensure maximum system security.<br />
Shared desktop, account or login<br />
Shared desktops, accounts or logins can violate the principle of no<br />
repudiation. If the audit trail is not able to distinguish between individuals<br />
using such shared network resources, an electronic signature is not valid.<br />
Tecan customer<br />
Company or organization which uses pipetting instruments and/or other<br />
equipment which is manufactured by Tecan.<br />
User name, User ID<br />
A unique code used together with a password to identify a user.<br />
Validation of a computer system<br />
Confirmation by examination and provision of objective evidence that<br />
computer system specifications conform to user needs and intended uses,<br />
and that all requirements can be consistently fulfilled.<br />
B.4 Recommendations<br />
The following lists points to be considered to ensure compliance with 21 CFR Part<br />
11.<br />
Access security determines who is allowed to log in to a system locally or from a<br />
network and puts mechanisms in place that prevent unauthorized persons from<br />
gaining access to the computer system. For example, the Microsoft operating<br />
systems Windows 2000, NT and XP provide several different types of access<br />
privileges or rights that can be granted or denied to specific users or groups of<br />
users.<br />
System administrator: The person responsible for maintaining a multi-user<br />
computer system and managing the security of the computer network.<br />
Audit trails: 21 CFR Part 11 requires audit trails to be generated independently of<br />
the equipment operator. They must record all activities related to creating,<br />
modifying and deleting records on the system. The user organization must<br />
develop procedures for the data integrity and long-term archiving of audit trails<br />
with data retrieval throughout the legally required retention period.<br />
Configuration settings: An overall organizational structure defining how<br />
permissions or privileges are configured for the computer system, with settings<br />
which may e.g. allow one user to only read a file while another person can<br />
execute the file and a third person can write new data into it.<br />
<strong>Freedom</strong> <strong>EVOware</strong> <strong>Software</strong> <strong>Manual</strong>, 393172, en, V<strong>2.3</strong> B - 5
B - Appendix B - FDA 21 CFR Part 11 Compliance<br />
Security Features in the <strong>Software</strong> Which Assist 21 CFR Part 11 Compliance<br />
Consider whether all signatures which are used now are really needed from a<br />
regulatory point of view.<br />
Create an infrastructure which will allow smooth implementation of the<br />
regulations.<br />
Create awareness of the regulations among all employees, especially regarding<br />
their accountability for electronic signatures.<br />
Decide whether to use full electronic records and signatures or hybrid systems<br />
(records in electronic and paper format). Report all decisions in your process<br />
records.<br />
Develop an implementation plan for the user organization and the laboratory.<br />
Develop procedures for limiting system access to authorized individuals.<br />
Form a task group with members from the information technology department (if<br />
existing), quality assurance personnel and laboratory staff.<br />
Establish procedures for limiting system access to authorized individuals.<br />
Identify all work or activities in the organization or laboratory that will fall under 21<br />
CFR Part 11.<br />
Look at all of the equipment in the laboratory and develop a plan for making it<br />
comply with CFR 21 Part 11.<br />
Provide functional specifications for computerized systems in the laboratory.<br />
Train personnel in the user organization and in the laboratory on the application<br />
and consequences of the regulations.<br />
Validate new computer systems. Follow the equipment qualification approach<br />
with design qualification, installation qualification, operational qualification and<br />
performance qualification.<br />
B.4.1 Assigning and Using <strong>Freedom</strong> <strong>EVOware</strong> User Names<br />
User names in <strong>Freedom</strong> <strong>EVOware</strong> are unique. To allow laboratory personnel to be<br />
uniquely identified by auditors, Tecan customers must provide each of them with<br />
his or her own <strong>Freedom</strong> <strong>EVOware</strong> user name. The same user name must not be<br />
used by groups of users. In addition, Tecan customers must not reassign user<br />
names for use by different employees, for example if a change of staff takes place<br />
or if an employee leaves the company. In such cases, the user name should be<br />
disabled and no longer used.<br />
Tecan customers must instruct their employees not to reveal their user name and<br />
password combinations or to share them with other employees, and to log out<br />
before allowing another employee to use <strong>Freedom</strong> <strong>EVOware</strong> or if they plan to<br />
leave the running system unattended (see 6.1.9 “Lock <strong>EVOware</strong>”, 6-7).<br />
B.5 Security Features in the <strong>Software</strong> Which Assist 21<br />
CFR Part 11 Compliance<br />
B.5.1 Closed Systems<br />
<strong>Freedom</strong> <strong>EVOware</strong> is a closed system and access to <strong>Freedom</strong> <strong>EVOware</strong> requires<br />
a combination of user name and password for unique identification. <strong>Freedom</strong><br />
<strong>EVOware</strong> cannot be used without a valid user name and password. The Tecan<br />
User Management system also require the user’s full name to be specified when<br />
the user account is created.<br />
B - 6 <strong>Freedom</strong> <strong>EVOware</strong> <strong>Software</strong> <strong>Manual</strong>, 393172, en, V<strong>2.3</strong>
B - Appendix B - FDA 21 CFR Part 11 Compliance<br />
Security Features in the <strong>Software</strong> Which Assist 21 CFR Part 11 Compliance<br />
This mechanism provides both the ability to carry out authority checks and the<br />
ability to sign and/or authorize electronic records. Each user is traceable and<br />
accountable for his or her actions, process data and configuration changes.<br />
To maximize security, the <strong>Freedom</strong> <strong>EVOware</strong> access control mechanisms are<br />
independent of the access control mechanisms in the Microsoft operating system.<br />
Accordingly, user accounts and passwords for the operating system and for the<br />
<strong>Freedom</strong> <strong>EVOware</strong> system are managed separately. <strong>Freedom</strong> <strong>EVOware</strong> user<br />
accounts are managed with the Tecan User Management system. User accounts<br />
for the Microsoft operating system are managed using standard Microsoft tools<br />
and procedures.<br />
B.5.2 <strong>Freedom</strong> <strong>EVOware</strong> User Levels<br />
There are four user levels in <strong>Freedom</strong> <strong>EVOware</strong>:<br />
Operator, Power User, Application Specialist and Administrator.<br />
Operator has rights to:<br />
• Run a pipetting script (<strong>Freedom</strong> <strong>EVOware</strong> <strong>Standard</strong>)<br />
or process (<strong>Freedom</strong> <strong>EVOware</strong> Plus)<br />
• Run maintenance scripts (see 6.4.2 “Run Maintenance”, 6-10)<br />
• View a pipetting script (but not change it)<br />
• Handle errors during pipetting<br />
Power User: Same rights as Operator but with additional rights to:<br />
• Start running pipetting scripts at a specified line number.<br />
• Run direct commands (see 5.4.1.3 “Direct commands”, 5-10)<br />
Application Specialist: Same rights as Operator but with additional rights to:<br />
• Create, modify and save pipetting scripts (<strong>Freedom</strong> <strong>EVOware</strong> <strong>Standard</strong> and<br />
<strong>Freedom</strong> <strong>EVOware</strong> Plus) and processes (<strong>Freedom</strong> <strong>EVOware</strong> Plus)<br />
• Edit the configuration of the pipetting instrument<br />
• Edit the configurations of carriers and labware<br />
• Edit the liquid classes for pipetting<br />
• Change settings in the <strong>Freedom</strong> <strong>EVOware</strong> Configuration Tool<br />
• Skip pre-programmed timers during pipetting,<br />
Administrator: Same rights as Application Specialist but with additional rights to:<br />
• Create and disable/re-enable users<br />
• Configure the options in the Tecan User Management system<br />
• Enable or disable the Electronic Signatures feature<br />
B.5.3 Tecan User Management System<br />
The Tecan User Management system, which is used by <strong>Freedom</strong> <strong>EVOware</strong> and<br />
other Tecan software components, has the following main features:<br />
• All changes relating to user management require <strong>Freedom</strong> <strong>EVOware</strong><br />
Administrator access rights.<br />
• All changes relating to user management are recorded in the user<br />
management audit trail.<br />
• User accounts are automatically disabled following a configurable number of<br />
consecutive failed attempts to enter the correct user name and password<br />
combination. The disabled account can only be reactivated again by the<br />
<strong>Freedom</strong> <strong>EVOware</strong> Administrator.<br />
<strong>Freedom</strong> <strong>EVOware</strong> <strong>Software</strong> <strong>Manual</strong>, 393172, en, V<strong>2.3</strong> B - 7
B - Appendix B - FDA 21 CFR Part 11 Compliance<br />
Security Features in the <strong>Software</strong> Which Assist 21 CFR Part 11 Compliance<br />
• <strong>Freedom</strong> <strong>EVOware</strong> does not allow more than one person to use the software<br />
simultaneously.<br />
• Users can log out without leaving <strong>Freedom</strong> <strong>EVOware</strong> or interrupting a running<br />
pipetting script or process. The same or a different user can then log in to<br />
<strong>Freedom</strong> <strong>EVOware</strong> again while the script or process is still running. See<br />
6.1.9 “Lock <strong>EVOware</strong>”, 6-7.<br />
• Users are automatically logged out after a specified time during which no<br />
keyboard or mouse-click activities have been detected.<br />
• User passwords expire after a configurable number of days. The user must<br />
then choose another password. The new password must be different from the<br />
old password.<br />
• Passwords must contain a specified minimum number of characters.<br />
• Passwords can be forced to contain numeric digits.<br />
• Passwords cannot be reused.<br />
• User names and user name and password combinations are unique within the<br />
system and cannot be assigned more than once.<br />
• The <strong>Freedom</strong> <strong>EVOware</strong> Administrator provides a temporary password when<br />
setting up a user. When the new user first logs on to the system, he or she is<br />
forced to change the password immediately. This ensures that no one other<br />
than the individual user knows the particular user name and password<br />
combination.<br />
• If a user forgets his/her password, the <strong>Freedom</strong> <strong>EVOware</strong> Administrator does<br />
not have access to the user’s password. The <strong>Freedom</strong> <strong>EVOware</strong><br />
Administrator is only able to reset the password and provide a new temporary<br />
password.<br />
• If the <strong>Freedom</strong> <strong>EVOware</strong> Administrator forgets his or her password, no one<br />
has access to the password.<br />
• A specified person (typically the <strong>Freedom</strong> <strong>EVOware</strong> Administrator) can be<br />
automatically notified by eMail in case of potential security threats (e.g. a user<br />
account has been disabled after a configurable number of consecutive failed<br />
login attempts).<br />
B.5.3.1 User Management Audit Trail<br />
All changes relating to user management are recorded in the user management<br />
audit trail. A new file is written to the \AuditTrail\Configuration<br />
directory each time you start and then exit the <strong>Freedom</strong> <strong>EVOware</strong> Configuration<br />
Tool. The file name is UserTrailYYYYMMDD_HHMMSS, where YYYYMMDD is<br />
the file creation date and HHMMSS is the file creation time.<br />
B.5.4 Checksums<br />
<strong>Freedom</strong> <strong>EVOware</strong> uses a checksum system which is based on a CRC algorithm<br />
to protect configuration, script, trace and log files. The checksum is a computed<br />
value which is used to detect corrupted or otherwise altered data. It is also able to<br />
detect whether files have been modified outside of <strong>Freedom</strong> <strong>EVOware</strong> by another<br />
program or process. The checksum is stored in the file header.<br />
The Data Explorer can be used to check whether <strong>Freedom</strong> <strong>EVOware</strong><br />
configuration and data files have valid checksums (see A.9.1 “Data Explorer Tool”,<br />
A-35).<br />
The plain text header of each file can also be viewed independently of <strong>Freedom</strong><br />
<strong>EVOware</strong> using a suitable editor. The following information is stored in the header:<br />
• CRC checksum<br />
B - 8 <strong>Freedom</strong> <strong>EVOware</strong> <strong>Software</strong> <strong>Manual</strong>, 393172, en, V<strong>2.3</strong>
B - Appendix B - FDA 21 CFR Part 11 Compliance<br />
Security Features in the <strong>Software</strong> Which Assist 21 CFR Part 11 Compliance<br />
• Date and time of creation or modification<br />
• User name<br />
• User-specified reason for the change (if the Electronic Signatures feature is<br />
enabled in the <strong>Freedom</strong> <strong>EVOware</strong> Configuration Tool) See B.5.5 “Electronic<br />
Signatures”, B-9.<br />
• User’s full name<br />
A warning is shown if an attempt is made to load a file with an incorrect or missing<br />
checksum. The user can then choose to load the file or cancel. In the latter case,<br />
<strong>Freedom</strong> <strong>EVOware</strong> aborts with the exception of script files. In this case, the file is<br />
not loaded but <strong>Freedom</strong> <strong>EVOware</strong> remains running. An entry is written to the log<br />
file each time an incorrect or missing checksum is found.<br />
Note: A user with <strong>Freedom</strong> <strong>EVOware</strong> Administrator rights can enable or disable<br />
the incorrect checksum warning using the <strong>Freedom</strong> <strong>EVOware</strong> Configuration Tool<br />
(see 8.3.1.4 “Protocol Options Tab”, 8-8). To comply with the FDA regulations,<br />
this feature must not be disabled.<br />
B.5.5 Electronic Signatures<br />
The <strong>Freedom</strong> <strong>EVOware</strong> security features ensure that the currently logged in user<br />
can be uniquely identified. Furthermore, <strong>Freedom</strong> <strong>EVOware</strong> users should be<br />
instructed never to leave the running system unattended without first logging out.<br />
To ensure full compliance with 21 CFR Part 11, the <strong>Freedom</strong> <strong>EVOware</strong><br />
Administrator must also activate <strong>Freedom</strong> <strong>EVOware</strong>’s Electronic Signatures<br />
feature, which provides support for a series of signings in one session.<br />
The Electronic Signatures feature records user input on the reason for creating or<br />
changing configuration files, data files and user management settings. It helps to<br />
identify why the user performed a specific action.<br />
Note: A user with <strong>Freedom</strong> <strong>EVOware</strong> Administrator rights can enable or disable<br />
the electronic signatures feature using the <strong>Freedom</strong> <strong>EVOware</strong> Configuration Tool<br />
(see 8.3.1.4 “Protocol Options Tab”, 8-8). To comply with the FDA regulations,<br />
this feature must not be disabled.<br />
If the Electronic Signatures feature is activated, a dialog box is shown when<br />
carrying out one of the following actions:<br />
• Creating, deleting or editing script files and script templates<br />
• Creating, deleting or editing process files and process templates<br />
• Creating, deleting or editing worktable templates<br />
• Creating, deleting or editing carrier definitions<br />
• Creating, deleting or editing labware definitions<br />
• Creating, deleting or editing liquid classes<br />
• Making changes to configuration settings<br />
• Creating, deleting or editing users, groups and password rules<br />
The currently logged in user must re-enter his or her password and specify the<br />
reason for the change:<br />
<strong>Freedom</strong> <strong>EVOware</strong> <strong>Software</strong> <strong>Manual</strong>, 393172, en, V<strong>2.3</strong> B - 9
B - Appendix B - FDA 21 CFR Part 11 Compliance<br />
Security Features in the <strong>Software</strong> Which Assist 21 CFR Part 11 Compliance<br />
Fig. B-1<br />
Password prompt with the Electronic Signatures feature active<br />
After confirming the entries by clicking OK, an electronic signature is executed<br />
and an entry is made in <strong>Freedom</strong> <strong>EVOware</strong>’s trace file.<br />
The Data Explorer can be used to view the user comment for each of these files<br />
(see A.9.1 “Data Explorer Tool”, A-35). Only the most recent comment is saved<br />
in the file. Earlier comments are stored with previous versions of these files, which<br />
are automatically backed up to the \AuditTrail\Configuration<br />
directory (see A.5 “<strong>Freedom</strong> <strong>EVOware</strong> Directory Structure and Files”, A-25).<br />
The plain text header of each file can also be viewed independently of <strong>Freedom</strong><br />
<strong>EVOware</strong> using a suitable editor. The following information is stored in the header:<br />
• CRC checksum<br />
• Date and time of creation or modification<br />
• User name<br />
• User-specified reason for the change (if the Electronic Signatures feature is<br />
enabled in the <strong>Freedom</strong> <strong>EVOware</strong> Configuration Tool)<br />
• User’s full name<br />
A user comment is required by 21 CFR Part 58 (GLP) but not by 21 CFR Part 11,<br />
although some customers want to record this type of information anyway.<br />
If one of the above changes has been made automatically by <strong>Freedom</strong> <strong>EVOware</strong>,<br />
a comment is inserted which starts with “<strong>EVOware</strong>:”<br />
B.5.6 Trace File (Audit Trail)<br />
The trace file contains information on configuration, data and log files which have<br />
been created, edited or saved. The default location for the trace file is<br />
\AuditTrail\Log.<br />
Each time a configuration, data or log file is created or modified, a CRC checksum<br />
is stored in the file and an entry is made in the trace file.<br />
Each entry in the trace file specifies the date and time, the name of the currently<br />
logged in user and the file name. Log files are created by <strong>Freedom</strong> <strong>EVOware</strong><br />
automatically and a user name is not included in the trace file entry in this case.<br />
The trace file can be viewed with a plain text editor.<br />
Each time a configuration or data file is modified and saved, the previous version<br />
is archived in the \AuditTrail\Configuration sub-directory. The date<br />
and time is appended to the original filename. The archive copy includes the userspecified<br />
reason for the change if “Electronic Signatures” is enabled in the<br />
<strong>Freedom</strong> <strong>EVOware</strong> Configuration Tool (see B.5.5 “Electronic Signatures”, B-9).<br />
B - 10 <strong>Freedom</strong> <strong>EVOware</strong> <strong>Software</strong> <strong>Manual</strong>, 393172, en, V<strong>2.3</strong>
B - Appendix B - FDA 21 CFR Part 11 Compliance<br />
Part A - General Provisions<br />
All changes relating to user management are recorded in the user management<br />
audit trail (see B.5.3.1 “User Management Audit Trail”, B-8).<br />
B.5.7 Log Files<br />
<strong>Freedom</strong> <strong>EVOware</strong> creates log files to document the pipetting and to record user<br />
actions and changes to parameter values, etc. (see A.1 “Overview of the Log<br />
Files”, A-1).<br />
The log files are written to the directory \AuditTrail\Log and are<br />
protected with checksums which are stored in each file.<br />
<strong>Freedom</strong> <strong>EVOware</strong> users with Administrator or Application Specialist rights can<br />
activate several log file types with different levels of logging detail, either<br />
individually or in combination. See A.1 “Overview of the Log Files”, A-1 for more<br />
information.<br />
• A new log file of type EVO (file name EVO*.log) is created each time <strong>Freedom</strong><br />
<strong>EVOware</strong> is started. It contains initialization information from the <strong>Freedom</strong><br />
<strong>EVOware</strong> software, the <strong>Freedom</strong> <strong>EVOware</strong> version number and the serial<br />
number of the pipetting instrument. It also contains information on the<br />
hardware options and external devices which are currently connected to the<br />
pipetting instrument, including their firmware versions.<br />
• A new log file of type EVO is also created each time a pipetting script is<br />
started. It contains information about the script, the position of the instrument<br />
arms and the instrument settings.<br />
• Each time the pipetting instrument is initialized, <strong>Freedom</strong> <strong>EVOware</strong> writes<br />
information on the positions of arms, the connected external devices and the<br />
COM ports into a new log file of type EVO.<br />
• In addition, the Export Data command can be included in pipetting scripts to<br />
create report files on pipetting operations (see 15.26 “Export Data Command”,<br />
15-48).<br />
B.5.8 Backing Up Files<br />
<strong>Freedom</strong> <strong>EVOware</strong>’s Configuration Tool provides functions for backing up and<br />
restoring important files. Backup and restore operations are reported in the<br />
<strong>Freedom</strong> <strong>EVOware</strong> trace file. See 8.2 “Backing Up and Restoring Your<br />
Configuration”, 8-3 for a list of the files which are backed up.<br />
B.6 Part A - General Provisions<br />
B.6.1 § 11.1 Scope<br />
The structure of this section of the manual is based on 21 CFR Part 11, Electronic<br />
Records; Electronic Signatures; Final Rule; Department of Health and Human<br />
Services, Food and Drug Administration, March 20, 1997 and discusses the key<br />
points in each of the relevant sections, giving information on the steps which are<br />
required to attain FDA compliance.<br />
<strong>Freedom</strong> <strong>EVOware</strong> <strong>Software</strong> <strong>Manual</strong>, 393172, en, V<strong>2.3</strong> B - 11
B - Appendix B - FDA 21 CFR Part 11 Compliance<br />
Part A - General Provisions<br />
B.6.1.1 § 11.1(a) Criteria<br />
Compliance <strong>Freedom</strong> <strong>EVOware</strong><br />
The features implemented in <strong>Freedom</strong> <strong>EVOware</strong> that deal with electronic<br />
records and electronic signatures are described in detail in the following<br />
sections and in B.5.5 “Electronic Signatures”, B-9.<br />
Compliance Tecan Customer<br />
Tecan customers must develop a procedure to establish criteria under which<br />
electronic records, electronic signatures and handwritten signatures executed<br />
on electronic records are considered to be trustworthy, reliable and generally<br />
equivalent to paper records and handwritten signatures.<br />
B.6.1.2 § 11.1(b) Records In Electronic Form<br />
Compliance <strong>Freedom</strong> <strong>EVOware</strong><br />
<strong>Freedom</strong> <strong>EVOware</strong> uses specified directories to store process data, the trace<br />
file (audit trail) and the log files. A default directory structure is created for<br />
these files when <strong>Freedom</strong> <strong>EVOware</strong> is first installed. See A.5 “<strong>Freedom</strong><br />
<strong>EVOware</strong> Directory Structure and Files”, A-25 for a list of the files and<br />
directories which are used. See also B.5.6 “Trace File (Audit Trail)”, B-10.<br />
If required, users with <strong>Freedom</strong> <strong>EVOware</strong> Administrator or Application<br />
Specialist rights can configure <strong>Freedom</strong> <strong>EVOware</strong> to use other directories<br />
(including network directories) for storing data, log and output files. See<br />
8.3.1.4 “Protocol Options Tab”, 8-8.<br />
Compliance Tecan Customer<br />
Tecan customers must develop a procedure to document which records in<br />
electronic form are created, modified, maintained, archived, retrieved or<br />
transmitted and where the records are stored on the computer system. This<br />
does not apply to paper records that are transmitted by electronic means.<br />
B.6.1.3 § 11.1(c) Electronic Signatures<br />
Compliance <strong>Freedom</strong> <strong>EVOware</strong><br />
<strong>Freedom</strong> <strong>EVOware</strong> uses electronic signatures on data and configuration files.<br />
See B.5.5 “Electronic Signatures”, B-9 for more information.<br />
Compliance Tecan Customer<br />
Tecan customers must develop a procedure to identify where electronic<br />
signatures and their associated electronic records are equivalent to<br />
handwritten signatures.<br />
B.6.1.4 § 11.1(d) Electronic Records<br />
Compliance <strong>Freedom</strong> <strong>EVOware</strong><br />
<strong>Freedom</strong> <strong>EVOware</strong> uses specified directories to store process data, the trace<br />
file (audit trail) and the log files. A default directory structure is created for<br />
these files when <strong>Freedom</strong> <strong>EVOware</strong> is first installed. See A.5 “<strong>Freedom</strong><br />
<strong>EVOware</strong> Directory Structure and Files”, A-25 for a list of the files and<br />
directories which are used. See also B.5.6 “Trace File (Audit Trail)”, B-10.<br />
If required, users with <strong>Freedom</strong> <strong>EVOware</strong> Administrator or Application<br />
Specialist rights can configure <strong>Freedom</strong> <strong>EVOware</strong> to use other directories<br />
(including network directories) for storing data, log and output files. See<br />
8.3.1.4 “Protocol Options Tab”, 8-8.<br />
B - 12 <strong>Freedom</strong> <strong>EVOware</strong> <strong>Software</strong> <strong>Manual</strong>, 393172, en, V<strong>2.3</strong>
B - Appendix B - FDA 21 CFR Part 11 Compliance<br />
Part A - General Provisions<br />
Compliance Tecan Customer<br />
Tecan customers must specify where electronic records are used instead of<br />
paper records.<br />
B.6.1.5 § 11.1(e) Computer Systems<br />
Compliance <strong>Freedom</strong> <strong>EVOware</strong><br />
As an important tool for quality assurance, Tecan has developed detailed<br />
guidelines and rules for all phases of hardware and software development and<br />
testing.<br />
Compliance Tecan Customer<br />
Tecan customers must name the computer systems (hardware and software)<br />
and the documents which will be made available for FDA inspections.<br />
B.6.2 § 11.2 Implementation<br />
B.6.2.1 § 11.2(a) Required Records<br />
Compliance <strong>Freedom</strong> <strong>EVOware</strong><br />
<strong>Freedom</strong> <strong>EVOware</strong> uses specified directories to store process data, the trace<br />
file (audit trail) and the log files. A default directory structure is created for<br />
these files when <strong>Freedom</strong> <strong>EVOware</strong> is first installed. See A.5 “<strong>Freedom</strong><br />
<strong>EVOware</strong> Directory Structure and Files”, A-25 for a list of the files and<br />
directories which are used. See also B.5.6 “Trace File (Audit Trail)”, B-10.<br />
If required, users with <strong>Freedom</strong> <strong>EVOware</strong> Administrator or Application<br />
Specialist rights can configure <strong>Freedom</strong> <strong>EVOware</strong> to use other directories<br />
(including network directories) for storing data, log and output files.<br />
8.3.1.4 “Protocol Options Tab”, 8-8.<br />
Compliance Tecan Customer<br />
Tecan customers must keep copies of all records which are required for FDA<br />
inspections and establish reliable procedures to make all technical processes<br />
comprehensible and understandable.<br />
B.6.2.2 § 11.2(b) Submitted Records<br />
Compliance <strong>Freedom</strong> <strong>EVOware</strong><br />
<strong>Freedom</strong> <strong>EVOware</strong> uses specified directories to store process data, the trace<br />
file (audit trail) and the log files. A default directory structure is created for<br />
these files when <strong>Freedom</strong> <strong>EVOware</strong> is first installed. See A.5 “<strong>Freedom</strong><br />
<strong>EVOware</strong> Directory Structure and Files”, A-25 for a list of the files and<br />
directories which are used. See also B.5.6 “Trace File (Audit Trail)”, B-10.<br />
If required, users with <strong>Freedom</strong> <strong>EVOware</strong> Administrator or Application<br />
Specialist rights can configure <strong>Freedom</strong> <strong>EVOware</strong> to use other directories<br />
(including network directories) for storing data, log and output files. See<br />
8.3.1.4 “Protocol Options Tab”, 8-8.<br />
Compliance Tecan Customer<br />
Tecan customers must keep copies of all records which are required for FDA<br />
inspections and provide reliable procedures to make all technical processes<br />
comprehensible and understandable.<br />
<strong>Freedom</strong> <strong>EVOware</strong> <strong>Software</strong> <strong>Manual</strong>, 393172, en, V<strong>2.3</strong> B - 13
B - Appendix B - FDA 21 CFR Part 11 Compliance<br />
Part B - Electronic Records<br />
B.6.<strong>2.3</strong> § 11.2(b) Requirements<br />
Compliance <strong>Freedom</strong> <strong>EVOware</strong><br />
As an important tool for quality assurance, Tecan has developed detailed<br />
guidelines and rules for all phases of hardware and software development and<br />
testing.<br />
Compliance Tecan Customer<br />
Tecan customers must develop a procedure to ensure compliance with all<br />
FDA requirements.<br />
B.6.2.4 § 11.2(b) Identification<br />
Compliance <strong>Freedom</strong> <strong>EVOware</strong><br />
<strong>Freedom</strong> <strong>EVOware</strong> uses specified directories to store process data, the trace<br />
file (audit trail) and the log files. A default directory structure is created for<br />
these files when <strong>Freedom</strong> <strong>EVOware</strong> is first installed. See A.5 “<strong>Freedom</strong><br />
<strong>EVOware</strong> Directory Structure and Files”, A-25 for a list of the files and<br />
directories which are used. See also B.5.6 “Trace File (Audit Trail)”, B-10.<br />
Compliance Tecan Customer<br />
Tecan customers must specify the records which will be made available for<br />
FDA inspections.<br />
B.7 Part B - Electronic Records<br />
B.7.1 § 11.10 Control of Closed Systems<br />
§ 11.10 describes controls for closed systems (systems to which access is<br />
controlled by persons responsible for the content of the electronic records on that<br />
system). These controls include measures designed to ensure the integrity of<br />
system operations and information stored in the system. It also addresses the<br />
security of closed systems.<br />
B - 14 <strong>Freedom</strong> <strong>EVOware</strong> <strong>Software</strong> <strong>Manual</strong>, 393172, en, V<strong>2.3</strong>
B - Appendix B - FDA 21 CFR Part 11 Compliance<br />
Part B - Electronic Records<br />
B.7.1.1 § 11.10(a) Validation of System<br />
⌦ Hardware and software<br />
Compliance <strong>Freedom</strong> <strong>EVOware</strong><br />
<strong>Software</strong> verification<br />
Tecan provides objective evidence that the design outputs of a particular<br />
phase of the software development life cycle meet all of the specified<br />
requirements for that phase. <strong>Software</strong> verification looks for consistency,<br />
completeness and correctness of the software and its supporting<br />
documentation as it is being developed and provides support for a subsequent<br />
conclusion that the software is validated.<br />
As an important tool for quality assurance, Tecan has developed detailed<br />
guidelines and rules for all phases of hardware and software development and<br />
testing.<br />
<strong>Software</strong> testing is one of many verification activities which are carried out to<br />
confirm that software development output meets its input requirements. Other<br />
verification activities include various static and dynamic analyses, code and<br />
document inspections, walkthroughs and other techniques.<br />
Supported hardware<br />
See 3.5 “Computer Requirements”, 3-7 for a list of supported hardware.<br />
Compliance Tecan Customer<br />
Tecan customers must develop and implement a procedure for validating the<br />
system. The purpose of validation is “… to ensure accuracy, reliability,<br />
consistent intended performance and the ability to discern invalid or altered<br />
records”. This applies to both new and existing systems.<br />
⌦ Database<br />
Compliance <strong>Freedom</strong> <strong>EVOware</strong><br />
Tecan does not use a database in its <strong>Freedom</strong> <strong>EVOware</strong> software.<br />
Compliance Tecan Customer<br />
Tecan customers must develop and implement a validation procedure if they<br />
want to make a connection between the Tecan software and a database.<br />
⌦ Network<br />
Compliance <strong>Freedom</strong> <strong>EVOware</strong><br />
<strong>Freedom</strong> <strong>EVOware</strong> uses specified directories to store process data, the trace<br />
file (audit trail) and the log files. A default directory structure is created for<br />
these files when <strong>Freedom</strong> <strong>EVOware</strong> is first installed. See A.5 “<strong>Freedom</strong><br />
<strong>EVOware</strong> Directory Structure and Files”, A-25 for a list of the files and<br />
directories which are used. See also B.5.6 “Trace File (Audit Trail)”, B-10.<br />
If required, users with <strong>Freedom</strong> <strong>EVOware</strong> Administrator or Application<br />
Specialist rights can configure <strong>Freedom</strong> <strong>EVOware</strong> to use other directories<br />
(including network directories) for storing data, log and output files. See<br />
8.3.1.4 “Protocol Options Tab”, 8-8.<br />
Compliance Tecan Customer<br />
Tecan customers must develop and implement a validation procedure for their<br />
computer network. This includes managing user access and other security<br />
aspects, data backups and archiving.<br />
<strong>Freedom</strong> <strong>EVOware</strong> <strong>Software</strong> <strong>Manual</strong>, 393172, en, V<strong>2.3</strong> B - 15
B - Appendix B - FDA 21 CFR Part 11 Compliance<br />
Part B - Electronic Records<br />
⌦ Validation master plan<br />
Compliance <strong>Freedom</strong> <strong>EVOware</strong><br />
As an important tool for quality assurance, Tecan has developed detailed<br />
guidelines and rules for all phases of hardware and software development and<br />
testing. The guidelines also cover validation and verification of product<br />
requirements.<br />
21 CFR Part 11 contains rules for both closed and open computer systems.<br />
<strong>Freedom</strong> <strong>EVOware</strong> is a closed system and is not designed for an open<br />
system.<br />
Compliance Tecan Customer<br />
Tecan customers must develop and implement a master plan to validate the<br />
complete system with all instruments and instrument connections.<br />
⌦ Installation qualification<br />
Compliance <strong>Freedom</strong> <strong>EVOware</strong><br />
This does not lie in the scope of the <strong>Freedom</strong> <strong>EVOware</strong> software.<br />
Compliance Tecan Customer<br />
Tecan customers must develop and implement a procedure for installation<br />
qualification. This can be done e.g. by setting up and then validating a<br />
<strong>Freedom</strong> <strong>EVOware</strong> script.<br />
Installation qualification may also be connected with user management and<br />
rules on who can install what, when and where.<br />
⌦ Operational qualification<br />
Compliance <strong>Freedom</strong> <strong>EVOware</strong><br />
This does not lie in the scope of the <strong>Freedom</strong> <strong>EVOware</strong> software.<br />
Compliance Tecan Customer<br />
Tecan customers must develop and implement a procedure for routine<br />
operational qualification for all persons using the Tecan equipment.<br />
This can be done e.g. by using a “control” or “standard” during pipetting or by<br />
performing dedicated validation runs.<br />
⌦ Control procedures<br />
Compliance <strong>Freedom</strong> <strong>EVOware</strong><br />
<strong>Freedom</strong> <strong>EVOware</strong> does not provide direct support for control procedures.<br />
Compliance Tecan Customer<br />
Tecan customers must develop and implement control procedures.<br />
⌦ Detecting invalid and/or altered records<br />
Compliance <strong>Freedom</strong> <strong>EVOware</strong><br />
See B.5.4 “Checksums”, B-8.<br />
Compliance Tecan Customer<br />
Tecan customers must develop and implement a procedure for documenting<br />
invalid and/or altered records.<br />
B - 16 <strong>Freedom</strong> <strong>EVOware</strong> <strong>Software</strong> <strong>Manual</strong>, 393172, en, V<strong>2.3</strong>
B - Appendix B - FDA 21 CFR Part 11 Compliance<br />
Part B - Electronic Records<br />
B.7.1.2 § 11.10 (b) Ability to Generate Accurate and Complete Copies of Records.<br />
⌦ Storage of instrument control, pipetting sequence, data acquisition and<br />
data evaluation parameters together with audit trails and raw data<br />
Compliance <strong>Freedom</strong> <strong>EVOware</strong><br />
See B.5.7 “Log Files”, B-11.<br />
See B.5.6 “Trace File (Audit Trail)”, B-10.<br />
See B.5.5 “Electronic Signatures”, B-9.<br />
Compliance Tecan customer<br />
Tecan customers must develop and implement a procedure to store and<br />
archive the process data, the trace file (audit trail) and the log files created by<br />
<strong>Freedom</strong> <strong>EVOware</strong> and protect them against accidental or intentional<br />
modification, falsification or deletion. This is a pre-requirement for reliable and<br />
trustworthy records that withstand scrutiny from regulators. The audit trail<br />
associated with the records must also be retained.<br />
Tecan customers must establish rigorous and systematic archiving and<br />
backup procedures to ensure that electronic records generated by <strong>Freedom</strong><br />
<strong>EVOware</strong> are stored in such a manner that they can be retrieved and used<br />
over an extended period of time.<br />
In some cases, the records must be kept for 10 years or longer. Due to the<br />
expected technical changes in hardware and software over such time spans,<br />
this requires consideration of issues such as the appropriate choice of storage<br />
media, file formats, etc.<br />
The regulations refer to the use of electronic records and signatures, not to<br />
which records need to be retained or for how long.<br />
⌦ Versioning of data and all associated meta data (including automatic<br />
versioning of re-integrated results)<br />
Compliance <strong>Freedom</strong> <strong>EVOware</strong><br />
See B.5.7 “Log Files”, B-11.<br />
See B.5.6 “Trace File (Audit Trail)”, B-10.<br />
Compliance Tecan Customer<br />
Tecan customers must develop and implement a procedure to store and<br />
archive the process data, the trace file (audit trail) and the log files created by<br />
<strong>Freedom</strong> <strong>EVOware</strong> and protect them against accidental or intentional<br />
modification, falsification or deletion.<br />
⌦ Audit trail of all data<br />
Compliance <strong>Freedom</strong> <strong>EVOware</strong><br />
See B.5.7 “Log Files”, B-11.<br />
See B.5.6 “Trace File (Audit Trail)”, B-10.<br />
Compliance Tecan Customer<br />
The integrity and completeness of the electronic records relies on the<br />
customer’s assignment of Microsoft Windows access rights for the PC and the<br />
computer network and on data backup and archiving procedures.<br />
Tecan customers must set appropriate access privileges for the local and<br />
network files and directories to ensure that records can only be deleted or<br />
modified by authorized persons.<br />
<strong>Freedom</strong> <strong>EVOware</strong> <strong>Software</strong> <strong>Manual</strong>, 393172, en, V<strong>2.3</strong> B - 17
B - Appendix B - FDA 21 CFR Part 11 Compliance<br />
Part B - Electronic Records<br />
⌦ Protection of data with checksums<br />
Compliance <strong>Freedom</strong> <strong>EVOware</strong><br />
See B.5.4 “Checksums”, B-8.<br />
Compliance Tecan Customer<br />
No action required.<br />
B.7.1.3 § 11.10 (c) Protection of records<br />
⌦ Data Archiving Processes and Procedures for Long-term Data Storage<br />
Compliance <strong>Freedom</strong> <strong>EVOware</strong><br />
See B.5.8 “Backing Up Files”, B-11.<br />
Compliance Tecan Customer<br />
Tecan customers must develop and implement a procedure to store and<br />
archive the process data, the trace file (audit trail) and the log files created by<br />
<strong>Freedom</strong> <strong>EVOware</strong> and protect them against accidental or intentional<br />
modification, falsification or deletion.<br />
In some cases, the records must be kept for 10 years or longer. Due to the<br />
expected technical changes in hardware and software over such time spans,<br />
this requires consideration of issues such as the appropriate choice of storage<br />
media, file formats, etc.<br />
⌦ Protection of directories used to store process data and log files to<br />
ensure that they are only accessible to authorized persons<br />
Compliance <strong>Freedom</strong> <strong>EVOware</strong><br />
<strong>Freedom</strong> <strong>EVOware</strong> uses specified directories to store process data, the trace<br />
file (audit trail) and the log files. A default directory structure is created for<br />
these files when <strong>Freedom</strong> <strong>EVOware</strong> is first installed. See A.5 “<strong>Freedom</strong><br />
<strong>EVOware</strong> Directory Structure and Files”, A-25 for a list of the files and<br />
directories which are used. See also B.5.6 “Trace File (Audit Trail)”, B-10.<br />
If required, users with <strong>Freedom</strong> <strong>EVOware</strong> Administrator or Application<br />
Specialist rights can configure <strong>Freedom</strong> <strong>EVOware</strong> to use other directories<br />
(including network directories) for storing data, log and output files. See<br />
8.3.1.4 “Protocol Options Tab”, 8-8.<br />
Compliance Tecan Customer<br />
The integrity and completeness of the electronic records relies on the<br />
customer’s assignment of Microsoft Windows access rights for the PC and the<br />
computer network and on data backup and archiving procedures.<br />
Tecan customers must set appropriate access privileges for the local and<br />
network files and directories to ensure that records can only be deleted or<br />
modified by authorized persons.<br />
⌦ Access to process data and log files after a number of years<br />
Compliance <strong>Freedom</strong> <strong>EVOware</strong><br />
No action required.<br />
B - 18 <strong>Freedom</strong> <strong>EVOware</strong> <strong>Software</strong> <strong>Manual</strong>, 393172, en, V<strong>2.3</strong>
B - Appendix B - FDA 21 CFR Part 11 Compliance<br />
Part B - Electronic Records<br />
Compliance Tecan Customer<br />
Tecan customers must establish rigorous and systematic archiving and<br />
backup procedures to ensure that electronic records generated by <strong>Freedom</strong><br />
<strong>EVOware</strong> are stored in such a manner that they can be retrieved and used<br />
over an extended period of time.<br />
In some cases, the records must be kept for 10 years or longer. Due to the<br />
expected technical changes in hardware and software over such time spans,<br />
this requires consideration of issues such as the appropriate choice of storage<br />
media, file formats, etc.<br />
B.7.1.4 § 11.10 (d) Limiting System Access to Authorized Individuals<br />
⌦ Microsoft operating system<br />
Compliance <strong>Freedom</strong> <strong>EVOware</strong><br />
See B.5.1 “Closed Systems”, B-6.<br />
See B.5.3 “Tecan User Management System”, B-7.<br />
Compliance Tecan Customer<br />
Tecan customers must develop and implement user management procedures<br />
for their employees to control access to the <strong>Freedom</strong> <strong>EVOware</strong> software and<br />
the Microsoft operating system.<br />
The access control mechanisms should be designed to prevent unauthorized<br />
persons from gaining access to, altering or deleting records in the system or<br />
carrying out unauthorized functions within the system.<br />
Access security is typically ensured with a number of behavioral controls or<br />
policies that are backed up and enforced by appropriate security mechanisms<br />
implemented on the company’s information systems.<br />
Access control determines who is allowed to log on to a system locally or from<br />
the network. The Microsoft operating systems offers several different types of<br />
access privileges that can be granted or denied to specific users or groups of<br />
users.<br />
Under consideration of typical work practices in analytical laboratories, we<br />
recommend a system of access privileges on a task basis - not only to ensure<br />
confidentiality, but also to eliminate human mistakes or accidental loss of data.<br />
It is insufficient to only restrict system access to a group of individuals without<br />
differentiating their responsibilities, knowledge or position. In this case, users<br />
could inadvertently modify system settings in a way that affects the integrity or<br />
security of the records.<br />
⌦ Different Levels of Access Based On User Responsibilities<br />
Compliance <strong>Freedom</strong> <strong>EVOware</strong><br />
See B.5.2 “<strong>Freedom</strong> <strong>EVOware</strong> User Levels”, B-7.<br />
Compliance Tecan Customer<br />
See B.4.1 “Assigning and Using <strong>Freedom</strong> <strong>EVOware</strong> User Names”, B-6.<br />
<strong>Freedom</strong> <strong>EVOware</strong> <strong>Software</strong> <strong>Manual</strong>, 393172, en, V<strong>2.3</strong> B - 19
B - Appendix B - FDA 21 CFR Part 11 Compliance<br />
Part B - Electronic Records<br />
B.7.1.5 § 11.10 (e) Use of Computer-generated, Time-stamped Audit Trails<br />
⌦ Audit trails are used to record the activities of <strong>Freedom</strong> <strong>EVOware</strong> users<br />
as well as data transfers (who, what, when)<br />
Compliance <strong>Freedom</strong> <strong>EVOware</strong><br />
See B.5.7 “Log Files”, B-11.<br />
See B.5.6 “Trace File (Audit Trail)”, B-10.<br />
See B.5.3.1 “User Management Audit Trail”, B-8.<br />
See B.5.5 “Electronic Signatures”, B-9.<br />
See B.5.8 “Backing Up Files”, B-11.<br />
Compliance Tecan Customer<br />
The integrity and completeness of the electronic records relies on the<br />
customer’s assignment of Microsoft Windows access rights for the PC and the<br />
computer network and on data backup and archiving procedures.<br />
Tecan customers must set appropriate access privileges for the local and<br />
network files and directories to ensure that records can only be deleted or<br />
modified by authorized persons.<br />
Tecan customers must develop and implement a procedure to store and<br />
archive the process data, the trace file (audit trail) and the log files created by<br />
<strong>Freedom</strong> <strong>EVOware</strong> and protect them against accidental or intentional<br />
modification, falsification or deletion.<br />
⌦ Audit trail of all integration and re-integration processes<br />
Compliance <strong>Freedom</strong> <strong>EVOware</strong><br />
See B.5.7 “Log Files”, B-11.<br />
See B.5.6 “Trace File (Audit Trail)”, B-10.<br />
Compliance Tecan Customer<br />
Tecan customers must develop and implement a procedure to store and<br />
archive the process data, the trace file (audit trail) and the log files created by<br />
<strong>Freedom</strong> <strong>EVOware</strong> and protect them against accidental or intentional<br />
modification, falsification or deletion.<br />
⌦ Audit trail information includes the instrument’s serial number<br />
Compliance <strong>Freedom</strong> <strong>EVOware</strong><br />
See B.5.7 “Log Files”, B-11.<br />
Compliance Tecan Customer<br />
No action required.<br />
⌦ Audit trail when data is transferred to and from a database<br />
Compliance <strong>Freedom</strong> <strong>EVOware</strong><br />
Tecan does not use a database in its <strong>Freedom</strong> <strong>EVOware</strong> software.<br />
Compliance Tecan Customer<br />
Tecan customers must develop and implement a procedure for recording data<br />
transfer from and to the database if they make a connection between the<br />
Tecan software and a database.<br />
B - 20 <strong>Freedom</strong> <strong>EVOware</strong> <strong>Software</strong> <strong>Manual</strong>, 393172, en, V<strong>2.3</strong>
B - Appendix B - FDA 21 CFR Part 11 Compliance<br />
Part B - Electronic Records<br />
⌦ Audit trail data must be protected from accidental or intentional<br />
modification or deletion<br />
Compliance <strong>Freedom</strong> <strong>EVOware</strong><br />
See B.5.4 “Checksums”, B-8.<br />
Compliance Tecan Customer<br />
The integrity and completeness of the electronic records relies on the<br />
customer’s assignment of Microsoft Windows access rights for the PC and the<br />
computer network and on data backup and archiving procedures.<br />
Tecan customers must set appropriate access privileges for the local and<br />
network files and directories to ensure that records can only be deleted or<br />
modified by authorized persons.<br />
⌦ Audit trail aspects of data migration to new <strong>Freedom</strong> <strong>EVOware</strong> version or<br />
operating system version<br />
Compliance <strong>Freedom</strong> <strong>EVOware</strong><br />
Although <strong>Freedom</strong> <strong>EVOware</strong> software migration does not delete existing<br />
process data, audit trails and log files, Tecan customers are recommended to<br />
use the Backup function and then to archive this information before migration<br />
see B.5.8 “Backing Up Files”, B-11).<br />
After archiving, the files can be deleted from the <strong>Freedom</strong> <strong>EVOware</strong><br />
directories.<br />
Compliance Tecan Customer<br />
Tecan customers must develop and implement a procedure for storing and<br />
transferring data from one operating system to another when operating<br />
system versions are changed.<br />
B.7.1.6 § 11.10 (f) Use of Operational System Checks to Enforce Permitted<br />
Sequencing of Steps and Events<br />
⌦ Correct sequential operation of the system<br />
Compliance <strong>Freedom</strong> <strong>EVOware</strong><br />
Each <strong>Freedom</strong> <strong>EVOware</strong> script is executed using the sequence defined in the<br />
script. Each time you insert a new command in the script, <strong>Freedom</strong> <strong>EVOware</strong><br />
checks whether the data required by the script (such as information on<br />
labware and liquid classes) has already been defined. It validates the entire<br />
script to check for errors and shows all commands which have errors in red.<br />
Compliance Tecan Customer<br />
Tecan customers must develop and implement a procedure to verify the<br />
correct sequential operation of the system (pipetting sequences and scripts,<br />
appropriate instrument operating procedures for each of the tasks which will<br />
be carried out).<br />
<strong>Freedom</strong> <strong>EVOware</strong> <strong>Software</strong> <strong>Manual</strong>, 393172, en, V<strong>2.3</strong> B - 21
B - Appendix B - FDA 21 CFR Part 11 Compliance<br />
Part B - Electronic Records<br />
B.7.1.7 § 11.10 (g) Use of Authority Checks<br />
⌦ Ensure that only authorized individuals can use the system,<br />
electronically sign a record, access the operation or computer system, input<br />
or output device, alter records or perform other operations<br />
Compliance <strong>Freedom</strong> <strong>EVOware</strong><br />
See B.5.1 “Closed Systems”, B-6.<br />
See B.5.3 “Tecan User Management System”, B-7.<br />
Compliance Tecan Customer<br />
Tecan customers must develop and implement user management procedures<br />
for their employees to control access to the <strong>Freedom</strong> <strong>EVOware</strong> software and<br />
the Microsoft operating system.<br />
21 CFR part 11 rules require the use of procedures and controls to limit<br />
access to the system to authorized individuals and the use of authority checks<br />
to ensure that only authorized individuals can use the system and carry out<br />
specified functions within the system.<br />
B.7.1.8 § 11.10 (h) Use of Device Checks to Determine the Validity of the Source of<br />
Data Input<br />
⌦ Device checks<br />
Compliance <strong>Freedom</strong> <strong>EVOware</strong><br />
See B.5.7 “Log Files”, B-11.<br />
Compliance Tecan Customer<br />
Tecan customers must develop and implement a procedure for keeping<br />
records of device checks from <strong>Freedom</strong> <strong>EVOware</strong> and all of the laboratory<br />
equipment involved in the respective activity or process. They must store<br />
records of serial numbers, instrument numbers and version numbers of all<br />
devices and record any device changes and replacements.<br />
B.7.1.9 § 11.10 (i) Determine that Employees have the Education, Training and<br />
Experience to Perform the Assigned Tasks<br />
⌦ Provide evidence that persons who develop, maintain or use electronic<br />
record/electronic signature systems have the education, training and<br />
experience to perform their assigned tasks<br />
Compliance <strong>Freedom</strong> <strong>EVOware</strong><br />
Tecan ensures that all staff is suitably qualified with respect to their education,<br />
job training and experience to perform their assigned tasks.<br />
Compliance Tecan Customer<br />
Tecan customers must ensure that their employees have the necessary<br />
education, training and experience to perform the assigned tasks.<br />
For computer security measures to be effective, the users involved in<br />
implementing and using them must be trained. This training will need to cover<br />
full-time, temporary/part-time and contract staff that use the computers in your<br />
organization. It may also need to cover service and maintenance engineers<br />
undertaking repairs or modifications to computerized equipment or software.<br />
B - 22 <strong>Freedom</strong> <strong>EVOware</strong> <strong>Software</strong> <strong>Manual</strong>, 393172, en, V<strong>2.3</strong>
B - Appendix B - FDA 21 CFR Part 11 Compliance<br />
Part B - Electronic Records<br />
Furthermore, since technology can provide the means to access applications<br />
remotely via a modem or a remote connection, special arrangements may be<br />
necessary to minimize the impact that this can have, especially in a regulated<br />
environment.<br />
The training should involve using the security measures such as passwords<br />
and their maintenance, but also general awareness of computer security<br />
issues.<br />
⌦ Job descriptions, training plans, documented training on computerized<br />
systems<br />
Compliance <strong>Freedom</strong> <strong>EVOware</strong><br />
Tecan ensures that all Tecan staff is suitably qualified with respect to their<br />
education, job training and experience to perform their assigned tasks.<br />
Compliance Tecan Customer<br />
Tecan customers must implement procedures to provide regular user training.<br />
B.7.1.10 § 11.10 (j) Written Policy that Holds Individuals Accountable and<br />
Responsible for Their Actions<br />
⌦ Written policy that holds individuals accountable and responsible for<br />
actions initiated using their electronic signatures in order to deter record<br />
and signature falsification:<br />
Compliance <strong>Freedom</strong> <strong>EVOware</strong><br />
No action required.<br />
Compliance Tecan Customer<br />
Tecan customers must develop and implement a set of policies on employee<br />
responsibility and reliability.<br />
B.7.1.11 § 11.10 (k) Use of Appropriate Controls Over Systems Documentation<br />
⌦ Control distribution of, access to and use of system operation and<br />
maintenance documentation<br />
Compliance <strong>Freedom</strong> <strong>EVOware</strong><br />
Tecan provides extensive documentation with each software version.<br />
Compliance Tecan Customer<br />
Tecan customers must distribute the supplied software documentation and<br />
make it available to all <strong>Freedom</strong> <strong>EVOware</strong> users. Tecan customers must<br />
implement procedures to provide regular user training.<br />
B.7.2 § 11.30 Controls for Open Systems<br />
§ 11.30 specifies controls for open systems, including the controls required for<br />
closed systems in Sec. 11.10 and additional measures such as document<br />
encryption and the use of appropriate digital signature standards to ensure record<br />
authenticity, integrity and confidentiality.<br />
<strong>Freedom</strong> <strong>EVOware</strong> <strong>Software</strong> <strong>Manual</strong>, 393172, en, V<strong>2.3</strong> B - 23
B - Appendix B - FDA 21 CFR Part 11 Compliance<br />
Part B - Electronic Records<br />
B.7.2.1 § 11.30 Controls for Open Systems<br />
⌦ Open systems<br />
Compliance <strong>Freedom</strong> <strong>EVOware</strong><br />
This is not applicable to <strong>Freedom</strong> <strong>EVOware</strong>. <strong>Freedom</strong> <strong>EVOware</strong> is intended<br />
for a closed system and not designed for an open system.<br />
Compliance Tecan Customer<br />
No action required.<br />
B.7.3 § 11.50 Signature Manifestations<br />
§ 11.50 requires signature manifestations to contain information associated with<br />
the signing of electronic records. This information must include the printed name<br />
of the signer, the date and time when the signature was executed and the<br />
meaning (such as review, approval, responsibility and authorship) associated with<br />
the signature. In addition, this information is subject to the same controls as<br />
electronic records and must be included in any human readable forms of the<br />
electronic record (such as electronic display or printout).<br />
B.7.3.1 § 11.50 (a) Signature Manifestation<br />
⌦ Signed electronic records<br />
Compliance <strong>Freedom</strong> <strong>EVOware</strong><br />
See B.5.1 “Closed Systems”, B-6.<br />
See B.5.5 “Electronic Signatures”, B-9.<br />
Compliance Tecan Customer<br />
See B.4.1 “Assigning and Using <strong>Freedom</strong> <strong>EVOware</strong> User Names”, B-6.<br />
B.7.3.2 § 11.50 (a) Printed Name of Signer<br />
Compliance <strong>Freedom</strong> <strong>EVOware</strong><br />
See B.5.1 “Closed Systems”, B-6.<br />
See B.5.5 “Electronic Signatures”, B-9.<br />
Compliance Tecan Customer<br />
See B.4.1 “Assigning and Using <strong>Freedom</strong> <strong>EVOware</strong> User Names”, B-6.<br />
B.7.3.3 § 11.50 (a) Date and Time of Signature<br />
Compliance <strong>Freedom</strong> <strong>EVOware</strong><br />
See B.5.1 “Closed Systems”, B-6.<br />
See B.5.5 “Electronic Signatures”, B-9.<br />
Compliance Tecan Customer<br />
No action required.<br />
B.7.3.4 § 11.50(a) Meaning Associated with Signature<br />
Compliance <strong>Freedom</strong> <strong>EVOware</strong><br />
See B.5.5 “Electronic Signatures”, B-9.<br />
B - 24 <strong>Freedom</strong> <strong>EVOware</strong> <strong>Software</strong> <strong>Manual</strong>, 393172, en, V<strong>2.3</strong>
B - Appendix B - FDA 21 CFR Part 11 Compliance<br />
Part B - Electronic Records<br />
Compliance Tecan Customer<br />
No action required.<br />
B.7.4 § 11.70 Signature/ Record Linking<br />
§ 11.70 requires that electronic signatures and handwritten signatures executed<br />
on electronic records must be linked to their respective records to ensure that<br />
signatures cannot be excised, copied or otherwise transferred to falsify an<br />
electronic record by ordinary means.<br />
⌦ User-specific log on in case more than one person works on a system<br />
Compliance <strong>Freedom</strong> <strong>EVOware</strong><br />
<strong>Freedom</strong> <strong>EVOware</strong> does not allow more than one person to use the software<br />
simultaneously.<br />
Users can log out without leaving <strong>Freedom</strong> <strong>EVOware</strong> or interrupting a running<br />
pipetting script. The same or a different user can then log in to <strong>Freedom</strong><br />
<strong>EVOware</strong> again while the script is still running. See 6.1.9 “Lock <strong>EVOware</strong>”,<br />
6-7.<br />
Users are automatically logged out after a specified time during which no<br />
keyboard or mouse-click activities have been detected.<br />
Compliance Tecan Customer<br />
Tecan customers must instruct their employees not to share their user name<br />
and password combinations with other employees, and to log out before<br />
allowing another employee to use <strong>Freedom</strong> <strong>EVOware</strong> or if they plan to leave<br />
the running system unattended (see 6.1.9 “Lock <strong>EVOware</strong>”, 6-7).<br />
⌦ Specify measures to prevent violation of the signature uniqueness<br />
Compliance <strong>Freedom</strong> <strong>EVOware</strong><br />
<strong>Freedom</strong> <strong>EVOware</strong> is a closed system and access to <strong>Freedom</strong> <strong>EVOware</strong><br />
uses a combination of user name and password for unique identification.<br />
<strong>Freedom</strong> <strong>EVOware</strong> cannot be used without a valid user name and password.<br />
<strong>Freedom</strong> <strong>EVOware</strong> does not allow more than one person to use the software<br />
simultaneously.<br />
If an attempt is made to copy a signature from one file to another, this is<br />
detected by <strong>Freedom</strong> <strong>EVOware</strong>’s CRC checksum feature.<br />
See B.5.1 “Closed Systems”, B-6.<br />
See B.5.5 “Electronic Signatures”, B-9.<br />
Compliance Tecan Customer<br />
See B.4.1 “Assigning and Using <strong>Freedom</strong> <strong>EVOware</strong> User Names”, B-6.<br />
⌦ User-specific automated inactivity time out in case more than one<br />
person works on a single system<br />
Compliance <strong>Freedom</strong> <strong>EVOware</strong><br />
<strong>Freedom</strong> <strong>EVOware</strong> does not allow more than one person to use the software<br />
simultaneously.<br />
Users are automatically logged out after a specified time during which no<br />
keyboard or mouse-click activities have been detected.<br />
<strong>Freedom</strong> <strong>EVOware</strong> <strong>Software</strong> <strong>Manual</strong>, 393172, en, V<strong>2.3</strong> B - 25
B - Appendix B - FDA 21 CFR Part 11 Compliance<br />
Part C - Electronic Signatures<br />
Compliance Tecan Customer<br />
No action required.<br />
B.8 Part C - Electronic Signatures<br />
B.8.1 § 11.100 General Requirements<br />
§ 11.100 requires that each electronic signature must be unique to one individual<br />
and must not be reused by or reassigned to anyone else. Before an organization<br />
establishes, assigns, certifies or otherwise sanctions an individual's electronic<br />
signature, the organization must verify the identity of the individual.<br />
B.8.1.1 § 11.100 (a) Uniqueness<br />
⌦ Uniqueness of electronic signatures<br />
Compliance <strong>Freedom</strong> <strong>EVOware</strong><br />
See B.5.1 “Closed Systems”, B-6.<br />
See B.5.5 “Electronic Signatures”, B-9.<br />
Compliance Tecan Customer<br />
See B.4.1 “Assigning and Using <strong>Freedom</strong> <strong>EVOware</strong> User Names”, B-6.<br />
⌦ Procedures and controls to make sure that electronic signatures are<br />
never reassigned to anyone else<br />
Compliance <strong>Freedom</strong> <strong>EVOware</strong><br />
See B.5.3 “Tecan User Management System”, B-7.<br />
Compliance Tecan Customer<br />
See B.4.1 “Assigning and Using <strong>Freedom</strong> <strong>EVOware</strong> User Names”, B-6.<br />
B.8.1.2 § 11.100 (b) Verify Identity<br />
⌦ Verify the identity of an individual<br />
Compliance <strong>Freedom</strong> <strong>EVOware</strong><br />
<strong>Freedom</strong> <strong>EVOware</strong> is a closed system and access to <strong>Freedom</strong> <strong>EVOware</strong><br />
uses a combination of user name and password for unique identification.<br />
<strong>Freedom</strong> <strong>EVOware</strong> cannot be used without a valid user name and password.<br />
Also see B.5.3 “Tecan User Management System”, B-7.<br />
Compliance Tecan Customer<br />
See B.4.1 “Assigning and Using <strong>Freedom</strong> <strong>EVOware</strong> User Names”, B-6.<br />
B - 26 <strong>Freedom</strong> <strong>EVOware</strong> <strong>Software</strong> <strong>Manual</strong>, 393172, en, V<strong>2.3</strong>
B - Appendix B - FDA 21 CFR Part 11 Compliance<br />
Part C - Electronic Signatures<br />
B.8.1.3 § 11.100 (c) Legally Binding Signature<br />
⌦ Persons using electronic signatures verify it as the legally binding<br />
equivalent of the handwritten signature<br />
Compliance <strong>Freedom</strong> <strong>EVOware</strong><br />
<strong>Freedom</strong> <strong>EVOware</strong> is a closed system and access to <strong>Freedom</strong> <strong>EVOware</strong><br />
uses a combination of user name and password for unique identification.<br />
<strong>Freedom</strong> <strong>EVOware</strong> cannot be used without a valid user name and password.<br />
Also see B.5.3 “Tecan User Management System”, B-7.<br />
Compliance Tecan Customer<br />
See B.4.1 “Assigning and Using <strong>Freedom</strong> <strong>EVOware</strong> User Names”, B-6.<br />
B.8.2 § 11.200 Electronic Signature Components and Controls<br />
§ 11.200 requires that electronic signatures not based on biometrics must employ<br />
at least two distinct identification components such as a name and password. In<br />
addition, when an individual executes a series of signings during a single period of<br />
controlled system access, the first signing must be executed using all electronic<br />
signature components and the subsequent signings must be executed using at<br />
least one component designed to be used only by that individual. When an<br />
individual executes one or more signings not performed during a single period of<br />
controlled system access, each signing must be executed using all of the<br />
electronic signature components. Electronic signatures not based on biometrics<br />
are also required to be used only by their genuine owners and administered and<br />
executed to ensure that attempted use of an individual's electronic signature by<br />
anyone else requires the collaboration of two or more individuals. This would<br />
make it more difficult for anyone to forge an electronic signature. Electronic<br />
signatures based upon biometrics must be designed to ensure that such<br />
signatures cannot be used by anyone other than the genuine owners.<br />
B.8.2.1 § 11.200(a) Non-biometric Signatures<br />
Compliance <strong>Freedom</strong> <strong>EVOware</strong><br />
See B.5.1 “Closed Systems”, B-6.<br />
Compliance Tecan Customer<br />
Tecan customers must follow their company rules for using non-biometric<br />
signatures.<br />
B.8.2.2 § 11.200(a) Employ At Least Two Distinct Identifications<br />
Compliance <strong>Freedom</strong> <strong>EVOware</strong><br />
See B.5.1 “Closed Systems”, B-6.<br />
Compliance Tecan Customer<br />
No action required.<br />
B.8.<strong>2.3</strong> § 11.200(a) Series of Signings During Continuous System Access<br />
Compliance <strong>Freedom</strong> <strong>EVOware</strong><br />
<strong>Freedom</strong> <strong>EVOware</strong> requires the user to log in with name and password at<br />
startup (first signing). For each following signing only entry of the user’s<br />
password is required.<br />
See B.5.5 “Electronic Signatures”, B-9.<br />
<strong>Freedom</strong> <strong>EVOware</strong> <strong>Software</strong> <strong>Manual</strong>, 393172, en, V<strong>2.3</strong> B - 27
B - Appendix B - FDA 21 CFR Part 11 Compliance<br />
Part C - Electronic Signatures<br />
Compliance Tecan Customer<br />
No action required.<br />
B.8.2.4 § 11.200(a) Signing During Non-continuous System Access<br />
Compliance <strong>Freedom</strong> <strong>EVOware</strong><br />
<strong>Freedom</strong> <strong>EVOware</strong> requires the user to login with user name and password<br />
when signings are performed during non-continuous system access.<br />
• When closing <strong>Freedom</strong> <strong>EVOware</strong> and starting the software again.<br />
• When actively logging out of <strong>Freedom</strong> <strong>EVOware</strong> without closing the program.<br />
• When automatically being logged out of <strong>Freedom</strong> <strong>EVOware</strong> after the defined<br />
idle time.<br />
Compliance Tecan Customer<br />
No action required.<br />
B.8.2.5 § 11.200(a) Genuine Owner of Signature<br />
Compliance <strong>Freedom</strong> <strong>EVOware</strong><br />
See B.5.1 “Closed Systems”, B-6.<br />
Compliance Tecan Customer<br />
See B.4.1 “Assigning and Using <strong>Freedom</strong> <strong>EVOware</strong> User Names”, B-6.<br />
B.8.2.6 § 11.200(a) Administered Signature<br />
Compliance <strong>Freedom</strong> <strong>EVOware</strong><br />
See B.5.1 “Closed Systems”, B-6.<br />
Compliance Tecan Customer<br />
See B.4.1 “Assigning and Using <strong>Freedom</strong> <strong>EVOware</strong> User Names”, B-6.<br />
B.8.2.7 § 11.200(b) Biometric Signatures<br />
Compliance <strong>Freedom</strong> <strong>EVOware</strong><br />
<strong>Freedom</strong> <strong>EVOware</strong> does not use biometric signatures.<br />
Compliance Tecan Customer<br />
Not applicable.<br />
B.8.3 § 11.300 Controls for Identification Codes and Passwords<br />
§ 11.300 describe that electronic signatures based upon the use of identification<br />
codes in combination with passwords must use controls to ensure security and<br />
integrity.<br />
B.8.3.1 § 11.300(a) Maintaining Uniqueness<br />
Compliance <strong>Freedom</strong> <strong>EVOware</strong><br />
See B.5.1 “Closed Systems”, B-6.<br />
See B.5.3 “Tecan User Management System”, B-7.<br />
Compliance Tecan Customer<br />
See B.4.1 “Assigning and Using <strong>Freedom</strong> <strong>EVOware</strong> User Names”, B-6.<br />
B - 28 <strong>Freedom</strong> <strong>EVOware</strong> <strong>Software</strong> <strong>Manual</strong>, 393172, en, V<strong>2.3</strong>
B - Appendix B - FDA 21 CFR Part 11 Compliance<br />
<strong>Freedom</strong> <strong>EVOware</strong> Installation Checklist<br />
B.8.3.2 § 11.300(b) Check Identification<br />
Compliance <strong>Freedom</strong> <strong>EVOware</strong><br />
See B.5.1 “Closed Systems”, B-6.<br />
See B.5.3 “Tecan User Management System”, B-7.<br />
Compliance Tecan Customer<br />
See B.4.1 “Assigning and Using <strong>Freedom</strong> <strong>EVOware</strong> User Names”, B-6.<br />
B.8.3.3 § 11.300(c) Loss Management<br />
Compliance <strong>Freedom</strong> <strong>EVOware</strong><br />
This section is not applicable to <strong>Freedom</strong> <strong>EVOware</strong> since the Tecan User<br />
Management system does not use tokens, cards or other devices to bear or<br />
generate identification codes.<br />
Compliance Tecan Customer<br />
No action required.<br />
B.8.3.4 § 11.300(d) Prevent Unauthorized Use<br />
Compliance <strong>Freedom</strong> <strong>EVOware</strong><br />
See B.5.1 “Closed Systems”, B-6.<br />
See B.5.3 “Tecan User Management System”, B-7.<br />
Compliance Tecan Customer<br />
Tecan customers must develop and implement procedures to disable the user<br />
name and password when an employee leaves the company.<br />
Tecan customers must name an authority that should be notified if an attempt<br />
is made to get unauthorized access to the system.<br />
As part of the regular system maintenance activities, the <strong>Freedom</strong> <strong>EVOware</strong><br />
Administrator should routinely and regularly check the <strong>Freedom</strong> <strong>EVOware</strong> log<br />
files for attempts get unauthorized access to the system. In addition, it is<br />
recommended to enable the feature in the Tecan User Management system to<br />
automatically notify a specified person by email if an attempt is made to get<br />
unauthorized access.<br />
B.8.3.5 § 11.300(e) Periodic Testing<br />
Compliance <strong>Freedom</strong> <strong>EVOware</strong><br />
This section is not applicable to <strong>Freedom</strong> <strong>EVOware</strong> since the Tecan User<br />
Management system does not use tokens, cards or other devices to bear or<br />
generate identification codes.<br />
Compliance Tecan Customer<br />
Not applicable.<br />
B.9 <strong>Freedom</strong> <strong>EVOware</strong> Installation Checklist<br />
This section contains a checklist of the major tasks that need to be carried out to<br />
help the system to become compliant with the 21 CFR Part 11 regulations. It is<br />
divided into things that need to be done before, during and after installation of the<br />
software.<br />
<strong>Freedom</strong> <strong>EVOware</strong> <strong>Software</strong> <strong>Manual</strong>, 393172, en, V<strong>2.3</strong> B - 29
B - Appendix B - FDA 21 CFR Part 11 Compliance<br />
<strong>Freedom</strong> <strong>EVOware</strong> Installation Checklist<br />
B.9.1 Before Installing <strong>Freedom</strong> <strong>EVOware</strong><br />
Designate an experienced system administrator to set up the PC and the PC<br />
network.<br />
The system administrator must develop a secure and effective way of<br />
remembering his or her password.<br />
If you plan to install <strong>Freedom</strong> <strong>EVOware</strong> in a network environment (LAN), take<br />
appropriate configuration steps when installing the Microsoft operating system<br />
and the network server(s).<br />
If you plan to store <strong>Freedom</strong> <strong>EVOware</strong> data on a network, you must assign<br />
appropriate access privileges to the network directories.<br />
Archive and clear existing Microsoft Application, Security and System logs.<br />
For network domain servers, disable the Guest account.<br />
For network domain users, set the same account policies as on the local PCs:<br />
• Set the “Enforce password history” password policy to “12 passwords<br />
remembered”.<br />
• Set the “Maximum password age” password policy to 30 days.<br />
• Set the “Minimum password age” password policy to 5 days.<br />
• Set the “Minimum password length” password policy to 5 characters.<br />
• Set the “Account lockout threshold” account lockout policy to 3 invalid logon<br />
attempts.<br />
Activate password-protected screen savers.<br />
B.9.2 Installing <strong>Freedom</strong> <strong>EVOware</strong><br />
Install the <strong>Freedom</strong> <strong>EVOware</strong> software according to the installation instructions<br />
supplied with the software. In some countries, the <strong>Freedom</strong> <strong>EVOware</strong> software<br />
must be installed by an authorized Tecan Field Service Engineer. Contact your<br />
local Tecan distributor for more information.<br />
B.9.3 After Installing <strong>Freedom</strong> <strong>EVOware</strong><br />
Ensure that the Microsoft Application, Security and System logs are set to “Do not<br />
overwrite events (clear log manually)”.<br />
Increase the default size for the Microsoft Application, Security and System logs.<br />
Ensure that the following procedures are implemented to address sections of the<br />
21 CFR Part 11 regulations, including (but not necessarily limited to):<br />
• Provide suitable education, training and practical experience to personnel.<br />
• Ensure that individuals are held accountable and responsible for their actions<br />
when using the pipetting system and the <strong>Freedom</strong> <strong>EVOware</strong> software.<br />
• Verify the identity of each individual who is permitted to work with <strong>Freedom</strong><br />
<strong>EVOware</strong>.<br />
• Create separate <strong>Freedom</strong> <strong>EVOware</strong> user accounts using the Tecan User<br />
Management system for all persons who are authorized to use <strong>Freedom</strong><br />
<strong>EVOware</strong>.<br />
• Create separate PC and/or PC network user accounts using standard<br />
Microsoft tools and procedures for all persons who are authorized to use<br />
<strong>Freedom</strong> <strong>EVOware</strong>.<br />
• Implement appropriate controls over distribution, use of and access to data<br />
and log files.<br />
B - 30 <strong>Freedom</strong> <strong>EVOware</strong> <strong>Software</strong> <strong>Manual</strong>, 393172, en, V<strong>2.3</strong>
B - Appendix B - FDA 21 CFR Part 11 Compliance<br />
<strong>Freedom</strong> <strong>EVOware</strong> Installation Checklist<br />
• Configure the log file functions in the <strong>Freedom</strong> <strong>EVOware</strong> settings to document<br />
the pipetting and to record user inputs.<br />
• Implement systems to prevent and detect unauthorized modification of data<br />
and log files.<br />
• Notify the FDA that electronic signatures are intended to be equivalent to<br />
handwritten signatures.<br />
Ensure that the following steps are also carried out:<br />
• Regularly archive and clear the Microsoft Application, Security and System<br />
logs.<br />
• Regularly check the Microsoft Security log to detect unauthorized access to<br />
the PC.<br />
• Ensure that users are logged out from <strong>Freedom</strong> <strong>EVOware</strong> when the PC is<br />
unattended.<br />
<strong>Freedom</strong> <strong>EVOware</strong> <strong>Software</strong> <strong>Manual</strong>, 393172, en, V<strong>2.3</strong> B - 31
B - Appendix B - FDA 21 CFR Part 11 Compliance<br />
<strong>Freedom</strong> <strong>EVOware</strong> Installation Checklist<br />
B - 32 <strong>Freedom</strong> <strong>EVOware</strong> <strong>Software</strong> <strong>Manual</strong>, 393172, en, V<strong>2.3</strong>
C - Validation of <strong>Freedom</strong> <strong>EVOware</strong> Applications<br />
Important Points to Check When Validating <strong>Freedom</strong> <strong>EVOware</strong> Applications<br />
C<br />
Validation of <strong>Freedom</strong> <strong>EVOware</strong> Applications<br />
All <strong>Freedom</strong> <strong>EVOware</strong> scripts and processes must be validated for correct<br />
functioning and for correct results before they are used for pipetting with real<br />
samples. It is recommended to test run the script or process to make sure that it<br />
operates as intended. This chapter gives an overview of some of the more<br />
important points which must be checked. See also 2.8.2 “General Rules When<br />
Using the Pipetting Instrument”, 2-6.<br />
The following list of points to check when validating is not intended to be<br />
exhaustive and does not replace any local laws or statutes that apply.<br />
C.1 Important Points to Check When Validating <strong>Freedom</strong><br />
<strong>EVOware</strong> Applications<br />
• When <strong>Freedom</strong> <strong>EVOware</strong> is first started, check the log file for errors. If error<br />
messages are found, the cause of the error must be remedied before you start<br />
pipetting.<br />
• If you intend to use <strong>Freedom</strong> <strong>EVOware</strong> to control a pipetting instrument, make<br />
sure that the operation mode which is shown in the status bar is REAL MODE.<br />
If you intend to use <strong>Freedom</strong> <strong>EVOware</strong> to simulate a script or process, e.g. for<br />
the purpose of testing, make sure that the operation mode which is shown in<br />
the status bar is OFFLINE. Pipetting does not take place in offline mode. See<br />
6.7.3 “Status Bar”, 6-20.<br />
• Make sure that you have loaded the correct script or process for the assigned<br />
pipetting task.<br />
• Check the script editor window for errors (commands which have errors are<br />
shown in red). In <strong>Freedom</strong> <strong>EVOware</strong> Plus, check all of the scripts in your<br />
process for errors. For example, script errors will be shown if:<br />
– The hardware configuration or the LiHa configuration of the pipetting<br />
instrument does not meet the requirements of the script or process.<br />
– Liquid classes required by the script or process are missing.<br />
– RoMa or PnP movement vectors required by the script or process are<br />
missing.<br />
– See also 11.4.2.1 “Checking the Pipetting Script for Errors”, 11-5.<br />
• Check the liquid containers and system liquid of the pipetting instrument for<br />
the correct liquid types and concentrations which are required by the script or<br />
process.<br />
• Before running the script or process, you must set up the worktable with the<br />
carriers, labware and devices which are needed by the application or assay.<br />
The administrator or owner of the pipetting instrument must establish standard<br />
operating procedures for setting up the worktable and make them available to<br />
everyone who carries out pipetting.<br />
• After setting up the worktable with the carriers, labware and devices which are<br />
needed by the application or assay, inspect the paths that the instrument arms<br />
(LiHa, RoMa, PnP) will take during the hardware initialization sequence to<br />
make sure that there are no obstacles which could obstruct the movements.<br />
See also 8.4.2.8 “Arm Initialization”, 8-31.<br />
• <strong>Manual</strong>ly initialize the arms of the pipetting instrument (e.g. using the Initialize<br />
button in the <strong>Freedom</strong> <strong>EVOware</strong> toolbar), make a visual check that the<br />
initialization sequence has been carried out correctly and check the log file for<br />
<strong>Freedom</strong> <strong>EVOware</strong> <strong>Software</strong> <strong>Manual</strong>, 393172, en, V<strong>2.3</strong> C - 1
C - Validation of <strong>Freedom</strong> <strong>EVOware</strong> Applications<br />
Important Points to Check When Validating <strong>Freedom</strong> <strong>EVOware</strong> Applications<br />
initialization errors. If error messages are found, the cause of the error must<br />
be remedied before you start pipetting.<br />
• Before you pipette using real samples, test run the script or process to make<br />
sure that:<br />
– Pipetting takes place at the intended positions on the worktable (e.g.<br />
correct microplate, correct well).<br />
– The correct volumes of liquid are pipetted.<br />
– Pipetting takes place in the correct sequence as required by the<br />
application.<br />
• <strong>Freedom</strong> <strong>EVOware</strong> chooses multi-dispensing mode automatically if the<br />
pipetting script specifies an aspirate command followed by several<br />
consecutive dispense commands. In turn, this influences the liquid class<br />
parameters which are used. The decision between single dispensing mode<br />
and multi-dispensing mode is made when the script is validated and not when<br />
the script is run. Scripts are validated when they are modified and also when<br />
they are opened for running without being modified. Validation is done using<br />
default values for the variables (see 11.4.2.1 “Checking the Pipetting Script for<br />
Errors”, 11-5).<br />
If the number of consecutive dispense commands is controlled by a variable<br />
whose value can change during runtime, it is recommended to design the<br />
script with branches or separate groups of commands for single-pipetting<br />
mode (one dispense operation) and multi-pipetting mode (more than one<br />
dispense operation). This ensures that the correct pipetting mode and liquid<br />
class parameters will be chosen at runtime.<br />
• If your script or process uses liquid level detection (e.g. the chosen liquid<br />
class uses liquid level detection or the script or process uses the Detect Liquid<br />
command), make sure that liquid detection is working correctly. The capacitive<br />
detection system is not suitable for all liquid types (e.g. liquids with foam, nonconductive<br />
liquids). Liquid detection can not be used if you are using septum<br />
piercing. To ensure accurate liquid detection, make sure that the labware is<br />
correctly seated on the carriers.<br />
• If your script or process sends firmware commands to the pipetting instrument<br />
or to other devices, make sure that the correct firmware commands have been<br />
specified and that they initiate the intended actions. Sending the wrong<br />
commands can cause invalid results, damage the instrument or objects in its<br />
workspace, hurt yourself or other people and can cause the script or process<br />
to produce invalid results.<br />
• If your script or process uses a microplate reader, check the results (output<br />
data) from the reader to make sure that they are plausible.<br />
• When setting up an assay for a liquid which can clot, make sure that clot<br />
detection is enabled in the liquid classes which are used to handle the liquid.<br />
Refer to the Good Usage information in the Operating <strong>Manual</strong> for the pipetting<br />
instrument for additional recommendations.<br />
• When setting up an assay which uses a trough (container for a reagent liquid),<br />
make sure that the liquid classes which are used for aspirating from the trough<br />
are configured to immerse the tips in the liquid by at least 3 mm.<br />
• Appropriate tip washing actions must be provided in the script or process to<br />
avoid cross-contamination of samples and/or reagents. Disposable tips can<br />
also be used to avoid cross-contamination of samples and/or reagents.<br />
Design and test run the script or process to make sure that crosscontamination<br />
will not take place.<br />
• If your script or process uses a shaker, make sure that the shaker parameters<br />
(e.g. shaking time, shaking frequency) have been configured correctly and<br />
that the shaker operates as intended.<br />
C - 2 <strong>Freedom</strong> <strong>EVOware</strong> <strong>Software</strong> <strong>Manual</strong>, 393172, en, V<strong>2.3</strong>
C - Validation of <strong>Freedom</strong> <strong>EVOware</strong> Applications<br />
Important Points to Check When Validating <strong>Freedom</strong> <strong>EVOware</strong> Applications<br />
• If your script or process uses an incubator, make sure that the incubator<br />
parameters (e.g. incubating time and temperature) have been configured<br />
correctly and that the incubator operates as intended.<br />
• If your script or process uses devices with heating elements (e.g. shaker,<br />
heated incubator, some microplate readers), make sure that the script or<br />
process allows enough time for the heater to heat up to or cool down to the<br />
intended temperature before it is used. Test run the script or process and<br />
measure the temperature which has been achieved.<br />
• If your script or process uses operations where timing is critical (e.g.<br />
incubator, shaker), make sure that the timing and delays have been<br />
configured correctly and work as intended:<br />
– Check the time specified in the respective device command.<br />
– Check the time specified in Wait For Timer commands.<br />
– In <strong>Freedom</strong> <strong>EVOware</strong> Plus, check that the sum of execution time and<br />
maximum waiting time (as specified in the process step) meets the<br />
requirements of the script or process. For example, if an incubation<br />
process step needs to wait for another operation to finish, the incubation<br />
time must still lie within the limits which are acceptable to the application.<br />
If necessary, adjust the specified maximum waiting time and test the<br />
application again.<br />
• If the system pauses for any reason when running a script or process, the<br />
duration of the pipetting script, process step or procedure may differ from the<br />
intended time. For example, sample incubation time may be outside of the<br />
specified limits. Depending on the application, this can make the assay<br />
invalid.<br />
– A system pause can be caused e.g. by clicking the Pause button in<br />
<strong>Freedom</strong> <strong>EVOware</strong>’s Runtime Controller dialog box, by pressing the<br />
Pause button on the pipetting instrument, by a pipetting error or by an<br />
internal timeout if a process step has taken longer than expected or<br />
specified.<br />
– System pauses are not shown in the Gantt chart in the Extended View of<br />
the Runtime Controller (the Gantt chart is only available in <strong>Freedom</strong><br />
<strong>EVOware</strong> Plus).<br />
• If your script or process uses eMail for notification of important events, the<br />
notification function must be used to send a test eMail to make sure that the<br />
eMail is sent correctly and is received by the intended recipient.<br />
• If your script or process imports required information from external files<br />
(barcode lists, lists of values for variables etc.):<br />
– Make sure that the correct filename has been specified in the script or<br />
process.<br />
– Make sure that the import file exists and contains the intended data.<br />
• Check that the script or process starts to run as intended when you click the<br />
Start button in the Runtime Controller<br />
• When the script or process has completed, check the status information and<br />
the Warnings / Errors window in the extended view of the Runtime Controller<br />
and check all log files to make sure that the entire script or process has<br />
completed and that there are no error messages.<br />
• The results of an assay are only valid if the entire script or process completed<br />
without errors. If this is not the case, the entire script or process must<br />
repeated after rectifying the cause of the error(s).<br />
<strong>Freedom</strong> <strong>EVOware</strong> <strong>Software</strong> <strong>Manual</strong>, 393172, en, V<strong>2.3</strong> C - 3
C - Validation of <strong>Freedom</strong> <strong>EVOware</strong> Applications<br />
Setting the Validation Status of Scripts and Processes<br />
C.2 Setting the Validation Status of Scripts and Processes<br />
<strong>Freedom</strong> <strong>EVOware</strong> allows you to hide non-validated scripts and processes from<br />
users with the access level Operator to ensure that they cannot use them. This<br />
optional feature must be activated in the Configuration Tool (see 8.3.3.1 “Settings<br />
Tab”, 8-17, Enable file validation).<br />
If you activate this feature, non-validated scripts, processes and templates are<br />
shown to <strong>Freedom</strong> <strong>EVOware</strong> Administrators and Application Specialists in the<br />
Selection dialog box with a gray icon instead of a colored icon (they are not visible<br />
at all to Operators).<br />
After validating a script or process (see C.1 “Important Points to Check When<br />
Validating <strong>Freedom</strong> <strong>EVOware</strong> Applications”, C-1), proceed as follows to set it's<br />
file status to Approved (you need Administrator or Application Specialist access<br />
rights to do this):<br />
• In the main window of <strong>Freedom</strong> <strong>EVOware</strong>, click Open in the Toolbar or<br />
choose Open in the File menu.<br />
• In the Selection dialog box, right click the script (<strong>Freedom</strong> <strong>EVOware</strong> <strong>Standard</strong>)<br />
or process (<strong>Freedom</strong> <strong>EVOware</strong> Plus) and choose Validate from the context<br />
menu.<br />
Proceed as follows to revoke the Validated status (you need Administrator or<br />
Application Specialist access rights to do this).<br />
• Right click a validated script or process and choose Remove Validation from<br />
the context menu.<br />
C.3 Recommendations when using barcodes<br />
If your script or process uses a barcode scanner:<br />
• Check the results (output data) from the barcode scanner to make sure that<br />
they are plausible.<br />
• Make a visual check of the barcode scanning process to make sure that the<br />
correct barcode label is scanned (if the labware, carrier or tube has more than<br />
one label) and that the barcode scanner scans across the center of the label<br />
(physical alignment).<br />
• The barcodes must be accurately aligned - both horizontally and vertically - on<br />
all labware, tubes and containers. For more information see the Operating<br />
<strong>Manual</strong> of the pipetting instrument (refer to the section on Barcode<br />
Positioning).<br />
To ensure good reading results, pay attention to the following recommendations:<br />
• The quality of the barcode labels should be grade A according to ANSI X3.182<br />
and DIN EN 1635. The identification of grade B and C barcode labels is<br />
possible but the barcode scanner manufacturer's performance specifications<br />
cannot be guaranteed in this case.<br />
• Do not use yellowed, stained, creased, wet or damaged barcode labels.<br />
• The adhesive labels must be flat and not peeling off at the edges.<br />
• Use barcodes printed by a thermal-transfer or photographic quality printer (not<br />
a dot-matrix printer).<br />
• Use a barcode testing device to verify the barcode quality.<br />
• The barcode label surface must be clean.<br />
• We recommend you to ensure the quality of the barcodes by implementing a<br />
local SOP (<strong>Standard</strong> Operating Procedure).<br />
C - 4 <strong>Freedom</strong> <strong>EVOware</strong> <strong>Software</strong> <strong>Manual</strong>, 393172, en, V<strong>2.3</strong>
C - Validation of <strong>Freedom</strong> <strong>EVOware</strong> Applications<br />
Recommendations when using barcodes<br />
Note: For more information see the Operating <strong>Manual</strong> of the pipetting instrument<br />
(refer to the sections on Barcode Quality and Barcode Positioning).<br />
• Barcodes for carriers (e.g. microplate carriers and tube racks) contain<br />
information on the carrier type. The carrier type is coded in the first three digits<br />
of the barcode and is also shown in the Edit Carrier dialog box. <strong>Freedom</strong><br />
<strong>EVOware</strong> will output an error during script or process runtime if the carrier<br />
type indicated by the PosID/PosID-3 barcode scanner does not match the<br />
type which you have used in the worktable definition.<br />
• For (custom) tube racks, make sure that the barcode which is fitted is<br />
appropriate for the tube rack type. The carrier (tube rack) type is coded in the<br />
first three digits of the barcode and is also shown in the Edit Carrier dialog<br />
box. Do not use the wrong tube size in the tube rack (e.g. do not use 13 mm<br />
tubes in a tube rack which is intended for 16 mm tubes). This will cause<br />
scanning and pipetting errors. The PosID/PosID-3 calculates the expected<br />
position of the tube barcodes according to the tube rack type which is shown<br />
on the tube rack barcode.<br />
In the settings for the PosID (or PosID-3) command:<br />
• Only choose the barcode types which are used on the barcode labels. This<br />
makes it easier for the scanner to identify incorrect barcodes.<br />
• If the barcode type you are using has start and stop characters, they must be<br />
activated in the settings.<br />
• If the barcode type you are using has a checksum (check digit), it must be<br />
activated in the settings.<br />
• If the barcode type you are using does not have a checksum, you must always<br />
specify the actual number of barcode characters used (do not specify 0).<br />
Notes on specific barcode types:<br />
• Codabar: You must always specify the actual number of barcode characters<br />
used (do not specify 0) and you must always use a check digit (modulo 16).<br />
This barcode type is not recommended due to reading security.<br />
• Code 128: This barcode type always has a check digit - you do not need to<br />
activate the checksum in the PosID/PosID-3 command explicitly. This barcode<br />
type is widely used and has good reading security (and used by Tecan for<br />
carrier barcodes).<br />
• Interleaved 2 of 5: You must always specify the actual number of barcode<br />
characters used (do not specify 0) and you must always use a check digit<br />
(modulo 10). The number of characters is always even for this barcode type.<br />
The barcode should have at least 6 characters. This barcode type should not<br />
be used due to reading security.<br />
• Code 39 Full ASCII: Only use with a check digit (modulo 43).<br />
• Code 39: Only use with a check digit (modulo 43).<br />
• EAN-128: This barcode type is a special version of Code 128 which is often<br />
used for commercial and industrial applications. It always has a check digit -<br />
you do not need to activate the checksum in the PosID/PosID-3 command<br />
explicitly. It is limited to numeric data and has good reading security.<br />
Only use barcodes with a specified length and a checksum (check digits) for<br />
general purpose pipetting applications. This ensures that incorrectly scanned<br />
barcodes are always detected.<br />
<strong>Freedom</strong> <strong>EVOware</strong> <strong>Software</strong> <strong>Manual</strong>, 393172, en, V<strong>2.3</strong> C - 5
C - Validation of <strong>Freedom</strong> <strong>EVOware</strong> Applications<br />
Recommendations when using barcodes<br />
C - 6 <strong>Freedom</strong> <strong>EVOware</strong> <strong>Software</strong> <strong>Manual</strong>, 393172, en, V<strong>2.3</strong>
D - Glossary<br />
Glossary of Terms and Instrument Options<br />
D<br />
Glossary<br />
Purpose of This<br />
Chapter<br />
This chapter consists of two parts:<br />
• The first part (section D.1 “Glossary of Terms and Instrument Options”, D-1)<br />
explains a number of important terms which are used in this manual. The<br />
terms are listed in alphabetical order.<br />
• The second part (section D.2 “Important GUI features in MS Windows<br />
Applications”, D-27) explains the most common Windows controls you will<br />
encounter in many screens, dialog boxes, message boxes and forms shown<br />
in this manual.<br />
D.1 Glossary of Terms and Instrument Options<br />
This section provides an explanation of important terms which are used in this<br />
manual and describes some of the more common options for Tecan pipetting<br />
instruments. Contact Tecan for information on the options which are available for<br />
the pipetting instrument version and pipetting software version that you are using.<br />
3-way valve box<br />
The 3-way valve box is a component of the Te-Flow option, which provides<br />
support for the In Situ Hybridization method.<br />
6-way valve<br />
The ChemSystem option includes a 6-way valve to allow you to switch<br />
between six different system liquids. A 6-way valve is also available for the<br />
→ Te-Fill option. It allows you to switch between six different liquid<br />
containers.<br />
<br />
Placeholder which represents the original location of the object (the labware<br />
source).<br />
<br />
Placeholder which is used in this manual to represent the installation path of<br />
the <strong>Freedom</strong> <strong>EVOware</strong> software. The default installation directory of <strong>Freedom</strong><br />
<strong>EVOware</strong> is C:\Program Files\Tecan\<strong>EVOware</strong>. You may decide to choose<br />
another directory when you install the software. The installation path is also<br />
dependent on the language version of your operating system.<br />
<br />
Placeholder to indicate that the parameter is unused (e.g. if you want to<br />
execute a plate robot movement command without using the barcode<br />
scanner).<br />
<br />
Placeholder to indicate an object (typically a plate lid or plate insert).<br />
Active Positioning Carrier (APC)<br />
Carrier fitted with an electromagnetic clamping device which is used to hold<br />
microplates and align them precisely.<br />
Active WashStation<br />
The Active WashStation is an instrument option which is used for washing<br />
Active Tips and ZipTips. It is provided with a pressure pump and a waste<br />
container. Note: Active Tips are no longer supported by <strong>Freedom</strong> <strong>EVOware</strong>.<br />
<strong>Freedom</strong> <strong>EVOware</strong> <strong>Software</strong> <strong>Manual</strong>, 393172, en, V<strong>2.3</strong> D - 1
D - Glossary<br />
Glossary of Terms and Instrument Options<br />
ActiveTip<br />
An Active Tip is an electrically activated tip which dispenses very small<br />
quantities of liquid down to 0.5 nl (nano liters). Active tips are equipped with a<br />
micro pump and a piezo-actuated pump chamber.<br />
With Active Tips, dispensing is metered by the micropump rather than by the<br />
dilutor. The droplet volume depends on the electrical drive parameters<br />
(voltage, frequency and pulse width). Each Active Tip is individually tested and<br />
is supplied with its own drive parameters which are required for proper<br />
functioning.<br />
Active Tips are a component of the Tecan Nanopipetting System (NPS).<br />
Active Tips are no longer supported by <strong>Freedom</strong> <strong>EVOware</strong>. For other tip types<br />
→ Tip.<br />
Airgaps<br />
Airgaps are necessary for separation of different liquid segments inside tubing<br />
and tips. In order to avoid disintegration, airgaps should be kept below 30 µl.<br />
For the same reason, the airgap aspiration speed should not exceed 70 µl/<br />
second.<br />
Aquarius<br />
The Aquarius is a compact robot pipetting instrument which is supplied with its<br />
own pipetting software. Many of the Aquarius functions are similar to those of<br />
the Te-MO 3/3 (Tecan Multi-Pipetting Option), which is an option for the<br />
<strong>Freedom</strong> EVO series of pipetting instruments. Aquarius is equipped with a<br />
specially designed pipetting system which can pipette up to 384 wells<br />
simultaneously, resulting in an extremely high throughput and efficiency. With<br />
the Aquarius instrument, the same volume is pipetted by all of the tips.<br />
Aspiration speed<br />
In general, a decrease of the aspiration speed will increase precision and<br />
accuracy. Very low aspiration speeds (30-70 µl/second) are required when<br />
pipetting small volumes (< 25 µl) or when pipetting liquids with high viscosity<br />
or low boiling point. Liquids with a viscosity higher than that of water may also<br />
require an aspiration delay.<br />
ASTM interface<br />
ASTM (American Society for Testing and Materials) is a leading US standards<br />
institute. In the context of this manual, ASTM interface refers to a standard for<br />
transferring information between clinical instruments and computer systems<br />
through a serial (RS232) connection. The ASTM interface protocol is specified<br />
in the two ASTM documents E1381 and E1394. Although this standard has<br />
now been superseded by other standards from ANSI/NCCLS, it is widely used<br />
in laboratories for transferring data to and from laboratory information<br />
management systems (LIMS).<br />
Autoloader<br />
The Autoloader is an optional plate feeder and storage system for<br />
→ Aquarius pipetting instruments. The Autoloader, which is installed on the<br />
right side of the Aquarius, is provided with six stacker columns. Each stacker<br />
column can accommodate up to 50 pieces of labware.<br />
Calibration volume<br />
Use of the Calibration tool requires knowledge of the actual absolute pipetting<br />
volume error.<br />
CAN bus (Controller Area Network)<br />
High-speed data bus which is used internally by Tecan pipetting instruments<br />
for interconnecting devices such as the → Liquid Handling Arm.<br />
D - 2 <strong>Freedom</strong> <strong>EVOware</strong> <strong>Software</strong> <strong>Manual</strong>, 393172, en, V<strong>2.3</strong>
D - Glossary<br />
Glossary of Terms and Instrument Options<br />
Carousel<br />
The carousel is a motor-driven magazine system which is used to store<br />
microplates, tube racks or DITI racks and to present them to the instrument for<br />
pipetting operations. Each carousel can have 1 to 9 towers. The labware is<br />
removed from the carousel and re-inserted using the → RoMa. The carousel<br />
can be fitted with a barcode scanner which can read barcode labels on plates<br />
when they are inserted and removed. The carousel can be used like any other<br />
microplate hotel on your pipetting instrument.<br />
The Carousel NT supersedes the standard carousel and features a number of<br />
electrical and mechanical improvements, including faster operation and safety<br />
doors which can be fitted with doorlocks.<br />
Carrier<br />
A carrier is a removable support or mount on the instrument's worktable (i.e.<br />
deck) which holds one or more pieces of labware in place. Carriers can be<br />
fitted to the instrument’s worktable at pre-defined grid positions (see Fig. 11-<br />
8, 11-20).<br />
In <strong>Freedom</strong> <strong>EVOware</strong>, carriers are also used to represent positions on<br />
devices which can be accessed by the plate or tube robot. For example, the<br />
plate robot can put a microplate onto the shuttle of the Te-Stack stacker when<br />
the shuttle is at the transfer position.<br />
The carrier name indicates the labware type for which it is designed (for<br />
device carriers, it indicates the device type).<br />
Carrier code<br />
Code which indicates the carrier type. This is the first three digits of the<br />
barcode at the end of the carrier. All standard Tecan carriers and tube racks<br />
have a unique carrier code.<br />
Carrier unit<br />
→ Grid Unit.<br />
Carry over<br />
Residue of sample liquid that remains in a tip after rinsing at the end of a<br />
pipetting cycle. Such residue is “carried over” to the next cycle and could<br />
cause contamination. Where no carry over is admissible, → DiTis<br />
(Disposable tips) must be used.<br />
Cellerity, CellGEM<br />
Tecan Cellerity is a modular system based on the <strong>Freedom</strong> EVO series of<br />
pipetting instruments which allows you to automate typical cell biology<br />
processes for adherent cell lines such as cell feeding, harvesting and<br />
passaging. CellGEM is the Tecan application software for the Cellerity system.<br />
CGM (Common Gripper Module)<br />
The CGM is a robot arm with gripper fingers that can grip and move objects<br />
such as microplates. It is a hardware option for the → MCA384 (Multi Channel<br />
Arm 384).<br />
ChemSystem<br />
An option which allows you to use up to 6 different system liquids in the<br />
pipetting instrument. It consists of a 6-way valve to select the required system<br />
liquid, a nitrogen valve and the vacuum assisted waste option.<br />
Cleaner position<br />
Part of a wash station into which the tips are placed to wash the outside of the<br />
tips using the system liquid. The used liquid then flows off through the waste<br />
tubing into the waste container. → Waste position.<br />
<strong>Freedom</strong> <strong>EVOware</strong> <strong>Software</strong> <strong>Manual</strong>, 393172, en, V<strong>2.3</strong> D - 3
D - Glossary<br />
Glossary of Terms and Instrument Options<br />
Clot detection<br />
Two different technologies are available for the <strong>Freedom</strong> EVO pipetting<br />
instrument series to detect clots which have been aspirated by the pipetting<br />
tips: capacitive and pressure-based. The capacitive method is always<br />
available and the pressure-based method is optional.<br />
With capacitive clot detection, a message is output if the difference between<br />
the liquid levels measured before and after sample aspiration does not<br />
correspond to the calculated level difference, indicating that clots are attached<br />
to the tip. Capacitive clot detection is only available if capacitive liquid level<br />
detection has been activated in the liquid class.<br />
Capacitive liquid level detection (cLLD) works in both directions, i.e. when the<br />
tip is moved into a liquid and when it is retracted again. This allows detection<br />
of aspirated clots, e.g. blood clots. The software stores the height at which the<br />
tip enters the liquid. The volume aspirated and the container or tube diameter<br />
are known. The software can then calculate the height at which the tip should<br />
leave the liquid again when it is retracted. If the exit height is too high, it can<br />
be assumed that a clot is hanging from the tip. See also 10.2.1 “LiHa Aspirate<br />
Parameters (Fixed Tips and DiTis)”, 10-7, Use exit signal detection.<br />
With pressure-based clot detection, a message is output if abnormal<br />
presssure values are detected in the pipetting tip when aspirating, indicating<br />
the presence of a clot or tip blockage. Pressure-based clot detection requires<br />
the → Pressure Monitored Pipetting (PMP) hardware option. PMP is only<br />
available for LiHa DITI tips.<br />
Compartment (of well)<br />
Some special labware types (e.g. for protein crystallography) have wells with<br />
several compartments (cavities). <strong>Freedom</strong> <strong>EVOware</strong> can pipette a different<br />
liquid into each of the compartments. Each well typically has one main<br />
compartment and one or more satellite compartments which are directly<br />
adjacent and are often smaller in size.<br />
Columbus washer<br />
The Columbus Washer is used for stripwise washing of 96-well microplates<br />
(optional: 384-well microplates). It can be equipped with either a 8, 12 or 16<br />
way manifold or a 384 way manifold, each of which are provided with one<br />
aspirating and one dispensing needle per well. It can store up to 9 userdefined<br />
labware types that define the dispensing and aspirating positions for<br />
round or flat bottomed plates. The dispensing and aspirating speeds can be<br />
selected from 5 pre-defined speed settings. For dispensing, an additional drip<br />
mode setting is available which allows a wash liquid to be added drop by drop.<br />
In the soaking phase, you can also activate a microplate shaking mechanism.<br />
These features allow the device to be used for all ELISA microplate washing<br />
applications including cell washing.<br />
Command<br />
In <strong>Freedom</strong> <strong>EVOware</strong>, script commands are used to specify pipetting<br />
operations. A collection of script commands is called a pipetting script. Device<br />
commands are used to implement device-specific functions such as washing<br />
a microplate in a plate washer. Each device has its own set of commands.<br />
Conditioning volume<br />
Volume of excess liquid that is aspirated together with the liquid to be<br />
distributed and immediately discarded (usually in the source container) before<br />
the dispense process starts. It serves to create a controlled state of the<br />
system. The use of a conditioning volume will help to dispense the first portion<br />
of a multi-pipetting distribution under conditions most similar to those of the<br />
subsequent portions. This is because the mechanical backlash of the dilutor<br />
drive is eliminated after dispensing the conditioning volume.<br />
D - 4 <strong>Freedom</strong> <strong>EVOware</strong> <strong>Software</strong> <strong>Manual</strong>, 393172, en, V<strong>2.3</strong>
D - Glossary<br />
Glossary of Terms and Instrument Options<br />
Configuration<br />
<strong>Freedom</strong> <strong>EVOware</strong> stores information on fixed and variable parts of the<br />
pipetting instrument in an internal database and a set of configuration files. It<br />
also stores information on the dimensions of carriers and labware items and<br />
the configuration settings for the optional devices. The Configuration is edited<br />
with the Configuration Tool, which is started by clicking Configure in <strong>Freedom</strong><br />
<strong>EVOware</strong>’s toolbar.<br />
Connection box (Te-Flow)<br />
Valve box for use with the Te-Flow option.<br />
Container<br />
Individual well or tube which is used to contain liquid (see Fig. 11-8, 11-20).<br />
CRC (checksum)<br />
Cyclic redundancy check. A method which used to calculate a checksum for<br />
files or data. <strong>Freedom</strong> <strong>EVOware</strong> uses a CRC checksum to check whether<br />
configuration files have been corrupted or modified outside of <strong>Freedom</strong><br />
<strong>EVOware</strong>.<br />
CRC Editor<br />
Carrier/Rack/Container editor (part of the Tecan Instrument <strong>Software</strong>). It is<br />
used to edit the CRC database. See 1.2 “Reference Documents”, 1-3 for<br />
more information.<br />
Deep-well plate<br />
A type of microplate with a capacity of more than 400 µl for each well. Mainly<br />
used for pre-dilution and/or for storage of serum.<br />
Detection speed<br />
Speed at which the liquid level is detected. Because liquid level detection is<br />
based on measurement of the capacitance, the correct detection speed is<br />
dependent on the conductivity of the liquid used as well as on the well<br />
geometry. The normally used liquid level detection speed (500-800 mm/s)<br />
must be reduced when pipetting small volumes of distilled water or organic<br />
solvents.<br />
Device<br />
Single intelligent piece of hardware (such as a plate washer or a robot<br />
pipetting arm). It is controlled by <strong>Freedom</strong> <strong>EVOware</strong> using a device driver.<br />
The device drivers which were chosen during the <strong>Freedom</strong> <strong>EVOware</strong><br />
installation are visible in the Worktable Editor and/or in the Control Bar.<br />
Dilutor<br />
Precision pump that aspirates and dispenses exactly defined volumes of liquid<br />
by means of motor-driven syringes. The XP 3000 dilutor consists of a syringe<br />
pump and a 3-way valve that is connected through flexible tubing to the<br />
pipetting tip and a system liquid reservoir. Each tip has its own dilutor.<br />
The XP dilutor supports syringe sizes from 25 µl to 5 ml. The XLP dilutor<br />
supports syringe sizes from 50 µl to 50 ml. In addition it has a high resolution<br />
mode which allows more accurate pipetting. The XMP dilutor is used by the<br />
<strong>Freedom</strong> EVO 75 pipetting instrument.<br />
Dispense speed/breakoff<br />
The dispense speed never should be set below 250 µl/second to guarantee<br />
laminar liquid flow at the tip face and to avoid droplets forming on the tip when<br />
dispensing from above the liquid surface. The maximum dispense speed may<br />
be limited by foam formation as well as by the shape and size of the<br />
destination container. When pipetting very small volumes, the speed of the<br />
liquid flow often is limited by the dilutor drive’s maximum acceleration.<br />
<strong>Freedom</strong> <strong>EVOware</strong> <strong>Software</strong> <strong>Manual</strong>, 393172, en, V<strong>2.3</strong> D - 5
D - Glossary<br />
Glossary of Terms and Instrument Options<br />
DiTi (Disposable tip)<br />
Disposable pipetting tip, often made of plastic. DiTis are normally only used<br />
for a single aspirate/dispense cycle and are discarded after use. DiTis are<br />
used when it is essential that no residues from one sample are carried over to<br />
the next → Carry over, → DiTi waste.<br />
LiHa DiTis are DiTis which are fitted to the liquid handling arm (as opposed to<br />
the → MCA or → Te-MO).<br />
DiTi rack<br />
Rack (also called DITI tray or box) containing disposable tips which can be<br />
placed on the worktable to allow the DiTis to be picked up by the → LiHa.<br />
Stackable DITI rack: Special DITI rack design which can be stacked using<br />
plastic spacers to form a pile of racks. The pile can be put on the workable.<br />
This avoids the need for a carousel if the number of DITIs required by your<br />
script or process is not too high. The Get DITIs command picks up DITIs from<br />
the DITI rack which is on the top of the stack. When the DITI rack is empty, it is<br />
removed from the pile together with the spacer to reveal the next DITI rack in<br />
the stack. Stackable DITI racks can only be used with the LiHa.<br />
Nested DITIs: Special DITI rack design with 96 DITIs which can be stacked to<br />
form a pile of racks. The pile can be put on the worktable or stored in the Te-<br />
Stack. When the racks are stacked, the DITI tips slide inside the DITIs on the<br />
layer below to save space. Each layer of DITIs has its own rack. Nested DITIs<br />
can only be used with the MCA96 or MCA384.<br />
DiTi Waste<br />
Waste chute for collecting used DiTis. → Lower DITI Eject.<br />
DMSO<br />
Dimethyl sulfur oxide (reagent).<br />
Dongle<br />
→ Hardlock.<br />
Dynamic Link Library (DLL)<br />
A Dynamic Link Library (DLL) is a collection of programs that can be loaded<br />
and used while the executable application program (exe) is running. One DLL<br />
can be shared by several application programs at the same time.<br />
EEPROM<br />
(Electrically Erasable Programmable Read-Only Memory). Memory chip for<br />
non-volatile storage of parameters and/or executable software instructions.<br />
Non-volatile means that the data is not lost when the power supply is switched<br />
off. An EEPROM behaves like an ordinary → ROM (Read-Only Memory)<br />
during normal operation. However, an EEPROM can be erased electrically<br />
and then re-programmed. For some applications, EEPROMs are now being<br />
replaced by → Flash memory.<br />
Error handling mode<br />
Identifies the system reaction (e.g., stop instrument and call operator, or<br />
aspirate at Z-max, or skip sample, etc.) which is triggered by an error<br />
condition.<br />
<strong>EVOware</strong><br />
Tecan control and automation software for the <strong>Freedom</strong> EVO series of<br />
pipetting instruments.<br />
D - 6 <strong>Freedom</strong> <strong>EVOware</strong> <strong>Software</strong> <strong>Manual</strong>, 393172, en, V<strong>2.3</strong>
D - Glossary<br />
Glossary of Terms and Instrument Options<br />
Exit signal detection<br />
Exit signal detection (also called dip out signal detection) detects the liquid<br />
surface through a change of the electrical capacitance of the pipetting tip<br />
when the tip is retracted and exits the liquid. It is carried out just after<br />
aspirating. The measured liquid level is then compared with the liquid level<br />
which should have resulted from the aspiration. → Clot detection.<br />
See also 10.2.1 “LiHa Aspirate Parameters (Fixed Tips and DiTis)”, 10-7,<br />
Use exit signal detection.<br />
<strong>Freedom</strong> <strong>EVOware</strong> Administrator<br />
System administrator for the <strong>Freedom</strong> <strong>EVOware</strong> software.<br />
Excess volume<br />
Used for multi-pipetting mode. Volume of excess liquid that is aspirated<br />
together (not separated by an airgap) with the liquid to be distributed. It is not<br />
dispensed anywhere, but is discarded to waste (or to a special position) after<br />
use. Use of an excess volume ensures that the volume of the last portion of a<br />
multi-pipetting distribution is the same as previous portions. To a certain<br />
extent, excess volume can also help to prevent the pipetted sample from<br />
being diluted by the system liquid.<br />
Exchange position<br />
→ Transfer position.<br />
Execution parameters<br />
Device-specific parameters which are used when a device command is<br />
executed. They can be configured individually for each process step or script<br />
line. To view or edit the execution parameters in <strong>Freedom</strong> <strong>EVOware</strong> Plus,<br />
double-click on the process step in the Process Editor. To view or edit the<br />
execution parameters in <strong>Freedom</strong> <strong>EVOware</strong> <strong>Standard</strong>, double-click on the<br />
script command for the device in the Script Editor.<br />
FACTS<br />
Flexible Assay Controller and Task Scheduler. Tecan advanced dynamic<br />
scheduling software.<br />
Fast Wash Option (FWO)<br />
The FWO is used to pump a large amount of liquid at high speed through the<br />
system, normally to flush the tips. The Fast Wash Option (formerly called<br />
FaWa) is included with the → MPO (Monitored Pump Option) and the → SPO<br />
(Sensored Pump Option).<br />
Firmware<br />
Control software residing semi-permanently in an → EEPROM or Flash<br />
memory. In Tecan pipetting Instruments, firmware is used to control hardware<br />
components (motors, pumps, syringes etc.) via the respective control boards.<br />
In certain cases it is necessary to download a firmware file from the hard disk<br />
to the respective EEPROM. Optional devices such as the PosID barcode<br />
scanner are also controlled by firmware.<br />
Firmware command<br />
Combination of machine parameters which instructs the pipetting instrument<br />
to perform a specific action such as moving one of the robot arms in a<br />
specified direction. The commands must follows the rules and syntax of the<br />
instrument’s firmware command set. Firmware commands can also be sent to<br />
optional devices such as the PosID barcode scanner. See the respective<br />
instrument manual for a list of firmware commands. Also called Command<br />
string.<br />
<strong>Freedom</strong> <strong>EVOware</strong> <strong>Software</strong> <strong>Manual</strong>, 393172, en, V<strong>2.3</strong> D - 7
D - Glossary<br />
Glossary of Terms and Instrument Options<br />
Fixed tip<br />
General term for a tip that can be screwed to a pipetting device (e.g. → LiHa).<br />
Unlike a → Disposable tip (DiTi) it is rinsed after each pipetting cycle and<br />
can be used again.<br />
FlaskFlipper<br />
The FlaskFlipper hardware option is one of the components of the Tecan<br />
Cellerity system. It is mounted on the worktable of the pipetting instrument<br />
and is used to load, unload, hold, shake and knock the cell culture flasks.<br />
Flash memory<br />
Memory chip for non-volatile storage of parameters and/or executable<br />
software instructions. Non-volatile means that the data is not lost when the<br />
power supply is switched off. Flash memory can be erased electrically and<br />
then re-programmed.<br />
Flushing the instrument<br />
Procedure that rinses the entire liquid system of the pipetting instrument for<br />
the purpose of removing air pockets or exchanging the system liquid. The<br />
liquid flows through the dilutors and tubing and exits through the tips into the<br />
waste position of the wash station.<br />
Free air dispensing<br />
Dispensing liquid without the tip touching the liquid surface. Free air<br />
dispensing is sometimes called jet dispensing. The opposite of free air<br />
dispensing is → Submerged dispensing.<br />
<strong>Freedom</strong><br />
Tecan <strong>Freedom</strong> pipetting instrument.<br />
<strong>Freedom</strong> EVO<br />
Tecan pipetting instrument series. Depending on the model, the <strong>Freedom</strong><br />
EVO can be fitted with up to three robot arms (up to two liquid handling arms,<br />
two plate robots and/or two tube robots). It can be interfaced to a wide range<br />
of Tecan and third-party laboratory devices such as centrifuges and a laser<br />
scanners.<br />
FSE<br />
Tecan Field Service Engineer. The FSE is a specially trained and authorized<br />
person who is responsible for installation and initial set up of the Tecan<br />
instrument. He or she is also responsible for service and maintenance and<br />
should be contacted if there are any problems with the system.<br />
Gemini<br />
Control and automation software for the Tecan Genesis and Genesis<br />
<strong>Freedom</strong> series of pipetting instruments.<br />
Genesis<br />
A series of Tecan pipetting instruments. The Genesis series is fitted with a<br />
liquid handling arm (LiHa) and plate and tube robots (RoMa and PnP). It can<br />
be interfaced to a wide range of Tecan and third-party laboratory devices such<br />
as a centrifuge and a laser scanner.<br />
GENios reader<br />
The Tecan GENios is a fully automatic computer-controlled microplate reader<br />
for measuring samples in microplates. It fulfills the requirements for numerous<br />
fluorescence, absorbance and glow type luminescence applications in<br />
research and routine investigations. It can be used with 384, 96, 24, 12 or 6<br />
well microplates. The filters are arranged in filter slides which allow up to four<br />
excitation filters and four emission filters.<br />
D - 8 <strong>Freedom</strong> <strong>EVOware</strong> <strong>Software</strong> <strong>Manual</strong>, 393172, en, V<strong>2.3</strong>
D - Glossary<br />
Glossary of Terms and Instrument Options<br />
GENios Pro reader<br />
The Tecan GENios Pro is a multifunctional microplate reader with injector<br />
option. The GENios Pro provides high performance for the vast majority of<br />
today’s microplate applications and research and is robotic compatible. It<br />
supports several measurement techniques such as Fluorescence Intensity<br />
(FI), Fluorescence Time Resolved (FTR), Fluorescence Polarization (FP),<br />
Flash Fluorescence, Absorbance, Absorbance with Injectors, Glow Type<br />
Chemi- or Bioluminescence, Bioluminescence Resonance Energy Transfer<br />
(BRET) and Flash Luminescence.<br />
Any common microplate ranging from 6 to 384 well format maybe measured<br />
with any of the above measurement techniques. Switching between<br />
measurement techniques or labware formats is fully automated via software. It<br />
is designed for optimum sensitivity and speed of measurement.<br />
Grid unit<br />
Unit of measurement (25.0 mm, not 1 inch) on the worktable of the pipetting<br />
instrument. Corresponds to the spacing between the positioning pins in the X<br />
direction. Also called → Carrier unit.<br />
Grid, grid position<br />
Objects such as carriers are held in place on the instrument’s worktable by a<br />
grid of positioning pins (clips). This ensures that they are accurately fixed at<br />
discrete positions. The positioning pins are spaced 25.0 mm apart in the X<br />
direction. Grid position 1 is on the left of the worktable. In <strong>Freedom</strong><br />
<strong>EVOware</strong>’s Worktable Editor, you can only position objects at grid positions<br />
and not in between.<br />
GUI<br />
Graphical User Interface (of a computer program).<br />
Hardlock<br />
<strong>Software</strong> copy protection device (dongle) which is plugged into the USB port<br />
of your PC. Different hardlock versions enable different <strong>Freedom</strong> <strong>EVOware</strong><br />
software feature levels (see 3.1.2 “Hardlocks for <strong>Freedom</strong> <strong>EVOware</strong> <strong>Standard</strong><br />
and <strong>Freedom</strong> <strong>EVOware</strong> Plus”, 3-2).<br />
Heating block<br />
Component incorporated in options like Te-MagS, Te-Shake or the Incubation<br />
Device that is used to heat up samples and to keep them at a defined<br />
temperature.<br />
Hettich centrifuge<br />
Centrifuging device from the Hettich company which is fitted below the<br />
worktable and secured to the floor. It can be loaded and unloaded by reaching<br />
through a hole in the worktable with a robot. It can perform centrifuging of<br />
samples at configurable speeds and temperatures.<br />
Hit-Picking Wizard<br />
The Hit-Picking Wizard is a software add-on for <strong>Freedom</strong> <strong>EVOware</strong>. It creates<br />
a pipetting script which picks samples from source labware and dispenses<br />
them into destination plates according to a configurable destination plate<br />
layout (dispense map). A “sample list” file (input file) specifies the location of<br />
the samples you want to process.<br />
Hotel (RoMa hotel)<br />
Device (e.g. arrangement of shelves) which is used to store (i.e. park) objects<br />
such as labware which can then be picked up by the RoMa for placing on<br />
carriers. Hotels are normally put at the rear of the worktable.<br />
<strong>Freedom</strong> <strong>EVOware</strong> <strong>Software</strong> <strong>Manual</strong>, 393172, en, V<strong>2.3</strong> D - 9
D - Glossary<br />
Glossary of Terms and Instrument Options<br />
Hydroflex <strong>Software</strong><br />
Tecan control software and driver system which is used by certain Tecan plate<br />
washer models. The Hydroflex software, which must be installed separately,<br />
installs it’s own commands for the washer in the <strong>Freedom</strong> <strong>EVOware</strong> Control<br />
Bar. Refer to the Hydroflex and/or washer documentation for information on<br />
using the commands within <strong>Freedom</strong> <strong>EVOware</strong> scripts and processes.<br />
ILID<br />
Integrated LIquid Detector. Electronic device mounted on the liquid handling<br />
(LiHa) arm. The ILID monitors the capacitance between the pipetting tip and<br />
electrical ground (worktable) and generates a signal when there is a sudden<br />
change in capacitance caused by the pipetting tip coming in and out of contact<br />
with an ionic solution. The signal is used for liquid and clot detection.<br />
Incubator<br />
An incubator is a device which is used to keep labware containing samples or<br />
reagents at a defined temperature for a specified length of time, for example<br />
until the desired biological or biochemical reaction has taken place.<br />
A heated incubator incorporates a → Heating Block and a control circuit and<br />
can be fitted with a shaker option.<br />
A Room Temperature Incubator provides a location where labware can be<br />
kept at room temperature.<br />
The Base Incubator treats the base (labware source) location of a piece of<br />
labware as a room temperature incubator. The labware is taken back to its<br />
base position and left there for a specified length of time. In <strong>Freedom</strong><br />
<strong>EVOware</strong>, the base incubator is a software concept. It is not a device which<br />
you can fit to your pipetting instrument.<br />
See also → Te-Thermix.<br />
Initialization<br />
Term used to describe the calibration of one or more axes of the pipetting<br />
instrument. This is done by moving the instrument arms etc. to predefined<br />
positions. When initializing the dilutors, the LiHa is moved over the Wash<br />
Station (if it is defined on the worktable) to avoid liquid dripping onto the<br />
instrument deck. The pipetting instrument uses an absolute coordinate<br />
system that requires X/Y/Z calibration.<br />
Instance of a process<br />
To achieve the maximum throughput (efficiency) of the pipetting instrument,<br />
for example the maximum number of processed microplates per hour,<br />
<strong>Freedom</strong> <strong>EVOware</strong> Plus allows you to run several copies of the same process<br />
in parallel. This allows <strong>Freedom</strong> <strong>EVOware</strong> Plus e.g. to fetch a microplate from<br />
the carousel while pipetting is taking place on another microplate. Each copy<br />
of the process is called an instance (or “iteration”). The number of process<br />
copies you want to run is chosen in the Runtime Controller when you run the<br />
process. Each process instance is given a unique number (the process<br />
instance ID, counting from 1).<br />
Instrument (pipetting instrument)<br />
A number of devices which work together. One of the devices is normally a<br />
robot pipetting arm. Other devices can be e.g. a centrifuge, a plate washer or<br />
a barcode scanner, depending on the requirements of your application or<br />
experiment. Pipetting instrument are normally provided with a → Worktable<br />
(deck).<br />
Instrument step<br />
Smallest unit of movement for the servo motors of the pipetting instrument<br />
(0.1 mm).<br />
D - 10 <strong>Freedom</strong> <strong>EVOware</strong> <strong>Software</strong> <strong>Manual</strong>, 393172, en, V<strong>2.3</strong>
D - Glossary<br />
Glossary of Terms and Instrument Options<br />
ISH<br />
In Situ Hybridization method, requires the Te-Flow option.<br />
Labware<br />
Disposable item such as a microplate or a sample tube. Microplates have a<br />
regular arrangement of containers or cavities (wells) for holding liquid samples<br />
or reagents (see Fig. 11-8, 11-20). During pipetting, microplates are<br />
normally placed on carriers. Tubes are inserted into tube racks or strip racks.<br />
The carriers and racks are placed on the worktable of the pipetting instrument<br />
at pre-defined positions.<br />
LICOS<br />
Liquid Container Supervisor. The LICOS option is a device which monitors the<br />
liquid level in the waste liquid and system liquid containers. It outputs a<br />
warning if the waste container is nearly full or if the system liquid container is<br />
nearly empty. LICOS is included with the Monitored Pump Option (MPO).<br />
LiHa (Liquid handling arm)<br />
Robot arm on the pipetting instrument which is mounted on the X-slide and<br />
typically holds four or eight pipetting tips. It is used for pipetting samples in<br />
different volume ranges, depending on the tip types used and the features of<br />
the liquid system.<br />
Liquid arrival check<br />
The Liquid Arrival Check (LAC) feature verifies that the correct liquid volumes<br />
have been dispensed by weighing the labware before and after pipetting. The<br />
labware must be put onto a special balance (pooling balance) for the dispense<br />
operation. <strong>Freedom</strong> <strong>EVOware</strong> automatically calculates the liquid volume from<br />
the weight difference and compares the results with the volume specified in<br />
the pipetting command. An LAC error is output if the two values differ by more<br />
than the maximum volume deviation which is specified in the liquid class.<br />
The LAC feature is only supported by special balance types such as the<br />
Mettler WM pooling balance. This balance has a built-in tube rack for 16 x 13<br />
mm tubes and is commonly used for liquid pooling operations. In <strong>Freedom</strong><br />
<strong>EVOware</strong>, the LAC feature is configured in the settings for the liquid class.<br />
Liquid class<br />
Set of properties defining a theoretical model for a particular type of liquid.<br />
Liquid classes are identified by a generic name (e.g., Serum, Buffer, Ethanol,<br />
etc.) and include all liquid handling parameters required to process liquids of<br />
that type. The liquid classes can be edited with the Liquid Class Editor.<br />
Liquid distributor<br />
A liquid distributor is a device which is used to distribute liquid. For example,<br />
the Liquid Distributor 1-to-4 distributes liquid from a (main) tube to four smaller<br />
tubes. The Liquid Distributor 1-to-3, which is used by the Nano-Pipetting<br />
System, also contains a valve system to route system liquid between the Fast<br />
Wash pump, the Active WashStation and the dilutors/Active Tips according to<br />
the function being performed. Note: Active Tips are no longer supported by<br />
<strong>Freedom</strong> <strong>EVOware</strong>.<br />
Liquid handling parameters<br />
Set of parameters that influence the liquid distribution process (e.g., aspirate<br />
and dispense speeds, delays, liquid level detection, tracking, etc.).<br />
<strong>Freedom</strong> <strong>EVOware</strong> <strong>Software</strong> <strong>Manual</strong>, 393172, en, V<strong>2.3</strong> D - 11
D - Glossary<br />
Glossary of Terms and Instrument Options<br />
Liquid level detection (LLD)<br />
Two different liquid level detection technologies are available for the <strong>Freedom</strong><br />
EVO pipetting instrument series: capacitive and pressure-based. The<br />
capacitive method is always available and the pressure-based method is<br />
optional.<br />
Capacitive liquid level detection (cLLD) detects the liquid surface through a<br />
change of the electrical capacitance of the pipetting tip when the tip enters or<br />
exits the liquid.<br />
Pressure-based liquid level detection (pLLD) detects the liquid surface<br />
through a change of pressure in the airgap between the sample and the<br />
system liquid when the pipetting tip enters or exits the liquid. pLLD requires<br />
the → Pressure Monitored Pipetting (PMP) hardware option. PMP is only<br />
available for LiHa DITI tips. In contrast to cLLD, pLLD is also suitable for<br />
detecting non-conductive liquids.<br />
The LLD settings can be configured individually for each liquid class (liquid<br />
type). The liquid class can be configured to use cLLD, pLLD or both systems<br />
in parallel.<br />
Liquid system<br />
All instrument modules and parts that contain or directly influence liquid<br />
(tubing, dilutors, valves, tips, etc.).<br />
LIMS<br />
Laboratory Information Management System. Also called Laboratory<br />
Information System (LIS). Overlying software which is used to control the<br />
operations to be carried out in a laboratory and to store the results of the tests<br />
or assays, normally in a database.<br />
Loading Interface<br />
The Loading Interface is a hardware option for the pipetting instrument which<br />
detects when labware items (typically tube racks) are put onto the worktable<br />
(or removed again). It requires special labware which is fitted with a small<br />
magnet which activates a proximity switch.<br />
The presence or absence of the labware is reported to <strong>Freedom</strong> <strong>EVOware</strong>. In<br />
addition, <strong>Freedom</strong> <strong>EVOware</strong> can control LEDs fitted to the front edge of each<br />
grid position to indicate to the operator that labware should be exchanged<br />
and/or should not be exchanged. The Loading Interface is normally controlled<br />
by the Sample Oriented <strong>EVOware</strong> software add-on. Sample Oriented<br />
<strong>EVOware</strong> provides special script commands for specifying which grid<br />
positions contain labware which needs to be exchanged and should be<br />
monitored by the Loading Interface hardware.<br />
Low volume option<br />
The Low Volume option allows the LiHa to pipette small volumes as low as<br />
0.5 µl with free dispensing, i.e. the tips are not touching the liquid. Even<br />
smaller volumes can be dispensed if tip touching is used. The main<br />
components of the Low Volume option are the pinch valve, the low volume<br />
pipetting tubing, the thinner low volume tips, and the pressure relief valve,<br />
which reduces the pressure in the tubing system. Impulses in the pinch valve<br />
drive tiny droplets out of the tip. The Low Volume option can only be used with<br />
a system liquid of water.<br />
Lower DITI Eject<br />
Hardware option to discard DITIs at a lower height, e.g. to minimize<br />
contamination due to aerosols which could arise when the DiTis drop down<br />
into the → DiTi Waste. This option is required by the Set DiTis Back<br />
command.<br />
D - 12 <strong>Freedom</strong> <strong>EVOware</strong> <strong>Software</strong> <strong>Manual</strong>, 393172, en, V<strong>2.3</strong>
D - Glossary<br />
Glossary of Terms and Instrument Options<br />
Magellan<br />
The Magellan software is a Tecan option which is used to control microplate<br />
readers (e.g. photometers) and to carry out data analysis using stored<br />
procedures. The Magellan software, which has its own installation procedure,<br />
has built-in drivers for Tecan microplate readers.<br />
Matrix Assisted Laser Desorption Ionization (MALDI)<br />
Technique in which the sample is in a state where it is evenly mixed with a<br />
mass matrix. The matrix absorbs a nitrogen laser and converts it into thermal<br />
energy. At the same time, a minute amount of the matrix rapidly heats (within<br />
several nanoseconds) and vaporizes with the sample.<br />
MCA (Multi Channel Arm)<br />
The MCA96 is a special liquid handling arm which is fitted with a 96-tip<br />
pipetting head. The pipetting head can be fitted with a tipblock (a replaceable<br />
block with 96 tips) or with DITIs. The spacing between the tips is fixed (9 mm).<br />
The MCA96 can be optionally fitted with gripper fingers to allow it to pick up<br />
and move labware. In contrast to the RoMa, the gripper fingers cannot be<br />
rotated (they are always parallel to the X axis of the pipetting instrument).<br />
The MCA96 has important perfomance advantages when pipetting to a large<br />
number of wells simultaneously. For mechanical reasons, the same volume is<br />
pipetted by all of the tips.<br />
The MCA384 is a special liquid handling arm which can be fitted with a 96 or<br />
384 fixed tips or disposable tips (DITIs). The spacing between the tips is fixed<br />
(9 mm and/or 4.5 mm). So-called head adapters are used to adapt the<br />
pipetting head to the different tip types. The MCA384 can be optionally fitted<br />
with a gripper system (CGM, common gripper module) which can be used to<br />
pick up and move labware. The gripper module can be rotated.<br />
Method<br />
In <strong>Freedom</strong> <strong>EVOware</strong>, a method is a set of one or more processes to be run<br />
together (either sequentially or in parallel). The method file also contains<br />
information on the runtime settings. Methods are created and saved in the<br />
Runtime Controller. Methods are only supported by <strong>Freedom</strong> <strong>EVOware</strong> Plus.<br />
Microplate<br />
Disposable component with standardized dimensions which has a regular<br />
arrangement of containers or cavities (wells) for holding liquids or samples.<br />
Common microplate types are provided with 96 or 384 wells.<br />
MIO<br />
Monitored Incubator Option. Consists of a heated incubator with optional<br />
shaker device.<br />
Movement axes<br />
The various arms with which an instrument can be equipped can move in<br />
several axes. The most important axes are listed below. Note that not all arms<br />
can move in all of the listed axes.<br />
- X-axis, left/right movement along the worktable front<br />
- Y-axis, front/rear movement<br />
- Z-axis, vertical up/down movement<br />
- R-axis, for rotational movements (e.g. of RoMa gripper head)<br />
- G-axis, for opening/closing grippers (RoMa, PnP)<br />
MPO<br />
Monitored Pump Option (consists of FWO and LICOS). The MPO is used to<br />
pump a larger amount of liquid at higher speed through the system, normally<br />
to flush the tips. → SPO.<br />
<strong>Freedom</strong> <strong>EVOware</strong> <strong>Software</strong> <strong>Manual</strong>, 393172, en, V<strong>2.3</strong> D - 13
D - Glossary<br />
Glossary of Terms and Instrument Options<br />
MTP<br />
Abbreviation for microtiter plate. → Microplate.<br />
Multi Pipetting Option<br />
→ Te-MO.<br />
Multi Channel Arm<br />
→ MCA.<br />
Multi-pipetting mode<br />
With multi-pipetting mode (also called multi-dispensing mode), a quantity of<br />
liquid is aspirated and the liquid is then dispensed in portions into several<br />
destination wells. → Single Pipetting mode.<br />
Normalization <strong>Software</strong><br />
The Normalization <strong>Software</strong> is an add-on for <strong>Freedom</strong> <strong>EVOware</strong>. The<br />
Normalization Wizard creates a pipetting script which dilutes samples of<br />
varying concentration so that the concentration of each sample is uniform<br />
across the destination labware.<br />
The Quantitation Wizard is an option that works in conjunction with <strong>Freedom</strong><br />
<strong>EVOware</strong> and the Magellan software to determine the initial concentration of<br />
the samples. The Quantitation Wizard can also be used to dilute highly<br />
concentrated samples prior to measurement and normalization. The<br />
Normalization Wizard imports the concentration data from the Quantitation<br />
Wizard or from a data file. The samples are then normalized into a single<br />
piece of labware, with all samples having the same concentration.<br />
NPS<br />
Tecan Nanopipetting System. It uses piezo-controlled → ActiveTips for<br />
dispensing very small quantities of liquid.<br />
Nucleic Acid Testing (NAT)<br />
Method of testing blood that is potentially more sensitive than conventional<br />
tests that require the presence of antibodies to trigger a positive test result.<br />
Object parameters<br />
In the Process Editor, the bottom half of each process step icon shows the<br />
name or names of the labware and/or devices which are involved in the<br />
operation. They are called object parameters. The RoMa_MoveObject<br />
command has three object parameters:<br />
Fig. D-1<br />
Object parameters of the RoMa_MoveObject command<br />
See also 9.10.4 “Locations”, 9-75.<br />
On the fly device<br />
Some devices require the use of the RoMa (plate robot) to carry out their<br />
function. A typical example of this is the Symbol LS-1220 barcode scanner<br />
which is rigidly fixed to the instrument's deck and cannot move towards the<br />
labware to scan it. Instead, the RoMa is used to move the labware past the<br />
barcode scanner “on-the-fly” while carrying out something else, for example<br />
when moving the labware from one carrier to another. The barcode scanner is<br />
then instructed to perform a read operation when the RoMa presents the<br />
labware. Such devices are called on-the-fly devices.<br />
D - 14 <strong>Freedom</strong> <strong>EVOware</strong> <strong>Software</strong> <strong>Manual</strong>, 393172, en, V<strong>2.3</strong>
D - Glossary<br />
Glossary of Terms and Instrument Options<br />
PCR Block<br />
Heating block which can be fitted to the Te-MagS or Te-Shake. It is used for<br />
→ Polymerase chain reaction sample preparation.<br />
Pinch valve<br />
Used by the Low Volume option. Allows small quantities of liquid to be<br />
dispensed accurately.<br />
Pipetting script<br />
Sequence of pipetting commands. → Script<br />
Plate<br />
→ Labware, → Microplate.<br />
Plate robot<br />
→ RoMa<br />
Plunger<br />
The piston in a → Syringe or a channel of a → Multichannel pipetting head.<br />
It aspirates liquid by moving in one direction and dispenses it when moving in<br />
the opposite direction.<br />
PMP (Pressure Monitored Pipetting)<br />
Pressure Monitored Pipetting is a hardware option for the liquid handling arm<br />
that monitors the pressure in the airgap between the sample and the system<br />
liquid during aspiration and dispensing. The pressure curves are used to<br />
detect pipetting errors.<br />
PMP is only available for 200 µl and 1000 µl LiHa DITI tips. It requires a<br />
special tip adapter and control electronics. Either four or eight tip positions can<br />
be fitted with the PMP option.<br />
In addition, the PMP hardware allows pressure-based pipetting error<br />
detection, clot detection and liquid level detection (pLLD). In contrast to the<br />
capacitive liquid level detection (cLLD), pLLD is also suitable for detecting<br />
non-conductive liquids. The PMP and LLD settings can be configured<br />
individually for each liquid class (liquid type). The liquid class can be<br />
configured to use cLLD, pLLD or both systems in parallel.<br />
PnP (Pick and Place arm) or tube robot<br />
Robot arm equipped with special grippers that can pick up, transport and<br />
place small objects within the working area of the pipetting instrument. It is<br />
typically used to transport tubes with samples. Current Tecan pipetting<br />
instruments can be fitted with up to two PnP arms. Movements of the robot<br />
arms between different positions are called vectors.<br />
PnP vector<br />
A predefined sequence of PnP movements which define an action like getting<br />
a tube from a tube rack. Also called Tube Robot Vector.<br />
Polymerase Chain Reaction (PCR)<br />
An in vitro technique for rapidly synthesizing large quantities of a given DNA<br />
segment. It involves separating the DNA into its two complementary strands<br />
and synthesizing two-stranded DNA from each single strand, and repeating<br />
the process.<br />
PosID (Positive Identification System)<br />
The PosID (Positive Identification System) is a movable barcode scanner<br />
which can be used to read the barcode labels on carriers, labware and tubes.<br />
Unlike fixed barcode scanners, it does not need a robot to bring the labware to<br />
it. The PosID is installed at the rear of the pipetting instrument and is provided<br />
with a gripper which pulls the carrier towards the rear for barcode identification<br />
<strong>Freedom</strong> <strong>EVOware</strong> <strong>Software</strong> <strong>Manual</strong>, 393172, en, V<strong>2.3</strong> D - 15
D - Glossary<br />
Glossary of Terms and Instrument Options<br />
and then slides the carrier back into the pipetting position. The scanning head<br />
hinges to read barcodes which are attached to horizontal or vertical surfaces.<br />
Barcodes can be read on both the primary side (e.g. sample tube) and the<br />
secondary side (e.g. microplates).<br />
The PosID-3 is a new, improved version of the PosID hardware.<br />
Bar codes can also be scanned by the → Symbol LS-1220.<br />
PosID-3<br />
The PosID-3 (Positive Identification System) is a movable barcode scanner<br />
which can be used to read the barcode labels on carriers, labware and tubes.<br />
The PosID-3 supersedes the → PosID and has configurable features which<br />
allow it to scan a wider range of custom carrier and labware types.<br />
Position<br />
Physical coordinates of the pipetting tip which define a location on the<br />
worktable. The position is expressed as X, Y, and Z in mm from the<br />
initialization position.<br />
Positioning pin<br />
Objects such as carriers are held in place by a grid of positioning pins (clips).<br />
This ensures that they are accurately positioned at discrete positions on the<br />
worktable. The positioning pins are spaced 25.0 mm apart in the X direction.<br />
→ Grid position.<br />
Pre-action/Post-action<br />
Pre-actions and post-actions are additional commands which are associated<br />
with a device command and are carried out before and after the device<br />
command. They are configured with the <strong>Freedom</strong> <strong>EVOware</strong> Configuration<br />
Tool. Examples are moving labware to a microplate reader and opening the<br />
door of a reader (the main function of the reader is to scan the labware). In<br />
many cases, <strong>Freedom</strong> <strong>EVOware</strong> configures suitable pre-actions and postactions<br />
for you automatically. This applies above all to actions which move<br />
objects using the plate robot (RoMa_MoveObject command).<br />
Pre-dilution<br />
Technique in which a liquid (e.g., sample, control) is first diluted with additive<br />
or system liquid. Some of the resulting mixture is processed further in a followup<br />
distribution. The remainder of the mixture is usually discarded.<br />
Process<br />
In <strong>Freedom</strong> <strong>EVOware</strong>, a process is a sequence of commands (process<br />
steps). Processes are only supported by <strong>Freedom</strong> <strong>EVOware</strong> Plus.<br />
→ Scheduling, → Method.<br />
Process step<br />
In the Process Editor in <strong>Freedom</strong> <strong>EVOware</strong> Plus, a process step is the<br />
graphical representation of an operation such as centrifuging a microplate or<br />
pipetting to a microplate. Each process step is shown as an icon and is<br />
associated with a single device such as a centrifuge, a carousel or the liquid<br />
handling arm (LiHa). A process step is the smallest execution unit when<br />
scheduling and optimizing a process. In <strong>Freedom</strong> <strong>EVOware</strong> Plus, a pipetting<br />
script is normally associated with the LiHa Pipette process step. See<br />
13.2 “Overview of Device Commands”, 13-12.<br />
Each process step is associated with a single command (such as Carousel -<br />
ReturnPlate). Each command can also have → Pre-actions and → Postactions.<br />
D - 16 <strong>Freedom</strong> <strong>EVOware</strong> <strong>Software</strong> <strong>Manual</strong>, 393172, en, V<strong>2.3</strong>
D - Glossary<br />
Glossary of Terms and Instrument Options<br />
PW (Plate washer)<br />
The Tecan 96PW Washer is a fully automated microplate washer for all types<br />
of 96-well microplates. The device is fitted with a 96-well wash head, which<br />
has one aspirating and one dispensing needle per well. The plate carrier is<br />
adjustable to enable the use types of round and flat bottom microplates. The<br />
device is also equipped with a mirror so that visual quality control can be<br />
performed during the washing procedure. By treating all 96 wells of the<br />
microplate simultaneously, the washer is able to achieve very short wash<br />
times.<br />
The PW384 is a microplate washer which performs ultra-fast washing of both<br />
384-well and 96-well microplates. The PW384 not only processes all 384<br />
wells simultaneously, but uses “Overflow” washing to further boost wash<br />
performance. This wash procedure combines high wash efficiency with short<br />
wash times, since no transport steps are required to index the wash head.<br />
The <strong>Freedom</strong> <strong>EVOware</strong> plate washer driver is based on Tecan’s<br />
→ WinWash Plus software.<br />
Rack<br />
→ Labware, → Microplate, → Strip Rack, → Tube Rack.<br />
Random Access Memory (RAM)<br />
A read-write memory that is used by the software for storing intermediate<br />
results. Each memory cell can be addressed individually. Note that the RAM is<br />
volatile, i.e. stored information becomes lost when the RAM is not supplied<br />
with electricity.<br />
Read-Only Memory (ROM)<br />
Memory chip for non-volatile storage of parameters and/or executable<br />
software instructions. Non-volatile means that the data is not lost when the<br />
power supply is switched off. The parameters and/or executable software<br />
instructions are permanently programmed into the chip during manufacture<br />
and cannot be changed later.<br />
Reader<br />
Sample detection or scanning system which uses one or more measurement<br />
techniques (e.g. fluorescence, luminescence or absorbance) to analyze the<br />
samples. Readers are typically controlled by the Magellan software option<br />
using <strong>Freedom</strong> <strong>EVOware</strong>’s Magellan driver.<br />
Reference Tip<br />
Alignment tool that can be fixed to a pipetting arm (e.g. LiHa or Te-MO). It is<br />
used to exactly adjust the arm in the various axes. Reference tips cannot be<br />
used for pipetting.<br />
REMP devices<br />
The REMP company develops and produces devices, consumables, software<br />
and fully automated sample processing and storage systems which are mainly<br />
used for laboratory applications. REMP is part of the Tecan Group of<br />
companies. <strong>Freedom</strong> <strong>EVOware</strong> currently provides drivers for the following<br />
REMP devices: Portrait Heat Sealer, Reatrix barcode scanner for 96-format<br />
REMP tubes and cap/decap device for tubes in a REMP Storage Tube Rack.<br />
Replicates<br />
Replicates are repetitions (copies) of the same liquid(s) at different well<br />
positions.<br />
Retract the tips<br />
Retract the tips = raise the tips.<br />
<strong>Freedom</strong> <strong>EVOware</strong> <strong>Software</strong> <strong>Manual</strong>, 393172, en, V<strong>2.3</strong> D - 17
D - Glossary<br />
Glossary of Terms and Instrument Options<br />
Retract Speed<br />
The retract speed can be critical if you want to pipette liquids with a high<br />
viscosity. You must make certain that the tips retract slowly enough to prevent<br />
any subsequent droplet formation.<br />
RMP<br />
GENESIS Robot Microplate Processor (pipetting instrument).<br />
Robot only carrier<br />
A robot only carrier is a carrier which can only be accessed by a plate or tube<br />
robot and not by the liquid handling arm. It cannot be used for pipetting<br />
operations. It is typically a storage device such as a carousel or labware hotel<br />
or a device such as a shaker or incubator. The plate or tube robot must be<br />
used to move the labware to a “normal” carrier before it can be used for<br />
pipetting.<br />
RoMa (Robot Manipulator) or plate robot<br />
Robot arm equipped with special grippers that can pick up, transport and<br />
place objects within the working area of the pipetting instrument. It is typically<br />
used to transport microplates, reagent blocks, deep well plates, etc. between<br />
carriers, incubators and storage positions (e.g. a → RoMa shelf or<br />
→ Carousel).<br />
Current Tecan pipetting instruments can be fitted with up to two RoMas.<br />
<strong>Standard</strong> arm versions can handle objects on or above the worktable. Long<br />
arm (long z) versions can also access objects which are positioned lower than<br />
the worktable, for example the Hettich Centrifuge. Movements of the robot<br />
arms between different positions are called vectors.<br />
RoMa versions are available with offset gripper fingers (RoMa eccentric) and<br />
symmetrical gripper fingers (RoMa centric). The type to use is chosen<br />
according to the accessibility of the object to be gripped. You do not need to<br />
(and cannot) specify the RoMa type in the <strong>Freedom</strong> <strong>EVOware</strong> configuration.<br />
However, you must re-teach the robot movement commands (RoMa vectors)<br />
if you exchange the robot arm for a different type. The RoMa vectors supplied<br />
with <strong>Freedom</strong> <strong>EVOware</strong> have been designed for RoMa eccentric.<br />
RoMa vector<br />
A predefined sequence of RoMa movements which define an action like<br />
getting labware from a carrier. Also called Plate Robot Vector.<br />
RSP<br />
GENESIS Robot Sample Processor (pipetting instrument).<br />
RWS<br />
GENESIS Robot WorkStation (pipetting instrument).<br />
Safire reader<br />
The Tecan Safire is a multi-functional monochromator-based microplate<br />
reader. It provides high performance for the vast majority of today’s microplate<br />
applications and research.<br />
Safire provides you with the following measurement techniques:<br />
– Fluorescence Intensity (FI) top/bottom<br />
– Fluorescence Time Resolved (TRF) top/bottom<br />
– Absorbance<br />
D - 18 <strong>Freedom</strong> <strong>EVOware</strong> <strong>Software</strong> <strong>Manual</strong>, 393172, en, V<strong>2.3</strong>
D - Glossary<br />
Glossary of Terms and Instrument Options<br />
– Quick Absorbance Scanning (optional)<br />
Any standard microplates from 6-well to 384-well format can be measured<br />
with any of the above measurement techniques. Fluorescence measurement<br />
can be made with up to 1536-well microplates (max. labware height 24.5 mm).<br />
Switching between measurement techniques and labware formats is fully<br />
automated.<br />
Sample<br />
Substance (blood, urine etc.) to be analyzed in a test or experiment.<br />
Sample Oriented <strong>EVOware</strong><br />
Sample Oriented <strong>EVOware</strong> is a software add-on for <strong>Freedom</strong> <strong>EVOware</strong>.<br />
Conventional pipetting scripts specify which pipetting operations should be<br />
carried out on which wells or tubes, regardless of whether the wells or tubes<br />
actually contain samples. With Sample Oriented <strong>EVOware</strong>, the actions of the<br />
pipetting script can be controlled by a so-called joblist which contains<br />
information on the locations and/or barcodes of the samples in the source<br />
labware. The joblist also lets you specify which test or tests should be carried<br />
out on each of the samples. It is not necessary to modify the script or<br />
process if the number and/or location of the samples changes with each run.<br />
Built-in intelligent algorithms automatically optiimize the movements of the<br />
liquid handling arm depending on the location of the samples, provide support<br />
for random controls and - if insufficient samples are available for all wells -<br />
ensure that reagents are not pipetted to wells which are empty. Support is also<br />
provided for laborarory information systems (LIMS).<br />
Sample Tracking<br />
Sample Tracking is a software add-on for <strong>Freedom</strong> <strong>EVOware</strong>. It allows you to<br />
record sample and labware identities, track samples and labware through<br />
pipetting and robotic steps and to store process-related information, raw data<br />
and reduced data. In a network (LAN) environment, it can be used to collect<br />
and store data from several <strong>Freedom</strong> <strong>EVOware</strong> installations. The recorded<br />
data is stored centrally in an SQL database. The data can be exported in<br />
various formats and can be accessed by third-party software using an API. A<br />
web-based reporting tool is also provided.<br />
Scheduling<br />
Parallel execution of a number of process steps (commands). Scheduling is<br />
only supported by <strong>Freedom</strong> <strong>EVOware</strong> Plus and can increase the throughout<br />
of your pipetting instrument dramatically.<br />
Script<br />
A (pipetting) script is a sequence of pipetting commands. A pipetting script is<br />
created with the Script Editor. The commands in a script are normally<br />
performed in a sequential manner. In <strong>Freedom</strong> <strong>EVOware</strong> Plus, each script<br />
within the process is given a unique number (the script ID, normally counting<br />
from 1). In <strong>Freedom</strong> <strong>EVOware</strong> <strong>Standard</strong>, you can choose the name of the<br />
script when you save it.<br />
Sealer<br />
The Tecan Plate Sealer is used to protect stored samples from oxidative<br />
degradation and contamination. A heat-sealed plastic film is applied to the<br />
labware to facilitate subsequent transport and/or long term storage. The<br />
sealing film is resistant to DMSO and shrinkage and is compatible with<br />
temperatures down to -70° C. The Plate Sealer is compatible with a wide<br />
variety of labware types.<br />
<strong>Freedom</strong> <strong>EVOware</strong> <strong>Software</strong> <strong>Manual</strong>, 393172, en, V<strong>2.3</strong> D - 19
D - Glossary<br />
Glossary of Terms and Instrument Options<br />
Serial Dilution<br />
Technique in which a fraction of the liquid dispensed into a destination position<br />
is re-aspirated and then dispensed together with additive or system liquid into<br />
a further destination position. This can be repeated several times if necessary.<br />
Shaker<br />
→ Te-Shake (Tecan Orbital Shaker).<br />
Shuttle (Te-Stack) or handler (Carousel)<br />
Sliding carrier which brings labware from the tower or cartridge to the<br />
→ Transfer position, where it can be picked up by the plate robot.<br />
Single-Pipetting mode<br />
With single-pipetting mode (also called single-dispensing mode), a quantity of<br />
liquid is aspirated and all of the liquid is dispensed into a single destination<br />
well in one step. → Multi-pipetting mode.<br />
Site<br />
Position on a carrier which can hold an object such as labware. For example a<br />
Microplate 3 pos. landscape carrier can hold three 384 well landscape plates.<br />
Source Labware<br />
Labware holding container(s) out of which liquid is aspirated.<br />
SPE<br />
Solid Phase Extraction (sample preparation technique). The Tecan vacuum<br />
filtration option is based on this method. → Te-VacS.<br />
Spectra reader<br />
Tecan microplate reader which can perform both single-wavelength and dualwavelength<br />
measurements. Dual-wavelength has the advantage that it<br />
eliminates any influence on the results due to either the microplate itself or<br />
due to non-specific absorbance of samples, finger prints, scratches, dust etc.<br />
on the microplate. It can store up to 20 programmable tests in its internal<br />
memory.<br />
SpectraFluor reader<br />
A fully automatic, computer controlled fluorometer for measuring samples in a<br />
microplate. It fulfills the requirements for numerous fluorescence and<br />
absorbance applications in research and routine investigations. The filters are<br />
arranged in filter slides which allow up to four excitation filters and four<br />
emission filters.<br />
SPO<br />
Sensored Pump Option (includes FWO). The SPO is used to pump a larger<br />
amount of liquid at higher speed through the system, normally to flush the tips.<br />
The SPO supersedes the → MPO and has improved liquid level sensors for<br />
the waste and system liquid containers.<br />
Stacker<br />
Stackers are used to store a stack of labware and to present them to the<br />
instrument for pipetting operations. The labware can then be returned to the<br />
stacker for subsequent actions. Tecan pipetting instruments support several<br />
types of stacker, e.g. the Te-MO stacker (which is installed above the Te-MO<br />
3/5) and the Stand-alone stacker (which is attached to the side of the<br />
instrument alongside the worktable).<br />
Stand-alone stacker option<br />
Stackers are used to store a stack of labware and to present them to the<br />
instrument for pipetting operations. The labware can then be returned to the<br />
stacker for subsequent actions. The Stand-alone stacker (or Te-Stack) is<br />
attached to the side of the instrument alongside the worktable.<br />
D - 20 <strong>Freedom</strong> <strong>EVOware</strong> <strong>Software</strong> <strong>Manual</strong>, 393172, en, V<strong>2.3</strong>
D - Glossary<br />
Glossary of Terms and Instrument Options<br />
<strong>Standard</strong><br />
Liquid containing a defined concentration of the substance to be tested. It is<br />
used to create a standard curve allowing the concentration of the analyte in<br />
the samples to be determined. The properties of the standard are well known<br />
and stable.<br />
<strong>Standard</strong> tip<br />
A Tecan “<strong>Standard</strong> Tip” is a special type of → Fixed tip that has predefined<br />
characteristics. There are various models of standard tips (with/without<br />
coating, various volumes).<br />
Strip Rack<br />
A rack which holds a single row of sample tubes (i.e. it has a single column of<br />
wells). → Tube Rack.<br />
Structured Query Language (SQL)<br />
A standard language used to communicate with databases to perform tasks<br />
such as update data on a database, or to retrieve data from a database.<br />
Submerged dispensing<br />
Dispensing liquid where the tip is submerged in the liquid. The opposite of<br />
submerged dispensing is → Free air dispensing. Submerged dispensing is<br />
sometimes called contact or surface dispensing.<br />
Sunrise reader<br />
Fully automatic, microprocessor controlled reader designed for professional<br />
use, enabling the user to measure the light absorbency (optical density) of<br />
samples in 96-well microplates. By reading twelve wells simultaneously, the<br />
instrument is able to measure a microplate in approximately six seconds. With<br />
an innovative range of options, this versatile MTP reader provides a wide<br />
range of features for numerous applications.<br />
Symbol LS-1220<br />
Fixed barcode scanner option which requires a RoMa or PnP to bring the<br />
plates or tubes to the scanner. Barcodes can also be scanned by the<br />
→ PosID.<br />
Syringe<br />
Part of the → Dilutor. A glass cylinder with a motor-driven → Plunger that<br />
aspirates/dispenses the required quantity of liquid.<br />
System liquid<br />
Liquid (e.g. water) that fills the liquid system of the pipetting instrument.The<br />
use of a system liquid (and the absence of air bubbles) is important for<br />
pipetting accuracy. The system liquid can also be used as a washing fluid and/<br />
or can be added to selected samples, analogously to an additive. The system<br />
liquids option for the pipetting instrument (formerly called the ChemSystem<br />
option) allows you to switch between up to 6 different system liquids.<br />
TCP/IP<br />
TCP/IP stands for stands for Transmission Control Protocol/Internet Protocol.<br />
It is a collection of protocols, or rules, that govern the way in which data<br />
travels from one computer to another across networks. The Internet is based<br />
on TCP/IP.<br />
Te-Fill option<br />
The Te-Fill option uses a bi-directional pump instead of the diluter to aspirate<br />
and dispense large volumes of liquid, for example buffer solutions. The Te-Fill<br />
can be optionally provided with a 6-way valve, which allows you to switch<br />
between six different liquid containers. The combination of Te-Fill and 6-way<br />
valve is called the Tecan DynamicFill system.<br />
<strong>Freedom</strong> <strong>EVOware</strong> <strong>Software</strong> <strong>Manual</strong>, 393172, en, V<strong>2.3</strong> D - 21
D - Glossary<br />
Glossary of Terms and Instrument Options<br />
Te-Flow option<br />
The Te-Flow option provides support for the In Situ Hybridization method.<br />
Te-Lidder<br />
Tecan device for removing or replacing lids from plates.<br />
Te-Link<br />
The Te-Link is a transfer rail (conveyor) option that allows the transport of<br />
labware such as microplates from one pipetting instrument to another or to<br />
another device. Labware to be moved is placed by the RoMa on a shuttle<br />
carrier at one end of the Te-Link. It is then moved to the other end of the Te-<br />
Link where it can be picked up by another RoMa for further processing.<br />
Te-MagS (Magnetic Bead Separator)<br />
The Te-MagS is a magnetic bead separator with an optional heating function.<br />
It uses a commercially-available liquid containing microscopic magnetic beads<br />
to rapidly isolate bio-molecules (e.g. DNA, RNA, proteins etc.) or whole cells<br />
from various crude mixtures by means of magnetic forces. The magnetic<br />
beads are pulled through the liquid in the tubes using magnets and collect the<br />
required substance as they move:<br />
Te-MO (Multi-Pipetting Option)<br />
Tecan Multi-Pipetting Option (not to be confused with multi-pipetting mode).<br />
The Te-MO is a robot pipetting device which can be mounted on the worktable<br />
of the pipetting instrument. It is equipped with a specially designed multipipetting<br />
head which can pipette to 96 or 384 wells simultaneously, resulting in<br />
an extremely high throughput and efficiency. For mechanical reasons, the<br />
same volume is pipetted by all of the tips. The Te-MO is available as the Te-<br />
MO 3/5 (3 slides, 5 carriers per slide) and the Te-MO 3/3 (3 slides, 3 carriers<br />
per slide). The Te-MO 3/5 can be fitted with the → Te-Stack Te-MO (Te-MO<br />
stacker option). The Te-Stack Te-MO cannot be fitted to the smaller Te-MO 3/3<br />
version.<br />
Te-Poolsafe<br />
Tecan pooling balance. → Liquid arrival check and see Pooling balance in<br />
the index.<br />
Te-PS (Tecan Positioning System)<br />
The Tecan Positioning System is a feature of the <strong>Freedom</strong> EVO pipetting<br />
instrument which allows the alignment of the Liquid Handling Arm (LiHa) to be<br />
checked and re-adjusted by the <strong>Freedom</strong> <strong>EVOware</strong> software.<br />
Arm alignment, which is only necessary for labware with 1536 wells, is done<br />
using the Te-PS Sensor Plate, which is placed on the Te-PS Carrier. The tip<br />
alignment process moves each of the pipetting tips past the sensor plate, and<br />
lasers are used to accurately measure the position.<br />
Te-Shake<br />
Tecan orbital shaker for microplates or microplate-like containers. The shaker<br />
is used for mixing functions and can be equipped with an optional heating<br />
plate. The shaker plate is placed on an eccentric. Rotation of the rotor causes<br />
an orbital movement of the shaker plate. The orbit of the movement can be<br />
varied by changing the eccentric.<br />
Te-Sonic<br />
Device which is used to verify whether tubes contain samples.The Te-Sonic<br />
can be equipped with up to four ultrasonic transducers (USTs) that move over<br />
one or more rows of tubes to check the presence or absence of samples in<br />
them. Each UST can check up to 16 tubes in a tube rack.<br />
D - 22 <strong>Freedom</strong> <strong>EVOware</strong> <strong>Software</strong> <strong>Manual</strong>, 393172, en, V<strong>2.3</strong>
D - Glossary<br />
Glossary of Terms and Instrument Options<br />
Te-Stack (Tecan Microplate Stacker option)<br />
The Te-Stack is used to store a stack of microplates, tube racks or DITI racks<br />
and to present them to the instrument for pipetting operations. It fetches the<br />
labware from a specified stack and places it onto a moveable carrier where it<br />
can be accessed by the liquid handling device or a robot arm. It also lets you<br />
put the rack back into the stack. The Te-Stack can be fitted with a barcode<br />
scanner which can read barcode labels on plates when they are inserted and<br />
removed. The Te-Stack is fitted to the side of the pipetting instrument<br />
alongside the worktable.<br />
Te-Stack Te-MO<br />
The Te-Stack Te-MO is used to store a stack of microplates or DITI racks and<br />
to present them to the Te-MO for pipetting operations. The microplates can be<br />
returned to the stacker for subsequent actions. The Te-MO Stacker is fitted<br />
above the Te-MO. It is only available for the Te-MO 3/5 (it cannot be fitted to<br />
the smaller Te-MO 3/3 version). <strong>Freedom</strong> <strong>EVOware</strong> uses the same driver to<br />
control the Te-Stack and the Te-Stack Te-MO. The barcode scanner option is<br />
not available for the Te-Stack Te-MO.<br />
Te-Thermix<br />
The Te-Thermix is a modular incubator/cooler system. An incubator is a<br />
device which is used to keep labware containing samples or reagents at a<br />
defined temperature for a specified length of time, for example until the<br />
desired biological or biochemical reaction has taken place.<br />
Te-Thermix modules are available with heating or cooling elements. They are<br />
also available with built-in orbital shakers. In addition, some models are are<br />
provided with a sliding drawer and are loaded with labware from the front.<br />
Other models are loaded from above and do not have a drawer.<br />
Te-VacS<br />
Tecan SPE (Solid Phase Extraction) vacuum filtration system which is used<br />
for vacuum separation of biological molecules and chemical compounds.<br />
Te-VacS-P<br />
Tecan SPE Vacuum Separator for the ProTeam Digest workstation.<br />
Teaching block<br />
Alignment tool equipped with four pseudo tips. It is used instead of a → Tip<br />
block and serves for aligning a 96-channel pipetting head with carriers. A<br />
teaching block is also available for teaching the Te-MO 96 Wash Block.<br />
Teaching pin<br />
Pin that can be attached to a 384-channel pipetting head. Used for aligning<br />
the head precisely with the carriers.<br />
Teaching plate<br />
Special microplate which is used by Tecan technicians to align the pipetting<br />
instrument and adjust the plate robot etc.<br />
Tip<br />
A needle-like device that can be mounted to a pipetting device for aspirating<br />
or dispensing liquids. The following tip types are used with Tecan instruments:<br />
→ <strong>Standard</strong> tip<br />
→ DITI (disposable tip)<br />
→ ActiveTip<br />
→ Fixed tip<br />
→ Tip block (for multipipetting heads)<br />
<strong>Freedom</strong> <strong>EVOware</strong> <strong>Software</strong> <strong>Manual</strong>, 393172, en, V<strong>2.3</strong> D - 23
D - Glossary<br />
Glossary of Terms and Instrument Options<br />
Tip block<br />
Set of 96 pipetting tips for use with the → Te-MO.<br />
Tip Touching<br />
Tip touching is a special movement when dispensing a liquid. When tip<br />
touching is activated, <strong>Freedom</strong> <strong>EVOware</strong> dispenses to the destination<br />
container in the normal way, but moves the tips to the side of the well and<br />
back before retracting them. This helps to remove any drops which may be<br />
adhering to the tips. Tip touching is sometimes called touch-off dispensing.<br />
Tracking speed<br />
Refers to the speed at which the tip moves up or down to follow the liquid level<br />
during aspiration and dispensing operations.<br />
Transfer position or exchange position<br />
Position to which the Te-MO slide moves to allow the robot arm to fetch or<br />
return labware on a specified site. For mechanical reasons, the robot arm<br />
cannot access all of the sites unless the slide is moved. → Active<br />
Positioning Carriers are automatically opened at the transfer position.<br />
For the Te-Stack, Te-Stack Te-MO or carousel, the transfer position is the<br />
position which is used by the robot arm for fetching or returning labware. For<br />
special applications, the transfer position can also be used for pipetting.<br />
Trough<br />
Special carrier on the worktable or the Te-MO which is used as a container for<br />
a reagent liquid. The reagent liquid can be aspirated using the normal<br />
pipetting commands. The Te-MO trough is refilled by the Te-MO Wash & Refill<br />
Center using the Te-MO Refill Trough command. The worktable trough is<br />
refilled manually. Troughs are available with capacities of up to 1000 ml.<br />
Tube<br />
Small round container for holding liquid samples or reagents. Tubes are often<br />
marked with a barcode label so that they can be distinguished from one<br />
another.<br />
Tube Rack<br />
A rack which holds a collection of sample tubes (typically 8 or 16 per row). A<br />
strip rack holds a single row of tubes.<br />
Tube robot<br />
→ PnP<br />
Ultra reader<br />
The Tecan Ultra reader is a fully automated software-controlled fluorometer<br />
for both normal and polarized fluorescence as well as absorbance<br />
measurements. It provides unrivaled performance in luminescence mode.<br />
Ultra Evolution reader<br />
The Tecan Ultra Evolution is a multi-functional microplate reader which<br />
provides high performance for the vast majority of today’s microplate<br />
applications and research. Being sensitive while fast, the Ultra Evolution<br />
fulfills the special demands of Ultra High Throughput Screening (UHTS). It<br />
provides the following measurement techniques: Fluorescence Intensity (FI),<br />
Fluorescence Time Resolved (FTR), Fluorescence Polarization (FP),<br />
Fluorescence Lifetime (FL), Absorbance, Luminescence and Dual Color<br />
Luminescence (Bioluminescence Resonance Energy Transfer). Measurement<br />
results can be optimized for different assay types (cell based or<br />
homogeneous), for different microplate types and for different dispensed<br />
volumes per well.<br />
Vacuum assisted waste<br />
Option for viscous liquids which creates a partial vacuum in the waste bottle.<br />
D - 24 <strong>Freedom</strong> <strong>EVOware</strong> <strong>Software</strong> <strong>Manual</strong>, 393172, en, V<strong>2.3</strong>
D - Glossary<br />
Glossary of Terms and Instrument Options<br />
Variomag<br />
H+P Variomag. Device from the H+P company consisting of magnetic stirrers<br />
for tubes and a thermostatically-controlled heater.<br />
Vector (as in RoMa or PnP vector)<br />
A vector is a sequence of movements of the RoMa or PnP. → Waypoint.<br />
Volume Calibration Function<br />
<strong>Software</strong> function by which the volumes actually pipetted can be calibrated in<br />
order to correspond exactly to the intended volume.<br />
Wash<br />
Technique of aspirating system liquid from the system reservoir and<br />
dispensing it through the pipetting tips into a wash station in order to clean the<br />
tips. → Waste position, → Cleaner position.<br />
Wash & Refill Center (WRC)<br />
The Wash & Refill Center is a supporting device for the Te-MO which is<br />
connected to the Te-MO wash block through tubing. The wash block is a<br />
special carrier for the Te-MO which used to clean the Te-MO tips or DITIs and/<br />
or for discarding liquid which is no longer needed. The Te-MO 96 and Te-MO<br />
384 have different pipetting heads and use a different wash block design. The<br />
Wash & Refill Center is also used to refill the Te-MO reagent troughs.<br />
Wash Block<br />
The wash block is a special carrier for the Te-MO which used to clean the Te-<br />
MO tips or DITIs and/or for discarding liquid which is no longer needed. The<br />
Te-MO 96 and Te-MO 384 have different pipetting heads and use a different<br />
wash block design.<br />
Wash Station<br />
Refers to a special carrier on the worktable which consists of a waste position<br />
and one or more cleaner positions. The wash station is used to clean the tips<br />
and/or to discard liquid which is no longer needed. → Waste position,<br />
→ Cleaner position.<br />
WashStation NPS<br />
→ Active WashStation.<br />
Waste position<br />
Part of a wash station above which the tips are positioned to discard liquid<br />
which is no longer needed and/or to flush the inside of the tips using the<br />
system liquid. The system liquid is dispensed through the tips and then into<br />
the cavity of the wash station. The used liquid then flows off through the waste<br />
tubing into the waste container.<br />
Waypoint (in RoMa or PnP vectors)<br />
A vector is a sequence of movements of the RoMa or PnP. Each of the<br />
intermediate positions is called a waypoint.<br />
Well<br />
One of the containers in a microplate.<br />
WinWash Plus<br />
WinWash Plus is an MS Windows-based program which is supplied with<br />
Tecan Plate Washers. It lets you create wash programs and download and<br />
upload them to/from the plate washer via the RS232 interface. It also<br />
functions as the software interface between <strong>Freedom</strong> <strong>EVOware</strong> and the plate<br />
washer hardware. Since the WinWash Plus <strong>Software</strong> uses an OLE Interface,<br />
the implementation is transparent to the user.<br />
<strong>Freedom</strong> <strong>EVOware</strong> <strong>Software</strong> <strong>Manual</strong>, 393172, en, V<strong>2.3</strong> D - 25
D - Glossary<br />
Glossary of Terms and Instrument Options<br />
Worktable<br />
Working surface (or deck) of the pipetting instrument where objects (such as<br />
microplates) are placed for access by the liquid handling arm (LiHa) or the<br />
plate robot (RoMa).<br />
Worktable Editor<br />
Graphical representation of the pipetting instrument's worktable (deck). It<br />
shows icons for the devices which are installed and the arrangement of the<br />
carriers and labware.<br />
The gray area in the Worktable Editor represents that part of the worktable<br />
which can be accessed by the Liquid Handling Arm. This is called the<br />
pipetting area. The real worktable is normally larger than this.<br />
See Fig. 11-8 “Example worktable showing carriers, labware and labware<br />
labels”, 11-20.<br />
Worktable, initial<br />
Graphical representation of the initial layout of the pipetting instrument’s<br />
working surface (deck). When required by the script or process, <strong>Freedom</strong><br />
<strong>EVOware</strong> uses the plate robot (RoMa) to move labware during runtime to new<br />
positions (carrier sites). However, carriers and devices always stay at the<br />
same position.<br />
XP and XLP dilutor<br />
→ Dilutor<br />
X slide<br />
Rail across the top of the pipetting instrument which supports the robot arms<br />
(→ LiHa, → MCA, → RoMa, → PnP). The robot arms move along the rail to<br />
reach all of the X positions on the worktable.<br />
Y-distance of wells<br />
The spacing between adjacent wells in the rack in the Y direction (front to<br />
back).<br />
Z-Dispense<br />
Tip height at which liquid is dispensed. It should be low enough to ensure that<br />
no liquid drops can get into adjacent wells or tubes. See Fig. 9-13, 9-26.<br />
Z-Max<br />
Tip height which is very slightly above the lowest point of the well, tube or<br />
container. It is the lowest position which the tip is allowed to reach without<br />
touching the bottom. When searching for the liquid surface, the pipetting<br />
instrument will search from Z-Start down to Z-Max. If the tip reaches Z-max<br />
without finding liquid, the pipetting instrument reacts according to the<br />
configured liquid level detection error mode. See Fig. 9-13, 9-26.<br />
Z-Start<br />
Tip height at which the liquid level detection (ILID) is switched on during<br />
pipetting. For tubes and containers (troughs), choose Z-Start to be at least 1<br />
mm below the rim but above the liquid surface. For microplates, choose Z-<br />
Start to be at least 1 mm above the edge of the well.<br />
Z-Start should be chosen as low as possible to ensure fast liquid level<br />
detection. At the same time, Z-Start must be above the highest possible liquid<br />
level in the well/tube to ensure that the liquid surface is found. See Fig. 9-<br />
13, 9-26.<br />
D - 26 <strong>Freedom</strong> <strong>EVOware</strong> <strong>Software</strong> <strong>Manual</strong>, 393172, en, V<strong>2.3</strong>
D - Glossary<br />
Important GUI features in MS Windows Applications<br />
Z-Travel<br />
Tip height at which the tips move from one X/Y position to another. Choose Z-<br />
Travel to be higher than all obstacles on the carrier. Movements that pass over<br />
different pieces of labware use a tip height of Z-Travel (global) instead. See<br />
Fig. 9-13, 9-26.<br />
Z-Travel (global)<br />
This parameter is also called Travel Height. When the LiHa moves over a<br />
single labware item or between adjacent identical labware items, it retracts all<br />
tips to the Z-Travel value which is specified in the labware definition. However,<br />
if two consecutive commands cause it to move over different pieces of<br />
labware, the tips are retracted to the height you specify with Travel Height in<br />
the Configuration Tool (see 8.4.2.1 “LiHa (Liquid Handling Arm)”, 8-22). This<br />
is done to speed up and optimize LiHa movements. Choose this parameter to<br />
be higher than all obstacles on the woktable.<br />
ZipTips<br />
ZipTips are disposable tips which are pre-filled with liquid and thus do not<br />
need an aspirate command.<br />
D.2 Important GUI features in MS Windows Applications<br />
Checkbox<br />
Square box that is selected or cleared to turn on or<br />
off an option. It is possible to select zero, one or<br />
more options at a time. Selected check boxes are<br />
marked with a tick or a similar check mark.<br />
Combo box<br />
Very similar to the → Drop down list box. In<br />
principle, a combo box is a text box with an<br />
attached list box. Users can either type a valid<br />
name in the text box or select an item from the list.<br />
Command button<br />
Button that initiates an action when clicked.<br />
Drop down list box<br />
When you click on the arrow on the right side a<br />
drop down list appears that lets you select one of<br />
the listed items. It is not possible to type a<br />
selection in the box as you can do with a<br />
→ Combo box.<br />
<strong>Freedom</strong> <strong>EVOware</strong> <strong>Software</strong> <strong>Manual</strong>, 393172, en, V<strong>2.3</strong> D - 27
D - Glossary<br />
Important GUI features in MS Windows Applications<br />
List box<br />
A box containing a list of items the user can select.<br />
It is not possible to type a selection in a list box.<br />
Option button<br />
Round button used to select one of a group of<br />
mutually exclusive options. Option buttons are<br />
also called → Radio buttons.<br />
Progress bar<br />
A control that displays how many per cent of a<br />
particular process have been completed so far.<br />
Radio button<br />
See → Option buttons.<br />
Slider<br />
Indicator that can be moved to display and set a<br />
value from a number of values or from a<br />
continuous range.<br />
Spin box<br />
Text box with up and down arrows which the user<br />
can click to move through a set of fixed values. It<br />
is also possible to type a valid value in the box.<br />
Tab<br />
Labeled group of page tops that can be selected to<br />
display the related page.<br />
Text box<br />
Rectangular box in which the user can type text or<br />
numeric values.<br />
Tree view<br />
Tree view controls are similar to list boxes, except<br />
that they display information in a tree-like<br />
structure. Tree view controls are especially<br />
suitable for representing hierarchical data<br />
structures. The small square boxes with a + or -<br />
sign in them are called “nodes”. These nodes can<br />
be expanded or collapsed to show or hide<br />
elements on a lower hierarchical level.<br />
D - 28 <strong>Freedom</strong> <strong>EVOware</strong> <strong>Software</strong> <strong>Manual</strong>, 393172, en, V<strong>2.3</strong>
D - Glossary<br />
Important GUI features in MS Windows Applications<br />
Panel<br />
A panel is part of a dialog box which groups<br />
together related items. A panel is normally<br />
surrounded by a box.<br />
<strong>Freedom</strong> <strong>EVOware</strong> <strong>Software</strong> <strong>Manual</strong>, 393172, en, V<strong>2.3</strong> D - 29
D - Glossary<br />
Important GUI features in MS Windows Applications<br />
D - 30 <strong>Freedom</strong> <strong>EVOware</strong> <strong>Software</strong> <strong>Manual</strong>, 393172, en, V<strong>2.3</strong>
IX - Index<br />
IX Index<br />
Purpose of This<br />
Chapter<br />
This chapter contains an alphabetical index which offers you help in finding<br />
information more quickly.<br />
Symbols<br />
{base} (overview). . . . . . . . . . D-1<br />
{install_path} (overview) . . . . . D-1<br />
{none} (overview) . . . . . . . . . D-1<br />
{object} (overview) . . . . . . . . . D-1<br />
Numerics<br />
21 CFR Part 11 compliance. . . . B-1<br />
3D Simulation mode. . . . . . . . 6-20<br />
3D Simulation tool . . . . . . . . . . 3-3<br />
using EVOSim. . . . . . . . A-103<br />
3-way valve box (overview) . . . D-1<br />
6-way valve (overview) . . . . . . D-1<br />
8 Plus 1 Access option for EVO 75 A-30<br />
96PW Plate Washer (overview) D-17<br />
A<br />
About Help. . . . . . . . . . . . . . . 1-5<br />
Absorbent station (Te-VacS) . 8-108<br />
Accept button . . . . . . . . . . . . 6-19<br />
Access rights . . . . . . . . . . . . . 3-8<br />
Access rights (Tecan user management)<br />
7-3<br />
Access/Status option . . . . . . . . 2-4<br />
Active Positioning Carrier (overview) D-1<br />
Active Tips (overview) . . . . . . D-2<br />
Active WashStation (overview) . D-1<br />
Administrator rights Tecan (user management)<br />
. . . . . . . . . . . . . . . . . . 7-3<br />
Advanced worklist commands A-118<br />
Activate_PMP . . . . . . . . A-132<br />
Active_Wash. . . . . . . . . A-134<br />
Aspirate . . . . . . . . . . . . A-123<br />
Aspirate-Multipip . . . . . . A-140<br />
Balance . . . . . . . . . . . . A-155<br />
Balance_Send. . . . . . . . A-156<br />
Carousel_EndAccess . . . A-160<br />
Carousel_InitCarousel. . . A-158<br />
Carousel_MoveToCartridge A-159<br />
Carousel_PresentPlate . . A-159<br />
Carousel_PresentPlateByBarcode<br />
A-161<br />
Carousel_ReadAllBarcodes A-157<br />
Carousel_ReadPlatesInCartridge A-<br />
160<br />
Carousel_ReturnPlate . . . A-158<br />
Carousel_ReturnPlateByBarcode A-<br />
161<br />
Centrifuge_Close . . . . . . A-163<br />
Centrifuge_Execute1. . . . A-163<br />
Centrifuge_Init . . . . . . . . A-162<br />
Centrifuge_MoveToPos . . A-164<br />
Centrifuge_Open . . . . . . A-162<br />
Command. . . . . . . . . . . A-156<br />
Comment . . . . . . . . . . . A-137<br />
Deactivate_PMP . . . . . . A-132<br />
Detect_Liquid . . . . . . . . A-131<br />
Dispense . . . . . . . . . . . A-124<br />
Dispense-Multipip. . . . . . A-141<br />
DropDITI . . . . . . . . . . . A-127<br />
Execute . . . . . . . . . . . . A-137<br />
Execute_VBscript. . . . . . A-139<br />
Export . . . . . . . . . . . . . A-135<br />
GetDITI . . . . . . . . . . . . A-127<br />
Magellan_Close . . . . . . . A-166<br />
Magellan_Emission_Out . A-165<br />
Magellan_Excitation_Out . A-164<br />
Magellan_Measure . . . . . A-166<br />
Magellan_Open . . . . . . . A-165<br />
Mix . . . . . . . . . . . . . . . A-125<br />
Mix-Multipip. . . . . . . . . . A-142<br />
MoveLiha . . . . . . . . . . . A-133<br />
Multipip_DropBlock. . . . . A-146<br />
Multipip_DropDITI . . . . . A-145<br />
Multipip_GetBlock . . . . . A-146<br />
Multipip_GetDITI . . . . . . A-145<br />
Notification . . . . . . . . . . A-139<br />
Pick Up_DITIs . . . . . . . . A-128<br />
PickUp_ZipTip . . . . . . . . A-130<br />
PnP. . . . . . . . . . . . . . . A-150<br />
PnP_Vector. . . . . . . . . . A-151<br />
PosID . . . . . . . . . . . . . A-153<br />
PosID3_Init . . . . . . . . . . A-167<br />
PosID3_Scan . . . . . . . . A-168<br />
RoMa. . . . . . . . . . . . . . A-147<br />
Set_DITI_Counter . . . . . A-128<br />
Set_DITIs_Back. . . . . . . A-129<br />
Shaker_Init . . . . . . . . . . A-170<br />
Shaker_SetFrequency. . . A-172<br />
<strong>Freedom</strong> <strong>EVOware</strong> <strong>Software</strong> <strong>Manual</strong>, 393172, en, V<strong>2.3</strong> IX - 1
IX - Index<br />
Shaker_SetTemperature . A-172<br />
Shaker_Start . . . . . . . . . A-171<br />
Shaker_Stop . . . . . . . . . A-171<br />
StartTimer. . . . . . . . . . . A-136<br />
Te-MagS_ActivateHeater . A-174<br />
Te-MagS_DeactivateHeater A-174<br />
Te-MagS_Execution . . . . A-175<br />
Te-MagS_MoveToPosition A-173<br />
TeMO_Refill . . . . . . . . . A-146<br />
TeMO_Relative . . . . . . . A-147<br />
Te-Stacker_InitStacker . . A-176<br />
Te-Stacker_PrepareReturnPlate A-<br />
177<br />
Te-Stacker_PresentPlate . A-177<br />
Te-Stacker_ReturnPlate. . A-176<br />
Transfer_Rack . . . . . . . . A-149<br />
Transfer_Tube . . . . . . . . A-152<br />
UserPrompt. . . . . . . . . . A-137<br />
Variable . . . . . . . . . . . . A-138<br />
Vector . . . . . . . . . . . . . A-148<br />
WaitTimer . . . . . . . . . . . A-136<br />
Wash . . . . . . . . . . . . . . A-126<br />
Wash-Multipip . . . . . . . . A-143<br />
Wash-TeMO-384 . . . . . . A-144<br />
Waste . . . . . . . . . . . . . A-134<br />
Waterbath . . . . . . . . . . . A-155<br />
Airgaps (overview) . . . . . . . . . D-2<br />
Animations (short films in AVI format) 5-<br />
16<br />
APC (overview) . . . . . . . . . . . D-1<br />
Application Specialist rights (Tecan user<br />
management) . . . . . . . . . . . . 7-3<br />
Approach Narrow and Wide (RoMa vector)<br />
. . . . . . . . . . . . . . . . . . . 9-58<br />
Approval flag for scripts and processes<br />
C-4<br />
Aquarius pipetting instrument (overview)<br />
D-2<br />
Arrays (array variables) . . . . . 14-15<br />
Aspirating the system liquid . . . 8-30<br />
Aspiration speed (overview) . . . D-2<br />
ASTM interface (overview). . . . D-2<br />
Attributes<br />
carrier . . . . . . . . . . . . . . 9-47<br />
hidden 9-50<br />
special 9-47<br />
labware . . . . . . . . . . . . . 9-34<br />
hidden 9-35<br />
special 9-35<br />
Audit trail<br />
for the user management system 7-<br />
2<br />
trace file . . . . . . . . . . . . A-11<br />
Autoloader (overview) . . . . . . . D-2<br />
Automatic DITI Handling feature 17-1<br />
B<br />
Backing up your configuration and data<br />
files . . . . . . . . . . . . . . . . . . . 8-3<br />
Barcode file<br />
for the carousel . . . . . . . A-12<br />
for the labware generator . A-14<br />
for the PosID-3 driver. . . . A-13<br />
for the runtime controller. . A-15<br />
from the carousel . . . . . . A-11<br />
from the PosID and PosID-3 A-13<br />
Barcode scanner<br />
PosID (overview) . . . . . . D-15<br />
Symbol LS-1220 (overview) D-21<br />
using in <strong>EVOware</strong> <strong>Standard</strong> 13-12,<br />
13-29<br />
Barcodes<br />
copying to a variable . . . . 14-16<br />
default . . 8-40, 8-42, 8-90, 8-97<br />
recommendations . . . . . . . C-4<br />
simulated . . . . . . . . . . . 15-50<br />
simulating (PosID-3) . . . . A-13<br />
Base incubator (overview) . . . D-10<br />
Blowout<br />
LiHa (LAG) . . . . . . . . . . . 10-8<br />
Blowout airgap<br />
MCA . . . . . . . 15-171, 15-193<br />
Te-MO 96 . . . . . . . . . . 15-135<br />
C<br />
Calibration volume (overview) . . D-2<br />
CAN bus (overview) . . . . . . . . D-2<br />
Carousel<br />
logical. . . . . . . . . . . . . . . 9-51<br />
Carousel (overview) . . . . . . . . D-3<br />
Carrier (overview). . . . . . . . . . D-3<br />
Carrier attributes . . . . . . . . . . 9-47<br />
hidden . . . . . . . . . . . . . . 9-50<br />
special . . . . . . . . . . . . . . 9-47<br />
Carrier code (overview) . . . . . . D-3<br />
Carrier colors in the Worktable Editor 9-<br />
41<br />
Carrier unit (overview) . . . . . . . D-9<br />
carrier.cfg file . . . . . . . . . . . A-38<br />
Carry over (overview) . . . . . . . D-3<br />
Cellerity (overview) . . . . . . . . . D-3<br />
Cellerity system<br />
FlaskFlipper hardware option 16-29<br />
CellGEM (overview) . . . . . . . . D-3<br />
Centric and eccentric RoMa (overview)<br />
IX - 2 <strong>Freedom</strong> <strong>EVOware</strong> <strong>Software</strong> <strong>Manual</strong>, 393172, en, V<strong>2.3</strong>
IX - Index<br />
D-18<br />
Centrifuge (overview) . . . . . . . D-9<br />
CFR compliance . . . . . . . . . . . B-1<br />
CGM<br />
coordinate system . . . . . . 9-11<br />
using the cursor keys to move it 9-<br />
11<br />
CGM, Common Gripper Module (overview).<br />
. . . . . . . . . . . . . . . . . D-3<br />
Checkbox (overview) . . . . . . . D-27<br />
Checksum incorrect . . . . . . . . . B-9<br />
Checksums . . . . . . . . . . . . . . B-8<br />
activating . . . . . . . . . . . . . 8-9<br />
ChemSystem (overview) . . . . . D-3<br />
ChemSystem option. . . . . . . . 8-30<br />
Cleaner position (overview) . . . D-3<br />
cLLD (overview) . . . . . . . . . . D-12<br />
Clot detection (overview). . . . . D-4<br />
Color of selected script line and worktable<br />
object . . . . . . . . . . . . . . . . . 12-4<br />
Colors for carriers in the Worktable Editor<br />
9-41<br />
Colors for labware in the Worktable Editor<br />
9-19<br />
Columbus Washer<br />
washing a variable number of strips<br />
17-15<br />
Columbus washer (overview) . . D-4<br />
COM port<br />
configuration settings for external devices.<br />
. . . . . . . . . 8-36<br />
Combo box (overview) . . . . . . D-27<br />
Command (overview) . . . . . . . D-4<br />
Command button (overview) . . D-27<br />
Command string (overview) . . . D-7<br />
Commands<br />
Overview of commands sorted by<br />
group . . . . . . . . . 13-1<br />
96PW Washer<br />
Aspirate 16-68<br />
Dispense 16-67<br />
ExitRemote 16-70<br />
Prime 16-68<br />
Remote 16-69<br />
Rinse 16-69<br />
Status 16-70<br />
WashPlate 16-66<br />
Activate DITI Handling. . . 15-12<br />
Activate PMP . . . . . . . . 15-29<br />
Active WashStation . . . . 15-36<br />
Aspirate . . . . . . . . . . . . . 15-1<br />
Balance . . . . . . . . . . . 15-155<br />
Balance Send Command 15-157<br />
Barcode Scanner<br />
ReadBarcode 16-2<br />
Base Incubator<br />
BaseIncubate 16-44<br />
Begin Loop . . . . . . . . . 15-100<br />
Carousel<br />
EndAccess 16-6<br />
InitCarousel 16-5<br />
LoadBCFromFile 16-8<br />
MoveToCartridge 16-5<br />
PrePresentPlate 16-7<br />
PreReturnPlateByBC 16-3<br />
PresentPlate 16-2<br />
PresentPlateByBarcode 16-7<br />
ReadAllBarcodes 16-5<br />
ReadPlatesInCartridge 16-6<br />
ReturnPlate 16-3<br />
ReturnPlateByBarcode 16-4<br />
UndoPrePresent 16-8<br />
Carousel NT<br />
CloseDoorlock 16-9<br />
Initialize 16-15<br />
LoadBCFromFile 16-16<br />
MoveToCartridge 16-14<br />
OpenDoorlock 16-9<br />
PrePresentPlate 16-15<br />
PresentPlate 16-11<br />
PresentPlateByBC 16-13<br />
ReturnPlate 16-12<br />
ReturnPlateByBC 16-14<br />
ScanAllCartridges 16-9<br />
ScanCartridge 16-10<br />
ScanLocation 16-10<br />
Shutdown 16-15<br />
UndoPrePresent 16-16<br />
VerifyCartridges 16-9<br />
Columbus Washer<br />
AllowAutoPrime 16-29<br />
DisableAutoPrime 16-29<br />
Exit Remote 16-24<br />
Init 16-24<br />
Prime 16-22<br />
Remote 16-24<br />
Rinse 16-23<br />
StartProg 16-25<br />
Status 16-24<br />
StopRinse 16-25<br />
WashPlate 16-19<br />
WashPlateEx 16-26<br />
Comment . . . . . . . . . . . 15-97<br />
Condition . . . . . . . . . . 15-109<br />
Copy Plate wizard . . . . . 15-59<br />
Deactivate PMP . . . . . . . 15-30<br />
<strong>Freedom</strong> <strong>EVOware</strong> <strong>Software</strong> <strong>Manual</strong>, 393172, en, V<strong>2.3</strong> IX - 3
IX - Index<br />
Detect Liquid . . . . . . . . . 15-20<br />
Dispense . . . . . . . . . . . . 15-3<br />
Drop DITIs . . . . . . . . . . 15-14<br />
Else . . . . . . . . . . . . . . 15-111<br />
End If . . . . . . . . . . . . . 15-112<br />
End Loop . . . . . . . . . . 15-100<br />
End Script . . . . . . . . . . 15-120<br />
Execute Application. . . . . 15-96<br />
Execute VB Script. . . . . 15-114<br />
Export Data . . . . . . . . . . 15-48<br />
Export Variable . . . . . . 15-107<br />
Fill system (Te-MO 384). 15-138<br />
FlaskFlipper<br />
ExecuteScript 16-30<br />
Knock 16-32<br />
LoadUnloadFlask 16-30<br />
PrepareForPipette 16-31<br />
Shake 16-31<br />
GENios Pro Reader<br />
Close 16-37<br />
Dispense<strong>Manual</strong> 16-39<br />
Emission Out 16-36<br />
Excitation Out 16-36<br />
Measure 16-37<br />
Multilabel 16-38<br />
Open 16-37<br />
Prime<strong>Manual</strong> 16-39<br />
Status 16-36<br />
GENios Reader<br />
Close 16-33<br />
Emission Out 16-33<br />
Excitation Out 16-33<br />
Measure 16-34<br />
Multilabel 16-34<br />
Open 16-33<br />
Status 16-33<br />
Get DITIs . . . . . . . . . . . 15-13<br />
Group. . . . . . . . . . . . . 15-112<br />
Heated Incubator<br />
CloseDoor 16-40<br />
Incubate 16-40<br />
InsertPlate 16-41<br />
RemovePlate 16-42<br />
SetTemperature 16-43<br />
StartShaker 16-41<br />
StopShaker 16-41<br />
Hettich Centrifuge<br />
Close 16-17<br />
ExecuteN 16-17<br />
Init 16-16<br />
MoveToPos 16-18<br />
Open 16-17<br />
If - Then . . . . . . . . . . . 15-111<br />
Import Variable. . . . . . . 15-103<br />
Liquid Handling Arm<br />
Flush RSP 16-46<br />
Pipette 16-47<br />
Loading the Te-MO . . . . 15-138<br />
Magellan<br />
Close 16-49<br />
Emission Out 16-49<br />
Excitation Out 16-49<br />
Measure 16-49<br />
Open 16-49<br />
Status 16-48<br />
Magnetic Bead Separator<br />
ActivateHeater 16-101<br />
DeactivateHeater 16-102<br />
Execution 16-102<br />
MoveToPosition 16-100<br />
<strong>Manual</strong> Tip Alignment . . . 15-57<br />
MCA384<br />
Aspirate 15-181<br />
Dispense 15-183<br />
Dock CGM 15-204<br />
Drop DITIs 15-194<br />
Drop Head Adapter 15-190<br />
Get DITIs 15-191<br />
Get Head Adapter 15-189<br />
Mix 15-185<br />
Move 15-198<br />
Pipette 16-48<br />
Transfer Labware 15-201<br />
Undock CGM 15-204<br />
Vector 15-199<br />
Wash 15-187<br />
MCA96<br />
Aspirate 15-159<br />
Dispense 15-161<br />
Drop DITIs 15-168<br />
Drop Tip Block 15-171<br />
Get DITIs 15-167<br />
Get Tip Block 15-170<br />
Merge Plate wizard 15-90<br />
Mix 15-162<br />
Move 15-174<br />
Pipette 16-48<br />
Relative Movements 15-171<br />
Transfer Labware 15-177<br />
Vector 15-175<br />
Wash 15-164<br />
Merge Plates wizard . . . . 15-77<br />
Mix . . . . . . . . . . . . . . . . 15-5<br />
Move LiHa. . . . . . . . . . . 15-33<br />
Move PnP . . . . . . . . . . 15-145<br />
Move RoMa. . . . . . . . . 15-140<br />
IX - 4 <strong>Freedom</strong> <strong>EVOware</strong> <strong>Software</strong> <strong>Manual</strong>, 393172, en, V<strong>2.3</strong>
IX - Index<br />
Notification . . . . . . . . . 15-116<br />
On Error Goto . . . . . . . 15-118<br />
Periodic Wash . . . . . . . . 15-10<br />
Pick Up DITIs . . . . . . . . 15-16<br />
Pickup ZipTip . . . . . . . . 15-19<br />
Plate Robot<br />
ChangeObject 16-86<br />
ClearLocation 16-86<br />
ExecuteSingleVector 16-84<br />
Initialize 16-85<br />
MoveInsert 16-86<br />
MoveObject 16-85<br />
MoveToBase 16-85<br />
ReplaceObject 16-85<br />
SwapInsert 16-86<br />
PnP Vector . . . . . . . . . 15-146<br />
PosID . . . . . . . . . . . . 15-150<br />
PosID-3<br />
Initialize 16-70<br />
Scan 16-70<br />
Process Script<br />
Script 16-127<br />
Process Starter<br />
Start 16-78<br />
WaitForProcess 16-82<br />
PW384 Washer<br />
PrepareEmptyWaste 16-53<br />
Prime 16-52<br />
Rinse 16-52<br />
Status 16-52<br />
Stop 16-53<br />
Wash 16-52<br />
PW384GP Washer<br />
Aspirate 16-54<br />
Dispense 16-55<br />
DownloadWash 16-59<br />
PrepareEmptyWaste 16-59<br />
Prime 16-57<br />
Rinse 16-57<br />
StartWash 16-62<br />
Stop 16-58<br />
WashPlate 16-62<br />
REMP ACD96<br />
Cap 16-78<br />
Decap 16-78<br />
REMP PHS<br />
SealPlate 16-74<br />
REMP Reatrix<br />
Initialize 16-77<br />
Read 16-76<br />
Replicates wizard. . . . . . 15-63<br />
Resume . . . . . . . . . . . 15-119<br />
RoMa Vector. . . . . . . . 15-141<br />
Room Temperature Incubator<br />
Incubate 16-45<br />
Safire Reader<br />
Close 16-87<br />
Measure 16-87<br />
Multilabel 16-88<br />
Open 16-87<br />
Status 16-87<br />
Send Command. . . . . . 15-158<br />
Serial Dilution wizard. . . . 15-69<br />
Set DITI Position . . . . . . 15-15<br />
Set DITIs Back. . . . . . . . 15-18<br />
Set Variable . . . . . . . . 15-101<br />
Spectra Fluor Reader<br />
Close 16-95<br />
Emission Out 16-95<br />
Excitation Out 16-95<br />
Measure 16-95<br />
Multilabel 16-96<br />
Open 16-95<br />
Status 16-94<br />
Start Script . . . . . . . . . 15-117<br />
Start Timer . . . . . . . . . . 15-95<br />
Sub-Routine . . . . . . . . 15-113<br />
Sunrise Reader<br />
Close 16-98<br />
Measure 16-98<br />
Multilabel 16-99<br />
Open 16-98<br />
Status 16-98<br />
Symbol MS-954 Barcode Scanner<br />
ReadBarcode 16-94<br />
Te-Fill<br />
Aspirate 15-22<br />
Dispense 15-24<br />
Prime 15-26<br />
Switch Valve 15-28<br />
Te-Link<br />
Move 16-128<br />
Te-MO<br />
Init 16-120<br />
Pipette 16-120<br />
Te-MO 384 Wash Tip Head 15-130<br />
Te-MO Aspirate . . . . . . 15-122<br />
Te-MO Dispense . . . . . 15-124<br />
Te-MO Drop DITIs . . . . 15-133<br />
Te-MO Drop Tip Block. . 15-135<br />
Te-MO Get DITIs . . . . . 15-132<br />
Te-MO Get Tip Block . . 15-134<br />
Te-MO Loading . . . . . . 15-138<br />
Te-MO Mix . . . . . . . . . 15-125<br />
Te-MO Refill Trough . . . 15-135<br />
Te-MO Relative Movements 15-136<br />
<strong>Freedom</strong> <strong>EVOware</strong> <strong>Software</strong> <strong>Manual</strong>, 393172, en, V<strong>2.3</strong> IX - 5
IX - Index<br />
Te-MO Wash . . . . . . . . 15-127<br />
Te-Shake Shaker<br />
Init 16-90, 16-92<br />
SetFrequency 16-93<br />
SetTemperature 16-92<br />
Shake 16-90<br />
Start 16-92<br />
Te-Stack<br />
InitStacker 16-108<br />
MoveObject 16-108<br />
PrepareReturnPlate 16-109<br />
PresentPlate 16-109<br />
ReturnPlate 16-108<br />
Te-Stack Te-MO<br />
DropPlate 16-106<br />
GetPlate 16-106<br />
InitStacker 16-105<br />
MoveObject 16-105<br />
Te-VacS<br />
ApplyVacuumFront 16-111<br />
ApplyVacuumRear 16-111<br />
CheckPlateWithBlock 16-112<br />
CheckWasteLevel 16-112<br />
DeactivateSystem 16-112<br />
Filtration 16-113<br />
OpenDesaltingValve 16-119<br />
PositionPlateFront 16-118<br />
PositionPlateRear 16-118<br />
SetPressureDiff 16-110<br />
VentFront 16-112<br />
VentRear 16-112<br />
Tip Alignment Check . . . . 15-30<br />
Transfer Labware . . . . . 15-143<br />
Transfer Station<br />
Transfer 16-127<br />
Transfer Tube . . . . . . . 15-148<br />
Transfer wizard . . . . . . . 15-85<br />
Tube Robot<br />
ExecuteScript 16-83<br />
Ultra Evolution Reader<br />
Close 16-124<br />
Emission Out 16-124<br />
Excitation Out 16-124<br />
Measure 16-124<br />
Multilabel 16-125<br />
Open 16-124<br />
Status 16-123<br />
Ultra Reader<br />
Close 16-121<br />
Emission Out 16-121<br />
Excitation Out 16-120<br />
Measure 16-121<br />
Multilabel 16-122<br />
Open 16-121<br />
Status 16-120<br />
User Prompt . . . . . . . . . 15-98<br />
Wait for Timer . . . . . . . . 15-95<br />
Wash Tips. . . . . . . . . . . . 15-8<br />
Waste. . . . . . . . . . . . . . 15-35<br />
Waterbath Control. . . . . 15-154<br />
Worklist . . . . . . . . . . . . 15-36<br />
Worklist Import . . . . . . . . 15-46<br />
Compartment of well (overview) D-4<br />
Conditioning volume . . . . . . . . 10-9<br />
Conditioning volume (overview). D-4<br />
Configuration files for pipetting instrument<br />
(overview). . . . . . . . . . . . . . . D-5<br />
Connection box for Te-Flow (overview)<br />
D-5<br />
Container (overview). . . . . . . . D-5<br />
Context menu<br />
Choosing a script or process 6-3<br />
Choosing a template . . . . . 6-2<br />
Control Bar . . . . . . . . . . . 5-14<br />
labware generator. . . . . . 11-19<br />
labware source icons. . . . . 9-77<br />
Process Editor . . . . . . . . . 5-19<br />
process steps. . . . . . . . . . 9-70<br />
Script Editor. . . . . . . . . . . 5-20<br />
Worktable Editor. . . . . . . . 5-22<br />
Control Bar . . . . . . . . . . . . . . 5-9<br />
Controller Area Network (overview) D-2<br />
Conventions . . . . . . . . . . . . . 1-2<br />
Coordinates for PnP vectors<br />
specifying . . . . . . . . . . . . 9-67<br />
Coordinates for RoMa vectors<br />
specifying . . . . . . . . . . . . 9-60<br />
CRC checksum for files (overview) D-5<br />
CRC Editor (overview). . . . . . . D-5<br />
current_user (pre-defined variable) 14-5<br />
Custom object for worktable, defining 9-<br />
47<br />
D<br />
Data reduction software for microplate<br />
readers . . . . . . . . . . . . . . . 16-48<br />
Declaring shared variables in <strong>EVOware</strong><br />
Plus. . . . . . . . . . . . . . . . . . . 6-12<br />
Deep-well plate (overview) . . . . D-5<br />
detected_volume_x (pre-defined variable)<br />
14-5<br />
Detection speed (overview) . . . D-5<br />
Device (overview). . . . . . . . . . D-5<br />
Dilutor (overview) . . . . . . . . . . D-5<br />
Direct commands<br />
for the MCA384 . . . . . . . . 5-12<br />
IX - 6 <strong>Freedom</strong> <strong>EVOware</strong> <strong>Software</strong> <strong>Manual</strong>, 393172, en, V<strong>2.3</strong>
IX - Index<br />
for the MCA96 . . . . . . . . . 5-11<br />
Direct commands in the Control Bar 5-<br />
10<br />
Dispense Modes . . . . . . . . . 10-43<br />
Dispense speed/breakoff (overview) D-5<br />
Dispensing<br />
free air (overview) . . . . . . D-8<br />
submerged . . . . . . . . . . . D-21<br />
Disposable tips (overview). . . . D-6<br />
DITI Capacity . . . . . . . . . . . . 9-20<br />
DiTi index . . . . . . . . . . . . . . 9-33<br />
DITI Offset . . . . . . . . . . . . . . 9-20<br />
DITI rack<br />
discarding in <strong>EVOware</strong> Plus 9-45<br />
DITI rack (overview). . . . . . . . D-6<br />
DITI tray (overview) . . . . . . . . D-6<br />
DITI types . . . . . . . . . . . . . . 9-32<br />
DiTi Waste (overview) . . . . . . D-6<br />
DITIs (overview) . . . . . . . . . . D-6<br />
DLL (overview) . . . . . . . . . . . D-6<br />
DMSO (overview) . . . . . . . . . D-6<br />
Dongle . . . . . . . . . . . . . . . . . 3-2<br />
Dongle (overview) . . . . . . . . . D-9<br />
Dongle type . . . . . . . . . . . . . 6-21<br />
Doorlocks . . . . . . . . . . . . . . . 2-4<br />
Double Blind Entry<br />
PosID-3 barcode scanner . 8-81<br />
Double Te-Shake . . . . . . . . 16-90<br />
Drop down list box (overview) . D-27<br />
Duplicating device drivers . . . . A-36<br />
Dynamic Link Library (overview) D-6<br />
DynamicFill system (overview) . D-21<br />
E<br />
EEPROM (overview) . . . . . . . D-6<br />
Electronic Signatures . . . . . . . . B-9<br />
activating . . . . . . . . . . . . 8-10<br />
Emergency stop of the pipetting instrument<br />
. . . . . . . . . . . . . . . . . . . 6-7<br />
Error dialogs. . . . . . . . . . . . . 18-1<br />
Error handling mode (overview) D-6<br />
Error messages. . . . . . . . . . 18-32<br />
Variable not defined . . . 15-114<br />
EVO 75 pipetting instrument . . A-30<br />
EVOSim<br />
using . . . . . . . . . . . . . . A-103<br />
<strong>EVOware</strong> (overview) . . . . . . . D-6<br />
<strong>EVOware</strong> Administrator (overview) D-7<br />
Example scripts. . . . . . . . . . . 17-1<br />
Excess volume . . . . . . . . . . . 10-9<br />
Excess volume (overview) . . . . D-7<br />
Exchange position (overview). . D-24<br />
Execute menu<br />
custom menu items for external programs<br />
. . . . . . . . . 6-11<br />
custom menu items for VB scripts 6-<br />
12<br />
Execution parameters (overview) D-7<br />
Exit signal detection (overview). D-7<br />
Exit signal error and clot error. 10-11<br />
External devices<br />
configuration settings for the serial interface.<br />
. . . . . . . . 8-36<br />
F<br />
FACTS<br />
co-existence with <strong>EVOware</strong> . 4-1<br />
FACTS dynamic scheduling software<br />
(overview) . . . . . . . . . . . . . . D-7<br />
Fast Wash (overview) . . . . . . . D-7<br />
FaWa (overview) . . . . . . . . . . D-7<br />
FDA approval . . . . . . . . . . . . B-1<br />
Feature level (of the <strong>EVOware</strong> software)<br />
6-20<br />
Feature levels of the <strong>EVOware</strong> software<br />
3-2<br />
Field Service Engineer (overview) D-8<br />
Final position icons (process editor) 5-17<br />
Firmware<br />
compatibility . . . . . . . . . . . 3-6<br />
Firmware (overview). . . . . . . . D-7<br />
Firmware command<br />
device test function in the Configuration<br />
Tool . . . . . . . 8-37<br />
sending from a pipetting script 15-<br />
158<br />
Firmware command (overview). D-7<br />
Firmware version of devices<br />
checking. . . . . . . . . . . . . 8-37<br />
First well of the labware . . . . . 9-27<br />
Fixed tip (overview) . . . . . . . . D-8<br />
Flash memory (overview) . . . . D-8<br />
FlaskFlipper (overview) . . . . . . D-8<br />
Flushing the instrument (overview) D-8<br />
Free air dispensing (overview) . D-8<br />
<strong>Freedom</strong> EVO 75 pipetting instrument<br />
A-30<br />
<strong>Freedom</strong> EVO pipetting instrument (overview)<br />
. . . . . . . . . . . . . . . . . . D-8<br />
<strong>Freedom</strong> pipetting instrument (overview)<br />
D-8<br />
Frequently Asked Questions (FAQ) A-31<br />
FSE (overview) . . . . . . . . . . . D-8<br />
FWO (overview) . . . . . . . . . . D-7<br />
<strong>Freedom</strong> <strong>EVOware</strong> <strong>Software</strong> <strong>Manual</strong>, 393172, en, V<strong>2.3</strong> IX - 7
IX - Index<br />
G<br />
Gemini<br />
importing configuration data into<br />
<strong>EVOware</strong> . . . . . . A-54<br />
Genesis (overview). . . . . . . . . D-8<br />
GENios Pro reader (overview) . D-9<br />
GENios reader (overview) . . . . D-8<br />
Global Z-travel (LiHa) . . . . . . . 8-25<br />
Global Z-travel (overview) . . . D-27<br />
Glossary . . . . . . . . . . . . . . . 1-5<br />
security-related terms for FDA approval<br />
. . . . . . . . . B-2<br />
Grid (overview) . . . . . . . . . . . D-9<br />
Grid position (overview). . . . . . D-9<br />
Grid unit (overview) . . . . . . . . D-9<br />
Group labels for carrier sites<br />
configuring . . . . . . . . . . . 9-44<br />
for APC sites on the Te-MO 9-45<br />
for discarding DITI racks . . 9-75<br />
for the regrip location. . . . . 8-86<br />
for the Te-Stack Te-MO . . 8-103<br />
GUI (overview) . . . . . . . . . . . D-9<br />
H<br />
Handler, Carousel (overview) . D-20<br />
Hardlock . . . . . . . . . . . . . . . 3-2<br />
Hardlock (overview) . . . . . . . . D-9<br />
Hardlock type . . . . . . . . . . . . 6-21<br />
Heating block (overview) . . . . . D-9<br />
Help<br />
using . . . . . . . . . . . . . . . 1-5<br />
Hettich centrifuge (overview) . . D-9<br />
Hit-Picking Wizard (overview) . . D-9<br />
Home position for a PnP . 9-63, 9-69<br />
Home position for a RoMa 9-56, 9-62<br />
Hotel (overview). . . . . . . . . . . D-9<br />
Hydroflex <strong>Software</strong> (overview) D-10<br />
Hyperlinks<br />
in infopads . . . . . . . . . . . 5-16<br />
I<br />
I/O status<br />
checking and setting . . . . . 8-36<br />
ILID (overview) . . . . . . . . . . D-10<br />
Imbalance<br />
centrifuge . . . . . . . . . . . 16-17<br />
Importing and exporting configuration<br />
data . . . . . . . . . . . . . . . . . A-38<br />
Importing configuration data<br />
from Gemini. . . . . . . . . . A-54<br />
Incorrect checksum . . . . . . . . B-9<br />
Incubator<br />
physical and logical . . . . . . 8-55<br />
Incubator (overview) . . . . . . . D-10<br />
Individual calibration of dilutors 10-15<br />
Infopads . . . . . . . . . . . . . . . . 5-15<br />
Initial worktable (overview) . . . D-26<br />
Initialization (overview) . . . . . D-10<br />
Initializing<br />
instrument arms (LiHa, RoMa and<br />
PnP) . . . . . . . . . . 8-31<br />
Installation<br />
Add software components . 4-9<br />
Modify . . . . . . . . . . . . . . 4-9<br />
Remove software . . . . . . . 4-9<br />
Repair . . . . . . . . . . . . . . 4-9<br />
Installing <strong>EVOware</strong> . . . . . . . . . 4-1<br />
Instance of a process (overview) D-10<br />
Instrument (overview) . . . . . . D-10<br />
Instrument step (overview) . . . D-10<br />
Intended audience for this manual 1-1<br />
Intended use of this software . . 3-3<br />
ISH (overview). . . . . . . . . . . D-11<br />
Iteration of a process (overview) D-10<br />
L<br />
Label<br />
for labware . . . . . . . . . . 11-19<br />
Laboratory Information Management System<br />
(overview). . . . . . . . . . . D-12<br />
Labware<br />
intended usage. . . . . . . . . 9-32<br />
Labware (overview) . . . . . . . D-11<br />
Labware attributes . . . . . . . . . 9-34<br />
<strong>Freedom</strong> <strong>EVOware</strong> Plus. . 14-18<br />
in pipetting scripts . . . . . . 14-16<br />
special . . . . . . . . . . . . . . 9-35<br />
Labware attributes hidden . . . . 9-35<br />
Labware colors in the Worktable Editor<br />
9-19<br />
Labware Generator. . . . . . . . 11-16<br />
barcode file . . . . . . . . . . A-14<br />
Labware label (labware name) 11-19<br />
Labware source icons (process editor)<br />
5-17<br />
Labware type . . . . . . . . . . . . 9-32<br />
Last well of the labware . . . . . . 9-27<br />
last_barcode (pre-defined variable) 14-5<br />
last_error_line (pre-defined variable) 14-<br />
5<br />
last_error_message (pre-defined variable)<br />
. . . . . . . . . . . . . . . . . . 14-5<br />
last_error_message_id (pre-defined variable)<br />
. . . . . . . . . . . . . . . . . . 14-5<br />
Leading airgap (LAG) . . . . . . . 10-8<br />
IX - 8 <strong>Freedom</strong> <strong>EVOware</strong> <strong>Software</strong> <strong>Manual</strong>, 393172, en, V<strong>2.3</strong>
IX - Index<br />
LICOS (overview) . . . . . . . . . D-11<br />
LiHa<br />
coordinate system . . . . . . . 9-4<br />
second LiHa . . . . . . . . . . 13-1<br />
using the cursor keys to move it 9-4<br />
LiHa (overview). . . . . . . . . . . D-11<br />
LiHa DITIs (overview). . . . . . . D-6<br />
liha_move_height (pre-defined variable)<br />
14-5<br />
LIMS (overview) . . . . . . . . . . D-12<br />
Liquid Arrival Check<br />
(overview). . . . . . . . . . . . D-11<br />
configuring . . . . . . . . . . . 10-6<br />
pooling balance data in report files<br />
15-56<br />
Liquid class (overview) . . . . . . D-11<br />
Liquid classes. . . . . . . . . . . . 10-1<br />
fixed tips and DITIs. . . . . . 10-7<br />
MCA . . . . . . . . . . . . . . 10-24<br />
MCA96 . . . . . . . . . . . . 10-17<br />
Te-MO 384 . . . . . . . . . . 10-38<br />
Te-MO 96. . . . . . . . . . . 10-32<br />
Liquid Classes Editor . . . . . . . 10-1<br />
Liquid distributor (overview) . . . D-11<br />
Liquid handling arm (overview). D-11<br />
Liquid handling parameters (overview)<br />
D-11<br />
Liquid level detection . . . . . . . 10-4<br />
(overview). . . . . . . . . . . . D-12<br />
Detect Liquid command. . 15-20<br />
Te-MO 10-18, 10-25, 10-28, 10-33<br />
Te-MO and MCA . . . . . . . 14-7<br />
Liquid level detection (capactiive) 10-9<br />
Liquid system (overview). . . . . D-12<br />
List box (overview). . . . . . . . . D-28<br />
Load a Template button . . . . . 6-19<br />
Loading Interface (overview) . . D-12<br />
Locating pin (overview). . . . . . D-16<br />
Lock <strong>EVOware</strong> . . . . . . . . . . . . 6-7<br />
Log files<br />
LogViewer tool. . . . . . . . . A-72<br />
overview. . . . . . . . . . . . . . A-1<br />
Serial data . . . . . . . . . . . 8-10<br />
type DB . . . . . . . . . . . . . A-10<br />
type ERR . . . . . . . . . . . . . A-9<br />
type EVO . . . . . . . . . . . . . A-2<br />
type MACRO. . . . . . . . . . A-10<br />
type MCS . . . . . . . . . . . . A-10<br />
type USR . . . . . . . . . . . . . A-9<br />
Logging in to <strong>EVOware</strong>. . . . . . . 7-1<br />
Logical device<br />
carousel . . . . . . . . . . . . . 9-51<br />
incubator . . . . . . . . . . . . 8-55<br />
Te-Stack. . . . . . . . . . . . . 8-98<br />
LogViewer tool . . . . . . . . . . . A-72<br />
Long arm RoMa (overview) . . . D-18<br />
Loop options. . . . . . . . . . . . 14-23<br />
loop_x (pre-defined variable) . . 14-6<br />
Low volume option (overview) . D-12<br />
Lower DITI Eject (overview) . . . D-12<br />
M<br />
Magellan photometer software (overview)<br />
D-13<br />
Magellan software . . . 16-48, 17-29<br />
Magnetic Bead Separator (overview) D-<br />
22<br />
Maintenance functions<br />
in the Control Bar . . . . . . . 16-1<br />
maintenance scripts . . . . . 6-10<br />
MALDI (overview) . . . . . . . . . D-13<br />
MAPI service (required for sending eMails<br />
via MAPI) . . . . . . . . . . . . . . . 8-13<br />
Mathematical expressions . . . 14-11<br />
Matrix Assisted Laser Desorption Ionization<br />
(overview) . . . . . . . . . . . D-13<br />
MCA<br />
side movement when dropping DITIs<br />
15-169<br />
MCA vector . . . . . . . . . . . . . 9-69<br />
mca_move_height (pre-defined variable)<br />
14-6<br />
MCA384<br />
coordinate system . . . . . . . 9-9<br />
using the cursor keys to move it 9-9<br />
MCA384 (overview) . . . . . . . . D-13<br />
MCA96<br />
coordinate system . . . . . . . 9-8<br />
using the cursor keys to move it 9-8<br />
MCA96 (overview) . . . . . . . . . D-13<br />
MCS (Message Control Server)<br />
setting the logging level . . . A-42<br />
Measuring the position of the LiHa, RoMa,<br />
PnP and Te-MO . . . . . . . . . . . 9-3<br />
Method (overview) . . . . . . . . . D-13<br />
Microplate (overview) . . . . . . . D-13<br />
Microtiter plate (overview) . . . . D-14<br />
MIO option (overview). . . . . . . D-13<br />
Move Narrow and Wide (RoMa vector)<br />
9-58<br />
regrip location . . . . . . . . . 8-87<br />
Movement axes (overview) . . . D-13<br />
Moving the LiHa, RoMa, PnP and Te-MO<br />
9-3<br />
MPO option (overview) . . . . . . D-13<br />
MTP (overview) . . . . . . . . . . . D-14<br />
<strong>Freedom</strong> <strong>EVOware</strong> <strong>Software</strong> <strong>Manual</strong>, 393172, en, V<strong>2.3</strong> IX - 9
IX - Index<br />
Multi-Channel Arm (overview). D-13<br />
Multi-pipetting (or multi-dispensing) mode<br />
(overview) . . . . . . . . . . . . . D-14<br />
Multi-pipetting option (overview) D-22<br />
Multiple devices of the same type A-36<br />
Multiple wells<br />
selecting in wizards. . . . . 15-62<br />
N<br />
Name (label) for labware, assigning 11-<br />
19<br />
Nano Pipetting System (overview) D-14<br />
NAT (overview) . . . . . . . . . . D-14<br />
Nested DITIs (overview) . . . . . D-6<br />
New pipetting instrument<br />
setting up . . . . . . . . . . . . 11-1<br />
No connection to the instrument (error)<br />
5-3<br />
Normalization <strong>Software</strong> (overview) D-14<br />
Normalization Wizard (overview) D-14<br />
NPS (overview) . . . . . . . . . . D-14<br />
Nucleic Acid Testing (overview) D-14<br />
O<br />
Object parameters (overview). D-14<br />
Offline mode . . . . . . . . . . . . . 6-20<br />
On the fly device (overview) . . D-14<br />
On-the-fly devices . . . . . . . . 11-15<br />
On-the-fly icons (process editor) 5-17<br />
Orange lines in the Worktable Editor 5-<br />
23, 9-41<br />
P<br />
Panel (overview) . . . . . . . . . D-29<br />
Password for log in. . . . . . . . . 7-1<br />
PCR (overview) . . . . . . . . . . D-15<br />
PCR Block (overview) . . . . . . D-15<br />
Permissions . . . . . . . . . . . . . 3-8<br />
Pinch valve (overview) . . . . . D-15<br />
Pipetting area of the worktable (overview)<br />
D-26<br />
Pipetting instrument<br />
configuration settings for the serial interface.<br />
. . . . . . . . 8-36<br />
Pipetting instrument (overview) D-10<br />
Pipetting script (overview) . . . D-15<br />
Plate (overview). . . . . . . . . . D-15<br />
Plate robot (overview) . . . . . . D-18<br />
Plate sealer (overview) . . . . . D-19<br />
Plate Washer (overview) . . . . D-17<br />
pLLD (overview) . . . . . . . . . D-12<br />
Plunger (overview) . . . . . . . . D-15<br />
PMP<br />
clot error . . . . . . . . . . . . 10-11<br />
error and success messages 17-22<br />
Pressure Viewer Tool . . . 17-18<br />
PMP, Pressure Monitored Pipetting<br />
(overview) . . . . . . . . . . . D-15<br />
configuring and using. . . . 17-16<br />
PnP<br />
(overview) . . . . . . . . . . . D-15<br />
coordinate system. . . . . . . 9-6<br />
using the cursor keys to move it 9-6<br />
PnP vector . . . . . . . . . . . . . . 9-63<br />
(overview) . . . . . . . . . . . D-15<br />
Polymerase Chain Reaction (overview)<br />
D-15<br />
Pooling balance<br />
configuring . . . . . . . . . . . 10-6<br />
Poolsafe (overview) . . . . . . . D-22<br />
PosID<br />
coordinate system. . . . . . . 9-14<br />
custom labware . . . . . . . . 8-29<br />
using the cursor keys to move it 9-<br />
14<br />
PosID (overview) . . . . . . . . . D-15<br />
PosID-3 (overview) . . . . . . . . D-16<br />
Position (overview) . . . . . . . . D-16<br />
Positioning pin (overview) . . . D-16<br />
Positive Identification System (overview)<br />
D-15<br />
Post-action<br />
custom . . . . . . . . . . . . . . 9-72<br />
Post-action (overview). . . . . . D-16<br />
Pre-action<br />
custom . . . . . . . . . . . . . . 9-72<br />
Pre-action (overview) . . . . . . D-16<br />
Pre-defined variables . . . . . . . 14-4<br />
Pre-dilution (overview). . . . . . D-16<br />
Process (overview) . . . . . . . . D-16<br />
Process instance ID (overview) D-10<br />
Process step (overview) . . . . D-16<br />
Process step icons . . . . . . . . . 5-17<br />
process_iteration (pre-defined variable)<br />
14-6<br />
process_name (pre-defined variable) .<br />
14-6<br />
process_node (pre-defined variable) 14-<br />
6<br />
Progress bar (overview). . . . . D-28<br />
PW384 Plate Washer (overview) D-17<br />
Q<br />
Quantitation Wizard (overview) D-14<br />
IX - 10 <strong>Freedom</strong> <strong>EVOware</strong> <strong>Software</strong> <strong>Manual</strong>, 393172, en, V<strong>2.3</strong>
IX - Index<br />
R<br />
Rack (overview) . . . . . . . . . . D-17<br />
rack_offset (pre-defined variable) 14-7<br />
rack_volume_x (pre-defined variable)<br />
14-7<br />
Radio button (overview) . . . . . D-28<br />
RAM (overview) . . . . . . . . . . D-17<br />
Random Access Memory (overview) D-<br />
17<br />
Reader (overview) . . . . . . . . . D-17<br />
Read-Only Memory (overview) . D-17<br />
Real mode . . . . . . . . . . . . . . 6-20<br />
Reatrix (overview) . . . . . . . . . D-17<br />
Recovery function for scripts and processes.<br />
. . . . . . . . . . . . . . . . . . . 17-5<br />
Red<br />
script line is marked red. . . 11-5<br />
Reference Documents . . . . . . . 1-3<br />
Reference tip (overview) . . . . . D-17<br />
Registration of your software . . A-63<br />
Regripping labware<br />
custom grip position . . . . . 8-87<br />
regrip location . . . . . . . . . 8-86<br />
Reject button . . . . . . . . . . . . 6-19<br />
Remove software . . . . . . . . . . 4-9<br />
REMP devices (overview) . . . . D-17<br />
Repair<br />
Reinstalling software. . . . . . 4-9<br />
replace_diti_grid (pre-defined variable)<br />
14-7<br />
replace_diti_site (pre-defined variable)<br />
14-8<br />
Replicates (overviiew) . . . . . . D-17<br />
Retract speed (overview) . . . . D-18<br />
Retract the tips (overview) . . . . D-17<br />
RMP instrument (overview) . . . D-18<br />
Robot only carrier . . . . . . . . . 9-41<br />
Robot only carrier (overview) . . D-18<br />
Robot vector. . . . . . . . . . . . . 9-55<br />
Robot vector, creating . . . . . . 5-12<br />
ROM (overview) . . . . . . . . . . D-17<br />
RoMa<br />
(overview). . . . . . . . . . . . D-18<br />
coordinate system . . . . . . . 9-5<br />
eccentric and centric (overview) D-<br />
18<br />
transfer position for Te-MO slides 9-<br />
13<br />
using the cursor keys to move it 9-5<br />
RoMa hotel (overview) . . . . . . D-9<br />
RoMa shelf (overview) . . . . . . D-9<br />
RoMa vector. . . . . . . . . . . . . 9-55<br />
(overview). . . . . . . . . . . . D-18<br />
custom grip position . . . . . 8-87<br />
site-specific. . . . . . . . . . 17-13<br />
user-defined . . . . . . . . 15-143<br />
Room temperature incubator (overview)<br />
D-10<br />
RS232 interface<br />
configuration settings for external devices.<br />
. . . . . . . . . 8-36<br />
RSP pipetting instrument (overview) D-<br />
18<br />
RWS pipetting instrument (overview) D-<br />
18<br />
S<br />
Safe operation of the instrument and the<br />
doorlocks . . . . . . . . . . . . . . . . 2-5<br />
Safe Pathways feature . . . . . 17-14<br />
Safety features for the pipetting instrument<br />
Status lamp and acoustic alarm device<br />
. . . . . . . . . . . 2-4<br />
Safire reader (overview) . . . . . D-18<br />
Sample (overview) . . . . . . . . . D-19<br />
Sample Oriented <strong>EVOware</strong> (overview)<br />
D-19<br />
Sample scripts . . . . . . . . . . . 17-1<br />
Sample Tracking (overview). . . D-19<br />
sample_cnt (pre-defined variable) 14-8<br />
Save as Template button. . . . . 6-19<br />
Save Worktable as Template button 6-<br />
20<br />
Saving the worktable layout . . . 11-3<br />
scan.csv (barcode report file) . . A-13<br />
Scheduling (overview) . . . . . . D-19<br />
Scope . . . . . . . . . . . . . . . . . . 1-1<br />
Scope of a variable . . . . . . . . 6-15<br />
Declare Variables option . . 6-12<br />
for pre-defined variables . . 14-4<br />
Script (overview) . . . . . . . . . . D-19<br />
Script commands<br />
detailed descriptions . . . . . 15-1<br />
in <strong>EVOware</strong> Plus . . . . . . 11-12<br />
marked red due to errors . . 11-5<br />
Script Editor<br />
opening in <strong>EVOware</strong> Plus 11-12<br />
Script ID (overview) . . . . . . . . D-19<br />
Scripts. . . . . . . . . . . . . . . . . . 3-1<br />
Sealer (overview). . . . . . . . . . D-19<br />
Security . . . . . . . . . . . . . . . . . 3-8<br />
Security features in <strong>EVOware</strong> for FDA approval<br />
. . . . . . . . . . . . . . . . . B-6<br />
Serial dilution (overview) . . . . . D-20<br />
Service functions . . . . . . . . . . 16-1<br />
<strong>Freedom</strong> <strong>EVOware</strong> <strong>Software</strong> <strong>Manual</strong>, 393172, en, V<strong>2.3</strong> IX - 11
IX - Index<br />
Setting up a new pipetting instrument.<br />
11-1<br />
setup. . . . . . . . . . . . . . . . . 17-29<br />
Setup & Service software. . . . . 1-4<br />
Shaker (overview) . . . . . . . . D-20<br />
Shuttle (Te-Stack) . . . . . . . . . 8-98<br />
Shuttle, Te-Stack (overview). . D-20<br />
Signatures, electronic . . . . . . . B-9<br />
Simulation mode . . . . . . . . . . 6-20<br />
Single-pipetting (or single-dispensing)<br />
mode (overview) . . . . . . . . . D-20<br />
Site (overview) . . . . . . . . . . D-20<br />
Slide, Te-Stack (overview) . . . D-20<br />
Slider (overview) . . . . . . . . . D-28<br />
SnS software . . . . . . . . . . . . 1-4<br />
Solid Phase Extraction (overview) D-20<br />
Source labware (overview). . . D-20<br />
Spacing of tips. . . . . . . . . . . . 9-33<br />
SPE (overview) . . . . . . . . . . D-20<br />
Spectra reader (overview) . . . D-20<br />
SpectraFluor reader (overview) D-20<br />
Spin box (overview) . . . . . . . D-28<br />
SPO option (overview) . . . . . D-20<br />
SQL (overview) . . . . . . . . . . D-21<br />
Stackable DITI rack (overview) . D-6<br />
Stacker (overview) . . . . . . . . D-20<br />
Stand-alone stacker (overview) D-20<br />
<strong>Standard</strong> (overview) . . . . . . . D-21<br />
<strong>Standard</strong> tip (overview) . . . . . D-21<br />
Status bar. . . . . . . . . . . . . . . 6-20<br />
Strip Rack (overview) . . . . . . D-21<br />
StripCount attribute (Columbus washer)<br />
17-15<br />
StripMask attribute (Columbus washer)<br />
17-15<br />
Structured Query Language (overview)<br />
D-21<br />
Submerged dispensing (overview) D-21<br />
Sub-routines . . . . . . . . . . . . 14-19<br />
Sunrise reader (overview) . . . D-21<br />
Symbol LS-1220 barcode scanner<br />
using in <strong>EVOware</strong> <strong>Standard</strong> 13-12<br />
Symbol LS-1220 barcode scanner (overview)<br />
. . . . . . . . . . . . . . . . . D-21<br />
Symbol MS-954 barcode scanner<br />
using in <strong>EVOware</strong> <strong>Standard</strong> 13-29<br />
Syringe (overview) . . . . . . . . D-21<br />
System liquid<br />
aspirating in worklists . . . 15-44<br />
System liquid (overview) . . . . D-21<br />
System liquids option<br />
configuring and aspirating. . 8-30<br />
System trailing airgap (STAG)<br />
LiHa. . . . . . . . . . . . . . . . 10-8<br />
Te-MO 96 and MCA 10-18, 10-25,<br />
10-33<br />
T<br />
Tab (overview). . . . . . . . . . . D-28<br />
Target group . . . . . . . . . . . . . 1-1<br />
TCP/IP (overview) . . . . . . . . D-21<br />
Teaching block (overview) . . . D-23<br />
Teaching labware coordinates . 9-26<br />
Teaching pin (overview). . . . . D-23<br />
Teaching plate (overview) . . . D-23<br />
Tecan User Management system 7-1<br />
audit trail. . . . . . . . . . . . . 7-2<br />
main features. . . . . . . . . . 7-2<br />
Te-Fill<br />
configuring . . . . . . . . . . . 8-26<br />
Te-Fill (overview) . . . . . . . . . D-21<br />
Te-Fill option<br />
6-way valve . . . . . . . . . . . 8-31<br />
Te-Flow (overview) . . . . . . . . D-22<br />
Te-Lidder (overview) . . . . . . . D-22<br />
Te-Link (overview) . . . . . . . . D-22<br />
Te-Link device . . . . . . . . . . 16-127<br />
Te-MagS (overview) . . . . . . . D-22<br />
Te-MO<br />
assigning groups to sites . 8-103<br />
coordinate system. . . . . . . 9-12<br />
liquid level detection 10-18, 10-25,<br />
10-28, 10-33<br />
loading labware manually at the transfer<br />
position . . . . 15-138<br />
side movement when dropping DITIs<br />
15-133<br />
site numbers . . . . . . . . . 8-104<br />
teaching the Te-MO 96 Wash Block<br />
9-29<br />
transfer position for Te-MO slides 9-<br />
13<br />
using the cursor keys to move it 9-<br />
12<br />
Te-MO (overview) . . . . . . . . D-22<br />
Te-MO stacker. . . . . . . . . . 15-121<br />
Te-MO stacker (overview) D-20, D-23<br />
Te-MO trough . . . . . . . . . . 15-135<br />
Te-Poolsafe (overview) . . . . . D-22<br />
Te-PS (Tecan Positioning System) (overview)<br />
. . . . . . . . . . . . . . . . . D-22<br />
Te-PS Sensor plate<br />
Z-offset. . . . . . . . . . . . . . 9-42<br />
Te-Shake<br />
configuring double and multiple site<br />
shakers . . . . . . . 16-90<br />
IX - 12 <strong>Freedom</strong> <strong>EVOware</strong> <strong>Software</strong> <strong>Manual</strong>, 393172, en, V<strong>2.3</strong>
IX - Index<br />
Te-Shake (overview) . . . . . . . D-22<br />
Te-Sonic (overview) . . . . . . . . D-22<br />
Te-Stack<br />
errors. . . . . . . . . . . . . . 18-20<br />
physical and logical . . . . . 8-98<br />
Te-Stack (overview) . . . . . . . . D-23<br />
Te-Stack Te-MO (overview). . . D-23<br />
Te-Thermix (overview) . . . . . . D-23<br />
Te-VacS (overview) . . . . . . . . D-23<br />
Te-VacS carrier<br />
configuring . . . . . . . . . . 8-105<br />
Te-VacS-P (overview) . . . . . . D-23<br />
Text box (overview) . . . . . . . . D-28<br />
Tip (overview). . . . . . . . . . . . D-23<br />
Tip Alignment . . . . . . . . . . . 15-30<br />
Tip alignment . . . . . . . . . . . 15-57<br />
Tip block (overview) . . . . . . . . D-24<br />
Tip spacing . . . . . . . . . . . . . 9-33<br />
in pipetting commands . . . 15-2<br />
Tip touching (overview). . . . . . D-24<br />
tip_mask (pre-defined variable) 14-9<br />
tip_offset (pre-defined variable) 14-9<br />
tip_volume_x (pre-defined variable) 14-9<br />
Toolbar buttons<br />
Configuration Tool . . . . . . . 8-1<br />
<strong>EVOware</strong> . . . . . . . . . . . . 6-18<br />
Script Editor . . . . . . . . . . 6-19<br />
Worktable Editor . . . . . . . 6-20<br />
Tools<br />
ASTM Interface Module. . . A-90<br />
Audit Trail Archiving . . . . . A-47<br />
Data Explorer . . . . . . . . . A-35<br />
Duplicate Device . . . . . . . A-36<br />
EVOSim. . . . . . . . . . . . A-103<br />
EVOTransfer. . . . . . . . . . A-50<br />
Export/Import . . . . . . . . . A-38<br />
Gemini Migration . . . . . . . A-54<br />
Import vCards . . . . . . . . . A-68<br />
IQ Wizard . . . . . . . . . . . . A-55<br />
LogViewer . . . . . . . . . . . A-72<br />
Registration Wizard . . . . . A-63<br />
Shutdown <strong>EVOware</strong> drivers A-55<br />
Tecan Driver Installer . . . . A-80<br />
Version Checker . . . . . . . A-70<br />
Zip & Send . . . . . . . . . . . A-42<br />
Tools menu<br />
custom menu items for external programs<br />
. . . . . . . . . 6-11<br />
custom menu items for VB scripts 6-<br />
12<br />
Trace file (audit trail) . . . . . . . A-11<br />
Tracking speed (overview). . . . D-24<br />
Trailing airgap (TAG) . . . . . . . 10-9<br />
Transfer carrier (Te-Stack). . . . 8-98<br />
Transfer Position (overview). . . D-24<br />
Transfer station . . . . . . . . . 16-127<br />
Travel height (LiHa) . . . . . . . . 8-25<br />
Travel height (overview) . . . . . D-27<br />
Tree view (overview) . . . . . . . D-28<br />
Trough (overview) . . . . . . . . . D-24<br />
Trough (reagent trough for Te-MO) 15-<br />
135<br />
Tube (overview) . . . . . . . . . . D-24<br />
Tube Rack (overview). . . . . . . D-24<br />
Tube robot (overview). . . . . . . D-15<br />
tube_cnt (pre-defined variable) 14-10<br />
U<br />
Ultra Evolution reader (overview) D-24<br />
Ultra reader (overview) . . . . . . D-24<br />
Undefined variables . . . . . . 15-114<br />
Uninstall<br />
see Remove software<br />
Unload drivers. . . . . . . . . . . . . 6-8<br />
Upgrading <strong>EVOware</strong> . . . . . . . 4-10<br />
USB<br />
installing the driver for the pipetting instrument<br />
. . . . . . . 4-12<br />
power management . . . . . 4-14<br />
solving problems with the connection<br />
4-15<br />
USB, problems with . . . . . . . . . 3-7<br />
User data, backing up. . . . . . . . 4-1<br />
User levels (Tecan user management)<br />
7-3<br />
User management system . . . . . 7-1<br />
configuring user accounts and general<br />
settings . . . . . . 8-16<br />
User name for log in . . . . . . . . . 7-1<br />
User-defined robot vector, creating 5-12<br />
Using Help . . . . . . . . . . . . . . . 1-5<br />
V<br />
Vacuum assisted waste (overview) D-24<br />
Validated flag for scripts and processes<br />
C-4<br />
Validating<br />
important guidelines . . . . . C-1<br />
pipetting script . . . . . . . . . 11-5<br />
pipetting script which contains subroutines<br />
. . . . . . . 14-22<br />
pipetting script which contains variables.<br />
. . . . . . . . 14-18<br />
Variable not defined error . . 15-114<br />
Variables<br />
<strong>Freedom</strong> <strong>EVOware</strong> <strong>Software</strong> <strong>Manual</strong>, 393172, en, V<strong>2.3</strong> IX - 13
IX - Index<br />
global. . . . . . . . . . . . . . . 6-12<br />
pre-defined . . . . . . . . . . . 14-4<br />
scope of . . . . . . . . . . . . . 6-15<br />
string variables. . . . . . . . . 14-1<br />
Variomag (overview). . . . . . . D-25<br />
VB (Visual Basic) script . . . . 15-114<br />
VB scripts<br />
creating custom menu items 6-12<br />
Vector<br />
MCA . . . . . . . . . . . . . . . 9-69<br />
PnP . . . . . . . . . . . . . . . . 9-63<br />
RoMa. . . . . . . . . . . . . . . 9-55<br />
Vector (as in RoMa or PnP vectors) (overview)<br />
. . . . . . . . . . . . . . . . . D-25<br />
Version of <strong>EVOware</strong> which is installed<br />
how to check . . . . . . . . . . 4-10<br />
Versions<br />
device firmware . . . . . . . . 3-6<br />
of installed drivers. . . . . . . 8-21<br />
Visual Basic script . . . . . . . 15-114<br />
Volume Calibration Function (overview)<br />
D-25<br />
W<br />
Wash & Refill Center (WRC) (overview)<br />
D-25<br />
Wash (overview) . . . . . . . . . D-25<br />
Wash and Refill Center for MCA (WRC)<br />
15-164, 15-187<br />
Wash and Refill Center for Te-MO (WRC)<br />
15-121<br />
Wash Block (overview) . . . . . D-25<br />
Wash Station (overview) . . . . D-25<br />
WashStation NPS (overview) . D-25<br />
Waste option of Te-Stack (<strong>Freedom</strong><br />
<strong>EVOware</strong> Plus) . . . . . . . . . . 17-24<br />
Waste position (overview) . . . D-25<br />
Waypoints<br />
(overview) . . . . . . . . . . . D-25<br />
in PnP vectors . . . . . . . . . 9-63<br />
in RoMa vectors . . . . . . . . 9-55<br />
Well (overview) . . . . . . . . . . D-25<br />
Well compartments (overview) . D-4<br />
well_offset (pre-defined variable) 14-10<br />
WinWash Plus software (overview) D-25<br />
Worklists . . . . . . . . . . . . . . 15-36<br />
Worktable (overview) . . . . . . D-26<br />
Worktable Editor<br />
changing the size . . . . . . . 11-3<br />
Worktable editor (overview) . . D-26<br />
Worktable layout, saving . . . . . 11-3<br />
Worktable, initial (overview) . . D-26<br />
WRC (Wash & Refill Center) (overview)<br />
D-25<br />
WRC (Wash and Refill Center, for MCA)<br />
15-164, 15-187<br />
WRC (Wash and Refill Center, for Te-MO)<br />
15-121<br />
X<br />
X slide (overview). . . . . . . . . D-26<br />
XP, XLP and XMP dilutor (overview) D-5<br />
Y<br />
Y-distance of wells . . . . . . . . . 9-33<br />
Y-distance of wells (overview). D-26<br />
Yellow label (labware name). . 11-19<br />
Z<br />
Z-Dispense (overview) . . . . . D-26<br />
ZipTip . . . . . . . . . . . 15-19, 15-36<br />
ZipTip (overview) . . . . . . . . . D-27<br />
Z-Max (overview) . . . . . . . . . D-26<br />
Z-Start (overview). . . . . . . . . D-26<br />
Z-Travel (overview). . . . . . . . D-27<br />
IX - 14 <strong>Freedom</strong> <strong>EVOware</strong> <strong>Software</strong> <strong>Manual</strong>, 393172, en, V<strong>2.3</strong>