KRF-A4020
KRF-A4020
KRF-A4020

You also want an ePaper? Increase the reach of your titles
YUMPU automatically turns print PDFs into web optimized ePapers that Google loves.
AUDIO RECEIVER<br />
<strong>KRF</strong>-<strong>A4020</strong><br />
INSTRUCTION MANUAL<br />
About the supplied remote control (RC-R0708) . . .<br />
Compared to standard remote controls, the remote control supplied with this receiver has<br />
several operation modes. These modes enable the remote control to control other audio<br />
components. In order to effectively use the remote control it is important to read the operating<br />
instructions and obtain a proper understanding of the remote control and how to switch its<br />
operation modes (etc.).<br />
Using the remote control without completely understanding its design and how to switch the<br />
operation modes may result in incorrect operations.<br />
B60-4129-00 00 CS MA (E2, T, Q) MC
2<br />
Preparations Operations<br />
Other<br />
Getting started<br />
Before applying the power<br />
Units are designed for operation as follows.<br />
Europe and U.K. ................................................................. AC 230 V only<br />
Russia ................................................................................. AC 220 V only<br />
Safety precautions<br />
WARNING :<br />
TO PREVENT FIRE OR ELECTRIC SHOCK, DO NOT EXPOSE<br />
THIS APPLIANCE TO RAIN OR MOISTURE.<br />
CAUTION<br />
RISK OF ELECTRIC SHOCK<br />
DO NOT OPEN<br />
CAUTION: TO REDUCE THE RISK OF ELECTRIC SHOCK, DO NOT<br />
REMOVE COVER (OR BACK). NO USER-SERVICEABLE PARTS<br />
INSIDE, REFER SERVICING TO QUALIFIED SERVICE PERSONNEL.<br />
THE LIGHTNING FLASH WITH ARROWHEAD SYMBOL,<br />
WITHIN AN EQUILATERAL TRIANGLE, IS INTENDED TO<br />
ALERT THE USER TO THE PRESENCE OF UNINSULATED<br />
“DANGEROUS VOLTAGE” WITHIN THE PRODUCT’S ENCLO-<br />
SURE THAT MAY BE OF SUFFICIENT MAGNITUDE TO CONSTI-<br />
TUTE A RISK OF ELECTRIC SHOCK TO PERSONS.<br />
THE EXCLAMATION POINT WITHIN AN EQUILATERAL<br />
TRIANGLE IS INTENDED TO ALERT THE USER TO THE<br />
PRESENCE OF IMPORTANT OPERATING AND MAINTE-<br />
NANCE (SERVICING) INSTRUCTIONS IN THE LITERATURE AC-<br />
COMPANYING THE APPLIANCE.<br />
For the United Kingdom<br />
Factory fitted moulded mains plug<br />
1. The mains plug contains a fuse. For replacement, use only<br />
a 13-Amp ASTA-approved (BS1362) fuse.<br />
2. The fuse cover must be refitted when replacing the fuse in<br />
the moulded plug.<br />
3. Do not cut off the mains plug from this equipment. If the<br />
plug fitted is not suitable for the power points in your home<br />
or the cable is too short to reach a power point, then obtain<br />
an appropriate safety approved extension lead or adapter, or<br />
consult your dealer.<br />
If nonetheless the mains plug is cut off, remove the fuse and<br />
dispose of the plug immediately, to avoid a possible shock<br />
hazard by inadvertent connection to the mains supply.<br />
IMPORTANT: The wires in the mains lead are coloured in<br />
accordance with the following code:<br />
Blue : Neutral<br />
Brown : Live<br />
Do not connect those leads to the earth terminal of a three-pin<br />
plug.<br />
Maintenance of the set<br />
When the front panel or case becomes dirty, wipe with a soft,<br />
dry cloth. Do not use thinner, benzine, alcohol, etc. for these<br />
agents may cause discoloration.<br />
In regard to contact cleaner<br />
Do not use contact cleaners because it could cause a<br />
malfunction. Be specially careful not to use contact cleaners<br />
containing oil, for they may deform the plastic component.<br />
Caution : Read this page carefully to ensure safe operation.<br />
Unpacking<br />
<strong>KRF</strong>-<strong>A4020</strong> (En/E2T)<br />
Unpack the unit carefully and make sure that all accessories<br />
are put aside so they will not be lost.<br />
Examine the unit for any possibility of shipping damage. If<br />
your unit is damaged or fails to operate, notify your dealer<br />
immediately. If your unit was shipped to you directly, notify<br />
the shipping company without delay. Only the consignee (the<br />
person or company receiving the unit) can file a claim against<br />
the carrier for shipping damage.<br />
We recommend that you retain the original carton and packing<br />
materials for use should you transport or ship the unit in<br />
the future.<br />
Keep this manual handy for future reference.<br />
Accessories<br />
FM indoor antenna (1)<br />
AM loop antenna (1)<br />
Remote control unit (1)<br />
How to use this manual<br />
Loop antenna stand (1)<br />
Batteries (R06/AA) (2)<br />
This manual is divided in to three sections, Preparations,<br />
Operations, and Other.<br />
Preparations<br />
Shows you how to connect your audio components to the<br />
receiver.<br />
We've tried to make setting up your system as easy as<br />
possible. However, since this receiver works with all of your<br />
audio components, connecting the system can be fairly<br />
complex.<br />
Operations<br />
Shows you how to operate the various functions available<br />
from the receiver.<br />
Other<br />
Shows you additional information such as “In case of difficulty”<br />
(troubleshooting) and “Specifications.”
Special features<br />
MONITOR<br />
The TAPE2/MONITOR jacks of this unit accept the connection<br />
of a cassette deck, graphic equalizer, surround processor,<br />
etc. When a 3-head cassette deck is connected to the<br />
TAPE2/MONITOR jacks, it is possible to monitor the sound<br />
which has just been recorded during recording. @<br />
Station preset<br />
This unit incorporates a function for storing received stations<br />
in preset memory with a simple operation. It is very convenient<br />
to preset the stations you like. The preset stations can<br />
be recalled also very easily. $<br />
RDS (Radio Data System) tuner #<br />
The receiver is equipped with a RDS tuner that provides several<br />
convenient tuning functions: RDS Auto Memory to automatically<br />
preset up to 30 stations including RDS broadcasting<br />
different programs and ordinary FM stations; station name<br />
display to show you the name of the current broadcast station;<br />
and PTY Search to let you tune stations by program type.<br />
PTY (Program TYpe) search<br />
Lets you tune stations by specifying the type of program<br />
you want to hear.<br />
EON (Enhanced Other Networks) reservation<br />
The EON function lets you monitor information on other<br />
stations so you can receive traffic or news programs as<br />
soon as they are broadcast, even they are broadcast on a<br />
station different from the one you are currently listening<br />
to. When the broadcast ends, the receiver returns to the<br />
original station. When listening to KENWOOD source<br />
components connected with system control cords, the<br />
input selector on the receiver automatically switches to<br />
the tuner when a program you desire is broadcast.<br />
Remote controllable audio function<br />
By connecting KENWOOD source components such as a<br />
cassette deck and CD player through system control connection,<br />
the basic operations of these components can be controlled<br />
from the remote control unit provided with this unit. A<br />
single remote control unit can control the entire audio system<br />
easily.<br />
New “TRAIT“ transistor<br />
The new developed “TRAIT” transistor with extremely superior<br />
temperature characteristics is used in this amplifier‘s<br />
amplification circuit. Through the use of this transistor, distortion<br />
generated because of temperature change is kept to a<br />
minimum resulting in “pure” sound reproduction.<br />
Contents<br />
Caution : Read the pages marked<br />
safe operation.<br />
Preparations<br />
<strong>KRF</strong>-<strong>A4020</strong> (En/E2T)<br />
carefully to ensure<br />
Getting started ......................................................... 2<br />
Before applying the power ........................................... 2<br />
Safety precautions ........................................................ 2<br />
Unpacking ...................................................................... 2<br />
How to use this manual ................................................ 2<br />
Special features ............................................................. 3<br />
Setting up the system ............................................. 4<br />
Connecting audio components ..................................... 4<br />
Connecting the antennas .............................................. 5<br />
Connecting the speakers .............................................. 5<br />
Connecting the system control .................................... 6<br />
Names and functions of parts .............................. 7<br />
Main unit ....................................................................... 7<br />
Remote control unit ...................................................... 8<br />
Preparing the remote control ........................................ 9<br />
Operations<br />
Normal playback................................................... 10<br />
Preparing for playback................................................. 10<br />
Listening to a source component ............................... 10<br />
Adjusting the sound .................................................... 11<br />
Recording ............................................................... 12<br />
Recording audio .......................................................... 12<br />
Listening to radio broadcasts ............................. 13<br />
Tuning (non-RDS) radio stations ................................. 13<br />
Using RDS (Radio Data System) ................................. 13<br />
Using the DISPLAY key .............................................. 14<br />
Presetting RDS stations 13<br />
(RDS AUTO MEMORY) ........................................... 14<br />
Presetting radio stations manually.............................. 15<br />
Receiving preset stations ........................................... 15<br />
Receiving preset stations in order (P.CALL) ............... 15<br />
Tuning by program type (PTY search) ........................ 16<br />
Reserving the desired information ............................. 16<br />
Other<br />
Getting started<br />
In case of difficulty ............................................... 18<br />
Specifications ....................................................... 20<br />
3<br />
Operations Preparations<br />
Other
4<br />
Setting up the system<br />
Make connections as shown below.<br />
When connecting the related system components, be<br />
sure to also refer to the instruction manuals supplied<br />
with the components you are connecting.<br />
Do not connect the power cord to a wall outlet until all<br />
connections are completed.<br />
Microcomputer malfunction<br />
Caution : Read this page carefully to ensure safe operation.<br />
Connecting audio components<br />
Shape of AC outlets<br />
For U.K.<br />
<strong>KRF</strong>-<strong>A4020</strong> (En/E2T)<br />
Preparations Operations<br />
Other<br />
If operation is not possible or an erroneous display appears,<br />
even though all connections have been made<br />
properly, reset the microcomputer referring to “In case of<br />
difficulty”. *<br />
CAUTION<br />
Be sure to adhere followings. Or proper ventilation<br />
will be blocked causing damage or fire hazard.<br />
• Do not place any objects impairing heat radiation onto<br />
the top of unit.<br />
• Leave a space around the unit (from the largest outside<br />
dimension including projection) equal or greater than,<br />
shown below.<br />
Top panel<br />
Side panel<br />
Back panel<br />
: 50 cm<br />
: 10 cm<br />
: 10 cm<br />
SYSTEM CONTROL jacks 6<br />
L<br />
R<br />
PHONO<br />
PLAY IN<br />
CD<br />
PLAY IN<br />
REC OUT<br />
Other countries<br />
AUX MD / TAPE1 TAPE2/<br />
MONITOR<br />
IN<br />
PLAY IN REC OUT PLAY IN<br />
OUT<br />
To AC wall outlet<br />
IN OUT<br />
Cassette deck or<br />
graphic equalizer@<br />
Cassette deck or<br />
MD recorder<br />
OUT<br />
Video deck<br />
Monitor TV<br />
Notes:<br />
1. Be sure to insert all connection cords securely. If their<br />
connections are imperfect, the sound may not be produced<br />
or noise may interfere.<br />
2. Be sure to remove the power cord from the AC outlet<br />
before plugging or unplugging any connection cords. Plugging<br />
/ unplugging connection cords without disconnecting<br />
the power cord can cause malfunctions and may damage<br />
the unit.<br />
3. Do not connect power cords from components whose<br />
power consumption is larger than what is indicated on the<br />
AC outlet at the rear of this unit.<br />
OUT<br />
CD player<br />
OUT<br />
Record player
Connecting the antennas<br />
Antenna terminal connections<br />
1 Push lever. 2 Insert cord. 3 Return lever.<br />
Connecting the speakers<br />
Setting up the system<br />
<strong>KRF</strong>-<strong>A4020</strong> (En/E2T)<br />
1 Strip coating. 2 Push lever.<br />
5<br />
AM loop antenna<br />
The supplied loop antenna is for use indoors. Place it as far as<br />
possible from the receiver, TV set, speaker cords and power<br />
cord, and adjust the direction for best reception.<br />
FM indoor antenna<br />
The supplied indoor antenna is for temporary use only. For<br />
stable signal reception we recommend using an outdoor<br />
antenna. Disconnect the indoor antenna when you connect<br />
one outdoors.<br />
FM outdoor antenna<br />
Lead the 75Ω coaxial cable connected to the FM outdoor<br />
antenna into the room and connect it to the FM 75Ω terminal.<br />
3 Insert cord. 4 Return lever.<br />
Front Speakers A<br />
Right Left<br />
R<br />
SPEAKERS<br />
A<br />
+ - - +<br />
Front Speakers B<br />
Right Left<br />
L<br />
Operations Preparations<br />
ANTENNA<br />
AM<br />
AM loop<br />
antenna<br />
+ - - +<br />
B<br />
R<br />
L<br />
Use the FRONT<br />
SPEAKERS B<br />
terminals if you<br />
want to connect a<br />
second front<br />
speaker system.<br />
Other<br />
GND<br />
FM<br />
75Ω<br />
Use an antenna adaptor<br />
(Commercially available)<br />
FM indoor<br />
antenna<br />
FM outdoor antenna<br />
SUBWOOFER<br />
PRE OUT<br />
• Never short circuit the + and – speaker cords.<br />
• If the left and right speakers are connected inversely or the<br />
speaker cords are connected with reversed polarity, the<br />
sound will be unnatural with ambiguous acoustic imaging.<br />
Be sure to connect the speakers correctly.<br />
Speaker impedance<br />
Powered subwoofer<br />
To produce sound from<br />
the powered subwoofer,<br />
turn the SPEAKERS A<br />
key on. No sound will be<br />
produced if only the<br />
SPEAKERS B key is on.<br />
After confirming the speaker impedance indications printed<br />
on the rear panel of the receiver, connect speakers with<br />
matching impedance ratings. Using speakers with a rated<br />
impedance other than that indicated on the rear panel of<br />
the receiver could result in malfunctions or damage to the<br />
speakers or receiver.
6<br />
Preparations Operations<br />
Other<br />
Connecting the system control<br />
Connecting system control cords after connecting a<br />
KENWOOD audio component system lets you take<br />
advantage of convenient system control operations.<br />
There are two KENWOOD system control modes.<br />
Make connections according to the groups of terminal<br />
symbols shown below.<br />
ƒ Mode : lets you combine f, ƒ, and F<br />
terminals<br />
Mode : for<br />
terminals only<br />
This unit is compatible with both [XS8] and [SL16] modes.<br />
It comes from the factory set to the [SL16] mode. To<br />
switch to the [XS8] mode, follow the instructions in<br />
“Switching from [SL16] to [XS8]” below.<br />
SYSTEM CONTROL cord<br />
SYSTEM CONTROL switch<br />
Example: [XS8] mode connections<br />
The underlined portion represents the setting of the system<br />
control mode.<br />
[SL16] [XS8]<br />
[SL16]<br />
[SL16] [XS] [XS8] [XR]<br />
[SL16] [XS] [XS8]<br />
[XS]<br />
SYSTEM CONTROL<br />
SL16<br />
(XS 8)<br />
Example: [SL16] mode connections<br />
The underlined portion represents the setting of the system<br />
control mode.<br />
[SL16] [XS8]<br />
[SL16] [XS] [XS8] [XR]<br />
[SL16] [XS] [XS8]<br />
Receiver<br />
MD recorder<br />
Cassette deck<br />
CD player<br />
Record player<br />
Receiver<br />
Cassette deck<br />
or MD recorder<br />
CD player<br />
System<br />
control cord<br />
System<br />
control cord<br />
SYSTEM CONTROL operations<br />
<strong>KRF</strong>-<strong>A4020</strong> (En/E2T)<br />
Do not connect a system control cord to a cassette<br />
deck connected to the TAPE2/MONITOR jacks.<br />
Remote Control<br />
Lets you operate this unit with the system remote supplied<br />
with the receiver.<br />
Automatic Operation (except [XR] equipment)<br />
When you start playback from a source component, the<br />
input selector on this unit switches to that component<br />
automatically.<br />
Synchronized Recording (except [XR] equipment)<br />
Lets you synchronize recording with the start of playback<br />
when recording from CD, MD or analog discs.<br />
Switching from [SL16] to [XS8]<br />
Setting up the system<br />
• Some MD players are not system control compatible.<br />
You cannot make system control connections to this<br />
kind of equipment.<br />
Notes:<br />
1. [SL16] equipment cannot be combined with [XR],<br />
[XS], and [XS8] equipment for system operations. If<br />
your equipment consists of this kind of combination,<br />
please do not connect any system control cords. Even<br />
without system control cords, normal operations can<br />
be carried out without effecting performance.<br />
2. Do not connect system control cords to any components<br />
other than those specified by KENWOOD. It may<br />
cause a malfunction and damage your equipment.<br />
3. Be sure the system control plugs are inserted all the<br />
way in to the system control terminals.<br />
You can easily change the system control mode by adjusting<br />
the position of the SYSTEM CONTROL switch on the<br />
rear panel.<br />
Do this operation after completing all connections.<br />
[XS]<br />
Record player<br />
For [SL16]<br />
For [XS8]<br />
• In order to take advantage of the system control operations,<br />
the components must be connected to the correct<br />
jacks. To use a CD player it must be connected to the CD<br />
jacks. To use a cassette deck (or MD recorder) it must be<br />
connected to the MD/TAPE1 jacks. When using more<br />
than one CD player (etc.) only the one connected to the<br />
specified jacks may be connected for system control.<br />
• Some CD players and cassette decks are not compatible<br />
with the[SL16] system control mode. Be sure to use the<br />
[XS8] system control mode when making system connections<br />
with equipment that is not [SL16] compatible.<br />
SL16<br />
(XS 8)<br />
• This operation will not effect items stored in the memory.<br />
• After switching the system control mode, turn the power<br />
off and unplug the power cord from the wall outlet, then<br />
plug it back.
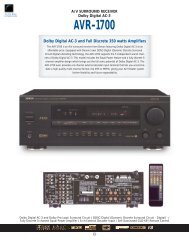
Names and functions of parts<br />
Main unit<br />
Band indicators<br />
MUTE indicator<br />
Speaker indicators<br />
RDS indicator<br />
TUNED indicator<br />
MEMO indicator<br />
STEREO indicator<br />
<strong>KRF</strong>-<strong>A4020</strong> (En/E2T)<br />
7<br />
RDS indicator<br />
S.DIRECT indicator<br />
1<br />
STANDBY<br />
ON / STANDBY<br />
POWER<br />
-ON OFF–<br />
AV SURROUND RECEIVER<br />
TAPE 2/ MONI indicator<br />
R D S<br />
SP. A B MUTE<br />
EON FM<br />
TI. VOL AM<br />
S.DIRECT<br />
TAPE 2/MONI<br />
A<br />
SPEAKERS<br />
B MUTE BASS BOOST<br />
TA NEWS TP PTY<br />
TAPE2/<br />
MONITOR<br />
Display<br />
MEMO<br />
****** **<br />
AUTO indicator<br />
Frequency display, Input display,<br />
Preset channel display<br />
2 3 4 5 6 7 8<br />
PTY TA/NEWS DISPLAY<br />
SOURCE<br />
DIRECT BALANCE SOUND<br />
STEREO<br />
TUNED<br />
AUTO<br />
MHz<br />
. kHz<br />
BAND AUTO MEMORY<br />
MULTI CONTROL<br />
INPUT SELECTOR<br />
VOLUME CONTROL<br />
TRAIT<br />
Operations Preparations<br />
PHONES<br />
DOWN<br />
UP<br />
9 0! @ # $ % ^ &<br />
*<br />
(<br />
1 ON/STANDBY ( ) key 0<br />
Use to switch the power ON/STANDBY when the POWER<br />
is turned ON.<br />
STANDBY indicator<br />
POWER key 0<br />
2 PTY key ^<br />
Use to perform PTY search.<br />
3 TA/NEWS key &<br />
4 DISPLAY key $<br />
Use to change the display indications when receiving RDS<br />
broadcasts.<br />
Use to adjust the brightness of the display.<br />
5 BAND key #<br />
Use to select the broadcast band.<br />
6 AUTO key #<br />
Use to select the auto tuning mode.<br />
7 MEMORY key %<br />
Use to store radio stations in the preset memory.<br />
8 VOLUME CONTROL knob 0<br />
9 PHONES jack !<br />
Use for headphone listening.<br />
0 SPEAKERS A key 0<br />
Use to turn speaker system A on and off.<br />
! SPEAKERS B key 0<br />
Use to turn speaker system B on and off.<br />
@ MUTE key !<br />
Use to temporarily mute the sound.<br />
# BASS BOOST key !<br />
Use to select the maximum adjustment setting for the low<br />
frequency range.<br />
$ TAPE2/MONITOR key 0 @<br />
% SOURCE DIRECT key !<br />
^ BALANCE key !<br />
Use to adjust the sound balance.<br />
& SOUND key !<br />
Use to adjust the sound quality.<br />
* MULTI CONTROL knob<br />
Used to make a variety of settings.<br />
( INPUT SELECTOR knob 0<br />
Use to select the input sources.<br />
Other<br />
Standby mode<br />
While the standby indicator of the unit is lit, a small amount of current is flowing into the unit’s internal circuitry to back up the<br />
memory. This condition is referred to as the standby mode of the unit. While the unit is in the standby mode, it can be turned ON<br />
from the remote control unit.
8<br />
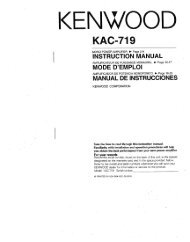
Remote control unit<br />
Names and functions of parts<br />
<strong>KRF</strong>-<strong>A4020</strong> (En/E2T)<br />
Preparations Operations<br />
Other<br />
1<br />
2<br />
3<br />
4<br />
5<br />
6<br />
7<br />
8<br />
9<br />
%<br />
1 2 3<br />
4 5 6 0<br />
7 8 9 +10<br />
2<br />
VOL. DOWNfi<br />
BASS BOOST DIMMER<br />
MD/TAPE1 TUNER<br />
6 7<br />
BAND AUTO A/B +100<br />
1 TUNING ¡ 4 P.CALL ¢<br />
MEMORY<br />
SOUND<br />
MULTI CONTROL<br />
VOL. UP<br />
MUTE<br />
Model: RC-R0708<br />
Infrared ray system<br />
1 Numeric keys (1~0, +10)<br />
If CD or MD is selected as the input source, these keys<br />
function as numeric keys. If tuner is selected as the input<br />
source, these keys are used to call up station presets.<br />
2 Component operation keys<br />
Use these keys to operate other components with system<br />
control connections to the receiver.<br />
TUNING (1 ¡) keys #<br />
If tuner is selected as the input source, these keys function<br />
as tuning keys.<br />
If CD or MD is selected as the input source, these keys<br />
function as search keys.<br />
P.CALL (4 ¢) keys %<br />
If tuner is selected as the input source, these keys function<br />
as P.CALL keys.<br />
If CD or MD is selected as the input source, these keys<br />
function as skip keys.<br />
2 key<br />
If tape is selected as the input source, this key functions<br />
as the play key for side B of the cassette (the side facing<br />
away from the front of the deck).<br />
fi<br />
CD<br />
TAPE2/<br />
MONITOR<br />
PTY TA/NEWS DISPLAY AUX<br />
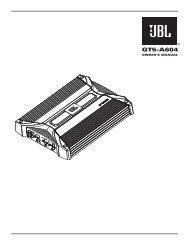
REMOTE CONTROL UNIT<br />
RC-R0708<br />
POWER<br />
DISC SKIP<br />
S.DIRECT<br />
BALANCE<br />
PHONO<br />
fi<br />
0<br />
!<br />
@<br />
#<br />
$<br />
%<br />
BAND (6) key #<br />
If tuner is selected as the input source, this key functions<br />
as the band selector key.<br />
If CD is selected as the input source, this key functions as<br />
the play/pause key.<br />
If MD is selected as the input source, this key functions as<br />
the play key.<br />
DISC SKIP, A/B, +100 key<br />
If CD is selected as the input source, this key functions as<br />
the multi-CD player disc skip key.<br />
If TAPE is selected as the input source, this key is used to<br />
switch between the two decks (A and B) of a double<br />
cassette deck.<br />
If MD is selected as the input source, this key function as<br />
numeric key.<br />
AUTO(7) key #<br />
If tuner is selected as the input source, this key functions<br />
as the AUTO key.<br />
If CD or MD is selected as the input source, this key<br />
functions as the stop key.<br />
3 VOLUME UP, DOWN keys 0<br />
4 MEMORY key %<br />
Use to store radio stations in the preset memory.<br />
5 SOUND key !<br />
Use to adjust the sound quality.<br />
6 BASS BOOST key !<br />
Use to select the maximum adjustment setting for the low<br />
frequency range.<br />
7 DIMMER key $<br />
Use to adjust the brightness of the display.<br />
8 Input selector keys 0<br />
Use to select the receiver’s input source.<br />
9 RDS operation keys #<br />
Use to receive RDS broadcasts.<br />
0 POWER ( )key 0<br />
Use to switch the power ON/STANDBY when the POWER<br />
is turned ON.<br />
! S.DIRECT key !<br />
@ MUTE key !<br />
Use to temporarily mute the sound.<br />
# MULTI CONTROL keys<br />
Used to make a variety of settings.<br />
$ BALANCE key !<br />
Use to adjust the sound balance.<br />
% TAPE2/ MONITOR key 0@
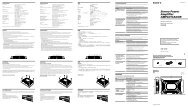
Preparing the remote control<br />
Loading the batteries<br />
1 Remove the cover. 2 Insert the batteries.<br />
Names and functions of parts<br />
<strong>KRF</strong>-<strong>A4020</strong> (En/E2T)<br />
9<br />
3 Close the cover.<br />
• Insert two AA-size (R06) batteries as indicated by the<br />
polarity markings.<br />
Operation<br />
When the “STANDBY” indicator is lit, the power turns ON<br />
when you press the POWER ( ) key on the remote control.<br />
When the power comes ON, press the key you want to<br />
operate.<br />
Operations Preparations<br />
Operating range<br />
(Approx.)<br />
Remote sensor<br />
6 m<br />
30˚<br />
30˚<br />
Other<br />
Model: RC-R0708<br />
Infrared ray system<br />
• When pressing more than one remote control key successively,<br />
press the keys securely by leaving an interval of 1<br />
second or more between keys.<br />
Notes:<br />
1. The supplied batteries may have shorter lives than ordinary<br />
batteries due to use during operation checks.<br />
2. When the remote-controllable distance gets shorter than<br />
before, replace both batteries with new ones.<br />
3. Placing the remote sensor in direct sunlight, or in direct<br />
light from a high frequency fluorescent lamp may cause a<br />
malfunction.<br />
In such a case, change the location of the system installation<br />
to prevent malfunction.
Normal playback<br />
<strong>KRF</strong>-<strong>A4020</strong> (En/E2T)<br />
10<br />
Preparations Operations<br />
Other<br />
ON/STANDBY<br />
POWER<br />
SPEAKERS A B<br />
MUTE<br />
BASS BOOST<br />
SOURCE DIRECT<br />
VOLUME UP, DOWN<br />
SOUND<br />
BASS BOOST<br />
Preparing for playback<br />
Some preparatory steps are needed before starting playback.<br />
Turning on the receiver<br />
1 Turn on the POWER key to ON.<br />
INPUT SELECTOR<br />
AUTO<br />
MULTI CONTROL<br />
SOUND<br />
BALANCE<br />
POWER<br />
2 Turn on the power to this receiver by pressing ON/<br />
STANDBY ( ) key.<br />
Selecting MD/TAPE 1 (Main unit only)<br />
VOLUME CONTROL<br />
S. DIRECT<br />
MUTE<br />
BALANCE<br />
MULTI CONTROL<br />
Select the source name corresponding to the component<br />
connected to the MD/TAPE1 jacks. The initial factory setting<br />
is “TAPE 1”. To change the source name associated with the<br />
MD/TAPE1 jacks to “MD”, follow the steps below:<br />
Selecting the speaker system<br />
Press the SPEAKERS A or B key to select the speaker system<br />
to be used.<br />
A ON<br />
B ON<br />
A+B ON<br />
A+B OFF<br />
: Sound from the speakers connected to the<br />
SPEAKERS A terminals on the rear panel.<br />
: Sound from the speakers connected to the<br />
SPEAKERS B terminals on the rear panel.<br />
: Sound from both the speakers connected to<br />
the SPEAKERS A and B terminals on the rear<br />
panel.<br />
: No sound from the speakers. Use this setting<br />
when listening with headphones.<br />
The indicator for the speakers you<br />
want to use should be lit.<br />
SP. A B<br />
Listening to a source component<br />
1Use the input selector (INPUT SELECTOR) to select<br />
the source you want to listen to.<br />
The input sources change as shown below:<br />
Selecting a source using the INPUT SELECTOR knob<br />
1 TUNER (frequency display)<br />
2 “CD”<br />
3 “TAPE 1” or “MD”<br />
4 “PHONO”<br />
5 “AUX”<br />
• When selecting an input source by using the remote<br />
control , press the desired input selector key.<br />
• The INPUT SELECTOR on the front panel of the receiver<br />
always cycles through all inputs.<br />
1 Use the INPUT SELECTOR knob to select “TAPE 1”.<br />
2 Hold down the AUTO key for more than 2 seconds.<br />
• The source indication changes to “MD”.<br />
• To return to the original indication, repeat the above<br />
procedure.<br />
2Start playback from the selected source.<br />
3Use the VOLUME CONTROL (VOLUME UP , DOWN)<br />
to adjust the volume.<br />
• The sound of input source cannot be listened to with<br />
TAPE2/MONITOR is ON.
Normal playback<br />
<strong>KRF</strong>-<strong>A4020</strong> (En/E2T)<br />
Adjusting the sound<br />
Adjusting the tone<br />
SOURCE DIRECT playback<br />
11<br />
Use the following procedure to adjust the bass and treble<br />
levels.<br />
Use this function to pass the source material direct to the<br />
amplifier, by passing any audio processing.<br />
1 Press the SOUND key to select the tone mode to be<br />
adjusted.<br />
BASS : Select this to adjust the low frequency range.<br />
(Press the SOUND key once.)<br />
TREBLE: Select this to adjust the high frequency range.<br />
(Press the SOUND key twice.)<br />
SP.<br />
A B<br />
BAss +4<br />
2 Use the MULTI CONTROL to adjust the sound quality.<br />
• The bass and treble levels are adjustable from -10 to +10<br />
in 2 step increments.<br />
• The adjustment item is displayed for approximately 8<br />
seconds.<br />
Once-touch low frequency emphasis<br />
(BASS BOOST)<br />
Use the following procedure to emphasize the bass and<br />
create a richer sound.<br />
Press the BASS BOOST key.<br />
Press the SOURCE DIRECT (S.DIRECT) key.<br />
SP. A B<br />
S.DIRECT<br />
• Switch to another input source to cancel SOURCE DI-<br />
RECT (S.DIRECT) playback.<br />
To cancel<br />
Press the SOURCE DIRECT (S.DIRECT) key again.<br />
Listening with headphones<br />
1 Press the SPEAKERS A or B key so that the speaker<br />
indicator goes off.<br />
Make sure the SPEAKERS indicators are turned off.<br />
SP.<br />
2 Connect headphones to the PHONES jack.<br />
PHONES<br />
TAPE1<br />
TAPE1<br />
Operations Preparations<br />
SP.<br />
A B<br />
BAss + 1)<br />
• Press the BASS BOOST key once to select the maximum<br />
(+10) low frequency emphasis setting.<br />
Switching back to the previous setting<br />
Press the BASS BOOST key again.<br />
Muting the sound<br />
MUTE lets you mute the sound of the speakers.<br />
Press the MUTE key.<br />
Blinks<br />
SP.<br />
A<br />
B<br />
MUTE<br />
TAPE1<br />
• Muting can also be cancelled by adjusting the volume.<br />
3 Use the VOLUME CONTROL (VOLUME UP, DOWN) to<br />
adjust the volume.<br />
To adjust the BALANCE<br />
The mode for adjusting the volume balance between the left<br />
and right.<br />
1 Press the BALANCE key.<br />
2 Use the MULTI CONTROL to adjust the balance.<br />
Indicates the center.<br />
Indicates the balance setting.<br />
Other<br />
To cancel<br />
Press the MUTE key again so that the “MUTE”<br />
indicator goes off.<br />
SP. A B<br />
L--<br />
t -R
Recording<br />
<strong>KRF</strong>-<strong>A4020</strong> (En/E2T)<br />
12<br />
Preparations Operations<br />
Other<br />
TAPE2 /MONITOR<br />
Recording audio<br />
Recording a music source<br />
1 Use the input selector (INPUT SELECTOR) to select<br />
the source (other than “TAPE 1”) you want to record.<br />
2 Set the cassette deck to record.<br />
3 Start playback, then start recording.<br />
Copying tapes<br />
SOUND<br />
TAPE 1 = TAPE 2 copying<br />
INPUT SELECTOR<br />
MULTI CONTROL<br />
SOUND<br />
MULTI CONTROL<br />
TAPE2 /MONITOR<br />
1 Use the input selector to select “TAPE 1”.<br />
2 Start playback on the cassette deck connected to the<br />
MD/TAPE1 jacks and start recording on the cassette<br />
deck connected to the TAPE2/MONITOR jacks.<br />
• To copy tapes using a double cassette deck, refer to the<br />
instruction manual of the double cassette deck.<br />
TAPE2/MONITOR function<br />
You can connect a cassette deck or graphic equalizer to<br />
the TAPE2/MONITOR jacks of the receiver. If a graphic<br />
equalizer is connected, the TAPE2/MONITOR key should<br />
be left in the on position. Alternately, if a cassette deck<br />
equipped with a 3-head system is connected to theTAPE2/<br />
MONITOR jacks, you will be able to monitor the justrecorded<br />
signal while making recordings on the cassette<br />
deck. By switching the TAPE2/MONITOR key on and off,<br />
you can compare the sound of the source signal and the<br />
just-recorded signal. For more information, refer to the<br />
instruction manual of the connected component.<br />
• The equalizer effect can be applied to the played<br />
audio but cannot be recorded together with the<br />
audio signal.<br />
• Copy from “TAPE 2” to ”TAPE 1“ is not possible.<br />
Input level adjustment<br />
(when using the monitor function)<br />
If the input level while using the monitor function is too high,<br />
adjust the input level as described below.<br />
The input level cannot be adjusted when in the source direct<br />
playback mode.<br />
1 Press the TAPE2/MONITOR key.<br />
2 Press the SOUND key several times until the “INPUT”<br />
indication appears.<br />
3 Use the MULTI CONTROL to adjust the input level.<br />
SP.<br />
A B<br />
TAPE 2/MONI<br />
FW<br />
INPUT -6<br />
• The adjustment mode is displayed for approximately 8<br />
seconds.<br />
• The input level may be adjusted to any one of 2 settings:<br />
0 and -6. (The initial setting is 0.)<br />
4 Press the SOUND key to return to the input indication.
Listening to radio broadcasts<br />
Tuning (non-RDS) radio stations<br />
Radio stations can be classified into RDS (Radio Data System)<br />
stations and other stations. To listen to or store RDS stations<br />
in the preset memory, see the section entitled, “Using RDS”.<br />
1Use the input selector (INPUT SELECTOR) to select<br />
the tuner.<br />
2Use the BAND key to select the desired broadcast<br />
band.<br />
3Use the AUTO key to select the desired tuning<br />
method.<br />
Each press switches the tuning method as follows:<br />
• Normally, set to “AUTO”(auto tuning). If the radio<br />
waves are weak and there is a lot of interference, switch<br />
to manual tuning. (With manual tuning, stereo broadcasts<br />
will be received in monaural.)<br />
4Use the MULTI CONTROL to select the station.<br />
SP.<br />
A B<br />
DISPLAY<br />
TA/NEWS<br />
PTY<br />
FM<br />
1~0, +10<br />
VOLUME UP, DOWN<br />
DIMMER<br />
PTY<br />
MEMORY<br />
AUTO<br />
BAND<br />
Each press switches the band as follows:<br />
“FM“ or “AM” indicator<br />
1 FM<br />
SP. A B<br />
2 AM<br />
1 AUTO lit (auto tuning)<br />
2 AUTO not lit (manual tuning)<br />
Lights when a broadcast is being received in stereo.<br />
-- 89 ))<br />
STEREO<br />
.<br />
TUNED<br />
AUTO<br />
MHz<br />
Frequency display<br />
INPUT SELECTOR<br />
MULTI CONTROL<br />
BAND<br />
AUTO<br />
4 P.CALL ¢<br />
MULTI CONTROL<br />
DISPLAY<br />
TA/NEWS<br />
VOLUME CONTROL<br />
FM<br />
AM<br />
STEREO<br />
AUTO<br />
MHz<br />
. ))<br />
”TUNED“ is<br />
displayed when<br />
a station is<br />
received<br />
Auto tuning :The next station is tuned automatically.<br />
Manual tuning :Turn the knob (press the key) to select<br />
the desired station.<br />
Using RDS (Radio Data System)<br />
<strong>KRF</strong>-<strong>A4020</strong> (En/E2T)<br />
RDS is a system that transmits useful information (in the form<br />
of digital data) for FM broadcasts along with the broadcast<br />
signal. Tuners and receivers designed for RDS reception can<br />
extract the information from the broadcast signal for use with<br />
various functions, such as automatic display of the station<br />
name.<br />
RDS functions:<br />
PTY (Program TYpe identification) Search ^<br />
Automatically tunes to a station that is currently broadcasting<br />
the specified program type (genre).<br />
EON (Enhanced Other Network) reservation ^<br />
Sets the tuner to automatically switch to stations broadcasting<br />
one of two types of programs, even though you are<br />
listening to another station. The tuner returns to the<br />
original station when the broadcast of the selected program<br />
ends.<br />
PS (Program Service name) Display<br />
Automatically displays the station name transmitted by<br />
the RDS station.<br />
RDS Auto Memory function $<br />
Automatically selects and stores up to 30 RDS stations in<br />
the preset memory.<br />
If fewer than 30 RDS stations have been stored in the<br />
preset memory, regular FM stations will be stored in the<br />
remaining places.<br />
Radio Text function<br />
Displays the radio text data transmitted by some RDS<br />
stations when you press the DISPLAY key. There is no<br />
display if no text data was transmitted.<br />
TI volume<br />
&<br />
If you preset the volume level, you can listen to the<br />
information of your choice at that volume level automatically.<br />
After the information has been received, the volume<br />
returns to the previous level.<br />
The ”RDS“ indicator lights up when an RDS broadcast (signal)<br />
is received.<br />
SP. A B MUTE<br />
TP<br />
STEREO<br />
BBC 1F M<br />
EON FM<br />
TUNED<br />
AM<br />
AUTO<br />
S.DIRECT<br />
MHz<br />
TAPE 2/MONI<br />
kHz<br />
Note:<br />
Some functions and function names may differ for certain<br />
countries and areas.<br />
Before using a function utilizing the RDS, be sure to<br />
perform the RDS Auto Memory operation by referring to<br />
the description in “Presetting RDS stations (RDS AUTO<br />
MEMORY)”. $<br />
13<br />
Operations Preparations<br />
Other<br />
• You can also use the TUNING key on the remote control<br />
to make the selection.
Listening to radio broadcasts<br />
<strong>KRF</strong>-<strong>A4020</strong> (En/E2T)<br />
14 Using the DISPLAY key<br />
Preparations Operations<br />
Other<br />
Pressing the DISPLAY key changes the contents of the<br />
display.<br />
Each press switches the display mode as follows:<br />
1 PS (Program Service name) display<br />
2 RT (Radio Text) display<br />
3 Frequency display<br />
1 PS (Program Service name) display:<br />
The station name is displayed automatically when an RDS<br />
broadcast is received,<br />
If no PS data was sent, “NO PS” is displayed.<br />
SP. A B MUTE<br />
TP<br />
STEREO<br />
BBC 1F M<br />
EON FM<br />
TUNED<br />
AM<br />
AUTO<br />
S.DIRECT<br />
MHz<br />
TAPE 2/MONI<br />
kHz<br />
2 RT (Radio Text) display:<br />
Text data accompanying the RDS broadcast scrolls across<br />
the display. “NO RT” or “RT----” is displayed if the current<br />
RDS station does not provide RT data.<br />
SP. A B MUTE<br />
EON FM<br />
AM<br />
S.DIRECT<br />
TAPE 2/MONI<br />
3 Frequency display:<br />
Displays the frequency of the current station.<br />
SP. A B MUTE<br />
EON FM<br />
AM<br />
S.DIRECT<br />
TAPE 2/MONI<br />
TP<br />
STEREO<br />
ABCDEF GH<br />
TUNED<br />
AUTO<br />
MHz<br />
kHz<br />
TP<br />
STEREO<br />
-- 1)) . 4)<br />
TUNED<br />
AUTO<br />
MHz<br />
kHz<br />
Display dimmer adjustent<br />
The dimmer function lets you select the brightness of the<br />
receiver's display. You might find this useful if you darken<br />
your room to watch movies or listen to music.<br />
Presetting RDS stations<br />
(RDS AUTO MEMORY) (Main unit only)<br />
This function automatically stores up to 30 stations including<br />
the RDS stations and ordinary FM stations in the preset<br />
memory. In order to use the EON and PTY functions, the RDS<br />
stations must be stored in the preset memory using the RDS<br />
AUTO MEMORY function.<br />
1Use the INPUT SELECTOR to select the tuner.<br />
2Use the BAND key to set the broadcast band to<br />
“FM”.<br />
3Press and hold the MEMORY key for more than 2<br />
seconds.<br />
SP. A B MUTE<br />
R.D.S EON FM<br />
AM<br />
S.DIRECT<br />
TAPE 2/MONI<br />
SP. A B MUTE<br />
R.D.S EON FM<br />
AM<br />
S.DIRECT<br />
TAPE 2/MONI<br />
TP<br />
AUTO<br />
j<br />
TP<br />
MEMORY<br />
STEREO<br />
TUNED<br />
AUTO<br />
MHz<br />
kHz<br />
STEREO<br />
TUNED<br />
AUTO<br />
MHz<br />
kHz<br />
• After a few minutes, up to 30 RDS stations are preset in<br />
order from channel “01”.<br />
• Stations already stored in the preset memory may be<br />
replaced by RDS stations. (i.e., If the RDS AUTO<br />
MEMORY function finds 15 RDS stations, the stations<br />
currently preset at numbers 01~15 are replaced by the<br />
RDS stations.)<br />
• The RDS AUTO MEMORY may take a few minutes to<br />
preset stations.<br />
Each time you hold down the DISPLAY key of the main<br />
unit for more than 2 seconds, the display brightness<br />
changes among the three available settings. Select the<br />
brightness level you find most pleasing.<br />
The same function as above is also available by pressing<br />
the DIMMER key of the remote control unit.<br />
SP.<br />
A B<br />
TAPE1<br />
SP.<br />
A B<br />
TAPE1<br />
SP.<br />
A B<br />
TAPE1
Presetting radio stations manually<br />
The RDS auto memory function assigns preset numbers to<br />
RDS stations starting from preset number ”01“. Therefore,<br />
be sure to execute the RDS auto memory function before<br />
using the following operations to manually store AM stations<br />
and other FM stations, and RDS stations.<br />
“Presetting RDS stations (RDS AUTO MEMORY)”.$<br />
1Tune to the station you want to store.<br />
2Press the MEMORY key while receiving the station.<br />
Proceed to step 3 within 5 seconds.<br />
(If more than 5 seconds elapse, press the MEMORY<br />
key again).<br />
• When storing radio stations manually, it may take a few<br />
seconds before the “MEMO” indicator appears in the<br />
display after pressing the MEMORY key depending on<br />
receiving conditions.<br />
Blinks for 5 seconds<br />
SP.<br />
A B<br />
FM<br />
Lights for 5 seconds<br />
01 89 ))<br />
MEMO<br />
STEREO<br />
.<br />
TUNED<br />
AUTO<br />
MHz<br />
3Use the MULTI CONTROL to select one of the station<br />
presets (1 – 30).<br />
4Press the MEMORY key to accept the setting.<br />
• Repeat steps 1, 2, 3 and 4 to store as many stations<br />
as necessary.<br />
• If you store a station at a previously used preset, the old<br />
station will be replaced by the new one.<br />
Receiving preset stations<br />
Listening to radio broadcasts<br />
<strong>KRF</strong>-<strong>A4020</strong> (En/E2T)<br />
1Use the input selector (INPUT SELECTOR) to select<br />
the tuner.<br />
2Using the remote control unit, enter the number of<br />
the preset you want to receive (up to ”30“).<br />
Press the numeric keys in the following order:<br />
For ”15“, press .......... 0,5<br />
For ”20“, press .......... 0,0,)<br />
• If you make a mistake entering a two digit number, press<br />
the 0 key several times to return to the original<br />
display and start again.<br />
SP. A B<br />
STEREO<br />
15 9) . ))<br />
FM<br />
TUNED<br />
AUTO<br />
MHz<br />
Receiving preset stations in order<br />
(P.CALL)<br />
1Use the input selector (INPUT SELECTOR) to select<br />
the tuner.<br />
2Use the P.CALL key to select the desired station.<br />
• Each time you press the P.CALL key, another preset<br />
station is received in order.<br />
Pressing the P.CALL (¢) key does the following:<br />
01=02=03= .... 28=29=30=01=02=03=<br />
15<br />
Operations Preparations<br />
Pressing the P.CALL (4) key does the following:<br />
01+02+03+ .... 28+29+30+01+02+03+<br />
Holding down the P.CALL key, lets you skip through<br />
the presets, receiving each for 0.5 seconds apiece.<br />
Other
16<br />
Tuning by program type (PTY search)<br />
This function lets you set the tuner to automatically search for<br />
stations which are currently broadcasting the type of program<br />
(genre) you want to listen to.<br />
Listening to radio broadcasts<br />
<strong>KRF</strong>-<strong>A4020</strong> (En/E2T)<br />
“NO PROG” is displayed if this operation is attempted<br />
before performing the RDS AUTO MEMORY operation.<br />
3Press the PTY key to start searching.<br />
Preparations Operations<br />
Other<br />
Under certain receiving conditions, it may take more<br />
than 1 minute to complete the search.<br />
• PTY search cannot be activated during EON override<br />
reception.<br />
Preparations<br />
• Execute the RDS auto memory procedure.<br />
• Set the broadcast band to ”FM“.<br />
• Tune to a RDS station.<br />
1Press the PTY key to activate the PTY search mode.<br />
SP. A B MUTE<br />
EON FM<br />
TI. VOL AM<br />
S.DIRECT<br />
TAPE 2/MONI<br />
TA<br />
TP PTY<br />
NEWs<br />
When a RDS broadcast is received, the program type is<br />
shown on the display. If no PTY data is available, or if the<br />
station is not a RDS station, ”NONE” is displayed.<br />
2While the “PTY” indicator is lit, use the MULTI<br />
CONTROL to select the program type of your choice.<br />
Program type table<br />
Program Type Name<br />
Pop Music<br />
Rock Music<br />
Easy Listening Music<br />
Light Classical<br />
Serious Classical<br />
Other Music<br />
News<br />
Current Affairs<br />
Information<br />
Sport<br />
Education<br />
Drama<br />
Culture<br />
Science<br />
Varied<br />
Weather<br />
Finance<br />
Children’s programs<br />
Social Affairs<br />
Religion<br />
Phone In<br />
Travel<br />
Leisure<br />
Jazz Music<br />
Country Music<br />
National Music<br />
Oldies Music<br />
Folk Music<br />
Documentary<br />
STEREO<br />
TUNED<br />
AUTO<br />
MHz<br />
kHz<br />
Display<br />
POP M<br />
ROCK M<br />
EASY M<br />
LIGHT M<br />
CLASSICS<br />
OTHER M<br />
NEWS<br />
AFFAIRS<br />
INFO<br />
SPORT<br />
EDUCATE<br />
DRAMA<br />
CULTURE<br />
SCIENCE<br />
VARIED<br />
WEATHER<br />
FINANCE<br />
CHILDREN<br />
SOCIAL<br />
RELIGION<br />
PHONE IN<br />
TRAVEL<br />
LEISURE<br />
JAZZ<br />
COUNTRY<br />
NATION M<br />
OLDIES<br />
FOLK M<br />
DOCUMENT<br />
Example: Searching for a Rock Music broadcast.<br />
Display while searching<br />
Blinks<br />
SP. A B MUTE<br />
EON FM<br />
AM<br />
S.DIRECT<br />
TAPE 2/MONI<br />
PTY<br />
ROCK M<br />
Blinks for 2 seconds<br />
Program type name display<br />
Display when a station is received.<br />
Goes out<br />
Station name display<br />
• No sound is heard while “PTY” is blinking.<br />
• If the desired program type cannot be found, “NO<br />
PROG” is displayed, then after several seconds the<br />
display returns to the original display.<br />
To select another program type<br />
Repeat steps 1, 2 and 3.<br />
STEREO<br />
TUNED<br />
AUTO<br />
MHz<br />
kHz<br />
SP. A B MUTE<br />
TP PTY<br />
STEREO<br />
BBC 1F M<br />
EON FM<br />
TUNED<br />
AM<br />
AUTO<br />
S.DIRECT<br />
MHz<br />
TAPE 2/MONI<br />
kHz<br />
Reserving the desired information<br />
When the receiver is tuned to a RDS EON station (a station at<br />
which the “EON” indicator lights up), this function lets you<br />
set the receiver to automatically switch stations to receive<br />
news or traffic programs as they are broadcast. When the<br />
broadcast is over, the receiver returns to the original station<br />
automatically.<br />
Preparation<br />
• Set the broadcast band to ”FM”. #<br />
1Complete steps 1 ~ 3 of ”Presetting RDS stations<br />
(RDS AUTO MEMORY)“. $<br />
Skip this step if you have already completed the<br />
RDS AUTO MEMORY procedure.<br />
• The EON function will not work if all 30 FM preset<br />
stations were stored manually using the procedure shown<br />
in “Presetting radio stations manually”. %<br />
Be sure to use the RDS AUTO MEMORY function.<br />
Continued to next page
2Press the TA/NEWS key to select the information<br />
type of your choice.<br />
Display When ”TA“ is selected<br />
SP. A B MUTE<br />
EON FM<br />
AM<br />
S.DIRECT<br />
TAPE 2/MONI<br />
TA<br />
TP PTY<br />
STEREO<br />
BBC 1F M<br />
TUNED<br />
AUTO<br />
MHz<br />
kHz<br />
”TP“ lights for stations where TP (Traffic Program) information<br />
can be received.<br />
Listening to radio broadcasts<br />
<strong>KRF</strong>-<strong>A4020</strong> (En/E2T)<br />
When waiting for information while listening<br />
to a RDS station without the EON function<br />
If the “EON” indicator does not light in steps 3 and 4 and<br />
the desired kind of information has already been selected,<br />
the information from only the station being received will<br />
be waited for.<br />
17<br />
Each press switches the reservation mode as follows:<br />
1 TA (Traffic Announcement)<br />
2 NEWS (News)<br />
3 TA, NEWS (Traffic Announcement and News)<br />
4 Goes off (EON off)<br />
• If “TA” and “NEWS” can not be selected, carry out the<br />
“Presetting RDS stations (RDS AUTO MEMORY)”<br />
again. $<br />
3Tune to a preset RDS station.<br />
Choose a RDS preset station that displays both the<br />
“RDS” and “EON” indicators.<br />
Display When “TA” is selected<br />
SP. A B MUTE<br />
EON FM<br />
AM<br />
S.DIRECT<br />
TAPE 2/MONI<br />
TA<br />
TP PTY<br />
NOW TA<br />
Be sure “EON” appears in the display<br />
STEREO<br />
TUNED<br />
AUTO<br />
MHz<br />
kHz<br />
• If you want to reserve TA, receive a station with which<br />
the “TP” indicator lights.<br />
When “EON” does not light although an RDS station is<br />
received, that station is not transmitting EON data.<br />
Please select a different station.<br />
4Wait for the information you selected while listening<br />
to the current station.<br />
The receiver will wait for the desired information to start<br />
as long as the tuner is set to a preset RDS station that<br />
displays both the “EON” and “RDS” indicators.<br />
When listening to the tuner:<br />
Be sure to stay tuned to stations that display both the<br />
“EON” and “RDS” indicators.<br />
To listen sources other than the tuner:<br />
1. Tune in a station which that displays both the “EON”<br />
and “RDS” indicators, then use the INPUT SELECTOR<br />
to switch the input to the source you desire.<br />
2. Even when the INPUT SELECTOR is set to a source<br />
other than tuner, it will automatically switch to tuner<br />
when the desired EON program starts to broadcast.<br />
During this period, the source selected in step 1 continues<br />
playing, but will not be heard.<br />
3. When reception of the desired EON program is complete,<br />
the INPUT SELECTOR returns to the previous<br />
input source.<br />
TP (Traffic Program) indication<br />
When the “TP” indicator is lit, this means that the presently-received<br />
station or a station in the same network is<br />
transmitting traffic information. When “TP” is displayed<br />
for the station being received, the traffic information of<br />
this station can be received without EON reservation.<br />
To cancel<br />
Press the TA/NEWS key again.<br />
Setting the volume while receiving information<br />
(TI volume) (Main unit only)<br />
If you preset the volume level, you can listen to the information<br />
of your choice at that volume level automatically. After<br />
the information has been received, the volume returns to the<br />
previous level.<br />
1 Hold down the TA/NEWS key for more than 2<br />
seconds so that the “TI.VOL” indicator starts blinking.<br />
SP. A B MUTE<br />
EON FM<br />
TI. VOL AM<br />
S.DIRECT<br />
TAPE 2/MONI<br />
2 Use the VOLUME CONTROL knob to select the<br />
desired volume level.<br />
Proceed to next step within 5 seconds.<br />
3 Press the TA/NEWS key to enter the new setting.<br />
• The “TI.VOL” indicator stops blinking and remains lit.<br />
To cancel<br />
TA<br />
TP PTY<br />
STEREO<br />
TI -66 dB<br />
TUNED<br />
AUTO<br />
MHz<br />
kHz<br />
Blinks<br />
Hold down the TA/NEWS key for more than 2 seconds<br />
so that the “TI.VOL” indicator goes off.<br />
Operations Preparations<br />
Other<br />
•If a reserved EON program starts to broadcast during<br />
recording, the INPUT SELECTOR switches to the tuner<br />
and the station broadcasting the EON program is recorded.<br />
•Do not use the EON function during recording.
18<br />
Preparations Operations<br />
Other<br />
In case of difficulty<br />
Resetting the Microcomputer<br />
If the microcomputer may malfunction (unit cannot be<br />
operated, or shows an erroneous display) if the power cord<br />
is unplugged while the power is ON, or due to some other<br />
external factor. If this happens, execute the following procedure<br />
to reset the microcomputer and return the unit to its<br />
normal operating condition.<br />
Amplifier<br />
Tuner<br />
Symptom<br />
No sound from the speakers.<br />
The standby indicator blinks and<br />
sound is not output.<br />
Sound is not output from one of<br />
the speakers.<br />
A humming noise is generated<br />
when the PHONO input selector is<br />
selected.<br />
Symptom<br />
Cause<br />
• The speaker cords are disconnected.<br />
• VOLUME is set to the minimum position.<br />
• MUTE is ON.<br />
• The SPEAKERS switches are set to OFF.<br />
• Speaker cords are short-circuited.<br />
• The speaker cord is disconnected.<br />
• The audio cord from the turntable is not<br />
connected to the PHONO jacks.<br />
• The turntable is not grounded.<br />
Cause<br />
Remedy<br />
<strong>KRF</strong>-<strong>A4020</strong> (En/E2T)<br />
With the power cord plugged in, turn the POWER key<br />
OFF. Then, while holding down the ON/STANDBY<br />
key, press the POWER key.<br />
• Please note that resetting the microcomputer will clear<br />
the contents of the memory and returns the unit to the<br />
state it was in when it left the factory.<br />
• Connect properly referring to “Setting<br />
the speakers”. 5<br />
• Adjust the volume to a proper level.<br />
• Turn OFF the MUTE. !<br />
• Set the SPEAKERS switch(es) to ON.<br />
0<br />
• Turn the power off, eliminate the shortcircuiting,<br />
then turn on the power again.<br />
5<br />
• Connect properly referring to “Setting<br />
the speakers”. 5<br />
• Insert the audio cord plugs securely into<br />
the PHONO jacks.<br />
• Connect the grounding wire to the GND<br />
terminal on the rear panel. 4<br />
Remedy<br />
Radio stations cannot be received.<br />
Interference.<br />
A station which was preset cannot<br />
be received by pressing the corresponding<br />
numeric key.<br />
• No antenna is connected.<br />
• The broadcast band is not set properly.<br />
• The frequency of the desired station is<br />
not tuned.<br />
• Noise due to ignition noise from an automobile.<br />
• Noise due to interference from an electric<br />
appliance.<br />
• Noise due to a nearby TV set.<br />
• The preset station belongs to a frequency<br />
that cannot be received.<br />
• The preset memory was cleared because<br />
the power cord had been unplugged<br />
for a long period of time.<br />
• Connect an antenna. 5<br />
• Set the broadcast band properly.<br />
• Tune the frequency of the desired station.<br />
#<br />
• Install the outdoor antenna away from<br />
the road.<br />
• Turn off the power to the appliance.<br />
• Install the receiver farther away from the<br />
TV.<br />
• Preset a station with a receivable frequency.<br />
• Preset the station again.
Remote control unit<br />
Symptom<br />
Remote control operation is not<br />
possible.<br />
Memory back up function<br />
Please note that the following items will be deleted from<br />
the unit's memory if the power cord is disconnected from<br />
the AC outlet or the main power switch is turned off for<br />
approximately 3 days.<br />
• Power mode<br />
• Input selector settings<br />
• Volume level<br />
• Broadcast band<br />
• Frequency setting<br />
• Preset stations<br />
Cause<br />
• Batteries are exhausted.<br />
• The remote control unit is too far away<br />
from the main system, controlling angle<br />
is too large, or there is an obstacle between<br />
the receiver and the remote.<br />
• The audio cords and system control cords<br />
are not connected properly.<br />
• No software is loaded in the source<br />
component.<br />
• An attempt is made to play a tape which<br />
is being recorded in the cassette deck.<br />
In case of difficulty<br />
Remedy<br />
<strong>KRF</strong>-<strong>A4020</strong> (En/E2T)<br />
• Replace with new batteries. 9<br />
• Operate the remote control unit within<br />
the controllable range.<br />
• Connect properly referring to “Setting<br />
up the system”. 46<br />
• Place software in the source component<br />
you want to play.<br />
• Wait until recording has completed.<br />
19<br />
Operations Preparations<br />
Other
Specifications<br />
Caution : Read this page carefully to ensure safe operation.<br />
<strong>KRF</strong>-<strong>A4020</strong> (En/E2T)<br />
20<br />
Preparations Operations<br />
Other<br />
[ AUDIO section ]<br />
Rated power output during STEREO operation<br />
(DIN) 1 kHz, 0.7 % at 4 Ω ........................ 105 W + 105 W<br />
(IEC) 63 kHz ~ 12.5 kHz, 0.5 % at 4 Ω..100 W + 100 W<br />
Total harmonic distortion ....... 0.02 % (1 kHz, 50 W, 4 Ω)<br />
Signal to noise ratio<br />
PHONO (MM) .......................................... 75 dB (IHF'66)<br />
55 dB (DIN 50mW output)<br />
CD ............................................................. 92 dB (IHF'66)<br />
56 dB (DIN 50mW output)<br />
Input sensitivity / impedance<br />
PHONO (MM) ........................................ 2.5 mV / 27 kΩ<br />
CD .......................................................... 200 mV / 47 kΩ<br />
Output level / impedance<br />
TAPE REC ............................................ 200 mV / 2.2 kΩ<br />
PRE OUT (SUBWOOFER) ........................... 2 V / 2.2 kΩ<br />
Tone control<br />
BASS ...................................................±9 dB (at 100 Hz)<br />
TREBLE ...............................................±9 dB (at 10 kHz)<br />
[ FM tuner section ]<br />
Tuning frequency range<br />
U.K. and Europe ........................ 87.5 MHz ~ 108.0 MHz<br />
Russia ............... 87.5 MHz ~ 108.0 MHz (10 kHz STEP)<br />
65.0 MHz ~ 74.0 MHz (50 kHz STEP)<br />
Usable sensitivity (DIN, 75 Ω)<br />
MONO ..... 1.2 µV / 13.2 dBf (40 kHz DEV., S/N 26 dB)<br />
STEREO .... 45 µV / 44.2 dBf (46 kHz DEV., S/N 46 dB)<br />
Total harmonic distortion (DIN, 1 kHz)<br />
MONO .......................................... 0.2% (65.2 dBf input)<br />
STEREO ........................................ 0.8% (65.2 dBf input)<br />
Signal to noise ratio (DIN weighted, 1 kHz)<br />
U.K. and Europe<br />
MONO .... 65 dB (40 kHz DEV., S/N 26 dB, 65.2 dBf input)<br />
STEREO . 58 dB (46 kHz DEV., S/N 46 dB, 65.2 dBf input)<br />
Russia<br />
MONO ... 63 dB (40 kHz DEV., S/N 26 dB, 65.2 dBf input)<br />
STEREO . 58 dB (46 kHz DEV., S/N 46 dB, 65.2 dBf input)<br />
Stereo separation (DIN, 1 kHz) ................................ 36 dB<br />
Selectivity (DIN, ±300 kHz) ....................................... 64 dB<br />
Frequency response (30 Hz ~ 15kHz) ....... +0.5 dB ~ –3.0 dB<br />
[ AM tuner section ]<br />
Tuning frequency range................... 531 kHz ~ 1,602 kHz<br />
Usable sensitivity (30% mod., S/N 20 dB)<br />
......................................................... 16 µV / (600 µV/m)<br />
Signal to noise ratio (30% mod., 1 mV input)........ 50 dB<br />
[ GENEAL ]<br />
Power consumption ................................................. 280 W<br />
AC outlet<br />
SWITCHED .................................... 2 (total 150 W max.)<br />
Dimensions ........................................................ W: 440mm<br />
H : 144mm<br />
D : 390mm<br />
Weight (Net) ............................................................... 8.0 kg<br />
Notes:<br />
1. KENWOOD follows a policy of continuous advancements in development. For this reason specifications may be changed<br />
without notice.<br />
2. The full performance may not be exhibited in an extremely cold location (under a water-freezing temperature).<br />
For your records<br />
Record the serial number, found on the back of the unit, in<br />
the spaces designated on the warranty card, and in the<br />
space provided below. Refer to the model and serial<br />
numbers whenever you call upon your dealer for information<br />
or service on this product.<br />
Model<br />
Serial Number