Sexual Offense Evidence Collection Kit - New York State ...
Sexual Offense Evidence Collection Kit - New York State ...
Sexual Offense Evidence Collection Kit - New York State ...

You also want an ePaper? Increase the reach of your titles
YUMPU automatically turns print PDFs into web optimized ePapers that Google loves.
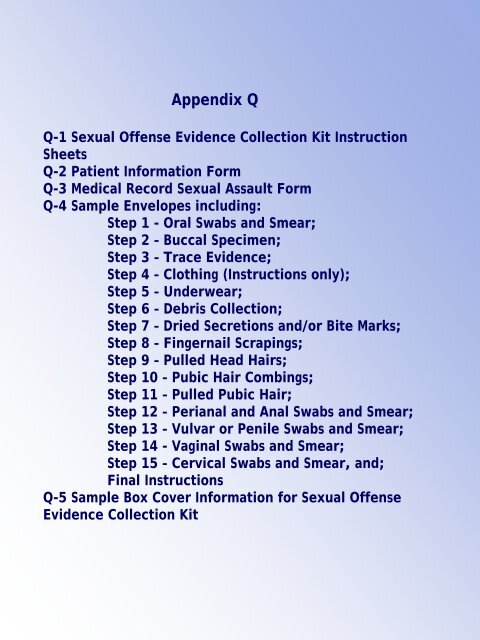
Appendix Q<br />
Q-1 <strong>Sexual</strong> <strong>Offense</strong> <strong>Evidence</strong> <strong>Collection</strong> <strong>Kit</strong> Instruction<br />
Sheets<br />
Q-2 Patient Information Form<br />
Q-3 Medical Record <strong>Sexual</strong> Assault Form<br />
Q-4 Sample Envelopes including:<br />
Step 1 - Oral Swabs and Smear;<br />
Step 2 – Buccal Specimen;<br />
Step 3 – Trace <strong>Evidence</strong>;<br />
Step 4 – Clothing (Instructions only);<br />
Step 5 – Underwear;<br />
Step 6 – Debris <strong>Collection</strong>;<br />
Step 7 – Dried Secretions and/or Bite Marks;<br />
Step 8 – Fingernail Scrapings;<br />
Step 9 – Pulled Head Hairs;<br />
Step 10 – Pubic Hair Combings;<br />
Step 11 – Pulled Pubic Hair;<br />
Step 12 – Perianal and Anal Swabs and Smear;<br />
Step 13 – Vulvar or Penile Swabs and Smear;<br />
Step 14 - Vaginal Swabs and Smear;<br />
Step 15 – Cervical Swabs and Smear, and;<br />
Final Instructions<br />
Q-5 Sample Box Cover Information for <strong>Sexual</strong> <strong>Offense</strong><br />
<strong>Evidence</strong> <strong>Collection</strong> <strong>Kit</strong>
APPENDIX Q - 1<br />
240 O’Connor Street Wellsville, NY 14895 585-593-6645 ext. 321<br />
SEXUAL OFFENSE EVIDENCE COLLECTION KIT<br />
INSTRUCTION SHEET<br />
“Copyright September 1993 by NYS DIVISION OF CRIMINAL JUSTICE SERVICES*. All rights reserved worldwide. This<br />
publication may be reproduced without the express written permission of the NEW YORK STATE DIVISION OF CRIMINAL<br />
JUSTICE SERVICES provided that this copyright notice appears on all copies or segments of the publication.” For additional<br />
consent forms and to order kits for Victim <strong>Evidence</strong> <strong>Collection</strong> you can go to: http://www.criminaljustice.state.ny.us/ofpa/evidencekit.htm.<br />
*First revision September 2000, second revision February 2002, third revision April 2005, fourth revision September 2008.<br />
Refer to NYS Department of Health Protocol for the Acute Care of the Adult Patient Reporting <strong>Sexual</strong> Assault for further<br />
information concerning the examination of victims of sexual assault at:<br />
http://www.health.state.ny.us/professionals/protocols_and_guidelines/sexual_assault/index.htm.<br />
Refer to the National Protocol for <strong>Sexual</strong> Assault Medical Forensic Examinations for further information at:<br />
http://www.ncjrs.gov/pdffiles1/ovw/206554.pdf.<br />
NOTE: This kit is designed to assist in the uniform collection of evidentiary specimens in any case in which the crime/incident<br />
involved is a sexual assault. Although the completion of each appropriate step is requested, it is acknowledged that the<br />
examiner may elect not to complete one or more steps, based upon a consideration of the physical and/or emotional wellbeing<br />
and preference of the patient. It must be acknowledged that a patient has the right to refuse one or more of the<br />
individual steps without relinquishing the right to have evidence collected.<br />
Each step in this kit is designed for one of two purposes. The first is to recover potentially valuable physical evidence that will<br />
be useful in any subsequent investigation and legal proceeding to identify the perpetrator of the reported assault (through<br />
forensic DNA analysis, for instance) and/or to verify the nature and circumstances of the reported assault. The type of<br />
evidence often detected includes saliva, semen, hairs, spermatozoa, blood, fibers, plant material, soil and other debris that<br />
may have been transferred from the perpetrator’s clothing or personal effects, or from the scene of the reported assault. The<br />
other steps are intended to collect evidence that will be used as a reference standard (controls from the victim). Each step is<br />
noted as either “<strong>Evidence</strong> <strong>Collection</strong>” or “Control Sample”.<br />
This kit contains material sufficient for the collection of evidence from ONE subject (male or female). Use a separate kit for<br />
each person. Change gloves for each step.<br />
The hospital is requested not to analyze any of the specimens/evidence collected in this kit.<br />
In order to locate alternative witnesses years later in the event of a DNA hit and/or arrest, please ensure that the names of<br />
other hospital personnel present during the exam are clearly recorded in the medical records.<br />
Included in this kit are the Medical Record <strong>Sexual</strong> Assault form, Body Diagrams, Authorization for Release of Information and<br />
<strong>Evidence</strong> to Law Enforcement form, and Patient Information form as provided by NYS Department of Health. The forms are<br />
provided for hospital records if desired and are NOT to be included in the completed, sealed kit. Follow the<br />
instructions on the forms to determine distribution. In addition, enclosed in the kit are two forms from the NYS Crime Victims<br />
Board. One is a claim form for the victim and one is a claim form for the Medical Provider. Do not include either Claim<br />
Form in the sealed kit.<br />
INSTRUCTIONS<br />
STEP 1 ORAL SWABS AND SMEAR <strong>Evidence</strong> <strong>Collection</strong><br />
NOTE: This step is to collect possible perpetrator DNA. Do not stain or chemically fix smear. Do not moisten swabs prior to<br />
sample collection. Upon completion of this step, ask patient to thoroughly rinse mouth with water.<br />
1. Remove all items from envelope. Using both swabs simultaneously, carefully swab the patient’s mouth and<br />
gum pockets. Using both swabs, prepare one smear. (Smear should be confined to the circle area on the slide.)<br />
10/1/2008
APPENDIX Q - 1<br />
Allow both swabs and smear to AIR DRY. DO NOT DISCARD EITHER SWAB. Place swabs in swab box<br />
marked “Oral”.<br />
2. When slide is dry, write “oral” on slide and place slide in slide mailer marked “Oral”. Tape closed on one side only<br />
and fill out label on mailer.<br />
3. Fill out all information requested on envelope; replace both slide mailer and swab box into envelope and seal.<br />
STEP 2 BUCCAL SPECIMEN Control Sample<br />
NOTE: This step MUST be completed for DNA control sample of patient.<br />
1. Instruct the patient to rinse the inside of mouth with water, using vigorous swishing.<br />
2. Using the special swab from the envelope marked “Buccal Specimen”, collect a specimen by vigorously<br />
swabbing the inside mid-section of the cheek 15 – 20 times.<br />
3. Allow the swab to AIR DRY. When dry, place swab in box provided.<br />
4. Fill out all information requested on the envelope; replace the swab box into envelope and seal.<br />
STEP 3 TRACE EVIDENCE <strong>Evidence</strong> <strong>Collection</strong><br />
1. To minimize the loss of evidence, place one sheet of exam table paper on the floor and then place another piece<br />
of exam table paper on top of that. The patient should disrobe over the top exam table paper, preferably in the<br />
presence of the examiner.<br />
2. Fill out all information requested on the envelope; carefully fold only top exam table paper and place into<br />
envelope and seal.<br />
3. Discard bottom exam table paper.<br />
STEP 4 CLOTHING (collect all clothing unless patient objects) <strong>Evidence</strong> <strong>Collection</strong><br />
NOTE: Wet or damp clothing should be air dried before packaging. Do not cut through any existing holes, rips, or stains<br />
in patient’s clothing. Underwear is collected in next step; do not include underwear in this step.<br />
1. Clothing worn at the time of the assault should be assessed carefully for potential evidentiary value such as<br />
stains, tears, debris or foreign matter. If you are collecting patient’s clothing ensure she/he has access to other<br />
clothes.<br />
2. Do not shake clothing as microscopic evidence may be lost. Place each item into a SEPARATE PAPER bag<br />
(not provided). Each bag should be labeled before article of clothing is placed in bag, seal bag and initial by<br />
examiner. Individual bags can then be put into one bag. Label with patient’s name and type of items and tape<br />
bag closed.<br />
3. If patient has changed clothes after assault and intends to release the kit to law enforcement, ask if it is possible<br />
for the patient to bring the clothing to the law enforcement agency handling the investigation. Patient should be<br />
instructed to package each piece of clothing individually into paper bags.<br />
STEP 5 UNDERWEAR <strong>Evidence</strong> <strong>Collection</strong><br />
NOTE: Wet or damp underwear should be air dried before packaging.<br />
1. Patient’s underwear should be collected regardless if it was worn at time of assault.<br />
2. Fill out all information requested on envelope; place underwear into envelope and seal.<br />
3. Ensure underwear envelope is put in kit.<br />
STEP 6 DEBRIS COLLECTION <strong>Evidence</strong> <strong>Collection</strong><br />
1. Remove paper bindle from Debris <strong>Collection</strong> envelope. Unfold and place on a flat surface. Collect any foreign<br />
material found on patient’s body (leaves, fibers, glass, hair etc.), and place in center of bindle. Refold in a<br />
manner to retain debris.<br />
2. Fill out all information requested on envelope; replace bindle into envelope and seal.<br />
STEP 7 DRIED SECRETIONS AND/OR BITE MARKS <strong>Evidence</strong> <strong>Collection</strong><br />
1. If dried secretion and/or bite marks are found or suspected, moisten both swabs with 1-2 drops of water. Using<br />
both swabs simultaneously, with a rolling motion carefully swab the area. Allow both swabs to AIR DRY.<br />
10/1/2008
APPENDIX Q - 1<br />
2. When dry, place both swabs in swab box marked “Dried Secretions and/or Bite Marks”. Label box<br />
indicating area of the body swabbed and possible type of secretion. If additional dried secretion specimens<br />
are collected, use the second set of swabs and box provided. If still more swabs and boxes are needed, you<br />
may use standard hospital swabs and plain white stationery envelopes in lieu of the boxes.<br />
3. Fill out all information requested on the envelope; replace swab boxes into envelope and seal.<br />
STEP 8 FINGERNAIL SCRAPINGS <strong>Evidence</strong> <strong>Collection</strong><br />
1. Remove both paper bindles and scrapers from envelope. Mark one bindle Left and one Right.<br />
2. Left hand - Unfold one bindle and place on flat surface. Hold each finger over bindle while scraping gently<br />
under each nail with the stick provided so that any debris present will fall onto it. After all fingers on left hand are<br />
done, place scraper in center of bindle, refold to retain debris and scraper.<br />
3. Right hand - Follow same procedure used for left hand.<br />
4. Fill out all information requested on envelope; replace both bindles into envelope and seal.<br />
NOTE: Pulled Hair Samples [from the National Protocol for <strong>Sexual</strong> Assault Medical Forensic Examinations]<br />
[Follow jurisdictional policy for collection of hair reference samples. Many jurisdictions do not collect pubic hair reference<br />
samples routinely and some do not collect head hair reference samples routinely during the exam. In other jurisdictions,<br />
both samples are collected routinely unless otherwise indicated or declined by patients. Whatever the jurisdictional policy,<br />
patients should always be informed about the purpose of collection, procedures used to collect samples, discomfort that may<br />
be involved, and how these samples may be used during the investigation and prosecution. If hair reference samples are<br />
not collected at the initial exam, it is important to inform patients that there might be a need to collect these samples for<br />
crime lab analysis at a later date. They should be aware that hair evidence collected at a later date may not be as<br />
conclusive as if it is collected at the time of the initial exam (e.g., due to fact that hair characteristics can change over time).<br />
When these samples are collected, the indications, timing, and techniques vary. Jurisdictional policies should be in place<br />
and followed.] Many of the hairs needed for evidence comparison can be collected by gently combing pubic or scalp<br />
region with fingers, followed with light pulling so the looser hairs close to natural shedding are removed. Give<br />
patients the option of collecting sample themselves.<br />
STEP 9 PULLED HEAD HAIRS Control Sample<br />
1. Remove paper bindle from envelope. Using thumb and forefinger, not forceps, PULL, do not cut, 5 hairs from<br />
each of the following scalp locations (for a total of 25 hairs): center, front, back, left side, right side. Place pulled<br />
hair in center of bindle and refold bindle.<br />
2. Fill out all information requested on the envelope; replace bindle into envelope and seal.<br />
STEP 10 PUBIC HAIR COMBINGS <strong>Evidence</strong> <strong>Collection</strong><br />
1. Remove paper bindle from envelope and place beneath patient’s genital area. Using the comb provided, comb<br />
pubic hair in downward strokes so that any loose hairs/debris will fall onto bindle. To reduce embarrassment and<br />
increase their sense of control, the patient may prefer to do the combing.<br />
2. Carefully remove bindle. Place comb in center and refold in manner to retain comb and any evidence present.<br />
3. Fill out information requested on envelope; replace bindle into envelope and seal.<br />
STEP 11 PULLED PUBIC HAIRS Control Sample<br />
1. Remove paper bindle from envelope. Using thumb and forefinger, not forceps, PULL, do not cut, 15 full length<br />
hairs from various areas of the pubic region and place pulled pubic hair in center of bindle and refold bindle.<br />
2. Fill out all information requested on envelope; replace bindle into envelope and seal.<br />
STEP 12 PERIANAL AND ANAL SWABS AND SMEAR <strong>Evidence</strong> <strong>Collection</strong><br />
NOTE: Do not stain or chemically fix smear. Swabs may be moistene d with 1 or 2 drops of water prior to collection. Take<br />
special care not to contaminate the patient’s anal area with debris from the vaginal area. Perianal swabs should be<br />
taken (even without history of anal contact) as secretions may pool in this area. If both sets of swabs are<br />
collected (perianal and anal), it is preferable to make the slide from the anal swabs.<br />
1. Remove all items from envelope. Follow either 2a or 2b below as needed.<br />
2a. If only perianal swabs are to be collected, proceed as follows: Using two swabs simultaneously, moisten<br />
if necessary with 1 or 2 drops of water and with a rolling motion carefully swab<br />
the perianal area. Using<br />
both swabs, prepare one smear on slide provided and allow to AIR DRY. (Smear should be confined to the<br />
10/1/2008
APPENDIX Q - 1<br />
circle area on the slide.) DO NOT DISCARD EITHER SWAB. When slide is dry, place in the slide mailer<br />
marked “Perianal/Anal”. Tape closed on one side only and fill out label on mailer indicating perianal area.<br />
Allow both swabs to AIR DRY. When swabs are dry, place in swab box marked “Perianal”.<br />
2b. If both perianal and anal swabs are to be collected, proceed as follows: Using two additional swabs<br />
simultaneously, moisten with 1 or 2 drops of water if necessary and with a rolling motion carefully swab the<br />
perianal area. Allow to air dry. Using two additional swabs simultaneously, gently swab the anal canal.<br />
Using both swabs, prepare one smear on slide provided and allow to AIR DRY. (Smear should be confined<br />
to the circle area on the slide.) DO NOT DISCARD EITHER SWAB. When slide is dry, place in the slide<br />
mailer marked “Perianal/Anal”. Tape closed on one side only and fill out label on mailer indicating anal<br />
area. When swabs are dry place in appropriate swab box marked “Perianal” or “Anal”.<br />
3. Fill out all information requested on the envelope; replace swab boxes and slide mailer into envelope and<br />
seal.<br />
STEP 13 VULVAR OR PENILE SWABS AND SMEAR<br />
<strong>Evidence</strong> <strong>Collection</strong><br />
1. Remove all items from envelope. Moisten swabs with 1-2 drops of water. Using both swabs<br />
simultaneously, with a rolling motion carefully swab the external genitalia including along the folds<br />
between the labia majora and labia minora in the female patient. For male patients, swab the penis and<br />
scrotum. Prepare one smear on the slide provided and allow to AIR DRY. (Smear should be confined to the<br />
circle area on the slide.) DO NOT DISCARD EITHER SWAB. Allow both swabs to AIR DRY.<br />
2. When swabs and slide are dry, place swabs in box marked “Vulvar/Penile”. Place slide in slide mailer<br />
marked “Vulvar/Penile”. Tape closed on one side only and fill out label on mailer. Circle appropriate<br />
collection area on swab box and slide mailer.<br />
3. Fill out all information on envelope to include possible type of secretion; replace swab box and slide mailer<br />
into envelope and seal.<br />
STEP 14<br />
VAGINAL SWABS AND SMEAR<br />
<strong>Evidence</strong> <strong>Collection</strong><br />
NOTE: Do not stain or chemically fix smear. Do not moisten swabs prior to sample collection. Take special care not<br />
contaminate the patient’s vaginal area with any debris from the anal area.<br />
It is generally unnecessary to use a speculum when evaluating injuries and collecting specimens in a prepubescent or<br />
young adolescent female. NEVER USE AN ADULT SIZE SPECULUM WHEN EXAMINING THESE PATIENTS. Even a<br />
pediatric speculum may cause further trauma. Specimens for culture and forensic analysis may be obtained by using a<br />
cotton-tipped applicator. In prepubescent children, a vaginal (not cervical) specimen is appropriate for STD culture. In<br />
cases where extensive injury or foreign bodies cannot be ruled out, or if the exam might cause further trauma to the child,<br />
or the child is too distressed to cooperate for the exam, an Examination Under Anesthesia (EUA) is recommended.<br />
1. Remove all items from envelope. Using two swabs simultaneously, carefully swab the vaginal vault. Allow both<br />
swabs to AIR DRY. When dry, place in swab box marked “Vaginal”.<br />
2. Using two additional swabs, repeat the swabbing procedure of the vaginal vault. Prepare one smear on the<br />
slide provided and allow to AIR DRY. (Smear should be confined to the circle area on the slide.) DO NOT<br />
DISCARD EITHER SWAB. When slide is dry, place in the slide mailer marked “vaginal”. Tape closed on one<br />
side only and fill out label on mailer. When swabs are dry place in swab box marked “Vaginal”. (If a speculum<br />
is used for this step, do not remove until next step is completed.)<br />
3. Fill out all information on envelope; replace swab boxes and slide mailer into envelope and seal.<br />
to<br />
STEP 15<br />
CERVICAL SWABS AND SMEAR<br />
<strong>Evidence</strong> <strong>Collection</strong><br />
NOTE: This step is particularly important if more than 12 hours have passed since the assault. Do not moisten swabs<br />
prior to sample collection. DO NOT COLLECT ON PREPUBERTAL CHILDREN.<br />
1. Remove all items from envelope. Using two swabs simultaneously, carefully swab the cervix and cervical os.<br />
Allow both swabs to AIR DRY. When dry, place in swab box marked “Cervical”.<br />
2. Using two additional swabs, repeat the swabbing procedure of the cervix and os. Prepare one smear on the<br />
slide provided and allow to AIR DRY. (Smear should be confined to the circle area on the slide.) DO NOT<br />
DISCARD EITHER SWAB. When slide is dry, place in the slide mailer marked “Cervical”.<br />
Tape closed on one<br />
side only and fill out label on mailer. When swabs are dry, place in swab box marked “Cervical”.<br />
10/1/2008
APPENDIX Q - 1<br />
3. Fill out all information on envelope; replace swab boxes and slide mailer into envelope and seal.<br />
FINAL INSTRUCTIONS<br />
1. Make sure each envelope used contains all requested items and information. Envelopes which were NOT used should<br />
bear a mark in the “NO” box next to the “Was sample collected?” line.<br />
2. Remove the Police <strong>Evidence</strong> Seal from the box. Return all evidence envelopes and instruction sheet to the kit box. If<br />
photographs were taken, do not include them in the kit. Include photos in the patient’s medical record, or release to<br />
investigating officer as determined by your institution’s policy.<br />
3. Do not include blood or urine in this kit. Sign the Police <strong>Evidence</strong> Seal and use it to seal the box.<br />
4. Fill out information requested on top of box in space provided for Hospital Personnel.<br />
5. Give sealed kit and clothing bags to the investigating officer. If officer is not present, place sealed kit in a secure area, in<br />
accordance with established protocol. Just as it is the responsibility of each facility to properly collect evidence in sexual<br />
assault cases, it is also their responsibility to ensure that evidence is properly maintained, and the chain of custody is<br />
documented. <strong>New</strong> <strong>York</strong> <strong>State</strong> Public Health Law 2805-i (Appendix A of the Protocol for the Acute Care of the Adult Patient<br />
Reporting <strong>Sexual</strong> Assault) requires that evidence be secured for 30 days.<br />
10/1/2008
APPENDIX Q - 2<br />
Patient information form<br />
Formulario de informacion sobre el paciente<br />
Patient Name/Nombre y apellido del paciente :<br />
Hospital Name/Norbre del hospital :<br />
Date of Examination/Fecha del examen:<br />
Examining Practitioner/Médico que practicó el examen:<br />
With your consent, a number of specimens were collected from you to provide evidence in court should the case be prosecuted.<br />
You may call at to discuss the release of disposition of the sexual offense<br />
evidence collected today. Additional tests were conducted as follows:<br />
Usted dio su autorización para que le sacaran muestras de laboratorio que, en caso de jucio, se presentarán como prueba ante lost<br />
tribunales. Usted puded llamar a al para hablar sobre la presentación o<br />
entrega de la muestra que le sacaron hoy como prueba del delito sexual. Además, le hicieron las siguientes pruebas :<br />
1. A blood test for syphilis/Análisis de sangre para detectar sifilis<br />
2. A blood test for Hepatitis B/Análisis de sangre para detectar hepatitis B<br />
3. Smear and culture for:/Frotis y cultivo de: Gonorrhea/Gonorrea<br />
Chlamydia/Clamidia<br />
Trichomonas/Tricomonas<br />
4. Other (specify)/Otras pruebas (indicar)<br />
Yes/Si<br />
No<br />
You were given medication as follows:/Le dieron lost siguientes medicamentos:<br />
Name of medication/Nombre del medicamento Dosage/Dosis For/Por<br />
Remarks:/Observaciones:<br />
You were not given any treatment medication because/No le hicieron tratamiento con medicamentos porque:<br />
You were given information/referrals for the following:/Le dieron la siguiente información/referencias:<br />
Rape Crisis Counseling/Apoyo psicológico por violación<br />
HIV/AIDS counseling and Testing/Apoyo psicológico y<br />
Para detectar el VIH/SIDA<br />
Crime Victims Compensation/Compensación a las<br />
Victimas de crimenes<br />
Other/Otras agencies<br />
Agency/Agencia<br />
An appointment was made for you at this hospital for follow-up medical treatment on<br />
Le dieron una hora en este hospital para el tratamiento médico subsiguiente el<br />
An appointment was made for you at this hospital for follow-up counseling on<br />
Le dieron una hora en este hospital para la sesión de apoyo psicológico subsiguiente el<br />
Number/Numero<br />
(date).<br />
(fecha).<br />
(date).<br />
(fecha).<br />
(Health Practioner Signature)/(Firma del profesional de la salud)<br />
I have received this Patient Information Form/He recibido este formulario de información sobre el paciente.<br />
(Patient/Parent/Guardian Signature)/(Firma del paciente/padre/madre/tutor)<br />
I do not wish to receive this form./No deseo recibir este formulario.<br />
(Patient/Parent/Guardian Signature)/(Firma del paciente/padre/madre/tutor)<br />
Distribute one copy to patient/Entregue una copia al paciente.<br />
File one copy in Medical Record/Archive una copia en la historia clinica
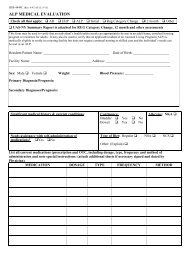
APPENDIX Q - 3<br />
Print Name or Use Patient Plate<br />
MEDICAL RECORD SEXUAL ASSAULT FORM<br />
I. HISTORY DATE OF VISIT TIME<br />
Significant past medical history:<br />
Approximate Time of Attack Is patient pregnant? LMP Medications<br />
Allergies<br />
Date of Attack<br />
Usual form of birth control<br />
Is patient bleeding from an injury? Yes<br />
No<br />
If yes, describe location:<br />
II. PHYSICAL EXAMINATION (Note all evidence/details of trauma):<br />
III. PELVIC/GENITOURINARY EXAM<br />
Ext/BUS/Hymen Cervix Adnexae Vagina Uterus Rectal<br />
Penis<br />
Scrotum<br />
IV. DIAGNOSTIC TESTS<br />
Pregnancy test GC Cultures (Pharyngeal Cervical Urethral<br />
Rectal ) VDRL Chlamydia Hepatitis B Other<br />
V. TREATMENT<br />
Tetanus Toxoid Pregnancy Prevention STI Prophylaxis Other<br />
VI. EVIDENCE COLLECTION<br />
<strong>Evidence</strong> collected? Y N <strong>Evidence</strong> kit released to law enforcement? Y N<br />
Written consent? Y N<br />
VII. FOLLOW UP APPOINTMENT<br />
1. Medical: (Adults should be seen within 2 weeks) 2. Counseling:<br />
Examining Health Practitioner:<br />
Signature<br />
Print Name<br />
Health Practitioner:<br />
Signature<br />
Print Name
APPENDIX Q - 4<br />
USE FRESH GLOVES FOR EACH STEP<br />
STEP 1 (<strong>Evidence</strong> <strong>Collection</strong>) ORAL SWABS AND SMEAR<br />
WAS SAMPLE COLLECTED? ______YES<br />
_____ NO<br />
Attach Patient’s Identification Label here, or enter<br />
PATIENT’S NAME:<br />
______________________________________________<br />
DATE COLLECTED:_____________<br />
TIME: _______________________<br />
COLLECTED BY: _______________________________________________________________<br />
NOTE: This step is to collect possible perpetrator DNA. Do not stain or chemically fix smear.<br />
Do not moisten swabs prior to sample collection.<br />
1. Using both swabs simultaneously, carefully swab the patient’s mouth and gum pockets.<br />
Using both swabs, prepare one smear. (Smear should be confined to the circle area on<br />
the slide.) Allow both swabs and slide to AIR DRY. DO NOT DISCARD EITHER SWAB.<br />
2. When slide is dry, write “oral” on slide and place slide in slide mailer marked “Oral”. Tape<br />
closed on one side only and fill out label on mailer. When swabs are dry, place in swab<br />
box marked “Oral”.<br />
3. Fill out all information requested on envelope, replace slide mailer and swab box into<br />
envelope and seal.<br />
1
APPENDIX Q - 4<br />
USE FRESH GLOVES FOR EACH STEP<br />
STEP 2 (Control Sample) BUCCAL SPECIMEN<br />
WAS SAMPLE COLLECTED? ______YES<br />
_____ NO<br />
Attach Patient’s Identification Label here, or enter<br />
PATIENT’S NAME:<br />
F<br />
______________________________________________<br />
DATE COLLECTED:______________<br />
TIME:__<br />
_______ ____<br />
COLLECTED BY: _______________________________________________________________<br />
NOTE: This step MUST be completed for DNA control sample of patient.<br />
1. Instruct the patient to rinse the inside of mouth with water, using vigorous swishing.<br />
2. Using the special swab from the envelope marked “Buccal Specimen”, collect a specimen<br />
by vigorously swabbing the inside mid-section of the cheek 15-20 times.<br />
3. Allow the swab to AIR DRY. When dry, place swab in box marked “Buccal Specimen”.<br />
4. Fill out all information requested on the envelope; replace swab box into envelope and<br />
seal.<br />
2
APPENDIX Q - 4<br />
USE FRESH GLOVES FOR EACH STEP<br />
STEP 3 (<strong>Evidence</strong> <strong>Collection</strong>) TRACE EVIDENCE<br />
WAS SAMPLE COLLECTED? ______YES<br />
_____ NO<br />
Attach Patient’s Identification Label here, or enter<br />
PATIENT’S NAME:<br />
_____________________________________________<br />
DATE COLLECTED:___________<br />
TIME:__ __ _______<br />
COLLECTED BY: ___________________________________________________________<br />
1. To minimize the loss of evidence, place one sheet of exam table paper on the floor and<br />
then place another piece of exam table paper on top of that. The patient should disrobe<br />
over the top exam table paper, preferably in the presence of the examiner.<br />
2. Fill out all information requested on envelope, carefully fold only top exam table paper<br />
and place into envelope and seal.<br />
3. Discard bottom exam table paper.<br />
3
APPENDIX Q - 4<br />
NO ENVELOPE FOR THIS STEP – INSTRUCTIONS ONLY<br />
STEP 4 (<strong>Evidence</strong> <strong>Collection</strong>) CLOTHING<br />
NOTE: Wet or damp clothing should be air dried before packaging. Do not cut through any<br />
existing holes, rips, or stains in patient’s clothing. Underwear is collected in next step; do not<br />
include underwear in this step.<br />
1. Clothing worn at the time of the assault should be assessed carefully for potential<br />
evidentiary value such as stains, tears, debris or foreign matter. If you are collecting<br />
patient’s clothing ensure she/he has access to other clothes.<br />
2. Do not shake clothing as microscopic evidence may be lost. Place each item into a<br />
SEPARATE PAPER bag (not provided). Each bag should be labeled before article of<br />
clothing is placed in bag, seal bag and initial by examiner. Individual bags can then be<br />
put into one bag. Label with patient’s name and type of items and tape bag closed.<br />
3. If patient has changed clothes after assault and intends to release the kit to law<br />
enforcement, ask if it is possible for the patient to bring the clothing to the law<br />
enforcement agency handling the investigation. Patient should be instructed to<br />
package each piece of clothing individually into paper bags.<br />
4
APPENDIX Q - 4<br />
USE FRESH GLOVES FOR EACH STEP<br />
STEP 5 (<strong>Evidence</strong> <strong>Collection</strong>) UNDERWEAR<br />
WAS SAMPLE COLLECTED? ______YES<br />
_____ NO<br />
Attach Patient’s Identification Label here, or enter<br />
PATIENT’S NAME:<br />
DATE COLLECTED:______________<br />
___________________________________________<br />
TIME:_<br />
________ ____<br />
COLLECTED BY: ____________________________________________________________<br />
NOTE: Wet or damp underwear should be AIR DRIED before packaging. Do not cut<br />
through existing holes, rips, or stains in patient’s underwear.<br />
1. Patient’s underwear should be collected regardless if it was worn at time of assault.<br />
2. Fill out all information requested on envelope; place underwear into envelope and seal.<br />
Ensure underwear envelope is put into kit.<br />
5
APPENDIX Q - 4<br />
USE FRESH GLOVES FOR EACH STEP<br />
STEP 6 (<strong>Evidence</strong> <strong>Collection</strong>) DEBRIS COLLECTION<br />
WAS SAMPLE COLLECTED? ______YES<br />
_____ NO<br />
IF YES, MUST DESCRIBE AREA(S) OF BODY COLLECTED FROM AND TYPE OF DEBRIS<br />
Area(s) of body:_____________________________________________________________<br />
Type of Debris: □hair □biological sample □unknown □other________________<br />
Attach Patient’s Identification Label here, or enter<br />
PATIENT’S NAME:<br />
DATE COLLECTED:______________<br />
___________________________________________<br />
TIME: _________ __<br />
__<br />
COLLECTED BY: ____________________________________________________________<br />
1. Remove and unfold paper bindle from Debris <strong>Collection</strong> envelope. Collect any foreign<br />
material found on patient’s body (leaves, fibers, glass, hair, etc.), and place in center of<br />
bindle. Refold in a manner to retain debris.<br />
2. Fill out all information requested on envelope; replace bindle into envelope and seal.<br />
6
APPENDIX Q - 4<br />
USE FRESH GLOVES FOR EACH STEP<br />
STEP 7 (<strong>Evidence</strong> <strong>Collection</strong>) DRIED SECRETIONS AND/OR BITE MARKS<br />
WAS SAMPLE COLLECTED? ______YES<br />
_____ NO<br />
IF YES, MUST DESCRIBE AREA(S) OF BODY & POSSIBLE TYPE OF SECRETION:<br />
Area(s) of Body:__________________________________________________________<br />
Type of Secretion: □saliva □semen □other □unknown__________________<br />
Attach Patient’s Identification Label here, or enter<br />
PATIENT’S NAME:<br />
___________________________________________<br />
DATE COLLECTED:_____________<br />
TIME: _<br />
________ ____<br />
COLLECTED BY: ____________________________________________________________<br />
1. If dried secretion and/or bite marks are found or suspected, moisten both swabs with 1-<br />
2 drops of water. Using both swabs simultaneously, with a rolling motion carefully<br />
swab the area.<br />
2. Allow both swabs to AIR DRY. When dry, place in swab box marked “Dried Secretions<br />
and/or Bite Marks”.<br />
3. Label outside of box indicating area of body swabbed and possible type of secretion.<br />
4. If additional dried secretion specimens are collected, use the second set of swabs and<br />
box provided and follow the procedure above; include the specimen in the kit.<br />
(Standard hospital swabs and white envelopes may be used as needed.)<br />
5. Fill out all information requested on envelope, replace swab boxes into envelope and<br />
seal.<br />
7
APPENDIX Q - 4<br />
USE FRESH GLOVES FOR EACH STEP<br />
STEP 8 (<strong>Evidence</strong> <strong>Collection</strong>) FINGERNAIL SCRAPINGS<br />
WAS SAMPLE COLLECTED? ______YES<br />
_____ NO<br />
Attach Patient’s Identification Label here, or enter<br />
PATIENT’S NAME:<br />
DATE COLLECTED:______________<br />
___________________________________________<br />
TIME: _<br />
________ ____<br />
COLLECTED BY: _____________________________________________________________<br />
BEFORE STARTING, MARK ONE BINDLE “LEFT” AND ONE “RIGHT”<br />
1. Left hand – Unfold one bindle and place on flat surface. Hold patient’s left hand over it<br />
while scraping under nails so that debris will fall onto bindle.<br />
2. When all fingers on left hand are done, place scraper in center of bindle. Refold to retain<br />
debris and scraper.<br />
3. Right hand – Follow same procedure used for left hand.<br />
4. Fill out information requested on envelope; replace both bindles into envelope and seal.<br />
8
APPENDIX Q - 4<br />
USE FRESH GLOVES FOR EACH STEP<br />
STEP 9 (Control Sample) PULLED HEAD HAIRS<br />
WAS SAMPLE COLLECTED? ______YES<br />
_____ NO<br />
Attach Patient’s Identification Label here, or enter<br />
PATIENT’S NAME:<br />
___________________________________________<br />
DATE COLLECTED:______________<br />
TIME: _<br />
__ ________ ____<br />
COLLECTED BY: ____________________________________________________________<br />
NOTE: Pulled Hair Samples Follow jurisdictional policy for collection of hair reference samples. Many<br />
jurisdictions do not collect pubic hair reference samples routinely and some do not collect head hair reference<br />
samples routinely during the exam. In other jurisdictions, both samples are collected routinely unless otherwise<br />
indicated or declined by patients. Whatever the jurisdictional policy, patients should always be informed about the<br />
purpose of collection, procedures used to collect samples, discomfort that may be involved, and how these<br />
samples may be used during the investigation and prosecution. If hair reference samples are not collected at the<br />
initial exam, it is important to inform patients that there might be a need to collect these samples for crime lab<br />
analysis at a later date. They should be aware that hair evidence collected at a later date may not be as<br />
conclusive as if it is collected at the time of the initial exam (e.g., due to fact that hair characteristics can change<br />
over time). When these samples are collected, the indications, timing, and techniques vary. Jurisdictional<br />
policies should be in place and followed. To alleviate any physical and emotional discomfort; many of the<br />
hairs needed for evidence comparison can be collected by gently combing scalp region with fingers,<br />
followed with light pulling so the looser hairs close to natural shedding are removed. Give patients the<br />
option of collecting sample themselves.<br />
1. Remove paper bindle from envelope. Using thumb and forefinger, not forceps, PULL,<br />
do not cut, 5 hairs from each of the following scalp locations (for a total of 25 hairs):<br />
center, front, back, left side, right side and place pulled hair in center of bindle and<br />
refold bindle.<br />
2. Fill out all information requested on the envelope; replace bindle into envelope and<br />
seal.<br />
9
APPENDIX Q - 4<br />
USE FRESH GLOVES FOR EACH STEP<br />
STEP 10 (<strong>Evidence</strong> <strong>Collection</strong>) PUBIC HAIR COMBINGS<br />
WAS SAMPLE COLLECTED? ______YES<br />
_____ NO<br />
Attach Patient’s Identification Label here, or enter<br />
PATIENT’S NAME:<br />
DATE COLLECTED:______________<br />
___________________________________________<br />
TIME: _<br />
________ ____<br />
COLLECTED BY: _____________________________________________________________<br />
1. Remove paper bindle from envelope and place beneath patient’s genital area. Using the<br />
comb provided, comb pubic hair in downward strokes so that any loose hairs or debris<br />
will fall onto bindle. To reduce embarrassment, and increase their sense of control, the<br />
patient may prefer to do the combing.<br />
2. Carefully remove bindle. Place comb in center and refold in manner to retain comb and<br />
any evidence present.<br />
3. Fill out all information requested on envelope; replace bindle into envelope and seal.<br />
10
APPENDIX Q - 4<br />
USE FRESH GLOVES FOR EACH STEP<br />
STEP 11 (Control Sample) PULLED PUBIC HAIRS<br />
WAS SAMPLE COLLECTED? ______YES _____ NO _____ N/A (No pubic hair)<br />
Attach Patient’s Identification Label here, or enter<br />
PATIENT’S NAME:<br />
DATE COLLECTED:______________<br />
___________________________________________<br />
TIME: _<br />
________ ____<br />
COLLECTED BY: ____________________________________________________________<br />
NOTE: Pulled Hair Samples Follow jurisdictional policy for collection of hair reference samples. Many<br />
jurisdictions do not collect pubic hair reference samples routinely and some do not collect head hair reference<br />
samples routinely during the exam. In other jurisdictions, both samples are collected routinely unless otherwise<br />
indicated or declined by patients. Whatever the jurisdictional policy, patients should always be informed about the<br />
purpose of collection, procedures used to collect samples, discomfort that may be involved, and how these<br />
samples may be used during the investigation and prosecution. If hair reference samples are not collected at the<br />
initial exam, it is important to inform patients that there might be a need to collect these samples for crime lab<br />
analysis at a later date. They should be aware that hair evidence collected at a later date may not be as<br />
conclusive as if it is collected at the time of the initial exam (e.g., due to fact that hair characteristics can change<br />
over time). When these samples are collected, the indications, timing, and techniques vary. Jurisdictional<br />
policies should be in place and followed. To alleviate any physical and emotional discomfort; many of the<br />
hairs needed for evidence comparison can be collected by gently combing the pubic region with fingers,<br />
followed with light pulling so the looser hairs close to natural shedding are removed. Give patients the<br />
option of collection sample themselves.<br />
1. Remove paper bindle from envelope. Using thumb and forefinger, not forceps, PULL,<br />
do not cut, 15 full length hairs from various areas of the pubic region and place pulled<br />
pubic hair in center of bindle and refold bindle.<br />
2. Fill out all information requested on the envelope; replace bindle into envelope and<br />
seal.<br />
11
APPENDIX Q - 4<br />
USE FRESH GLOVES FOR EACH STEP<br />
STEP 12 (<strong>Evidence</strong> <strong>Collection</strong>) PERIANAL AND ANAL SWABS & SMEAR<br />
WAS PERIANAL SAMPLE COLLECTED? ______YES _____ NO<br />
WAS ANAL SAMPLE COLLECTED? ______YES _____ NO<br />
Attach Patient’s Identification Label here, or enter<br />
PATIENT’S NAME:<br />
DATE COLLECTED:______________<br />
___________________________________________<br />
TIME: _<br />
________ ____<br />
COLLECTED BY: _____________________________________________________________<br />
NOTE: Do not stain or chemically fix smear. Swabs may be moistened with 1 or 2 drops of<br />
water prior to collection. Take special care not to contaminate the patient’s anal area with<br />
debris from the vaginal area. Perianal swabs should be taken (even without history of anal<br />
contact) as secretions may pool in this area. If both sets of swabs are collected (perianal<br />
and anal), it is preferable to make the slide from the anal swabs.<br />
1. Remove all items from envelope. Follow either 2a or 2b below as needed.<br />
2a. If only perianal swabs are to be collected, proceed as follows: Using two swabs<br />
simultaneously, moisten if necessary with 1 or 2 drops of water and with a rolling motion carefully<br />
swab the perianal area. Using both swabs, prepare one smear on slide provided and allow to<br />
AIR DRY. (Smear should be confined to the circle area on the slide.) DO NOT DISCARD<br />
EITHER SWAB. When slide is dry, place in the slide mailer marked “Perianal/Anal”. Tape<br />
closed on one side only and fill out label on mailer indicating perianal area. Allow both swabs to<br />
AIR DRY. When swabs are dry, place in swab box marked “Perianal”.<br />
2b. If both perianal and anal swabs are to be collected, proceed as follows: Using two additional<br />
swabs simultaneously, moisten with 1 or 2 drops of water if necessary and with a rolling motion<br />
carefully swab the perianal area. Allow to air dry. Using two additional swabs simultaneously,<br />
gently swab the anal canal. Using both swabs, prepare one smear on slide provided and allow to<br />
AIR DRY. (Smear should be confined to the circle area on the slide.) DO NOT DISCARD<br />
EITHER SWAB. When slide is dry, place in the slide mailer marked “Perianal/Anal”. Tape<br />
closed on one side only and fill out label on mailer indicating anal area. When swabs are dry<br />
place in appropriate swab box marked “Perianal” or “Anal”.<br />
3. Fill out all information requested on the envelope; replace swab boxes and slide mailer into<br />
envelope and seal.<br />
12
APPENDIX Q - 4<br />
USE FRESH GLOVES FOR EACH STEP<br />
STEP 13 (<strong>Evidence</strong> <strong>Collection</strong>) VULVAR OR PENILE SWABS & SMEAR<br />
WAS SAMPLE COLLECTED? ______YES<br />
_____ NO<br />
Type of possible collection: □saliva □semen □other □unknown______________<br />
Attach Patient’s Identification Label here, or enter<br />
PATIENT’S NAME:<br />
DATE COLLECTED:______________<br />
___________________________________________<br />
TIME: _<br />
________ ____<br />
COLLECTED BY: ____________________________________________________________<br />
1. Moisten swabs with 1-2 drops of water. Using both swabs simultaneously, with a<br />
rolling motion swab the external genitalia including along the folds between the labia<br />
majora and labia minora in the female patient. For male patients, swab the penis and<br />
scrotum. Prepare one smear on the slide provided and AIR DRY. (Smear should be<br />
confined to the circle area on the slide.) DO NOT DISCARD EITHER SWAB. Allow<br />
both swabs to AIR DRY.<br />
2. When swabs and slide are dry, place both swabs in box marked “Vulvar/Penile.” Place<br />
slide in slide mailer marked “Vulvar/Penile”. Tape closed on one side only and fill out<br />
label on mailer. Circle appropriate collection; e.g. vulvar or penile area on swab box<br />
and slide mailer.<br />
3. Fill out all information requested on the envelope; replace swab box and slide mailer<br />
into envelope and seal.<br />
13
APPENDIX Q - 4<br />
USE FRESH GLOVES FOR EACH STEP<br />
STEP 14 (<strong>Evidence</strong> <strong>Collection</strong>) VAGINAL SWABS AND SMEAR<br />
WAS SAMPLE COLLECTED? ______YES<br />
_____ NO<br />
Attach Patient’s Identification Label here, or enter<br />
PATIENT’S NAME:<br />
DATE COLLECTED:______________<br />
___________________________________________<br />
TIME: _<br />
________ ____<br />
COLLECTED BY: ____________________________________________________________<br />
NOTE: Do not stain or chemically fix smear. Do not moisten swabs prior to sample collection.<br />
It is generally unnecessary to use a speculum when evaluating injuries and collecting<br />
specimens in a prepubescent or young adolescent female. Never use an adult size<br />
speculum when examining these patients. See instruction for more detail. Take special<br />
care not to contaminate the patient’s vaginal area with any debris from the anal area.<br />
1. Remove all items from envelope. Using two swabs simultaneously, carefully swab<br />
the vaginal vault. Allow BOTH swabs to AIR DRY. When dry, place swabs in swab box<br />
marked “Vaginal”.<br />
2. Using the two additional swabs provided, repeat the swabbing procedure of the vaginal<br />
vault. Prepare one smear on the slide provided and AIR DRY. (Smear should be<br />
confined to the circle area on the slide.) DO NOT DISCARD EITHER SWAB. When<br />
slide is dry, place in slide mailer marked “Vaginal”. Tape closed on one side only and<br />
fill out label on mailer. When swabs are dry, place in swab box marked “Vaginal”. (If a<br />
Speculum is used for this step, do not remove until next step is completed.)<br />
3. Fill out all information requested on the envelope; replace swab boxes and slide mailer<br />
into envelope and seal.<br />
14
APPENDIX Q - 4<br />
USE FRESH GLOVES FOR EACH STEP<br />
STEP 15 (<strong>Evidence</strong> <strong>Collection</strong>) CERVICAL SWABS AND SMEAR<br />
WAS SAMPLE COLLECTED? ______YES<br />
_____ NO<br />
Attach Patient’s Identification Label here, or enter<br />
PATIENT’S NAME:<br />
DATE COLLECTED:_____________<br />
___________________________________________<br />
TIME: _<br />
________ ____<br />
COLLECTED BY: ____________________________________________________________<br />
NOTE: This step is particularly important if more than 12 hours have passed since the<br />
assault. Do not moisten swabs prior to sample collection. DO NOT COLLECT ON<br />
PREPUBERTAL CHILDREN<br />
1. Remove all items from envelope. Using two swabs simultaneously, swab the cervix<br />
and cervical os. Allow both swabs to AIR DRY. When dry, place in swab box marked<br />
“Cervical”.<br />
2. Using two additional swabs, repeat the swabbing procedure of the cervix and cervical<br />
os. Prepare one smear on the slide provided and allow to AIR DRY. (Smear should be<br />
confined to the circle area on the slide.) DO NOT DISCARD EITHER SWAB. When<br />
slide is dry, place in the slide mailer marked “Cervical”. Tape closed on one side only<br />
and fill out label on mailer. When swabs are dry, place in swab box marked “Cervical”.<br />
3. Fill out all information requested on envelope; replace swab boxes and slide mailer into<br />
envelope and seal.<br />
15
APPENDIX Q - 4<br />
FINAL INSTRUCTIONS<br />
1. Make sure each envelope used contains all requested items and information.<br />
Envelopes which were NOT used should bear a mark on the “NO” box next to the<br />
“Was sample collected?” line.<br />
2. Remove the Police <strong>Evidence</strong> Seal from the box. Return all evidence envelopes and<br />
instruction sheet to the kit box. If photographs were taken, do not include them in<br />
the kit. Include photos in the patient’s medical record, or release to investigating<br />
officer as determined by your institution’s policy.<br />
3. Do not include blood or urine in this kit.<br />
4. Sign the Police <strong>Evidence</strong> Seal and use it to seal the box.<br />
5. Fill out information requested on top of box in space provided for Hospital Personnel.<br />
6. Give sealed kit and clothing bags to the investigation officer. If officer is not present,<br />
place sealed kit in a secure area, in accordance with established protocol. Just as it is<br />
the responsibility of each facility to properly collect evidence in sexual assault cases, it<br />
is also their responsibility to ensure that evidence is properly maintained, and the chain<br />
of custody is documented. <strong>New</strong> <strong>York</strong> <strong>State</strong> Public Health Law 2805-i (Appendix A of<br />
the Protocol for the Acute Care of the Adult Patient Reporting <strong>Sexual</strong> Assault) requires<br />
that evidence be secured for 30 days.<br />
16
APPENDIX Q - 5<br />
A health care assessment and evaluation must be offered to all patients reporting sexual assault, regardless of the<br />
length of time which may have elapsed between the assault and the examination. (If the assault occurred within 96<br />
hours, a <strong>New</strong> <strong>York</strong> <strong>State</strong> <strong>Sexual</strong> Assault <strong>Evidence</strong> <strong>Collection</strong> <strong>Kit</strong> is used. If it is determined that the assault took place<br />
more than 96 hours prior to the examination, the use of an evidence collection kit is generally not necessary.)<br />
Mfg.<br />
By:<br />
240 O’Conner Street<br />
Wellsville, NY 14895<br />
585-593-6645 ext. 321<br />
<strong>Sexual</strong> <strong>Offense</strong><br />
<strong>Evidence</strong> <strong>Collection</strong> <strong>Kit</strong><br />
FOR HOSPITAL PERSONNEL<br />
This kit may be ordered for VICTIM <strong>Evidence</strong> <strong>Collection</strong> at this website:<br />
http://www.criminaljustice.state.ny.us/ofpa/evidencekit.htm or by calling 518-457-9726<br />
This kit can be purchased at PWI directly for SUSPECT <strong>Evidence</strong> <strong>Collection</strong>.<br />
PATIENT’S NAME: _____________________________________________<br />
FEMALE _______ MALE ________ DOB: ___________________<br />
HOSPITAL NAME:_____________________________________________<br />
IF THIS SEAL IS BROKEN<br />
THE KIT MAY STILL BE USED IF<br />
CONTENT BAG IS STILL INTACT.<br />
<strong>Evidence</strong> Secured By: _______________________________ Date: _______<br />
Time <strong>Kit</strong> Opened: ___________________am/pm<br />
<strong>Kit</strong> Sealed by:______________________________________ Date:_______<br />
Time <strong>Kit</strong> Sealed: ____________________am/pm<br />
OTHER EVIDENCE TAKEN: YES_____ NO _____ # OF PARCELS:______________<br />
PLACE KIT IN SECURED AREA AFTER USE<br />
FOR ALL WHO HANDLE KIT<br />
CHAIN OF CUSTODY<br />
RECEIVED BY__________________________DATE________TIME_______ AM PM<br />
RECEIVED BY__________________________DATE________TIME_______ AM PM<br />
RECEIVED BY__________________________DATE________TIME_______ AM PM<br />
RECEIVED BY__________________________DATE________TIME_______ AM PM<br />
DELIVER TO CRIME LAB AS SOON AS POSSIBLE<br />
FOR FORENSIC LAB PERSONNEL ONLY<br />
LAB CASE NUMBER ________________________________________________________<br />
POLICE CASE NUMBER_____________________________________________________<br />
NO BLOOD OR URINE SHOULD BE<br />
INCLUDED IN THIS KIT