Stratum VRS (Model VR1000) - Owners Manual - Pool Center
Stratum VRS (Model VR1000) - Owners Manual - Pool Center
Stratum VRS (Model VR1000) - Owners Manual - Pool Center

You also want an ePaper? Increase the reach of your titles
YUMPU automatically turns print PDFs into web optimized ePapers that Google loves.
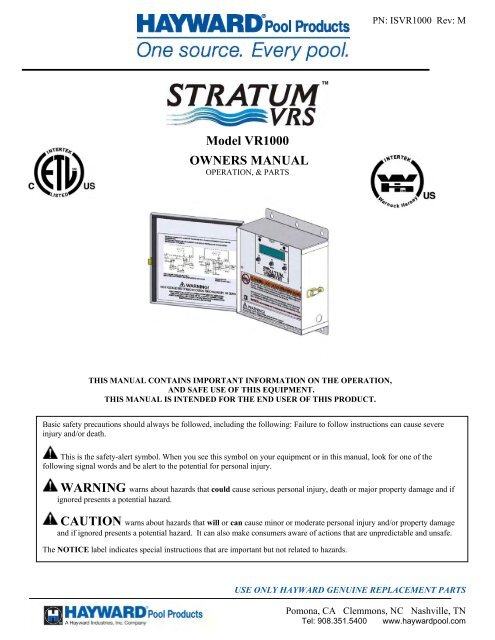
PN: IS<strong>VR1000</strong> Rev: M<br />
<strong>Model</strong> <strong>VR1000</strong><br />
OWNERS MANUAL<br />
OPERATION, & PARTS<br />
THIS MANUAL CONTAINS IMPORTANT INFORMATION ON THE OPERATION,<br />
AND SAFE USE OF THIS EQUIPMENT.<br />
THIS MANUAL IS INTENDED FOR THE END USER OF THIS PRODUCT.<br />
Basic safety precautions should always be followed, including the following: Failure to follow instructions can cause severe<br />
injury and/or death.<br />
This is the safety-alert symbol. When you see this symbol on your equipment or in this manual, look for one of the<br />
following signal words and be alert to the potential for personal injury.<br />
WARNING warns about hazards that could cause serious personal injury, death or major property damage and if<br />
ignored presents a potential hazard.<br />
CAUTION warns about hazards that will or can cause minor or moderate personal injury and/or property damage<br />
and if ignored presents a potential hazard. It can also make consumers aware of actions that are unpredictable and unsafe.<br />
The NOTICE label indicates special instructions that are important but not related to hazards.<br />
USE ONLY HAYWARD GENUINE REPLACEMENT PARTS<br />
Pomona, CA Clemmons, NC Nashville, TN<br />
Tel: 908.351.5400 www.haywardpool.com
Page 2 of 16 STRATUM <strong>Model</strong> <strong>VR1000</strong> P/N: IS<strong>VR1000</strong> Rev: M<br />
IMPORTANT SAFETY INSTRUCTIONS<br />
READ AND FOLLOW ALL INSTRUCTIONS IN THIS OWNER’S MANUAL<br />
AND ON EQUIPMENT.<br />
Before installing or servicing this electrical equipment, turn power supply OFF.<br />
KEEP SAFETY LABELS IN GOOD CONDITION AND<br />
REPLACE IF MISSING OR DAMAGED.<br />
WARNING – To reduce risk of injury, do not permit children to use or climb on the pumps and filters. Closely supervise children at all<br />
times. Components such as the filtration system, pumps, and heaters must be positioned to prevent children from using them as a means of access to<br />
the pool.<br />
CAUTION – This vacuum release system is intended for use on permanently installed swimming pools and may also be used with hot<br />
tubs and spas. Do NOT use with storable pools. A permanently installed pool is constructed in or on the ground or in a building such that it<br />
cannot be readily disassembled for storage. A storable pool is constructed so that it is capable of being readily disassembled for storage and<br />
reassembled to its original integrity.<br />
Though this product is designed for outdoor use, it is strongly recommended to protect the electrical components from the weather. Select a welldrained<br />
area, one that will not flood when it rains. It requires free circulation of air for cooling. Do not install in a damp or non-ventilated location. If<br />
installed within an outer enclosure or beneath the skirt of a hot tub or spa, adequate ventilation and free circulation of air must be provided to prevent<br />
overheating of the components.<br />
WARNING – All electrical wiring MUST be in conformance with all applicable local codes, regulations, and the<br />
National Electrical Code (NEC). Risk of Electric Shock. Hazardous voltage can shock, burn, cause death or serious property<br />
damage. To reduce the risk of electric shock, do NOT use an extension cord to connect unit to electric supply. Provide a<br />
properly located outlet. All electrical wiring MUST be in conformance with applicable local and national codes and<br />
regulations. Before working on pump or motor, turn off power supply to the pump.<br />
WARNING – To reduce the risk of electric shock replace damaged wiring immediately. Locate conduit to prevent abuse from lawn<br />
mowers, hedge trimmers and other equipment.<br />
WARNING – All electrical wiring MUST be in conformance with all applicable local codes, regulations, and the National Electrical Code<br />
(NEC) including a Ground Fault Circuit Interrupter (GFCI) in circuit. For size of GFCI required and test procedures for GFCI, see<br />
manufacturer’s instructions. Pump MUST be permanently connected to GFCI.<br />
WARNING – Failure to bond pump to pool structure will increase risk for electrocution and could result in injury or death. To reduce the<br />
risk of electric shock, the electrician must comply with installation instructions and must bond the pump accordingly. In addition, the electrician<br />
must also conform to local electrical codes for bonding requirements.<br />
Notes to the electrician:<br />
Use a solid copper conductor, size 8 or larger. Run a continuous wire from external bonding lug to reinforcing rod or mesh. Connect a No. 8 AWG<br />
(8.4 mm 2 ) solid copper bonding wire to the pressure wire connector provided on the motor housing and to all metal parts of swimming pool, spa, or<br />
hot tub, and to all electrical equipment, metal piping (except gas piping), and conduit within 5 ft. (1.5 m) of inside walls of swimming pool, spa, or<br />
hot tub. IMPORTANT - Reference NEC codes for all wiring standards including, but not limited to, grounding, bonding and other general wiring<br />
procedures. NOTE - The National Electrical Code (NEC) permits use of a cord with a maximum 3 ft. (1 m) length. If your pump is equipped with a<br />
cord complying with the NEC, the preceding four (4) hazards apply.<br />
WARNING – Suction Entrapment Hazard.<br />
Suction in suction outlets and/or suction outlet covers which are, damaged, broken, cracked, missing, or unsecured can cause severe injury<br />
and/or death due to the following entrapment hazards:<br />
Hair Entrapment- Hair can become entangled in suction outlets.<br />
Limb Entrapment- A limb inserted into an opening of a suction outlet or suction outlet cover that is damaged, broken, cracked, missing,<br />
or not securely attached can result in a mechanical bind or swelling of the limb.<br />
Body Suction Entrapment- A differential pressure applied to a large portion of the body or limbs can result in an entrapment.<br />
Evisceration/ Disembowelment - A negative pressure applied directly to the intestines through an unprotected suction outlet sump or<br />
suction outlet cover which is damaged, broken, cracked, missing, or unsecured can result in evisceration (disembowelment).<br />
Mechanical Entrapment- There is potential for jewelry, swimsuit, hair decorations, finger, toe or knuckle to be caught in an opening of a<br />
suction outlet or suction outlet cover resulting in mechanical entrapment.<br />
USE ONLY HAYWARD GENUINE REPLACEMENT PARTS<br />
Pomona, CA Clemmons, NC Nashville, TN<br />
Tel: 908.351.5400 www.haywardpool.com
Page 3 of 16 STRATUM <strong>Model</strong> <strong>VR1000</strong> P/N: IS<strong>VR1000</strong> Rev: M<br />
o<br />
o<br />
o<br />
o<br />
o<br />
WARNING - To reduce the risk of entrapment hazards:<br />
o When suction outlets are less than a 18” x 23” equivalent, a minimum of two functioning suction outlets per pump<br />
must be installed. Suction outlets in the same plane (i.e. floor or wall), must be installed a minimum of three feet<br />
(3’) [1 meter] apart, as measured from near point to near point.<br />
o Dual suction outlets shall be placed in such locations and distances to avoid “dual blockage” by a user.<br />
Dual suction fittings shall not be located on seating areas or on the backrest for such seating areas.<br />
The maximum system flow rate shall not exceed the flow rating of any listed (per current revision of ASME/ANSI A112.19.8) suction<br />
outlet cover installed.<br />
Never use the <strong>Pool</strong> or Spa if any suction outlet component is damaged, broken, cracked, missing, or not securely attached.<br />
Replace damaged, broken, cracked, missing, or not securely attached suction outlet components immediately.<br />
In addition two or more suction outlets per pump installed in accordance with latest APSP (formally NSPI) Standards and CPSC<br />
guidelines, follow all National, State, and Local codes applicable.<br />
This vacuum release system is designed to prevent body suction entrapment, but not evisceration.<br />
WARNING – Failure to remove pressure test plugs and/or plugs used in winterization of the pool/spa from the suction outlets<br />
can result in an increase potential for suction entrapment as described above.<br />
WARNING – Failure to keep suction outlet components clear of debris, such as leaves, dirt, hair, paper and other material<br />
can result in an increase potential for suction entrapment as described above.<br />
WARNING – Suction outlet components have a finite life, the cover/grate should be inspected frequently and replaced at<br />
least every ten years or if found to be damaged, broken, cracked, missing, or not securely attached.<br />
WARNING – All suction and discharge valves MUST be OPEN when starting the circulation system. Failure to do so could result<br />
in severe personal injury and/or property damage. All drains and suction outlets MUST have properly installed covers, securely attached using<br />
the screws supplied with the covers. If screws are lost, order replacement parts from your supplier.<br />
WARNING – Hazardous Pressure. <strong>Pool</strong> and spa water circulation systems operate under hazardous pressure during<br />
start up, normal operation, and after pump shut off. Stand clear of circulation system equipment during pump start up. Failure to<br />
follow safety and operation instructions could result in violent separation of the pump housing and cover due to pressure in the<br />
system, which could cause property damage, severe personal injury, or death. Before servicing pool and spa water circulation<br />
system, all system and pump controls must be in off position and filter manual air relief valve must be in open position. Before<br />
starting system pump, all system valves must be set in a position to allow system water to return back to the pool. Do not change<br />
filter control valve position while system pump is running. Before starting system pump, fully open filter manual air relief valve.<br />
Do not close filter manual air relief valve until a steady stream of water (not air or air and water) is discharged.<br />
WARNING – Separation Hazard. Failure to follow safety and operation instructions could result in violent<br />
separation of pump components. Strainer cover must be properly secured to pump housing with strainer cover lock ring. Before<br />
servicing pool and spa circulation system, manual air relief valve must be in open position. Do not operate pool and spa<br />
circulation system if a system component is not assembled properly, damaged, or missing. Do not operate pool and spa<br />
circulation system unless filter air relief valve body is in locked position in filter upper body.<br />
WARNING – Never operate or test the circulation system at more than 40 PSI.<br />
WARNING – Fire and burn hazard. Motors operate at high temperatures and if they are not properly isolated from any flammable<br />
structures or foreign debris they can cause fires, which may cause severe personal injury or death. It is also necessary to allow the motor to cool<br />
for at least 20 minutes prior to maintenance to minimize the risk of burns.<br />
WARNING – Failure to install according to defined instructions may result in severe personal injury or death.<br />
DEFINITIONS:<br />
Suction Outlet – The term Suction Outlet is a fitting, fitting assembly, cover/grate and related components that provide a means for water to exit the<br />
pool and into the pump circulating system.<br />
Inches of Mercury (in Hg) - A unit for measuring pressure below atmospheric (“suction” or “vacuum”) (1.0 inch Hg = .491 PSI)<br />
Main Drain – See Suction Outlet<br />
PSI – An abbreviation for pounds per square inch.<br />
USE ONLY HAYWARD GENUINE REPLACEMENT PARTS<br />
Pomona, CA Clemmons, NC Nashville, TN<br />
Tel: 908.351.5400 www.haywardpool.com
Page 4 of 16 STRATUM <strong>Model</strong> <strong>VR1000</strong> P/N: IS<strong>VR1000</strong> Rev: M<br />
General Information:<br />
The <strong>VR1000</strong> Vacuum Release System is designed as a pump controller. The system will protect pool and spa equipment from certain<br />
mechanical failures, such as clogged drains and pipe breakage; which can cause premature pump motor failure. The system monitors<br />
and recognizes a change in pressure and electrical power. When a change occurs, it will shut down the pump, and vent the suction<br />
line. Automatic soft start should provide notice to swimmers or bathers on pump startup. The <strong>VR1000</strong> meets the requirements of<br />
ASTM Specification F2387-04. Meets ASME Standard 112.19.17. Meets UL Std 1563 as well as certified to Can/CSA Std. C27.2<br />
No. 218.1.<br />
The <strong>VR1000</strong> system will automatically restart in most instances. Should a manual restart be required, pressing the “OK” button will<br />
restart the system. “Unprotected Mode” Mode can be entered, after restart, by holding “NO” & “OK” buttons. “Unprotected<br />
Mode” mode lasts 30 minutes, providing NO protection for swimmers or bathers. DO NOT ALLOW SWIMMERS OR<br />
BATHERS IN THE POOL OR SPA WHEN THE SYSTEM IS IN “UNPROTECTED” MODE.<br />
For proper installation and to avoid unnecessary service calls, read this manual carefully and completely.<br />
WARNING – This product should be installed and serviced only by a qualified professional. Failure to install and/or<br />
operate according to defined instructions and/or use of non-Hayward replacement parts will void the warranty.<br />
CAUTION – All electrical wiring MUST be in conformance with all applicable local codes, regulations, and the National<br />
Electrical Code (NEC).<br />
Introduction:<br />
This manual contains information for the proper operation of the Hayward <strong>VR1000</strong> Vacuum Release System. The<br />
instructions in this manual MUST be followed precisely.<br />
NOTICE – The <strong>VR1000</strong> is rated for 115 VAC 50/60Hz for up to a 1 horsepower pump motor or 208/230 VAC<br />
50/60Hz for up to a 3 horsepower pump motor.<br />
FIG 1<br />
USE ONLY HAYWARD GENUINE REPLACEMENT PARTS<br />
Pomona, CA Clemmons, NC Nashville, TN<br />
Tel: 908.351.5400 www.haywardpool.com
Page 5 of 16 STRATUM <strong>Model</strong> <strong>VR1000</strong> P/N: IS<strong>VR1000</strong> Rev: M<br />
FIG 2<br />
FIG 3<br />
Internal Control<br />
External<br />
FIG 5<br />
FIG 4<br />
Internal<br />
Control<br />
FIG 6<br />
FIG 7<br />
THREE PHASE PUMP MOTOR<br />
USE ONLY HAYWARD<br />
SUGGESTED<br />
GENUINE<br />
CONNECTION<br />
REPLACEMENT PARTS<br />
Pomona, CA Clemmons, NC Nashville, TN<br />
Tel: 908.351.5400 www.haywardpool.com
Page 6 of 16 STRATUM <strong>Model</strong> <strong>VR1000</strong> P/N: IS<strong>VR1000</strong> Rev: M<br />
CUSTOMER SCREENS ON <strong>VR1000</strong><br />
HAYWARD POOL<br />
PRODUCTS<br />
02-02-07<br />
12:00 P.M.<br />
No Action Required<br />
No Action Required<br />
SET TIME AND<br />
DATE? Y/N<br />
SET TIMER<br />
EVENTS Y/N<br />
SELECT POOL<br />
TECH. MODE? Y/N<br />
No Action Required. However, setting the time and date can be done at this time.<br />
(If the date and time is not maintained from the last time it was set, the battery<br />
needs to be replaced.) If “YES” follow screen instructions<br />
SET TIMER EVENTS is the only used when the <strong>VR1000</strong> has been set to allow<br />
control of pump on/off times.(or with use of a 2-speed pump) See Page 8 for screen<br />
information.<br />
No Action Required. Defaults to “CUSTOMER Mode” in 5 seconds.<br />
See Technician <strong>Manual</strong> for options.<br />
The following screens are shown for information only:<br />
HAYWARD <strong>VR1000</strong><br />
CALIBRATING<br />
<strong>VR1000</strong> VER X.X<br />
STARTING PUMP<br />
<strong>VR1000</strong> VER X.X<br />
STABILIZING<br />
<strong>VR1000</strong> VER X.X<br />
MONITORING<br />
CUSTOMER SCREENS showing errors and exceptions:<br />
<strong>VR1000</strong> VER X.X<br />
STOP SWITCH<br />
<strong>VR1000</strong> VER X.X<br />
S/S VENT ERROR<br />
<strong>VR1000</strong> VER X.X<br />
NO STABILIZATION<br />
<strong>VR1000</strong> VER X.X<br />
SELF TEST<br />
The system will not start if the optional “STOP Switch” is pressed in.<br />
Action Required: Reset “STOP Switch”<br />
Sensor/Solenoid Venting Error. Remove and clean or replace the vent plug.<br />
(This is the cone shaped device on the exterior/bottom of the box.) (See Fig 1) If<br />
vent cleaning/replacement does not correct the problem, replace the solenoid<br />
valve (See Fig 7). If neither option corrects the problem, replace the unit.<br />
“No Stabilization" indicates that there is likely a problem with the pump. The<br />
pump basket should be checked for debris. Other pumping issues can cause<br />
stabilization problems.<br />
Self Test Indicates the system is checking itself for proper operation of its<br />
components. The pump may cycle and restart. No action is required.<br />
USE ONLY HAYWARD GENUINE REPLACEMENT PARTS<br />
Pomona, CA Clemmons, NC Nashville, TN<br />
Tel: 908.351.5400 www.haywardpool.com
Page 7 of 16 STRATUM <strong>Model</strong> <strong>VR1000</strong> P/N: IS<strong>VR1000</strong> Rev: M<br />
<strong>VR1000</strong> OVER<br />
WINDOW VACUUM<br />
<strong>VR1000</strong> UNDER<br />
WINDOW VACUUM<br />
HIGH VACUUM<br />
ALERT<br />
SYSTEM WON'T<br />
STABILIZE<br />
TOO MANY SEN/SOL<br />
ERRS OR NO PRIME<br />
Over Window Vacuum indicates a vacuum level detected that is above normal for<br />
the pool system. The system should restart.<br />
Under Vacuum Window indicates a problem with the inlet water flow to the<br />
pump. Low volume flow can be caused by line breaks, or low water levels. The<br />
system should restart.<br />
High Vacuum Alert indicates the system has stopped the pump, vented, and set<br />
off the alarm.<br />
CUSTOMER ACTION IS REQUIRED. Clear the cause of the problem. Then<br />
press the “OK” button to restart the system.<br />
System Won't Stabilize indicates the system has stopped the pump three times and<br />
set off the alarm.<br />
CUSTOM ACTION IS REQUIRED. Clear the cause of the problem. Then<br />
press the “OK” button to restart the system.<br />
Too Many Sen/Sol Errs Or No Prime indicates the system has vented and stopped<br />
the pump three times and set off the alarm.<br />
CUSTOM ACTION IS REQUIRED. Clear the cause of the problem. Then<br />
press the “OK” button to restart the system.<br />
• If the <strong>VR1000</strong> has shut the pump down due to “HIGH VACUUM” and does not restart, due to debris in<br />
the suction line, the line must be cleared. This is normally done through the use of a garden hose or other<br />
method.<br />
• If the green light is on, and the Red light is on with the Pump not running during a normal operational time<br />
cycle, it is suggested that cutting the power to the system and then restoring the power will reset the system.<br />
(This will assure the system program is operating.)<br />
• The green light indicates power is on.<br />
• The combination of a green light on and a yellow light on indicates that the system is monitoring the pool,<br />
but the screen has been turned off due to a high temperature internally in the box.<br />
CUSTOMER ACCESSIBLE MODES<br />
To initiate a self-test through the use of the push buttons on the display push button “OK/MENU” and<br />
release. This only causes the system test in “RUN MODE”. The self test is run by the customer just to<br />
confirm the <strong>VR1000</strong> is actively protecting the pool/spa. The system should restart and stabilize.<br />
SET TIME AND<br />
DATE? Y/N<br />
Set the time of day clock. In normal operation the time of day will be displayed on<br />
the LCD.<br />
When the board is first powered up the time and date are displayed. Pushing the<br />
“Menu” button will step through the date and time of day set up.<br />
Pushing the “NO” will go to next step. (5 Seconds of inactivity will go to next step.)<br />
“YES” follow screen instructions.<br />
NOTE: If system does not maintain date and time when the power fails or is disconnected, replace the<br />
battery.<br />
USE ONLY HAYWARD GENUINE REPLACEMENT PARTS<br />
Pomona, CA Clemmons, NC Nashville, TN<br />
Tel: 908.351.5400 www.haywardpool.com
Page 8 of 16 STRATUM <strong>Model</strong> <strong>VR1000</strong> P/N: IS<strong>VR1000</strong> Rev: M<br />
SET TIMER<br />
EVENTS? Y/N<br />
Y= 7 DAY MODE<br />
N= EACH DAY MODE<br />
The timer events are used to control the ON and OFF times of the Filter Pump,<br />
Booster Pump and Low Speed on a two speed Pump. Dip switch #4 Must be on to<br />
allow the timers to be set. A “YES” will allow the following timer settings.<br />
“YES” 7-day all the week long the pumps will run at the same times.<br />
“NO” Each days timers must be set<br />
The 7-day time clock has two (2) on/off programs per day, while each day only has<br />
one program. All time clocks are selected either as “7-day” or “each day”. If “each day” is selected,<br />
you will need to program “ON” times for every day and “OFF” times for every day, even if you<br />
want them all to be the same. All times are adjusted in 1 minute increments.). If you program the<br />
“ON” time equal to the “OFF” time (“12:01 AM to 11:59 PM”) the output will always be “ON”.<br />
For the Booster pump timer “ON” time equals “OFF” time the pump will always be “OFF”<br />
ON = 04:00 AM<br />
OFF=08:00 PM OK?<br />
Daily On Hour =<br />
4 AM<br />
Daily On Min=<br />
1<br />
Daily Off Hour =<br />
6 AM<br />
Daily Off Min =<br />
0<br />
Low Speed On=<br />
08:00 AM OK?<br />
BST On=04:00PM<br />
Off = 0400 PM OK?<br />
On=0700AM Mon<br />
Off= 0400PM OK?<br />
Tue. = Mon<br />
OK? Y/N<br />
7 DAY MODE<br />
“YES” will use the timing events currently stored in the <strong>VR1000</strong><br />
“NO” will allow setting the timers<br />
Blinking time indicates that the timer is ready to be set.<br />
“Down” will move On time earlier<br />
“UP” will move On time later. Menu/OK to go to next screen.<br />
Blinking time indicates that the timer is ready to be set.<br />
“Down” will move On time earlier<br />
“UP” will move On time later. Menu/OK to go to next screen.<br />
Blinking time indicates that the timer is ready to be set.<br />
“Down” will move On time earlier<br />
“UP” will move On time later. Menu/OK to go to next screen.<br />
Blinking time indicates that the timer is ready to be set.<br />
“Down” will move On time earlier<br />
“UP” will move On time later. Menu/OK to go to next screen.<br />
Low Speed On will only appear if dip switch 3 is “ON”<br />
This will allow setting the timing on the Low speed of a two speed pump.<br />
A “N” will allow setting the On and Off time.<br />
Follow the above instructions for the timer settings.<br />
BST On is the timer for the Booster Pump. To set timer follow the above.<br />
Repeat the above for the second timer cycle. For “OVERNIGHT” operation, set<br />
the first timer cycle starting at midnight (12:01 AM) as the desired “ON” time<br />
and then the desired AM “OFF” time. The second timer cycle should be set<br />
from the desired PM “ON” time to midnight (11:59 PM) as the “OFF” time.<br />
EACH DAY MODE<br />
Note when each day mode is selected the timers must be set on a daily basis.<br />
The week days will be stepped through to allow individual day setting.<br />
USE ONLY HAYWARD GENUINE REPLACEMENT PARTS<br />
Pomona, CA Clemmons, NC Nashville, TN<br />
Tel: 908.351.5400 www.haywardpool.com
Page 9 of 16 STRATUM <strong>Model</strong> <strong>VR1000</strong> P/N: IS<strong>VR1000</strong> Rev: M<br />
OPERATIONS<br />
Normal operational mode monitors pool conditions for proper operation.<br />
The system operates in four basic states during normal pool monitoring.<br />
STARTUP – PULSING<br />
The vacuum solenoid valve is opened and closed several times to ‘soft start’ the system at startup time to warn<br />
swimmers that the pump is running. A self-test then occurs to verify that the sensor / solenoid subsystem is<br />
functioning properly. During this time a High Vacuum setting provides protection. As the pump starts priming<br />
the system is providing protection for swimmers. STABILIZING is entered if the system experiences no errors.<br />
With the pump off the system will take an initial voltage reading. This reading will be stored to allow low<br />
voltage cut off of the pump. In no case will the low voltage be allowed to drop below 188VAC or 100VAC<br />
(factory calibrated) depending on initial reading. The low voltage will turn the pump off until normal voltage is<br />
restored.<br />
STABILIZING<br />
The pump is running and the vacuum sensor is monitoring the pool pump inlet vacuum. The High Vacuum<br />
setting continues to provide protection. The pump will become fully primed and the vacuum should stabilize.<br />
The operating vacuum will then be determined. Detection of vacuum being out of window from the calibrated<br />
value or any other errors will result in entering the Vacuum Anomaly Detected state. The following state is<br />
entered if the system operates properly.<br />
MONITORING<br />
Monitoring is when the pump is running and a stable vacuum has been established. Vacuum measurements are<br />
taken at about 1000 samples per second, yielding a filtered vacuum value about every hundredth of a second.<br />
The filtered vacuum values are compared to the established normal vacuum value. When this filtered vacuum<br />
value is outside an established window Vacuum Anomaly Detected state is entered.<br />
Continuous operation in Monitoring is periodically interrupted by a “self-test” where a change in vacuum must<br />
be detected. If any problem is detected during “self-test,” the Vacuum Anomaly Detected state is entered.<br />
Green light will display with power to the system. (If both the Yellow and Green light are on, the system has<br />
turned off the display due to high temperatures internally in the box. The system is still in the operation.)<br />
VACUUM ANOMALY DETECTED<br />
The pump(s) and the vacuum solenoid valve are turned off within 0.1 seconds to help reduce the risk of certain<br />
types of entrapment. The system may also reduce equipment damage due to a cracked pipe or low pool water<br />
levels. Startup with Pulsing state will be entered after a short delay and the stabilization process is repeated<br />
allowing the system to adapt to changing pool conditions, such as gradual obstruction of the filter. Three<br />
occurrences of certain errors will cause the system to shut down the pump(s), sound the alarm(s) and update the<br />
LCD display to indicate the reason. The audible alarm(s) may be silenced through following instructions on the<br />
display or through the remote “stop” switch(s); or else the audible alarm(s) will be silenced automatically after<br />
10 minutes. However manual intervention, including responding to certain questions via the LCD display and<br />
function pushbuttons, is required in order to restart the system.<br />
USE ONLY HAYWARD GENUINE REPLACEMENT PARTS<br />
Pomona, CA Clemmons, NC Nashville, TN<br />
Tel: 908.351.5400 www.haywardpool.com
Page 10 of 16 STRATUM <strong>Model</strong> <strong>VR1000</strong> P/N: IS<strong>VR1000</strong> Rev: M<br />
4<br />
8<br />
5<br />
2<br />
1<br />
6<br />
FIG 8<br />
SPARE PARTS<br />
Item Part Number Description Qty<br />
1 VRX100E Solenoid Valve 24 VAC 1.0<br />
2 GLX-RELAY Contactor/Relay OMRON G7L-2A-BUB-JCB (24DC) 1.0<br />
3 VRX100KIT2 Fitting Kit with saddle fitting (See Fig 6) 1.0<br />
4 VRX100H 250ma Fuse 1.0<br />
5 VRX100PAK Tubing Replacement Kit 1.0<br />
6 VRX100F Vent Filter ¼” NPTM (Pack includes 8’ hose & fittings 1.0<br />
to extend hose above water level)<br />
7 CLX220J25 5/16” Tubing x 25’ Long (See Fig 6) 1.0<br />
8 VRXPCBA Printed Circuit Board 1.0<br />
USE ONLY HAYWARD GENUINE REPLACEMENT PARTS<br />
Pomona, CA Clemmons, NC Nashville, TN<br />
Tel: 908.351.5400 www.haywardpool.com
Page 11 of 16 STRATUM <strong>Model</strong> <strong>VR1000</strong> P/N: IS<strong>VR1000</strong> Rev: M<br />
WARNING – Hazardous Pressure. Pumps, filters, and other equipment components of a swimming pool<br />
filtration systems operate under pressure. Incorrectly installed and/or improperly tested filtration equipment and/or components<br />
may fail resulting in injury and/or property damage.<br />
Plumbing<br />
Use Teflon tape to seal threaded connections on molded plastic components. All plastic fittings must be new or thoroughly cleaned before<br />
use. NOTE: Do NOT use Plumber’s Pipe Dope as it may cause cracking of the plastic components.<br />
When applying Teflon tape to plastic threads, wrap the entire threaded portion of the male fitting with one to two layers of tape. Wind the<br />
tape clockwise as you face the open end of the fitting, beginning at the end of the fitting.<br />
The pump suction and outlet ports have molded-in thread stops. Do NOT attempt to force hose connector fitting past this stop. It is<br />
only necessary to tighten fittings enough to prevent leakage. Tighten fitting by hand and then use a tool to engage fitting an additional 1 ½<br />
turns. Use care when using Teflon tape as friction is reduced considerably; do NOT over-tighten fitting or you may cause damage. If<br />
leaks occur, remove connector, clean off old Teflon tape, re-wrap with one to two additional layers of Teflon tape, and re-install connector.<br />
Fittings<br />
Fittings restrict flow. For better efficiency, use the fewest possible fittings (but at least two suction outlets). Avoid fittings that could cause<br />
an air trap. <strong>Pool</strong> and spa fittings MUST conform to the International Association of Plumbing and Mechanical Officials (IAPMO)<br />
standards.<br />
Electrical<br />
WARNING – Ground motor before connecting to electrical power supply. Failure to ground pump motor<br />
can cause serious or fatal electrical shock hazard.<br />
WARNING – Do NOT ground to a gas supply line.<br />
WARNING – TO AVOID DANGEROUS OR FATAL ELECTRICAL SHOCK, TURN OFF POWER<br />
TO MOTOR BEFORE WORKING ON ELECTRICAL CONNECTIONS.<br />
WARNING – Ground Fault Circuit Interrupter (GFCI) tripping indicates electrical problem. If GFCI trips<br />
and won’t reset, consult electrician to inspect and repair electrical system.<br />
WARNING – Fire Hazard. Match supply voltage to motor nameplate voltage.<br />
Insure that the electrical supply available agrees with the motor’s voltage, phase, and cycle, and that the wire size is<br />
adequate for the H.P. (KW) rating and distance from the power source. NOTE: All electrical wiring MUST be in<br />
conformance with all applicable local codes, regulations, and the National Electrical Code (NEC).<br />
Brake Horsepower Full Rate Horsepower<br />
Motor Electric V/A<br />
BHP<br />
(FRHP)<br />
HP KW HP KW Voltage Amps Wire Size<br />
.99 .74 .50 0.37<br />
208-230 5.3-4.9 14 AWG<br />
115<br />
9.8 14 AWG<br />
1.39 1.04 .75 0.56<br />
208-230 6.0-5.5 14 AWG<br />
115<br />
11.0 14 AWG<br />
1.85 1.39 1.00 0.75<br />
208-230 8.5-7.8 14 AWG<br />
115<br />
15.6 12 AWG<br />
2.40 1.80 1.50 1.12 208-230 11-10.2 14 AWG<br />
2.70 2.02 2.00 1.50 208-230 13.0-11.8 12 AWG<br />
3.60 2.69 3.00 2.25 208-230 16.0-15.8 12 AWG<br />
Voltage at motor MUST NOT be more than 10% above or below motor name plate rated voltage, or motor may overheat, causing overload<br />
tripping and reduced component life. If voltage is less than 90% or more than 110% of rated voltage when motor is running at full load,<br />
consult power company.<br />
Grounding/Bonding<br />
Install, ground, bond, and wire motor in accordance with local and national electrical code requirements.<br />
Permanently ground motor. Use green ground terminal provided under motor canopy or access place; use size and type wire required by<br />
code. Connect motor ground terminal to electrical service ground.<br />
Reference NEC codes for all wiring standards including, but not limited to, grounding, bonding and general wiring procedures.<br />
Use a solid copper conductor, size 8 or larger. Run wire from external bonding lug to reinforcing rod or mesh. Connect a No. 8 AWG (8.4<br />
mm 2 ) solid copper bonding wire to the pressure wire connector provided on the motor housing and to all metal parts of swimming pool,<br />
spa, or hot tub, and to all electrical equipment, metal piping (except gas piping), and conduit within 5 ft. (1.5 m) of inside walls of<br />
swimming pool, spa, or hot tub.<br />
USE ONLY HAYWARD GENUINE REPLACEMENT PARTS<br />
Pomona, CA Clemmons, NC Nashville, TN<br />
Tel: 908.351.5400 www.haywardpool.com
Page 12 of 16 STRATUM <strong>Model</strong> <strong>VR1000</strong> P/N: IS<strong>VR1000</strong> Rev: M<br />
Wiring<br />
WARNING – All electrical wiring MUST be in conformance with all applicable local codes, regulations, and the National<br />
Electrical Code (NEC).<br />
Pump MUST be permanently connected to circuit. If other lights or appliances are also on the same circuit, be sure to add their amp loads<br />
before figuring wire and circuit breaker sizes. Use the load circuit breaker as the Master On-Off switch.<br />
Install a Ground Fault Circuit Interrupter (GFCI) in circuit; it will sense a short-circuit to ground and disconnect power before it becomes<br />
dangerous to pool users. For size of GFCI required and test procedures for GFCI, see manufacturer’s instructions. In case of a power<br />
outage, check GFCI for tripping, which will prevent normal pump operation. Reset if necessary.<br />
NOTE: If you do not use conduit when wiring motor, be sure to seal wire opening on end of motor to prevent dirt, bugs, etc., from<br />
entering.<br />
Start-Up & Operation<br />
Prior to Start-Up<br />
Notice: If it is necessary to perform a pressure test prior to initial use to ensure pump is functioning properly. The following criteria should<br />
be maintained for this test:<br />
1. Ensure all pump and system components are sealed properly to prevent leaks.<br />
2. Remove any trapped air in the system by fully opening filter manual air relief valve until a steady stream of<br />
water is discharged.<br />
3. Allow no more than 40 psi (172 kPa) at a water temperature no higher than 100° F (38° C).<br />
4. Run pressure test for no longer than 24 hours. Immediately inspect all parts to verify they are intact and<br />
functioning properly.<br />
5. Have a professional perform this test.<br />
Fill strainer housing with water to suction pipe level. NEVER OPERATE THE PUMP WITHOUT WATER. Water acts as a coolant<br />
and lubricant for the mechanical shaft seal.<br />
ATTENTION – NEVER run pump dry. Running pump dry may damage seals, causing leakage, flooding, and voids<br />
warranty. Fill strainer housing with water before starting motor.<br />
ATTENTION – Do NOT add chemicals to pool/spa system directly in front of pump suction. Adding undiluted<br />
chemicals may damage pump and voids warranty.<br />
ATTENTION – Before removing strainer cover:<br />
1. STOP PUMP before proceeding.<br />
2. CLOSE VALVES in suction and outlet pipes.<br />
3. RELEASE ALL PRESSURE from pump and piping system using filter manual air relief valve. See filter owner’s<br />
manual for more detail.<br />
WARNING – If pump is being pressure tested (40 PSI MAXIMUM), be sure pressure has been released before removing<br />
strainer cover.<br />
Priming Pump<br />
CAUTION – All suction and discharge valves MUST be OPEN, as well as filter air relief valve (if available) on filter,<br />
when starting the circulating pump system. Failure to do so could result in severe personal injury.<br />
• Release all pressure from filter, pump, and piping system. See filter owner’s manual.<br />
• If water source is higher than the pump, pump will prime itself when suction and outlet valves are opened. If water source is<br />
lower than the pump, unscrew and remove strainer cover; fill strainer housing with water.<br />
• Clean and lubricate strainer cover O-ring with "Jack's 327" each time it is removed. Inspect O-ring and re-install on strainer<br />
cover.<br />
• Replace strainer cover on strainer housing; turn clockwise to tighten cover.<br />
NOTE: Tighten strainer cover by hand only (no wrenches).<br />
Turn on power and wait for pump to prime, which may take up to five (5) minutes. Priming time will depend on vertical length of suction<br />
lift and horizontal length of suction pipe. If pump does NOT prime within five minutes, stop motor and determine cause. Be sure all<br />
suction and discharge valves are open when pump is running. See Pump <strong>Owners</strong> <strong>Manual</strong> For Troubleshooting Guide.<br />
ATTENTION – Wait five (5) seconds before re-starting pump. Failure to do so may cause reverse rotation of motor and<br />
consequent serious pump damage.<br />
Close air relief valve after pump is primed.<br />
USE ONLY HAYWARD GENUINE REPLACEMENT PARTS<br />
Pomona, CA Clemmons, NC Nashville, TN<br />
Tel: 908.351.5400 www.haywardpool.com
Page 13 of 16 STRATUM <strong>Model</strong> <strong>VR1000</strong> P/N: IS<strong>VR1000</strong> Rev: M<br />
Maintenance<br />
• Clean strainer basket regularly. Do NOT strike basket to clean. Inspect strainer cover gasket regularly and replace as<br />
necessary.<br />
• Keep motor clean. Insure air vents are free from obstruction to avoid damage. Do NOT use water to hose off motor.<br />
Storage/Winterization<br />
WARNING – Separation Hazard. Do not purge the system with compressed air. Purging the<br />
system with compressed air can cause components to explode, with risk of severe injury or death to anyone<br />
nearby. Use only a low pressure (below 5 PSI), high volume blower when air purging the pump, filter, or piping.<br />
ATTENTION – Do NOT use anti-freeze solutions (except propylene glycol) in your pool/spa<br />
system. Propylene glycol is non-toxic and will not damage plastic system components; other anti-freezes are highly<br />
toxic and may damage plastic components in the system.<br />
Drain all water from pump and piping when expecting freezing temperatures or when storing pump for a long time (see<br />
instructions below). Gravity drain system as far as possible. Disconnect hose from <strong>VR1000</strong> electrical box.<br />
Keep motor dry and covered during storage. To avoid condensation/corrosion problems, do NOT cover or wrap pump with<br />
plastic film or bags.<br />
Storing Pump For Winterization<br />
WARNING – To avoid dangerous or fatal electrical shock hazard, turn OFF power to motor before<br />
draining pump. Failure to disconnect power may result in serious personal injury or death.<br />
1. Drain water level below all inlets to the pool.<br />
2. Remove drain plugs from bottom of strainer body, and remove strainer cover from strainer housing.<br />
3. Disconnect pump from mounting pad, wiring system (after power has been turned OFF), and piping<br />
system.<br />
4. Once the pump is removed of water, re-install the strainer cover and drain plugs. Store pump in a dry area.<br />
• After all the settings have been completed, a test consisting of three simulated entrapments must<br />
be conducted to verify proper installation, calibration and operation.<br />
• An entrapment can be simulated by partially closing or repositioning a valve so that there will be a<br />
change in the flow pattern. That is, changing the pattern of flow from the suction outlet (Main Drain)<br />
to the skimmer will simulate an entrapment.<br />
• Periodic testing of the <strong>VR1000</strong> can be performed by pushing the “OK” button. This will verify<br />
proper installation and operation.<br />
WARNING - Body Suction Entrapment Hazard<br />
Suction in suction outlets can cause severe injury and/or death due to a differential pressure<br />
applied to a large portion of the body or limbs. STRATUM “Unprotected” Mode: Is when the<br />
pump is operating and the STRATUM is NOT providing any protection against Body Suction<br />
Entrapment. Do not be allow Swimmers and Bathers in the pool and spa when the STRATUM<br />
is in “Unprotected” mode. The STRATUM only provides a layer of protection against Body<br />
Suction Entrapment in monitoring mode.<br />
NOTICE: The <strong>VR1000</strong> will beep to indicate the unit is in unprotected mode.<br />
USE ONLY HAYWARD GENUINE REPLACEMENT PARTS<br />
Pomona, CA Clemmons, NC Nashville, TN<br />
Tel: 908.351.5400 www.haywardpool.com
Page 14 of 16 STRATUM <strong>Model</strong> <strong>VR1000</strong> P/N: IS<strong>VR1000</strong> Rev: M<br />
HAYWARD ® LIMITED WARRANTY<br />
This equipment was inspected before shipment from our plant. To original purchasers of this equipment, Hayward<br />
<strong>Pool</strong> Products, 620 Division Street, Elizabeth, New Jersey, warrants its products free from defects in materials and<br />
workmanship for a period of ONE (1) year from the date of purchase.<br />
Parts which fail or become defective during the warranty period, except as a result of freezing, negligence, improper<br />
installation, use, or care, shall be repaired or replaced, at our option, without charge, within 90 days of the receipt of<br />
defective product, barring unforeseen delays.<br />
To obtain warranty replacements or repair, defective components or parts should be returned, transportation paid, to<br />
the place of purchase, or to the nearest authorized Hayward service center. For further Hayward dealer or service<br />
center information, contact Hayward customer service department. No returns may be made directly to the factory<br />
without the express written authorization of Hayward <strong>Pool</strong> Products<br />
To original purchasers of this equipment, Hayward <strong>Pool</strong> Products warrants its vacuum release systems to be free<br />
from defects in materials and workmanship for a period of ONE (1) year from the date of purchase.<br />
Vacuum Release Systems which become defective during the warranty period, except as a result of freezing,<br />
negligence, improper installation, use or care, shall be repaired or replaced, at our option, without charge.<br />
All other conditions and terms of the standard warranty apply.<br />
Hayward shall not be responsible for cartage; removal and/or reinstallation labor or any other such costs incurred in<br />
obtaining warranty replacements.<br />
The Hayward <strong>Pool</strong> Products warranty does not apply to components manufactured by others. For such products, the<br />
warranty established by the respective manufacturer will apply.<br />
Some states do not allow a limitation on how long an implied warranty lasts, or the exclusion or limitation of<br />
incidental or consequential damages, so the above limitation or exclusion may not apply to you.<br />
This warranty gives you specific legal rights, and you may also have other rights, which vary from state to state.<br />
Hayward <strong>Pool</strong> Products<br />
620 Division Street<br />
*Supersedes all previous publications. Elizabeth, NJ 07207<br />
USE ONLY HAYWARD GENUINE REPLACEMENT PARTS<br />
Pomona, CA Clemmons, NC Nashville, TN<br />
Tel: 908.351.5400 www.haywardpool.com
Page 15 of 16 STRATUM <strong>Model</strong> <strong>VR1000</strong> P/N: IS<strong>VR1000</strong> Rev: M<br />
© Hayward <strong>Pool</strong> Products 2007<br />
All rights reserved.<br />
PRODUCT REGISTRATION<br />
(Retain For Your Records)<br />
DATE OF INSTALLATION ____________________<br />
INITIAL PRESSURE GAUGE READING (CLEAN FILTER)<br />
_______________________<br />
PUMP MODEL ________________ HORSEPOWER _______________________<br />
FILTER MODEL ________________<br />
MODEL <strong>VR1000</strong><br />
SERIAL NUMBER _______________________<br />
SERIAL NUMBER _______________________<br />
▲Retain this Warranty Certificate (upper portion) in a safe and convenient location for your records.<br />
DETACH HERE: Fill out completely and mail within 10 days of purchase/installation, or REGISTER ONLINE AT WWW.HAYWARDNET.COM<br />
---------------------------------------------------------------------------------------------------------<br />
Mail to: Hayward <strong>Pool</strong> Products, 620 Division Street, Elizabeth, NJ 07207, Attn: Warranty Dept.<br />
Please Print Clearly: Warranty Registration Card<br />
Name__________________________________________________<br />
Address________________________________________________<br />
City______________________ State_________ Zip____________<br />
E-mail Address__________________________________________<br />
Phone No:______________________________________________<br />
Purchased Date:________________________________________________<br />
Purchased from:<br />
Company name________________________________________________<br />
Address_______________________________________________________<br />
City__________________________ State_________ Zip_______________<br />
Product <strong>Model</strong> Number _______<strong>VR1000</strong>_______________<br />
Please send me more information on these other<br />
products from Hayward:<br />
Product Serial No. _____________________________________ □ Pump □ Filter □ Automatic <strong>Pool</strong> Cleaner □ Light<br />
□ New Installation □ Replacement □ Chlorinator □ Skimmer □ Heater □ Heat Pump<br />
Type of In-Ground <strong>Pool</strong>: □ Salt/Chlorine Generator □ Controls<br />
□ Vinyl □ Fiberglass □ Gunite<br />
May we contact you for future product promotions and offerings? □ Yes □ No<br />
Size of <strong>Pool</strong>______________________________________<br />
© Hayward <strong>Pool</strong> Products 2007 REGISTER YOUR WARRANTY ON-LINE AT WWW.HAYWARDNET.COM<br />
All rights reserved.<br />
USE ONLY HAYWARD GENUINE REPLACEMENT PARTS<br />
Pomona, CA Clemmons, NC Nashville, TN<br />
Tel: 908.351.5400 www.haywardpool.com
Page 16 of 16 STRATUM <strong>Model</strong> <strong>VR1000</strong> P/N: IS<strong>VR1000</strong> Rev: M<br />
THIS PAGE IS BLANK<br />
USE ONLY HAYWARD GENUINE REPLACEMENT PARTS<br />
Pomona, CA Clemmons, NC Nashville, TN<br />
Tel: 908.351.5400 www.haywardpool.com