Office XP Mail Merge, Toolbar Method
Office XP Mail Merge, Toolbar Method
Office XP Mail Merge, Toolbar Method

You also want an ePaper? Increase the reach of your titles
YUMPU automatically turns print PDFs into web optimized ePapers that Google loves.
<strong>Mail</strong> <strong>Merge</strong> in <strong>Office</strong> <strong>XP</strong> (Using the <strong>Mail</strong> <strong>Merge</strong> <strong>Toolbar</strong>)<br />
<strong>Office</strong> <strong>XP</strong> provides two ways to do mail merge:<br />
• The <strong>Mail</strong> <strong>Merge</strong> Wizard (which replaces the <strong>Mail</strong> <strong>Merge</strong> Helper in <strong>Office</strong> versions 2000 and prior)<br />
• The <strong>Mail</strong> <strong>Merge</strong> <strong>Toolbar</strong>, assuming your data source is already created. If you need to create a data source<br />
as you go, you will need to use the <strong>Mail</strong> <strong>Merge</strong> Wizard to do so. This document addresses the toolbar<br />
method only. If the mail merge toolbar is not displayed, enable it from the menu bar by selecting View,<br />
<strong>Toolbar</strong>s, <strong>Mail</strong> <strong>Merge</strong>.<br />
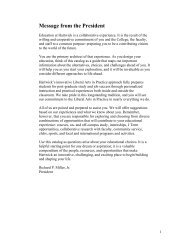
1. Open the document you wish to use as your mail merge main document (letter).<br />
2. Click the first button on the toolbar (Main Document Setup)<br />
3. In the Main Documents Type window, select the type of document you are creating and click OK.<br />
4. Click the second button on the mail merge toolbar (Open Data Source).<br />
5. Locate and select the file you will use for your data source and click Open.<br />
6. Select the DDE option in the confirm data source window, and click OK.
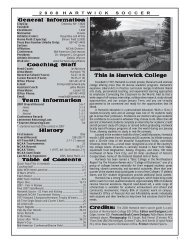
7. Use the third button on the toolbar to view or edit your recipients.<br />
8. The <strong>Mail</strong> <strong>Merge</strong> Recipients window will open, displaying the people in your data source.<br />
9. You can use the checkboxes at the left side of the window to include or exclude people from the merge.<br />
10. If you wish to sort or filter your recipients, open the drop-down list beside a field name, and select<br />
Advanced.<br />
11. Sort the records: by using the “sort records” tab, you can choose up to three fields to sort your records<br />
on. However you set the sort, this is the order in which the letters will print.<br />
12. Filter the records: by using the “filter records” tab, you can set criteria for which records will be used in<br />
the merge at this time.<br />
13. Choose a field in the first field area, and set a comparison from the drop-down list. Then type in the<br />
compare to box what the field should be compared to (see example below).<br />
14. You can set additional criteria for the records and Word will act on them based on whether you set them<br />
as an “And” or an “Or”.<br />
15. If you set two criteria using “And”, then a record has to meet both criteria in order to be used in the<br />
merge.<br />
If you set two criteria using “Or”, then a record needs to meet one or the other criteria in order to be used in the<br />
merge. Once you have your sort and filter criteria set, click OK.
16 20<br />
19<br />
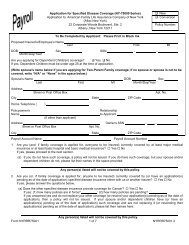
16. Click the sixth toolbar button to add merge fields to the main document.<br />
17. The Insert <strong>Merge</strong> Fields window will open. Select the field you wish by double-clicking on it, or<br />
clicking once, then clicking insert.<br />
18. Click Close to close the window and re-position your cursor before inserting your next field.<br />
17<br />
18. (The cancel<br />
button becomes<br />
“close” once you<br />
insert a field)<br />
19. Once you have added all your fields, you may wish to preview the merge. Click the “view merged data”<br />
button.<br />
20. If the merge is ready to go, use the “<strong>Merge</strong> to new document” button to create your form letters.