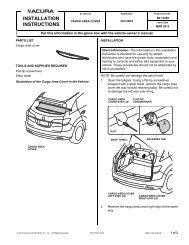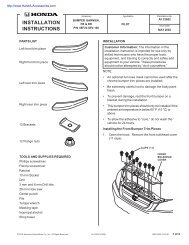
INSTALLATION INSTRUCTIONS - Bernardi Acura Parts & Accessories
INSTALLATION INSTRUCTIONS - Bernardi Acura Parts & Accessories
INSTALLATION INSTRUCTIONS - Bernardi Acura Parts & Accessories

You also want an ePaper? Increase the reach of your titles
YUMPU automatically turns print PDFs into web optimized ePapers that Google loves.
<strong>INSTALLATION</strong><br />
<strong>INSTRUCTIONS</strong><br />
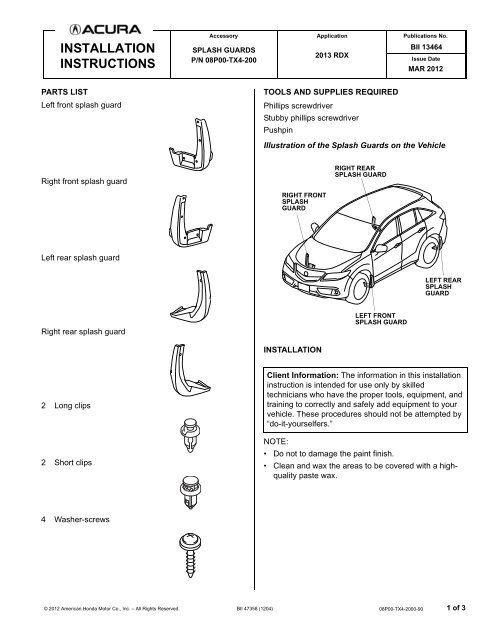
Accessory<br />
SPLASH GUARDS<br />
P/N 08P00-TX4-200<br />
Application<br />
2013 RDX<br />
Publications No.<br />
BII 13464<br />
Issue Date<br />
MAR 2012<br />
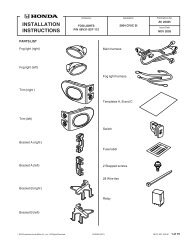
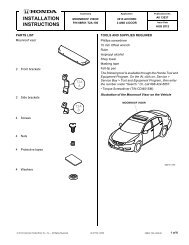
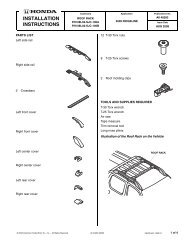
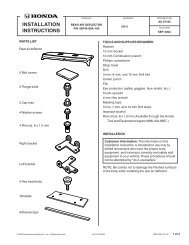
PARTS LIST<br />
TOOLS AND SUPPLIES REQUIRED<br />
Left front splash guard<br />
Phillips screwdriver<br />
Stubby phillips screwdriver<br />
Pushpin<br />
Illustration of the Splash Guards on the Vehicle<br />
Right front splash guard<br />
RIGHT REAR<br />
SPLASH GUARD<br />
RIGHT FRONT<br />
SPLASH<br />
GUARD<br />
Left rear splash guard<br />
LEFT REAR<br />
SPLASH<br />
GUARD<br />
Right rear splash guard<br />
LEFT FRONT<br />
SPLASH GUARD<br />
QA00606AG<br />
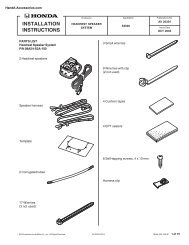
<strong>INSTALLATION</strong><br />
2 Long clips<br />
2 Short clips<br />
Client Information: The information in this installation<br />
instruction is intended for use only by skilled<br />
technicians who have the proper tools, equipment, and<br />
training to correctly and safely add equipment to your<br />
vehicle. These procedures should not be attempted by<br />
“do-it-yourselfers.”<br />
NOTE:<br />
• Do not to damage the paint finish.<br />
• Clean and wax the areas to be covered with a highquality<br />
paste wax.<br />
4 Washer-screws<br />
© 2012 American Honda Motor Co., Inc. – All Rights Reserved. BII 47358 (1204) 08P00-TX4-2000-90 1 of 3
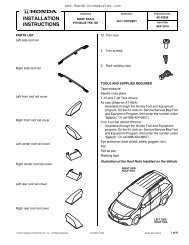
Installing the Front Splash Guards<br />
1. Turn the steering wheel fully counterclockwise.<br />
2. Using a pushpin, pierce the centers of two clips in the<br />
left front inner fender.<br />
PUSHPIN<br />
CLIP<br />
4. Install the left front splash guard to the left front inner<br />
fender with two washer-screws and the two selftapping<br />
screws removed in step 3. Tighten in the<br />
order<br />
. <br />
NOTE: Make sure there is no gap between the left<br />
front splash guard and the vehicle body. If there is a<br />
gap, loosen the washer-screws and self-tapping<br />
screws, hold the splash guard against the body, and<br />
retighten the screws.<br />
2 WASHER-<br />
SCREWS<br />
FRONT<br />
LEFT FRONT <br />
INNER FENDER<br />
QA00601AG<br />
3. Remove two self-tapping screws from the left front<br />
inner fenderwell.<br />
LEFT FRONT <br />
INNER FENDERWELL<br />
FRONT<br />
4<br />
2<br />
1<br />
SELF-TAPPING<br />
SCREWS<br />
(Reuse.)<br />
3<br />
LEFT<br />
FRONT<br />
SPLASH<br />
GUARD<br />
QA00603AG<br />
5. Turn the steering wheel fully clockwise, and repeat<br />
steps 2 through 4 to install the right front splash<br />
guard.<br />
FRONT<br />
SELF-TAPPING<br />
SCREWS<br />
QA00602AG<br />
2 of 3 BII 47358 (1204) © 2012 American Honda Motor Co., Inc. – All Rights Reserved.
Installing the Rear Splash Guards<br />
6. Remove the self-tapping screw from the rear<br />
bumper.<br />
LEFT REAR INNER<br />
FENDERWELL<br />
REAR<br />
BUMPER<br />
8. Install the left rear splash guard to the rear bumper<br />
with one long clip, one short clip and the self-tapping<br />
screw removed in step 6. Install in the order<br />
. <br />
NOTE: Make sure there is no gap between the left<br />
rear splash guard and the vehicle body. If there is a<br />
gap, loosen the self-tapping screw, hold the splash<br />
guard against the body, and retighten the screw.<br />
LEFT<br />
REAR<br />
SPLASH<br />
GUARD<br />
SELF-<br />
TAPPING<br />
SCREW<br />
1<br />
FRONT<br />
CLIPS<br />
(Discard.)<br />
QA00604AG<br />
7. Remove and discard the two clips from the left rear<br />
inner fenderwell.<br />
FRONT<br />
SHORT<br />
LONG CLIP<br />
CLIP<br />
9. Repeat steps 6 through 8 to install the right rear<br />
splash guard.<br />
3<br />
2<br />
SELF-<br />
TAPPING<br />
SCREW<br />
(Reuse.)<br />
QA00605AG<br />
© 2012 American Honda Motor Co., Inc. – All Rights Reserved. BII 47358 (1204) 3 of 3