Instructions FAULT CODE READER - Gunson
Instructions FAULT CODE READER - Gunson
Instructions FAULT CODE READER - Gunson

You also want an ePaper? Increase the reach of your titles
YUMPU automatically turns print PDFs into web optimized ePapers that Google loves.
3<br />
ii. Following the kick-down switch test, fault<br />
codes are then transmitted as follows: Codes<br />
stored at the time of the test are transmitted<br />
first. These codes are repeated once.<br />
If no faults are present, code 111 is<br />
transmitted.<br />
Separator code 10 is transmitted.<br />
Codes stored in KAM (Keep Alive Memory) are<br />
then transmitted. These codes are repeated<br />
once. If no codes are stored in KAM, code<br />
111 is transmitted.<br />
iii. Once all codes have been transmitted,<br />
momentarily press the accelerator pedal<br />
fully and thefollowing actuators (if fitted) are<br />
activated: Electronic Vacuum Regulator (EVR)<br />
Canister Purge Solenoid (CANP)<br />
Idle Speed Control Valve (ISC)<br />
Wide-open Throttle A/C cut-off (WAC)<br />
Transmission Hydraulic Switch (THS 3/4)<br />
Lock-Up Solenoid (LUS) Self Test Output (STO)<br />
Each time the accelerator pedal is pressed,<br />
these actuators are activated.<br />
TEST PROCEDURE<br />
Ensure ignition is OFFConnect tester to<br />
diagnostic socketPress MEM/TESTSwitch<br />
ignition ON<br />
Wait for codes to be displayedMake a note<br />
of displayed codes - Code 11 indicates that<br />
no faults are present Code 20 appears – this<br />
is just a separator code Wait for KAM codes<br />
to be displayed Make a note of displayed<br />
codes - Code 11 indicates that no faults have<br />
been stored in the last 40 starts When code<br />
10 is displayed you are being prompted to<br />
perform the ‘wiggle test’. The operator should<br />
flex all interconnections in the system and the<br />
unit LED on the left of the display will flash<br />
if intermittent connections are disturbed. If<br />
the LED flashes dismantle the connector and<br />
check that the pins/sockets are free from<br />
corrosion and dirt, and that the correct spring<br />
tension. Switch ignition OFFPress MEM/TEST<br />
ENGINE RUNNING TEST<br />
NOTE, BEFORE UNDERTAKING THE ENGINE<br />
RUNNING TEST: ANY <strong>FAULT</strong>S FOUND IN THE<br />
ENGINE OFF TEST SHOULD BE RECTIFIED;<br />
KEEP ALIVE MEMORY SHOULD BE CLEARED;<br />
ENGINE SHOULD BE UP TO NORMAL<br />
OPERATING TEMPERATURE.<br />
THE FOLLOWING NOTES ARE REQUIRED AS<br />
PART OF THE TEST SEQUENCE<br />
i. Code 20 (Zeta) or 30 (Scorpio) will be<br />
transmitted and within 10 seconds you must<br />
start thefollowing procedure: Press the brake<br />
pedal.Turn the steering wheel full lock one<br />
way and then back again to allow the power<br />
steering pressure switch to operate. Failure<br />
to do this will cause code 521 to be stored.<br />
For vehicles fitted with auto transmission,<br />
turn the overdrive cancel switch ON and OFF<br />
(if fitted), and turn the performance/economy<br />
switch ON and OFF (if fitted).Wait for code 10<br />
to be transmitted.<br />
ii. Within 10 seconds of code 10 being<br />
transmitted, press the accelerator pedal fully<br />
to rapidly increase the engine speed above<br />
3000 RPM. Failure to do this will cause code<br />
538 to be stored, in which case the test<br />
procedure will have to be repeated.<br />
iii. Fault codes are now transmitted. These<br />
codes are repeated once. If no codes are<br />
present, code 111 is transmitted.<br />
iv. After the final code is transmitted, the<br />
ECU enters the Service Adjustment Mode<br />
for 2 minutes during which time Idle Speed<br />
control is deactivated. Note: Base idle speed<br />
and ignition timing are not adjustable. v.<br />
Once Service Adjustment Mode is terminated,<br />
Wiggle Test mode is entered, during<br />
which time the Coolant Temperature, Air<br />
Temperature, Throttle Position and Airflow<br />
sensors can be checked. Any faults will be<br />
logged in KAM.<br />
TEST PROCEDURE<br />
• Press MEM/TESTCode 30 may be displayed<br />
at this stage – ignore itSwitch ignition on<br />
and wait for 3 seconds before starting<br />
engine<br />
• There may now be a delay while coolant<br />
temperature rises.If any fault codes are<br />
displayed at this stage stop engine, press<br />
MEM/TEST and rectify any faults before<br />
restarting TEST 3.Engine speed will now<br />
increase.Code 10 will be displayed – blip<br />
throttle so that engine speed exceeds<br />
3000RPM<br />
If Code 538 is displayed ECU has not detected<br />
rise in engine speed – stop engine, press<br />
MEM/TEST and return to start of TEST 3.<br />
Wait for codes to be displayedMake a note<br />
of displayed codes - Code 11 indicates that<br />
no faults are present.If any fault codes are<br />
displayed at this stage stop engine, press<br />
MEM/TEST and rectify any faults before<br />
restarting TEST 3.Engine speed will now<br />
decrease.Base idle mode has been initiated.<br />
Guarantee<br />
ERASING <strong>FAULT</strong> <strong>CODE</strong>S<br />
i. Ensure ignition is off and unit is connected<br />
to vehicle<br />
ii. Switch ignition ON iii. Press MEM/TEST<br />
iv. Whilst codes are being transmitted press<br />
MEM/TEST three times with a slight pause<br />
between presses. Following this, KAM codes<br />
should have been erased and this can be<br />
checked by repeating the Engine Off Test as<br />
detailed above.<br />
EPIC<br />
DIAGNOSTIC SOCKET/ECU LOCATION<br />
The EPIC ECU and diagnostic socket are<br />
located in the glove box.<br />
TEST OPERATION<br />
To be confirmed<br />
ERASING <strong>FAULT</strong> <strong>CODE</strong>S<br />
i. Ensure ignition is off and unit is connected<br />
to vehicle<br />
ii. Switch ignition ON<br />
iii. Press MEM/TEST<br />
iv. Whilst codes are being transmitted press<br />
MEM/TEST three times with a slight pause<br />
between presses. Following this, KAM codes<br />
should have been erased and this can be<br />
checked by repeating the Engine Off Test as<br />
detailed above.<br />
onnection C<br />
8.7 TEVES ABS DIAGNOSTIC SOCKET<br />
LOCATION<br />
The ABS diagnostic socket is located either<br />
on the LH side above the battery (Transit) or<br />
on the RH suspension tower.<br />
TEST OPERATION<br />
Connect unit to diagnostic connectorStart<br />
enginePress MEM/TEST Wait for codes to be<br />
displayed Make a note of displayed codes -<br />
Code 11 indicates that no faults are present<br />
Press MEM/TEST Switch ignition OFFIf any<br />
failure faults are repaired.<br />
ERASING <strong>FAULT</strong> <strong>CODE</strong>S<br />
Fault codes are only erased when all faults<br />
have been fixed and the vehicle is driven<br />
faster than 18 mph.<br />
ol connection Cop<br />
Tool Connection Copyr<br />
If this product fails through faulty materials or workmanship, contact our<br />
service department direct on: +44 (0) 1926 818186. Normal wear & tear are<br />
excluded as are consumable items & abuse.<br />
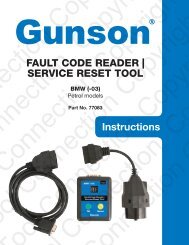
<strong>CODE</strong> <strong>READER</strong><br />
<strong>FAULT</strong> <strong>CODE</strong> <strong>READER</strong><br />
<strong>FAULT</strong><br />
PETROL & DIESEL – FORD 1986-97<br />
Part No. 77032<br />
<strong>Instructions</strong><br />
onnection Copyright<br />
nection Copyri<br />
ction Copy<br />
ol Connection Copyrigh
2<br />
77032<br />
Fault Code Reader Petrol & Diesel – Ford 1986-97<br />
Suitable for engines on vehicles from 1986-1997<br />
subject to correct ECU system and engine type. It<br />
includes some diesel applications and ABS systems.<br />
The unit comes complete with two DLC (Data Link<br />
Connection) cables for connecting to diagnostic port<br />
under the bonnet and a cable (Red) for connection<br />
to the positive power supply on the battery. The DLC<br />
have either a 3pin connection or 1pin connection.<br />
Only one DLC cable is required for each vehicle.<br />
Fiesta 1.1/1.3/1.4 Cfi 1989-96 EEC-IV Enh + KAM<br />
1.6 efI 1989-93 EEC-IV Enh + KAM<br />
1.6 Turbo 1990-93 EEC-IV Enh + KAM<br />
1.8 Zetec 1995-97 EEC-IV Enh 3 digit<br />
Escort/Orion 1.1/1.3/1.4 Cfi 1989-96 EEC-IV Enh + KAM<br />
1.6 Efi 1997-97 EEC-IV Enh + KAM<br />
onnection C<br />
1.6 16v 1987-96 EEC-IV Enh + KAM<br />
1.8i 16v 1991-97 EEC-IV Enh + KAM<br />
2.0 DOHC 16V Efi 1991-96 EEC-IV Enh + KAM<br />
1.6 Zetec 1992-97 EEC-IV Enh 3 digit<br />
1.8 Zetec 1991-97 EEC-IV Enh 3 digit<br />
Cosworth 4x4 1992-94 Weber IAW<br />
Cosworth 4x4 1994-96 EEC-IV Enh + KAM<br />
ABS 1991- Teves ABS<br />
Sierra 1.6 Cfi 1989-93 EEC-IV Enh + KAM<br />
1.8 Cfi 1992-93 EEC-IV Enh + KAM<br />
2.0 DOHC EFi 1989-93 EEC-IV Enh + KAM<br />
2.9 V^ 1989-93 EEC-IV Enh<br />
2.9 V6 Cat 1989-93 EEC-IV Enh + KAM<br />
Cosworth 1988-93 Weber IAW<br />
Cosworth 4x4 1988-93 Weber IAW<br />
Mondeo 1.8 Zetec 1995-97 EEC-IV Enh 3 digit<br />
IMPORTANT NOTES REGARDING TEST<br />
PROCEDURES ENSURE YOU READ AND<br />
UNDERSTAND THE FOLLOWING BEFORE<br />
PROCEEDING WITH THE TEST PROCESS.<br />
DIAGNOSTIC CONNECTOR<br />
The approximate location of the diagnostic<br />
connector is detailed within each section.<br />
The connector will take one of two forms:<br />
Black triangular outline with a red insert<br />
and 3 terminals – this will normally have a<br />
black protected cap inserted. Or Black 5 way<br />
D outline with 3 terminals fitted – this will<br />
normally have a black rubber protective boot<br />
fitted. Similar connectors are used elsewhere<br />
within the engine bay. Ensure you connect<br />
only to the diagnostic connector – refer to<br />
other workshop manuals if at all in doubt.<br />
TEST PROCEDURES<br />
It is essential that test procedures are<br />
followed precisely. The procedures involve<br />
activating a test line at certain points within<br />
the ignition cycle. The completion of a test<br />
always involves deactivating the test line in<br />
the exactly reverse order e.g.<br />
• Switch ignition on<br />
• Activate test<br />
• Read codes<br />
• Deactivate test<br />
• Switch ignition off<br />
ol connection Cop<br />
2.0 Zetec 1995-97 EEC-IV Enh 3 digit<br />
Granada/Scorpio 2.4 V6 EFi 1986-91 EEC-IV Enh<br />
2.4 V6 EFi 1989-94 EEC-IV Enh + KAM<br />
2.4 V6 EFi + Cat 1986-94 Enh + KAM<br />
2.8 V6 EFi 1989-94 EEC-IV Enh + KAM<br />
2.9 V6 EFi 1986-94 EEC-IV Enh<br />
2.9 V6 EFi + Cat 1986-94 EEC-IV Enh + KAM<br />
2.9 V6 24v 1991-94 EEC-IV Enh 3 digit<br />
ABS 1992- Teves ABS<br />
Transit 2.0 DOHC 1991-95 EEC-IV Enh + KAM<br />
2.9 V6 EFi 1989-91 EEC-IV Enh<br />
2.9 V6 EFi + Cat 1989-91 EEC-IV Enh + KAM<br />
2.5 Turbo Diesel 1991-94 EPIC<br />
ABS 1992- Teves ABS<br />
If the procedure is not followed it can result in<br />
leaving the vehicle in diagnostic mode which<br />
may cause it to run unreliably.<br />
<strong>FAULT</strong> <strong>CODE</strong>S<br />
Please refer to a suitable source e.g Autodata<br />
Diagnostic Codes Manual for the codes<br />
specific to your engine type.<br />
WEBER IAW<br />
Diagnostic Socket Location<br />
Diagnostic connector is either located by the<br />
vehicle battery or by the glovebox.<br />
TEST PROCEDURE<br />
The Weber IAW system is only capable of<br />
outputting fault codes present at the time of<br />
test. Ensure ignition is switched OFF Connect<br />
tester to diagnostic socket<br />
• Press MEM/TEST<br />
• Switch ignition ON<br />
• Wait for codes to be displayed<br />
• Make a note of displayed codes – Code 11<br />
indicates that no faults are present<br />
• Switch Ignition off<br />
• Press MEM/TEST<br />
ERASING <strong>FAULT</strong> <strong>CODE</strong>S<br />
As this system is not fitted with KAM, fault<br />
codes are lost when the ignition is switched<br />
off.<br />
EEC-IV ENHANCED<br />
DIAGNOSTIC SOCKET LOCATION<br />
The diagnostic socket is located near the<br />
battery.<br />
TEST OPERATION<br />
Before testing ensure that:<br />
• Air conditioning is switched off<br />
• Octane and idle adjust wires are<br />
disconnected<br />
• The adjust wires are located near the<br />
ignition coil<br />
• Early vehicles have Lucar type connectors<br />
and later models a combined socket.<br />
• Ensure that all are disconnected before<br />
test, but note the original state so that the<br />
vehicle can be reassembled after the test<br />
is completed.<br />
TEST PROCEDURE<br />
Three distinct tests are available as described<br />
below. These should be performed in<br />
numerical order so that faults are corrected in<br />
the right sequence. 1.<br />
• Key on, engine off test<br />
• Ensure ignition is OFF<br />
• Connect tester to diagnostic socket<br />
• Press MEM/TEST<br />
• Switch ignition ON<br />
• Wait for codes to be displayed<br />
• Make a note of displayed codes – Code 11<br />
indicates that no faults are present<br />
• Code 20 appears – this is just a separator<br />
code<br />
• Wait for codes to be displayed<br />
• Make a note of displayed codes – Code 11<br />
indicates that no faults have been stored in<br />
the last 40 starts<br />
• When code 10 is displayed you are being<br />
prompted to perform the ‘wiggle test’. The<br />
operator should flex all interconnections<br />
in the system and the unit LED on the<br />
left of the display will flash if intermittent<br />
connections are disturbed.<br />
• If the LED flashes dismantle the connector<br />
and check that the pins/sockets are free<br />
from corrosion and dirt, and that the correct<br />
spring tension.<br />
• Switch ignition OFF<br />
• Press MEM/TEST<br />
REPEAT TEST 1.<br />
If any failure codes are produced during this<br />
test it is imperative that faults are repaired.<br />
The test must be repeated with no faults,<br />
before proceeding to test 2.<br />
2. ENGINE IDLE RUNNING TEST<br />
This test should only be performed if test<br />
1, “Key on, engine off”, has been passed<br />
satisfactorily.<br />
• Start Engine<br />
• Wait 4 seconds then press MEM/TEST<br />
• Wait for codes to be displayed<br />
• Make a note of displayed codes – Code 11<br />
indicates that no faults are present<br />
• Press MEM/TEST<br />
• Switch ignition OFF<br />
• If any failure codes are produced during this<br />
test it is imperative that faults are repaired.<br />
The test must be repeated with no faults,<br />
before proceeding to test 3<br />
3. ENGINE RUN/DYNAMIC TEST<br />
This test should only be performed if test 1,<br />
“Key on, engine off” and test 2, “Engine idle<br />
running”, have been passed satisfactorily.<br />
• The engine MUST be at the normal<br />
operating temperature no codes will be<br />
produced with the engine cold.<br />
• When operator is prompted to start the<br />
engine - they must proceed PROMPTLY to<br />
ensure that unit reads the next code.<br />
• When unit reads code 10 it will prompt the<br />
operator to blip the throttle. This action<br />
must be performed quickly or code 44 –<br />
Blip test not performed – will be displayed.<br />
The engine must then be switched off and<br />
test 3 restarted. When unit reads code 60<br />
it will prompt the operator to check/adjust<br />
the ignition timing using a strobe light. This<br />
base timing condition will be maintained for<br />
up to ten minutes depending on the ECU<br />
type, after which code 70 will be displayed.<br />
Timing adjustments MUST NOT be made<br />
once code 70 is received. The ECU will now<br />
revert to automatic timing control. If engine<br />
stalls when Code 60 is displayed adjust<br />
throttle linkage and repeat TEST 3.<br />
• If any failure codes are produced during this<br />
test it is imperative that faults are repaired.<br />
The test must be repeated with no faults<br />
before ending the test.<br />
• Press MEM/TEST<br />
• Code 30 may be displayed at this stage<br />
– ignore it<br />
• Switch ignition on and wait for 3 seconds<br />
before starting engine<br />
• Code 50 should be displayed to indicate a<br />
European ECU. If code 50 is not produced<br />
then check the ECU part number, located<br />
below the passenger glove box.<br />
• There may now be a delay while coolant<br />
temperature rises.<br />
• If any fault codes are displayed at this stage<br />
stop engine, press MEM/TEST and rectify<br />
any faults before restarting<br />
TEST 3.<br />
• Engine speed will now increase.<br />
• Code 10 will be displayed – blip throttle so<br />
that engine speed exceeds 2500RPM<br />
• If Code 44 is displayed ECU has not<br />
detected rise in engine speed – stop<br />
engine, press MEM/TEST and return to start<br />
of TEST 3.<br />
• Wait for codes to be displayed Make a note<br />
of displayed codes – Code 11 indicates that<br />
no faults are present.<br />
• If any fault codes are displayed at this stage<br />
stop engine, press MEM/TEST and rectify<br />
any faults before restarting TEST 3.<br />
• Engine speed will now decrease.Code 60 is<br />
displayed indicating base idle speed mode<br />
• When adjustments are complete or Code<br />
70 is displayed - stop engine and press<br />
MEM/TEST<br />
8.4.5 ERASING <strong>FAULT</strong> <strong>CODE</strong>S<br />
Fault codes are erased from KAM<br />
automatically by successfully conducting the<br />
Engine off test above (TEST1).<br />
EC-IV ENHANCED 3 DIGIT <strong>CODE</strong>S<br />
DIAGNOSTIC SOCKET LOCATION<br />
The diagnostic socket is located near the LH<br />
suspension strut (zetec engines) or adjacent<br />
to the vehicle battery (Scorpio).<br />
TEST OPERATION<br />
ENSURE HANDBRAKE IS ON AND NEUTRAL/<br />
PARK SELECTED. ENGINE OFF TEST<br />
Please read the following notes:<br />
onnection Copyright<br />
Tool Connection Copyr<br />
nection Copyri<br />
ction Copy<br />
i. If Code 10 appears, you must press the<br />
accelerator pedal fully within 10 seconds<br />
to activate the kick-down switch. Failure to<br />
do so will cause Code 576 to be stored for<br />
later retrieval.<br />
ol Connection Copyrigh<br />
3