Create successful ePaper yourself
Turn your PDF publications into a flip-book with our unique Google optimized e-Paper software.
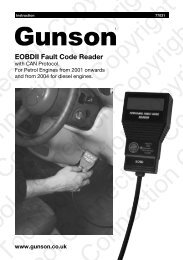
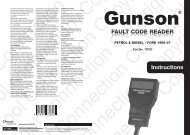
<strong>FAULT</strong> <strong>CODE</strong> <strong>READER</strong><br />
for Petrol Engines<br />
Citroen/Peugeot<br />
PART NO G4154<br />
HANDBOOK
Gunson Fault Code Reader<br />
2
Gunson Fault Code Reader<br />
Fault Code Reader<br />
for Petrol Engines<br />
Citroen/Peugeot<br />
For vehicles with fuel injection or<br />
electronic control units<br />
INDEX<br />
Contents<br />
Page<br />
1. Safety First 4<br />
2. How Fault Codes make it easy 5<br />
3.The Fault Code Reader 7<br />
4. How to use the Fault Code reader 7<br />
5. Connection 9<br />
6. Display codes 9<br />
7.Vehicle applications 10<br />
8. Citroen/Peugeot Fault Codes 11<br />
9.Test procedure notes (TPN) 12<br />
10. Common terms 17<br />
11.Warranty and customer service 19
Gunson Fault Code Reader<br />
1. SAFETY FIRST<br />
General safety guidelines to follow when working on vehicles<br />
• Always operate the vehicle in a well ventilated area.<br />
• Do not inhale exhaust gases - they are very poisonous.<br />
• Always make sure the vehicle is in park (Automatic transmission) or neutral<br />
(manual transmission) and that the parking brake is firmly set. Block the<br />
drive wheels.<br />
• Always keep yourself, tools and test equipment away from all moving or hot<br />
engine parts. Treat high tension ignition components with respect,<br />
remembering that electrical shocks can cause involuntary movement which<br />
may result in secondary injury.<br />
• Wear approved eye protection.<br />
• Never wear loose clothing that can catch in moving engine parts and always<br />
tie-up or cover long hair.<br />
• Never lay tools on a vehicle battery. You may short the terminals together<br />
causing harm to yourself, the tools or the battery.<br />
• When carrying out tests on a motor vehicle, remember NEVER run the<br />
engine with the car battery disconnected (either + or -) since the alternator<br />
would then run at a damaging over-voltage.<br />
• Never smoke or have open flames near vehicle. Vapours from gasoline and<br />
charging battery are highly flammable and explosive.Always keep a suitable<br />
fire extinguisher handy.<br />
• Never leave vehicle unattended while running tests.<br />
• Keep children and animals out of the area.<br />
• Always turn ignition key OFF when connecting or disconnecting electrical<br />
components, unless otherwise instructed.<br />
• Always follow vehicle manufacturer's warnings, cautions and service<br />
procedures.<br />
CAUTION<br />
Some vehicles are equipped with safety air bags. You must follow vehicle<br />
service manual cautions when working around the air bag components or<br />
wiring. If the cautions are not followed, the air bag may open up<br />
unexpectedly, resulting in personal injury. Note:The air bag may still open up<br />
several minutes after the ignition key is off (or even if the vehicle battery is<br />
disconnected) because of a special energy reserve module.<br />
4
Gunson Fault Code Reader<br />
Precautions to be followed when using the Fault Code Reader<br />
• Before connecting the leads, ensure that the correct connector of the car has<br />
been identified.<br />
• Using this product may cause vehicle systems to self test, items such as<br />
coolant fans to suddenly start with no warning, and engine speed to<br />
suddenly increase.<br />
• Using this product can involve working on a car while the engine is running.<br />
This is a potential hazard and the user should take every precaution to avoid<br />
any possibility of damage or injury.<br />
2. HOW <strong>FAULT</strong> <strong>CODE</strong>S MAKE IT EASY<br />
Modern vehicles have electronic control units that are able to identify and<br />
remember faults which occur in the vehicle's equipment. This system was<br />
introduced on the higher specification electronic fuel injection vehicles around<br />
1986 and was applied to other types of ECU a little later(ABS and Ignition) Its<br />
application is now virtually universal to all petrol engine vehicles. This is a<br />
great benefit to service and maintenance personnel as it can considerably<br />
simplify vehicle repair. The vehicle faults are stored in the vehicle's Electronic<br />
Control Unit (ECU) as "Fault Codes".<br />
The system is so simple that retrieving vehicle fault codes does not require<br />
particular skill. However, in order to read these fault codes some equipment<br />
is necessary. (E.g. a Fault Code Reader), which is used to instruct the vehicle's<br />
ECU to download fault codes and/or present them to the user on a display. By<br />
far the most common system is to present the code as a “blink code”. The<br />
Fault Code Reader will activate that part of the OBD programme which<br />
identifies the defective component and cause a code to be displayed, usually by<br />
a light on the Fault Code Reader or by an instrument panel "Check Engine"<br />
light. These provide a series of pulses to simply count a code number. Systems<br />
with an instrument panel “Check engine” light are able to illuminate this when<br />
the engine is running to warn of faults, other systems are more secretive and<br />
need to be interrogated.<br />
The Fault Code Reader is an economical but very effective product. It is<br />
available for a wide range of vehicles and enables the user to instruct the<br />
vehicle to download stored fault codes. Having obtained the fault codes, the<br />
user then identifies the nature of faults by referring to a list of code numbers.<br />
Comprehensive lists of code numbers are included in this handbook.<br />
5
Gunson Fault Code Reader<br />
NB Car manufacturers have in the past used a connector type unique to<br />
their own cars. Many manufacturers have used different types of connector at<br />
various times. Only recently have there been moves to standardise to a 16 pin<br />
socket.<br />
Makes and models of car also vary in the degree of testing and fault<br />
diagnosis that is possible. In general, the ECU will identify faults that exist at<br />
the time of the test, but the ECU may also have a memory that remembers<br />
faults that have occurred in the recent past, and these can also be read out<br />
from memory using the Fault Code Reader. For instance, in some vehicles, the<br />
readout consists of the faults that are present at that time, followed after a<br />
“separator” code, by the codes that are held in memory from some previous<br />
time.<br />
In most vehicles, tests are carried out with the engine off (but ignition on).<br />
Occasionally additional tests may be carried out with the engine running (this<br />
depends on the sophistication of the ECU and is not available on all makes of<br />
vehicle).<br />
Having identified the fault codes, and eliminated the faults, the user may<br />
then wish to erase the faults from the ECU's memory.With some cars this is<br />
possible using a special sequence of operations, or a sequence of switch<br />
operations on the Fault Code Reader. With other vehicles this is not possible<br />
and it may be necessary to erase the memory by disconnecting the battery<br />
(-) connection (with engine not running), this has the disadvantage that codes<br />
for radio/ security system and also some ECU memory settings are<br />
temporarily lost. Fault codes generally disappear anyway after the fault has<br />
not been present for a certain number of engine start cycles, but deletion of<br />
the codes followed by a short drive has the advantage that it allows the<br />
operator to check if the fault has truly been rectified. This is confirmed if the<br />
code does not re-occur.<br />
Before using this product (or indeed carrying out any vehicle maintenance),<br />
the user is recommended to read the precautions presented in later sections<br />
of this manual. In particular, note that during the use of this product the<br />
vehicle's On Board Diagnostic programme (OBD) takes control of the vehicle,<br />
and may activate various vehicle systems (such as turning on the cooling fan),<br />
this can constitute a safety hazard and the user should keep fingers clear<br />
during tests.<br />
6
Gunson Fault Code Reader<br />
3.THE <strong>FAULT</strong> <strong>CODE</strong> <strong>READER</strong><br />
Fault Code Reader is complete with the connections<br />
for the vehicle listed on the packaging. It is not suitable<br />
for use on any other vehicle<br />
INSTRUCTIONS FOR USE please read carefully and it<br />
will help you to use the product and interpret the<br />
information it can provide<br />
TEST SWITCH. Labelled “0" and “I”. Moving from “0"<br />
to “I” starts a test or changes the way the vehicle’s<br />
Electronic Control Unit (ECU) functions.<br />
LED <strong>CODE</strong> INDICATOR. (If fitted), will transmit<br />
pulses which represent the fault codes. On models where<br />
this is not fitted the pulses will generally be seen on the<br />
engine check light on the vehicle instrument panel.<br />
4. HOW TO USE YOUR <strong>FAULT</strong> <strong>CODE</strong> <strong>READER</strong><br />
NUMBER / <strong>CODE</strong> IDENTIFICATION<br />
Identifying fault codes is in fact very easy and simple, though it may seem<br />
complicated at a first reading, the user will soon get accustomed to the<br />
technique.<br />
Basically, the ECU communicates with the “Code Reader” in a series of<br />
pulses, and the user simply counts these pulses to identify particular numbers.<br />
For example, the number 6 would be transmitted as 6 pulses in rapid<br />
succession. If we use the symbol to indicate a pulse, then the number 6 will<br />
be transmitted as:<br />
= 6<br />
If the number is a 2 digit number, then each digit is transmitted separately. For<br />
example, the number 25 would be represented as 2 pulses, followed by a brief<br />
pause, and then 5 more pulses.<br />
<br />
2 5 = 25<br />
7
Gunson Fault Code Reader<br />
In practice, the ”Fault Code Reader” code will be output as a series of<br />
numbers one after the other, and the user has to recognise individual numbers,<br />
and recognise the gaps between numbers. This is made easy by the fact that<br />
the pause between two numbers is much greater than the pause between the<br />
individual digits of a number.<br />
Similarly, there is an even greater pause between one series of code numbers<br />
(egg representing current faults), and another series of code numbers (e.g.<br />
representing faults stored in memory.<br />
To make matters even easier, the ECU, in most instances, repeats a series of<br />
code numbers, so that the user has the opportunity to check the reading.<br />
Each code has a particular meaning, which is identified by reference to the<br />
tables of Fault Codes which follow.<br />
GENERAL NOTES<br />
Before connecting “the Fault Code Reader” to the car, the user should<br />
ensure that the TEST SWITCH is set to "O" and the diagnostic socket has<br />
been correctly identified. Check that the car ignition is off, the car is out of<br />
gear, and that the handbrake is applied.<br />
When a fault code appears, it does not necessarily mean that the component<br />
indicated is faulty. It could mean that the ECU has received a signal from the<br />
component or it's wiring, which is outside specification.<br />
Therefore before tests are performed, (using the Test Procedure Notes later<br />
in this Manual), it is important<br />
all of the connections and wiring associated with the indicated component are<br />
checked.<br />
When multiple faults are indicated, it is possible that the fault on one<br />
component is causing incorrect readings from other components, but all the<br />
components will have to be checked to eliminate the true cause.<br />
8
Gunson Fault Code Reader<br />
5. CONNECTION<br />
DIAGNOSTIC SOCKET LOCATION<br />
The diagnostic socket is usually located close to the ECU or the<br />
main relays in the engine compartment. It is a two pin socket with<br />
Female contacts, the moulding is usually green<br />
Fault Code Reader connection:<br />
Flat blade connector to socket A<br />
Alligator Clip to battery earth<br />
<strong>FAULT</strong> INDICATION AND DISPLAY TYPE<br />
It is normal for Citroen / Peugeot vehicles to have an engine check light fitted to the instrument<br />
panel. If a significant continuous fault is present this light should be illuminated. An intermittent<br />
fault may record a code without setting the engine check light.<br />
The engine check light is orange in appearance, has a small engine silhouette with a transistor<br />
symbol on it. It should illuminate with the ignition ON and engine not running to check the bulb<br />
and wiring.<br />
<strong>FAULT</strong> STORAGE MEMORY<br />
This facility is included. Intermittent fault detection will result in a code being set. After a number<br />
of repeat vehicle journeys without a fault, the code may be automatically deleted.<br />
6. DISPLAY <strong>CODE</strong>S<br />
Carry out a basic inspection under the bonnet before proceeding, ensuring that all leads and<br />
connectors are secure and the ignition is turned off.<br />
TEST PROCEDURE<br />
1. Set the ”Code Reader” switch to the O position and connect the Code Scanner to<br />
the diagnostic socket (Fig 1)<br />
2.Turn on the ignition ON but do not start the engine.<br />
3. Set the Code Reader switch in the l position for a period of approximately three<br />
seconds, then return it to the 0 position.<br />
After about five seconds the Test Start code will be transmitted as a series of pulses reading<br />
code 12 (PULSE- PAUSE-PULSE PULSE).<br />
4.After a further five seconds the LED will extinguish.<br />
5. Set the switch into the I position again for three seconds and then return to the 0<br />
position, the LED will now come on. After about five seconds the next code will be transmitted<br />
6. If the code is code 11, (PULSE PAUSE PULSE) this denotes the end of the test sequence with<br />
no faults registered, therefore proceed to (6).<br />
If any other code is transmitted, there is a fault continue to (5) below<br />
9
Gunson Fault Code Reader<br />
7.Wait for five seconds and the Code Reader LED will extinguish, if a fault code was transmitted,<br />
set the switch into the I position again for three seconds and then return to the 0 position. After<br />
about five seconds a further fault code may be transmitted.<br />
8.This switch sequence must be repeated until code 11, end of test, is transmitted.<br />
9. The test can be repeated in order to confirm any codes or terminated by switching off the<br />
ignition and disconnecting the Code Reader.<br />
Reference should be made to the Fault Code Table to identify any codes and to assist in repair<br />
procedures.<br />
CLEARING <strong>CODE</strong>S (AFTER CORRECTING ANY VEHICLE <strong>FAULT</strong>S)<br />
When the end of the test procedure is indicated by the end of code 11, there will be a pause of<br />
about five seconds and the LED will extinguish.<br />
1. Put the switch into the I position for about ten seconds.Then put the switch into the 0 position,<br />
and switch off the ignition.<br />
2. Perform the test procedure again to ensure that the fault codes have been deleted.<br />
3. Drive the vehicle sufficient to warm the engine fully and then operate it under a variety<br />
of part and full load conditions.<br />
4. Perform the test procedure again to ensure that the fault codes have not been reset.<br />
7.VEHICLE APPLICATIONS<br />
APPLICATIONS: Peugeot vehicles with petrol engines and electronic injection<br />
systems<br />
These instructions only apply to the vehicles fitted with an ECU fault<br />
diagnostic system with a blink code output and a check engine light on the<br />
instrument panel<br />
Manufacturer MODELS YEAR SYSTEM<br />
Peugeot 106 1991< Magneti Marelli G6/ 8P, Mono-Motronic MA3.0, Motronic<br />
MP3.1<br />
205 1993< Mono-Jetronic, Magneti Marelli G5/G6, Mono-Motronic<br />
MA3.0, Motronic M1.3<br />
306 1993< Magneti Marelli G6/8P. Mono-Motronic MA3.0 Motronic<br />
MP3.2, MP5.1<br />
309 1988< Mono-Jetronic Magneti Marelli G5/G6 Motronic M1.3, ML4.1<br />
405 1987< Magneti Marelli G5/G6, 8PL, AP. Mono-Motronic MA3.0,<br />
Motronic M1.3, MP3.1, MP3.2, ML4.1, MP5.1<br />
605 1990< Magneti Marelli G5 single & multipoint Motronic MP3.1, 3.2,<br />
5.1, 5.1.1, Fenix 3B & 4<br />
10
Gunson Fault Code Reader<br />
Manufacturer MODELS YEAR SYSTEM<br />
Citroen AX 1991< Mono-Jetronic, Mono-Motronic MA3.0, , Magneti Marelli G6.11,<br />
Motronic MP3.1<br />
BX 1990< Motronic M1.3, MP3.1, MP4.1, Fenix 1B<br />
XM 1989< Magneti Marelli G5 Single & Multipoint Motronic MP3.1,<br />
MP3.2, MP5.1, MP5.1.1, Fenix 3B & 4.<br />
SAXO 1996< Mono-Motronic MA3 1 Motronic MP5 1, Magneti Marelli 8p<br />
/XANTIA<br />
ZX 1991< Mono-Jetronic, Mono-Motronic MA3.0, Motronic M1.3, MP3.1,<br />
MP3.2, MP5.1, Magneti Marelli G5, G6, 8P<br />
8. CITROEN/PEUGEOT <strong>FAULT</strong> <strong>CODE</strong>S<br />
<strong>CODE</strong> MEANING OF <strong>CODE</strong> ACTION<br />
11 End of test<br />
12 Start of test<br />
13 Air Temp sensor Refer to TPN 3<br />
14 Coolant Temp sensor Refer to TPN 2<br />
15 Fuel pump relay Test pump circuitry<br />
21 Throttle position sensor/idle Refer to TPN 4/5<br />
22 Idle speed control valve Refer to TPN 10<br />
23 Idle speed control valve Refer to TPN 10<br />
27 Vehicle speed sensor Test for speed signal to ECU<br />
31 Lambda system control Refer to TPN 9<br />
32 Lambda system control Refer to TPN 9<br />
33 MAF/throttle switch/MAP sensor Refer to TPN 7/4/6<br />
34 Carbon filter solenoid valve<br />
35 Throttle position sensor/full load Refer to TPN 4/5<br />
36 Lambda sensor heating control<br />
41 Crank Angle Sensor Test for CAS signal to ECU<br />
42 Injector valve control<br />
43 Anti-knock control<br />
44 Knock sensor No.1<br />
45 Ignition coil control No.1<br />
46 Turbo pressure valve<br />
47 Turbo pressure regulation<br />
51 Lambda sensor Refer to TPN 9<br />
52 Lambda system control Refer to TPN 9<br />
53 Battery voltage<br />
54 ECU and anti-knock module<br />
55 CO mixture potentiometer<br />
56 Coded anti-theft<br />
57 Ignition coil control No.2<br />
62 Knock sensor No.2<br />
63 Lambda sensor No.2 Refer to TPN 9<br />
64 Mixture control B Refer to TPN 9<br />
65 Cylinder sensor<br />
71 Inj. valve 1<br />
72 Inj. valve 2<br />
73 Inj. valve 3<br />
74 Inj. valve 4<br />
75 Inj. valve 5<br />
76 Inj. valve 6<br />
91 Inj. valve control<br />
11
Gunson Fault Code Reader<br />
9.TEST PROCEDURE NOTES (TPN)<br />
1. VANE AIR FLOW METER<br />
This is positioned in the airstream and is opened by the flow<br />
of the air intake. The greater the airflow, the more the flap/plate opens. The<br />
flap/plate is connected<br />
to a potentiometer that will produce a voltage reading proportional to the<br />
position of the flap/plate.<br />
To test a Vane Air Flow Meter, probe the airflow meter connector with a<br />
voltage meter until the sensor<br />
output is identified.The output will be a voltage of 0.5v to 4.5v, or 4.5v to 9v.<br />
The reading changes as<br />
the air flow is varied. The airflow can be varied by varying the engine speed.<br />
Test the output of the airflow meter with the ignition on, at idle, at 1500 RPM,<br />
at 3000 RPM, and during a rapid acceleration, and compare to typical values<br />
given below:<br />
Ignition on 0.25v-0.5v 3.5v<br />
Idle 0.5v-1.5v 4.5v-5.0v<br />
1500 RPM 0.7v-2v 5.0v-5.5v<br />
3000 RPM 1.1v-3v 6-7v<br />
Rapid Acceleration 3v-4.5v >8v<br />
Typical Air Flow sensor output<br />
Most systems give an increase in voltage with air flow rate, but some systems<br />
give a fall in voltage.<br />
Gradually increase engine speed from idle to 3000 RPM, observing the voltage<br />
change. If the voltage becomes 0v or 5v at any point, repeat the test. If the<br />
same result is obtained, the resistive track of the airflow meter is damaged. If<br />
the voltage stays at a value as the engine speed changes it indicates a sticking<br />
flap/plate.<br />
A sensor simulator that can simulate a varying voltage, can be used to provide<br />
a voltage to the ECU to simulate the output of the airflow sensor and positively<br />
diagnose a faulty airflow meter.<br />
2. COOLANT TEMPERATURE SENSOR:<br />
This should be tested by an ohms meter when the engine is cold, and also<br />
when warm (with any connections to the sensor disconnected). The results<br />
should be checked against manufacturer’s specifications, or typical values as<br />
12
Gunson Fault Code Reader<br />
given overleaf:<br />
Typical Coolant Temperature Sensor Resistance<br />
Most systems<br />
Exception KE Jetronic, EEC1V.<br />
Cold 3-5 K Ω 50 K Ω @ 15∞C<br />
Warm 300-400 Ω 3.5 K Ω @ 80∞C<br />
A sensor simulator that can simulate resistance can be used to simulate the<br />
resistance value of the sensor and positively identify a defective sensor.<br />
3 AIR TEMPERATURE SENSOR:<br />
This may be tested by connecting an ohms meter across the sensor and checking<br />
against the typical values given below:<br />
Typical Air Temperature Sensor Resistance<br />
Most systems<br />
Exceptions*<br />
Cold 5 K Ω 500 Ω @ 0∞C<br />
Warm 2.5 K Ω 200 Ω @ 20∞C<br />
*Exceptions - KE,L,LE2 and LE3 Jetronic Lucas P Digital<br />
The sensor is intended for fine-tuning the petrol/air mixture. Therefore<br />
dynamic tests while observing the injection duration are inconclusive. The use<br />
of a Sensor Simulator to simulate extreme temperature variations is useful<br />
to show the injection duration can be affected by air temperature and therefore<br />
that the circuit is fully operational.<br />
4.THROTTLE SWITCH:<br />
This is a switch which connects two terminals at idle (or closed throttle), and<br />
connect two other terminals when the throttle is open.<br />
A B C<br />
• • •<br />
At idle A+B connected<br />
Open throttle B+C connected<br />
13
Gunson Fault Code Reader<br />
Typical throttle position switch<br />
Therefore to test a throttle switch, connect an ohms meter across A + B. If the<br />
throttle is closed then there should be 0 ohms across A+B. With the throttle<br />
open, the reading should be open circuit or infinity. Connect the ohms meter<br />
across B + C. Vary the throttle positions and the opposite should be true.<br />
Throttle closed A to B = 0 Ω (closed circuit)<br />
Typical throttle switch resistance Throttle open A to B = infinity (open circuit)<br />
Throttle closed B to C = infinity (open circuit)<br />
Throttle open B to C = 0 Ω (closed circuit)<br />
5.THROTTLE POTENTIOMETER.<br />
This is variable resistor with a reference voltage supplied to the resistor. As<br />
the throttle position changes the voltage on the output of the potentiometer<br />
varies. This voltage informs the ECU of the exact position of the throttle. In<br />
some cases the ECU measures the rate of change of throttle position, and so<br />
a “clean” potentiometer track can be very important.<br />
A B C<br />
• • •<br />
A = Variable Voltage : 0.5 to 4.5v<br />
B+C = Resistor - fixed : 3K Ω - 10K Ω<br />
Typical throttle potentiometer<br />
To test the throttle potentiometer disconnect the connector to the sensor and<br />
connect an ohms meter to terminals B and C. This is usually the fixed<br />
resistance of the potentiometer. A resistance of between 3k-10k should be<br />
observed. Re-connect the ohms meter to terminals A and B. A resistance of<br />
0_-1k to 5k-10k should be observed between throttle closed and throttle open.<br />
From throttle closed, slowly open the throttle, observing the steady change in<br />
resistance. A rapid change in resistance or an open/ closed circuit reading<br />
indicates a faulty sensor.<br />
To further test the sensor, reconnect the connector to the sensor and start the<br />
engine. Connect a voltage meter between terminal A and earth. Observe the<br />
voltage at idle. Slowly open the throttle observing the change in voltage. The<br />
voltage is typically O.5v to 4.5v. A rapid change in the voltage, or a loss of the<br />
14
Gunson Fault Code Reader<br />
voltage, indicates a faulty sensor.<br />
If the sensor is not producing a producing a voltage, or the tests are<br />
inconclusive, the use of a sensor simulator (to simulate the sensor output),<br />
should be used to provide a voltage to the ECU. If symptoms persist while<br />
using a Sensor Simulator, then the fault is not with the Throttle Position<br />
sensor. If the system works correctly while the sensor is being simulated<br />
(replaced) the sensor is positively identified as faulty.<br />
6 MANIFOLD ABSOLUTE PRESSURE SENSOR:<br />
This produces a voltage of 0.5 to 4.5v dependant upon the pressure/vacuum in<br />
the inlet manifold.<br />
The connector usually has three terminals. Use a voltage meter to identify the<br />
5 volt supply, the ground, and the output voltage of the sensor.<br />
Test the response of the sensor output relative to engine speed as for (1). If<br />
there is little or no response, disconnect the vacuum pipe from the sensor and<br />
apply a vacuum directly to the sensor. If the voltage now varies, check the<br />
vacuum pipe for leaks or blockages. If the voltage does not vary with a direct<br />
vacuum, it is likely that the sensor is defective.<br />
To positively identify the MAP sensor as faulty, use a Sensor Simulator to<br />
simulate the output of the sensor.<br />
7. MASS AIR FLOW SENSOR:<br />
This is a hot wire positioned in the air stream. The air flow through the air<br />
intake has a cooling effect on the hot wire, and the greater the flow, the greater<br />
the cooling effect. A control unit which regulates the temperature of the hot<br />
wire provides a voltage signal to the ECU relative to the air flow.<br />
To test a mass air flow sensor, probe the airflow meter connector with a<br />
voltage meter until the sensor output is identified. The output will be a<br />
voltage of 0.5v to 4.5v, or 4.5v to 9v. This voltage changes as the air flow is<br />
varied. The airflow can be varied by varying the engine speed.<br />
Test the output of the airflow meter with the ignition on, at idle, at 1500 RPM,<br />
at 3000 RPM and during a rapid acceleration and compare to the typical<br />
values below:<br />
Ignition on<br />
0.25v-0.5v<br />
Idle<br />
0.5v-1.5v<br />
1500 RPM 0.7v-2v<br />
3000 RPM 1.1v-3v<br />
Rapid Acceleration 3v-4.5v<br />
Typical Air Flow sensor output<br />
Some systems produce a fall in the output voltage relative to an increase in air<br />
flow. A sensor simulator can be used to provide a voltage to the ECU to<br />
15
Gunson Fault Code Reader<br />
simulate the output of the airflow sensor and positively diagnose a faulty<br />
airflow meter.<br />
8.PETROL TEMPERATURE SENSOR:<br />
This measures the fuel temperature in the fuel manifold/pipe. If the<br />
temperature exceeds 90∞C the ECU will enrich the mixture by increasing the<br />
injection duration, as fuel evaporation is likely above 90∞C.<br />
9.LAMBDA OR OXYGEN SENSOR:<br />
This sensor is positioned in the exhaust system. It provides a voltage signal to<br />
the ECU which is used to vary the injection duration to maintain an air/fuel<br />
ratio of 14 parts air to 1 part of fuel.<br />
A Lambda sensor tester is required to test the operation of this sensor. On<br />
vehicles with a catalytic converter the Lambda sensor is essential as the<br />
sensor enables the ECU to maintain an oxygen content of about 2% in the<br />
exhaust. The catalytic converter requires the 2% of oxygen to perform its<br />
function.<br />
10. VALVES:<br />
The ECU uses valves in the fuel system to pass or restrict fuel or gases<br />
according to engine load conditions. Use the relay test to ensure that the ECU<br />
is actuating the valve. Valves are mechanical devices which can be sticking or<br />
jammed, therefore, removal and testing when removed from the vehicle may<br />
be required.<br />
16
Gunson Fault Code Reader<br />
10. COMMON TERMS<br />
Many abbreviated terms are peculiar to a particular manufacturer and are<br />
explained in the relevant text. Some more common or universal ones appear<br />
below.<br />
COMPUTER SYSTEMS<br />
ECU<br />
OBD<br />
KAM<br />
ELECTRONIC CONTROL UNIT These units may control a separate<br />
function, for example fuel injection, ignition, ABS. Modern systems<br />
tend to be more multi- function as this saves cost, wiring complications<br />
and ensures greater resistance to interference and more control over<br />
emitted interference.<br />
ON BOARD DIAGNOSTICS The facility provided by modern ECU’s<br />
to self diagnose and report faults in the ECU, sensors, wiring<br />
connections etc. Fault codes are used to differentiate faults.<br />
KEEP ALIVE MEMORY A system for maintaining a record of faults<br />
encountered to be accessed later. These may be intermittent or<br />
recorded only under particular conditions and therefore not accessible<br />
during no load testing.<br />
IGNITION<br />
DIS<br />
EDIS<br />
CID<br />
DISTRIBUTOR LESS IGNITION SYSTEM. These use one coil per<br />
cylinder or an arrangement which provides one coil per two cylinders<br />
and sparks every rotation of the engine instead of every two rotations<br />
(wasted spark). The net result is that H.T. voltages do not have to be<br />
mechanically distributed. Together with ignition advance “mapping” in<br />
the ECU this provides a high reliability and performance.<br />
ELECTRONIC DISTRIBUTOR LESS IGNITION SYSTEM<br />
CYLINDER IDENTIFICATION (SIGNAL) Determines which cylinder<br />
is not only receiving a spark but is also on the compression stroke.<br />
RON Defines the OCTANE NUMBER of petrol. Multiple position<br />
plug/socket arrangements allow ignition requirements to be changed<br />
for different rated fuels. e.g.“octane multiplug”<br />
17
Gunson Fault Code Reader<br />
INJECTION/FUEL<br />
LAMBDA SENSOR See EGO and HEGO sensors.<br />
EGO EXHAUST GAS OXYGEN (SENSOR) Sensitive to low<br />
concentrations of oxygen in hot exhaust gas. Essential for accurate<br />
“feedback” control of injection.<br />
HEGO HEATED EGO (SENSOR)<br />
MAP<br />
MAF<br />
MANIFOLD ABSOLUTE PRESSURE (SENSOR) Manifold pressure<br />
sensor measures differential pressure with vacuum sealed capsule (not<br />
atmospheric pressure).<br />
MANIFOLD AIR FLOW (SENSOR) “Vane” or “hot wire” flow sensor.<br />
SENSORS GENERAL<br />
PTC TEMPERATURE SENSOR of POSITIVE TEMPERATURE<br />
COEFFICIENT type. Low resistance when cold. NTC (NEGATIVE<br />
TEMPERATURE COEFFICIENT)is low resistance hot.<br />
ATS, FTS, CTS, TTS TEMPERATURE SENSORS Air, Fuel, Coolant,<br />
Transmission.<br />
18
Gunson Fault Code Reader<br />
11. WARRANTY AND CUSTOMER SERVICE<br />
This warranty is in addition to the statutory rights of the purchaser.<br />
The Tool Connection has made every effort to ensure that this product is of the highest quality<br />
and value to the customer. However,The Tool Connection can accept no responsibility for<br />
consequential damage howsoever caused arising from the use of this product.<br />
All technical enquiries regarding this product should be made to:<br />
The Tool Connection Technical Service Department: ++44 (0) 1926 818181<br />
Please note that The Tool Connection cannot provide technical information or advice or service<br />
data on particular motor vehicles.<br />
If this product should require service or repair, it should be returned to:<br />
The Tool Connection Technical Service Department,<br />
Kineton Road,<br />
Southam,<br />
Warwickshire,<br />
CV47 0DR,<br />
England.<br />
Please give full details of faults requiring attention when sending goods for service or repair<br />
19<br />
Gunson 05/2005