PORTABLE INTERNET RADIO
PORTABLE INTERNET RADIO
PORTABLE INTERNET RADIO

You also want an ePaper? Increase the reach of your titles
YUMPU automatically turns print PDFs into web optimized ePapers that Google loves.
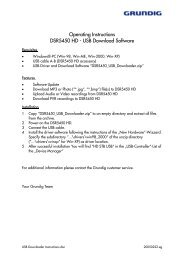
SPECIAL SETTINGS ------------------------------------------------------------------<br />
›<br />
Network setup<br />
Time setup<br />
Sleep<br />
Alarms<br />
Wizard<br />
PC settings<br />
View settings<br />
›Manual settings<br />
DHCP enable<br />
›DHCP disable<br />
Ethernet<br />
IP address<br />
193.169.99.220<br />
Ethernet<br />
Subnet mask<br />
255.255.255.0<br />
Ethernet<br />
Gateway address<br />
193.168.99.1<br />
Registering the device with the WLAN router<br />
with individual settings in the network<br />
These settings require advanced knowledge of the configuration of<br />
networks.<br />
1 Press »MENU« to open the menu of the current source.<br />
2 Press »Λ« or »V« to select the »Main menu« option and press<br />
»OK« to confirm.<br />
3 Press »Λ« or »V« to select the »System setup« option and press<br />
»OK« to confirm.<br />
4 Press »Λ« or »V« to select the »Network setup« option and press<br />
»OK« to confirm.<br />
5 Press »Λ« or »V« to select the »Manual settings« option and<br />
press »OK« to confirm.<br />
6 Press »Λ« or »V« to select option »Wireless« or »Wired« and<br />
press »OK« to confirm.<br />
7 Press »Λ« or »V« to select the »DHCP disable« option and<br />
press »OK« to confirm.<br />
– You are prompted to enter the IP address(es).<br />
Note:<br />
Setting »DHCP disable« means you have to enter all addresses<br />
manually. If »DHCP enable« is set, the addresses are automatically<br />
assigned by the router. If you have selected »DHCP enable«,<br />
continue with step 12.<br />
8 Use »Λ« or »V« to enter the IP address and press »OK« to<br />
confirm.<br />
– You are prompted to enter the subnet mask.<br />
Notes:<br />
Use » « to move to the next position.<br />
The settings in steps 9 to 11 can be found in the router configuration.<br />
9 Use »Λ« or »V« to enter the subnet mask and press »OK« to<br />
confirm.<br />
– You are prompted to enter the gateway address.<br />
Note:<br />
The device uses the gateway address to access the network.<br />
10 Use »Λ« or »V« to enter the gateway address and press<br />
»OK« to confirm.<br />
– You are prompted to enter the primary DNS.<br />
Note:<br />
The primary and secondary DNS (Domain Name System) are<br />
the network address of the server made available by the provider.<br />
V<br />
48