Create successful ePaper yourself
Turn your PDF publications into a flip-book with our unique Google optimized e-Paper software.
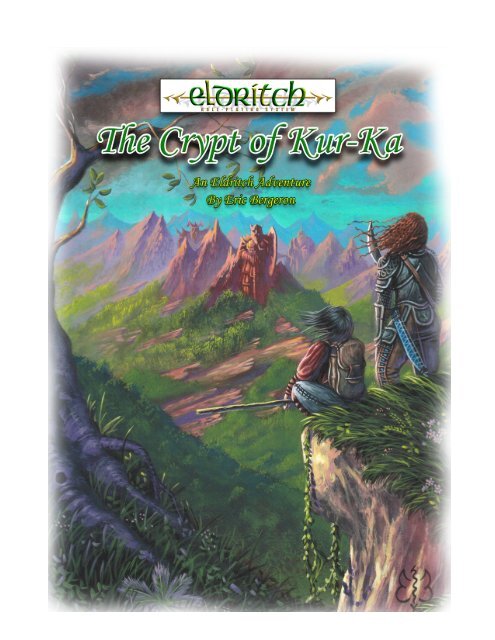
Crypt of Kur-Ka<br />
By Eric Bergeron<br />
Edited by Dan Cross<br />
An Eldritch RPG Adventure for 2 to 4 low level<br />
characters.<br />
Game Master’s requirements and preparation: The<br />
GM will need a copy of <strong>Goodman</strong> Game’s Eldritch Role-<br />
Playing System, and a set of RPG dice (D4, D6, D8, and so<br />
on). A copy of “Eldritch Traps”, available as a <strong>PDF</strong> through<br />
goodmangames.com, would also be useful. The GM should<br />
be familiar with the whole adventure before running the<br />
scenario, although the setting is only used as background<br />
information, and can be any generic town situated near a<br />
mountain range.<br />
Note to GM: Please take good notes on where the players<br />
position their characters (called ‘marching order’ in old school<br />
parlance) as this is important to this adventure. Especially for<br />
the encounter in the crypt’s room #8. Note it on a piece of<br />
paper or use miniatures if it helps.<br />
Players’ requirements and preparation: Like the GM,<br />
the players will need at least one copy of Eldritch’s core rule<br />
book and a set of RPG dice. Players will need character sheets<br />
or notepaper to keep track of their abilities, Defense Pools,<br />
inventory and so on…<br />
Terms and Abbreviations used for this module:<br />
GM = Game Master.<br />
PC(s) = Player Character(s).<br />
NPC(s) = Non-Player Character(s).<br />
Other abbreviations can be found in the Eldritch core<br />
rule book.<br />
Back-story synopsis<br />
A human teenager named Forlin Silver was hunting<br />
moose near the closest mountain range, a place dwarves<br />
once called their home. The young boy was aware he was<br />
approaching the hallowed grounds of ancient dwarven<br />
crypts, and knew better than to go near such a sacred place,<br />
uninvited by the dwarven priesthood. But it mattered not,<br />
because Forlin was quite venturesome.<br />
Lying at the outskirts of dusty ruins, only a few crypts<br />
remained undamaged, their entrances carved out of the<br />
mountainside, surrounded by crumbling citadels and<br />
abandoned temples of ancient times. Forlin passed a crypt of<br />
particular interest, one he knew was ordinarily sealed shut.<br />
Forgetting all about hunting moose, his curiosity took over.<br />
He lit a torch, and entered the dark entrance hall. To his<br />
disappointment, all of the rooms seemed devoid of the riches<br />
he heard about in common dwarven stories. Until, that is, he<br />
discovered a room containing an ornate fountain. A carved<br />
dwarf head spit water into its rectangular basin, and sitting<br />
atop the water basin’s edges were nine golden statuettes,<br />
representing key figures of the dwarven people’s past. On<br />
both sides of the fountain there were two small iron braziers,<br />
unlit.<br />
Fearing the worst if he dared touch something, Forlin<br />
went back to the town of Bloodspring, revealing his fantastic<br />
discovery to Borakr Nord and Ulric Willow, two promising<br />
local warriors, both of whom he idolized. Borakr admonished<br />
the boy to keep this news a secret between them. However,<br />
initially, Ulric was against this, thinking it better to report<br />
the open crypt to the town elders. But Borakr convinced<br />
him to keep his mouth shut, in the interest of personal<br />
gain. Forlin, excited about treasure, agreed to guide the two<br />
warriors to the crypt. Once there, Borakr and Ulric would<br />
enter the crypt and steal the statuettes to sell them at the<br />
nearest port. The gold would then be split equally among the<br />
three of them. Borakr however, had other plans in mind…<br />
During their preparations to empty the crypt, Forlin’s<br />
older sister Freyla spied on them, and immediately alerted<br />
the town’s elder about what was going on. Although she did<br />
not hear the whole story, the elder knew this meant trouble,<br />
especially since the town’s dwarves were unaware of the<br />
situation.<br />
The PCs’ Involvement<br />
The elder immediately formed a party of brave folks<br />
(the players) to track the fools and stop them before they<br />
attempted anything stupid. Bepin, a local hunter, volunteered<br />
to accompany and guide the PCs. They’ve been told to bring<br />
the fools back alive!<br />
Notes to the GM: The town’s elder provided the players<br />
with the following inventory…<br />
Each player is given the following: A handbag to carry<br />
small items, a full waterskin, two days of traveling rations,<br />
cooking pots and utensils, and two torches, along with flint<br />
and steel pieces.<br />
If a PC has purchased at least D4 in the Healing skill,<br />
he will be given one full herb pouch and the necessary<br />
equipment needed to prepare healing balms of herbs. The<br />
player must succeed an easy skill test to create a healing balm.<br />
Success or failure means the herbs have been used. A balm<br />
can heal 1D4 Hit Points, or helps in fighting poison and –s.
Two tents. Each tent has enough room for three PCs.<br />
One set of a 25 feet rope with a grappling hook.<br />
After the PCs prepared for the travel, they immediately<br />
headed to the mountain range. At sundown however, it was<br />
too dark and dangerous to continue forward. Therefore, they<br />
had no choice but to find a safe area and set up camp.<br />
Therefore the players’ objectives are the following:<br />
1 = Head to the dwarven crypt.<br />
2 = Find Forlin, Ulric and Borakr and bring them back<br />
to town so the elder can deal with them.<br />
Scene 1 – At Camp<br />
this mission, as you are about to enter places sacred to the dwarven<br />
people. In fact, it’s our hope you’ll embark with haste and return to<br />
us soon…”<br />
Thus, you set out to find the crypts that evening, following<br />
the local hunter and guide named Bepin Swiftarrow, traveling<br />
northwest from town. However, during the night, travel became<br />
impossible due to a hard rain so you stopped to set up camp.<br />
The next morning you notice how your campsite is a beautiful,<br />
grassy clearing on the side of a hill. The grass is tall and bends in<br />
gentle waves under the cool winds descending from the mountain<br />
range. The trees are sparse, the sky is clear and the sun is warm.<br />
The campfire is smoldering; its burning scent fills your nostrils.<br />
Sitting on a log facing the campfire, Bepin is already up, finishing<br />
a meal which looks tastier than what you were given. But the peace<br />
is broken by the sound of distant voices; the grunting of many<br />
humanoid creatures. You are not sure of their true locations but the<br />
guttural sound they make echoes through the hills and mountains.<br />
GM’s Note: There is the possibility of recompense, but<br />
only if players ask, because the elder assumes the “heroes”<br />
will do it out of good will. 250 gp is the reward, should it<br />
come up (1gold = 10 silver = 100 copper).<br />
The players will probably panic a little and completely<br />
extinguish the campfire to prevent noticeable smoke, or at<br />
least become more aware of their surroundings. Let them do<br />
so, but after many minutes pass, nothing happens (the orcs<br />
are too far away).<br />
Information Bepin Knows and willingly shares:<br />
1 - The camp site: In the morning the players awake<br />
abruptly by the sound of grunting orcs.<br />
Describe the following to the players:<br />
Yesterday, a young hunter named Forlin and two warriors<br />
named Boarkr and Ulric decided to explore beyond the reaches of<br />
town, and loot a nearby dwarven crypt located near the mountain<br />
range. The town’s elder learned about this and was outraged. The<br />
human residents are at peace with the dwarven clans and share the<br />
local towns with them. Disrespecting their resting places could<br />
very well break the peace. Therefore, knowing your adventuresome<br />
reputations, the elder called for your help.<br />
“I’ve called upon you as the bravest and most noble of<br />
travelers, and thank you for answering my plea. Our relationship<br />
with both the dwarves and our own esteemed townsfolk could be<br />
jeopardized if young Forlin, Boarkr and Ulric are not returned<br />
safely to town. You will be provided the best gear, well suited for an<br />
expedition into the ruins. But please, at all cost, be careful how you<br />
deal with lost treasures, and never utter the ‘word’ looting in regard<br />
Bepin<br />
• Bepin knows that the grunts are from orcs up in the<br />
mountains, but does not know if the creatures are near the<br />
crypts.<br />
• The quest was rushed by the elder, thus leaving the<br />
adventurers with very little information other than they must<br />
find and bring back Forlin, Borakr and Ulric to him.<br />
• The crypts were used to connect with the citadels via
narrow passageways (area no. 3 on the crypt’s map).<br />
• The Elder charged Bepin to lead everyone back safely<br />
through the wilderness, including the PCs.<br />
• If they ask about what he knows of the dwarves and their<br />
lost homes, he tells them the following…<br />
“When the dwarves lost their lands during the great war<br />
against the orcs, they spread into the surrounding forested realms<br />
occupied by Human and some Halfling settlements. Sadly, havoc<br />
ensued as the angry and beleaguered dwarves looted both the<br />
humans and Halflings in order to survive. But as legend has<br />
it, The Great Wolf, King of the Land made a truce with the<br />
dwarves, allowing them to work and pay taxes like everyone<br />
else, in exchange for peace and citizenship. War was averted,<br />
though the dwarves did not want to give allegiance to humans.<br />
However, the dwarves were starving, running out of resources,<br />
and outnumbered, so agreed to the truce. To their surprise, the<br />
Great Wolf proved to be a great and fair man, and over the<br />
years the dwarves regarded him as a brother. Eventually they<br />
became accustomed to the local human ways, which to their<br />
greater surprise, were not all that different—besides living on<br />
the surface rather than underground. Indeed, the humans had<br />
similar ideals, like family, drinking, and of course killing the<br />
orcs. Although the dwarves rarely excelled in some human sports,<br />
like hunting, they became more open minded, sharing jokes and<br />
funny stories with the common folk. Still, even as the dwarves<br />
became very friendly with the local humans and Halflings,<br />
vengeance against the orcs still runs in their blood and they miss<br />
the mountains terribly. If the opportunity arises, they will surely<br />
try to claim their lands back”.<br />
When the players are ready to continue traveling, Bepin<br />
suggest that they should leave the tents behind. If the players<br />
ignore his suggestion, the tents will slow down the characters’<br />
progress and in doing so, they will encounter more orcs in<br />
Scene 3.<br />
2 - Frog pond: Near the camp lies a little murky pond<br />
filled with cattails, lilies and frogs. If for any reason PCs do<br />
drink this water they will get sick (-1 to ability rolls for one<br />
day). However, the sickness will only kick in when the PCs<br />
go near the crypt’s entrance. If a PC owns at least a D4 of<br />
Healing skill, he may roll against an easy challenge rank<br />
opposition dice of a 1D4 to see if he is aware that the pond’s<br />
water is detrimental to them.<br />
The pond is the home of a good number of frogs. If a PC<br />
wants to catch some for whatever reasons, be it for making<br />
a tastier breakfast or not, he will have to roll a moderate<br />
Reflexes skill test against a challenge rank opposition dice of<br />
2D4. On a success the PC will catch a number of frogs equal<br />
to the difference check of the roll (note too that some orcs<br />
love to eat plump, juicy frogs, so such could be a role-playing<br />
opportunity). On a failure the player simply cannot catch<br />
one. If a player fails by a margin of 4 or more, the player<br />
falls into the pond and in the process will spoil his traveling<br />
rations.<br />
If the players linger too long, or if the GM feels a need<br />
for a random encounter, have the party attacked by Wild<br />
Dogs. They are quite vicious, trained by orcs to kill, and<br />
escaped from their owners.<br />
Wild Dogs<br />
TY/CS 12.0<br />
Unarmed 2D6<br />
HP 12<br />
RS 6<br />
BP D10<br />
Scene 2 – The<br />
traveling trader<br />
1 - Trader’s break:<br />
Describe the following to the players:<br />
As you continue your path Northwest, you come across a road<br />
and notice an old wagon parked on its southern side.<br />
Weather or not the players arrive by stealth…<br />
Describe the following:<br />
You identify three well-armed guards watching over a trader<br />
who appears to be napping fitfully on the bench of his wagon. The<br />
wagon looks like it is filled with crates and barrels. Just under the<br />
bench where the trader uncomfortably rests his feet, you notice a<br />
small chest.<br />
If the players approach the wagon by stealth and the<br />
guards notice, they instantly become suspicious of the<br />
characters. If the trader is intimidated, he’ll sell his wares<br />
with a 10% reduction to average price. On the other hand,<br />
if the players do not get in trouble, and wish to deal up front<br />
with the trader, the man will raise his prices up to 1D4 X<br />
10% of their normal rates.<br />
The trader is bloated with food, and he’s having digestion<br />
problems. The man cannot sleep as his stomach hurts. In<br />
addition, the man cannot stop himself from burping and<br />
farting. It’s truly sad.<br />
If the characters decide to approach the trader…
Describe the following to the players:<br />
As you approach the sleepy trader, you startle him, and he falls<br />
down from his wagon, cursing at his misfortune, asking what’s<br />
going on. One of his guards come to his aid, dusting off the dirt<br />
from his shoulders, and turns to face you, one hand on the pommel<br />
of this sword.<br />
As soon as the trader realizes the characters are<br />
adventurers, and potential buyers, he changes his attitude and<br />
becomes overwhelmingly friendly, in hopes to sell some of his<br />
goods.<br />
Read or paraphrase the following dialog to the players:<br />
Please excuse my clumsiness; I have not had much sleep today.<br />
I’ve been…(burp!) having stomach trouble…(burp!)…trying to<br />
keep the food down. I just eat a tasty, but exotic vegetable, which<br />
sadly makes my stomach feel terrible. It is rare that we…(Burp!<br />
Fart! Fart!)…oh, I’m terribly sorry for that! Uh, what was I saying,<br />
ah yes...? It is rare that we see travelers on this road, I guess my…<br />
(Burp!) My reputation as a fine … (Burp!)…trader precedes me.<br />
Care to see what old Olaf has for sale, friends?<br />
If the players want to deal with the trader, he’s got the<br />
following merchandise…<br />
• 23 Traveling Rations. Cost = 1 silver pieces each.<br />
• 4 Colorful and warm blankets (The trader pretends they<br />
come from a far away land, which is false of course. The blankest<br />
come from his older sister). PCs can roll for a Skullduggery skill<br />
check against the trader’s own Skullduggery skill to notice the lie.<br />
Cost = 1 gold piece each.<br />
• 2 wooden statuettes. One represents a man holding a<br />
moon above his head and the other a woman holding a sun over<br />
her head. Sadly, the male statuette is broken and it is missing<br />
parts of the moon (The trader will try to make a quick coin<br />
anyway if the players tell him about it being broken. He will<br />
reply that the statuette holds a moon crescent and not the full<br />
moon, which again is a lie!<br />
• Cost = 4 gold Pieces (total waste of money!) A PC may<br />
roll an Appraisal skill check against a moderate challenge rank<br />
opposition dice of a 2D4 to notice that the items are worth no<br />
more than 4 copper pieces each and even less so for the broken<br />
one.<br />
to trade it with one of the player weapons (another sword if<br />
possible). The trader will even say that the katana is engraved<br />
with magic runes (the runes are Asian writing, it is the signature<br />
of its maker, and if none of the PCs know about this language<br />
they may well believe the lie). However, the players can roll a<br />
Skullduggery skill check against the trader’s own Skullduggery<br />
skill. PCs with Appraisal can also check a roll against an easy<br />
challenge rank opposition dice of a D4 to realize this item is just<br />
a piece of junk. In any case, if the players agree to this terrible<br />
deal the trader will hurry up and pack his things and head west.<br />
If the player strikes something with the katana, it will fall apart.<br />
The rest of the trader’s merchandise are barrels filled with<br />
flower and horse grain. Cost = 1 silver pieces per lbs.<br />
Once the PCs have dealt with him, the trader will slowly<br />
pack his things and head west.<br />
If the players try to steal the chest under the bench on the<br />
wagon (where the trader likes to rest his feet), they must roll a<br />
Thievery check against a moderate challenge rank opposition<br />
dice of a 2D4. To take it under the eyes of the guards, the<br />
check becomes difficult (2D6), or even harder if they are<br />
suspicious.<br />
GM Note: Alternatively, roll for each of the guards<br />
separately, as an opposed roll of Scrutiny 1D4 versus the player’s<br />
Thievery Ability.<br />
If the players attack for any reasons and/or get caught<br />
stealing, then the guards will attack. The trader will try<br />
to run away with his wagon. Olaf is a coward and will do<br />
anything to stay alive, even if he has to give his wagon and<br />
horse. If the players take his stuff and let him go, he will<br />
report the PCs as being highwaymen and they will issue a<br />
bounty on their heads (that is up to the GM and the later will<br />
have to prepare and create the events as this is not the goal of<br />
this adventure).<br />
Trader Guards<br />
4 human guards (CS 8).<br />
Unarmed 1D8<br />
HP 8<br />
RS 4<br />
BP D6<br />
Notes: The guards wear leather armor (1D6 protection).<br />
• Old wine bottles. Unlike the rest of his merchandise,<br />
the wine is actually valuable and the trader unaware of this fact<br />
himself. If a PC inspects the wine, he may roll an Appraisal skill<br />
check against a moderate challenge rank opposition dice of a<br />
2D4 (If the PC successfully rolls, his character will estimate each<br />
bottle’s value to 50 gold pieces each!) Cost = 8 Silver pieces each.<br />
• 1 Katana. This is a decorative sword and has no real<br />
value whatsoever. The trader will not sell it; instead he wants
Scene 3 The warriors<br />
1 – Battlefield: About an hour ago, on the side of a<br />
cliff, four orcs faced two hulking ogres in a grueling<br />
battle, and apparently only one orc survived. They were<br />
fighting for territory. The surviving orc is resting behind<br />
a bush which matches his skin color, thus giving him<br />
good camouflage (formidable challenge of 2D10 versus<br />
Scrutiny or Scouting).<br />
Describe the following to the players:<br />
As you continue your way Northwest, you come about a<br />
hillside where you notice evidence of a recent battle. Three orc<br />
corpses are piled over the bloody remains of two hulking ogres.<br />
The stench of the corpses is unbearable, invading your nostrils like<br />
an unwanted parasite. Some spiked chain weapons and primitive<br />
leather bags are scattered around the debris.<br />
If the players fight the orc, refer below.<br />
Orc<br />
TY/CS 10.0<br />
Melee 2D10 (all other attacks 1D4)<br />
HP 20<br />
RS 10<br />
BP D10<br />
Notes: wears hide armor.<br />
If the PCs are able to loot the battlefield, they will find<br />
three spiky chain weapons the orcs were carrying (four of<br />
them if they kill the wounded orc). Loose chain weapon -<br />
medium 1H, +2 damage, +10 to Weaponry for Mastery, Max-<br />
Split 2, +1 initiative. The other weapons are two spears the<br />
ogres were carrying (weapon details are found in the Eldritch<br />
core book. Look for Pole Arms/Spears, then Spear). All<br />
humanoids sport hide armor, likely useless to the PCs unless<br />
one of them is a Half-Orc. However, the armor stinks to the<br />
core and will penalize the wearer by -2 for any social skill<br />
checks. In the first primitive leather bag the PCs will find 3<br />
rotten apples, one wolf tooth, a piece of unknown dried meat<br />
(possibly dwarf flesh) and 1D6 gold pieces. In the second<br />
bag, the PCs will find a severed dwarf finger sporting a silver<br />
ring worth 1D8 X10 silver pieces, one wolf pelt worth 1 gold<br />
piece, and a stinking, headless dead rat.<br />
Note: If the players carried the tents and slowed down<br />
progress, the above event still happens, however when the<br />
wounded orc shouts, two other healthy orcs will immediately<br />
come to his aid. The later were already on their way to help<br />
their allies fight the ogres (the details of the two new orcs can<br />
be found at the end of this book).<br />
If the players go near the pile for whatever reason, be<br />
it curiosity or for looting, the wounded orc will spring out<br />
of his hiding place and actually challenge the characters by<br />
standing by the corpse pile, his head high and bloodshot eyes<br />
full of defiance.<br />
Describe the following to the players:<br />
As you go near the pile of corpses, an orc comes out from a<br />
nearby bush. He appears to be badly wounded. However, he his<br />
determined to stop you from getting closer to his dead companions’<br />
remains. With his spiky-chain weapon in hand, he firmly plants his<br />
feet on the ground, and emits a loud, cat-like war cry, a deep tone<br />
rising to a deafening shriek. Then, he waits for your next move.<br />
This orc is a formidable warrior and although he is quite<br />
wounded, he is still a threat, and will fight until his last<br />
breath. However, he is only defending his fallen allies resting<br />
place, so if the PCs decide the leave the area without getting<br />
closer or touching anything, the orc will not fight them.
Scene 4 The dwarven crypt<br />
GM’s Note: Forlin, the young hunter who lead the warriors to the<br />
crypt, hides behind the fallen monolith. At the approach of the PCs,<br />
Forlin will come out of his hiding place and greet them.<br />
Describe the following to the players:<br />
1 – The Crypt<br />
GM Note: If one of the PCs drank from the pond at the<br />
camp, the sickness starts. The PC will show signs of a severe<br />
fever and will loose 1D6 Resilience points on the spot. Feats<br />
of Strength, Endurance, Speed, Reflexes, Melee and Ranged<br />
weapons and Unarmed combat all drop by one base rank for<br />
seven days (it does not affect specializations or masteries). If<br />
base rank is already D4, then a constant penalty of -2 applies.<br />
A successful moderate heal check with healing herbs will<br />
lessen the duration of the fever by 1D4 days.<br />
Describe the following to the players:<br />
As you arrive at your destination, you marvel at the crypt’s<br />
masterwork. Its gates are recessed into the majestic mountainside.<br />
The metal doors are impossibly thick, and at least 25 feet high,<br />
fully decorated with etchings of their finest dwarven warriors.<br />
One of the doors is open, with enough space to allow an average<br />
humanoid’s egress. Two huge, impressively lifelike dwarven statues<br />
stand to either side of the gates; however, one of them has been<br />
broken, possibly from a mountain rock fall. Just in front of the<br />
statues are monoliths, engraved with runic symbols, and just like<br />
one of the statues, the left one was broken to pieces.<br />
Forlin comes out from behind the fallen monolith, waving a<br />
fist at the sky… “I knew my sister would rat us out! But, boy am<br />
I glad to see you guys! Borakr and Ulric have been in there for<br />
ages! The crypt is small, and I worried they were taking too long.<br />
Actually, I’m sure of it, because they told me to wait for them here,<br />
which I did. But I just heard somebody scream in terror a few<br />
minutes ago, just before you arrived, and I think that’s a clue, right?<br />
Something terrible has happened!”<br />
If players ask questions to Forlin, he knows the<br />
following…<br />
• The crypt is small.<br />
• He thinks there are probably still traps in there.<br />
• Two passage ways seem to be blocked beyond the crypt.<br />
• Both Borakr and Ulric were healthy when they entered...<br />
now, who knows?<br />
• PCs will need torches as the crypt is quite dark, but the<br />
boy’s torch burned down.<br />
• There are no living creatures in there (the boy does not<br />
know about the resident in area 8).<br />
• He does not know who screamed in terror, and he is<br />
unaware of creatures other than his fellow explorers, so can only<br />
guess.<br />
• He did not take anything valuable or sacred from the<br />
crypt.
Ever since he heard the screams the boy became<br />
stricken with fear, believing Borakr and Ulric faced a ghost.<br />
Therefore, he will not venture into the crypt anymore. If<br />
the PCs tell him to go back to town, he will do so without<br />
hesitation. Otherwise he will wait for them near the fallen<br />
monolith. If the PCs tell him the expedition was a stupid<br />
idea, he will agree and say he will not do this again.<br />
If the PCs inspect the monoliths, they are engraved with<br />
dwarven runes. Unless they speak/read the language they<br />
cannot understand their meaning. Otherwise they can read<br />
the following on both of them. “Here rests the nine kings of<br />
Kur-Ka.”<br />
2: The Crypt’s Entrance: Note that the PCs will need<br />
torches to see inside the crypts, or else they will need night<br />
vision. Unless stated otherwise, all the ceilings of this crypt<br />
are set at a height of 200 feet. The walls are made of finely<br />
sculpted stone blocks, and the floor is made of marble tiles.<br />
There is dust everywhere. If the players want to follow the<br />
tracks Borakr and Ulric left behind, they must succeed with<br />
a Scouting skill check against an easy challenge vs. 1D4. On<br />
a success, they will also notice older orc footprints, which all<br />
lead north, and all of them take both the farthest east and<br />
west corridors, which lead to the holy fountain room (#8).<br />
Describe the following to the players:<br />
Your eyes slowly adjust to the dark environment of the crypt.<br />
The walls in this T-shaped room are filled with sculpted designs,<br />
which seem to represent the surrounding mountain area, and the<br />
ceiling slopes upward into darkness. The floor is a bit dusty, and<br />
is made of marble slabs and in the center; nine of the slabs display<br />
a large dwarven two-dimensional runic symbol. Besides the main<br />
gates, there are three exits from this room. The East and West exits<br />
both have a small metal door reinforced by metal spikes. At the<br />
northern end of the room are two small staircases, each going up<br />
beside a huge dwarven statue, painted in amazingly lifelike color,<br />
representing some dwarf of great importance.<br />
The west and the east doors lead to area #3. Both doors<br />
are unlocked; however they are jammed with rust and rubble<br />
from the other side. The players will have to roll for a Feats<br />
of Strength skill test against a moderate challenge of 2D4 to<br />
open the doors. Otherwise they stay jammed and cannot be<br />
opened.<br />
The nine slabs on the floor represent the names of all the<br />
past dwarven kings which once ruled the Kur-Ka clan. They<br />
are… 1 = Or-Tuek, 2 = Or-Biok, 3 = Or-Biak, 4 = Or-Kurek,<br />
5 = Or-Kirok, 6 = Or-Zak, 7 = Or-Nirok, 8 = Or- Tuuk, 9 =<br />
Or- Kurok. The Or before the names mean King or Lord in<br />
dwarven. Only players knowing the dwarven language can<br />
understand and read them.<br />
GM Note: These runic symbols are not traps unto themselves;<br />
they are only a gallery of names and if you look at the map,<br />
they are aligned to the dwarf god. The huge statue at the end<br />
of the room represents the main dwarf god, For-Ka. Also, these<br />
halls may lead to ancient rooms and halls, even older citadels.<br />
In any case it is up to the GM to decide what to do with them.<br />
However, for the purpose of this module we encourage the GM<br />
to only make these halls available for more creative adventures,<br />
once the objective of this module is completed.<br />
GM’s Note: Danger Zone (an optional rule from<br />
‘Traps’ by Dieter Zimmerman)<br />
This crypt is a dangerous environment affecting Active<br />
Defense Refresh rates. The GM may declare they’re in a<br />
“danger zone”, causing ADPs to refresh slowly, or not at all,<br />
until escaping the situation.<br />
The refresh rate depends on the overall stress level of<br />
the situation. If the heroes are in an area they know to be<br />
fairly safe, they are considered to be Relaxed. Heroes in a<br />
dangerous area who have taken precautions such as scouting<br />
around corners and blocking doors can refresh in a Wary<br />
state. The heroes must be Vigilant in dangerous areas when<br />
they are unable or unwilling to take extra precautions, or if<br />
they fortify a position in an extremely dangerous area. When<br />
heroes are Stressed (directly involved in combat or a chase, for<br />
example) they do not recover any ADPs.<br />
• Relaxed 20% refresh per minute<br />
• Wary 10% per minute<br />
• Vigilant 5% per minute<br />
• Stressed (Combat, Chase, etc) 0%.<br />
3: The broken Corridors: (the doors are trapped;<br />
however it is impossible to detect the rubble traps).<br />
Describe the following to the players.<br />
The moment you open the door, a large dust cloud blows<br />
into your faces, and then you hear rocks cracking, crumbling,<br />
and falling down…<br />
At this very moment, the player who opened the door<br />
will be hit by falling rubble<br />
Falling Rubble<br />
Type: Mechanical<br />
No detection or disarm is possible.<br />
Effect: 2D8 damage<br />
Defenses: Armor reduces damage exceeding the Evade<br />
or Dodge DP (victim chooses one or the other).<br />
Area: One Creature in 5’ space.
Describe the following to the players.<br />
As the dusty cloud dissipates, you understand that this area,<br />
which seems to be a corridor, is condemned. Progress will be<br />
impossible.<br />
4: Hall of For-Ka (the Dwarf God)<br />
Describe the following to the players.<br />
The stairs lead behind the statue to a bigger T-shaped room.<br />
If the players want to inspect the statue a bit more...<br />
Describe the following to the players.<br />
This statue is made of marble and it one of the most impressive<br />
creations that you ever seen. The statue is so lifelike; all of you feel<br />
as if its eyes are actually watching you.<br />
The statue holds a huge one handed war hammer, wears<br />
a chain mail suit, and protects himself with a medium shield.<br />
All look masterfully worked. The shield is engraved with<br />
the For-Ka’s own symbol; hammer striking an anvil over a<br />
mountain background. The GM can change this to whatever<br />
weapon the deity favors, and the same goes for its armor and<br />
shield, if any other than being a masterpiece, the statue is<br />
quite ordinary, and holds neither traps nor magic.<br />
5: Brazier Stairs:<br />
Describe the following to the players.<br />
Separated by a small marble ramp, two sets of stairs lead up to<br />
a small corridor going east and west. Right beside the stairs are two<br />
big braziers made of iron. Neither of them are lit.<br />
The braziers have not been lit in ages and unless players<br />
are equipped with wood and such, it’s impossible to light<br />
them up.<br />
6: Spiked Pit trap (see map): This trap was sprung by an<br />
orc the day before, and its corpse emits a nasty stench. Ulric<br />
also perished in the trap. What the players do not know is<br />
that Borakr actually pushed Ulric into it. As for the corridors,<br />
they are both identical, besides the spiked pit trap, and both<br />
lead to the corridor of tombs in front of the fountain room.<br />
As the players venture into one of the corridors…<br />
Describe the following to the players.<br />
The walls of the corridor become richer with sculptures<br />
detailing what seems to be stories of past glory days for the<br />
dwarves. Unlike the rooms and halls you have crossed so far, the<br />
corridor looks like it is in better shape. The sculptures even retained<br />
their colors.<br />
If the players venture near the Spiked Pit Trap, describe<br />
the same details as above and …<br />
As you venture into the west corridor and follow its path<br />
leading north, you notice a huge square shaped hole blocking you<br />
way.<br />
If the players peak into the hole…<br />
The hole is a sprung spiked pit trap, which is 30 feet deep. At<br />
the bottom, you notice an impaled orc corpse, and sadly Ulric the<br />
warrior shared the same fate.<br />
If the players venture into the pit (using their ropes) to<br />
loot the corpses they find the following items on the orc;<br />
one spiked chain weapon, (Loose - medium 1H, +2 damage,<br />
+10 to Weaponry for Mastery, Max-Split 2, +1 initiative) one<br />
damaged hide armor (light, 1D4 protection. However it is<br />
quite damaged and on a roll of 1 while protecting the user, it<br />
will break down and become useless). A wolf-teeth necklace,<br />
and crude iron lock picks. On Ulric, they will find his entire<br />
inventory: wolf skin hide with wolf head hood and cloak, a<br />
two-handed sword, a small knife, and a leather belt with 2<br />
gold pouches; one has 14 silver pieces while the other holds 3<br />
gold pieces. Also, a leather backpack with black bread, and a<br />
cut piece of smelly cheese.<br />
7: Dwarf Tombs: (Of the twelve holes, nine of them<br />
hold dwarf skeletons, which are the remains of the nine dwarf<br />
kings).<br />
Describe the following to the players.<br />
As you turn into the corridor, you see that the north wall holds<br />
burial galleries, and in nine of the twelve alcoves lay a skeleton of<br />
dwarven size. In the middle of the south wall, you can make out<br />
two metal door gates, similar to the ones found in the entrance of<br />
the crypt; however it is only as high as a human adult of average<br />
size. Light comes out of it and sheds into the corridor creating a<br />
contrast with darkness.<br />
Beside bones, the tombs have nothing in them.<br />
8: The holy fountain room: The fountain in this room<br />
was once blessed, and priests used it to pour the holy water<br />
over the remains of the nine dwarven kings, at least once per<br />
year. Every king had a golden statuette in his image, which<br />
was also used as a cup for the holy water. The statuettes were<br />
placed over the edges of the fountain. The gate to this room<br />
was once locked, and the golden statuettes were safe from<br />
thieves. But, not too long ago, a “skilled” and “smart” orc<br />
(the one found in the spiked pit trap!) was able to open both
the entrance of the crypt and the fountain room with crude<br />
lock picks. As he was about to loot the golden statuettes, he<br />
spotted the room’s huge, terrifying resident and ran as fast<br />
as possible, thus triggering the trap, and falling to his death.<br />
The day after, the young Forlin noticed the gates open and<br />
instigated the conditions for this adventure.<br />
If the players enter the room…<br />
Describe the following to the players.<br />
This room is a dead-end and its walls look rather blank<br />
compared to what you’ve seen in other rooms. Only a beautifully<br />
decorated fountain stands in the middle of the south wall, were a<br />
marble gargoyle-like dwarf head spits water into it. In the Southeast<br />
corner of the room, you see Borakr on one knee, wincing in pain as<br />
if wounded, and his foot appears stuck between two floor slabs. His<br />
torch lights up his part of the room, and you see he’s working hard<br />
to get himself free.<br />
Giant Spider<br />
TY/CS Extraordinary / 78.0<br />
Threat Ranks<br />
Mandibles: 3D12<br />
Poison: 3D10 to Resilience if attack penetrates active<br />
DP & armor.<br />
HP 144 ( Mod to HP x4 due to size)<br />
RS 36 ( Mod to RS x2 )<br />
BP D20<br />
If a player tries to stop Borakr before he leaves the room,<br />
Borakr will attack them with the torch (1D8 +1 fire damage).<br />
GM Note: In any case, we encourage the GM to make sure Borakr<br />
can leave the crypt alive. However, if it’s not possible for him to escape<br />
the players, he will beg for his life. Keeping him alive is part of the<br />
objectives and if the players kill him, they will loose some RP points in<br />
the end.<br />
Borakr<br />
TY: Standard<br />
TR: 1D10+2 (powerful fists)<br />
EA: 1D8+1 (torch)<br />
HP: 10<br />
RS: 5<br />
Notes: Borakr will get the first attack in the round,<br />
likely his last if the PC’s retailiate with force.<br />
Scene 5 Conclusion<br />
Borakr<br />
Borakr is not stuck, in fact he’s just afraid. He’s using his<br />
torch to keep a huge spider at bay, which makes the room its<br />
nest. High in the ceiling hangs many webs and cocoons of<br />
animals. The spider comes and goes into the room by a large<br />
cavity found in the ceiling, which leads outside. Borakr has<br />
all the golden statuettes in his backpack and he intends to<br />
leave the place with them. He is faking his wounds and he’s<br />
not stuck at all. The minute a player character comes to his<br />
aid, he will push the hapless hero into the fountain, hoping<br />
to drown him, and use his torch against the others, hoping<br />
to ultimately run away. At the very same moment, the spider<br />
will come down toward the player who was pushed into the<br />
fountain and attack. This creates a dilemma here, as the<br />
players will be surprised by both Borakr and the spider.<br />
The adventure ends once the players bring back Forlin<br />
and Borakr if he did not escape. Experience rewards depend<br />
on the actual difficulty of encounters, which can only<br />
be judged in hindsight. Defeating or escaping a creature<br />
should reward at least 1 Victory Point, and if the battle or<br />
situation proves even more challenging than expected, use the<br />
following battle odds and situational danger guidelines:<br />
Battle Odds and VP Awards<br />
Devastating: 5pts<br />
Deadly: 4pts<br />
Nearly Outmatched: 3pts<br />
Formidable: 2pts<br />
Challenging: 1pt<br />
Situation Danger Level VP Awards<br />
Nearly Impossible: 5pts<br />
Extreme: 4pts
Difficult: 3pts<br />
Troublesome: 2pts<br />
Easy: 1pt<br />
Award Role-Playing points as events unfold, during the<br />
actual session. That way it eliminates GM bookkeeping.<br />
Individual RP Awards:<br />
• Good, but ineffective idea or action: 5 points<br />
• Good, and effective idea or action, or clever use of skill, feat or<br />
ability : 10 to 15 points<br />
• Creative and unusual idea or action, beneficial conjecture, or<br />
excellent tactical maneuver: 25 points<br />
• *Excellent role-playing, extraordinary daring, or personal<br />
sacrifice: 50 points<br />
If players with good willed characters made efforts during<br />
or after the game to bring back Ulric’s remain to town will be<br />
awarded extra 25 RP points.<br />
Award extra Victory Point and 10 Role-Playing Points if<br />
players capture Borakr alive.<br />
Award players 50 Role-Playing points if they give the<br />
golden statuettes back to the town dwarves (assuming the<br />
players are aware that Borakr has them in his bag).<br />
If for some reason players want to keep the golden<br />
statuettes and sell them they will become outlaws and a<br />
bounty will be put over their heads (The GM will have to<br />
create this adventure on his on as this module does not cover<br />
this).<br />
If all goes well and the players succeed their objectives,<br />
the elder will award 250 Gold Pieces to divide among the<br />
party.<br />
Key to “The fallen Kingdom of Kur-Ka”<br />
1 = Town of Bloodspring<br />
2 = Splinted Shield Keep<br />
3 = Ruins of Hammerwall Keep<br />
4 = Ruins of Kur-Ka<br />
5 = Ruins of Dur-Ka<br />
6 = Chasm of Ragorax<br />
7 = Ruins of Mur-Ka<br />
8 = Helmreck Keep
Player


