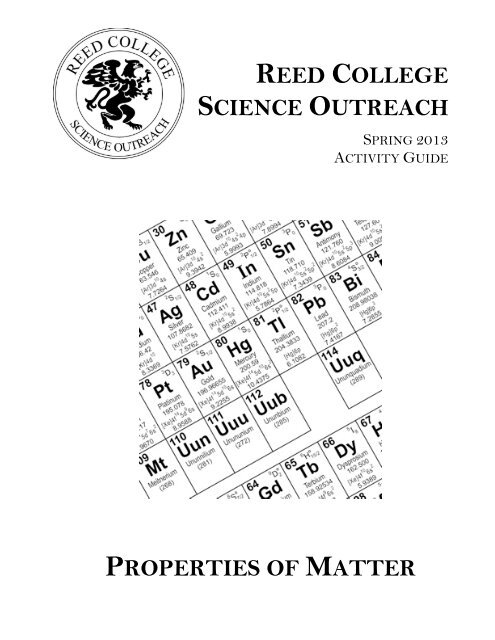
REED COLLEGE SCIENCE OUTREACH PROPERTIES OF MATTER
REED COLLEGE SCIENCE OUTREACH PROPERTIES OF MATTER
REED COLLEGE SCIENCE OUTREACH PROPERTIES OF MATTER

Create successful ePaper yourself
Turn your PDF publications into a flip-book with our unique Google optimized e-Paper software.
<strong>REED</strong> <strong>COLLEGE</strong><br />
<strong>SCIENCE</strong> <strong>OUTREACH</strong><br />
SPRING 2013<br />
ACTIVITY GUIDE<br />
<strong>PROPERTIES</strong> <strong>OF</strong> <strong>MATTER</strong>
2 Reed Biology Outreach<br />
Reed College Science Outreach Program<br />
2012-2013<br />
Manual compiled by:<br />
Kristy Gonyer, Outreach Coordinator<br />
Special thanks:<br />
Many of the lessons in this unit are based on units compiled in earlier years by Thea True,<br />
Laurie Hausch, Kelly Fellows, and Juliana Arrighi. Previous lessons and those included in this<br />
manual benefited from the contributions of Reed College Faculty including Robert Kaplan and<br />
Arthur Glasfeld. I thank them for the work that they put into developing these lessons.<br />
Finally, thank you to Li Zha, Cole Perkinson, and OMSI for their support in adapting and<br />
implementing the chemistry lessons in this manual.<br />
Acknowledgements:<br />
Funding provided by<br />
Reed College & donations by:<br />
An Duclos in memory of her son Levi &<br />
Diane Perkinson<br />
Thanks for the support and guidance of our classroom teachers!<br />
Portland Public Schools and David Douglas School District faculty:<br />
Beach Elementary School<br />
Kristi Burnham<br />
Grout Elementary School<br />
Marika Bilter<br />
Jonathan Ficher<br />
Brian Gilroy<br />
Sally Stephenson<br />
Lewis Elementary<br />
Paul Colvin<br />
Sarah Kohn<br />
Abby Rotwein<br />
Sylvia Jen<br />
Matthew Marchyok<br />
Lent Elementary School<br />
Sarah Meyers<br />
Lincoln Park Elementary<br />
Sara Camp<br />
Chris Healey<br />
Sam Wallace<br />
Pioneer Special School Program<br />
Christopher Marquardt<br />
Paul Pierson<br />
Dan Wilson<br />
Brandon Breedon<br />
Vernon School<br />
Brad Johnson<br />
Karanja Crews
3<br />
Table of Contents<br />
Table of Contents ................................................................................................................. 3<br />
Tentative Schedule............................................................................................................... 3<br />
Outreach Calendar................................................................................................................ 4<br />
Lesson One- Exploring States of Matter ......................................................................... 6<br />
Lesson Two- What is Matter? ......................................................................................... 10<br />
Lesson Three- Exploring Electricity.............................................................................. 14<br />
Lesson Four- Exploring Magnetism ............................................................................... 19<br />
Lesson Five- What is pH? ................................................................................................. 22<br />
Lesson Six- Exploring Solubility..................................................................................... 26<br />
Lesson Seven- What is a Chemical Reaction? .............................................................. 29<br />
Lesson Eight- Mystery Powders...................................................................................... 32<br />
Tentative Schedule<br />
Observation & Pre-Lesson-<br />
Lesson 1. Exploring the Properties of Matter, States of Matter<br />
Lesson 2. Exploring the Properties of Matter, Atoms & Molecules<br />
Lesson 3. Exploring the Properties of Matter, Electricity<br />
Lesson 4. Exploring the Properties of Matter, Magnetism<br />
Lesson 5. Exploring the Properties of Matter, What is pH?<br />
Lesson 6. Exploring the Properties of Matter, Solubility<br />
Reed’s Spring Break- No Outreach<br />
Portland Public Schools Spring Break- No Outreach<br />
L7. Properties of Matter, What is a Chemical Reaction?<br />
L8. Exploring the Properties of Matter, Mystery Powders<br />
Make up weeks & Optional Field Trips to Reed Reactor & Science Labs<br />
Jan 28-<br />
Feb 1<br />
Feb<br />
4-8<br />
Feb<br />
11-15<br />
Feb<br />
18-22<br />
Feb 25-<br />
March 1<br />
March<br />
4-8<br />
March<br />
11-15<br />
March<br />
18-22<br />
Mach<br />
25-29<br />
April<br />
1-5<br />
April<br />
8-12<br />
April<br />
15-26
4<br />
Outreach Calendar<br />
January<br />
20<br />
21<br />
22 23 24 25<br />
26<br />
Paideia<br />
MLK Day<br />
LP Closed<br />
27<br />
28<br />
29 30 31 1<br />
2<br />
Observation<br />
& Training<br />
February<br />
Reed Starts<br />
Outreach<br />
Meeting<br />
5/5:30???<br />
PPS Closed<br />
3<br />
4 5 6 7 8 9<br />
Week 1<br />
10<br />
11 12 13 14 15<br />
16<br />
Week 2<br />
17<br />
Week 3<br />
24<br />
Week 4<br />
18<br />
PPS/LP<br />
Closed<br />
19 20<br />
PPS Late<br />
25 26 27 28 1<br />
LP Closed<br />
21 22 23<br />
LP Closed<br />
2<br />
March<br />
3<br />
Week 5<br />
10<br />
4 5 6 7 8 9<br />
11 12 13 14 15 16<br />
Week 6<br />
17<br />
Reed Spring<br />
Break<br />
24<br />
PPS/ LP<br />
Spring<br />
Break<br />
18 19 20<br />
25<br />
PPS/ LP<br />
Closed<br />
26<br />
PPS/ LP<br />
Closed<br />
PPS Late<br />
27<br />
PPS/ LP<br />
Closed<br />
21 22 23<br />
28<br />
PPS/ LP<br />
Closed<br />
29<br />
PPS/ LP<br />
Closed<br />
30
5<br />
April<br />
31<br />
1 2 3 4 5<br />
6<br />
Week 7<br />
7<br />
Week 8<br />
14<br />
Make-up<br />
Week<br />
21<br />
Make-up<br />
Week<br />
28<br />
Make-up<br />
Week<br />
8 9 10 11<br />
15 16 17<br />
PPS Late<br />
LP Closed<br />
LP Closed<br />
12<br />
PPS/LP<br />
Closed<br />
13<br />
18 19 20<br />
22 23 24 25 26 27<br />
29 30 1 2 3<br />
Last Day of<br />
Classes<br />
4<br />
May<br />
5<br />
Field Trips<br />
12<br />
6<br />
Reading<br />
Week<br />
13<br />
7 8 9<br />
Outreach<br />
Party 5pm<br />
10 11<br />
14 15 16 17 18<br />
Field Trips<br />
Finals<br />
19 20<br />
21 22 23 24 25<br />
Graduation<br />
26 27 28 29 30 31 1
6<br />
Lesson One- Exploring States of Matter<br />
Objectives<br />
o Students will begin to learn about matter and some of matter’s properties.<br />
o Students will learn about the three most common states of matter and observe<br />
changes between the three states of matter.<br />
Lesson Background- The Three States of Matter<br />
For the next eight weeks we will be studying a few of the basic chemical and physical<br />
properties of matter. Each lesson will focus on a different property of matter.<br />
o What is matter? Matter is everything in the world that takes up space and has<br />
mass. Matter makes up everything in the world and there are many different<br />
kinds of matter. These different types of matter have different properties.<br />
Today students will begin to explore one of the fundamental physical properties of<br />
matter. Students will learn that matter on Earth exists in one of three states: solid,<br />
liquid, or gas (matter also can take the form of plasma, but temperatures are usually too<br />
cool on Earth for plasma to form). Each state has specific physical characteristics.<br />
• Solids hold a particular shape.<br />
• Liquids have no particular<br />
shape of their own. They take<br />
the shape of the container<br />
they are poured into.<br />
• Gasses expand or contract to<br />
fill the space of whatever<br />
container holds them,<br />
whether it is a balloon or a<br />
room.<br />
When a substance changes from one phase to another, heat energy is either emitted or<br />
absorbed. The processes of changing phases are:<br />
• Melting-going from a solid to a liquid (heat energy in)<br />
• Freezing-going from a liquid to a solid (heat energy out)<br />
• Evaporation- going from a liquid to a gas (heat energy in),<br />
• Condensation-going from a gas to a liquid (heat energy out)<br />
• Sublimation-going from a solid to a gas (heat energy in)<br />
• Deposition- going from a gas to a solid (heat energy out)
7<br />
Week Three Activity Overview<br />
Today’s activity will begin with a demonstration to introduce students to some of the<br />
properties of matter that they will learn about this spring. In front of the class you will<br />
drop a piece of dry ice into a graduated cylinder full of cabbage juice. The juice will<br />
begin to bubble violently as the dry ice sublimates producing a carbon dioxide gas<br />
(here you can review states of matter). The CO2 will slowly react with the water to form<br />
a weak carbonic acid, which will cause the cabbage juice to change colors (signs of a<br />
chemical reaction as the pH changes). Students will learn more about the changes that<br />
they observe in this demonstration later in the semester.<br />
For the rest of the lesson, the students will explore freezing points and changes in the<br />
states of matter by making homemade sorbet (sorbet will be made rather than ice-cream<br />
because of allergy concerns).<br />
Demo Materials<br />
o Graduated cylinder<br />
o Tray<br />
Activity Materials<br />
o Gloves<br />
o Ziplock bags, fruit juice, rock<br />
salt, & ice cubes (for freezing<br />
experiment)<br />
o Cabbage juice<br />
o Dry ice pieces<br />
o Cups, spoons, napkins for<br />
serving sorbet<br />
Lesson Plan<br />
Introduction to Matter (5-10 Minutes):<br />
Note: Remember to leave some time to remind students of your names (or to introduce yourself if<br />
you are new) and to point out the question box.<br />
1. On the overhead, point out the first word on the students’ “Science Toolbox”: matter.<br />
Tell students that matter is the scientific word for all the stuff that makes the universe.<br />
Tell the students that there are many different types of matter and that these different<br />
types of matter have different types of properties. Ask students if they can think of<br />
different properties in the matter they see around them (i.e. my pencil lead is grey, my<br />
desk is smooth, my book is heavy, etc.).<br />
2. Tell students that today we are going to learn about another very important<br />
property: the states of matter. Ask students if they can remember the three states. List<br />
the states on the overhead, and then ask the students to describe the characteristics of<br />
the three states.
8<br />
3. Ask the students how matter can change from one state to another. Explain to the<br />
students that solids can melt into a liquid and then evaporate into a gas if heat is<br />
added to the matter. Tell students that all matter can melt and evaporate; it just has to<br />
be very hot sometimes. Remind students that if matter looses heat it can also condense<br />
into a liquid and freeze into a solid. You might want to have the students fill out the<br />
vocabulary section in “My Science Toolbox” at this point.<br />
Demonstration (15 Minutes):<br />
4. Today’s activity will start with a demonstration to introduce students to some of the<br />
properties of matter that they will learn about this spring.<br />
5. Find a place where the entire class can see you perform the demo. After donning your<br />
safety gear, place a graduated cylinder inside a tray to catch any spills. Fill the cylinder<br />
halfway with cabbage juice. Briefly brainstorm some of the juice’s properties (color etc.).<br />
6. Then, bring out a piece of dry ice and discuss the dry ice’s properties. Be sure to point<br />
out the change in states as the dry ice sublimates from solid to gas. Next drop the ice<br />
into the cabbage juice and ask the students to point out changes in the properties of the<br />
juice. Tell the students that for the next several weeks we will learn more about the<br />
properties of matter and how different types of matter interact with each other.<br />
Freezing Experiment (20-25 Minutes):<br />
7. Tell students that they are now going to start an experiment about freezing. Explain<br />
the concept of freezing point and how the salt lowers the freezing point of water. Tell<br />
students that different types of matter freeze, evaporate, melt, etc. at different<br />
temperatures. For example, water usually freezes at 32˚F or 0˚C. However if you add<br />
salt, it changes the properties of the water so that it will start melting will be lower (the<br />
amount of salt will determine the exact melting/freezing point).<br />
½ cup fruit juice<br />
2 cups ice<br />
1 Tbs salt<br />
Sorbet in a Bag<br />
1. Pour the juice into a plastic baggie that has a zipper. Close the bag.<br />
2. Add the ice, and salt to a larger bag.<br />
3. Place the bag of juice inside the baggie containing the ice, salt and water.<br />
4. Shake, shake, shake the bag until the sorbet is the consistency you want. Remove<br />
the inner bag, scoop out your frozen treat, and enjoy!<br />
How It Works<br />
Salt, or sodium chloride, dissociates into sodium and chloride ions. These ions act as<br />
impurities in the water lowering its freezing point. Energy is absorbed from the<br />
environment (the sorbet) as the ice changes phase into water, which can't release the<br />
energy by solidifying back into ice. Therefore the sorbet keeps getting colder as the<br />
ice melts.
9<br />
8. Pass a small sample of fruit juice and have students make observations of their<br />
sample. Students should also take an initial temperature reading. (Sample juice should<br />
be dumped down the sink once they are done with it…No drinking! These samples are<br />
part of an experiment!)<br />
9. While students are making observations you should pass out gloves and sandwichsized<br />
Ziploc bags. You should also begin adding 1 Tbs of ice to the pre-prepared gallon<br />
sized bags of ice.<br />
10. Once students have finished their observations, have students wash their hands and<br />
put on their gloves. The students can then line up to fill their sandwich bags with ½ cup<br />
fruit juice in their small bag. The students should then seal their juice bag and place it<br />
into a bag with ice and salt. They should then go back to their seats and shake for 5-10<br />
minutes until the juice begins to freeze.<br />
11. After their sorbet is solid, they should open their ice bag over the sink (or the cooler<br />
if there is a long line). They should dump their ice into the sink, but retain their frozen<br />
juice. Make sure to give students paper towels to clean up any messes. The bags etc. can<br />
be thrown away.<br />
12. Before they dig into their sorbet, have students take a small sample and place it in a<br />
cup. How does it look now? What temperature is it now?<br />
13. Once students have cleaned up, they can enjoy their sorbet while completing their<br />
worksheets.<br />
Experiment Wrap-up and Conclusion (10-15 Minutes):<br />
14. Discuss the results as a class. What happened to the ice when salt was added? Were<br />
solids or liquids warmer?<br />
15. Finish by cleaning everything up and passing out stickers to students who<br />
completed their worksheets. If time allows, check for questions in the Question Box.
10<br />
Lesson Two- What is Matter?<br />
Objectives<br />
o Students will learn that matter is made up of atoms & molecules.<br />
o Students will learn that there are many kinds of atoms that give matter its<br />
unique properties.<br />
o Students will learn that atoms can form bonds with other atoms to form<br />
molecules with new properties.<br />
Lesson Background— Atoms and Molecules<br />
So far students have learned that the world is made up of matter and that different types<br />
of matter that have different properties. Today students will learn that matter is made<br />
up of atoms and molecules.<br />
Matter is made up of tiny atoms that are too small for us to see even with an optical<br />
microscope (although there are electron microscopes that allow us to see them). Atoms<br />
are measured in Angstroms, which are 1/10,000,000,000 of a meter (very, very small).<br />
There are many types of atoms, each with their own properties, which is why there are<br />
so many types of matter. Each different type of atom is called an element. Right now<br />
scientists have discovered 118 different types of elements (and they continue to discover<br />
new ones). Scientists have made a chart of the elements called the periodic table of<br />
elements.<br />
This table contains important information about the atoms. Even though atoms are very<br />
small, they are made up of even smaller parts. Atoms consist of a nucleus, which is<br />
made up of tiny little particles called protons and neutrons. Protons are very<br />
important. Some atoms have many protons and others only have a few. Each element<br />
has a specific number of protons and they help to determine the element’s unique
11<br />
properties. The periodic table tells you how many protons each element has. Around the<br />
nucleus are other particles called electrons. Atoms usually (but not always) have the<br />
same number of neutrons and electrons as protons.<br />
Electrons are also very important particles. Most atoms don’t like to be alone. They like<br />
to interact with other atoms. When atoms interact, the atoms’ electrons form a bond<br />
that holds the atoms together. These bonded atoms form a bigger piece of matter called<br />
a molecule. Molecules can be made up of all one kind of atom (like oxygen gas—02) or<br />
more than one kind of atom (like water—H20). Often molecules form new types of<br />
matter that have completely new properties (i.e. water vs. very flammable H2 or O2).<br />
Because atoms and molecules are so small, many people, including scientists, build<br />
models to better understand something that can be difficult to picture. Chemistry<br />
students often use molecular models when they’re learning about how molecules behave<br />
and computer-generated models are used in research as well. Today we will learn about<br />
some common molecules using models.<br />
Activity overview<br />
Today, students will use models to build molecules. The exercise will help emphasize<br />
how different types of molecules form bonds to create molecules. Be sure to emphasize<br />
the changes in properties that molecules undergo when they form new molecules.
12<br />
Materials<br />
o Molecule Building Kits<br />
Lesson Plan<br />
Review & Introduction (5–10 Minutes):<br />
Note: Remember that this lesson in only an introduction to atoms and molecules. Try to not get<br />
bogged down in the details. Just stick to the basics and be sure to leave more time for the activity<br />
than the introduction.<br />
1. Have students remind you about the different properties we have learned about so far<br />
(magnetism, states, etc.). Ask students why they think different types of matter have<br />
different properties.<br />
2. Tell students that matter is actually made up of very tiny particles called atoms. All<br />
matter is made up of these tiny particles. Put up an overhead of a periodic table. Explain<br />
that there are at least 118 different types of atoms, and each type of atom is called an<br />
element. Scientists created this table to list all the types of elements that have been<br />
discovered so far.<br />
3. Ask students if they have ever heard of the element carbon. Does anyone know what<br />
it looks like? Have student look at the graphite in their pencils, and tell them the<br />
graphite is made up of trillions of carbon atoms. Tell them that carbon (and all other<br />
atoms) has unique properties because of the way it is built.<br />
4. Show a picture of a carbon atom. Point out that it is made up of even tinier particles.<br />
Go through each part of the carbon atom, having students label the particles in their<br />
worksheets. Be sure to emphasize that the protons are the particles that give carbon<br />
(and all other atoms) its unique properties. Also point out how the periodic table tells<br />
the students how many protons each element has. To check comprehension, ask<br />
students: Do any two elements have the same number of protons?<br />
5. Finally, tell students that electrons also play an important role. Inform students that<br />
most atoms don’t like to be alone. They like to interact with other atoms. The electrons<br />
are the part of the atom that helps it to form bonds (like a friendship) with other atoms.<br />
Sometimes atoms will form bonds with the same kind of atom and sometimes atoms will<br />
form bonds with other kinds of atoms. These bonded atoms are called molecules.<br />
Molecule Modeling (35–40 Minutes):<br />
6. Ask student to open their science notebooks to the molecule-modeling activity. Tell<br />
students that today we are going to explore how atoms form bonds with each other.<br />
Tell students that we will do the first two exercises together to help them understand<br />
what to do.<br />
7. Before you pass out the kits, do the first example as a demonstration. Point out the<br />
chart that lists the elements that students will work with today. Point out how each<br />
element has its own properties. One of the properties that each element has is that they
13<br />
like to form a certain number of bonds. (It is like how some people like to have just one<br />
close friend, while others like to have lots of friends). Point out that hydrogen only likes<br />
to form one bond, while the others like to form many bonds. Show the students the<br />
Styrofoam balls in the kit. Each ball represents a different type of atom. The chart lists<br />
the color of each atom.<br />
8. Have students look at the first exercise in their science notebook. Point out that the<br />
instructions are like a recipe. For the first exercise, show students how the “recipe”<br />
shows them they will need 2 oxygen atoms. Tell students that they should then look at<br />
the chart for 2 pieces of information. 1.) What color are the oxygen atoms (red) and 2.)<br />
how many bonds do the oxygen atoms want (2)? Show students the toothpicks that will<br />
represent the bonds. Show the students how the two oxygen molecules will form with<br />
two bonds shared between them. Have the students draw the molecule in their<br />
worksheets.<br />
9. Tell the students that we will do the next one together as a class. The next exercise is<br />
water. Ask the students what elements we will need for this puzzle (2 hydrogen and 1<br />
oxygen). What colors are those atoms? How many bonds does each atom want? How<br />
can we put the atoms together to make everyone “happy”? Hopefully a student will<br />
suggest that the oxygen atom will share one bond with each of the two hydrogen atoms.<br />
10. Tell students to work on the rest of their molecules individually or in groups of two<br />
to complete the rest of the exercises. Walk around to help students as they work on the<br />
exercises. (If any students finish early, you will have a challenge sheet available).<br />
Wrap-up (10–15 Minutes):<br />
11. As students wrap up, have the students put their kits back in their bags (made sure<br />
to look for lost atoms and bonds on the floor). Ask students which ones were easy and<br />
which ones were more difficult. Ask the students if they noticed the descriptions of the<br />
new molecule’s properties. Do the new molecules have the same properties as the<br />
elements in them?<br />
12. Be sure to pass out stickers to students who completed their worksheets. If time<br />
allows, check for questions in the Question Box.
14<br />
Lesson Three- Exploring Electricity<br />
Objectives<br />
o Students will learn that the flow of electrons is responsible for electricity.<br />
o Students will learn that certain types of matter are better conductors of<br />
electricity than others.<br />
Lesson Background- Electricity<br />
This week, students will review the parts of an atom and learn that the flow of electrons<br />
is responsible for electricity, which powers the electronic devices we use everyday.<br />
They will be introduced to the concepts of electricity, circuits, and voltage by building<br />
batteries with four different types of fruit and using the circuits to power LEDs. They<br />
will also review the scientific method and develop their quantitative skills by recording<br />
the voltages produced by each type of fruit in a table of results. This week, students<br />
should learn that<br />
o An electron is a basic component of every atom that is responsible for creating<br />
current.<br />
o Current is the flow of electrons through a material.<br />
o Voltage is a measure of how strongly electrons are being pushed through a<br />
material (in general, increasing voltage will produce a stronger current, just like<br />
increasing the pressure in a hose will force more water through the hose).<br />
o Resistance is a measure of how tightly a material holds its electrons (if a<br />
material has a higher resistance, then it is harder for current to flow through it,<br />
similar to how a kink in a hose makes it harder for water to flow through it).<br />
o A circuit is a path through which electrons can flow.<br />
Week Two Activity overview<br />
Today, students will build batteries using fruit, use their batteries to power LEDs, and<br />
determine which of four fruits makes the most effective battery.<br />
Materials<br />
o Fruit, roughly equivalent in size:<br />
either lemons, apples, oranges,<br />
or tomatoes<br />
o Copper nails (~1.5” in length)<br />
o Galvanized zinc nails (~1.5” in<br />
length)<br />
o Small red LED with ~2” leads<br />
o 9 alligator clip connectors<br />
o Voltmeter with alligator clip<br />
probes
15<br />
Lesson Plan<br />
Review & Introduction to Electricity (10 Minutes):<br />
Note: This activity has a lot of parts, and it is important to leave plenty of time for the<br />
actual activity. Try to introduce the terms in bold below simply and clearly, and avoid<br />
getting bogged down in excessive detail.<br />
1. Review the steps of the scientific method (OHECK) with the class. Then ask students<br />
to remind you what they learned about atoms last week. Make sure students know that<br />
the electron is a basic component of all atoms. (To give them a picture of how small the<br />
electron is, mention that if an electron were the size of an apple, humans would be 3.5<br />
times the size of the solar system!)<br />
2. Tell students that today we are going to learn about another special property of<br />
matter. Ask your students what they know about electricity. Describe electricity as a<br />
form of energy created by electrons. Sometimes atoms can give up their electrons, which<br />
can then begin to move through materials such as wire. When these electrons are in<br />
motion, we get current; current is the flow of electrons through a material. (You might<br />
make an analogy to current in a river.) This current is used to power all of our electrical<br />
appliances.<br />
3. Now have students picture a garden hose. What causes water to flow through the<br />
hose? Generally, pressure is needed to make water flow up the hose so that you can,<br />
say, water your plants. Similarly, a pressure is needed to make electrons flow through a<br />
material. This pressure is called voltage. Voltage is a measure of how strongly<br />
electrons are being pushed through a material, just like pressure is a measure of how<br />
strongly water is being forced through your garden hose.<br />
4. Now, it is also possible that there is a kink, or sharp bend, in your garden hose. What<br />
happens then? Well, even if the pressure in the hose is very high, the kink probably<br />
stops very much water from being able to pass through the hose. In a similar way,<br />
atoms that don’t like to give up their electrons will slow the flow of electrons through a<br />
material. This is called resistance. Resistance is a measure of how tightly a material<br />
holds onto its electrons. (If a material has a high resistance, it will be harder for electrons<br />
to flow through it.)<br />
5. Now imagine putting your hand over the end of your garden hose. If you turn the<br />
hose on slowly, water will gradually pile up in the hose until the hose is completely<br />
filled with water. The same sort of thing happens with electrons. If you block the<br />
electrons, they will start to pile up until they can’t flow any more. Usually, for a current<br />
to exist, we need a complete, unblocked path for the electrons to flow around. This electron<br />
path is called a circuit. A circuit is a path through which electrons can flow. (Remind<br />
the students of the electromagnet that they built... To form the magnetic field around<br />
the iron nail, we created an electric circuit that flowed from the battery through the<br />
wire around the nail and back into the other side of the battery...)<br />
6. As a check before you go on, ask a few different students to define current, voltage,<br />
resistance, and/or circuit. We’re only asking students to get a very basic, general idea<br />
of the concepts, so don’t worry too much about the nitty-gritty details. You might want<br />
to have the students fill out the vocabulary section in “My Science Toolbox” at this<br />
point.
16<br />
Building Fruit Batteries (30 minutes)<br />
7. Tell students that today they will be working together in groups of 4 to build<br />
batteries using fruit (either lemons, apples, oranges, or tomatoes). How is this even<br />
possible? Somehow, electrons must be able to travel through the fruit. When this<br />
happens, we say the fruit conducts electricity. It turns out that citric acid (found in tart<br />
fruits) allows electrons to flow more easily through sour fruits than through regular<br />
water.<br />
8. Before you begin, have the students write down their hypotheses to the question,<br />
“Which fruit will make the most effective battery?” in the indicated spots on their<br />
worksheets.<br />
9. Now distribute the supplies to each table (4 fruits, 4 copper nails, 8 zinc nails and 5<br />
alligator clip connectors— save the LED for later). Tell the students that you will be<br />
giving them step-by-step directions, so they need to be very good listeners. Let the<br />
students know not to eat the fruits, as they may get contaminated during the activity.<br />
Instruct each student to take 1 fruit, 1 of copper nail, 2 zinc nails and 1 alligator clip<br />
connector. As you give the students instructions, you should also follow along on the<br />
overhead, while your teammates help the students.<br />
10. When the class is ready, have the students take their fruits into their hands and roll<br />
the fruit between their palms while gently squeezing. Explain that this will soften up<br />
the fruit and make it easier for current to flow through it. (Try to avoid rupturing the<br />
skin of the fruit if you can.)<br />
11. Now have students take their copper nails and push it gently about 1” into one side<br />
of the fruit. Then have the students take one of the zinc nails and push it about 1” into<br />
the other side of the fruit so that the tips of the nails are close, but not touching. Add<br />
the second zinc nail right next to the first (Fig 1).<br />
Fig. 1. How to insert nails into the fruit. The nails can be a bit closer than in the picture above,<br />
but make sure they are not touching or the battery won’t work!<br />
12. Once everyone has prepared his or her fruit with nails, remind the students that<br />
these fruits are actually little batteries. Copper holds onto its electrons more forcefully<br />
than zinc does, so the electrons want to flow from the zinc nail to the copper nail. (This<br />
is like an electron tug-of-war between copper and zinc, and copper is winning!)<br />
13. Tell students that scientists measure how strong a battery is by using a device called<br />
a voltmeter. (Hold up a voltmeter for everyone to see.) We can use this device to<br />
measure the voltage of our fruit batteries. Remind students what voltage is by having a<br />
student define it for you. (Voltage is a measure of how strongly the battery is pushing<br />
on the electrons to create a current.) Demonstrate how a voltmeter works on the<br />
overhead by holding the two probes of the voltmeter against the two nails on the
17<br />
sample fruit that you prepared. Say that voltage is measured in units called volts (how<br />
many volts a battery produces says how powerful the battery is).<br />
14. Tell the students that you are going to go around and measure the voltage of one of<br />
each type of fruit. When you measure the voltage of each type of fruit, announce the<br />
voltage to the class, and have them enter the value into the table on their worksheet.<br />
(The voltage reading might fluctuate, but the reading should be somewhere in the 0.1–<br />
1.0 V range, and probably larger for the lemons and tomatoes than for the apples and<br />
oranges.)<br />
15. Tell the students that we are going to try to use the energy from our fruit batteries<br />
to power little red lights called LEDs (light-emitting diodes). Put the diagram of the<br />
lemon battery circuit up on the projector for the class to see. Inform the class that each<br />
line going from one nail to another represents one of the alligator clip connectors. Have<br />
students attach one end of their alligator clips to their copper nails. (Tell the students to<br />
be careful so that they don’t pinch their fingers.)<br />
16. Now have the students arrange their fruits in the middle of their tables in a line, as<br />
shown in the figure. Tell the students to make sure that all of the copper nails point in<br />
one direction and that all of the zinc nails point in the other direction. (This is essential<br />
in order for the batteries to work properly.)<br />
17. Have the students work cooperatively to attach all of their alligator clips to the nails<br />
so that it matches the diagram displayed on the board. Tell the students to work<br />
together so that each person has a chance to connect their alligator clip connector to the<br />
circuit. (Five alligator clips will be needed in total.) You will want to have a couple Reed<br />
teachers circle the class to assist any confused students with their alligator clips.<br />
18. After you see that each group is complete, tell them that a Reed teacher will go<br />
around the room and attach an LED to each circuit. For each table, do a once-over of<br />
the circuit to make sure it is correct before attaching the LED. Make sure the long leg<br />
of the LED (this side will be bent to distinguish it) is attached to the copper side of the<br />
circuit and the short end of the circuit is attached to the zinc side of the circuit, as<br />
depicted in Fig. 2. (This is essential because current only travels through LEDs in one<br />
direction.)<br />
Fig. 2. Complete fruit circuit with LED attached. Make sure the fruits are aligned as shown, and<br />
then attach the LED with the bent leg is connected to a copper nail.<br />
19. Have a student at the table look very closely at the LED and tell the class if they can<br />
see any light being produced. (The light will be dim, so it may help to turn the lights off<br />
temporarily for this part of the activity. Also make sure that the student look at the end<br />
of the LEDs...the sides don’t glow.)
18<br />
After confirming the student’s finding, have the students circle “yes” or “no” in their<br />
results table in the appropriate row. Remind the students not to be disappointed if their<br />
circuit doesn’t manage to make the LED light up; it just means that their type of fruit<br />
does not make as effective of a battery as others.<br />
20. Go to each of the other tables, attach an LED, assign a student at the table to tell<br />
the class if they can see any light being produced, and have the class fill out the<br />
appropriate row in their results table. If one of the circuits works particularly well, make<br />
sure the entire class has a chance to see the LED light up.<br />
Note: Some of the fruit circuits might not be strong enough to light the LED, but the<br />
lemon circuit should work. If you are having trouble getting the lemon circuit to light<br />
up the LED, try the following:<br />
(a) Double check that the copper nail is attached to the bent leg of the LED.<br />
(b) Make sure the nails are connected properly. (No two nails of the same type<br />
should be connected...i.e. no copper attached to copper etc.)<br />
(c) Measure the voltage across the two lemons on either end of the circuit. It should<br />
be between 2.5-4 Volts.<br />
(d) To increase the voltage, try moving the nails closer together and/or pushing the<br />
nails further into the lemons. This will increase the surface area of contact<br />
between the nails and the lemon, which should increase the voltage.<br />
Final Discussion and Wrap-Up (5-10 minutes)<br />
21. Have a Reed teacher go around and collect each of the fruit circuits. Meanwhile,<br />
gather the class’s attention for a final class discussion. Have the students look at their<br />
results table. Ask a student to tell you which fruit produced the highest voltage. Ask<br />
them if they know why. (Fruits that have more citric acid—the ones that are most<br />
sour—generally conduct electricity most efficiently.)<br />
22. Ask a different student which circuits (if any) were able to light the LED. Ask the<br />
students if they thinks the results make sense.<br />
Note: LEDs require a certain minimum voltage to produce light. If that voltage isn’t<br />
reached, then we don’t expect the LED to produce light.<br />
23. Have students fill out the conclusion section of their worksheets as best they can.<br />
Before saying goodbye to the class for the week, pass out stickers for completed<br />
worksheets and check for questions in the Question Box.
19<br />
Lesson Four- Exploring Magnetism<br />
Objectives<br />
o Students will begin to investigate the properties of magnets. They will learn<br />
about magnetic poles and permanent vs. temporary magnets by building an<br />
electromagnet.<br />
Lesson Background- Properties of Matter: Magnetism<br />
This week we want the students to start learning:<br />
o What is magnetism? A force of attraction or repulsion in and around certain<br />
materials. All materials exhibit a low level of magnetism, but for most materials<br />
it is too weak to be detected.<br />
o What is a magnet? A magnet is any piece of material that can attract certain<br />
metals (iron, steel or nickel...but don’t tell students this yet!). Magnetism may be<br />
naturally present in a material (such as in magnetite or iodestone) or the<br />
material may be artificially magnetized by various methods. Magnetized<br />
materials may remain magnetic permanently or temporarily (as in<br />
electromagnets, which can be turned on and off).<br />
o Magnets can either be permanent (like a bar magnet) or temporary (like an<br />
electromagnet that can<br />
be shut on and off).<br />
o Magnets can be made in<br />
a variety of shapes, but<br />
all magnets have 2 poles,<br />
North (-) and South (+).<br />
The poles are where the<br />
magnet is strongest.<br />
o Opposite poles attract<br />
and like poles repel.<br />
o All magnets have a<br />
magnetic field. The<br />
magnetic field is the area<br />
around a magnet where<br />
the material will attract<br />
metals.<br />
Activity Overview- Electromagnets<br />
Today students will spend some time observing the interactions of simple bar magnets.<br />
They will then build a simple electromagnet and determine the N & S poles of the<br />
magnet using a compass.
20<br />
Materials<br />
o Bar magnets<br />
o Magnet sets (D-cell battery, 1<br />
length of wire, 2 pieces of<br />
electrical tape, 1 6” iron nail, 5<br />
paper clips).<br />
o Compasses<br />
Lesson Plan<br />
Introduction to Magnetism (5-10 Minutes):<br />
1. Tell students that today they will learn about one special kind of property of certain<br />
types of matter: magnetism. Ask students what they already know about magnets. After<br />
a few students have answered, tell the students that magnets are a type of matter that<br />
has a special property called magnetism. Ask students to think about magnets that they<br />
have used in the past. What kinds of materials were magnets attracted to?<br />
Magnet Interactions (10-15 minutes):<br />
2. For this activity, students will work independently in groups of 2 to answer the<br />
questions in their science notebooks. They will be asked to make observations about<br />
what the magnet looks like and how magnets interact. Students should learn that like<br />
magnetic poles repel and opposite poles attract.<br />
Building an Electromagnet (20-25 minutes)<br />
3. Now, show students the compasses that they will use for today’s experiment. Ask<br />
students what a compass is used for. Ask students if they know which way the needle<br />
points. Use the compass to have the entire class point to the north side of their<br />
classroom. Tell the students that the earth is kind of like a giant magnet. Right now<br />
they are pointing to the North Pole. Tell students that we can also use a compass to find<br />
the poles of a magnet, since every magnet has a North and South pole just like the earth.<br />
4. Explain that today they will be making a type of magnet called an electromagnet.<br />
Tell them that this type of magnet is special because it can turn metal into a magnet<br />
using electricity. Unlike the bar magnets that you were just using, these magnets can be<br />
turned on and off.<br />
5. Tell students that they will be working together in groups of 2-4 to build this<br />
magnet. Tell them that you will be giving them step-by-step directions so they need to<br />
be very good listeners today.<br />
6. As you pass out the magnet kits, instruct students to leave the materials in the bag<br />
until you tell them what to do. As you give the students instructions, you should also<br />
construct an electromagnet on the overhead, while your teammates help the students.<br />
7. First, tell students to take out the nail. Tell students that this is the metal object that<br />
they will magnetize. Next, take out the wire. Show students how to wrap the wire<br />
tightly around the nail; leaving “tails” that will be connected to the batteries.
21<br />
8. Finally, have students remove the battery. Show them how to attach the “tails” of the<br />
wire to each end of the battery using electrical tape. Warn them that the wire may start<br />
to become a little warm over time because of the electricity flowing through it.<br />
9. Tell the students that their magnet is now complete. Have them test if it is working<br />
by seeing if it will attract paperclips. Go around and help students if they are having<br />
trouble.<br />
Testing for Polarity (5 minutes)<br />
10. Once the students’ magnets are working, pass out the compasses. Have students use<br />
the compass to figure out which side is north by placing the compass close to the<br />
magnet & determining which way the arrow points. Have students draw a quick sketch<br />
of their magnet (including the poles).<br />
11. As students finish, have them begin to disassemble and return their electromagnet<br />
kits.<br />
Wrap-Up (5-10 minutes)<br />
12. After the students clean up, review the important vocabulary and concepts covered<br />
today. Be sure to pass out stickers for completed worksheets and to check for questions<br />
in the Question Box.
Lesson Five- What is pH? 1<br />
Objectives<br />
o Students will learn about acids and bases, indicators, and the pH scale.<br />
Lesson Background- Acids, Bases, and Indicators<br />
So far, most of the properties of matter that students have learned about (magnetism &<br />
physical states) are all physical properties. Many of the other properties that students have<br />
thought of are most likely also physical properties (e.g. color, weight, density, etc.). Now that<br />
students also have a basic understanding of atoms and molecules, we will begin to explore<br />
matter’s chemical properties.<br />
Today students will learn about an important property that chemists use to categorize<br />
chemicals. Chemists divide substances into three categories: acidic, basic, or neutral. Many<br />
chemicals can be classified as either acids or bases. These two types of chemicals are opposites<br />
in chemistry and will react when they are mixed. Many other substances do not act as either<br />
acids or bases, and these substances are called neutral.<br />
• Examples of acids are vinegar, battery acid, and stomach acid.<br />
• Examples of bases are ammonia, detergents, drain cleaners, and baking soda.<br />
• Water, table salt, and plastics (etc.) are considered neutral.<br />
The strength of acids and bases ranges on a scale. Very weak acids and bases are not harmful<br />
to humans and can be detected according to taste. Acids taste sour while bases taste bitter.<br />
However, strong acids and bases are highly corrosive (and hazardous) so the safest way to<br />
determine whether a chemical is acidic or basic is to measure its acidity with an indicator.<br />
Indicators are chemicals that turn different colors depending on whether they are exposed to<br />
an acid or a base. (There are also indicators that will turn color in the presence of other<br />
substances. These indicators are very useful for many other purposes, e.g. blood sugar tests,<br />
lead paint tests, pregnancy tests…)<br />
Today students will use an indicator made from cabbage juice. Cabbage contains a chemical<br />
called anthocyanins that react to acid and bases. Cabbage juices can change to yellow, green,<br />
or blue when exposed to bases and red/pink when exposed to acids. (Many other plants also<br />
have indicator properties.)<br />
Scientists have devised a number scale (called the pH scale) to specify how acidic or basic a<br />
solution is. The scale ranges from 0-14, with 0 indicating a strong acid, 7 indicating a neutral<br />
substance, and 14 indicating a strong base.<br />
1 Lesson Adapted from:<br />
“Of Cabbages and Kings”, Chemistry in the K-8 Classroom, OMSI, 2007.
23<br />
pH Scale & Cabbage Color Changes<br />
Red Light Pink Dark Pink Purple Blue Aqua Green<br />
1 2 3 4 5 6 7 8 9 10 11 12<br />
Battery Acid<br />
Vinegar, Lemon<br />
Juice<br />
Aspirin,<br />
Coca cola<br />
Tomato Juice<br />
Water Melon<br />
Milk<br />
Water, Sugar,<br />
Salt<br />
Baking Soda<br />
Borax<br />
Great Salt Lake<br />
Ammonia<br />
Bleach<br />
Acidic Neutral Basic<br />
Activity overview<br />
Today students will use cabbage juice to test various household materials to determine which<br />
substances are acids and bases.<br />
Materials<br />
o Goggles and gloves<br />
o Demonstration: vinegar & lemon<br />
for tasting (keep separate)<br />
o Cafeteria trays<br />
o Bottles of cabbage juice<br />
o Clear plastic cups & spoons<br />
o Test solutions (cream of tartar,<br />
baking soda, borax, vinegar, sugar,<br />
salt, aspirin, etc.)<br />
Lesson Plan<br />
Review, Introduction, & Demonstration (10 Minutes):<br />
1. Ask students to remind you about the properties of matter that they have learned about so<br />
far (magnetism & physical states). Tell the students that all of these properties are called<br />
physical properties. Tell students that these properties are ones that can be easily seen (or<br />
felt), such as color, size, or weight. Explain that there are other types of properties called<br />
chemical properties. These properties describe the way that one type of substance interacts<br />
with another type of substance (for example, what happens when you put baking soda in<br />
vinegar). Point out that they already started to learn about chemical properties with the<br />
molecule building activity.
24<br />
2. Tell students that scientists use these physical and chemical properties to put matter into<br />
different groups. Grouping these substances helps to understand ways that chemicals are<br />
similar and different.<br />
As an example of how scientists might group items, you could have students help you<br />
group food items into food groups (fruits and vegetables, grains, proteins, dairy…).<br />
What do the items in each food group have in common?<br />
3. Tell students that scientists have special categories that they use to group chemicals. Two of<br />
the important groups are called acids and bases. Tell students that acids are substances like<br />
vinegar, lemon juice, and battery acid and that bases are substances like baking soda and many<br />
cleaning supplies. There are also some substances that are acids or bases (like water) and these<br />
are called neutral.<br />
4. Tell students that we are going to make a special exception today and we are going to get a<br />
chance to use our sense of taste to make some observations about acids.<br />
Ask for a few brave volunteers. Hand them each a packet of vinegar. Tell them to open it up and<br />
taste it. What does it taste like? Now hand them both a packet of lemon juice. What does it taste<br />
like?<br />
5. Tell the students that both of these substances are acidic. Students should conclude that<br />
acids taste sour. Tell students that it was ok for us to taste these substances since we know<br />
that they are safe. However, it wouldn’t be safe for us to try tasting everything to see if it was<br />
an acid or a base. For example, bases would taste bitter but most of them are also poisonous. It<br />
would be especially dangerous to taste really strong acids or basses because they are corrosive<br />
(will eat through substances like your skin).<br />
6. Tell students that instead of tasting everything, scientists have found another way to test to<br />
tell whether a substance is an acid or a base. They have special chemicals called indicators<br />
that will change colors when mixed with an acid or a base. Explain that many of these<br />
indicators are made from chemicals found in plants (such as the cabbage juice we are going to<br />
use today!).<br />
7. You will want to show the students the overhead showing the colors that cabbage juice will<br />
turn if it is an acid or a base. Point out that under each color is a number. Tell the students<br />
that these numbers are called the pH scale. Tell the students that it is a way that scientists<br />
describe how strong an acid or a base is (0=strong acid, 7=neutral, 14=strong base).<br />
pH Experiment (35-40 Minutes):<br />
8. Tell students that today their task will be to test a variety of substances that they might find<br />
around the house to determine which ones are acidic, basic, or neutral. Remind students that<br />
we WILL NOT taste these substances (they could be contaminated or even poisonous).<br />
Instead they will use cabbage juice as an indicator.<br />
9. Students will work in groups of 3-4 to test their substances. First pass out the gloves and<br />
goggles (Safety First!) and make sure that everyone puts on their safety equipment.<br />
10. Now you can start passing out the materials to each group, but tell them to wait for<br />
instructions before you start. Each group should have a cafeteria tray, a bottle of cabbage juice,<br />
vials of the test samples, and enough plastic cups/spoons for each sample.
25<br />
11. Have students test the first sample (vinegar) step-by-step with you (remind them to be<br />
good listeners, and be sure to check for comprehension often). Remind them that they already<br />
know that it is acidic from their taste experiment, so what color do they think the cabbage will<br />
turn (look at the chart of the overhead…pink/red).<br />
12. Instruct students to pour in cabbage juice up to the marked line on the cup. What color is<br />
it now? Then have the students pour 1 spoonful of vinegar into the cup and stir. What<br />
happened? What color is it now? Was their hypothesis correct? Does the indicator show that<br />
it is acidic?<br />
13. Tell students that they will do the same thing for their other samples. Make sure that they<br />
keep track of their data on their worksheets.<br />
14. If students finish early you can have them experiment with CAREFULLY mixing an acid<br />
and a base. What happens?<br />
15. Make sure to leave plenty of time for clean-up. All the chemicals can be washed down the<br />
sink this week.<br />
Wrap-up (10-15 Minutes):<br />
16. Once students have everything cleaned up, as a class check to see if everyone reached the<br />
same conclusions. You might want to make a class pH scale on the overhead to show where<br />
each sample falls on the scale.<br />
17. Give stickers to students for completed worksheets and be sure to check the Question Box<br />
for questions.
26<br />
Lesson Six- Exploring Solubility<br />
Objectives<br />
o Students will learn that different types of matter have different solubility.<br />
Lesson Background- Solubility<br />
Today students will learn about another chemical property of matter. Students will<br />
learn that different types of solids react differently when mixed with a liquid. Each type<br />
of matter has a different solubility, or ability to dissolve into a liquid. When a solid<br />
dissolves, all the molecules in a solid separate and are surrounded by the molecules of a<br />
liquid. The molecules of the liquid will then hold each of the solid molecules in a<br />
solution.<br />
All solids are able to dissolve into<br />
certain types of liquid. However, some<br />
types of matter will dissolve into water<br />
and others will only dissolve into other<br />
types of liquids like alcohol. This is<br />
because there are two types of<br />
molecules: polar and non-polar. Polar<br />
molecules act like a magnet. One side<br />
of the molecule has a slight negative<br />
charge and the other side has a slight<br />
positive charge. Just like a magnet,<br />
opposite poles of polar molecules<br />
attract. Water is a polar molecule, so<br />
when a polar molecule (such as sugar) is mixed into water, the water molecules’<br />
negative poles are attracted to sugar molecule’s possible poles (and viscera). As a result,<br />
water will only be attracted to (and dissolve) polar molecules. Similarly, non-polar<br />
liquids (such as alcohol), will only dissolve non-polar molecules (such as CO2).<br />
Activity overview- Paper Chromatography<br />
This week, students will work together to identify different types of ink by separating<br />
the ink’s molecules using paper chromatography. Ink is made up of a mix of different<br />
types of chemicals, each with different chemical properties. Some of the chemicals are<br />
water-soluble and others are only soluble in non-polar liquids such as alcohol. Paper<br />
chromatography uses a process called capillary action, to draw liquid up a piece of paper<br />
on which there is a sample of ink. As the liquid moves up the paper it will begin to<br />
dissolve some of the chemicals in the ink and move them up the paper. Smaller<br />
molecules will be drawn up the paper faster than larger chemical, so each type of ink<br />
will create its own unique pattern. In addition each type of ink will produce a different<br />
pattern when dissolved in water or alcohol, since not all chemicals can be dissolved by<br />
water/alcohol. Using this process, the students will separate the different chemicals<br />
using their unique chemical properties, and identify a mystery ink by its unique pattern.
27<br />
Materials<br />
o Goggles and Gloves<br />
o Clear plastic cups, wooden<br />
dowels and tape<br />
o Alcohol in squeeze bottle<br />
o Water in squeeze bottle<br />
o Filter papers marked with<br />
different permanent and<br />
washable markers.<br />
Lesson Plan<br />
Review & Introduction (5-10 Minutes):<br />
1. Again ask the students about the properties that we have learned about so far this<br />
semester. Remind students that all matter has both physical and chemical properties.<br />
Tell the students that today they will learn about another chemical property of matter.<br />
2. Ask students what happens when you stir a spoonful of sugar into water? Where does<br />
it go? Does the sugar turn into a liquid? Explain that when a solid (such a sugar) is<br />
stirred into a liquid (such as water) the solid is sometimes dissolved by the liquid.<br />
Explain how a solid is dissolved into a liquid and be sure to emphasize that certain types<br />
of liquid can only dissolve certain types of solids. Explain how molecules are either<br />
polar or non-polar and how this affects molecules solubility.<br />
Ink Experiment (30-40 Minutes):<br />
4. Tell the students that scientist can use this property of matter to separate a mixture<br />
of chemicals. Explain that for example, scientists use a method called paper<br />
chromatography to separate the mixture of chemicals in markers’ ink. For example,<br />
scientists might use this procedure in order to identify what type of pen or marker was<br />
used at a note left at a crime scene.<br />
5. Explain how chromatography uses chemicals’ solubility to separate the various<br />
chemicals in ink. Also be sure to emphasize that the dissolved chemicals move up the<br />
paper at different rates depending on the size of the molecules, creating a unique pattern<br />
for each brand of marker or pen.<br />
6. Tell students that they will be working in groups of 3 today to identify a mystery ink.<br />
Tell the students that they will receive two strips of paper with a few dots of ink. The<br />
first few dots of ink will be identified. The last dot will be a mystery. The students’ job<br />
will be to use chromatography to separate the chemicals in the ink and then to identify<br />
the mystery ink by comparing its pattern with the patterns to the identified brands of<br />
ink.<br />
7. Explain the procedure (modeling portions of the instructions) and then pass out the<br />
safety equipment and supplies. Allow the students to work independently while you<br />
help individual groups as required.
28<br />
Chromatography Procedure<br />
1. After you hand out the pieces of filter paper, instruct the students to use a pencil to<br />
label one piece “water” and the other “alcohol.”<br />
2. Tape the top of the filter paper to a wooden dowel and lay the dowel across the<br />
mouth of the cup. Leave the strip of paper hanging in the cup.<br />
3. Now slowly pour water into the cup so that only the bottom edge of the strip is wet.<br />
Do not let the water cover any part of the dots of ink! Also be sure that the water does<br />
not splash onto the paper.<br />
4. Repeat the same procedure for the alcohol.<br />
5. Watch the water/alcohol spread up the paper until it is about an inch from the top of<br />
the paper. Take the paper out of the cup and lay it on a paper towel so that the ink<br />
stops spreading.<br />
6. Record the unique pattern for each of the known and mystery inks. Then compare<br />
the mystery ink’s pattern to those of the known inks. Can the students identify which<br />
ink was used for the mystery ink?<br />
Note: There will be different types of mystery ink used, so each group should have a<br />
different result.<br />
Wrap-up (10-15 Minutes):<br />
8. Once the students have cleaned up their workstations, have them compare their<br />
results with the class. Was every group able to identify their mystery ink?<br />
9. Give stickers to students for completed worksheets and be sure to check the Question<br />
Box for questions.
29<br />
Lesson Seven- What is a Chemical Reaction? 2<br />
Objectives<br />
o Students will learn to identify the characteristics of a chemical reaction.<br />
Lesson Background- Chemical Reactions<br />
Today students will dig deeper into the concept of chemical properties. They will also<br />
learn to identify signs of a chemical reaction. In a chemical reaction, atoms or<br />
molecules react and transform each other. You should emphasize to students that you<br />
start with two-or more-types of matter (each with their own properties) and that at the<br />
end of a chemical reaction you end up with new types of matter (with potentially<br />
different properties).<br />
The students already explored how atoms can interact with each other to form new<br />
molecules. Today students will learn that sometimes when molecules are mixed with<br />
each other they can also interact. You won’t want to go into much detail about how the<br />
individual atoms are interacting, but be sure to remind students that atoms like to form<br />
bonds with other atoms. Sometimes when you mix two types of molecules, the atoms<br />
“decide” that they would rather form bonds with a different atom, and so they switch<br />
partners. When they do this, a chemical reaction takes place.<br />
This process produces signs that students can observe, which will tell them a chemical<br />
reaction has taken place. These signs might include:<br />
• Appearance of a new gas, solid, or liquid<br />
• Appearance of light or change in temperature<br />
• Change in color<br />
• Change in pH<br />
Activity overview<br />
This week, students will work together to create the following chemical reacton:<br />
2NaHCO3 + CaCl2 2NaCl + CaCO3 + CO2 (gas) + H2O<br />
(baking soda) (calcium chloride) (table salt) (limestone) (carbon dioxide) (water)<br />
The main reaction in the bag is between calcium chloride and baking soda. The calcium<br />
chloride causes the baking soda to break into CO2 gas and salt. Students will be able to<br />
identify these signs of a chemical reaction:<br />
• New gas: Since the carbon dioxide produced by the reaction is a gas, it will<br />
bubble out of the liquid into the bag. The gas will build up and begin to “blow<br />
up” the bag. There also may be some bubbling or fizzing.<br />
2 Adapted from: “Reaction: Yes or No?,” Chemistry in the K-8 classroom, OMSI, 2007.
30<br />
• New solid: Students may or may not see the limestone in this reaction.<br />
Limestone may appear on the sides and bottom of the bag as a white powder. If<br />
the students allowed the water in the bag to evaporate over time, they might<br />
also eventually notice salt crystals forming.<br />
• Color change: Students will put in turmeric as a chemical indicator (similar to<br />
the cabbage juice experiment from last week). It will turn red in response to the<br />
baking soda (a base). As the reaction progresses it will turn yellow, indicating<br />
that an acid is being formed. (The acid is actually the result of a second reaction.<br />
The products of the reaction, water and the carbon dioxide, will undergo a<br />
second reaction to form a weak carbonic acid.)<br />
• Temperature change: As the reaction progresses, energy will be released,<br />
resulting in heat. The students should be able to notice that the bag warms up.<br />
Materials<br />
o Goggles and gloves<br />
o Cafeteria trays<br />
o Plastic bags, spoons, & paper<br />
towels<br />
o Containers of pre-measured<br />
turmeric, baking soda, & calcium<br />
chloride<br />
Lesson Plan<br />
Review & Introduction (5-10 Minutes):<br />
1. Remind students one more time of the properties that we have learned about so far<br />
(magnetism, physical states, pH…). Also remind them about how they learned that<br />
atoms like to interact with each other. Tell students that today we are going to learn a<br />
little bit more about chemicals/molecules interact. Explain that sometimes when two<br />
types of matter react together, they make changes to each other. When they do this<br />
there can be some pretty dramatic results (explosions, color changes, etc.).<br />
2. Can the students think about any chemical reactions that they have seen? (Last<br />
week’s experiment, fires, baking soda + vinegar, cooking food, rusting, bleaching hair,<br />
etc.). Ask the students how they know that these are chemical reactions. What signs are<br />
there that they are chemical reactions?<br />
3. Explain that they should be able to recognize a chemical reaction by the following<br />
signs: appearance of a new gas, liquid or solid, color change, temperature change,<br />
appearance of light, or a change in pH. Basically any properties that seem to change<br />
could be signs of a chemical reaction.<br />
4. Tell students that these reactions are not too different from when atoms make bonds<br />
with other atoms (think about the modeling activity). But sometimes, when you mix two<br />
types of molecules (atoms that aready have formed bonds), the atoms “decide” that they<br />
would rather form bonds with a different atom, and so they switch partners.
31<br />
Chemical Reaction Experiment (30-40 Minutes):<br />
5. Tell students that today their task will be to try to create a chemical reaction and to<br />
pay close attention for signs that the reactions is happening. Remind students that it is<br />
very important to listen to directions so that the experiment will work correctly.<br />
6. Students will work in groups of 2-4. First pass out the gloves and goggles and make<br />
sure that everyone puts on their safety equipment.<br />
7. Now you can start passing out the materials to each group, but tell them to wait for<br />
instructions before you start. Each group should have a cafeteria tray, a plastic bag, and<br />
their pre-measured chemicals.<br />
8. Before the students start, have them examine their chemicals individually. What<br />
properties do they have (what do they look like)?<br />
9. You should have the students follow the experiment step-by-step with you (be sure to<br />
check for comprehension often). See below for the experimental procedure:<br />
Chemical Reaction Procedure:<br />
Step 1: Add the alcohol to the plastic bag.<br />
Step 2: Dump the baking soda into the same plastic bag.<br />
Step 3: Close the bag tightly and mix until the baking soda dissolves.<br />
Step 4: Add the turmeric powder. Close the bag and mix for 30-60 sec.<br />
(The turmeric can stain, so make sure the students are cautious!)<br />
• What do the contents look like?<br />
Step 5: Add the calcium chloride to the bag. Close the bag and mix.<br />
At this point the reaction will start (make sure the bag is tightly<br />
closed). After this step the students shouldn’t open the bag (to<br />
exploding turmeric juice).<br />
• What changes occur? What do they see, hear, and feel?<br />
Step 6: Clean up by throwing the bag and gloves in the trash and picking up<br />
the remaining supplies.<br />
avoid<br />
Wrap-up (10-15 Minutes):<br />
10. Once students have everything cleaned up, ask the students what the chemicals<br />
looked like before you mixed them. How was the mixture different after you mixed<br />
everything together? What evidence of a chemical reaction did they notice?<br />
11. More advanced questions might include: How many color changes did you observe?<br />
Which chemical inside the bag was responsible for the color change? How do you know<br />
that there is new gas inside the bag?<br />
12. Give stickers to students for completed worksheets and be sure to check the<br />
Question Box for questions.
32<br />
Lesson Eight- Mystery Powders 3<br />
Objectives<br />
o Students will use their knowledge of physical and chemical properties to identify<br />
mystery powders.<br />
Lesson Background- Properties of Matter Review<br />
Today the students will use all the information they have learned about the physical and<br />
chemical properties of matter to identify mystery powders. Students should already<br />
know the following:<br />
• Physical properties include characteristics that are easily seen (or felt) such as<br />
color, size, shape, magnetism, physical state, etc.<br />
• Chemical properties describe how atoms and molecules react with each other.<br />
For this activity students will need to remember the signs of a chemical reaction<br />
(color change, formation of a new gas, liquid, or solid, temperature change, etc.).<br />
Activity overview<br />
Students will make observations to determine the unidentified powders’ physical<br />
properties and then conduct a few simple tests to determine some of the powders’<br />
chemical properties.<br />
Physical properties: All the powders are similar in color and composition (white<br />
powders), but students will be able to notice slight differences. For example, milk<br />
powder has a slight cream tinge, salt is actually made up of tiny square crystals, and<br />
detergent is made up of differently sized particles.<br />
Vinegar Test: This test will be able to identify substances that contain carbonate,<br />
which will react with the vinegar to create carbon dioxide gas bubbles. These<br />
substances will include baking soda, baking powder, Alka-Seltzer, & detergent.<br />
Iodine Test: Iodine reacts with starch to form a blue/black compound. Detergent and<br />
milk powder will also react and eventually cause the color of the iodine to fade.<br />
Cabbage Juice Test: Finally, students will test the pH of the powders with cabbage<br />
juice.<br />
After the students have collected data on all of their powders, they should be able to use<br />
these clues to identify each mystery powder.<br />
3 Adapted from: “Lost Labels,” Chemistry in the K-8 classroom, OMSI, 2007.
33<br />
Materials<br />
o Goggles and gloves<br />
o Cafeteria trays<br />
o Clear plastic well plates, spoons, &<br />
toothpicks<br />
o Magnifying glasses<br />
o Containers of pre-measured<br />
Lesson Plan<br />
mystery powders<br />
o Testing solutions (vinegar, iodine,<br />
& cabbage juice)<br />
o Reedie answer sheets<br />
o Squeeze bottles of water (for<br />
clean-up)<br />
Review & Introduction (5 Minutes):<br />
1. Tell students that today they will need to use all the things they have learned so far<br />
to solve a mystery. Tell students that they will be given a few vials of unlabeled<br />
powders and their job will be to figure out what each of the powders is.<br />
2. Have the students help you make a list on the board of various physical and chemical<br />
properties they have learned about so far that could help them with this task. The<br />
students should list these properties in the review section of “My Science Toolbox.”<br />
Mystery Powder Investigation (40-45 Minutes):<br />
3. After students have brainstormed, show them the chart that contains the list of<br />
possible powders and descriptions of each powder’s properties. Point out that they will<br />
complete four investigations for each powder. Their first task will be to make visual<br />
observations of the powders physical properties. Next the students will perform three<br />
tests to investigate a few of the powders’ chemical properties.<br />
4. Tell the students that we will test the first powder together as a class, so that they<br />
know how to perform each test. Students will work in groups of four.<br />
5. First pass out the gloves and goggles and put on the safety equipment.<br />
6. Now you can start passing out the materials to each group, but tell them to wait for<br />
instructions before you start. Each group should have cafeteria trays, two plastic well<br />
plates, scoops, toothpicks, vials of the powders, and the three testing solutions.<br />
7. Have the students open the vial labeled #1. Tell the students that each group has<br />
different types of powder (so they won’t necessarily have the same results as other<br />
groups). The students should take a small scoop (pea-sized) of the powder and put it<br />
into one of their wells.<br />
8. First students should examine the physical properties of their powder with a<br />
magnifying glass. What does it look like? Does it have a smell? Are there crystals or<br />
small, irregular chunks? Is it a fine or coarse powder? The students should write their<br />
observations in the table on the worksheet.<br />
9. Next have the students put two more pea-sized scoops of powder into two more<br />
wells. Have the students follow along with you step-by-step as you perform the<br />
procedures for the three chemical tests.
34<br />
Vinegar Test Procedure:<br />
Step 1: Put a small scoop of powder<br />
into a well.<br />
Step 2: Add ¼ tsp of vinegar.<br />
Step 3: Stir with a toothpick.<br />
Step 4: What happens?<br />
(watch for bubbles)<br />
Iodine Test Procedure:<br />
Step 1: Put a small scoop of powder<br />
into a well.<br />
Step 2: Add ¼ tsp of iodine solution.<br />
Step 3: Stir with a toothpick.<br />
Step 4: What happens? (watch for<br />
color changes)<br />
Cabbage Test Procedure:<br />
Step 1: Put a small scoop of powder into a well.<br />
Step 2: Add ¼ tsp of cabbage juice.<br />
Step 3: Stir with a toothpick.<br />
Step 4: What happens? (watch for color changes)<br />
10. Tell the students that their<br />
group will now work together<br />
to test the remaining powders in<br />
the same way. (Depending on<br />
how quickly you believe your<br />
students can work, you might<br />
suggest that the group splits the<br />
powders up and works in pairs<br />
to make sure that they finish<br />
testing all the powders).<br />
11. Once the students have finished collecting their data, have the students clean up<br />
their workstation. All the powders and testing solutions can be rinsed down the drain.<br />
(If any groups finish quickly, you could give them additional powders to test before<br />
having them clean up).<br />
12. Pass out the powder identification chart to groups who have finished collecting data<br />
and cleaned up. Have the students compare their data to the properties of each possible<br />
powder in order to try to identify each vial.<br />
13. Once the students have made their identifications, check their answers with the<br />
Reedie answer sheet.<br />
Wrap-up (10-15 Minutes):<br />
14. Once the entire class has finished and cleaned up, ask the students what reasoning<br />
they used to identify the powders. What powders were easy to identify? Which were<br />
difficult to identify?<br />
15. Today students will take a end of the year survey to give us feedback on which<br />
lessons they enjoyed the most this semester. Remind students that there are no right or<br />
wrong answers and that we just want to know what they think. You might want to<br />
briefly review what we did in each lesson to help jog their memories. Give the students<br />
5-10 minutes to fill them out, and then collect them. Be sure to return them to Kristy!<br />
Note: There will also be a separate survey for the classroom teacher to complete as well.<br />
16. Finally, give stickers to students for completed worksheets and be sure to check the<br />
Question Box and then say goodbye to your students!