Download - Pearson Learning Solutions
Download - Pearson Learning Solutions
Download - Pearson Learning Solutions
Create successful ePaper yourself
Turn your PDF publications into a flip-book with our unique Google optimized e-Paper software.
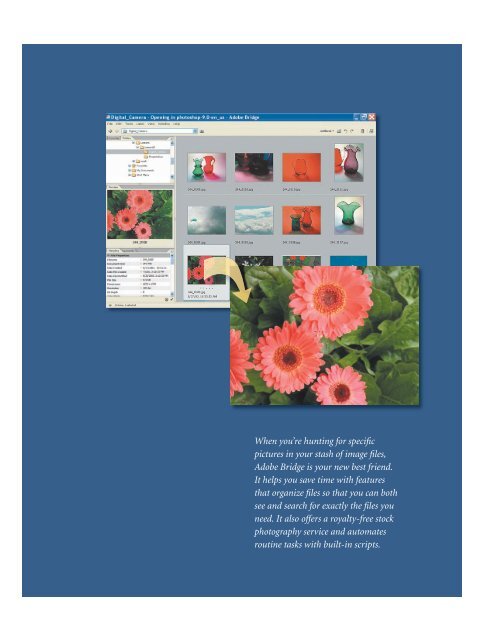
When you’re hunting for specific<br />
pictures in your stash of image files,<br />
Adobe Bridge is your new best friend.<br />
It helps you save time with features<br />
that organize files so that you can both<br />
see and search for exactly the files you<br />
need. It also offers a royalty-free stock<br />
photography service and automates<br />
routine tasks with built-in scripts.
2 Using Adobe Bridge<br />
Lesson overview<br />
In this lesson, you’ll learn how to do the following:<br />
• Identify and resize Adobe Bridge palettes and panes.<br />
• Rotate, resize, and view thumbnail and preview image files.<br />
• Sort and rearrange thumbnails in the Bridge browser window.<br />
• Delete and batch-rename files in Adobe Bridge.<br />
• Assign star rankings, colored labels, metadata, and keywords to<br />
image files.<br />
• Search for image files based on criteria you define.<br />
• Create a Web gallery of images selected in Adobe Bridge.<br />
• Search for and download stock photography from Adobe Bridge.<br />
This lesson will take an hour to an hour and a half to complete. Copy the<br />
Lesson02 folder from the Adobe Photoshop CS2 Classroom in a Book CD<br />
into the Lessons folder on your hard drive that you set up earlier. As you<br />
work, you’ll overwrite some of the start files. To restore these original<br />
files, recopy them from the CD.<br />
Getting started<br />
You’ve already had a brief introduction to Adobe Bridge in Lesson 1,<br />
“Getting to Know the Work Area.” If you’ve completed that lesson, you<br />
know that the permanent Go to Bridge button ( ) on the Photoshop<br />
tool options bar takes you directly to Adobe Bridge. In this lesson, you<br />
will explore Adobe Bridge in depth. The aim of the first project for the<br />
lesson is to organize a motley collection of photographs.<br />
Adobe ® Photoshop ® CS2 Classroom in a Book ® . Copyright © 2005 by Adobe Systems Incorporated and its licensors. Published by Peachpit<br />
Press, a division of <strong>Pearson</strong> Education.
56<br />
LESSON 2<br />
Using Adobe Bridge<br />
Adobe Bridge shares some functionality with your desktop regarding files and folders.<br />
The changes you apply to files in Adobe Bridge change the files themselves, not merely<br />
the Adobe Bridge view of them. At the end of the lesson, you’ll experience how easy it<br />
can be to find specific images on your computer, as well as to browse and purchase stock<br />
photography using Adobe Bridge.<br />
1 Start Photoshop and then immediately hold down Ctrl-Alt-Shift (Windows) or<br />
Command-Option-Shift (Mac OS) to restore the default preferences. (See “Restoring<br />
default preferences” on page 6.)<br />
2 When prompted, click Yes to confirm that you want to reset preferences, and Close to<br />
close the Welcome Screen.<br />
3 Click the Go to Bridge button ( ) on the tool options bar to open Adobe Bridge.<br />
Note: You can also open Adobe Bridge by double-clicking its application icon on the<br />
desktop or by clicking it in the Dock (Mac OS), or by choosing Start > All Programs ><br />
Adobe Bridge (Windows).<br />
The Bridge browser window is the dashboard for a creative workflow. It provides the<br />
starting point for you to browse, locate, and preview your assets.<br />
Viewing and editing files in Adobe Bridge<br />
The left side of the browser window displays palettes that you can rearrange, resize, and<br />
group within Adobe Bridge, using the same techniques as with Photoshop palettes. The<br />
palettes in Adobe Bridge help you navigate, preview, search, and manage information<br />
for your image files and folders.<br />
Customizing Adobe Bridge views and spaces<br />
The ideal arrangement and relative sizes of items and areas of Adobe Bridge depend<br />
on your work style and preferences. Depending on the tasks you’re doing, it may be<br />
important to see what images are in a file; at other times, viewing information about<br />
the file may take priority. You can customize Adobe Bridge to increase your efficiency in<br />
these different situations.<br />
In this procedure, you’ll try out some of the custom views you can use in Adobe Bridge.<br />
The default configuration of Adobe Bridge areas appears in the following figure,<br />
although you won’t see these particular thumbnails onscreen yet.
ADOBE PHOTOSHOP CS2 57<br />
Classroom in a Book<br />
A<br />
B<br />
G<br />
H<br />
I<br />
C<br />
D<br />
J<br />
E<br />
F<br />
K<br />
L<br />
A. Menu bar B. Favorites palette C. Folders palette D. Preview palette E. Metadata palette<br />
F. Keywords palette G. Filter view menu H. Compact mode button I. Rotation buttons<br />
J. Thumbnail preview pane K. Thumbnail slider L. View option buttons<br />
Note: If you do not see the tabbed palettes on the left side of the browser window, click the<br />
Show/hide panels button ( ) in the lower left corner.<br />
1 Click the Folders tab in the upper left corner of the Bridge browser window to bring<br />
that palette forward, and navigate to the Lessons/Lesson02/Digital_Camera folder<br />
that you copied to your hard drive from the Adobe Photoshop CS2 Classroom in a Book<br />
CD. To navigate, either click the arrows (Mac OS) or plus signs (Windows) to open<br />
nested folders in the Folders palette, or double-click the folder thumbnail icons in the<br />
thumbnail preview area on the right side of the browser window.
58<br />
LESSON 2<br />
Using Adobe Bridge<br />
The Bridge preview pane updates interactively, showing you thumbnail previews of<br />
asset files. Adobe Bridge displays previews of image files such as those in PSD, TIFF, and<br />
JPEG formats as well as Adobe Illustrator vector files, multipage Adobe PDF files, and<br />
Microsoft Office documents.<br />
2 At the bottom of the browser window, drag the thumbnail slider to reduce and then<br />
enlarge the thumbnail previews. Then, choose the Details view, then the Filmstrip view.<br />
Details view<br />
Filmstrip view<br />
Note: Adobe Bridge also offers a Versions and Alternates view for those who work with<br />
Version Cue CS2. For more about Version Cue, see the “Understanding Adobe Version Cue<br />
CS2 File Manager” white paper on the Adobe Photoshop CS2 Classroom in a Book CD.
ADOBE PHOTOSHOP CS2 59<br />
Classroom in a Book<br />
3 Choose Window > Workspace > Lightbox. Then, in succession, choose the File<br />
Navigator, Metadata Focus, and Filmstrip Focus workspaces.<br />
Adobe Bridge can be customized to suit virtually any workflow or preference.<br />
4 When you’re finished experimenting, reset to the default workspace (press<br />
Command-F1 on the Mac or Ctrl-F1 in Windows).<br />
5 Select any thumbnail by clicking it once.<br />
A larger preview appears in the Preview palette, filling the available area.<br />
6 Enlarge the Preview palette by dragging the horizontal and vertical bars that separate<br />
it from the other panes of the browser window. The pointer appears as double lines with<br />
arrows ( ) when positioned over the bars.<br />
7 Continue to adjust the panes, palettes, and thumbnails in Adobe Bridge until the<br />
arrangement suits you.
60<br />
LESSON 2<br />
Using Adobe Bridge<br />
Adobe Bridge modes<br />
You can work in Photoshop with Adobe Bridge open in Full Mode in the background, at the<br />
ready for you to jump to and use to locate and open files. Or you can switch to Compact or<br />
Ultra-Compact mode by clicking those buttons in the upper right corner of the Bridge browser<br />
window. Both compact modes display Bridge as a floating palette over Photoshop. Ultra-Compact<br />
mode ( ) displays only the Go Back and Go Forward buttons as well as the Recent Folders menu.<br />
Compact mode ( ) shows thumbnail previews of the selected folder. As soon as you start to navigate<br />
to a folder in Ultra-Compact mode, Bridge automatically switches to Compact mode so that<br />
you can see thumbnail previews. Both modes provide a button to toggle back to Full mode ( ).<br />
Compact mode<br />
Ultra-Compact mode<br />
Rotating and opening images<br />
In addition to controlling the workspace and appearance of image previews in Bridge,<br />
you can also change the orientation of selected images and open them in Photoshop.<br />
Rotating the thumbnail previews in Adobe Bridge does not affect the resolution or<br />
quality of the files, but the rotation is permanent unless or until you undo it.<br />
1 Select the 244_0107.jpg thumbnail in the Lesson02/Digital_Camera folder.
ADOBE PHOTOSHOP CS2 61<br />
Classroom in a Book<br />
2 Click the Rotate 90˚ Counterclockwise button ( ) at the top of the browser window.<br />
3 In the thumbnail preview pane, select the 244_0111.jpg thumbnail.<br />
4 Click the Rotate 90˚ Clockwise button ( ).<br />
5 (Optional) To open any .PSD, .TIF, or .JPG image at any time into Photoshop from<br />
within Adobe Bridge, double-click its thumbnail preview.<br />
Note: Adobe Bridge will also automatically open .AI files into Adobe Illustrator, .PDF files<br />
into Adobe Acrobat, .INDD files into Adobe InDesign, and .DOC and .XLS documents into<br />
Microsoft Word and Microsoft Excel, respectively, if you have those applications. You can<br />
control file associations in Adobe Bridge preferences.
62<br />
LESSON 2<br />
Using Adobe Bridge<br />
You can select multiple thumbnails in Adobe Bridge and open or rotate them together.<br />
Select the files by using the usual methods: Click and then Shift-click, or drag the<br />
cursor across image thumbnails, to select contiguous files; or Ctrl-click (Windows) or<br />
Command-click (Mac OS) to select discontiguous images.<br />
Deleting images<br />
You can use Adobe Bridge to remove files or folders from your system exactly as you<br />
would remove them from your desktop. Deleting images in Adobe Bridge sends the files<br />
to the Recycle Bin (Windows) or Trash (Mac OS).<br />
Using Adobe Bridge to examine your images, you can confidently select and delete files<br />
that you no longer need or that you find unsatisfactory.<br />
1 Select the thumbnail for 244_0109.jpg, which is poorly composed, out of focus, and<br />
underexposed—a real loser.<br />
2 Click the Delete Item button ( ) at the top of the Bridge browser window. When a<br />
message appears asking you to confirm this action, click OK.<br />
At this point, the deleted file is not yet removed from your computer, although it is<br />
not visible in Adobe Bridge. You can find and retrieve deleted files by switching to the<br />
desktop and dragging them out of the Recycle Bin (Windows) or Trash (Mac OS). When<br />
you empty your desktop trash container, the files will be permanently deleted from your<br />
computer.<br />
Rearranging and renaming image files<br />
You can rearrange thumbnails in Adobe Bridge as freely as you might move negatives<br />
or slides on a light table. You can also use a batch-renaming process to give image files<br />
friendlier but well-organized filenames. In this exercise, you’ll rearrange the thumbnails<br />
according to subject matter—colored glass containers, flowers, and cloudy skies—and<br />
then rename them.<br />
1 In the thumbnail preview area of the browser window, drag the thumbnails of<br />
cloudy-sky photographs one by one until they are next to each other.
ADOBE PHOTOSHOP CS2 63<br />
Classroom in a Book<br />
2 Select the first sky thumbnail in the group and then Shift-click the last sky thumbnail<br />
to select the entire group.<br />
3 Choose Tools > Batch Rename.<br />
4 Under New Filenames in the Batch Rename dialog box, choose Text from the Current<br />
Filename pop-up menu, and type Clouds in the text field.<br />
5 Click the plus button ( )at the far right side of the New Filenames area, and choose<br />
Sequence Number from the pop-up menu. Make sure the default, 1, is selected for the<br />
starting sequence number, or type 1 now.<br />
6 Click the plus button to create a third criterion, and then choose New Extension<br />
from the pop-up menu. Type jpg (no period necessary) into the extension text field.<br />
(This preserves the .jpg file extension in the filename.)
64<br />
LESSON 2<br />
Using Adobe Bridge<br />
7 For Compatibility, select the check boxes for other operating systems: Windows,<br />
Mac OS, and Unix. (The operating system you are using will be dimmed but checked.)<br />
8 Review the sample in the Preview area to make sure that it reads “Clouds1.jpg,” and<br />
then click Rename.<br />
9 Choose View > Sort > By Filename to arrange the thumbnails in alphanumeric order.<br />
10 Using the techniques described in Steps 1–8, select and batch-rename the remaining<br />
photographs according to the subject matter pictured: flowers and ornamental<br />
glassware. When you set options in the Batch Rename dialog box, type Plants instead of<br />
Clouds to name the flower images, and type Glass for the glassware images. Otherwise,<br />
use the same options as in Steps 5–7.<br />
The Batch Rename command behaves differently depending on what is selected when<br />
you choose the command: If no thumbnails are selected, the naming scheme you specify<br />
in the Batch Rename dialog box applies the name change to all the files in the selected<br />
folder. If several—but not all—thumbnails are selected, the command renames only the<br />
selected files.<br />
Note: You can also rename a single file in Adobe Bridge in the conventional manner—that<br />
is, by clicking the filename in the thumbnail preview area and typing to overwrite the<br />
existing name.<br />
Embedding information for easy identification<br />
Adobe Bridge gives you numerous tools for retrieving the images you need to find.<br />
This is critical when you have a large number of stored images and no time to waste on<br />
browsing through hundreds or thousands of files.<br />
In this section, you’ll work with three more ways to embed information in files so that<br />
you can quickly find them later: rankings, metadata, and keywords.<br />
Ranking and sorting image files<br />
Adobe Bridge has a star-ranking feature that you can use to group and sort image<br />
thumbnails. This gives you an alternative way to organize images in the thumbnail<br />
preview area. In this exercise, five stars will stand for the best and most usable images,<br />
three stars for medium-quality images, and one star for the poorest-quality or least<br />
desirable photographs. How many stars you assign to each image is a personal
ADOBE PHOTOSHOP CS2 65<br />
Classroom in a Book<br />
judgment, so there are no right or wrong answers for star rankings, and—as opposed to<br />
the real world, perhaps—no one will take offense at your choices.<br />
1 Make sure you have large, clear thumbnail previews, and then click to select one<br />
that’s of particularly good quality, such as the red glass pitcher.<br />
2 Click one of the dots that appear below the image thumbnail. When you click, the<br />
dot turns into a star. Click to turn all five dots into stars.<br />
3 Select additional high-quality files, including one or two images in each category<br />
(glass, flowers, and skies).<br />
Note: Use Ctrl-click (Windows) or Command-click (Mac OS) to select discontiguous<br />
thumbnails, if desired.<br />
4 Choose Label > to apply the five-star ranking to all selected images at once.<br />
Click OK to dismiss the XMP warning dialog box if it appears.<br />
5 Choose View > Sort > By Rating to rearrange the thumbnails so that the best images<br />
are grouped together. Toggle off View > Sort > Ascending Order to have the five-starred<br />
images appear at the top of the thumbnail preview area.
66<br />
LESSON 2<br />
Using Adobe Bridge<br />
6 Continue to assign five-, three-, and one-star rankings to all the files in the folder,<br />
either by ranking them individually (as in Steps 1 and 2) or in multiples (as in Steps 3<br />
and 4).<br />
Note: You can delete stars at any time by selecting the thumbnail, moving the cursor over<br />
the stars, and clicking the gray circle with a slash through it ( ) that appears to the left.<br />
7 Choose View > Sort > By Rating again to arrange the files in reverse alphabetical<br />
order of their rankings.<br />
Quality is not the only consideration by which you might want to rank images. You can<br />
use star rankings to indicate anything—subject matter, client, project name, or time of
ADOBE PHOTOSHOP CS2 67<br />
Classroom in a Book<br />
day, for example. Indeed, if you want to organize your images by multiple factors—say,<br />
by quality and by project, you can also apply colored labels your images. Yellow labels<br />
might be applied to assets that will be used for a Web project, for example, while red<br />
labels could indicate that the image will be used for a print brochure.<br />
8 Click to select the thumbnail of any image, such as the red pitcher, and then choose<br />
Label > Yellow. Click OK to dismiss the XMP warning dialog box if it appears.<br />
A yellow label appears behind the five-star ranking of the thumbnail preview.<br />
9 Continue to assign colored labels—yellow or otherwise—to additional files in the<br />
folder, either by selecting them individually or in multiples and then choosing a color<br />
from the Label menu.<br />
Note: You can also apply colored labels by selecting one or more thumbnails and Controlclicking<br />
(Mac OS) or right-clicking (Windows) and choosing Label and a color from the<br />
contextual pop-up menu.<br />
10 Choose View > Sort > By Label to arrange the files in the thumbnail preview area by<br />
their colored labels.
68<br />
LESSON 2<br />
Using Adobe Bridge<br />
In addition to sorting your view by rankings and labels, you can filter the view to see only<br />
those thumbnails of a specific ranking or color. Let’s experiment with those filters now.<br />
11 Choose Show 5 Stars from the Unfiltered pop-up menu to show thumbnails of only<br />
those thumbnails with a five-star ranking.<br />
12 Choose Filtered > Show Red Label.<br />
13 Choose Filtered > Show All Items so that you can see all of your image files.<br />
Reviewing and editing metadata<br />
You can quickly see file information in one of several ways: Simply hover the mouse cursor<br />
over an image thumbnail in the Thumbnails view, and it will pop up; or switch to the<br />
Details view and the same metadata file information appears next to the image thumbnail<br />
preview. Or you can use the Metadata palette, which displays more complete metadata.<br />
Next, you will compare the two displays of metadata information.
ADOBE PHOTOSHOP CS2 69<br />
Classroom in a Book<br />
The information in the Metadata palette is nested under headings that you can expand<br />
or collapse by clicking the arrow next to a heading. There are three headings for images:<br />
File Properties, IPTC, and Camera Data (Exif). Additional headings are available for<br />
stock photo images. In Bridge, you can directly edit only some of the IPTC metadata.<br />
1 Make sure you’re in Details view, and click to select the thumbnail of one of the fivestarred<br />
glassware images.<br />
2 If necessary, click the Metadata tab to bring that palette forward in the lower left<br />
pane of the browser window. If any of the major headings are collapsed, click the arrows<br />
( ) to expand them so that you can compare the information here to the information<br />
listed in the Details view of the thumbnails.<br />
When you work with large amounts of metadata, it helps to enlarge the Metadata<br />
palette, even if it reduces or eliminates the Preview, Favorites, and Folders palettes. This<br />
can reduce the amount of scrolling needed to review and edit the information.<br />
3 Scroll down the Metadata palette to the IPTC heading so that you can see the items<br />
listed under it. The pencil icons ( ) on the left indicate items that you can edit.<br />
4 Click the blank space for Description and type a few words describing the image,<br />
such as red pitcher.
70<br />
LESSON 2<br />
Using Adobe Bridge<br />
5 At the bottom of the Metadata palette, click the Apply button ( ) to enter the<br />
information you typed.<br />
Creating and applying keywords<br />
Keywords can streamline your searches for images. If you have a large collection of<br />
images, the few seconds required to enter some well-chosen keywords can save you<br />
hours later as you try to locate specific images.<br />
The Keywords palette organizes keywords in categories that you can expand and<br />
collapse as you did on the Metadata palette. The Keywords palette standardizes<br />
keywords so that you can apply identical terms to specific types of images. This greatly<br />
reduces the risks of occasional typographical errors or inconsistencies that can turn<br />
keyword searches from a dream come true into a nightmare.<br />
1 Click the Keywords tab to bring that palette forward.<br />
2 Click the Keywords palette menu button ( ), and choose New Keyword Set. Or, click<br />
the New Keyword Set button ( ) at the bottom of the Keywords palette.<br />
3 Type Glass Project in the new blank to name the keyword set, and press Enter<br />
(Windows) or Return (Mac OS). Leave the Glass Project keyword set selected, or reselect<br />
it if necessary.
ADOBE PHOTOSHOP CS2 71<br />
Classroom in a Book<br />
4 Click the New Keyword button ( ) to create a keyword under the Glass Project<br />
category, type Red, and press Enter (Windows) or Return (Mac OS). Then, select the<br />
Glass Project category again and repeat the process until you have created five more new<br />
keywords, naming them Green, Blue, Orange, Purple, and Yellow.<br />
5 Select the thumbnail for the photograph of the green vase and the red pitcher.<br />
6 In the Keywords palette, click the boxes for both the Red and Green keywords to<br />
apply them to the image metadata. Or, double-click each of those keywords.<br />
A check mark appears next to the applied keywords. The bold hyphen next to the Glass<br />
Project category indicates that some (but not all) of the keywords in that set apply to the<br />
selected file.
72<br />
LESSON 2<br />
Using Adobe Bridge<br />
7 One by one, select each of the other glassware images and apply the appropriate<br />
keywords for the glass colors in those photographs. Or, you can select multiple files—<br />
such as all the images with blue glassware, if there are several—and simultaneously<br />
apply the keyword Blue to each of them.<br />
Deleting keywords<br />
The lists on the Keywords palette are application-wide, so the same keyword choices are<br />
available regardless of what folder you’re browsing. Many of the preset keywords may<br />
not be useful to you. Fortunately, you can delete keywords you won’t need. Since there is<br />
no orange glass in the images, you can delete Orange.<br />
You don’t have to worry about deleting a keyword that is currently applied to some<br />
files. In those cases, the keyword is deleted from the heading but shows up under a new<br />
heading named Other Keywords. You’ll see that in this exercise.<br />
1 In the Keywords palette, select the Orange keyword, and then click the Delete<br />
Keyword button ( ) at the bottom of the palette. Click OK to dismiss the warning<br />
that appears.<br />
2 Repeat Step 1, but this time delete the Red keyword.<br />
3 Select one of the thumbnails showing a red glass item. (You previously assigned Red<br />
to this file.)<br />
4 In the Keywords palette, find the Other Keywords category and locate the Red<br />
keyword. Drag the keyword back into the Glass Project category to group it with the<br />
other color keywords.
ADOBE PHOTOSHOP CS2 73<br />
Classroom in a Book<br />
You can also edit keywords. This is easy to do, but there’s a little trick to it. Since<br />
double-clicking a keyword applies it to any currently selected files, you need to select the<br />
keyword and then choose Rename from the Keywords palette menu or context menu.<br />
Then, type in your new text.<br />
Searching with Adobe Bridge<br />
Now that you’ve taken the time to associate information with the images in the<br />
Lesson02/Digital_Camera folder, you’re ready to see how easy this makes searching.<br />
1 Choose Edit > Find.<br />
2 In the Find dialog box, make sure that the Lesson02/Digital_Camera folder appears<br />
in the Look In option, or click Browse and navigate to that folder.<br />
3 Under Criteria, choose Filename > contains, and type Glass in the blank field.<br />
4 Click the plus-sign button ( ) to open another set of criteria menus.<br />
5 In the second row, choose Keywords > contains, and type Red.<br />
6 Click the plus-sign button to open a third row, and choose Rating > is equal to, and<br />
choose five stars.<br />
7 Click Find.
74<br />
LESSON 2<br />
Using Adobe Bridge<br />
Any files that match all three sets of criteria—that is, five-star-quality images of<br />
red glassware, if you’ve completed the previous tasks in this lesson—appear in the<br />
thumbnail preview area. Look at the Recent Folders menu, and notice that the current<br />
location is a new folder named Find Results.<br />
Julieanne Kost is an official Adobe Photoshop evangelist.<br />
T O O L T I P S F R O M T H E P H O T O S H O P E V A N G E L I S T<br />
Hi, I’m Julieanne Kost, a Photoshop evangelist for Adobe Systems. That simply means I lecture<br />
and teach courses on Adobe Photoshop, as well as use it for my own professional photography.<br />
Photoshop is a powerful application, and learning some key shortcuts and tricks not only adds to<br />
the functionality of the program but also lets you use it more freely and efficiently. So sprinkled<br />
throughout this book are some of my favorite tips and tricks, which I hope that you find useful.<br />
Keyboard shortcuts with Bridge<br />
Here are some tips to help you get a running start with Adobe Bridge:<br />
• To jump from Photoshop to Bridge using a keyboard shortcut, press Alt-Ctrl-O (Windows) or<br />
Option-Command-O (Mac OS).<br />
• In Thumbnails view, quickly navigate image thumbnails in the main preview area using the up,<br />
down, right, and left arrow keys.<br />
• Rotate one or more selected images 90 degrees clockwise by pressing Ctrl-] (Windows) or<br />
Command-] (Mac OS). Rotate 90 degrees counterclockwise by pressing Ctrl-[ (Windows) or<br />
Command-[ (Mac OS).
ADOBE PHOTOSHOP CS2 75<br />
Classroom in a Book<br />
Using Favorites and Collections<br />
Favorites and Collections are two organizational features that might help you right<br />
about now. Favorites are bookmarked locations on your hard drive or network that you<br />
can access with the click of a button. Collections are groups of images that you can access<br />
quickly from the Favorites palette.<br />
Let’s start by saving your search results as a collection so that you can easily locate all the<br />
five-star red glassware images in the future.<br />
1 Click the Save As Collection button at the top of the browser window ( ).<br />
2 In the Save Collection dialog box, name your collection 5-star red glassware, and<br />
then click Save.<br />
3 Click the Favorites tab to bring that palette forward if it’s behind the Folders palette,<br />
and resize to enlarge it if necessary for a better view.<br />
Favorites provide quick links to frequently visited locations. Be default, Bridge provides<br />
Favorites for your computer, desktop, and some other folders, such as Pictures and<br />
Documents. Another default Favorite is Collections, which can be any group of images<br />
or assets that you create, such as the results of your search.<br />
4 Click to select Collections in the Favorites palette, and then double-click the 5-star<br />
red glassware collections thumbnail to see thumbnail previews of the images in that<br />
collection.
76<br />
LESSON 2<br />
Using Adobe Bridge<br />
Now let’s create a custom favorite that will come in handy for the rest of the lessons of<br />
this book.<br />
5 Click the Folders tab to bring that palette forward, and navigate to the Lessons folder<br />
that contains all of the individual Classroom in a Book lesson folders.<br />
6 Select the Lessons folder (in the Folders palette or preview area) and choose File ><br />
Add to Favorites.<br />
Now, when you need to locate files for the other lessons in this book, you can click<br />
Lessons in the Favorites palette and double-click to open the folder in the preview area<br />
for the particular numbered lesson.<br />
Automating routine tasks<br />
The Adobe Bridge Tools menu includes a number of automated routines that also<br />
appear on the File > Automate menu in Photoshop. You’ll try out one of these now.<br />
The advantage of the automated commands in Bridge is that you can use them without<br />
even opening the files in Photoshop. You can apply these commands to all the files in a<br />
selected folder or to individual files in the folder that you select—it’s your choice.<br />
Creating a Web photo gallery<br />
The Web Photo Gallery command generates an entire Web site for you, with<br />
thumbnails, images, text, and even an area for review feedback that the user fills out
ADOBE PHOTOSHOP CS2 77<br />
Classroom in a Book<br />
on the site and e-mails to the alias you designate. You can choose from a generous<br />
assortment of predefined layouts and styles that you can customize.<br />
1 Click the Favorites tab to bring that palette forward, select Lessons, and then navigate<br />
to the Lesson02/Presentation folder.<br />
This folder contains five Ferris-wheel photographs; none of them are currently selected.<br />
2 Choose Tools > Photoshop > Web Photo Gallery.<br />
If Photoshop was closed, it will launch now. Otherwise, Bridge simply jumps to the<br />
open application. The Web Photo Gallery dialog box opens.<br />
3 In the Web Photo Gallery dialog box, do the following:<br />
• Choose Centered Frame 1- Feedback from the Styles pop-up menu.<br />
• Type your own e-mail address as the address at which you want to receive feedback<br />
from reviewers.<br />
4 Under Source Images, do the following, if they are not already done:<br />
• Choose Use > Folder.<br />
• Click the Browse button (Windows) or Choose button (Mac OS), and then verify<br />
that the Presentation folder is selected. Or, select it now.<br />
• Create a destination folder for your Web gallery: Click the Destination button,<br />
navigate to your desktop, and click the New Folder button. Type Wheel Web Site to
78<br />
LESSON 2<br />
Using Adobe Bridge<br />
name the folder, then click OK (Windows) or Create (Mac OS). You should return to<br />
the Web Photo Gallery dialog box.<br />
5 Under Options, use the pop-up menu to toggle through the General, Banner, Large<br />
Images, and Thumbnails categories, specifying the following options for each:<br />
• General: Choose .html from the Extension pop-up menu, and deselect all three<br />
check boxes.<br />
• Banner: Type Ferris Wheel Photos for Site Name, Adobe Systems for photographer,<br />
and today’s date (if necessary) or another date. You can leave the Contact Info option<br />
blank or type any phone number or street address.<br />
• Large Images: Select the Resize Images check box (if necessary), choose Large from<br />
the pop-up menu, and leave the other options at the default settings.<br />
• Thumbnails: Select Custom from the Size pop-up menu, and type 70 pixels. Leave<br />
the other options at the default settings.<br />
Because you’ll accept the default settings for Custom Colors and Security, you don’t<br />
need to visit those categories.<br />
6 Click OK.<br />
Photoshop automatically opens the files and creates the resources for the Web gallery,<br />
and then the gallery opens in your default Web browser application.
ADOBE PHOTOSHOP CS2 79<br />
Classroom in a Book<br />
Reviewers can click any thumbnail at left to view a larger preview at right. Clicking<br />
the Image Info tab displays information about the selected image. Clicking the Image<br />
Feedback tab lets reviewers comment on or approve the image, and e-mail their<br />
comments to you.<br />
Web Photo Gallery is just one of several automated tasks you can perform in Adobe<br />
Bridge. You can explore the others when you have time.<br />
7 Close your browser and return to Bridge.<br />
Acquiring stock photography<br />
In addition to using Adobe Bridge to organize and locate your own image assets, you<br />
can use it to browse and purchase royalty-free stock photography. This is because Adobe<br />
Bridge includes a service called Adobe Stock Photos, which provides one-stop shopping<br />
for thousands of royalty-free digital images from numerous stock agencies. You can use<br />
Adobe Stock Photos to conduct searches, download comps, and purchase images, all<br />
from within Adobe Bridge.<br />
Browsing and searching for stock images<br />
As the designer on the Ferris wheel project, let’s pretend you’ve decided to go on a hunt<br />
for additional images of Ferris wheels.<br />
1 In the Favorites palette of Adobe Bridge, click Adobe Stock Photos.
80<br />
LESSON 2<br />
Using Adobe Bridge<br />
The home page for Adobe Stock photos highlights new content and lets you browse and<br />
search for royalty-free stock content.<br />
2 In the search box at the top of the page, type the keywords ferris wheel, and then<br />
press Enter (Windows) or Return (Mac OS), or click the Start Search button.<br />
Adobe Stock Photos search results appear in the Bridge browser window, offering all<br />
of the same customizable previews controls, including scalable thumbnails, that are<br />
available to local image files.
ADOBE PHOTOSHOP CS2 81<br />
Classroom in a Book<br />
<strong>Download</strong>ing and purchasing stock photos<br />
Next, download a low-res comp.<br />
1 With an image thumbnail selected (or two or three thumbnails), click the <strong>Download</strong><br />
Comp button ( ).<br />
Comps may be downloaded for free from Adobe Stock Photos and used without<br />
watermarked logos in layouts and proofs. Comps are saved to the <strong>Download</strong>ed Comps<br />
folder, which is in the My Documents/Adobe Stock Photos folder (Windows) or<br />
Documents/Adobe Stock Photos folder (Mac OS).<br />
2 In the Favorites palette, click <strong>Download</strong>ed Comps to see your comps.<br />
To open these comps in Photoshop, simply double-click on a thumbnail preview as you<br />
would any other image file. You can also rename downloaded comps more intuitively,<br />
move them to other folders on your hard drive or network, and even place them in page<br />
layout files. Adobe Stock Photos preserves the original file information so that when<br />
you’re ready to purchase an image, you can do it from Bridge.<br />
3 To purchase any image, select its thumbnail preview and click the Add to Cart button<br />
( ).<br />
Note: You will be prompted to choose a country the first time you try to purchase a stock<br />
photo. Choose from among the 27 countries in the pop-up menu, then click Continue.<br />
4 When Adobe Stock Photos tells you that the image has been added to your cart, click<br />
the View Shopping Cart button to see what’s there.
82<br />
LESSON 2<br />
Using Adobe Bridge<br />
Adobe Stock Photos has added a low-resolution version of the image to your cart.<br />
You can delete images from your shopping cart, choose a different size or resolution,<br />
continue shopping, or proceed to checkout from the shopping cart page. Adobe Stock<br />
Photos lets you purchase images as a guest, or you can set up an account. Either way,<br />
you can purchase images from multiple stock photo libraries in a single transaction. All<br />
purchased images are placed in the Purchased Images folder.<br />
Congratulations—you’ve finished this lesson on Adobe Bridge. As you work through<br />
this book, you’ll have many more opportunities to use Bridge and to discover what a<br />
time-saver it can be.
Review<br />
Review questions<br />
1 Describe three ways to display Adobe Bridge.<br />
2 What are some of the similarities between working with folders and files on<br />
the desktop and working with them in Adobe Bridge?<br />
3 How can you customize the browser window and thumbnail previews in<br />
Adobe Bridge?<br />
4 What are the advantages of using Adobe Bridge instead of a desktop folder?<br />
Review answers<br />
1 You can display Adobe Bridge in Full mode as a regular application, or toggle<br />
to Ultra-Compact or Compact mode. The compact modes display Bridge as a<br />
floating palette over other applications.<br />
2 You can use either Adobe Bridge or a desktop folder—such as the Explorer<br />
(Windows) or the Finder (Mac OS)—to rename files, move files into the Recycle<br />
Bin (Windows) or Trash (Mac OS), move files and folders from one location to<br />
another, rename files and folders, and create new folders.<br />
3 You can rearrange the palettes on the left side of the Adobe Bridge browser<br />
window by dragging their tabs, and you can resize panes by dragging their<br />
edges. You can enlarge and reduce thumbnail previews on the right side of the<br />
browser window by dragging the thumbnail slider, and you can choose between<br />
Thumbnail, Details, and Filmstrip views, depending on personal preference.<br />
4 Adobe Bridge shows high-resolution, scalable thumbnail previews of image<br />
files as well as metadata information about the selected item. You can apply a<br />
number of changes to files in Bridge without having to open them in Photoshop;<br />
for example, you can rotate them. You can also use Bridge to assign star rankings<br />
and colored labels to files, to sort files by various criteria, and to batch-rename<br />
files. Finally, you can perform automated functions in Adobe Bridge, such as<br />
creating Web photo galleries, and you can browse and purchase royalty-free<br />
digital stock photography.


